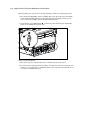
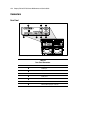
1
ProLiant DL760 Servers
Maintenance and Service Guide
First Edition (March 2001)
Part Number 173771-001
Spare Part Number 234212-001
Compaq Computer Corporation
Notice
© 2001 Compaq Computer Corporation
Compaq, the Compaq logo, Compaq Insight Manager, ProLiant, and SmartStart Registered in U.S. Patent
and Trademark Office.
Microsoft, Windows, and Windows NT are registered trademarks of Microsoft Corporation in the United
States and other countries.
Intel, Pentium, and Xeon are trademarks of Intel Corporation in the United States and other countries.
All other product names mentioned herein may be trademarks of their respective companies.
Compaq shall not be liable for technical or editorial errors or omissions contained herein. The information
in this document is provided “as is” without warranty of any kind and is subject to change without notice.
The warranties for Compaq products are set forth in the express limited warranty statements accompanying
such products. Nothing herein should be construed as constituting an additional warranty.
Compaq ProLiant DL760 Servers Maintenance and Service Guide
First Edition (March 2001)
Part Number 173771-001
Spare Part Number 234212-001
Contents
About This Guide
Text Conventions ......................................................................................................vii
Symbols in Text........................................................................................................viii
Symbols on Equipment.............................................................................................viii
Rack Stability ............................................................................................................. ix
Airflow Requirements ................................................................................................ ix
Compaq Technician Notes .......................................................................................... x
Access Panel Label and Indicators ............................................................................. xi
Getting Help ..............................................................................................................xii
Help Sources ......................................................................................................xii
Compaq Technical Support ................................................................................xii
Compaq Website ................................................................................................xii
Compaq Authorized Reseller ............................................................................xiii
Integrated Management Display........................................................................xiii
Chapter 1
Illustrated Parts Catalog
System Chassis Exploded View ...............................................................................1-2
Processor and Memory Module Exploded View......................................................1-4
Media Module Exploded View.................................................................................1-7
I/O Module Exploded View .....................................................................................1-9
Chapter 2
Removal and Replacement Procedures
Electrostatic Discharge Information .........................................................................2-2
System Interconnect Status LED Indicators .............................................................2-2
Preparation Procedures.............................................................................................2-3
Hot-Pluggable Parts...........................................................................................2-3
Non-Hot-Plug Parts ...........................................................................................2-3
Weight Warning ................................................................................................2-5
Rack Warnings ..................................................................................................2-5
Server Warnings and Precautions......................................................................2-6
Compaq ProLiant DL760 Server ..............................................................................2-7
Server Modules.........................................................................................................2-9
Top Access Panel ...................................................................................................2-10
iv
Compaq ProLiant DL760 Servers Maintenance and Service Guide
Removal and Replacement Procedures
continued
Media Module ........................................................................................................2-11
Removing the Media Module..........................................................................2-11
Media Module Bezel .......................................................................................2-13
Integrated Management Display......................................................................2-14
Hard Drive Blank ............................................................................................2-16
Hot-Plug Drive Replacement Guidelines ........................................................2-17
Hot-Plug Drive Replacement Precautions.......................................................2-17
Integrated Diskette Drive and CD-ROM.........................................................2-19
Media Module Cable Routing Diagram ..........................................................2-21
Power On/Standby Switch Assembly..............................................................2-22
Processor and Memory Module..............................................................................2-24
Shipping Screw ...............................................................................................2-24
Opening and Removing the Processor and Memory Module..........................2-25
Removing the Memory Board .........................................................................2-27
Dual Inline Memory Modules .........................................................................2-28
Processor Board Layout ..................................................................................2-31
Processor .........................................................................................................2-32
Processor Power Module.................................................................................2-33
Processor Terminator Board............................................................................2-34
Middle Air Baffle ............................................................................................2-35
Cache Accelerators..........................................................................................2-36
Processor Board...............................................................................................2-37
I/O Module .............................................................................................................2-38
Removing the I/O Module...............................................................................2-38
Removing the Cable Management Arm ..........................................................2-40
Locating the I/O Expansion Slots....................................................................2-41
Removing the I/O Expansion Slot Cover ........................................................2-42
Removing a PCI/PCI-X Expansion Board ......................................................2-43
9-Slot Hot-Plug Basket....................................................................................2-45
Hot-Plug Fans..................................................................................................2-47
Fan Cage Assembly.........................................................................................2-49
I/O Module Central Support Bracket ..............................................................2-50
I/O Plenums.....................................................................................................2-51
Internal Battery................................................................................................2-55
Hot-Plug Power Supply and Midplane Assembly ..................................................2-56
Hot-Plug Power Supply...................................................................................2-56
System Midplane Assembly............................................................................2-58
Chapter 3
Diagnostic Tools
Diagnostic Tools Utility Overview...........................................................................3-2
For More Information...............................................................................................3-4
About This Guide
Chapter 4
Connectors, Switches, and LED Indicators
Connectors................................................................................................................4-2
Rear Panel .........................................................................................................4-2
I/O Board...........................................................................................................4-3
Processor Board.................................................................................................4-4
Switches ...................................................................................................................4-5
I/O Board Switches ...........................................................................................4-5
Processor Board.................................................................................................4-6
SW1 - SW4 Processor Board Bus/Core Frequency Ratio .................................4-7
LED Indicators .........................................................................................................4-8
System Interconnect Status Indicator LEDs......................................................4-8
Hot-Plug I/O Fan LED Indicators .....................................................................4-9
PCI Hot Plug LED Indicators..........................................................................4-10
Power Supply LED Indicators.........................................................................4-12
Hot-Plug SCSI Hard Drive Indicators.............................................................4-13
Chapter 5
Physical, Operating, and Performance Specifications
System Unit ..............................................................................................................5-2
Power Supply ...........................................................................................................5-3
Dual Inline Memory Module (DIMM) .....................................................................5-4
1.44-MB Diskette Drive ...........................................................................................5-4
24X Max IDE CD-ROM Drive ................................................................................5-5
Hot-Plug Ultra2 SCSI Hard Drives ..........................................................................5-6
Hot-Plug Ultra3 SCSI Hard Drives ..........................................................................5-7
Compaq Integrated Smart Array Controller .............................................................5-8
Compaq NC3134 Fast Ethernet NIC 64 PCI Dual 10/100 Controller ......................5-9
Index
v
About This Guide
About This Guide
This maintenance and service guide can be used for reference when servicing Compaq
ProLiant DL760 servers.
WARNING: To reduce the risk of personal injury from electric shock and hazardous energy
levels, only authorized service technicians should attempt to repair this equipment. Improper
repairs could create conditions that are hazardous.
IMPORTANT: The installation of options and servicing of this product shall be performed by individuals
who are knowledgeable of the procedures, precautions, and hazards associated with equipment
containing hazardous energy circuits.
Text Conventions
This document uses the following conventions to distinguish elements of text:
Keys
Keys appear in boldface. A plus sign (+) between
two keys indicates that they should be pressed
simultaneously.
USER INPUT
User input appears in a different typeface and in
uppercase.
FILENAMES
File names appear in uppercase italics.
Menu Options,
Command Names,
Dialog Box Names
These elements appear in initial capital letters.
COMMANDS,
DIRECTORY NAMES,
and DRIVE NAMES
These elements appear in uppercase.
Type
When you are instructed to type information, type
the information without pressing the Enter key.
Enter
When you are instructed to enter information, type
the information and then press the Enter key.
vii
viii
Compaq ProLiant DL760 Servers Maintenance and Service Guide
Symbols in Text
These symbols may be found in the text of this guide. They have the following meanings.
WARNING: Text set off in this manner indicates that failure to follow directions in the warning
could result in bodily harm or loss of life.
CAUTION: Text set off in this manner indicates that failure to follow directions could result in
damage to equipment or loss of information.
IMPORTANT: Text set off in this manner presents clarifying information or specific instructions.
NOTE: Text set off in this manner presents commentary, sidelights, or interesting points of information.
Symbols on Equipment
These symbols may be located on equipment in areas where hazardous conditions may exist.
This symbol in conjunction with any of the following symbols indicates the presence of a
potential hazard. The potential for injury exists if warnings are not observed. Consult your
documentation for specific details.
This symbol indicates the presence of hazardous energy circuits or electric shock hazards.
Refer all servicing to qualified personnel.
WARNING: To reduce the risk of injury from electric shock hazards, do not open this
enclosure. Refer all maintenance, upgrades, and servicing to qualified personnel.
This symbol indicates the presence of electric shock hazards. The area contains no user- or
field-serviceable parts. Do not open for any reason.
WARNING: To reduce the risk of injury from electric shock hazards, do not open this
enclosure.
This symbol on an RJ-45 receptacle indicates a Network Interface Connection.
WARNING: To reduce the risk of electric shock, fire, or damage to the equipment, do not
plug telephone or telecommunications connectors into this receptacle.
This symbol indicates the presence of a hot surface or hot component. If this surface is
contacted, the potential for injury exists.
WARNING: To reduce the risk of injury from a hot component, allow the surface to cool
before touching it.
These symbols on power supplies or systems indicate the equipment is supplied
by multiple sources of power.
WARNING: To reduce the risk of injury from electric shock, remove all power
cords to completely disconnect power from the system.
About This Guide
This symbol indicates that the component exceeds the recommended weight for
one individual to handle safely.
42–62 kg
93–137 lb
WARNING: To reduce the risk of personal injury or damage to the equipment,
observe local occupational health and safety requirements and guidelines for
manual material handling.
Rack Stability
WARNING: To reduce the risk of personal injury or damage to the equipment, be sure that:
■ The leveling jacks are extended to the floor.
■ The full weight of the rack rests on the leveling jacks.
■ The stabilizing feet are attached to the rack if it is a single rack installation.
■ The racks are coupled together in multiple rack installations.
■ Only one component is extended at a time. A rack may become unstable if more than one
component is extended for any reason.
Airflow Requirements
The Compaq ProLiant DL760 server draws cool air in through the front door and exhausts warm
air through the rear door. Therefore, the front door of the rack must be adequately ventilated to
allow ambient room air to enter the cabinet, and the rear door must be adequately ventilated to
allow the warm air to escape from the rack. Do not block the ventilation apertures. Clearance
from the back of the rack to the rear of another rack or row of racks should be at least 48 inches.
CAUTION: If a third-party rack is used, the following minimum requirements should be
observed to ensure adequate airflow to the server:
■ Front and rear doors should have 64% open area (equivalent to 830 square inches of
space on a 42U rack) for airflow with holes evenly distributed from top to bottom to permit
adequate air flow.
■ Side clearance between the installed server and the side panels of the rack must be a
minimum of 2.75 inches.
CAUTION: If not all of the vertical space in the rack is filled by components, the gaps left will
cause a change in airflow through the rack and across the components. Cover these gaps with
rack blanking panels.
High Airflow Rack Door Insert
The increased power of new processor technology requires increased cooling efficiency for
rack-mounted servers. The new Compaq Rack 9000 series provides enhanced airflow for
maximum cooling, allowing these racks to be fully loaded with servers using the latest
processors.
When installing this server in Compaq Rack 7000 and 4000 series racks, the new processor
technology requires the installation of a new Compaq High Airflow Rack Door Insert, if the
rack has a LEXAN front door.
ix
x
Compaq ProLiant DL760 Servers Maintenance and Service Guide
Compaq Technician Notes
WARNING: Only authorized technicians trained by Compaq should attempt to repair this
equipment. All troubleshooting and repair procedures are detailed to allow only
subassembly/module-level repair. Because of the complexity of the individual boards and
subassemblies, no one should attempt to make repairs at the component level or make
modifications to any printed wiring board. Improper repairs can create a safety hazard. Any
indications of component replacement or printed wiring board modifications may void any
warranty.
WARNING: To reduce the risk of personal injury from electric shock and hazardous energy
levels, do not exceed the level of repair specified in these procedures. Because of the
complexity of the individual boards and subassemblies, do not attempt to make repairs at the
component level or to make modifications to any printed wiring board. Improper repairs could
create conditions that are hazardous.
WARNING: To reduce the risk of electric shock or damage to the equipment:
■ If the system has multiple power supplies, disconnect power from the system by
unplugging all power cords from the power supplies.
■ Do not disable the power cord grounding plug. The grounding plug is an important safety
feature.
■ Plug the power cord into a grounded (earthed) electrical outlet that is easily accessible at
all times.
CAUTION: To properly ventilate your system, you must provide at least 30.5 cm (12 inches) of
clearance at the front and back of the computer.
CAUTION: The computer is designed to be electrically grounded. To ensure proper operation,
plug the AC power cord into a properly grounded AC outlet only.
About This Guide
Access Panel Label and Indicators
A significant amount of information about server configuration and options installation is
provided on the panel labels. As shown in Figure 1, these labels are located on the top of the
unit and on the sides of the Processor and Memory Module. To access the appropriate label, see
“Figure 1” and “Table-1”.
NOTE: These labels do not contain warning and caution information. Refer to this guide or to the option
documentation for the applicable warnings and cautions.
1
2
7
3
5
4
6
Figure 1. Location of labels and indicators
Table-1
Location of Labels and Indicators
Item
Component
I/O board information
Options installation
Module access
System Interlock Status
Indicators
Item
Component
Additional I/O information
Processor board configuration
Memory installation
xi
xii
Compaq ProLiant DL760 Servers Maintenance and Service Guide
Getting Help
If you have a problem and have exhausted the information in this guide, you can get further
information and other help in the following locations.
Help Sources
The following sources contain additional information:
■
User documentation
■
Compaq Service Quick Reference Guide
■
Service training guides
■
Compaq service advisories and bulletins
■
Compaq QuickFind
■
Compaq Insight Manager
■
Compaq Download Facility: Call 1-281-518-1418
Compaq Technical Support
In North America, call the Compaq Technical Phone Support Center at 1-800-OK-COMPAQ.
This service is available 24 hours a day, 7 days a week. For continuous quality improvement,
calls may be recorded or monitored.
Outside North America, call the nearest Compaq Technical Support Phone Center. Telephone
numbers for worldwide Technical Support Centers are listed in the Worldwide Telephone
Numbers booklet included with your product or available on the Compaq website:
http://www.compaq.com
Be sure to have the following information available before you call Compaq:
■
Technical support registration number (if applicable)
■
Product serial number, model name, and module number
■
Applicable error messages
■
Add-on boards or hardware
■
Third-party hardware or software
■
Operating system type and revision level
Compaq Website
The Compaq website has information on this product as well as the latest drivers and
Flash ROM images. You can access the Compaq website by logging on to the Internet and
pointing your browser to
http://www.compaq.com
About This Guide
Compaq Authorized Reseller
For the name of your nearest Compaq authorized reseller:
■
In the United States, call 1-800-345-1518.
■
In Canada, call 1-800-263-5868.
■
Elsewhere, see the Compaq website for locations and telephone numbers.
Integrated Management Display
Some Compaq server models include a Compaq Integrated Management Display (IMD), an
integrated, 16 x 4 character display mounted on the front of the server. This display provides
easy-to-use menu-driven access to server information, including model number, LCD firmware
revision, and POST operations.
xiii
Chapter
1
Illustrated Parts Catalog
This chapter provides the illustrated parts breakdown and a spare parts list for the
Compaq ProLiant™ DL760 server. See the table following each illustration for the names of
referenced spare parts.
1-2
Compaq ProLiant DL760 Servers Maintenance and Service Guide
System Chassis Exploded View
5
2
1
3
7
4
6
Figure 1-1. System chassis exploded view
Illustrated Parts Catalog
1-3
Table 1-1
System Chassis Parts List
Item
Description
Spare Part Number
SYSTEM CHASSIS
1
System chassis
122231-001
2
Top access panel
122214-001
3
Processor and Memory Module (with system board)
122216-001
4
Media module
146446-001
a) Drive tray module*
b) Drive cage assembly*
c) Integrated Management Display (IMD)*
d) CD-ROM/1.44-MB diskette drive*
e) Media module bezel*
f)
5
Bezel screws (Quantity 4)*
I/O module with PCI-X I/O board
180447-001
SYSTEM COMPONENTS
6
Hot-Plug power supply 1150 W
122235-001
System midplane assembly
122234-001
BOARDS
7
*Not shown
1-4
Compaq ProLiant DL760 Servers Maintenance and Service Guide
Processor and Memory Module Exploded View
10
11
9
10
12
14
13
16a
8b
15a
8a
8d
15c
15d
15b
8c
Figure 1-2. Processor and Memory Module exploded view
Illustrated Parts Catalog
1-5
Table 1-2
Processor and Memory Module Spare Parts List
Item
Description
Spare Part Number
MODULE COMPONENTS
8
Processor module with processor board
122216-001
a) Processor module
b) Processor 8P/Memory host board
c) Processor guide, front
d) Processor guide, rear
e) Processor Power Module (PPM) guide*
f)
Memory guide (Quantity 2)*
g) Memory board insertion guide*
h) Air baffle assembly*
i)
Neoprene bumpers (Quantity 2)*
j)
Black keeper*
PROCESSORS
9
Processor, 700 MHz with 1-MB cache and heatpipe
178943-001
Processor, 700 MHz with 2-MB cache and heatpipe
178944-001
Processor, 900 MHz with 2-MB cache and heatpipe
232388-001
10
Redundant Processor Power Module
312257-001
11
Processor terminator board
122224-001
12
Memory board
122215-001
13
Memory module, 128-MB, 64-MB CL2 (Quantity1)
146488-001
Memory module, 256-MB, 128-MB, CL2 (Quantity 1)
146489-001
Memory module, 512-MB, 128-MB, CL2 (Quantity 1)
146490-001
Memory module, 256-MB, 64-MB, CL2 (Quantity 1)
170514-001
Memory module, 512-MB, 256-MB, CL2 (Quantity 1)
170515-001
Memory module, 512-MB, 128-MB, CL3 (Quantity 1)
170516-001
Memory module, 512-MB, 256-MB, CL3 (Quantity 1)
170517-001
Memory module, 1-GB, 256-MB, CL2 (Quantity 1)
170518-001
Memory module, 1-GB, 256-MB, CL3 (Quantity 1)
170519-001
Cache Accelerator (Quantity 2)
143887-001
MEMORY
14
continued
1-6
Compaq ProLiant DL760 Servers Maintenance and Service Guide
Table 1-2
Processor and Memory Module Spare Parts List continued
Item
Description
Spare Part Number
MISCELLANEOUS
15
Plastics kit
123185-001
a) Memory guide right and left (Quantity 2)
b) Terminator PPM guide
c) Module ejector, right front (Quantity 2)
d) Module ejector, left front (Quantity 2)
e) Fan cage plenum*
f)
Plenum, 9 slot, top*
g) Plenum, 2 slot*
h) I/O plenum, 9 slot*
i)
Port PCI retainers (Quantity 11)*
j)
I/O slot double guide*
k) I/O slot triple guide*
l)
I/O ejector, right*
m) I/O ejector, left*
n) Black keeper*
o) CPU module ejector, right*
p) CPU module ejector, left*
q) Memory card insertion guide*
16
Miscellaneous hardware kit
a) Processor module air baffle cover
b) I/O center support bracket*
*Not shown
123187-001
Illustrated Parts Catalog
Media Module Exploded View
19
17b
18
20
22
21
Figure 1-3. Media module exploded view
1-7
1-8
Compaq ProLiant DL760 Servers Maintenance and Service Guide
Table 1-3
Media Module Spare Parts List
Item
Description
Spare Part Number
CHASSIS
17
Front bezel kit
122236-001
a) Processor bezel*
b) Media bezel
c) IMD blank panel*
ASSEMBLIES
18
Media module
146446-001
19
IMD with cable
122223-001
20
Power switch assembly with LED
122233-001
MASS STORAGE
21
22
*Not shown
Wide Ultra2 hard drive with tray, 9.1-GB, 1-inch, 7200 rpm
104665-001
Wide Ultra2 hard drive with tray, 18.2-GB, 1-inch, 7200 rpm
104663-001
Wide Ultra3 hard drive with tray, 9.1-GB, 1-inch, 10000 rpm
152188-001
Wide Ultra3 hard drive with tray, 18.2-GB, 1-inch, 10000 rpm
152190-001
Wide Ultra3 hard drive with tray, 36.4-GB, 1-inch, 10000 rpm
177986-001
Wide Ultra3 hard drive with tray, 9.1-GB, 1-inch, 15000 rpm
189393-001
Wide Ultra3 hard drive with tray, 18.2-GB, 1-inch, 15000 rpm
189395-001
LVDS 1-inch hard drive blank
122759-001
Illustrated Parts Catalog
I/O Module Exploded View
25
28b
24
23d
26b
27
26a
26c
29e
29i
26d
23b
29f
29g
23a
29l
29k
Figure 1-4. I/O module exploded view
1-9
1-10
Compaq ProLiant DL760 Servers Maintenance and Service Guide
Table 1-4
I/O Module Spare Parts List
Item
Description
Spare Part Number
CHASSIS
23
I/O module (with I/O board)
180447-001
a) PCI-X I/O board
b) Array enabler board (replacement part is Item 38, Table 1-5)
c) I/O module assembly*
d) Fan cage
e) Fiber optic fan cage CA assembly*
f)
Hot-pluggable fan interface*
g) PCI POC divider*
h) Fiber optic fan plenum CA assembly*
i)
Hot-pluggable basket, 9 slot*
j)
PCI Hot Plug 10P, 15.3 inch CA assembly*
k) PCI Hot Plug 40P, 6 inch CA assembly*
l)
RILOE CA assembly, extender*
ASSEMBLIES
24
Hot-pluggable basket, 9 slot
122230-001
25
Hot-pluggable I/O fan
122225-001
PCI Hot Plug interface board with cables
122228-001
BOARDS
26
a) Lever PCB with insulation and latches, 2 slot
b) Lever PCB with insulation and latches, 9 slot
c) PCI Hot Plug 10P, 15.3 inch CA assembly
d) PCI Hot Plug 40P, 6 inch CA assembly
27
NC3134 10/100 TX UTP NIC
161105-001
MISCELLANEOUS
28
Miscellaneous hardware kit*
123187-001
a) Processor module air baffle cover*
b) I/O center support bracket
continued
Illustrated Parts Catalog
1-11
Table 1-4
I/O Module Spare Parts List continued
Item
29
Description
Spare Part Number
123185-001
Miscellaneous plastics kit
a) Memory guide right and left (Quantity 2)*
b) Terminator PPM guide*
c) Module ejector, right front (Quantity 2)*
d) Module ejector, left front (Quantity 2)*
e) Fan cage plenum
f)
Plenum, 9 slot, top
g) Plenum, 2 slot
h) I/O plenum, 9 slot*
i)
Port PCI retainers (Quantity 11)
j)
Memory board connector guide front*
k) I/O slot double guide
l)
I/O slot triple guide
m) Black keeper*
n) CPU module ejector, right*
o) CPU module ejector, left*
*Not shown
Table 1-5
Miscellaneous Spare Parts List
Item
Description
Spare Part Number
MISCELLANEOUS
30
Miscellaneous screw kit*
123186-001
a) Module ejector screws (Quantity 6)*
b) CD shoulder screws (Quantity 3)*
c) Diskette drive shoulder screws (Quantity 3)*
d) Diskette drive fastening screw (Quantity 1)*
31
Miscellaneous cable kit*
123184-001
a) PCI Hot Plug switch cable, 9 slot*
b) PCI Hot Plug switch cable, 2 slot*
c) Diskette drive power cable*
d) CD-ROM drive cable*
e) Diskette drive data cable*
32
Cable management arm, 28-inch rails, slides*
123188-001
continued
1-12
Compaq ProLiant DL760 Servers Maintenance and Service Guide
Table 1-5
Miscellaneous Spare Parts List continued
Item
Description
Spare Part Number
33
SCSI adapter (50/68)*
189638-001
34
Country kit*
152406-001
35
Return kit*
123189-001
36
Maintenance and service guide*
234212-001
37
Internal battery*
179322-001
38
Integrated Array Enabler Board*
122232-001
39
Ethernet loopback RJ-45*
317465-001
40
Fan controller board*
122226-001
41
Long SCSI cable*
146447-002
*Not shown
Chapter
2
Removal and Replacement Procedures
This chapter provides subassembly/module-level removal and replacement procedures for
Compaq ProLiant DL760 servers. After completing all necessary removal and replacement
procedures, run the Diagnostics program to verify that all components operate properly.
To service Compaq ProLiant DL760 servers, you might need the following:
■
Flat-blade screwdriver (four millimeter)
■
Torx T-15 screwdriver
■
Phillips screwdriver
■
From the Compaq SmartStart™ for Servers CD:
G
ROM-Based Setup Utility (RBSU) software
NOTE: For more information on RBSU, refer to the ROM-Based Setup Utility User Guide.
G
Drive Array Advanced Diagnostics software (DAAD)
G
Array Diagnostics Utility software (ADU)
2-2
Compaq ProLiant DL760 Servers Maintenance and Service Guide
Electrostatic Discharge Information
A discharge of static electricity can damage static-sensitive devices or microcircuitry. Proper
packaging and grounding techniques are necessary precautions to prevent damage. To prevent
electrostatic damage, observe the following precautions:
■
Transport products in static-safe containers, such as conductive tubes, bags, or boxes.
■
Keep electrostatic-sensitive parts in their containers until they arrive at static-free stations.
■
Cover workstations with approved static-dissipating material. Use a wrist strap connected
to the work surface and properly grounded tools and equipment.
■
Keep the work area free of nonconductive materials, such as ordinary plastic assembly
aids and foam packing.
■
Make sure you are always properly grounded when touching a static-sensitive component
or assembly.
■
Avoid touching pins, leads, or circuitry.
■
Always place drives PCB assembly-side down.
■
Use conductive field service tools.
System Interconnect Status LED Indicators
Compaq ProLiant DL760 servers ship with system interconnect status LED indicators. These 17
LED indicators provide a closed-loop checking mechanism for verifying proper component
mating and interconnections between critical server components. The indicators provide a visual
aid to assist in isolating which components to check if the server will not power up. These LED
indicators are located in the I/O module and can be viewed through the top access panel. See
Chapter 4, “Connectors, Switches, and LED Indicators,” for more information.
Preparation Procedures
System power in Compaq ProLiant DL760 servers does not completely shut off with the front
panel Power On/Standby switch. The switch toggles between On and Standby, rather than On
and Off. The Standby position removes power from most electronics and the drives, but portions
of the power supply, the Integrated Management Display (IMD), the system interlock circuitry,
and some internal circuitry remain active. You must disconnect all power cords from the server
to completely remove all power from the system.
WARNING: To reduce the risk of electric shock or damage to the equipment, disconnect power
from the server by unplugging all power cords from either the electrical outlet or the server. In
systems with multiple power supplies, you must disconnect all the power cords to completely
remove power from the system.
IMPORTANT: It is necessary to be knowledgeable about electrostatic discharge information before
conducting the preparation procedures. For electrostatic discharge information, see “Electrostatic
Discharge Information” earlier in this chapter.
Removal and Replacement Procedures
Hot-Pluggable Parts
Before beginning the removal of any serviceable parts, determine whether the part is
hot-pluggable or not hot-pluggable. If it is hot-pluggable, do not perform a power shutdown of
the server. The access panels can be removed while the server is powered up without causing a
system shutdown. When the server is in Standby mode, portions of the power supply, auxiliary
power (+5V), and some internal circuitry will remain active.
Non-Hot-Plug Parts
If any serviceable parts are not hot-pluggable, then the server must be shut down. Non-hot-plug
parts include the processor, Processor Power Module, system board, memory board, and
DIMMs.
IMPORTANT: It is not necessary to turn off the server to replace hot-plug devices, such as PCI Hot Plug
power supplies or hot-plug fans.
2-3
2-4
Compaq ProLiant DL760 Servers Maintenance and Service Guide
Before beginning any of the removal and replacement procedures for non-hot-plug devices:
1. Press the Power On/Standby switch to Standby. This action places the server in Standby
mode, thereby disabling the main power supply output and providing auxiliary power
(+5V) to the server. Standby does not disable main input power.
2. Verify that the system LED indicator on the front panel, near the Power On/Standby
switch, is off and that the fan noise stops.
1
Figure 2-1. System LED indicator
3. Disconnect all power cords from the server to disable all power to the server.
4. For some removal and replacement procedures, you must remove the server from the rack
and place it on a sturdy table or workbench. Refer to the Compaq ProLiant DL760 Servers
User Guide for further instructions.
Removal and Replacement Procedures
Weight Warning
WARNING: The Compaq ProLiant DL760 weighs 62 kilograms (137 pounds) when
fully assembled. To reduce the risk of personal injury or damage to the equipment:
42-62 kg
93-137 lb
■ Observe local health and safety requirements and guidelines for manual material
handling.
■ Obtain adequate assistance to lift and stabilize the product during installation or
removal.
■ Remove all pluggable modules and power supplies to reduce the overall weight of
the product.
Rack Warnings
WARNING: To reduce the risk of personal injury or damage to the equipment, be sure that:
■ The leveling jacks are extended to the floor.
■ The full weight of the rack rests on the leveling jacks.
■ The stabilizers are attached to the rack if it is a single-rack installation.
■ The racks are coupled together in multiple-rack installations.
■ Only one component is extended at a time. A rack may become unstable if more than one
component is extended for any reason.
2-5
2-6
Compaq ProLiant DL760 Servers Maintenance and Service Guide
Server Warnings and Precautions
WARNING: To reduce the risk of personal injury from electric shock and hazardous energy
levels, only authorized service technicians should attempt to repair this equipment. Improper
repairs could create conditions that are hazardous. .
WARNING: To reduce the risk of personal injury from hazardous energy or damage to the
equipment when working on energized servers:
■ Remove all watches, rings, and any other loose-fitting jewelry.
■ Do not use conductive tools inside the server that could bridge live parts.
WARNING: To reduce the risk of electric shock or damage to the equipment:
■ Do not disable the power cord grounding plug. The grounding plug is an important safety
feature.
■ Plug the power cord into a grounded electrical outlet that is easily accessible at all times.
■ Install the power supply before connecting the power cord to the power supply.
■ Unplug the power cord before removing the power supply from the server.
■ If the system has multiple power supplies, disconnect power from the system by
unplugging all power cords from the power supplies.
WARNING: To reduce the risk of personal injury from hot surfaces, allow the internal system
components to cool before touching them.
CAUTION: Because the Compaq ProLiant DL760 server does not have safety interlocks, it is
possible for a unit to be operated without the cover and air baffles properly installed. This could
cause thermal damage in the system and may void your warranty. The rack-mountable
Compaq ProLiant DL760 server should always be operated with the system unit cover on.
Proper cooling will not be achieved if the system unit cover is removed for extended periods of
time.
CAUTION: Protect the server from power fluctuations and temporary interruptions with a
regulating uninterruptible power supply (UPS). This device protects the hardware from damage
caused by power surges and voltage spikes and keeps the system in operation during a power
failure.
IMPORTANT: The installation of options and servicing of this product shall only be performed by
individuals who are knowledgeable of the procedures, precautions, and hazards associated with
equipment containing hazardous energy circuits.
Removal and Replacement Procedures
Compaq ProLiant DL760 Server
In Compaq ProLiant DL760 servers, options and accessories are easily accessed through a
sliding top access panel and three removable modules: the Processor and Memory Module, the
media module, and the I/O module. See Figure 2-2, Figure 2-3, Table 2-1 and Table 2-2 for
identification of these modules and other components.
2
1
5
4
3
Figure 2-2. Compaq ProLiant DL760 server—front view
Table 2-1
Front Components
Item
Description
Processor and Memory Module
Media module
24X Max IDE CD-ROM drive
1.44-MB diskette drive
Integrated Management Display (IMD)
2-7
2-8
Compaq ProLiant DL760 Servers Maintenance and Service Guide
1
2
3
Figure 2-3. Compaq ProLiant DL760 server—rear view
Table 2-2
Rear Components
Item
Description
I/O module with system fans
Integrated server lift handles
Hot-plug power supplies
Removal and Replacement Procedures
Server Modules
The Compaq ProLiant DL760 server chassis facilitates the replacement or installation of
hardware using three removable modules and a sliding top access panel. Table 2-3 describes the
contents of the modules and how to access the components.
1
2
3
Figure 2-4. ProLiant DL760 server modules
Table 2-3
Module Components and Access
Module
Contents
To Access
PCI Hot Plug expansion
slots
Slide top access panel toward the front of the server. Lift up the
air baffle.
Configuration switches
Slide top access panel toward the front of the server
Fans 1 and 2
Slide top access panel toward the front of the server.
Processor sockets
Remove Processor and Memory Module.
Processor bus/core
ratio switches
Remove Processor and Memory Module
Cache Accelerator
Remove Processor and Memory Module
Memory (DIMMs)
Open Processor and Memory Module. Remove memory board.
CD-ROM/Diskette/IMD
Remove media module
Media
module
Hot-plug hard drives
Access directly at front of server
I/O
module
Processor
and
Memory
Module
2-9
2-10
Compaq ProLiant DL760 Servers Maintenance and Service Guide
Top Access Panel
WARNING: To reduce the risk of personal injury from hot surfaces, allow the internal system
components to cool before touching them.
CAUTION: When the server is powered on, the access panel must be installed for proper
system cooling. Otherwise, component stress and permanent equipment damage may result.
Open the top access panel to access the PCI Hot Plug expansion slots, system fans, and
configuration switches.
To open the top access panel:
and then pull the latch forward .
2. Slide the top access panel toward the front of the server .
1. Unlock the top latch security screw
3
3
1
2
Figure 2-5. Opening the top access panel
NOTE: Compaq recommends leaving the top access panel locked during normal use.
Removal and Replacement Procedures
Media Module
Mass storage in Compaq ProLiant DL760 servers is located in the media module. The media
module is capable of configuring a maximum of four 1-inch hot-plug Wide Ultra2 or
Wide Ultra3 SCSI hard drives. The media module supports two non-hot-plug media drive bays:
■
One third-height drive bay occupied by a 1.44-MB diskette drive
■
One third-height drive bay occupied by a 24X Max (or higher) IDE CD-ROM drive
Removing the Media Module
CAUTION: Removable media blank bezels and hot-plug drive cage blanking panels must be
installed over unused mass storage and removable media device bays to maintain proper
airflow.
To remove the media module from the server:
1. Perform the preparation procedures. See “Preparation Procedures” earlier in this chapter.
2. Push in the sides of the cam levers on the media module
downward .
1
and rotate the top of the levers
2
Figure 2-6. Removing the media module
WARNING: To reduce the risk of personal injury from hot surfaces, allow the internal system
components to cool before touching them.
2-11
2-12
Compaq ProLiant DL760 Servers Maintenance and Service Guide
3. Pull the media module out of the chassis until it contacts the module stop latch
4. Press in the module stop latches, then pull the module out of the chassis
.
.
3
3
4
Figure 2-7. Media module opened to stops
Reverse steps 2 through 4 to reinstall the module.
IMPORTANT: Check the System Interconnect Status Indicator LEDs to ensure that the module is properly
seated. See Chapter 4, “Connectors, Switches, and LED Indicators.”
Removal and Replacement Procedures
Media Module Bezel
To remove the media module bezel:
1. Perform the preparation procedures. See “Preparation Procedures” earlier in this chapter.
2. Remove the four screws securing the bezel to the module.
3. Lift up and pull the bezel away from the chassis.
Figure 2-8. Removing the bezel from the media module
Reverse steps 1 through 3 to replace the media module bezel.
2-13
2-14
Compaq ProLiant DL760 Servers Maintenance and Service Guide
Integrated Management Display
To remove the Integrated Management Display (IMD):
1. Perform the preparation procedures. See “Preparation Procedures” earlier in this chapter.
2. Remove the bezel. See “Media Module Bezel” earlier in this chapter.
3. Remove the media module. See “Removing the Media Module” earlier in this chapter.
4. Disconnect the IMD cable from the media backplane board
Routing Diagram.”
. See “Media Module Cable
1
Figure 2-9. Removing the IMD cable
Removal and Replacement Procedures
5. Press inward on the two locking tabs on the rear of the display panel
6. Pull the IMD from the front of the server
.
.
2
2
3
2
Figure 2-10. Removing the IMD
Reverse steps 1 through 6 to replace the IMD.
2-15
2-16
Compaq ProLiant DL760 Servers Maintenance and Service Guide
Hard Drive Blank
To remove a hard drive blank from a hard drive bay:
1. Push the side of the retaining clip inward
2. Pull the hard drive blank from the bay
.
.
1
2
Figure 2-11. Removing a hard drive blank
Reverse steps 1 and 2 to replace a hard drive blank.
Removal and Replacement Procedures
Hot-Plug Drive Replacement Guidelines
You should be able to hot-plug a drive during normal activity. Be aware, however, that
hot-plugging a disk drive will affect system performance and fault tolerance.
NOTE: Depending on your configuration, a drive failure and the subsequent rebuild process will cause
storage subsystem performance degradation. For example, the replacement of a single drive on an array
with 50 logical drives will have less impact than if the array has only three logical drives.
Although the system is operational, the disk subsystem may no longer be fault tolerant when a
disk drive is hot-plugged.
CAUTION: Fault tolerance will be lost until the removed drive is replaced and the rebuild
operation is completed (this will take several hours, even if the system is not busy while the
rebuild is in progress). If another drive in the array incurs an error during the period when fault
tolerance is unavailable, a fatal system error could result. If another drive fails during this
period, the entire contents of the array will be lost.
IMPORTANT: Perform a disk drive replacement during low activity periods whenever possible. In
addition, have a current valid backup available for the logical drives in the array of the drive being
replaced, even if drive replacement is being made during server downtime.
Hot-Plug Drive Replacement Precautions
Be aware of the following Compaq guidelines for safe hot-plug replacement:
■
Do not remove a degraded drive if any other member of the array is offline (the online
LED is off). No other drive in the array can be hot-plugged without data loss, unless
RAID 0+1 is used as a fault tolerant form. In this case, drives are mirrored in pairs. More
than one drive can fail and be replaced as long as the drive or drives they are mirroring are
online.
Refer to your Smart Array Controller user guide for information on fault tolerance
options.
■
Do not remove a degraded drive if any member of an array is missing (previously
removed and not yet replaced).
■
Do not remove a degraded drive if any member of an array is being rebuilt, unless the
drive being rebuilt has been configured as an online spare. The online LED for the drive
being rebuilt will flash, indicating that a replaced drive is being rebuilt from data stored on
the other drives.
NOTE: An online spare will not activate and start rebuilding after a predictive failure alert because the
degraded drive is still online. The online spare activates only after a drive in the array has failed.
■
Do not replace multiple degraded drives at the same time (for example, when the system is
off), or the fault tolerance may be compromised. When a drive is replaced, the controller
uses data from the other drives in the array to reconstruct data on the replacement drive. If
more than one drive is removed, a complete data set is not available to reconstruct data on
the replacement drive or drives, and permanent data loss could occur.
2-17
2-18
Compaq ProLiant DL760 Servers Maintenance and Service Guide
CAUTION: Do not turn off an attached disk drive enclosure when the server containing the
Smart Array Controller is powered on. Also, do not turn on the server before turning on the disk
enclosure. If these ordering rules are not followed, the Smart Array Controller may mark the
drives in this enclosure as “failed,” which could result in permanent data loss.
CAUTION: Replace a hot-plug SCSI hard drive only when the drive LED is amber. Do not
remove a hot-plug SCSI hard drive if the online LED is green.
To remove a hot-plug SCSI hard drive:
1. Push the tab to unlock the drive
.
2. Rotate the hot-plug drive ejector lever outward
3. Pull the hot-plug drive from the drive bay
.
.
1
2
3
Figure 2-12. Removing a hot-plug SCSI hard drive
Reverse steps 1 through 3 to replace a hot-plug SCSI hard drive.
Removal and Replacement Procedures
Integrated Diskette Drive and CD-ROM
The media module has a one third-height drive bay occupied by a 1.44-MB diskette drive and
24X Max (or higher) IDE CD-ROM drive. To remove the integrated diskette drive and
CD-ROM drive:
1. Turn the media module over and disconnect the CD-ROM drive signal cable , the
diskette drive control and data cable , and diskette drive power cable from the back of
the drives.
1
2
3
Figure 2-13. Disconnecting the CD-ROM/diskette drive cables
2-19
2-20
Compaq ProLiant DL760 Servers Maintenance and Service Guide
2. Unscrew the tray screw located on the front of the media module.
3. Slide out the diskette drive/CD-ROM tray.
Figure 2-14. Removing the integrated diskette drive and CD-ROM drive
Reverse steps 1 through 3 to replace the integrated diskette drive and
CD-ROM drive.
Removal and Replacement Procedures
Media Module Cable Routing Diagram
1
2
3
4
Figure 2-15. Media module cable routing diagram
Table 2-4
Media Module Cable Routing
Item
Description
CD-ROM drive signal cable
Diskette drive control and data cable
Diskette drive power cable
IMD cable
Power switch/LED/ambient air temperature sensor cable
5
2-21
2-22
Compaq ProLiant DL760 Servers Maintenance and Service Guide
Power On/Standby Switch Assembly
To remove the Power On/Standby switch:
1. Perform the preparation procedures. See “Preparation Procedures” earlier in this chapter.
2. Remove the media module bezel. See “Media Module Bezel” earlier in this chapter.
3. Remove the media module. See “Removing the Media Module” earlier in this chapter.
4. Unplug the IMD cable from the media backplane board. See “Media Module Cable
Routing Diagram” earlier in this chapter.
5. Remove the IMD. See “Integrated Management Display” earlier in this chapter.
6. Disconnect the Power On/Standby switch connector from the media backplane board
See “Media Module Cable Routing Diagram” earlier in this chapter.
7. Loosen the thumbscrew that secures the power switch plate to the media backplane
board .
2
1
Figure 2-16. Unplugging the power switch cable and loosening the thumbscrew
.
Removal and Replacement Procedures
8. Remove the power switch plate from the media module
.
3
Figure 2-17. Removing the power switch plate from the media module
9. Squeeze the grommets around the LEDs, and remove the LEDs from the grommets.
Remove the thermistor from the bracket assembly .
10. Pull the switch assembly out of the power switch plate
.
4
5
4
Figure 2-18. Removing the Power On/Standby switch from the power switch plate
Reverse steps 1 through 8 to replace the Power On/Standby switch assembly.
NOTE: The Power On/Standby switch LED is in the top position, and the thermistor is in the bottom
position.
2-23
2-24
Compaq ProLiant DL760 Servers Maintenance and Service Guide
Processor and Memory Module
Shipping Screw
To protect the Processor and Memory Module during shipping, a bracket with a shipping screw
is installed. To loosen the shipping screw:
1. Perform the preparation procedures. See “Preparation Procedures” earlier in this chapter.
2. Open the top access panel. See “Top Access Panel” earlier in this chapter.
3. Lift the fan intake plenum
4. Loosen the thumbscrew
.
.
2
1
Figure 2-19. Loosening the shipping screw
Removal and Replacement Procedures
Opening and Removing the Processor and Memory Module
To open the Processor and Memory Module:
1. Perform the preparation procedures. See “Preparation Procedures” earlier in this chapter.
2. Push in the sides of the cam levers on the Processor and Memory Module
the top of the levers downward .
1
Figure 2-20. Opening the Processor and Memory Module
, and rotate
2
2-25
2-26
Compaq ProLiant DL760 Servers Maintenance and Service Guide
3. Pull the Processor and Memory Module out of the chassis until it contacts the module
stop latches .
4. Push the module stop latches inward, and slide the Processor and Memory Module out of
the chassis .
4
3
Figure 2-21. Removing the Processor and Memory Module
Reverse steps 1 through 4 to reinstall and close the Processor and Memory Module.
Removal and Replacement Procedures
Removing the Memory Board
WARNING: To reduce the risk of personal injury from hot surfaces, allow the internal system
components to cool before touching them.
To remove a memory board:
1. Perform the preparation procedures. See “Preparation Procedures” earlier in this chapter.
2. Open the Processor and Memory Module. See “Opening and Removing the Processor and
Memory Module” earlier in this chapter.
3. Rotate the memory board ejectors outward
the processor board .
, and then remove the memory board from
4. Place the memory expansion board, components facing up, on a flat surface.
1
1
2
Figure 2-22. Removing the memory board
IMPORTANT: The memory board is part of the system interconnect scheme and must be seated
properly for server startup.
Reverse steps 1 through 4 to replace the memory board.
2-27
2-28
Compaq ProLiant DL760 Servers Maintenance and Service Guide
Dual Inline Memory Modules
Compaq ProLiant DL760 servers ship with 128-MB, 256-MB, 512-MB, or 1-GB Synchronous
DRAM (SDRAM) Dual Inline Memory Modules (DIMMs) installed. Memory can be expanded
to a maximum of 16 GB. Install SDRAM DIMM module pairs, one module at a time, into the
proper sockets.
CAUTION: Compaq recommends using only Compaq SDRAM DIMMs. DIMMs from other
sources may adversely affect data integrity.
Adhere to the following guidelines when installing or replacing memory:
■
DIMMs must be installed in pairs.
■
Use only 128-MB, 256-MB, 512-MB, or 1-GB SDRAM DIMMs.
■
Both DIMMs of a given bank must be the same size, type, and speed.
The recommended SDRAM DIMM installation order is to begin with Bank 1, DIMMs 1 and 2,
and then populate toward Bank 8.
Figure 2-23 shows DIMM memory bank locations 1 through 8 and DIMMs 1 through 16 on the
memory expansion board in Compaq ProLiant DL760 servers.
DIMM 2
DIMM 4
DIMM 6
DIMM 8
DIMM 10
DIMM 12
DIMM 14
DIMM 16
Memory
Banks
1
2
3
4
5
6
7
8
Figure 2-23. Locating DIMM sockets on memory banks 1 through 8
DIMM 1
DIMM 3
DIMM 5
DIMM 7
DIMM 9
DIMM 11
DIMM 13
DIMM 15
Removal and Replacement Procedures
Any combination of SDRAM DIMMs can be used as long as the guidelines explained earlier are
followed. Examples of possible SDRAM DIMM upgrade combinations for each memory board
are shown in Table 2-5.
Table 2-5
Examples of SDRAM DIMM Upgrade Combinations
Total
Memory
Bank 1
Bank 2
Bank 3
Bank 4
Bank 5
Bank 6
2 x 128 MB
2 x 128 MB
2 x 256 MB
2 x 256 MB
Bank 7
Bank 8
2 x 256 MB
2 x 256 MB
256 MB
2 x 128 MB
512 MB
2 x 128 MB
2 x 128 MB
1 GB
2 x 128 MB
2 x 128 MB
2 x 128 MB
2 x 128 MB
1.5 GB
2 x 128 MB
2 x 128 MB
2 x 128 MB
2 x 128 MB
2 GB
2 x 256 MB
2 x 256 MB
2 x 256 MB
2 x 256 MB
4 GB
2 x 256 MB
2 x 256 MB
2 x 256 MB
2 x 256 MB
4 GB
2 x 512 MB
2 x 512 MB
2 x 512 MB
2 x 512 MB
6 GB
2 x 512 MB
2 x 512 MB
2 x 512 MB
2 x 512 MB
2 x 512 MB
2 x 512 MB
8 GB
2 x 512 MB
2 x 512 MB
2 x 512 MB
2 x 512 MB
2 x 512 MB
2 x 512 MB
2 x 512 MB
2 x 512 MB
16 GB
2 x 1 GB
2 x 1 GB
2 x 1 GB
2 x 1 GB
2 x 1 GB
2 x 1 GB
2 x 1 GB
2 x 1 GB
2-29
2-30
Compaq ProLiant DL760 Servers Maintenance and Service Guide
To remove a DIMM:
1. Perform the preparation procedures. See “Preparation Procedures” earlier in this chapter.
2. Remove the Processor and Memory Module. See “Opening and Removing the Processor
and Memory Module” earlier in this chapter.
3. Remove the memory board. See “Removing the Memory Board” earlier in this chapter.
4. Press outward on the socket latches at each end of the DIMM
5. Remove the DIMM from the memory expansion board
2
.
.
1
1
Figure 2-24. Removing a DIMM from the memory board
Reverse steps 1 through 5 to replace a DIMM.
CAUTION: The ejectors prevent the memory expansion board from lying completely flat.
Inserting a DIMM without counter pressure applied behind the socket to the back of the
expansion board can cause the memory expansion board to flex and could result in damage.
Always support the memory expansion board or apply counter pressure while inserting a DIMM.
IMPORTANT: Make sure that both latches are secured when the DIMM is installed.
Removal and Replacement Procedures
Processor Board Layout
Figure 2-25 and Table 2-6 show the processor board layout and processor socket numbering.
1
2
13
3
4
11
12
9
14
5
6
7
8
10
Figure 2-25. Processor board layout
Table 2-6
Processor Board Layout
Item
Description
Processor socket 1 and associated power module socket
Processor socket 2 and associated power module socket
Processor socket 3 and associated power module socket
Processor socket 4 and associated power module socket
Processor socket 5 and associated power module socket
Processor socket 6 and associated power module socket
Processor socket 7 and associated power module socket
Processor socket 8 and associated power module socket
Processor bus termination power module
Memory board socket
Bus 1 Cache Accelerator socket
Bus 2 Cache Accelerator socket
Bus 1 processor/core ratio switch (SW1)
Bus 2 processor/core ratio switch (SW2)
2-31
2-32
Compaq ProLiant DL760 Servers Maintenance and Service Guide
Processor
CAUTION: Handle the processor only by the ejectors. If you must set the processor down, lay it
down on the side with the hologram to prevent damage to the heat pipes and fins.
IMPORTANT: If you remove a processor, a processor terminator board must be reinstalled in the slot
before powering up the server.
To remove a processor:
1. Perform the preparation procedures. See “Preparation Procedures” earlier in this chapter.
2. Remove the Processor and Memory Module. See “Opening and Removing the Processor
and Memory Module” earlier in this chapter.
3. Rotate the front and rear ejector levers on the processor outward until the processor is
disconnected from the connector .
4. Remove the processor by lifting up on the ejectors
.
1
1
2
Figure 2-26. Removing a processor
Reverse steps 1 through 4 to replace a processor.
CAUTION: The Processor Power Module must be installed before you install the accompanying
processor. Attempting to install the Processor Power Module afterward could damage its
electronic components.
CAUTION: The server will not boot if the Intel Pentium III Xeon processors are not the same
speed.
IMPORTANT: When installing a processor, push down on both levers simultaneously. The server may
not recognize the processor if it is not properly installed.
NOTE: Upon restart, the System ROM will automatically detect the presence of the new processor and
clear the POST processor failure message.
Removal and Replacement Procedures
Processor Power Module
CAUTION: The processor must be removed before you remove the Processor Power Module.
Attempting to remove the Processor Power Module before removing the processor could
damage the processor’s electronic components.
To remove a Processor Power Module:
1. Perform the preparation procedures. See “Preparation Procedures” earlier in this chapter.
2. Remove the Processor and Memory Module. See “Opening and Removing the Processor
and Memory Module” earlier in this chapter.
3. Rotate the ejector levers on the Processor Power Module outward
4. Remove the Processor Power Module
.
.
1
2
Figure 2-27. Removing a Processor Power Module
Reverse steps 1 through 4 to replace the Processor Power Module.
CAUTION: The Processor Power Module must be installed before you install the accompanying
processor. Attempting to install the Processor Power Module afterward could damage its
electronic components.
NOTE: The Processor Power Module is keyed for correct alignment.
2-33
2-34
Compaq ProLiant DL760 Servers Maintenance and Service Guide
Processor Terminator Board
To remove a processor terminator board:
1. Rotate the ejector levers on the processor terminator board
2. Remove the processor terminator board
.
2
1
2
1
Figure 2-28. Removing a processor terminator board
Reverse steps 1 and 2 to replace a processor terminator board.
outward.
Removal and Replacement Procedures
Middle Air Baffle
IMPORTANT: The middle air baffle must be installed during operation of the server to ensure proper
processor cooling.
To remove the middle air baffle:
1. Loosen the thumbscrew of the middle air baffle
2. Lift the baffle upward
.
.
3. Remove the middle air baffle
.
1
3
2
Figure 2-29. Removing the middle air baffle
Reverse steps 1 through 3 to replace the middle air baffle.
2-35
2-36
Compaq ProLiant DL760 Servers Maintenance and Service Guide
Cache Accelerators
IMPORTANT: Cache Accelerators must be installed when processors are installed on both buses.
To remove a Cache Accelerator:
1. Perform the preparation procedures. See “Preparation Procedures” earlier in this chapter.
2. Remove the Processor and Memory Module. See “Opening and Removing the Processor
and Memory Module” earlier in this chapter.
3. Loosen the thumbscrew of the middle air baffle and lift the baffle upward to allow access
to the Cache Accelerator. See “Middle Air Baffle” earlier in this chapter.
4. Locate the Cache Accelerator.
5. Push down on the release lever on the side of the Cache Accelerator slot
6. Remove the Cache Accelerator
.
1
2
Figure 2-30. Removing a Cache Accelerator
Reverse steps 1 through 6 to replace the Cache Accelerator.
NOTE: Cache Accelerator modules are keyed to ensure correct alignment.
.
Removal and Replacement Procedures
After replacing the Cache Accelerator, complete the following steps to clear the Cache
Accelerator POST Error 220:
1. Reboot the server and press the F9 key to enter the ROM-based Setup Utility.
2. After you are in the utility, select Advanced Options.
3. Select Set Cache Accelerator Corrected.
4. Select the slot, either 1 or 2, that has been corrected.
5. Press the ESC key twice, and then press the F10 key to save.
The bit in NVRAM is cleared at this point. If the Cache Accelerator replacement has been
successful, the POST Error 220 should no longer appear at reboot.
Processor Board
The processor board is located at the bottom of the Processor and Memory Module and should
not be removed. If there is a need to replace the processor board, a new processor module with
system board must be ordered. The new processor board will be attached to the bottom of the
module, along with processor guide rails.
2-37
2-38
Compaq ProLiant DL760 Servers Maintenance and Service Guide
I/O Module
The I/O module is located at the rear of the server. Remove it to replace or service non-hot-plug
components or to access other components in the I/O module.
Removing the I/O Module
To remove the I/O module:
1. Perform the preparation procedures. See “Preparation Procedures” earlier in this chapter.
If the server is rack mounted, the cable management arm must be removed. See the section
“Removing the Cable Management Arm” later in this chapter.
2. Label and remove the cables from the back of the I/O module.
3. Open the top access panel. See “Top Access Panel” earlier in this chapter.
4. Loosen the shipping screw, if necessary. See “Shipping Screw” earlier in this chapter.
5. Push in on the sides of the stop latches
downward .
6. Pull the I/O module out of the chassis
1
on the I/O module, and rotate the cam levers
until it catches on the module stop latch.
2
3
Figure 2-31. Partially removing the I/O module
Removal and Replacement Procedures
7. To completely remove the I/O module from the chassis, press in on the module stop
latches , and pull the module out of the chassis .
4
5
Figure 2-32. Removing the I/O module
Reverse steps 1 through 7 to reinstall the module in the server.
2-39
2-40
Compaq ProLiant DL760 Servers Maintenance and Service Guide
Removing the Cable Management Arm
To remove the cable management arm:
1. Label all cables running through the cable management arm.
2. Disconnect all cables from the rear of the I/O module.
3. Loosen the green thumbscrew that secures the cable management arm and bracket to the
I/O module .
4. Move the bracket, with cable management arm attached, slightly up and then back from
the server so that it is possible to access the cam levers on the I/O module.
2
1
Figure 2-33. Disconnecting the cable management bracket from the I/O module
5. Swing the cable management arm to the left and out of the way
3
Figure 2-34. Rotating the cable management arm to the left
.
Removal and Replacement Procedures
Locating the I/O Expansion Slots
The I/O expansion slots are located on the I/O board in the I/O module. The I/O board in the
Compaq ProLiant DL760 server has 11 slots divided into 3 buses. The Primary bus (slots 7
through 9) is keyed for 64-bit 5-V PCI boards or 64-bit PCI universal boards. The Secondary
bus (slots 1 through 6) and the Tertiary bus (slots 10 through 11) are keyed for 64-bit 3.3V PCI/PCI-X boards or 64-bit universal PCI/PCI-X boards. The PCI/PCI-X expansion slots
associated with each of the three buses and the supported speeds are identified in Figure 2-35,
Figure 2-36, and Table 2-7. Bus balancing is not required...
WARNING: To reduce the risk of personal injury from hot surfaces, allow the internal system
components to cool before touching them.
2
1
2
3
1
4
5
6
7
3
8
9
10 11
Figure 2-35. Diagram of I/O slot connections from the rear of the server
11
10
9
8
Figure 2-36. Bus distribution of PCI Hot Plug slots
7
6
5
4
3
2
1
2-41
2-42
Compaq ProLiant DL760 Servers Maintenance and Service Guide
Table 2-7
Bus Distribution of PCI Hot Plug Slots.
Bus
PCI Hot Plug Slot No
Associated PCI Bus and Bus Speed
through Slots through Slots through Slots and Slots and Primary
PCI Bus 1 (64 Bit), 33-MHz
Slots
Secondary
Tertiary
PCI-X Bus 2 (64 Bit), 50-MHz
PCI Bus 2 (64-Bit), 33-MHz
PCI-X Bus 3 (64 Bit), 100-MHz
PCI Bus 3 (64-Bit), 33-MHz, 66-MHz
Note 1: All PCI-X Buses support PCI expansion boards at 33 MHz.
Note 2: The Bus speed will only run as fast as the slowest board installed.
NOTE: The I/O expansion board slots are numbered from right to left as you face the front of the server.
Removing the I/O Expansion Slot Cover
To remove the I/O expansion slot cover:
1. Press down on the top of the expansion slot release lever
2. Remove the expansion slot cover
and push the lever up .
.
1
3
2
Figure 2-37. Removing the I/O expansion slot cover
Reverse steps 1 and 2 to replace the I/O expansion slot cover.
Removal and Replacement Procedures
Removing a PCI/PCI-X Expansion Board
CAUTION: Do not open the slot release lever unless the green PCI Hot Plug LED indicator is off.
System power down and subsequent data loss could occur.
To remove a PCI/PCI-X expansion board:
1. Perform the preparation procedures. See “Preparation Procedures” earlier in this chapter.
2. Open the top access panel. See “Top Access Panel” earlier in this chapter.
3. Use the PCI Hot Plug button to turn off power to the slot . The green LED flashes
during the power down transition and turns off when the power down is complete. For
more information on PCI Hot Plug LED indicators, see Chapter 4, “Connectors, Switches,
and LED Indicators.”
NOTE: Pressing the PCI Hot Plug button within five seconds of the first press cancels the action.
1
Figure 2-38. Accessing the PCI Hot Plug button
2-43
2-44
Compaq ProLiant DL760 Servers Maintenance and Service Guide
4. When the green LED is off, disconnect the cables to the PCI/PCI-X expansion board.
5. Press down on the top of the expansion slot
6. Lift up the I/O plenum
.
7. Remove the PCI/PCI-X expansion board
, and open the slot release lever .
.
8. Return power to the slot by pressing the PCI Hot Plug button. The green LED will flash
during the power up transition and will glow steadily when power up is complete. For
more information on PCI Hot Plug LED indicators, see Chapter 4, “Connectors, Switches,
and LED Indicators.”
5
2
3
4
Figure 2-39. Removing a PCI/PCI-X expansion board
Reverse steps 1 through 8 to replace the PCI/PCI-X expansion board.
IMPORTANT: If you are only removing the expansion board, install an expansion slot cover in the slot.
IMPORTANT: Remove any shipping brackets from the replacement expansion board before installation.
Removal and Replacement Procedures
9-Slot Hot-Plug Basket
To remove the 9-slot hot-plug basket:
1. Perform the preparation procedures. See “Preparation Procedures” earlier in this chapter.
2. Open the top access panel. See “Top Access Panel” earlier in this chapter.
3. Remove all installed expansion boards in slots 1 through 9. See “Removing a PCI/PCI-X
Expansion Board” earlier in this chapter.
4. Flex the snap tab holding the array enabler board
and remove the board .
1
2
Figure 2-40. Removing the array enabler board
2-45
2-46
Compaq ProLiant DL760 Servers Maintenance and Service Guide
securing the hot-plug basket to the chassis.
6. Disengage the two hot-plug basket tabs near slot 1 from the I/O module chassis.
7. Remove the hot-plug basket from of the I/O module .
5. Remove the screw
5
4
4
3
Figure 2-41. Removing the 9-slot hot-plug basket
Reverse steps 1 through 7 to replace the 9-slot hot-plug basket.
Removal and Replacement Procedures
Hot-Plug Fans
The Compaq ProLiant DL760 server ships with two hot-plug fans. Fan 1 is closest to the rear of
the server. Each fan has LEDs that indicate the status of the fan. For more information on the
hot-plug fan LEDs, see Chapter 4, “Connectors, Switches, and LED Indicators.”
1
2
Figure 2-42. Top view of hot-plug fans
Table 2-8
Hot-Plug Fans
Item
Description
Hot-plug fan 1
Hot-plug fan 2
2-47
2-48
Compaq ProLiant DL760 Servers Maintenance and Service Guide
To remove a hot-plug fan from the server:
CAUTION: Never remove both hot-plug fans while the server is powered up. Overheating and
damage to hardware could result. If the appropriate Compaq software drivers are installed, the
operating system software will initiate a power shutdown in the event of overheating.
1. Perform the preparation procedures. See “Preparation Procedures” earlier in this chapter.
2. Open the top access panel. See “Top Access Panel” earlier in this chapter.
3. Press in the locking latches
module .
and remove the failed hot-plug fan (either 1 or 2) from the
2
1
Figure 2-43. Removing a hot-plug fan
Reverse steps 1 through 3 to replace a hot-plug fan.
Removal and Replacement Procedures
Fan Cage Assembly
To remove the fan cage assembly:
1. Perform the preparation procedures. See “Preparation Procedures” earlier in this chapter.
2. Remove the I/O module. See the sections on removing the I/O Modules earlier in this
chapter.
3. Remove any PCI/PCI-X expansion boards in slots 10 and 11. See “Removing a
PCI/PCI-X Expansion Board” earlier in this chapter.
4. Remove the hot-plug I/O fans. See “Hot-Plug Fans” earlier in this chapter.
5. Loosen the three screws securing the fan cage assembly to the I/O module
6. Remove the fan cage assembly
.
1
2
Figure 2-44. Removing the fan cage assembly
Reverse steps 1 through 6 to replace the fan cage assembly.
NOTE: The server boot block ROM is located underneath the fan cage assembly.
.
2-49
2-50
Compaq ProLiant DL760 Servers Maintenance and Service Guide
I/O Module Central Support Bracket
To remove the I/O module central support bracket:
1. Perform the preparation procedures. See “Preparation Procedures” earlier in this chapter.
2. Remove the I/O module. See the sections on removing the I/O modules earlier in this
chapter.
3. Remove the fan cage assembly. See “Fan Cage Assembly” earlier in this chapter.
4. Loosen the thumbscrew securing the bracket to the chassis
5. Remove the bracket
.
.
2
1
Figure 2-45. Removing the I/O module central support bracket
Reverse steps 1 through 5 to replace the I/O module central support bracket.
Removal and Replacement Procedures
I/O Plenums
The I/O module is installed with three plenums. There is a fan cage plenum, a 2-slot plenum that
covers slots 10 and 11, and a 9-slot plenum that covers slots 1 through 9. There is an air baffle
over the 9-slot plenum.
Removing the Air Baffle and 9-slot Plenum
To remove the air baffle and 9-slot plenum:
, and flex each end to release the catches .
2. Remove the air baffle .
1. Lift up the air baffle
3
1
Figure 2-46. Removing the air baffle
2
2-51
2-52
Compaq ProLiant DL760 Servers Maintenance and Service Guide
, and flex each end to release the catches .
4. Remove the 9-slot plenum .
3. Lift up the 9-slot plenum
6
4
5
Figure 2-47. Removing the 9-slot plenum
Reverse steps 1 through 4 to replace the I/O plenum and air baffle.
Removal and Replacement Procedures
Removing the Fan Cage Plenum
To remove the fan cage plenum from the I/O module:
1. Lift up the fan cage plenum
2. Remove the plenum
, and flex each end until the catches are released .
.
3
2
1
Figure 2-48. Removing the fan cage plenum
Reverse steps 1 and 2 to replace the fan cage plenum.
2-53
2-54
Compaq ProLiant DL760 Servers Maintenance and Service Guide
Removing the 2-Slot Plenum
To remove the 2-slot plenum:
1. Locate the 2-slot plenum attached to the side of the fan cage plenum.
2. Remove the fan cage plenum. See “Removing the Fan Cage Plenum” earlier in this
chapter.
3. Slightly separate the fan cage plenum walls that trap the 2-slot plenum.
4. Remove the 2-slot plenum.
Figure 2-49. Removing the 2-slot plenum
Reverse steps 1 through 4 to replace the 2-slot plenum.
Removal and Replacement Procedures
Internal Battery
WARNING: Your computer contains an internal Lithium cell battery. There is risk of fire and
burns if the battery pack is incorrectly replaced or not handled properly. To reduce the risk of
personal injury, do not attempt to recharge the battery. Do not expose to temperatures higher
than 60°C. Do not disassemble, crush, puncture, short external contacts, or dispose of in fire or
water. Replace only with the Compaq spare designated for this product.
CAUTION: Replace the battery within 15 minutes of removal to avoid data loss.
To remove the internal battery:
1. Perform the preparation procedures. See “Preparation Procedures” earlier in this chapter.
2. Open the top access panel. See “Top Access Panel” earlier in this chapter.
3. Locate the battery on the I/O board behind slots 10 and 11.
4. Pull the battery out of the battery socket
.
2
1
Figure 2-50. Removing the internal battery (fan guide and other plastics not shown)
Reverse steps 1 through 4 to replace the battery
.
CAUTION: Batteries, battery packs, and accumulators should not be disposed of
together with the general household waste. In order to forward them to recycling
or proper disposal, please use the public collection system or return them to
Compaq, your authorized Compaq Partners, or their agents.
2-55
2-56
Compaq ProLiant DL760 Servers Maintenance and Service Guide
Hot-Plug Power Supply and Midplane Assembly
Compaq ProLiant DL760 servers support up to two hot-plug, redundant power supplies.
Hot-Plug Power Supply
The system power in the Compaq ProLiant DL760 server does not have to be shut off to replace
one of the power supplies.
WARNING: To reduce the risk of electric shock or damage to the equipment:
■ Install the power supply before connecting the power cord to the power supply.
■ Unplug the power cord before removing the power supply from the server.
To replace a hot-plug power supply with the system power on:
1. Remove the power cord from the power supply to be replaced and release the power cord
clamp.
Figure 2-51. Removing the power cord
Removal and Replacement Procedures
2. Squeeze upward on the release tab in the middle of the power supply handle
3. Rotate the power supply handle down
as shown in Figure 2-52.
.
and slide the power supply out of the chassis IMPORTANT: Use only the power supply part number for the Compaq ProLiant DL760 server. Power
supplies from other servers will not fit.
NOTE: When you remove the power supply, a spring-loaded trap door closes to block the opening. This
door preserves the air path required to cool the internal components of the server.
1
3
2
Figure 2-52. Removing a hot-plug power supply
Reverse steps 1 through 3 to replace the hot-plug power supply.
2-57
2-58
Compaq ProLiant DL760 Servers Maintenance and Service Guide
System Midplane Assembly
The system midplane assembly is the board that the power supply connects to.
To remove the system midplane assembly:
1. Perform the preparation procedures. See “Preparation Procedures” earlier in this chapter.
2. Open the top access panel. See “Top Access Panel” earlier in this chapter.
3. Remove and disconnect all modules and power supplies. See the sections, “Removing the
Media Module,” “Removing the I/O Module,” and “Hot-Plug Power Supply.”
4. Loosen the two thumbscrews securing the system midplane assembly to the chassis
5. Remove the board from the chassis
.
1
2
Figure 2-53. Removing the system midplane assembly
Reverse steps 1 through 5 to replace the system midplane assembly.
.
Chapter
3
Diagnostic Tools
This chapter provides an overview of the software and firmware diagnostic tools available for
Compaq ProLiant DL760 servers.
3-2
Compaq ProLiant DL760 Servers Maintenance and Service Guide
Diagnostic Tools Utility Overview
The following utilities were developed to assist in diagnosing problems, testing the hardware,
and monitoring and managing Compaq server hardware.
Table 3-1
Diagnostic Tools
Tool
What it is
How to run it
Compaq Diagnostics
Compaq Diagnostics assists in testing
and/or verifying operation of Compaq
hardware. If problems are found,
Compaq Diagnostics isolates failures
down to a replaceable part, whenever
possible.
Diagnostics and utilities are located on
the system partition of the hard drive,
and must be accessed when a system
configuration error is detected during
Power-On Self-Test (POST). For a
complete list of POST error messages,
refer to the Compaq Servers
Troubleshooting Guide.
Compaq Inspect
Utility
The Inspect Utility provides a report
detailing system information
Run the Inspect Utility from the Compaq
Diagnostics program.
Compaq Insight
A client/server application used to
remotely manage Compaq hardware in
a network environment. Reports
hardware fault conditions (both failure
and prefailure) and collects data for
reporting and graphing.
For more information, refer to the
Compaq Management CD and the
Compaq Insight Manager User Guide.
An online information gathering agent
that runs on servers, gathering critical
hardware and software information
from various sources. A utility for
servers running Windows NT or
NetWare.
Install the Survey Utility from SmartStart,
the Compaq Integration Maintenance
Utility, or the Compaq Management CD.
Managerä
Compaq Survey
Utility
If a significant change occurs between
data gathering intervals, previous
information is marked, and the survey
text file is overwritten to reflect the
latest configuration and changes since
last configuration. This process creates
a historical record of change events for
server hardware and software.
continued
Diagnostic Tools
Table 3-1
Diagnostic Tools continued
Tool
What it is
How to run it
ROM-based Setup
Utility (RBSU)
The ROM-based Setup Utility allows you
to change the system configuration
settings from the initial startup of the
system. Specifically, it provides:
On an unconfigured server, powering up
the server causes RBSU to run
automatically.
■ “Virtual Presence” allowing a
system administrator to use the
Compaq Remote Lights-Out Edition
to remotely access and configure
the system in a totally unattended
fashion
On an already configured server,
pressing F9 when prompted after
restarting the server will cause RBSU to
run.
■ The ability to immediately save
settings
■ Selection of operating system. It
also allows configuration of system
specific options such as COM ports
and LPT ports, standard boot order,
and NUMLOCK
■ Viewing of installed PCI devices and
configures IRQ (interrupt) settings
for each installed PCI device
■ Viewing and changing of the
system date and time
■ Viewing and setting of configuration
options for Automatic Server
Recovery (ASR)
■ The ability for the server passwords
to be set or changed
■ Setting or customization of the
server asset tag and the text that
will be displayed on the IMD
■ Setting of advanced options such
as MPS/APIC Mode, Hot-plug
Reservation, and CPU Correction
Marking
■ Selection of the language for RBSU
(English, French, Italian, German,
Spanish, or Japanese)
continued
3-3
3-4
Compaq ProLiant DL760 Servers Maintenance and Service Guide
Table 3-1
Diagnostic Tools continued
Tool
What it is
How to run it
Array Diagnostics
Utility (ADU)
ADU is a Windows-based tool designed
to run on all Compaq systems that
support Compaq array controllers. The
two main functions of ADU are:
Use the information provided in the Array
Diagnostics Utility (ADU).
■ To collect all possible information
about the array controllers in the
system
For a complete list of ADU error
messages, see the Compaq Servers
Troubleshooting Guide.
■ To generate a list of detected
problems.
This tool is available for all Compaq
servers covered by this guide.
Drive Array
Advanced
Diagnostics (DAAD)
Integrated
Management Log
(IML)
The predecessor to ADU, DAAD is a
DOS-based tool for Compaq servers
with Smart Array Controllers. DAAD
collects information about the array
controllers in the system and offers a
list of detected problems.
For a list of Compaq servers still
supported by this tool, visit the Compaq
website:
IML is a log of system events, such as
system failures or nonfatal error
conditions. View events in the
Integrated Management Log from
within:
The Integrated Management Log requires
Compaq operating system-dependent
drivers. Refer to the Compaq Support
Software CD for instructions on installing
the appropriate drivers.
■
Compaq Insight Manager
■
Compaq Survey Utility
■
Operating system-specific IML
utilities
http://www.compaq.com
For More Information
For detailed information about each of these diagnostic tools, see the Compaq Servers
Troubleshooting Guide.
Chapter
4
Connectors, Switches, and LED Indicators
The graphics and tables in this section show the connector locations on the rear panel,
I/O board, and processor board of the Compaq ProLiant DL760 server.
4-2
Compaq ProLiant DL760 Servers Maintenance and Service Guide
Connectors
Rear Panel
1
7
6
2
3
5
4
Figure 4-1. Rear panel connectors
Table 4-1
Rear Panel Connectors
Item
Description
Parallel port
Keyboard connector
Serial port B
Serial port A
Mouse connector
Video connector
External Ultra2 tape port connector
Connectors, Switches, and LED Indicators
I/O Board
18
11
17
16
15
14
13
10
9
12
8
7
6
5
4
3
2
1
19
20
21
22
23
Figure 4-2. I/O board components
Table 4-2
I/O Board Components
Item
–
–
–
Description
Secondary 64-bit PCI/PCI-X Hot
Plug slots
Primary 64-bit PCI Hot Plug slots
Tertiary 64-bit PCI/PCI-X Hot Plug
slots
Parallel port connector
External Ultra2 tape port
connector
Video connector
Mouse connector
Keyboard connector
Item
Description
Serial port A connector
Serial port B connector
PCI Hot Plug 2-slot connector
PCI Hot Plug 9-slot connector
Fan assembly connector
NVRAM battery
Array enabler connectors
4-3
4-4
Compaq ProLiant DL760 Servers Maintenance and Service Guide
Processor Board
1
2
3
4
11
12
5
9
6
7
8
10
Figure 4-3. Processor board connectors
Table 4-3
Processor Board Connectors
Item
–
Connector
Processor and Processor Power Module
Processor bus termination power module
Memory board
Bus 1 Cache Accelerator
Bus 2 Cache Accelerator
Connectors, Switches, and LED Indicators
Switches
This section contains graphics and tables showing switch locations and settings on the processor
board.
I/O Board Switches
The I/O board configuration switchbank (SW1)
describes the function of each switch.
is located on the I/O board. Table 4-4
1
on
1 2 3 4 5 6
Figure 4-4. I/O board switchbank (default settings shown)
Table 4-4
I/O Board Configuration Switch Settings (SW1)
Switch
Function
Enable
Disable
Default
S1
On-board video
OFF
ON
OFF
S2
Configuration lock
ON
OFF
OFF
S3
Rack-mount
-
-
ON
S4
Diskette boot override
ON
OFF
OFF
S5
Boot password
OFF
ON
OFF
S6
Clear NVRAM
ON
OFF
OFF
4-5
4-6
Compaq ProLiant DL760 Servers Maintenance and Service Guide
Processor Board
1
2
1
on
Figure 4-5. Processor board switches
Table 4-5
Processor Board Switches
SW2
on
1234
Item
2
SW1
Component
SW1 Bus 1 bus/core ratio
SW2 Bus 2 bus/core ratio
1234
Connectors, Switches, and LED Indicators
SW1 - SW4 Processor Board Bus/Core Frequency Ratio
Processor board bus/core frequency ratio switches can be set manually or by the system ROM.
Figure 4-5 shows the location of the processor board bus/core frequency ratio switches.
Table 4-6 shows the bus/core frequency ratio switch settings.
CAUTION: Setting the processor switchbanks incorrectly can result in permanent damage to
the processor or in data loss.
CAUTION: The server will NOT boot if the Intel Pentium III Xeon processors are NOT the same
speed.
IMPORTANT: The bus/core switches are delivered set at the Off position. This default setting allows the
ROM to automatically set the optimal speed for the buses. The server will not start if the switches are set
to a speed higher than the slowest processor.
NOTE: When all bus/core frequency switches are set to the Off position, the system ROM will
automatically set the bus/core frequency.
Table 4-6
SW1–SW4 Bus/Core Frequency Ratio
Bus/Core
Frequency
Ratio
SW 1
SW 2
SW 3
SW 4
550
5½
OFF
OFF
OFF
ON
700
7
ON
OFF
ON
OFF
900
Auto
OFF
OFF
OFF
OFF
ROM Default
Auto
OFF
OFF
OFF
OFF
NOTE: The Intel Pentium III Xeon 900 MHz processors bus/core frequency ratio comes locked from Intel.
These processors automatically run at 900 MHz regardless of the bus/core frequency ratio switch
settings. Compaq recommends leaving these settings in the default positions.
4-7
4-8
Compaq ProLiant DL760 Servers Maintenance and Service Guide
LED Indicators
This section contains graphics and tables showing LED locations and functions on the system
interconnect status indicators, hot-plug I/O fan, PCI Hot Plug LED Indicators, hot-plug power
supply, and hot-plug SCSI hard drive.
System Interconnect Status Indicator LEDs
Figure 4-6 and Table 4-7 show the location and identification of the system interconnect status
indicator LEDs.
1
3
5
7
9
11
13
15
2
Shutdown
P8
P7
P6
P5
P4
P3
P2
P1
Memory
9 VRM
Host Mod
I/O Mod
Media Mod
SCSI Bd 1
SCSI Bd 2
Reset
4
6
8
10
12
14
16
17
Figure 4-6. System interconnect status indicator LEDs
Table 4-7
System Interconnect Status Indicators
Indicator
Component
Emergency shutdown
Processor – MP8
Processor – MP7
Processor – MP6
Processor – MP5
Processor – MP4
Processor – MP3
Processor – MP2
Indicator
Component
Memory board
Processor Power Module
Processor and Memory Module
I/O module and fans
Media module
SCSI backplane 1
SCSI backplane 2
Reset
Processor – MP1
IMPORTANT: To check system interconnect status indicator LEDs, place the server in Standby mode
with the power supplies plugged in.
Connectors, Switches, and LED Indicators
Hot-Plug I/O Fan LED Indicators
The ProLiant DL760 server ships with two hot-plug fans. Fan 1 is closest to the rear of the
server. Each fan has LED indicators that indicate the following fan statuses:
■
No light—Power is not applied to the fan.
■
Green light
■
—Power is applied to the fan, and the fan is functional.
Amber light —The fan has failed.
Figure 4-7 shows the location and identification of the hot-plug fan LEDs.
NOTE: The hot-plug fan LED indicators are not part of the fan housing. Figure 4-7 shows the LED
indicators as if the fan were installed in the server.
1
2
Figure 4-7. Hot-plug I/O fan LEDs
CAUTION: Never remove both hot-plug fans while the server is powered up. Overheating and
damage to hardware could result. If the appropriate Compaq software drivers are installed, the
operating system software will initiate a power shutdown if overheated.
4-9
4-10
Compaq ProLiant DL760 Servers Maintenance and Service Guide
PCI Hot Plug LED Indicators
The PCI Hot Plug amber LED and green LED indicators (shown in Figure 4-8, for one
slot) provide a visual reference of the status of the corresponding slot. The LEDs are viewed
from the rear of the server or by opening the top access panel.
1
Figure 4-8. PCI Hot Plug LED indicators from rear of server
2
Connectors, Switches, and LED Indicators
Each PCI Hot Plug button is used to activate or deactivate its associated PCI Hot Plug slot.
Activating or deactivating a PCI Hot Plug slot can also be accomplished through the operating
system PCI Hot Plug software application. For more information, refer to the Compaq
ProLiant DL760 Server User Guide, and the “PCI Hot Plug Important Facts” section in the
online PCI Hot Plug Administration Guide on the server documentation CD.
1
2
3
Figure 4-9. PCI Hot Plug LED indicators in the I/O module
Table 4-8 shows the appropriate slot condition and status for each state of the two PCI Hot Plug
LEDs.
Table 4-8
PCI Hot Plug LED Indicators and Button
Green LED
Amber LED
OK to Open
On
Off
No
Power is on. The slot does not require attention.
On
On
No
Power is on. The slot requires attention. There may be a
problem with the slot, the PCI/PCI-X board, or the driver. Do NOT
open the slot release lever.
Slot Condition and Status
Refer to the IML and/or the PCI Hot Plug software application for
a description of the problem indicated.
Flashing
Off
No
Power to the slot is being turned off or on. This process may
take several minutes. DO NOT open the slot release lever until
the green LED is completely off.
Off
On
Yes
Power is off. You may replace or remove a board in this slot
depending on the operating system. (If Windows NT or Windows
2000, this device requires attention).
Off
Off
Yes
Power is off. You can replace or remove the board in this slot
only.
PCI Hot Plug Button
Used to activate and deactivate the associated PCI Hot Plug slot.
4-11
4-12
Compaq ProLiant DL760 Servers Maintenance and Service Guide
Power Supply LED Indicators
Figure 4-10 and Table 4-9 show the location of power supply 1
description of both power supply LED indicators.
and power supply 2 with a
3
4
1
2
Figure 4-10. Power supply LEDs
Table 4-9
Power Supply Indicators
Item
Status
AC Power
Condition
Meaning
Green
Normal operation.
Green/Amber alternating
Power supply failed to restart after a prolonged
fault.
Green flashing
Power supply will restart within 20 seconds.
Amber
Fault detected in this power supply.
Amber flashing
Power supply failed self-test.
Off
System is in standby mode or interlocks are
disabled.
Green
AC power is connected to this power supply.
Off
No AC power is connected to this power supply.
Connectors, Switches, and LED Indicators
Hot-Plug SCSI Hard Drive Indicators
The hot-plug SCSI hard drive LED indicators, located on each physical drive, are visible on the
front of the server or external storage unit. They provide: Activity, Power/Online, and
Fault status for each corresponding drive when configured as a part of an array and attached to a
powered-on controller. Their behavior may vary, depending on the status of other drives in the
array.
1
Figure 4-11. Hot-Plug SCSI hard drive indicators
2
3
4-13
Chapter
5
Physical, Operating, and Performance
Specifications
This section provides physical, operating and performance specifications for the following
components of the Compaq ProLiant DL760 server:
■
System unit
■
Power supply
■
Dual inline memory module (DIMM)
■
1.44-MB diskette drive
■
24X Max (or higher) IDE CD-ROM drive (low profile)
■
Hot-pluggable Wide Ultra2 and Wide Ultra3 SCSI hard drives
■
Compaq Integrated Smart Array Controller
■
Fast Ethernet dual port controller (64 PCI)
5-2
Compaq ProLiant DL760 Servers Maintenance and Service Guide
System Unit
Table 5-1
System Unit Specifications
Dimensions
Height
30.83 cm (12.14 inches)
Width
48.26 cm (19.0 inches)
Depth
69.72 cm (27.45 inches)
Weight (no drives and two power supplies)
50 kg (110 lb)
Temperature range
Operating
10° to 35°C (50° to 90°F)
Nonoperating
-30° to 60°C (-20° to 140°F)
Shipping
-30° to 50°C (-22° to 122°F)
Maximum wet bulb temperature
38.7°C (101.7°F)
Input requirements (per power supply)
Low Range/High Range
Rated input voltage
100 to 120V/200 to 240V
Rated input frequency
47 to 63 Hz/47 to 63 Hz
Rated input current
8 A/10 A
Rated input power
740W @ 110V/1700W @ 220V
Power supply output power (per power supply)
Low Range/High Range
Rated steady-state power
500W/1150W
Maximum peak power
540W/1150W
Relative humidity range (noncondensing)
Operating
20% to 80%
Nonoperating
5% to 90%
Heat dissipation
Maximum heat output (system is configured
to draw maximum power)
5309 Btu/h/1555W
Physical, Operating, and Performance Specifications
Power Supply
Table 5-2
Power Supply Specifications
General specifications
Full output rating
To 40°C and 1,525 m (to 104°F and 5,000 ft)
To 32°C and 3,050 m (to 90°F and 10,000 ft) (derate
linearly)
Minimum load
1.0 A on + 5V output
1.0 A on + 12V output
0.5 A on + 3.3V output
Ambient temperature range
Operating
10° to 40°C (50° to 104°F)
Storage
-40° to 65°C (-40° to 149°F)
Input specifications
Low Range/High Range
Nominal line voltage
100 to 120 VAC/200 to 240 VAC
Range input line
90 to 132 VAC/180 to 265 VAC
Frequency range
47 to 63 Hz/47 to 63 Hz
Power factor
0.95/0.95
Input power
500W @ 110V/750W @ 220V
Input current
8 A at 100 VAC/10 A at 200 VAC
Inrush current
<70 A at 132 VAC (cold start)/<70 A at 132 VAC (cold
start)
Holdup time
20 ms from zero crossing at 120 VAC/20 ms from zero
crossing at 120 VAC
Dielectric voltage withstand
Input to output
3000 VAC per minute/3000 VAC per minute
Input to ground
1500 VAC per minute/1500 VAC per minute
Input transient susceptibility
Common and differential mode
(superimposed on AC line)
2500V, 10 µs pulse
Differential mode
20% step change in AC input voltage
5-3
5-4
Compaq ProLiant DL760 Servers Maintenance and Service Guide
Dual Inline Memory Module (DIMM)
Table 5-3
DIMM Specifications
Size
128MB, 256MB, 512MB, or 1 GB
Speed
60 ns or faster
Upgrade requirement
Bank of two DIMMs; must be same type, size, speed, and
manufacturer
Type
Buffered ECC protected DIMMs; SDRAM
1.44-MB Diskette Drive
Table 5-4
Diskette Drive Specifications
Size
3.5 inches
LED indicators (front panel)
Green
Read/write capacity per diskette (high/low density)
1.44 MB/720 KB
Drives supported
1
Drive height
1/3
Drive rotation
300 rpm
Transfer rate bits per sec (high/low)
500/250 K
Bytes per sector
512
Sectors per track (high/low)
18/9
Tracks per side (high/low)
80/80
Access times
Track-to-track (high/low)
6 ms/3 ms
Average (high/low)
174 ms/94 ms
Settling time
15 ms
Latency average (high/low)
100 ms/83 ms
Cylinders (high/low)
80/80
Read/write heads
2
Physical, Operating, and Performance Specifications
24X Max IDE CD-ROM Drive
Table 5-5
24X Max IDE CD-ROM Drive Specifications
Dimensions
Height
4.29 cm (1.69 inches)
Width
15.0 cm (5.75 inches)
Depth
20.8 cm (8.19 inches)
Weight
1200 g (2.66 lb)
Operating conditions
Temperature
5° to 45°C (41° to 113°F)
Humidity
10% to 80%
Applicable disk
CD-ROM (mode 1 and 2), CD-DA, CD-XA (mode 2, form
1 and 2), photo CD (single-session and multi-session),
mixed mode (audio and data combined)
Capacity
550 MB (mode 1, 12 cm)
640 MB (mode 2, 12 cm)
Block size
2048, 1024 bytes (mode 1)
2340, 2336, 1024 bytes (mode 2)
2352 bytes (CD-DA)
2328 bytes (CD-XA)
Diameter
12 cm, 8 cm (4.7 inches, 3.15 inches)
Rotational speed
4200 rpm maximum
Center hole thickness
15 mm (0.6 inches)
Track pitch
1.6 µm
Data transfer rate
Sustained
150 KB/s (single)
Variable
1200-3600 KB/s (8X to 24X)
Data transfer method
32-bit bus master PCI
Access times (typical)
Full stroke
200 ms
Random
100 ms
Cache/buffer
128 KB
Startup time (typical)
>7s
Stop time
>4s
continued
5-5
5-6
Compaq ProLiant DL760 Servers Maintenance and Service Guide
Table 5-5
24X Max IDE CD-ROM Drive Specifications continued
Audio output level
Line out
0.7 VRMS at 47 Ohms
Headphone
0.6 VRMS at 32 Ohms (maximum width)
Laser parameters
Type
Semiconductor laser GaA1As
Wave length
780 +/- 25 nm
Divergence angle
53.5° +/- 1.5°
Output power
0.14 mW
Interface
IDE (ATAPI)
Hot-Plug Ultra2 SCSI Hard Drives
Table 5-6
Hot-Plug Ultra2 SCSI Hard Drives
9.1-GB
18.2-GB
Capacity
9100.0 MB
18209.8 MB
Height
1/3, 1.0 inch
1/2, 1.0 inch
Size
3.5 inches
3.5 inches
Interface
Wide Ultra2 SCSI
Wide Ultra2 SCSI
Transfer rate
80 MB/s
80 MB/s
Single track
0.8 ms
0.8 ms
Average
7.9 ms
6.9 ms
Full stroke
17.0 ms
15.0 ms
7,200 rpm
7,200 rpm
Bytes/sector
512
512
Logical blocks
17,773,524
35,566,080
Operating temperature
10° to 35°C
50° to 95°F
10° to 35°C
50° to 95°F
Seek time (typical, including setting)
Rotational speed
Physical configuration
Physical, Operating, and Performance Specifications
Hot-Plug Ultra3 SCSI Hard Drives
Table 5-7
Hot-Plug Ultra3 SCSI Hard Drives
9.1-GB
18.2-GB
36.4-GB
9.1-GB
18.2-GB
Capacity
9100.0 MB
18209.3 MB
36419.3
9100.0 MB
18209.3 MB
Height
1.0 inches
1.0 inches
1.0 inches
1.0 inches
1.0 inches
Size
3.5 inches
3.5 inches
3.5 inches
3.5 inches
3.5 inches
Interface
Wide-Ultra3
SCSI
Wide-Ultra3
SCSI
Wide-Ultra3
SCSI
Wide-Ultra3
SCSI
Wide-Ultra3
SCSI
Transfer rate
160 MB/s
160 MB/s
160 MB/s
160 MB/s
160 MB/s
Seek time (typical, including setting)
Single track
0.8 ms
0.8 ms
0.9 ms
0.7 ms
0.7 ms
Average
5.0 ms
5.2 ms
5.7 ms
3.9 ms
3.9 ms
Full stroke
12.0 ms
12.0 ms
12.0 ms
12.0 ms
12.0 ms
10,000 rpm
10,000 rpm
10,000 rpm
15,000 rpm
15,000 rpm
Bytes/Sector
512
512
512
512
512
Logical
blocks
17,773,524
35,565,080
17,773,524
17,773,524
35,565,080
Operating
temperature
10° to 35°C
50° to 95°F
10° to 35°C
50° to 95°F
10° to 35°C
50° to 95°F
10° to 35°C
50° to 95°F
10° to 35°C
50° to 95°F
Rotational
speed
Physical configuration
5-7
5-8
Compaq ProLiant DL760 Servers Maintenance and Service Guide
Compaq Integrated Smart Array Controller
Table 5-8
Compaq Integrated Smart Array Controller Specifications
Temperature range
Operating
10° to 35°C (50° to 95°F)
Shipping
-30° to 60°C (-22° to 140°F)
Relative humidity range (noncondensing)
Operating
20% to 80%
Nonoperating
5% to 90%
Maximum drives supported
4
Logical drives supported
32
Simultaneous drive transfer channels
1
Data transfer method
64-bit PCI bus master
Total transfer rate
80 MB/s (80 MB/s per channel)
SCSI electrical interface
Low-voltage differential (LVD) and singleended
PCI bus transfer rate (maximum)
133 MB/s
SCSI port connectors (internal and external)
PCI 64D Extended SCSI connector
Protocol
Wide Ultra2 SCSI
SCSI electrical interface
Low-voltage differential
Software upgradable firmware
Yes
Read cache
12 MB
Reliability features
Cache battery backup
No
Online capacity expansion
Yes
Logical drive capacity extension
Yes
Online RAID level migration
Yes
Online stripe size migration
Yes
Automatic data recovery
Yes
Distributed data guarding (RAID 5)
Yes
Data guarding (RAID 4)
No
Data mirroring (RAID 1)
Yes
Drive striping (RAID 0, 0 + 1)
Yes
Physical, Operating, and Performance Specifications
Compaq NC3134 Fast Ethernet NIC
64 PCI Dual 10/100 Controller
Table 5-9
Fast Ethernet Controller Specifications
Network interface
10Base-T/100Base-TX
Compatibility
IEEE 802.3/802.3u compliant
Data transfer method
32/64-bit PCI bus master
Network transfer rate:
10Base-T (half-duplex), 10Base-2
10Base-T (full-duplex)
100Base-TX (half-duplex)
100Base-TX (full-duplex)
10 MB/s
20 MB/s
100 MB/s
200 MB/s
Connectors (2)
RJ-45
I/O address and interrupt
Automatic configuration
Cable support:
10Base-T
100Base-TX
Operating system driver support
Categories 3, 4, or 5 UTP (2 or 4 pair); up to
100 meters (328 feet)
Category 5 UTP (2 pair); up to 100 meters
(328 feet)
Novell NetWare Server 4.x and 5.x
Microsoft Windows NT 4.0
Microsoft Windows 2000
SCO OpenServer 5.x
UnixWare 7.x
5-9
Index
2
B
2-slot plenum 2-54
battery
part number 1-12
removing/replacing 2-55
warnings 2-55
bezels, media module
part numbers 1-3, 1-8
removing/replacing 2-13
blanking panels
cautions 2-11
hard drives 1-8, 2-16
boards
Cache Accelerator 1-5
I/O
connectors 4-3
removing/replacing 2-43
switches 4-5
memory 1-5, 2-27
Netelligent 3134 1-10
part numbers 1-3
PCI Hot Plug 1-10
processor
connectors 4-4
location 2-37
part numbers 1-5
socket numbering 2-31
switches 4-6
Processor Power Module 1-5
9
9-slot hot-plug basket 2-45
9-slot plenum 2-51
A
access panel
label and indicators xi
opening 2-10
part number 1-3
ADU (Array Diagnostics Utility)
location 2-1
overview 3-4
air baffle 2-51
part numbers 1-5, 1-6, 1-10
removing/replacing 2-35
airflow
rack ix
requirements ix
Array Diagnostics Utility (ADU)
location 2-1
overview 3-4
array enabler board
connectors 4-3
part numbers 1-10, 1-12
Compaq Confidential – Need to Know Required
Writer: Integrity Group Project: Compaq ProLiant DL760 Servers Maintenance and Service Guide Comments:
Part Number: 173771-001 File Name: x-index.doc Last Saved On: 2/22/01 5:12 PM
2
Compaq ProLiant DL760 Servers Maintenance and Service Guide
brackets
cable management arm 2-40
I/O center support 1-6, 1-10,
2-50
bus/core ratio switch settings 4-7
buses
bus balancing 2-41
PCI/PCI-X I/O expansion
slots 2-41
C
cable management arm
part number 1-11
removing 2-40
cables
CD-ROM drive 1-11
diskette drives 1-11
media module cable
routing 2-21
PCI Hot Plug 1-10, 1-11
Cache Accelerators
accessing 2-9
connectors 4-4
part number 1-5
removing/replacing 2-36
cautions
access panel 2-10
battery 2-55
blanking panels 2-11
bus/core switch settings 4-7
data loss 2-18
DIMMs 2-30
grounding x
hot-plug drives 2-17
power surges 2-6
processor handling 2-32
processor speeds 4-7
rack airflow ix
ventilation x, 2-6
voltage spikes 2-6
CD-ROM drives
location 2-11
part numbers 1-3, 1-11
specifications 5-5
center support bracket
part numbers 1-6, 1-10
removing/replacing 2-50
chassis, part number 1-3
Compaq authorized reseller xiii
Compaq Diagnostics utilitiy 3-2
Compaq Insight Manager 3-2
Compaq Inspect utility 3-2
Compaq NC3134 Fast Ethernet
Controller 5-9
Compaq Smart Array Controller
caution 2-18
hot-plug drive
replacement 2-17
specifications 5-8
Compaq Survey utility 3-2
Compaq website xii
configuration switches 2-9
connectors
I/O board 4-3
processor board 4-4
rear panel 4-2
controllers
Fast Ethernet 5-9
Smart Array 2-17, 2-18, 5-8
country kit 1-12
CPU module ejectors, part
number 1-6, 1-11
D
DAAD (Drive Array Advanced
Diagnostics)
location 2-1
overview 3-4
data loss caution 2-18
diagnosing problems, hard
drives 2-17
diagnostic tools
location 2-1
overview 3-2
DIMMs (Dual Inline Memory
Modules)
accessing 2-9
Compaq Confidential – Need to Know Required
Writer: Integrity Group Project: Compaq ProLiant DL760 Servers Maintenance and Service Guide Comments:
Part Number: 173771-001 File Name: x-index.doc Last Saved On: 2/22/01 5:12 PM
Index
part numbers 1-5
removing/replacing 2-28
specifications 5-4
diskette drives
identified 2-7
location 2-11
part numbers 1-11
specifications 5-4
display connector 4-2, 4-3
Drive Array Advanced Diagnostics
(DAAD)
location 2-1
overview 3-4
drive cage assembly 1-3
drive tray bezel assembly 1-3
drive tray module 1-3
drives See CD-ROM drives;
diskette drives; hard drives
Dual Inline Memory Modules
(DIMMs)
accessing 2-9
part numbers 1-5
removing/replacing 2-28
specifications 5-4
E
electrostatic discharge (ESD) 2-2
equipment symbols viii
ESD (electrostatic discharge) 2-2
Ethernet controllers 5-9
Ethernet loopback RJ-45 1-12
expansion boards See boards
F
fan assembly connector 4-3
fan cage assemblies
I/O module 1-10
removing/replacing 2-49
fan cage plenums
part numbers 1-6, 1-11
removing/replacing 2-53
fans
accessing 2-9
LEDs 4-9
part numbers 1-10
removing/replacing 2-47
status 4-9
Fast Ethernet Controller 5-9
fault tolerance capability 2-17
fiber optic fan plenum 1-10
floppy disk drives See diskette
drives
front bezel kit 1-8
G
grounding procedures x, 2-2, 2-6
H
hard drives See also SCSI devices
accessing 2-9
blanks 2-16
hot-plug guidelines 2-17
LEDs 4-13
part numbers 1-8
removing/replacing 2-18
hazardous conditions See cautions;
warnings
help resources xii
Hot Plug fans 1 and 2 4-9
hot surface warnings 2-6
hot-plug components See also PCI
Hot Plug
accessing 2-9
baskets 2-45
fans 2-47
I/O module 1-10
LEDs 4-9
power supplies 1-3, 2-8, 2-56
preparation procedures 2-3
removing/replacing 2-17
Compaq Confidential – Need to Know Required
Writer: Integrity Group Project: Compaq ProLiant DL760 Servers Maintenance and Service Guide Comments:
Part Number: 173771-001 File Name: x-index.doc Last Saved On: 2/22/01 5:12 PM
3
4
Compaq ProLiant DL760 Servers Maintenance and Service Guide
I
I/O components
board connector locations 4-3
central support bracket 2-50
expansion slots 2-41, 2-42
part numbers 1-6, 1-10, 1-11
PCI/PCI-X expansion
boards 2-43
plenums 2-51
switches 4-5
I/O module
accessing 2-9
exploded view 1-9
identified 2-8
part numbers 1-3, 1-10
removing/replacing 2-38
illustrated parts catalog 1-1
IMD (Integrated Management
Display)
description xiii
identified 2-7
part numbers 1-3, 1-8
removing/replacing 2-14
IML (Integrated Management
Log) 3-4
indicators, access panel xi. See
also LED indicators
Inspect Utility 3-2
integrated server lift handles 2-8
internal battery 2-55
K
keyboard connector 4-2, 4-3
L
labels
access panel xi
symbols on equipment viii
LED indicators
I/O fan 4-9
PCI Hot Plug 4-10
power supply 4-12
SCSI hard drive 4-13
system interconnect status 4-8
lever PCB, part numbers 1-10
lift handles 2-8
LVDS hard drive blank 1-8
M
maintenance and service guide, part
number 1-12
media module
accessing 2-9
contents 2-11
exploded view 1-7
identified 2-7
part numbers 1-3, 1-8
removing/replacing 2-11
memory
accessing 2-9
connectors 4-4
part numbers 1-5
removing/replacing 2-27
specifications 5-4
upgrade combinations 2-29
memory guides, part numbers 1-6,
1-11
middle air baffle 2-35
midplane assembly
part number 1-3
removing/replacing 2-58
miscellaneous cable kit 1-11
miscellaneous hardware kit 1-6,
1-10
miscellaneous part numbers 1-11
miscellaneous plastics kit 1-6,
1-11
module ejectors, part numbers 1-6,
1-11
modules See I/O module; media
module; Processor and Memory
Module
monitor connector 4-2, 4-3
mouse connector 4-2, 4-3
Compaq Confidential – Need to Know Required
Writer: Integrity Group Project: Compaq ProLiant DL760 Servers Maintenance and Service Guide Comments:
Part Number: 173771-001 File Name: x-index.doc Last Saved On: 2/22/01 5:12 PM
Index
N
neoprene bumpers 1-5
Netelligent 3134 NIC, part
number 1-10
NIC (Network Interface Card), part
number 1-10
P
parallel port 4-2
parallel ports 4-3
part numbers
I/O module 1-10
media module 1-8
miscellaneous 1-11
Processor and Memory
Module 1-5
system chassis 1-3
parts catalog, illustrated 1-1
PCI Hot Plug
accessing 2-9, 2-10
connectors 4-3
LEDs 4-10
part numbers 1-10, 1-11
slot locations 2-42
PCI POC divider 1-10
PCI/PCI-X
bus distribution 2-42
I/O expansion boards 2-41
plenums
fan cage 2-53
I/O 2-51
part numbers 1-6, 1-11
port PCI retainers, part
number 1-6, 1-11
Power On/Standby switch
LEDs 4-8
preparation procedures 2-2
removing/replacing 2-22
power supplies
LEDs 4-12
location 2-8
part number 1-3
removing/replacing 2-56
specifications 5-3
power switch assembly with
LED 1-8
Processor and Memory Module
accessing 2-9
exploded view 1-4
identified 2-7
part numbers 1-3, 1-5
removing/replacing 2-24
Processor Power Module
connectors 4-4
part number 1-5
removing/replacing 2-33
processors
accessing 2-9
connectors 4-4
part numbers 1-5, 1-8
removing/replacing 2-32
socket numbering 2-31
switches 4-6
terminator board 2-34
R
rack
airflow ix
racks
removing I/O module 2-40
safety issues 2-5
RBSU (ROM-based Setup
Utility) 3-3
rear panel configuration 4-2
redundant Processor Power
Module 1-5
removal and replacement
procedures 2-1
requirements, airflow ix
return kit, part number 1-12
ROM-based Setup Utility
(RBSU) 3-3
S
screws
part numbers 1-11
shipping 2-24
Compaq Confidential – Need to Know Required
Writer: Integrity Group Project: Compaq ProLiant DL760 Servers Maintenance and Service Guide Comments:
Part Number: 173771-001 File Name: x-index.doc Last Saved On: 2/22/01 5:12 PM
5
6
Compaq ProLiant DL760 Servers Maintenance and Service Guide
SCSI devices
adapter part number 1-12
connectors 4-2
hot-plug replacement 2-18
LEDs 4-13
SDRAM DIMMs
accessing 2-9
part numbers 1-5
removing/replacing 2-28
specifications 5-4
serial ports 4-2, 4-3
server components, overview 2-7
server lift handles 2-8
shipping screw 2-24
Smart Array Controller
caution 2-18
hot-plug drive
replacement 2-17
specifications 5-8
SmartStart, utilities 2-1
software required for service
procedures 2-1
spare drives 2-17
spare parts list
I/O module 1-10
media module 1-8
miscellaneous 1-11
Processor and Memory
Module 1-5
system chassis 1-3
specifications
CD-ROM drives 5-5
DIMMs 5-4
diskette drives 5-4
Fast Ethernet Controller 5-9
power supplies 5-3
Smart Array Controller 5-8
system unit 5-2
speed of processors 4-7
static electricity 2-2
storage devices, media
module 1-8. See also CD-ROM
drives; diskette drives; hard
drives
storage of parts 2-2
Survey utility 3-2
switches
configuration 2-9
I/O 4-5
processor board 4-6
symbols in text viii
system chassis, exploded view 1-2
system components, part
numbers 1-3
system interconnect status
indicators
LEDs 4-8
purpose 2-2
system midplane assembly
part number 1-3
removing/replacing 2-58
system unit specifications 5-2
T
tape port connector 4-2
technical support xii
telephone numbers xiii
terminator boards
part numbers 1-5
removing/replacing 2-34
terminator PPM guide, part
number 1-6, 1-11
text conventions vii
tools required for service
procedures 2-1
top access panel 2-10
transporting parts 2-2
troubleshooting hard drives 2-17
U
Ultra2 tape port connector 4-2
UPS (uninterruptible power
supply) 2-6
utilities
overview 3-2
required 2-1
V
video connector 4-2, 4-3
Compaq Confidential – Need to Know Required
Writer: Integrity Group Project: Compaq ProLiant DL760 Servers Maintenance and Service Guide Comments:
Part Number: 173771-001 File Name: x-index.doc Last Saved On: 2/22/01 5:12 PM
Index
W
warnings
battery 2-55
electrical safety vii, x, 2-2,
2-6, 2-56
equipment repair 2-6
level of repair x
racks ix, 2-5
weight 2-5
website, Compaq xii
Wide Ultra2 SCSI hard drives
part numbers 1-8
specifications 5-6
Wide Ultra3 SCSI hard drives
part numbers 1-8
specifications 5-7
wrist strap, using 2-2
Compaq Confidential – Need to Know Required
Writer: Integrity Group Project: Compaq ProLiant DL760 Servers Maintenance and Service Guide Comments:
Part Number: 173771-001 File Name: x-index.doc Last Saved On: 2/22/01 5:12 PM
7