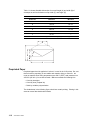
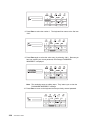
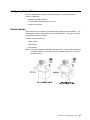
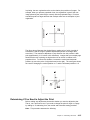
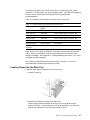
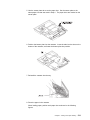
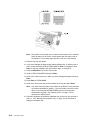
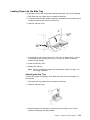
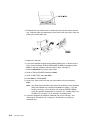
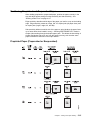
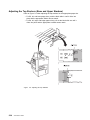
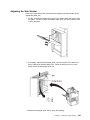
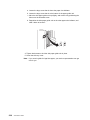
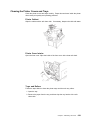
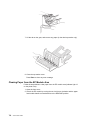
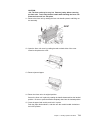
1
3130 Advanced Function Printer IBM User's Guide S544-5337-02 3130 Advanced Function Printer IBM User's Guide S544-5337-02 Note Before using this information and the product it supports, be sure to read the general information under “Notices” on page xi. Third Edition (September 1996) The following paragraph does not apply to any other country where such provisions are inconsistent with local law. INTERNATIONAL BUSINESS MACHINES CORPORATION PROVIDES THIS PUBLICATION “AS IS” WITHOUT WARRANTY OF ANY KIND, EITHER EXPRESS OR IMPLIED, INCLUDING, BUT NOT LIMITED TO THE IMPLIED WARRANTIES OF MERCHANTABILITY OR FITNESS FOR A PARTICULAR PURPOSE. Some states do not allow disclaimer of express or implied warranties in certain transactions, therefore, this statement may not apply to you. Requests for IBM publications should be made to your IBM representative or to your IBM branch office serving your locality. If you request publications from the address given below, your order will be delayed because publications are not stocked there. IBM welcomes your comments. For your convenience, a form for readers' comments is provided at the back of this publication. You may send your comments by facsimile to 1-800-524-1519, by electronic mail to [email protected], or mail your comments to: IBM Printing Systems Company Information Development Department H7FE, Building 003G P.O. Box 1900 Boulder, CO 80301-9191, U.S.A. When you send information to IBM, you grant a nonexclusive right to use or distribute the information in any way IBM believes appropriate without incurring any obligation to you. Copyright International Business Machines Corporation 1994, 1996. All rights reserved. Note to U.S. Government Users — Documentation related to restricted rights — Use, duplication or disclosure is subject to restrictions set forth in GSA ADP Schedule Contract with IBM Corp. Contents Statement of Limited Warranty Notices . . . . . . . . . . . . . . . . . . . . . . . . . . . . . Trademarks . . . . . . . . . . . . . . . . . . . . . . . . . . . Communications Statements . . . . . . . . . . . . . . . . . Federal Communication Commission (FCC) Statement. Safety Notices . Safety Precautions Electrical Safety Laser Safety . . . . . . . . . . . . . . . . . . . . . . . . . . . . . . . . . . . . . . . . . . . . . . . . . . . . . . . . . . . . . . . . . . . . . . . . . . . . . . . . . . . . . . . . . . . . . . . . . . . . . . . . . . . . . . . . . . . . . . . . . . . . . . . . . . . . . . . . . . . . . . . . . . . . . . . . . . . . . . . . . . . . . . . . . . . . . . . . . . . . . . . . . . . . . . . . . Preface . . . . . . . . . . . . . . . . . . . Audience . . . . . . . . . . . . . . . . . . . Organization and Contents of This Guide Conventions Used . . . . . . . . . . . . . Terminology . . . . . . . . . . . . . . . . . Related Publications . . . . . . . . . . . . . . . . . . . . . . . . . . . . . . . . . . . . . . . . . . . . . . . . . . . . . . . . . . . . . . . . . . . . . . . . . . . . . . . . . . . . . . . . . . . . . . . . . . . . . . . . . . . . . . . . . . . . . . . . . . . . . . . . . . . . . . . . . . . . . . Chapter 1. Introducing the 3130 Printer . . . . . . . . . . . About the 3130 Printer . . . . . . . . . . . . . . . . . . . . . . . . . . . . . . . . . . . . . . . . . . . . . . . . . . Printer Models Optional Accessories . . . . . . . . . . . . . . . . . . . . . . . . Model 01S Simplex Printer Features . . . . . . . . . . . . . Model 02S High-Capacity Simplex Printer Features . . . . Model 02D Duplex and Model 03S Simplex Printer Features Part Names and Their Functions . . . . . . . . . . . . . . . . . External View of the Printer . . . . . . . . . . . . . . . . . . Functions—External View . . . . . . . . . . . . . . . . . . . Internal View of the Printer . . . . . . . . . . . . . . . . . . . Functions—Internal View . . . . . . . . . . . . . . . . . . . . Relocating the Printer . . . . . . . . . . . . . . . . . . . . . . . Safety Precautions . . . . . . . . . . . . . . . . . . . . . . . . . Operating Precautions . . . . . . . . . . . . . . . . . . . . . . . Choosing Forms . . . . . . . . . . . . . . . . . . . . . . . . . . Paper and Stock . . . . . . . . . . . . . . . . . . . . . . . . . Paper Parameters . . . . . . . . . . . . . . . . . . . . . . Label Parameters . . . . . . . . . . . . . . . . . . . . . . Envelope Parameters . . . . . . . . . . . . . . . . . . . . Preprinted Paper . . . . . . . . . . . . . . . . . . . . . . . . Prepunched Paper . . . . . . . . . . . . . . . . . . . . . . . Chapter 2. Performing Basic Tasks . . . . . Printing Help Pages . . . . . . . . . . . . . . . . Understanding Status Messages . . . . . . . . . Starting Print Jobs and Making the Printer Ready Interrupting Printing . . . . . . . . . . . . . . . . Shutting Down and Powering Off the Printer . . Restarting the Printer . . . . . . . . . . . . . . . Loading Paper and Envelopes . . . . . . . . . . Copyright IBM Corp. 1994, 1996 vii . . . . . . . . . . . . . . . . . . . . . . . . . . . xi xi xii xii xv xv xv xv xvii xvii xvii xviii xviii xix 1-1 1-2 . 1-2 . 1-2 . 1-2 . 1-3 . 1-4 . 1-5 . 1-5 . 1-6 . 1-6 . 1-7 . 1-8 . 1-8 . 1-9 . 1-9 . 1-9 . 1-9 1-10 1-11 1-12 1-13 . . . . . . . . . . . . . . . . . . . . . . . . . . . . . . . . . . . . . . . . . . . . . . . . . . . . . . . . . . . . . . . . . . . . . . . . . . . . . . . . . . . . . . . . . . . . . . . . . . . . . . . . . . . . . . . . . . . . . . . . . . . . . . . . . . . . . . . . . . . . . . . . . . . . . . . . . . . . . . . . . . . . . . . . . . . . . . . . . . . . . . . . . . . . . . . . . . . . . . . . . . . . . . . . . . . . . . . . . . . . . . . . . . . . . . . . . . . . . . . . . . . . . . . . . . . . . . . . . . . . . . . . . . . . . . . . . . . . . . . . . . . . . . . . . . . . . . . . . . . . . . . . . . . . . . . . . . . . . . . . . . . . . . . . . . . . . . . . . . . . . . 2-1 2-2 2-2 2-3 2-3 2-4 2-4 2-5 iii Paper Positioning and Guidelines . . . . . . . . . Envelope Positioning and Guidelines . . . . . . . Changing the Form Name or Paper Assigned to a Tray Handling Messages . . . . . . . . . . . . . . . . . . . . Clearing Paper Jams . . . . . . . . . . . . . . . . . . . . Canceling Print Jobs . . . . . . . . . . . . . . . . . . . . Canceling Internal Print Jobs . . . . . . . . . . . . . . . . . . . . . . . . . . . . . . . . . . . . . . . . . . . . . . . . . . . . . . . . . . . . . . . . . . . . . . . . . . . . . . . . . . . . . . . . . . . . . . . . . . . . . . . . . . . . . . Chapter 3. Using the Operator Panel . . . . . . . . . . . . Input Keys . . . . . . . . . . . . . . . . . . . . . . . . . . . . . Display . . . . . . . . . . . . . . . . . . . . . . . . . . . . . . . Status mode . . . . . . . . . . . . . . . . . . . . . . . . . . Menu Mode . . . . . . . . . . . . . . . . . . . . . . . . . . Using the Display in Menu Mode . . . . . . . . . . . . . . Entering and Exiting Menu Mode . . . . . . . . . . . . Navigating through the Menu Items . . . . . . . . . . . Entering a Password to Access Menu Items . . . . . . Selecting Settings and Actions in the Menu . . . . . . . . . . . . . . . . . . . . . . . . . . . . . . . Menu Tree Using the Keyboard . . . . . . . . . . . . . . . . . . . . . . . . . . . . . . . Parts of the Display—Keyboard Mode Accessing the Keyboard . . . . . . . . . . . . . . . . . Keyboard Order . . . . . . . . . . . . . . . . . . . . . . Navigating through the Keyboard . . . . . . . . . . . . Selecting a Keyboard Character . . . . . . . . . . . . . . . . . . . Selecting and Saving Your Keyboard Entry Editing Keyboard Entries . . . . . . . . . . . . . . . . . Canceling Keyboard Entries . . . . . . . . . . . . . . . Status Indicators . . . . . . . . . . . . . . . . . . . . . . . . . Attention . . . . . . . . . . . . . . . . . . . . . . . . . . . Job/Processing . . . . . . . . . . . . . . . . . . . . . . . Duplex . . . . . . . . . . . . . . . . . . . . . . . . . . . . On Line . . . . . . . . . . . . . . . . . . . . . . . . . . . Power . . . . . . . . . . . . . . . . . . . . . . . . . . . . Intervention Indicator Lights . . . . . . . . . . . . . . . . . . . Paper Jam Indicator Lights . . . . . . . . . . . . . . . . Toner Indicator Light . . . . . . . . . . . . . . . . . . . . Beeper . . . . . . . . . . . . . . . . . . . . . . . . . . . . . . . Error Beeper . . . . . . . . . . . . . . . . . . . . . . . . Keys Beeper . . . . . . . . . . . . . . . . . . . . . . . . Tutorial: Using the Menu to Enter a Key Operator Password Skills Covered . . . . . . . . . . . . . . . . . . . . . . . Prerequisites . . . . . . . . . . . . . . . . . . . . . . . . Instructions . . . . . . . . . . . . . . . . . . . . . . . . . 3130 User's Guide 3-1 3-2 . 3-4 . 3-5 . 3-5 . 3-5 . 3-6 . 3-6 . 3-6 . 3-7 . 3-7 3-11 3-11 3-11 3-12 3-13 3-13 3-13 3-14 3-14 3-14 3-14 3-15 3-15 3-15 3-15 3-16 3-16 3-16 3-17 3-17 3-17 3-17 3-17 3-18 3-18 . . . . . . . . . . . . . . . . . . . . . . . . . . . . . . . . . . . . . . . . . . . . . . . . . . . . . . . . . . . . . . . . . . . . . . . . . . . . . . . . . . . . . . . . . . . . . . . . . . . . . . . . . . . . . . . . . . . . . . . . . . . . . . . . . . . . . . . . . . . . . . . . . . . . . . . . . . . . . . . . . . . . . . . . . . . . . . . . . . . . . . . . . . . . . . . . . . . . . . . . . . . . . . . . . . . . . . . . . . . . . . . . . . . . . . . . . . . . . . . . . . . . . . . . . . . . . . . . . . . . . . . . . . . . . . . . . . . . . . . . . . . . . . . . . . . . . . . . . . . . . . . . . . . . . . . . . . . . . . . . . . . . . . . . . . . . . . . . . . . . . . . . . . . . . . . . . . . . . . . . . Chapter 4. Customizing the Printer . . . . . . . . . . . . . . . . Configuring Input Trays . . . . . . . . . . . . . . . . . . . . . . . . Tray Names . . . . . . . . . . . . . . . . . . . . . . . . . . . . . Enabling and Disabling Trays . . . . . . . . . . . . . . . . . . . Tray Selection Defaults . . . . . . . . . . . . . . . . . . . . . Changing the Form Name and Paper Size Assigned to a Tray Selecting an Autoswitch Tray . . . . . . . . . . . . . . . . . . . Tray Name Correspondence . . . . . . . . . . . . . . . . . . . . Configuring Output Stackers . . . . . . . . . . . . . . . . . . . . . iv 2-5 2-6 2-7 2-7 2-7 2-8 2-8 . . . . . . . . . . . . . . . . . . . . . . . . . . . . . . . . . . . . . . . . . . . . . . . . . . . . . . . . . . . . . . . . . . . . . . . . 4-1 4-2 4-2 4-3 4-4 4-4 4-5 4-6 4-7 Stacker Names . . . . . . . . . . . . . . . . . . Enabling and Disabling Stackers . . . . . . . . Stacker Selection Defaults . . . . . . . . . . Setting Offset Stacking . . . . . . . . . . . . . . Selecting Offset Stacking . . . . . . . . . . . Autolinking the Output Stackers . . . . . . . . . Selecting Autolinking . . . . . . . . . . . . . . Clearing Autolinked Stackers . . . . . . . . . Configuring the Printer . . . . . . . . . . . . . . . . Configuration Menu Items . . . . . . . . . . . . Printer Configuration Menu Item Descriptions Setting Printer Configuration Items . . . . . . . Printing the Printer Configuration . . . . . . . . Printing a One-Page Configuration Listing . Printing a Multi-Page Configuration Listing . Running Print Quality Samples . . . . . . . . . . . Running the Demonstration Pack . . . . . . . . . Adjusting the Print (IPDS Only) . . . . . . . . . . . Determining if You Need to Adjust the Print . . How to Adjust the Print . . . . . . . . . . . . . . . . . . . . Changing the Key-Operator Password Defining Forms . . . . . . . . . . . . . . . . . . . . Defining a New Form . . . . . . . . . . . . . . . Modifying a Form . . . . . . . . . . . . . . . . . Deleting a Form . . . . . . . . . . . . . . . . . . Checking the Current Definition of a Form . . . Machine Information . . . . . . . . . . . . . . . . . Machine Information Items . . . . . . . . . . . . Viewing Machine Information . . . . . . . . . . Configuring Attachments . . . . . . . . . . . . . . Enabling and Disabling Attachments . . . . . . Enabling and Disabling Applications . . . . . Setting Configuration Parameters . . . . . . . . Printing the Attachment Configuration . . . . . 4-7 . 4-8 . 4-8 . 4-8 . 4-9 . 4-9 . 4-9 4-10 4-10 4-10 4-11 4-11 4-12 4-12 4-12 4-13 4-14 4-14 4-15 4-16 4-17 4-18 4-18 4-20 4-21 4-21 4-22 4-22 4-22 4-23 4-23 4-24 4-25 4-25 . . . . . . . . . . . . . . . . . . . . . . . . . . . . . . . . . . . . . . . . . . . . . . . . . . . . . . . . . . . . . . . . . . . . . . . . . . . . . . . . . . . . . . . . . . . . . . . . . . . . . . . . . . . . . . . . . . . . . . . . . . . . . . . . . . . . . . . . . . . . . . . . . . . . . . . . . . . . . . . . . . . . . . . . . . . . . . . . . . . . . . . . . . . . . . . . . . . . . . . . . . . . . . . . . . . . . . . . . . . . . . . . . . . . . . . . . . . . . . . . . . . . . . . . . . . . . . . . . . . . . . . . . . . . . . . . . . . . . . . . . . . . . . . . . . . . . . . . . . . . . . . . . . . . . . . . . . . . . . . . . . . . . . . . . . . . . . . . . . . . . . . . . . . . . . . . . . . . . . . . . . . . . . . . . . . . . . . . . . . . . . . . . . . . . . . . . . . . . . . . . . . . . . . . . . . . . . . . . . . . . . . . . . . . . . . . . . . . . . . . . . . . . . . . . . . . . . . . . . . . . . . . . . . . . . . . . . . . . . . . . . . . . . . . . . . . . . . . . . . . . . . . . . . . . . . . . . . . . . . . . . . . . . . . . . . . . . . . . . . . . . . . Chapter 5. Printing and Paper Handling . . . . . . . . . . . . . . . . . . . . . 5-1 Powering On and Off the Printer . . . . . . . . . . . . . . . . . . . . . . . . . . . 5-2 Powering On . . . . . . . . . . . . . . . . . . . . . . . . . . . . . . . . . . . . . 5-2 Powering Off . . . . . . . . . . . . . . . . . . . . . . . . . . . . . . . . . . . . . 5-2 Shutting Down and Restarting the Printer . . . . . . . . . . . . . . . . . . . . . . 5-3 Shutdown . . . . . . . . . . . . . . . . . . . . . . . . . . . . . . . . . . . . . . . 5-3 How to Shut Down the Printer . . . . . . . . . . . . . . . . . . . . . . . . . . . 5-3 Restart . . . . . . . . . . . . . . . . . . . . . . . . . . . . . . . . . . . . . . . . 5-3 How to Restart the Printer . . . . . . . . . . . . . . . . . . . . . . . . . . . . . 5-3 Understanding Status Messages . . . . . . . . . . . . . . . . . . . . . . . . . . . 5-4 Clearing Information Messages . . . . . . . . . . . . . . . . . . . . . . . . . . . . 5-4 Starting Print Jobs . . . . . . . . . . . . . . . . . . . . . . . . . . . . . . . . . . . 5-5 Interrupting Printing . . . . . . . . . . . . . . . . . . . . . . . . . . . . . . . . . . 5-5 Canceling Print Jobs . . . . . . . . . . . . . . . . . . . . . . . . . . . . . . . . . . 5-5 . . . . . . . . . . . . . . . . . . . . . . . . . . . . . . . . . . . . . 5-6 Loading Paper Loading Paper into the Main Tray . . . . . . . . . . . . . . . . . . . . . . . . . 5-7 Loading Paper into the Lower Sub Tray, Upper Sub Tray, or Top Front Tray 5-9 Loading Paper into the Side Tray . . . . . . . . . . . . . . . . . . . . . . . . 5-13 Adjusting the Side Tray . . . . . . . . . . . . . . . . . . . . . . . . . . . . 5-13 Contents v Positioning Preprinted and Prepunched Paper . . . . . . Preprinted Paper (Prepunched or Nonpunched) . . . Prepunched (Not Preprinted) . . . . . . . . . . . . . . Preprinted (Prepunched or Nonpunched) . . . . . . . Loading Labels . . . . . . . . . . . . . . . . . . . . . . . . Loading Envelopes into the Envelope Feeder . . . . . . Using the Output Stackers . . . . . . . . . . . . . . . . . Adjusting the Top Stackers (Base and Upper Stackers) Adjusting the Side Stacker . . . . . . . . . . . . . . . . Chapter 6. Maintaining the Printer . . . . . . . . . . Replacing Supplies . . . . . . . . . . . . . . . . . . . . . When to Replace Supplies . . . . . . . . . . . . . . . General Guidelines for Supplies . . . . . . . . . . . . Display Messages for Supplies . . . . . . . . . . . . Replacing the Toner Cartridge . . . . . . . . . . . . . Replacing the Developer Mix . . . . . . . . . . . . . Replacing the Photoconductor Belt . . . . . . . . . . . . . . . . . . . . . Replacing the Transfer Belt Unit Replacing the Fuser Unit . . . . . . . . . . . . . . . . . . . . . . . . . . . . . . Replacing the Cleaner Unit Cleaning the Printer . . . . . . . . . . . . . . . . . . . . Cleaning the Printer Covers and Trays . . . . . . . . Printer Cabinet . . . . . . . . . . . . . . . . . . . . Printer Cover Interior . . . . . . . . . . . . . . . . . . . . . . . . . . . . . . . . . . Trays and Rollers Cleaning the Drum Unit and Drum Seal . . . . . . . Cleaning the Paper Guide Rollers and Guard Fingers . . . . . . . . . . . . . . . . . . . . . . . . . . . . . . . . . . . . . . . . . . . . . . . . . . . . . . . . . . . . . . . . . . . . . . . . . . . . . . . . . . . . . . . . . . . . . . . . . . . . . . . . . . . . . . . . . . . . . . . . . . . . . . . . . . . . . . . . . . . . . . . . . . . . . . . . . . . . . . . . . . . . . . . . . . . . . . . . . . . . . . . . . . . . . . . . . . . . . . . . . . . . . . . . . . . . . . . . . . . . . . . . . . . . . . . . . . . . . . . . . . . . . . . . . . . . . . . . . . . . . . . . . . . . . . . . . . . . . . . . . . . . . . . . . . . . . . . . . . . . . . . . . . . . . . . . . 7-1 . 7-2 . 7-2 . 7-3 . 7-4 . 7-6 . 7-8 7-12 7-13 7-13 7-13 7-13 7-14 7-14 7-14 . . . . . . . . . . . . . . . . . . A-1 . . . . . . . . . . . . . . . . . . . . . . . . . . . . . . . . . . . . G-1 . . . . . . . . . . . . . . . . . . . . . . . . . . . . . . . . . . . . . . . G-3 . . . . . . . . . . . . . . . . . . . . . . . . . . . . . . . . . . . . . . . . . . X-1 Appendix A. Display Messages and Codes Abbreviations Glossary vi 3130 User's Guide 6-1 6-2 . 6-2 . 6-3 . 6-4 . 6-5 . 6-7 6-10 6-12 6-16 6-18 6-20 6-21 6-21 6-21 6-21 6-23 6-23 . . . . . . . . . . . . . . . . . . . . . . . . . . . . Chapter 7. Handling Operation Problems . . . . . . . . Paper Jams . . . . . . . . . . . . . . . . . . . . . . . . . . . Using Paper Jam Indicator Lights to Locate Paper Jams . . . . . . . . . . . . . . . . . . . Clearing a Paper Jam Clearing Paper from the Side Doors and Top Stackers Clearing Paper from the EP Module Area . . . . . . . . Clearing Paper from the Paper Feed Module Area . . . Clearing Paper from the Front Trays . . . . . . . . . . . Clearing Paper from the Stackers . . . . . . . . . . . . . Handling Aborts and Program Checks . . . . . . . . . . . . Hard Abort . . . . . . . . . . . . . . . . . . . . . . . . . . Program Check . . . . . . . . . . . . . . . . . . . . . . . Correcting Print Quality Problems . . . . . . . . . . . . . . All Black Print Samples . . . . . . . . . . . . . . . . . . . Other Print Samples . . . . . . . . . . . . . . . . . . . . Index 5-15 5-15 5-16 5-17 5-17 5-18 5-19 5-20 5-21 . . . . . . . . . . . . . . . . . . . . . . . . . . . . . . . . . . . . . . . . . . . . . . . . . . . . . . . . . . . . . . . . . . . . . . . . . . . . . . . . . . . . . . . . . . . . . . . . . . . . . . . . . . . . . . . . . . . . . . . . . . . . . . . . . . . . . . . . . . . . . . . . . . . . . . . . . . . . . . . . . . . . . . Statement of Limited Warranty The warranties provided by IBM in this Statement of Limited Warranty apply only to Machines you originally purchase for your use, and not for resale, from IBM or an IBM authorized re-seller. The term “Machine” means an IBM machine, its features, conversions, upgrades, elements, or accessories, or any combination of them. Machines are subject to these terms only if purchased in the United States or Puerto Rico, or Canada, and located in the country of purchase. If you have any questions, contact IBM or your re-seller. Machine: 3130 Warranty Period: 90 days Contact your place of purchase for warranty service information. Production Status Each Machine is manufactured from new parts, or new and serviceable used parts (which perform like new parts). In some cases, the Machine may not be new and may have been previously installed. Regardless of the Machine's production status, IBM's warranty terms apply. The IBM Warranty IBM warrants that each Machine 1) is free from defects in materials and workmanship and 2) conforms to IBM's Official Published Specifications. IBM calculates the expiration of the warranty period from the Machine's Date of Installation. The date on your receipt is the Date of Installation, unless IBM or your re-seller informs you otherwise. During the warranty period, IBM or your re-seller will provide warranty service under the type of service designated for the Machine and will manage and install engineering changes that apply to the Machine. IBM or your re-seller will specify the type of service. For a feature, conversion, or upgrade, IBM or your re-seller may require that the Machine on which it is installed be 1) the designated, serial-numbered Machine and 2) at an engineering-change level compatible with the feature, conversion, or upgrade. Some of these transactions (called “Net-Priced” transactions) may include additional parts and associated replacement parts that are provided on an exchange basis. All removed parts become the property of IBM and must be returned to IBM. Replacement parts assume the remaining warranty of the parts they replace. If a Machine does not function as warranted during the warranty period, IBM or your re-seller will repair or replace it without charge. If IBM or your re-seller is unable to do so, you may return it to your place of purchase and your money will be refunded. If you transfer a Machine to another user, warranty service is available to that user for the remainder of the warranty period. You should give your proof of purchase and this Statement to that user. Copyright IBM Corp. 1994, 1996 vii Warranty Service To obtain warranty service for the Machine, you should contact your re-seller or call IBM. In the United States, call IBM at 1-800-IBM-SERV (426-7378). In Canada, call IBM at 1-800-465-6666. You may be required to present proof of purchase. Depending on the Machine, the service may be 1) a “Repair” service at your location (called “On-site”) or at one of IBM's or a re-seller's service locations (called “Carry-in”) or 2) an “Exchange” service, either On-site or Carry-in. When a type of service involves the exchange of a Machine or part, the item IBM or your re-seller replaces becomes its property and the replacement becomes yours. The replacement may not be new, but will be in good working order. It is your responsibility to: 1. Obtain authorization from the owner (for example, your lessor) to have IBM or your re-seller service a Machine that you do not own; 2. where applicable, before service is provided— a. follow the problem determination, problem analysis, and service request procedures that IBM or your re-seller provide, b. secure all programs, data, and funds contained in a Machine, c. inform IBM or your re-seller of changes in a Machine's location, and d. for a Machine with exchange service, remove all features, parts, options, alterations, and attachments not under warranty service. Also, the Machine must be free of any legal obligations or restrictions that prevent its exchange; and 3. be responsible for loss of, or damage to, a Machine in transit when you are responsible for the transportation charges. Extent of Warranty IBM does not warrant uninterrupted or error-free operation of a Machine. Misuse, accident, modification, unsuitable physical or operating environment, improper maintenance by you, or failure caused by a product for which IBM is not responsible may void the warranties. THESE WARRANTIES REPLACE ALL OTHER WARRANTIES, EXPRESS OR IMPLIED, INCLUDING, BUT NOT LIMITED TO, THE IMPLIED WARRANTIES OF MERCHANTABILITY AND FITNESS FOR A PARTICULAR PURPOSE. HOWEVER, SOME LAWS DO NOT ALLOW THE EXCLUSION OF IMPLIED WARRANTIES. IF THESE LAWS APPLY, THEN ALL EXPRESS AND IMPLIED WARRANTIES ARE LIMITED IN DURATION TO THE WARRANTY PERIOD. NO WARRANTIES APPLY AFTER THAT PERIOD. In Canada, warranties include both warranties and conditions. Some jurisdictions do not allow limitations on how long an implied warranty lasts, so the above limitation may not apply to you. viii 3130 User's Guide Limitation of Warranty Circumstances may arise where, because of a default on IBM's part (including fundamental breach) or other liability (including negligence and misrepresentation), you are entitled to recover damages from IBM. In each such instance, regardless of the basis on which you are entitled to claim damages, IBM is liable only for: 1. bodily injury (including death), and damage to real property and tangible personal property; and 2. the amount of any other actual loss or damage, up to the greater of $100,000 or the charge for the Machine that is the subject of the claim. Under no circumstances is IBM liable for any of the following: 1. third-party claims against you for losses or damages (other than those under the first item listed above); 2. loss of, or damage to, your records or data; or 3. economic consequential damages (including lost profits or savings) or incidental damages, even if IBM is informed of their possibility. Some jurisdictions do not allow the exclusion or limitation of incidental or consequential damages, so the above limitation or exclusion may not apply to you. This warranty gives you specific legal rights and you may also have other rights which vary from jurisdiction to jurisdiction. Statement of Limited Warranty ix x 3130 User's Guide Notices References in this publication to IBM products, programs or services do not imply that IBM intends to make these available in all countries in which IBM operates. Any reference to an IBM licensed product, program, or service is not intended to state or imply that only IBM's product, program, or service may be used. Any functionally equivalent product, program, or service that does not infringe any of IBM's intellectual property rights may be used instead of the IBM product. Evaluation and verification of operation in conjunction with other products, except those expressly designated by IBM, is the user's responsibility. Any performance data contained in this document was obtained in a controlled environment based on the use of specific data. The results that may be obtained in other operating environments may vary significantly. Users of this document should verify the applicable data in their specific environment. Therefore, such data does not constitute a performance guarantee or warranty. IBM may have patents or pending patent applications covering subject matter in this document. The furnishing of this document does not give you any license to these patents. You can send license inquiries, in writing, to the IBM Corporation, IBM Director of Licensing, 506 Columbus Ave., Thornwood, N.Y. 105894 U.S.A. The IBM 3130 Advanced Function Printer meets the requirements of IEC 950, First Edition, Amendments 1 and 2. The laser used in the 3130 complies with IEC 825 and EN 60825. Trademarks The following terms are trademarks of the IBM Corporation in the United States or other countries or both: Advanced Function Presentation Advanced Function Printing AFCCU AFP AIX AIX/6000 Application System/400 AS/400 IBM Intelligent Printer Data Stream IPDS MVS/ESA MVS/SP MVS/XA OS/2 OS/400 Personal System/2 Print Services Facility PS/2 PSF PSF/6000 RISC System/6000 Copyright IBM Corp. 1994, 1996 xi WIN-OS/2 The following terms are trademarks or registered trademarks of other companies: Trademark Agfa Agfa Rhombus AXIS CG Intellifont CG Omega CG Times ITC Advant Garde Gothic ITC Bookman ITC Zapf Chancery ITC Zapf Dingbat Lexmark Marigold NetWare PostScript PCL PCL5e TrueType Univers Windows Company Agfa-Gevaert A.G. Agfa-Gevaert A.G. AXIS Communication, Inc. Miles, Inc. Miles, Inc. Miles, Inc. under license from Monotype Corp. (Times New Roman) International Typeface Corp. International Typeface Corp. International Typeface Corp. International Typeface Corp. Lexmark International, Inc. AlphaOmega Typography Corp. Novell Inc. Adobe Systems, Inc. Hewlett-Packard Co. Hewlett-Packard Co. Apple Computer Co. Linotype AG and Subsidiaries Microsoft Corp. Communications Statements Federal Communication Commission (FCC) Statement. Note: This equipment has been tested and found to comply with the limits for a Class A digital device, pursuant to Part 15 of the FCC Rules. These limits are designed to provide reasonable protection against harmful interference when the equipment is operated in a commercial environment. This equipment generates, uses, and can radiate frequency energy and, if not installed and used in accordance with the instruction manual, may cause harmful interference to radio communication. Operation of this equipment in a residential area is likely to cause harmful interference, in which case the user will be required to correct the interference at his own expense. Properly shielded and grounded cables and connectors must be used to meet FCC emission limits. IBM is not responsible for any radio or television interference caused by using other than recommended cables and connectors or by unauthorized changes or modifications to this equipment. Unauthorized changes or modifications could void the user's authority to operate the equipment. This device complies with Part 15 of the FCC Rules. Operation is subject to the following two conditions: (1) this device may not cause harmful interference, and (2) this device must accept any interference received, including interference that may cause undesired operation. xii 3130 User's Guide Shielded Cables (European Statement): Properly shielded and grounded cables must be used in order to reduce the potential for causing interference to radio and TV communications and to other electrical or electronic equipment. Such cables and connectors are available from IBM authorized dealers. IBM cannot accept responsibility for any interference caused by using other than recommended cables and connectors. European Community (EC) Conformity Statement: This product is in conformity with the protection requirements of EC Council Directive 89/336/EEC on the approximation of the laws of the Member States relating to electromagnetic compatibility. IBM cannot accept responsibility for any failure to satisfy the protection requirements resulting from a non-recommended modification of the product, including the fitting of non-IBM option cards. German Conformity Statement: Dieses Gerät erfüllt die Bedingungen der EN 55022 Klasse A. Für diese Klasse von Geräten gilt folgende Bestimmung nach dem EMVG: Geräte dürfen an Orten, für die sie nicht ausreichend entstört sind, nur mit besonderer Genehmigung des Bundesminesters für Post und Telekommunikation oder des Bundesamtes für Post und Telekommunikation betrieben werden. Die Genehmigung wird erteilt, wenn keine elektromagnetischen Störungen zu erwarten sind. (Auszug aus dem EMVG vom 9.Nov.92, Para.3, Abs.4) The United Kingdom Telecommunications Act 1984: This apparatus is approved under approval No. NS/G/1234/J/100003 for the indirect connections to the public telecommunications systems in the United Kingdom. Canadian Department of Communications Compliance Statement: This Class A digital apparatus meets the requirements of the Canadian Interference-Causing Equipment Regulations. Avis de conformité aux normes du ministére des Communications du Canada: Cet appareil numérique de la classe A respecte toutes les exigences du Réglement sur le matériel brouilleur du Canada. Statement of CISPR 22 Edition 2 Compliance: Attention This is a Class A Product. In a domestic environment this product may cause radio interference in which case the user may be required to take adequate measures. Notices xiii xiv 3130 User's Guide Safety Notices There are three levels of safety notices: DANGER calls attention to a situation that is potentially or extremely hazardous to people. CAUTION calls attention to a situation that is potentially hazardous to people. Attention calls attention to the possibility of damage to a program, device, system, or data. Attention notices are located throughout this publication, but are not listed here. Safety Precautions Electrical Safety This printer is inspected and listed by recognized national testing laboratories, such as Underwriters Laboratories, Inc. (UL) in the U.S.A. and Canadian Standards Association (CSA) in Canada. Listing of a product by a national testing laboratory indicates that the product is designed and manufactured in accordance with national requirements intended to minimize safety hazards. IBM equipment meets a very high standard of safety in design and manufacture. Remember, however, that this product operates under conditions of high electrical potentials and heat generation, both of which are functionally necessary. Because the paper and toner used in the printer can burn, you should take normal precautions to prevent fire. These precautions include common-sense measures, such as keeping potentially combustible materials (for example, curtains and chemicals) away from the printer, providing adequate ventilation and cooling, limiting unattended operation, and having trained personnel available and assigned to the printer. Laser Safety This printer complies with the performance standards set by the U.S. Food and Drug Administration for a Class 1 Laser Product. This means that the printer belongs to a class of laser products that does not product hazardous laser radiation. This classification was accomplished by providing the necessary protective housing and scanning safeguards to ensure that laser radiation is inaccessible or within Class 1 limits. There are various tool-operated machine covers that should be moved, removed, or replaced only by trained service personnel. There are no operator controls or adjustments associated with the laser. No operator maintenance is required to keep the product in compliance as a Class 1 Laser Product. No adjustments that affect laser operation or power are accessible to the operator. This printer is a Class 1 Laser Product that contains an enclosed Class 3B laser. Copyright IBM Corp. 1994, 1996 xv xvi 3130 User's Guide Preface The IBM 3130 Advanced Function Printer: User's Guide explains how to operate and maintain the IBM 3130 Advanced Function Printer. Audience This publication is intended for users and key operators of the IBM 3130 Advanced Function Printer. Both users and key operators should have a basic understanding of computer equipment and computer operations. A user is someone who sends print jobs to the printer and performs basic functions related to printing and picking up those print jobs. Chapter 2 contains information about basic tasks that users perform. Chapters 1, 3, 4, 5, and 7 are also directed to users. Some topics in chapters 3, 4, 5, and 6 describe tasks performed only by key operators. A key operator is someone designated to handle more complex printer functions, such as replacing the toner cartridge. The key operator helps keep the printer in optimal working order and changes printer settings as needed. All chapters are directed to key operators. An administrator (either a systems administrator or LAN administrator) is someone designated to set up attachment configurations, job management options, and font management options for the printer. A customer engineer (IBM service representative) may also refer to this publication. The customer engineer is responsible for service actions, such as maintaining preventive maintenance logs and event logs, performing disk operations, and running printer diagnostics. Organization and Contents of This Guide This publication is designed to provide all basic information needed to operate, customize, and maintain the printer. It consists of the following chapters: Chapter 1, “Introducing the 3130 Printer” gives a general description of the printer features and functions of the 3130 printer. Illustrations are used to identify key parts of the printer. Chapter 2, “Performing Basic Tasks” explains the tasks that users perform on a regular basis. This chapter is designed to be used as a quick reference guide. Chapter 3, “Using the Operator Panel” describes how to use the operator panel keys, display, and indicators to control printer functions and set printer configurations. This chapter also contains a tutorial to help in using the keyboard to enter characters. Chapter 4, “Customizing the Printer” describes how to set up the printer so that it suits your printing environment. It also explains how to set up the printer attachment. Copyright IBM Corp. 1994, 1996 xvii Chapter 5, “Printing and Paper Handling” explains how to load paper (including user-defined forms) and run the printer. It includes information about using the printer trays and stackers. Chapter 6, “Maintaining the Printer” describes how to keep the printer in good working condition. It describes how to replace consumable parts (other than paper), a responsibility of key operators. Chapter 7, “Handling Operation Problems” describes how to identify and solve minor problems that occur during operations. Appendix A, “Display Messages and Codes” describes messages and recommended recovery actions. This publication also contains a list of abbreviations, a glossary, and an index. Conventions Used The following typeface conventions are used in this publication. Names of keys on the operator panel are shown in Helvetica Bold typeface. Examples are: Press the Enter key. Press Stop. Text shown on the operator panel display is shown in Helvetica Narrow typeface. Examples are: Scroll to SETUP. The operator panel displays NOT READY. Terminology Printer Models This publication refers to the following 3130 printer models: Model 01S: Simplex Model 02S: High-capacity simplex Model 02D: Duplex Model 03S: Simplex Paper Input and Output Receptacles Input receptacles are called trays. Output receptacles are called stackers. xviii 3130 User's Guide Related Publications The following 3130 publications are also available: IBM 3130 Advanced Function Printer: System Administration Guide, S544-5328 IBM 3130 and 3160 Advanced Function Printer: Safety Information, S544-3978 IBM 3130 Advanced Function Printer: Introduction and Planning Guide, G544-3974 IBM InfoPrint 60; 3130, 3160 and 3935 Advanced Function Printer: Attachment Configuration Handbook, S544-3977 IBM 3130 Advanced Function Printer: Programming Reference, S544-5329 IBM IPDS Handbook for Printers That Use The Advanced Function Common Control Unit, G544-3895 The following books contain information that relates to the IBM 3130 Advanced Function Printer: Advanced Function Printer: Cut Sheet Paper Reference for Use with IBM Electrophotographic Printers, G544-3915. Advanced Function Presentation: Printer Information, G544-3290. This book contains an extensive list of other publications related to Advanced Function Printing. Guide to Advanced Function Presentation, G544-3876. Contact your IBM marketing representative for information concerning either the 3130, its publications, or its associated licensed programs. Preface xix xx 3130 User's Guide Chapter 1. Introducing the 3130 Printer This chapter introduces some of the features and functions of the IBM 3130 Advanced Function Printer. Descriptions of the following are provided: Features of the 3130 Printer models Optional accessories for the 3130 Part names and functions This chapter also contains basic guidelines concerning: Relocation information Safety precautions Printer operation precautions Selection of forms (paper specifications) Copyright IBM Corp. 1994, 1996 1-1 About the 3130 Printer The 3130 printer provides the following standard features: 30 printed impressions of letter-size or A4 paper per minute Resolution of 240 or 300 pels (dots per inch) Choice of five attachment methods: – Ethernet host attachment is standard. – PC Parallel host attachment is standard. – One additional interface slot is available for an additional host attachment (token ring, twinaxial, or SDLC). An operator panel, including a display and keys for user input A wide range of paper sizes available Printer Models There are four models of the 3130 printer: Model 01S: Simplex Model 02S: High-capacity simplex Model 02D: Duplex Model 03S: Simplex Optional Accessories The following accessories are optional for the printer: 1 500-sheet side stacker (optional for all models) 1 000-sheet dual top stacker (optional for Model 01S simplex and Model 02S high-capacity simplex printers) 500-sheet side tray (optional for Model 02S high-capacity simplex, Model 02D duplex, and Model 03S Simplex printers) 250-sheet cassette for front trays (optional for all models) 500-sheet cassette for the side tray (optional for all models) Envelope feeder (optional for all models but side tray must be installed) Model 01S Simplex Printer Features The following are standard features of the 3130 Model 01S simplex printer: Simplex (single-sided) printing One internal tray (250-sheet capacity) One side tray (500-sheet capacity) Single top paper stacker with offset feature (500-sheet capacity) 1-2 3130 User's Guide The following are optional features of the 3130 Model 01S simplex printer: Envelope feeder (100-envelope capacity) Dual top stacker with offset feature (1 000-sheet capacity) Side stacker with offset feature (1 500-sheet capacity) Figure 1-1. Model 01S Simplex Printer with Optional Envelope Feeder Model 02S High-Capacity Simplex Printer Features The following are standard features of the 3130 Model 02S high-capacity simplex printer: Simplex (single-sided) printing Four internal trays (three 250-sheet capacity and one 2 000-sheet capacity) Single top paper stacker with offset feature (500-sheet capacity) The following are optional features of the 3130 Model 02S high-capacity simplex printer: Side tray (500-sheet capacity) Envelope feeder (100-envelope capacity) Dual top stacker with offset feature (1 000-sheet capacity) Side stacker with offset feature (1 500-sheet capacity) Chapter 1. Introducing the 3130 Printer 1-3 Figure 1-2. Model 02S High-Capacity Simplex Printer Model 02D Duplex and Model 03S Simplex Printer Features The following are standard features of the 3130 Model 02D duplex and Model 03S simplex printers: Simplex (single-sided) and duplex (double-sided) printing (Model 02D only) Three internal trays (two 250-sheet capacity and one 2 000-sheet capacity) Dual top stacker with offset feature (1 000-sheet capacity) The following are optional features of the 3130 Model 02D duplex and Model 03S simplex printers: Side tray (500-sheet capacity) Envelope feeder (100-envelope capacity) Side stacker with offset feature (1 500-sheet capacity) Figure 1-3. Model 02D Duplex and Model 03S Simplex Printers 1-4 3130 User's Guide Part Names and Their Functions External View of the Printer Figure 1-4 shows the external parts of the printer. The printer shown includes all possible trays and stackers. Figure 1-4. External View of the Printer (All Optional Accessories Are Shown) Chapter 1. Introducing the 3130 Printer 1-5 Functions—External View Table 1-1 describes each external part. Table 1-1. Description of External Printer Parts Front Cover Open to replace consumable assemblies, clear paper jams, or clean the inside of the printer. Top Auto-Eject Door Open to clear paper jams. When the side tray is used, it is installed at this location. Bottom Door Open to clear paper jams. Stacker Cover Open to clear paper jams. Toner Supply Cover Open to replace the toner cartridge. Main Tray Holds up to 2 000 sheets of paper. Lower Sub Tray Holds up to 250 sheets of paper. Upper Sub Tray Holds up to 250 sheets of paper. Top Front Tray Holds up to 250 sheets of paper. Side Tray Holds up to 500 sheets of paper. Envelope Feeder Holds up to 100 envelopes. Operator Panel Contains the indicator lights, input keys, and LCD display. Upper Stacker Collects the printed paper. It holds up to 500 sheets of paper. Upper stacker is the name of the top section of a dual top stacker. Base Stacker Collects the printed paper. It holds up to 500 sheets of paper. Base stacker is the name of the single top stacker and also the bottom section of a dual top stacker. Side Stacker Collects the printed paper. It holds up to 1 500 sheets of paper. Power Switch Powers on (turn on) and powers off (turn off) the printer. Tray Indicator Indicates the main tray is in use. Do not open the main tray when the indicator light is on. Tray Window Shows the paper level in the main tray. Internal View of the Printer Figure 1-5 on page 1-7 shows the internal parts of the printer. The printer is shown with the front cover open. To access a module or unit, use the indicated handles or levers. You will need to access these areas to clear paper jams, replace supplies, and clean the printer. 1-6 3130 User's Guide Figure 1-5. Internal View of the Printer Functions—Internal View Table 1-2 describes each internal part. Table 1-2. Description of Internal Printer Parts Developer Mix Duct Mount the developer mix bottle onto the developer mix duct to replace the developer mix. Paper Feed Module Consists of the transfer belt assembly and fuser assembly. Paper Feed Module Lever Turn to the RELEASE position; then pull forward to access the paper feed module components. EP Module Consists of the drum unit, cleaner assembly, charger assembly, developer unit, pre-clean unit, and the toner hopper unit. EP Module Handle Release the paper feed module lever and two lock levers; then pull the EP module handle forward to access the EP module components. Drum Unit Part of the EP module. Consists of the drum and a photoconductor belt mounted around the drum. Drum Unit Handle Turn to the RELEASE position; then pull forward to access the drum unit components, including the photoconductor. Fuser Temperature Switch Switch to raise the temperature of the fuser by approximately 10°C to aid in fusing heavier weights of paper. The normal setting should be used for paper weights below 27 lb. Toner Cartridge Slot Insert the toner cartridge into the toner cartridge slot to replace toner. Chapter 1. Introducing the 3130 Printer 1-7 Relocating the Printer Whenever the printer is to be moved to another location, a relocation kit is required. The customer engineer will disconnect and reconnect the printer, but the customer is responsible for ordering the relocation kit. The relocation kit part number is 45G1611. Safety Precautions Always follow these safety precautions: Always keep the area around the printer clean. Use the printer under the proper lighting (500-1 000 lux). Keep sufficient space around the printer so the paper trays can be pulled forward and the printer can be serviced. Space required in the vicinity of the printer is as follows: – Front: 129.5 cm (51 inches) – Left and right sides: 76 cm (30 inches) – Rear: 15 cm (6 inches) Do not place anything on the printer. Keep this guide on a shelf nearby instead of on top of the printer. Do not open any covers (except the toner cover and paper trays) during printing operation. Personal injury might result if moving elements or electrical parts are accidentally touched. After opening the front cover, touch only blue parts. Other parts may be hot. Be particularly careful when working in the fuser unit area. Do not touch the inside of the fuser unit. The fuser unit becomes very hot, and it may cause personal injury if accidentally touched. Toner and developer mix are composed of powdery particles. Avoid inhaling toner or developer. If the toner or developer mix spill on the floor, immediately clean with a water-dampened cloth. Do not leave toner or developer mix on the floor. Developer mix may cause accidents if stepped on as it contains slippery beads of metal. Limit your operations to those described in this publication. Contact the customer engineer or service technician for operations that are not explained in this publication. Provide proper ventilation for the printer to prevent high ozone concentration. Long-term exposure should be limited to 0.1 ppm calculated as an 8-hour time weighted average concentration. Avoid installing the printer in a room smaller than or equal to 81 cubic m (1 000 cubic ft), which approximately equals a 3 x 3 m (10 x 10 ft) room. If installing in a space smaller than 81 cubic m (1 000 cubic ft), air exchange ventilation is necessary. Take care not to allow ties, sleeves, shirts, jewelry, and long hair to be caught in the printer. Be careful not to touch the hazardous parts near the caution labels. Never touch the high voltage portions of the printer (where caution labels are attached) when the printer is on. Touching these areas may cause personal injuries. 1-8 3130 User's Guide Operating Precautions Follow the procedures and instructions described in this publication to optimize printer performance and to ensure safe operation. Properly load the paper into the trays to prevent paper skew and paper jams. See “Loading Paper and Envelopes” on page 2-5 for more information. Use only paper that complies with the supply specifications, as detailed in “Choosing Forms.” Choosing Forms The following information can help you choose the most appropriate forms to use in the 3130. Also see Advanced Function Printer: Cut Sheet Paper Reference for Use with IBM Electrophotographic Printers for additional specifications to consider when choosing forms. Paper and Stock Printing on paper that does not comply with the specifications may result in paper jams and print quality degradation. The 3130 can use standard white paper, colored paper, pre-punched or drilled paper, preprinted paper, cardstock, labels, and envelopes (with optional envelope feeder installed). The following standard paper sizes are supported: A4 (210 x 297 mm) Letter (8.5 x 11 in.) Legal (8.5 x 14 in.) B4 (257 x 364 mm) Ledger (11 x 17 in.) A3 (297 x 420 mm) B5 (182 x 257 mm) The following standard envelope sizes are supported: Commercial #10 (4.5 x 9.5 in.) International DL (110 x 220 mm) Select only high quality papers and forms. IBM recommends that you initially test several reams of special use materials in your 3130 before you purchase large quantities for a given application. For more detailed information regarding pretesting, see Advanced Function Printer: Cut Sheet Paper Reference for Use with IBM Electrophotographic Printers. Paper Parameters Table 1-3 on page 1-10 summarizes recommendations that can help you and your paper supplier choose paper that is most suitable for your 3130. Chapter 1. Introducing the 3130 Printer 1-9 Table 1-3. Recommended Paper Parameters Paper Parameter Recommendation Fiber composition Preferred: 100% chemical wood pulp Acceptable: Recycled or with cotton content Color White or pastel colors Grain direction Parallel to the long dimension Cutting method Rotary precision cut (Leonids, Will, or equivalent) Cutting tolerances Length and width: ±0.787 mm (±0.031 in.) Squareness: All corners 90° ± 0°6′ Basis weight Preferred: 75 g/mò (20-lb) bond Acceptable: 60 to 160 g/mò (16- to 42-lb) bond† 200 g/mò (110-lb) index paper Smoothness (Sheffield) 100-200 Sheffield units (75 to 90 g/mò) Coefficient of static friction 0.35 to 0.62 Stiffness (Tabor Method) Machine direction: 1.7 minimum Cross direction: 0.8 minimum Moisture content 3.4 to 5.5 % Surface resistivity 5x10⁹ to 2.1012 ohms †For paper heavier than 27-lb bond, you may need to set the fuser temperature switch to the high setting. For more detailed information about paper, cardstock, and other forms, see Advanced Function Printer: Cut Sheet Paper Reference for Use with IBM Electrophotographic Printers. Label Parameters The 3130 can also print on the paper face of self-sticking adhesive-backed labels in simplex mode. Because the use of labels may cause more problems than printing on plain xerographic paper, IBM recommends that you and your label supplier consider the parameters recommended in Table 1-4 when purchasing labels: Table 1-4. Recommended Label Parameters Label Parameter Recommendation Total basis weight 60-160 g/mò Caliper 175 microns (6.8 mils) maximum Face stock smoothness 70 to 200 Sheffield units For more detailed information about labels, see Advanced Function Printer: Cut Sheet Paper Reference for Use with IBM Electrophotographic Printers. 1-10 3130 User's Guide Envelope Parameters For optimal printing results, use new 90 g/mò (24-lb) 100% chemically pulped wood, or 25% cotton bond envelopes. You should try samples of any envelopes you are considering using in your printer. This includes envelopes with rough or highly textured surfaces, such as laid finishes. The laser printing process heats envelopes to a temperature of 175°C (350°F). Only use envelopes that are able to withstand these temperatures without sealing, excessive curling, wrinkling, or releasing hazardous emissions. Check with the manufacturer or vendor of the envelopes you plan to use to determine if they are usable with laser printers, which heat them to 175°C. For optimal performance and to prevent paper jams, do not use envelopes that: Have excessive curl or twist Are stuck together Are damaged in any way Contain windows, holes, perforations, cutouts, or deep embossing Have exposed flap adhesive when the flap is placed in the sealed or closed position Have an interlocking design Have postage stamps attached Table 1-5 summarizes recommendations that can help you and your paper supplier choose envelopes that are most suitable for your 3130. Table 1-5. Recommended Envelope Parameters Envelope Parameter Recommendation Fiber composition Preferred: 100% chemical wood pulp Acceptable: 25% cotton bond Total basis weight 75 to 90 g/mò (20 to 24 lb) Note: Only commercial #10 (4.12 x 9.5 in.) and ISO DL (110 x 220 mm) envelopes that meet the conditions stated in Table 1-6 on page 1-12 are supported. Chapter 1. Introducing the 3130 Printer 1-11 Table 1-6 shows allowable dimensions for overall length (A) and width (B) of envelopes as well as limitations on flap width (F) and length (E). Table 1-6. Allowable Dimensions for Envelope Dimension Maximum Minimum A 254 mm 162 mm B 140 mm 95 mm C — 41 mm† D 200 mm 137 mm E — 110 mm F 70 mm — †The C dimension must be 41 mm or greater and the angle (O) must be larger than 0°. Preprinted Paper Preprinted paper has ink applied to it before it is used in the 3130 printer. Be sure that ink used in preprinting is non-volatile and contains drying or resin oils. Ink must not transfer when fusing temperatures are 200°C (392°F) and pressures are 450 kPA (65 lb/in.ò) for several seconds. IBM recommends the following inks: Cured by ultraviolet Cured by heat (Tinplate ink) Dried by oxidative polymerization The shaded area in the following figure should not contain printing. Printing in this area can cause false double-sheet feeds. 1-12 3130 User's Guide Prepunched Paper Prepunched paper should be flat and without deformation. Discard paper with ragged or damaged hole edges. Do not allow chads (the little paper bits that result from punching) or paper dust to adhere to the paper. Supplies with prepunched holes must conform to the following specifications: Maximum of four holes Maximum hole diameter of 10 mm (0.39 in.) Holes may not be located in or protrude into the area marked by the diagonal lines in the following figures; otherwise, the holes will be detected by the paper sensor, or the strength of the paper will decrease. Prepunched paper clearances for A4, B5, and letter-size paper are shown in Figure 1-6. Figure 1-6. Prepunched Paper Clearances—A4, B5, and Letter Size Chapter 1. Introducing the 3130 Printer 1-13 Prepunched paper clearances for A3, B4 and ledger-size paper are shown in Figure 1-7. Figure 1-7. Prepunched Paper Clearances—A3, B4, and Ledger Size 1-14 3130 User's Guide Chapter 2. Performing Basic Tasks This chapter contains information about basic, everyday printer tasks that users perform. Use this chapter for quick reference. The following general procedures are described in this chapter: Printing help pages Understanding status messages Starting print jobs and making the printer ready Interrupting printing Shutting down the printer Restarting the printer Loading paper and envelopes Changing the form name and paper assigned to a tray Handling messages Clearing paper jams Canceling print jobs Information in this chapter is intentionally brief. The following chapters contain more detailed instructions and explanations: Chapter 3, “Using the Operator Panel” Chapter 4, “Customizing the Printer” Chapter 5, “Printing and Paper Handling” Chapter 7, “Handling Operation Problems” Copyright IBM Corp. 1994, 1996 2-1 Printing Help Pages You can print internal help pages to keep near the printer for quick reference. The help pages contain: The menu tree (an illustration of the display menu options that are available on the operator panel display) A help page that contains a labeled illustration of the 3130 printer instructions for performing basic printer tasks To print the help pages, do the following: 1. Press the Menu/Exit key. HELP appears on the display. 2. Press the Enter key. PRINT HELP PAGE appears on the display. 3. Press the Enter key. Scroll to PRESS ENTER TO PRINT, and press the Enter key to request printing. The help pages will be put in the print queue. Note: If the printer is busy, the help pages may not print immediately. 4. Press the Menu/Exit key to exit the menu. If you want to change the defaults for quantity, input tray (A4, letter paper only), stacker, or duplex, scroll to each menu item and change the setting. See “Running Print Quality Samples” on page 4-13. Understanding Status Messages Status messages are displayed in status mode when no intervention messages are outstanding and the printer is not receiving data. Status messages are displayed on the operator panel two-line display. The top line shows general status messages (READY or NOT READY). The bottom line shows printer status messages (PRINTING, RECEIVING, WARMING UP, SLEEPING, or TRACING). These messages do not indicate errors; they give information about the current status of the printer. Table 2-1 lists both general status and printer status messages. Recommended user actions follow each explanation. Table 2-1 (Page 1 of 2). Status Messages and Recommended Actions 2-2 3130 User's Guide Message Recommended Action READY Description: The printer is ready to receive information from a host or network if an attachment is on line. Action: No action is required. NOT READY Description: The printer is in a stopped mode and cannot print information from a host or network. Action: Press Start to make the printer Ready. The message PRINTER HAS BEEN MADE READY appears. The printer will then start to print if a print job is waiting and an attachment is online. RECEIVING Description: The printer is receiving information from a host or network. Action: No action is required. PRINTING Description: The printer is printing a print job. Action: No action is required. Table 2-1 (Page 2 of 2). Status Messages and Recommended Actions Message Recommended Action WARMING UP Description: The printer is warming up. The printer will be ready to print in 1 to 5 minutes. Action: Wait for the printer to warm up. If the printer is Ready, it will start printing as soon as it warms ups (if print jobs are waiting). SLEEPING Description: The printer is in sleep mode, which means the fuser has turned off due to inactivity. The fuser will turn on and the printer will warm back up when it receives a print job or, if the printer is in the Not Ready state, when the Start key is pressed. Action: No action is required. TRACING Description: The printer is tracing an application or attachment. The tracing operation may slow down throughput and should be turned off when not needed. Action: No action is required. Contact the key operator or customer engineer if you think the tracing function was left on in error. You can scroll to see other messages (if present). Press the down arrow key to display the messages. Starting Print Jobs and Making the Printer Ready To start (or continue) print jobs, do the following: 1. After performing the recovery action (listed in Appendix A, “Display Messages and Codes”), press Enter to clear any existing error conditions. 2. Press Start. Any pending print jobs will continue or begin printing. If you press Start again, the message ALREADY STARTED is displayed. Interrupting Printing If you want to temporarily stop printing, you can do so at any time. No print job information will be lost. Any print jobs currently printing will continue after you start the printer again. To interrupt printing, do the following: 1. Press Stop. The printer will complete printing the current page and any other page that is in the print queue. The message STOPPING... appears while the printer finishes printing. When printing has stopped, the message PRINTER HAS BEEN MADE NOT READY is displayed. If you press Stop again, the message ALREADY STOPPED is displayed. 2. If you wish, you may run internal prints, load paper into empty trays, and so on. 3. Press Start to continue printing. Chapter 2. Performing Basic Tasks 2-3 Shutting Down and Powering Off the Printer A shutdown closes all active functions, disables communications and attachments, and stops all programs. After the shutdown is completed, a power off and power on is required to start the printer again. Attention: Always shut down the printer before powering off. To shut down and power off the printer, do the following: 1. If the printer is Ready, press Stop. 2. Press Menu/Exit to enter menu mode. HELP is displayed. 3. Press the down arrow key until SYSTEM SHUTDOWN is displayed and press Enter. PRESS ENTER TO SHUTDOWN is displayed. Press Enter to begin the shutdown. 4. Wait for the message SHUTDOWN DONE-POWER OFF to be displayed before you power off. 5. Press the power switch (on the right side of the printer) to the Off (O) position to power off the printer. Note: An alternate method to shut down the printer: Press at the same time the Down Arrow, Enter, and Start keys. Wait for the SHUTDOWN DONE-POWER OFF message to appear before you power off the printer. Restarting the Printer A restart is similar to a shutdown, but the printer starts up again automatically after the shutdown. Restart the printer only when instructed to do so in recovery actions. To restart the printer, do the following: 1. Press the Power On switch (on the right side of the printer) to the On (I) position to power on the printer. 2. Press Menu/Exit to enter menu mode. HELP is displayed. 3. Press the down arrow key until SYSTEM SHUTDOWN is displayed, and press Enter PRESS ENTER TO SHUTDOWN is displayed. 4. Press the down arrow key until PRESS ENTER TO RESTART is displayed and press Enter to begin the restart. 5. Wait for the restart procedure to complete. If the printer displays the message NOT READY, press Start to make the printer Ready, so the printer can print waiting print jobs. Note: If the On Line indicator light is not lit, the printer attachments and/or applications may need to be enabled. Contact the key operator to enable the attachments. 2-4 3130 User's Guide Loading Paper and Envelopes An OUT OF PAPER message is displayed on the operator panel whenever a tray is empty. The message names the empty tray. Refer to these labeled illustrations to determine which tray is out of paper. The printer may have up to six trays depending on the model and options installed. Paper Positioning and Guidelines Refer to the drawings below to ensure that you load the paper in the correct position for that paper size. Chapter 2. Performing Basic Tasks 2-5 When loading paper, follow these guidelines to prevent paper jams and stacking problems: Do not use paper that is creased, folded, or damaged. Rewrap partially used reams to maintain moisture content. Pull firmly on the trays to open them. Load only one size and type of paper into a tray. Do not add small amounts of paper on top of paper already in the tray. Do not overfill the tray. Do not load paper above the red line marking (in all front trays). See “Loading Paper” on page 5-6 for detailed instructions. Envelope Positioning and Guidelines Refer to the drawings below to ensure that you load the envelopes in the correct position in the envelope feeder. When loading envelopes, follow these guidelines to prevent paper jams and stacking problems: Do not use envelopes that have excessive curl or twist, are stuck together, or are damaged in any way. Do not use envelopes that contain windows, holes, perforations, cutouts, or deep embossing, or that have exposed flap adhesive when the flap is placed in the sealed or closed position. Do not use envelopes that have an interlocking design or have postage stamps attached. Load only one size and type of envelope into the envelope feeder. Do not overfill the envelope feeder. Do not load more than 100 envelopes into the envelope feeder. See “Loading Envelopes into the Envelope Feeder” on page 5-18 for detailed instructions. 2-6 3130 User's Guide Changing the Form Name or Paper Assigned to a Tray If you have changed the form loaded in a tray, you may need to change (or verify) the form name assigned to that tray. Do this when the message CHECK FORM NAME FOR TRAY is displayed on the operator panel. To clear the message and change the form name assigned to a tray: 1. Press Enter to clear the message. 2. Press Menu/Exit to enter menu mode. 3. Press the down arrow key until TRAYS/STACKERS is displayed. Press Enter. 4. Press the down arrow key until the input tray for which you have changed the loaded form is displayed. Press Enter. 5. Press the down arrow key until FORM NAME is displayed. Press Enter. 6. Press the down arrow key until the form name loaded in the tray is displayed. Press Enter. Note: If there is only one form name with the form size you have loaded in the tray, the printer will automatically choose that form name. Handling Messages When you see a message that indicates an error condition, do the following: 1. Find the display message (and code, if present) in Appendix A, “Display Messages and Codes.” 2. Perform the recovery action recommended for the displayed message and code. 3. Press Enter to clear the message. 4. Press Start to continue printing. Clearing Paper Jams The printer stops printing when a misfeed occurs, and the message PAPER JAM is displayed on the operator panel. Do the following to clear the paper jam and the error message: 1. Check the operator panel intervention indicators. 2. If an arrow indicator light is lit, open the corresponding side door and empty the paper, starting with the upper door, before you open the front cover or trays. 3. If the top stacker arrow indicator light is lit, clear paper from that area. 4. Check the intervention indicators again. If any lights remain lit, clear the paper from the corresponding area. Paper jams may occur in several areas of the printer. Check the paper path thoroughly and remove all paper along the paper path according to the procedures described in Chapter 7, “Handling Operation Problems.” 5. When all the paper is removed and all indicator lights are off, press Enter to clear the error message from the operator panel. Chapter 2. Performing Basic Tasks 2-7 The message NOT READY, WARMING UP, or SLEEPING may appear on the display. 6. Press Start to continue printing. The pages removed from the paper path are reprinted automatically when the printer starts printing again. If the printer is warming up, printing may take a few minutes to start. Note: To ensure that no data is lost, the 3130 may print a few extra pages. Canceling Print Jobs You can cancel a print job once that print job has started printing. To cancel a print job, do the following: 1. Press Stop to stop the printer. 2. Check the output stacker after all sheets have been ejected. Note: If the print job you want to cancel has finished printing, do not cancel printing or the next print job will be canceled. 3. If the print job has started but has not yet finished printing, press Cancel Print. Note: If there are no jobs in the print queue, the message NO PRINT JOBS TO CANCEL appears. 4. When the prompt message SELECT STACKER TO CANCEL appears, press Enter. A list of stacker names displays. Scroll to the stacker that is being used for your job and press Enter. If you do not want to cancel printing, press the down arrow key to display RETURN, and press Enter. The print job is not canceled. 5. Press Start to continue printing other print jobs. Canceling Internal Print Jobs If you are printing pages generated by the printer itself and not from the data stream, such as help pages or print quality samples, you can cancel the print job at any time by pressing any key on the operator panel. 2-8 3130 User's Guide Chapter 3. Using the Operator Panel This chapter describes the operator panel. The operator panel consists of input keys, display, status indicators, and intervention indicators. The operator panel is used to: Display messages .Show the printer status Indicate the location of paper jams Configure and control the printer This chapter describes each portion of the operator panel: Input keys Display Status indicators Intervention indicators Beeper This chapter also contains a tutorial to help you use the keyboard to enter or change your password. Copyright IBM Corp. 1994, 1996 3-1 Input Keys The input key area of the operator panel consists of eight input keys, which are used to: Change the state of the printer to Ready or Not Ready, using the Start and Stop keys Change between status mode and menu mode, using the Menu/Exit key (see “Display” on page 3-4 for more information about status mode and menu mode) Navigate and select items in the menu, using the Scroll Up and Scroll Down keys and the Enter key Each input key is described below. Scroll Up Use the Scroll Up key to scroll up through the menu mode items. You can also use the Scroll Up key to access and scroll through informational messages, aborts, and program checks. Each time you press the key, the previous menu item or message displays. The Scroll Up key operates in a circular scroll fashion; when the top item on a list has been displayed, the menu rolls over to the last item, and scrolling continues. If you press the Scroll Up key when there is no information to scroll through or access, the key press is ignored. No action occurs. Scroll Down Use the Scroll Down key to scroll down through the menu mode items. You can also use the Scroll Down key to access and scroll through status and information messages. Each time you press the key, the next menu item or message displays. The Scroll Up key operates in a circular scroll fashion; when the top item on a list has been displayed, the menu rolls over to the last item, and scrolling continues. If you press the Scroll Down key when there is no information to scroll through or access, the key press is ignored. No action occurs. 3-2 3130 User's Guide Menu/Exit If the display is in status mode, use the Menu/Exit key to switch the display to menu mode. While in the menu mode, you can scroll through the list of items with the scroll keys and select items using the Enter key. If the display is in menu mode, use this key to exit from the menu and switch the display to status mode. Enter While in menu mode, use the Enter key to: Navigate between menu levels Select a choice on a menu Initiate an action Accept a character or operation for keyboard input While in keyboard input mode, use the Enter key to select a character, proceed after an error is posted, or select the keyboard edit operations. See “Using the Keyboard” on page 3-11 for more information about using the Enter key in keyboard input mode. While in status mode, press the Enter key to clear an information or error message. Page Eject When ASCII jobs are printing, use the Page Eject key to force a page to print (for applications that do not send a page eject until the page buffer is full). Note: This key functions for PC parallel attachments only. When IPDS jobs are printing, this key is not active. Cancel Print This key is active only when the printer is receiving or processing a print job and the printer is in the Not Ready state. (You can put the printer into the Not Ready state by pressing the Stop key.) If you press the Cancel Print key when there are no jobs in the print queue, the message NO PRINT JOBS TO CANCEL appears. If you press the Cancel Print key when the printer is not stopped, a message is issued telling you to stop the printer. After the job is canceled at the printer, the job is deleted at the host queue. This key also cancels internal print jobs (those originated at the printer). Verification is required: When you press the Cancel Print key, the message SELECT STACKER TO CANCEL appears. When you select the output stacker assigned to the print data stream (either the base, upper, or side stacker) and press Enter, the print job is canceled. A CANCEL COMPLETE message indicates that the print job was canceled. To avoid canceling the print job after pressing the Cancel Print key, scroll to RETURN and press the Enter key. The printer continues as though the Cancel Print key had not been pressed. Note: To avoid canceling another person's print job, verify that the job that is printing is the job you want to cancel. After you press Stop, wait until pages are ejected into the stacker. Check those pages. If the print job you wish to cancel has not finished printing, proceed to cancel the print job. If the print job has finished printing, do not cancel it, because this would cancel the next print job sent to the printer. Chapter 3. Using the Operator Panel 3-3 Start Use the Start key to initiate a request for the printer to change to a Ready state. Printing proceeds only when the printer is Ready. You can also use the Start key to attempt to clear some errors and interventions. Preventive maintenance messages are not cleared. Start is inactive when the printer is in a Ready state. Stop Use the Stop key to initiate a request for the printer to change to a Not Ready state. If you press the Stop key while the printer is printing, the printer continues to process the current pages. When processing is completed, the printer stops. The Stop key is inactive when the printer is in a Not Ready state. Stop does not cancel a print job, internal or external. Print jobs are canceled using the Cancel Print key (even while in menu mode). The Stop key stops the printer until the Start key is pressed. At that time, the printer continues what it had been doing at the stop. Display The LCD display area of the operator panel consists of two rows of 16 characters each. The following types of information can be displayed: Printer status Intervention conditions Menu operations The display operates in two modes: status mode and menu mode. These are described in detail in the following sections. The display text can appear in one of the following languages, which the operator can select: English, German, French, Spanish, Brazilian Portuguese, Japanese, Italian, or Dutch. 3-4 3130 User's Guide Status mode Status mode is the normal operating mode. In status mode, the two-line display contains messages that provide the following types of information: General status messages (READY or NOT READY) are displayed when no intervention messages are outstanding and the printer is not receiving data. Printer status messages (RECEIVING, PRINTING, WARMING UP, SLEEPING, or TRACING) are displayed when no intervention messages are outstanding and the printer is not receiving data. These messages indicate the current condition of the printer. Notification that replaceable supplies are low or need to be replaced. Error messages when the printer encounters difficulty. Confirmation of requested actions. See Appendix A, “Display Messages and Codes” for a list of messages and their meanings. Menu Mode In menu mode, the display shows menus and submenus from which you select choices to: Print the help pages Enable and disable trays and stackers Perform actions such as shutting down and restarting the printer Replace supplies Configure the printer and its attachments Perform printer setup functions, such as printing samples, setting machine configuration parameters, defining forms, viewing machine information, adjusting print, changing passwords, and printing current printer configuration The menu options are arranged in a “menu tree,” which shows the basic menu choices. See “Menu Tree” on page 3-7 for an illustration of the menu tree. Not all menu items are shown. Using the Display in Menu Mode Use the menu to configure the printer and its attachments and to perform actions such as shutting down the printer and entering the password to access password-protected items. Menu items are arranged in a “menu tree.” “Menu Tree” on page 3-7 illustrates the basic menu choices available in menu mode. Not all menu items are shown. From each main-menu item, you select the second-level submenu item. From the second-level submenu item, you select the third level submenu items, and so on. Chapter 3. Using the Operator Panel 3-5 Entering and Exiting Menu Mode To enter menu mode from status mode, press the Menu/Exit key. To exit menu mode, press the Menu/Exit key. Navigating through the Menu Items When using the display in menu mode, the arrow keys and the Enter key become navigation and selection keys. Use the Up Arrow key to scroll up through the menu and submenu items. When you scroll, the items wrap so that you can access all items by scrolling either up or down. Use the Down Arrow key to scroll down through the menu and submenu items. When you scroll, the items wrap so that you can access all items by scrolling either up or down. Use the Enter key to: Select the main menu item and access its submenu. Select a submenu item and access its submenu. Entering a Password to Access Menu Items The 3130 password feature limits access to some menu items that are restricted to either the key operator or the customer engineer. When you try to access a restricted menu item, the message ENTER KEY OP PASSWORD or ENTER CE PASSWORD appears on the display. If you are a user not assigned to key operator duties, you cannot access that menu item. All SERVICE menu items are restricted to the customer engineer. If you see a request for a password and you are a user without a password, do the following: 1. Press Enter to clear the message. 2. Press the Up Arrow or Down Arrow key until <CANCEL> is displayed, and press Enter. Either return to the parent menu item or press Menu/Exit to exit menu mode. A user who is not assigned key operator duties can access submenu items only under the following main menu items: HELP TRAYS/STACKERS SYSTEM SHUTDOWN Key operators can practice entering a password by completing the tutorial on 3-17. 3-6 3130 User's Guide Selecting Settings and Actions in the Menu Use the Enter key to: Select and save a submenu setting from a list, such as any of the following: – Printer configuration items such as BEEPER>ERROR>OFF – Attachment configuration items such as ETHERNET>ENABLE STATUS>ENABLE – Tray settings such as MAIN TRAY>AUTOSWITCH>NONE Select characters for a unique value (on the keyboard), such as any of the following: – Attachment configuration items such as XID NUMBER – Number of print samples desired – Key operator password Select and save a keyboard entry when you have completed it. Select and perform an action, such as: PRESS ENTER TO SHUT DOWN PRESS ENTER TO RESTART Items that are currently selected are indicated by an asterisk (*). When only one item can be selected from a list of choices, * indicates which item is selected. When you select an item that is not selected, an * appears to the left of the item to indicate that it is now selected. Pressing Enter on an item that is preceded by * returns the display to the parent menu item. Menu Tree Menu items are arranged in a “menu tree.” The following pages contain illustrations of the basic menu choices available in menu mode. Not all menu items are shown. From each main-menu item, you select the second-level submenu item. From the second-level submenu item, you select the third-level submenu items, and so on. The first two pages show the available main menu items: HELP TRAYS/STACKERS SYSTEM SHUTDOWN SUPPLIES ATTACHMENTS SETUP SERVICE The third page shows the detailed menu items available for MACHINE CONFIGURATION. Chapter 3. Using the Operator Panel 3-7 3-8 3130 User's Guide Chapter 3. Using the Operator Panel 3-9 3-10 3130 User's Guide Using the Keyboard Some settings in the menu cannot be selected from a list of choices. Instead, you select from a scrollable field known as the keyboard. The contents of the keyboard can vary. Only those characters that are appropriate for the particular setting are displayed. Possible items are: Letters of the alphabet Numbers Symbols Editing Operations Parts of the Display—Keyboard Mode When you are using the keyboard, the bottom line if the display contains keyboard choices. The top line contains your input. As you select characters from the keyboard line, they are displayed on the top line. Accessing the Keyboard The keyboard appears when you press the Enter key when a submenu item that requires unique input is displayed. The keyboard characters and editing operations appear between < and > symbols on the second line of the display. Only one keyboard character or operation is displayed at a time. Note: <OK> appears on the keyboard only after you have made an acceptable selection. Chapter 3. Using the Operator Panel 3-11 Keyboard Order Only those characters needed for the specific submenu items you have selected are displayed. Figure 3-1 shows all possible characters and operations in the order that they appear on the keyboard. Not all characters appear on the keyboard for each submenu item. You can access all valid characters by scrolling either up or down (using the Up Arrow key or the Down Arrow key). Figure 3-1. Keyboard Scrolling Order 3-12 3130 User's Guide Navigating through the Keyboard Because you can see only one keyboard character at a time, you must scroll through the characters one by one until you see the character you want to select. Use the Up Arrow and Down Arrow keys to move (scroll) through the keyboard. The following figure shows the use of the Down Arrow key to scroll to the letter <A>. Selecting a Keyboard Character When you have scrolled down to the keyboard character you want to select, press Enter. The selected keyboard character is then placed on the input line (the top line) of the display, and the keyboard line (always the second line) returns to its starting keyboard character <OK>. You can then choose the next character or value. The following figure shows the resulting display after you press Enter to select the letter <A>. Selecting and Saving Your Keyboard Entry Press Enter when <OK> is displayed on the keyboard line to select your completed keyboard entry. After you have finished selecting all the keyboard characters for your entry, press Enter to select <OK>. The entry is selected and saved, and you return to the submenu item for which you made the entry. Chapter 3. Using the Operator Panel 3-13 Editing Keyboard Entries If you want to change one of your keyboard character selections, use the edit operations <BACKSPACE>, <CLEAR>, or <CANCEL> as follows: <BACKSPACE> Discards the previous character and displays <BACKSPACE> on the bottom line of the keyboard. <CLEAR> Deletes all characters from the top (input) line. <CANCEL> Discards any changes to the previous entry and returns to the parent menu item. Canceling Keyboard Entries If you want to cancel your entry before you have saved it, select <CANCEL> on the keyboard. Do this by scrolling up or down to the <CANCEL> keyboard entry and then pressing the Enter key. Status Indicators Five status indicators on the right side of the operator panel indicate printer activity and existing conditions: Attention Job/Processing Duplex On Line Power During the power-on procedure, the Power indicator flashes. After the printer is powered on, the indicators light up depending on printer activity and existing conditions. Attention The Attention indicator lets you know when a condition exists that requires your attention. The Attention indicator has three states. Table 3-1 on page 3-15 describes each state and any recommended actions. 3-14 3130 User's Guide Table 3-1. Attention Indicator State Descriptions State Description/Action Blinking Description: A new condition requiring attention exists. The message on the display shows the condition. Action: Perform the recovery action (listed in Appendix A, “Display Messages and Codes”), or press Enter to clear the message. The blinking will stop when the condition is corrected or the message is cleared. On Description: One or more unresolved conditions exist. Action: To view any unresolved conditions, press the Down Arrow key (while in status mode). You can scroll down to see messages such as DEVELOPER MIX: CHANGE SOON. In some cases, you can delay performing the recovery action for the unresolved condition (for example, messages indicating that a supply needs changing soon). Other unresolved conditions require correction before the printer can continue printing. (not blinking) Off Description: No new or unresolved conditions that require attention. Action: None. Job/Processing When the Job/Processing indicator is lit, data is currently being received, processed, or printed. When the indicator is not lit, there is no data to be processed. Duplex The Duplex indicator light indicates when the 3130 is printing in duplex mode. On Line The On Line indicator is lit when any attachment with a corresponding application is enabled. The indicator is not lit when all attachments are disabled. Power The Power indicator shows whether the printer power is on or off. When the printer is started, the Power indicator lights up and remains lit until the printer is powered off. The Power indicator blinks during the power-on procedure. Chapter 3. Using the Operator Panel 3-15 Intervention Indicator Lights The left side of the operator panel contains a printer icon in a configuration that closely matches that of your model printer. There are several intervention indicator lights within the printer icon. Each intervention indicator light identifies an area in the paper path. The intervention indicator lights show: The location of a paper jam (paper jam indicators 1-13) The door or cover to be opened when a paper jam occurs (arrow indicators A, B, C) A toner low condition (toner indicator) When an intervention indicator light is turned on, it indicates the location in the printer where a problem exists. There may be more than one intervention indicator light turned on at any one time. When the printer senses a problem, you may be required to perform a recovery action, also known as an intervention. The first step you should take is shown by an arrow indicator light that is turned on. The display will have a message that corresponds to the intervention indicator light. After the intervention resolution has been completed, the indicator light usually turns off within one second. See “Using Paper Jam Indicator Lights to Locate Paper Jams” on page 7-2 for paper jam recovery information. Paper Jam Indicator Lights When a paper jam occurs, the printer stops printing, and the paper jam indicator lights show where the paper jam has occurred. See “Clearing a Paper Jam” on page 7-3 for instructions on clearing paper jams. Toner Indicator Light The toner indicator light turns on when the toner supply is low. See “Replacing the Toner Cartridge” on page 6-5 for instructions on adding toner to maintain print quality and printer operation. 3-16 3130 User's Guide Beeper Two types of audible cues are available. The first is the error beeper, which sounds when a condition requiring intervention occurs. The second is the feedback that is given when an input key is pressed. Each of these cues is configured using menu options under the SETUP main menu. Error Beeper Menu options used to configure the error beeper are described in the following table. Menu Option Description TIMED The error beeper sounds for three minutes or until a key is pressed. This is the original factory setting. CONTINUOUS The error beeper sounds until the intervention is cleared or any key is pressed. OFF The error beeper does not sound. Keys Beeper Menu options used to configure the keys beeper are described in the following table. Menu Option Description ON The beeper sounds when a key is pressed (except when the keyboard is displayed). OFF The beeper does not sound when a key is pressed. If you press a key at a time when it is not accessible, the key press is ignored. However, if the keyboard beeper is turned on, a beep sounds when you press an input key. Tutorial: Using the Menu to Enter a Key Operator Password The following tutorial is a hands-on exercise for key operators. It is designed to provide practice in navigating through the menu and using the keyboard. Skills Covered In this tutorial, you will learn how to: Enter and exit menu mode. Navigate through the menu. Make menu selections. Use the keyboard. Enter a key operator password. Chapter 3. Using the Operator Panel 3-17 Prerequisites This tutorial steps you through the process of entering an incorrect and then a correct key-operator password. In order for the steps in this tutorial to accurately reflect what you will see displayed on your printer operator panel, the following conditions must be met: You have key operator authorization. The customer engineer has set up a key-operator password. You know this key-operator password. The printer is in status mode. Instructions The hands-on steps that follow instruct you to enter the password A1. This is not your correct password; you will enter it as a learning exercise. After entering the incorrect password, you will be instructed how to clear it. You will then be asked to enter your correct password. Follow the steps below. 1. Press the Menu/Exit key to change to menu mode, if it is not already in menu mode. 2. Press the Down Arrow key several times until you see SETUP displayed. 3. Press the Enter key to select SETUP. Access to SETUP menu items requires key-operator authorization. A prompt message appears asking you to enter the key-operator password. 3-18 3130 User's Guide 4. Press Enter again. The first item <OK> in the keyboard is displayed on the second line. <EMPTY> appears on the top line until you select a character and press Enter (see step 6). 5. Press the Down Arrow key several times to scroll to the letter <A>. 6. Press Enter to select the letter A. The selected character appears on the top input line. The keyboard line returns to the first item <OK>. 7. Press the Up Arrow key several times to scroll to the number <1>. Chapter 3. Using the Operator Panel 3-19 8. Press Enter to select the number 1. The keyboard line returns to the first item <OK>. 9. Press Enter again to select the entire entry (by selecting <OK>). Because you have not entered your correct password, the message PASSWORD INCORRECT is displayed Note: The remaining steps are editing steps. They instruct you to clear the PASSWORD INCORRECT message. 10. Press Enter to return to the keyboard and the previously entered password. 3-20 3130 User's Guide 11. Press the Up Arrow key to scroll to <CLEAR>. 12. Press Enter to clear (erase) the incorrect password. 13. Enter your own password using the same procedure you have used in this tutorial. After you have successfully entered your password, PRINT SAMPLES (the first submenu item under SETUP) is displayed. 14. Press Menu/Exit to exit menu mode. Chapter 3. Using the Operator Panel 3-21 3-22 3130 User's Guide Chapter 4. Customizing the Printer This chapter gives you step-by-step instructions for customizing your printer to match your particular printing environment and requirements. You can use the operator panel display to change the printer settings and thus customize the way the printer operates. Changing the settings is called configuring. You can configure the trays, stackers, printer attachments, and printer setup. In this chapter you will find instructions for: Configuring the input trays Configuring the output stackers Configuring the printer Running print quality samples Running the demonstration pack Adjusting the print (IPDS only) Changing the key-operator password Defining forms Viewing machine information Configuring attachments Copyright IBM Corp. 1994, 1996 4-1 Configuring Input Trays Both users and key operators can configure certain items relating to the paper input trays. A user or key operator can do the following: Change the paper size and form name assigned to each tray. Select an autoswitch tray. Enable and disable trays (key operator only). Note: Always adjust the input tray itself for the correct paper size before configuring that tray. See the instructions for loading trays in Chapter 5, “Printing and Paper Handling.” Tray Names Each model of the 3130 printer may have a different set of standard and optional trays and stackers. The figure below shows each model with all possible trays installed. Your printer may not have all these trays installed. Possible input trays are: Top front tray Upper sub tray Lower sub tray Main tray Envelope feeder Side tray 4-2 3130 User's Guide Note: Paper input (feeding) receptacles are called trays. Paper output receptacles are called stackers. Enabling and Disabling Trays The key operator can enable or disable any of the input trays. If a tray is enabled, it can be used by the printer. If a tray is disabled, it cannot be used. You may want to disable a tray if it is having problems (for example, frequent paper jams). To enable or disable a tray, do the following: 1. Press the Menu/Exit key to enter menu mode. 2. Scroll to the TRAYS/STACKERS menu and press Enter. 3. Scroll to the input tray you want to enable or disable, and press Enter to make the selection. 4. Press Enter on ENABLE STATUS. You may be prompted to enter the key-operator password. 5. Scroll to ENABLE, and press Enter to enable the tray. Scroll to DISABLE, and press Enter to disable the tray. Note: When you disable a tray that has been designated as the autoswitch tray for another tray, the informational message AUTOSWITCH NO LONGER VALID appears. Press Enter, if necessary, to clear this message. Chapter 4. Customizing the Printer 4-3 Tray Selection Defaults If the host or network does not tell the printer which tray to use, the printer uses the following order of priority. All trays may not be present on your printer model. Priority 1 2 3 4 Model 01S Simplex Model 02S High-Capacity Simplex Model 02D Duplex and Model 03S Simplex Side Tray Top Front Tray Main Tray Side Tray Lower Sub Tray Upper Sub Tray Main Tray Side Tray Lower Sub Tray Upper Sub Tray Note: Default input trays can be configured by data streams. If the selected tray is not available because the tray is out of paper, has the wrong paper size, or is removed, the printer stops printing, and a message appears on the operator panel display. See Appendix A, “Display Messages and Codes” for a list of messages and their meanings. Changing the Form Name and Paper Size Assigned to a Tray If you have changed the form loaded in a tray, you need to change (or verify) the form name assigned to that tray. Printing media (paper, forms, and envelopes) used in the printer are called forms. If there are user-defined forms (defined for specific customer needs, such as preprinted paper), the paper size may be the same for several user-defined forms. Each defined form has a unique form name. You can assign only one form name to a tray at any one time. The side tray handles only letter and A4 size paper. All other trays handle the following paper sizes: letter, legal, ledger, A3, A4, B4, and B5. The envelope feeder handles only #10 or DL envelopes. Note: Always adjust the input tray itself before configuring that tray. Only those form names that match the paper size of the current adjusted tray are available for configuration. To change the form name assigned to a tray: 1. Press the Menu/Exit key to enter menu mode. 2. Scroll to the TRAYS/STACKERS menu and press Enter. 3. Scroll to the input tray for which you have changed the loaded form and press Enter to make the selection. 4. Scroll to FORM NAME and press Enter. 5. Scroll to the desired form name and press Enter. 4-4 3130 User's Guide Notes: 1. When loading a new form into a tray, if there is only one form name defined with the form size you have loaded in the tray, the printer will automatically choose that form name. If several defined form names have the same size as the one you have loaded, the message CHECK FORM NAME IN MENU appears. You must then verify or change the form name assigned to the tray. 2. If you change the form name loaded in a tray that has another tray designated as the autoswitch tray or has been previously designated as the autoswitch tray for another tray, then the informational message FORM MISMATCH FOR AUTOSWITCH appears. Press Enter, if necessary, to clear this message. Selecting an Autoswitch Tray You can select an input tray that will automatically start feeding paper when the originally selected tray becomes empty. When an autoswitch tray has been assigned to the original input tray, you can reload that original tray after it is empty and not interrupt printing. An autoswitch tray is used only when the original tray becomes empty; it is an alternate tray. Notes: 1. The original factory setting for autoswitch tray is NONE. 2. Before designating an autoswitch tray, you must first select the original tray. 3. You can return the autoswitch tray designation to NONE at any time a job is not printing. Do the following to designate an autoswitch tray: 1. Press the Menu/Exit key to enter menu mode. 2. Scroll to the TRAYS/STACKERS menu and press Enter. 3. Scroll to the original input tray for which you wish to assign another tray as the autoswitch tray and press Enter to make the selection. See the example below. 4. Scroll to AUTOSWITCH and press Enter. 5. Scroll to the autoswitch tray name and press Enter. It becomes the autoswitch tray for the tray selected in Step 3. Example: The following example selects the side tray as the autoswitch (alternate) tray for the main tray (original). The procedure is as follows: 1. Press the Menu/Exit key to enter menu mode. 2. Scroll to the TRAYS/STACKERS menu and press Enter. 3. Scroll to MAIN TRAY and press Enter. 4. Scroll to AUTOSWITCH and press Enter. 5. Scroll to SIDE TRAY and press Enter. Chapter 4. Customizing the Printer 4-5 Notes: 1. The autoswitch tray must be loaded with the same form name as the original tray. If you choose an autoswitch tray that has a different form name loaded in it, the message WRONG FORM IN AUTOSWITCH TRAY is displayed. You must then choose a different autoswitch tray. 2. If you choose an autoswitch tray that is disabled, the message AUTOSWITCH TRAY NOT ENABLED is displayed. You must then choose a different autoswitch tray. (If you do not choose another one, there will be no autoswitch tray.) 3. If someone changes the form name loaded in an autoswitch tray, that tray will no longer act as an autoswitch tray. 4. If no autoswitch tray is selected, the job will stop printing when the original tray is empty. 5. Before designating an autoswitch tray, you must first select the original tray. Tray Name Correspondence The tray names used by the printer are descriptive to make it easier to identify the trays. However, when users send print jobs to the printer from their workstations, they may be selecting input and output trays labeled with numbers. Table 4-1 shows the correspondence between input bin numbers and printer tray names and between output bin numbers and printer stacker names. Remember that not all models have all trays and stackers installed. Note: Select the base stacker or upper stacker for all label printing. Table 4-1. Input Bin and Output Bin Numbers Input Bin Number 3130 User's Guide Capacity (No. of Sheets) 1 Main Tray 2 Lower Sub Tray 250 3 Upper Sub Tray 250 4 Side Tray 500 5 Envelope Feeder 100 6 Top Front Tray 250 Output Bin Number 4-6 Printer Tray Name Printer Stacker Name 2 000 Capacity (No. of Sheets) 1 Base Stacker 500 2 Upper Stacker 500 3 Side Stacker 1 500 Configuring Output Stackers Only key operators can configure the output stackers. Three tasks compose stacker configuration: Enable and disable stackers. Turn the offset stacking function on or off. Autolink the stackers. Stacker Names Each model of the 3130 printer has standard and optional trays and stackers. The following figure shows each model with all possible stackers. Your printer may not have all these stackers installed. Possible output stackers are: Upper stacker Base stacker Side stacker Note: Paper input (feeding) receptacles are called trays. Paper output receptacles are called stackers. If the printer has only a single top stacker, it is called the base stacker. Chapter 4. Customizing the Printer 4-7 Enabling and Disabling Stackers The key operator can enable or disable any of the stackers. If a stacker is enabled, it can be used by the printer. If a stacker is disabled, it cannot be used. To enable or disable a stacker, do the following: 1. Press the Menu/Exit key to enter menu mode. 2. Scroll to the TRAYS/STACKERS menu and press Enter. 3. Scroll to the stacker you want to enable or disable and press Enter. 4. Press Enter on ENABLE STATUS. You may be prompted to enter the key-operator password. 5. Scroll to ENABLE, and press Enter to enable the stacker. Scroll to DISABLE, and press Enter to disable the stacker. Stacker Selection Defaults If the data stream is not configured for a specific stacker and the print job does not instruct the printer which stacker to use, the following order of priority is followed: Base stacker Upper stacker Side stacker Note: Not all stackers are installed on all printers. If the selected stacker is not available because it is full, the job stops printing and a message is displayed. Setting Offset Stacking When a stacker has the offset stacking function turned on, print job separation is indicated by the jogging of forms at the beginning of each print job. This is known as offset stacking. 4-8 3130 User's Guide You can configure each stacker so that the offset stacking function is enabled or disabled. Selecting Offset Stacking To enable or disable the offset stacking function, do the following: 1. Press the Menu/Exit key to enter menu mode. 2. Scroll to the TRAYS/STACKERS menu and press Enter. 3. Scroll to the name of the stacker for which you want to enable or disable offset stacking and press Enter. You may be prompted to enter the key-operator password. 4. Scroll to OFFSET STACKING and press Enter. 5. Scroll to YES, and press Enter to set offset stacking. Scroll to NO and press Enter to turn off offset stacking. Autolinking the Output Stackers The key operator can autolink the output stackers. When the stackers are autolinked, the printer automatically switches to another stacker when the first stacker becomes full. The printer continues doing this until all stackers are full. You can set autolinking to YES or NO. The printer selects the order in which the stackers are filled, starting with the side stacker (if installed and enabled). Any stacker that is installed and enabled is used in autolinking. If a stacker is disabled or is not installed, it is not used. The following table shows the order in which the printer fills the enabled and installed stackers. Your printer may not have all stackers installed. Autolink Order Stacker 1 Side stacker 2 Base stacker 3 Upper stacker Selecting Autolinking To select autolinking, do the following: 1. Press the Stop key (if the printer is Ready) to make the printer Not Ready. 2. Press the Menu/Exit key to enter menu mode. 3. Scroll to the TRAYS/STACKERS menu and press Enter. 4. Scroll to AUTOLINK OUTPUT STACKERS and press Enter. You may be prompted to enter the key-operator password. 5. Scroll to YES and press Enter to select autolinking. Scroll to NO and press Enter to deselect autolinking. 6. Press the Menu/Exit key to exit menu mode (if desired). 7. Empty all the stackers before pressing Start to continue printing. Chapter 4. Customizing the Printer 4-9 Note: When using autolinked stackers, be sure to completely empty all the stackers before starting or continuing a print job. If a print job is being continued, the pages that are printed after autolinking has been selected will be sent to the first stacker in the autolink order. Clearing Autolinked Stackers When the stackers are autolinked, stacker-specific STACKER FULL messages are displayed as each stacker becomes full. However, the printer stops printing only after all enabled stackers become full. When all stackers are full and the printer stops printing, the autolinked stackers can be cleared. To clear the autolinked stackers, do the following: 1. Completely empty all stackers. The STACKER FULL messages no longer appear. 2. Press Start to continue printing. Printing does not continue if any of the stackers are full. Note: To ensure job integrity, do not press Start until all stackers are completely empty. Although the printer does not stack forms in full stackers, it does stack forms in partially full stackers. Note: If you want to reset the autolink stacker function and start sending pages to the first stacker in the autolinking order, do the following: 1. Press and hold the Enter key. 2. Press the Page Eject key. 3. Release both keys. Configuring the Printer There are several choices you can make regarding how your printer functions. Establishing the setup that best suits your particular printing environment involves configuring the printer using the SETUP > MACHINE CONFIGURATION menu items. Only a key operator or customer engineer can configure the printer. Configuration Menu Items Some of the items on the Machine Configuration Menu are discussed in this book and others are discussed in the 3130 Advanced Function Printer: System Administration Guide. 4-10 3130 User's Guide Job Management System Administration Guide, Chapter 4 Font Management System Administration Guide, Chapter 5 Data Streams System Administration Guide, Chapter 4 Printer Configuration See Table 4-2 on page 4-11 Printer Configuration Menu Item Descriptions Table 4-2 describes general printer configuration items and available values for each item. These items can be configured by a key operator. Table 4-2. Printer Configuration Menu Items Item Available Values Description DUPLEX ENABLE or DISABLE Duplex indicates whether two-sided printing is enabled or disabled (duplex model only). SLEEP TIME (MINUTES) 1-999 minutes or 0 (never sleeps) Sleep time is the number of minutes of printer inactivity (no print jobs) before the fuser turns off. Values 1 through 999 indicate that the printer goes into a “sleep” state after the selected number of minutes. A value of 0 indicates that the printer never goes into the “sleep” state; the fuser remains on. BEEPER ERROR TIMED BEEP CONTINUOUS OFF KEYS ON OFF The beeper may be set to sound when the 3130 detects an error or when keys are pressed. You can set the ERROR beeper to sound until any operator panel key is pressed (CONTINUOUS), to sound for three minutes, or until a key is pressed and then stop (TIMED BEEP) or to never sound at all (OFF). The original factory setting is TIMED BEEP. You can set the KEYS beeper to ON or OFF. The original factory setting is ON. LANGUAGE ENGLISH, FRENCH, GERMAN, JAPANESE KATAKANA, ITALIAN, SPANISH, BRAZILIAN PORTUGUESE, DUTCH Language specifies the language used to display operator panel text for general users and key operators. The original factory setting is ENGLISH. (Text for customer engineer-only items is in English only.) PRINT DENSITY LIGHT, MEDIUM, or DARK Print density indicates the degree of print darkness on a printed page. You can choose a lighter print density to add detail to a fine line, or a darker print density to enhance graphics or images. IBM recommends MEDIUM. The darker selection uses more toner. The original factory setting is MEDIUM. Setting Printer Configuration Items To configure the printer, do the following: 1. Press the Menu/Exit key to enter menu mode. 2. Scroll to the SETUP menu and press Enter. You may be prompted to enter the key-operator password. 3. Scroll to MACHINE CONFIGURATION and press Enter. 4. Scroll to PRINTER CONFIGURATION and press Enter. 5. Scroll to the submenu item you want to configure and press Enter. 6. Scroll to the desired value, and press Enter to make the selection. Press Enter again to return to the parent menu. Or use the keyboard to enter your selection. Chapter 4. Customizing the Printer 4-11 Printing the Printer Configuration You have two options for printing printer configuration items and their current settings. One option prints a one-page listing of the current settings for DUPLEX, SLEEP TIME, BEEPER, LANGUAGE, and PRINT DENSITY. The other option prints a multi-page listing of the current settings for all options that can be configured for the printer. This includes attachments, data streams, job management, and so forth, as well as the settings on the one-page listing. Printing a One-Page Configuration Listing To print a one-page listing, do the following: 1. Press the Menu/Exit key to enter menu mode. 2. Scroll to the SETUP menu and press Enter. You may be prompted to enter the key-operator password. 3. Scroll to MACHINE CONFIGURATION and press Enter. 4. Scroll to PRINTER CONFIGURATION and press Enter. 5. Scroll to PRINT CURRENT CONFIGURATION and press Enter. 6. If you want to specify the number of copies desired, scroll to QUANTITY and press Enter. Use the keyboard to indicate the number of copies. 7. If you want to specify the input tray desired, scroll to INPUT TRAY and press Enter. Scroll to the desired tray and press Enter to make the selection. Press Enter again to return to the parent menu. 8. If you want to specify the stacker desired, scroll to STACKER and press Enter. Scroll to the desired stacker and press Enter to make the selection. Press Enter again to return to the parent menu. 9. (Duplex model only with DUPLEX enabled in the printer configuration.) If you want to specify whether the information is to be printed in duplex or simplex, scroll to DUPLEX and press Enter. Scroll to YES or NO and press Enter. Press Enter again to return to the parent menu. 10. Scroll to PRESS ENTER TO PRINT and press Enter to request printing. The configuration page is put in the print queue. Note: If the printer is busy, the configuration page may not print immediately. Printing a Multi-Page Configuration Listing To print a multi-page listing of all option values, do the following: 1. Press the Menu/Exit key to enter menu mode. 2. Scroll to the SETUP menu and press Enter. You may be prompted to enter the key-operator password. 3. Scroll to PRINT CURRENT CONFIGURATION and press Enter. 4. If you want to specify the number of copies desired, scroll to QUANTITY and press Enter. Use the keyboard to indicate the number of copies. Note: This listing can be quite large. It is recommended that you print one copy before requesting multiple copies. 5. If you want to specify the input tray desired, scroll to INPUT TRAY and press Enter. Scroll to the desired tray and press Enter to make the selection. Press Enter again to return to the parent menu. 4-12 3130 User's Guide 6. If you want to specify the stacker desired, scroll to STACKER and press Enter. Scroll to the desired stacker and press Enter to make the selection. Press Enter again to return to the parent menu. 7. (Duplex model only with DUPLEX enabled in the printer configuration.) If you want to specify whether the information is to be printed in duplex or simplex, scroll to DUPLEX and press Enter. Scroll to YES or NO and press Enter. Press Enter again to return to the parent menu. 8. Scroll to PRESS ENTER TO PRINT and press Enter to request printing. The configuration pages are put in the print queue. Note: If the printer is busy, the configuration pages may not print immediately. Running Print Quality Samples You can run print quality samples to test print quality. Print samples are pages of text or patterns. These pages are generated from the printer itself, not from the data stream. Print quality samples can be printed at 300 or 240 pel resolution. Selecting 300 PEL sets the print resolution to 300 dpi; selecting 240 PEL sets the print resolution to 240 dpi. When you select 300 PEL, the available print samples are LETTER, PRIMARY, ALL WHITE, and ALL BLACK. If you specify ALL SAMPLES, all print samples except ALL BLACK are printed. When you choose ALL BLACK, the printer always prints four simplex copies of the all black print sample. When you select 240 PEL, PRIMARY is the only available print sample. To print the print quality samples, do the following: 1. Press the Menu/Exit key to enter menu mode. 2. Scroll to the SETUP menu and press Enter. You may be prompted to enter the key-operator password. 3. Press Enter on PRINT QUALITY SAMPLES. 4. Scroll to 300 PEL or 240 PEL and press Enter. 5. Scroll to the type of print samples you want to print and press Enter to make the selection. 6. If you want to specify the number of copies desired, scroll to QUANTITY and press Enter. Use the keyboard to indicate the number of copies. 7. If you want to specify the input tray desired, scroll to INPUT TRAY and press Enter. Scroll to the desired tray and press Enter. Press Enter again to return to the parent menu. Note: For ALL SAMPLES, PRIMARY, or ALL BLACK, you can select only input trays containing LETTER or A4 size paper. 8. If you want to specify the stacker desired, scroll to STACKER and press Enter. Scroll to the desired stacker and press Enter to make the selection. Press Enter again to return to the parent menu. 9. (Duplex model only with DUPLEX enabled in the printer configuration.) If you want to specify that the information be printed in duplex or simplex, scroll to Chapter 4. Customizing the Printer 4-13 DUPLEX and press Enter. Scroll to YES or NO and press Enter to make the selection. Press Enter again to return to the parent menu. 10. Scroll to PRESS ENTER TO PRINT and press Enter to request printing. The print sample pages will be put in the print queue. Note: If the printer is busy, the print sample pages may not print immediately. Running the Demonstration Pack You can run the Demonstration Pack to preview the types of printing possible on the 3130 Printer. The Demonstration Pack also contains useful information about the 3130 Printer capabilities. These pages are generated from the printer itself, not from the data stream. The Demonstration Pack contains samples of all internal fonts. To print the Demonstration Pack, do the following: 1. Press the Menu/Exit key to enter menu mode. 2. Scroll to the SETUP menu and press Enter. You may be prompted to enter the key-operator password. 3. Scroll to PRINT DEMO PACK and press Enter. 4. If you want to specify the number of copies desired, scroll to QUANTITY and press Enter. Use the keyboard to indicate the number of copies. 5. If you want to specify the input tray desired, scroll to INPUT TRAY and press Enter. Scroll to the desired tray and press Enter. Press Enter again to return to the parent menu. Note: You should print the Demonstration Pack on LETTER or A4 size paper. 6. If you want to specify the stacker desired, scroll to STACKER and press Enter. Scroll to the desired stacker and press Enter to make the selection. Press Enter again to return to the parent menu. 7. (Duplex model only with DUPLEX enabled in the printer configuration.) If you want to specify that the information be printed in duplex or simplex, scroll to DUPLEX and press Enter. Scroll to YES or NO and press Enter to make the selection. Press Enter again to return to the parent menu. 8. Scroll to PRESS ENTER TO PRINT and press Enter to request printing. The demonstration pages will be put in the print queue. Note: If the printer is busy, the demonstration pages may not print immediately. Adjusting the Print (IPDS Only) Do this task when you load preprinted forms, adhesive labels, or other forms that require a precise registration that is not satisfied by the factory-set default registration. All controls required for this task are available under the ADJUST PRINT (IPDS) submenu. Print adjustment can be done for IPDS jobs only. 4-14 3130 User's Guide In printing, the term registration refers to the relative print positions of images. For example, when you process preprinted forms, the registration is good if the new image printed by the printer aligns correctly with the preprinted image. Print that extends beyond box edges and text that overlaps other text are examples of poor registration. The figure above illustrates the original factory setting point of origin (vertical=0, horizontal=0) and the range of possible adjustments (shown much larger than actual size). The maximum adjustment in any direction from this position is 999 pels (approximately 3 1/2 inches or 90 millimeters). Imagine that your sample page shows that the text is printing too high and too far to the left in relation to the preprinted form. To correct this situation, increase the vertical and horizontal positions (to move the point of origin down and to the right). The next figure shows the result of changing the vertical position to +7 and the horizontal position to +6. Determining if You Need to Adjust the Print Before making any adjustments, determine whether you need to adjust the print. That is, run a print test to see if you need to change the point of origin on a page by adding to, or subtracting from, the vertical and horizontal starting positions. Note: This procedure assumes the following: Chapter 4. Customizing the Printer 4-15 A defined form is loaded in the printer and that form is assigned to the tray (using the TRAYS/STACKER menu options). A job is waiting to be run. Do the following to determine whether you need to adjust the print: 1. Press the Stop key. 2. Press the Menu/Exit key to enter menu mode. 3. Scroll to the SETUP menu and press Enter. You may be prompted to enter the key operator password. 4. Scroll to ADJUST PRINT (IPDS) and press Enter. 5. Scroll to the form you want to adjust and press Enter. 6. Scroll to the side you want to adjust and press Enter. 7. If you want to specify the number of pages desired for the print test, scroll to NUMBER OF PAGES and press Enter. Use the keyboard to indicate the number of copies. 8. If you want to specify the stacker, scroll to STACKER and press Enter. Scroll to the desired stacker and press Enter to make the selection. Press Enter again to return to the parent menu. 9. Run a print test of the current setting. You must have a job waiting to be run in order to run a print test. To start the print test, scroll to PRESS ENTER TO PRINT and press Enter. Note: The test pages printed will consist of the next pages in the IPDS data stream. If no job is waiting, no pages are printed. 10. Look at the pages just printed to determine if adjustments are necessary. If needed, determine how far to adjust the print position. How to Adjust the Print The following procedure assumes a defined form is loaded in the printer and a job is waiting to be run. Note: If you have just run a test print, as instructed above, start at Step 7. 1. Press the Stop key. 2. Press the Menu/Exit key to enter menu mode. 3. Scroll to the SETUP menu and press Enter. You may be prompted to enter the key-operator password. 4. Scroll to ADJUST PRINT (IPDS) and press Enter. 5. Scroll to the form you want to adjust and press Enter. 6. Scroll to the side you want to adjust and press Enter. Note: If a form is duplex, each side may have unique horizontal and vertical adjustment amounts. 7. To make a horizontal adjustment, scroll to HORIZONTAL (PELS) and press Enter. The keyboard is displayed. The keyboard displays the value entered when this form was last adjusted, or the original factory setting of 0 if this form has never been adjusted. 4-16 3130 User's Guide 8. Use the keyboard to clear the current value. Enter the new value, and then press Enter when <OK> is displayed. The range is -999 to 999. When you increase the horizontal value by one, you move the origin right one pel. When you decrease the horizontal value by one, you move the origin left one pel. Ten pels equals about one millimeter. 9. To make a vertical adjustment, scroll to VERTICAL (PELS) and press Enter. The keyboard is displayed. The keyboard displays the value entered when this form was last adjusted, or the original factory setting of 0 if this form has never been adjusted. 10. Use the keyboard to clear the current value. Enter the new value, and then press Enter when <OK> is displayed. The range is -999 to 999. When you increase the vertical value by one, you move the origin down one pel. When you decrease the vertical value by one, you move the origin up one pel. Ten pels equals about one millimeter. 11. If you want to specify the number of pages desired for the print test, scroll to NUMBER OF PAGES and press Enter. Use the keyboard to indicate the number of copies. 12. If you want to specify the stacker, scroll to STACKER and press Enter. Scroll to the desired stacker, and press Enter to make the selection. Press Enter again to return to the parent menu. 13. Run a print test of the new setting. You must have a job waiting to be run in order to run a print test. To start the print test, scroll to PRESS ENTER TO PRINT and press Enter. Note: The adjusted test pages printed will consist of the next pages in the IPDS data stream. If no job is waiting, no pages are printed. 14. If the registration is still not correct, repeat Step 7 on page 4-16 through Step 13 until you are satisfied with the registration. 15. When the registration is satisfactory, scroll to RETURN and press Enter or press Menu/Exit to exit menu mode. The printer stores the horizontal and vertical adjustment values. Note: When you adjust the print position for a user-defined form, the 3130 printer automatically stores the new point of origin as part of the current definition of the form. 16. Press Start to continue printing. Changing the Key-Operator Password Either the key operator or the customer engineer can change the key-operator password. You must enter the current password before you can change it. 1. Press the Menu/Exit key to enter menu mode. 2. Scroll to the SETUP menu and press Enter. You may be prompted to enter the key-operator password. 3. Scroll to CHANGE PASSWORD and press Enter. 4. Press Enter on KEY OP/ADMIN. ENTER NEW PASSWORD is displayed. 5. Press Enter to access the keyboard. Chapter 4. Customizing the Printer 4-17 6. Enter the new password using the keyboard. (See “Tutorial: Using the Menu to Enter a Key Operator Password” on page 3-17 for detailed instructions.) RE-ENTER THE PASSWORD is displayed. 7. Press Enter to access the keyboard. 8. Enter the new password again to verify it. After you select <OK>, the password is changed. Defining Forms Every type of printing media (paper, forms, or envelopes) that you plan to use must be defined to the printer in the DEFINE FORMS menu. Printing media are called forms. Each defined form has a unique form name. Some form names were included at the time of manufacture. Key operators can define new forms to meet specific user needs. For example, users might have several preprinted forms, each with a unique form name. The paper size may be the same on each form, but the preprinted text and graphics may be different. Before you can load a form in the printer, that form must first be defined. The definition of the form consists of: Form name Form size Duplex (two-sided) Paper orientation: edge sensitivity, side sensitivity (duplex model only with duplex set to YES), for preprinted or prepunched forms Definitions of the type of paper, color of paper, weight of paper, and matchall parameters for the paper (PostScript emulation only). These values are available for use in custom PostScript applications. When you access DEFINE FORMS in the SETUP menu, you can add, view, modify, or delete forms. Note: Only the forms that are defined in DEFINE FORMS appear in the lists of available forms to be loaded into each tray (in the TRAYS/STACKERS menu). You must define a form before that form will appear in the list of forms that can be loaded for that tray. Example: You define a form with the form name INVOICE and the form size 8.5 x 11 IN (LETTER). INVOICE appears in the lists of forms that can be loaded for any tray adjusted for letter-size paper. If you delete the form INVOICE, it will not appear in the lists of forms to be loaded for any tray. Defining a New Form Add a form any time you load (or plan to load) a form that has not yet been defined for the printer. Certain standard forms are already defined when the printer comes from the factory. To add a new form, do the following: 1. Press the Menu/Exit key to enter menu mode. 2. Scroll to the SETUP menu and press Enter. You may be prompted to enter the key-operator password. 4-18 3130 User's Guide 3. Scroll to DEFINE FORMS and press Enter. 4. Press Enter on ADD FORM NAME. The keyboard is displayed. 5. Use the keyboard to enter the new form name. The form name can consist of any unique descriptive or numeric name up to 12 characters. Press Enter on <OK> when you have finished entering the form name. The ADDING FORM message displays momentarily, and then the FORM ADDED message displays. 6. Scroll to VIEW /MODIFY FORM and press Enter. A list of all currently defined forms is displayed. 7. Scroll to the form name just added and press Enter. 8. Press Enter on FORM SIZE. Note: The default for each new form parameter is indicated by an asterisk (*). 9. Scroll to the form size desired and press Enter to make the selection. Press Enter again to return to the parent menu. 10. (Duplex model only with DUPLEX enabled in the printer configuration.) Scroll to DUPLEX and press Enter. Scroll to YES or NO and press Enter to make the selection. Selecting YES defines the form as two-sided (can be printed on both sides). Selecting NO defines it as simplex (can be printed on one side only). Press Enter again to return to the parent menu. 11. Scroll to PAPER ORIENTATION and press Enter. 12. Press Enter on EDGE SENSITIVITY. Scroll to YES or NO and press Enter to make your selection. If the form is a prepunched form, you may wish to set EDGE SENSITIVITY to YES. When EDGE SENSITIVITY is set to YES, the printer rotates the image 180° before printing it on the page. Press Enter again to return to the parent menu. 13. (Duplex model only with DUPLEX set to YES [Step 10.]) Scroll to SIDE SENSITIVITY and press Enter. Scroll to YES or NO, and press Enter to make your selection. If the form is a preprinted form, you may wish to set SIDE SENSITIVITY to YES. When SIDE SENSITIVITY is set to YES on simplex jobs, the printer prints a blank side two for each page. Therefore, these simplex print jobs run at half speed. If you are running custom-written PostScript jobs that interrogate the printer to determine media characteristics, do the following steps also: 14. Scroll to TYPE and press Enter. 15. Use the keypad to enter a code that indicates the type of print medium to be used. Press Enter on <OK>. 16. Scroll to COLOR and press Enter. 17. Use the keypad to enter a code that indicates the color of the print medium. Press Enter on <OK>. 18. Scroll to WEIGHT and press Enter. 19. Use the keypad to enter the weight of the print medium. Press Enter on <OK>. 20. Scroll to MATCHALL and press Enter. 21. Select YES or NO and press Enter. If you select YES, at least one tray on the printer must have a form loaded whose form definition includes the criteria Chapter 4. Customizing the Printer 4-19 specified for TYPE, COLOR, and WEIGHT. If none of the forms loaded in the printer match all three, the job is not printed. If you select NO, the job is printed even if none of the forms loaded in the printer matches all three criteria. NO is the original factory setting. For more information on custom-written PostScript printing, see PostScript Language Reference Manual by Adobe Systems Inc. Modifying a Form To modify a form, follow the directions given below. The current settings for each item are indicated by an asterisk (*). 1. Press the Menu/Exit key to enter menu mode. 2. Scroll to the SETUP menu and press Enter. You may be prompted to enter the key-operator password. 3. Scroll to DEFINE FORMS and press Enter. 4. Scroll to VIEW/MODIFY FORM and press Enter. A list of all currently defined forms is displayed. 5. Scroll to the form name you wish to modify and press Enter. 6. Press Enter on FORM SIZE. 7. Scroll to the form size desired and press Enter to make the selection. Press Enter again to return to the parent menu. 8. (Duplex model only with DUPLEX enabled in the printer configuration.) Scroll to DUPLEX and press Enter. Scroll to YES or NO and press Enter to make the selection. Selecting YES defines the form as duplex (can be printed on both sides). Selecting NO defines it as simplex (can be printed on one side only). Press Enter again to return to the parent menu. 9. Scroll to PAPER ORIENTATION and press Enter. 10. Press Enter on EDGE SENSITIVITY. Scroll to YES or NO and press Enter. If the form is a prepunched form, you may wish to set EDGE SENSITIVITY to YES. When EDGE SENSITIVITY is set to YES, the printer rotates the image 180° before printing it on the page. Press Enter again to return to the parent menu. 11. (Duplex model only with DUPLEX set to YES [Step 8].) Scroll to SIDE SENSITIVITY and press Enter. Scroll to YES or NO, and press Enter. If the form is a preprinted form, you may wish to set SIDE SENSITIVITY to YES. When SIDE SENSITIVITY is set to YES on simplex jobs, the printer prints a blank side two for each page. Therefore, these simplex print jobs run at half speed. 4-20 3130 User's Guide Deleting a Form You may wish to delete a form that is no longer being used. Deleting a form removes it from the FORM NAME lists under the TRAYS/STACKERS menu. Therefore, you cannot assign a deleted form name to a tray. To delete a form, do the following: 1. Press the Menu/Exit key to enter menu mode. 2. Scroll to the SETUP menu and press Enter. You may be prompted to enter the key-operator password. 3. Scroll to DEFINE FORMS and press Enter. 4. Scroll to DELETE FORM and press Enter. 5. Scroll to the form name you wish to delete and press Enter. 6. Press Enter on PRESS ENTER TO DELETE to delete the selected form. Note: To avoid deleting the form when PRESS ENTER TO DELETE is displayed, scroll to RETURN and press Enter. Checking the Current Definition of a Form To view the current definition of a particular form, do the following: 1. Press the Menu/Exit key to enter menu mode. 2. Scroll to the SETUP menu and press Enter. You may be prompted to enter the key-operator password. 3. Scroll to DEFINE FORMS and press Enter. 4. Scroll to VIEW /MODIFY FORM and press Enter. A list of all currently defined forms is displayed. 5. Scroll to the form name you wish to view and press Enter. 6. Press Enter on FORM SIZE. The current selection is displayed with an asterisk (*) next to it. Press Enter again to return to the parent menu. 7. (Duplex model only with DUPLEX enabled in the printer configuration.) Scroll to DUPLEX and press Enter. The current selection is displayed with * next to it. YES defines the form as duplex (can be printed on both sides). NO defines it as simplex (can be printed on one side only). Press Enter again to return to the parent menu. 8. Scroll to PAPER ORIENTATION and press Enter. 9. Press Enter on EDGE SENSITIVITY. The current selection is displayed with * next to it. When EDGE SENSITIVITY is set to YES, the printer rotates the image 180° before printing it on the page. Press Enter again to return to the higher-level menu. 10. (Duplex model only with DUPLEX set to YES [Step 7].) Scroll to SIDE SENSITIVITY and press Enter. The current selection is displayed with * next to it. When SIDE SENSITIVITY is set to YES on simplex jobs, the printer prints a blank side two for each page. Therefore, these simplex print jobs run at half speed. Chapter 4. Customizing the Printer 4-21 Machine Information Information regarding your specific printer is available for viewing only (read only). This information may be requested by the customer engineer or your system administrator. Machine Information Items The machine information includes the following items: PRINT COUNT (IMPRESSIONS) The total number of prints (impressions) run on this printer to the present date CODE LEVEL Controller code level EC LEVEL Engineering change level (for customer engineers) OS LEVEL Operating system level (for customer engineers) ENGINE CODE LEVEL Microcode level (for customer engineers) MEMORY (KB) Number of kilobytes of memory installed on the control unit system board AVAILABLE SPOOL SPACE (MB) Amount of available disk space for spooling ASCII jobs PRINTER TYPE 3130 Advanced Function Printer SERIAL NUMBER Unique number assigned by IBM to each printer MANUFACTURING PLANT Number that designates the manufacturing plant at which the printer was made Viewing Machine Information To view machine information, do the following: 1. Press the Menu/Exit key to enter menu mode. 2. Scroll to the SETUP menu and press Enter. You may be prompted to enter the key-operator password. 3. Scroll to MACHINE INFORMATION and press Enter. 4. Scroll to an item you wish to view and press Enter. The read-only information is displayed. You cannot change this information. 5. Press Enter to return to the parent menu. View other item information by repeating the previous step. 4-22 3130 User's Guide Configuring Attachments The communications and cable attachments are configured at the time of printer installation by the customer engineer. However, you may wish to change the attachment being used or the current attachment configuration. Change this configuration only when asked to do so by your system administrator or network administrator. Only key operators or system administrators can change the attachment configuration. Attention: Changing the attachment configuration may make your printer inoperable. For information on how to set up your system and configure the attachments, see IBM 3130 Advanced Function Printer: System Administration Guide. For information on configuration, see IBM Advanced Function Printer: Attachment Configuration Handbook. The 3130 printer supports the following attachments: Twinaxial SDLC (SNA) Token Ring (TCP/IP, NetWare, and SNA) Ethernet (TCP/IP and NetWare) PC Parallel Each attachment has configuration items that are specific to that attachment. Twinaxial, SDLC (SNA), token ring (TCP/IP and SNA), and Ethernet (TCP/IP) support an IPDS data stream, but IPDS can be connected to only a single attachment at a time. Token ring (TCP/IP), Ethernet (TCP/IP), and PC Parallel support both PCL and PostScript data streams. Enabling and Disabling Attachments An enabled attachment attempts to establish communication with the host or network. When the current attachment is enabled and the application that will receive the data to be printed is enabled, the printer is online. When the current attachment is disabled, the printer is offline and cannot receive data from the host or network. Attention: The IPDS application must be disabled before you disable token ring SNA or SDLC SNA. See “Disabling IPDS” on page 4-24. The Netware application must be disabled before you disable token ring or Ethernet. See “Enabling or Disabling NetWare, LPR, FTP, or TFTP” on page 4-24. Chapter 4. Customizing the Printer 4-23 To enable or disable attachments, do the following: 1. Press the Menu/Exit key to enter menu mode. 2. Scroll to the ATTACHMENTS menu and press Enter. You may be prompted to enter the key-operator password. 3. Scroll to the attachments you want to enable or disable, and press Enter. 4. Scroll to ENABLE STATUS and press Enter. 5. Scroll to ENABLE or DISABLE and press Enter. Enable the attachment as directed by your system administrator. For information on how to set up and configure the attachments, see IBM 3130 Advanced Function Printer: System Administration Guide. Enabling and Disabling Applications Enabling IPDS: To enable the IPDS, do the following: Note: Ensure that the attachment that IPDS will be using is enabled before you begin enabling IPDS. 1. Press the Menu/Exit key to enter menu mode. 2. Scroll to the ATTACHMENTS menu and press Enter. You may be prompted to enter the key-operator password. 3. Scroll to the APPLICATION SETUP menu and press Enter. 4. Press Enter on IPDS. 5. Scroll to CONFIGURATION and press Enter. 6. Press Enter on SOURCE ATTACHMENT. 7. Scroll to the attachment you want to use to receive IPDS jobs and press Enter. 8. The IPDS menu appears again. Select ENABLE STATUS and press Enter. 9. Press Enter on ENABLE. Disabling IPDS: To disable the IPDS, do the following: 1. Press the Menu/Exit key to enter menu mode. 2. Scroll to the ATTACHMENTS menu and press Enter. You may be prompted to enter the key-operator password. 3. Scroll to the APPLICATION SETUP menu and press Enter. 4. Press Enter on IPDS. 5. Scroll to ENABLE STATUS and press Enter. 6. Scroll to DISABLE and press Enter. Enabling or Disabling NetWare, LPR, FTP, or TFTP: To enable or disable NetWare, LPR, FTP, or TFTP, do the following: 1. Press the Menu/Exit key to enter menu mode. 2. Scroll to the ATTACHMENTS menu and press Enter. You may be prompted to enter the key-operator password. 3. Scroll to the APPLICATION SETUP menu and press Enter. 4-24 3130 User's Guide 4. Scroll to the application you want to enable or disable and press Enter. 5. Press Enter on ENABLE STATUS. 6. Press Enter on ENABLE or scroll to DISABLE and press Enter. Notes: 1. If a particular attachment is enabled when AUTO START is selected, that attachment is enabled when the printer is made ready and when it is powered on or restarted. 2. With a 3174 controller, the attachment should be enabled before the host system is activated. Setting Configuration Parameters To configure an attachment, do the following: 1. Press the Menu/Exit key to enter menu mode. 2. Scroll to the ATTACHMENTS menu and press Enter. You may be prompted to enter the key-operator password. 3. Scroll to the attachments you want to configure, and press Enter to make the selection. For information on how to setup and configure the attachments, see IBM 3130 Advanced Function Printer: System Administration Guide. 4. Scroll to CONFIGURATION and press Enter. 5. For each parameter, select from the choices, or use the keyboard to enter the desired value. For descriptions of configuration parameter values, see IBM 3130, 3160, and 3935 Advanced Function Printer: Attachment Configuration Handbook. Printing the Attachment Configuration You can print a page that lists the attachment configuration items and their current settings. Note: The attachment configuration page prints after the current job completes. To print the attachment configuration, do the following: 1. Press the Menu/Exit key to enter menu mode. 2. Scroll to the ATTACHMENTS menu and press Enter. You may be prompted to enter the key-operator password. 3. Scroll to the attachment whose configuration you want to print. Press Enter. 4. Scroll to PRINT CURRENT CONFIGURATION and press Enter. 5. If you want to specify the number of copies desired, scroll to QUANTITY and press Enter. Use the keyboard to select the number of copies. 6. If you want to specify the input tray desired, scroll to INPUT TRAY and press Enter. Scroll to the desired tray and press Enter. Press Enter again to return to the parent menu. Chapter 4. Customizing the Printer 4-25 7. If you want to specify the stacker desired, scroll to STACKER and press Enter. Scroll to the desired stacker, and press Enter to make the selection. Press Enter again to return to the parent menu. 8. (Duplex model only with DUPLEX enabled in the printer configuration.) If you want to specify that the information be printed in duplex or simplex, scroll to DUPLEX and press Enter. Scroll to YES or NO, and press Enter to make the selection. Press Enter again to return to the parent menu. 9. Scroll (if necessary) to PRESS ENTER TO PRINT, and press Enter to request printing. The help pages will be put in the print queue. Note: If the printer is busy, the help pages may not print immediately. 4-26 3130 User's Guide Chapter 5. Printing and Paper Handling This chapter describes the paper handling and printing features of the printer. You will find instructions for: Powering on and off the printer Shutting down and restarting the printer Understanding status messages Handling information messages Starting print jobs Interrupting printing Canceling print jobs Loading paper Positioning preprinted and prepunched forms Loading labels Loading envelopes Using the output stackers Copyright IBM Corp. 1994, 1996 5-1 Powering On and Off the Printer Turn the printer on (power on) and off (power off) using the switch on the right side of the printer. The symbols on the switch are “O” for off and “I” for on. Powering On When the printer is powered on, it goes through a power-on sequence that takes approximately 5 minutes. During the power-on sequence, the printer runs a series of internal tests. While the printer is running hardware diagnostics, numbers between 200 and 299 appear on the operator panel display. A delay of several minutes occurs after 299 is displayed. Then the printer processes its internal computer programs, with four-digit numbers appearing on the display. When the power-on sequence has finished, the READY message appears. Powering Off Before you power off the printer, you must always shut down the printer. Shut down the printer from the SYSTEM SHUTDOWN menu. Do not power off until the message SHUTDOWN DONE-POWER OFF is displayed. Attention: Failure to shut down the printer before powering off may damage the printer internal computer software. 5-2 3130 User's Guide Shutting Down and Restarting the Printer Both users and key operators may need to shut down and restart the printer. Shutdown A shutdown stops all active functions, disables communications and cable attachments, and stops all programs. A power off and power on is required to start the printer again. Shut down the printer only when necessary: Before turning the printer power off. (A shut down is required whenever powering off.) When instructed to do so in recovery procedure instructions. How to Shut Down the Printer To shut down the printer, do the following: 1. Press Menu/Exit to enter menu mode. 2. Scroll down to SYSTEM SHUTDOWN and press Enter. 3. Scroll down to PRESS ENTER TO SHUT DOWN, and press Enter to begin the shutdown. Wait for the message SHUTDOWN DONE-POWER OFF to be displayed before you power off. 4. Press the power switch (on the right side of the printer) to the off (O) position to power off the printer. Restart A restart is similar to a shutdown, but the printer starts up again automatically after the shutdown. Use the restart procedure only when instructed to do so in recovery actions. How to Restart the Printer To restart the printer, do the following: 1. Press the Stop key to make the printer NOT READY. (You may need to press the Stop key twice.) 2. Press Menu/Exit to enter menu mode. 3. Scroll down to SYSTEM SHUTDOWN and press Enter. 4. Scroll down to PRESS ENTER TO RESTART and press Enter to begin the restart. 5. Wait for the restart procedure to finish. If NOT READY is displayed, press Start to make the printer Ready, so the printer can print waiting print jobs. Note: If the On Line indicator light on the operator panel is not lit, you need to enable the attachment. Chapter 5. Printing and Paper Handling 5-3 Understanding Status Messages The following messages appear on the operator panel two-line display. These messages do not indicate errors. They simply give information about the current status of the printer. Recommended user actions follow each explanation. Message Description and Recommended Action READY Description: The printer is ready to receive information from a host or network if an attachment is online. Action: No action is required. NOT READY Description: The printer is in a stopped mode and cannot print information from a host or network. Action: Press Start to make the printer Ready. The message PRINTER HAS BEEN MADE READY appears. The printer can then start to print if a print job is waiting and the attachment is online. RECEIVING Description: The printer is receiving information from a host or network. Action: No action is required. PRINTING Description: The printer is printing. Action: No action is required. WARMING UP Description: The printer is warming up. The printer will be ready to print in 1 to 5 minutes. Action: Wait for the printer to warm up. If the printer is Ready and the attachment is online, printing starts as soon as the printer warms ups (if print jobs are waiting). SLEEPING Description: The printer is in sleeping mode, which means the fuser has turned off due to inactivity. The fuser turns on, and the printer warms back up when it receives a print job, or, if the printer is in the Not Ready state, when the Start key is pressed. Action: No action is required. TRACING Description: The control unit is tracing an application or attachment. The tracing operation may slow down throughput and should be turned off when not needed. Action: Contact the key operator or customer engineer if you think the tracing function was left on in error. You can scroll to see other messages, if any. Simply press the Down Arrow key to display the messages. Clearing Information Messages Information messages are displayed as needed while the printer is printing. To clear an information message, press the Enter key. For information on handling messages that require action, see Appendix A, “Display Messages and Codes.” 5-4 3130 User's Guide Starting Print Jobs To start print jobs, do the following: 1. Clear any existing error conditions by performing the recovery action and pressing the Enter key. (See Appendix A, “Display Messages and Codes.”) 2. Press Start. Any pending jobs in the print queue will begin printing. Interrupting Printing If you want to temporarily stop printing, you can do so at any time. No print job information will be lost. Any print jobs printing continue after you start the printer again. To interrupt printing, do the following: 1. Press Stop. The printer finishes printing the current page and any other page that is in the printer buffer. The message STOPPING... appears while the printer finishes printing. When printing has stopped, the message PRINTER HAS BEEN MADE NOT READY is displayed. If you press Stop again, the message ALREADY STOPPED is displayed. 2. If you wish, you may run internal prints, load paper into empty trays, and so on. 3. Press Start to continue printing. Canceling Print Jobs You can cancel a print job that was sent to the printer once that print job has started printing. To cancel a print job, do the following: 1. Press Stop to stop the printer. 2. Check the output stacker after all sheets have been ejected. Important: If your print job has finished printing, do not cancel printing or the next print job will be canceled. 3. If the print job has started but has not yet finished printing, press Cancel Print. Note: If there are no jobs in the print queue, the message NO PRINT JOBS TO CANCEL is displayed. 4. When the prompt message SELECT STACKER TO CANCEL appears, press Enter. A list of stacker names displays. Scroll to the stacker that is being used for your job and press Enter. If you do not want to cancel printing, press the Down Arrow key to display RETURN and press Enter. The print job is not canceled. 5. Press Start to continue printing. Chapter 5. Printing and Paper Handling 5-5 Loading Paper The printer can have up to six trays depending on the model and options installed. The following figure shows the name of each tray for each printer model. When loading paper into a tray, follow these guidelines to prevent paper jams and stacking problems: Do not use paper that is creased, folded, or damaged. Re-wrap partially used reams to maintain moisture content. Load only one size and type of paper into a tray. Do not add small amounts of paper on top of paper already in the tray. Do not overfill the tray. Do not load paper above the red line marking (in all front trays). See Advanced Function Printer: Cut Sheet Paper Reference for Use with IBM Electrophotographic Printers for additional instructions on loading paper correctly. It explains the correct procedure for opening reams, fanning paper, and determining curl. 5-6 3130 User's Guide Several sizes of paper can be used in your printer, provided they meet certain guidelines. For best results, use only xerographic paper. See IBM 3130 Advanced Function Printer: Introduction and Planning Guide for specific paper recommendations. Table 5-1 shows the sheet capacity and paper sizes for each tray. Table 5-1. Sheet Capacity and Paper Sizes for Printer Trays Printer Tray Capacity (20 lb paper) Paper Size Main Tray 2 000 sheets Letter, Legal, Ledger, A3, A4, B4, B5 Lower Sub Tray 250 sheets Letter, Legal, Ledger, A3, A4, B4, B5 Upper Sub Tray 250 sheets Letter, Legal, Ledger, A3, A4, B4, B5 Top Front Tray 250 sheets Letter, Legal, Ledger, A3, A4, B4, B5 Side Tray 500 sheets Letter, A4 Envelope Feeder 100 envelopes† #10, ISO DL †The envelope feeder can hold up to 100 envelopes depending on the weight of the envelopes. When a tray is out of paper or disabled, or when the cassette has been removed and no other tray is available, the printer stops printing and the operator panel displays a message. See Appendix A, “Display Messages and Codes,” for a list of messages and their meanings. See “Positioning Preprinted and Prepunched Paper” on page 5-15 for more information about positioning special types of paper. Loading Paper into the Main Tray Follow the steps below to load paper into the main tray. 1. Open the main tray. 2. Adjust the size guide according to the paper size. Use the setting positions marked on the top of the size guide and on the bottom of the tray. Lift and position the size guide accordingly. Be sure that both the top and bottom of the guide are properly in place. Chapter 5. Printing and Paper Handling 5-7 3. Position the paper in the tray. When loading paper, position each paper size as shown in the following figures. The corner of the paper must be flush against the corner of the tray, marked with an arrow (as shown below). Note: Do not stack paper above the red line. 4. Close the main tray by pushing it back into the cabinet. 5-8 3130 User's Guide 5. If you have changed the paper being loaded (different size or different type of form), and the message CHECK FORM NAME IN MENU is displayed, press Enter to clear the message, and then perform Steps 6 through 10. 6. Press the Menu/Exit key to enter menu mode. 7. Scroll to TRAYS/STACKERS and press Enter. 8. Press Enter on MAIN TRAY. 9. Press Enter on FORM NAME. 10. Scroll to the name of the form that you have loaded in the tray and press Enter. Note: Only those forms that were defined in the Define Forms procedure are listed as available for loading. If you are loading a new form name, define it first using the DEFINE FORMS menu item (key-operator authorization required). See “Defining Forms” on page 4-18 for directions on defining forms. 11. If desired, designate an autoswitch (alternate) tray for the main tray. See “Selecting an Autoswitch Tray” on page 4-5 for directions on setting an autoswitch tray. Loading Paper into the Lower Sub Tray, Upper Sub Tray, or Top Front Tray Follow the steps below to load paper into the lower sub tray, the upper sub tray, or the top front tray. 1. Open the tray. Chapter 5. Printing and Paper Handling 5-9 Note: If you are reloading paper without changing the size, skip to Step 8 on page 5-11. To reset the cassette for a different paper size continue to Step 2 on page 5-10. 2. Remove the cassette from the tray. 3. Remove the bottom plate from the cassette. 4. Adjust the cassette paper size guides for the paper size to be used. Squeeze the paper size guide tab and slide into position, or remove and insert the tab into the correct paper size slot. Note: Paper size guide 1 must be used in slot 1 or slot 2. Paper size guide 2 must be used in slot 3. Each guide must be set to the same paper size. The paper sizes are marked next to each slot. 5-10 3130 User's Guide 5. Use the sensor plate tab to set the paper size. Set the sensor plate to the same paper size that was used in Step 4. The paper sizes are marked on the sensor plate. 6. Position the bottom plate into the cassette. Insert the tabs into the slots on the bottom of the cassette, and lower the bottom plate into position. 7. Reinstall the cassette into the tray. 8. Place the paper in the cassette. When loading paper, position each paper size as shown in the following figures. Chapter 5. Printing and Paper Handling 5-11 Note: The position for the paper size is marked on the bottom of the cassette. Place the paper so the corner is flush against the front right corner of the cassette. Do not stack paper above the red line in the cassette. 9. Push the tray into the cabinet. 10. If you have changed the paper being loaded (different size or different type of form), and the message CHECK FORM NAME IN MENU is displayed, press Enter to clear the message, and then perform Steps 11 through 16. 11. Press the Menu/Exit key to enter menu mode. 12. Scroll to TRAYS/STACKERS and press Enter. 13. Scroll to the name of the tray in which you have changed the paper and press Enter. 14. Press Enter on FORM NAME. 15. Scroll to the form name that you have loaded in the tray and press Enter. Note: Only those forms that have been defined in the Define Forms procedure are listed as available for loading. If you are loading a new form name, define it first using the DEFINE FORMS menu item (key-operator authorization required). See “Defining Forms” on page 4-18 for directions on defining forms. 16. If desired, designate an autoswitch (alternate) tray for the tray you selected in Step 13. See “Selecting an Autoswitch Tray” on page 4-5 for directions on setting an autoswitch tray. 5-12 3130 User's Guide Loading Paper into the Side Tray To load paper into the side tray (without changing the paper size), do the following: 1. Push down the tray release lever to release the side tray. 2. For printers with envelope feeders installed, push down the tray release lever to release the side tray and remove the side tray. 3. Open the side tray cover. 4. Load the paper into the tray (letter size or A4 only), as shown above. Load as much paper as can fit easily into the tray. There is no red line to indicate maximum level of paper. 5. Lower the side tray cover. 6. Replace the side tray. Note: Refer to “Loading Envelopes into the Envelope Feeder” on page 5-18 for loading envelopes. Adjusting the Side Tray If you need to adjust the side tray, which holds only letter and A4 size paper, do the following: 1. Push down the tray release lever to release the side tray. 2. Open the side tray cover. 3. Adjust the paper size indicator by squeezing it and moving it to the correct position for the paper size being loaded. Chapter 5. Printing and Paper Handling 5-13 4. Push down the tray release lever to release the side tray and remove the side tray. Slide the paper size adjustment (on the back of the tray) until it clicks into place at the correct paper size. 5. Replace the side tray. 6. If you have changed the paper being loaded (different size or different type of form), and the message CHECK FORM NAME IN MENU is displayed, press Enter to clear the message, and then perform Steps 7 through 12. 7. Press the Menu/Exit key to enter menu mode. 8. Scroll to TRAYS/STACKERS and press Enter. 9. Scroll to SIDE TRAY and press Enter. 10. Press Enter on FORM NAME. 11. Scroll to the name of the form that you have loaded in the tray and press Enter. Note: Only those forms that have been defined in the Define Forms procedure and fit the adjusted tray are listed as available for loading. If you are loading a new type of form, define it first using the DEFINE FORMS menu (key-operator authorization is required). See “Loading Paper into the Side Tray” on page 5-13 for directions on loading forms. 12. If desired, designate an autoswitch (alternate) tray for the side tray. See “Selecting an Autoswitch Tray” on page 4-5 for directions on setting an autoswitch tray. 5-14 3130 User's Guide Positioning Preprinted and Prepunched Paper When loading preprinted or prepunched paper, position the paper correctly in the tray and adjust printer settings for edge sensitivity and side sensitivity. See “Defining a New Form” on page 4-18. Edge sensitivity describes which edge of the paper you load in a tray as the leading edge. Edge sensitivity rotates an image 180° for simplex jobs (all paper sizes) and for duplex jobs (Legal, Ledger, A3, and B4). Side sensitivity defines on which side of the paper to print (whether the paper faces up or faces down when loaded in a tray). Selecting SIDE SENSITIVITY results in simplex jobs traveling through the duplex paper path. This allows the intermixing of simplex and duplex jobs to be run from the same input tray, such that the same paper orientation is achieved in the output stacker. Preprinted Paper (Prepunched or Nonpunched) Chapter 5. Printing and Paper Handling 5-15 Note: For normal duplex printing of Legal, Ledger, A3, and B4, the first image (applied to side 2) is positioned with the top of the image facing to the right, and the second image (applied to side 1) is positioned with the top of the image facing left. Letter, A4, and B5 prints the top of the image towards the rear of the printer. Prepunched (Not Preprinted) *Note: 1. For normal duplex printing of Legal, Ledger, A3, and B4, the first image (applied to side 2) is positioned with the top of the image facing to the right, and the second image (applied to side 1) is positioned with the top of the image facing left. Letter, A4, and B5 prints the top of the image towards the rear of the printer. 2. When Edge Sensitive is selected, the image is rotated 180° from the normal image placement for all paper sizes in simplex, and Legal, Ledger, A3, and B4 in duplex. 5-16 3130 User's Guide Preprinted (Prepunched or Nonpunched) *Notes: 1. First pass (side 2 is blank), then second pass (side 1) prints. 2. Side 2 always prints first in duplex mode. SIDE SENSITIVE=YES treats a simplex sheet like a duplex sheet. Loading Labels Follow the steps below to load labels: 1. Load labels face down in the desired tray. Note: Labels may be loaded into the main tray, the lower sub tray, the upper sub tray, or the top front tray. Do not load labels into the side tray. 2. When defining the form name for a label in a duplex model printer, set SIDE SENSITIVITY to NO and DUPLEX to NO. Note: SIDE SENSITIVITY will no longer be active. See “Changing the Form Name and Paper Size Assigned to a Tray” on page 4-4 for instructions on changing form names. 3. Scroll to the TRAYS /STACKERS menu and press Enter. 4. Scroll to AUTOLINK OUTPUT STACKERS and press Enter. You may be prompted to enter the key-operator password. 5. Scroll to NO, and press Enter to deselect autolinking. 6. Press the Menu/Exit key to exit menu mode. Remember to remove unused label stock and reset the printer configuration parameters after the label application is complete. Chapter 5. Printing and Paper Handling 5-17 Note: Use only the base stacker or upper stacker for labels. Using the side stacker for labels may damage the printer. Loading Envelopes into the Envelope Feeder To load envelopes into the envelope feeder, do the following: 1. Press the weight assembly lever and lift the weight assembly until it locks into place. 2. Load the envelopes into the envelope feeder (Number 10 or DL envelopes only), as shown below. Envelopes must be loaded with the flap side down and facing away from the printer. Load only as many envelopes as can fit easily into the envelope feeder (the maximum number of envelopes is 100). There is no red line to indicate the maximum level of envelopes. 3. Press the weight assembly lever and lower the weight assembly onto the envelopes. 5-18 3130 User's Guide Using the Output Stackers The printer may have up to three stackers depending on the model and options installed. Figure 5-1 shows the position of each output stacker for all models of the 3130. The top stackers (the base stacker and the upper stacker) can hold up to 500 sheets each, and the optional side stacker can hold 1 500 sheets of printed paper. All the stackers hold printed sheets face-down and provide a job offset feature. Figure 5-1. Paper Output Stackers for Each Model When all the stackers are full, the printer stops printing, and the operator panel displays a message asking you to clear one of the stackers. See Appendix A, “Display Messages and Codes” for a list of messages and their meanings. Chapter 5. Printing and Paper Handling 5-19 Adjusting the Top Stackers (Base and Upper Stackers) Refer to Figure 5-2 when adjusting the top stackers for the appropriate paper size. For B5, A4, and letter paper sizes, push the black slide in until it clicks into place and the appropriate filled-in arrows match. For B4, A3, legal, and ledger paper sizes, pull out the black slide out until it clicks into place and the appropriate outlined arrows match. Figure 5-2. Adjusting the Top Stackers 5-20 3130 User's Guide Adjusting the Side Stacker Refer to the figure below each instruction when adjusting the side stacker for the appropriate paper size. 1. For B5, A4, and letter paper sizes, push in the stacker black slide until it clicks into place. For B4, A3, legal, and ledger paper sizes, pull out the stacker until it clicks into place. 2. If necessary, adjust the side paper guide unit at the top left of the stacker so that it matches the selected paper size. Raise the side tray cover to more easily access the side paper guide unit. 3. Adjust the side paper guide unit by doing the following: Chapter 5. Printing and Paper Handling 5-21 a. Loosen the large screw that is above the paper size indicator. b. Loosen the large screw that is at the bottom of the paper guide unit. c. Move the side paper guide unit up slightly, and remove it by positioning the holes over the loosened screw. d. Reposition the side paper guide unit on the other paper size indicator, and slide it down to secure it. 4. Tighten both screws to lock the side paper guide unit in place. 5. Lower the side tray cover. Note: If you need a guide for legal-size paper, your service representative can get one for you. 5-22 3130 User's Guide Chapter 6. Maintaining the Printer This chapter contains information on maintaining the printer for the best performance. Routine care and maintenance of the printer is the responsibility of the key operator. You will find instructions regarding: When to replace consumables (other than paper) Replacing the following consumables: – Toner – Developer mix – Photoconductor belt – Transfer belt unit – Fuser unit – Cleaner unit Cleaning the following parts: – Printer cover and trays – Drum unit and drum seal (EP module) – Paper guide rollers and guard fingers (paper feed module) Copyright IBM Corp. 1994, 1996 6-1 Replacing Supplies The key operator is responsible for replacing six consumable supplies. Step-by-step instructions and corresponding figures are provided in this chapter. Labels on the printer (viewable when the front cover is open) contain pictures to help guide you through these tasks. It is usually the key operator's responsibility to order the consumable supplies. Be sure that there is always a replacement on hand. If multiple printers are installed, replacement supplies can be shared among printers in the same location. To order supplies for the IBM 3130 Advanced Function Printer in the United States, use any of the following methods: Contact a Lexmark International, Inc. authorized supply dealer. Call Lexmark Telemarketing at 1-800-438-2468 from 8 a.m. to 8 p.m. Eastern Standard Time. Fax a complete order form to 1-800-522-3422. Write Lexmark Telemarketing at: Lexmark Telemarketing 1221 Alverser Drive Midlothian, Virginia 23113 In other countries, contact your point of purchase for information about where to order supplies. When to Replace Supplies Replace supplies when: The operator panel message indicates that replacement procedures are necessary. You are directed to replace a supply to correct a print quality problem according to “Correcting Print Quality Problems” on page 7-14. Note: If replacing a supply to correct a print quality problem does not correct the problem, remove the new supply and put it back on the shelf for future use. Return the original supply to the printer. The following table will help you anticipate when to replace supplies. The supply yields in this table are approximate average yields and were obtained from extensive supply testing. The majority of this testing was performed at an average printer utilization of 85% and with a print coverage of 4%. The printer performs non-printing cycles to prepare the printer for operation. These non-printing cycles cause wear on the supplies. Operating the printer at a lower utilization or at higher percent print coverages will reduce the lives of the supplies. Many factors (for example, the number of prints per month, number of pages per job, print coverage per page, paper type and size, and environmental conditions) can also affect supply lives. Special applications (for example, adhesive labels, extensive graphics, bar codes, some landscape applications, and preprinted forms) may significantly reduce supply lives. 6-2 3130 User's Guide Supply Replace Every... Part Number Toner Cartridge 35 000 impressions 1402690 Photoconductor Belt 50 000 to 100 000 impressions 1372472 Fuser Unit 600 000 impressions 1372475 (100V) 1372478 (200V) Transfer Belt Unit 600 000 impressions 1372477 Cleaner Unit 300 000 to 500 000 impressions 1372476 Developer Mix 600 000 impressions 1402691 Notes: 1. The approximate average yields are not a warranty or guarantee of minimum life and are provided to assist in initial supply planning. Actual usage should be used to establish the life of the supply in the end user's application. 2. Supply warranties are only for defects in materials and workmanship at the time of shipment and installation. They are not for print count life or normal wear and tear, nor for any print count minimum. Contact your place of purchase for warranty return instructions. 3. Waste material may be disposed of or incinerated under conditions which meet all federal, state, and local environmental regulations. Since regulations may vary from one locale to another, check with the agency that governs waste disposal in your area for correct procedures. General Guidelines for Supplies Following are the general guidelines for supplies: Replacement of the developer mix, fuser unit, photoconductor belt, cleaner unit, and transfer belt unit is associated with print count. Replacement of the photoconductor belt and cleaner unit is also associated with your application (type of print job). Replacement of the toner is associated with the amount of toner detected by the printer. The printer must be Not Ready (stopped) when changing all supplies except the toner. You may add toner while the printer is printing. The printer must be turned on (powered on) while you change a supply. The procedure for changing a supply includes indicating YES when prompted by the message IS CHANGE COMPLETED?, except for changing toner. A warning message notifies you that a supply is low (except for toner). If you miss seeing this warning message, you can scroll to see it. See “Display Messages for Supplies” on page 6-4. The Toner Low indicator on the operator panel lights up when the toner is low. When replacing supplies other than paper, touch blue parts of the printer only. The blue color indicates that the part is not hot and is safe to touch. Chapter 6. Maintaining the Printer 6-3 Display Messages for Supplies When the life of a consumable supply is exceeded, the following warning message indicates the consumable is low or near the end of its life, and you should replace it. You may wait to replace it if you wish. The following occur: The printer stops printing and becomes Not Ready. The error beeper sounds (if configured to sound). A message is displayed on the operator panel requesting that you replace the consumable soon. For example: DEVELOPER MIX: REPLACE SOON For toner only, the Toner Low indicator lights up. The printer continues printing after you press Enter to clear the message and press Start to make the printer Ready. The warning message is added as a scrollable status message. Although a warning message appears to notify you that supplies are low, you may not see these messages. Another user may clear these messages without notifying the key operator. To view outstanding messages regarding supplies, do the following while the printer is in normal status mode: 1. Press the Down Arrow key on the operator panel to display the first message. 2. Continue pressing the Down Arrow key until all messages have been displayed. A final notification message indicates that you must replace the consumable before printing can continue. The following occur: The printer stops printing and becomes Not Ready. The error beeper sounds (if configured to sound). The Attention indicator flashes. A message is displayed on the printer operator panel requesting that you replace the consumable now. For example: DEVELOPER MIX: REPLACE NOW Printing cannot be resumed until you replace the consumable and indicate (using the operator panel display) that the change has been completed. This chapter contains separate instructions for changing each supply. Note: Changing toner does not require that you indicate to the printer (using the operator panel display) that the change has been completed. You must do so for all the other consumables. 6-4 3130 User's Guide Replacing the Toner Cartridge Replace the toner cartridge only when the Toner Low indicator on the operator panel lights up. A message is displayed when the toner cartridge is empty. The toner cartridge can be replaced at any time during printer operation. The printer can remain online and continue printing during the replacement process. Although the printer can continue to print after the Toner Low indicator is lit, replace the toner cartridge as soon as possible before the toner reservoir becomes empty. Because of this toner reservoir, there is no advantage to waiting to add toner. When the toner cartridge is empty, the message OUT OF TONER-ADD TONER NOW is displayed, and the printer stops printing. Note: If toner gets on your clothes, wipe it off with a dry cloth and wash the clothes in cold water. Hot water sets the toner in the fabric. Although toner is nontoxic, avoid breathing toner particles. Follow the steps below to replace the toner cartridge: 1. Remove the new toner cartridge and cardboard from the box. The cardboard is used when the empty toner cartridge is removed from the toner cartridge slot. 2. Level the toner in the new cartridge: Shake the toner cartridge several times to level out the surface of the toner in the toner cartridge. 3. Open the toner supply cover. Chapter 6. Maintaining the Printer 6-5 4. Put the cardboard under the toner cartridge handle. 5. Remove the empty toner cartridge. Push down the toner cartridge handle, and remove the toner cartridge by pulling forward with the cardboard underneath. Place the used toner cartridge and cardboard in the empty plastic bag. 6. Install the new toner cartridge. Slide the new toner cartridge into the toner cartridge slot until it stops. Remove the sealing tape by pulling and rolling up and inward to prevent the toner on the sealing tape from scattering. Place the sealing tape in the plastic bag with the used toner cartridge. Seal and properly dispose of the bag. 6-6 3130 User's Guide 7. Close the toner supply cover. Replacing the Developer Mix Replace the developer mix when the message DEVELOPER MIX: CHANGE SOON or DEVELOPER MIX: CHANGE NOW is displayed on the operator panel display. Follow the steps below to replace the developer mix: 1. Press Menu/Exit to enter menu mode. 2. Scroll to SUPPLIES on the main menu and press Enter. You may be prompted to enter the key-operator password. 3. Scroll to DEVELOPER MIX and press Enter. 4. The message CHANGE SUPPLY NOW is displayed. (The message PLEASE WAIT... may occur first.) Note: If you selected SUPPLIES by mistake and do not want to begin a replacement procedure, scroll to CANCEL CHANGE and press Enter. 5. Remove the developer mix bottle from the box. 6. Open the front cover. 7. Remove the developer mix bottle cap: Remove the cap from the center of the bottle by pulling the cap straight out. 8. Install the developer mix bottle onto the developer mix duct. Chapter 6. Maintaining the Printer 6-7 9. Lock the developer mix bottle in place: Turn the developer mix bottle knob counterclockwise to the LOCK position. 10. Remove the sealing tape from the bottle by pulling the tape straight out. 11. Close the front cover. The message PRESS ENTER TO START CHANGE is displayed. 12. Press Enter to start the developer mix replacement process. The message DEVELOPER MIX CHANGING... is displayed. 6-8 3130 User's Guide Note: If the message ADJUST BOTTLE is displayed, open the front cover, wiggle the developer mix bottle, and close the front cover. Press Enter to start the developer mix replacement process. If the ADJUST BOTTLE message remains, call for service. 13. Wait approximately four minutes for the message REMOVE BOTTLE to appear. Attention: Do not open the front cover until the REMOVE BOTTLE message is displayed. Opening the front cover too soon can disrupt the replacement procedure. 14. Remove the developer mix bottle. Open the front cover. Turn the bottle knob clockwise to the RELEASE position, then remove the bottle. 15. Clean any spilled developer mix from the printer. 16. Close the front cover. Note: If the developer mix bottle has not been removed, a message will appear instructing you to remove the developer mix bottle before the printer can resume printing. Press Enter to clear the error message. 17. When the message IS CHANGE COMPLETED? appears, press Enter. 18. Press Enter again to select YES to notify the printer that the replacement is finished. This resets the supply counter. 19. Press Menu/Exit to exit menu mode. 20. Press Start to continue printing. 21. Properly dispose of the developer mix. Chapter 6. Maintaining the Printer 6-9 Replacing the Photoconductor Belt Replace the photoconductor belt (sometimes called a PC or OPC belt) when the message PHOTOCOND BELT: REPLACE SOON or PHOTOCOND BELT: REPLACE NOW is displayed on the operator panel. Follow the steps below to replace the photoconductor belt: 1. Press Menu/Exit to enter menu mode. 2. Scroll to SUPPLIES on the main menu and press Enter. You may be prompted to enter the key operator password. 3. Press Enter on PHOTOCONDUCTOR BELT. This rotates the drum into the proper position to change the photoconductor belt. 4. The message CHANGE SUPPLY NOW is displayed. (The message PLEASE WAIT... may occur first.) Note: If you selected SUPPLIES by mistake and do not want to begin a replacement procedure, scroll to CANCEL CHANGE and press Enter. 5. Open the front cover. 6. Open the drum unit. Turn the drum unit handle counterclockwise to the RELEASE position, then pull toward you. 7. Release the drum seal by pulling the drum seal knob (blue) forward, then lifting up from the drum holder. 8. Remove the used photoconductor belt by pulling the photoconductor belt holder out of the guide of the drum seal. 6-10 3130 User's Guide 9. Clean the surface of the drum unit, and clean the top and sides of the drum seal, with a lint-free cloth. 10. Remove the new photoconductor belt from the box. Attention: Do not touch the photoconductor belt surface (green). Do not expose the photoconductor belt to sunlight or excessive direct light. Use care to avoid wrinkling the photoconductor belt. 11. Install the new photoconductor belt. Carefully insert the new photoconductor belt holder into the guide of the drum seal until it stops. Some noise from the photoconductor belt can be expected. Close the drum seal by pulling the drum seal knob forward and inserting it into the drum front holder. Attention: The rear edge can be easily damaged during installation. Be sure the drum seal knob is fully seated in the front holder after installing the new photoconductor belt. 12. Close the drum unit and lock in place. Push the drum unit in, using the drum unit handle; then turn the drum unit handle clockwise to the LOCK position. Chapter 6. Maintaining the Printer 6-11 13. Close the front cover. 14. When the message IS CHANGE COMPLETED? appears, press Enter. 15. Press Enter again to select YES to notify the printer that the replacement is finished. This resets the supply counter. Note: If you did not complete this entire procedure (because you did not have the supply, for example), scroll to NO and press Enter. 16. Press Menu/Exit to exit menu mode. 17. Press Start to continue printing. 18. Properly dispose of the old photoconductor belt. Replacing the Transfer Belt Unit Replace the transfer belt unit when the message TRANSFER BELT: REPLACE SOON or TRANSFER BELT: REPLACE NOW is displayed on the operator panel. Follow the steps below to replace the transfer belt unit: 1. Press Menu/Exit to enter menu mode. 2. Scroll to SUPPLIES on the main menu and press Enter. You may be prompted to enter the key-operator password. 3. Scroll to TRANSFER BELT UNIT and press Enter. 4. The message CHANGE SUPPLY NOW is displayed. (The message PLEASE WAIT... may occur first.) Note: If you selected SUPPLIES by mistake and do not want to begin a replacement procedure, scroll to CANCEL CHANGE and press Enter. 5. Open the front cover. 6. Open the paper feed module. 7. Turn the paper feed module handle counterclockwise to the RELEASE position, and then pull the handle forward. 6-12 3130 User's Guide 8. Loosen the thumb screw on each side of the transfer belt unit. Turn the thumbs screws counterclockwise to loosen, and then rotate the thumb screw brackets up and away from the transfer belt unit. 9. Remove the transfer belt unit. Lift the transfer belt unit out by the top end of the unit. Chapter 6. Maintaining the Printer 6-13 10. Install the new transfer belt unit. Position the top end of the new transfer belt unit into the paper feed module first. 11. Secure the transfer belt unit by positioning the two thumb screw brackets in place on each side of the transfer belt unit. Tighten the thumb screws in a clockwise direction. 6-14 3130 User's Guide 12. Gently push the lower end of the transfer belt unit downward. 13. Close the paper feed module and lock in place. Push the paper feed module in, and then turn the module handle clockwise to the LOCK position. Chapter 6. Maintaining the Printer 6-15 14. Close the front cover. 15. When the message IS CHANGE COMPLETED? appears, press Enter. 16. Press Enter again to select YES to notify the printer that the replacement is finished. This resets the supply counter. Note: If you did not complete this entire procedure (because you did not have the supply, for example), scroll to NO and press Enter. 17. Press Menu/Exit to exit menu mode. 18. Press Start to continue printing. 19. Properly dispose of the transfer belt unit. Replacing the Fuser Unit Replace the fuser unit when the message FUSER UNIT: REPLACE SOON or FUSER UNIT: REPLACE NOW is displayed on the operator panel. Follow the steps below to replace the fuser unit: CAUTION: <28> The fuser unit may be very hot. Remove jewelry before changing the fuser unit. Touch only the blue handle while changing the fuser unit. Place the used fuser unit in a safe place, and allow it to cool for 30 minutes before disposing of it. 1. Press Menu/Exit to enter menu mode. 2. Scroll to SUPPLIES on the main menu and press Enter. You may be prompted to enter the key-operator password. 3. Scroll to FUSER UNIT and press Enter. The message CHANGE SUPPLY NOW is displayed. (The message PLEASE WAIT.... may occur first.) Note: If you selected SUPPLIES by mistake and do not wish to begin a replacement procedure, scroll to CANCEL CHANGE and press Enter. 4. Open the front cover. 5. Open the paper feed module. Turn the paper feed module handle counterclockwise to the RELEASE position, then pull the handle forward. 6-16 3130 User's Guide 6. Remove the fuser unit by rotating the fuser unit handle upward, and then lifting the unit out. CAUTION: <28> The fuser unit may be very hot. Remove jewelry before changing the fuser unit. Touch only the blue handle while changing the fuser unit. Place the used fuser unit in a safe place, and allow it to cool for 30 minutes before disposing of it. 7. Install the new fuser unit. Secure the fuser unit in place by rotating the handle downward into the latched position. Be sure that the fuser unit handle is pushed all the way down. 8. Close the paper feed module and lock it in place. Push the paper feed module in, then turn the module handle clockwise to the LOCK position. Chapter 6. Maintaining the Printer 6-17 9. Close the front cover. 10. When the message IS CHANGE COMPLETED? appears, press Enter. 11. Press Enter again to select YES to notify the printer that the replacement is finished. This resets the supply counter. Note: If you did not complete this entire procedure (because you did not have the supply, for example, scroll to NO and press Enter. 12. Press Menu/Exit to exit menu mode. 13. Press Start to continue printing. 14. Properly dispose of the used fuser unit. Replacing the Cleaner Unit Replace the cleaner unit when the message CLEANER UNIT: CHANGE SOON or CLEANER UNIT: CHANGE NOW is displayed on the operator panel. Follow the steps below to replace the cleaner unit: 1. Press Menu/Exit to enter menu mode. 2. Scroll to SUPPLIES on the main menu and press Enter. You may be prompted to enter the key-operator password. 3. Scroll to CLEANER UNIT and press Enter. 4. The message CHANGE SUPPLY NOW is displayed. (The message PLEASE WAIT... may occur first.) Note: If you selected SUPPLIES by mistake and do not want to begin a replacement procedure, scroll to CANCEL CHANGE and press Enter. 5. Open the front cover. 6. Unlock the EP module by turning the two lock levers clockwise and the paper feed module handle counterclockwise to the RELEASE position. 6-18 3130 User's Guide 7. Pull out the EP module by pulling the EP module handle. 8. Remove the cleaner unit by pulling the cover handle downward (1), and then lifting the cleaner unit out by its handle (2). 9. Install the new cleaner unit by aligning the arrows on the cleaner unit and the EP module. Latch the cleaner unit cover in place. 10. Close the EP module and lock in place. Lock the EP module in place by turning the paper feed module handle clockwise to the LOCK position and turning the two lock levers counterclockwise. Chapter 6. Maintaining the Printer 6-19 11. Close the front cover. 12. When the message IS CHANGE COMPLETED? appears, press Enter. 13. Press Enter again to select YES to notify the printer that the replacement is finished. This resets the supply counter. Note: If you did not complete this entire procedure (because you did not have the supply, for example), scroll to NO and press Enter). 14. Press Menu/Exit to exit menu. 15. Press Start to continue printing. 16. Properly dispose of the used cleaner unit. Cleaning the Printer To prevent print quality and operating problems, regular cleaning of the printer is required. This section describes the cleaning locations and instructions for cleaning the following internal components: Printer cabinet Printer interior Printer trays and tray rollers Drum unit and drum seal Paper-guide roller-guard fingers and rollers More extensive cleaning may be required to solve print quality or operating problems. These parts should only require additional cleaning if you have encountered a problem and are instructed to perform the cleaning operation in “Correcting Print Quality Problems” on page 7-14. Attention: Never use ammonia-based cleaners on or around the printer. Ammonia may react chemically with the toner and with the printer plastic covers. Note: If you get toner on your clothes, wipe it off with a dry cloth or brush. Wash the clothing in cold water. Hot water sets toner in the fabric. 6-20 3130 User's Guide Cleaning the Printer Covers and Trays Clean the printer covers and trays monthly. Paper dust and toner inside the printer often cause print quality and operating problems. Printer Cabinet Wipe the cabinet with a soft clean cloth. If necessary, dampen the cloth with water. Printer Cover Interior Open the front cover. Wipe the inside of the front cover with a clean soft cloth. Trays and Rollers Follow the steps below to clean the printer trays and the main tray rollers. 1. Open the tray. 2. Remove the paper from the tray, and then wipe the tray interior with a soft clean cloth. Chapter 6. Maintaining the Printer 6-21 3. If you have a duplex or high-capacity simplex printer, perform the following steps to clean the main tray rollers. 4. Open the main tray pick cover. 5. Clean the two pick rollers with a clean lint-free cloth. 6. Clean the separator roller with a clean lint-free cloth. 6-22 3130 User's Guide Cleaning the Drum Unit and Drum Seal Clean the drum unit and drum seal only when replacing the photoconductor belt. Cleaning the Paper Guide Rollers and Guard Fingers Clean the paper feed module parts every two months. Follow the steps below to clean the paper-feed module paper-guide parts. 1. Open the front cover. 2. Open the paper feed module. Turn the paper feed module handle counterclockwise to the RELEASE position, and then pull the handle forward. 3. Open the paper guide by pulling the handle downward. 4. Clean the roller-guard fingers and paper-feed rollers. To clean the nine roller-guard fingers, clean the front face and upper rear face of the fingers with a lint-free cloth. Clean the twelve paper-feed rollers with a lint-free cloth. 5. Close the paper guide. Latch the paper guide handle in place. Chapter 6. Maintaining the Printer 6-23 6. Close the paper feed module and lock it in place. Push the paper feed module in, and then turn the module handle clockwise to the LOCK position. 7. Close the front cover. 6-24 3130 User's Guide Chapter 7. Handling Operation Problems This chapter provides information for solving common problems you may encounter while using your printer: Clearing paper jams Handling aborts and program checks Correcting print quality problems Copyright IBM Corp. 1994, 1996 7-1 Paper Jams Occasionally a sheet of paper may get stuck (jammed) inside the printer during the printing process. Several things can cause a paper jam: The paper may be installed incorrectly. The wrong type of paper may be used. The paper may be curled or damp. The printer may need cleaning. Best results are obtained with laser-quality or xerographic paper. Store paper in an area that meets temperature and humidity requirements. The printer stops printing when a paper jam occurs, and the message PAPER JAM is displayed on the operator panel. A code is also displayed. The operator-panel paper-jam indicator-lights identify the area of the paper path where paper must be removed, including the location where the paper jam has occurred. Each lamp on the indicator corresponds to an area of the printer. A light indicates a paper jam location. Refer to the troubleshooting information in Advanced Function Printer: Cut Sheet Paper Reference for Use with IBM Electrophotographic Printers. It provides information that can help you prevent the following problems: Repeated or frequent paper jams Frequent misfeeds Multiple feeds Using Paper Jam Indicator Lights to Locate Paper Jams When a paper jam occurs, the printer stops printing and the intervention indicator lights on the printer icon show where the paper jam has occurred. The paper jam indicator lights and arrow indicator lights are numbered (or lettered) lights that turn on to indicate the area where the paper jam is located. More than one indicator light may be lit at any one time. Figure 7-1. Operator Panel Paper Jam Indicator Lights Note: The paper jam indicators vary according to the model. 7-2 3130 User's Guide Table 7-1 on page 7-3 shows the area of the paper jam that corresponds to each indicator number or letter and the location of the appropriate recovery procedure. Table 7-1. Paper Jam Indicator and Recovery Procedure Cross Reference Light Area of Paper Jam Recovery Procedure A Top auto-eject door “Clearing Paper from the Side Doors and Top Stackers” on page 7-4 B, 6 Bottom door “Clearing Paper from the Side Doors and Top Stackers” on page 7-4 C, 10 Top stacker (base stacker and/or upper stacker) “Clearing Paper from the Side Doors and Top Stackers” on page 7-4 13 EP module area “Clearing Paper from the EP Module Area” on page 7-6 7, 8, 9, 11, 12 Paper feed module area “Clearing Paper from the Paper Feed Module Area” on page 7-8 1, 2, 3 Tray area “Clearing Paper from the Front Trays” on page 7-12 14 Stacker area “Clearing Paper from the Stackers” on page 7-13 Clearing a Paper Jam The printer stops printing when a misfeed occurs, and the message PAPER JAM is displayed. Perform the following steps to clear the paper jam and operator panel error message: 1. Check the intervention indicators on the printer icon. 2. If an arrow is lit, open the corresponding door and empty the paper, starting with the upper door. 3. If the top stacker arrow is lit, clear paper from that area. 4. Check the indicators again. If any lights remain lit, clear the paper from the corresponding area. Paper jams may occur in several areas of the printer. Check the paper path thoroughly, and remove all paper along the paper path according to the procedures for each area. This chapter contains instructions for clearing paper jams from each area of the printer 5. When all the paper is removed and all indicator lights are off, press the Start key twice to clear the error message from the display. The message NOT READY, WARMING UP, or SLEEPING may appear on the display. 6. Press Start to continue printing. The pages removed from the paper path are reprinted automatically when the printer starts printing again. If the printer is warming up, it may take a few minutes to start printing. Chapter 7. Handling Operation Problems 7-3 Clearing Paper from the Side Doors and Top Stackers Follow the steps below to clear paper from the top auto-eject door and bottom door (indicator lights A, B, and 6 on the printer icon) and the base stacker and upper stacker (indicator lights C and 10 on the printer icon). 1. Open the top auto-eject door to remove the jammed paper. Paper along the paper path is automatically ejected through the top auto-eject door. 2. If the side tray is installed, push the tray base lever to open the tray base as shown below. Remove any jammed paper. 7-4 3130 User's Guide If the envelope feeder is installed, push the tray base lever to open the tray base as shown below. Remove any jammed envelopes. 3. Close the top auto-eject door. Leave the tray base open if the side tray is installed. 4. Open the bottom door to remove any paper (in Models 02S, 02D, and 03S only). 5. Close the bottom door. If necessary, close and latch the side tray base. 6. Open the top stacker cover, and remove any jammed paper. Chapter 7. Handling Operation Problems 7-5 7. Lift the tab on the gate, and remove any paper (in the dual top stacker only). 8. Close the top stacker cover. Press Enter to clear any error message. Clearing Paper from the EP Module Area Follow the steps below to clear paper from the EP module area (indicator light 13 on the printer icon). 1. Open the front cover. 2. Unlock the EP module by turning the two lock levers clockwise and the paper feed module handle counterclockwise to the RELEASE position. 7-6 3130 User's Guide 3. Open the EP module. Pull out the EP module by pulling the EP module handle. 4. Remove any paper from the EP module and drum unit. Take care to avoid scratching or touching the drum unit while removing paper. 5. If necessary, remove the cleaner unit to remove any paper. Remove the cleaner unit by pulling the cleaner unit cover handle downward (1), and then lifting the cleaner unit out by its handle (2). Chapter 7. Handling Operation Problems 7-7 6. Return the cleaner unit to its original position. To reinstall the cleaner unit, align the arrows on the cleaner unit and the EP module. Latch the cleaner unit cover in place. 7. Close the EP module and lock it in place. Lock the EP module in place by turning the paper feed module handle clockwise to the LOCK position and turning the two lock levers counterclockwise. 8. Close the front cover. Press Enter to clear any error messages. Clearing Paper from the Paper Feed Module Area Follow the steps below to clear paper from the paper feed module area (indicator lights 7, 8, 9, 11, and 12 on the printer icon). 1. Open the front cover. 2. Open the paper feed module. Turn the paper feed module handle counterclockwise to the RELEASE position, and then pull forward. 7-8 3130 User's Guide 3. Remove any jammed paper from the transfer belt unit. 4. Remove any jammed paper from the paper guide: Open the paper guide by pulling the handle downward. 5. If duplex printing, remove any paper from the lower paper guide. Open the lower paper guide by pushing handle # 11a downward. While holding handle # 11a down, rotate each blue knob (# 11b and # 12), as shown, to remove any jammed paper. Chapter 7. Handling Operation Problems 7-9 6. Close the paper feed module, and lock it in place. 7. Close the front cover. 8. Look at the paper jam indicator. If a paper feed module indicator is still lit, you need to remove the fuser unit (Step 9 through Step 16 on page 7-12). 9. Open the front cover. 10. Open the paper feed module. Turn the paper feed module handle counterclockwise to the RELEASE position, and then pull the handle forward. 7-10 3130 User's Guide CAUTION: <29> The fuser unit may be very hot. Remove jewelry before removing the fuser unit. Touch only the blue handle while handling the fuser unit. Place the fuser unit in a safe place. 11. Remove the fuser unit by rotating the fuser unit handle upward, and lifting out the assembly. 12. Open the fuser unit cover by pushing the tabs on both sides of the cover inward to drop down the cover. 13. Remove jammed paper. 14. Return the fuser unit to its original position. Secure the fuser unit in place by rotating the handle downward into the latched position. Be sure to push the handle completely down into the latched position. 15. Close the paper feed module, and lock it in place. Push the paper feed module in, and then turn the module handle clockwise to the LOCK position. Chapter 7. Handling Operation Problems 7-11 16. Close the front cover. 17. Press Enter to clear any error messages. Clearing Paper from the Front Trays Follow the steps below to clear paper from the main tray, lower sub tray, upper sub tray, and top front tray areas (indicator lights 1, 2, and 3 on the printer icon). 1. Open the main tray, and remove the jammed paper. To remove jammed paper, lift and open the cover. 2. Close the tray. 3. Open the lower sub tray, the upper sub tray, or the top front tray, and remove the jammed paper. 7-12 3130 User's Guide 4. Close the tray. Press Enter to clear any error messages. Clearing Paper from the Stackers Remove any jammed paper from the stackers (indicator light 14 on the printer icon) by carefully pulling the paper straight out. The side stacker is shown below. Press Enter to clear any error messages. Handling Aborts and Program Checks Hard Abort Occasionally, during printer operation, the printer has a problem that affects its internal computer. Restart the printer and retry. Call for service if the problem continues. This problem displays the message Do the following if you see this message: 1. Press Enter to clear the message. 2. PRESS ENTER TO RETRY is displayed. Press Enter to restart the printer. 3. If the hard abort error occurs again, press Enter to clear the message. 4. Press the Down Arrow key to scroll to PRESS ENTER TO SHUT DOWN. 5. Press the Enter key to shut down the printer. 6. When the message SHUTDOWN DONE-POWER OFF is displayed, power off the printer and power on again. 7. Call for service if the problem continues. Program Check Occasionally the message PROGRAM CHECK is displayed. Do the following if you see this message. 1. Press Enter to clear the message. 2. Press Start to make the printer Ready again. Chapter 7. Handling Operation Problems 7-13 Correcting Print Quality Problems All Black Print Samples For print quality problems, run the ALL BLACK (4) print sample (see “Running Print Quality Samples” on page 4-13) to see if there is a photoconductor problem. Four copies will be printed. If the print quality problem appears on every other print in the same location, replace the photoconductor. Other Print Samples Look at a sample of your print quality problem. If necessary, run a print sample similar to your print quality problem. The following pages provide suggestions for problems in the appearance of a printed document. The top of each print quality problem sample shown is the leading edge of the form and is in the printer process direction. If the suggested action does not improve the print quality, call for service. Note: If replacing a supply (as directed below) does not correct the print quality problem, and the original supply has not reached the end of its life, remove the new supply and put it back on the shelf for future use. Return the original supply to the printer. Light print If the image is too light (too little toner consumed): Check PRINT DENSITY and TONER SAVER MODE settings. Clean and check the position of the transfer belt unit. Clean the transfer belt unit. Toner does not adhere to paper If toner does not adhere to the paper and can be easily wiped off: Ensure that the fuser unit handle is in the latched position. Replace the fuser unit; the fuser unit may be bad. White spots appear on the image If white spots appear in the images throughout the page: Clean and check the position of the transfer belt unit. 7-14 3130 User's Guide Unwanted lines or stripes If black streaks or spots appear on the page: Clean the drum unit surface by wiping it with a lint-free cloth. Replace the photoconductor belt. Print skew If the image is misaligned on the page: If using the main tray, clean the pick and separator rollers. If using another tray, call for service. White voids If faded areas or white voids appear on the page: Use paper from a sealed package; the paper may be damaged. Clean the transfer belt unit wires. Image transfer (offset) If portions of the image are transferred onto another area of the page: Clean and check the position of the transfer belt unit. Chapter 7. Handling Operation Problems 7-15 7-16 3130 User's Guide Appendix A. Display Messages and Codes When you see error and information messages on the operator panel display, refer to Table A-1 on page A-2 for the recommended recovery action. After you perform the recovery action, do the following: 1. If the message remains displayed, press Enter to clear the message. 2. Press Start when you want to continue printing. If the recovery action does not solve the problem, call for service. Always note the system reference code (SRC), if it is displayed. Give this code to the customer engineer. Copyright IBM Corp. 1994, 1996 A-1 Table A-1 (Page 1 of 17). Messages and Recovery Actions Display Message Code (SRC) ADJUST BOTTLE 100F Description The developer bottle is incorrectly installed. ALL JOBS CANCELLED You selected and confirmed the CANCEL ALL SPOOLED JOBS menu item. The operation has been completed. ATTACHMENT ADAPTER ERROR There is a hardware problem during an attempt to enable an attachment (possibly during autostart). ATTACHMENT CARD ERROR AF11 ATTACHMENT ENABLED ATTACHMENT NO LONGER SUSPENDED Open the front cover. Wiggle the developer mix bottle. Close the front cover. Press Enter to start the developer mix replacement process. 5. If this message remains, call for service. Not an error, informational only. 1. Restart the printer and retry. 2. Call for service if the problem continues. Error occurs only once. B001 An attachment has been enabled. Not an error, informational only. B011 Attachment has been released from suspension. Not an error, informational only. An attempt to enable an attachment was unsuccessful (possibly during autostart). This may occur because another attachment is already enabled. This also may be due to a hardware problem. B002 ATTACHMENT TIMED OUT ATTACHMENT SUSPENDED 1. 2. 3. 4. The attachment card has been removed. ATTACHMENT NOT ACCESSIBLE ATTACHMENT RESET Recovery Action An attachment has been reset. An attempt to enable an attachment was unsuccessful (possibly during autostart) within a pre-specified time-out period. B010 Call for service and report error code AF11. 1. Check to see if another attachment is already enabled (under ENABLE STATUS for each attachment-key operator authority required). If so, disable that attachment. 2. If no other attachment was enabled, restart the printer and retry. 3. Call for service if the problem continues. Not an error, informational only. 1. Restart the printer and retry. 2. Call for service if the problem continues. An attachment has been suspended. Not an error, informational only. AUTOSWITCH NO LONGER VALID Someone has disabled a tray that is designated as the autoswitch tray of another tray. Not an error, informational only. AUTOSWITCH TRAY NOT ENABLED The selected autoswitch tray is disabled. Select another autoswitch tray. Close the door. BOTTOM DOOR OPEN 0104 The lower door on the right side of the printer is open, CALL FOR SERVICE various code numbers There is an error that must be corrected by the Customer Engineer. A-2 3130 User's Guide 1. Shut down the printer and power off. 2. Power on. Press Start and retry. 3. Call for service if the problem continues. Table A-1 (Page 2 of 17). Messages and Recovery Actions Display Message Code (SRC) CANCELING ... Description Recovery Action The printer is canceling a print job. This message can apply to internal print jobs or to jobs submitted by a host system. Not an error, informational only. CANNOT ATTACH TO FILE SERVER A700 The NetWare print server in the printer cannot successfully attach to a print queue in the file server. 1. Check to see if the file server is down. 2. Check the spelling of the print server name in both the printer and the file server; they should match. 3. Check to see if a password for the print server is needed. If so, check the spelling of the password in both the printer and the file server. 4. Check to see if a file server name was entered under ADVANCED CONFIGURATION in the printer. If so, check the spelling of the file server name in the printer. 5. Check that printer slot 0 has been chosen in PConsole for printer configuration under Print Server Information. CANNOT OFFSET OFFSET DISABLED D007 Attempt to print with offset tray. 1. Press Start and retry. 2. Call for service if the problem continues. CANNOT PRINT DISABLED TRAY D006 Attempt to print with disabled tray. 1. Press Start and retry. 2. Call for service if the problem continues. CHANGING ... The printer is processing a request to change a configuration value. Not an error, informational only. CHECK FORM NAME IN MENU There is more than one form name defined for the size of paper loaded in the tray. If you have changed the type of form loaded in the tray, reconfigure that tray with the correct form name (key operator authorization required). CLEANER UNIT: REPLACE NOW 1009 The cleaner unit needs to be replaced. Replace the cleaner unit. CLEANER UNIT: REPLACE SOON 1015 The cleaner unit life is almost finished. Replace the cleaner unit soon. COMMUNICATIONS ERROR A440 A441 A442 Ethernet/Token Ring TCP/IP Communications error. 1. Restart the printer and retry. 2. Call for service if the problem continues. COMMUNICATIONS ERROR AF00 AF01 AF02 Attachment subsystem— Cannot open attach driver. 1. Shut down the printer and power off. 2. Power on. Restart the printer and retry. 3. Call for service if the problem continues. CONFIG CHANGED RESTART REQUIRED DELETION FAILED The changes made to certain IPDS configuration items do not take effect until the IPDS subsystem is restarted. E020 Deletion of fonts has failed. Restart IPDS using the SETUP / MACHINE CONFIGURATION / DATA STREAMS / IPDS / CONFIGURATION / RESTART IPDS NOW menu. (This menu item appears only when needed.) 1. Follow the proper procedure and try to delete the font again. 2. Call for service if the problem continues. Appendix A. Display Messages and Codes A-3 Table A-1 (Page 3 of 17). Messages and Recovery Actions Display Message Code (SRC) Description Recovery Action Please wait for further instructions. DEVELOPER MIX CHANGING... 1011 The developer mix is being changed. DEVELOPER MIX: REMOVE BOTTLE 100E The developer mix bottle needs to be removed before printing can continue. DEVELOPER MIX: REPLACE NOW 1002 The developer mix needs to be changed. Replace the developer mix. DEVELOPER MIX: REPLACE SOON 1012 The developer mix needs to be changed soon. Replace the developer mix. DISKETTE IS NOT INSERTED E004 A diskette is not inserted in the drive or the diskette is corrupted. Insert a diskette and retry. DUPLEX DISABLED D005 Attempt to duplex with duplex disabled. ENABLING ... The printer is attempting to activate an attachment card or application. 1. 2. 3. 4. 5. Open the front cover. Remove the developer mix bottle. Close the front cover. Press Enter to clear the error message. Call for service if the problem continues. 1. Press Start and retry. 2. Call for service if the problem continues. Not an error, informational only. ERROR SEE USER'S GUIDE BA00 through BA02 Program check. 1. Restart the printer. 2. Call for service if the problem continues. ERROR SEE USER'S GUIDE BC02 Invalid print head resolution. 1. Shut down the printer and power off. 2. Power on. Press Start and retry. 3. Call for service if the problem continues. ERROR SEE USER'S GUIDE BC03 Invalid tray ID. 1. Shut down the printer and power off. 2. Power on. Press Start and retry. 3. Call for service if the problem continues. ERROR SEE USER'S GUIDE BC04 Invalid maximum paper size. 1. Check paper size assigned to each tray. 2. Call for service if the problem continues. ERROR SEE USER'S GUIDE BC05 Memory configuration changed. ERROR SEE USER'S GUIDE BF01 BF02 Control unit disk error. 1. Shut down the printer and power off. 2. Power on. Press Start and retry. 3. Call for service if the problem continues. ERROR SEE USER'S GUIDE BF03 Automatic backup to diskette failure. 1. This error is for the log only. 2. Inform the Customer Engineer on next service call. ERROR SEE USER'S GUIDE C003 through C004 Control unit error. 1. Shut down the printer and power off. 2. Power on. Press Start and retry. 3. Call for service if the problem continues. ERROR SEE USER'S GUIDE C005 Control unit error. ERROR SEE USER'S GUIDE D010 through D011 Printer error. A-4 3130 User's Guide Call for service and report code BC05. Call for service if printer does not recover. 1. Restart the printer. 2. Call for service if the problem continues. Table A-1 (Page 4 of 17). Messages and Recovery Actions Display Message Code (SRC) Description Recovery Action ERROR SEE USER'S GUIDE D300 through D3FF Printer error. 1. Shut down the printer and power off. 2. Power on. Press Start and retry. 3. Call for service if the problem continues. ETHERNET ERROR A450 Ethernet TCP/IP—Control unit error. 1. Restart the printer and retry. 2. Call for service if the problem continues. ETHERNET ERROR A451 Ethernet TCP/IP—Host error. 1. Press Start and retry. 2. Call for service if the problem continues. ETHERNET ERROR A452 Ethernet TCP/IP—Network error. 1. Report network problems to site System Network Administrator. 2. Call for service if the problem continues. ETHERNET ERROR A453 A454 Ethernet TCP/IP—Communications error. 1. Restart the printer and retry. 2. Call for service if the problem continues. ETHERNET ERROR A455 Ethernet TCP/IP—Host error. 1. Restart the printer and retry. 2. Call for service if the problem continues. ETHERNET ERROR A456 Ethernet TCP/IP—Network error. 1. Report network problems to site System Network Administrator. 2. Restart the printer and retry. 3. Call for service if the problem continues. ETHERNET ERROR A457 through A45B Ethernet TCP/IP—Communications error. 1. Report network problems to site System Network Administrator. 2. Restart the printer and retry. 3. Call for service if the problem continues. ETHERNET ERROR A45C Ethernet TCP/IP—Invalid startup. 1. Report network problems to site System Network Administrator. 2. Restart the printer and retry. 3. Call for service if the problem continues. ETHERNET ERROR A45D Ethernet TCP/IP—Invalid run time. 1. Report network problems to site System Network Administrator. 2. Restart the printer and retry. 3. Call for service if the problem continues. FONT DISK SPACE IS FULL E023 The hard disk space reserved for fonts is full. Delete some fonts from the hard disk and retry. FORM MISMATCH FOR AUTOSWITCH A different form name has been loaded in a tray previously designated as an autoswitch tray. While this different form name remains loaded in this tray, the previously designated autoswitching will not occur. Not an error, informational only. FORMATTING ... The printer is creating the print job for an internal print request, such as PRINT CURRENT CONFIG or PRINT SAMPLES. Not an error, informational only. Wait for the message to clear. The front cover is open. Close the front cover (if you have finished procedures requiring the door to be open). FRONT COVER OPEN 0103 Appendix A. Display Messages and Codes A-5 Table A-1 (Page 5 of 17). Messages and Recovery Actions Display Message Code (SRC) Description Recovery Action FUNCT. UNAVAIL DISABLE IPDS You attempted to disable an attachment adapter while it was the active IPDS source attachment and the IPDS application was enabled. Disable the IPDS application using the ATTACHMENTS / APPLICATIONS / IPDS / ENABLE STATUS menu. FUNCT. UNAVAIL DISABLE TOK RING FUNCT. UNAVAIL DISABLE ETHERNET FUNCT. UNAVAIL DISABLE SDLC FUNCT. UNAVAIL DISABLE LPR FUNCT. UNAVAIL DISABLE FTP FUNCT. UNAVAIL DISABLE TFTP FUNCT. UNAVAIL DISABLE PC PARALLEL FUNCT. UNAVAIL DISABLE ATTACHMT Certain configuration items can be changed only when the attachment adapter or application is not active. You attempted to change one of these items when the card or application was active. Disable the adapter or application and try again. FUNCTION UNAVAIL ENABLE IPDS You attempted to access the IPDS configuration menu while the printer's IPDS subsystem was not running. Enable the IPDS subsystem using the SETUP / MACHINE CONFIGURATION / DATA STREAMS / IPDS / ENABLE STATUS menu. FUNCTION UNAVAIL ENABLE PCL You attempted to access the PCL configuration menu while the printer's PCL subsystem was not running. Enable the PCL subsystem using the SETUP / MACHINE CONFIGURATION / DATA STREAMS / PCL / ENABLE STATUS menu. FUNCTION UNAVAIL ENABLE POSTSCRIPT You attempted to access the POSTSCRIPT configuration menu while the printer's POSTSCRIPT subsystem was not running. Enable the PCL subsystem using the SETUP / MACHINE CONFIGURATION / DATA STREAMS / POSTSCRIPT / ENABLE STATUS menu. FUNCTION UNAVAIL INSTALL PCL You attempted to access the PCL menu on a printer that does not have the PCL feature installed. Contact your point of purchase and order the PCL feature. FUNCTION UNAVAIL INSTALL POSTSCRIPT You attempted to access the POSTSCRIPT menu on a printer that does not have the PostScript feature installed. Contact your point of purchase and order the PostScript feature. FUNCTION UNAVAIL MUST BE OFFLINE You cannot perform the requested function when the attachment is enabled. Have the key operator disable the attachment. Retry the function. FUNCTION UNAVAIL (READ ONLY) You attempted to change a value displayed on the menu, but the menu item is a fixed value and cannot be changed. No action required. Do not attempt to change this item. A-6 3130 User's Guide Table A-1 (Page 6 of 17). Messages and Recovery Actions Display Message Code (SRC) FUNCTION UNAVAIL STOP PRINTER Description You selected a menu item that is not valid when the printer is printing. Recovery Action 1. Press Enter to clear the message. 2. Press Stop to make the printer Not Ready. 3. Reselect the menu item. FUSER UNIT: REPLACE NOW 1005 The fuser needs to be replaced. Replace the fuser unit. FUSER UNIT: REPLACE SOON 1013 The fuser unit life is almost finished. Replace the fuser unit soon. HARD ABORT See “Hard Abort” on page 7-13 for recovery actions. HOST APP OFF The PSF Writer application is not operational on the host. This message appears if the printer is running in a PSF Printer Sharing environment with other VTAM PSF application or with PostScript or PCL jobs. Normally this message does not appear when the printer is connected to a single PSF that is not being shared. IN PROGRESS ... The printer is processing a request you made on the operator panel. 1. Determine if the printer is in a PSF Sharing environment and if there is a job in the PSF print queue. 2. If the printer is in a PSF Sharing environment, wait 20 minutes before proceeding to the next step. 3. Start the PSF Writer application on the host. If this fails for a new installation, check the PSF Writer configuration on the host. If the PSF Writer is operational on the host and you have a new installation, check the networking configuration path to the printer. (This applies to an SNA attachment only.) Not an error, informational only. Wait for the request to be processed. INSTALLATION FAILED E003 Installation of fonts has failed. 1. Follow the proper procedure and try to install the fonts again. 2. Call for service if the problem continues. INTERNAL PRINT ERROR A501 through A505 Internal printing—Control unit problem. 1. Restart the printer and retry. 2. Call for service if the problem continues. INVALID FILE FORMAT E016 The format of the file is invalid. Check the formats of the font files you are trying to install. If the problem continues, get another diskette or call your font vendor. INVALID FONT SELECTED E015 An invalid font was selected for installation. Do not select a font that you have previously installed. IPDS ATTACHMENT NOT ACCESSIBLE E030 Operator cannot query for IPDS attachment status. IPDS ATTACHMENTS NOT DISABLED E019 You were using the font management utility to add or delete an IPDS font while the printer had an active IPDS communication session with a host. 1. Shut down the printer and power off. 2. Restart the printer and retry. 3. Call for service if the problem continues. Disable the active IPDS communication session by using the ATTACHMENTS / APPLICATIONS / IPDS / ENABLE STATUS / DISABLE menu. Then try the font management operation again. Appendix A. Display Messages and Codes A-7 Table A-1 (Page 7 of 17). Messages and Recovery Actions Display Message Code (SRC) Description Recovery Action Try the procedure again when IPDS is not busy. IPDS BUSY TRY LATER E032 The IPDS font data base is busy. IPDS FAILED E031 The query for the IPDS font data base failed. JAM RECOVERY OVERRIDDEN B00D Operator has overridden jam recovery. Not an error, informational only. JAM RECOVERY SUPPRESSED B00E Jam recovery has been suppressed. Not an error, informational only. JOB HAS BEEN CANCELED BOOA Job has been canceled. Not an error, informational only. The job numbered "n" has been canceled. Not an error, informational only. JOB n CANCELLED 1. Shut down the printer and power off. 2. Restart the printer and retry. 3. Call for service if the problem continues. LISTING OF FONTS FAILED E022 The listing font procedure has failed. LOWER SUB TRAY OPEN 2011 The lower sub tray is open. Close the lower sub tray. MAIN TRAY OPEN 2010 The main tray is open. Close the main tray. MISMATCH IN DEFINED FORM D004 The loaded form for this print job cannot be used. Assign a different form to the tray or change the definition of the form that is now loaded in the tray. You attempted to enable the IPDS application, but one of the following occurred: Make a valid selection in the SOURCE ATTACHMENT menu. NO ATTACHMENT SELECTED / AVAILABLE 1. Follow the proper procedure and try to list the fonts again. 2. Call for service if the problem continues. No IPDS attachment has been selected in the ATTACHMENT / APPLICATIONS / IPDS / CONFIGURATION / SOURCE ATTACHMENT menu The adapter you selected in the ATTACHMENT / APPLICATIONS / IPDS / CONFIGURATION / SOURCE ATTACHMENT menu is not installed in the machine. NO A4 OR LETTER PAPER LOADED A-8 3130 User's Guide Certain print samples are designed to print only on paper sizes A4 or LETTER. You have requested one of these samples, but there is not paper of either size loaded in the printer or the tray in which the required paper is loaded is disabled. Load the appropriate paper or enable the tray in which it is already loaded. Table A-1 (Page 8 of 17). Messages and Recovery Actions Display Message Code (SRC) Description Recovery Action NO HOST CONNECT There is no line connection made for the SNA Token Ring or SNA SDLC connection to the host. For PSF/400, vary on the AS/400 controller for the line. For all other hosts, check the configurations and communication controller connections. If the line connection is up on the host system, check the configuration to ensure that the host is configured correctly. Try changing the call direction on the printer to CALL for Token Ring. Changing to CALL sometimes causes the system to attach and overcome other configuration problems. (This applies to an SNA attachment only.) NO SPOOLED JOBS You selected the QUEUE STATUS menu item when there were no jobs spooled to the printer. Not an error, informational only. NO VALID FONT FILE FOUND E017 No valid file was found on the diskette. Insert another diskette with valid font formats or call the font vendor. NO VALID FONT TO DELETE E021 No more installed fonts to delete. Stop the deletion procedure. OUT OF PAPER D000 Paper out. Check for properly loaded paper in paper tray. OUT OF PAPER LOWER SUB TRAY 2002 The lower sub tray is out of paper. Load paper in lower sub tray. OUT OF PAPER MAIN TRAY 2001 The main tray is out of paper. Load paper in main tray. OUT OF PAPER SIDE TRAY 2006 The side tray is out of paper. Load paper in side tray. OUT OF PAPER TOP FRONT TRAY 2005 The top front tray is out of paper. Load paper in top front tray. OUT OF PAPER UPPER SUB TRAY 2003 The upper sub tray is out of paper. Load paper in upper sub tray. OUT OF TONER ADD TONER NOW 1001 The toner cartridge is empty. Replace the toner cartridge. You pressed the PAGE EJECT key. The PC Parallel job that has been received is now being processed to completion. Not an error, informational only. Wait for the job to print. PAGE EJECTING IN PROGRESS ... PAPER JAM 2020 Paper is detected at the main tray paper path. Follow directions for clearing paper jams. PAPER JAM 2021 Paper is detected at the lower sub tray paper path. Follow directions for clearing paper jams. PAPER JAM 2022 Paper is detected at the upper sub tray paper path. Follow directions for clearing paper jams. PAPER JAM 2031 Paper is detected on paper path 22 (top front tray pick jam sensor). Remove paper from the paper path. Appendix A. Display Messages and Codes A-9 Table A-1 (Page 9 of 17). Messages and Recovery Actions Display Message Code (SRC) PAPER JAM Description Recovery Action 2032 Paper is detected on paper path 23 (side tray pick jam sensor). Remove paper from the paper path. PAPER JAM 2050 2051 A double paper feed from main tray was detected. Follow directions for clearing paper jams. PAPER JAM 2052 2053 A double feed from lower sub tray was detected. Follow directions for clearing paper jams. PAPER JAM 2054 2055 A double feed from upper sub tray was detected. Follow directions for clearing paper jams. PAPER JAM 2058 2059 A double feed from top front tray was detected. Follow directions for clearing paper jams. PAPER JAM 205A 205B A double feed from side tray was detected. Follow directions for clearing paper jams. PAPER JAM 2060 There is a paper jam at main tray (before the main tray pick sensor). Follow directions for clearing paper jams. PAPER JAM 2061 There is a paper jam at main tray (main tray pick sensor). Follow directions for clearing paper jams. PAPER JAM 2062 There is a paper jam at main tray. Follow directions for clearing paper jams. PAPER JAM 2064 through 2066 There is a paper jam at lower sub tray. Follow directions for clearing paper jams. PAPER JAM 2068 through 206A There is a paper jam at upper sub tray. Follow directions for clearing paper jams. PAPER JAM 2070 through 2072 There is a paper jam at top front tray. Follow directions for clearing paper jams. PAPER JAM 2074 through 2078 There is a paper jam at side tray. Follow directions for clearing paper jams. PAPER JAM 4004 Paper is detected on paper path 5 (IS feed sensor). Follow directions for clearing paper jams. PAPER JAM 4006 Paper is detected on paper path 7 (IS timing sensor). Follow directions for clearing paper jams. PAPER JAM 4007 Paper is detected on paper path 8 (IS skew 1 sensor). Follow directions for clearing paper jams. PAPER JAM 4008 Paper is detected on paper path 9 (IS skew 2 sensor). Follow directions for clearing paper jams. PAPER JAM 4009 Paper is detected on paper path A (IS return top sensor). Follow directions for clearing paper jams. PAPER JAM 4010 through 4013 There is a paper jam at the registration station. Follow directions for clearing paper jams. A-10 3130 User's Guide Table A-1 (Page 10 of 17). Messages and Recovery Actions Display Message Code (SRC) PAPER JAM Description Recovery Action 4020 A skewed sheet from main tray was detected at the registration unit. Follow directions for clearing paper jams. PAPER JAM 4021 A skewed sheet from lower sub tray was detected at the registration unit. Follow directions for clearing paper jams. PAPER JAM 4022 A skewed sheet from upper sub tray was detected at the registration unit. Follow directions for clearing paper jams. PAPER JAM 4024 A skewed sheet from the return path was detected at the registration unit. Follow directions for clearing paper jams. PAPER JAM 4025 A skewed sheet from top front tray was detected at the registration unit. Follow directions for clearing paper jams. PAPER JAM 4026 A skewed sheet from side tray was detected at the registration unit. Follow directions for clearing paper jams. PAPER JAM 4030 4031 There is a paper jam at the input station (IS feed sensor). Follow directions for clearing paper jams. PAPER JAM 4032 4033 There is a paper jam at the input station (IS top sensor). Follow directions for clearing paper jams. PAPER JAM 4034 There is a paper jam at the input station (double feed detector). Follow directions for clearing paper jams. PAPER JAM 4037 4038 There is a paper jam at the registration station (IS timing sensor). Follow directions for clearing paper jams. PAPER JAM 403E 403F There is a paper jam at the registration station (paper top return sensor). Follow directions for clearing paper jams. PAPER JAM 600A Paper is detected on paper path B (drum wrap sensor). Follow directions for clearing paper jams. PAPER JAM 600B Paper is detected on paper path C (switch-back path sensor). Follow directions for clearing paper jams. PAPER JAM 600C Paper is detected on paper path D (return path 1 sensor). Follow directions for clearing paper jams. PAPER JAM 600D Paper is detected on paper path E (return path 2 sensor). Follow directions for clearing paper jams. PAPER JAM 600E Paper is detected on paper path F (PF out sensor). Follow directions for clearing paper jams. PAPER JAM 6010 Paper is detected on paper path 20 (HR out sensor). Follow directions for clearing paper jams. PAPER JAM 6028 The simplex sheet is wrapped around the photoconductor belt. Follow directions for clearing paper jams. Appendix A. Display Messages and Codes A-11 Table A-1 (Page 11 of 17). Messages and Recovery Actions Display Message Code (SRC) PAPER JAM Description Recovery Action 6029 The duplex sheet is wrapped around the photoconductor belt. Follow directions for clearing paper jams. PAPER JAM 6038 6039 There is a paper jam at the fusing station. Follow directions for clearing paper jams. PAPER JAM 6040 There is a paper jam at the switch back. Follow directions for clearing paper jams. PAPER JAM 6044 6045 There is a paper jam at the paper feed exit. Follow directions for clearing paper jams. PAPER JAM 6048 through 604B There is a paper jam at the return feed path. Follow directions for clearing paper jams. PAPER JAM 7041 Paper is detected on paper path 21 (side path sensor). Follow directions for clearing paper jams. PAPER JAM 7078 There is a paper jam at base stacker (before the base stacker out sensor). Follow directions for clearing paper jams. PAPER JAM 707A There is a paper jam at upper stacker (before the upper stacker out sensor). Follow directions for clearing paper jams. PAPER JAM 7080 7081 There is a paper jam at side stacker (side stacker jam sensor). Follow directions for clearing paper jams. PASSWORD INCORRECT You entered an incorrect password at the ENTER PASSWORD prompt. Enter the correct password. PASSWORD CHANGE SUCCESSFUL The new password has been set. Not an error, informational only. PASSWORD CHANGE FAILED You entered the new password differently the first and second times. The password was not set or changed. Repeat the process to set or change the password. Call for service if the problem continues. PC PARALLEL: INTERNAL ERROR A602 PC parallel internal error. PC PARALLEL: INTERNAL ERROR A603 PC parallel control unit error. 1. Shut down the printer and power off. 2. Restart the printer and retry. 3. Call for service if the problem continues. PC PARALLEL: INTERNAL ERROR A604 Configuration error. 1. Shut down the printer and power off. 2. Restart the printer and retry. 3. Call for service if the problem continues. PC PARALLEL: LOAD FAILED AF20 PC parallel load driver failed. 1. Shut down the printer and power off. 2. Restart the printer and retry. 3. Call for service if the problem continues. PC PARALLEL: UNLOAD FAILED AF21 PC parallel unload driver failed. 1. Shut down the printer and power off. 2. Restart the printer and retry. 3. Call for service if the problem continues. A-12 3130 User's Guide Table A-1 (Page 12 of 17). Messages and Recovery Actions Code (SRC) Description PC PARALLEL: OPEN FAILED AF22 PC parallel open driver failed. 1. Shut down the printer and power off. 2. Restart the printer and retry. 3. Call for service if the problem continues. PC PARALLEL: CLOSE FAILED AF23 PC parallel close driver failed. 1. Shut down the printer and power off. 2. Restart the printer and retry. 3. Call for service if the problem continues. PC PARALLEL: COMMUN FAILED AF24 PC parallel communication failed. 1. Shut down the printer and power off. 2. Restart the printer and retry. 3. Call for service if the problem continues. PCL BUSY TRY LATER E008 The PCL device (pcl) is busy and cannot be suspended. PCL FAILED E007 Communication with the PCL device (pcl) failed. 1. Shut down the printer and power off. 2. Restart the printer and retry. 3. Call for service if the problem continues. PCL NOT RESUMED E011 Communication with the PCL device (pcl) failed. 1. Shut down the printer and power off. 2. Restart the printer and retry. 3. Call for service if the problem continues. PHOTOCOND BELT: REPLACE NOW 1007 The photoconductor belt needs to be replaced. Replace the photoconductor belt. PHOTOCOND BELT: REPLACE SOON 1014 The photoconductor belt life is almost finished. Replace the photoconductor belt soon. POSTSCRIPT BUSY TRY LATER E010 The PostScript device (ps) is busy and cannot be suspended. Try the procedure again when PostScript is not busy. POSTSCRIPT FAILED E009 Communication with the PostScript device (ps) failed. 1. Shut down the printer and power off. 2. Restart the printer and retry. 3. Call for service if the problem continues. POSTSCRIPT NOT RESUMED E013 Communication with the PostScript device (ps) failed. 1. Shut down the printer and power off. 2. Restart the printer and retry. 3. Call for service if the problem continues. PRINT ADJUST HAS BEEN ENTERED B009 Printer adjust has been entered. PRINT FONT LIST FAILED E018 Printing of the font list failed. PRINTER HAS BEEN MADE NOT READY B00C Printer has been made not ready. Not an error, informational only. PRINTER SETUP HAS CHANGED B003 Printer attributes have changed. Not an error, informational only. The printer is processing the request you made on the operator panel. Not an error, informational only. Display Message PROCESSING ... PROGRAM CHECK Recovery Action Try the procedure again when PCL is not busy. Not an error, informational only. 1. Follow the proper procedure and try to print the listing again. 2. Call for service if the problem continues. See “Program Check” on page 7-13 for recovery actions. Appendix A. Display Messages and Codes A-13 Table A-1 (Page 13 of 17). Messages and Recovery Actions Display Message Code (SRC) Description Recovery Action READING ... The printer is reading internal data and processing it to determine the next message to display. Not an error, informational only. REENTER PASSWORD When you set or change a password, it must be entered a second time to ensure it was entered correctly. Enter the correct password again. REMOVE DEVELOPER MIX BOTTLE 100E RESTART IN PROGRESS The developer mix bottle needs to be removed before printing can continue. The IPDS subsystem is being restarted because you selected the SETUP / MACHINE CONFIGURATION / DATA STREAMS / IPDS / CONFIGURATION / RESTART IPDS NOW menu item. 1. 2. 3. 4. 5. Open the front cover. Remove the developer mix bottle. Close the front cover. Press Enter to clear the error message. Call for service if the problem continues. Not an error, informational only. SDLC ERROR A4A0 A4A1 A4A2 SDLC/Token Ring SNA—Communication error. SIDE STACKER COVER OPEN 0106 The cover of the side stacker is open. Close the cover of the side stacker. SIDE TRAY OPEN 2015 The cassette in the side tray is not installed or adjusted correctly. Install or adjust the cassette. SIZE MISMATCH LOWER SUB TRAY 2040 The paper size in lower sub tray is different from the size presently configured. 1. Reload the tray with the correct paper size. 2. Call for service if the problem continues. SIZE MISMATCH MAIN TRAY 2040 The paper size in main tray is different from the size presently configured. 1. Reload the tray with the correct paper size. 2. Call for service if the problem continues. SIZE MISMATCH SIDE TRAY 2040 The paper size in the side tray is different from the size presently configured. 1. Reload the tray with the correct paper size. 2. Call for service if the problem continues. SIZE MISMATCH TOP FRONT TRAY 2040 The paper size in top front tray is different from the size presently configured. 1. Reload the tray with the correct paper size. 2. Call for service if the problem continues. SIZE MISMATCH UPPER SUB TRAY 2040 The paper size in upper sub tray is different from the size presently configured. 1. Reload the tray with the correct paper size. 2. Call for service if the problem continues. SNA SDLC ERROR A4B0 SNA SDLC—Control unit error. 1. Restart the printer and retry. 2. Call for service if the problem continues. SNA SDLC ERROR A4B1 SNA SDLC—Host error. 1. Press Start and retry. 2. Call for service if the problem continues. A-14 3130 User's Guide 1. Restart the printer and retry. 2. Call for service if the problem continues. Table A-1 (Page 14 of 17). Messages and Recovery Actions Display Message Code (SRC) Description Recovery Action SNA SDLC ERROR A4B2 A4B3 SNA SDLC—Network error. 1. Report network problems to the site System Network Administrator. 2. Call for service if the problem continues. SNA SDLC ERROR A4B4 SNA SDLC—Communications error. 1. Restart the printer and retry. 2. Call for service if the problem continues. SNA SDLC ERROR A4B5 SNA SDLC—Host error. 1. Restart the printer and retry. 2. Call for service if the problem continues. SNA SDLC ERROR A4B6 SNA SDLC—Network error. 1. Report network problems to the site System Network Administrator. 2. Restart the printer and retry. 3. Call for service if the problem continues. SNA SDLC ERROR A4B7 through A4BB SNA SDLC—Communications error. 1. Report network problems to the site System Network Administrator. 2. Restart the printer and retry. 3. Call for service if the problem continues. SNA SDLC ERROR A4BC SNA SDLC—Invalid startup. 1. Report network problems to the site System Network Administrator. 2. Restart the printer and retry. 3. Call for service if the problem continues. SNA SDLC ERROR A4BD SNA SDLC—Invalid run time. 1. Report network problems to the site System Network Administrator. 2. Restart the printer and retry. 3. Call for service if the problem continues. SNA SDLC ERROR A4BE SNA SDLC—Waiting for connection. Normally not an error. If problem continues, do the following: 1. Restart the printer and retry. 2. Report network problems to the site System Network Administrator. 3. Call for service if the problem continues. SPOOL SPACE FULL A605 The printer's internal space for holding jobs before they are printed is full. No more data can be received from an attachment or application that is using spooling. Wait for some of the jobs to print—which frees the space they had been occupying—or cancel some or all the spooled jobs. STACKER ENABLED OR DISABLED B008 Stacker enabled or disabled. Not an error, informational only. STACKER FULL D001 Stacker full. Check for full stacker or paper jammed on stacker. STACKER FULL BASE STACKER 700B The base stacker is full of paper. Remove paper from the stacker. STACKER FULL SIDE STACKER 700D The side stacker is full of paper. Remove paper from the stacker. STACKER FULL UPPER STACKER 700C The upper stacker is full of paper. Remove paper from the stacker. Appendix A. Display Messages and Codes A-15 Table A-1 (Page 15 of 17). Messages and Recovery Actions Display Message Code (SRC) Description Recovery Action STARTING ... The printer is processing the start request you made by pressing the START button on the operator panel. The printer is being made READY. Not an error, informational only. STOPPING ... The printer is processing the stop request you made by pressing the STOP button on the operator panel. The printer is being made NOT READY. Not an error, informational only. TOKEN RING ERROR A460 Token Ring TCP/IP—Control unit error. 1. Restart the printer and retry. 2. Call for service if the problem continues. TOKEN RING ERROR A461 Token Ring TCP/IP—Host error. 1. Press Start and retry. 2. Call for service if the problem continues. TOKEN RING ERROR A462 Token Ring TCP/IP—Network error. 1. Report network problems to the site System Network Administrator. 2. Call for service if the problem continues. TOKEN RING ERROR A463 A464 Token Ring TCP/IP—Communications error. 1. Restart the printer and retry. 2. Call for service if the problem continues. TOKEN RING ERROR A465 Token Ring TCP/IP—Host error. 1. Restart the printer and retry. 2. Call for service if the problem continues. TOKEN RING ERROR A466 Token Ring TCP/IP—Network error. 1. Report network problems to the site System Network Administrator. 2. Restart the printer and retry. 3. Call for service if the problem continues. TOKEN RING ERROR A467 through A46B Token Ring TCP/IP—Communications error. 1. Report network problems to the site System Network Administrator. 2. Restart the printer and retry. 3. Call for service if the problem continues. TOKEN RING ERROR A46C Token Ring TCP/IP—Invalid startup. 1. Report network problems to the site System Network Administrator. 2. Restart the printer and retry. 3. Call for service if the problem continues. TOKEN RING ERROR A46D Token Ring TCP/IP—Invalid run time. 1. Report network problems to the site System Network Administrator. 2. Restart the printer and retry. 3. Call for service if the problem continues. TOKEN RING ERROR A4A0 through A4C0 Token Ring SNA—Control unit error. 1. Restart the printer and retry. 2. Call for service if the problem continues. TOKEN RING ERROR A4C1 Token Ring SNA—Host error. 1. Press Start and retry. 2. Call for service if the problem continues. TOKEN RING ERROR A4C2 Token Ring SNA—Network error. 1. Report network problems to the site System Network Administrator. 2. Call for service if the problem continues. TOKEN RING ERROR A4C3 A4C4 Token Ring SNA—Communications error. 1. Restart the printer and retry. 2. Call for service if the problem continues. A-16 3130 User's Guide Table A-1 (Page 16 of 17). Messages and Recovery Actions Code (SRC) Description TOKEN RING ERROR A4C5 Token Ring SNA—Host error. 1. Restart the printer and retry. 2. Call for service if the problem continues. TOKEN RING ERROR A4C6 Token Ring SNA—Network error. 1. Report network problems to the site System Network Administrator. 2. Restart the printer and retry. 3. Call for service if the problem continues. TOKEN RING ERROR A4C7 through A4CB Token Ring SNA—Communications error. 1. Report network problems to the site System Network Administrator. 2. Restart the printer and retry. 3. Call for service if the problem continues. TOKEN RING ERROR A4CC Token Ring SNA—Invalid startup. 1. Report network problems to the site System Network Administrator. 2. Restart the printer and retry. 3. Call for service if the problem continues. TOKEN RING ERROR A4CD Token Ring SNA—Invalid run time. 1. Report network problems to the site System Network Administrator. 2. Restart the printer and retry. 3. Call for service if the problem continues. TOKEN RING ERROR A4CE Token Ring SNA—Waiting for connection. Normally not an error. If problem continues, do the following: Display Message Recovery Action 1. Restart the printer and retry. 2. Report network problems to the site System Network Administrator. 3. Call for service if the problem continues. TOP AUTO-EJECT DOOR OPEN 0105 The top auto-eject door is open. Close the auto-eject door. TOP FRONT TRAY OPEN 2014 The top front tray is open. Close the top front tray. TRANSFER BELT: REPLACE NOW 100A The transfer belt unit needs to be replaced. Replace the transfer belt unit. TRANSFER BELT: REPLACE SOON 1016 The transfer belt unit life is almost finished. Replace the transfer belt unit soon. TRAY COVER OPEN 0104 The tray cover is open. Close the tray cover. TWINAXIAL ERROR A100 Twinaxial—Station Address compare error. 1. Check the station address in configuration. 2. Check cables. 3. Call for service if the problem continues. TWINAXIAL ERROR A101 Twinaxial—Line parity error. 1. Check cables. 2. Call for service if the problem continues. TWINAXIAL ERROR A107 Twinaxial—Severe communication error, generates off-line condition. 1. Check that attachment cables are connected. 2. Restart the printer and retry. 3. Call for service if the problem continues. TWINAXIAL ERROR A108 A109 Twinaxial—Printer control unit error, generates off-line condition. 1. Restart the printer and retry. 2. Call for service if the problem continues. Appendix A. Display Messages and Codes A-17 Table A-1 (Page 17 of 17). Messages and Recovery Actions Code (SRC) Description TWINAXIAL ERROR A10A through A10E Twinaxial—Printer control unit or communications error, generates off-line condition. 1. Restart the printer and retry. 2. Call for service if the problem continues. TWINAXIAL ERROR A1CC through A1FF Twinaxial—Diagnostics or configuration failure. 1. Restart the printer and retry. 2. Call for service if the problem continues. UPPER SUB TRAY OPEN 2012 The upper sub tray is open. Close the upper sub tray. The selected autoswitch tray is not loaded with the same form name as that loaded in the original tray. Select an autoswitch tray loaded with the same form name as that loaded in the original tray. Display Message WRONG FORM NAME IN AUTOSWITCH TRAY WRONG PAPER SIZE IN INPUT TRAY BC01 Invalid paper size in input tray. WRONG SEQUENCE NUMBER E006 The wrong sequence number was entered when adding or deleting fonts. A-18 3130 User's Guide Recovery Action 1. 2. 3. 4. Check paper size and cassettes. Shut down the printer and power off. Power on. Press Start and retry. Call for service if the problem continues. Correct the sequence number and retry. (Do not use the same sequence number twice.) Abbreviations This list explains the acronyms and abbreviations used in this manual and in the other manuals that are part of the 3130 documentation library. ABIC Adoptive Bi-Level Image Compression. AEA Alternate Exception Action. AFIG Advanced Function Image and Graphics. AFP Advanced Function Presentation Advanced Function Printing. AFPDS Advanced Function Printing Data Stream. AFPF Advanced Function Print Finishing. AIX Advanced Interactive Executive. APA All-Points Addressable. ARQ Active Record Queue. ASCII American National Standard Code for Information Interchange. ASHRAE American Society of Heating, Refrigeration, and Air Conditioning Engineers. IML Initial Microcode Load. IP Internet Protocol. IPDS Intelligent Printer Data Stream. IPX Internetwork Packet Exchange. ISO International Organization for Standardization. JES2 Job Entry System 2. JES3 Job Entry System 3. LCD Liquid Crystal Display. LED Light-Emitting Diode. LF Load Font command. LU Logical Unit. MAC Medium Access Control. MB Megabyte (1MB=1 048 576 bytes). MICR Magnetic Ink Character Recognition. MIH Missing-Interrupt Handler. CCITT Comite Consultatif International Telegraphique et Telephonique. MMR Modified-Modified READ 2 dimensional image. CCW Channel Command Word. MR CE Customer Engineer (IBM). CPI Characters per Inch. Modified READ Relative Element Address Designate) 2-dimensional image compression algorithm. Also referred to as CCITT Group 3. CSW Channel Status Word. MTU Maximum Transmission Unit. CU Control Unit. MVS Multiple Virtual Storage. DBCS Double-byte Character Set. NACK Negative Acknowledge reply. DASD Direct Access Storage Device. NOP No Operation instruction. DPE Decompression Performance Enhancement. OBR Outboard Recorder. DPI Dots Per Inch. OCR Optical Character Recognition. EBCDIC Extended Binary-Coded Decimal Interchange Code. OPC Organic Photoconductor. OS/VS Operating System/Virtual Storage. EC Engineering Change. EHC Exception Handling Control command. EMTF European Money Transfer Form. EP PAGEDEF Page Definition. PCL Hewlett-Packard Printer Command Language. Electrophotographic. PC Photoconductor. ESCON Enterprise Systems Connection. PEL Picture Element. ESMM End Select Medium Modification. PEM Print-Error Marker. FORMDEF Form Definition. PJL Hewlett-Packard Printer Job Language. HAID Host-Assigned ID. PPM Parts Per Million HFSI High Frequency Service Items. PSF Print Services Facility. IHF Image Handling Facility. RAM Random Access Memory. Copyright IBM Corp. 1994, 1996 G-1 RPQ Request for Price Quotation. RRL Request Resource List. SBCS Single-byte Character Set. SCSW Subchannel Status Word. SDLC Synchronous Data Link Control. SMM Select Medium Modification. SNA System Network Architecture. SPX Sequenced Packet Exchange. SRC System Reference Code. G-2 3130 User's Guide TCP/IP Transmission Control Protocol/Internet Protocol. TCS Two-Channel Switch. VM Virtual Machine. VSE Virtual Storage Extended. VSE/AF Virtual Storage Extended/Advanced Functions. VSE/SP Virtual Storage Extended/System Package. XOA Execute Order Anystate command. XOH Execute Order Homestate command. Glossary The following terms are defined as they are used in 3130 documentation. If you do not find the term you need, refer to the index or to the IBM Dictionary of Computing, ZC20-1699 or the IBM Dictionary of Printing, G544-3973. A A3-size paper. Paper that is 297 x 420 mm (11.7 x 16.5 in.). An ISO standard size. A4-size paper. Paper that is 210 x 297 mm (8.3 x 11.7 in.). An ISO standard size. adhesive label. Special-application material; typically consists of paper labels coated on one side with an adhesive mixture temporarily affixed to backing material. See also carrier. adjust print. To adjust a preprinted form's point of origin horizontally or vertically so that text lines up correctly on the preprinted form. Advanced Function Image and Graphics. This allows the 3130 to decompress compressed graphics in GOCA format and images in IOCA format. Advanced Function Printing (AFP). The set of licensed programs, together with user applications, that use the all-points-addressable concept to print data (text, images, and graphics) on a wide variety of printers. Advanced Function Printing includes creating, formatting, distributing, and printing information. Advanced Function Printing data stream (AFP data stream). A printing data stream that is processed in AFP environments. all-points addressability. The capability to address, reference, and position text, overlays, and images at any defined point on the printable area of a page. application. The use to which an information processing system is put. application program. A program written for or by a user that applies to the user's work, such as a program that does inventory control or payroll. ASCII. American National Standard Code for Information Interchange. The standard code, using a coded character set consisting of 7-bit coded characters (8 bits including parity check), that is used for information interchange among data processing systems, data communication systems, and associated equipment. The ASCII set consists of control characters and graphic characters. autostart. A printer configuration setting. When the printer is powered on, the printer automatically enables the last enabled attachment and makes the printer Ready. autoswitch. An alternate tray. If an autoswitch tray is selected for an input tray, that autoswitch tray starts feeding paper when the original input tray becomes empty. B B4-size paper. Paper that is 257 x 363 mm (10.1 x 14.33 in.). A JIS standard size. B5-size paper. Paper that is 182 x 257 mm (7.17 x 10.12 in.). A JIS standard size. bar code. A code representing characters by sets of parallel bars of varying thickness and separation that are read optically by transverse scanning. basis weight. The weight in pounds of a ream (500 sheets) of paper cut to a given standard size for that grade; for example, 25 x 38 inches for book papers, 17 x 22 inches for bond papers, and other sizes for other grades. binder holes. A series of holes or slots punched at set intervals that allows the form to be inserted in a loose-leaf or ring binder. bond paper. Paper formulated with at least 80% wood pulp. Bond-paper forms work best in the IBM 3130. See also cotton bond. buffer. A routine or storage used to compensate for a difference in rate of flow of data, or time of occurrence of events, when transferring data from one device to another. application programmer. A person who develops application programs. Contrast with system programmer. Copyright IBM Corp. 1994, 1996 G-3 C calender. A process to make paper smooth or glossy by passing it through a series of metal rollers during the last steps of a paper-making machine. calender cut. Slits, glazed lines, or discolored lines across the paper caused when wrinkles pass through the calender rollers. caliper. The thickness of forms. This is usually expressed in thousandths of an inch. carrier. The backing material for labels. Labels consist of the printable material, the adhesive, and the carrier. See also adhesive label. chad. (1) The material separated from a data medium when punching a hole. (2) The residue separated from the carrier holes in continuous forms. character. A letter, number, punctuation mark, or special graphic used for the production of text. character set. (1) A finite set of different characters that is complete for a given purpose; for example, the character set in ISO Standard 646, “7-bit Coded Character Set of Information Processing Interchange.” (2) A group of characters used for a specific reason; for example, the set of characters a printer can print. chemically pulped wood. The process by which the non-cellulose material that binds wood fibers together is extracted chemically. coated paper. Paper that has had a surface coating applied to produce smoothness. code page. A font library member that associates code points and character identifiers. code point. An element of a code page or site in a code table to which a character can be assigned. coded font. A font file (data set, library member, or resource object) that associates a code page and font character set. For double-byte fonts, a coded font associates multiple pairs of code pages and font character sets. command. A control signal that initiates an action or the beginning of a sequence of actions. commercial number 10 envelope. A common North American envelope size (4.12 x 9.5 in.). configuration. (1) The arrangement of a computer system or network as defined by the nature, the number, and the chief characteristics of its functional G-4 3130 User's Guide units. More specifically, the term configuration may refer to a hardware configuration or a software configuration. (2) The devices and programs that make up a system, subsystem, or network. configure. The procedure used to customize the 3130 for a specific operating and communication environment. connector. A means of establishing electrical flow. constant data. Data that does not change; for example, the company letterhead and standard text in form letters, or the headings and boxes on a preprinted form. Contrast with variable data. constant spaced font. A font in which the graphic characters are contained in character cells of uniform size. The distance between reference points of adjacent graphic characters is constant in the in-line progression. The white spaces between graphic characters may vary. Synonymous with fixed-space font. Contrast with proportionally spaced font. control storage. In the 3130, a portion of storage that contains microcode and other data. control unit (CU). (1) A device that controls input and output operations at one or more devices. (2) In the 3130, the electronics and code that control the printer and the communication attachment. controlling computer. The processing unit to which the 3130 is attached through a communication attachment. controlling computer system. The data-processing system to which a network is connected and with which the system can communicate. copy group. One or more copies of a sheet of paper. Each may have modifications applied; for example, overlays and text suppression. copy modification. The process of adding, deleting, or replacing data on selected copies of certain sheets of paper. copy separation. The mechanism for distinguishing consecutive copies of a single data set. In the stacker, it consists of offset stacking. corner cut. In a form, a cut or opening of any size containing one or more right angles. corona. A small diameter wire (or wires, depending on the function) to which a high voltage is applied, causing ionization of the air. The ionization creates an electrical charge to perform various functions during the printing process. cotton bond. Paper made of wood fiber and cotton. Bond papers were developed for items such as stocks, bonds, certificates, and other documents that are subjected to repeated handling, filing, and long-term storage. Bond paper is usually designated by the percentage of cotton in the paper, such as 25% cotton bond. See also bond paper. cure. The process of drying ink sufficiently for minimum transfer of the ink to any parts of the printer it contacts. curl. See paper curl. customer engineer. The person responsible for installing and repairing the printer. Synonymous with service representative. cut. The severed part of a perforation. Cuts are separated by ties. cutout. A part of the form that has been eliminated or perforated for subsequent removal; for example, corner cuts and binder holes. diagnostic. Pertaining to the detection and isolation of errors in programs and faults in equipment. diagnostic mode. The operational mode in which the printer can check itself in case of a malfunction. When the 3130 is in diagnostic mode, it is not accepting information from the attached controlling computer system. In the 3130, only customer engineers can use diagnostic mode. Contrast with status mode and test mode. direct attach. The environment in which an application program directly allocates the 3130 printer. disable. To make non-functional. Contrast with enable. disabled mechanism. If necessary, the operator can disable some printer functions. In the 3130, the mechanisms that can be disabled are the paper trays, stackers, and the duplex mechanism. cut-sheet paper. Paper that is cut into sheets. diskette. A thin, flexible magnetic disk and a protective jacket, in which the disk is permanently enclosed. A flexible magnetic disk enclosed in a protective container. D diskette-storage device. A direct-access-storage device that uses diskettes as the storage medium. data stream. (1) All data transmitted through a data channel in a single read or write operation. (2) A continuous stream of data elements being transmitted, or intended for transmission, in character or binary-digit form, using a defined format. double-byte character set. A font in which the characters are defined by two bytes; the first defines a coded-font section, the second defines a code point. Contrast with double-byte coded font. double-tag interlock. See high-speed transfer. data-transfer mode. See data-transfer phase. data-transfer phase. The phase of a data call during which data signals can be transferred between data terminal equipments (DTEs) connected via the network. deep embossing. The process of creating a paper surface by raising or depressing localized areas of the paper in a specific pattern that is more exaggerated than standard embossing. Embossing is usually done with engraved rolls that press the desired pattern into the paper. Deep embossing can cause multiple sheet feeds and paper jams. default. An alternative value, attribute, or option that is assumed when none has been specified. developed image. The image that has been exposed onto the photoconductor and covered with toner by the developer. developer. The unit in the process assembly that supplies a flow of developer mix over the photoconductor to develop the electrostatic image. dry ink. The material that forms the image on the paper. Synonymous with toner. duplex printing. Printing on both sides of a sheet of paper. Synonym for two-sided printing. Contrast with simplex printing. E edge sensitivity. A setting designed for paper with a nonstandard edge. Example: 3-hole paper. electronic form. See electronic overlay. electronic overlay. (1) A collection of constant data that is electronically composed in the host system and may be combined with variable data on a sheet during printing. (2) The library member that contains the definition of the electronic overlay. See also forms, preprinted form, overlay, and forms overlay. electrophotographic process. The creation of an image on forms by uniformly charging the Glossary G-5 photoconductor, creating an electrostatic image on the photoconductor, attracting negatively charged toner to the discharged areas of the photoconductor, and transferring and fusing the toner to forms. electrostatic image. The invisible image consisting of discharged areas of the photoconductor as a result of exposure from digital data. emboss. To press and raise the surface of paper into a design. Embossed paper appears thicker than non-embossed paper, can increase printer wear, and can degrade print quality. See also deep embossing. form definition (FORMDEF). In Print Services Facility (PSF), a resource object that defines the characteristics of the form, which include: overlays to be used, text suppression, position of page data on the form, and number and modifications of a page. forms. The material on which output data is printed, such as paper or adhesive labels. See electronic overlay and preprinted form. forms overlay. In the 3130, that function of the printer that allows customer-prepared data to be printed with variable-page data. See also overlay and electronic overlay. enable. To make functional. Contrast with disable. error log. (1) A data set or file in a product or system where error information is stored for later access. (2) A record of machine checks, device errors, and volume statistical data. error-recovery procedure. Procedures designed to help isolate and, where possible, to recover errors in equipment. The procedures are often used in conjunction with programs that record the statistics of machine malfunctions. Ethernet. A 10-megabit baseband local area network that allows multiple stations to access the transmission medium at will without prior coordination, avoids contention by using carrier sense and deference, and resolves contention by using collision detection and transmission. Ethernet uses carrier sense multiple access with collision detection (CSMA/CD). European money transfer form. A form used for financial transactions. Its size is 210 mm x 317 mm (8.3 in. x 12.5 in.). exception. (1) An invalid or unsupported data-stream construction. (2) In IPDS, a condition requiring host notification or requiring the host to resend data. F font. (1) A family or assortment of characters of a given size and style; for example, 9-point Bodoni modern. A font has a unique name and may have a registry number. (2) A font is data used to create an image of each graphic character; for example, a raster pattern. font section. A subdivision of a double-byte font character set. The section consists of a maximum of 256 characters. format. (1) The arrangement or layout of data on a data medium. (2) The size, style, type of page, margins, printing requirements, and so on, of a printed page. G-6 3130 User's Guide forms path. The entire route that forms travel during processing. The forms path usually begins where the forms are loaded and ends at the stacker. Synonym for paper path. function key. A key that performs a specified set of operations when it is pressed. fuse. To use heat and pressure to blend toner onto forms to make a permanent bond. fuser. The assembly that bonds the toned image to the paper, using heat and pressure. G graphic. A symbol produced by a process such as handwriting, drawing, or printing. See also vector graphics. graphic character. A character that is normally represented by a graphic, independent of code points or fonts. A graphic character is often in the form of a spatial arrangement of adjacent or connected strokes; for example, a letter or digit. Graphic Object Content Architecture (GOCA). An IPDS command set that provides data control information for printing graphics on a page, page segment, or overlay. H hardware. Physical equipment used in data processing, as opposed to programs, procedures, rules, and associated documentation. Contrast with software. Hewlett-Packard Printer Command Language (HP-PCL). A data stream used for printing on Hewlett-Packard laser printers and compatible printers. Hewlett-Packard Printer Job Language (HP-PJL). A language for controlling the printer at the job level. high-speed transfer. A transfer method using ‘service out’/‘service in’ and ‘data out’/‘data in’ lines. This method is faster than single-tag interlock. installation verification procedure. A procedure distributed with IBM licensed programs that tests the newly installed IBM programs to verify that the basic facilities of the programs are functioning correctly. host system. (1) The primary or controlling computer in a multiple-computer installation. (2) A computer used to prepare programs for use on another computer or on another data-processing system; for example, a computer used to compile, link edit, or test programs to be used on another system. intelligent printer data stream (IPDS). An all-points-addressable data stream that allows users to position text, images, and graphics at any defined point on a printed page. I interface. A shared boundary. An interface might be a hardware component to link two devices or it might be a portion of storage or registers accessed by two or more computer programs. IBM branch office. The local IBM sales office. IBM customer engineer. An IBM representative who services IBM products in the field. See also service representative. icon. A pictorial representation of an object. ideographic. Pertaining to 2-byte characters consisting of pictograms, symbolic characters, and other types of symbols. image. (1) A string of picture elements organized in scan lines to represent the contrasting portions of a picture. (2) A likeness or imitation of an object. (3) In this printer, an image comprises a string of pels organized in scan lines to represent the contrasting portions of a picture. The image may consist of any data stored as a raster pattern. The term image is interchangeable with impression and is printed on one side of a sheet of paper. See also impression. Image Object Content Architecture (IOCA). An IPDS command set to print image data on a page, page segment, or overlay. image printer. A printer in which printing is the result of mechanical impacts. Contrast with nonimpact printer. impression. An implied or physical page. Used when calculating the reduction of printer output caused by switching the printer between duplex and simplex modes or upper and lower paper supplies. See also image. Initial microcode load (IML). A procedure that prepares the 3130 for use. input. The data that is entered into a device for processing or storage. installation. (1) In system development, preparing and placing a functional unit in position for use. (2) A particular computing system, including the work it does and the people who manage it, operate it, apply it to problems, service it, and use the results it produces. interlocked mode. Prevents a machine or device from initiating further operations until an operation in process is completed. interlocking design. An envelope design that can cause adjacent envelopes in a stack to lock together and be difficult to separate with a picking mechanism. Envelopes with windows or cutouts have an interlocking design. internal print job. A print job originated on the printer itself. Example: print samples, current attachment configuration print-out. intervention. An unexpected condition that requires user intervention to clear it, for example, out of toner. IPX. Internetwork Packet eXchange. A Novell, Inc. implementation of the XNS communication protocol that transports data packets between network devices. Delivery of the data packets is not guaranteed. Contrast with SPX. ISO DL envelope. A standard international envelope size (110 x 220 mm). ISO sizes. Pertaining to a set of paper sizes selected from those standardized by the International Organization for Standardization (ISO) for use in data processing. J jam. In a printer, a condition where forms have become blocked or wedged in the forms path so the printer cannot operate. JIS. Japanese Industry Standards. Used in reference to paper standards for size. job separation. (1) The hardware mechanism that uses the mark form sequence to distinguish jobs, which are consecutively stacked in the output stacker. (2) In the 3130, job offset stacking is used to indicate job termination. See also offset stacking. Glossary G-7 K from a uniform point source of 1 candle intensity. Equal to 1 lumen per square meter. key operator. A user assigned to perform routine maintenance and configuration of the printer. M L laid finish. The ribbed appearance of paper that is produced by a roll on which the wires are laid parallel to each other instead of being woven. landscape orientation. Text and images that are printed parallel to the longer side of the forms. Contrast with portrait orientation. laser (light amplification by stimulated emission of radiation). A device that emits a beam of coherent light. latent image. In a printer, the invisible image that exists in the sensitized material after exposure but before development. layout plan. A list of requirements, such as electrical and space, that must be considered before installing the 3130. ledger-size paper. Paper that is 279 x 432 mm (11.0 x 17.0 in.). medium access control. For local area networks, the method of determining which device has access to the transmission medium at any time. menu. A list of procedures or actions available for selection. microcode. In the 3130, refers to the microprogramming stored on the microcode diskette. Microcode is used by the control unit to manage the printer and its functions. N NetWare. A network operating system developed by Novell, Inc. NetWare runs on a server and provides several functions to the network and the applications running on it, including print spooling, file serving, and interprocess communications. nonimpact printer. A printer in which printing is not the result of mechanical impacts. Contrast with impact printer. legal-size paper. Paper that is 216 x 356 mm (8.5 x 14.0 in.). normal duplex. Printing of both sides of a sheet where the top is in the same position on both sides. Contrast with tumble duplex. letter-size paper. Paper that is 216 x 279 mm (8.5 x 11.0 in.). O library. A collection of related files. For example, one line of an invoice may form an item, a complete invoice may form a file, and the collection of inventory control files may form a library. The libraries used by an organization are known as the data bank. licensed program. A separately priced program that bears an IBM copyright and is offered to customers under the terms and conditions of the Agreement for IBM Licensed Programs. line printer. A printer that prints a line of characters as a unit. Contrast with page printer. logical page. The print on the page, such as composed text, graphics, and fonts within defined margins. Contrast with physical page. logo. An identifying emblem, statement, or motto of a company. lux. A unit of illumination equal to the direct illumination of a surface that is everywhere 1 meter G-8 3130 User's Guide offline. Not connected to an installed and enabled attachment. Contrast with online. offset paper. A grade of paper to which sizing is added to resist moisture and surface during printing by ink presses. offset stacking. The jogged stacking of output media in the output stacker so that jobs protrude from the balance of the stack to give physical identification. See also job separation. OK. With the 3130 printer, an operator panel keyboard selection that causes the printer to accept and save any changed information. online. Connected to an installed and enabled attachment. Contrast with offline. operating environment. The physical environment; for example, temperature, humidity, layout, or power requirements. operating requirements. A list of requirements, such as environmental, electrical, and space, that must be satisfied before the 3130 can be installed. pallet. A portable platform for handling, storing, or moving materials. paper curl. The curve or bend of the paper. Optical Character Recognition (OCR). Character recognition that uses optical means to identify graphic characters. orientation. The number of degrees an object is rotated relative to a reference; for example, the orientation of an overlay relative to the page point of origin. See also text orientation. outboard recorder (OBR). A feature that records pertinent data on the system recorder file when an unrecoverable I/O exception occurs. overlay. (1) A collection of predefined data, such as lines, shading, text, boxes, or logos, that can be combined with variable data on a sheet while printing. (2) The library member that contains the definition of an overlay. See also electronic overlay and forms overlay. paper path. The entire route that forms travel while they are being processed. The paper path usually begins where the forms are loaded and ends at the stacker. parallel channel. A channel having a System/360 and System/370 channel-to-control-unit I/O interface that uses bus-and-tag cables as a transmission medium. parameter. A variable that is given a constant value during printer and attachment configuration. pattern storage. Storage that contains the fonts and images used for printing the character data, overlays, and segments contained in the page buffer. PC drum. A hollow cylinder that is covered with photoconductive material. overrun condition. Loss of data because a receiving device is unable to accept data at the rate it is transmitted. PC parallel. A standard interface between a personal computer and another device, such as a printer. overstrike. The merging of two or more graphic characters in the same position on a sheet of paper. PCL. See Hewlett-Packard Printer Command Language. P page. A collection of information bound by the beginning page control and its associated end control. A page of printing is one side of a sheet of paper or form. See also logical page and physical page. page buffer storage. Writable control storage in which data to be printed is stored. The data is stored one line at time until a page is complete and ready to print. page definition (PAGEDEF). A statement that specifies attributes of a logical page, such as the width of its margins and the orientation of text. page printer. A device that prints one page at a time (for example, xerographic printer, cathode-ray-tube printer, film printer). Contrast with line printer. page printer data stream. A data stream that enables a printer to format a complete page at one time, including text, images, and page segments. It is characterized by a composed-page data-stream format. page segment. (1) An object that can include text and images and that can be printed on any addressable point on a page or electronic overlay. It assumes the environment of the object in which it is included. (2) The library member which contains the definition of a page segment. pel (picture element). (1) An element of a raster pattern; a point where a toned area on the photoconductor may appear. (2) On an all-points-addressable output medium, each pel is an addressable unit. On a row-column addressable output medium, the only pel addressable is the beginning of a character cell. photoconductor. The material that is used as the medium for transferring images to paper. physical page. The form on which the printer is printing, such as an 8.5 x 11-inch sheet of paper. Contrast with logical page. physical planner. The person in an organization who plans the environmental, electrical, and space requirements for your facility. pitch. A unit of measurement for the width of a printed character. It identifies the number of graphic characters per inch; for example, 10-pitch has ten graphic characters per inch. Uniformly spaced fonts are measured in pitches. Contrast with point. PJL. See Hewlett-Packard Printer Job Language. planning coordinator. The person in your organization who is responsible for coordinating all the planning and installation activities for the 3130. Glossary G-9 plant. A manufacturing location. point. A unit of measurement for describing type sizes. There are 12 points to a pica, about 72 points to an inch. point of origin. The location of the first print position on a logical page. The point of origin is usually stated in terms of X and Y coordinates. The point of origin used by a printer can be affected by factors such as printable area and forms orientation. portrait orientation. Pertaining to a display or hard copy with greater height than width. Contrast with landscape orientation. PostScript. (1) A page description language with interactive graphics capabilities that was developed by Adobe Systems, Inc. (2) An interpretive programming language that describes the appearance of text, graphical shapes, and sampled images on a printed page by defining a print file format that is the interface between document composition applications and raster printing devices. print surface. The side of a form that receives the printed image. proportionally spaced font. A font in which the graphic characters are contained in character cells that may vary with the size of each graphic character and have varying character increments. This allows for even spacing between printed characters and eliminates excess white space around narrow characters. Contrast with constant spaced font. R Random-Access Memory (RAM). A storage device into which data is entered and from which data is retrieved in a nonsequential manner. raster. (1) In computer graphics, a predetermined pattern of lines that provides uniform coverage of a display space. (2) The coordinate grid that divides the display area of a display device. (3) In the 3130, an on/off pattern of electrostatic images produced by the laser print head under control of the character generator. power off. To remove power to the printer. power on. To provide power to the printer. preprinted form. A sheet of forms containing a preprinted design of constant data with which variable data can be combined. See also forms and electronic overlay. Presentation Text Object Content Architecture (PTOCA). IPDS control sequences used to present text information on a page, page segment, or overlay. printer. A device that writes output data from a system onto paper or other media. Print-Error Marker (PEM). Small, black, rectangular marks that indicate incorrectly placed data in the valid printable area. print position. The physical positions of the characters constituting a print line relative to the form. print quality. The quality of printed output relative to existing standards and in comparison with jobs printed earlier. Print Services Facility (PSF). An IBM licensed program that manages and controls the input data stream and output data stream required by supported IBM page printers. PSF combines print data (from the system spool) with other resources and printing controls to produce the printer data stream (including printer commands) for AFP printers. G-10 3130 User's Guide raster pattern. A series of picture elements (pels) arranged in scan lines to form an image. raster scan. A technique of generating or recording the elements of an image by a line-by-line sweep across the entire output medium. registration. In printing, refers to the relative print positions of images that are printed at different times. For example, when you process preprinted forms, the registration is good if the new image printed by the 3130 aligns correctly with the preprinted image. Print that extends beyond box edges and text that overlaps other text are examples of poor registration. resident font. Those font data sets that are resident within the printer. They usually reside on the printer disk media (diskette or hard disk). These font sets are usually commonly used fonts. Having them resident reduces font load time. These fonts may also be used during offline testing of the printer. resource. (1) People, equipment, or material used to perform a task or a project. (2) Any facility of a computing system or operating system required by a job or task, including main storage, input/output devices, processing units, data sets, and controller processing programs; for example, page printers use resources such as form definitions, page definitions, and fonts. reverse heading. A heading where each character is highlighted by reversing the color of the character with its background; for example, changing a black character on a white background to a white character on a black background. S scanner. A device that examines OCR, graphics, MICR, or bar-code patterns and generates electrical signals corresponding to the pattern. It sends the signals to a computing device for processing. screen or screening. (1) In document printing, a sheet of material, usually film, carrying a regular pattern of small dots. When printing, ink adheres only to the dots, and many dots close together appear solid. This method prints large areas of ink on paper but uses much less ink than printing the same area with solid ink. (2) The viewing area of a workstation's display. scrolling. Moving a display image vertically or horizontally in order to view data not otherwise visible within the boundaries of the display. security paper. Specially formulated paper used for negotiable documents, such as checks, which improves the antifraud characteristics of the document. sense byte. A byte that contains sense (exception) information. sense data. Sense information used to indicate the causes of command-stream and device exceptions and to direct the host program to the appropriate exception-recovery actions. service representative. The person responsible for installing and repairing the printer. Synonymous with customer engineer. See also IBM customer engineer. sheet. In reference to paper, a single sheet may be printed on one side (simplex) or both sides (duplex). side sensitivity. A setting designed for paper with a sensitive side. Example: letterhead paper. simplex printing. Printing on one side of a sheet of paper. Contrast with duplex printing. single-byte coded font. A font in which the characters are defined by one byte. A single-byte coded font has only one coded-font section. Contrast with double-byte coded font. special-application materials. Items such as adhesive labels and preprinted paper that the 3130 can print on. special-purpose materials. Printable items other than blank forms; for example, adhesive labels and preprinted forms. SPX. Sequenced Packet eXchange. A Novell, Inc. communication protocol that monitors network transmissions to ensure successful delivery of data packets to the destination. Contrast with IPX. SRC. System Reference Code. stacker. A device used to hold paper or forms that have been printed; the output device of a printer. stack lean. A measurable slope from the vertical of a stack of forms. Excessive stack lean can cause failures when feeding forms. status mode. The operational mode in which information is received from the attached controlling computer system and printed output is produced. Contrast with test mode and diagnostic mode. storage. (1) The retention of data in a storage device. (2) In word processing, a unit into which recorded text can be entered, in which it can be retained and processed, and from which it can be retrieved. (3) A device, or part of a device, that can retain data. Synchronous Data Link Control (SDLC). For managing synchronous, code-transparent, serial-by-bit, information transfer over a link connection. system programmer. A programmer who plans, generates, maintains, extends, and controls the use of an operating system, with the aim of improving overall productivity of an installation. Contrast with application programmer. System Reference Code (SRC). A code that contains information, such as a failing field-replaceable unit, for a customer engineer. T sizing. A process where paper is treated to give it resistance against penetration of liquids. task. A basic unit of work to be accomplished by a device or an operator. skew. Refers to the paper going through the paper path at a slight angle. This will cause the printing lines to not be aligned properly. tensile strength. A measure of the force that the paper forms can withstand without tearing. software. Programs, procedures, rules, and associated documentation pertaining to the operation of a computer system or word-processing system. Contrast with hardware. test mode. The operational mode in which the customer engineer runs diagnostic tests. Contrast with status mode and diagnostic mode. Glossary G-11 text orientation. The position of text as a combination of print direction and baseline direction. See also orientation. throughput. A measure of the amount of work performed by the printer over a period of time, for example, number of jobs per day. token ring. A network with a ring topology that passes tokens from one attaching device to another, for example, the IBM Token-Ring Network. toner. (1) In a document-printing machine, image-forming material used in electrostatic processes. (2) A supply item for the printer. The black powder used for printing images. Synonymous with dry ink. trace. (1) A record of the running of a computer program. It exhibits the sequences in which the instructions were executed. (2) To record a series of events as they occur. (3) In the 3130, a customer engineer analysis procedure. twinaxial. A cable consisting of two conductors, usually small copper tubes or wires insulated from each other, within and insulated from another conductor of larger diameter, usually copper tubing or copper braid. two-sided printing. Printing on both sides of a sheet of paper. Synonymous with duplex printing. Contrast with simplex printing. V value. A quantity assigned to a constant, a variable, a parameter, or a symbol. variable data. The data that can vary; for example, the names and addresses in form letters. Contrast with constant data. vector graphics. Computer graphics in which display images are generated from display commands and coordinate data. See also graphic. Contrast with raster pattern. trailing edge. The trailing edge of the paper is the edge of the paper that proceeds into the printer last as it is fed from one of the paper supplies. void. (1) A missing part of the printed character. (2) A missing piece of a continuous form. tray. A device for holding paper forms used for printing. Contrast with stacker. X tumble duplex. Printing of both sides of a sheet where the top on the second side is in the opposite position as the top on the first side. Contrast with normal duplex. xerographic paper. A paper that is manufactured specifically for the xerographic process, in which key paper qualities are carefully controlled. G-12 3130 User's Guide Index Numerics 1 000-sheet dual top stacker 250-sheet cassette 1-2 500-sheet cassette 1-2 1-2 A accessing the keyboard 3-11 accessories optional 1-2 adjusting print 4-16 adjusting side stacker 5-21 adjusting side tray 5-13 adjusting top stackers 5-20 all black print samples 7-14 attachment configuration items 4-25 attachments 1-2 configuring 4-23 enabling and disabling 4-23 printing configuration 4-25 setting configuration parameters 4-25 Attention 3-14 Attention status indicator 3-14 autoswitch tray selecting 4-5 AVAILABLE SPOOL SPACE (MB) 4-22 B base stacker adjusting 5-20 clearing paper from function of 1-6 basis weight BEEPER 3-17, 4-11 error 3-17 keys 3-17 bottom door clearing paper from function of 1-6 changing the key operator password 4-17 character description of keyboard characters 3-11 choosing forms 1-9 cleaner unit recommended replacement 6-2 replacing 6-18 cleaning the printer 6-20 clearing information messages 5-4 clearing paper from EP module 7-6 front trays 7-12 paper feed module area 7-8 side doors and top stackers 7-4 stackers A-1 clearing paper jams 2-7, 7-3 CODE LEVEL 4-22 codes and messages A-1 configuration items setting 4-11 configuration items table 4-11 configuration parameters setting 4-25 configuring input trays 4-2 stackers 4-7 the printer 4-10 cover front cover function 1-6 stacker cover function 1-6 toner supply cover function 1-6 7-4 D 7-4 C cable attachments 4-23 Cancel Print key 3-3 canceling print jobs 2-8, 5-5 canceling your keyboard entry 3-14 cartridge slot toner cartridge slot function 1-7 changing paper size assigned to a tray changing the form name 4-4 Copyright IBM Corp. 1994, 1996 4-4 defaults for tray selection 4-4 deleting a form 4-21 developer mix recommended replacement 6-2 replacing 6-7 developer mix duct function of 1-7 display 1-2, 3-4 keyboard 3-11 display messages and codes A-1 display messages for supplies 6-4 Display Modes 3-4 door bottom door function 1-6 drum seal cleaning 6-23 drum unit cleaning 6-23 X-1 drum unit (continued) function of 1-7 drum unit handle function of 1-7 dual top stacker 1-2 duct See developer mix duct DUPLEX 4-11 duplex (two-sided) form 4-18 duplex mode paper positioning 5-15, 5-16, 5-17 duplex model positioning paper 2-5 duplex model features 1-4 Duplex status indicator 3-15 E EC LEVEL 4-22 editing keyboard entries 3-14 editing operations 3-11 enabling or disabling a stacker 4-8 enabling or disabling a tray 4-3, 4-7 ENGINE CODE LEVEL 4-22 Enter key 3-3 enter key operator password tutorial 3-17 entering a password to access menu items 3-6 menu mode 3-6 menu mode tutorial 3-17 envelope feeder 1-2 function of 1-6 loading envelopes 5-18 EP module clearing paper from 7-6 function of 1-7 EP module handle function of 1-7 error beeper 3-17 error messages A-1 exit menu mode 3-6 exit menu mode tutorial 3-17 external parts of the printer 1-5 F features duplex model 1-4 high-capacity simplex model 1-3 simplex model 1-2 standard with 3130 printer 1-2 final notification message 6-4 form name 4-18 changing assigned name 4-4 form size 4-18 X-2 3130 User's Guide forms adding to printer 4-18 assigning to a tray 4-4 changing form name for a tray 4-4 checking definition 4-21 defining to printer 4-18 deleting from printer 4-21 modifying 4-20 front cover 1-6 function of 1-6 front tray 1-2 front trays paper positioning (duplex) 5-15, 5-16 paper positioning for simplex models 2-5 fuser unit recommended replacement 6-2 replacing 6-16 G guidelines for supplies 6-3 H handle drum unit handle function 1-7 handling aborts and program checks 7-13 handling messages 2-7 hard abort 7-13 high-capacity simplex model features 1-3 how to restart the printer 5-3 how to shut down the printer 5-3 I image transfer print samples 7-15 impressions 1-2 indicator tray indicator function 1-6 indicators paper jam 7-2 information messages A-1 input keys 1-2 input trays assigning paper sizes 4-4 changing form name 4-4 configuring 4-2 enabling and disabling 4-3 names 4-2 PSF assigned numbers 4-6 instruction 5-21 instructions for entering password 3-17 internal parts of printer 1-7 interrupting printing 2-3, 5-5 messages (continued) status messages 5-4 messages and codes A-1 mode print mode description 3-5 models of 3130 printer 1-2 modifying a form 4-20 module EP module function 1-7 paper feed module function 1-7 module lever paper feed module lever function J Job/Processing status indicator 3-15 K key operator changing password 4-17 configuring attachments 4-23 entering password tutorial 3-17 key operators configuring stackers 4-7 keyboard accessing 3-11 characters 3-11 display 3-11 editing operations 3-11 navigating 3-13 order of submenu items 3-12 keyboard mode 3-11 keys 1-2 keys beeper 3-17 N navigating through menu tutorial 3-17 navigating through the keyboard 3-13 navigating through the menu 3-6 NetWare 4-24 NOT READY status message 2-2, 5-4 O offset stacking 4-8 On Line status indicator 3-15 operation precautions 1-9 operator panel 1-2 function of 1-6 optional accessories 1-2 optional side stacker 5-19 ordering supplies 6-2 OS LEVEL 4-22 L label parameters recommendations for 1-10 LANGUAGE 4-11 light print sample 7-14 loading a form 4-18 loading labels 5-17 loading paper 2-5, 5-6 envelope feeder 5-18 lower sub tray, upper sub tray, top front tray main tray 5-7 lower sub tray clearing paper from 7-12 function of 1-6 loading paper 5-9 M main tray clearing paper from 7-12 function of 1-6 making the printer ready 2-3 MANUFACTURING PLANT 4-22 MEMORY (KB) 4-22 menu items accessing with password 3-6 Menu Mode 3-5 entering and exiting 3-6 tutorial 3-17 Menu/Exit key 3-3 messages clearing from display 5-4 scrollable status messages 6-4 1-7 5-9 P Page Eject key 3-3 panel See operator panel paper 4-7 and stock supported 1-9 clearances for prepunched paper feed module 1-7 function of 1-7 guide roller cleaning 6-23 input receptacles 4-3 jam indicator lights 7-2 jams 7-2 output receptacles 4-7 output stackers 5-19 parameters 1-9 recommendations for 1-9, 1-11 paper feed module area clearing paper from 7-8 paper feed module lever function of 1-7 1-13 Index X-3 parameters label parameter recommendations 1-10 paper parameter recommendations 1-9, 1-10 parts of display 3-12 password changing for key operator 4-17 entering 3-6 tutorial 3-17 photoconductor belt recommended replacement 6-2 replacing 6-10 positioning 5-15 power off procedure 5-2 Power status indicator 3-15 power switch function of 1-6 power-off sequence 5-2 power-on sequence 5-2 powering on and off the printer 5-2 precautions 1-8, 1-9 preprinted forms positioning in input trays 5-15, 5-17 preprinted paper 1-12 prepunched paper 1-13 positioning in input trays 5-16, 5-17 PRINT COUNT (IMPRESSIONS) 4-22 print jobs canceling 5-5 interrupting printing 5-5 starting 5-5 Print Mode 3-5 print quality problems 7-14 print samples 7-14 print skew print samples 7-15 printer 1-2 accessories 1-2 adjusting print 4-14 cleaning 6-20 configuring 4-10 customizing 4-1 label parameter recommendations 1-10 machine information 4-22 maintaining 6-1 models of 1-2 paper parameters for 1-9, 1-10 powering off 5-2 powering on 5-2 relocating kit 1-8 restart procedure 5-3 shutdown procedure 5-3 standard features 1-2 standard paper sizes for 1-9 printer cabinet cleaning 6-21 printer cover interior cleaning 6-21 X-4 3130 User's Guide PRINTER TYPE 4-22 printing a help page 2-2 PRINTING status message 2-2, 5-4 printing the attachment configuration 4-25 printing the printer configuration 4-12 priority of input trays 4-4 procedures adding a form 4-18 adjusting print 4-14, 4-16 adjusting side stacker 5-21 adjusting side tray 5-13 adjusting top stackers 5-20 canceling print jobs 5-5 changing form names/paper size assigned to tray 4-4 changing key operator password 4-17 checking form definitions 4-21 clearing paper from EP module 7-6 clearing paper from front trays 7-12 clearing paper from paper feed module area 7-8 clearing paper from side doors and top stackers 7-4 clearing paper from stackers 7-13 clearing paper jams 7-3 configuring for offset stacking 4-8 configuring stackers 4-7 deleting a form 4-21 determining when to adjust print 4-15 enabling and disabling attachments 4-23, 4-24 enabling and disabling stackers 4-8 enabling or disabling a tray 4-3 entering passwords 3-17 hard abort 7-13 interrupting printing 5-5 loading envelopes into envelope feeder 5-18 loading paper into main tray 5-7 loading paper into side tray 5-13 loading paper into trays 5-9 modifying a form 4-20 positioning paper in front trays 2-5, 5-7, 5-9, 5-15—5-17 positioning paper in side tray 2-5, 5-13, 5-15—5-17 power on 5-2 powering off 5-2 program check 7-13 replacing cleaner unit 6-18 replacing developer unit 6-7 replacing fuser unit 6-16 replacing photoconductor belt 6-10 replacing toner cartridge 6-5 replacing transfer belt unit 6-12 restarting 5-3 selecting an autoswitch tray 4-5 setting configuration parameters 4-25 setting printer configuration items 4-11 shutdown 5-3 starting print jobs 5-5 procedures (continued) viewing machine information 4-22 procedures running print samples 4-13, 4-14 PSF/tray name correspondence 4-6 R READY status message 2-2, 5-4 RECEIVING status message 2-2, 5-4 recovery actions for messages A-1 registration 4-15 relocating the printer 1-8 relocation kit 1-8 replacing developer mix 6-7 replacing supplies 6-2 replacing the cleaner unit 6-18 replacing the fuser unit 6-16 replacing the photoconductor belt 6-10 replacing the toner cartridge 6-5 replacing the transfer belt unit 6-12 resolution of printer 1-2 restarting the printer 2-4, 5-3 running a print test 4-15 S safety precautions 1-8 saving keyboard entries 3-13 Scroll Down key 3-2 Scroll Up key 3-2 scrollable status messages 6-4 selecting a keyboard character 3-13 selecting an autoswitch tray 4-5 selecting and saving your keyboard entry 3-13 selecting menu items tutorial 3-17 selecting settings and actions 3-7 SERIAL NUMBER 4-22 setting configuration items 4-11 setting configuration parameters 4-25 sheet capacity of input trays 5-7 shutting down the printer 2-4 side stacker 1-2 adjusting 5-21 function of 1-6 side tray 1-2 adjusting 5-13 function of 1-6 loading paper 5-13 paper positioning (duplex) 5-15—5-17 paper positioning (simplex) 5-15—5-17 simplex model features of 1-2 simplex models paper positioning 2-5 size assigning to a tray 4-4 sizes for input trays 5-7 SLEEP TIME (MINUTES) 4-11 SLEEPING status message 2-3, 5-4 stacker base stacker function 1-6 side stacker function 1-6 upper stacker function 1-6 stacker cover function of 1-6 stacker names 4-7 stacker selection defaults 4-8 stackers clearing paper from 7-13 enabling or disabling 4-8 names 4-7 standard envelope sizes 1-9 standard features 1-2 standard paper sizes 1-9 Start key 3-4 starting print jobs 2-3, 5-5 status indicators operator panel 3-14 status messages 2-2, 5-4 Stop key 3-4 supplies display messages 6-4 general guidelines 6-3 how to order 6-2 status messages 6-4 when to replace 6-2 switch power switch 1-6 T table of configuration items 4-11 testing print quality 4-13 toner cartridge recommended replacement 6-2 replacing 6-5 toner cartridge slot function of 1-7 toner does not adhere to paper print sample toner supply cover function of 1-6 top auto-eject door clearing paper from 7-6 function of 1-6 top front tray clearing paper from 7-4, 7-12 function of 1-6 loading paper 5-9 top stacker 1-2 top stackers 5-19 TRACING status message 2-3, 5-4 7-14 Index X-5 transfer belt unit recommended replacing 6-2 replacing 6-12 tray lower sub tray function 1-6 main tray function 1-6 side tray function 1-6 top front tray function 1-6 upper sub tray function 1-6 tray indicator function of 1-6 tray names 4-2 tray selection defaults 4-5 tray window function of 1-6 trays sheet capacity and paper sizes trays and rollers cleaning 6-21 tutorial 3-17 5-7 U understanding status messages 2-2 unwanted lines or stripes print samples upper stacker adjusting 5-20 clearing paper from 7-4 function of 1-6 upper sub tray clearing paper from 7-12 function of 1-6 loading paper 5-9 user actions for status messages 2-2 using the keyboard 3-11 using the keyboard tutorial 3-17 using the menu 3-11 V viewing machine information 4-22 W WARMING UP status message 2-3, 5-4 when to replace supplies 6-2 white spots print sample 7-14 white voids print samples 7-15 window See tray window X-6 3130 User's Guide 7-15 Readers' Comments — We'd Like to Hear from You 3130 Advanced Function Printer User's Guide Publication No. S544-5337-02 Use this form to provide comments about this publication, its organization, or subject matter. Understand that IBM may use the information any way it believes appropriate, without incurring any obligation to you. Your comments will be sent to the author's department for the appropriate action. Comments may be written in your language. Note: IBM publications are not stocked at the location to which this form is addressed. Direct requests for publications or for assistance in using your IBM system, to your IBM representative or local IBM branch office. Yes No Does the publication meet your needs? Did you find the information: Accurate? Easy to read and understand? Easy to retrieve? Organized for convenient use? Legible? Complete? Well illustrated? Written for your technical level? Do you use this publication: As an introduction to the subject? As a reference manual? As an instructor in class? As a student in class? What is your occupation? Thank you for your input and cooperation. Note: You may either send your comments by fax to 1-800-524-1519, or mail your comments. If mailed in the U.S.A., no postage stamp is necessary. For residents outside the U.S.A., your local IBM office or representative will forward your comments. Comments: Name Company or Organization Phone No. Address Readers' Comments — We'd Like to Hear from You S544-5337-02 Fold and Tape Please do not staple IBM Cut or Fold Along Line Fold and Tape NO POSTAGE NECESSARY IF MAILED IN THE UNITED STATES BUSINESS REPLY MAIL FIRST-CLASS MAIL PERMIT NO. 40 ARMONK, NEW YORK POSTAGE WILL BE PAID BY ADDRESSEE Information Development The IBM Printing Systems Company Department H7FE Building 003G P O Box 1900 BOULDER CO 80301-9817 Fold and Tape S544-5337-02 Please do not staple Fold and Tape Cut or Fold Along Line IBM Part Number: 52H1248 File Number: S370/4300/9370-15 52H1248 Printed in the United States of America on recycled paper containing 10% recovered post-consumer fiber. S544-5337-ð2