1
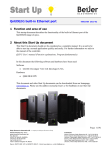
CENTREDIRECT
Network Installation
Table of Contents
Installing the CentreDirect Print Server ................. 1
Setting a Static IP Address........................................ 3
Configuring the CentreDirect................................... 5
Installing CentreDirect Print Drivers ...................... 7
Troubleshooting ......................................................... 8
C E N T R E D I R E C T
N E T W O R K
I N S T A L L A T I O N
Installing the CentreDirect Print Server
Remove the CentreDirect and power supply from the box. Note the position of
the two dipswitches. The two dipswitches on the CentreDirect can have the
following configurations:
Note: Up is towards the LED's (there is a small black arrow that indicates
down).
Down 2
1
UP
D1 UP/D2 UP
Normal operation. In this mode, jobs are serviced from the network. A startup
page will not print in this mode. Telnet sessions are not allowed in this mode.
D1 UP/D2 DN (Default-Recommended)
Normal operation. In this mode, jobs are serviced from the network. A startup
page will print within 10 seconds after a hard or soft reset of the Centredirect.
The startup page will list the IP address. Telnet sessions are allowed in this
mode.
D1 DN/D2 UP
Settings Page Mode. The Centredirect prints a settings page immediately
after a hard reset. However, the Centredirect does not start network services,
and will not acquire an IP address if dynamic resolution
(DHCP/BOOTP/RARP) is being used to obtain an IP address. For this reason,
THIS MODE IS NOT RECOMMENDED.
D1 DN/D2 DN
Factory Reset Mode. The Centredirect will not service jobs in this mode.
THIS MODE SHOULD BE USED ONLY FOR PERFORMING A
MANUAL FACTORY RESET.
1
Rev. 2/02
2
Down
1
UP
C E N T R E D I R E C T
N E T W O R K
I N S T A L L A T I O N
Configure the dipswitches so that the number 2 switch is down and number switch
is up. This will allow the CentreDirect to print a configuration page at startup.
Attach the CentreDirect to the parallel port of the device. With the device powered
up, connect the Ethernet patch cable to the RJ45 socket. Next, connect the power
supply to the CentreDirect.
You should see a number of lights that indicate power is applied to the device and it
is communicating with the network.
After about 40 seconds, the device should print a startup sheet. If the startup sheet is
not printed, try changes the positions of both dipswitches. (See troubleshooting
section)
The CentreDirect is set to DHCP from the factory. If the customer is running
DHCP, the device should obtain an IP address and display it on the startup sheet. If
DHCP is unavailable, proceed to “Setting a static IP Address”
2
Rev. 2/02
C E N T R E D I R E C T
N E T W O R K
I N S T A L L A T I O N
Setting a static IP address
If the network supports DHCP, the device will obtain an IP address from the
network. Locate the startup sheet that was printed. Locate the TCP/IP engine
options. The IP address will show that it is “Not Set”. If an IP address is listed
(13.243.81.184 set by DHCP) , skip to “Configuring the CentreDirect”.
The CentreDirect on TCP/IP network are identified by two address:
Hardware (MAC) address and a IP address. The IP address is stored in NVRAM.
The default IP address is set to 0.0.0.0.
To set the IP address on a windows system, you will need to use the ARP and telnet
commands from the command line of a Windows PC that is on the same subnet as
the device.
1. Enter the command mode on the PC
2. Obtain a IP address from the customer. Ping the address to make sure it
is available.
3.
Create a static ARP entry: Type "arp -s x.x.x.x aa-aa-aa-aa-aa-aa"
(where x.x.x.x is the IP address you are assigning to the CentreDirect
and aa-aa-aa-aa-aa-aa is the Ethernet address
of the CentreDirect with hyphens between the hexadecimal pairs) and
press [enter]. NOTE: The Ethernet address of the CentreDirect is listed
as its serial number on its label as well the startup sheet. EXAMPLE:
"arp -s 123.456.654.789 00-00-aa-12-34-56"
4. Type: arp –a and press [enter]. You should see an entry for the static
address you entered in step 3.
5. Start a telnet connection to the device by typing:
telnet x.x.x.x. If a connection is successful, you should see:
Connected to 13.243.81.184
Escape character is ^]
Vers. 1.78.6 Datacode 8.29.2000
Type “S” to see status
Type “!” to enter monitor
6. At the menu option, type “!” and press [enter].
3
Rev. 2/02
C E N T R E D I R E C T
N E T W O R K
I N S T A L L A T I O N
7. When asked if you want to enter the monitor, type “yes” and press
[enter].
8. The Diagnostic Monitor should be displayed. Type “I” to Display / Set
IP address.
9. Enter the IP address and press [enter]. The new IP address should be
displayed.
10. Type “X” to return to the Main Menu.
11. Next you must disable DHCP and BOOTP/RARP. Type “N” and press
[enter]. The Network Protocol Menu should be displayed.
12. Type “T” to select the TCP/IP options. Next type “E” to select the
Engine Options.
13. Type “Y” to modify the options. Choose BOOTP/RARP parameters:
Type "B" and press [enter]. Disable BOOTP/RARP: Type "Y" and
press [enter]. Next choose option “D” for DHCP and press [enter].
Disable DHCP: Type “Y” and press [enter].
14. Exit the TCP/IP Options by typing “X” and pressing [enter]
15. Exit the Network Protocol Menu by typing “X” and pressing [enter].
16. To store the settings and reboot the device, type “R” and press [enter].
NOTE: A message box will appear, "Connection to host lost." Select
OK.
17. When the device reboots, it should print a startup sheet. Verify that the
new IP address, subnet mask, and gateway are set correctly and that
DHCP and BOOTP/RARP are disabled.
18. Ping the device to make sure it is communicating. Proceed to install the
print driver.
4
Rev. 2/02
C E N T R E D I R E C T
N E T W O R K
I N S T A L L A T I O N
Configuring the CentreDirect
If the network supports DHCP, the device will obtain an IP address from the
network. Locate the startup sheet that was printed. Locate the TCP/IP engine
options. The IP address will show that it is “Not Set”. If an IP address is listed
(13.243.81.184 set by DHCP) continue with this procedure. Otherwise, proceed to
“Setting a Static IP address”
The CentreDirect on TCP/IP networks are identified by two address:
Hardware (MAC) address and an IP address. The IP address is stored in NVRAM.
The default IP address is set to 0.0.0.0.
To set the IP address on windows systems, you will need to use the ARP and telnet
commands from the command line of a Windows PC that is on the same subnet as
the device.
1. Enter the command mode on the PC
2. Obtain an IP address from the customer. Ping the address to make sure
it is available.
3. Using the IP listed on the startup that was set by DHCP, start a telnet
connection to the device by typing:
telnet x.x.x.x. Where x.x.x.x is the IP address that was set by DHCP. If
a connection is successful, you should see:
Connected to 13.243.81.184
Escape character is ^]
Vers. 1.78.6 Datacode 8.29.2000
Type “S” to see status
Type “!” to enter monitor
4. At the menu option, type “!” and press [enter].
5. When asked if you want to enter the monitor, type “yes” and press
[enter].
19. The Diagnostic Monitor should be displayed. Type “I” to Display / Set
IP address.
5
Rev. 2/02
C E N T R E D I R E C T
N E T W O R K
I N S T A L L A T I O N
20. Enter the IP address and press [enter]. The new IP address should be
displayed.
21. Type “X” to return to the Main Menu.
22. Next you must disable DHCP and BOOTP/RARP. Type “N” and press
[enter]. The Network Protocol Menu should be displayed.
23. Type “T” to select the TCP/IP options. Next type “E” to select the
Engine Options.
24. Type “Y” to modify the options. Choose BOOTP/RARP parameters:
Type "B" and press Enter. Disable BOOTP/RARP: Type "Y" and press
Enter. Next choose option “D” for DHCP and press [enter]. Disable
DHCP: Type “Y” and press [enter].
25. Exit the TCP/IP Options by typing “X” and pressing [enter]
26. Exit the Network Protocol Menu by typing “X” and pressing [enter].
27. To store the settings and reboot the device, type “R” and press [enter].
NOTE: A message box will appear, "Connection to host lost." Select
OK.
6. To store the settings and reboot the device, type “R” and press [enter].
The device should disconnect the telnet session and reboot. You may
close the telnet and command line windows on the PC.
7. When the device reboots, it should print a startup sheet. Verify that the
new IP address, subnet mask, and gateway are set correctly and that
DHCP and BOOTP/RARP are disabled.
8. Ping the device to make sure it is communicating. Proceed to install the
print driver.
6
Rev. 2/02
C E N T R E D I R E C T
N E T W O R K
I N S T A L L A T I O N
Installing the Print Driver (Windows NT)
If your device uses a PCL driver, the driver may be downloaded from the Xerox
website at http://www.xerox.com or use the software CD that comes with the
machine
The Print Driver on the web is a self-extracting ZIP that will automatically
install the print driver on LPT1.
1. Download the self-extracting print driver from the Xerox Website.
2. Double-click the file to extract the print driver on the workstation.
3. Proceed to the Printers folder to locate the printer that was created.
4. Right-Click the printer and select [properties]
5. From the properties windows, select the port tab. Select “Add a Port”.
The select a “LPR port”.
6. Enter the IP address of the device and hit the [tab} key.
7. Enter “raw” as the printer name and select, [OK].
8. If the printer is to be shared, select the “share” tab and enter the share
name.
9. Print a test page to ensure that the printer is functioning correctly.
7
Rev. 2/02
C E N T R E D I R E C T
N E T W O R K
I N S T A L L A T I O N
Troubleshooting
No Lights on the Unit
Check the wall sockets for 110 VAC. Check the power supply connections at
the device.
The SYS LED flashes Quickly
If the SYS LED flashes quickly (approximately 5 times per second), the device
does not have an IP address.
Can not print a startup sheet
Check the dipswitch settings. D1 UP/D2 DN (Default-Recommended)
In this mode, jobs are serviced from the network. A startup page will print
within 10 seconds after a hard or soft reset of the Centredirect. The startup page
will list the IP address. Telnet sessions are allowed in this mode.
DHCP does NOT provide an address to the CentreDirect
Check the dipswitch settings. D1 DN/D2 UP Settings Page Mode. The
Centredirect prints a settings page immediately after a hard reset. However, the
Centredirect does not start network services, and will not acquire an IP address
if dynamic resolution (DHCP/BOOTP/RARP) is being used to obtain an IP
address. For this reason, THIS MODE IS NOT RECOMMENDED.
Can not reset the CentreDirect to default settings
In most cases, you can position the dipswitches to perform a factory reset. . D1
DN/D2 DN Factory Reset Mode. The Centredirect will not service jobs in this
mode. THIS MODE SHOULD BE USED ONLY FOR PERFORMING A
MANUAL FACTORY RESET.
If the dipswitches do not reset the CentreDirect, you will need to do the
following steps:
1. Remove the power supply and network cable from the CentreDirect
2. Remove the CentreDirect from the back of your device.
8
Rev. 2/02
C E N T R E D I R E C T
N E T W O R K
I N S T A L L A T I O N
3. With the CentreDirect removed from the machine, locate the dipswitch
number 2.
4. Connect the power supply to the CentreDirect and move dipswitch
number 2 up and down approximately 10 times to reset the NVRAM.
5. Remove the power supply connect from the CentreDirect.
6. Reconnect the CentreDirect to the device and connect the network cable
7. Position dipswitch number 2 in the DOWN position and connect the
power supply.
8. When the configuration sheet prints, ensure that the settings have
returned to factory defaults.
9
Rev. 2/02