1
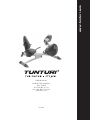
E5R
OWNER'S MANUAL
BETRIEBSANLEITUNG
MODE D'EMPLOI
MANUALE D'USO
MANUAL DEL USUARIO
HANDLEIDING
BRUKSANVISNING
w ww. tu nt ur i. co m
KÄYTTÖOHJE
• SERIAL NUMBER • SERIENNUMMER
• NUMERO DE SERIE • NÚMERO DE SERIE
• NUMERO DI SERIE • SERIENUMMER
• SERIENNUMMER • SARJANUMERO
OWNER'S MANUAL • E5R
1
5
2
6
2
7
3
8
4
9
OWNER'S MANUAL • E5R
OWNER'S MANUAL
E5R
I N F O R M AT I O N A N D
WA R N I N G S
Please read this owner’s manual through carefully
before assembling, using and servicing the workout
cycle! Follow the instructions described in this
manual carefully.
The equipment has been designed for home
and light commercial use. The Tunturi warranty
applies only to faults and malfunctions in home
(24 months) and light commercial use (12
months). Please note that the warranty does not
cover damage due to shipping or negligence of
adjustment or maintenance instructions described
in this manual.
N O T E A B O U T Y O U R H E A LT H
• Before you start any training, consult a
physician to check your state of health.
• If you experience nausea, dizziness or other
abnormal symptoms while exercising, stop your
workout at once and consult a physician.
• To avoid muscular pain and strain, begin each
workout by warming up and end it by cooling
down (slow pedalling at low resistance). Don’t
forget to stretch at the end of the workout.
NOTE ABOUT THE EXERCISING
EN V I R O N M E N T
• Place the device on a firm, level surface. Place
the device on a protective base.
• Make sure that the exercising environment has
adequate ventilation. To avoid catching cold, do
not exercise in a drafty place.
• In training, the equipment tolerates an
environment measuring +10°C to +35°C. The
equipment can be stored in temperatures ranging
between -15°C and +40°C. Air humidity in the
training or storage environment must never exceed
90 %.
• Before you start using the device, make sure that
it functions correctly in every way. Do not use a
faulty device.
• Only one person may use the device at a time.
• Wear appropriate clothing and shoes when
exercising.
• Do not use the device when the protective
covers are not in place.
• Press the keys with the tip of the finger; your
nails may damage the key membrane.
• Never lean on the meter.
• Do not let the meter come into contact with
water. Always dry the surface of the meter, if there
are any drops of sweat on it. Use a soft, absorbent
cloth. Do not use solvents to clean the meter
surface.
• Protect the meter from excess sunlight: it may
fade the colors of the meter box and surface
membrane.
• Do not attempt any servicing or adjustment
other than those described in this manual.
The given service instructions must be followed
carefully.
• The device is not recommended for persons
weighing over 150 kg or 333 lbs.
A S S E M B LY
Open the transport package on its side. Take the
parts out of the package and make sure the package
includes all the following parts:
1.
2.
3.
4.
5.
6.
7.
8.
9.
Front frame
Lower frame
Seat frame
Seat (2 pcs)
Handlebar
Meter
Feet (2 pcs)
Pedals (2 pcs)
Hardware (marked with an
asterisk (*) in the spare part list)
NOTE ABOUT USING THE EQUIPMENT
If you notice that a part is missing, contact the
dealer and give the model, serial number and spare
part number (the spare part list is in the back of the
manual). The package includes also a silicate bag
for absorbing moisture during transportation and
storage. Assemble the recumbent cycle as follows
(left, right, front and back are as seen from the
exercising position):
• Parents or others responsible for children
HANDLEBAR ASSEMBLY AND SEAT
should note that children’s natural playfulness and
curiosity may lead to situations and behaviour
for which the device is not designed. If children
are allowed to use the device, they should be
supervised and taught to use the device properly,
keeping in mind the child’s physical and mental
development and their personality. The exercise
device is not a toy.
GB
FIG. 1
(version without hand grip pulse)
Remove the seat fastening nuts. Place the seat
upside down, for example, on a chair. Place the
handlebar, the spacer bar and the seat frame upside
down on the bottom of the seat. Fasten the
handlebar and seat to the seat frame with nuts.
3
H A N D L E B A R A S S E M B LY A N D S E AT FIG. 1
(version with hand grip pulse)
Remove the seat fastening nuts. Place the seat
upside down, for example, on a chair. Place the
handlebar, the spacer bar and the seat frame upside
down on the bottom of the seat. N O T E ! Do
not damage the hand grip pulse wires. Fasten the
handlebar and seat to the seat frame with nuts.
Attach the hand grip pulse wires to the transmitter
box and push the extra wire length inside the
handlebar. Detach the lid of the transmitter box,
insert batteries (3xAAA) and close the lid.
LOWER FRAME
FIG. 2
Slide the retaining plate located underneath the
seat frame to the front of the bar. Fasten the lower
frame to the seat frame using the shorter M8 screw
(A) in the front and longer M8 screw (B) in the
back. Place the shorter screw (A) into the frame
hole from the end of the lower frame and the
longer screw (B) through the frame. Pass the screws
through the holes in the lower frame so that they
match the threads in the retaining plate. Make sure
the screws are tightly fastened.
FEET
FIG. 3
Secure the rear foot with two M10 bolts (C) and
washers (D). At this point tighten the bolts only
with your fingers. Lift the cycle on the floor and
turn it right side up. Fasten the front foot with the
transportation wheels to the front frame the same
way.
JOINING THE FRAMES
FIG. 4
Join the front frame and seat frame by pushing one
tube inside the other so that the screw holes in the
tubes match together. Fasten the frames with two
M8 screws (E) and washers (F). Tighten the rear
and front foot screws and push the plastic caps over
the screw heads.
OWNER'S MANUAL • E5R
S E AT B A C K
4
FIG. 5-6
Push the fastening screw (G) through the hole in
the seat frame tube and the assembly plate. Place
the bushing (H) on the fastening screw and secure
the plate by tightening the nut (I) on the fastening
screw. Remove the fastening nuts and washers of
the seat back and attach the seat back to the
assembly plate with them. Finally, push the plastic
caps over the nuts.
METER
FIG. 7-8
Remove the tape covering the wire coming out
of the frame tube, and connect the wire with
the connector inside the meter tube. Thread the
connected wire carefully into the frame tube, and
push the meter’s connecting tube into place within
the frame tube so that the heads of the screws point
to the seat. N O T E ! Do not remove the fastening
screws, but tighten the two fastening screws of the
connecting tube by pushing the allen key through
the hole in the frame tube to the screw head and
turning counter-clockwise. Loosen the two screws
for the drink bottle rack and secure the rack in
place with the screws. Remove the protecting film
from the meter display.
PEDALS
FIG. 9
The pedals are distinguished by the markings R
(=right) and L (=left). Fasten the right pedal to
the right pedal crank by turning clockwise and
the left pedal to the left pedal crank by turning
counter-clockwise. Fasten the pedal straps. The
straps are distinguished by the markings R (=right)
and L (=left). Choose the strap tightness, set the
appropriate strap hole on the retainer from below
and pull forcibly upwards.
POWER CORD
Plug the transformer into the connector, just above
the front support, and then the transformer cord
into the wall socket.
• Always unplug the appliance from the wall
socket and remove the cord from the appliance
immediately after use.
• Make sure that the cord does not run
underneath the appliance.
USE
CORRECT BODY POSITION
The Recumbent Ergometer E5R is designed to
comfortably distribute your weight evenly over
your buttocks and lumbar region of your lower
back. Your legs are also positioned closer to the
level of your heart, allowing a less strenuous and
more efficient cardiovascular workout. To ensure
proper positioning please follow the recommended
guidelines: the distance between the seat and
the pedals should be adjusted so that your knee
remains slightly bent when your leg is extended
to the furthest pedalling point forward. To adjust
the distance lift the lever located below the seat.
Place first your feet on the pedals, then release the
seat and push it to the right distance. Release the
lever to lock the seat. Make always sure the seat
is locked.
EXERCISING WITH TUNTURI
No matter what your goal, you’ll get the best results
by training at the right level of effort, and the
best measure is your own heart-rate. First find your
maximum heart-rate, i.e. where the rate doesn’t
increase with added effort. If you don’t know
your maximum heart rate, please use the following
formula as a guide:
Women: 226 - age Men: 220 - age
OWNER'S MANUAL • E5R
These are average values and the maximum varies
from person to person. The maximum heart rate
diminishes on average by one point per year. If you
belong to a risk group, ask a doctor to measure
your maximum heart rate for you. We have defined
three different heart-rate zones to help you with
targeted training.
Beginner: 50-60 % of maximum heart rate
Also suitable for weight-watchers, convalescents
and those who haven’t exercised for a long time.
Three sessions a week of at least a half-hour each
is recommended.
Trainer: 60-70 % of maximum heart rate
Perfect for improving and maintaining fitness. You
should train for a minimum of 30 minutes at least
three times a week. To improve your condition still
further, increase either frequency or effort, but not
both at the same time!
Active trainer: 70-80 % of maximum
heart rate
Exercise at this level suits only the fittest and
presupposes a long history of exercising.
METER
TU R N I N G T H E M E T E R O N A N D O F F
The meter turns itself on when the device is
connected to the mains current. When the meter
has not been used for five minutes (no heart
rate registered, no keys pressed, no pedaling), it
automatically switches itself to energy-saver state.
The meter is returned to its active state by pressing
any key, starting to pedal or sending heart-rate
signals to the unit. When you restart, the meter
automatically starts from Mode function.
Protect the meter from excess sunlight,
because that may fade the interface box and surface
membrane colors. Please also be careful not to
allow the meter to come into contact with water. A
sharp blow may damage the meter.
PU L S E M E A S U R E M E N T
WITH HAND GRIP PULSE
The hand grip pulse measurement
functions with the transmitter box switch in ON
position. If you wish to use the Polar belt for heart
rate measurement, switch the hand grip pulse to
OFF position.
Pulse is measured by the hand grip sensors in
the handle bars. Pulse is measured when the user of
E5R is touching both sensors simultaneously. Pulse
measurement requires that the skin is constantly
touching the sensors and that the skin is slightly
moist. N O T E ! If you use a heart rate controlled
exercise or if the accuracy of heart rate information
is important to you, we recommend heart rate
measurement with the Polar belt; unlike with the
NOTE !
GB
heart rate belt, the accuracy of pulse measurement
may vary considerably from person to person.
HEART RATE MEASUREMENT WITH
THE HEART RATE BELT
Attach the transmitter to the elastic strap.
Adjust the length of the strap to fit snugly and
comfortably.
3 . Pull the transmitter away from your chest and
wet the grooved areas at its back.
4 . Check the wet electrodes are uniformly
positioned next to your skin and that the Polar logo
is central and upright.
The heart rate belt works best when the
transmitter is worn against your bare skin. If you
prefer to wear it over a shirt, please moisten the
shirt well under the electrodes: the contacts must
be wet while you exercise.
Take good care of the transmitter after you
exercise. This helps to prolong the life of the
electrodes and battery.
1. Wash the transmitter carefully with a mild
soap-water solution.
2 . Rinse with clean water.
3 . Dry the transmitter carefully.
1.
2.
FUNCTION KEYS
includes constant resistance, constant effort
and constant heart-rate workouts. The user
interface automatically starts from the constant
resistance workout. Use the operation key SET to
make settings and adjustments to the user interface
options. PROG includes pre-programmed exercise
profiles, memory positions for your self-designed
exercise profiles and measurement of recovery
pulse.
MODE
REC AND OK
Use the Rec key to save your own workouts. Press
Rec before beginning the workout you wish to
save. Press OK to confirm.
RESET
Press the Reset key for more than one second to
display the cumulative values. Pressing Reset always
resets the value on the display.
SETTING KEYS -/+
Use the setting keys (-/+) to adjust resistance, effort
and heart rate for the workout.
5
M A I N D I S P L AY
When you turn the meter on, the display shows the
following exercise parameters:
1. EFFICIENCY (W)
Figure indicates exercise efficiency in Watts,
which depends on pedaling speed and resistance
adjustment.
2 . ENERGY CONSUMPTION (kcal / kJ)
Displays cumulative energy consumption (0-999);
default setting is kcal.
3 . SPEED (rpm / km/h / mph)
Default setting is rpm (pedal revolutions / minute).
4 . PULSE
Heart rate transmitter belt or an ear sensor is
required. If the meter does not receive a heart-rate
signal, - - is displayed instead of the heart rate.
N O T E ! Always disconnect the ear sensor from the
meter if using a heart rate transmitter belt; the ear
sensor will interfere with the heart rate transmitter.
5. TIME
Displays the exercise time elapsed between 0:00 59:59 minutes and between 1:00 - 10:00 hours in
1 minute increments. Time display stops if speed
falls to zero.
6 . DISTANCE (km / miles)
Default display setting is km. Displays the distance
traveled during the workout in km (or miles) to
two decimal points up to 9.99 km (or miles) and
with one decimal point up to 99.9.
FUNCTIONS
A D J U S T I N G R E S I S TA N C E
Resistance in constant resistance workouts is
adjusted with the - / + keys. The text SET
and setting value are displayed when you adjust
resistance. The meter returns to the main display 2
seconds after setting the value.
RESET
Press R ESET to reset the values on the display.
Cumulative training values are displayed by
pressing R ESET for more than one second. They
remain on the display for as long as the key is
pressed.
MODE
includes constant resistance, constant effort
and constant heart-rate workouts. In all workouts,
one parameter is set as a constant, after which
your exercise equipment automatically maintains
the level. Constant heat-rate exercise requires your
using the heart-rate measurement system.
1. Press MODE key to select the workout.
R ESISTANCE = constant resistance exercise at the
same resistance level throughout. Faster pedaling
means an increase in effort.
WATT = constant effort exercise; the interface
OWNER'S MANUAL • E5R
MODE
6
adjusts resistance automatically so the training
effort set, e.g. 100 W, remains the same
independent of pedaling rate.
PULSE = constant heart-rate exercise; the
interface adjusts effort automatically and keeps
your heart-rate at the desired level, e.g. 120 beats
per minute, independent of pedaling rate.
2 . Set the target level with the - /+ keys. You can
adjust the target level with the - / + keys during the
workout whereupon the text SET and the setting
value (Nm, W, heart rate) are displayed. The meter
returns to the main display 2 seconds after setting
the target value.
PROG
includes pre-programmed exercise profiles,
memory positions for self-designed profiles and
measuring recovery pulse. The resistance level
varies in a pre-determined way and has three
options: Health = fitness improvement, Slim
= weight control (HRC ; requires heart-rate
measurement), Fit = profile designed for the
physically fit. The level of difficulty of the selected
profile can be scaled from 1 to 9. Level 1 is the
easiest and longest and level 9 the most challenging
and shortest. A full description of the profiles is
given at the end of these instructions.
PROG
PRE-PROGRAMMED PROFILES
(HEALTH, SLIM, FIT)
Press PROG until the desired profile (Health,
Slim, Fit) appears on the display. Press OK to
confirm.
2 . Use the - / + keys to select the level (Level 1-9).
Press OK to confirm.
3 . Start pedaling to begin the workout.
1.
DESIGNING YOUR OWN
EXERCISE PROFILES
You can save three self-designed exercise profiles.
Although the profile can be any of the MODE
programs (Resistance, Watt, Pulse), the program
cannot be changed during saving. A total of 30
changes can be saved in each profile. There is no
time limit in the profiles.
1. Press R EC to start saving your self-designed
workout. During saving the text R EC is displayed.
Press OK after completing your profile. The text
R EC on the display is cleared and replaced by
memory position “User 1”. The flashing numeric
value indicates that a profile has already been saved
in the memory position. Previous profiles can be
replaced by new ones, or use the - / + keys to move
to other memory positions (User 1, 2, 3). Press OK
to save the profile in the desired memory position.
2 . To use a self-designed exercise profile press
PROG until User appears on the display. Use the - /
+ keys to select a memory position (User 1, 2, 3).
OWNER'S MANUAL • E5R
If the memory position is empty the reading 0:00 is
displayed. Press OK to confirm your choice.
3 . Start pedaling to begin the workout.
RE C O V E RY
Measure your recovery pulse rate at the end of
the workout. To measure recovery pulse rate press
PROG until the text “Recovery” appears on the
display. Press OK to confirm.
In order to improve the reliability of recovery
pulse measurement, always try to standardize the
measurement situation as accurately as possible;
start measuring at the same heart rate level as
precisely as possible. The measurement of recovery
pulse takes two minutes, during which time the
current heart rate is displayed. During measuring
the text “Recovery” flashes on the display. At the
end of the measurement period the recovery ratio
percentage is displayed. The smaller the reading
the fitter you are. Note that results are individual
and not directly comparable with those of others.
N O T E ! If there is a problem in pulse measurement,
the display will show - - instead of the heart
rate, and measurement of recovery pulse will
automatically restart when the user interface once
again receives a heart-rate signal. Press OK to move
from recovery pulse measurement to the main
display. The main display will appear automatically
1 minute after the measurement.
PA U S E
When the user interface has not been used for three
minutes (no heart rate registered, no keys pressed,
no pedaling), it automatically switches itself to
energy-saver state. The interface is returned to its
active state by pressing any key, starting to pedal or
sending heart-rate signals to the unit. The values in
a workout that has been interrupted are saved in
the memory of the user interface for 10 minutes,
after which they are reset. The values on the display
are always reset when the R ESET key is pressed.
SE T
To set the heart-rate limit press SET once. The
lower heart rate limit is indicated by the text LO
and the upper limit by HI . If desired, the user
interface indicates when your heart rate falls below
the lower limit or exceeds the upper limit with an
alarm. To set heart rate limits procede as follows:
The lower limit (LO ) may be set between 50
and 220 beats per minute. Use the - or + keys to
set the value and press OK to confirm. Set the upper
heart-rate limit (max. 220) in the same way as for
the lower limit. Press OK to confirm.
To delete heart-rate limits use the - or + key
to move the values above the permitted upper or
lower limit. The value is then replaced by — on
the display.
2 . To select the alarm press SET twice. The text Ind
1.
GB
indicates that the alarms are switched off and
Ind ON that they are switched on. Use the - or +
keys to select OFF or ON and press OK to confirm.
3. To set units of measurement press SET three times.
Default units are rpm, km and kcal. To
change the units press the + or - key until the
desired units are displayed. To measure speed
you can set either revolutions per minute, (rpm),
kilometres per hour (km/h) or miles per hour
(mph). Energy consumption measurement can be
set for kilocalories (kcal) or kilojoules (kJ).
In addition to rpm you can also select either
kilometres (km) or miles as distance measures. If
km/h is selected as the unit to measure speed, km
will automatically be the unit for distance. The
same applies to the units mph and miles. Press OK
to confirm your selections, which are then saved
and indicated on the main display. Press the R ESET
key to exit the setting function without saving the
adjustment. This resets the readings on the main
display.
OFF
MAINTENANCE
The semi-recumbent ergometer E5R requires very
little maintenance. We recommend, however, that
you make sure all the fastening screws are tight
after approximately one week of use. Turn the cycle
on its side and tighten the screws, if necessary.
From time to time check that the screws and nuts
are tight. Clean the cycle with a damp cloth. Do
not use solvents.
Please contact your dealer immediately if you
notice any defects or malfunctions while using your
equipment. Please state the nature of the problem,
conditions of use, purchase date and serial number
of your equipment. In spite of continuous quality
control, individual defects and malfunctions may
occur due to individual components. It is in most
cases unnecessary to take the whole cycle for repair,
as it is usually sufficient to replace the defective
part.
TRANSPORT AND STORAGE
Move the recumbent cycle according to the
following instruction: stand behind the cycle and
take it by the seat frame with one hand and by
the handlebar with the other hand. Lift the E5R so
that it rests on the transport wheels and move it by
wheeling. Lower the cycle on the floor while
holding on to it and remaining all the
time behind the device. N O T E ! Follow the
transportation instructions because lifting the
recumbent cycle incorrectly may strain your back
or cause other risk of accidents.
To prevent malfunctioning of the cycle, store
in a dry place with as little temperature variation as
possible, protected against dust.
7
DIMENSIONS
BETRIEBSANLEITUNG E5R
Length ............ 165 cm / 65 in
Height ............ 100 cm / 40 in
Width .............. 67 cm / 27 in
Weight ........... 63 kg / 140 lbs
BETRIEBSANLEITUNG • E5R
All Tunturi models are designed to meet the
electro-magnetic compatibility directive, EMC and
are affixed with the CE conformity marking.
N O T E ! The instructions must be followed
carefully in the assembly, use and maintenance
of your equipment. The warranty does not
cover damage due to negligence of the assembly,
adjustment and maintenance instructions described
herein. Changes or modifications not expressly
approved by Tunturi Ltd will void the user’s
authority to operate the equipment!
Due to our continuous programme of product
development we reserve the right to change
specifications without notice.
8
WICHTIGE
SICHERHEITSHINWEISE
Diese Betriebsanleitung ist ein wesentlicher
Bestandteil Ihrer Trainingsausrüstung. Lesen Sie
dieses Handbuch daher aufmerksam durch, bevor
Sie Ihr Trainingsgerät montieren, mit ihm
trainieren oder es warten. Bitte bewahren Sie dieses
Handbuch auf. Es wird Sie jetzt und zukünftig
darüber informieren, wie Sie Ihr Gerät benutzen
und warten. Befolgen Sie diese Anweisungen
immer sorgfältig.
Ihr neuer Heimtrainer von Tunturi wurde für
das Heimtraining und die leichte kommerzielle
Nutzung entwickelt. Die Garantie dieses Gerätes
beträgt 24 Monate für das Heimtraining und 12
Monate für die leichte kommerzielle Nutzung.
Sowohl Tunturi, als auch seine nationalen
Vertretungen übernehmen keine Haftung für
Verletzungen oder Geräteschäden, die sich bei
Dauereinsatz in gewerblichen Fitnesscentern,
Sportvereinen und vergleichbaren Einrichtungen
ergeben. Für Schäden, die durch Missachtung der
beschriebenen Einstellungs- und
Wartungsanweisungen entstehen, besteht kein
Garantie-Anspruch!
• Suchen Sie vor dem Trainingsbeginn einen Arzt
auf, der Ihren Gesundheitszustand feststellt.
• Bei Übelkeit, Schwindelgefühl oder anderen
anomalen Symptomen sollte das Training sofort
abgebrochen und unverzüglich ein Arzt aufgesucht
werden.
• Das Trainingsgerät ist ein Sportgerät und kein
Spielzeug für Kinder. Aufgrund des natürlichen
Spieltriebes und der Experimentierfreudigkeit von
Kindern können Situationen und Verhaltensweisen
entstehen, für die das Trainingsgerät weder gebaut
noch abgesichert ist und die eine Verantwortung
seitens des Herstellers ausschließen. Wenn Sie
dennoch Kinder an das Trainingsgerät lassen,
müssen Sie deshalb deren geistige und körperliche
Entwicklung und vor allem deren Temperament
berücksichtigen, sie gegebenenfalls beaufsichtigen
und sie vor allem auf die richtige Benutzung des
Gerätes hinweisen.
• Das Gerät sollte grundsätzlich nur von einer
Person benutzt werden.
• Das Gerät auf möglichst ebenen Untergrund
stellen.
• Dieses Gerät ist nicht für den Einsatz in
Feuchträumen (Sauna, Schwimmbad) vorgesehen.
• Vor Beginn des Trainings sicherstellen, dass das
2
5
8
93
71 62
73
6
92 91
10
4
9
65
1
13n
69
7
2
3
61
8
16
12 13m
21 20
74
15
33
13k
13a
14
72
42 43
24
70
62
75
13d
59
60
66 67 68
62
64
60
63
43
17
35
56
39
18
57
13e
54
22 41
58
13c 43
135
55
35 32 43 44
45 40 53
39
18
233 9003
User interface
1
-
2
153 9003
Seat back
1
12 503 9010
*-
M8 DIN 125
Washer
4
-
*-
M8 DIN 934
Nut
4
13 403 1070
Cable set (incl. 13a,13d,13e) 1
3
153 9001
Seat
1
13c 403 1026
RPM-magnet
1
-
M8 DIN 985
Nut nylon
2
13k 403 1071
RJ12-plug, Mod 6/6
1
4
403 1073
Receiver
1
13m 403 9004
RJ12-plug, Mod 8/8
1
5
533 7024
Handlebar plug
2
13n 403 9005
Cable
1
6
213 1004
Handle grip
2
14 683 1011
Bezel
1
7
203 9002
Handle bar (incl.. 5, 6, 8)
1
15 103 9010
Tube
1
-
M8 DIN 985
Nut nylon
4
-
DIN 7380 Screw
2
8
403 9006
Telemetric hand pulse
1
16 533 4047
Plug
1
-
4,2x16 DIN 7504-K PT-Screw
2
17 103 9005
Frame
1
9
433 9001
1
18 533 1050
Stand plug
4
-
4,2x16 DIN 7504-K PT-Screw
2
19
Label set (incl.19a, 19b)
2
10
173 9008
Side cover for Al-profil
1
20 173 1053
Side cover, LH and RH.
2
-
M8x35 DIN 912
Screw
1
-
KB 40x20
WN-1411 PT-Screw
4
-
M8x50 DIN 912
Screw
2
21
533 9012
Plug
1
11
173 9009
Side cover for Al-profil
1
22 653 1017
Nut
2
-
M8x35 DIN 912
Screw
1
-
12x18x05
DIN 988 Washer
1
24
303 9003
E5R Flywheel
1
1
48
38 37 36
47
Al-profil for user interface
M8x50 DIN 912
Screw
2
RJ12-plug bracket
1
KB 40x20 WN-1411 PT-Screw
M8x20
4213 9003
1
E5R
-
17x24x1,5
DIN 988 Washer
1
-
Screw
4
31
403 0022
Transformer 24VDC, EUR
1
64 503 9008
Adjusting plate
1
-
403 0025
Transformer 24VDC, USA
1
-
M8x20 DIN 912
Screw
2
-
403 0027
Transformer 24VDC, UK
1
-
M8x20 DIN 7991
Screw
1
-
403 0028
Transformer 24VDC, SUI
1
-
M8 DIN 934
Nut
3
-
403 0029
Transformer 24VDC, ISR
1
65 153 9004
Seat frame
1
-
403 0030
Transformer 24VDC, AUS
1
-
M8 DIN 934
Nut
2
32
403 1066
Control card, compl.
1
-
652 133
Washer
2
-
M4x6 DIN 7985
Screw
3
M8x16 DIN 933
Screw
2
33 403 1050
El. magnet
1
Axle, upper
2
-
M6x50 DIN 931
Screw
4
-
M6 DIN 125
Washer
4
35
533 1046
M10 plug
4
36 673 500 88
Snap locking
2
37 533 1048
Wheel
2
38 103 1038
Front support
1
-
103 1039 compl.
(incl. 18, 36, 37)
1
*-
M10 DIN 125
Washer
2
*-
M10x25 DIN 933
Screw
2
39
103 9006
Rear support
1
*-
M10 DIN 125
Washer
2
*-
M10x25 DIN 933
Screw
2
40 643 104 89
Spring
1
41 523 504 84
Bearing, flywheel
1
42
Bearing, flywheel
1
43 523 409 85
Bearing
4
44 343 1010
Flywheel axle
1
45 443 9003
Transmission belt
1
47 513 9002
Belt tightener frame
1
-
12x18x1 DIN 988
Washer
1
-
10 DIN 471A
Retaining
1
53 263 1007
Pulley
1
-
Retaining
1
54 353 1005 1
Crank, RH
1
-
Crank, LH
1
55 653 0073
Screw-plug
2
56 363 1002
Pedal band, pair
1
57 363 1001
Pedal, pair (incl. 56)
1
58 103 9007
Rail support
1
523 1010
17 DIN 471A
353 1004 1
-
M8x40 DIN 912
Screw
1
-
M8x65 DIN 912
Screw
1
59 103 9009
Inner tube
1
-
M8 DIN 125
Washer
2
-
M8x20 DIN 933
Screw
2
60
173 9005
Rear plug
1
-
M4x25 DIN 7500C Screw
60 173 9006
-
Front plug
M4x25 DIN 7500C Screw
M8x20 DIN 913
66 343 9004
3
1
3
61 103 9011
Seat rail
1
62 533 0020
M8 plug
14
63 503 9009
Fastener plate
2
49
PROFILES • E5R
PROFILES
50
PROFILES
E5R
PROFILES
Health Slim
(min) (W) (bpm)
0
80
80
1
90
90
2
90
90
3
100
100
4
110
100
5
120
110
6
130
110
7
140
120
8
140
120
9
140
130
10 140
130
11 140
130
12 140
130
13 130
140
14 130
140
15 120
140
16 120
140
17 130
140
18 130
140
19 140
140
20 140
130
21 140
130
22 140
130
23 140
130
24 140
120
25 140
120
26 130
120
27 130
120
28 120
120
29 120
120
30 130
130
Level
Intensity =
Level x
1
0,7
Fit
(W)
80
90
100
110
130
130
140
140
140
130
130
120
120
150
150
170
170
150
150
140
140
140
150
150
180
180
150
150
140
130
130
2
0,775
(min)
31
32
33
34
35
36
37
38
39
40
41
42
43
44
45
46
47
48
49
50
51
52
53
54
55
56
57
58
59
3
0,85
Health Slim
(W) (bpm)
130
130
140
130
140
140
140
140
140
140
140
140
140
130
140
130
130
130
130
120
120
120
110
120
110
120
120
120
130
130
130
130
140
130
140
140
140
140
140
140
140
140
140
130
140
130
140
130
130
120
130
120
120
120
120
110
110
110
4
0,925
5
1,0
Fit
(W)
140
140
140
150
150
170
170
170
170
150
150
150
120
120
120
130
130
140
140
140
130
130
120
120
110
110
100
100
100
6
1,075
7
1,15
8
1,225
9
1,3
51
www.tunturi.co m
TUNTURI OY LTD
P.O.BOX 750, FIN-20361
Turku, Finland
Tel. +358 (0)2 513 31
Fax +358 (0)2 513 3323
www.tunturi.com
583 9002