Download Sony AIR-SA5R Speaker System User Manual
Transcript
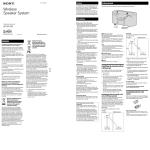
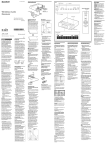
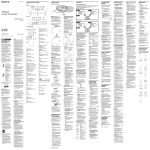
4-147-617-11(1) Wireless Speaker Operating Instructions Manual de instrucciones (reverso) Features The AIR-SA5R is an “S-AIR” compatible product. It is also called the “S-AIR sub unit.” It is easy to ready the unit for use. All you have to do is connect it to a wall socket. Connecting the S-AIR main unit (transmitter product, hereafter called “main unit”) with the S-AIR sub unit (receiver product, hereafter called “sub unit”) using “S-AIR” technology, you can use each unit in a remote location. For example, you can install this unit in a bedroom, and then install the main unit in the living room. You can then listen to music from the main unit located in the living room with this unit in the bedroom. This unit is compatible with a main unit with “MULTI SOURCE” mode, and the coupling operation. The coupling operation establishes a connection between the sub unit and optional S-AIR remote commander. Precautions Notes on use of the S-AIR product AIR-SA5R ©2009 Sony Corporation Printed in China WARNING To reduce the risk of fire or electric shock, do not expose this apparatus to rain or moisture. To reduce the risk of fire or electric shock, do not expose this apparatus to dripping or splashing, and do not place objects filled with liquids, such as vases, on the apparatus. As the main plug is used to disconnect the unit from the mains, connect the unit to an easily accessible AC outlet. Should you notice an abnormality in the unit, disconnect the main plug from the AC outlet immediately. The unit is not disconnected from the mains as long as it is connected to the AC outlet, even if the unit itself has been turned off. Do not install the appliance in a confined space, such as a bookcase or built-in cabinet. The nameplate is located on the bottom exterior. Owner’s Record The model and serial numbers are located on the bottom of the unit. Record these numbers in the space provided below. Refer to them whenever you call upon your Sony dealer regarding this product. Model No. Serial No. Important Safety Instructions 1) 2) 3) 4) 5) Read these instructions. Keep these instructions. Heed all warnings. Follow all instructions. Do not use this apparatus near water. 6) Clean only with dry cloth. 7) Do not block any ventilation openings. Install in accordance with the manufacturer’s instructions. 8) Do not install near any heat sources such as radiators, heat registers, stoves, or other apparatus (including amplifiers) that produce heat. 9) Do not defeat the safety purpose of the polarized or grounding-type plug. A polarized plug has two blades with one wider than the other. A grounding type plug has two blades and a third grounding prong. The wide blade or the third prong are provided for your safety. If the provided plug does not fit into your outlet, consult an electrician for replacement of the obsolete outlet. 10)Protect the power cord from being walked on or pinched particularly at plugs, convenience receptacles, and the point where they exit from the apparatus. 11)Only use attachments/accessories specified by the manufacturer. 12)Use only with the cart, stand, tripod, bracket, or table specified by the manufacturer, or sold with the apparatus. When a cart is used, use caution when moving the cart/ apparatus combination to avoid injury from tip-over. 13)Unplug this apparatus during lightning storms or when unused for long periods of time. 14)Refer all servicing to qualified service personnel. Servicing is required when the apparatus has been damaged in any way, such as power-supply cord or plug is damaged, liquid has been spilled or objects have fallen into the apparatus, the apparatus has been exposed to rain or moisture, does not operate normally, or has been dropped. NOTE: This equipment has been tested and found to comply with the limits for a Class B digital device, pursuant to Part 15 of the FCC Rules. These limits are designed to provide reasonable protection against harmful interference in a residential installation. This equipment generates, uses and can radiate radio frequency energy and, if not installed and used in accordance with the instructions, may cause harmful interference to radio communications. However, there is no guarantee that interference will not occur in a particular installation. If this equipment does cause harmful interference to radio or television reception, which can be determined by turning the equipment off and on, the user is encouraged to try to correct the interference by one or more of the following measures: Reorient or relocate the receiving antenna. Increase the separation between the equipment and receiver. Connect the equipment into an outlet on a circuit different from that to which the receiver is connected. Consult the dealer or an experienced radio/TV technician for help. As the S-AIR product transmits sound by radio waves, sound may skip when radio waves are obstructed. This is a characteristic of radio waves and is not a malfunction. As the S-AIR product transmits sound by radio waves, equipment that generates electromagnetic energy, such as a microwave oven, may interfere with sound transmission. As the S-AIR product uses radio waves that share the same frequency as other wireless systems, such as wireless LAN or Bluetooth devices, interference or poor transmission may result. In this case, take the following steps: Do not install the S-AIR product near other wireless systems. Do not use the S-AIR product and other wireless systems at the same time. The transmission distance differs depending on the usage environment. Find a location where transmission between the unit and the S-AIR main unit is most effective, and install the unit and the S-AIR main unit there. On safety Operate the unit only on the power sources specified in “Specifications”. Completely disconnect the unit from the wall socket (mains) if it is not going to be used for an extended period of time. Should any solid object or liquid get into the unit, unplug the unit, and have it checked by qualified personnel before operating it again. On placement Do not place the unit in an inclined position or in locations that are extremely hot, cold, dusty, dirty, humid or lacking adequate ventilation, subject to vibration, direct sunlight or a bright light. Be careful when placing the unit on surfaces that have been specially treated (for example, with wax, oil, polish) as staining or discoloration of the surface may result. Heat buildup in the unit during operation is normal and is not cause for alarm. Do not touch the cabinet if it has been used continuously at a high volume because the cabinet may have become hot. On the speaker system This speaker system is not magnetically shielded, and the picture on nearby TV sets may become magnetically distorted. In this situation, turn off the TV, wait about 15 to 30 minutes, and turn it back on. If there is no improvement, move the unit far away from the TV. Cleaning the cabinet Clean the cabinet with a soft dry cloth. Do not use any type of abrasive pad, scouring powder, or solvent, such as thinner, benzine, or alcohol. S-AIR (Sony Audio Interactive Radio frequency) Recent times have seen the rapid spread of DVD media, Digital Broadcasting, and other highquality media. To ensure that the subtle nuances of these high-quality media are transmitted with no deterioration, Sony has developed a technology called “S-AIR” for the radio transmission of digital audio signals with no compression, and has incorporated this technology into the built-in wireless transceiver EZW-RT10A. This technology transfers digital audio signals with no compression using the 2.4 GHz band range of ISM band (Industrial, Scientific, and Medical band), such as wireless LANs and Bluetooth applications. Getting Started / (power) S-AIR CH+ * VOL + has a tactile dot. Your system Main unit ID: A not connected For details on turning on the S-AIR function, refer to the Operating Instructions supplied with the S-AIR main unit. 2 3 Neighboring system Operate the S-AIR main unit to turn on the S-AIR function. Set the S-AIR ID of the unit to the same S-AIR ID as the S-AIR main unit to be connected. ID: A Sub unit 1 Press to turn on the unit. 2 Once the connection is established, the S-AIR indicator on the unit lights up. Identifying the main unit with a specific sub unit (Pairing operation) It is easy to set the same S-AIR ID for the main unit and the sub units to establish the connection. However, if a neighbor has an S-AIR main unit with the same S-AIR ID as your S-AIR main unit, the neighbor may be able to hear the audio transmitted from your S-AIR main unit on the neighbor’s system. Also, you may be able to hear the audio transmitted from your neighbor’s S-AIR main unit on your system. To prevent this, you can identify the main unit with a specific sub unit by performing the pairing operation. Place the sub unit to be paired near the main unit. Pair the main unit with the sub unit one at a time. 3 4 Check that the power of the main unit and the sub unit are turned on. Check that the S-AIR ID of the main unit is the same as the S-AIR ID of the sub unit. Operate the S-AIR main unit to turn on the pairing function. For details on turning on the pairing function, refer to the Operating Instructions supplied with the S-AIR main unit. 5 Press the PAIRING button on the side panel of the unit using a pointed object. When pairing is in progress, the PAIRING indicator on the unit flashes. When completed, it stays on. To cancel pairing Before pairing The connection is established by the S-AIR ID (example). Your system ID: A Sub unit Pairing For details on setting the S-AIR ID of the S-AIR main unit, refer to the Operating Instructions supplied with the S-AIR main unit. Neighboring system Change the S-AIR IDs of the main unit and the sub unit to different S-AIR IDs. To stop the pairing operation midway Press the PAIRING button again. Main unit ID: A To pair the main unit with multiple sub units Repeat steps 1 through 5. ID: A Sub unit Listening to the sound of the connected S-AIR main unit You can use the S-AIR function to listen to the sound of an S-AIR main unit in a remote location. 1 2 Perform the procedure described in “Establishing the connection with an S-AIR main unit” and check that the S-AIR indicator is lit. Press S-AIR CH + repeatedly to select the desired S-AIR channel of the S-AIR main unit. 3 4 Press VOL +/– to adjust the volume. To operate the S-AIR main unit from the unit You can perform the following operations using the buttons on the unit. To Press Select sound source. S-AIR CH + Adjust the volume. VOL +/– Depending on the connected S-AIR main unit, the operation may differ. Refer to the Operating Instructions of the S-AIR main unit. Note You cannot use this unit as a subwoofer or surround speaker with other Sony S-AIR components. Advanced Operations Use the main unit that can set the MULTI SOURCE mode. When selecting the MULTI SOURCE mode, you can listen to different sound source with each sub unit. For setting up and details, refer to the Operating Instructions of the main unit. This equipment must not be co-located or operated in conjunction with any other antenna or transmitter. Hooking up the unit S-AIR ID selector Set the same S-AIR ID for this unit and the S-AIR main unit to be connected. For details on setting the S-AIR ID, see “Establishing the connection with an S-AIR main unit.” Remote Sensor The optional* S-AIR remote commander (AIR-RM10) can operate / (power), VOLUME +/–, and COUPLING with this unit. Hook-and-loop fastener :The hook-and-loop fastener is attached to the unit. :Attach the hook-and-loop fastener in the following way. Clean the area where the hookand-loop fastener is to be attached beforehand. (If you fail to do so, the hook-and-loop fastener may detach.) Peel off the bottom sheet on the adhesive side of the supplied hook-and-loop fastener. Attach it to the prepared area of the wall socket and press it firmly. Tips - Allow some space between the hook-and-loop fastener and the blades of the plug. - Make sure to attach the hook-andloop fastener where it can support the unit securely. Power Connect the unit to a wall socket. Notes Do not use the unit with a wall socket that is located in a high place. Hold the unit when pressing buttons to avoid stressing the plug blades in the wall socket. To identify the unit using the optional* S-AIR Remote commander AIR-RM10 (Coupling operation) This unit is compatible with the coupling operation. The coupling operation establishes a connection between the sub unit and optional* S-AIR remote commander. For details, refer to the Operating Instructions of the optional* S-AIR remote commander. When the coupling operation is in progress, the CPL indicator on the unit flashes. When completed, it stays on. 1 Make sure the unit is correctly and firmly connected to a wall socket. 2 Find your problem in the checklist below, and take the indicated corrective action. If the issue persists, contact your nearest Sony dealer. When bringing this unit in for repairs, be sure to bring in the entire system (this unit, the S-AIR main unit). This product is a system product, and the entire system is needed to determine the location requiring repair. The S-AIR indicator is turned off. Check that the unit is connected to a wall socket securely and the unit is turned on. Connecting the unit and S-AIR main unit is not possible. (The S-AIR indicator flashes.) If you use another S-AIR main unit, place it more than 8 m (26 1/4 feet) away from the S-AIR main unit you are using. Confirm the S-AIR IDs of the unit and the S-AIR main unit. The main unit is paired with another S-AIR sub unit. Pair the main unit with the sub unit you are using. The main unit is paired with another S-AIR sub unit. Cancel pairing. Place so that the unit and the S-AIR main unit are separated from other wireless devices. Stop using any other wireless devices. The connected S-AIR main unit is turned off. Turn on the S-AIR main unit. There is no sound. If you use another S-AIR main unit, place it more than 8 m (26 1/4 feet) away from the S-AIR main unit you are using. Confirm the S-AIR IDs of the unit and the S-AIR main unit. Check the pairing setting. Place so that the unit and the S-AIR main unit are closer. Stop using any equipment that generates electromagnetic energy, such as a microwave oven. Place so that the unit and the S-AIR main unit are separated from other wireless devices. Stop using any other wireless devices. Change the S-AIR ID settings of the unit and the S-AIR main unit. Turn off the unit and S-AIR main unit and then turn them on again. Check that the unit is connected to a wall socket securely and the unit is turned on. Increase the volume of the unit. There is noise or the sound skips. If you use another S-AIR main unit, place it more than 8 m (26 1/4 feet) away from the S-AIR main unit you are using. Place so that the unit and the S-AIR main unit are closer. Stop using any equipment that generates electromagnetic energy, such as a microwave oven. Place so that the unit and the S-AIR main unit are separated from other wireless devices. Stop using any other wireless devices. Change the S-AIR ID settings of the unit and the S-AIR main unit. Do not place a mobile phone near the unit and the S-AIR main unit, as this may result in noise. The S-AIR channel fails to change. Check that the unit and the S-AIR main unit are connected properly. When using the Wireless Audio Transmitter for PC as the S-AIR main unit, sub unit operations will not be functional if supplied PC application is not booted or Standard Mode is selected. Amplifier section Operate S-AIR main unit or the optional* S-AIR remote commander to start playback. Enjoying different sound source with multiple sub units Troubleshooting Specifications ID: A Sub unit The S-AIR channels that can be selected depend on the S-AIR main unit. For details, refer to the Operating Instructions supplied with the S-AIR main unit. This device complies with Part 15 of the FCC Rules. Operation is subject to the following two conditions: (1) this device may not cause harmful interference, and (2) this device must accept any interference received, including interference that may cause undesired operation. ™ ® 1 VOL (Volume) +*/– For the built-in wireless transceiver (EZW-RT10A) “S-AIR” and its logo are trademarks of Sony Corporation. The Bluetooth word mark and logos are owned by the Bluetooth SIG, Inc. and any use of such marks by Sony Corporation is under license. Other trademarks and trade names are those of their respective owners. iPod is a trademark of Apple Inc., registered in the U.S. and other countries. iPhone is a trademark of Apple Inc. All other trademarks and registered trademarks are of their respective holders. In this manual, and marks are not specified. The connection is established between the paired main unit and sub unit. Operations POWER indicator You are cautioned that any changes or modifications not expressly approved in this manual could void your authority to operate this equipment. This equipment should be installed and operated with at least 20cm and more between the radiator and person’s body (excluding extremities: hands, wrists, feet and ankles). After pairing Connect the unit and S-AIR main unit to listen to sound from the S-AIR main unit. You can easily establish the connection by setting the same S-AIR ID for this unit and S-AIR main unit. On heat buildup CAUTION This equipment complies with FCC radiation exposure limits set forth for uncontrolled equipment and meets the FCC radio frequency (RF) Exposure Guidelines in Supplement C to OET65. Establishing the connection with an S-AIR main unit Notes The AIR-RM10 can operate / (power), VOLUME+/–, and COUPLING with this unit. In the following cases, the CPL indicator turns off: - If the S-AIR main unit is not compatible with the MULTI SOURCE mode. - If the S-AIR main unit is not compatible with the coupling operation. - If processing of the coupling operation is failed. For details on coupling operation, refer to the Operating Instructions of the AIR-RM10. AUDIO POWER SPECIFICATIONS POWER OUTPUT AND TOTAL HARMONIC DISTORTION: With 4 ohms loads, both channels driven, from 100 – 10,000Hz; rated 1.5 watts per channel minimum RMS power, with no more than 10% total harmonic distortion. Continuous RMS power output (reference): 2.5 watts (4 ohms at 1 kHz, 10% harmonic distortion) Speaker section Speaker system: Full range, bass-reflex type Speaker units: 39 mm (1 9/16 in), cone type (1) Nominal impedance: 4 ohms Built-in wireless transceiver (EZW-RT10A) Communication System: S-AIR Specification version 1.0 Frequency band: 2.4000 GHz 2.4835 GHz Modulation method: DSSS Power requirements: DC 3.3 V, 350 mA Dimensions (w/h/d): 50 × 13 × 60 mm (2 × 17/32 × 2 3/8 in) Mass: 24 g (1 oz) General Power requirements: 120 V AC, 60 Hz Power consumption: 4 watts Dimensions (w/h/d): Approx. 80 × 166 × 62 mm (3 1/4 × 6 5/8 × 2 1/2 in) Mass: Approx. 380 g (13.4 oz) Supplied accessories: Hook-and-loop fastener (1) Design and specifications are subject to change without notice. * The optional S-AIR remote commander is included in the package product. ADVERTENCIA Para reducir el riesgo de incendios o electrocución, no exponga este aparato a la lluvia ni a la humedad. Para reducir el riesgo de incendios o descargas eléctricas, no exponga el aparato a goteos o salpicaduras, y no coloque sobre el aparato objetos que contengan líquidos como, por ejemplo, un jarrón. Puesto que para desconectar la unidad de la red eléctrica se utiliza la clavija principal, conecte la unidad a una toma de corriente de ca de fácil acceso. Si detecta alguna anomalía en la unidad, desconecte la clavija principal de la toma de corriente de ca inmediatamente. La unidad no estará desconectada de la red eléctrica mientras esté conectada a la toma de corriente de ca, aunque se haya apagado la propia unidad. No instale la unidad en un lugar de espacio reducido, como por ejemplo en una estantería para libros o una vitrina empotrada. La placa de características se encuentra en la parte inferior exterior. Anotaciones del propietario Los números de modelo y de serie se encuentran en la parte inferior de la unidad. Anote estos números en el espacio provisto abajo. Refiérase a ellos siempre que acuda a su distribuidor Sony en relación con este producto. Nº de modelo Nº de serie Instrucciones de seguridad importantes 1) Lea estas instrucciones. 2) Guarde estas instrucciones. 3) Preste atención a todas las advertencias. 4) Siga todas las instrucciones. 5) No utilice este aparato cerca del agua. 6) Límpielo solamente con un paño seco. 7) No bloquee ninguna abertura de ventilación. Instale el aparato de acuerdo con las instrucciones del fabricante. 8) No instale el aparato cerca de fuentes de calor como radiadores, rejillas de salida de calor, estufas, u otros aparatos (incluidos amplificadores) que produzcan calor. 9) No anule la función de seguridad de la clavija polarizada o de tipo con puesta a tierra. Una clavija polarizada tiene dos cuchillas con una más ancha que la otra. Una clavija de tipo con puesta a tierra tiene dos cuchillas y una tercera espiga de puesta a tierra. La cuchilla ancha o la tercera espiga están provistas para su seguridad. Si la clavija provista no encaja en su toma de corriente, consulte con un electricista para que le reemplace la toma de corriente obsoleta. 10)Proteja el cable de alimentación para impedir que pueda ser pisado o pinchado, particularmente en los enchufes, tomas de corriente de alargaderas, y puntos donde salen del aparato. 11)Utilice solamente aditamentos/ accesorios especificados por el fabricante. 12)Utilícelo solamente con el carrito, estante, trípode, soporte, o mesa especificado por el fabricante, o vendido con el aparato. Cuando se utilice un carrito, tenga cuidado al mover la combinación de carrito/aparato para evitar que se vuelque y le ocasione heridas. 13)Desenchufe este aparato durante las tormentas eléctricas o cuando no lo vaya a utilizar durante largos periodos de tiempo. 14)Solicite toda asistencia técnica a personal cualificado. El servicio de reparación será necesario cuando el aparato haya sido dañado de cualquier forma, tal como cuando esté dañado el cable de alimentación o la clavija, se haya derramado líquido o hayan caído objetos al interior del aparato, el aparato haya sido expuesto a la lluvia o humedad, no funcione normalmente, o se haya dejado caer. NOTA: Este equipo ha sido probado y se ha encontrado que cumple con los límites estipulados para un dispositivo digital de clase B, en conformidad con el apartado 15 de las normas de la FCC. Estos límites están designados para ofrecer protección razonable contra las interferencias nocivas en una instalación residencial. Este equipo genera, utiliza y puede radiar energía de radiofrecuencia y, si no se instala y utiliza de acuerdo con las instrucciones, podrá ocasionar interferencias nocivas para las comunicaciones de radio. Sin embargo, no hay garantía de que no vayan a ocurrir interferencias en una instalación en particular. Si este equipo ocasiona interferencias de radio nocivas para la recepción de radio o televisión, lo que podrá determinarse apagando y encendiendo el equipo, se sugiere que el usuario intente corregir las interferencias tomando una o más de las medidas siguientes: Reoriente o reubique la antena de recepción. Aumente la separación entre el equipo y el receptor. Conecte el equipo a una toma de corriente de un circuito diferente al que está conectado el receptor. Consulte al distribuidor o a un técnico con experiencia en radio/ TV para que le ayude. PRECAUCIÓN Se le advierte que cualquier cambio o modificación no autorizada expresamente en este manual podrá anular la autorización que usted tiene para utilizar este equipo. Transceptor inalámbrico incorporado (EZW-RT10A) Este dispositivo cumple con el apartado 15 de las normas de la FCC. El funcionamiento está sujeto a las dos condiciones siguientes: (1) este dispositivo no debe causar interferencias nocivas, y (2) este dispositivo debe aceptar cualquier interferencia que reciba, incluidas aquellas que puedan causar un funcionamiento no deseado. Este equipo no debe colocarse ni utilizarse junto con ninguna otra antena o transmisor. Este equipo cumple con los límites de exposición a la radiación establecidos por la FCC para equipos no controlados y satisface las directrices de exposición a la radiofrecuencia (RF) de la FCC según el suplemento C de OET65. Tenga cuidado cuando ponga la unidad encima de superficies que hayan sido tratadas especialmente (por ejemplo, con cera, aceite o abrillantador), porque podrían producirse manchas o decoloración de la superficie. Precauciones Notas sobre el uso del producto S-AIR Puesto que el producto S-AIR transmite sonido a través de ondas radioeléctricas, es posible que se produzcan saltos en el sonido si se obstaculizan dichas ondas. Se trata de una característica de las ondas radioeléctricas y no de un fallo de funcionamiento. Puesto que el producto S-AIR transmite sonido a través de ondas radioeléctricas, los equipos que generan energía electromagnética, como un horno microondas, pueden interferir en la transmisión del sonido. Puesto que el producto S-AIR utiliza ondas radioeléctricas que comparten la misma frecuencia que otros sistemas inalámbricos, tales como una LAN inalámbrica o dispositivos Bluetooth, es posible que se produzcan interferencias o una transmisión deficiente. En este caso, realice los pasos siguientes: No instale el producto S-AIR cerca de otros sistemas inalámbricos. No utilice el producto S-AIR y otros sistemas inalámbricos al mismo tiempo. La distancia de transmisión varía en función del entorno de uso. Localice un lugar donde la transmisión entre la unidad y la unidad principal S-AIR sea más efectiva, e instale la unidad y la unidad principal S-AIR en este. Acumulación de calor La acumulación de calor en la unidad durante el funcionamiento es normal y no debe ser causa de alarma. No toque la unidad si se ha utilizado continuamente a un volumen alto, ya que podría estar caliente. Establecimiento de la conexión con una unidad principal S-AIR Conecte la unidad y la unidad principal S-AIR para escuchar el sonido de la unidad principal S-AIR. Es posible establecer la conexión fácilmente mediante el ajuste del mismo ID de S-AIR para esta unidad y la unidad principal. 1 2 S-AIR (Sony Audio Interactive Radio frequency o Radiofrecuencia interactiva de audio de Sony) En los últimos tiempos se ha visto una rápida propagación del soporte DVD, de la emisión digital y de otros soportes de alta calidad. Para garantizar la transmisión de los sutiles matices de estos soportes de alta calidad sin deterioro alguno, Sony ha desarrollado una tecnología denominada “S-AIR” para la transmisión de señales de audio digital sin compresión, y ha incluido esta tecnología en el transceptor inalámbrico incorporado EZWRT10A. Esta tecnología transfiere señales de audio digital sin compression utilizando el rango de banda de 2,4GHz de la banda ISM (Industrial, Científica, y Médica), tal como las aplicaciones LAN inalámbricas y Bluetooth. Seguridad Utilice la unidad solamente con las fuentes de alimentación indicadas en “Especificaciones”. Desconecte completamente la unidad de la toma de corriente de pared si no la va a utilizar durante un periodo de tiempo prolongado. Si se introduce algún objeto sólido o líquido en la unidad, desenchúfela y haga que la revise personal especializado antes de volver a utilizarla. Ubicación No ponga la unidad en posición inclinada ni en lugares que sean muy calientes, fríos, polvorientos, sucios, húmedos o que carezcan de una ventilación adecuada, estén expuestos a vibración, luz solar directa o una luz intensa. 3 Pulse para encender la unidad. Cuando se establece la conexión, el indicador S-AIR de la unidad se ilumina. Vinculación de la unidad principal con una unidad secundaria específica (emparejamiento) Es fácil establecer el mismo ID de S-AIR para la unidad principal y las unidades secundarias para establecer la conexión. Sin embargo, si un vecino tiene una unidad principal S-AIR con el mismo ajuste de ID de S-AIR que el de su unidad principal S-AIR, es posible que el vecino oiga el audio transmitido desde la unidad principal S-AIR en su sistema. Asimismo, es posible que usted oiga el audio transmitido desde la unidad principal S-AIR del vecino en su sistema. Para evitar esto, puede identificar la unidad principal con una unidad secundaria específica mediante el emparejamiento. sin conexión ID: A Unidad secundaria La conexión se establece mediante el ID de S-AIR (ejemplo). Sistema del vecino Unidad principal ID: A Indicador POWER ID: A Unidad secundaria Emparejamiento 1 Coloque la unidad secundaria que desea emparejar cerca de la unidad principal. Realice el emparejamiento de la unidad principal con la unidad secundaria a la vez. 2 3 4 Compruebe que la alimentación de la unidad principal y de la unidad secundaria está conectada. Compruebe que el ID de S-AIR de la unidad principal es el mismo que el ID de S-AIR de la unidad secundaria. Utilice la unidad principal S-AIR para activar la función de emparejamiento. Si desea obtener más información acerca de la función de emparejamiento, consulte el manual de instrucciones suministrado con la unidad principal S-AIR. 5 Pulse el botón PAIRING del panel lateral de la unidad mediante un objeto puntiagudo. Cuando el emparejamiento está en curso, el indicador PAIRING de la unidad parpadea. Cuando finaliza el proceso, pasa a permanecer encendido. Para cancelar el emparejamiento Cambie los ID de S-AIR de la unidad principal y de la unidad secundaria a ID de S-AIR diferentes. Para detener el emparejamiento antes de finalizar Pulse el botón PAIRING otra vez. / (encendido) ID: A Unidad secundaria S-AIR CH+ ID: A Unidad secundaria Para emparejar la unidad principal con varias unidades secundarias Repita los pasos del 1 al 5. Cómo escuchar el sonido de la unidad S-AIR conectada 4 Puede utilizar la función S-AIR para escuchar el sonido de una unidad principal S-AIR en una ubicación remota. Para controlar la unidad principal S-AIR desde la unidad 1 Características 2 Realice el procedimiento descrito en “Establecimiento de la conexión con una unidad principal S-AIR” y compruebe que el indicador S-AIR esté encendido. Pulse S-AIR CH + varias veces para seleccionar el canal S-AIR deseado de la unidad principal S-AIR. Los canales S-AIR que pueden seleccionarse dependen de la unidad principal S-AIR. Si desea obtener más información, consulte el manual de instrucciones suministrado con la unidad principal S-AIR. 3 Conexión de la unidad Selector S-AIR ID Ajuste el mismo ID de S-AIR para esta unidad y para la unidad principal S-AIR que desee conectar. Si desea obtener más información acerca de cómo ajustar el ID de S-AIR, consulte “Establecimiento de la conexión con una unidad principal S-AIR”. Sensor remoto El mando a distancia opcional* S-AIR (AIR-RM10) puede controlar las funciones de los botones / (encendido), VOLUME +/– y COUPLING de esta unidad. Velcro :el velcro se fija en la unidad. :fije el velcro como se indica a continuación. Limpie de antemano la zona en la que va a colocar el velcro. (Si no lo hace, es posible que el velcro se despegue). Despegue la lámina inferior del lado adhesivo del velcro suministrado. Fíjelo en la zona de la toma de corriente de pared que ha preparado y presiónelo firmemente. Sugerencias - Deje algo de espacio entre el velcro y las varillas del enchufe. - Asegúrese de fijar el velcro en una parte donde pueda sostener la unidad de manera segura. Alimentación Conecte la unidad a una toma de corriente de pared. Notas No utilice la unidad con una toma de corriente de pared que se encuentre en una posición alta. Sujete la unidad mientras pulsa los botones para evitar presionar excesivamente las varillas del enchufe contra la toma de corriente de pared. Pulse VOL +/– para ajustar el volumen. Puede realizar las siguientes operaciones mediante los botones de la unidad. Para Pulse Seleccionar la fuente de sonido. S-AIR CH + Ajustar el volumen. VOL +/– En función de la unidad principal S-AIR conectada, es posible que el funcionamiento sea diferente. Consulte el manual de instrucciones suministrado con la unidad principal S-AIR. Nota No puede utilizar esta unidad como un altavoz potenciador de graves o un altavoz de sonido envolvente con otros componentes S-AIR de Sony. Utilice la unidad principal S-AIR o el mando a distancia opcional* S-AIR para iniciar la reproducción. Cómo escuchar diferentes fuentes de sonido con varias unidades secundarias Cuando la operación de acoplamiento está en curso, el indicador CPL de la unidad parpadea. Cuando finaliza el proceso, pasa a permanecer encendido. Utilice la unidad principal que puede ajustar el modo MULTI SOURCE. Si selecciona el modo MULTI SOURCE, puede escuchar una fuente de sonido diferente con cada unidad secundaria. Si desea obtener más información acerca de los ajustes y los detalles, consulte el manual de instrucciones de la unidad principal. Notas El mando a distancia AIR-RM10 puede controlar las funciones / (encendido), VOLUME+/– y COUPLING de esta unidad. El indicador CPL se apaga en los casos siguientes: - Si la unidad principal S-AIR no es compatible con el modo MULTI SOURCE. - Si la unidad principal S-AIR no es compatible con la operación de acoplamiento. - Si se produce un error de procesamiento de la operación de acoplamiento. Si desea obtener más información acerca de la operación de acoplamiento, consulte el manual de instrucciones del mando a distancia AIR-RM10. Esta unidad es compatible con la operación de acoplamiento. La operación de acoplamiento establece una conexión entre la unidad secundaria y el mando a distancia opcional* S-AIR. Si desea obtener más información, consulte el manual de instrucciones del mando a distancia opcional* S-AIR. 2 Localice su problema en la lista de comprobación que aparece a continuación y efectúe la acción indicada para corregirlo. Si el problema persiste, póngase en contacto con el distribuidor Sony más cercano. Asegúrese de entregar el sistema completo cuando lleve esta unidad a un centro de servicio técnico para su reparación (esta unidad y la unidad principal S-AIR). Este producto es un sistema integral y para determinar la parte que necesita reparación es necesario el sistema completo. El indicador S-AIR está apagado. Compruebe que la unidad está firmemente conectada a una toma de corriente de pared y que está encendida. No es posible conectar la unidad y la unidad principal S-AIR. (El indicador S-AIR parpadea). Si utiliza otra unidad principal S-AIR, colóquela a más de 8 m (26 1/4 pies) de la unidad principal S-AIR que está utilizando. Compruebe el ID de S-AIR de la unidad y de la unidad principal S-AIR. La unidad principal está emparejada con otra unidad secundaria S-AIR. Empareje la unidad principal con la unidad secundaria que está utilizando. La unidad principal está emparejada con otra unidad secundaria S-AIR. Cancele el emparejamiento. Colóquelas de modo que la unidad y la unidad principal S-AIR estén alejadas de otros dispositivos inalámbricos. Deje de utilizar otros dispositivos inalámbricos. La unidad principal S-AIR conectada está apagada. Encienda la unidad principal S-AIR. No es posible cambiar el canal S-AIR. No hay sonido. Si utiliza otra unidad principal S-AIR, colóquela a más de 8 m (26 1/4 pies) de la unidad principal S-AIR que está utilizando. Compruebe el ID de S-AIR de la unidad y de la unidad principal S-AIR. Compruebe el ajuste de emparejamiento. Colóquelas de modo que la unidad y la unidad principal S-AIR estén más cerca. Deje de utilizar cualquier equipo que genere energía electromagnética como, por ejemplo, un horno microondas. Colóquelas de modo que la unidad y la unidad principal S-AIR estén alejadas de otros dispositivos inalámbricos. Deje de utilizar otros dispositivos inalámbricos. Cambie los ajustes de ID de S-AIR de la unidad y de la unidad principal S-AIR. Apague la unidad y la unidad principal S-AIR y vuelva a encenderlas. Compruebe que la unidad está firmemente conectada a una toma de corriente de pared y que está encendida. Suba el volumen de la unidad. Hay ruido o interrupciones del sonido. Si utiliza otra unidad principal S-AIR, colóquela a más de 8 m (26 1/4 pies) de la unidad principal S-AIR que está utilizando. Colóquelas de modo que la unidad y la unidad principal S-AIR estén más cerca. Deje de utilizar cualquier equipo que genere energía electromagnética como, por ejemplo, un horno microondas. Colóquelas de modo que la unidad y la unidad principal S-AIR estén alejadas de otros dispositivos inalámbricos. Deje de utilizar otros dispositivos inalámbricos. Cambie los ajustes de ID de S-AIR de la unidad y de la unidad principal S-AIR. No coloque un teléfono móvil cerca de la unidad y de la unidad principal S-AIR, ya que se podría producir ruido. Compruebe que la unidad y la unidad principal S-AIR estén conectadas correctamente. Si utiliza el transmisor de audio inalámbrico para ordenador como unidad principal S-AIR, las operaciones de la unidad secundaria no funcionarán si no se inicia la aplicación informática suministrada o se selecciona Modo estándar. ESPECIFICACIONES DE POTENCIA DE AUDIO POTENCIA DE SALIDA Y DISTORSIÓN ARMÓNICA TOTAL: Con cargas de 4 ohmios, ambos canales dirigidos, de 100 a 10.000 Hz; potencia eficaz RMS mínima de 1,5 vatios nominales por canal, con un máximo del 10% de distorsión armónica total. Potencia de salida eficaz RMS continua (referencia): 2,5 vatios (4 ohmios a 1 kHz, 10% de distorsión armónica) Sección de los altavoces Sistema de altavoces: gama completa, tipo reflejo de graves Altavoces: 39 mm (1 9/16 pulgadas), tipo cónico (1) Impedancia nominal: 4 ohmios Transceptor inalámbrico incorporado (EZW-RT10A) Sistema de comunicación: especificación S-AIR, versión 1.0 Banda de frecuencia: 2,4000 GHz – 2,4835 GHz Método de modulación: DSSS Requisitos de alimentación: cc de 3,3 V, 350 mA Dimensiones (an/al/prf): 50 × 13 × 60 mm (2 × 17/32 × 2 3/8 pulgadas) Peso: 24 g (1 onza) General Requisitos de alimentación: ca de 120 V, 60 Hz Consumo de energía: 4 W Dimensiones (an/al/prf): aprox. 80 × 166 × 62 mm (3 1/4 × 6 5/8 × 2 1/2 pulgadas) Peso: aprox. 380 g (13,4 onzas) Accesorios suministrados: Velcro (1) El diseño y las especificaciones están sujetos a cambios sin previo aviso. * El mando a distancia opcional S-AIR se incluye en el paquete del producto. Operaciones avanzadas Para identificar la unidad mediante el mando a distancia opcional* S-AIR AIR-RM10 (operación de acoplamiento) Asegúrese de que la unidad está conectada correcta y firmemente a una toma de corriente de pared. Sección del amplificador Operaciones ™ ® 1 Especificaciones VOL (volumen) +*/– * VOL + presenta un punto táctil. Solución de problemas Sistema del vecino Unidad principal ID: A Antes de realizar el emparejamiento Procedimientos iniciales “S-AIR” y su logotipo son marcas comerciales de Sony Corporation. La marca de la palabra Bluetooth y sus logotipos son propiedad de Bluetooth SIG, Inc. y cualquier uso de estos por parte de Sony Corporation se realiza bajo licencia. Las demás marcas y nombres comerciales pertenecen a sus respectivos propietarios. iPod es una marca comercial de Apple Inc. registrada en los Estados Unidos y en otros países. iPhone es una marca comercial de Apple Inc. El resto de marcas comerciales y marcas comerciales registradas pertenecen a sus respectivos propietarios. En este manual, no se especifican las marcas y . El modelo AIR-SA5R es un producto compatible con “S-AIR”. También se denomina “unidad secundaria S-AIR”. Es muy fácil preparar la unidad para su utilización. Todo lo que debe hacer es conectarla a la toma de pared. Si conecta la unidad principal S-AIR (transmisor, en adelante denominado “unidad principal”) a la unidad secundaria S-AIR (receptor, en adelante denominado “unidad secundaria”) mediante la tecnología “S-AIR”, es posible utilizar cada unidad en una ubicación remota. Por ejemplo, puede instalar esta unidad en una habitación y, a continuación, instalar la unidad principal en la sala de estar. De este modo, es posible escuchar la música de la unidad principal situada en la sala de estar mediante esta unidad en la habitación. Esta unidad es compatible con una unidad principal con el modo “MULTI SOURCE” y la operación de acoplamiento. La operación de acoplamiento establece una conexión entre la unidad secundaria y el mando a distancia opcional S-AIR. Ajuste el ID de S-AIR de la unidad al mismo ID de S-AIR que el de la unidad principal S-AIR que desea conectar. Su sistema Este equipo deberá instalarse y utilizarse con una separación de al menos 20 cm o más entre el radiador y el cuerpo de la persona (sin incluir las extremidades: manos, muñecas, pies y tobillos). Su sistema Utilice la unidad principal S-AIR para activar la función S-AIR. Si desea obtener más información acerca del ajuste del ID de S-AIR de la unidad principal S-AIR, consulte el manual de instrucciones suministrado con la unidad principal S-AIR. Limpieza de la unidad Limpie la unidad con un paño suave y seco. No utilice ningún tipo de estropajo abrasivo, limpiador en polvo ni disolvente, como diluyente, benzina o alcohol. La conexión se establece entre la unidad principal y la unidad secundaria emparejadas. Si desea obtener más información acerca de la activación de la función S-AIR, consulte el manual de instrucciones suministrado con la unidad principal S-AIR. Sistema de altavoces Este sistema de altavoces no está blindado magnéticamente, y la imagen de un televisor cercano podría distorsionarse magnéticamente. En esta situación, apague el televisor, espere de 15 a 30 minutos aproximadamente y vuelva a encenderlo. Si no se produce ninguna mejora, aleje la unidad del televisor. Después de realizar el emparejamiento


