1
EN
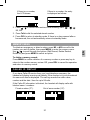
Amplified Cordless Phone
Model: KR2812
USER MANUAL
1
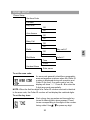
TABLE OF CONTENTS
Table of Contents ........................................................................................2
Important Safety Instructions .....................................................................5
Safety and Care ............................................................................................7
Safety Precautions ......................................................................................7
Caring for Your Product ................................................................................7
Caution .......................................................................................................7
Introduction .................................................................................................8
Main Features .............................................................................................8
Package Contents .......................................................................................9
Product Overview ......................................................................................10
Handset and Base Unit - Front View ...........................................................10
LCD Display Symbols ................................................................................11
Getting Started ...........................................................................................12
Connecting AC Adaptor / Phone Line ..........................................................12
Installing Handset Batteries .......................................................................12
Charging Handset Batteries .......................................................................13
Low Battery Warning ..................................................................................13
Attaching the Belt Clip ................................................................................13
Wall-Mounting the Base Unit ......................................................................14
Initialization and Standby Mode .................................................................14
Handset Reception ....................................................................................14
Using Handset Keys ..................................................................................15
Basic Handset Functions ..........................................................................15
Making Calls ..............................................................................................15
Receiving / Ending Calls ............................................................................16
Adjusting Volume .......................................................................................16
Amplifying Volume .....................................................................................16
Muting Volume ...........................................................................................16
Adjusting Tone...........................................................................................17
Using Pre-Dial ...........................................................................................17
Last Number Redial................................................................................... 17
Using the Pause ........................................................................................17
2
EN
Handset and Base Unit - Back View ............................................................11
Call Waiting ...............................................................................................17
Using the Phonebook ................................................................................18
Adding a Phonebook Entry .........................................................................18
Editing a Phonebook Entry .........................................................................19
Deleting a Phonebook Entry .......................................................................19
Deleting All Phonebook Entries ..................................................................19
Calling a Stored Phonebook Entry ..............................................................20
Emergency and Direct Number Memory ..................................................20
Memory Menu ...........................................................................................21
Caller ID Display .........................................................................................21
Viewing Caller ID Records .........................................................................22
Saving Caller ID Records in the Phonebook ...............................................23
Changing the Caller ID Number Format ......................................................24
Erasing a Caller ID Record .........................................................................24
Erasing All Caller ID Records .....................................................................25
Dialing a Caller ID Record .........................................................................25
Additional Phone Functions ......................................................................26
Using the Intercom .....................................................................................25
Transferring Calls ......................................................................................25
Making a Conference Call .........................................................................26
One-way Base Paging ...............................................................................26
Menu Settings ............................................................................................26
Navigating Handset Menus ........................................................................26
Language..................................................................................................27
Ring Setting ...............................................................................................27
Set Time ...................................................................................................28
Phone Setup ..............................................................................................30
Security Setting / Registering Additional Handsets .....................................32
Default Settings .........................................................................................34
Troubleshooting ........................................................................................35
Specifications ............................................................................................36
About Krown ..............................................................................................36
FCC Statement ...........................................................................................36
3
EN
Edit the Call Log Number Before Dialing ................................................. 24
Declaration of Conformity ........................................................................37
Lightning ....................................................................................................38
Consumer Information ..............................................................................38
EN
Warranty.................................................................................................39
IMPORTANT SAFETY INSTRUCTIONS
Some of the following information may not apply to your particular product.
However, when using telephone equipment, basic safety precautions should
always be followed to reduce the risk of fire, electric shock and injury to
persons, including the following:
1. Read and understand all instructions.
2. Follow all warnings and instructions marked on the product.
3. Unplug this product from the wall outlet before cleaning. Do not use
liquid cleaners or aerosol cleaners. Use a damp cloth for cleaning.
5. Slots and openings in the cabinet back or bottom are provided for
ventilation, to protect it from overheating. These openings must not be
blocked or covered. The openings should never be blocked by placing
the product on the bed, sofa, rug, or other similar surface. This product
should not be placed in a built-in installation unless proper ventilation is
provided.
6. This product should be operated only from the type of power source
indicated on the marking label. If you are not sure of the type of power
supplied to your home, consult your dealer or local power company.
7. Do not allow anything to rest on the power cord. Do not locate this
product where the cord will be abused by persons walking on it.
8. Do not overload wall outlets and extension cords as this can result in
the risk of fire or electric shock.
9. Never push objects of any kind into this product through cabinet slots
as they may touch dangerous voltage points or short out parts that
could result in a risk of fire or electric shock. Never spill liquid of any
kind on the product.
10.To reduce the risk of electric shock, do not disassemble this product,
but take it to a qualified serviceman when service or repair work is
required. Opening or removing covers may expose you to dangerous
voltages or other risks. Incorrect reassembly can cause electric shock
when the telephone equipment is subsequently used.
11. Do not expose the product to extreme temperatures such as areas
near a hot radiator or stove or in a hot car.
12.Do not place lighted candles, cigarettes, etc., on the telephone.
5
EN
4. This product should not be used while you are in a bathtub, shower
or pool. Immersion of the product in water could cause an electrical
shock.
13.Never touch uninsulated telephone wires or terminals unless the telephone line has been disconnected at the network interface.
14.Never install or modify telephone wiring during a lightning storm.
15.Never install telephone jacks in wet locations unless the jack is specifically designed for wet locations.
16.Use caution when installing or modifying telephone lines to prevent electrical shock and/or fire.
17.Unplug this product from the wall outlet and refer servicing to qualified service personnel under the following conditions:
A. When the power supply cord or plug is damaged or frayed.
B. If the product has been exposed to rain or water.
C. If the product does not operate normally by following the operating
instructions.
D. If the product’s cabinet has been damaged.
E. If the product exhibits a distinct change in performance.
18.Do not use the telephone to report a gas leak in the vicinity of the leak.
19.Do not place this product on an unstable cart, stand or table. The product may fall, causing serious damage to the product.
20.Use only the power cord and batteries indicated in this manual. Do not dispose of batteries in a fire. They may explode.
21.For servicing or replacement, you can purchase a suitable headset through service center or retailer shop.
CAUTION
You must use a Class 2 power source that supplies 9V DC and delivers at least 500mA.
Its plug must fit the phone’s DC jack. The adapter
supplied meets these specifications. Using an
adapter that does not meet these specifications could
damage the phone or the adapter.
Always connect the AC adapter to the phone before
you connect it to AC power. When you finish, disconnect the adaptor from AC power before you disconnect from the phone.
SAVE THESE INSTRUCTIONS
EN
SAFETY AND CARE
Observe the following safety precautions and warnings when setting up and
using this product.
SAFETY PRECAUTIONS
•
LCD panel – The LCD panel is made of glass, and may break if the unit
is dropped. Place the unit securely on a stable surface.
•
Heat sources – Keep the product away from heat sources, such as
radiators, stoves, heaters, and other heat-generating products.
•
Water and moisture – Do not use the product in or near water or in high
moisture areas, such as a bathroom.
•
The KR2812 is designed for indoor use only. Do not place the handset in
direct sunlight, as this will damage the LCD and invalidate your warranty.
•
Do not clean any part of your phone with benzene, thinner or other
solvent chemicals as this may cause permanent damage that is not
covered by the warranty. When necessary, clean it with a damp cloth.
•
Keep your phone away from hot, humid conditions or strong sunlight.
•
Never immerse the unit in water or use your phone outdoors in the
rain, or handle it with wet hands.
•
Do not subject the base unit to extreme force, shock, or fluctuations in
humidity.
•
Do not tamper with the internal components or disassemble the unit.
•
Do not mix new and old batteries or batteries of different types
Replace batteries with the same or equivalent type recommended by the
manufacturer.
•
Every effort has been made to ensure the highest standards of reliability
for your phone. However, if something does go wrong, do not try to
repair it yourself – consult your supplier.
CAUTION
•
Dispose of old, defective batteries in an environmentally friendly manner
in accordance with the relevant legislation.
•
No open flames, such as lighted candles, should be placed near the
apparatus.
•
Never use your phone in the open air during a thunderstorm – unplug
7
EN
CARING FOR YOUR PRODUCT
•
Do not install the base unit near a sink, bath or shower, or anywhere
it could get wet. Electrical equipment can cause serious injury if used
while you are wet or standing in water.
•
If the base unit ever falls into water, do not retrieve it until you have unplugged the power lead from the A/C wall outlet and the phone line from
the phone outlet; then pull it out by the unplugged cables.
•
When handling batteries exercise care. Contact with conductive materials
can short the batteries. To avoid the risk of fire never use
non-rechargeable batteries.
•
Use only the power source marked on the power supply (adaptor). If you
are unsure of the power supplied to you home, consult your power
company. Do not place objects on the power cord.
•
Never use this unit near a gas leak as this can cause explosions.
•
Occasional loss of synchronization between the handset and base
unit is normal if there is significant interference from the surrounding
environment.
•
Disconnect the telephone line from the wall-outlet before replacing
the battery.
INTRODUCTION
Thank you for selecting the Krown Amplified Cordless Phone model
KR2812. Based on the 2.4GHz ISM FHSS WDCT platform, the KR2812
cordless phone provides the freedom to communicate from anywhere in
your home, making phone conversations louder, clearer and easier to
understand.
MAIN FEATURES
•
Long-range cordless communications between handset and base unit
up to 300 meters / 980 feet (outdoors) without obstacles
•
Loud base unit ringer up to 95dBSPL(A) with Amplify handset volume
option for enhanced audio clarity; rubberized earpiece cushion for
comfortable listening
•
24 large, easy-press handset navigation / number keys with backlight,
including 5 programmable preset emergency and direct memory keys,
and 1 tone control key
•
Extended handset operation time of 6.5 hours with standby time of at
least 100 hours
8
EN
the base unit from the phone line and the A/C power when there are
storms in your area.
3.6V rechargeable battery pack provides long-lasting cordless use
•
Up to 3 additional handsets (not supplied) can be used with the same
base unit
•
Bright handset LCD can display information in English, French or
Spanish with large font display option
•
Save up to 99 24-digit phonebook / Caller ID records; review and edit all
information in one screen with call time display and single-digit name
search
•
Convenient handset rotary audio volume control and base unit ringer
slide switch; user-selectable ring tones and audio volume settings
•
Real-time clock in 12/24-hour format with alarm function
•
Large, easy-to-view LED ringer indicator on base and handset units
•
Other phone features include intercom, call waiting, call transferring,
multi- party conferencing, one-way base-to-handset paging, handset
manual / auto-answer, baby call, message waiting indication and, pulse /
tone dialing modes.
NOTE To use the call waiting and caller ID features you must subscribe to
these services from your phone service provider.
PACKAGE CONTENTS
• Handset
• Rechargeable handset battery
• Base unit
• AC / DC adaptor for base unit
• Phone line for base unit
• Belt clip for handset
• Wall mount hanger
• User manual
NOTE Keep this manual handy as you use your new product. It contains
practical step-by-step instructions, as well as technical specifications and
warnings you should know.
9
EN
•
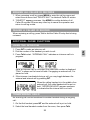
PRODUCT OVERVIEW
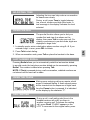
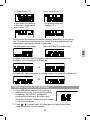
HANDSET AND BASE UNIT - FRONT VIEW
1. Visual ringer alert
1
2. Receiver
2
3. Emergency number memory
Fire /
6
7
8
4. Talk: answer and end calls
16
17
18
5. Redial / Pause
6. 0-9, *, # numeric keypad:
enter numbers and characters
7. Mute / DEL / PHBK
19
20
8. Amplify; MENU / CONF:
amplify volume level; enter
menu settings
21
9
10
11
12
Police /
Ambulance
9. Base Speaker
10.Charging contacts on base
unit
22
11.Charging / In Use LED
12.Base visual ringer alert
23
13.LCD display
14.Direct number memory
M1 / M2 : view Caller ID
log; navigate menus and
settings
15.Tone:adjust receiver tone
16.
Neck loop jack
17.INT: dial internal line
18. Headset jack
19.Flash; FORMAT / CID
20.Microphone
21.Charging contacts on phone
22.Page: pages handsets(up to 4)
23.Ringer Hi-Low-Off switch
10
EN
3
4
5
13
14
15
HANDSET AND BASE UNIT - BACK VIEW
1. Detachable belt clip
2. Battery compartment
1
4
5
3. Jacks for telephone and auxiliary lines
4. Ringer On / Off
5. Rotary volume control
6. Jack for base unit power supply(9V DC)
2
3
EN
6
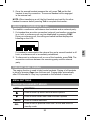
LCD DISPLAY SYMBOLS
There are 3 rows to display phone information according to the
corresponding highest-to-lowest priority: incoming call indication, alarm,
external line in use, handset name / clock.
• Top row: displays status icons and shows date / time, call-log number index and phone book number index.
• Second row: displays phone name (name of caller) information.
• Third row: displays phone number information.
NOTE: When any key is pressed on the handset, the LCD and keypad
back- light will light up.
11
GETTING STARTED
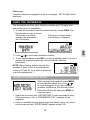
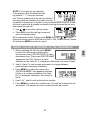
CONNECTING A/C ADAPTOR / PHONE LINE
Plug one end of the telephone line cord into
the Tel. Line jack on the back of the base
and the other end into a phone jack. Plug
the adaptor into the jack on the back of the
base and the other end of the adaptor into
the electrical outlet.
NOTE: The auxiliary line jack can be used to connect an additional
telephone and a telephone signaling device to the same line as the base
unit.
The handset uses a rechargeable 600 mAh 3.6V (AA) Ni-Cd (Nickel
Cadmium) battery pack (SANIK, type no. 3SN-AA60-S-J1F).
To insert the handset battery pack:
1. Slide the battery compartment
cover off.
2. Insert the battery pack into the
compartment, ensuring
the red-black wire
mini-connector is plugged into
the corresponding socket.
3. Slide the cover back until it clicks firmly into place.
WARNING: Risk of explosion if battery is replaced by an incorrect type.
Dispose of used batteries according to the instructions.
BATTERY SAFETY PRECAUTIONS
•
Do not burn, disassemble, mutilate, or puncture. Like other batteries of
this type toxic materials could be released which can cause injury.
•
Cadmium is a chemical recognized by the State of California to cause cancer.
•
Do not short-circuit the battery.
•
Do not place the rechargeable nickel-cadmium battery used in this
equipment in any charger other than the one designed to charge this
battery as specified in the user manual.
•
To reduce the risk of fire or personal injury, use only the battery listed in
the User Manual.
12
EN
INSTALLING HANDSET BATTERIES
•
Rechargeable Nickel-Cadmium batteries must be recycled or disposed
of properly.
•
Keep batteries out of the reach of children.
•
Remove batteries if storing over 30 days.
Rechargeable Nickel-Cadmium Batteries Must Be
Recycled or Disposed of Properly
NOTE: The RBRC seal on the battery used in your
KROWN product indicates that we are participating
in a program to collect and recycle Nickel Cadmium
batteries throughout the United States. Please call
1-800-8-BATTERY for information or contact your local
recycling center. RBRC(R) is a registered trademark of the Rechargeable
Battery Recycling Corporation.
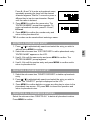
LOW BATTERY WARNING
When the battery is low on power, the handset
emits a tone and “LOW BATTERY”
appears on the display.
ATTACHING THE BELT CLIP
13
EN
CHARGING HANDSET BATTERIES
Place the handset in the handset cradle of the base unit to charge. Allow the
handset to charge for 14 hours before use.
WALL-MOUNT THE BASE UNIT
INITIALIZATION AND STANDBY MODE
NOTE: Do not adjust volume by pressing Amplify directly after initialization.
HANDSET RECEPTION
When outdoors, the handset can be used up to 300 meters (approx. 980
feet) away from the base unit. When indoors, the handset can be used up
to 50 meters (approx. 160 feet) from the base unit. An out-of-range tone is
generated if the handset is nearly out of range. If the handset connection is
completely lost, the base station automatically goes on-hook and “OUT OF
RANGE” is displayed on the LCD.
During outdoor and indoor use, the effective range is dependent upon
the surrounding environment, i.e., obstacles or interference that may
affect transmission. Interference from electrical appliances such as a TV,
microwave or mobile phone should be avoided.
NOTE: Due to radio interference, occasional loss of synchronization
between the handset and base unit may occur. If this happens the
base unit will quickly switch to another channel automatically to restore
synchronization.
14
EN
After inserting the battery (handset) and A/C power (base unit), both go to
standby mode directly. All previously saved settings are kept. During normal
operation, the handset’s display shows handset name / time and the base
unit LED is off.
USING HANDSET KEYS
Characters are entered by pressing the 0…9, * and # keys. A consecutive
press of the same key will enter a different character according to the table
below:
Character versus key press numbers
1
2
3
4
5
6
1
space
1
,
.
;
:
2
A(a)
B(b)
C(c)
2
(
[
3
D(d)
E(e)
F(f)
3
)
]
4
G(g)
H(h)
I(i)
4
$
<
5
J(j)
K(k)
L(l)
5
‘
>
6
M(m)
N(n)
O(o)
6
+
-
7
P(p)
Q(q)
R(r)
7
%
8
T(t)
U(u)
V(v)
8
~
^
9
W(w)
X(x)
Y(y)
Z(z)
9
=
0
0
/
\
&
|
_
*
*
#
?
!
{
}
#
S(s)
Toggle between upper / lower case letters
Characters can be generated or deleted by multiple presses of the
numerical or DEL key
BASIC HANDSET FUNCTIONS
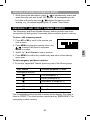
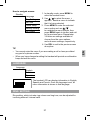
MAKING CALLS
1. Pick up the handset and press Talk.
2. Use the numeric keypad 0…9 to dial the
phone number you want to call. If an
external call is successfully made, “TALK”
is shown on the LCD and you may begin
speaking into the handset microphone.
15
EN
Key
RECEIVING / ENDING CALLS
When the base unit receives a call, the handset rings immediately. If there
is no Caller ID available, the LCD displays “EXTERNAL CALL”. Pick up the
handset and press Talk at any time to begin the conversation.
To end a call:
During a call, press Talk to end the current connection at any time
OR place the handset in the base unit. The handset returns to standby
mode.
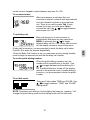
ADJUSTING VOLUME
AMPLIFYING VOLUME
Amplifying volume enhances sound quality so
a conversation can be heard more clearly for
a selected volume level. The Amplify function
further increases a volume level by 25dB.
To amplify volume during a call:
Press Amplify to toggle between amplified / normal volume level. When
amplified volume is selected, a display with volume level is shown.
WARNING: Make sure to lower or minimize the volume level before
selecting the Amplifying volume function to protect your ears from damage.
MUTING
VOLUME
To mute the microphone during a call:
1. Press Mute. A text message in the display indicates the mute status.
2. The microphone can be un-muted by pressing Mute again.
16
EN
The volume level ranges from 1 to 4 and is
shown in the lower right side of the display. To
adjust volume during a call, rotate the volume
control on the handset.
ADJUSTING TONE
Adjusting the tone can help make a conversation
be heard more clearly.
During a call, press Tone to toggle between
low, normal, medium and high tone levels. A
text message in the display indicates the level
selected.
USING PRE-DIAL
The pre-dial function allows you to dial your
number first and view it as shown on the
display, then press Talk to make your call. For
viewing convenience in pre-dial mode, digits are
displayed in large fonts.
2. Press Talk to start dialing.
3. When conversation ends, press Talk or place the handset in the base.
LAST NUMBER REDIAL
Pressing Redial allows you to automatically redial the last number dialed.
In pre-dial mode, the last phone number dialed can be accessed by pressing
Redial. The number is dialed when pressing Talk.
NOTE: If Flash is pressed during a call conversation, redialed numbers are
not stored until the next call is made.
USING THE PAUSE
Making some outgoing calls may require a brief
pause in between dialing. A three second pause
will be inserted into the sequence of digits each
time the Pause button is pressed. It is indicated
on the display by the character “P”.
CALL WAITING
During a call, a call waiting alert tone in the
handset receiver will notify you there is
another incoming call. To answer the waiting
call, press Flash. “FLASH” appears on the
LCD. To reconnect to the original caller, press
17
EN
1. In standby mode, enter a destination phone number using 0…9. If you
entered a digit in error, press DEL to delete.
Flash again.
If another handset is engaged in a call, the message, “EXT IN USE” will be
displayed .
USING THE PHONEBOOK
The phonebook can store up to 99 phone numbers up to 24 digits each
and names (up to 14 characters).
2. Press
/
to view other phonebook entries.
3. To exit the phonebook, press DEL to return to standby mode. If no key is
pressed for several seconds, the unit automatically exits the
phonebook.
NOTE: When viewing a phone number that
contains 11 digits or less in the phonebook,
memory or Caller ID, the number is shown as
x-xxx-xxx separated by “-“.
ADDING A PHONEBOOK ENTRY
While viewing the phonebook, press MENU
/
to enter the phonebook menu. Use
to scroll through the 4 sub- menu options
available, Add Record, Edit Record, Delete
Record and Delete All, and press MENU to
select an option.
1. Select the sub-menu item “ADD RECORD” to add a phonebook entry.
If the phonebook is full, a “PHONEBOOK FULL” message will be
displayed.
2. If there is available storage space in the phonebook, select from one of
the free memory slots. “ENTER NAME” appears on the LCD.
18
EN
1. To enter the phonebook and view stored numbers, press PHBK. The
first phonebook entry is shown.
If there are no numbers
If there are numbers stored,
stored in the phonebook,
the first entry is displayed:
the LCD shows:
Press 0…9 and *,# to enter a phonebook name, repeatedly pressing the keys until the desired character appears. Wait for 1 second or press a different key to input a new character. Repeat until the name is entered.
3. Press MENU to confirm the name entry. The “ENTER NUMBER” prompt then appears. To enter a phonebook number, press 0…9 and *, #,Pause.
4. Press MENU to confirm the number entry and return to the phonebook list.
TIP: A number can be saved without entering a name.
EDITING A PHONEBOOK ENTRY
2. Select the sub-menu item “EDIT RECORD” to edit a phonebook entry.
“ENTER NAME” appears on the LCD.
3. Use 0…9 to edit the name entry and press MENU to confirm. The “ENTER NUMBER” prompt appears.
4. Use 0…9 to edit the number entry and press MENU to confirm and to return to phonebook list.
DELETING A PHONEBOOK ENTRY
1. Select the sub-menu item “DELETE RECORD” to delete a phonebook entry.
2. Press
/
to alphabetically search and select the entry you wish to delete. The “DELETE?” prompt is displayed on the LCD.
3. Press MENU to confirm deletion or press any other key to return to the phonebook view screen. OR, press DEL to cancel the operation and return to phonebook view.
DELETING ALL PHONEBOOK ENTRIES
Select the sub-menu item “DELETE ALL” to delete all phonebook entries.
Press MENU to confirm.
19
EN
1. Press
/
to alphabetically search and select the entry you wish to edit and press MENU to confirm.
CALLING A STORED PHONEBOOK ENTRY
1. While viewing the phonebook, press
/
to alphabetically search and select the entry you wish to call. OR, press 2…9 corresponding to the first letter of the entry and use
/
to select the name you are seeking, e.g., for names beginning with “R” press 7 three times.
EMERGENCY AND DIRECT NUMBER MEMORY
The Emergency and Direct Number Memory feature provides one-touch
convenience for dialing up to 5 important phone numbers stored in memory.
To store / edit a memory record:
1. Press M1 or M2 to scroll to the number you wish to store.
3. Use 0…9, *,# and Pause to enter a number.
4. Press MENU to confirm the number entry and return to the memory menu view.
To dial emergency and direct numbers:
1. To use this “speed-dial” feature, press any one of the following keys:
KEY PRESS
STORED NUMBER TO DIAL
Emergency Memory
Fire (Emergency 1)
Police (Emergency 2)
Ambulance (Emergency 3)
Direct Memory
M1
Direct 1
M2
Direct 2
The corresponding stored number is shown on the display. The name is
fixed as “DIRECT” for direct number memory and as “EMERGENCY” for
emergency number memory.
20
EN
2. Press MENU to enter the memory menu, use /
to select Edit Record, and press MENU to confirm.
If there is no number,
the LCD shows:
/
2. Press
M1, M2.
If there is a number, the entry
is displayed as follows:
to review other entries in the following order:
,
,
,
3. Press Talk to dial the selected stored number.
4. Press DEL to return to standby mode. If there is no key pressed after a few seconds, the unit automatically returns to standby mode.
To delete a memory record:
Press MENU to confirm deletion of a memory number or press any key to
return to the number memory review. OR, press DEL to cancel the operation
and return to memory review.
CALLER ID DISPLAY
If you have Caller ID service from your local telephone company, the
handset will display incoming call details. If the number is in your phonebook
the name will also be displayed. The call log records the caller name,
number and the date / time for up to 99 calls.
If the Caller ID information is blocked, the handset will display calls with
blocked name / numbers:
Private number (“P”):
Out of area number (“O”):
21
EN
MEMORY MENU
To delete an emergency or direct number, press M1 or M2 to scroll to the
number you wish to delete, then press MENU to enter the memory menu.
Use
/
to scroll through the options (Edit Record, Delete Record,
Delete All) and press MENU to select an option.
Private name (“P”):
Out of area name (“O”):
If both name and number
is blocked: Private name
and number (“P”)
Out of area name and
number (“O”):
EN
When the call is accepted, the display changes depending on the type of
call. If the unit times out before a new Caller ID is received during a call
conversation, the display returns to talk mode.
Call with name and number:
Call with Caller ID (number only):
In cases where the Caller ID number is blocked (and the name is not
available), the incoming call is shown as:
OR
For calls with a blocked name or unknown name, the Caller ID is shown as:
OR
VIEWING CALLER ID RECORDS
1. Press CID on the handset. If the call log is empty when you try to enter call log review, a message “NO CALLS” is displayed and the phone returns to the main menu. Otherwise, the total number and new number of call logs are shown.
2. Press
/
to review calls. All information including caller name, number and date / time are shown.
22
NOTE: The number on the right side
of the display’s first line shows the call
log number – “1” is the last received
call. The first (oldest) call is the call log number 1.
Incoming calls are sorted by the order of arrival;
the oldest is shown first. A number is only contained once in the list. A new
call from a caller that is already contained in the log removes the old entry
and inserts the new call.
3. Use
/
to see other call log entries.
4. Press DEL to exit the call log review and
return to standby mode.
/
to scroll
While viewing the Caller ID logs, press MENU then use
through the menu options (Edit Record, Edit To Call, Delete Record, Delete
All) and press MENU to select an option.
2. Use 0…9 and * to edit a name and press # to change between
uppercase and lowercase characters.
3. Press MENU to confirm the name entry.
“ENTER NUMBER” then appears onscreen.
If there is a number available for the Caller
ID, it is displayed. Otherwise, the number is
blank.
4. Use 0…9, * and # to edit a phone book number.
5. Press MENU to confirm the number entry. The call log is stored into the
phonebook. The display will return to show the call log number.
23
EN
SAVING CALLER ID RECORDS IN THE PHONEBOOK
1. When reviewing the call log, press MENU
to enter the call log menu and to select
the sub-menu item “ADD RECORD” to add a
phonebook entry. The prompt “ENTER NAME”
appears on the LCD. If there is a name
available for the Caller ID, it is displayed. Otherwise, the name is blank.
CHANGING THE CALLER ID NUMBER FORMAT
It is possible to change the number format in the call log before storing the
name / number . While viewing the Caller ID list, press Format to change
the number format . The available number formats depend on the received
number. The table below shows the possible selections and the order in
which they appear. The number format is changed by truncating or by
adding the digits.
ACTION
ONSCREEN DISPLAY
Area code is available / not
available, number contains
10-digits
Format changes from 7-digits -->
10-digits --> 11-digits, then
returns to 7-digits
Format change from 10-digits-->
11-digits --> 7-digits, then returns
to 10-digits
yyy-yyyy --> xxx-yyy-yyyy -->
1-xxx-yyy-yyy where y is the
number, x is the area code
yyy-yyy-yyyy --> 1-yyy-yyyyyyy --> yyy-yyyy where y is
the number
Area code is available / not
available, number contains
11-digits with first digit “1”
Format changes from 11-digits-->
7-digits -->10-digits, then returns
to 11-digits
1-yyy-yyy-yyyy --> yyy-yyyy
--> yyy-yyy-yyyy where y is the
number
EN
INCOMING NUMBER
Area code is available,
number contains 7-digits
EDIT THE CALL LOG NUMBER BEFORE DIALING
When reviewing the call log, press MENU to enter the call log menu and
select the sub-menu item “EDIT TO CALL”. Edit the number using 0…9 OR
press DEL to quit the operation. The call log number is transferred to predial mode. The number can be edited before dialing in pre-dial mode.
NOTE: During an incoming call, the name that appears on the screen may
either be available from the phone network or from information previously
stored in the phonebook. If the Caller ID data contains the caller’s name
information, it will be displayed. If the calling number matches a number in
the phonebook, the name associated with this number is shown instead.
The phonebook name takes precedence.
ERASING A CALLER ID RECORD
1. When reviewing a call log, press MENU to enter the call log menu and select the sub-menu item “DELETE RECORD”.
2. “DELETE?” appears onscreen. Use MENU to confirm deletion of the selected Caller ID record OR press any other key to cancel the operation and return to call log review.
24
ERASING ALL CALLER ID RECORDS
1. When reviewing a call log, press MENU to enter the call log menu and
select the sub-menu item “DELETE ALL?” to delete all Caller ID entries.
2. “DELETE?” appears onscreen. Use MENU to confirm deletion of all
Caller ID records OR press any other key to cancel the operation and
return to call log review.
DIALING A CALLER ID RECORD
When reviewing a call log, press Talk to dial the Caller ID entry that is being
reviewed.
ADDITIONAL PHONE FUNCTIONS
USING THE INTERCOM
3. Press Talk to start. “INTERNAL CALL” indicates an intercom call is in
progress.
Once an intercom call is connected, the called unit number is displayed.
“TALK” is shown on the lower left side. If engaging an external call, it is
placed on hold.
4. If the intercom is activated during a call, you may toggle between the
external and internal call by pressing INT.
When the calling handset is in the middle of an
external call, the called handset will be put on
hold. “INTERCOM HOLD” appears onscreen
to indicate that the internal call is on hold.
TRANSFERRING CALLS
An incoming call can be transferred to another handset during an ongoing
call:
1. On the first handset, press INT and the external call is put on hold .
2. Select the local handset number from the menu, then press Talk.
25
EN
1. Press INT to make an intercom call.
2. Dial the number of the handset you wish to call.
3. Once the second handset answers the call, press Talk on the first handset to end its connection. The second handset will be engaged in the external call.
NOTE: When transferring a call, the first handset must wait for the other
handset to answer before pressing Talk to complete the transfer .
MAKING A CONFERENCE CALL
To establish a conference call between two handsets and an external party:
If a handset is connected to the external line and a second handset is off hook, a conference call is immediately established.
2. To disconnect a conference call on one of the handsets, press Talk. The connection continues between the remaining party and the external party.
ONE-WAY BASE PAGING
The paging function is used to help locate handsets. Paging of all handsets
is done by pressing Page from the base unit. Paging stops automatically
after 120 seconds or if any key is pressed on the handset or base unit.
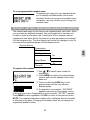
MENU SETTINGS
NAVIGATING HANDSET MENUS
KEY
FUNCTION
Press to scroll up menu and sub-menu options
Press to scroll down menu and sub-menu options
MENU
Press to confirm selection
DEL
Press to exit to previous menu and / or exit and return to
standby mode
26
EN
1. If a handset has an active connection (external) and another connection is on hold, a conference call may be established by pressing CONF. During a conference call, the calling and called handset displays the following on the LCD:
How to navigate menus:
Standby
Language
Ring Setting
Set Time
Phone Setup
Security Setting
1. In standby mode, press MENU to enter the handset menu.
2. Use
/
to select the menu. > appears beside a menu to indicate that it is being selected.
3. Press MENU to enter the selected menu option and use
/
to navigate the menu options, then Set Default
press MENU again to confirm and exit to the previous menu. Repeat step
3 if there are settings available to choose from the menu options and sub-menu settings, respectively.
• You cannot enter the menu if you are making a call or have pre-dialed any part of a phone number.
• When you have changed a setting the handset will provide a confirmation beep and exit the menu.
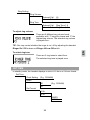
LANGUAGE
Language
English
French
Spanish
The handset LCD can display information in English,
Spanish and French. Once the language is set, all
menu information is shown in that language.
RING SETTING
Ring setting, which includes ring volume and ring tone, can be adjusted for
incoming external / internal calls.
27
EN
4. Use DEL to exit to the previous menu at anytime.
TIP
Ring Setting
Ring Volume
External Call
1-5
Internal Call
1-5
External Call
Internal Call
Ring Tone 1-5
Ring Tone 1-5
Ring Tone
To adjust ring volume:
There are 5 different ring volume levels
available, with “1” being the lowest and “5” the
highest ring volume. The selected ring volume
is played once .
To select ring tone:
There are 3 ring tones to select from.
The selected ring tone is played once.
SET TIME
In standby mode, the handset displays a clock in 12-hour or 24-hour format.
Set Time
Clock Setting
(E.g. 12:00AM)
Alarm
Off
(E.g. 12:00AM)
On
Set Format
12 Hr
24 Hr
MM/DD
DD/MM
28
EN
TIP: You may control whether the ringer is on / off by adjusting the handset
Ringer On / Off or base unit Ringer Hi-Low-Off switch.
To adjust clock:
1. On the numeric keypad, press 0...9
to enter the clock time sequentially from left
(hours) to right (minutes) using
/
.
2. Press # to toggle between AM / PM if the
time format is 12-hour format.
To set the alarm:
/
to select between alarm On / Off. If the alarm is set to “Off”,
1. Use
the display returns to the previous menu. If the alarm is set to “On”, the
display shows the alarm time as a clock setting.
2. Follow the same steps as entering the clock time to enter the alarm time.
EN
When the alarm sounds, press any key to stop the alarm from ringing.
To adjust the time display format:
/
to toggle between 12 / 24 hour formats and press MENU
1. Use
to confirm selection. Then enter the MM/DD format (month / date). The
selected MM/DD format is displayed.
2. Use
/
to toggle between Month-Date display formats.
NOTE This format will also change the day and date format in the Caller ID
screen.
29
PHONE SETUP
Phone Setup
Set Area Code
Contrast
Key Tone
Off
On
Auto Answer
Off
On
Baby Call
Off
On
Prefix
Baby call # ?
EN
Off
On
Dial Mode
Prefix # ?
Tone
Pulse
Handset Name
Enter name
To set the area code:
An area code generally identifies a geographic
area and appears onscreen when the Caller ID
number is displayed during call reception and
Caller ID list view. If no area code is set, the
display will show “—-”. Press 0…9 to enter the
3-digit area code sequentially.
NOTE: When the first few digits of a Caller ID number received is identical
to the area code, the Caller ID number will not display the matched digits.
To set the key tone:
Each phone key generates and transmits key
tones of differing pitch when pressed. These
tones corresponding to the digits of the number
being called. Use /
or press any digit
30
on the numeric keypad to select between key tone On / Off.
To set auto answer:
When auto answer is activated, the unit
connects to internal / external calls automatically
once the handset is picked up from the base
unit. There is no need to press Talk. If auto
answer is not set, you must press Talk to
connect the call. Use
/
to toggle between
auto answer On / Off.
Baby call allows you to set a number to
automatically dial when any key (apart from
MENU) is pressed. Use
/
to toggle
between baby call On / Off. If baby call is turned
off, the display returns to the previous menu.
If baby call is turned on, you are prompted to enter the baby call number.
Press 0…9 to enter the number sequentially.
When the Baby Call function is set, you can press any key during standby
mode to begin an external call and dial the baby call number.
To set the prefix dialing number:
When the prefix dialing number is set, the
number will be inserted prior to the dial . Use
/
to toggle between prefixed dialing On /
Off. If prefixed dialing is turned off, the display
returns to the previous menu. If prefix dialing is
turned on, you are prompted to enter the prefix
number.
To set dial mode:
There are 2 dial modes TONE and PULSE. Use
/
to toggle between “TONE” and “PULSE”
dialing mode.
NOTE: Temporary tone dialing: If pulse dialing has been set, pressing * will
change the pulse dialing mode to tone dialing mode until the call ends.
31
EN
To set baby call:
To set programmable handset name:
Programming a name into your handset allows
you to identify and differentiate it from other
handsets. Similar to keying in phonebook name
characters, use any numeric key to change the
handset name.
SECURITY SETTING / REGISTERING ADDITIONAL HANDSETS
The handset and base unit are factory pre-registered with each other. When
you purchase an additional handset, you must register it to the base unit
in order to make and answer calls. A maximum of four handsets can be
registered to one base. Select the base to be used as primary and connect
it to the telephone line. The other base(s) will act as the charger(s) only. Do
not connect the additional bases into the telephone line.
Security Setting
Registration
EN
De-registration
Clr Msg Wait
No
Yes
Select Base
1-4
Show ID
To register the handset:
1. Use
/
to select base number for
registration.
2. Press MENU to confirm the selected base
number and hold the handset close to the
base unit.
3. Press and hold the PAGE key on the
primary base until the ring indicator
flashes rapidly.
4. If registration is successful, “SUCCESS”
appears onscreen and the display returns
to the previous menu. If registration is not successful, “RETRY?” appears.
Press MENU to retry registration OR DEL to return to the previous menu.
NOTE: The registered handset number will be displayed after the handset
is returned to any base. Changing the handset name will not change the
registered handset number.
32
To de-register the handset:
1. Use
/
to select handset number for de-
registeration.
2. Press MENU to confirm. If de-registration is successful “SUCCESS” appears on the LCD screen, otherwise “RETRY” appears. Press MENU to retry or DEL to return to the previous menu.
To manually clear message waiting:
If you have voicemail service from your local telephone company activated
and you have a message waiting, the base unit LED will flash. The LED will
stop flashing once all messages have been read and deleted.
To select base:
1. You can have up to four handsets and bases.To register a handset to a base Use
/
to select the base number.
2. Press MENU to confirm. If registration is successful “SUCCESS” appears on the LCD screen, otherwise “RETRY” appears. Press MENU to retry or DEL to return to the previous menu.
To show ID:
RFPI (Radio Fixed Part Identity) and IPUI
(International Portable User Identity) are
identity numbers unique to each handset and
base unit that allows its corresponding base
unit / handset to identity one another during
phone registration.
33
EN
Use /
to select “YES” or “NO” and press
MENU to confirm. If you selected “No”, the
display returns to the previous menu. If you
selected “Yes” the unit will clear the message
waiting status. If successful, “SUCCESS” appears and the display returns to the previous
menu.
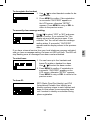
DEFAULT SETTINGS
Set Default
No
Yes
SETTING
Language
Internal / external ring volume
External ring tone
Internal ring tone
Alarm
Alarm time
Display format
Month-Date display format
Key tone
Auto answer
Call
Call number
Dial tone
Flash time
Handset name
Handset volume
Base ringer level
Pre-fixed
Pre-fixed number
34
DEFAULT VALUE
English
4
Ring Tone 1
Ring Tone 1
Off
12:00 AM
12-hour
MM / DD
On
Off
Off
Clear
Tone dial
600ms
Clear
V01
Highest
Off
Clear
EN
The phone can be reset to its factory default settings at any time. The
default settings are:
TROUBLESHOOTING
See below for some common problems and their remedies. Whatever the
problem, you should first check:
• The base unit is connected to the power supply and phone line.
• The main power is switched on at the A/C outlet.
• The handset battery is installed and has not run out of power.
PROBLEM
Can’t make a call / “OUT
OF RANGE” appears on the
handset
Can’t enter the sub-menus
POSSIBLE CAUSES / REMEDIES
• Out of range of base unit - move to within
300 m (approx. 980 ft)
• Interference due to environment - position
base unit to reduce interference (move
higher)
• De-synchronization has occurred. The base
unit will reset synchronization automatically
• Handset may not be registered to base unit
• Ensure unit is not in the base
• Return to standby mode by pressing DEL
Every key I press calls a
preset number
• Phone is in Call mode. To deactivate see
section on PHONE SETUP
Caller ID is not displayed
• Check your network subscription to Caller
ID
• Name and number need to be stored in
phonebook for name display
Handset does not ring
• Ring Volume “OFF” (to turn ring volume on
see section on RING SETTING)
I can’t hear the person
talking on the other line
• Make sure that your ear is touching the
top section of the handset (receiver) when
you are talking
Battery is low, even if recharged
• Battery pack may need to be replaced
I can’t register my new
handset
• A maximum of 4 units can be registered to
the base. De-register a handset and try
again
• Make sure you select a base number that
has not been assigned
I can’t make a call with
my new handset
• Only one external call and one internal
call can take place at once. Make sure no
other handset is making a call
35
EN
DO NOT attempt any repairs yourself. This will invalidate your warranty.
SPECIFICATIONS
TYPE
Handset dimensions
DESCRIPTION
41.5 mm (W) x 184.7 mm (L) x 54.2 mm (D)
Handset weight
0.171 kg (without battery)
Base unit dimensions
Base unit weight
Standard
126.6 mm (W) x 122 mm (L) x 73 mm (D)
0.186 kg
Communication range
Up to 300 meters (approx. 980 feet) in open area
Base power supply
Input: 120 V / 60 Hz
Output: 9V / 500 mA
Rechargeable 600 mAh 3.6 V (AA) Ni-Cd battery
pack
Handset: approx. 6.5 hours
Operating time
Standby time
Handset: at least 100 hours
Charge time
Display language
Approx. 14 hours
English, Spanish, French
Operating temperature
0 °C to 50 °C (32 °F to 122 °F)
Storage temperature
-20 °C to 60 °C (-4 °F 140 °F)
ABOUT KROWN
Visit our website (www.krownmfg.com) to learn more about Krown
Manufacturing products. The website also includes contact information for
our Customer Care department in case you need to reach us, as well as
frequently asked questions and customer downloads.
We hope you will find all the information you need on our website, however
if you would like to contact the Krown Customer Care department directly,
please visit: www.krownmfg.com/html/contactus.html OR call (817)
738-2485.
FCC STATEMENT
This device complies with Part 15 of the FCC Rules. Operation is subject to
the following two conditions: (1) This device may not cause harmful
interference, and (2) This device must accept any interference received,
including interference that may cause undesired operation.
36
EN
Handset power supply
Worldwide Digital Cordless Telecommunications
(WDCT)
Privacy of communications may not be ensured when using the phone.
WARNING: Changes or modifications to this unit not expressly approved by
the party responsible for compliance void the user warranty.
NOTE: This equipment has been tested and found to comply with the
limits for a Class B digital device, pursuant to Part 15 of the FCC Rules.
These limits are designed to provide reasonable protection against harmful
interference in a residential installation.
This equipment generates, uses and can radiate radio frequency energy
and, if not installed and used in accordance with the instructions, may cause
harmful interference to radio communications.
This equipment is hearing aid compatible.
However, there is no guarantee that interference will not occur in a particular
installation. If this equipment does cause harmful interference to radio or
television reception, which can be determined by turning the equipment off
and on, the user is encouraged to try to correct the interference by one or
more of the following measures:
• Reorient or relocate the base.
• Increase the separation between the equipment and receiver.
• Connect the equipment into an outlet on a circuit different from that to which the receiver is connected.
• Consult the dealer or an experienced radio / TV technician for help.
CAUTION: To maintain compliance with the FCC’s RF exposure guidelines
it is recommended a typical distance at least 20cm is maintained between
the base unit and nearby persons.
DECLARATION OF CONFORMITY
The information below is not to be used as contact for support or sales.
Please call our customer service number (listed on our website at www.
krownmfg.com, or on the warranty card) for all inquiries .
Name:
Krown Manufacturing, Inc.
Address:
3408 Indale Road, Fort Worth, TX 76116
declare that the product
Product No.:
KR2812
Product Name: Krown Digital Amplifier Cordless Phone
is in conformity with Part 15 of the FCC Rules. Operation is subject to the
37
EN
This product meets the applicable Industry Canada technical specifications.
following two conditions:
1. This device may not cause harmful interference.
2. This device must accept any interference received, including interference that may cause undesired operation.
LIGHTNING
Your telephone has built-in lightning protection to reduce the risk of
damage from surges in telephone line and power line current. This lightning
protection meets or exceeds FCC requirements. However, lightning striking
the telephone or power lines can damage your telephone.
Lightning damage is not common. Nevertheless, if you live in an area that
has severe electrical storms, we suggest that you unplug your phone when
storms approach to reduce the possibility of damage.
This equipment complies with Part 68 of the FCC rules and the requirements
adopted by the ACTA. On the bottom of this equipment is a label that
contains, among other information, a product identifier in the format US:
KT5W400BKR2812. If requested, this number must be provided to the
telephone company.
An applicable certification jacks Universal Service Order Codes (USOC) for
the equipment is provided (i.e., RJ11C) in the packaging with each piece of
approved terminal equipment. The mounting of the approval unit in the final
assembly must be made so that the approved unit is isolated from exposure
to any hazardous voltages within the assembly. Adequate separation and
restraint of cable and cords have provided.
A plug and jack used to connect this equipment to the premises wiring
and telephone network must comply with the applicable FCC Part 68 rules
and requirements adopted by the ACTA. A compliant telephone cord and
modular plug is provided with this product. It is designed to be connected
to a compatible modular jack that is also compliant. See installation
instructions for details.
The REN is used to determine the number of devices that may be
connected to a telephone line. Excessive RENs on a telephone line may
result in the devices not ringing in response to an incoming call. In most but
not all areas, the sum of RENs should not exceed five (5.0). To be certain
of the number of devices that may be connected to a line, as determined
by the total RENs, contact the local telephone company. [For products
approved after July 23, 2001, the REN for this product is part of the product
identifier that has the format US:KT5W400BKR2812. The digits represented
38
EN
CONSUMER INFORMATION
by N/A are the REN without a decimal point (e.g., 03 is a REN of 0.3). For
earlier products, the REN is separately shown on the label.]
If this equipment causes harm to the telephone network, the telephone
company will notify you in advance that temporary discontinuance of
service may be required. But if advance notice isn’t practical, the telephone
company will notify the customer as soon as possible. Also, you will be
advised of your right to file a complaint with the FCC if you believe it is
necessary.
If the equipment KR2812 is causing harm to the telephone network, the
telephone company may request that you disconnect the equipment until
the problem is resolved.
Please follow instructions for repairing if any (e.g. battery replacement
section); otherwise do not alternate or repair any parts of device except
specified.
Connection to party line service is subject to state tariffs. Contact the state
public utility commission, public service commission or corporation commission for information.
NOTICE: If your home has specially wired alarm equipment connected to
the telephone line, ensure the installation of this [equipment ID] does not
disable your alarm equipment. If you have questions about what will disable
alarm equipment, consult your telephone company or a qualified installer.
NOTICE: According to telephone company reports, AC electrical surges,
typically resulting from lightning strikes, are very destructive to telephone
equipment connected to AC power sources. To minimize damage from these
types of surges, a surge arrestor is recommended.
WARRANTY
Krown Manufacturing, Inc. warrants the Digital Amplified Cordless Phone
KR2812 sold by Krown Manufacturing, Inc. is free from defects in materials
and workmanship under normal use and service for one year. This warranty
is applicable only to the original purchaser of the cordless phone when
accompanied by a sale receipt stating the date of purchase and the name
of the company from which purchased. This warranty is in lieu and excludes
39
EN
The telephone company may make changes in its facilities, equipment,
operations or procedures that could affect the operation of the equipment. If
this happens the telephone company will provide advance notice in order for
you to make necessary modifications to maintain uninterrupted service.
Should you experience trouble with this equipment, please contact Krown
Manufacturing at www.krownmfg.com/html/contactus.html OR call (817)
738-2485 for repair or warranty information.
all other warranties, expressed or implied, including any implied warranty
of merchantability or fitness and of any obligation on the part of Krown
Manufacturing, Inc. If the phone shall prove the defective, then Krown
Manufacturing, Inc shall either replace or repair the phone at no cost to the
original purchaser within one year of the date of purchase. During the oneyear period you may return the phone to Krown Manufacturing, Inc. at the
following address:
Krown Manufacturing, Inc.
3408 Indale Rd.
Shipping charges are at the customer’s expense. Please include a check
or money order make out to Krown Manufacturing in the amount of $15.00
to cover for the Shipping and Handling. This warranty does not extend to
any phone sold by Krown Manufacturing, Inc., which has been subjected
to misuse, neglect, accident, improper application, improper installation, or
any use in violation of the instruction furnished by Krown Manufacturing,
Inc. Battery pack provided with this product is not covered under this
warranty.This warranty does not extend to or apply to any phone, which
has been repaired or altered by any persons who have not been expressly
approved by Krown Manufacturing, Inc. Krown Manufacturing, Inc. shall not
be liable for any special or consequential damages or for loss or expense
directly or indirectly arising from use of the product or any inability to use
them either separately or in combination with other equipment or product
accessories or from any other cause. This warranty is only applicable to a
product purchased through Krown Manufacturing, Compu-TTY, or a Krown
dealer. Other than state herein, there is no other warranty whether by the
sample or model, by description or quantity, whether expressed or implied,
and there are no implied warranties of fitness for a particular purpose or of
merchantability.
40
EN
Fort Worth, TX 76116