1
SCH - T300
P O R T A B L E
C E L L U L A R
T E L E P H O N E
User’s Guide
Please read this manual before operating your
phone, and keep it for future reference.
Intellectual Property
All Intellectual Property, as defined below, owned by or which is otherwise the property
of Samsung or its respective suppliers relating to the SAMSUNG Phone, including but not
limited to, accessories, parts, or software relating thereto (the “Phone System”), is
proprietary to Samsung and protected under federal laws, state laws, and international
treaty provisions. Intellectual Property includes, but is not limited to, inventions
(patentable or unpatentable), patents, trade secrets, copyrights, software, computer
programs, and related documentation and other works of authorship. You may not
infringe or otherwise violate the rights secured by the Intellectual Property. Moreover,
you agree that you will not (and will not attempt to) modify, prepare derivative works of,
reverse engineer, decompile, disassemble, or otherwise attempt to create source code
from the software. No title to or ownership in the Intellectual Property is transferred to
you. All applicable rights of the Intellectual Property shall remain with SAMSUNG and its
suppliers.
Samsung Telecommunications America (STA),
Inc.
Headquarters:
1130 E. Arapaho Road
Richardson, TX 75081
Tel: 972.761.7000
Fax: 972.761.7001
Customer Care Center:
1601 E. Plano Parkway, Suite 150
Plano, TX 75074
Toll Free Tel: 1.888.987.HELP (4357)
Fax: 972.761.7501
Internet Address: http://www.samsungusa.com
©2001 Samsung Telecommunications America, Inc. All rights reserved. No
reproduction in whole or in part allowed without prior written approval. Samsung
Telecommunications America, Inc. is a trademark of Samsung Electronics Corporation,
Ltd.
Licensed by Qualcomm Incorporated under one or more of the following patents: U.S.
Patent No. 4, 901, 307; 5, 056, 109; 5, 099, 204; 5, 101, 501; 5, 103, 459; 5, 107, 225;
5, 109, 390.
Openwave® is a registered Trademark of Openwave, Inc.
RSA® is a registered Trademark RSA Security, Inc.
English: 2001:1:31. Version A
Printed in South Korea
User Guide GH68-01704A
DISCLAIMER OF WARRANTIES;
EXCLUSION OF LIABILITY
EXCEPT AS SET FORTH IN THE EXPRESS WARRANTY CONTAINED ON THE WARRANTY PAGE
ENCLOSED WITH THE PRODUCT, THE PURCHASER TAKES THE PRODUCT “AS IS”, AND
SAMSUNG MAKES NO EXPRESS OR IMPLIED WARRANTY OF ANY KIND WHATSOEVER WITH
RESPECT TO THE PRODUCT, INCLUDING BUT NOT LIMITED TO THE MERCHANTABILITY OF
THE PRODUCT OR ITS FITNESS FOR ANY PARTICULAR PURPOSE OR USE; THE DESIGN,
CONDITION OR QUALITY OF THE PRODUCT; THE PERFORMANCE OF THE PRODUCT; THE
WORKMANSHIP OF THE PRODUCT OR THE COMPONENTS CONTAINED THEREIN; OR
COMPLIANCE OF THE PRODUCT WITH THE REQUIREMENTS OF ANY LAW, RULE,
SPECIFICATION OR CONTRACT PERTAINING THERETO. NOTHING CONTAINED IN THE
INSTRUCTION MANUAL SHALL BE CONSTRUED TO CREATE AN EXPRESS OR IMPLIED
WARRANTY OF ANY KIND WHATSOEVER WITH RESPECT TO THE PRODUCT. IN ADDITION,
SAMSUNG SHALL NOT BE LIABLE FOR ANY DAMAGES OF ANY KIND RESULTING FROM THE
PURCHASE OR USE OF THE PRODUCT OR ARISING FROM THE BREACH OF THE EXPRESS
WARRANTY, INCLUDING INCIDENTAL, SPECIAL OR CONSEQUENTIAL DAMAGES, OR LOSS OF
ANTICIPATED PROFITS OR BENEFITS.
Introduction To Your Samsung T300 Series
Phone
Congratulations on the purchase of your Samsung T300 Series Phone. Using
the latest digital technology, the Samsung T300 Series Phone operates similar
to other wireless phones, while providing superior resonance and tone quality.
Your Samsung T300 Tri-Mode phone is packed with productive
features that are easy to use. Here are some of them:
¨ Operates in 1900 MHz digital CDMA, 800 MHz digital CDMA, and 800
MHz analog networks.
¨ Voice Dialing – 20 Locations
¨ Answer or hang up calls just by opening and closing the flip on the
phone.
¨ User friendly display with dedicated icons for signal strength, service,
roaming, messages, vibrator, and battery
¨ 9 Ring Types, 24 Melody Tones, 10 downloadable ring tones via PC
¨
¨
¨
¨
¨
¨
¨
¨
¨
¨
¨
¨
¨
¨
¨
¨
¨
¨
Link Kit, and Vibrator Alert
Distinctive ringer types for voice, message, and alarm calls
Distinctive ringer volumes for voice, message, and alarm calls
Phone Book Memory – 500 Locations
Call Logs – 10 Locations each for outgoing, incoming, and missed
calls. These 30 numbers are all easy to redial.
2 way Short Message Services (SMS) and Voicemail notification
Internet MiniBrowser
Pause Dialing for tele-services
Fast Ringer Mute during Incoming Call
Alarm with three programmable alarms
Last number redial – last 10 Numbers
One-touch Turbo dialing – 9 Locations
Two-touch Turbo dialing – 90 Locations
Three-Touch Turbo dialing - 401 Locations
Easily mute the microphone during conversation
Security features including Call Restriction, Secret Number capability,
and Lock mode
Voice Memo recorder - up to 4 minutes
Fax and Data capability
Easily change from English to Spanish user interface
How To Use This Manual
This user guide explains your Samsung T300 phone operations
through easy-to-follow instructions and illustrations. Check out
“Getting to know your phone” on page 17 to get started understanding
the functions of your phone. You’ll find much of what you need to
know about using your new Samsung T300 Series Phone right here.
We’ve included some important safety and usage information that you
should know before using your phone. You’ll find this information in
“Usage guidelines: all about performance and safety” on page 153.
If you still have questions, we’ll be happy to answer them. Just call our
Samsung Customer Care Center toll-free at 1.888.987.HELP (4357).
We hope you enjoy using your new Samsung T300 Series Phone, and
thanks for choosing Samsung.
Table of Contents
Your Consumer Package .......................................... 15
Front View of the Samsung T300.............................. 16
Getting to know your phone..................................... 17
Antenna............................................................................... 17
Backlight Features............................................................... 17
CLR (Clear) Key .................................................................. 17
Display Screen .................................................................... 17
End (power On/Off Key) ..................................................... 18
Front Flip ............................................................................ 18
Headset Connector .............................................................. 18
Internet/Web Button............................................................ 18
LED Indicator...................................................................... 18
Menu Key ............................................................................ 19
Microphone ........................................................................ 19
Numeric Key Functions........................................................ 19
Receiver .............................................................................. 19
Send Key ............................................................................. 19
OK/Navigation Key ............................................................... 19
Voice Memo Button............................................................. 20
Voice Privacy Icon............................................................... 20
Volume/Scroll Buttons ........................................................ 20
Interface (IF) Adapter ......................................................... 21
Getting Started ......................................................... 22
Getting Connected ............................................................... 22
Turning your Phone On....................................................... 22
Turning your Phone Off....................................................... 23
vii
List of Menu Functions............................................. 24
Using your Phone’s Menus....................................... 29
Accessing Menus by Scrolling ..............................................29
Returning to the Previous Menu...........................................30
Accessing Menus by using their Short Cut Number ...............30
Your phone’s modes ................................................ 31
Lock Mode...........................................................................31
Power Save Mode.................................................................31
Standby Mode ......................................................................31
Conversation/Talk Mode ......................................................32
Silent Mode..........................................................................32
The Top Line of the Display Screen.......................... 33
Using the Battery...................................................... 35
Installing the battery.............................................................35
Removing the Battery ...........................................................36
Charging the Battery.............................................................36
Low Battery Indicator...........................................................37
The Empty Battery Icon ........................................................37
Charging with a Travel Charger ............................................37
Caring for the Battery .............................................. 39
Protecting your battery.........................................................39
Disposal of Lithium Ion batteries .........................................39
Calls ........................................................................ 40
Outgoing ..............................................................................40
Incoming .............................................................................40
Missed .................................................................................41
Three Way Calling ................................................................42
viii
Erase logs ........................................................................... 43
Keeping track of call logs ..........................................................43
Reviewing outgoing, incoming, or missed calls .........................44
Air Time .............................................................................. 45
Last Call .............................................................................. 45
Total ................................................................................... 46
Erase Total .......................................................................... 47
Lifetime ............................................................................... 48
Phone Book ............................................................. 49
Answering a Call.................................................................. 50
Find Name........................................................................... 51
Add Entry ............................................................................ 52
Assigning a Specific Memory Address .................................. 53
Pause Dialing ...................................................................... 54
Storing Pauses in a Phone Book Entry ................................. 54
Pause dialing from a stored phone book entry .................... 55
Manual pause dialing ................................................................56
Editing phone book numbers ....................................................56
Prepending a phone Number ....................................................57
Erasing phone book entries.......................................................58
Adding a name ringer................................................................58
E-mail address ..........................................................................59
Finding an Entry .................................................................. 60
Relation Search ................................................................... 61
Secret phone book numbers .....................................................61
To add a new phone number to the Phone Book.......................61
Setting speed dial ......................................................................62
Storing phone numbers at the end of a call ...............................63
Shortcuts to Storing Phone Numbers ................................... 63
Dialing numbers from the phone book.................... 64
ix
Shortcuts to Memory Dialing................................................64
Web/MiniBrowser .................................................... 66
Launching the Minibrowser .................................................66
Exiting the Web/Minibrowser ...............................................67
The MiniBrowser Start and End Prompts .............................67
The MiniBrowser Soft Keys...................................................68
Navigating the Web...............................................................69
How the Keys Work in the MiniBrowser ...............................70
Entering Text, Numbers, or Symbols ....................................71
Alphabetical Text Entry.........................................................72
Number Entry.......................................................................72
Symbol Entry........................................................................73
T9 Word Text Entry ..............................................................74
Scheduler ................................................................ 75
Today...................................................................................75
How to schedule an event:......................................................... 75
View Month..........................................................................76
How to view an event:................................................................ 77
Calendar ................................................................................... 78
Date .....................................................................................79
Jump to date ............................................................................. 79
Using jump to date .................................................................... 79
To Do List ............................................................................80
How to create a to do list .......................................................... 80
To view, edit, add, or erase to do list items ............................... 80
Countdown...........................................................................81
Creating a Countdown item ....................................................... 81
Adding, editing, and erasing a countdown item ......................... 82
World Time..........................................................................83
Checking the Current Time in Another City or Country .............. 83
x
Calculate ............................................................................. 83
Performing a calculation ...........................................................83
Alarm .................................................................................. 85
Alarm set...................................................................................85
To edit a programmed alarm ....................................................85
Sounds..................................................................... 86
Ringer Options .................................................................... 86
Adjusting Ringer Volume (Quickly)..................................... 86
Adjusting Voice Volume during a Call .................................. 86
Ringer Volume .................................................................... 86
Ringer Type......................................................................... 87
Voice Calls.................................................................................88
Messages...................................................................................88
Browser MSG ...................................................................... 90
Viewing Browser Messages........................................................90
Key Beep ............................................................................. 90
Alerts .................................................................................. 90
Minute beep ..............................................................................91
Service ......................................................................................91
Connect.....................................................................................92
Disconnect ................................................................................92
Fade ..........................................................................................93
Roam ........................................................................................94
Privacy ......................................................................................94
Voice Volume ...................................................................... 95
Roam Ringer ....................................................................... 96
Power On/Off ...................................................................... 97
Display..................................................................... 98
Display Options ................................................................... 98
Backlight............................................................................. 98
xi
Banner.................................................................................99
Animation ..........................................................................100
My Phone Number .............................................................101
To display my phone number:................................................. 101
To view your phone number during a conversation:................ 102
Language............................................................................102
Set Time.............................................................................103
Auto Hyphen ......................................................................103
LCD Contrast ......................................................................104
Version ..............................................................................104
Voice dial............................................................... 105
Voice Dialing......................................................................105
Tips on Recording Names ..................................................105
Record...............................................................................106
Play/Erase ..........................................................................107
To play voice dialing entries:................................................... 107
To erase all voice dialing entries: ............................................ 107
Set Active............................................................................108
Training .............................................................................108
Undo Train.........................................................................109
Voice memo ........................................................... 110
Voice Memo ............................................................... 110
Play/Erase ............................................................................... 111
Call Answer............................................................ 112
On/Off................................................................................112
Default Greeting.................................................................113
Call Screen.........................................................................113
Wait Time...........................................................................114
Inbox .................................................................................115
xii
Games .................................................................... 116
Game Menu....................................................................... 116
Push Push ......................................................................... 116
Object .....................................................................................116
Key Commands........................................................................117
Fly Ribon........................................................................... 117
Object .....................................................................................117
Puzzle World ..................................................................... 118
Object .....................................................................................118
Spider Hunter ................................................................... 119
Object .....................................................................................119
Setup ..................................................................... 120
Auto Retry ......................................................................... 120
Auto Answer ...................................................................... 121
Answer Mode .................................................................... 122
Tone Length ...................................................................... 122
Set NAM ............................................................................ 123
Roam Option..................................................................... 124
Data/Fax............................................................................ 124
Receiving a fax ........................................................................126
Changing your phone back to voice calling .............................127
Ending a fax or data call..........................................................127
Sending a fax or data file .........................................................127
Set Network....................................................................... 128
Mail Kit.................................................................. 129
Mobile Originating (MO) SMS Text Messaging .................. 129
Creating a New SMS Message...................................................129
Multiple Addressing.................................................................132
Options Menu..........................................................................132
Replying to a Message .............................................................133
xiii
Viewing Messages.................................................................... 134
New Messages ....................................................................134
Inbox .................................................................................136
Receiving a message in standby mode ..................................... 136
Receiving a message while on a call ........................................ 136
Receiving a Message in Standby Mode..................................... 136
Reviewing numeric pages, text messages, and
browser messages................................................................... 136
Outbox...............................................................................137
Sent......................................................................................... 137
Stored ..................................................................................... 138
Delivery Acknowlegment ....................................................138
MSG Setup..........................................................................139
Canned Messages .................................................................... 139
Message options.................................................................139
Message Ringing ................................................................140
Message Time ....................................................................141
Creating a New Message: ....................................................141
Message Memory Capacity .................................................142
Messages and Lock Mode ..................................................142
Voicemail...........................................................................142
Listening to your Messages...................................................... 143
Security.................................................................. 144
Security Features................................................................144
Lock Mode.........................................................................144
Locking the phone .................................................................. 144
Unlocking the phone............................................................... 145
Dialing in lock mode............................................................... 145
To place an outgoing call in lock mode:.................................. 145
Restrict ..............................................................................146
Lock Code..........................................................................146
xiv
Emergency # ..................................................................... 147
Storing numbers......................................................................148
Send PIN ........................................................................... 148
Clearing the Memory ......................................................... 149
Resetting the Phone........................................................... 150
Privacy .............................................................................. 150
InUse Menu............................................................ 152
Usage guidelines:
all about performance and safety........................... 153
Understanding Signal Strength........................................... 153
Understanding the Power Save Mode................................. 153
Understanding how Your Phone Operates ......................... 153
Specifications are Subject to Change ................................. 153
Exposure To Radio Frequency Signals ............................... 154
Antenna Care..................................................................... 154
Phone Operation ............................................................... 154
Tips on Efficient Operation......................................................155
How to Order Accessories ................................................. 155
Operating a Motor Vehicle ................................................ 156
Electronic Devices............................................................. 156
Pacemakers.............................................................................156
Other Medical Devices ............................................................157
TTY Access ..............................................................................157
Vehicles...................................................................................157
Posted Facilities.......................................................................157
Aircraft.............................................................................. 157
Blasting Areas ................................................................... 158
Potentially Explosive Atmospheres..................................... 158
For Vehicles Equipped with an Air bag .............................. 158
xv
Storing your phone ............................................................158
Cautions.............................................................................159
Voice Memo.......................................................................159
Your Phone as a Network Device ........................... 160
Acknowledging Special Precautions
and the FCC and Industry Canada Notice................ 161
Cautions.............................................................................161
FCC Compliance Information .............................................161
Information to User............................................................161
Samsung Phone and Battery Specifications.........................162
Samsung Phone with Standard Battery ...............................162
Samsung T-300 Phone with Extended Battery.....................163
Owner's Record.................................................................163
User Guide Proprietary Notice............................................163
Limited Warranty ................................................... 169
xvi
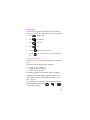
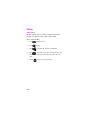
Your Consumer Package
Your consumer package contains the following items:
¨
¨
¨
¨
Samsung SCH-T300 phone with hand strap
Samsung standard Li-ion battery
Samsung travel charger
User guide
15
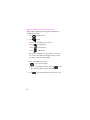
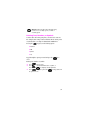
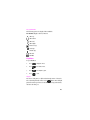
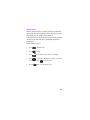
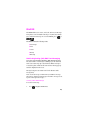
Front View of the Samsung T300
16
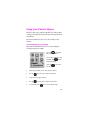
Getting to know your phone
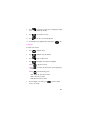
Antenna
A device for transmitting or receiving signals. An antenna makes the
call sound clearer when fully extended. Use only in the normal position
and do not touch the antenna excessively when the phone is active.
Backlight Features
Your keypad has backlighting for easy visibility. For further information
on this feature see “Backlight” on page 98.
CLR (Clear) Key
The clear key is used to erase numbers or characters that have been
entered incorrectly, or it can be used to return to a previous screen in
the menu.
¨ If an incorrect number or character has been entered on the display
¨
¨
¨
screen, press the CLR key once briefly, to erase it.
To erase all digits or characters from the display screen, press this key
for one second.
To back up one menu level, press
once, briefly.
To return to standby mode from any menu, press
.
Display Screen
The display has two areas, an upper line of stationary icons, and the
lower text and graphic area.
¨ The top line of icons shown on the LCD (liquid crystal display), are
¨
displayed according to the phone’s operating mode. For further
information see “Turning your Phone On” on page 22.
The lower area of the LCD displays the InUse information, for example (if
available), the calling party’s name and number, the call timer, mute and
call waiting, as well as menus, sub menus etc.
17
End (power On/Off Key)
This key is utilized several ways:
¨ Press and hold to turn on your phone.
¨ Press and hold to turn off your phone.
¨ Press once to disconnect a call or to return to standby mode and cancel
your input.
Front Flip
Closing your phone’s flip ends a call. There are several options that can
be set when you open the phone’s flip:
¨ Answer an incoming call: To set this option, and for further information
see “Answer Mode” on page 122
¨ Voice dial an individual: To set this option, and for further information
see “Voice Dialing” on page 105.
¨ Control the backlight: To set this option, and for further information see
“Backlight” on page 98.
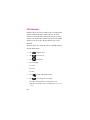
Headset Connector
This is where the optional headset connects to the phone. The headset
includes an earpiece and microphone in a convenient, lightweight unit
so you can converse without using your hands.
Internet/Web Button
This button allows you to access instant information such as stock
quotes and weather via the Internet. Browsing the web via the phone is
not the same as using your computer. Site providers have selected only
the critical aspects of their site to present to wireless phone users, and
have removed most graphics.
LED Indicator
Flashes to indicate an incoming call or message. When the phone is
closed and the ringer is set to off, the LED indicator will notify you that
there is an incoming call or message.
18
¨ Lights up when you turn on the phone.
Menu Key
Press to enter the menu facility.
Microphone
A typical microphone used for conversation, but this microphone also
accepts voice commands for voice dialing and voice memos.
Numeric Key Functions
Numeric keys can be used to enter text, numbers and special
characters.
Receiver
Is for listening to voice conversations.
Send Key
This key performs several useful functions:
¨ Press to answer calls.
¨ Dial a number and press to connect.
¨ Press it twice in when in standby mode to redial the last outgoing
number.
OK/Navigation Key
When in the menu facility this key allows you to scroll through the
menu options using your thumb. It also stores information that you
have entered and acts as an “OK” button when you press it in the
center. When in standby mode, it functions as a hot key when it is
pressed or clicked in any of the four directions.
Pushing the OK/Navigation key to the left or right displays different
screen savers loaded into the phone. Pushing it up/down displays the
Phone Book.
19
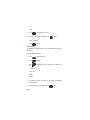
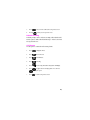
Voice Memo Button
Located on the left side of the phone.
¨ Press and hold this button to record up to 240 seconds of audio.
¨ A total of four minutes of audio can be recorded. These voice memos can
be stored indefinitely or erased as desired.
¨ From the menu in standby mode, press the voice memo button briefly to
view the voice memo menu.
¨ Can record audio during a conversation.
Voice Privacy Icon
The Voice Privacy icon is cycled between “P” and “D” since the phone
is set to enhanced privacy by default. The privacy icon indicates that the
phone is ready to use the privacy option is available in the network. For
more information on the privacy feature, see “Privacy” on page 94.
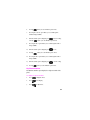
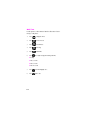
Volume/Scroll Buttons
These buttons (one up/one down) on the side of the phone are used to
set audio volume levels.
Press the volume/scroll buttons to:
¨ Scroll up/down or through the menu functions.
¨ Adjust the headphone volume during conversation.
¨ Adjust the ringer (8 levels) volume in standby mode. (No bars indicate
that the ringer is turned off.)
¨ Turn on/off Vibrate mode.
¨ Mute ringer during an incoming call.
20
Interface (IF) Adapter
Located at the bottom of the phone.
¨ Before using, gently pry the cover from the phone to expose the IF
adapter.
¨ This plug is used to connect additional phone accessories such as the
travel charger and data cable.
21
Getting Started
Getting Connected
You must contact your service provider to obtain service for your
Samsung T300 phone. It is suggested that you read this user guide to
fully understand the features that your phone supports.
Turning your Phone On
To turn your phone on, open the phone’s flip cover and press
the
key. Hold down the key for a few seconds to turn the phone
on:
The service light in the top left of the phone flashes, and an alert
sounds. The phone begins searching for a network signal. When a
signal is found, the date, time and day is displayed, and the phone
enters standby mode. You can now send and receive calls. The standby
mode screen is shown below:
¨ Signal strength icon
¨ Battery strength icon
¨ Time and date.
¨ Day
¨ Roam
¨ Digital Mode
¨ Analog Mode
22
.
Note: If the phone is out-of-service the
icon displays. If this happens
you cannot place or receive calls. You can try later when service becomes
available. For further information see “The Top Line of the Display Screen” on
page 33
Turning your Phone Off
To turn your phone off, press and hold the
key for more than 2
seconds. Notice that when the phone is turned off, both the display
screen and backlight are off.
Note: If your phone is on and the
key is selected for less than one
second, the phone will not turn off. This feature stops your phone from being
turned off accidentally.
23
List of Menu Functions
This list displays the menu structure and indicates the number
assigned to each option.
1. Calls
1: Outgoing
2: Incoming
3: Missed
4: Erase Logs
1: Outgoing
2: Incoming
3: Missed
4: All
5: Air Time
1: Last Call
2: Total
3: Erase Total
4: Lifetime
2. Phone Book
1:
2:
3:
4:
5:
Find Name
Add Entry
Find Entry
RelationSrch
Add email
3. Web
1: Get in Web
2: Prompt
4. Scheduler
1: Today
2: View Month
3: Date
4: To Do List
5: Countdown
6: World Time
7: Calculator
8: Alarm Set
24
5. Sounds
1: Ringer Vol
1: Calls
2: Messages
3: Alarm
2: Ringer Type
1: Voice Calls
2: Messages
1: Voice Mail
2: Text
3: Web MSG
3:
4:
5:
3: Key Beep
4: Alerts
1:
2:
3:
4:
5:
6:
7:
Alarm
Data/Fax In
Schedule
Minute Beep
Service
Connect
Disconnect
Fade
Roam
Privacy
5: Voice Volume
6: Roam Ringer
7: Power On/Off
25
6. Display
1: Backlight
2: Banner
3: Animation
1: Power On
2: Power Off
3: Idle 1
4: Idle 2
4: My Phone #
5: Language
6: Set Time
7: Auto Hyphen
8: LCD Contrast
9: Version
7. Voice Dial
1: Record
2: Play/Erase
3: Set Active
4: Training
5: Undo Train
8. Voice Record
1: Voice Memo
1: Record
2: Play/Erase
2: Call Answer
1: On/Off
2: Config
1: Screening
2: Wait Time
3: Inbox
26
9. Games
1:
2:
3:
4:
Push Push
Fly Ribon
Puzzle World
Spider Hunter
1:
2:
3:
4:
5:
6:
7:
8:
Auto Retry
Auto Answer
Answer Mode
Tone Length
Set NAM
Roam Option
Data/Fax
Set Network
*. Setup
0. Mail Kit
1: New Message
2: Inbox
1: Voice
2: Text
3: Web
3: Outbox
1: Sent
2: Stored
4: Delivery
5: MSG Setup
1: General
1: Scroll Timer
2: Msg. Remind
2: New Message
1:
2:
3:
4:
5:
Call Back #
Save Message
Entry Method
Delivery Ack
Canned Msg.
3: Erase
1:
2:
3:
4:
5:
Voice Notif.
Received
Sent
Stored
All
27
#. Security
1: Lock Mode
2: Restrict
3: Lock Code
4: Emergency #
5: Send Pin
6: Clear MEM
7: Reset Phone
8: Privacy
InUse Menu
1: Mute/Quit
2: Calls
1: Outgoing
2: Incoming
3: Missed
4: Erase Logs
1: Outgoing
2: Incoming
3: Missed
4: All
5: Air Time
1: Last Call
2: Total
3: Erase Total
4: Lifetime
3: PhoneBook
1: Find Name
2: Add Entry
3: Find Entry
4: RelationSrch
5: Add email
4: Silent/Quit
5: Send Tel#
6: My Phone#
7: Version
8: Privacy
28
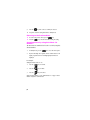
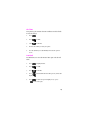
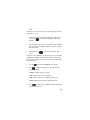
Using your Phone’s Menus
The phone offers a range of functions that allow you to tailor the phone
to your personal requirements. These functions are arranged in menus
and submenus.
The menus and submenus can be accessed by scrolling or using
shortcuts.
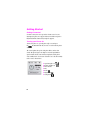
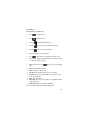
Accessing Menus by Scrolling
Menu items are numbered and can be accessed by scrolling then
selecting that option. For example:
1.Press the
key in standby
mode to access the menu.
2.To enter the Sounds menu, using
your thumb, slide
,until the
Sounds menu displays.
3.Press the
in the center to
select this option.
4.
Again, using your thumb scroll to Alerts, using the same key.
5.
Press the
6.
Scroll to Connect, using the same key.
7.
Press the
8.
Use your thumb on the
key in the center to enter the Alerts menu.
key in the center to enter the Connect menu.
key to select the desired setting.
29
9.
Press the
key in the center to confirm your selection.
10. Your phone saves this setting and returns to standby mode.
Returning to the Previous Menu
¨ To return to the previous menu, press the
key.
¨ Select the
key to exit the menu without saving the setting.
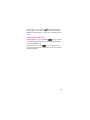
Accessing Menus by using their Short Cut
Number
The menu items are numbered and can be accessed by using their
shortcut numbers.
1.
In standby mode, press the
key to access the menu options.
2.
Key in the first digit of the required ‘shortcut’ number shown on the
display, repeat this action for each digit displayed as menus are
displayed.
For example:
Setting the Connect tone to ‘on’.
1.
Press the
key for Sounds.
2.
Press the
key for Alerts.
3.
Press the
key for Connect.
Note: For further details see “List of Menu Functions” on page 24 for the
numbers assigned to each menu item.
30
Your phone’s modes
Lock Mode
When you lock your phone using the Lock mode menu option, phone
use becomes restricted. You can receive messages and calls, but you
cannot make an outgoing call until the phone is unlocked. To unlock
,
,
, or and enter the
the phone, press
lock code. The phone will return to standby mode.
Power Save Mode
Your phone comes with a Power Save feature that automatically
activates if your phone is unable to find a signal after 15 minutes of
searching. While this feature is active, the phone’s battery charge is
conserved. The phone automatically rechecks periodically for a signal.
To manually force the phone to recheck for a signal, press any key. A
message on the display screen will inform you when your phone is
operating in the Power Save mode.
Standby Mode
Standby is the fundamental state of your phone. The phone goes into
standby mode soon after you turn it on, or if your phone is on,
key.
whenever you press the
While in standby mode, you can enter a phone number, press the
key to dial it, or press the
key in the center to save it in
the Phone Book.
Press the
key at any time to return to the standby mode, but be
careful; if you are on a call when you press the
key, you will
return to standby mode and disconnect the call.
31
Conversation/Talk Mode
You can send and answer calls only when your phone is turned on.
During a call, the phone is in conversation or talk mode. While you are
gives you a list of options referred to as
in this mode, pressing
‘InUse Options’. See “InUse Menu” on page 152.
Silent Mode
The phone can be set to a silent mode with a press of a button. The
silent mode disables all sound on the phone. This feature is best used
in situations where the phone might disturb others, such as a meeting,
library, etc.
1.
To enable silent mode, press and hold
2.
A message is displayed on the screen that indicates the phone is in Silent
Mode.
32
.
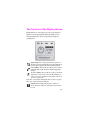
The Top Line of the Display Screen
Display indicators (or icons) appear across the top of your phone’s
display screen. The signal strength and battery strength icons are
always displayed, but the other icons appear based your phone’s
operating mode.
Signal strength: This icon always appears when your phone is on,
and shows your current signal strength. The more lines displayed, the
better the signal strength. Four lines indicate maximum strength.
Service indicator: This icon indicates a call is in progress. If there is
trouble with signal strength, this indicator will have a diagonal line
through it.
No service indicator: This icon indicates your phone cannot find a
signal because you are outside a service area. When displayed, you
cannot send or receive calls. Wait for a better signal or move into an
open area to regain service.
Note: The no service indicator always displays when you turn on your phone.
When service is located, the indicator disappears.
Roaming: This icon displays when the phone is outside your
carrier’s area and receiving service from another carrier’s network.
If you are:
33
¨ In your home service area, this indicator does not display.
¨ In a preferred analog or digital roaming area (where your service
provider has a roaming agreement in place), this indicator is on, but
not flashing.
¨ In an analog or digital area that is not covered by your phone’s
service provider, this indicator is on.
New Message: These icons appear when a new voice, text or page
message, or net alert is received.
Digital mode: This icon indicates your phone is operating in digital
mode. Your phone has some features that work only in a digital
service area; these services include the Web Browser and certain
other message(s) services.
Analog mode: This icon indicates that your phone is operating in
analog mode.
Vibrating mode: This icon indicates that an incoming call will make
the phone vibrate rather than ring. This feature is used for situations
where your normal ringer may disturb others, or for “loud” situations
where a ringer cannot be heard.
Battery strength: This icon is displayed when your phone is active.
It displays your battery’s current charge level. The more bars, the
greater the charge. When the battery becomes very low, an empty
battery icon displays and the phone flashes an alert; this indicates that
your phone is about to turn itself off.
Voice Privacy: This icon represents the voice privacy feature of the
phone. When the icon is solid, voice privacy is supported on the
network and the call is secure. If the icon is outlined, the privacy
option is enabled, but not active on the network. Voice privacy must
be supported by the local carrier.
34
Using the Battery
Note: Your phone comes packaged with a partially charged, rechargeable
standard Li-ion battery. The phone can be used while the battery is charging,
but must be fully charged the first time you use your phone otherwise the
battery could be damaged.
Installing the battery
The battery attaches to the phone very easily:
1.
Insert the contact end on the bottom of the battery into the slots on the
bottom of the phone.
2.
Press the battery down until you hear it click into place.
35
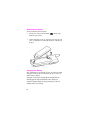
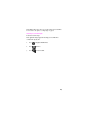
Removing the Battery
To remove the battery from your phone:
1.
Turn the phone off (by pressing and holding
animation sequence begins.)
until the closing
2.
Push the catch button up on the top of the battery on the back side of the
phone. (see illustration). The battery will easily lift out or fall away from
the phone.
Charging the Battery
Note: A standard battery is provided with your phone. The battery must be fully
charged before using your phone for the first time. The phone can be used
while the battery is charging.
Your phone is powered by a rechargeable Li-ion battery. Only use
Samsung approved chargers and batteries. These chargers are
designed to maximize battery life. Using other chargers voids your
warranty and may cause damage.
36
Low Battery Indicator
You can tell whether or not your battery needs to be recharged by
checking the
indicator (it’s located in the upper-right corner of
the display). The presence of all three bars indicates a full charge, two
bars indicates a medium charge, and one bar indicates a minimum
charge. No bars (the battery icon is empty) indicates the battery no
longer has any charge and must be recharged.
The Empty Battery Icon
Two to three minutes before the battery charge level gets too low to
operate the phone, the battery sensor will let you know by blinking an
), and sounding a tone. If you continue to
empty battery icon (
operate the phone without charging the battery, the phone will turn off
automatically. If this happens, your wireless call will be ended. But if
you plug into a charging device, you can continue your call. Be sure to
monitor the battery strength icon and make sure your battery is
sufficiently charged.
Charging with a Travel Charger
The travel charger allows you to charge your phone’s battery from any
standard 110VAC wall outlet. Also, using the travel charger allows you
to make a phone call while the battery is charging. The travel charger
will fully charge an “empty” standard battery in about three hours, and
an “empty” extended battery in about four hours.
Follow these steps:
1.
With the battery connected to the phone, connect the travel charger to
the accessory connector on the bottom of the phone.
2.
Connect the charger to a standard 110 AC wall outlet. The battery begins
charging.
37
3.
The LED on the travel charger indicates the status of the battery charge.
¨Red indicates that the battery is charging.
¨Green indicates that the battery is fully charged.
¨Yellow indicates that the battery is operating at a temperature that is
too high or too low, or that the charger is not plugged in correctly.
Please check the charger and battery.
4.
The travel charger continues charging the battery even when you are
making outgoing calls.
Note: The battery charges faster when the phone is off.
38
Caring for the Battery
Protecting your battery
The guidelines listed below help you get the most out of your battery’s
performance.
¨ Use only Samsung approved batteries and chargers. Samsung chargers
¨
¨
¨
¨
¨
¨
¨
¨
¨
are designed to maximize battery life. Using other manufacturers
batteries or chargers voids your warranty and may cause damage.
To purchase additional Samsung batteries & chargers, call
(800) SAMSUNG or visit our website at http://www.samsungusa.com.
In order to avoid damage, charge the battery only in temperatures that
range from 32º F to 113º F (0º C to 45º C).
Don’t use the battery charger in direct sunlight or in high humidity areas,
such as a bathroom.
Never dispose of the battery by incineration.
Keep the metal contacts on top of the battery clean.
Don’t attempt to disassemble or short-circuit the battery.
The battery may need recharging if it has not been used for a long period
of time.
Replace the battery when it no longer holds an acceptable charge.
Don’t store the battery in high temperature areas for long periods of
time. It’s best to follow these storage rules:
Less than one month:
4º F to 140º F (-20º C to 60º C).
More than one month:
4º F to 113º F (-20º C to 45º C).
Disposal of Lithium Ion batteries
For safe disposal options of your Lithium Ion batteries, contact your
nearest Samsung Authorized Service Center.
Note: Dispose of your battery properly. In some areas, the disposal of batteries
in household or business trash may be prohibited.
39
Calls
Outgoing
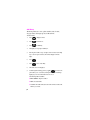
To place a call:
1.
Press
to power on your phone.
2.
Enter the phone number you wish to call (up to 32 digits) by pressing the
digit keys. The phone number is displayed from left to right.
3.
Press the
key. The phone calls the number entered.
Incoming
Your phone signals an incoming call or message in the following ways:
¨ The backlight illuminates.
¨ The red LED on the top of the handset flashes.
¨ The ringer sounds (unless you have set the ringer to Vibrate or Off).
Incoming call notification continues until one of the following events
occurs:
¨ You answer the call.
¨ The calling party ends the call.
¨ The call is sent to Voicemail.
Your phone provides the following voice call notification features.
¨ 11 ring volume settings including Vibrate, Off, and 1-Beep.
¨ Nine unique ring types, twenty four melody tones, and ten downloadable
ring tones. (see “Ringer Type” on page 87).
¨ Name display with Caller ID.
¨ Automatic storage of an incoming call’s information in the Call directory
(the last 10 calls you answered are stored in the Incoming directory and
the last 10 calls you missed are stored in the Missed directory). See
“Roam” on page 94.
40
Missed
Your phone keeps a list of calls that were not answered when the
phone is on and service is available. The phone indicates a missed call
by displaying a text notification on the screen. Additionally, if caller
information is available, a Missed entry is created, and the screen
displays the phone number of the most recent missed call.
Your phone gives you two very convenient options when you have
missed a call:
¨ Press
¨ Pressing
to call the displayed number.
in the center saves the number in the Phone Book.
To view a list of your missed calls, see “Reviewing outgoing, incoming,
or missed calls” on page 44.
¨ Press
to clear the “Missed Call” message from the display.
41
Three Way Calling
Your phone is also able to conference call or three way call two other
people. When you are talking to someone, you can conference in
another caller, so all three can talk to each other.
Note: You are billed for both calls according to your service plan. If you have
any questions about the billing process of three way calling, contact the service
carrier.
To three way call:
1.
Place a call normally using the phone. Dial the number of the first person
and press
.
2.
When the first party has been connected. Ask them to wait and press
. The caller is placed on hold.
3.
Dial the second parties phone number and press
4.
When the second party is connected, press
together.
42
.
to connect all parties
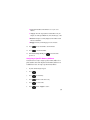
Erase logs
You can erase any of the three lists (Outgoing, Incoming or Missed
calls) or you can easily erase all three lists at once. Here is an example:
1.
Press
to display the menu.
2.
Press
for the Call menu.
3.
Press
for Erase Logs.
4.
Press
for All.
5.
Pressing
in the center erases all your logs.
6.
Pressing
logs.
cancels the action if you do not wish to erase all your
Keeping track of call logs
Your phone saves a log of call activity and permits you to easily return
calls.
Your phone retains the following call logs in memory:
¨ Outgoing - the last 10 calls dialed.
¨ Incoming - the last 10 incoming calls.
¨ Missed - the last 10 calls missed.
Each Call Log contains the name and phone number (if available).
In addition to the Incoming, Outgoing, and Missed calls lists, your
phone maintains an air time log. For further information see “Air
Time” on page 45.
You can quickly access your last 10 incoming, outgoing, and missed
calls from standby mode by pressing
. Use
to
select the desired call log.
43
Reviewing outgoing, incoming, or missed calls
When a call log is displayed, press the appropriate number to be
automatically connected.
1.
Press
to display the menu.
2.
Press
for Calls.
¨Press the associated digit key to select an option:
¨Press
for Outgoing calls.
¨Press
for Incoming calls.
¨Press
for Missed calls.
3.
When the list of calls displays, press the scroll key to scan the logs. If
there is a Phone Book match, the name displays. If there is no Phone
Book match, only the phone number displays.
4.
When a log is highlighted you can press:
¨
to be connected to that party.
¨ When you are viewing this information you can press
for more
options (Talk, Save, Call Info, and Prepend the number).
5.
44
Press
to exit the Call Logs list and return to the previous screen.
Air Time
Your phone logs the amount of air time or talk time used for all calls.
To view the call logs:
1.
Press
.
2.
Press
for Calls.
3.
Select
for Air Time.
4.
Then use the scroll key to review your options.
5.
Press the desired key to be automatically connected to the option of
choice.
Last Call
Last Call allows you to view the amount of time spent on the last call
made:
1.
Press
to display the menu.
2.
Press
for Calls.
3.
Press
for Air Time.
4.
Press
displays.
for Last Call. The amount of time spent on your last call
5.
Press
to return to the previous display screen, or press
in the center to quit.
45
Total
Total air time is the amount of time the phone has been used since it
was last erased. All incoming and outgoing calls are saved in the log.
This feature is not intended for billing purposes.
To view or erase total air time:
1.
Press
2.
Press
for Calls.
3.
Press
for Air Time.
4.
Press:
for Total. The screen displays the total number of calls
and the total air time for all calls since you set this total to zero (by using
the “Erase Total” option).
5.
Press
46
to display the menu.
to return to the previous display screen, or press
in the center to quit.
Erase Total
To erase your total air time:
1.
Press
to display the menu.
2.
Press
for Calls.
3.
Press
for Air Time.
4.
Press
to Erase Total. Press
in the center to erase the
“Total” airtime measurement, or press
to cancel the operation
and return to the previous display screen.
Note: If you choose the Erase Total option, the counter is reset to “zero” and
begins counting the next time you make or receive a call.
47
Lifetime
Lifetime air time is the amount of time the phone has been used since it
was activated. All incoming and outgoing calls are saved in the log.
To view your total lifetime air time:
1.
Press
to display the menu.
2.
Press
for Calls
3.
Press
for Air Time.
4.
Press
for Life Time.
5.
Press
to quit or
to return to the previous menu.
Note: You cannot erase any information created by this option.
48
Phone Book
Your phone allows you store up to 500 numbers and names in the
Phone Book. Each entry can have up to 8 associated phone numbers.
Each entry can contain up to 32 digits including hard pauses, with an
associated name of up to 12 characters. (Name entry is optional)
Stored phone numbers can be categorized as one of eight categories ), Speed Dial ( ), Home ( ), Office ( ), Mobile
Voice Dial(
) and No-label( .) The memory location
( ), Pager ( ), Fax (
can be specified for each entry. Memory locations can be marked
“Secret”, preventing any unauthorized person from viewing the
telephone number.
There are two pre-programmed locations in the phone book. They are
location 411 and 311. These numbers were automatically saved in
these locations to allow three digit dialing. For more information on
three touch dialing, see “Dialing numbers from the phone book” on
page 64.
One-Touch, Two-Touch, and Three-Touch dialing makes it easy to call
a phone number stored in your Phone Book. See “Shortcuts to
Memory Dialing” on page 64.
49
Answering a Call
When you receive a call, the phone will ring and a phone icon is
displayed on the screen. If the caller can be identified, the caller’s
phone number (or name if pre-stored in your Phone Book is
displayed. If the caller cannot be identified only the phone icon
displays.
There are several ways to answer an incoming call:
¨ Open the flip.
¨ Press the Send button
Your phone is preset to answer when you press
. You can easily
change how your phone answers by setting the Call Answer feature as
explained here:
1.
Press
to display the menu.
2.
Press
for Setup.
3.
Press
for Auto Answer.
4.
Use the scroll keys to toggle between 5 seconds 3, seconds, 1 second,
and off.
5.
Press
mode.
50
to save the setting. and you will be returned to standby
Find Name
With your phone in standby mode:
1.
Press
to display the menu.
2.
Press
for the Phone Book.
3.
Pressing
displays the Find Name option.
4.
Slide the
key up or down to scroll the phone numbers.
5.
Pressing
in the center selects the number.
6.
The phone display screen shows the details.
7.
Press
to place the call, or enter the first few numbers of the
phone number to display the speed dial number. For further information
see “Setting speed dial” on page 62.
8.
With a selected entry, pressing
options:
allows you to access the following
¨
¨
¨
¨
Talk: Pressing Talk dials the number
Add #: Allows you to add a new entry.
Edit: Edits the phone number, name, entry or secret number.
Prepend: Allows you to prepend a number to either a feature code or
area code before dialing.
¨ Erase: Erases the number.
¨ Name Ring: Allows you to select a unique tone to identify an incoming
call by the ringer type.
¨ Email Address: Allows you to add an e-mail address.
Note: Stored names display numerically by memory position.
51
Add Entry
This menu permits you to store a phone number, name, location,
category, relation, and ringer type in your Phone Book.
To add an entry:
1.
Press
to display the menu.
2.
Press
for Phone Book.
3.
Press
for Add Entry.
4.
The display screen prompts ‘Add Entry #’.
5.
Enter the phone number. (Up to 32 digits can be entered.) Press the digit
keys to enter the phone number. (The number displays from left to
right).
6.
Press
.
7.
Press
to save as a New Entry.
8.
A PhoneBook screen is displayed.
9.
Scroll through the following options by toggling
up or down. The
phone allows you to overwrite any existing information, or if nothing is
displayed, you can enter information from the screen.
The following fields are available:
¨Phone Number: Telephone number
¨Name: Associated Name.
¨ Location: The number allocated to the name in the list of names and
numbers you created.
52
¨Secret: This field advises if this number is one of your ‘secret’
numbers.
¨ Category: This is the category label associated with the entry. For
example; Voice Dial, Speed Dial, Home, Office, Mobile, Pager, or Fax.
¨Relation: Pressing the scroll key displays both the number and the
name associated with it.
¨Ringtype: Informs you if the Ring Type is Active or Inactive.
10. Press
on any selected field to enter information.
11. Press
to save the information.
12. When finished editing all fields, press
phonebook.
to save and exit the
Assigning a Specific Memory Address
It may become necessary to assign a specific memory address for a
phone number entered into the phone book. Memory addresses are
available from 1-500. To assign a specific memory address:
1.
Key in the number using the keypad.
2.
Press
3.
Press
4.
Press
5.
Press
to save the name.
6.
Press
down to highlight “Location”.
.
for “New Entry”.
and enter a name for the entry.
53
7.
Press
to display the “Memory” screen.
8.
Enter the desired memory location using the keypad.
9.
Press
to save and exit.
Note: Follow the steps listed above when memory location 411 or 311 are
accidentally over written.
Pause Dialing
When you call automated systems, you are usually required to enter a
password or account number. Instead of manually entering the
numbers each time, the numbers can be stored in your Phone Book
separated by special characters called pauses.
There are two kinds of pauses that can be entered on your phone:
¨ Hard pause - A hard pause stops the dialing sequence.
¨ Two second pause - A two second pause stops the dialing sequence for
two seconds and then automatically sends the remaining digits.
Your phone has two pause dialing methods: pause dialing from the
Phone Book (see “Pause dialing from a stored phone book entry” on
page 55), and manual pause dialing (see “Manual pause dialing” on
page 56).
Note: Multiple two second pauses can be entered to extend the length of a
pause. For example, two consecutive two second pauses cause a total pause
time of four seconds. However, keep in mind that pauses count as digits
towards the 32 digit dialing maximum.
Storing Pauses in a Phone Book Entry
To store a number in your Phone Book that contains pauses:
1. Enter the phone number you want to store.
2.
54
Press
to display options to display the following options:
¨P pause - This option is used to enter a hard pause that will stop the
dialing sequence. Enter the account number or password digits after
entering this pause.
¨T pause - This pause is an automatic two second delay in the dialing
sequence. If numbers are entered after this pause, the dialing is
suspended two seconds and then resumed with the digits entered after
the pause.
¨Hyphen - This allows you to enter a hyphen between the digits in the
phone number for easier viewing. This does not affect the dialing
procedure.
3.
Press 1, 2 or 3 to select the desired choice when entering the dialing
sequence.
4.
Store the number in your Phone Book by pressing the
following the display prompts.
key and
Pause dialing from a stored phone book entry
Pause dialing from the Phone Book:
1.
If you stored the number using a two second pause(s), simply dial the
number from the Phone Book.
2.
If you stored the number using a hard pause(s), simply dial the number
from the Phone Book and wait for the appropriate prompt from the
number you are calling (credit card number, bank account number,
etc.). When prompted, press
or
to send the DTMF
number that follows your hard pause. “SENDING DTMF” is displayed on
the screen (the transmitted tones are audible).
55
Manual pause dialing
To perform manual pause dialing without first storing the number in
the Phone Book, enter pauses manually using the Digit Entry menu
during the dialing process.
To manually dial a number using a pause(s):
1.
Enter the phone number of the service you want to call. For example,
your bank’s automated phone number might be an 800 number.
2.
Press
3.
Press 1, 2 or 3 to select the desired choice when entering the dialing
sequence.
4.
Enter the remaining digits using the keypad after the pause.
5.
Press
to display digit dialing options.
to make the call.
Editing phone book numbers
When a number is stored in the Phone Book, it can be easily changed
by editing the information.
To change a Phone Book entry:
1.
From standby mode, toggle the
button down and search for the
Phone Book entry that you want to change.
2.
Highlight the name and press
3.
Press the
4.
Press
56
key for Options.
to select Edit.
.
5.
Your Information displays. If the number has been designated as
“Secret” you are prompted to enter the Lock Code. Toggle using the
key and choose from one of the following options:
¨Phone number
¨Name
¨Location
¨Secret
¨Category
¨Relation
¨Ringtype
6.
Press
to edit the selected field.
7.
Press
to accept or
8.
Press
to return to the previous menu.
to exit.
Prepending a phone Number
The Prepend option lets you add digits such as area codes and network
feature activation codes to a phone number that is stored in your
Phone Book or Call Logs.
Note: The prepended phone number cannot be longer than 10 digits.
To Prepend a stored phone number:
1.
Press
to display the menu.
2.
Press
for Phone Book.
3.
Press
for Find Name.
57
4.
Highlight the desired name and press
.
5.
Press
to display options.
6.
Press
for Prepend.
7.
The screen displays Prepending #. Use the keypad to enter the calling
prefix and press
to place the call.
Erasing phone book entries
To erase an entry in the Phone Book:
1. From standby mode, find the Phone Book entry that you wish to change
by pressing
and scrolling to the name or
number.
2. Press the
key to display the name or number.
3.
Press the
key for options.
4.
Scroll to the “Erase” option.
5.
Press
to Erase. Your phone will prompt for confirmation.
to confirm and erase the Phone Book entry, or press
Press
to cancel the Erase command and return to the Phone Book Options
menu.
The “Erased” notification displays together with the name, number,
and location of the erased entry.
Adding a name ringer
You can associate nine tones, 24 melodies, and 10 downloaded melodies to the
numbers stored in your Phone Book. When you receive an incoming call from
a number matching an entry in your Phone Book your phone will play the
associated ringer to announce the call.
58
Note: If the Caller ID information was unavailable for an incoming call then
the Name Ringer option will also be unavailable.
To add a Name Ringer to a Phone Book entry:
1.
Press
to display the menu.
2.
Press
for Phone Book.
3.
Press
to find the desired name entry in the phone book.
4.
Find the number to which you wish to add a Name Ringer, using one of
the search methods described under “Finding an Entry” on page 60, and
then press
.
5.
Press
to display Options.
6.
Press
to scroll to Name Ring.
7.
Your phone displays the current ringer setting. Use the scroll key to listen
to available ringers and melodies.
8.
Press
to save the selected ringer.
E-mail address
You can add an email address entry to the phone book for text
messaging. Your phone can send a message via the Verizon network to
an email address.
To add an email address:
1.
Press
to display the menu.
2.
Press
for Phone Book.
3.
Press
for Add email.
59
4.
Enter the email address using the numeric keys.
5.
Press
6.
Add the email as a New Entry.
7.
Press
to accept.
to save the entry.
Finding an Entry
This option allows you to find an entry by location number
1.
Press
to display the menu.
2.
Press
for the Phone Book.
3.
Press
for Find Entry. The Phone Book ‘Look Up’ screen displays.
4.
Enter the memory location or toggle
list of entries.
5.
Press
to select the entry.
6.
Press
to place a call.
60
down to scroll through the
Relation Search
Secret phone book numbers
Your phone allows you to hide a confidential number so that only a
person with your phone’s Lock Code can view that name and number.
To make a number “Secret,” see “To add a new phone number to the
Phone Book” on page 61. When you have made the number “Secret,”
the phone does not permit anyone to view information on that
particular number unless the four-digit lock code is entered.
To add a new phone number to the Phone Book
To store phone numbers and names:
1.
Enter the new phone number and press
twice.
2.
Press
3.
Enter the name using the keypad and press
4.
Toggle to the Relation field and press
5.
Toggle through the options using
available:
to edit the name field.
to save.
.
. The following choices are
¨No Group
¨VIP
¨Colleague
¨Family
¨Friend
6.
Select the desired choice and press
to save.
61
7.
Press
to save and exit.
Setting speed dial
For each name entered in the Phone Book, you can assign a Speed Dial
number.
To assign the number:
1.
Open the desired phone book entry.
2.
Toggle
3.
Press
and select the Category field.
to edit. The following options are available:
¨Speed Dial
¨Voice Dial
¨No Label
¨Fax
¨Pager
¨Mobile
¨Office
¨Home
4.
Select Speed Dial and press
5.
Press
62
to save and exit.
.
Storing phone numbers at the end of a call
To store a phone number after ending a call:
Note: If the call was incoming, and Caller ID information was unavailable, then
the store option will be unavailable.
1. Once you have pressed
to end your call, the screen displays the
call time (length of call), phone number of the party (if available), and
the “OK: Save” option.
2.
To add a new phone number, press
. The procedure from this
point is the same as “To add a new phone number to the Phone Book”
on page 61.
Shortcuts to Storing Phone Numbers
You can store a phone number quickly by entering the number, and
. Then follow the prompts to designate the label,
then pressing
name and entry. You can quickly save a number after an incoming or
outgoing call.
63
Dialing numbers from the phone
book
Dialing numbers from your Phone Book is quick and easy. Different
methods are explained below:
Shortcuts to Memory Dialing
Speed Dialing:
From standby mode, enter the number of the
memory location, and press the number for the
required option.
Scrolling to the number:
From standby mode, press the
key and
toggle using the
key to Phone Book. Press
to enter the Phone Book. Toggle until the
to
desired option is reached then press
enter the option.
Note: For the One-Touch, Two Touch, and Three Touch dialing to work as
described, the category setting in the phone book must be set to Speed Dialing
for the entry.
One-Touch Dialing:
64
Memory locations 01 through 09 are special OneTouch locations. You can dial the phone numbers
stored in the Phone Book memory from 01
through 09 simply by pressing one key. For
example, for location number 001. Press
and hold. The name and number is displayed and
dialed.
Two-Touch Dialing:
Memory locations 10 through 99 are special TwoTouch locations. For example, for location
and then hold down
number 013. Press
The name and number is displayed and
dialed.
Three-Touch Dialing
Memory locations 100 - 500 are special ThreeTouch locations. For example, for location 112.
.The
and hold down
Press
name and number is displayed and dialed.
65
Web/MiniBrowser
Your phone comes equipped with wireless Internet access by using the
MiniBrowser.
The MiniBrowser allows you to access up-to-the-minute information
through your phone. View specially designed versions of popular
Internet sites which may include news, sports, weather, stock quotes,
etc. Browsing the web through your phone is unlike using your
personal computer since site providers have selected only the critical
aspects of the site to present to wireless phone users and have removed
most graphics.
Each time you launch the MiniBrowser, the phone connects to the
) displays. Any time the
Internet and the service indicator icon (
service indicator icon is visible on the display, you are connected and
are invoiced accordingly. Rates and pricing vary according to your
service option. Please contact your service provider for more details.
Note: The phone must be in a digital network to use the MiniBrowser. When
icon is displayed.
you are in a digital network, the
Launching the Minibrowser
Note: The first time you use the MiniBrowser, you will be required to go
through a security setup process that takes approximately three to five minutes.
Please follow the on-screen prompts to complete the security setup process.
This initial setup process occurs only the first time you access the service.
Note: When the security key is initially sent to the carrier, it creates a unique
value. If the phone is reset for any reason, you must contact the carrier to reset
the security key. The old key is no longer valid and will not allow the
MiniBrowser to operate correctly.
To launch the web:
1.
66
Press
.
2.
Press
3.
Press
.
Note: A reminder of the charge may appear (depending on your prompt
setting - see “The MiniBrowser Start and End Prompts” on page 67). To
dismiss the prompt, simply choose yes or no. If no prompt is displayed, you
are immediately connected to the internet.
4.
Toggle
to select Yes or No.
5.
Once connected, the Home page (or the last page visited) will be
displayed. To access the Home menu page from any other menu in the
MiniBrowser, press and hold
.
Note: What displays when accessing the MiniBrowser is dependent on the
service provider content. To view additional text, use the scroll keys.
Note: You can also access the Web/MiniBrowser by pressing
on the right
side of the phone’s display screen.
Exiting the Web/Minibrowser
1.
Press
to exit the web or close the flip.
2.
Press
to exit the MiniBrowser. If the ‘Prompt to end’ or ‘Prompt
both’ option is selected in the MiniBrowser setup (
), you will be prompted whether you want to end the
MiniBrowser call.
The MiniBrowser Start and End Prompts
Your phone can be set to view a prompt each time you start or end a
MiniBrowser session. You have the option to change when the start
prompt is displayed. The default setting is set to start prompt. To
change the settings:
67
1.
Press
to display the menu.
2.
Press
for Web
3.
Press
for Prompt.
4.
Use the
button to select one of the four options:
¨To Start: (This is the default setting. You will see the prompt when you
enter the browser, but not when you exit it.)
¨To End: (You will see the prompt only when you exit the browser.)
¨Both: (You will be prompted when you enter or exit the browser.)
¨None: (You will never see this prompt.)
5.
Press
to save your setting or
to cancel.
The MiniBrowser Soft Keys
At the bottom of the MiniBrowser display is a solid bar which contains
) below the
browser commands. “Soft” keys (
solid bar are used to execute the commands. These two keys are called
“soft” keys because their function changes depending on where you
are in the MiniBrowser software.
68
Navigating the Web
When you use the MiniBrowser, some keys on your phone operate
differently than during a normal phone call. These keys are explained
below. The MiniBrowser presents on-screen items in one of the
following ways:
¨
¨
¨
¨
Text or numeric input
Links (embedded in content)
Numbered options (some options may not be numbered)
Simple text
You can select options or links by using the soft keys.
69
How the Keys Work in the MiniBrowser
Up/down navigation keys: Use the navigation keys to
scroll to and select from MiniBrowser options. The
currently selected option is indicated by an arrow. You
can also use the navigation keys to move the cursor when
editing text.
OK/Navigation key: This key is also used for selecting
the highlighted item by pressing down the button. This
button is also used with the internet. (see “The
MiniBrowser Soft Keys” on page 68).
Volume keys: These keys allow you to scroll
up or down or change the volume settings.
CLR key: This key performs two functions:
¨Backs you up in the browser. Pressing it once backs you up one
page. Pressing and holding it down backs you up to the Home page.
¨Clears out entered text or numbers. When entering numbers or
text, press
to clear the last number, letter, or symbol. Press
and hold
to completely clear the input field.
Asterisk / shift key: This is the shift key. Press before
entering text to create upper case letters. This key is
also used to scroll down or up a line at a time.
0 / next key: Enters a 0. Moves to the next word in T9
word mode.
Pound / space key: This is the space key. Press to
insert a space when entering text. This key is also used
to scroll down or up a line at a time.
Numbered keys 0 - 9: If items on a menu are
numbered, these keys can be used to select them.
END key: Exits the MiniBrowser and returns the phone
to standby mode.
70
MENU key: This is the right soft key. The right soft key
is used to access secondary options, or a menu of
secondary options.
Entering Text, Numbers, or Symbols
At various times when using your phone, you will need to enter text.
For example, when storing a name in the Phone Book, entering events
in your Calendar, or creating a bookmark in the MiniBrowser.
Pressing the
key gives you the following options:
¨T9 Word
¨ABC
¨Symbol
¨123
Toggle through the options presented and press the
select.
key to
Entering text, numbers, or symbols:
¨ Press
¨ Press
¨
to insert a space.
to clear the last number, letter, or symbol, or
Press and hold
to completely clear the input field.
Press
to display the options then
to change and lock in
the option of choice.
71
Alphabetical Text Entry
Alphabetical text characters may be entered in the alpha Input Mode by
pressing the key corresponding to the letter that you want to enter.
Press the same key repeatedly to change between the characters
represented by each key. To change capitalization formats while
key. The menu key allows you to choose
entering text, press the
from 4 options:
¨alpha: See Note: below.
¨Sym: For numbers that have symbols associated.
¨Num: For numbers
¨T9 Word: Recognizes and types whole words
Note: For example, you quickly press
three times to display the letter
key twice to display the letter ‘K’. This is
‘C’, and quickly press the
called multi-tap typing.
Number Entry
Numeric mode enables you to enter numbers into a text message. Press
the keys corresponding to the desired digits, and manually switch back
to text entry mode of choice.
72
Symbol Entry
Symbol mode enables you to enter symbols into a text message. Use the
key to display the options and press the
key up or down
to
select the symbol option. When displayed toggle using the
select the symbols. When in Symbol input mode, press the key shown
on the display under the symbol that you desire to enter.
Here are the list of available symbol characters:
¨
! _ \ ;
¨
@+?¡
¨
#=.¿
¨
% : , <<
¨
& “ { >>
¨
* ‘}±
¨
<($ ^
¨
>)[ .
¨
– / ]º
73
T9 Word Text Entry
T9 Word enables you to easily enter text. T9 (for “text on 9 keys”)
requires only one key press per letter and quickly recognizes the most
commonly used word of a numeric sequence.
For example, to enter the word “hello,” you can spell out the word by
pressing only five keys, 4-3-5-5-6. T9 Text Input knows the most
commonly used sequence for that numeric sequence is “hello”.
If two or more words share the same numeric sequence, T9 software
provides the most commonly used word, with the ability to scroll to the
up or down.
next most commonly used word by pressing
Press
repeatedly to display all of the available words that T9
knows. When the word you want displays, continue to enter text in the
same way, or change to another text or character entry mode. If the
to change the
word you want to enter is not known by T9 press
Input Mode.
Note: To type words not found in the T9 word, change the text input mode to
Alpha mode. Words typed in this mode are automatically added to the T9
dictionary so you can type them using the T9 English mode the next time. You
can include numbers between letters without exiting the T9 input mode by
simply pressing and holding the desired numeric key.
74
Scheduler
Today
You can schedule up to 9 events for the current day by indicating each
event’s start and end time. You can be alerted by the Calendar function
before an event is commenced. Events that are scheduled for future
dates automatically display on your Today events schedule for that
particular day.
How to schedule an event:
1.
Press
to display the menu.
2.
Press
for Scheduler.
3.
Press
for Today the New Event screen displays.
4.
Pressing the
key will offer further options. For example:
¨T9 Word
¨ABC
¨Symbol
¨123
¨Exit
5.
Choose your option by pressing the scroll key in the center and enter
your event information. Up to 32 characters can be entered. For more
information on Text and Symbol Entry see “Entering Text, Numbers, or
Symbols” on page 71.
6.
Press
to continue, the start time and date screen displays.
75
7.
Add the start time and date using the numeric keys, then press the
key to display the next screen.
8.
Add the end time and date. Press
9.
If an error is made, or duplicate information is already saved, pressing
the
key offers the following options:
to save the information.
¨Add new
¨Edit
¨Erase
10. Using
, scroll through the options and press
to select.
11. After the correct information has been entered, an alarm screen is
displayed. Select an alarm to notify you of your event. Your Alarm options
are: 10 minutes Before, 30 minutes Before, 1 hour Before, No Alarm and
On Time. Make your choice and press
.
12. This action will return you to standby mode.
View Month
View month permits you to view, in calendar format, the current month, a past
month, or future month. In view month, the current date is highlighted on the
calendar. Days with scheduled events are underlined.
1. Press
to display the menu.
2.
Press
3.
Press
for Scheduler.
for View Month. The Calendar displays.
¨Remember, the current date is highlighted.
¨Use the navigation key to select the month and day.
76
4.
Pressing the Menu key displays two options in the upper right corner of
the display screen, they are:
¨View (Permits you to view previous calendar entries).
¨Add New (Permits you to add a new calendar entry).
5.
To enter a new event, enter your event information. Up to 32 characters
can be entered. For more information on Text and Symbol Entry see
“Entering Text, Numbers, or Symbols” on page 71.
6.
Press
7.
Enter the start time and date, and press
The end time and date screen are displayed.
to save the information.
8.
Enter the start time and date, and press
to save the information.
9.
The alarm screen displays. Scroll to select an alarm to notify you of your
event. Your Alarm options are: 10 minutes Before, 30 minutes Before, 1
hour Before, No Alarm and On Time.
10. Press
to accept your entry.
to save your selection.
How to view an event:
1. Press
to display the menu.
2.
Press
for Scheduler.
3.
Press
for View Month and the Calendar displays.
4.
Use the navigation key to display all of an event’s information. If more
than one event is scheduled, use the navigation key to display them.
77
5.
Press
to display the options. Select one of the following:
¨Add New: Allows you to add an event
¨Edit: Allows you to edit the event
¨Erase: Allows you to delete the event.
6.
After an option is selected follow the display prompts to continue.
Calendar
Your phone features a Calendar to keep track of important dates and
events. It enables you to create To Do Lists, set a Count Down alarm,
check the time in another part of the world, and perform numerical
calculations.
1.
To access your Calendar press
2.
Press the
the option.
3.
Press
key to access one of the Calendar options, or navigate to
to access that option.
Calendar has the input modes:
¨T9 Word
¨ABC
¨Symbol
¨123
¨Exit
78
.
Date
Allows you to specify the calendar date you wish to view. Once this date
has been entered into the display screen it allows you to view other
events with the same date.
Jump to date
Jump To Date allows you to specify the calendar date you wish to view.
Once the date is obtained you can enter, edit and erase events in your
calendar. For further information see “Calendar” on page 78
Using jump to date
1. Press
to display the menu.
2.
Press
for Scheduler.
3.
Press
4.
Enter the date of the event and press
5.
The Calendar screen displays the newly entered highlighted date.
6.
Pressing the
7.
Scroll to view and press the
8.
Pressing the
9.
You can either schedule a new event or edit or erase an old one. Press
the
key to select the option.
for Date.
to continue.
key displays the options View and Add new.
key.
key opens the Add new, Edit, Erase options.
79
To Do List
The To Do List can help you keep track of, and prioritize the things you
need to do. You can enter and prioritize up to 30 items.
How to create a to do list
1. Press
to display the menu.
2.
Press
for Scheduler.
3.
Press
for To Do List.
4.
Select the
5.
Select the required option by toggling the
6.
Enter your To Do Item.
7.
Press
8.
Enter the time and date and press
9.
Using the navigation keys, set the priority for a To Do List item. Your
choices are High and Low.
10. Press
key for options.
key.
to save. This action opens the Time/Date screen.
to continue.
to save your prioritized To Do List item.
To view, edit, add, or erase to do list items
1. Press
for the menu.
2.
Press
for Scheduler.
3.
Press
for the To Do List.
80
4.
Press
and using the navigation keys find the To Do List item you
want to change.
5.
Press the
key to select the correct option. Your choices are:
¨Add New
¨Edit
¨Erase
6.
Continue to add a new item, edit or erase an existing item by following
the prompts.
Countdown
Have you ever wanted to know how much time it takes you to do
something, or how many minutes, hours, days and months until a
special event? The Countdown option can help you answer these
questions. You can create up to 30 countdown timers using this
feature.
Creating a Countdown item
Use this procedure the first time you program a countdown timer or if
you’ve erased them all.
1.
Press
to display the menu.
2.
Press
for Scheduler.
3.
Press
for Countdown.
4.
The screen prompts for new countdown. Enter a name for your new
countdown timer.
5.
Press
when complete.
81
6.
Enter the date and time that you want to “Countdown” to. For example, if
today’s date is November 10, 2000 and you wish to know how many
months, days, and hours are left before 7:00 PM February 14, 2001 enter
the time 07:00 PM and the date 02/14/2001.
¨You can press the digital keys
or
for AM or PM. The
volume keys can also be used to toggle between AM and PM.
¨Countdown timers can be entered for dates up to 2099.
7.
Press
to store the countdown timer.
Adding, editing, and erasing a countdown item
Use this procedure if you have a countdown timer(s) already
programmed.
1.
Press
to display the menu.
2.
Press
for Scheduler.
3.
Press
for Countdown.
¨Countdown timers display in order of the least amount of time passed
since the countdown commenced, and least amount of time remaining
until the specified date.
4.
Press
to display options.
¨Follow the screen prompts to enter a new countdown timer.
¨. Follow the screen prompts to edit the timer.
¨Follow the screen prompts to erase the timer.
¨Press
for Exit. This returns the screen to viewing the already
programmed countdown timer(s).
82
World Time
World Time displays what time it is in twenty-four different time zones
around the world together with one or more major cities, states,
regions or countries in a time zone.
Checking the Current Time in Another City or Country
1. Press
to display the menu.
2.
Press
for Scheduler
3.
Press
for World Time
4.
The display screen shows two globes. Both set to the GMT default.
5.
Press
6.
Press
to change time zone.
or
to return to standby mode.
Calculate
You can perform calculations including addition, subtraction,
multiplication and division on your phone.
Performing a calculation
1. Press
to display the menu.
2.
Press
for Scheduler.
3.
Press
for Calculator.
4.
Press digit keys to enter the first number in your calculation. Numbers
can be up to 9 digits long.
¨Press
to enter a decimal point.
¨Press
to change the sign of a number to a negative (-).
83
5.
Use the scroll keys (
Your choices are:
) to set the operator for your calculation.
¨[+] addition
¨[-] subtraction
¨[x] multiplication
¨[/] division
6.
Press the digit keys to enter the second number of your calculation.
7.
Press
8.
You can continue to perform calculations with the same operator or
change the operator and continue your calculations. Every time that you
change the operator, the previous calculation is performed and the result
is displayed as the top number in the display.
9.
Press
84
to perform the calculation and see the result, or:
to perform the calculation and view the result.
Alarm
Your phone has an alarm clock function with three separate alarms.
Each alarm can be set to go off once, or daily at a set programmed
time. Once you set an alarm, it is easy to change it’s time or to turn it
off.
Alarm set
1. Press
to display the menu.
2.
Press
for Scheduler.
3.
Press
for Alarm Clock.
4.
Select the alarm you want to set by pressing
Your choices are ‘Once’ ‘Daily’, or ‘Off’.
5.
Press
6.
Follow the prompts to save the alarm setting of choice.
7.
Press
, to the left or right.
to select the desired alarm.
to return to the previous menu.
To edit a programmed alarm
1. Press
to display the menu.
2.
Press
for Scheduler.
3.
Press
for Alarm Clock.
4.
Select the alarm you want to set by pressing
Your choices are ‘Once’ ‘Daily’, or ‘Off’. Press
5.
Edit the time and press
, to the left or right.
.
.
85
Sounds
Ringer Options
Your phone provides a variety of ringer options through the Sounds
menu. These options allow you to customize your ringer type and
ringer volume settings in order to easily recognize a certain type of
incoming call.
Adjusting Ringer Volume (Quickly)
From the standby mode, you can adjust the volume of the ringer by
on the side of the phone (8
pressing the volume keys
levels) as well as to 1 Beep/Vibrate. If the flip is open while you are
making this setting, leave it open until the phone returns to standby
mode (this allows the phone time to store the setting).
Adjusting Voice Volume during a Call
You can adjust the (optional) headset volume during a call using the
volume keys
on the side of your phone
Ringer Volume
Three options can be found under the Ringer Volume option for
Sounds. To activate these options:
1.
Press
to display the menu.
2.
Press
for Sounds.
3.
Press
for Ringer Volume. The three options display.
¨ 1 Calls
¨ 2 Messages
¨ 3 Alarm.
86
4.
Either press the numeric key, or scroll to the option and select it. The
screen displays the volume icon which changes according to the setting
selected.
5.
Press
to save the desired volume. The display icon changes to
reflect the new setting.
6.
When the desired setting is reached, press the
setting.
7.
You can press the
key to save the
key to return to the previous menu at any time.
Ringer Type
Five options are found for Ringer type in the Sounds menu. They are:
¨Voice Calls
¨Messages
¨Alarm
¨Data/Fax In
¨Schedule
Each of these allows you to specify the desired type of ringer.
To activate these options:
1.
Press
to display the menu.
2.
Press
for Sounds.
3.
Press
for Ringer Type.
87
4.
Either press the numeric key, or scroll and select the option of choice
using the
key to activate that option.
5.
Press the scroll key to scan through the nine ringer types, twenty four
melody tones, and ten downloadable ring tones. Each tone plays as you
scroll through the options.
6.
When the desired ringer type is displayed, press
setting.
key to save the
Voice Calls
To activate these options:
1.
Press
to display the menu.
2.
Press
for Sounds.
3.
Press
for Ringer Type.
4.
Press
for Voice Calls.
Use the scroll key to select from the twenty four melody tones, nine
distinctive rings, and ten downloaded ring tones. To select your choice
.
of melody or ringers, press
Messages
The Messages menu contains three options:
¨ Voice Mail
¨ Text
¨ Web Msg
To activate these options:
1.
88
Press
to display the menu.
2.
Press
for Sounds.
3.
Press
for Ringer Type.
4.
Press
for Web.
5.
Press the corresponding numeric key, or scroll to select the type of
message option then choose from twenty four melody tones, nine
distinctive rings, and ten downloadable ring tones. To lock in your choice
of melody or ringer press
.
6.
To cancel, press
to return to the previous menu.
89
Browser MSG
Browser messages are messages that are received from the Internet.
You must have an account setup online for this option.
Note: You must have web service from the carrier for this option to work. All
applicable charges apply when connecting to the web browser.
Any email that is received on your internet account is displayed. To
send a message, the person enters your phone number.
Viewing Browser Messages
To view browser messages:
1.
Press
to display the Mail Kit menu.
2.
Press
for Inbox.
3.
Press
for Web.
Key Beep
Key Beep allows you to designate the volume of the tone when a key is
pressed on the phone. There are nine levels of volume associated with
the key beep.
To activate Key Beep:
1.
Press
to display the menu.
2.
Press
for Sounds.
3.
Press
for Key Beep.
Alerts
Your phone beeps to notify you of an event or action, this is called an
alert. You can easily turn alert beeps on or off. The other party does not
hear the alerts when you are using the phone.
90
Minute beep
You can set the minute beep option to sound an alert 50 seconds
before each elapsed minute to remind you of the length of the current
call.
To turn minute beep on or off:
1.
Press
to display the menu.
2.
Press
for Sounds.
3.
Press
for Alerts.
4.
Press
for Minute Beep.
5.
Scroll through the Alert menu between Off/On. When the desired setting
is displayed, press
to save.
6.
To cancel, press
to return to the previous menu.
Service
To set the service alert On or Off:
1.
Press
to display the menu.
2.
Press
for Sounds.
3.
Press
for Alerts.
4.
Press
for Service.
5.
Scroll between On/Off. When the desired setting is displayed, press
to save.
91
6.
To cancel, press
to return to the previous menu.
Connect
With the Connect option set to on, the phone sounds a connect alert
tone when your call is connected.
To set the connect alert On or Off:
1.
Press
to display the menu.
2.
Press
for Sounds.
3.
Press
for Alerts.
4.
Press
for Connect.
5.
Scroll between On/Off. When the desired setting is displayed, press
to save.
6.
To cancel, press
to return to the previous menu.
Disconnect
When the Disconnect option is set to on, the phone sounds a
disconnect alert tone a call is dropped or failed.
To set the disconnect alert On or Off:
1.
Press
2.
Press
for Sounds.
3.
Press
for Alerts.
4.
Press
for Disconnect.
92
to display the menu.
5.
Scroll between On/Off. When the desired setting is displayed, press
to save.
6.
To cancel, press
to return to the previous menu.
Fade
When the Fade menu option is set to on, the phone sounds an alert
when a dropped call occurs during conversation because of a signal
fade.
¨Press
to clear the message and return to standby mode.
¨If the dropped call was an outgoing call from your phone, you can
redial the number automatically by pressing
twice.
To set the fade alert On or Off:
1.
Press
to display the menu.
2.
Press
for Sounds.
3.
Press
for Alerts.
4.
Press
for Fade.
5.
Scroll between On/Off. When the desired setting is displayed, press
to save.
6.
To cancel, press
to return to the previous menu.
93
Roam
When the roam alert option is turned On, a distinctive alert tone is
heard when you leave the network coverage area.
To set a distinctive ringer for incoming roam calls:
1.
Press
to display the menu.
2.
Press
for Sounds.
3.
Press
for Alerts.
4.
Press
for Roam.
5.
Scroll between On/Off. When the desired setting is displayed, press
to save.
6.
To cancel, press
to return to the previous menu at any time.
Privacy
When the Privacy option is set to on, the phone sounds an audible beep
when you loose a private encrypted CDMA line. For this option to work
correctly, you must have the enhanced privacy option set in the Security
options. This option is enabled by default.
Note: You can also enable the Privacy mode option during a call to make the
call secure. Simply enable the Privacy mode from the security menu while
connected to a call.
When the privacy option is enabled and you are located in an area that
supports the privacy option, the Privacy icon
is displayed at the
top of the screen. If the privacy mode is enabled and you are located in
an area that does not supports privacy, a outlined privacy icon is
The Digital and Privacy mode icons cycle back and
displayed.
forth.
94
1.
Press
to display the menu.
2.
Press
for Sounds.
3.
Press
for Alerts.
4.
Press
for Privacy.
5.
Scroll between On/Off. When the desired setting is displayed, press
to save.
6.
To cancel, press
key to return to the previous menu.
Voice Volume
The Voice Volume option allows you to adjust the voice volume of the
receiver.
1.
Press
to display the menu.
2.
Press
for Sounds.
3.
Press
for Voice Volume.
4.
Scroll between Softest - Loudest. When the desired setting is displayed,
press
to save.
5.
To cancel, press
key to return to the previous menu.
Note: The volume keys can be used to adjust the call volume during a call.
95
Roam Ringer
When this option is On, a distinctive ringer is heard when an incoming
call is received outside your local coverage area.
To set the roam ringer On or Off:
1.
Press
to display the menu.
2.
Press
for Sounds.
3.
Press
for Roam Ringer.
4.
Scroll between On/Off. When the desired setting is displayed, press
to save.
5.
To cancel, press
96
to return to the previous menu.
Power On/Off
When the Power On/Off option is set to on, the phone sounds an alert
when:
¨ When the handset is powered on or off.
¨ The phone experiences a dropped or failed call.
¨ The phone enters or leaves a service area.
To set the sound alert On or Off:
1.
Press
to display the menu.
2.
Press
for Sounds.
3.
Press
for the Power On/Off display screen.
4.
Scroll between Sound On/Off. When the desired setting is displayed,
press
to save.
5.
To cancel, press
to return to the previous menu.
97
Display
These settings determine what is displayed on the phones LCD screen.
Display Options
Your phone has several display options. They allow you to:
¨
¨
¨
¨
¨
Display your own phone number.
Control when and how long your backlight is active.
Define a personal greeting up to 30 characters.
Set the language (English or Spanish) used on your screen.
View hardware and software versions of your phone.
Backlight
There are several options for setting the backlight features.
When the phone flip is closed, the backlight remains off conserving
battery power. When the flip is open, the length of time that the
backlight remains active can be set to 7, 15, or 30 seconds.
To select backlight options:
1.
Press
to display the menu.
2.
Press
for Display.
3.
Press
for Backlight.
98
4.
Scroll through the menu options:
¨Always On
¨Always Off
¨7 seconds
¨15 seconds
¨30 Seconds
¨On when flip open
5.
When the desired option is displayed, press
to save.
Banner
The Banner option allows you to edit the banner displayed on the
standby screen. It can also be used as your ID when sending an e-mail.
Enter the banner desired using the alphanumeric keys.
To select banner options:
1.
Press
to display the menu.
2.
Press
for Display.
3.
Press
for Banner.
4.
Press
to view the options:
¨T9 Word
¨ABC
¨Symbol
¨123
99
¨Exit
5.
Press
to scroll through the options.
6.
When the desired option is displayed, press
7.
Enter your banner.
8.
Select
to select.
to save it.
Animation
The Animation option allows you to select the animation sequence for
your phone.
To select animation options:
1.
Press
to display the menu.
2.
Press
for Display.
3.
Press
are:
for Animation. The options appearing on the display screen
¨Power On
¨Power Off
¨Idle 1
¨Idle 2
4.
Choosing the ‘Power on’ option allows you to scroll through 8 different
animation images.
5.
When the desired option is displayed, press
100
to save.
6.
Pressing
returns you to the Animation options menu.
7.
Choosing the ‘Power off’ option allows you to scroll through the
animation images available.
8.
When the desired option is displayed, press
to save the setting.
Selecting
returns you to the Animation options menu.
9.
Choosing the ‘Idle 1’ option allows you to scroll through the 8 Idle 1
images available.
10. When the desired option is displayed, press
11. Pressing
to save.
returns you to the Animation options menu.
12. Choosing the ‘Idle 2’ option allows you to scroll through the 8 Idle 2
images available.
13. When the desired option is displayed, press
14. Pressing
to save the setting.
returns you to the Animation options menu.
My Phone Number
The My Phone Number option displays the telephone number of the
phone.
To display my phone number:
1. Press
to display the menu.
2.
Press
3.
Press
for the Display.
for My Phone#.
101
4.
Press
to return to standby mode.
To view your phone number during a conversation:
1. Press
to display the In-Use Menu.
2.
Press
3.
Press
for My Phone #. Your phone number will display.
to return to the previous menu.
Language
The Language option changes the language on the phone to English or
Spanish.
To change languages:
1.
Press
to display the menu.
2.
Press
for Display.
3.
Press
for Language.
4.
Scroll between English, French, or Spanish.
5.
When the desired option is displayed, press
102
to save.
Set Time
Your phone is equipped with a standard clock.
To set the clock:
1.
Press
to display the menu.
2.
Press
for Display.
3.
Press
for Time.
4.
Scroll to select On or Off.
5.
When the desired option is displayed, press
6.
Press
to save the setting.
to return to the previous menu.
Auto Hyphen
With the Auto Hyphen option set to on, your phone can automatically
hyphenate numbers. For example: 972-761-0000.
Here’s how it is configured:
1.
Press
to display the menu.
2.
Press
for Display.
3.
Press
for Auto Hyphen.
4.
When the desired option is displayed, press
5.
Pressing
to save.
returns you to the previous menu.
103
LCD Contrast
The LCD (Liquid Crystal Display) has contrast setting that can help you
see the screen better in different lighting conditions.
To set the LCD contrast:
1.
Press
to display the menu.
2.
Press
for Display.
3.
Press
for LCD Contrast.
4.
Scroll between the contrast settings to determine the most visible.
5.
When the desired contrast setting is displayed, press
to save.
Version
The Version menu displays the current hardware/software version that
is installed in your phone.
This feature is helpful if you need to call customer care.
To view the version:
1.
Press
2.
Press
for Display.
3.
Press
to view the Version information.
4.
Press
5.
Press
104
to display the menu.
to quit.
to return to the previous screen.
Voice dial
Voice Dialing
Your phone features voice dialing. When on a digital or analog
network, you can call up to 20 stored names simply by speaking the
name into the microphone. Using the voice dialing option requires that
you first program the phone to recognize the name of the person you
are calling.
Tips on Recording Names
¨ Avoid recording similar names phonetically. If you record a similar name
¨
¨
¨
¨
to one that is already stored in voice-dial memory, the phone requests
another name.
Avoid recording in a noisy place.
Speak clearly and naturally.
Avoid very long or very short names. Names with two to five syllables are
recommended.
If the voice dial entry does not connect properly, you may need to record
the name and number again.
105
Record
The phone provides voice prompts and screen displays to guide you
through the recording process.
To program the phone for voice dialing:
1.
Press
2.
Press
for Voice Dial.
3.
Press
for Record. The phone prompts you to record a name.
4.
Wait for a beep and then say the name. The phone stores the name and
then prompts you to speak the name again.
5.
Respond to the prompt by repeating the name after the beep exactly as
you did the first time. If the name is accepted, the phone requests the
phone number.
6.
Enter the phone number using the key pad.
7.
To store the phone number, press
. The number you entered
displays, along with the notification ‘Recorded’. If the number you
entered matches a name/number already stored in your Phone Book,
then the name also displays, together with the notification ‘Recorded’.
8.
The screen returns to the Phone Book menu.
9.
This option allows you to add, edit, or erase individual voice dial entries.
A list of entries displays.
106
to display the menu.
Play/Erase
The Play/Erase option is used to review and erase dialing entries.
To play voice dialing entries:
1.
Press
to display the menu.
2.
Press
for Voice Dial.
3.
Press
for Review. A list of stored voice dial numbers displays.
(The names also display if stored in the Phone Book).
4.
Press the digit key to select the desired entry or scroll to the desired entry
and press
. The recorded name is vocalized. You can quickly
scroll entries without having to listen to each one, or you can listen to
them all as they play in order.
5.
Press
6.
When the last entry is played, the phone returns to standby mode.
to return to the previous screen.
To erase all voice dialing entries:
1.
Press
to display the menu.
2.
Press
for Voice Dial.
3.
Press
for Play/Erase
4.
Press
5.
Press
to Erase All the entries. The display screen will inform you
when this action has taken place.
for Erase All.
107
6.
If you wish to exit without removing any voice dialing entries press
and you will return to the previous menu.
Set Active
Voice dialing is always on once you have programmed the phone to
accept voice dialing entries and associated the phone numbers. To
. Then say the name
place voice dialing calls, press and hold
into the phone after you hear the voice prompt and the beep.
You can also initiate a voice dialing call by simply opening the phone’s
flip( this option is selected through the menu).
To change voice dialing setup options:
1.
Press
to display the menu.
2.
Press
for Voice Dial.
3.
Press
for Set Active.
4.
Scroll between the following options:
¨ Enables voice dialing only by pressing and holding
.
¨Enables voice dialing when the phone’s flip is open.
Training
To use voice dialing, you must train the phone. To train the phone, you
are asked to say the word ‘Yes’ and then to repeat it. You are then
asked to say the word ‘No’ and to repeat it.
To train your phone:
1.
Press
2.
Press
108
to display the menu.
for Voice Dial.
3.
Press
for Training.
4.
Hold the phone to your ear and follow the instructions.
Undo Train
To undo the training, follow these steps:
1.
Press
to display the menu.
2.
Press
for Voice Dial.
3.
Press
for Un Training.
Your phone’s screen displays’ un-training control words proceed?’
to ‘Un train’ or
to return to the previous menu.
Select
109
Voice memo
Voice Memo
Your phone can record five separate voice memos. The total voice
memo time for all five memos can be up to four minutes in length.
When recording, a timer is displayed that indicates the length of the
recording. An alert sounds and the phone tells you that the recording
time has expired.
1.
Press
to display the menu.
Note: You can also press the voice memo button located on the side of the
phone.
2.
Press
for Voice Record.
3.
Press
for Voice Memo.
4.
The screen displays:
“Begin recording after the prompt tone”.
5.
Speak into the phone to record the Voice Memo.
6.
Press
7.
The Record Finished screen is displayed with the following choices:
to stop recording.
¨1. Review
¨2. Rerecord
¨3. save
110
8.
Press
to review the voice memo. The screen displays the length
of the recording with the date and time.
9.
Press
10. Press
to rerecord the voice memo.
to save the voice memo and add a title.
11. The Title Edit screen is displayed. Enter a title and press
to save.
Play/Erase
To review a voice memo:
1.
Press
to display the menu.
2.
Press
to display the Voice Record menu.
3.
Press
for the Voice Memo menu.
4.
Press
for Play/Erase. The Vmemo List is displayed.
¨Press
to play the voice memo.
¨Press
to go back to the previous menu or pause a playing voice
memo.
¨Press
to list the following options:
Info - Displays info about the voice memo
Erase - Erases the voice memo
Erase All - Erases all voice memos
5.
After reviewing the voice memos, press
mode or close the flip.
to return to standby
111
Call Answer
Call Answer allows you to have incoming messages stored directly into
the phone. When the Call Answer option is turned on, the callers
message is recorded directly into memory. This uses the voice memo
memory, so the amount of time available is dependent on the available
memory less any voice memos. The total talk time is 240 seconds.
On/Off
This option allows you to activate the option to enable Call Answering.
To enable Call Answering:
1.
Press
to display the menu.
2.
Press
for Voice Record.
3.
Press
for Call Answer.
4.
The screen displays:
¨1. On/Off
¨2. Config
¨3. Inbox
5.
Press
to enable or disable Call Answering.
6.
Press
to select Config. The screen displays:
¨Screening - This menu turns the screening speaker on/off.
¨Wait Time - The wait time can be set to No Ring, After 3 sec, 5 sec, or
10 sec.
112
7.
Press
to save your choice and return to the previous screen
8.
Pressing
returns you to the previous screen.
Default Greeting
A default greeting is used to welcome incoming callers when the Call
Answer option is enabled. The default message is “Please leave a brief
message after the tone”.
Call Screen
Use this option to activate the Call screening feature.
1.
Press
to display the menu.
2.
Press
for Voice Record.
3.
Press
for Call Answer.
4.
Press
for Config.
5.
Press
for Screening. The Call screening feature will display.
6.
Press
to toggle between Screening Speaker On or Off. Press
to save your option.
7.
Press
to return to the previous screen.
113
Wait Time
Use this option to set the amount of time the caller waits to leave a
message on the phone.
1.
Press
to display the menu.
2.
Press
for Voice Record.
3.
Press
for Call Answer.
4.
Press
for Config.
5.
Press
for Wait Time.
6.
Press
left or right to display the following wait times:
¨No Ring
¨After 3 seconds
¨After 5 seconds
¨After 10 seconds
7.
Press
down and highlight “Save”.
8.
Press
again to save.
114
Inbox
1.
Press
to display the menu.
2.
Press
for Voice Record.
3.
Press
for Call Answer.
4.
Press
for Inbox.
5.
The Message List is displayed. The following options are available:
6.
¨Press
to Play the message.
¨Press
to go back.
¨Press
for option.
If
is pressed, the following options are available:
¨Info - Press 1 to displays detailed information about the call.
¨Erase - Press 2 to erase the message.
¨Erase All - Press 3 to erase all messages.
¨Talk - Press 4 to call the number.
¨Save - Press 5 to save the number in the Phone Book.
115
Games
Game Menu
Using your phone you have the ability to play the following games:
1.
Push Push
2.
Fly Ribon
3.
Puzzle World
4.
Spider Hunter
Push Push
To open Push Push:
1.
Press
to display the menu.
2.
Press
for the Games menu.
3.
Press
for the Push Push game.
4.
When the game’s ‘start screen’ is displayed, press
press
for key commands.
to start and
Object
The object of the game is to push the balls into the little house. The ball
can be pushed left, right, up, or down. It cannot however be pushed
backwards. There must always be a space to push the ball forward or
else the ball is stuck and the level cannot be completed. Two balls
cannot be pushed together, only one ball at a time may be pushed.
Once the ball has been pushed into the house, another ball can push
the house if another house is located behind it. You can go back one
.
move by pressing
116
Key Commands
The following options are displayed when available:
KEY HELPER: Displays each key’s function.
- Move Up
- Move Down
- Move Left
- Move Right
- Previous stage
- Next stage
- Restart stage
- Clr Undo
- End Exit
Fly Ribon
To open Fly Ribon:
1.
Press
to display the menu.
2.
Press
for the Games menu.
3.
Press
for the Fly Ribon game.
4.
Press
to start.
Object
The object of the game is to fly the ribon through a maze of obstacles.
button. Move the flight
The control the path of the ribon, use the
path of the ribon up or down to avoid the wall. The longer the distance,
the faster the ribon goes.
117
Puzzle World
To open Puzzle World:
1.
Press
to display the menu.
2.
Press
for the Games menu.
3.
Press
for the Puzzle World game.
4.
Use
to select the type of puzzle. The choices are 3x3 or 4x4.
Object
The object of the game is to rearrange the tiles of the puzzle to make
the picture display correctly. To rearrange the tiles, you can move a tile
key. If you cannot figure out
to the next available slot using the
to solve.
the puzzle, press
118
Spider Hunter
To open Spider Hunter:
1.
Press
to display the menu.
2.
Press
for the Games menu.
3.
Press
for the Spider Hunter game.
4.
Press any key to start the game.
5.
Select the level by pressing
for easy or
for hard.
Object
The object of the game is to drop the potted plants on the spiders from
key. The
the top of the wall. To drop the plants, press the
spiders will attempt to reach the top of the wall. You start out with three
hearts. If a spider reaches the top, you loose one heart. When you
loose all three, the game is over. A high score is recorded each time
you play.
119
Setup
Auto Retry
When the Auto retry option is activated, your phone automatically
retries the last call up to ten times when a connection fails.
How to enable Auto Retry.
1.
Press
to display the menu.
2.
Press
for Setup.
3.
Press
4.
Press
to toggle between Off, every 10 seconds, every 30 seconds
and every 60 seconds. Press the same key in the center to save your
option.
5.
Pressing
120
for Auto Retry. The Auto Retry screen displays.
returns you to the previous screen.
Auto Answer
When the Auto answer option is activated, your phone automatically
answers calls after a specified number of rings. This option is useful
when driving or you are unable to answer the phone.
If Auto Answer is set to ‘Off’, the phone does not answer the incoming
call. If you do not answer the call it is automatically stored in the
Missed Call log.
How to enable Auto answer:
1.
Press
to display the menu.
2.
Press
for Setup.
3.
Press
for Auto Answer. The Auto Answer screen displays.
4.
Press
to scroll between Off, after 1 second, after 3 seconds, and
every 5 seconds. Press
to save your option.
5.
Pressing
returns you to the previous screen.
121
Answer Mode
When the Answer mode option is activated, your phone allows you to
select a specific answer mode when receiving an incoming call. Your
phone can be preset to answer when you do any of the following:
¨by send key: You can answer the phone by pressing
¨by flip open: You can answer the phone by opening the phone’s flip.
¨by any key: You can answer the phone by pressing any key on the
phone.
To set the Answer mode:
1.
Press
to display the menu.
2.
Press
for Setup.
3.
Press
for Answer Mode.
4.
Press
key’. Press
to scroll between ‘by flip open’, ‘only by SEND key’, ‘by any
to save.
5.
Pressing
returns you to the previous screen.
Tone Length
Some older phones only recognize longer tones. Therefore you may
have to change the tone length for some calls. When calling a paging
system, remember that your phone should be set in the normal mode.
To change the Tone length:
1.
Press
to display the menu.
2.
Press
for Setup.
122
3.
Press
for Tone length. The Tone length screen displays.
4.
Press
save.
to scroll between ‘Normal’, and ‘Long’. Press
5.
Pressing
to
returns you to the previous screen.
Set NAM
Your Samsung phone can store two NAMs (Numerical Assignment
Module, and is essentially your phone number). This allows you to
have two phone numbers on one phone. You can switch your service
back and forth between the two numbers using the NAM menu.
Note: Each NAM has an associated set of Roaming settings. See “Set Network”
on page 128 for information on these settings.
To select a different NAM:
1.
Press
to display the menu.
2.
Press
for Setup.
3.
Press
for Set NAM.
4.
Scroll between NAM-1 or NAM-2.
5.
When the desired option is displayed, press
6.
Press
to save.
to exit without saving.
Note: If you change your NAM, then the phone automatically reboots and
acquires service using the new NAM.
123
Roam Option
Your Samsung phone allows you to set the roaming option.
To select the System:
1.
Press
to display the menu.
2.
Press
for Setup.
3.
Press
for Roam Option. The Roam Option screen is displayed.
4.
Scroll between ‘No Roaming’, ‘Automatic-A’ or ‘Automatic-B’.
5.
When the desired option is displayed, press
6.
Press
to save.
to exit without saving.
Data/Fax
Your Samsung phone is capable of sending and receiving digital data
and fax calls when connected to a computing device (laptop, desktop,
hand held, palmtop, etc.) running Windows 95, Windows 98, Windows
2000, Windows ME, or Windows NT. Your Samsung phone functions
similar to a typical modem on your PC, enabling you to use wireless
data with a variety of Windows software applications.
To use digital data or fax services with your Samsung phone, you will
need to obtain a digital data/fax cable kit from your service provider.
This kit contains the necessary cables, software, and documentation
required for you to connect and use your Samsung phone with your
computing device.
Note: The phone must be on a digital network to receive or send faxes and
icon is displayed.
data. When you are in a digital network, the
To setup Data/Fax:
124
1.
Press
to display the menu.
2.
Press
for Setup.
3.
Press
for Data/Fax. The Data Mode screen displays.
4.
Use the scroll keys to toggle between:
¨Data/Fax Off: (No incoming Data/Fax calls can be received.)
¨Fax for Next Call: (Waiting for Fax Call. No Voice Calls can be
received for next 10 minutes.)
¨Fax until Powered Off: (No Voice Calls can be received.)
¨Data for Next Call: (Waiting for data call. No voice calls can be
received.)
¨Data until Powered Off: (No voice calls can be received.)
5.
When the desired option is displayed, press
6.
Press
to save.
to exit without saving.
125
Receiving a fax
To receive a fax:
1.
Ensure that your phone is connected to your PC and is powered on.
2.
Press
to display the menu.
3.
Press
for Setup.
4.
Press
for Data / Fax.
5.
Scroll and select “Fax for Next Call”.
6.
Press
to save. The screen displays “Waiting for Fax call.
Note: No incoming Voice Calls can be received for 10 minutes.” Your phone
then returns to the standby
7.
In the Fax program on your PC, setup the Answer mode. Click on
“Receive” and select one of the following:
¨Automatic Receive (recommended)
¨Manual Receive
Note: Once you have set your phone’s mode to “Fax for Next Call”, you cannot
receive regular voice calls until you change back to “Data/fax Off” or a fax has
been received.
126
Changing your phone back to voice calling
1. Press
to display the menu.
2.
Press
for Setup.
3.
Press
for Data/Fax.
4.
Scroll and select “Data/Fax Off”.
5.
Press
to save. The screen displays “No incoming Data/Fax calls
can be received”.
Ending a fax or data call
The usual way of ending a call, like closing the phone, do not end a fax
or data call. The connection must be closed through the application on
your computer.
Note: Disconnecting the data cable or turning off your phone will also end a
data or fax call, but may disrupt your computer.
Sending a fax or data file
When connected to a computing device, your phone allows wireless fax
and data transmissions. Your computing device software initiates the
call to the destination phone number. Your Samsung phone functions
as a wireless modem to send the fax or data file to the number
designated by your PC software.
127
Set Network
Your phone is preset to digital mode. If you wish to place a call in
analog mode use this menu. Your phone allows you to search for
analog service.
To Set Network:
1.
Press
to display the menu.
2.
Press
for Setup.
3.
Press
for Set Network.
4.
Press
to scroll between the options and press
to accept.
¨Networks: The phone allows for the following options:
¨ Automatic
¨ 1-Time Analog Call
¨Automatic - Automatically looks for all forms of service (1.9 MHZ,
800 MHZ, AMPS) according to the PRL (Preferred Roaming List)
supplied by the carrier.
¨1-Time Analog Call - Automatically switches the phone into analog
mode for one call. When the call is completed, the phone
automatically resets to the normal setting.
128
Mail Kit
The Mail Kit allows you to create, send, read, and save your messages.
Your phone receives four kinds of messages: voicemail, text, numeric
or
pages, and browser messages. To access the Mail kit, press
.
The Mail kit contains the following menus:
¨New Messages
¨Inbox
¨Outbox
¨Delivery
¨MSG Setup
Mobile Originating (MO) SMS Text Messaging
Your phone supports Mobile Originating (MO) SMS Text Messaging.
The T-300 is able to send messages containing up to 180 characters,
and receive text messages up to 255 characters. When a message is
received, the phone sounds an alert tone and a new message pop up
window is displayed on the screen.
Messages being sent can contain a total of 160 characters in the
message body.
Note: A total of 94 messages or 16KB of memory is available for messages.
This memory is shared between all messages. The number of messages stored
depends on the length of the messages.
Creating a New SMS Message
To create a new message:
1.
Press
to display the Mail Kit menu.
129
2.
Press
for New Message.
3.
Enter the email address or phone number of the recipient. Press
to display the following entry options:
¨T9 Word
¨ABC
¨Symbol
¨123
¨Exit
¨.com
¨.net
¨Phonebook
Note: Multiple addresses can be entered into the “Message To” screen by
separating the address entries with a space. For example;
“[email protected]” “[email protected]”. For more information, see
“Multiple Addressing” on page 132.
4.
Press
5.
The “Message” screen is displayed.
6.
Press
¨T9 Word
¨ABC
¨Symbol
¨123
130
to “Accept” and continue.
to select the desired mode of character entry. They are:
¨Exit
¨Canned
7.
Press
to return to the message body.
8.
Key in the message using the key pad. A counter in the top right corner of
the display screen indicates the remaining characters available.
9.
Press
to “Accept” the message.
10. The following choices are available:
¨Send - Send the message
¨OK - Save the Message
¨CLR - Returns to the Edit Menu
¨END - Discard the message and quit.
11. Press
.
Note: Your phone can receive messages in both Standby and InUse modes.
When you are on a call and a message is received, your phone automatically
mutes the ringer and provides the call waiting tone.
131
Multiple Addressing
Multiple addressing allows you to send mobile SMS messages to
multiple email or phone numbers by entering them in the “Message
To” screen when creating a new SMS message.
To enter multiple addresses:
1.
Press
to display the Mail Kit menu.
2.
Press
3.
Enter the email address or phone number of the recipient.
4.
Press
and enter the second email or phone number. Follow this
procedure until all the desired addresses are entered.
for New Message.
Note: Remember there is a total of 180 characters per message allowed
including the email address characters. The more characters used in the email
addresses, the less allowed in the actual message.
Options Menu
The options menu consist of the following delivery options:
¨ Message Priority - This setting sets the message priority with the following
¨
132
choices:
— Normal
— Urgent
Validity Period - This setting determines how long the message is valid for
the intended user to read. The available choices are:
— Always
— 30 min.
— 1 hour
— 2 hours
— 12 hours
— 1 day
¨
¨
¨
¨
¨
— 2 days
— 3 days
Deferred Delivery - This setting allows you to delay the delivery of the
outgoing message. The available choices are:
— Now
— 30 min.
— 1 hour
— 2 hours
— 12 hours
— 1 day
— 2 days
— 3 days
Delivery Acknowledge - This setting allows you to request a delivery
acknowledgement that the message was received by the user.
Save “Sent” Message - This setting allows you to save a copy of the
outgoing message in the Outbox.
Confirm - This confirms and saves the settings that have been changed.
Revert - This automatically reverts the settings back to the original default
settings.
Replying to a Message
1.
View the new message.
2.
Press
3.
Press
4.
Press
5.
Enter the message using the keypad. Press
6.
Use
to display the options.
to “Reply”.
to open the message body.
to highlight the Action menu. Press
when finished.
.
133
7.
Press
.
Viewing Messages
To view a message:
1.
Press
to display the Mail Kit menu.
2.
Press
for Inbox.
3.
Press
for Text.
New Messages
1.
Press
for the menu.
2.
Press
for Mail Kit.
3.
Press
for New Messages.
4.
The “Message To” screen is displayed.
5.
Press
for the Mode menu. Select the desired entry mode from the
following options:
¨Phonebook
¨T9 Word
¨ABC
¨Symbol
¨123
¨.com
¨.net
134
¨Exit
Note: If you choose the “Phonebook” option, follow the prompts to return to
the “Message To” screen.
6.
When you have entered the recipient information in the “Message To”
screen, press
to continue. The “New Message” main screen is
displayed.
7.
Enter the desired message in the space provided. The number displayed
in the upper right corner displays the amount of characters remaining
that can be entered.
8.
When finished, press
screen.
to return to the “New Message” main
Note: If you receive a call while composing a new message, a pop up window
is displayed. Select SEND to answer the incoming call. To save the message
being entered, press CLR (As long as a call is NOT disconnected while saving
the created message.)
9.
Press the
button down and highlight the “Action” field.
10. Press
to display the “Message Action” menu. The following
choices are available:
¨SEND - Send the message to the recipient.
¨OK - Save the message so you can send it later.
¨CLR - Returns you back to the “New Message” main screen.
¨END - Discards the message and exits the MO-SMS system.
11. Press
to send the message. (Animation is displayed showing that
the message has been sent.)
135
Inbox
Your phone receives incoming messages in both standby and send
modes. When you are on a call and a message is received, your phone
automatically mutes the ringer and provides the call waiting tone (this
is to avoid ringing in your ear while you are trying to speak).
Receiving a message in standby mode
When your phone receives a message in standby mode, the ringer
sounds (unless turned off), and the screen displays (“New Voicemail”,
“New Text”, “New Page” or “New BrowserMsg”). The message
indicator is displayed and remains on the screen until you listen to the
new voicemail message, read the new Browser message, text message
or numeric page.
Receiving a message while on a call
If you receive a new text message or numeric page while on a voice
call, the Call Waiting tone sounds and a pop-up message is displayed.
You can easily review the new message while on the call by just
. Your call is not disconnected and the caller is placed
pressing
on hold while you review the text message. Press
again to return
to the original call.
Receiving a Message in Standby Mode
When a message is received in Standby mode, the ringer sounds and an
alert message is displayed on the screen to identify the type of message.
The message indicator remains on the screen until you listen or read
the new message.
Reviewing numeric pages, text messages, and browser
messages
When a message arrives, you can review it by pressing
, or the
. The Messages menu
message can be stored by pressing
136
provides options for reviewing the sender’s name, phone number, time
/ date stamp and the message.
To review a stored (or old) numeric page, text message, or browser
message from the standby mode:
1.
Press
to display the Mail Kit menu. The number of new (unread)
messages displays next to the associated message type in the menu.
2.
Press
for Inbox. A list of messages displays. An exclamation point
next to an entry indicates an urgent message. An asterisk next to an entry
indicates that the message has not been read.
3.
Scroll through the list of messages.
4.
When a message is displayed, press
the message, the scroll keys operate:
to review. While reviewing
¨By pressing up or down to scroll.
5.
Press
to return to the previous screen.
Note: While reviewing a message, you can press
for more options.
Available options are Call Back, Forward, Save Addr, Erase, Detail, Reply, and
Save cb #. The same menu options are available in the Outbox.
Outbox
The outbox keeps a copy of messages that were sent or saved on the
phone.
Sent
The Sent box keeps a record of the messages that have been sent from
the phone. To access the Sent menu:
1.
Press
to open the Mail Kit.
137
2.
Press
for Outbox.
3.
Press
for Sent.
Stored
The Stored box keeps a record of the messages that have been saved or
not finished prior to sending a new message. To access the Stored
menu:
1.
Press
to open the Mail Kit.
2.
Press
for Outbox.
3.
Press
for Stored.
Delivery Acknowlegment
If Delivery Acknowledgement is set to “on” by using either Message
Setup or New Messages options in the Mail Kit menu, a message alert
will be sent to your phone. This Delivery Acknowledgement message
alert appears on the phone’s display screen, indicating that the
message was successfully delivered, together with the recipient’s
address and the delivery date and time. This information will be
displayed on your screen until you press any key, it will include the
delivered date/time stamp, and text notification of “Message to (Send
To #, or E-mail Address) delivered.”
Note: This Delivery Acknowledgement message will not be stored into memory
as it is a “one-time” only display. Also, if multiple messages were transmitted
consecutively within a short time period, only information relating to the last
message delivered will display.
Note: Delivery Acknowledgement is a message sent from the system to indicate
that a message arrived at its destination without error.
138
MSG Setup
The message setup allows you to configure the following options:
¨ General - The general setting allows you to configure the scroll timer and
message remind features.
¨ New Message - The new message options allow you to default input
¨
options that automatically populate the new SMS messages. These
options include call back number, saving, entry method, delivery
acknowledgment, and canned messages.
Erase - This option allows you to erase messages.
Canned Messages
Canned messages allow you to enter an entire phrase without having to
type. These messages are stored in the phones memory and are
available when creating a new SMS message. You can use the existing
canned messages or create your own. To edit canned messages:
1.
Press
to open the Mail Kit.
2.
Press
for MSG Setup.
3.
Press
for New Message.
4.
Press
for Canned Msg.
5.
Select a message to edit using
6.
Enter the changes using the keypad and press
7.
The new message is displayed in the list. Press
.
.
to exit.
Message options
When reviewing text messages, the Messages menu provides a number
of options. You can return a call to the phone number in the message,
139
save or erase the message, scroll to the next or previous message, or
extract a phone number that is included in the message.
1.
While reviewing a message, press
(to call the phone number).
2.
While reviewing a message, press
for Options:
3.
Scroll through the menu with the
option.
key. Press
to select the
The following options are available:
¨Call Back. - Automatically calls the number found in the message.
¨Forward - Automatically forwards the message to another recipient.
¨Save addr - Automatically saves the entry in you phone book.
¨Erase - Deletes the message.
¨Detail - Give the date and time the message was sent and received. Also
displays the encoding information.
¨Reply - Automatically generate a reply message.
¨Save cb# - Saves the entry in the phone book.
4.
Highlight “Save addr” and press
to extract the number included
by the sender of the message. If more than one number was included by
the sender, then a list of the numbers is available. Select the one you
want.
5.
Press
to return to the previous screen.
Message Ringing
Your phone allows you to set unique ring types. (see “Ringer Type” on
page 87).
140
Message Time
You can select one of three time stamps to be used for your incoming
messages. The time stamps to choose from are:
¨ UTC (Universal Time Coordinated). This stamps messages with the time
¨
¨
setting from the message center. The time stamp is based on Greenwich
Mean Time.
Local Time. This stamps messages with the local time based on your
coverage area.
Time Received: This setting causes your messages to be stamped with the
time that your phone received the message in your home time zone. This
setting may not work in some analog coverage areas.
Creating a New Message:
1.
Press
to open the Mail Kit.
2.
Press
for New Messages
3.
Press the
4.
Press
to select the option.
5.
Press
to enter a message.
6.
Press
Canned.
and toggle through T9 Word, ABC, Symbol, 123, Exit, or
7.
Press
to select the option.
8.
Enter the text message and press
9.
The following options are displayed:
and scroll through Phone #, E-mail, or Phonebook.
to accept.
¨SEND: Send Message
141
¨OK: Save Message
¨CLR: Back to Edit
¨END: Discard and quit.
10. Choose the desired option and press the corresponding key.
Message Memory Capacity
Your phone can store up to 16k or 94 messages. This storage capacity
includes all message types; numeric page, VMN (voicemail
notification), text, and browser. The number of messages stored
depends on the length of the messages. When message memory
reaches 75% capacity, the screen displays “Memory is 75% full. Erase
old messages.” At 100% capacity, the screen displays a text notification
and rejects additional incoming messages until you erase the stored
messages. The measurement is determined by either the amount of
messages, or the size allocated for the messages in memory. Whatever
amount is greater is measured as a percentage.
Messages and Lock Mode
Incoming messages are received even when your phone is in Lock
Mode. The screen displays the time and date of the message, but you
cannot access the message. To access the message, you must unlock
the phone.
Voicemail
Voicemail is available on your phone provided that you are signed up
for the service through the carrier. When you have a new voicemail
message, a sound plays and the LED on the phone flashes to indicate a
message is available. The screen also displays a message that says
“Voice Messages Received”.
142
Note: Different ringer types can be set to notify you that a new voicemail has
been received. To set options, see “Ringer Type” on page 87
Listening to your Messages
To listen to new messages:
Note: Applicable charges apply when checking your voicemail. This is
considered an outgoing call.
1.
Press
2.
Press
3.
Press
to display the Mail Kit menu.
for Inbox.
.for new Voicemail.
143
Security
Security Features
Your phone provides security options, including a user-programmable
lock code and special phone number features. To access the Security
,
, and enter the 4-digit lock
menu in standby mode, press
code. (normally the lock code is the last 4-digits of your phone
number). Press the associated numeric key to access one of the
following Security options:
¨
¨
¨
¨
¨
¨
¨
¨
Lock Mode
Restrict
Lock code
Emergency #
Send PIN
Clear MEM
Reset Phone
Privacy
Lock Mode
Locking the phone limits all outgoing calls except calls to hard-coded
emergency numbers (911, *911 and #911).
You can lock the phone manually during use, or set the phone to lock
automatically when it is turned on. When the phone is in Lock Mode,
you can answer incoming calls, but you must unlock the phone to
place outgoing calls.
Locking the phone
To lock the phone:
1.
Press
to display the menu.
2.
Press
for Security and enter your lock code.
144
3.
Press
for Lock Phone.
4.
Scroll through the options:
¨Never: The phone remains unlocked.
¨Now: The phone locks immediately and stays locked until the lock
code is entered.
¨On Power-Up: The phone locks automatically the next time your
phone is powered on and stays locked until the lock code is entered.
¨Press
to save the setting.
Unlocking the phone
When the phone is locked, it displays a screen “User Lock:”. Enter the
phone’s lock code, and the phone is immediately unlocked.
Dialing in lock mode
You can place calls to emergency and special numbers in the lock
mode. To place normal outgoing calls in lock mode, enter the lock
code to unlock the phone, and then dial the phone number.
To place an outgoing call in lock mode:
1.
To call an emergency or special number, enter the number and then
press
.
145
Restrict
This feature allows you to restrict the use of your phone.
To restrict the phone:
1.
Press
to display the menu.
2.
Press
for Security.
3.
Enter your current lock code.
4.
Press
5.
Press
to scroll between ‘Yes’ or ‘No’. Press
the restriction.
6.
Press
for Restrict.
to confirm
to exit.
Lock Code
The default lock code for your phone is the last four digits of your
phone number. You can enter a personal lock code or change the lock
code as often as you like.
To enter a new lock code:
1.
Press
to display the menu.
2.
Press
for Security.
3.
Enter your current lock code.
4.
Press
5.
Enter a new 4-digit lock code by pressing the numeric keys.
146
for Change Lock.
6.
Press
7.
Press
to save the new lock code.
to exit.
Note: Your phone does not allow viewing of the lock code unless you know the
lock code (this is for obvious security reasons). So, if you change the lock
code, be sure to write down or memorize the new code.
Emergency #
Your phone provides the option of storing three emergency or special
numbers. Each special number can be ten digits long.
All special numbers can be manually dialed at any time, even when
your phone is locked. This feature is useful for controlling what
numbers can be dialed from your phone.
Note: Even if your account is restricted, you can still dial 911, but no other
emergency numbers.
Important: IMPORTANT NOTICE! PLEASE READ!
Because of various transmission methods, network parameters, and
user settings used to complete a call from your wireless phone, a
connection cannot always be guaranteed.
Therefore, emergency calling may not be available on all wireless
networks at all times.
DO NOT depend on this phone as a primary method of dialing 911 or
for any other essential or emergency communications.
Remember to always turn your phone on and check for adequate
signal strength before placing a call.
147
Storing numbers
To store special numbers:
1.
Press
to display the menu.
2.
Press
for Security and enter your current lock code.
3.
Press
for Emergency #.
4.
Press
to the left and the screen will display the Emergency #:
either 1, 2, or 3 on the screen.
5.
Enter the special number.
6.
If you scroll to the right with the
enter the next emergency screen.
7.
Scrolling left allows you to edit the number just entered.
8.
Pressing
9.
Press
key, the phone permits you to
allows you to save the number entered.
to return to the Security menu.
Send PIN
1.
Press
to display the menu.
2.
Press
for Security and enter your current lock code.
3.
Press
for Send Pin.
4.
Choose between Never or Prompt.
5.
Press
148
to save the choice.
Clearing the Memory
You can erase all the numbers stored in your Phone Book and voice
dial recordings. This is useful if you want to give your phone to a friend
or family member, or if you want to erase all of your phone numbers.
To erase your phone book:
1.
Press
to display the menu.
2.
Press
for Security and enter your current lock code.
3.
Press
for Clear MEM. A confirmation message displays asking if
you want to ‘Clear All?’.
4.
Press
to erase the Phone Book.
5.
Press
to “Cancel” the operation.
“Erasing” displays while the operation is completed. The phone then
returns to standby mode.
149
Resetting the Phone
The Reset option resets the phone and returns all options to the factory
default settings. All your Personal settings (Phone Book, Voice Dial
recordings, Messages, and Calendar) are not affected by resetting your
phone.
To reset the phone:
1.
Press
to display the menu.
2.
Press
for Security and enter your current lock code.
3.
Press
for Reset Phone. A confirmation displays explaining that
you will reset the phone to factory defaults.
4.
Press
to reset the phone
5.
Press
to cancel the operation.
6.
The phone resets and restores the default settings, erases your messages
and then returns to standby mode.
Privacy
The Privacy option allows you to set the phone to make and receive
calls on an encrypted high security line to avoid eaves dropping. This
option is used in conjunction with the Privacy setting in alerts. See
“Privacy” on page 94. There are two different levels of privacy:
¨ Standard
¨ Enhanced
To set Privacy:
1.
Press
to display the menu.
2.
Press
for Security and enter your current lock code.
150
3.
Press
for Privacy.
4.
Press
to the right to display Standard or Enhanced.
5.
Press
to accept setting and exit.
151
InUse Menu
Your phone includes both a menu and an InUse menu. The InUse
button while the phone is
menu is displayed by pressing the
being used.
The InUse menu options are:
1.
Mute/Quit - Mutes the microphone so that the caller cannot hear your
conversation. You can still hear the caller, they just cannot hear you.
2.
Calls - Checks your call log for outgoing, incoming, and missed calls.
You can also erase the logs from this menu.
3.
PhoneBook - Accesses the PhoneBook menu options.
4.
Silent/Quit - This option silences the key beep tones when numbers are
pressed on the handset. Access the option again to turn off the silence.
5.
Send Tel # - Send the telephone number of the phone to the other
caller.
6.
My Phone # - Displays the phone number of the phone being used.
7.
Version - Displays the version of the software and hardware that is being
used on the phone.
8.
Privacy - Allows you to select a privacy level of standard or enhanced.
152
Usage guidelines:
all about performance and safety
Understanding Signal Strength
The quality of each call you make or receive, is dependent upon the
signal strength in your area. Your phone informs you of the current
signal strength by displaying a icon. The more bars displayed, the
) displays in
stronger the signal. The signal strength indicator (
the upper left corner of your display screen. The voice quality of your
phone is always clearest when the antenna is fully raised.If you’re
inside a building, reception may be better near a window.
Understanding the Power Save Mode
If you are trying to use your phone in an area where the signal is too
weak, the Power Save feature automatically activates to conserve
battery power when you have been unable to pick up a signal for 15
minutes. If your phone is on, it periodically rechecks service
availability. To manually check, press any key. A message is displayed
on the screen any time Power Save has been activated. When a signal is
found, your phone returns to standby mode.
Understanding how Your Phone Operates
Your phone is basically a radio transmitter and receiver. When it is
turned on, it receives and transmits radio frequency (RF) signals.
When your phone is in use, the system handling your call controls the
power level. This power can range from 0.006 watts to 0.2 watts in
digital mode.
Specifications are Subject to Change
The information contained in this manual is believed to be correct at
the time of printing, however, Samsung reserves the right to change or
153
modify any of the specifications without notice or obligation to update
existing units.
Exposure To Radio Frequency Signals
Your wireless handheld portable telephone is a low power radio
transmitter and receiver. When it is ON, it receives and also transmits
radio frequency (RF) signals
In August, 1996. the Federal Communications Commission (FCC)
adopted RF exposer guidelines with safety levels for hand-held wireless
phones. Those guidelines are consistent with the safety standards
previously set by both U.S. and international standards bodies:
¨ ANSI C95.1 (1992)
¨ NCRP Report 86 (1986)
¨ ICNIRP (1996)
Those standards were based on comprehensive and periodic
evaluations of the relevant scientific literature. For example, over 120
scientists, engineers, and physicians from universities, government
health agencies, and industry reviewed the available body of research
to develop the ANSI standard (C95.1).
The design of your phone complies with the FCC guidelines (and those
standards).
Antenna Care
Use only the supplied or an approved replacement antenna.
Unauthorized antennas, modifications, or attachments could damage
the phone and may violate FCC regulations.
Phone Operation
NORMAL POSITION: Hold the phone as you would any other telephone
with the antenna pointed up and over your shoulder.
154
Tips on Efficient Operation
For your phone to operate most efficiently:
¨ Extend your antenna fully.
¨ Do not touch the antenna unnecessarily when the phone is in use.
Contact with the antenna affects call quality and may cause the phone to
operate at a higher power level than otherwise needed.
How to Order Accessories
Most Samsung accessories can be purchased by visiting our web site at
www.samsungtelecom.com.
The accessories available for this phone include:
¨
¨
¨
¨
¨
¨
¨
¨
Travel charger (TCH020JBE).
Desktop charger (DCH039ADE).
Cigarette lighter adapter (CLC020).
Standard (BST0399DE), and Extended-life batteries (BEX039DDE).
Hands-free car kit (HSH020SBE).
Data cable (DC020).
Leather case (LC-T300).
Holster (HC070).
The use of any other power accessory will invalidate any approval or
warranty applying to the phone, and may be dangerous.
When you disconnect the power cord of any accessory, grasp and pull
the connector, not the cord.
IT IS EXTREMELY IMPORTANT THAT ONLY GENUINE SAMSUNG AUTHORIZED
ACCESSORIES BE UTILIZED WITH YOUR SAMSUNG PHONE. THIS IS BECAUSE
ACCESSORIES MIGHT APPEAR TO BE A PERFECT MATCH, AND LABELED
SUITABLE FOR YOUR SAMSUNG PHONE, BUT THEY CAN CHARGE AT
DIFFERENT CURRENT RATES. THE CURRENT PROVIDED THROUGH THE
ACCESSORY MAY NOT MATCH THE CURRENT THAT IS REQUIRED BY YOUR
SAMSUNG PHONE AND THE RESULT OF USING AN UNAUTHORIZED ACCESSORY
155
MAY BE A BATTERY OR PHONE MELT DOWN. YOUR WARRANTY OF COURSE,
WOULD BE NULL AND VOID.
Operating a Motor Vehicle
Check the laws and regulations on the use of wireless telephones in the
areas where you drive. Always obey them. Also, if using your phone
while driving, please:
¨ Give full attention to driving - driving safely is your first responsibility.
¨ Use hands free operation, if available.
Electronic Devices
Most modern electronic equipment is shielded from RF signals.
However, certain electronic equipment may not be shielded against the
RF signals from your wireless phone.
Pacemakers
The Health Industry Manufacturers Association recommends that a
minimum separation of six (6”) inches be maintained between a
handheld wireless phone and a pacemaker to avoid potential
interference with the pacemaker. These recommendations are
consistent with the independent research by and recommendations of
Wireless Technology Research.
Persons with pacemakers:
¨ Should ALWAYS keep the phone more than six inches from their
pacemaker when the phone is turned ON;
¨ Should not carry the phone in a breast pocket;
¨ Should use the ear opposite the pacemaker to minimize the potential for
interference;
¨ If you have any reason to suspect that interference is taking place, turn
your phone OFF immediately.
156
Other Medical Devices
If you use any other personal medical device, consult the manufacturer
of your device to determine if they are adequately shielded from
external RF energy. Your physician may be able to assist you in
obtaining this information.
Turn your phone Off in health care facilities when any regulations
posted in these areas instruct you to do so. Hospitals or health care
facilities may be using equipment that could be sensitive to external RF
energy.
TTY Access
A TTY (also known as TDD or Text Telephone) is a
telecommunications device that allows people who are deaf or hard of
hearing, or who have speech or language disabilities, to communicate
by telephone. It is possible to use your phone with a TTY. For more
information, contact the manufacturer of the TTY device.
Vehicles
RF signals may affect improperly installed or inadequately shielded
electronic systems in motor vehicles. Check with the manufacturer or
its representative regarding your vehicle. You should also consult the
manufacturer of any equipment that has been added to your vehicle.
Posted Facilities
Turn your phone Off in any facility where posted notices so require.
Aircraft
FCC regulations prohibit using your phone while in the air. Switch Off
your phone before boarding an aircraft.
157
Blasting Areas
To avoid interfering with blasting operations, turn your phone Off when
in a “blasting area” or in areas posted: “Turn off two-way radio”. Obey
all signs and instructions.
Potentially Explosive Atmospheres
Turn your phone Off when in any area with a potential explosive
atmosphere and obey all signs and instructions. Sparks in such areas
could cause an explosion or fire resulting in bodily injury or even
death.
Areas with a potentially explosive atmosphere are often, but not always
clearly marked. They include fueling areas such as gasoline stations;
below deck on boats; fuel or chemical transfers or storage facilities;
vehicles using liquefied petroleum gas (such as propane or butane);
areas where the air contains chemicals or particles, such as grain,
dust, or metal powders; any other area where you would normally be
advised to turn Off your vehicle engine.
For Vehicles Equipped with an Air bag
An air bag inflates with tremendous force. DO NOT place objects,
including both installed or portable wireless equipment, in the area
over the air bag or in the air bag deployment area. If in-vehicle wireless
equipment is improperly installed and the air bag inflates, serious
injury could result.
Storing your phone
You must not store or carry your phone, its parts, or accessories in the
same compartment or other area where there flammable liquids,
gases, or explosive or flammable materials.
158
Cautions
Any changes or modifications to your phone not expressly approved in
this document could void your warranty for this equipment and void
your authority to operate this equipment.
Only use approved batteries, antennas, and chargers. The use of any
unauthorized accessories may be dangerous and will invalidate the
phone warranty if said accessories cause damage or a defect to the
phone.
Although your phone is quite sturdy, it is a complex piece of hardware
and can be broken. Use common-sense guidelines to avoid dropping,
hitting, bending, or sitting on it.
Voice Memo
The voice memo feature of your phone is intended to let you record
information when a pencil and paper may not be available. Before
using this feature to record any part of a telephone conversation, you
should make sure that the recording will not be made or used for any
wrongful or unlawful purpose and that you have the consent of other
parties to the call if required by law or under your service agreement.
Under the laws of some states, for example, recording any part of a
telephone call is illegal unless every person on the call consents to
your making of the recording. State and federal law may impose
serious criminal penalties, in addition to possible civil liability, for
unlawful recording of a telephone call or for disclosure of an illegally
recorded conversation. Check to be sure that your intended use of this
feature will comply with all applicable laws before recording or playing
back a telephone conversation.
159
Your Phone as a Network Device
Your telephone requires a service provider to send and receive calls.
Your phone is only one part of a system or “network” of devices that
makes it possible for you to send and receive calls, text messages,
voice message, access the Internet using the minibrowser, and to take
advantage of all of the other services and features available when your
phone is used with your service provider.
Your phone will always try your call using your home system, but if this
is unavailable, then the phone will use the preferred roaming system.
If you cannot roam, your call will not be connected and the
icon is
displayed. In some service areas, an operator may come on the line
asking you how you would like to pay for the call.
To make all of the features available to you, your phone is designed by
Samsung and your service provider to allow your service provider to
send (at any time) a variety or information and messages to your
phone. You may think of this as an over the air service to your phone.
During an over-the-air programming session, your phone may display
the following messages:
¨ “Search... Download” - this message means the phone is
looking for the data to download.
¨ “Progress Download” - this message means the phone is
downloading data. Do not turn your phone off while this is
occurring. See the CAUTION below.
¨ “Download Success” - this message means that your phone
has been successfully reprogrammed. You can now continue
to use your phone as you normally do.
¨ “Download Failed” - if this message appears contact your
service provider.
160
CAUTION: If you turn off your phone during a download, your
phone (or some features) may not work properly in the network. If
this happens don’t worry, contact your service provider for help in
correcting the problem.
Acknowledging Special
Precautions
and the FCC and Industry Canada
Notice
Cautions
Only use approved batteries, antennas, and chargers. The use of any
unauthorized accessories may be dangerous and will invalidate the
phone warranty if said accessories cause damage or a defect to the
phone.
Although your phone is quite sturdy, it is a complex piece of hardware
and can be broken. Use common-sense guidelines to avoid dropping,
hitting, bending or sitting on it.
FCC Compliance Information
This device complies with part 15 of the FCC Rules. Operation and is
subject to the condition that this device does not cause harmful
interference.
Information to User
This equipment has been tested and found to comply with the limits of
a Class B digital device, pursuant to Part 15 of the FCC Rules. These
limits are designed to provide reasonable protection against harmful
interference in a residential installation. This equipment generates,
uses and can radiate radio frequency energy and, if not installed and
used in accordance with the instructions, may cause harmful
161
interference to radio communications. However, there is no guarantee
that interference will not occur in a particular installation; if this
equipment does cause harmful interference to radio or television
reception, which can be determined by turning the equipment off and
on, the user is encouraged to try to correct the interference by one or
more of the following measures:
¨ Reorient / relocate the receiving antenna.
¨ Increase the separation between the equipment and receiver.
¨ Connect the equipment into an outlet on a circuit difference from that to
which the receiver is connected.
¨ Consult the dealer or an experienced radio/TV technician for help.
Samsung Phone and Battery Specifications
Tri Mode:
Display Screen:
Battery Type:
PCS Antenna:
CDMA 1.9GHz / CDMA 800 MHz/
AMPS 800 MHz
Graphical LCD (with 1 dedicated Icon
Line)
Standard: Lithium-Ion
Retractable, user-replaceable
Samsung Phone with Standard Battery
Talk Time Digital:
200 Minutes
Standby Time Digital: 120 Hours
Analog:
15 hours
162
Samsung T-300 Phone with Extended Battery
Talk Time Digital:
Analog:
Standby Time Digital:
Analog:
300 Minutes
135 Minutes
180 Hours
22 Hours
Owner's Record
The model number, regulatory number and serial number are located
on a nameplate inside the battery compartment. Record the serial
number in the space provided below. This will be helpful if you need to
contact us about your phone in the future.
Model:
Serial No.:
User Guide Proprietary Notice
CDMA Technology is licensed by QUALCOMM Incorporated under one
or more of the following Patents:
4,901,3075,109,3905,267,2625,416,797
5,506,8655,544,1965,657,4205,101,501
5,267,2615,414,7965,504,7735,535,239
5,600,7545,778,338 5,228,054 5,337,338
5,710,7845,056,109 5,568,4835,659,569
5,490,1655,511,073
T9 Word® Text Input is licensed by Tegic Communications and is
covered by U.S. Pat. 5,818,437, U.S. Pat. 5,953,541, U.S. Pat.
6,011,554 and other patents pending.
Licensed by Qualcomm Incorporated under one or more of the
following patents: U.S. Patent No. 4,901,307; 5,056,109; 5,099,204;
5,101,501; 5,103,459; 5,107,225; 5,109,390.
Openwave® is a registered Trademark of Openwave, Inc.
163
The U.S. Food and Drug Administration's Center for Devices and Radiological Health
Consumer Update on Mobile Phones
FDA has been receiving inquiries about the safety of mobile phones, including cellular
phones and PCS phones. The following summarizes what is known--and what remains
unknown--about whether these products can pose a hazard to health, and what can be
done to minimize any potential risk. This information may be used to respond to
questions.
Why the concern?
Mobile phones emit low levels of radio frequency energy (i.e., radio frequency
radiation) in the microwave range while being used. They also emit very low levels of
radio frequency energy (RF), considered non-significant, when in the stand-by mode. It
is well known that high levels of RF can produce biological damage through heating
effects (this is how your microwave oven is able to cook food). However, it is not known
whether, to what extent, or through what mechanism, lower levels of RF might cause
adverse health effects as well. Although some research has been done to address these
questions, no clear picture of the biological effects of this type of radiation has emerged
to date. Thus, the available science does not allow us to conclude that mobile phones are
absolutely safe, or that they are unsafe. However, the available scientific evidence does
not demonstrate any adverse health effects associated with the use of mobile phones.
What kinds of phones are in question?
Questions have been raised about hand-held mobile phones, the kind that have a built-in
antenna that is positioned close to the user's head during normal telephone
conversation. These types of mobile phones are of concern because of the short distance
between the phone's antenna--the primary source of the RF--and the person's head. The
exposure to RF from mobile phones in which the antenna is located at greater distances
from the user (on the outside of a car, for example) is drastically lower than that from
hand-held phones, because a person's RF exposure decreases rapidly with distance from
the source. The safety of so-called “cordless phones,” which have a base unit connected
to the telephone wiring in a house and which operate at far lower power levels and
frequencies, has not been questioned.
How much evidence is there that hand-held mobile phones might be harmful?
Briefly, there is not enough evidence to know for sure, either way; however, research
efforts are on-going. The existing scientific evidence is conflicting and many of the
studies that have been done to date have suffered from flaws in their research methods.
Animal experiments investigating the effects of RF exposures characteristic of mobile
phones have yielded conflicting results. A few animal studies, however, have suggested
that low levels of RF could accelerate the development of cancer in laboratory animals.
In one study, mice genetically altered to be predisposed to developing one type of cancer
164
developed more than twice as many such cancers when they were exposed to RF energy
compared to controls. There is much uncertainty among scientists about whether results
obtained from animal studies apply to the use of mobile phones. First, it is uncertain how
to apply the results obtained in rats and mice to humans. Second, many of the studies
that showed increased tumor development used animals that had already been treated
with cancer-causing chemicals, and other studies exposed the animals to the RF virtually
continuously--up to 22 hours per day.
For the past five years in the United States, the mobile phone industry has supported
research into the safety of mobile phones. This research has resulted in two findings in
particular that merit additional study:
1.In a hospital-based, case-control study, researchers looked for an association between
mobile phone use and either glioma (a type of brain cancer) or acoustic neuroma (a
benign tumor of the nerve sheath). No statistically significant association was found
between mobile phone use and acoustic neuroma. There was also no association
between mobile phone use and gliomas when all types of types of gliomas were
considered together. It should be noted that the average length of mobile phone
exposure in this study was less than three years.
When 20 types of glioma were considered separately, however, an association was found
between mobile phone use and one rare type of glioma, neuroepithelliomatous tumors.
It is possible with multiple comparisons of the same sample that this association
occurred by chance. Moreover, the risk did not increase with how often the mobile
phone was used, or the length of the calls. In fact, the risk actually decreased with
cumulative hours of mobile phone use. Most cancer causing agents increase risk with
increased exposure. An ongoing study of brain cancers by the National Cancer Institute is
expected to bear on the accuracy and repeatability of these results.
2.Researchers conducted a large battery of laboratory tests to assess the effects of
exposure to mobile phone RF on genetic material. These included tests for several kinds
of abnormalities, including mutations, chromosomal aberrations, DNA strand breaks,
and structural changes in the genetic material of blood cells called lymphocytes. None of
the tests showed any effect of the RF except for the micronucleus assay, which detects
structural effects on the genetic material. The cells in this assay showed changes after
exposure to simulated cell phone radiation, but only after 24 hours of exposure. It is
possible that exposing the test cells to radiation for this long resulted in heating. Since
this assay is known to be sensitive to heating, heat alone could have caused the
abnormalities to occur. The data already in the literature on the response of the
micronucleus assay to RF are conflicting. Thus, follow-up research is necessary.
FDA is currently working with government, industry, and academic groups to ensure the
proper follow-up to these industry-funded research findings. Collaboration with the
165
Cellular Telecommunications Industry Association (CTIA) in particular is expected to
lead to FDA providing research recommendations and scientific oversight of new CTIAfunded research based on such recommendations.
Two other studies of interest have been reported recently in the literature:
1. Two groups of 18 people were exposed to simulated mobile phone signals under
laboratory conditions while they performed cognitive function tests. There were no
changes in the subjects' ability to recall words, numbers, or pictures, or in their spatial
memory, but they were able to make choices more quickly in one visual test when they
were exposed to simulated mobile phone signals. This was the only change noted among
more than 20 variables compared.
2. In a study of 209 brain tumor cases and 425 matched controls, there was no
increased risk of brain tumors associated with mobile phone use. When tumors did exist
in certain locations, however, they were more likely to be on the side of the head where
the mobile phone was used. Because this occurred in only a small number of cases, the
increased likelihood was too small to be statistically significant.
In summary, we do not have enough information at this point to assure the public that
there are, or are not, any low incident health problems associated with use of mobile
phones. FDA continues to work with all parties, including other federal agencies and
industry, to assure that research is undertaken to provide the necessary answers to the
outstanding questions about the safety of mobile phones.
What is known about cases of human cancer that have been reported in users
of hand-held mobile phones?
Some people who have used mobile phones have been diagnosed with brain cancer. But
it is important to understand that this type of cancer also occurs among people who have
not used mobile phones. In fact, brain cancer occurs in the U.S. population at a rate of
about 6 new cases per 100,000 people each year. At that rate, assuming 80 million users
of mobile phones (a number increasing at a rate of about 1 million per month), about
4800 cases of brain cancer would be expected each year among those 80 million people,
whether or not they used their phones. Thus it is not possible to tell whether any
individual's cancer arose because of the phone, or whether it would have happened
anyway. A key question is whether the risk of getting a particular form of cancer is
greater among people who use mobile phones than among the rest of the population.
One way to answer that question is to compare the usage of mobile phones among
people with brain cancer with the use of mobile phones among appropriately matched
people without brain cancer. This is called a case-control study. The current case-control
study of brain cancers by the National Cancer Institute, as well as the follow-up research
to be sponsored by industry, will begin to generate this type of information.
166
What is FDA's role concerning the safety of mobile phones?
Under the law, FDA does not review the safety of radiation-emitting consumer products
such as mobile phones before marketing, as it does with new drugs or medical devices.
However, the agency has authority to take action if mobile phones are shown to emit
radiation at a level that is hazardous to the user. In such a case, FDA could require the
manufacturers of mobile phones to notify users of the health hazard and to repair,
replace or recall the phones so that the hazard no longer exists.
Although the existing scientific data do not justify FDA regulatory actions at this time, FDA
has urged the mobile phone industry to take a number of steps to assure public safety.
The agency has recommended that the industry:
• support needed research into possible biological effects of RF of the type emitted by
mobile phones;
• design mobile phones in a way that minimizes any RF exposure to the user that is not
necessary for device function; and
• cooperate in providing mobile phone users with the best possible information on what
is known about possible effects of mobile phone use on human health.
At the same time, FDA belongs to an interagency working group of the federal agencies
that have responsibility for different aspects of mobile phone safety to ensure a
coordinated effort at the federal level. These agencies are:
• National Institute for Occupational Safety and Health
• Environmental Protection Agency
• Federal Communications Commission
• Occupational Health and Safety Administration
• National Telecommunications and Information Administration
The National Institutes of Health also participates in this group.
In the absence of conclusive information about any possible risk, what can
concerned individuals do?
If there is a risk from these products--and at this point we do not know that there is--it is
probably very small. But if people are concerned about avoiding even potential risks,
there are simple steps they can take to do so. For example, time is a key factor in how
much exposure a person receives. Those persons who spend long periods of time on
their hand-held mobile phones could consider holding lengthy conversations on
conventional phones and reserving the hand-held models for shorter conversations or
for situations when other types of phones are not available.
People who must conduct extended conversations in their cars every day could switch to
a type of mobile phone that places more distance between their bodies and the
167
source of the RF, since the exposure level drops off dramatically with distance. For
example, they could switch to:
• a mobile phone in which the antenna is located outside the vehicle,
• a hand-held phone with a built-in antenna connected to a different antenna mounted
on the outside of the car or built into a separate package, or
• a headset with a remote antenna to a mobile phone carried at the waist.
Again, the scientific data do not demonstrate that mobile phones are harmful. But if
people are concerned about the radio frequency energy from these products, taking the
simple precautions outlined above can reduce any possible risk.
Where can I find additional information?
For additional information, see the following websites:
Federal Communications Commission (FCC) RF Safety Program (select “Information on
Human Exposure to RF Fields from Cellular and PCS Radio Transmitters”): http://
www.fcc.gov/oet/rfsafety
World Health Organization (WHO) International Commission on Non-Ionizing Radiation
Protection (select Qs & As): http://www.who.int/emf
United Kingdom, National Radiological Protection Board: http://www.nrpb.org.uk
Cellular Telecommunications Industry Association (CTIA): http://www.wow-com.com
U.S. Food and Drug Administration (FDA) Center for Devices and Radiological Health:
http://www.fda.gov/cdrh/consumer/
168
Limited Warranty
1.What is Covered and For How Long? SAMSUNG
TELECOMMUNICATIONS AMERICA, INC. ("SAMSUNG") warrants the
original purchaser that SAMSUNG's Phones and accessories are free
from defects in material and workmanship under normal use and
service for a period commencing on the date of purchase and
continuing for the specified period of time after that date:
Samsung Phone 1Year
Batteries 1Year
Leather Cases Defect-free at time of purchase
Other Phone Accessories 1 Year
2. What is Not Covered? This Limited Warranty is conditioned upon
proper use of the product by the purchaser. This Limited Warranty
does not cover: (a) defects or damage resulting from accident, misuse,
abuse, neglect, unusual physical, electrical or electromechanical
stress, modifications of any part of the product, including antenna, or
cosmetic damage; (b) equipment that has the serial number removed
or made illegible; (c) all plastic surfaces and other externally exposed
parts that are scratched or damaged due to normal use; (d)
malfunctions resulting from the use of the product in
conjunction with the accessories, products or ancillary or peripheral
equipment not furnished or approved by SAMSUNG; (e) defects or
damage from improper testing, operation, maintenance, installation,
or adjustment; or (f) installation, maintenance, and service of
products.The limited warranty covers batteries only if the battery falls
below 80% of rated capacity or the battery leaks and this limited
warranty does not cover any battery if (i)the battery has been charged
by a battery charger not specified or approved by Samsung for
169
charging the battery, (ii) any of the seals on the battery are broken or
show evidence of tampering, or (iii) the battery has been used in
equipment other than the Samsung phone for which it is specified.
3. What are SAMSUNG's Obligations? During the applicable warranty
period, SAMSUNG will repair or replace, at SAMSUNG's sole option,
without charge to purchaser, any defective component part of the
phone or accessory. To obtain service under this Limited Warranty,
purchaser must return the product to an authorized SAMSUNG Phone
service facility in an adequate container for shipping, accompanied by
the purchaser's sales receipt or comparable proof of sale showing the
date of purchase, the serial number of the product, and the seller's
name and address.To obtain information on where to deliver the
phone or accessory, call your service provider or SAMSUNG Customer
Care at 1.888.987.4357. Upon receipt, SAMSUNG will promptly repair
the defective product. SAMSUNG may, at SAMSUNG's sole option, use
rebuilt, reconditioned, or new parts or components when repairing
any product or replace a product with a rebuilt, reconditioned or new
product. Repaired products will be warranted for a
period equal to the remainder of the original Limited Warranty on the
original product or for 90 days, whichever is longer. All replaced parts,
components, boards and equipment become the property of
SAMSUNG. If SAMSUNG determines that any product is not covered by
this Limited Warranty, purchaser must pay all parts, shipping, and
labor charges for the repair or return of such product.
4. What are the Limits on SAMSUNG's Liability? the warranties given in
this limited warranty are in lieu of all other warranties, expressed or
implied, including, but not limited to, any warranties of
merchantability or fitness for a particular purpose,and are limited to
the duration of this limited warranty. except to the extent prohibited by
170
applicable law, samsung shall not be liable for any special, incidental,
consequential, indirect or similar damages, loss of profits, damages to
purchaser's property or injury to purchaser or other parties arising
out of the use, misuse, or inability to use any samsung phone or
accessory, breach of warranty, breach of contract, or negligence,
including but not limited to Samsung’s phones and accessories.this
limited warranty shall not extend to anyone other than the original
purchaser of this product and states the purchaser's exclusive remedy.
if any portion of this warranty is illegal or unenforceable by reason of
any law, such partial illegality or unen-forceability shall not effect the
enforceability of the remainder of this limited warranty which
purchaser acknowledges is and will always be construed to be limited
by its terms or as limited as the law permits.
This Limited Warranty allocates risk of product failure between
purchaser and SAMSUNG, and SAMSUNG's product pricing reflects this
allocation of risk and the limitations of liability contained in this
Limited Warranty. The agents, employees, distributors, and dealers of
SAMSUNG are not authorized to make modifications to this Limited
Warranty, or make additional warranties binding on
SAMSUNG.Accordingly, additional statements such as dealer advertising
or presentations, whether oral or written, do not constitute warranties
by SAMSUNG and should not be relied upon.
5. How does State or Territorial Law Apply to This Warranty? SOME
STATES OR PROVINCES DO NOT ALLOW THE EXCLUSION OR
LIMITATIONS OF INCIDENTAL OR CONSEQUENTIAL DAMAGES OR
HOW LONG IMPLIED WARRANTY LASTS, SO THE ABOVE
LIMITATIONS OR EXCLUSIONS MAY NOT APPLY TO YOU.
This Limited Warranty gives you specific legal rights.You may also have
other rights which vary from one jurisdiction to another
171
NOTICE: Samsung is not, in any case, liable for any
consequential damage caused by the product. For your
convenience, if you prefer to use an ear-microphone, please
call (800) SAMSUNG to purchase a compatible ear microphone
for the product.
172
Numerics
0 / next key, 70
A
Accessing menus by scrolling, 29
Accessing menus using short cut number, 30
Adding a name ringer, 58
Adjusting ringer volume, 86
Air time, 45
Alarm, 85
Alarm set, 85
Alerts, 90
Animation, 100
Answer mode, 122
Answering a call, 50
Antenna, 17
Assigning a Specific Memory Address, 53
Asterisk / shift key, 70
Auto answer, 121
Auto retry, 120
B
Backlight features, 17
Browser MSG, 90
C
Calculator, 83
Calendar, 78
Call Answer, 112
Call Screen, 113
Calls - Incoming, 40
Calls - Missed, 41
Calls - Outgoing, 40
Canned Messages, 139
Caring for the battery, 39
173
Charging with the travel charger, 37
Clearing the Memory, 149
CLR (Clear) key, 17
CLR key, 70
Connect, 92
Conversation/Talk Mode, 32
Countdown, 81
D
Data/fax, 124
Delivery Acknowlegment, 138
Dialing in Lock Mode, 145
Dialing numbers from the phone book, 64
Disconnect, 92
Display options, 98
Display screen, 17
Disposal of Lithium Ion batteries, 39
E
Editing phone book numbers, 56
E-mail address, 59
empty battery icon, 37
End (power on/off key), 18
END key, 70
Ending a fax or data call, 127
Entering text, numbers, or symbols, 71
Erase logs, 43
Erase total, 47
F
Fade, 93
Find name, 51
Finding an Entry, 60
Front flip, 18
Front view of the Samsung T300, 16
174
G
Games, 116
Games - Push Push, 116
Getting to know your phone, 17
Greeting (Default), 113
H
Headset connector, 18
I
Installing the battery, 35
Interface, 21
Interface Adapter, 21
K
Key beep, 90
L
Last call, 45
LCD Contrast, 104
LED indicator, 18
Lifetime, 48
List of menu functions, 24
Lock Code Setting, 146
Lock Mode, 144
Lock mode, 31
Locking the phone, 144
M
Mail Kit, 129
Mail kit - Inbox, 136
Mail kit - Message memory capacity, 142
Mail kit - Message ringing, 140
Mail kit - Message time, 141
Mail kit - Messages and lock mode, 142
Manual pause dialing, 56
MENU key, 71
175
Menu key, 19
Message, 142
Message Options, 139
Message Ringing, 140
Microphone, 19
Minibrowser - exiting, 67
Minibrowser - launching, 66
MSG Setup, 139
Multiple Addressing, 132
N
Navigation key, 70
Number entry, 72
Numbered keys 0, 70
Numbered keys 0 - 9, 70
Numeric key functions, 19
O
OK/Navigation key, 19
Outbox, 137
P
Pause Dialing, 54
Pause dialing, 54
Phone Book, 49
phone modes, 31
Pound / space key, 70
Power save mode, 31
Prepending a phone number, 57
Privacy, 150
Protecting your battery, 39
Push, 116
R
Receiver, 19
Receiving a fax, 126
176
Relation search, 61
Removing the battery, 36
Resetting the Phone, 150
Returning to the previous menu, 30
Reviewing Airtime, 45
Ringer options, 86
Ringer type, 87
Roam, 94
Roam Option, 124
Roam ringer, 96
S
Scheduler, 75
Scheduler - How to schedule an event, 77
Scheduler - How to view an event, 77
Secret phone book numbers, 61
Security, 144
Security - Dialing in lock mode, 145
Security - Emergency, 147
Security - Lock code, 146
Security - Lock mode, 144
Security - Locking the phone, 145
Security - Restrict, 146
Security - Unlocking the phone, 145
Send key, 19
Send PIN, 148
Sending a fax or data file, 127
Set NAM, 123
Set Network, 128
Set Time, 103
Setting speed dial, 62
Standby mode, 31
Storing numbers, 148
Storing phone numbers at the end of a call, 63
177
Symbol entry, 73
T
Tips on recording names, 105
Tone length, 122
Turning your phone off, 23
Turning your phone on, 22
U
Unlocking the Phone, 145
Usage guidelines, 153
Using your phone’s menus, 29
V
Version, 104
Voice dial, 105
Voice Dial - Play/Erase, 107
Voice dial - Record, 106
Voice dial - Set active, 108
Voice dial - Training, 108
Voice dial - Undo Train, 109
Voice mail, 89
Voice memo, 110
Voice memo - Reviewing, 111
Voice memo button, 20
Voice Memo, Recording, 110
Voice Privacy, 20
Voice volume, 95
W
Warranty, 169
Web/MiniBrowser, 66
World Time, 83
Y
Your consumer package, 15
178