1
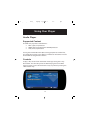
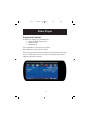
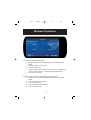
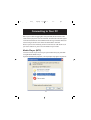
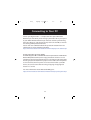
Title: PO_10664_MPU Manual_UK Language: English FI No.: 10664 Date: 22/11/07 Page: 1
Polaroid Freescape 4.3” Wireless Media Player
User’s Manual
20071016
Title: PO_10664_MPU Manual_UK Language: English FI No.: 10664 Date: 22/11/07 Page: 2
Table of Contents
CONGRATULATIONS on your purchase of a Polaroid Digital
Multimedia Player. Please read carefully and follow all instructions in
the manual and those marked on the product before first use. Failing
to follow these warnings could result in personal injury or damage to
the device. Also, remember to keep this User’s Manual in a convenient
location for future reference.
Important: Save the original box and all packing material for future
shipping needs.
Table of Contents.................................................................2
Safety and Regulatory Notice .............................................5
Contents and Getting Started..............................................8
Changing Languages ............................................................. 8
Features .................................................................................. 8
Controls .................................................................................. 9
Turning the Player On & Off.............................................. 11
Navigation............................................................................. 13
Updating Firmware ............................................................. 15
Using Your Player .............................................................16
Audio Player......................................................................... 17
Supported Content .......................................................................16
Controls .......................................................................................16
Playlists .......................................................................................18
Settings ........................................................................................18
Album Art ....................................................................................18
2
Titl
Title: PO_10664_MPU Manual_UK Language: English FI No.: 10664 Date: 22/11/07 Page: 3
Table of Contents
Picture Viewer ...................................................................... 19
Supported Content .......................................................................19
Controls .......................................................................................20
Settings ........................................................................................20
Video Player ......................................................................... 21
Supported Content .......................................................................21
Controls .......................................................................................22
Settings ........................................................................................23
Wireless Operation .............................................................. 24
About Wireless Networks............................................................24
Infrastructure Networks ..........................................................24
Ad-Hoc Networks ...................................................................24
Network Privacy .....................................................................24
Advanced Wireless Configuration ..........................................24
Using WiFi ..................................................................................26
Player-to-Player Sharing .............................................................27
Podcasting ...................................................................................29
Download Manager .....................................................................32
FM Radio .............................................................................. 35
Radio On/Off ...............................................................................35
Tuning..........................................................................................36
Presets..........................................................................................46
TV Out .................................................................................. 37
Connecting the A/V cable............................................................37
Selecting the proper TV Mode ....................................................38
3
Title: PO_10664_MPU Manual_UK Language: English FI No.: 10664 Date: 22/11/07 Page: 4
Table of Contents
Enabling TV Out Mode ...............................................................38
Exiting TV Out Mode..................................................................38
Optimizing Your TV Screen ........................................................38
Connecting to your PC ........................................................ 39
Removable Disk (Mass Storage) .................................................39
Media Player (MTP)....................................................................41
Charging the Battery ........................................................... 43
AC Adapter ..................................................................................44
USB Cable ...................................................................................44
Extras .................................................................................... 45
Setup ............................................................................................45
Display ....................................................................................45
System ....................................................................................45
Audio ......................................................................................45
Video.......................................................................................45
Photo .......................................................................................45
Network ..................................................................................45
Update Firmware ........................................................................48
About ...........................................................................................49
Resetting the PMP ............................................................... 50
Technical Specifications....................................................51
FAQ & Troubleshooting ...................................................55
Support ..............................................................................57
4
Titl
Title: PO_10664_MPU Manual_UK Language: English FI No.: 10664 Date: 22/11/07 Page: 5
Safety & Regulatory Notice
Safety & Handling
Although your Polaroid Portable Media Player (PMP) is quite sturdy,
please observe safety and handling instructions:
• Your PMP should only be operated within the following
environmental conditions:
o 40 – 122 ° F (5 – 50 ° C )
o 10% - 90% relative humidity, non-condensing
• Do not subject PMP to force or impact.
• Keep PMP away from moisture.
• Do not expose PMP to heat or flame.
• Keep PMP away from strong magnetic fields.
• Do not dismantle your PMP.
• Store PMP out of direct sunlight.
• Do not crush or puncture your PMP.
About the PMP’s Battery
Your PMP contains a long-lasting Lithium-ion battery that is
replaceable. Please
observe the following precautions:
1. Only use a Polaroid approved replacement battery. See
Polaroid.com for accessories.
2. The PMP’s battery must be disposed of according to local
environmental regulations.
Regulatory Information
FCC Notice
This device complies with Part 15 of FCC Rules. Operation is subject
to the following two conditions: (1) This device may not cause harmful
interference, and (2) This device must accept any interference received,
including interference that may cause undesired operation.
5
Title: PO_10664_MPU Manual_UK Language: English FI No.: 10664 Date: 22/11/07 Page: 6
Regulatory Notice
Warning: Changes or modifications to this unit not expressly approved
by the party responsible for compliance could void the user’s authority
to operate the equipment.
NOTE: This equipment has been tested and found to comply with the
limits for Class B digital device, pursuant to Part 15 of the FCC Rules.
These limits are designed to provide reasonable protection against
harmful interference in a residential installation. This equipment
generates, uses and can radiate radio frequency energy and, if not
installed and used in accordance with the instructions, may cause
harmful interference to radio communications.
However, there is no guarantee that interference will not occur
in a particular installation. If this equipment does cause harmful
interference to radio or television reception, which can be determined
by turning the equipment off and on, the user is encouraged to try to
correct the interference by one or more of the following measures:
• Reorient or relocate the receiving antenna.
• Increase the separation between the equipment and receiver.
• Connect the equipment into an outlet on a circuit different from that
to which the receiver is needed.
• Consult the dealer or an experienced radio / TV technician for help.
This product was tested for EMC compliance under conditions that
include use of Polaroid peripheral devices and shielded cables. It is
important that you use Polaroid peripheral devices and shielded to
reduce the possibility of causing interference to radios, television sets,
and other electronic devices.
Under the environment with electrostatic discharge, the device may
temporarily malfunction and require user to reset the device.
6
Titl
Title: PO_10664_MPU Manual_UK Language: English FI No.: 10664 Date: 22/11/07 Page: 7
Regulatory Notice
Industry Canada Statement
This Class B device meets all requirements of the Canadian
interference-causing equipment regulations.
Cet appareil numérique de la classe B respecte toutes les exigences du
Règlement sur le matéteriel brouilleur du Canada.
European Community
This device complies with European Directives 72/23/EEC and 89/336/
EEC.
WEEE:
This product contains electrical or electronic materials. The presence of
these materials may, if not disposed of properly, have potential adverse
effects on the environment and human health. Presence of this label
on the product means it should not be disposed of as unsorted waste
and must be collected separately. As a consumer, you are responsible
for ensuring that this product is disposed of properly. To find out how
to properly dispose of this product, please go to www.polaroid.com/
support and click on “Company” or call the customer service number
for your country listed in the instruction manual.
“Polaroid” and “Polaroid and Pixel” are trademarks of Polaroid Corporation.
7
Title: PO_10664_MPU Manual_UK Language: English FI No.: 10664 Date: 22/11/07 Page: 8
Contents and Getting Started
Contents
Packaging Includes:
•
Digital Portable Multimedia Player
•
USB Cable
•
AC Adapter
•
Earbud Headphones
•
User’s Manual
•
Quick Start Guide
•
Warranty Card
•
Worldwide Contact Sheet
Getting Started
Changing Languages
Go to the “Extras” .menu, click on “Setup”, click on “Settings”, click on
“Display”, click on “Language”. Choose your language
Features
Your PMP includes the following advanced features:
•
Large, 4.3” widescreen color LCD screen
•
Audio Player for HiFi playback of MP3, WMA and AAC files
•
Video Player for cinematic viewing experience
•
Microsoft DRM support for purchased and subscription content
•
Photo Viewer with slideshow capability
•
Integrated FM Radio Receiver
•
60GB storage: 15,000 songs, 10,000 photos or 80 hours video
•
High speed USB 2.0 interface
•
Integrated 802.11b/g WiFi wireless networking
•
Video Out
•
Rechargeable, replaceable Lithium-Ion battery
•
Upgradeable firmware
8
Titl
Title: PO_10664_MPU Manual_UK Language: English FI No.: 10664 Date: 22/11/07 Page: 9
Controls
Controls
Headphone/Video Out Jack
(top edge)
Power Button
USB Port
5 Way Nav Button
Volume Buttons
Reset Hole
(back side)
Touch Keys
AC Adapter Jack
(bottom edge)
The PMP has the following controls:
•
Power Button
If pressed while the player is on, it provides a menu
to power down your player, put it into standby or
lock/unlock the keys.
•
5-Way Navigation Button with push enter
Controls up, down, left, right and select (press down).
9
Title: PO_10664_MPU Manual_UK Language: English FI No.: 10664 Date: 22/11/07 Page: 10
Controls
•
USB Connector
This is a mini-USB style connector. When a USB
Cable is connected, it can charge your PMP or it can
provide a connection to your PC to transfer content.
•
Volume Buttons
This button tilts upwards to provide Volume Up and
tilts downwards to provide Volume Down.
•
AC Adapter Jack
This connection allows you to charge your PMP with
the provided AC charger.
•
Headphone/Video Out Jack
This connection provides a 3.5mm jack for
headphones. It also provides a connection for the
Video Out feature (video out cable not included).
•
Touch Keys
The touch keys are 5 backlit touch sensitive buttons.
They provide ‘Back’, ‘Reverse’, ‘Play/Pause’, ‘Fast
Forward’, and ‘Menu’ buttons.
•
Reset Hole
The reset hole located on the back of the PMP should
only be used if the player becomes locked up and
does not respond to any of the other controls. Using
a thin object such as a paper clip, you can press the
reset button to power off the player. A controlled
power down with the power button is always
preferred to using the reset button.
10
Titl
Title: PO_10664_MPU Manual_UK Language: English FI No.: 10664 Date: 22/11/07 Page: 11
Turning the Player On and Off
Turning the Player On and Off
There are several ways to turn the PMP on.
•
Power Button
The most common way to turn on the PMP is by
pressing the Power Button.
•
AC Adapter
The AC Adapter has the ability to completely power
your player regardless of the battery state. If you plug
in an AC Adapter, your PMP will turn on. However,
if you have a USB Cable plugged in, you must
remove it if you want the player to be powered up by
plugging in an AC Adapter.
•
USB Cable
The USB Cable does not have the ability to
completely power your player under all conditions.
If you plug in the USB Cable, the player will power
on if your battery is sufficiently charged. If you plug
in the USB Cable and the player does not power on,
it may take up to 30 minutes to charge the battery
enough so the player will power on by itself.
11
Title: PO_10664_MPU Manual_UK Language: English FI No.: 10664 Date: 22/11/07 Page: 12
Turning the Player On and Off
The PMP has 2 low power modes. Pressing the power button brings up
a menu to chose between these modes.
•
Shutdown Mode
This mode completely powers off the player and is
the lowest power state. When powered on from this
state, the player will need to completely reboot and
you will notice a delay before you are able to use the
PMP.
•
Standby Mode
This is a low power state that can be used to conserve
battery between uses of the PMP, however it does
consume more power than Shutdown Mode. The
player will enter and return from standby in a matter
of seconds, returning you to the state you were in
when Standby was entered.
12
Titl
Title: PO_10664_MPU Manual_UK Language: English FI No.: 10664 Date: 22/11/07 Page: 13
Navigation
Navigation
The PMP has a T-Bar style navigation. The main menu is considered
to be the icons along the top of the player. The item that you are
currently on is in the center of the row of icons, it is highlighted and its
corresponding title is displayed above it. Pressing left or right on the
5-Way nav button allows you to scroll through the menu icons.
13
Title: PO_10664_MPU Manual_UK Language: English FI No.: 10664 Date: 22/11/07 Page: 14
Navigation
To proceed into a menu item you can either press ‘down’ or ‘select’ on
the 5-Way nav button. To go backwards, press the ‘Back’ touch key.
The ‘Menu’ touch key is a button whose function may change
depending on which feature/mode you are in. The Audio Player will
have different ‘Menu’ functions than the Video Player and still different
‘Menu’ functions in the Picture Viewer. The ‘Menu’ button has 5
options which are always there no matter what menu you are in. They
are ‘Now Playing’, ‘Main Menu’, ‘Receive Files’, ‘WiFi On’, and ‘TV
Out On’.
14
Titl
Title: PO_10664_MPU Manual_UK Language: English FI No.: 10664 Date: 22/11/07 Page: 15
Updating Firmware
Firmware is the software in the player that controls the whole player.
Periodically Polaroid will release new firmware that addresses the
addition of new features and the improvement of existing features. It
is recommended that you always keep your PMP up-to-date with the
latest firmware. Updating firrmware is discussed in more detail in the
‘Updating Firmware section.
As there may be new firmware already available for your PMP, please
perform the following steps to make sure have the latest and greatest
features available to you.
Warning: Connect the AC Adapter to your player during the
upgrade process to prevent a loss of power. Loss of power during
a firmware upgrade can corrupt the firmware on your player and
prevent it from functioning.
1. Go to the support section on www.polaroid.com/support and
2.
3.
4.
5.
download the latest firmware for your PMP
Connect the USB Cable to your PC and to your PMP.
When prompted to select a connection type on the player,
select “Media Player”
Your PC will likely prompt you with a window asking you
what you want to do with this connection. You do not need to
select anything.
Double-Click on the firmware file you downloaded and follow
the on-screen instructions.
15
Title: PO_10664_MPU Manual_UK Language: English FI No.: 10664 Date: 22/11/07 Page: 16
Using Your Player
Audio Player
Supported Content
The PMP can play these audio formats:
• MP3 (.mp3) unprotected
• WMA (.wma) unprotected and DRM protected
• AAC (.m4a) unprotected
If using the “Removable Disk” (Mass Storage) option to transfer files,
the audio files must be in the “Music” or “Podcasts” directories in order
for the PMP to recognize the content.
Controls
To play a file, select it from the Audio menu by pressing the 5-way
Nav button. This will take you to the Now Playing menu. The Now
Playing screen can also be entered at nearly any time be pressing the
“Menu” touch key.
16
Titl
Title: PO_10664_MPU Manual_UK Language: English FI No.: 10664 Date: 22/11/07 Page: 17
Audio Player
In the Now Playing menu, you can
• Fast Forward
• Rewind
• Pause/Play
• Skip to Next Track
• Skip to Previous Track
When paused:
• Pressing Play/Pause touch key will begin to play the current track
• Momentarily pressing Forward touch key will skip to the next track
• A press and hold of Forward key will skip ahead multiple tracks
• Momentarily pressing Reverse touch key will skip to the
previous track
• A press and hold of Reverse key will skip back multiple tracks
When playing:
• Pressing the Play/Pause touch key will pause the current track
• Momentarily pressing the Forward touch key will skip to the
next track
• A press and hold of the Forward key will fast forward within
the current track
• Momentarily pressing the Reverse touch key will:
o If within the first several seconds of the track, skip to
the previous track
o If after the first several seconds, return to the
beginning of the track
• A press and hold of the Reverse key will rewind within the
current track.
The above controls are also duplicated by the 5-Way navigation button:
• Left is equivalent to Reverse
• Right is equivalent to Forward
• Select (press) is equivalent to Play/Pause
17
Title: PO_10664_MPU Manual_UK Language: English FI No.: 10664 Date: 22/11/07 Page: 18
Audio Player
Playlists
You can create playlists on the device by selecting an audio track and
adding it to a playlist. Within the Audio browser, when a track has been
highlighted, a press of the MENU key will bring up a list of options.
Scroll with the 5 way nav to “Add to Playlist” and select. A list of
available playlists will be presented or a new playlist can be created.
Automatic playlist
There is a “Recently Added Audio” playlist, which automatically
maintains a list of the last 50 items added to the PMP.
Settings
Audio settings can be accessed from the Now Playing view from the
MENU key or by navigating to: Extras -> Setup -> Settings -> Audio.
Three primary settings are available:
• Shuffle - The track play order of the current playlist becomes
random.
• Repeat - Continuously play the current playlist, otherwise the
player stops at the end of the playlist.
Album Art
Album art will only be visible if you use the “Media Player” option to
transfer files to the PMP. Available album art is displayed automatically
in the browse and Now Playing screen views.
18
Titl
Title: PO_10664_MPU Manual_UK Language: English FI No.: 10664 Date: 22/11/07 Page: 19
Picture Viewer
Picture Viewer
Supported Content
The PMP can display these picture formats:
• JPEG (.jpg)
If using the “Removable Disk” (Mass Storage) option to transfer files,
the picture files must be in the “Pictures” directory in order for the PMP
to recognize the content.
Invalid file formats or pictures of very large file size / very high
resolution cannot be displayed and are shown as a generic photo image
with a red X. If these are encountered, transfer the photos to the PMP
using Windows Media Player. Windows Media Player will convert the
photos to an acceptable format when transferring them to the PMP.
The PMP creates thumbnails of the images to improve navigation. If
many pictures are transferred to the PMP at one time, it may take several
minutes for the images to be scaled. During this time, a processing image
will be shown when viewing the thumbnail picture viewer.
19
Title: PO_10664_MPU Manual_UK Language: English FI No.: 10664 Date: 22/11/07 Page: 20
Picture Viewer
Controls
When in the Picture Viewer, photos can be browsed with the 5-Way nav
button by folder, date or by all. Photo thumbnails are displayed within
the selected view and a specific photo can be scrolled to and selected.
• Upon selection, the photo is shown full screen size
• A right movement of the 5 way nav will display the next photo
• Left will display the previous photo
• Select will start a slideshow, which automatically steps
through the photos. Left and right override the slideshow
sequence. An additional Select will pause the slide show.
When viewing photos or slideshows, the MENU key will bring up
additional options:
• Photo Mode
This specifies whether the photos are to be displayed
in their normal size and aspect ratio or if they should
occupy the full screen.
• Zoom
This allows you to zoom in on an image. The 5-Way
nav allows scrolling about the magnified image with
a position map shown in the lower right of the LCD.
Settings
The default Photo Mode can be set in Extras -> Setup -> Settings -> Photo.
Any photo image can be set as the default background for the player.
When the desired image has been selected and is displayed full screen,
select MENU -> Set as Background.
20
Titl
Title: PO_10664_MPU Manual_UK Language: English FI No.: 10664 Date: 22/11/07 Page: 21
Video Player
Supported Content
The PMP can display these video formats:
• Windows Media Video (.wmv)
• MPEG-4 (.m4v)
• MPEG (.mpg)
Up to 360x240 at 29.97 Frames Per Second
Up to 480x272 at 24 Frames Per Second
Note: If using the “Removable Disk” (Mass Storage) option to transfer
files, the video files must be in the “Video” directory in order for the
PMP to recognize the content.
21
Title: PO_10664_MPU Manual_UK Language: English FI No.: 10664 Date: 22/11/07 Page: 22
Video Player
Controls
To play a file, select it from the Video menus by pressing the ‘Select’
key. This will take you to the Now Playing menu. The Now Playing
screen can also be entered at nearly any time be pressing the ‘Menu’
touch key.
In the Now Playing menu, you can
• Fast Forward • Rewind • Pause/Play
• Skip to Next Video • Skip to Previous Video
When paused:
• Press the Play/Pause touch key to begin play of the current video
• The Forward and Reverse keys are ignored
When playing:
• Pressing the Play/Pause touch key will pause the current video.
• Momentarily pressing the Forward touch key will skip to next video.
• Press and hold the Forward key to fast forward within current video.
• Momentarily press the Reverse touch key to return to the start of
the current video.
• Two rapid presses of the Reverse key will skip to the previous video.
• Press and hold the Reverse key to rewind within the current video.
The above control is also duplicated by the 5-Way navigation button:
• Left is equivalent to Reverse
• Right is equivalent to Forward
• Select (press) is equivalent to Play/Pause
22
Titl
Title: PO_10664_MPU Manual_UK Language: English FI No.: 10664 Date: 22/11/07 Page: 23
Video Player
Settings
Video settings can be accessed from the Now Playing view with the
MENU key. Four primary settings are available:
• Treble Boost - Boosts the high frequencies of the audio
• Bass Boost - Boosts the low frequencies of the audio
• Video Mode - Selects Normal, Full Screen and Zoom modes.
The default Video Mode is set in Extras -> Setup -> Settings
-> Video.
• Bookmark - Allows saving the current position within the
video for later recall. To return to a previously bookmarked
position, navigate to Extras -> Bookmarks and select the saved
bookmark name.
23
Title: PO_10664_MPU Manual_UK Language: English FI No.: 10664 Date: 22/11/07 Page: 24
Wireless Operation
Wireless Operation
The PMP includes a built-in 802.11b/g wireless network adapter. This
section tells you how to use the features utilizing the wireless adapter.
About Wireless Networks
•
The PMP supports two basic Wireless network configurations:
Infrastructure and Ad-Hoc.
Infrastructure Networks
These networks involve the use of a device called a Wireless Access
Point (WAP) or otherwise known as a wireless router. The WAP
provides the ability to connect your PMP to Podcast downloads via an
Internet connection.
A WAP is configured with an SSID (Service Set Identifier) and possibly
a network key (i.e., a password) used to prevent unauthorized access to
the network. The PMP must be configured with the appropriate SSIDs
and network keys for each WAP you will be using. See “Configuring
Wireless Access” for more information.
Ad-Hoc Networks
Ad-Hoc networks allow two or more wireless devices to communicate
without the need of a Wireless Access Point (WAP). An Ad-Hoc
network is needed to perform player-to-player sharing
Player-to-Player
One PMP establishes an ad-hoc network allowing another PMP to
join the network and share files directly from player to player. See the
section “Player to Player Sharing” for more information.
24
Titl
Title: PO_10664_MPU Manual_UK Language: English FI No.: 10664 Date: 22/11/07 Page: 25
Wireless Operation
Network Privacy
The PMP supports both WEP (Wired Equivalent Privacy) and WPA
PSK (Wireless Protected Access Pre Shared Key) network privacy
methods.
• WEP: 64-bit and 128-bit keys are supported.
• WPA: A password comprised of from 8 to 63 characters may
be used.
Configuring Wireless Access
To configure wireless access on the PMP, simply try to connect to
a wireless network. If the PMP detects it does not have the proper
configuration it will prompt you to enter an appropriate network key
as required by the network. For example, if you try to connect to a
network enabled for WPA, the player will prompt you to enter a WPA
network key (i.e., password). The network configuration information
will be saved on the PMP for future use.
Advanced Wireless Configuration
You will need to manually configure a wireless network if any of the
following applies:
• Your WAP is configured with broadcast SSID disabled. In this
case, you need to manually enter the SSID and indicate that it
is non-broadcast.
• Your wireless network is configured to use static IP
addressing. In this case you need to manually enter an IP
address and mask for your PMP.
Use the ‘Configure Networks’ option in the Wireless application to
access the advanced wireless configuration. From this menu, you are
able to add a new network and edit existing networks.
25
Title: PO_10664_MPU Manual_UK Language: English FI No.: 10664 Date: 22/11/07 Page: 26
Wireless Operation
Using WiFi
•
Enabling WiFi Automatically
When attempting to use any feature that requires
WiFi, the user will be automatically prompted to
enable WiFi.
•
Enabling WiFi Manually
WiFi can be enabled manually by pressing the
‘Menu’ button and selecting ‘WiFi On’. WiFi can
be turned off by pressing the ‘Menu’ button and
selecting ‘WiFi Off ’.
•
AutoConnect
When in the WiFi feature’s ‘Status’ menu, the
AutoConnect feature can be enabled and disabled
by pressing the ‘Menu’ button and selecting ‘Enable
AutoConnect’ or ‘Disable AutoConnect’. This feature,
when enabled, will automatically connect to your
preferred networks (previously accessed networks)
when WiFi is enabled. When this feature is disabled, a
WiFi connection needs to be manually selected.
•
Configuring Networks
The Configure Networks option in the Wireless
application allows you to manually configure a
network’s settings. When within this menu press the
‘Menu’ button to choose between adding, deleting
and editing a network. Network features such as
SSID, security information, IP address, and DNS
Server can be configured in these menus.
26
Titl
Title: PO_10664_MPU Manual_UK Language: English FI No.: 10664 Date: 22/11/07 Page: 27
Wireless Operation
Player-to-Player Sharing
Player-to-Player wireless file sharing provides the ability for your PMP
to send and share files with another Polaroid PMP.
To share file(s):
1. Highlight the files or folders you choose to share with another
PMP by navigating to the file or folder
2. Press the Menu button.
3. Select the “Share Now” option from the popup menu.
4. The sender will automatically discover any other PMPs in
receive mode that are in the vicinity. Select the name of the
PMP that you desire to receive files or folders from.
5. Once the files start to transfer, the progress indicator will
display the artwork or thumbnails of the file currently being
transferred.
6. The player will automatically reset back to normal mode when
the transfer is complete.
27
Title: PO_10664_MPU Manual_UK Language: English FI No.: 10664 Date: 22/11/07 Page: 28
Wireless Operation
To receive files:
There are two ways to put the player into receive mode.
1. Press the Menu button.
2. Select “Receive Files”.
3. Once the files start to transfer, the progress indicator will
display the artwork or thumbnails of the file currently being
transferred.
4. The player will automatically reset back to normal mode when
the transfer is complete.
OR
1. Navigate to the “Sharing” icon from the Main Menu.
2. Press the Down button to enter sharing.
3. Press the Center button to place the player in receive mode.
4. You will be prompted to accept the files that are being
transferred by the sender.
5. Once the file(s) start to transfer, the progress indicator will
display the artwork or thumbnail of the file currently being
transferred.
6. The player will automatically reset back to normal mode when
the transfer is complete.
28
Titl
Title: PO_10664_MPU Manual_UK Language: English FI No.: 10664 Date: 22/11/07 Page: 29
Wireless Operation
Note: DRM protected content will not play on another device unless
that device has an appropriate license to play the content.
Podcasting
Your PMP has the ability to browse and download audio podcasts
(digital audio files) wirelessly from the internet. The Podcasting
features allow a user to subscribe, unsubscribe, and refresh podcasts.
To download a podcast:
1. Navigate to the “Podcasting” menu under the ‘Extras” icon
from the Main Menu.
2. Press the Right or Center key.
3. Select “Podcast Directories”.
4. You may be asked to connect and configure a wireless network
if you are not already connected.
5. A list of preconfigured podcasts is displayed.
6. To view a list of episodes, navigate to a podcast in the list and
then press the Right or Center key.
7. To download a podcast, press the Menu key.
8. Select the Download option.
9. Press the Center button.
10. The download will be sent to the download manager. You
will be prompted to go to the download manager. A progress
bar will be shown at the bottom of the screen to indicate the
progress of the download.
11. When the download completes, the episode list will show
an icon next to the episode indicating that it is now in your
library.
12. Press the Center key to play the file.
29
Title: PO_10664_MPU Manual_UK Language: English FI No.: 10664 Date: 22/11/07 Page: 30
Wireless Operation
To subscribe to a podcast:
1. Navigate to an episode you’d like to subscribe to.
2. Press the Menu button.
3. Select “Subscribe”.
To browse your subscriptions:
1. Navigate to “Podcasting” under the “Extras” icon from the
Main Menu.
2. Press the Right or Center button.
3. Navigate to “Browse Subscriptions”.
4. Press the Right or Center key.
To unsubscribe from a subscriptions:
1. Navigate to “Podcasting” under the “Extras” icon from the
Main Menu.
2. Press the Right or Center button.
3. Navigate to “Browse Subscriptions”.
4. Press the Right or Center key.
30
Titl
Title: PO_10664_MPU Manual_UK Language: English FI No.: 10664 Date: 22/11/07 Page: 31
Wireless Operation
5.
6.
7.
Press the Menu key.
Select “Unsubscribe”.
Press the Center Key.
To download the latest episode of the podcasts you subscribe to:
1. Navigate to “Podcasting” under the “Extras” icon from the
Main Menu.
2. Press the Right or Center button.
3. Navigate to “Refresh Subscriptions”.
4. Press the Right or Center key.
To add a custom URL:
1. Navigate to “Podcasting” under the “Extras” icon from the
Main Menu.
2. Press the Menu Key and select “Add Podcast”.
3. Enter a name for the new Podcast and press Next.
4. Enter the URL for the new Podcast and press the Center Key.
To Browse a Custom Podcast:
1. Navigate to “Podcasting” under the “Extras” icon from the
Main Menu.
2. Select “Custom Podcasts” from the list.
3. Press Center or Right Key
4. Select a custom Podcast from the list
5. Press the Center or Right Key to browse Podcasts.
31
Title: PO_10664_MPU Manual_UK Language: English FI No.: 10664 Date: 22/11/07 Page: 32
Wireless Operation
To Delete a Custom Podcast:
1. Navigate to “Podcasting” under the “Extras” icon from the
Main Menu.
2. Select “Custom Podcasts” from the list.
3. Press Center or Right Key
4. Select a custom Podcast from the list
5. Press the Menu Key and select “Delete Podcast”
To Edit a Custom Podcast:
1. Navigate to “Podcasting” under the “Extras” icon from the
Main Menu.
2. Select “Custom Podcasts” from the list.
3. Press Center or Right Key
4. Select a custom Podcast from the list
5. Press the Menu Key and select “Edit Podcast”
Download Manager
Once downloads are requested, they are added to the queue for
processing by the Download Manager. You can cancel, retry, or view
the status of the current download by using the Download Manager.
To disable the download manager:
1. Navigate to the “Download Manager” icon from the Main
Menu.
2. Press the Down or Center key.
3. Press the Menu key.
4. Select “Disable” option.
5. Press the Center key.
32
Titl
Title: PO_10664_MPU Manual_UK Language: English FI No.: 10664 Date: 22/11/07 Page: 33
Wireless Operation
To enable the download manager:
1. Navigate to the “Download Manager” icon from the Main
Menu.
2. Press the Down or Center key.
3. Press the Menu key.
4. Select “Enable” option. Note: You will not see the download
resume until the player is connected to a Wifi network.
5. Press the Center key.
To stop or remove the current item being downloaded:
1. Navigate to the “Download Manager” icon from the Main
Menu.
2. Press the Down or Center key.
3. Press the Menu key.
4. Select “Remove Active” option.
5. Press the Center key.
33
Title: PO_10664_MPU Manual_UK Language: English FI No.: 10664 Date: 22/11/07 Page: 34
Wireless Operation
To stop or remove all items being downloaded:
1. Navigate to the “Download Manager” icon from the Main
Menu.
2. Press the Down or Center key.
3. Press the Menu key.
4. Select “Remove All” option.
5. Press the Center key.
To retry downloading a failed file:
1. Navigate to the “Download Manager” icon from the Main
Menu.
2. Press the Down or Center key.
3. In the “Completed” list, navigate to the desired file.
4. Press the Menu key.
5. Select “Retry” option.
6. Press the Center key.
To remove an entry from the completed or queued list:
1. Navigate to the “Download Manager” icon from the Main
Menu.
2. Press the Down or Center key.
3. In the “Completed” or “Queued” list, navigate to the desired
file.
4. Press the Menu key.
5. Select “Remove” option.
6. Press the Center key.
34
Titl
Title: PO_10664_MPU Manual_UK Language: English FI No.: 10664 Date: 22/11/07 Page: 35
FM Radio
The PMP has an integrated FM Radio. The functions that can be
performed by the FM Radio are described here and are available by
pressing the ‘Menu’ Button when within the FM Radio feature.
Radio On/Off
If the selection shows ‘Radio On’, a select button press will
turn the Radio on. If the selection shows ‘Radio Off ’, a select
button press will turn the Radio off.
35
Title: PO_10664_MPU Manual_UK Language: English FI No.: 10664 Date: 22/11/07 Page: 36
FM Radio
Tuning
This option allows you to change the Tuning Mode of the FM Radio.
NOTE: Be sure your headphones are connected prior to tuning.
•
Seek
When using Seek Mode, pressing the 5-Way nav button
left or right or pressing the Soft Keys ‘Fast Forward’
or ‘Rewind’ will search in that direction for the next
available station with sufficient signal strength.
•
Scan
When using Scan Mode, pressing the 5-Way nav
button left or right or pressing the Soft Keys ‘Fast
Forward’ or ‘Rewind’ will search in that direction
for the next available station with sufficient signal
strength, pause on that station for 3 seconds, then
continue to the next station and repeat until the user
cancels the scanning.
•
Manual
When using Manual Mode, pressing the 5-Way nav
button left or right or pressing the Soft Keys ‘Fast
Forward’ or ‘Rewind’ will increment the station by
the minimal amount regardless of whether a signal is
present on that station.
Presets
This option allows you to manually add the station you are
currently on to your presets as well as you can have the
player ‘Auto Load’ your presets by automatically scanning for
stations with sufficient signal strength and present you with a
list of stations. You can also add custom names to stations and
remove stations from the preset in this menu option.
36
Titl
Title: PO_10664_MPU Manual_UK Language: English FI No.: 10664 Date: 22/11/07 Page: 37
TV Out
TV Out
The Polaroid PMP LCD image can be re-directed to be displayed
on most television sets, allowing the entire device operation to be
enjoyed on the big screen. This requires the included Audio/Video
Cable.
Note: Stationary images can “burn” into some TV screens, leaving a
permanent shadow. Consult your TV owner’s manual to determine if
your TV is at risk.
Connecting the A/V cable
Match and connect the cable’s red, white and yellow connectors to the
color-coded inputs on your TV. Yellow carries a composite video signal,
white is left audio and red is right audio. If your TV has only a single
audio input jack, either the white or red cable connection can be used.
Select the appropriate input source or “channel” on your TV to be these
input jacks.
Connect the mini jack end of the A/V cable into the headphone jack of
the PMP.
37
Title: PO_10664_MPU Manual_UK Language: English FI No.: 10664 Date: 22/11/07 Page: 38
TV Out
Selecting the proper TV Mode
The Polaroid PMP supports both PAL and NTSC TVs. This setting is
found by navigating through the menu levels:
Extras -> Setup -> Settings -> Display -> TV Mode
The selected setting is saved for future use.
Enabling TV Out Mode
At most any time, the LCD image can be sent to the TV by pressing the
MENU soft key, scrolling to and selecting the TV Out On option. The
PMP LCD will go dark and the display redirected to the TV. Device
operation remains exactly the same with the image on the TV.
Exiting TV Out Mode
Pressing the power button will cancel the TV output and return the
display to the device LCD. The display can be alternated between the
TV and LCD at will by following the Enable and Exit procedures
Optimizing Your TV Screen
Your TV brightness, contrast and sharpness controls may require
adjustment to deliver the best picture from your PMP. Photos and
videos can be zoomed or stretched to fill the screen. This can be done
by certain TVs or on the PMP itself.
See the Picture Viewer or Video Player sections for these screen control
options.
38
Titl
Title: PO_10664_MPU Manual_UK Language: English FI No.: 10664 Date: 22/11/07 Page: 39
Connecting to Your PC
Connecting to your PC
Audio, video and photo content can be transferred from your PC to
your PMP. To do so, connect the supplied USB cable from your PC to
the PMP. A prompt will appear on the PMP LCD with three options:
• USB Power Only
• Removable Disk
• Media Player
Selecting USB Power Only will use the PC as a charging source and
will not create a connection to the PC. Removable Disk and Media
Player will create a connection with your PC as described below.
Both modes are supported by Microsoft Windows XP and Vista; other
operating systems will only support the Removable Disk mode.
Note: For use with Windows Media Player 10 and above, as well as
other media manager applications, always use the Media Player USB
mode. This is the only mode that supports downloading both protected
and non-protected media files to your PMP.
Removable Disk (Mass Storage)
With this option, you can use your PMP as a removable disk. This allows
you to manually copy files from your PC to the PMP. You can use this
method to store data files, or copy music, videos or photos to the PMP.
39
Title: PO_10664_MPU Manual_UK Language: English FI No.: 10664 Date: 22/11/07 Page: 40
Connecting to Your PC
After selecting Removable Disk, a message may appear on your PC
similar to this one:
Select “Open folder ….” and press OK. This opens Windows Explorer
and allows you to browse the PMP’s internal hard disk. If this message
does not appear, Windows Explorer may be opened manually and the
PMP found as a normal drive letter.
Windows Explorer can be used to transfer unprotected music and
videos and all types of non-media files to your PMP. Use Windows
Explorer to drag and drop files onto your PMP. Media types should
be placed in their corresponding Music, Podcasts, Video or Pictures
folders on your PMP.
40
Titl
Title: PO_10664_MPU Manual_UK Language: English FI No.: 10664 Date: 22/11/07 Page: 41
Connecting to Your PC
When you are done dragging files onto your PMP, disconnect the USB
cable and the player will scan the new files. All new media files will appear
in the content browsers on the PMP. Transfers of large amounts of files can
result in longer content scans when the USB cable is removed.
Note: If you use this method, you will not be able to add album art. If
you desire album art, please use the “Media Player” mode
Media Player (MTP)
Select this mode if you want to sync your media library to your PMP
using Windows Media Player.
If you select Media Player option, a similar prompt may appear on your PC:
41
Title: PO_10664_MPU Manual_UK Language: English FI No.: 10664 Date: 22/11/07 Page: 42
Connecting to Your PC
Select “Sync digital media…” and press OK. This opens Windows
Media Player and allows you to manage your media library and sync it
to your PMP. Windows Media Player must be used for synchronizing
music for album art and playlists to be present on the PMP, as well for
transferring DRM protected content.
Please refer to the Windows Media Player documentation for more
information or visit the following website.
http://www.microsoft.com/windows/windowsmedia/player/11/default.aspx
Digital Rights Management (DRM)
The PMP supports MP3 and WMA files both unprotected and Windows
Media DRM protected files; other copy protection schemes are not
supported. Songs purchased online have a set of licenses dictating how
the song may be used (how many copies can be made, how many times
it can be burned, how may times it can be transferred to a portable
device, etc.) Please remember that illegal copying of copyrighted
material is a crime!
For more information about Microsoft DRM go to:
http://www.microsoft.com/windows/windowsmedia/player/faq/drm.mspx
42
Titl
Title: PO_10664_MPU Manual_UK Language: English FI No.: 10664 Date: 22/11/07 Page: 43
Charging the Battery
Charging the Battery
Your PMP uses a long-lasting Lithium-ion battery that is replaceable.
Only use a Polaroid approved replacement battery. Visit Polaroid.com
for accessories.
43
Title: PO_10664_MPU Manual_UK Language: English FI No.: 10664 Date: 22/11/07 Page: 44
Charging the Battery
There are 2 ways to charge the battery in your PMP.
AC Adapter
The AC Adapter is the recommended way to charge your
PMP. This connection has the ability to provide enough
power to completely power your player during the use of
any feature and charge your battery at full rate.
USB Cable
The PMP has a ‘USB Power Only’ option. When a
USB Cable is plugged into the player and the other
end is plugged into a powered USB port on a PC, the
player gives you the option to enter ‘USB Power Only’
mode. Although this mode charges your battery, there
are features on the PMP that can draw larger amounts
of power and cause the battery to discharge. This
charging connection is limited to the amount of power
allowed to be drawn from a PC’s USB port.
A battery icon is present at the lower right of the display, indicating the
relative charge state of the battery (full charge, half charge, etc.). When
charging, the battery icon will be animated.
When the battery is depleted, a low battery warning will be displayed.
The unit will continue to operate for a short duration of time, at which
point it will automatically turn off. To avoid this shutdown, connect the
unit to a charging source (AC adapter or USB cable).
Battery playtime is highly dependent on how the PMP is used. Using
wireless or TV Out features will shorten playtime. Music offers longer
playtimes than video. Minimizing usage of the LCD backlight will
increase playtime.
44
Titl
Title: PO_10664_MPU Manual_UK Language: English FI No.: 10664 Date: 22/11/07 Page: 45
Extras
Extras
Setup
There are many extra settings that can be accessed on your PMP that
will help you customize it to your liking. Navigate to the Main Menu
option ‘Extras’ Æ Setup Æ Settings.
Display
There are 3 display settings the user can modify.
•
Clear Background
This option will allow you to clear any customized
backgrounds that have been applied. Press the
‘Select’ button on the 5-Way nav button to clear the
background.
•
Backlight
This option allows you to change the backlight
timeout period. The longer the timeout period,
the more battery life the player will consume. To
help optimize your battery life, choose the shortest
backlight timeout period available.
•
Brightness
This option allows you to change the backlight
brightness. The higher the brightness, the more
battery life the player will consume. To help optimize
your battery life, choose the lowest brightness setting.
45
Title: PO_10664_MPU Manual_UK Language: English FI No.: 10664 Date: 22/11/07 Page: 46
Extras
System
This menu shows many of the system settings that you can customize.
•
•
Device Name
Selecting this menu option, a virtual keyboard will
pop-up and using the 5-Way nav button you can name
your player whatever you like.
Clock
The time of day can be modified in this menu option.
The time may need to be updated if the battery is
removed or if the player is unused for a long period of
time. Use the 5-Way nav button to change the time.
•
Date
The date can be modified in this menu option. The
date may need to be updated if the battery is removed
or if the player is unused for a long period of time.
Use the 5-Way nav button to change the date.
•
Restore Defaults
This menu option allows the user to reset
customizable settings to their original factory
defaults. All custom settings will be lost.
•
Main Menu
The user can customize the Main Menu T-Bar with
this option. Using the 5-Way nav button the user can
customize which applications they want to have appear
in the T-Bar. Options such as Now Playing, Audio,
Video and Pictures are not allowed to be removed from
the T-Bar.
46
Titl
Title: PO_10664_MPU Manual_UK Language: English FI No.: 10664 Date: 22/11/07 Page: 47
Extras
•
Auto Key Lock
This option will allow the user to have the player
lock all of the user input keys after a predetermined
amount of time. Press the Power Button to bring up
the menu to unlock the keypad.
•
Format Disk
This option allows the user to format the hard drive
of the player. A quick format or a full format can be
performed. The full format takes hours to perform,
while the quick format can be finished in minutes.
Warning: All content on the player will be erased
when formatting the hard drive. This includes all
media as well as data files. This action cannot be
undone.
Audio
This menu shows the customizable settings for the Audio Player.
•
Shuffle
This option will randomly choose the next song
within the selected playlist.
•
Repeat
This option will repeat the currently selected playlist.
If it is desired to repeat an individual song many
times, the song needs to be the only song in a playlist.
47
Title: PO_10664_MPU Manual_UK Language: English FI No.: 10664 Date: 22/11/07 Page: 48
Extras
Video
This menu allows you to change the default Video Mode. The choices
are Fullscreen, Zoom and Normal.
Photo
This menu allows you to change the default picture viewing mode. The
choices are Fullscreen, Zoom and Normal.
Network
This menu allows you to change the default “Auto Connect” setting.
See “Using WiFi” section for more information.
Updating Firmware
The firmware of the PMP can be updated in 2 ways. It can be done via
the USB connection Media Player and downloading the appropriate
firmware from www.polaorid.com, or it can be done via WiFi in the
Extras Æ Setup Æ Update Firmware section of the player.
Warning: Connect the AC Adapter to your player during any upgrade
process to prevent a loss of power. Loss of power during a firmware
upgrade can corrupt the firmware on your player and prevent it from
functioning.
USB Media Player
1. Go to the support section of www.polaroid.com/support
and download the latest firmware for your PMP
2. Connect the USB Cable to your PC and to your PMP.
3. When prompted to select a connection type on the player,
48
Titl
Title: PO_10664_MPU Manual_UK Language: English FI No.: 10664 Date: 22/11/07 Page: 49
Extras
4.
5.
select “Media Player”
Your PC will likely prompt you with a window asking
you what you want to do with this connection. You do not
need to select anything.
Double-Click on the firmware file you downloaded and
follow the on-screen instructions.
WiFi
The Update Firmware section of the Extras Æ Setup menu
allows the user to check for firmware updates using the PMP’s
built-in WiFi. You will need access to a wireless network with
an active internet connection in order to accomplish this task.
Follow the on-screen instructions to update the PMPs firmware.
About
The About screen shows various stats for the PMP. There are no options
that are user changeable in this menu. It shows the number of Songs,
Videos, Podcasts and Pictures currently on the player. It shows the
firmware version number, the player’s WiFi MAC address and the
Battery level (1-4).
49
Title: PO_10664_MPU Manual_UK Language: English FI No.: 10664 Date: 22/11/07 Page: 50
Resetting the PMP
Resetting the PMP
At times, your portable media player may no longer responds to button
presses. First, check to make sure the key-lock switch is not enabled.
Look for a padlock icon on the status bar. Next try to turn the PMP
off by pressing the Power button. If it does not respond to the power
button, and the keylock is not enabled, the PMP may need to be reset.
How to reset the PMP:
Disconnect all cables from the PMP. There is a reset hole located on
the back of the PMP. Using a thin object such as a straightened paper
clip, you can press the reset button to power off the player. Now the
PMP can be turned on. If the PMP fails to turn on, insert the AC power
adapter. This should provide enough power to allow the PMP to boot
in the event of a low battery. If it still fails to boot, it may need service.
Visit www.polaroid.com/support for service options.
50
Titl
Title: PO_10664_MPU Manual_UK Language: English FI No.: 10664 Date: 22/11/07 Page: 51
Technical Specifications
Display Specification
Display Technology
LCD
Size (inches)
4.3”
Aspect Ratio
16:9
Panel Type
Digital
Frames Per Second
24-30
Resolution
480x272
Number of lines
272
Backlight Type
LED
Brightness (cd/m2)
250
Contrast Ratio
400
Vertical Viewing Angle
120
Horizontal viewing angle 140
Number of colors
65K
51
Transmissive TFT, Norm
Black
Title: PO_10664_MPU Manual_UK Language: English FI No.: 10664 Date: 22/11/07 Page: 52
Technical Specifications
Storage
Internal 2.5” Hard Drive
15,000 songs
10,000 photos
60 GB 80 hours video
*actual capacity may vary by
content
Audio
MP3 Audio Playback
AAC Audio Playback
Unprotected
WMA Audio Playback
DRM Protected & DRM Unprotected
Windows DRM Support
ID3 Tag Support
DA Converter
16 bit
Audio Output
40 mW
Signal-Noise
90 dB
Dynamic Range
90 dB
Channel Separation
80 dB
Frequency Response
20-20kHz
Total Harmonic Distortion
.05%
52
Titl
Title: PO_10664_MPU Manual_UK Language: English FI No.: 10664 Date: 22/11/07 Page: 53
Technical Specifications
FM Tuner
FM Frequencies
87.5 – 107.9 MHz
Antenna
Headphone Cord
Video
H.264 Video Playback
WMV Video Playback
Photo
JPEG Support
Battery/Power
Battery
Lithium-Ion
Removable
Yes
Battery Life (hours)
16 hours audio, 4 hours video
AC Power
120VAC-240 VAC 50-60 Hz
53
Title: PO_10664_MPU Manual_UK Language: English FI No.: 10664 Date: 22/11/07 Page: 54
Technical Specifications
Headphones
Jack
3.5mm
Impedance
32 ohm
Frequency Response
20Hz – 20kHz
Other
USB
2.0 High Speed
TV Output
Composite Video (NTSC, PAL)
WiFi
802.11b/g
Unit Dimensions
Unit Dimensions (H x W x L)
.8” x 3.14” x 5.6”
22 x 80 x 144 (mm)
Unit Weight
10 oz.
286 (grams)
System Requirements
Windows Media Player 10 or greater
Windows XP or Windows Vista
54
Titl
Title: PO_10664_MPU Manual_UK Language: English FI No.: 10664 Date: 22/11/07 Page: 55
FAQ & Troubleshooting
FAQ & Troubleshooting
No album art appears, why?
Sync your PMP with Windows Media Player to transfer album art to the PMP.
The Player has stopped responding
Verify the Key-lock has not been enabled.
The Player has stopped responding
The system software my have locked up. Reset the PMP. See section
titled Resetting your PMP.
I created sub-folders within the Video folder, but the sub-folders do
not appear.
You must have video files in the sub-folders. The video files must be of
the proper format. See specifications for specific video file types.
My computer does not recognize the PMP over USB.
You must select the USB connection option Removable Disk or Media
Player on the PMP when using Windows XP or Vista. All other operating
systems must select Removable Disk mode. Remove the USB cable from
the PMP and re-insert, selecting the proper connection option.
My computer does not recognize the PMP over USB using a USB Hub.
Do not use a USB hub when connecting to your computer; connect the
PMP directly to your computer’s USB port.
My player runs out of battery power before I can transfer my content.
It’s a good idea to run the player with the AC adapter during large file
transfers to ensure this doesn’t happen.
55
Title: PO_10664_MPU Manual_UK Language: English FI No.: 10664 Date: 22/11/07 Page: 56
Support
Transferring music, video or photos to the PMP takes a long time. Use
Windows Media Player for the highest transfer rate. Songs transfer in a few
seconds each while an hour of video takes minutes. When synchronizing
large numbers of content files, a proportionately longer time is required.
Be sure your computer supports USB 2.0 for the highest transfer speed.
Windows Media Player does not recognize the PMP.
You must have Media Player version 10 or higher installed. See
http://www.microsoft.com/windows/windowsmedia/player/11/default.aspx
My player does not play videos or photos.
Be sure the video or photo file is of the correct format. See the Video
or Specifications section of this manual for supported formats.
For best results, use Windows Media Player version 10 or above to
transfer files to your player.
My player will not turn on.
The battery may be discharged. Connect the AC charger. The player
should power on. When connected to a USB cable, the player will only
power on if a battery is installed and not fully discharged. If the player
does not power on when connecting a USB cable, wait 30 minutes for
a trickle charge to complete or connect the AC charger.
Licenses Expired
Purchased songs and videos may have a subscription that only lasts so long.
Once it expires, you’ll need to connect the player to your PC and perform a
sync with Windows Media Player to automatically renew all licenses.
Formatting the Player Disk Drive
It may be necessary for you to format your player for it to recover.
Formatting your player will erase all music, photos, videos and data files
from your player. You can backup your files to your computer over a
Removable Disk USB connection before formatting the player. See the
Extras section in this manual for instructions on performing the format.
56
Titl
Title: PO_10664_MPU Manual_UK Language: English FI No.: 10664 Date: 22/11/07 Page: 57
Support
Visit the support page for the Digital Portable Multimedia Player at
www.polaroid.com/support for:
• Up to date documentation
• Firmware Updates
• Frequently Asked Questions
• Purchasing replacement parts or cables
• Troubleshooting Guide
If you do not have internet access, you can call the help line found on
the insert for technical support.
NOTICE: Your Limited Warranty does not cover data loss resulting
from the unlikely failure of the hard drive in the Player.
NOTICE: Do not subject the player to excessive force or impact as it
may damage your player.
Questions? Need some help?
Call our help line found on the insert with this icon:
Or visit www.polaroid.com/support
57