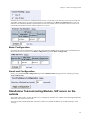
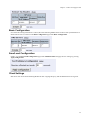
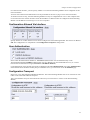
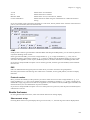
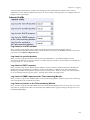
1
3Com® Telecommuting Module User
Manual
Version 4.3
3Com® Telecommuting Module User Manual: Version 4.3
Part Number BETA
Published December 2005
3Com Corporation, 350 Campus Drive, Marlborough MA 01752-3064
Copyright © 2005, 3Com Corporation. All rights reserved. No part of this documentation may be reproduced in any form or by any means or used to
make any derivative work (such as translation, transformation, or adaptation) without written permission from 3Com Corporation.
3Com Corporation reserves the right to revise this documentation and to make changes in content from time to time without obligation on the part of
3Com Corporation to provide notification of such revision or change.
3Com Corporation provides this documentation without warranty, term, or condition of any kind, either implied or expressed, including, but not
limited to, the implied warranties, terms, or conditions of merchantability, satisfactory quality, and fitness for a particular purpose. 3Com may make
improvements or changes in the product(s) and/or the program(s) described in this documentation at any time.
If there is any software on removable media described in this documentation, it is furnished under a license agreement included with the product as a
separate document, in the hardcopy documentation, or on the removable media in a directory file named LICENSE.TXT or !LICENSE.TXT. If you
are unable to locate a copy, please contact 3Com and a copy will be provided to you.
UNITED STATES GOVERNMENT LEGEND
If you are a United States government agency, then this documentation and the software described herein are provided to you subject to the
following:
All technical data and computer software are commercial in nature and developed solely at private expense. Software is delivered as "Commercial
Computer Software" as defined in DFARS 252.227-7014 (June 1995) or as a "commercial item" as defined in FAR 2.101(a) and as such is provided
with only such rights as are provided in 3Com’s standard commercial license for the Software. Technical data is provided with limited rights only as
provided in DFAR 252.227-7015 (Nov 1995) or FAR 52.227-14 (June 1987), whichever is applicable. You agree not to remove or deface any portion
of any legend provided on any licensed program or documentation contained in, or delivered to you in conjunction with, this guide.
Unless otherwise indicated, 3Com registered trademarks are registered in the United States and may or may not be registered in other countries.
3Com, the 3Com logo, NBX, and SuperStack are registered trademarks of 3Com Corporation. NBX NetSet, pcXset, and VCX are trademarks of
3Com Corporation.
Adobe is a trademark and Adobe Acrobat is a registered trademark of Adobe Systems Incorporated. Microsoft, Windows, Windows 2000, Windows
NT, and Microsoft Word are registered trademarks of Microsoft Corporation.
All other company and product names may be trademarks of the respective companies with which they are associated.
Table of Contents
Part I. Introduction to 3Com VCX IP Telecommuting Module ............................................................................. i
1. Introduction to 3Com VCX IP Telecommuting Module .................................................................................1
2. Installing 3Com VCX IP Telecommuting Module..........................................................................................5
3. Configuring 3Com VCX IP Telecommuting Module ...................................................................................13
Part II. How To..........................................................................................................................................................20
4. How To Configure SIP...................................................................................................................................21
Part III. Description of 3Com VCX IP Telecommuting Module Settings............................................................35
5. The Serial Console ........................................................................................................................................36
6. Basic Configuration .......................................................................................................................................42
7. Network Configuration ..................................................................................................................................60
8. SIP Services...................................................................................................................................................69
9. SIP Traffic......................................................................................................................................................82
10. Administration.............................................................................................................................................87
11. Logging........................................................................................................................................................98
12. Failover ......................................................................................................................................................112
13. Tools ..........................................................................................................................................................118
14. Firewall and Client Configuration .............................................................................................................121
Part IV. Appendices ................................................................................................................................................124
A. More About SIP..........................................................................................................................................125
B. Troubleshooting ..........................................................................................................................................127
C. Lists of Reserved Ports, ICMP Types and Codes, and Internet Protocols ..................................................130
D. Definitions of terms ....................................................................................................................................140
E. License Conditions......................................................................................................................................147
F. Obtaining Support for Your 3Com Products ...............................................................................................162
Index .........................................................................................................................................................................165
i
Part I. Introduction to 3Com VCX IP
Telecommuting Module
Chapter 1. Introduction to 3Com VCX IP
Telecommuting Module
Some of the functions of 3Com VCX IP Telecommuting Module are:
•
SIP proxy: Forwarding of SIP requests.
•
Protection against such attacks as address spoofing.
•
Logging/alarm locally on the Telecommuting Module, via email and/or via syslog.
•
Managing several logical/directly-connected networks and several network connections/physical networks.
•
Administration of the Telecommuting Module through a web browser using http or https.
•
Failover - connect two Telecommuting Modules in parallel; one handles traffic and the other acts as a hot standby.
•
STUN server and Remote SIP Connectivity for SIP clients behind NAT boxes which are not SIP aware (using the
Remote SIP Connectivity module).
Note that some of the functions mentioned here are only available if the corresponding extension module has been
installed.
What is a Telecommuting Module?
A Telecommuting Module is a device which processes traffic under the SIP protocol (see RFC 3261). The
Telecommuting Module receives SIP requests, processes them according to the rules you have set up, and forwards
them to the receiver.
The Telecommuting Module connects to an existing enterprise firewall through a DMZ port, enabling the
transmission of SIP-based communications without affecting firewall security. SIP messages are then routed
through the firewall to the private IP addresses of authorized users on the internal network.
The Telecommuting Module can also be used as an extra gateway to the internal network without connecting to the
firewall, transmitting only SIP-based communications.
Configuration alternatives
The 3Com VCX IP Telecommuting Module can be connected to your network in three different ways, depending
on your needs.
Note that the interface which should receive traffic from the outside must have a public IP address (no NAT),
regardless of which Telecommuting Module Type was selected. For a DMZ or DMZ/LAN type, this means that
the interface connected to the DMZ of the firewall must have a public IP address.
DMZ Configuration
Using this configuration, the Telecommuting Module is located on the DMZ of your firewall, and connected to it
with only one interface. The SIP traffic finds its way to the Telecommuting Module using DNS or by setting the
Telecommuting Module as an outbound proxy on the clients.
This is the most secure configuration, since all traffic goes through both your firewall and your Telecommuting
Module. It is also the most flexible, since all networks connected to any of your firewall’s interfaces can be
SIP-enabled.
The drawback is that the SIP traffic will pass the firewall twice, which can decrease performance.
1
Chapter 1. Introduction to 3Com VCX IP Telecommuting Module
Fig 1. Telecommuting Module in DMZ configuration.
DMZ/LAN Configuration
Using this configuration, the Telecommuting Module is located on the DMZ of your firewall, and connected to it
with one of the interfaces. The other interface is connected to your internal network. The Telecommuting Module
can handle several networks on the internal interface even if they are hidden behind routers. No networks on other
interfaces on the firewall can be handled.
This configuration is used to enhance the data throughput, since the traffic only needs to pass your firewall once.
This configuration can only support one local network.
Fig 2. Telecommuting Module in DMZ/LAN configuration.
Standalone Configuration
Using this configuration, the Telecommuting Module is connected to your internal network on one interface and the
outside world on the other.
Use this configuration only if your firewall lacks a DMZ interface, or for some other reason cannot be configured
for the DMZ or DMZ/LAN alternatives.
Fig 3. Telecommuting Module in Standalone configuration.
Quick guide to 3Com VCX IP Telecommuting Module
installation
3Com VCX IP Telecommuting Module is easy to install:
2
Chapter 1. Introduction to 3Com VCX IP Telecommuting Module
•
Select an IP address for the Telecommuting Module on your network.
•
The network interfaces are marked with 1 and 2. These numbers correspond to the physical interfaces eth0 and
eth1 respectively, the latter which should be use in the installation program.
•
Plug in the power cord and turn on the Telecommuting Module.
•
Wait while the Telecommuting Module boots up.
•
Connect the network cables to the network interfaces.
•
Find out the MAC address of the Telecommuting Module’s Network Interface 1 (printed on the Telecommuting
Module label).
•
Add a static entry in your local ARP table consisting of the Telecommuting Module’s MAC address and the IP
address it should have on Network Interface 1.
This is how to add a static ARP entry if you use a Windows computer:
Run the command command (or cmd).
In the Command window, enter the command arp -s ipaddress macaddress where ipaddress is the new IP
address for Network Interface 1, and macaddress is the MAC address printed on the Telecommuting Module, but
with all colons (:) replaced with dashes (-).
•
Ping this IP address to give the Telecommuting Module its new IP address. You should receive a ping reply if the
address distribution was successful.
•
Direct your web browser to the IP address of the Telecommuting Module. You will be prompted to set a
password for the Telecommuting Module admin user.
•
Now you can see the top page of 3Com VCX IP Telecommuting Module. Click on the Telecommuting Module
Type link and select the configuration for your Telecommuting Module. The types are described on the web page.
•
Go to the Network Interface 1 page and enter the necessary configuration. See also the Interface section. Note
that the Telecommuting Module must have at least one IP address which can be reached from the Internet.
•
If one of the Telecommuting Module Types DMZ/LAN or Standalone was chosen, move on to the Network
Interface 2 page and give the Telecommuting Module at least one IP address on this interface and state the
networks connected to the interface. See also the Interface section.
•
Go to the Networks and Computers page. Define the networks that will send and receive SIP traffic using the
Telecommuting Module. Usually, you need at least one network per interface of the firewall connected to the
Telecommuting Module (or, for the Standalone type, per interface of the Telecommuting Module). Some
computers should be handled separately, and they therefore need their own networks. See also the Networks and
Computers section.
•
Go to the Basic Configuration page under Basic Configuration and enter a Default gateway and a DNS
server. See also the Basic Configuration section.
•
Go to the Access Control page and make settings for the configuration of the Telecommuting Module. See also
the Access Control section.
•
Go to the Surroundings page (for the DMZ Telecommuting Module Type) and state the networks connected to
the firewall. See also the Surroundings section in chapter 7, Network Configuration.
•
Go to Basic under SIP Services and turn the SIP module on. See also the Basic section.
•
Go to the Interoperability page. Turn Preserve username and SIP URL encryption on.
•
If you use a dialing domain which looks like an IP address, enter the dialing domain in the Translation
exceptions table. See also the Interoperability section.
•
For this type of dialing domain, you also need to go to the Routing page. Enter the dialing domain in the DNS
Override For SIP Requests table and state the IP address of the SIP server(s) to handle the domain. See also the
Routing section.
•
Go to the Save/Load Configuration page under. Select Apply configuration. Now you can test your new
configuration and save it permanently if you are satisfied with it. If the configuration is not satisfactory, select
Revert or restart the Telecommuting Module. The old configuration will remain.
3
Chapter 1. Introduction to 3Com VCX IP Telecommuting Module
When the Telecommuting Module is configured, the firewall connected to it must also be reconfigured (for the
DMZ and DMZ/LAN Telecommuting Module Types).
•
Allow UDP and TCP traffic in the port interval used for media streams by the Telecommuting Module, and port
5060. This traffic must be allowed to all networks which should be reached by SIP traffic.
See also chapter 14, Firewall and Client Configuration, for information on configuring the firewall and the SIP
clients, and chapter 4, How To Configure SIP, for Telecommuting Module configuration examples.
Before you start
You could do a rough sketch of your network to make the configuration simpler. Things to think of:
•
Which IP addresses will the Telecommuting Module interfaces use? You can have more than one IP network on
one interface, each requiring a separate IP address for the Telecommuting Module.
•
Which series of IP addresses will be used on the networks connected to the different interfaces?
•
Are there networks behind routers?
•
What is the default gateway for the Telecommuting Module?
About settings in 3Com VCX IP Telecommuting Module
3Com VCX IP Telecommuting Module uses two sets of Telecommuting Module configurations: preliminary and
permanent configuration. The permanent configuration is what is used in the active Telecommuting Module. The
preliminary configuration is where you change and set the configuration. See chapter 3, Configuring 3Com VCX IP
Telecommuting Module, for instructions.
The changes you make in the preliminary configuration are not stored in the permanent configuration until you click
on Apply configuration on the Save/Load Configuration page under Administration.
The password configuration and time setting are the exceptions to this rule; they are saved immediately. Change the
administrator passwords and create more administrator users on the User Administration page under
Administration.
3Com VCX IP Telecommuting Module displays serious errors in red, e.g., if mandatory information is not entered.
Blank fields are shown in red. Fields that you correct remain red until you select Save, Add new rows or update the
page in some other way.
If you have a web connection with the Telecommuting Module that is inactive for 10 minutes, it will ask for a
password again.
Always log out from the Telecommuting Module administration interface when you are not using it. Press the Log
out button on the left to log out.
The terms used in the book are explained in appendix D, Definitions of Terms.
For a general description of how to configure and administer the Telecommuting Module, see chapter 3,
Configuring 3Com VCX IP Telecommuting Module.
4
Chapter 2. Installing 3Com VCX IP
Telecommuting Module
Installation
There are three ways to install an 3Com VCX IP Telecommuting Module: using a serial cable, using a diskette or
perform a magic ping.
Installation with a serial cable or a diskette requires being at the same place as the Telecommuting Module, but will
give more options for the start configuration.
Installation with magic ping does not require being on the same place as the Telecommuting Module (but the
computer has to be connected to the same logical network as the Telecommuting Module), but restricts the start
configuration.
Installation with magic ping
You can use the magic ping to set an IP address for the Telecommuting Module. This is how to perform a magic
ping:
•
Plug in the power cord and turn the Telecommuting Module on.
•
Wait while the Telecommuting Module boots up.
•
Connect the network cables to the network interfaces.
•
Find out the MAC address of the Telecommuting Module (printed on the back of the Telecommuting Module).
This is the MAC address of Network Interface 1.
•
Add a static entry in your local ARP table consisting of the Telecommuting Module’s MAC address and the IP
address it should have on Network Interface 1.
This is how to add a static ARP entry if you use a Windows computer:
Run the command command (or cmd).
In the Command window, enter the command arp -s ipaddress macaddress where ipaddress is the new IP address
for the Network Interface 1 interface, and macaddress is the MAC address printed on the Telecommuting
Module, but with all colons (:) replaced with dashes (-).
•
Ping this IP address to give the Telecommuting Module its new IP address. You should receive a ping reply if the
address distribution was successful.
•
Configure the rest through a web browser.
•
Plug in the power cord and turn the Telecommuting Module on.
•
Wait while the Telecommuting Module boots up.
•
Connect the network cables to the network interfaces.
•
Find out the MAC address of the Telecommuting Module (printed on the back of the Telecommuting Module).
This is the MAC address of Network Interface 1.
•
Add a static entry in your local ARP table consisting of the Telecommuting Module’s MAC address and the IP
address it should have on Network Interface 1.
This is how to add a static ARP entry if you use a Windows computer:
Run the command command (or cmd).
In the Command window, enter the command arp -s ipaddress macaddress where ipaddress is the new IP address
for the Network Interface 1 interface, and macaddress is the MAC address printed on the Telecommuting
Module, but with all colons (:) replaced with dashes (-).
5
Chapter 2. Installing 3Com VCX IP Telecommuting Module
•
Ping this IP address to give the Telecommuting Module its new IP address. You should receive a ping reply if the
address distribution was successful.
•
Configure the rest through a web browser.
Installation with a serial cable
These steps are performed when installing with a serial cable:
•
Connect the Telecommuting Module to your workstation with a null modem serial cable.
•
Plug in the power cord and turn the Telecommuting Module on.
•
Wait while the Telecommuting Module boots up.
•
Log on from your workstation.
•
Run the installation program (see following instructions).
•
Connect the network cables to the network interfaces.
•
Configure the rest through a web browser.
Connect the Telecommuting Module to your workstation with a null modem serial cable, plug in the power cord
and turn the Telecommuting Module on. You will have to wait a few minutes while it boots up.
•
If you use a Windows workstation, connect like this: Start Hyperterm. A Location dialogue will show, asking for
your telephone number and area. Click Cancel followed by Yes. Then you will be asked to make a new
connection. Type a name for this connection, select an icon and click OK. The Location dialogue will show
again, so click Cancel followed by Yes.
Now you can select Connect using COM1 and click OK. A Port settings dialogue will show, where you select
19200 as Bits per second. Use the default configuration for all other settings. Click OK and wait for a login
prompt. (In some cases you have to press Return to get the login prompt.)
•
If you use a Linux workstation, connect like this: Make sure that there is a symbolic link named /dev/modem
which points to the serial port you connected the Telecommuting Module to. Connect using minicom with the bit
rate 19200 bits/s, and wait for a login prompt.
Log on as the user admin. The first time you log on, no password is required. You set the password when you run
the installation script, which starts automatically when you have logged on.
Each network interface is marked with a name (1 and 2), which corresponds to a tab under Network. All eth
interfaces belong to ethernet cards and should only be connected using ethernet cables.
Decide which computer(s) are allowed to configure 3Com VCX IP Telecommuting Module and enter the name of
the network interface to which they are connected, for example, Network Interface 1. You must use the physical
device name (eth0 and eth1).
Enter the IP address of the Telecommuting Module on this interface and the network mask for the network.
A network mask can be written in two ways in 3Com VCX IP Telecommuting Module:
•
The first looks just like an IP address, for example 255.255.192.0 or 255.255.254.0.
•
The other way is as a number between 0 and 32. An IP address has 32 bits, where the number of the network
mask indicates how many bits are used in the network’s addresses. The rest of the bits identifies the computer on
the network.
Now, you can select to deactivate any network interfaces. Select y to deactivate all interfaces but the one you just
configured. The remaining network interfaces can be activated later when you complete the configuration via the
web interface from your work station. This only applies to interfaces which was previously active; you can’t
activate interfaces with this setting.
Now enter the computer or computers from which the Telecommuting Module may be configured (the configuration
computers).
6
Chapter 2. Installing 3Com VCX IP Telecommuting Module
Then enter a password for the Telecommuting Module. This is the password you use in your web browser to access
and change the Telecommuting Module’s configuration. Finally, you can reset all other configuration if you want to.
Following is a sample run of the installation program.
3Com VCX IP Telecommuting Module Administration
1. Basic configuration
2. Save/Load configuration
3. Become a failover team member
4. Leave failover team and become standalone
5. Wipe email logs
6. Set password
q. Exit admin
==>
Select 1 to install your 3Com VCX IP Telecommuting Module.
Basic unit installation program version 4.3
Press return to keep the default value
Network configuration inside:
Physical device name[eth0]:
IP address [0.0.0.0]: 10.47.2.242
Netmask/bits [255.255.255.0]: 255.255.0.0
Deactivate other interfaces? (y/n) [n]
Computers from which configuration is allowed:
You can select either a single computer or a network.
Configure from a single computer? (y/n) [y]
If you choose to allow only one computer to configure the Telecommuting Module, you are asked for the IP address
(the mask is set automatically).
IP address [0.0.0.0]: 10.47.2.240
If this IP address is not on the same network as the IP address of the Telecommuting Module, you are asked for the
router. Enter the IP address of the router on the network where the Telecommuting Module is connected. Then enter
the network address and mask of the network containing the configuring computer.
Static routing:
The computer allowed to configure from is not on a network local to
this unit. You must configure a static route to it. Give
the IP address of the router on the network the unit is on.
The IP address of the router [0.0.0.0]: 10.47.3.1
Network address [10.47.0.0]: 10.10.0.0
Netmask [255.255.255.0]:
You can choose to allow several computers to configure the Telecommuting Module, by answering no to the
question:
Configure from a single computer? (y/n) [y] n
The installation program then asks for the network number. The network number is the lowest IP address in the
series of numbers that includes the configuration computers (see chapter 3, Configuring 3Com VCX IP
7
Chapter 2. Installing 3Com VCX IP Telecommuting Module
Telecommuting Module). The network mask determines the number of computers that can act as configuration
computers.
Network number [0.0.0.0]: 10.47.2.0
Netmask/bits [255.255.255.0]: 255.255.255.0
If the network or partial network is not directly connected to the Telecommuting Module, you must enter the IP
address of the router leading to that network. Then enter the network’s address and mask.
Static routing:
The network allowed to configure from is not on a network local to this
unit. You must configure a static route to it. Give the
IP address of the router on the network this unit is on.
The IP address of the router [0.0.0.0]: 10.47.3.1
Network address [10.47.0.0]: 10.10.0.0
Netmask [255.255.255.0]:
Then enter a password.
Password []:
Finally, you are asked if you want to reset other configuration.
Other configuration
Do you want to reset the rest of the configuration? (y/n) [n]
If you answer n, nothing is removed. If you answer y, you have three alternatives to select from:
1. Clear as little as possible. This is the alternative that is used if you answer n to the question above. Both the
preliminary and the permanent configurations will be updated with the configuration specified above.
2. Revert to the factory configuration and then apply the configuration specified above. This will affect the
permanent but not the preliminary configuration.
3. Revert to the factory configuration and empty all logs and then apply the configuration specified above. Both
the preliminary and the permanent configurations will be affected.
Select the update mode, which is what you want to remove.
Update mode (1-3) [1]:
All configuration is now complete. The installation program shows the configuration and asks if it is correct.
yes saves the configuration.
no runs the installation program over again.
abort ends the installation program without saving.
8
Chapter 2. Installing 3Com VCX IP Telecommuting Module
You have now entered the following configuration
Network configuration inside:
Physical device name: eth0
IP address: 192.168.150.2
Netmask: 255.255.255.0
Deactivate other interfaces: no
Computer allowed to configure from:
IP address: 192.168.128.3
Password: eeyore
The rest of the configuration is kept.
Is this configuration correct (yes/no/abort)? yes
Now, finish configuration of the Telecommuting Module from the computer/computers specified in the installation
program.
Installation with a diskette
These steps are performed when installing with a diskette:
•
Select an IP address and store it on the installation diskette as described below.
•
Insert the installation diskette into the Telecommuting Module’s floppy drive.
•
Plug in the power cord and turn the Telecommuting Module on.
•
Connect the network cables to the network interfaces.
•
Wait while the Telecommuting Module boots up.
•
Configure the rest through a web browser.
You must first insert the diskette into your PC. If the PC is running Windows, open a Command window and run the
finst-en script from the diskette. If the PC is running Linux, mount the diskette, change directory to the mounted
one, and run the finst-en script.
Decide which computer(s) are allowed to configure 3Com VCX IP Telecommuting Module and enter the name of
the network interface to which they are connected, for example, Network Interface 1. You must use the physical
device name (eth0 and eth1).
Enter the IP address of the Telecommuting Module on this interface and the network mask for the network.
A network mask can be written in two ways in 3Com VCX IP Telecommuting Module:
•
The first looks just like an IP address, for example 255.255.192.0 or 255.255.254.0.
•
The other way is as a number between 0 and 32. An IP address has 32 bits, where the number of the network
mask indicates how many bits are used in the network’s addresses. The rest of the bits identifies the computer on
the network.
Now, you can select to deactivate any network interfaces. Select y to deactivate all interfaces but the one you just
configured. The remaining network interfaces can be activated later when you complete the configuration via the
web interface from your work station. This only applies to interfaces which was previously active; you can’t
activate interfaces with this setting.
Now enter the computer or computers from which the Telecommuting Module may be configured (the configuration
computers).
Then enter a password for the Telecommuting Module. This is the password you use in your web browser to access
and change the Telecommuting Module’s configuration. Finally, you can reset all other configuration if you want to.
9
Chapter 2. Installing 3Com VCX IP Telecommuting Module
Following is a sample run of the installation program on the diskette.
Basic unit installation program version 4.3
Press return to keep the default value
Network configuration inside:
Physical device name[eth0]:
IP address [0.0.0.0]: 10.47.2.242
Netmask/bits [255.255.255.0]: 255.255.0.0
Deactivate other interfaces? (y/n) [n]
Computers from which configuration is allowed:
You can select either a single computer or a network.
Configure from a single computer? (y/n) [y]
If you choose to allow only one computer to configure the Telecommuting Module, you are asked for the IP address
(the netmask is set automatically).
IP address [0.0.0.0]: 10.47.2.240
If this IP address is not on the same network as the inside of the Telecommuting Module, you are asked for the
router. Enter the IP address of the router on the network where the Telecommuting Module is connected. Now enter
the network address and mask of the network containing the configuring computer.
Static routing:
The computer allowed to configure from is not on a network local to
this unit. You must configure a static route to it. Give
the IP address of the router on the network the unit is on.
The IP address of the router [0.0.0.0]: 10.47.3.1
Network address [10.47.0.0]: 10.10.0.0
Netmask [255.255.255.0]:
You can choose to allow several computers to configure the Telecommuting Module, by answering no to the
question:
Configure from a single computer? (y/n) [y] n
The installation program then asks for the network number. The network number is the lowest IP address in the
series of numbers that includes the configuration computers (see chapter 3, Configuring 3Com VCX IP
Telecommuting Module). The network mask determines the number of computers that can act as configuration
computers.
Network number [0.0.0.0]: 10.47.2.0
Netmask/bits [255.255.255.0]: 255.255.255.0
If the network or partial network is not directly connected to the Telecommuting Module, you must enter the IP
address of the router leading to that network. Then enter the network’s address and mask.
10
Chapter 2. Installing 3Com VCX IP Telecommuting Module
Static routing:
The network allowed to configure from is not on a network local to this
unit. You must configure a static route to it. Give the
IP address of the router on the network this unit is on.
The IP address of the router [0.0.0.0]: 10.47.3.1
Network address [10.47.0.0]: 10.10.0.0
Netmask [255.255.255.0]:
Then enter a password.
Password []:
Finally, you are asked if you want to reset other configuration.
Other configuration
Do you want to reset the rest of the configuration? (y/n) [n]
If you answer n, nothing is removed. If you answer y, you have three alternatives to select from:
1. Clear as little as possible. This is the alternative that is used if you answer n to the question above. Both the
preliminary and the permanent configurations will be updated with the configuration specified above.
2. Revert to the factory configuration and then apply the configuration specified above. This will affect the
permanent but not the preliminary configuration.
3. Revert to the factory configuration and empty all logs and then apply the configuration specified above. Both
the preliminary and the permanent configurations will be affected.
Select the update mode, which is what you want to remove.
Update mode (1-3) [1]:
All configuration is now complete. The installation program shows the configuration and asks if it is correct.
yes saves the configuration.
no runs the installation program over again.
abort ends the installation program without saving.
Now, eject the diskette from your PC and insert it into the Telecommuting Module’s floppy drive. Then power up
the Telecommuting Module and wait for it to boot. Then, finish configuration of the Telecommuting Module from
the computer/computers specified in the installation program.
Note that the diskette contains a command to erase certain parts of the configuration during boot when the
diskette is inserted. Make sure to eject it once the Telecommuting Module has booted up to avoid future loss of
data.
If you happen to forget the administrator password for the Telecommuting Module, you can insert the diskette into
the Telecommuting Module again and boot it. Note that if you selected anything but 1 as the update mode, you will
lose configuration when doing this.
Turning off a Telecommuting Module
Backup the Telecommuting Module configuration (just in case something should happen). You do this on the
Save/Load Configuration page under Administration. Once this is done, just turn the computer off. The computer
that runs 3Com VCX IP Telecommuting Module is specially designed so that you can switch it off without causing
any problems in the file structure.
11
Chapter 2. Installing 3Com VCX IP Telecommuting Module
Remember to lock up the Telecommuting Module
The Telecommuting Module is a computer with special software, and must be protected from unauthorized physical
access just as other computers performing critical tasks. A locked up Telecommuting Module protects against:
•
connecting to the console
•
connecting a keyboard and monitor
•
changing the administrator password using the installation diskette.
•
changing BIOS configuration to allow the Telecommuting Module to be booted from a diskette
For more information about the necessary configuration, see chapter 3, Configuring 3Com VCX IP Telecommuting
Module.
12
Chapter 3. Configuring 3Com VCX IP
Telecommuting Module
You connect to your 3Com VCX IP Telecommuting Module by entering its name or IP address in the Location box
of your web browser.
Logging on
Before you can configure the Telecommuting Module, you must enter your administrator username and password or
RADIUS username and password. The admin user is predefined with complete administration privileges.
Log on again
If you have a web connection for Telecommuting Module configuration that is inactive for more than 10 minutes,
you must enter the password again and click on one of the buttons Keep changes below and Abandon changes
below.
On all pages where changes have been made, the two buttons Keep changes below and Abandon changes below
will be shown when you log on again. Keep changes below connects you to the Telecommuting Module and stores
the preliminary configuration you have changed. Abandon changes below connects you to the Telecommuting
Module and discards the changes you have made on this page.
On pages where nothing has been changed, the Log in again button is displayed. Enter the password and click on
the button to re-connect to the Telecommuting Module.
The Telecommuting Module’s encryption key is changed every 24 hours. If you have a web connection for
Telecommuting Module configuration when this happens, you must enter the password again. This works in the
same way as when your connection has been inactive for more than 10 minutes (see above).
Log out
When you have finished looking at or adding settings, you should log out from the Telecommuting Module. Below
the menu there is a Log out button which will end your session.
13
Chapter 3. Configuring 3Com VCX IP Telecommuting Module
Note: You will not be logged out automatically just by directing your web browser to a different web address. You
should log out using the button to make the browser forget your username and password.
Navigation
There is a menu for quick navigation to all configuration pages. On top of the page, you also see the name of the
Telecommuting Module.
Site Map
The Site Map is the first page displayed when you have logged on the Telecommuting Module. From this page, you
can access Basic Configuration, Administration, Network, Logging, SIP Services, SIP Traffic, and Failover.
You can also access a special page by the text links below each category name.
14
Chapter 3. Configuring 3Com VCX IP Telecommuting Module
Basic Configuration
Under Basic Configuration, select Telecommuting Module Type and the name of the Telecommuting Module. You
also enter IP addresses for gateway and DNS server. Here you also configure if the Telecommuting Module should
interact with a RADIUS or an SNMP server.
Administration
Under Administration, you store or load a configuration. You can also test your configuration to see if it works the
way you planned, upgrade or reboot your Telecommuting Module, set date and time, and configure administration
users and passwords.
Network
Under Network, you enter the Telecommuting Module’s IP address, the routing for the different networks, and
define groups of IP addresses which are used in various settings of the Telecommuting Module.
Logging
Under Logging, you specify the type of traffic you want to log/alarm and how it should be logged. You can also
view the logs and the traffic load here.
SIP Services
Under SIP Services, you configure interoperability settings and Remote SIP Connectivity.
SIP Traffic
Under SIP Traffic, you configure the SIP traffic through the Telecommuting Module. You can also view current
pass-through registrations and SIP sessions.
Failover
Under Failover, you configure the failover team and its dedicated network. You can also view the status of the other
team member.
Tools
Under Tools, you find handy tools for troubleshooting. The Telecommuting Module features a packet capturer
which produces pcap trace files.
Home
Under Home, you get basic information about the Telecommuting Module’s serial number, software version,
installed licenses and patches, and links to more information.
Overview of configuration
Start by installing the Telecommuting Module as described in chapter 2, Installing 3Com VCX IP Telecommuting
Module.
Select the Telecommuting Module Type.
The Telecommuting Module must have at least one IP address for each network card to work. A routing, or path, for
each network must also be set on the interface pages under Network. Go to the Networks and Computers page
and enter the networks which are using the Telecommuting Module. For a DMZ Telecommuting Module, also state
the Telecommuting Module’s Surroundings.
Then move on to SIP Services and turn the SIP module on.
Use logging to analyze the traffic that passes through the Telecommuting Module. Choose to log locally on the
Telecommuting Module, send logs to a syslog server or send them by email to an email address. Specify the type of
15
Chapter 3. Configuring 3Com VCX IP Telecommuting Module
logging wanted under Logging. This is also where the logs of traffic through the Telecommuting Module are
viewed.
When the configuration is complete, apply it. Go to Save/Load Configuration under Administration. Select
Apply configuration. Now the new configuration is tested. Save it permanently if it works satisfactorily. If the
configuration is not satisfactory, select Revert or restart the Telecommuting Module. The old configuration will
remain.
Preliminary and permanent configuration
3Com VCX IP Telecommuting Module has two kinds of settings: preliminary and permanent configuration. When
the Telecommuting Module is running, the permanent configuration controls the Telecommuting Module functions.
When you configure your Telecommuting Module, you are working with the preliminary configuration. As you
change the preliminary configuration, the permanent configuration continues to control the Telecommuting Module
functions.
When you are done with the preliminary configuration, you can test it by selecting Apply configuration on the
Save/Load Configuration page. Now the preliminary configuration controls the Telecommuting Module functions.
When you are satisfied with the preliminary configuration, you can apply it permanently, which copies the
preliminary configuration to the permanent configuration. Now the new configuration controls the Telecommuting
Module functions.
You can also copy the permanent configuration to the preliminary configuration. This does not affect the permanent
configuration or the Telecommuting Module functions, which are still being run by the permanent configuration.
You do this by selecting Abort all edits on the Save/Load Configuration page under Administration. This will
discard all changes made in the preliminary configuration since last time you applied a configuration by pressing
Save configuration.
16
Chapter 3. Configuring 3Com VCX IP Telecommuting Module
You can save the preliminary configuration to a file on your work station (the computer that is running your web
browser). Select Save to local file on the Save/Load Configuration page.
A saved configuration can be loaded to the preliminary configuration. Use Browse to search your local computer or
enter path and file name in the box. When you have chosen the file you want to load, select Load from local file on
the Save/Load Configuration page.
You can save the preliminary configuration to a diskette. Insert a formatted diskette in the Telecommuting Module’s
floppy drive and press Save to diskette on the Save/Load Configuration page.
You can load a saved configuration to the preliminary configuration. Insert a diskette containing the saved
configuration in the Telecommuting Module’s floppy drive and press Load from diskette on the Save/Load
Configuration page.
You can perform all of these functions on the Save/Load Configuration page under Administration.
Configuring IP addresses and masks in 3Com VCX IP
17
Chapter 3. Configuring 3Com VCX IP Telecommuting Module
Telecommuting Module
IP address
IP addresses are written as four groups of numbers with dots between them. The numbers must be between 0 and
255 (inclusive); for example, 192.168.129.17.
Mask/Bits
The binary system uses the numbers 0 and 1 to represent numbers. A binary digit is called a bit. Eight bits in the
binary system can represent numbers from 0 to 255.
The mask indicates how much of the IP address is used for the network address and the computers’ individual
addresses, respecitvely. A mask consists of 8+8+8+8 = 32 bits. Below is a mask with 26 bits set to 1, which means
that 26 bits of the IP address is locked to the network address and can’t be changed within the network.
Bits
11111111
11111111
11111111
11000000
No.
255
255
255
192
In the 3Com VCX IP Telecommuting Module, a mask is written either as the number of bits that are 1 or as four
numbers (0-255) with dots between the numbers.
Sometimes it can be convenient to give a group of computers a network name, such as Administration, or specify
that only a handful of computers can change the Telecommuting Module configuration.
You can form a group of computers with a network name, if the computers have consecutive IP addresses. In order
to do this, you must set the mask to indicate that the network group consists of those computers only. The lowest IP
address for these computers tells the network number of the group.
This is easiest to explain with a simple example. You have 7 computers that will make up a group called
Administration.
Take the nearest power of two above the number of computers you want to include: 2, 4, 8, 16, 32, 64, 128 or 256.
Since you have 7 computers, 8 is the nearest. In this example, one IP address is free for future use.
Give the computers consecutive IP addresses. Make the first IP address a multiple of the power of two number you
selected, but under 255. In the above example, this means 0, 8, 16, 24, 32, 40, 48 and so on, up to 248. You might
choose to start with 136 (17 x 8). This would give the computers the IP addresses 196.176.1.136, 196.176.1.137,
196.176.1.138, 196.176.1.139, 196.176.1.140, 196.176.1.141, 196.176.1.142 and 196.176.1.143.
One of the IP addresses is free and can be used for an eighth computer in the future. You must enter the first IP
address in the series, 196.176.1.136, in the Network/IP address field.
Now you must set the mask so that only the computers with these eight IP addresses are included in this network.
Take 256 and subtract the number of IP addresses in the named network. In the example, we would have 256-8 =
248. The complete mask is 255.255.255.248.
Now you have created a group of computers (IP addresses) that you can give a single name, such as Administration.
Table of netmasks.
No. of computers
Mask
Bits
1
255.255.255.255
32
2
255.255.255.254
31
4
255.255.255.252
30
8
255.255.255.248
29
16
255.255.255.240
28
32
255.255.255.224
27
64
255.255.255.192
26
128
255.255.255.128
25
256
255.255.255.0
24
18
Chapter 3. Configuring 3Com VCX IP Telecommuting Module
See appendix C, Lists of Reserved Ports, ICMP Types and Codes, and Internet Protocols, for more information on
netmasks.
Name queries in 3Com VCX IP Telecommuting Module
A Telecommuting Module should be as independent of other computers as possible. At the same time, the person
who changes the configuration of the Telecommuting Module may want to use names for the computers instead of
IP addresses. Also, the SIP module needs to look up names of SIP domains. This makes it necessary to use a DNS
(name server) for SIP requests.
There are three instances when 3Com VCX IP Telecommuting Module uses a DNS server:
•
When it receives a SIP request for a SIP domain.
The results of these DNS queries are stored for a short while in the Telecommuting Module.
•
When you change names/IP addresses and save the page.
The results of these DNS queries are stored in the Telecommuting Module.
•
When you click on Look up all IP addresses again.
The results of these DNS queries are stored in the Telecommuting Module.
3Com VCX IP Telecommuting Module is dependent of a working name server for the SIP functions. However, it
doesn’t automatically look up IP addresses in the configuration, which makes it necessary to click on Look up all
IP addresses again every time a computer changes its IP address.
When you enter IP addresses in the Telecommuting Module, they are not updated automatically. If you change a
name/IP address in a row, the row is updated when you click on Save, switch to another page of the Telecommuting
Module user interface, or click on Look up all IP addresses again.
19
Part II. How To
In the How To part, you find step-by-step descriptions for many common configurations for the Telecommuting
Module. You also find references to relevant chapters in Part III, Description of 3Com VCX IP Telecommuting
Module settings.
Chapter 4. How To Configure SIP
3Com VCX IP Telecommuting Module provides a lot of SIP possibilities. In this chapter, the most common SIP
setups are setup with step-by-step instructions for the configuration.
DMZ Telecommuting Module, SIP server on the outside
The simplest SIP scenario is when the SIP server is managed by someone else, and the Telecommuting Module SIP
function is only used to traverse NAT.
Note that the Telecommuting Module must have a public (non-NATed) IP address for the SIP signaling to work
correctly.
Here are the settings needed for this. It is assumed that the Telecommuting Module already has a network
configuration. Only the additional SIP settings are listed.
Networks and Computers
The Telecommuting Module must know the network structure to be able to function properly. On the Networks
and Computers page, you define all networks which the Telecommuting Module should serve and which are not
reached through the default gateway of the firewall. All computers that can reach each other without having to go
through the firewall connected to the Telecommuting Module should be grouped in one network.
You can also define networks and parts of networks for other configuration purposes.
21
Chapter 4. How To Configure SIP
Surroundings
To make the Telecommuting Module aware of the network structure, the networks defined above should be listed on
the Surroundings page.
One effect of this is that traffic between two users on different networks, or between one of the listed networks and
a network not listed here, is NAT:ed.
Another effect is that for connections between two users on the same network, or on networks where neither is
listed in Surroundings, no ports for RTP sessions will be opened, since the Telecommuting Module assumes that
they are both on the same side of the firewall.
Normally, at least one network should be listed here. If no networks are listed, the Telecommuting Module will not
perform NAT for any traffic.
Basic
Go to the Basic page under SIP Services and turn the SIP module on. Here you also select log classes for SIP event
logging.
Interoperability
If Windows Messenger is used for SIP communication, you need to set a parameter on the Interoperability page.
Set lr=true status to On under Loose routing.
22
Chapter 4. How To Configure SIP
Routing
On the Routing page, you can enter the SIP server managing your SIP domain. Enter the name or IP address of the
SIP server under Outbound proxy.
If you enter the server name here, all SIP traffic from the inside will be directed to this server, regardless of where it
is bound to.
Basic Configuration
If no other SIP routing information is entered, the Telecommuting Module must be able to look up SIP domains in
DNS. DNS servers are entered on the Basic Configuration page under Basic Configuration.
Save/Load Configuration
Finally, go to the Save/Load Configuration page under Administration and apply the new settings by pressing
Apply configuration.
DMZ Telecommuting Module, SIP server inside
You might instead have a SIP server of your own, located on the inside or maybe on a DMZ.
If the SIP server is located on a NATed network, DNS queries for the SIP domain should point to the
Telecommuting Module, which in turn will forward the SIP traffic to the server.
Note that the Telecommuting Module must have a public (non-NATed) IP address for the SIP signaling to work
correctly.
23
Chapter 4. How To Configure SIP
Here are the settings needed for this. It is assumed that the Telecommuting Module already has a network
configuration. Only the additional SIP settings are listed.
Networks and Computers
The Telecommuting Module must know the network structure to be able to function properly. On the Networks
and Computers page, you define all networks which the Telecommuting Module should serve and which are not
reached through the default gateway of the firewall. All computers that can reach each other without having to go
through the firewall connected to the Telecommuting Module should be grouped in one network.
You can also define networks and parts of networks for other configuration purposes.
Surroundings
To make the Telecommuting Module aware of the network structure, the networks defined above should be listed on
the Surroundings page.
One effect of this is that traffic between two users on different networks, or between one of the listed networks and
a network not listed here, is NAT:ed.
Another effect is that for connections between two users on the same network, or on networks where neither is
listed in Surroundings, no ports for RTP sessions will be opened, since the Telecommuting Module assumes that
they are both on the same side of the firewall.
Normally, at least one network should be listed here. If no networks are listed, the Telecommuting Module will not
perform NAT for any traffic.
24
Chapter 4. How To Configure SIP
Basic
Go to the Basic page under SIP Services and turn the SIP module on. Here you also select log classes for SIP event
logging.
Routing
If the SIP server is located on a NATed network, all SIP traffic from the outside will be directed to the
Telecommuting Module, which must know where to forward it.
One way to do this is to enter the SIP domain in the DNS Override For SIP Requests table on the Routing page,
to link the SIP server IP address to the name. The Telecommuting Module will look up the domain here instead of
in the DNS server, and send the SIP traffic to the correct IP address.
Interoperability
If Windows Messenger is used for SIP communication, you need to set a parameter on the Interoperability page.
Set lr=true status to On under Loose routing.
25
Chapter 4. How To Configure SIP
If the SIP server is an LCS (Live Communications Server) or some other server that does not accept more than one
Via header in SIP packets, you must enter the SIP server IP address in the Remove VIA headers table. This will
make the Telecommuting Module strip SIP packets of extra Via headers when it sends those packets to the server,
and add the Via headers when the response packets are received.
Basic Configuration
If no other SIP routing information is entered, the Telecommuting Module must be able to look up SIP domains in
DNS. DNS servers are entered on the Basic Configuration page under Basic Configuration.
Save/Load Configuration
Finally, go to the Save/Load Configuration page under Administration and apply the new settings by pressing
Apply configuration.
Standalone Telecommuting Module, SIP server on the
outside
The simplest SIP scenario is when the SIP server is managed by someone else, and the Telecommuting Module SIP
function is only used to traverse NAT.
Note that the Telecommuting Module must have a public (non-NATed) IP address for the SIP signaling to work
correctly.
26
Chapter 4. How To Configure SIP
Here are the settings needed for this. It is assumed that the Telecommuting Module already has a network
configuration. Only the additional SIP settings are listed.
Basic
Go to the Basic page under SIP Services and turn the SIP module on. Here you also select log classes for SIP event
logging.
Interoperability
If Windows Messenger is used for SIP communication, you need to set a parameter on the Interoperability page.
Set lr=true status to On under Loose routing.
Routing
On the Routing page, you can enter the SIP server managing your SIP domain. Enter the name or IP address of the
SIP server under Outbound proxy.
If you enter the server name here, all SIP traffic from the inside will be directed to this server, regardless of where it
is bound to.
27
Chapter 4. How To Configure SIP
Basic Configuration
If no other SIP routing information is entered, the Telecommuting Module must be able to look up SIP domains in
DNS. DNS servers are entered on the Basic Configuration page under Basic Configuration.
Save/Load Configuration
Finally, go to the Save/Load Configuration page under Administration and apply the new settings by pressing
Apply configuration.
Client Settings
SIP clients will use the Telecommuting Module as their outgoing SIP proxy and the SIP domain as the registrar.
Standalone Telecommuting Module, SIP server inside
You might instead have a SIP server of your own, located on the inside or maybe on a DMZ.
If the SIP server is located on a NATed network, DNS queries for the SIP domain should point to the
Telecommuting Module, which in turn will forward the SIP traffic to the server.
Note that the Telecommuting Module must have a public (non-NATed) IP address for the SIP signaling to work
correctly.
28
Chapter 4. How To Configure SIP
Here are the settings needed for this. It is assumed that the Telecommuting Module already has a network
configuration. Only the additional SIP settings are listed.
Basic
Go to the Basic page under SIP Services and turn the SIP module on. Here you also select log classes for SIP event
logging.
Routing
If the SIP server is located on a NATed network, all SIP traffic from the outside will be directed to the
Telecommuting Module, which must know where to forward it.
One way to do this is to enter the SIP domain in the DNS Override For SIP Requests table on the Routing page,
to link the SIP server IP address to the name. The Telecommuting Module will look up the domain here instead of
in the DNS server, and send the SIP traffic to the correct IP address.
Interoperability
If Windows Messenger is used for SIP communication, you need to set a parameter on the Interoperability page.
Set lr=true status to On under Loose routing.
If the SIP server is an LCS (Live Communications Server) or some other server that does not accept more than one
Via header in SIP packets, you must enter the SIP server IP address in the Remove VIA headers table. This will
29
Chapter 4. How To Configure SIP
make the Telecommuting Module strip SIP packets of extra Via headers when it sends those packets to the server,
and add the Via headers when the response packets are received.
Basic Configuration
If no other SIP routing information is entered, the Telecommuting Module must be able to look up SIP domains in
DNS. DNS servers are entered on the Basic Configuration page under Basic Configuration.
Save/Load Configuration
Finally, go to the Save/Load Configuration page under Administration and apply the new settings by pressing
Apply configuration.
Client Settings
SIP clients will use the Telecommuting Module as their outgoing SIP proxy and the SIP domain as the registrar.
DMZ/LAN Telecommuting Module, SIP server on the
outside
The simplest SIP scenario is when the SIP server is managed by someone else, and the Telecommuting Module SIP
function is only used to traverse NAT.
Note that the Telecommuting Module must have a public (non-NATed) IP address for the SIP signaling to work
correctly.
30
Chapter 4. How To Configure SIP
Here are the settings needed for this. It is assumed that the Telecommuting Module already has a network
configuration. Only the additional SIP settings are listed.
Basic
Go to the Basic page under SIP Services and turn the SIP module on. Here you also select log classes for SIP event
logging.
Interoperability
If Windows Messenger is used for SIP communication, you need to set a parameter on the Interoperability page.
Set lr=true status to On under Loose routing.
Routing
On the Routing page, you can enter the SIP server managing your SIP domain. Enter the name or IP address of the
SIP server under Outbound proxy.
If you enter the server name here, all SIP traffic from the inside will be directed to this server, regardless of where it
is bound to.
31
Chapter 4. How To Configure SIP
Basic Configuration
If no other SIP routing information is entered, the Telecommuting Module must be able to look up SIP domains in
DNS. DNS servers are entered on the Basic Configuration page under Basic Configuration.
Save/Load Configuration
Finally, go to the Save/Load Configuration page under Administration and apply the new settings by pressing
Apply configuration.
Client Settings
SIP clients will use the Telecommuting Module as their outgoing SIP proxy and the SIP domain as the registrar.
DMZ/LAN Telecommuting Module, SIP server inside
You might instead have a SIP server of your own, located on the inside or maybe on a DMZ.
If the SIP server is located on a NATed network, DNS queries for the SIP domain should point to the
Telecommuting Module, which in turn will forward the SIP traffic to the server.
Note that the Telecommuting Module must have a public (non-NATed) IP address for the SIP signaling to work
correctly.
Here are the settings needed for this. It is assumed that the Telecommuting Module already has a network
configuration. Only the additional SIP settings are listed.
Basic
Go to the Basic page under SIP Services and turn the SIP module on. Here you also select log classes for SIP event
logging.
32
Chapter 4. How To Configure SIP
Routing
If the SIP server is located on a NATed network, all SIP traffic from the outside will be directed to the
Telecommuting Module, which must know where to forward it.
One way to do this is to enter the SIP domain in the DNS Override For SIP Requests table on the Routing page,
to link the SIP server IP address to the name. The Telecommuting Module will look up the domain here instead of
in the DNS server, and send the SIP traffic to the correct IP address.
Interoperability
If Windows Messenger is used for SIP communication, you need to set a parameter on the Interoperability page.
Set lr=true status to On under Loose routing.
If the SIP server is an LCS (Live Communications Server) or some other server that does not accept more than one
Via header in SIP packets, you must enter the SIP server IP address in the Remove VIA headers table. This will
make the Telecommuting Module strip SIP packets of extra Via headers when it sends those packets to the server,
and add the Via headers when the response packets are received.
33
Chapter 4. How To Configure SIP
Basic Configuration
If no other SIP routing information is entered, the Telecommuting Module must be able to look up SIP domains in
DNS. DNS servers are entered on the Basic Configuration page under Basic Configuration.
Save/Load Configuration
Finally, go to the Save/Load Configuration page under Administration and apply the new settings by pressing
Apply configuration.
Client Settings
SIP clients will use the Telecommuting Module as their outgoing SIP proxy and the SIP domain as the registrar.
34
Part III. Description of 3Com VCX IP
Telecommuting Module Settings
This part contains complete descriptions of settings in 3Com VCX IP Telecommuting Module. The descriptions are
grouped in the same way as they are in the user interfaces.
Chapter 5. The Serial Console
Some settings are available without having to log on the web interface, but instead connecting to the
Telecommuting Module console via the serial cable. Here, the settings available from the console are listed.
The serial console is a text user interface which requires a terminal software on your workstation, such as
Hyperterm in Windows.
Connecting to the serial console
Connect the Telecommuting Module to your workstation with a null modem serial cable, plug in the power cord
and turn the Telecommuting Module on. You will have to wait a few minutes while it boots up.
If you use a Windows workstation, connect like this: Start Hyperterm. A Location dialogue will show, asking for
your telephone number and area. Click Cancel followed by Yes. Then you will be asked to make a new connection.
Type a name for this connection, select an icon and click OK. The Location dialogue will show again, so click
Cancel followed by Yes.
Now you can select Connect using COM1 and click OK. A Port settings dialogue will show, where you select
19200 as Bits per second. Use the default configuration for all other settings. Click OK and wait for a login prompt.
(In some cases you have to press Return to get the login prompt.)
If you use a Linux workstation, connect like this: Make sure that there is a symbolic link named /dev/modem which
points to the serial port you connected the Telecommuting Module to. Connect using minicom with the bit rate
19200 bits/s, and wait for a login prompt.
Log on as the user admin. The first time you log on, no password is required. You set the password when you run
the installation script, which starts automatically when you have logged on.
Main Menu
The first thing you see after logging on as admin is the main menu. Here, you can change password, make a basic
configuration of the Telecommuting Module, enter the Telecommuting Module into a failover team, save or load
configuration, or remove all log messages from the e-mail queue.
3Com VCX IP Telecommuting Module Administration
1. Basic configuration
2. Save/Load configuration
3. Become a failover team member
4. Leave failover team and become standalone
5. Wipe email logs
6. Set password
q. Exit admin
==>
1. Basic configuration
Basic settings for the Telecommuting Module, such as the IP address and the password.
This is one of two ways of giving the Telecommuting Module an IP address. The other way is to perform a magic
ping (see chapter 2, Installing 3Com VCX IP Telecommuting Module).
2. Save/Load configuration
Save or upload the configuration using the Zmodem protocol.
36
Chapter 5. The Serial Console
3. Become a failover team member
Make this Telecommuting Module member of a failover team.
4. Leave failover team and become standalone
Make this Telecommuting Module leave its failover team.
5. Wipe email logs
Remove all log messages queued to be sent by e-mail.
6. Set password
Set a new password for the admin user.
q. Exit admin
Log out from the admin program.
Basic configuration
Use Basic configuration to give the Telecommuting Module a start configuration. You can assign an IP address to
it (for the web GUI), enter the IP addresses of computers allowed to connect to the web GUI and change the
administrator password.
Wherever you can enter a value, there will be a default one in brackets, which is the current value. Press Return to
select the default value. This is an easy way to fast-forward if you only want to change one of the parameters.
IP address
Give the Telecommuting Module an IP address. The IP address will be added to any addresses already configured
on the Telecommuting Module. The IP address entered here is the one that should be used to access the web GUI.
Basic unit installation program version 4.3
Press return to keep the default value
Network configuration inside:
Physical device name[eth0]:
IP address [0.0.0.0]: 10.47.2.242
Netmask/bits [255.255.255.0]: 255.255.0.0
Deactivate other interfaces? (y/n) [n]
Physical device name
Select which interface should get the IP address. The interfaces use their physical names: if you want to use
Network Interface 1, enter "eth0", and if you want to use Network Interface 2, enter "eth1".
IP address
Enter the IP address for the Telecommuting Module on the interface above. If the Telecommuting Module didn’t
have an IP address before, the default address will be 0.0.0.0. Enter a different address, or the Telecommuting
Module will be unreachable via the web GUI.
Netmask/bits
At Netmask/bits, enter the netmask for the network to which the IP address above belongs. The netmask can be
written as an IP address or a number of bits (see also chapter 3, Configuring 3Com VCX IP Telecommuting
Module).
37
Chapter 5. The Serial Console
Deactivate other interfaces
If the Telecommuting Module has been used one or more interfaces are active. Select here if all interfaces but the
one selected above should be deactivated. You can activate them again via the web GUI.
Configuration computers
Enter here the computers from which it is allowed to configure the Telecommuting Module. The computers entered
here are the only ones allowed to access the web GUI.
Select between allowing a single computer or an entire network.
Computers from which configuration is allowed:
You can select either a single computer or a network.
Configure from a single computer? (y/n) [y]
Configure from a single computer
If configuration of the Telecommuting Module should be allowed from a single computer only, answer y to the
question above. Then enter the IP address of the configuration computer.
IP address [0.0.0.0]: 10.47.2.240
If the configuration computer is on the same network as the Telecommuting Module, these are all configuration
settings needed. If the configuration computer is on a different network, the Telecommuting Module will ask for
routing to that network.
Static routing:
The computer allowed to configure from is not on a network local to
this unit. You must configure a static route to it. Give
the IP address of the router on the network the unit is on.
The IP address of the router [0.0.0.0]: 10.47.3.1
Network address [10.47.0.0]: 10.10.0.0
Netmask [255.255.255.0]:
To let the Telecommuting Module know where traffic to the configuration computer should be sent to, you must
enter the router it should use here. Enter the router which is on the same network as the Telecommuting Module and
which is used to route traffic to the configuration computer.
You should also enter the network to which the configuration computer is connected.
Configure from multiple computers
If configuration of the Telecommuting Module should be allowed from more than one computer, answer n to the
question above. Then enter the network address of the network to which the configuration computers are connected.
This will allow all computers on this network to configure the Telecommuting Module.
Network number [0.0.0.0]: 10.47.2.0
Netmask/bits [255.255.255.0]: 255.255.255.0
Enter the network address and netmask for the configuration computer network. If they are on the same network as
the Telecommuting Module, these are all configuration settings needed. If the configuration computers are on a
different network, the Telecommuting Module will ask for routing to that network.
38
Chapter 5. The Serial Console
Static routing:
The network allowed to configure from is not on a network local to this
unit. You must configure a static route to it. Give the
IP address of the router on the network this unit is on.
The IP address of the router [0.0.0.0]: 10.47.3.1
Network address [10.47.0.0]: 10.10.0.0
Netmask [255.255.255.0]:
Enter the IP address of the router and the network to which the configuration computers are connected. This could
be a bigger network than the one entered to distinguish the configuration computers.
Password
Set a password for the Telecommuting Module here.
Password []:
Note that the password will be printed on the screen when entered. It will also be shown when all settings are made.
Other
You can also select if all other configuration should be removed or not.
Other configuration
Do you want to reset the rest of the configuration? (y/n) [n]
If you answer n, nothing is removed. If you answer y, you have three alternatives to select from:
1. Clear as little as possible. This is the alternative that is used if you answer n to the question above. Both the
preliminary and the permanent configurations will be updated with the configuration specified above.
2. Revert to the factory configuration and then apply the configuration specified above. This will affect the
permanent but not the preliminary configuration.
3. Revert to the factory configuration and empty all logs and then apply the configuration specified above. Both
the preliminary and the permanent configurations will be affected.
Update mode (1-3) [1]:
When all settings are entered, they are shown on the screen to be confirmed.
Is this configuration correct (yes/no/abort)?
yes will make the Telecommuting Module reboot using the new settings.
no will make the Telecommuting Module go through the Basic configuration questions again and allow you to
change settings.
abort will make the Basic configuration script end without changing any settings.
Save/Load configuration
Here, you can save your configuration to a file or load a configuration from a file. The transfer is made using the
Zmodem protocol, which can be found in terminal software such as Hyperterminal.
39
Chapter 5. The Serial Console
Load preliminary configuration
The configuration file selected here will be uploaded as a preliminary configuration. The permanent configuration
will not be affected.
To load the configuration, select this alternative and then start the transfer in your terminal program.
Load both configurations and apply
The configuration file selected here will be uploaded as both the preliminary and the permanent configuration.
When the upload is finished, the configuration will be applied.
To load the configuration, select this alternative and then start the transfer in your terminal program.
Save preliminary configuration
Save the preliminary configuration to a file. If your terminal program starts the transfer automatically, the file will
be named config.cfg.
Save permanent configuration
Save the permanent configuration to a file. If your terminal program starts the transfer automatically, the file will be
named config.cfg.
Main menu
Select this alternative to return to the main menu.
Become a failover team member
Here, you make the Telecommuting Module the second member of a failover team. All current configuration will be
removed. The Telecommuting Module will receive its new configuration from the first member of the team.
Dedicated network interface [eth0]:
Select the network interface which will be directly connected to the other Telecommuting Module in the team. This
interface will be used to synchronize the configurations and can’t be used for anything else. The interfaces use their
physical names: if you want to use Network Interface 1, enter "eth0", and if you want to use Network Interface 2,
enter "eth1".
IP network address for eth0 [10.120.121.64]:
Enter the network address for this interface. The network address must be the same as the one entered for the first
member of the failover team. If you used the default values for that Telecommuting Module you can do the same
here.
IP netmask for eth0 [255.255.255.252]:
Enter the netmask for the network. The netmask must be big enough to comprise IP addresses for two computers, a
network address and a broadcast address, i.e. at least four addresses. The default netmask (255.255.255.252) should
suffice. There is no use in assigning a larger network, since the Telecommuting Modules should be connected via a
crossover TP cable.
Current configuration:
Dedicated interface: eth0
Network address: 10.120.121.64
Network mask:
255.255.255.252
Is this configuration correct (yes/no/abort)?
When all settings are made they are shown.
40
Chapter 5. The Serial Console
yes will make the Telecommuting Module reboot, remove all current configuration and apply the new settings. It
will then wait for configuration from the other team member.
no will make the Telecommuting Module start over again asking for new settings, starting with the dedicated
interface.
abort will abort the failover configuration and return to the main menu without changing any settings on the
Telecommuting Module.
Leave failover team and become standalone
Here, you make the Telecommuting Module leave its failover team. The Telecommuting Module will keep the
configuration from the team except the failover settings.
This will change the operation mode from being a member of
a failover team to become a standalone machine.
The machine will reboot to complete this procedure.
Do you want to proceed (yes/no)?
yes will make the Telecommuting Module leave the failover team and reboot as a standalone unit.
no will make you return to the main menu without changing any settings.
Wipe email logs
Here, you can erase all log messages queued for sending via email to one or more receivers. This could be useful if
you by mistake made settings where lots of events are logged via email, which fill the queue rapidly.
This will remove all email logs that are waiting to be sent.
Do you want to proceed (yes/no)?
yes will remove all log messages from the email queue. These messages are not saved to file or similar before
removed. If you log locally as well as via email, the local log will not be affected by this.
Note that this will only remove messages already queued up for sending. To prevent further queue jams, you must
also change log classes for the events in question (see chapter 11, Logging).
no will amke you return to the main menu without removing anything.
Set password
Here, you can change password for the admin user.
Old password:
New password:
New password again:
As this option requires that you are logged on as admin, you need to know the current password in order to change
into a new one. If you have forgotten the password, you must use the installation diskette to set a new one.
Exit admin
Select Exit admin to log out.
41
Chapter 6. Basic Configuration
Under Basic Configuration, you configure:
•
Telecommuting Module Type
•
The name of the Telecommuting Module
•
The computers and networks from which the Telecommuting Module can be administered
•
Policies for ping packets and unwanted packets
•
Default domain
•
Default gateways and DNS servers
•
RADIUS configuration
•
SNMP configuration
•
Creation of Telecommuting Module certificates and upload of CA certificates
This configuration is usually not changed very often.
Basic Configuration
On the Basic Configuration page, general settings for the Telecommuting Module are made. The most important
ones for getting started are the default gateway and, for SIP, the DNS server.
General
Name of this Telecommuting Module
Here, you can give your 3Com VCX IP Telecommuting Module a name. The name of the Telecommuting Module
is displayed in the title bar of your web browser. This can be a good idea if you administer several Telecommuting
Modules. The name is also used if you use SNMP and when you export log files into the WELF format.
Default domain
Here, you can enter a default domain for all settings. If a default domain is entered, the Telecommuting Module will
automatically assume that an incomplete computer name should be completed with the default. If, for example,
Default domain contains company.com, you could as the name of the computer axel.company.com use only
axel. If no default domain should be used, the Default domain field should contain a single dot (.).
IP policy
Here, you specify what will happen to IP packets which are neither SIP packets, SIP session media streams, or
Telecommuting Module administration traffic. Discard IP packets means that the Telecommuting Module ignores
the IP packets without replying that the packet did not arrive. Reject IP packets makes the Telecommuting Module
reply with an ICMP packet telling that the packet did not arrive.
42
Chapter 6. Basic Configuration
Policy For Ping To the Telecommuting Module
Here, you specify how the Telecommuting Module should reply to ping packets to its IP addresses. You can choose
between Never reply to ping, Only reply to ping from the same interface and Reply to ping to all IP addresses.
Only reply to ping from the same interface means that the ping request should originate from a network which is
directly connected to the pinged interface of the Telecommuting Module or from a network to which there exists a
static route from the pinged interface, or the request will be ignored.
Ping is a way of finding out whether a computer is working. See appendix D, Definitions of Terms, for further
information on ping.
Default Gateways
A Default Gateway is the IP address of a router that is used to contact the outside world. This IP address is usually
the firewall. Default Gateway must be an IP address from one of the Directly Connected Networks of the
Telecommuting Module’s interfaces. See appendix D, Definitions of Terms, for further description of
routers/gateways.
The Telecommuting Module must have at least one default gateway to work. You can enter more than one default
gateway. The Telecommuting Module will use one of them until it stops responding, and then switch to the next one.
DNS name or IP address
Enter the DNS name or IP address for the default gateway. If an interface will receive its IP address from a DHCP
server, the Telecommuting Module will get its default gateway from the server, and Default Gateway must be set to
"*".
IP address
Shows the IP address of the DNS name or IP address you entered in the previous field.
Gateway Reference Hosts
The gateway reference hosts are used by the Telecommuting Module to check if the gateways are alive. For each
reference host, test ping packets are sent, using the different gateways.
Reference hosts are only needed when multiple default gateways are used.
DNS name or IP address
Enter the DNS name or IP address for the reference host. The reference host must be located on the other side of the
default gateway.
43
Chapter 6. Basic Configuration
IP address
Shows the IP address of the DNS name or IP address you entered in the previous field.
DNS Servers
Here, you configure DNS servers for the Telecommuting Module. The servers are used in the order they appear in
this table, which means that the Telecommuting Module uses the top server to resolve DNS records until it doesn’t
reply. Only then is server number two contacted.
No.
The DNS servers are used in the order they are presented in the table. To move a server to a certain row, enter the
number on the row to which you want to move it. You need only renumber servers that you want to move; other
servers are renumbered automatically. When you click on Save, the DNS servers are re-sorted.
DNS Name Or IP Address
The DNS name/IP address of the DNS server which the Telecommuting Module should use. Note that to use DNS
names here, there must exist a DNS server in the Telecommuting Module’s permanent configuration.
IP address
Shows the IP address of the DNS name or IP address you entered in the previous field.
Delete Row
If you select this box, the row is deleted when you click on Add new rows, Save, or Look up all IP addresses
again.
Create
Enter the number of new rows you want to add to the table, and then click on Create.
Save
Saves the Basic Configuration configuration to the preliminary configuration.
Cancel
Reverts all the above fields to their previous configuration.
Look up all IP addresses again
Looks up the IP addresses for all DNS names on this page in the DNS servers you entered above.
Access Control
On the Access Control page, settings are made which controls the access to the Telecommuting Module
administration web interface.
Select one or two configuration IP addresses for the Telecommuting Module. The configuration address is the IP
address to which you direct your web browser to access the web interface of the Telecommuting Module.
44
Chapter 6. Basic Configuration
For each network interface, you also specify whether or not the Telecommuting Module can be configured via this
network interface.
You also select what kind of authentication will be performed for the users trying to access the web interface.
To further increase security, the Telecommuting Module can only be configured from one or a few computers that
are accessed from one of these interfaces. Enter the IP address or addresses that can configure the Telecommuting
Module. The IP addresses can belong to one or more computers.
Configuration Allowed Via Interface
Specify whether or not this interface can be used to configure the Telecommuting Module. The choices are On and
Off. This configuration is a complement to the Configuration Computers setting below.
User Authentication
Select where the administrator database is: Local users (administrator users are defined locally on the
Telecommuting Module), RADIUS (administrator users are defined on an external RADIUS server), or a choice
between the two alternatives at login (Local users or RADIUS database).
Local administrator users and their passwords are defined on the User Administration page under Administration.
If the authentication should be made by help of a RADIUS server, you must enter one on the RADIUS page.
Configuration Transport
Select one or two Telecommuting Module IP addresses. The Telecommuting Module web server will listen for web
traffic on the selected IP addresses and ports.
This is the IP address and port which should be entered in your web browser to connect to the Telecommuting
Module.
45
Chapter 6. Basic Configuration
Configuration via HTTP
Select which IP address and port the Telecommuting Module administrator should direct her web browser to when
HTTP is used for Telecommuting Module configuration. You can select from the Telecommuting Module IP
addresses configured on the Interface pages under Network.
You can use different IP addresses for HTTP and HTTPS configuration.
Configuration via HTTPS
Select which IP address and port the Telecommuting Module administrator should direct her web browser to when
HTTPS is used for Telecommuting Module configuration. You can select from the Telecommuting Module IP
addresses configured on the Interface pages under Network.
You can use different IP addresses for HTTP and HTTPS configuration.
You also need to select a TLS certificate, which works as an ID card, identifying the Telecommuting Module to
your web browser. This will ensure that you are really communicating with your Telecommuting Module and not
somebody else’s computer. TLS uses an encryption method using two keys, one secret and one public. The secret
key is kept in the Telecommuting Module and the public key is used in the certificate. If any of the keys is changed,
the TLS connection won’t work.
The certificate is created on the Certificates page.
Configuration Computers
Enter the IP address or addresses that can configure the Telecommuting Module. The IP addresses can belong to
one or more computers.
Note that you must also allow configuration via the Telecommuting Module interface that the computers are
connected to. See Configuration Allowed Via Interface above.
DNS Name Or Network Address
Enter the DNS name or IP address of the computer or network from which the Telecommuting Module can be
configured. Avoid allowing configuration from a network or computer on the Internet or other insecure networks, or
use HTTPS or VPN to connect to the Telecommuting Module from these insecure networks.
Network Address
Shows the IP address of the DNS Name Or Network Address you entered in the previous field.
Netmask/Bits
Netmask/Bits is the mask that will be used to specify the configuration computers. See chapter 3, Configuring
3Com VCX IP Telecommuting Module, for instructions on writing the netmask. To limit access so that only one
computer can configure, use the netmask 255.255.255.255. You can also specify the netmask as a number of bits,
which in this case would be 32. To allow configuration from an entire network, you must enter the network address
under Network address, and a netmask with a lower number here. To allow configuration from several computers
or networks, create several lines for the information.
46
Chapter 6. Basic Configuration
Range
The Range shows all IP addresses from which the Telecommuting Module can be configured. The range is
calculated from the configuration under DNS name or network address and Netmask/Bits. Check that the correct
information was entered in the DNS name or network address and Netmask/Bits fields.
Log Class
Here, you enter what log class the Telecommuting Module should use to log the configuration traffic to the
Telecommuting Module’s web server. Log classes are defined on the Log Classes page under Logging. See also
chapter 11, Logging.
Log Rule No.
The Log Rule No. field determines the order of the lines. The order is important in deciding what is logged and
warned for. The Telecommuting Module uses the first line that matches the configuration traffic.
Perhaps you want to configure the Telecommuting Module so that configuration traffic from one specific computer
is simply logged while traffic from the rest of that computer’s network is both logged and generates alarms.
The rules are used in the order in which they are listed, so if the network is listed first, all configuration traffic from
that network is both logged and generates alarms, including the traffic from that individual computer. But if the
individual computer is listed on a separate line before the network, that line will be considered first and all
configuration traffic from that computer is only logged while the traffic from the rest of the computer’s network is
both logged and generates alarms.
Delete Row
If you select this box, the row is deleted when you click on Add new rows, Save, or Look up all IP addresses
again.
Create
Enter the number of new rows you want to add to the table, and then click on Create.
Save
Saves the Access Control configuration to the preliminary configuration.
Cancel
Reverts all the above fields to their previous configuration.
Look up all IP addresses again
Looks up the IP addresses for all DNS names on this page in the DNS servers you entered on the Basic
Configuration page.
RADIUS
RADIUS (Remote Authentication Dial-In User Service) is an authentication system consisting of one or more
servers, and clients using the servers to authenticate users. You could, for example, equip the company modems
with RADIUS clients, demanding that a user connecting to a modem first identifies himself to the RADIUS server.
Servers and clients communicate via UDP.
3Com VCX IP Telecommuting Module uses RADIUS for authentication of Telecommuting Module administration.
RADIUS Servers
Enter the server(s) that the Telecommuting Module should use. When more than one RADIUS server is entered,
make sure that their databases contain the same data, since the Telecommuting Module regards them all alike and
uses the server which first replies to a request.
47
Chapter 6. Basic Configuration
RADIUS server
Enter the DNS name or IP address for the RADIUS server used for authentication.
In IP address, the IP address of the server is shown. It is updated whenever Look up all IP addresses again is
pressed, or the DNS name or IP address field is changed.
Port
The official port for RADIUS is UDP port 1812. However, several RADIUS servers use port 1645, so you may have
to change the port number either on the RADIUS server or in the table.
Secret
A RADIUS authentication requires a ’shared secret’, which must be the same on both sides. Since the secret is used
as an encryption key, it is important that it is kept a secret. Since the secret is saved unencrypted in the
Telecommuting Module configuration, you should be careful with where you store the configuration.
Delete Row
If you select this box, the row is deleted when you click on Add new rows, Save, or Look up all IP addresses
again.
Create
Enter the number of new rows you want to add to the table, and then click on Create.
Identifier
A RADIUS client may use either of two ways to identify itself for the RADIUS server: an IP address or a name
(identifier). You must use at least one of these ways, or the authentication will fail.
Select here which method to use. The address or name in use must be registered at the RADIUS servers specified in
the top table, and must be unique in that RADIUS database.
Use NAS-IP-Address
If you select Yes, the Telecommuting Module’s IP address (the address selected under Contact IP Address) will be
enclosed as identity. If you select No, you must enter a NAS-Identifier for the Telecommuting Module.
48
Chapter 6. Basic Configuration
NAS-Identifier
You can enter a special identifier into this field. All characters except space are allowed according to the
Telecommuting Module, but your RADIUS server may have some restrictions on the identifier.
Contact IP Address
Select the IP address from which the Telecommuting Module should make connections to RADIUS servers. A
convenient choice of address is one on the interface closest to the RADIUS server.
Contact RADIUS servers from
Select a contact address from the IP addresses configured for the interfaces under Directly Connected Networks
and Alias.
Status for RADIUS servers
At the bottom of the page the status for the RADIUS servers is shown. Radiusmux is the part of 3Com VCX IP
Telecommuting Module that connects to the RADIUS servers.
If no authentication by RADIUS is configured, the radiusmux is not run. When you apply a configuration which
involves contacting a RADIUS server, the radiusmux is started.
RADIUS server
The IP address for this RADIUS server.
Score
Radiusmux gives points (the scale is 1 to 40, inclusive) to the different servers according to their performance. The
better server performance, the higher score. Radiusmux uses the score to select which server to query primarily.
Sent requests
The number of UDP packets sent to this server.
Received replies
The number of UDP packets received from this server.
Consecutive sends
The number of consecutive UDP packets sent without response from the server.
Recent average response time
A calculated average of response time for packets for which response has been received.
Free slots
The RADIUS server allocates a certain number of slots for each RADIUS client, and every pending request from
the Telecommuting Module occupies a slot. Here you see the current number of free slots.
Save
Saves the RADIUS configuration to the preliminary configuration.
49
Chapter 6. Basic Configuration
Cancel
Reverts all of the above fields to their previous configuration.
Look up all IP addresses again
Looks up the IP addresses for all DNS names on this page in the DNS servers you entered on the Basic
Configuration page.
Configuration of a RADIUS server
In this section it is assumed that you know how to configure your RADIUS server. Consult your RADIUS manual
for details.
Add the Telecommuting Module as a client in the RADIUS server. Make sure that the shared secret here is the same
as in the Telecommuting Module.
The Telecommuting Module checks the permissions for a user by looking at its RADIUS attribute Service-Type. If
the Service-Type has the value Administrative (6), the user is allowed to configure the Telecommuting Module.
For the various privileges for users, there is an 3Com-specific RADIUS attribute defined thus:
VENDOR 3Com 43
ATTRIBUTE 3Com-Admin-Account 1 integer 3Com
#
# Type of administrator account.
#
VALUE 3Com-Admin-Account Full-Access-Admin 1
VALUE 3Com-Admin-Account Backup-Admin 2
VALUE 3Com-Admin-Account Read-Only-Admin 3
VALUE 3Com-Admin-Account VPN-Admin 4
VALUE 3Com-Admin-Account SIP-Admin 5
More information about RADIUS can be found in RFC 2865.
SNMP
SNMP is a network monitoring protocol, which enables a single server to monitor one or more networks, including
all network equipment like routers and firewalls. 3Com VCX IP Telecommuting Module supports SNMP and can
accordingly be monitored automatically.
The monitoring signaling consists of two main parts. The SNMP server sends requests to the Telecommuting
Module, which replies with a list of network parameters and their values for the Telecommuting Module. The
Telecommuting Module can also send messages (traps) without the server prompting, when someone sends a
request without valid authentication and when the Telecommuting Module boots.
The 3Com VCX IP Telecommuting Module can only send parameters to the server; no changes of configuration can
be made through SNMP requests.
For more information about SNMP, read RFC 1157.
General
Here, decide whether the SNMP signaling should be activated. You can also enter contact information for the
Telecommuting Module.
50
Chapter 6. Basic Configuration
Contact person
Enter the name of the contact person for this 3Com VCX IP Telecommuting Module. This information is sent with
the parameter list as reply to an SNMP request from the server.
Node location
Enter the location of the Telecommuting Module. This information is sent with the parameter list as reply to an
SNMP request from the server.
The Telecommuting Module IP address to respond to SNMP requests
Enter the IP address of the Telecommuting Module to which the SNMP servers should direct their requests. Select
from the addresses defined on the Interface pages under Network.
Servers allowed to contact the Telecommuting Module via SNMP
Select the SNMP server(s) which are allowed to contact the Telecommuting Module. You select from the network
groups defined on the Networks and Computers page under Network.
SNMP v1 and v2c
In SNMP version 1 and 2c, the authentication is managed through an unencrypted password, a community. Here,
you select if the Telecommuting Module should accept access via v1 or v2c, and enter the valid communities.
Access via SNMPv1 and SNMPv2c
Select if access via SNMP version 1 or 2c (using communities as the autentication method) should be On or Off.
Community
Enter a password. Note that this password is stored unencrypted.
Delete Row
If you select this box, the row is deleted when you click on Add new rows, Save, or Look up all IP addresses
again.
51
Chapter 6. Basic Configuration
Create
Enter the number of new rows you want to add to the table, and then click on Create.
SNMP v3
In SNMP version 3, the authentication is managed through the server sending a username and an (in most cases)
encrypted password to the Telecommuting Module, which verifies the validity of them.
Here, you select if the Telecommuting Module should accept access via v3, and select the authentication and
encryption used for the SNMP reuqests.
Access via SNMPv3
Select if access via SNMP version 3 (using usernames and encrypted passwords as the autentication method) should
be On or Off.
User
Enter a username which the server should use when contacting the Telecommuting Module.
Password
Press the Change password button to enter a password for this user.
Authentication
Select the authentication algorithm to use for SNMP requests. 3Com VCX IP Telecommuting Module supports the
MD5 and SHA-1 algorithms.
Privacy
Select whether the SNMP request should be encrypted using DES or not encrypted at all.
Delete Row
If you select this box, the row is deleted when you click on Add new rows, Save, or Look up all IP addresses
again.
Create
Enter the number of new rows you want to add to the table, and then click on Create.
SNMP Traps
If SNMP traps status is On, the Telecommuting Module will send messages (traps) to the server(s) entered below
whenever an SNMP authentication fails or the Telecommuting Module boots.
If the trap sending is disabled, no traps will be sent.
52
Chapter 6. Basic Configuration
Trap sending
Select if trap sending (at boot and failed SNMP authentication) should be On or Off.
Trap receiver
Enter the IP address, or a name in the DNS, of the server to which the Telecommuting Module should send traps. If
you enter a DNS name instead of an IP address, you must enter the IP address of a DNS server on the Basic
Configuration page.
IP address shows the IP address of the DNS name or IP address you entered in the previous field.
Community
Enter the password (community) which the Telecommuting Module should use when sending traps. The
community is sent unencrypted over the network.
Version
Select the SNMP version to be used for traps. You can select v1 or v2c.
Delete Row
If you select this box, the row is deleted when you click on Add new rows, Save, or Look up all IP addresses
again.
Create
Enter the number of new rows you want to add to the table, and then click on Create.
Download the 3Com MIB
This link leads to the MIB (Management Information Base) definition for your 3Com VCX IP Telecommuting
Module.
Save
Saves the SNMP configuration to the preliminary configuration.
Cancel
Reverts all of the above fields to their previous configuration.
53
Chapter 6. Basic Configuration
Look up all IP addresses again
Looks up the IP addresses for all DNS names on this page in the DNS servers you entered on the Basic
Configuration page.
Certificates
Here, you create X.509 certificates for the Telecommuting Module, to be used for authentication in various
applications, like when configuration over HTTPS is performed.
On this page you also upload CA certificates to the Telecommuting Module. For the base Telecommuting Module,
CA certificates are not used.
Private Certificates
Here the private X.509 certificates of the Telecommuting Module are created. You can use the same certificate for
all authentication purposes, or create different certificates for the various functions in the Telecommuting Module.
Name
Enter a name for this certificate. The name is only used internally in the Telecommuting Module.
Certificate
Create, import or download a private certificate. See more information about creating certificates below. Under
Import, you upload Telecommuting Module certificates signed by an external CA.
Under View/Download, you download the private certificate, and you can also download the key pair.
Information
Information about this certificate, such as the signing CA and expiration date.
Delete Row
If you select this box, the row is deleted when you click on Add new rows or Save.
Create
Enter the number of new rows you want to add to the table, and then click on Create.
Create certificate or certificate request
Press Create New to create a new X.509 certificate. A new page with a form appears, requesting information about
the Telecommuting Module. Fill in the form to apply for a certificate or create a self-signed certificate. Fields
marked * are mandatory.
54
Chapter 6. Basic Configuration
Expire in
The expiration time defines how many days the certificate will last. Default time is 365 days, one year.
Common Name
Here, you enter the host name or IP address of the Telecommuting Module.
Email address
Enter the email address of the Telecommuting Module administrator.
Country code
Here, you enter the country code - not the top domain - for the country where the Telecommuting Module is
located. The country code for the USA is US.
State/province
The state or province where the Telecommuting Module is located.
Locality/town
The city or town where the Telecommuting Module is located.
55
Chapter 6. Basic Configuration
Organization
The name of the organization/company owning the Telecommuting Module.
Organizational Unit
The department using the Telecommuting Module.
Serial number
If you generate more than one certificate with the same information, and you want to give them separate names and
treat them as different certificates, you need to give them different serial number. Enter a serial number for this
certificate here.
Challenge password
Enter a password. This will be used only when revoking a signed certificate.
Create a self-signed X.509 certificate
By entering the requested information above and pressing this button, you can create a certificate that isn’t signed
by any certificate authority (CA). Self-signed certificates are for free, while certificates signed by an official CA
normally are not. Certificates signed by CAs are automatically accepted by web browsers, while you have to accept
self-signed certificates manually when using them in your web browser.
Create an X.509 certificate request
When pressing this button, you make a certificate request which can be sent to a certificate authority for signing.
The request is downloaded under View/Download on the certificate page. The signed certificate is uploaded under
Import.
Abort
Press the Abort button to return to the Certificates page without creating a new certificate or certificate request.
CA Certificates
Here, you upload CA certificates and CRLs (Certificate Revocation Lists).
In the base Telecommuting Module, CAs and CRLs are not used.
Name
Enter a name for this CA certificate. The name is only used internally in the Telecommuting Module.
CA Certificate
You upload the CA certificate to the Telecommuting Module, inspect the current certificate, or download it to use
somewhere else, by pressing the Change/View button.
CA CRL
A CRL (Certificate Revocation List) is used to tell the Telecommuting Module that some certificates issued by this
CAs are not valid, even though they may not have expired yet. Upload a CRL for this CA by pressing the
Change/View button.
56
Chapter 6. Basic Configuration
Information
Information about this certificate, such as the signing CA and expiration date.
Delete Row
If you select this box, the row is deleted when you click on Add new rows or Save.
Create
Enter the number of new rows you want to add to the table, and then click on Create.
Save
Saves all Certificates configuration to the preliminary configuration.
Cancel
Clears and resets all fields in new rows and resets changes in old rows.
Telecommuting Module Type
The Telecommuting Module can be connected to your network in different ways, depending on your needs. On this
page, you state what configuration you have.
The DMZ Configuration
Using this configuration, the Telecommuting Module is located on the DMZ of your firewall, and connected to it
with only one interface.
This is the safest configuration, since all traffic goes through both your firewall and your Telecommuting Module. It
is also the most flexible, since all networks connected to any of your firewall’s interfaces can be SIP-enabled.
On your firewall, you need to open the SIP port (normally UDP port 5060) and a range of UDP ports for RTP traffic
between the Telecommuting Module and the Internet as well as between the Telecommuting Module and your
internal networks. The SIP traffic finds its way to the Telecommuting Module using DNS or by setting the
Telecommuting Module as an outbound proxy on the clients.
The firewall mustn’t use NAT for the traffic between the Telecommuting Module and your internal networks or for
the traffic between the Telecommuting Module and the Internet. However, the Telecommuting Module can itself use
NAT for traffic to the Internet.
You need to declare your internal network topology on the Surroundings page.
The DMZ/LAN Configuration
Using this configuration, the Telecommuting Module is located on the DMZ of your firewall, and connected to it
with one of the interfaces.
This configuration is used to enhance the data throughput, since the traffic only needs to pass your firewall once.
57
Chapter 6. Basic Configuration
On your firewall, you need to open the SIP port (normally UDP port 5060) and a range of UDP ports for RTP traffic
between the Telecommuting Module and the Internet. The other interface is connected to your internal network.
The Telecommuting Module can handle several networks on the internal interface even if they are hidden behind
routers. No networks on other interfaces on the firewall can be handled.
Internal users have to configure the Telecommuting Module as outbound proxy, or an internal proxy has to use the
Telecommuting Module as outbound proxy.
The Telecommuting Module derives information about your network topology from the interface configuration.
The Standalone Configuration
Using this configuration, the Telecommuting Module is connected to your internal network on one interface and the
outside world on the other.
Use this configuration only if your firewall lacks a DMZ interface, or for some other reason cannot be configured
for the DMZ or DMZ/LAN alternatives.
Internal users have to configure the Telecommuting Module as outbound proxy, or an internal proxy has to use the
Telecommuting Module as outbound proxy. No change in the firewall configuration is needed.
The Telecommuting Module derives information about your network topology from the interface configuration.
Telecommuting Module Type configuration
Current Telecommuting Module Type
Shows which type is currently active.
58
Chapter 6. Basic Configuration
Change Telecommuting Module Type to
Select a new Telecommuting Module Type here.
Change type
Press the Change type button to set the new Telecommuting Module Type. This setting, like others, must be
applied on the Save/Load Configuration page before it affects the Telecommuting Module functionality.
59
Chapter 7. Network Configuration
Under Network, you configure:
•
Network groups which are used for the Telecommuting Module configuration
•
The Telecommuting Module’s IP addresses on all network interfaces
•
Routings for the networks so that computers behind routers can be contacted
•
VLAN settings
•
The Telecommuting Module network environment (only for the DMZ type)
Networks and Computers
Here, you name groups of computers and networks. Sometimes it can be useful to give a group of computers a
network name, such as Administration. If you want to group some computers, this can be done here, even if they do
not have consecutive IP addresses. You can also include a subgroup when defining a new network group.
The names are used when you configure Surroundings and SNMP.
Every group of computers which can reach each other without having to pass through the firewall needs a separate
network group.
The rows are sorted in alphabetical order, except that all upper case letters are sorted before lower case letters (B
comes before a).
When using an already defined group as a subgroup, select the name of the group under Subgroup. Set
Interface/VLAN to ’-’ and leave the other fields empty.
Name
Enter a name for the group of computers. You can use this name when you change configuration on the pages
mentioned above. A group can consist of several rows of IP addresses or series of IP addresses. By clicking on the
plus sign beside the name, you add more rows where you can specify more IP addresses for this group.
60
Chapter 7. Network Configuration
Subgroup
An already defined group can be used as a subgroup to new groups. Select the old group here and leave the fields
for DNS name empty. Select ’-’ as Interface/VLAN. If you don’t want to use a subgroup, select ’-’ here.
Lower Limit
DNS Name Or IP Address
Enter the DNS name or IP address of the network or computer. For computers in an IP range that you want to give a
network name, enter the first IP address in the range. DNS Name Or IP Address must not be empty if you are not
using a subgroup.
IP Address
The IP address of the object you entered in the DNS name or IP address field is displayed here. This field is not
updated until you click on Look up all IP addresses again or make changes in the DNS Name Or IP Address
field.
Upper Limit
DNS Name Or IP Address
Here, enter the last DNS name/IP address of the network or group. If the network contains a single computer, you
can leave this field empty. Then only the IP address in Lower Limit is used.
For computers in an IP range that you want to give a network name, enter the last IP address in the range. The IP
address in Upper Limit must be at least as high as the one in Lower Limit. If you use a subgroup, leave this field
empty.
IP Address
The IP address of the object you entered in the DNS Name Or IP Address field is displayed here. This field is not
updated until you click on Look up all IP addresses again or make changes in the DNS Name Or IP Address
field.
Interface/VLAN
Here, you can select an interface or a VLAN to restrict the IP range.
If the interface ’-’ is chosen, the group will consist of all IP addresses in the interval between Lower limit and
Upper limit, regardless of what interface they are connected to. By selecting an interface or a VLAN, you constrain
the group to consist only of the IP addresses in the interval that really are connected to the selected interface/VLAN.
For example, if 10.20.0.0 - 10.20.0.255 are IP addresses behind the interface DMZ-1 and the lower and upper limits
are 10.10.10.20 and 255.255.255.255 respectively, choosing DMZ-1 as Interface will cause the group to consist of
the IP addresses 10.20.0.0 - 10.20.0.255, being the IP addresses in the interval actually connected to the selected
interface.
If you have selected a subgroup, the Interface/VLAN should be ’-’.
Delete Row
If you select this box, the row is deleted when you click on Add new rows, Save, or Look up all IP addresses
again.
Create
Enter the number of new groups and rows you want to add to the table, and then click on Create.
61
Chapter 7. Network Configuration
Save
Saves the Networks and Computers configuration to the preliminary configuration.
Cancel
Clears and resets all fields in new rows and reset changes in old rows.
Interface (Network Interface 1 and 2)
There is a menu selection for each network interface (Network Interface 1 and 2) on the Telecommuting Module.
Select a page to make configuration for that interface. There is also a page where configuration for all interfaces can
be viewed and changed.
Here, you set the interface name, whether the interface is on or off, the IP address, alias, and static routing.
For each interface, go to Directly Connected Networks and state the IP address of the Telecommuting Module and
the size of the network connected to this interface.
General
Physical device name
This tells the physical device name of the network interface. The physical interface eth0 corresponds to Network
Interface 1, and eth1 corresponds to Network Interface 2.
Status
Specify if this network interface is On or Off. If the interface is off, all configuration on this page is ignored, and
the Telecommuting Module will behave as if this interface wasn’t present (except when used for failover).
If the interface should be used for failover, you should select Off. In this case, it won’t be available for other traffic
than the synchronizing within the failover team. Read more about failover in chapter 12, Failover.
Interface name
The network Interface name is only used internally in the Telecommuting Module, e. g. when configuring
Networks and Computers.
Directly Connected Networks
The Telecommuting Module must have an IP address on every network to which it is directly connected. This
applies to all networks on the same physical network to which this interface is connected.
Note that the interface which should receive traffic from the outside must have a public IP address (no NAT),
regardless of which Telecommuting Module Type was selected. For a DMZ or DMZ/LAN type, this means that
the interface connected to the DMZ of the firewall must have a public IP address.
62
Chapter 7. Network Configuration
Name
A name for this IP address. You can use this name when configuring the administration IP address. This name is
only used internally in the Telecommuting Module.
DNS name or IP address
The name/IP address of the Telecommuting Module on this network interface on this directly connected network.
IP address
Shows the IP address of the DNS name or IP address you entered in the previous field.
Netmask/bits
Enter the mask of the network where the DNS name or IP address applies.
Network address
The IP address of the network where the DNS name or IP address applies.
Broadcast address
Shows the broadcast address of the network in the Network address field.
VLAN id
VLANs are used for clustering IP ranges into logical networks.
A VLAN id is simply a number, which identifies the VLAN uniquely within your network.
Enter a VLAN id for this network. You don’t need to use a named VLAN (defined on the VLAN page).
VLAN name
If you entered the VLAN id of a named VLAN, the name will show here.
Delete Row
If you select this box, the row is deleted when you click on Add new rows, Save, or Look up all IP addresses
again.
Create
Enter the number of new rows you want to add to the table, and then click on Create.
Alias
3Com VCX IP Telecommuting Module can use extra IP addresses, aliases, on its interfaces. All alias IP addresses
must belong to one of the Directly Connected Networks you have specified.
Aliases are necessary for setting up a STUN server.
63
Chapter 7. Network Configuration
Name
Enter the name of your alias. This name is only used internally in the Telecommuting Module.
DNS name or IP address
Enter the IP address of this alias, or a name in the DNS. If you enter a DNS name instead of an IP address, you must
enter the IP address of a DNS server on the Basic Configuration page.
IP address
Shows the IP address of the DNS name or IP address you entered in the previous field.
Delete Row
If you select this box, the row is deleted when you click on Add new rows, Save, or Look up all IP addresses
again.
Create
Enter the number of new rows you want to add to the table, and then click on Create.
Static routing
If there is a router between the Telecommuting Module and a computer network which the Telecommuting Module
is serving, you must name the router and the network here. The table is sorted by network number and network
mask.
The Default gateway, configured on the Basic Configuration page, will automatically be entered in this table on
the corresponding interface page, when added to the Default Gateways table.
64
Chapter 7. Network Configuration
Routed network
Enter the DNS name or IP address of the routed network under DNS name or network address.
The IP address of the routed network is shown under Network address.
In the Netmask field, enter the netmask of the network.
Router
The name or IP address of the router that will be used for routing to the network. If there are several routers
between the Telecommuting Module and the network, fill in the router closest to the Telecommuting Module.
Delete Row
If you select this box, the row is deleted when you click on Add new rows, Save, or Look up all IP addresses
again.
Create
Enter the number of new rows you want to add to the table, and then click on Create.
Save
Saves all Interface configuration to the preliminary configuration.
Cancel
Clears and resets all fields in new rows and resets changes in old rows.
Look up all IP addresses again
Looks up the IP addresses for all DNS names on this page in the DNS servers you entered on the Basic
Configuration page.
VLAN
VLANs are used for clustering IP ranges into logical networks.
A VLAN id is simply a number, which identifies the VLAN uniquely within your network.
Here, you can list the VLANs you wish to use and give them names, to make administration easier.
Named VLANs can also be selected instead of interfaces on the Networks and Computers page.
65
Chapter 7. Network Configuration
Name
The name of this VLAN. The name is only used in the Telecommuting Module web interface to help you keep track
of the different VLANs.
Interface
Select an interface for this VLAN.
VLAN id
Enter a VLAN id. A VLAN id is just a number. All packets for this VLAN is then marked with this number,
enabling all network devices to recognize and route packets for the VLAN.
Status
The status for this VLAN. Status can be On (the VLAN is used on an active interface), Off (the VLAN is used on
an inactive interface) and Unused (no Directly Connected Networks has been selected for this VLAN).
Delete Row
If you select this box, the row is deleted when you click on Add new rows or Save.
Create
Enter the number of new rows you want to add to the table, and then click on Create.
Save
Saves all VLAN configuration to the preliminary configuration.
Cancel
Clears and resets all fields in new rows and resets changes in old rows.
Interface Status
On this page, status about the physical interfaces and links are shown.
66
Chapter 7. Network Configuration
Physical device
This tells the physical device name of the network interface. The physical interface eth0 corresponds to Network
Interface 1, and eth1 corresponds to Network Interface 2.
Type
Here the speed options for the interface are shown.
MAC address
The MAC address of the interface.
Active
Shows if the interface is activated or not.
Link
Here you can see if the interface has physical link to the network.
Speed
Here you can see the negotiated speed on the interface network.
Duplex
Here you can see the negotiated duplex for the interface.
Surroundings
Settings on the Surroundings page are only required when the Telecommuting Module has been made the DMZ
type.
The Telecommuting Module must know what the networks around it looks like. On this page, you list all networks
which the Telecommuting Module should serve and which are not reached through the default gateway of the
firewall.
All computers that can reach each other without having to go through the firewall connected to the Telecommuting
Module should be grouped in one network. When you are finished, there should be one line for each of your
firewall’s network connections (not counting the default gateway).
One effect of this is that traffic between two users on different networks, or between one of the listed networks and
a network not listed here, is NAT:ed.
Another effect is that for connections between two users on the same network, or on networks where neither is
listed in Surroundings, no ports for RTP sessions will be opened, since the Telecommuting Module assumes that
they are both on the same side of the firewall.
Normally, at least one network should be listed here. If no networks are listed, the Telecommuting Module will not
perform NAT for any traffic.
67
Chapter 7. Network Configuration
Network
Select a network. The alternatives are the networks you defined on the Networks and Computers page.
Delete Row
If you select this box, the row is deleted when you click on Add new rows or Save.
Create
Enter the number of new rows you want to add to the table, and then click on Create.
Save
Saves all Surroundings configuration to the preliminary configuration.
Cancel
Clears and resets all fields in new rows and resets changes in old rows.
68
Chapter 8. SIP Services
SIP (Session Initiation Protocol) is a protocol for creating and terminating various media stream sessions over an IP
network. It is for example used for Internet telephone calls and distribution of video streams.
SIP takes care of the initiation, modification and termination of a session with one or more participants. The
protocol makes it possible for the participants to agree on what media types they should share. You can find more
information about SIP in appendix A, More About SIP, and in RFC 3261.
You find examples on how to configure your 3Com VCX IP Telecommuting Module for SIP in chapter 4, How To
Configure SIP.
The SIP module in 3Com VCX IP Telecommuting Module handles SIP requests for users who have registered on a
machine connected to the Telecommuting Module. The module forwards the request through the Telecommuting
Module, which enables users behind different network interfaces to make contact. The SIP module controls the
security rules to temporarily let through the media streams that the users agree on, on their assigned ports.
You must enter a DNS server and a Default gateway on the Basic Configuration page to make the SIP module
work satisfactorily.
Administration of SIP
To enable the SIP function of the Telecommuting Module, you must at least configure on the Basic page.
These SIP functions are configured in the SIP Services section:
•
SIP module on/off.
•
SIP logging.
•
Port range for SIP media.
•
Interoperability settings.
•
SIP timeouts.
•
Remote SIP Connectivity (requires a Remote SIP Connectivity Module).
Basic
Here, you make basic settings for the Telecommuting Module SIP management.
General
Here, select whether the SIP module should be activated or not. If you select to turn the SIP module Off, no other
SIP settings will have any effect.
SIP media port range
State a port interval which the Telecommuting Module should use for SIP media streams. You can use any high
ports except 4500 (reserved for NAT-T) and 65097-65200 (reserved for RADIUS).
Enter the lower and upper limit of the port range that the Telecommuting Module should use for media streams. The
upper limit must be at least as high as the lower limit.
69
Chapter 8. SIP Services
SIP Servers To Monitor
Your Telecommuting Module can be made to monitor SIP servers, to check that they are alive. The information is
used by the Telecommuting Module when SIP signaling should be passed on to the server in question. This is useful
when a domain resolves to several individual hosts; the Telecommuting Module will know immediately if one of
them is down, which will speed up the call connection.
Server
Enter the host name, domain name, or IP address of the server to be monitored.
Port
Enter the port to be monitored on that host. This should be the port to use for SIP signaling.
Transport
Select the transport to be monitored on that host. This should be the transport to use for SIP signaling.
Delete Row
If you select this box, the row is deleted when you click on Add new rows or Save.
Create
Enter the number of new rows you want to add to the table, and then click on Create.
Logging
The same settings can also be found on the Logging Configuration page under Logging.
Log class for SIP errors
The Telecommuting Module sends a message if there are any SIP errors. Select a log class for these log messages.
70
Chapter 8. SIP Services
Log class for SIP signaling
For each SIP packet, the Telecommuting Module generates a message, containing the sender and receiver of the
packet and what type of packet it is. Select a log class for these log messages.
Log class for SIP packets
The Telecommuting Module logs all SIP packets (one SIP packet is many lines). Select a log class for the SIP
packets.
Log class for SIP debug messages
The Telecommuting Module logs a lot of status messages, for example the SIP initiation phase of a reboot. Select a
log class for these messages.
Save
Saves the Basic configuration to the preliminary configuration.
Cancel
Clears and resets all fields in new rows and resets changes in old rows.
Interoperability
The SIP standard is still young and under considerable development. As an effect, several implementations of the
standard omits parts of it, or makes guesses as to what will be accepted.
3Com VCX IP Telecommuting Module adheres rather well to the standard (RFC 3261) per default, but you can also
adjust the configuration to make more allowing for known issues in various SIP implementations.
On this page, you also configure timeout and retransmission values for SIP signaling.
Loose routing
The Telecommuting Module uses the parameter "lr" in its SIP signaling to announce to other SIP devices that it uses
loose routing. Some other SIP implementations incorrectly expect the lr parameter to be followed by a value, i.e.
"lr=true". If you select that the Telecommuting Module should add this value to its SIP signaling, it will work with
these implementations, too. This could affect its interaction with other SIP devices that conform to the SIP standard
very strictly.
Select to use lr or lr=true.
Relaxed Refer-To
The SIP standard requires that a Refer-To header with a question mark in it must be contained within angle
brackets. Some clients do not honor this.
71
Chapter 8. SIP Services
Select whether the Telecommuting Module should accept Refer-To headers without angle brackets, but containing
question marks. The recommended setting is Only allow Refer-To ? with angle brackets.
Remove VIA headers
Some SIP servers won’t accept requests with more than one Via header. To be able to communicate via these
servers, you can select to remove all Via headers but one in requests to those servers. The Via headers are added
again when the reply passes the Telecommuting Module.
Here, list servers that won’t accept more than one Via header in SIP requests.
SIP server
Enter the DNS name or IP address for a SIP server that won’t accept more than one Via header.
Delete Row
If you select this box, the row is deleted when you click on Add new rows, Save, or Look up all IP addresses
again.
Create
Enter the number of new rows you want to add to the table, and then click on Create.
Translation exceptions
Usually, the Telecommuting Module rewrites IP addresses in the SIP signaling to hide it for the receiver. For some
reasons, you might want to except certain IP addresses from being rewritten. Enter those IP addresses in the table.
If you use a dialing domain that looks like an IP address (like 10.10.10.10), you need to enter that domain in this
table.
Except this from translation
Enter the DNS name or IP address to be excepted from IP address translation. If you enter a DNS name, the
corresponding IP address will be excepted from translation.
72
Chapter 8. SIP Services
Delete Row
If you select this box, the row is deleted when you click on Add new rows, Save, or Look up all IP addresses
again.
Create
Enter the number of new rows you want to add to the table, and then click on Create.
Preserve username
When registering a SIP client on one side of the Telecommuting Module to a SIP server on the other side, the
Contact header is normally rewritten. By doing this, we make it possible for the SIP server to track when the same
user is registering multiple times from different places. It is possible to turn this rewriting off and preserve the
username in Contact headers passing through the Telecommuting Module, but that makes it impossible for the SIP
server to tell if registrations for a certain user belong to one or several clients (if a user has two registrations from
different clients and deregisters one of them, the SIP server will delete its only registration for him).
To make all calls work, you need to turn this On.
Select if usernames should be preserved or not. The recommended setting is to Preserve username in Contact
header.
Loose username check
Normally, the Telecommuting Module checks that the authentication username equals the username in the From
header. Some clients use their whole address as authentication username (ie: [email protected]), which means that the
username "user" in the From header is compared with the authentication username "[email protected]". This
authentication will fail. With this function, "@host.com" is stripped from the authentication username.
Select if usernames should be checked loosely (Yes) or strictly (No).
SIP URL encryption
In some situations some SIP URLs are encrypted and signed. When an invitation to a call is sent out, the address
that the callee is to send its answer to is encrypted, if the outgoing packet is NAT:ed. When the answer from the
callee comes in, the Telecommuting Module checks that the encryption and signing is correct before the address is
used to send the information onwards.
The encryption and signing makes the SIP packets slightly larger. This might lead to SIP packets being fragmented.
By turning encryption off, fragmentation can be avoided in some cases, and since some equipment has trouble with
fragmented packets this can sometimes be necessary.
Please note that when encryption is turned off, the Telecommuting Module maked no checks of incoming SIP
URLs. It becomes possible in theory to trick the Telecommuting Module to send SIP packets anywhere, which
means that security is drastically reduced if encryption is turned off.
If Remote NAT Traversal is used, the URL encryption must be turned on.
73
Chapter 8. SIP Services
Here, you select if SIP URL encryption should be used or not.
Expires header
Some SIP clients don’t understand the expires: parameter in the Contact header. To set the expiration time for those
clients, you can make the Telecommuting Module add to REGISTER request replies an Expires header with the
expires value in it.
Select to Always add Expires header, Never add Expires header, or Add Expires header if the request
contained one. The last means that the Telecommuting Module will add an Expires header to the response if the
request from the client contained one.
Local IP Addresses Are SIP Domains
Your 3Com VCX IP Telecommuting Module can be made to use all its local IP addresses as local SIP domains, in
addition to the domains listed on the User database page.
This setting have impact on all functions where distinctions can be made between local and other domains, like the
SIP Methods and the Matching Request-URI.
Select if the Telecommuting Module should regard all its own IP addresses on all interfaces as local SIP domains.
User Matching
Here, you can select to match on username only or username as well as domain.
If you match on username only, users with the same username will be treated as the same, even when they are under
different domains.
Force Record-Routing For Outbound Requests
Here, you select if the Telecommuting Module should add a Record-Route header to all requests received by the
Telecommuting Module, but whose Request-URI does not contain one of its Local SIP Domains.
74
Chapter 8. SIP Services
The Record-Route header makes all subsequent SIP signaling for this session to be routed via the Telecommuting
Module even if it is not the shortest route.
Here, you select to add Record-Route headers for outbound requests or not.
Force Record-Route For All Requests
Here, you select if the Telecommuting Module should add a Record-Route header to all requests received by the
Telecommuting Module, which should be passed on to another client/server.
The Record-Route header makes all subsequent SIP signaling for this session to be routed via the Telecommuting
Module even if it is not the shortest route.
Here, you select to add Record-Route headers for all requests or not.
Force remote TLS connection reuse
Enter SIP servers to which the Telecommuting Module connects using TLS. For the listed servers, the
Telecommuting Module will use the actual source port for the TLS connection instead of port 5061.
This is useful in the SIP signaling, where port numbers are used in Via and Route headers.
DNS name or IP address
Enter the DNS name or IP address for a SIP server for which the Telecommuting Module should reuse TLS ports.
IP address
Shows the IP address of the DNS name or IP address you entered in the previous field.
Delete Row
If you select this box, the row is deleted when you click on Add new rows, Save, or Look up all IP addresses
again.
Create
Enter the number of new rows you want to add to the table, and then click on Create.
75
Chapter 8. SIP Services
Accept TCP Marked As TLS
When a TLS accelerator is used, SIP packets can be sent to the Telecommuting Module via TCP, but the packet
content will look as if TLS was used.
Select if TCP packets with TLS content should be accepted. The recommended setting is not to accept them.
Allow Large UDP Packets
Sometimes, the SIP signaling UDP packets get larger than the standard allows. There are two ways to handle this;
either send large UDP packets, which may become fragmented into several packets, or use TCP. Some SIP devices
may not be able to receive TCP packets, which means that you have to allow large UDP packets, but to do this
violates section 18.1.1 in RFC 3261.
This setting only affects SIP signaling packets.
Select if large UDP packets should be allowed. The recommended setting is not to allow them.
Remove Headers in 180 Responses
Some SIP servers require that the Contact and Record-Route headers are removed from 180 responses.
Select if the Telecommuting Module should remove these headers in 180 responses. The recommended setting is to
keep the headers.
Open port 6891 for file transfer
Messenger clients do not always use the ports that are negotiated in the SIP signaling. In particular, the File Transfer
function always uses the same port, regardless of what is negotiated. To make File Transfer work through the
Telecommuting Module you must open port 6891, the Messenger File Transfer port.
You only need to do this if File Transfers are made between clients on different networks; if transfers are always
only made between clients on the same network, no extra ports need to be opened.
76
Chapter 8. SIP Services
Note: If more than one Messenger client performs file transfer through the Telecommuting Module at the same
time, they could end up sending to each other’s peers instead of their own. An attacker could possibly use this to
intercept transfered files; don’t use this mechanism to transfer sensistive data.
Here, you select to turn Open port 6891 On or Off. Recommended setting is Off.
Allow RFC 2069 authentication
Some SIP units can’t handle Digest authentication as described in RFC 2617, but they still do authentication. 3Com
VCX IP Telecommuting Module can allow the simpler form of authentication described in RFC 2069 to be able to
interoperate with these units.
To allow this can decrease security. Use it only if units in your system need it.
Select if authentication according to RFC 2069 should be allowed (On) or not (Off). It is recommended to keep this
setting off.
Save
Saves the Interoperability configuration to the preliminary configuration.
Cancel
Reverts all of the above fields to their previous configuration.
Look up all IP addresses again
Looks up the IP addresses for all DNS names on this page in the DNS servers you entered on the Basic
Configuration page.
Sessions and Media
Here, settings are made for the SIP timeouts and sessions negotiated via the Telecommuting Module.
Registrar Limits
77
Chapter 8. SIP Services
Timeout for registrations
Enter the timeout (in seconds) before a registration becomes obsolete. When the timeout is reached, the registrar
discards the registration.
Allowed number of users
Enter the maximum number of users allowed to register in the SIP registrar.
Leave the field empty to allow as many registrations as there are SIP user licenses on the Telecommuting Module
(number displayed inside parantheses). You can purchase additional SIP user licenses from your retailer.
Allowed number of registrations per user
Enter the allowed number of concurrent registrations for a user. A registration looks like user@computer, which
means that if you re-register from the same computer, this won’t count as another registration, but just an update.
Session Configuration
Session timer
Enter the maximum time for a SIP initiated connection. When the timeout is reached, the Telecommuting Module
discards the media streams. The clients won’t notice, as the connection is still active, but you won’t hear anything as
no media streams are let through. To avoid this, clients can regularly ask for new timeouts.
Timeout for SIP over TCP/TLS
The Timeout for SIP over TCP/TLS decides how long a SIP connection over TCP with the Telecommuting
Module may exist without having received a complete SIP request.
"0" or an empty field means that SIP over TCP or TLS cannot be used to the Telecommuting Module.
Limitation of sender of media streams
The Telecommuting Module usually locks a media stream to the first sender IP address and port (for security
reasons). Some SIP clients change ports during the first media stream packets, which will block the media stream
from being let through the Telecommuting Module. There are also scenarios where the media stream sender is
changed to an entirely new sender.
You can select for the Telecommuting Module to Lock to the first sender, which will render the behaviour
described above. Allow multiple concurrent senders lets the media stream through even if ports and/or IP
addresses change.
Allowed number of media streams per SIP session
Enter the number of media streams a single SIP session can handle. This restriction is primarily made for
preventing DOS attacks.
78
Chapter 8. SIP Services
Allowed number of concurrent sessions
Enter the number of concurrent SIP sessions which the Telecommuting Module should handle.
Leave the field empty to allow as many sessions as there are SIP traversal licenses on the Telecommuting Module
(number displayed inside parantheses). You can purchase additional SIP traversal licenses from your retailer.
Requests
You can configure timeouts for the different functions of the Telecommuting Module SIP module here. It is not
recommended to change from the default values unless you really know what you’re doing.
Default timeout for INVITE requests
When sending an INVITE request you can specify a timeout, telling how long you can wait before getting an
answer.
If no timeout is given when an INVITE request is sent, the Telecommuting Module sends the default timeout
entered here.
Maximum timeout for INVITE requests
Here, enter the maximum timeout to allow for an INVITE request. If a higher timeout is given, the Telecommuting
Module changes it to the value entered here.
SIP blacklist interval
When the Telecommuting Module sends out a SIP request and no reply is received, the SIP peer (say, a SIP server
or an IP phone) will be blacklisten for the given time interval. This blacklisting means that no new SIP requests will
be sent to the unit, even if requests that should be routed to this unit is received by the Telecommuting Module.
If the SIP request which caused the blacklisting, or a subsequent SIP request for that unit, can be routed to another
device instead, the Telecommuting Module will keep on sending those requests to the next known IP address for the
domain/user in question. When the blacklist ends, the Telecommuting Module will go back to sending requests to
the previously blacklisted unit again.
If a 0 is entered into this field, the SIP blacklisting will not be used by the Telecommuting Module.
Base retransmission timeout for SIP requests
When the Telecommuting Module sends out a SIP request, it will expect a reply within a certain time. If no reply
has been received within the Base retransmission timeout, the Telecommuting Module will start resending the
request.
Maximum number of retransmissions for INVITE requests
When the Telecommuting Module sends out an INVITE request, it will wait for a reply until the Base
retransmission timeout and then start to retransmit the request. The time intervals between retransmissions will
double for each new retransmission.
79
Chapter 8. SIP Services
Example: If the Base retransmission timeout is 0.5 seconds and the Maximum number of retransmissions is 6,
the INVITE requests will be sent with intervals of 0.5 s, 1 s, 2 s, 4 s, 8 s, and 16 s.
Maximum number of retransmissions for non-INVITE requests
When the Telecommuting Module sends out a request which is not an INVITE request, it will wait for a reply until
the Base retransmission timeout and then start to retransmit the request. The time intervals between
retransmissions will double for each new retransmission until the interval reaches 4 seconds. After that,
retransmissions will be made with a 4-second interval.
Example: If the Base retransmission timeout is 0.5 seconds and the Maximum number of retransmissions is7,
the requests will be sent with intervals of 0.5 s, 1 s, 2 s, 4 s, 4 s, 4 s, and 4 s.
Save
Saves the Sessions and Media configuration to the preliminary configuration.
Cancel
Reverts all of the above fields to their previous configuration.
Remote SIP Connectivity
If you are at a hotel or somewhere else where you find yourself behind a NAT-ing device that does not understand
SIP, you will have use of the SIP Remote Connectivity of 3Com VCX IP Telecommuting Module. This will help
your client to traverse the NAT, even if the device doing the NAT does not understand SIP. The SIP Remote
Connectivity is only available if you have installed the Remote Connectivity module.
If you have a STUN-capable SIP client, you need just turn on the STUN server of the Telecommuting Module to
make the client work behind NAT. If you have a SIP client that does not do STUN (or if the STUN-capable client is
located behind a Symmetric NAT device), you have to use the Remote NAT Traversal feature. This is easier for the
client, but generates more network traffic for the Telecommuting Module.
STUN Server
Use the STUN server if you have STUN-aware SIP clients. You will need at least two public IP addresses to make it
work with all client implementations of STUN.
STUN will not work properly if the NAT device uses Symmetric NAT (where the client’s private IP/port pair
translates to different public IP/port pairs depending on destination, and where other computers than the destination
host are not allowed to reply on that IP/port pair).
The client also needs extra configuring for this; it must know which IP addresses and ports the STUN server has.
STUN server function
Select if the STUN server function should be switched On or Off.
STUN server IP addresses
When activated, the STUN server requires two IP addresses, and a pair of ports on these two IP addresses, on the
Telecommuting Module. STUN clients will then send test packets to these ports.
80
Chapter 8. SIP Services
Select two IP addresses out of the ones assigned to the Telecommuting Module under Directly Connected
Networks and Alias on the interface pages.
Note: for the STUN server to work properly, you need to select IP addresses which the clients can reach. In normal
circumstances, this means that only public IP addresses can be used.
STUN ports
Enter the ports to use for the STUN server. These ports, on the IP addresses selected, will not be available for
anything else.
Remote NAT Traversal
If your SIP client is not STUN-capable, you can use the built-in Remote NAT traversal feature of the
Telecommuting Module. The client must register on the Telecommuting Module (or through it).
The SIP client needs to re-REGISTER rather often for this to work. The exact period for this depends on the
NAT-ing device, but 20 seconds should be enough to get across most NAT boxes. It is not advisable to use
OPTIONS for 3Com SIP clients.
Remote NAT traversal
Turn this function on or off.
Re-REGISTER period for clients
Clients using this function will have to re-REGISTER very often, to keep the IP/port NAT binding. A
re-REGISTER interval of 20 seconds should be enough to ensure this.
If some clients are unable to handle short re-REGISTER intervals, the Telecommuting Module can send OPTIONS
messages instead, see below.
Use OPTIONS for registered clients
Select if the Telecommuting Module should use OPTIONS packets instead of short re-REGISTER intervals to keep
the NAT binding.
OPTIONS should not be used for 3Com phones, as they don’t respond to that.
OPTIONS interval
Enter the interval for the Telecommuting Module to send OPTIONS packets to the client.
Save
Saves the Remote SIP Connectivity configuration to the preliminary configuration.
Cancel
Reverts all of the above fields to their previous configuration.
81
Chapter 9. SIP Traffic
SIP (Session Initiation Protocol) is a protocol for creating and terminating various media stream sessions over an IP
network. It is for example used for Internet telephone calls and distribution of video streams.
SIP takes care of the initiation, modification and termination of a session with one or more participants. The
protocol makes it possible for the participants to agree on what media types they should share. You can find more
information about SIP in appendix A, More About SIP, and in RFC 3261.
You find examples on how to configure your 3Com VCX IP Telecommuting Module for SIP in chapter 4, How To
Configure SIP.
The SIP module in 3Com VCX IP Telecommuting Module handles SIP requests for users who have registered on a
machine connected to the Telecommuting Module. The module forwards the request through the Telecommuting
Module, which enables users behind different network interfaces to make contact. The SIP module controls the
security rules to temporarily let through the media streams that the users agree on, on their assigned ports.
You must enter a DNS server and a Default gateway on the Basic Configuration page to make the SIP module
work satisfactorily.
These SIP functions are configured in the SIP Traffic section:
•
Allowed SIP methods
•
Routing of incoming SIP requests
SIP Methods
Enter the SIP methods you want to allow and/or authenticate. Methods that are not listed here will be blocked by the
Telecommuting Module.
Common methods are predefined (from RFC 3261). Note that the standard methods ACK and CANCEL can’t be
authenticated.
82
Chapter 9. SIP Traffic
Method
Enter the name of the SIP method. This should be the name used in RFC 3261.
Traffic to
Here, you select the direction of the traffic. Local domains means that traffic to Local SIP Domains of this
Telecommuting Module is affected by this row. Other domains means that traffic to all domains which are not
Local SIP Domains of this Telecommuting Module is affected by this row. Both means that this row affects all
traffic for the method, regardless of where the traffic is bound.
Allow
Select if the method in this direction should be allowed or not. For methods that are not allowed, the
Telecommuting Module sends a 403 (Forbidden) response.
Auth
In the base Telecommuting Module, authentication will not be performed, and this setting will have no effect.
Delete Row
If you select this box, the row is deleted when you click on Add new rows or Save.
Create
Enter the number of new rows you want to add to the table, and then click on Create.
Save
Saves the SIP Methods configuration to the preliminary configuration.
Cancel
Clears and resets all fields in new rows and reset changes in old rows.
Routing
Here, you configure routing of the SIP signaling received by the Telecommuting Module The options are: to
forward all SIP requests to a server, regardless of what they concern (Outbound Proxy), and to forward all requests
addressed to a specific SIP domain to a SIP server (DNS Override For SIP Requests).
You can also select to process class 3xx messages in the Telecommuting Module or pass them on to the client.
Outbound Proxy
Here, you can enter an external SIP proxy to which all SIP requests should be sent. This could be useful e.g. if the
Telecommuting Module separates two local departments of a company, and all SIP requests should be processed by
the main firewall connected to the Internet.
83
Chapter 9. SIP Traffic
Domain or IP address
Enter the domain name or IP address of the external SIP proxy.
Port
Enter the port number of the external SIP proxy.
If no port number is entered, the Telecommuting Module will make a DNS query for an SRV record. If a port
number is entered, it will query for an A record.
Delete Row
If you select this box, the row is deleted when you click on Add new rows, Save, or Look up all IP addresses
again.
Create
Enter the number of new rows you want to add to the table, and then click on Create.
Class 3xx message processing
Sometimes during negotiation for a connection, status messages about this process will be sent. Here you select
whether to forward these to the client or process them in the Telecommuting Module.
A class 3xx message from a server means that the connection attempt was terminated, but no connection was
established, e.g. due to use of the wrong address or service. The Telecommuting Module as well as some clients can
use this information to make new attempts which might have a better chance to succeed.
Forward class 3xx messages
The choices are Forward all, which forwards all class 3xx messages to the client (which might be able to use this
information), and Follow redirects, which means that the Telecommuting Module itself uses the information and
might make new connection attempts. In this case, it will only inform the client when the connection finally is
established or the attempt has failed totally.
DNS Override For SIP Requests
Here, you can register SIP domains to which the Telecommuting Module should be able to forward requests, but
which for some reason cannot be resolved in DNS. Enter an IP address and port to which the requests should be
forwarded. You can also select to use a specific protocol.
If you use a dialing domain that looks like an IP address, you must enter that dialing domain here along with the
SIP server for that domain.
You can enter more than one IP address or host name for a domain, and set weights and priorities for these.
84
Chapter 9. SIP Traffic
Domain
Enter the domain name of the SIP domain.
Relay to
Enter the IP address for the SIP registrar handling the domain. You can also enter a DNS name for the SIP registrar,
if it has a DNS-resolvable host name, even if the SIP domain is not possible to look up in DNS.
Under Port, enter the port on which the SIP registrar listens for SIP traffic. The standard port is 5060 (5061 for
TLS).
You can select which transport protocol to use between the Telecommuting Module and the registrar. Under
Transport, select from UDP, TCP and TLS. You can also select "-", which means that the signaling is passed on
using the same transport as was used to reach the Telecommuting Module.
If you entered more than one IP address/host name for the same domain, you should also assign them Priority and
Weight. A low Priority value means that the unit should have a high priority. If more than one unit has the same
Priority, the signaling sent to them is distributed between them according to their Weight. If two units have the
same priority, and Unit 1 has weight 4, and Unit 2 has weight 9, 4/13 of the signaling will be sent to Unit 1, and
9/13 will be sent to Unit 2.
Delete Row
If you select this box, the row is deleted when you click on Add new rows, Save, or Look up all IP addresses
again.
Create
Enter the number of new groups and rows you want to add to the table, and then click on Create.
Save
Saves the Routing configuration to the preliminary configuration.
Cancel
Reverts all of the above fields to their previous configuration.
Look up all IP addresses again
Looks up the IP addresses for all DNS names on this page in the DNS servers you entered on the Basic
Configuration page.
85
Chapter 9. SIP Traffic
Session Status
You can monitor the current SIP activity. The tables are updated when you select the page or reload it.
Registered Users
Here the currently registered users are listed.
User
The SIP address of the registered user. The address looks like name@domain, where name is a user name or a
telephone number, and domain is a domain name or an IP address.
Registered from
The IP address of the computer from which the user registered.
Active Sessions
Here the currently active sessions are listed.
Start
The time when the call started.
Caller
The SIP and IP addresses of the calling user.
Callee
The SIP and IP addresses of the called user.
State
Shows if the call is established or under negotiation.
Call ID/Media Type
Each SIP session has a unique ID, which is shown here. You can also see what media type is used in the call.
86
Chapter 10. Administration
Under Administration, you
•
apply your configuration
•
define administrator users and change their passwords
•
save the preliminary configuration to file
•
load a saved configuration
•
view the configuration
•
reboot your 3Com VCX IP Telecommuting Module
•
restart the SIP module on your 3Com VCX IP Telecommuting Module
•
upgrade your 3Com VCX IP Telecommuting Module
•
set table formats
•
set date, time, and time zone (manually or via NTP)
Save/Load Configuration
Here, you work with the preliminary and permanent configurations, save them and load new configurations from
previously saved configurations.
Test Preliminary Configuration
When Apply configuration is pressed, the Telecommuting Module will test the configuration before you make it
permanent.
During test, the Telecommuting Module waits for you to press one of the three buttons displayed. If you never see
the three buttons, something in your preliminary configuration (now tested) is wrong, which makes it impossible for
you to access the configuration web interface.
Duration of limited test mode
Here, you enter the time limit for the testing. If you do not press any button within this time, the Telecommuting
Module will assume that some part of your preliminary configuration makes connecting impossible. When the
timeout is reached, the Telecommuting Module automatically reverts to the old permanent configuration. If this
occurs, you will be informed when trying to press a button.
Apply configuration
Saves the preliminary configuration to the permanent configuration and puts it into use. You can test your
preliminary configuration before finalizing it.
Three buttons are displayed during the test:
87
Chapter 10. Administration
Save configuration saves your preliminary configuration to the permanent configuration and puts it into use.
Continue testing shows a new page with only the other two buttons.
Revert cancels this test of the preliminary configuration without saving.
If you do not press any button within the time limit, the Telecommuting Module will revert to the old permanent
configuration, just as if you had pressed Revert. This is useful if you happen to configure your Telecommuting
Module so it isn’t accessible from your browser.
After the timeout, pressing either of the three buttons will show a new page which will inform you that the test run
was aborted.
Restarting the Telecommuting Module by cycling the power also cancels the test.
Backup
All configurations can be saved to and loaded from diskette or file. This does not affect the permanent configuration.
Save to diskette
Insert a formatted diskette into the Telecommuting Module’s floppy drive and press Save to diskette to save the
preliminary configuration. Do not remove the diskette until the light on the floppy drive goes out.
Check that you get a confirmation of the saving. If not, the diskette may be faulty.
Load from diskette
Insert the diskette with the saved configuration into the Telecommuting Module’s floppy drive and press Load from
diskette. Do not remove the diskette until the light on the floppy drive goes out. The contents of the diskette are
now loaded in the preliminary configuration.
Save to local file
Press Save to local file to save the preliminary configuration to the file you have selected. A new window is opened
where you enter the name of the file.
Load from local file
Press Load from local file to load a new preliminary configuration from the file you have selected.
Browse
Browse is used to scan your local disk. The web browser opens a new window where you can search among files
and directories. Go to the right directory and select the file you want to upload.
Revert to old configurations
You can revert to old configurations of the Telecommuting Module, either back to the last configuration
successfully applied, or to the configuration delivered with your Telecommuting Module from the factory.
88
Chapter 10. Administration
Abort All Edits
Abort all edits copies the permanent configuration to the preliminary configuration. All changes made in the
preliminary configuration are deleted.
Reload Factory Configuration
The factory configuration is the standard configuration that is delivered with a Telecommuting Module. Click on
this button to load this configuration into the preliminary configuration. The permanent configuration is not affected.
Show configuration
Shows both the preliminary and permanent configurations, in that order. Before the preliminary configuration, you
see the Telecommuting Module’s version, serial number, the time zone and table format you selected.
The heading before each table for the preliminary configuration is clickable and accesses the corresponding
configuration page.
Print this list from your web browser and store it in a safe place.
User Administration
On the User Administration page, you change the administration password for the admin account on your
Telecommuting Module and create other administrator user accounts. The characters in the password are displayed
as little stars. Remember that the password is sent unencrypted over the network if you use HTTP instead of
HTTPS.
You can authenticate administrators using a RADIUS server instead of a local password (select this on the Access
Control page under Basic Configuration). When RADIUS is used, you must also enter a RADIUS server on the
RADIUS page under Basic Configuration.
More information about how to configure the RADIUS server to authenticate administrators can be found in the
RADIUS section.
89
Chapter 10. Administration
Password For the ’admin’ Account
The admin user is predefined. That user can make changes, load configurations, apply configurations and log on the
Telecommuting Module via the serial cable. You can’t remove this user or change its privileges, only change its
password.
Old password
Enter the old password for the admin user.
New password, Confirm password
Enter the new password in both fields. You must enter the exact same password in both fields, to make sure that you
did not make a mistake.
Change administration password
Click this button to change the password for the admin user. The new password is now saved on the Telecommuting
Module.
Other Accounts
Here, you define other user accounts that can access the Telecommuting Module. A user account can be restricted to
only look at settings, or to change only some settings. Changes of configuration are logged by user name.
Changes in restrictions for an existing user account are immediate. The exception is changes for a currently logged
on user, for which the changes will have effect the next time he/she logs on.
User
Enter the user name for this account. The name is used when the user logs on and for logging the changes.
Password
Press the Change password button to enter the password for this user.
90
Chapter 10. Administration
Account Type
Select what privileges this user should have.
Full Access means that the user can make any changes to the configuration. This is the same privileges as the admin
user has in the web GUI, but only the admin user can log on via the serial cable.
Backup/Restore Config means that the user can download the configuration to file, and upload a configuration file
to the Telecommuting Module. The user is also allowed to apply configurations.
The VPN admin account is not used in a base Telecommuting Module.
The VPN renegotiator account is not used in a base Telecommuting Module.
SIP admin means that the user can make any changes on the SIP Services and SIP Traffic pages and apply
configurations, but can’t change any other configuration.
View Config Only means that the user can view any configuration and make log searches, but can’t change any
configuration.
Off means that the user is not allowed to log on to the web interface of the Telecommuting Module.
Currently Logged In Administrators
Here, all users logged on the Telecommuting Module web interface are shown. If your user has full access, you can
log out other users here.
Account
The name of the logged on user.
Type
Here, the account type for the user is shown. The account type tells you the user’s access rights for the
Telecommuting Module web interface.
From
Here you see from which IP address the user connected to the Telecommuting Module.
Logged in
Here you see when the user logged on to the Telecommuting Module.
Last access
Here you see when the user last accessed the Telecommuting Module web interface. Accesses could be a change of
a parameter, a change of web page or a log search.
Status
Here you see if the user is active or idle. The Telecommuting Module marks a user as idle if the user has not
accessed the web interface in ten minutes.
91
Chapter 10. Administration
Log out
If your user has full access to the web interface, you can log out other users. However, if you do not change their
password (or change the Account type to Off), they can just log on again.
Upgrade
Read these instructions carefully before upgrading. You find version upgrades for 3Com VCX IP Telecommuting
Module at http://eSupport.3com.com/. The upgrade is signed with GNU Privacy Guard. When 3Com VCX IP
Telecommuting Module is upgraded, it automatically checks the signing before accepting the upgrade.
You should always upgrade your Telecommuting Module to the latest version.
Here, you also upgrade with extension modules (e.g. QoS) and SIP licenses. Upgrading with modules and licenses
is exactly the same procedure as upgrading to a new version.
You save the upgrade to a file on your workstation or network file system. When upgrading, select Upgrade.
Upgrade
This is the procedure to follow when upgrading an 3Com VCX IP Telecommuting Module.
Step 1
First save the upgrade to a file on your workstation. Enter the file name and path in the box or press Browse to
search the disk. When you have selected a file, press Upgrade from network. The Telecommuting Module will
read the upgrade file and check that it was correctly signed and is compatible with the current Telecommuting
Module version.
Step 2
If the upgrade file is correct, a text will appear at the top of the web page, informing about what version the upgrade
is. Two new buttons will also be shown; Apply upgrade and Remove upgrade. You can still load new upgrades
replacing the old one, which is useful if you for example have selected an upgrade which is too old.
Apply upgrade
Pressing Apply upgrade will make the Telecommuting Module install the new upgrade.
Remove upgrade
Remove upgrade removes the loaded upgrade from the Telecommuting Module. The upgrade will not be installed.
Step 3
If Apply upgrade was pressed, the buttons Try the upgrade and Remove upgrade will appear.
Try the upgrade
Try the upgrade will reboot the Telecommuting Module and test the loaded upgrade. When the reboot is done, log
on to continue upgrading the Telecommuting Module.
Remove upgrade
Remove upgrade removes the loaded upgrade from the Telecommuting Module. The upgrade will not be installed.
92
Chapter 10. Administration
Step 4
When you have pressed Try the upgrade and the Telecommuting Module has rebooted, you will see two buttons
on top of every web page: Accept upgrade and Abort upgrade.
Now, you can choose to make the upgrade permanent or to revert to the old version. You can check the
configuration, but no changes can be done before the upgrade is permanent. If the Telecommuting Module is
rebooted before the upgrade is made permanent, it will revert to the old version.
Accept upgrade
Accept upgrade will complete the upgrade. When you have accepted the upgrade, you must also go to Save/Load
Configuration and Apply configuration, i. e. the new upgrade.
Abort upgrade
Abort upgrade aborts the upgrade. The Telecommuting Module will revert to the old version.
Downgrade
If the Telecommuting Module has been upgraded before, it is possible to downgrade to the previous version.
When you downgrade, the Telecommuting Module will revert to the configuration it had before upgrading. All
configuration changes made after the upgrade will be lost.
When you want to upgrade, the upgrade file must be uploaded again.
Table Look
There are two alternatives for tables in 3Com VCX IP Telecommuting Module: Either you can change the contents
of the table directly, or else you must click on a box in the Edit row column to allow the row to be changed. The
image below shows how tables with an Edit row column can look.
To change a row, click in the Edit box for that row and click on Save or Add new rows. The page is updated so that
you can change the configurations on the row. You can select several rows to change.
With an Edit column, tables with many rows are loaded faster, provided that only few of the Edit boxes are checked.
93
Chapter 10. Administration
Edit Column
Select if all, some or none of the Telecommuting Module tables should have an Edit column. If you select that some
tables have an Edit column, you also enter the size required to add the Edit column.
Always have an Edit column
Regardless of the table size, all tables will have an Edit column.
Sometimes have an Edit column
Only the tables of the size entered below will have an Edit column.
Never have an Edit column
Regardless of the table size, no table will have an Edit column.
Tables with at least this many rows have an Edit column
This is an additional setting which only takes effect if you selected Sometimes have an Edit column above. Tables
with at least the number of rows as you enter in the box will have an Edit column. Tables with less rows than this
are changeable directly.
The standard setting for new 3Com VCX IP Telecommuting Modules is Tables with at least 10 rows have an Edit
column.
It is not advisable to enter a value higher than 15 here, or the web browser won’t be able to satisfactorily manage the
tables.
Save
Saves the Table Look configuration to the preliminary configuration. The change takes effect immediately.
Cancel
Reverts to the previous table configuration.
Date and Time
Set the Telecommuting Module clock to ensure that the information in the logs has the right date and time. The date
and time are displayed at the bottom of all pages. You can set the date and time manually or let the Telecommuting
Module get the correct time from an NTP server.
Change Time Zone
Before you change the time in the Telecommuting Module, check that it uses the correct time zone. A change of
time zone only affects the time displayed on the Telecommuting Module web pages; the Telecommuting Module
clock is not changed.
94
Chapter 10. Administration
The Time zone field shows the current time zone setting. Change time zone by selecting one in the left-hand box
and press the Change time zone button.
Change Date and Time Manually
Here you change the Telecommuting Module clock manually. When you change time here, there will be a time gap
in the log files (if you change time forwards) or the same time will be shown twice (if you change time backwards).
N.B. Before you change time here, make sure that the Telecommuting Module uses the correct time zone above.
Date
The date is written as four digits for the year, two for the month and two for the day. The punctuation between year,
month and day must be dashes (-).
Time
Time is written as two digits for the hour, two digits for the minute and two digits for the second, although seconds
can be left out. The punctuation between hours, minutes and seconds must be colon (:) or period (.). A 24-hour
clock is used.
Set date and time manually
Click on Set date and time manually to change the clock in the Telecommuting Module to what you entered in the
Date and Time fields.
Change Date and Time With NTP
Instead of setting the time manually, you can let the Telecommuting Module get the correct time from an NTP
server. The time for synchronizing will be notably shorter if the Telecommuting Module time is approximately
correct when NTP is activated.
N.B. Before you change time here, make sure that the Telecommuting Module uses the correct time zone above.
95
Chapter 10. Administration
Synchronize time with NTP
Here, select if NTP synchronizing should be enabled or not.
Enter servers to sync with in the table below.
DNS name or IP address
The name/IP address of the NTP server to which the Telecommuting Module should connect.
IP address
Shows the IP address of the DNS name or IP address you entered in the previous field.
Delete Row
If you select this box, the row is deleted when you click on Add new rows, Save, or Look up all IP addresses
again.
Create
Enter the number of new rows you want to add to the table, and then click on Create.
Save
Saves all Date and Time configuration to the preliminary configuration.
Cancel
Clears and resets all fields in new rows and resets changes in old rows.
Look up all IP addresses again
Looks up the IP addresses for all DNS names on this page in the DNS servers you entered on the Basic
Configuration page.
Restart
Here, you can reboot the Telecommuting Module or restart certain modules.
When the Telecommuting Module is rebooted, all active sessions, including SIP sessions (SIP calls, video
conferences etc), will be torn down. SIP user registrations are not affected.
When the SIP module is restarted, all active SIP sessions (SIP calls, video conferences etc) will be torn down and
all SIP user registrations will be removed.
N.B! The reboot/restart will be instantaneous when the button is pressed.
96
Chapter 10. Administration
Reboot Your 3Com VCX IP Telecommuting Module
When this button is pressed, the Telecommuting Module will immediately reboot.
All active sessions, including SIP sessions, will be torn down at the reboot.
Restart the SIP Module
When this button is pressed, the SIP module of the Telecommuting Module will restart and all SIP registrations will
be removed.
All active SIP sessions will be torn down and all SIP registrations will be removed at the restart.
97
Chapter 11. Logging
3Com VCX IP Telecommuting Module can log different types of traffic, attempts to connect and other events. You
can select to have the logs stored on the Telecommuting Module’s local hard drive, in which case they can be
queried. When the Telecommuting Module’s hard drive gets full, it removes the oldest data to make space for
saving new data.
You can also clear the logs manually by running the installation program (see chapter 2, Installing 3Com VCX IP
Telecommuting Module) and select to Reset the rest of the configuration and 3. Revert to the factory
configuration. NB: This will clear the logs, remove all configuration on the Telecommuting Module and then apply
the configuration set during the running of the installation program.
For traffic that uses the TCP protocol, only the first packet is logged, the one that initiates the connection. For the
UDP and ICMP protocols, all packets are logged. In this section, you specify what you want to log and alarm and
study the logs. Logging of events is also configured under Access Control.
Display Log
On this page, you can view the logs. You select the type of traffic you want to study by selecting which packets
should be processed. You can select packets by IP addresses, IP protocols and whether they were allowed to pass
the Telecommuting Module or not. Only packets matching all three criteria are shown.
Packet Type Selection
You can limit the selection to only allowed packets or rejected/discarded packets, or a subset of these. For example,
98
Chapter 11. Logging
you can select allowed, un-NAT:ed packets only.
IP Address Selection
You can limit the selection by specifying certain IP addresses.
In these fields, enter a single IP address (e. g., 10.3.27.3), a range of IP addresses (e. g., 10.3.27.1-10.3.28.254), an
IP address followed by a netmask (e. g.,10.3.27.0/24), a combination of these, or nothing at all. If a field is empty,
all IP addresses are selected.
If you want to study all traffic except the one to or from a specific computer or group of computers, enter the IP
address(es) here and mark the "not this address" box.
The selection can be modified by the control boxes under the fields A and B:
A src
A dst
A any
A to B
B to A
Between A&B
not this combination
Packets from the IP address in field A matches. Field B is ignored.
Packets to the IP address in field A matches. Field B is ignored.
Packets to or from the IP address in field A matches. Field B is ignored.
Packets from A to B matches.
Packets from B to A matches.
Packets from A to B, or from B to A, matches.
Packets that do not match the given combination of A and B are shown in
the log.
If you, for example, want to study all packets to or from 10.3.27.18, except those to the file server 10.3.27.2, you
should fill in the form like this:
Protocol/Port Selection
You can limit the selection by specifying certain protocols.
All IP protocols
No restriction regarding protocols.
TCP/UDP
When selecting TCP or UDP, you can choose all packets or packets to certain ports only.
In these fields, you can enter a single port number (32), a range of port numbers (1-1023), a list of port numbers and
ranges separated by commas (53, 1024-65535) or nothing at all. If the field is empty, any port will match. See
appendix G, Lists of ports, ICMP and protocols, for more information on port numbers.
If you want to study all traffic except the one to or from a specific port or group of ports, enter the port number(s)
here and mark the "not this port" box.
The selection can be modified by the control boxes under the fields A and B:
A src
A dst
A any
Packets from the port number in field A matches. Field B is ignored.
Packets to the port number in field A matches. Field B is ignored.
Packets to or from the port number in field A matches. Field B is ignored.
99
Chapter 11. Logging
A to B
B to A
Between A&B
not this combination
Packets from A to B matches.
Packets from B to A matches.
Packets from A to B, or from B to A, matches.
Packets that do not match the given combination of A and B are shown in
the log.
If you, for example, want to search for all packets to a web server, but not packets on the "normal" client and server
ports in your environment, fill in the form like this:
ICMP
ICMP packets contain a type field and a code field. When searching for ICMP packets, you can select all packets or
only those matching certain criteria.
In the type and code fields, you can enter a single number (e. g., 5), a range of numbers (e. g., 5-10), a list of
numbers and ranges, separated by commas (e. g., 5, 10-20) or nothing at all. If the field is empty, any type or code
will match. See appendix G, Lists of ports, ICMP and protocols, for more information on ICMP types and codes.
If you want to study all traffic except the one of a certain type/code, enter the type/code number(s) here and mark
the "not" box.
ESP
ESP is an authentication/encryption protocol. Select this if you want to search for encrypted packets.
Note that you must have selected a log class which saves to local file, for encrypted packets, to be able to display
them here.
Protocol number
Here, you enter the number(s) of the protocols you want to search for. You can enter a single number (e. g., 5), a
range of numbers (e. g., 5-10), a list of numbers and ranges, separated by commas (e. g., 5, 10-20) or nothing at all.
If the field is empty, any protocol will match. See appendix C, Lists of Reserved Ports, ICMP Types and Codes, and
Internet Protocols, for more information on protocol numbers.
If you want to study all traffic except the one over a certain protocol or protocols, enter the protocol number(s) here
and mark the "not" box.
Beside the boxes
On the right-hand side of the boxes, select time interval and event for the log display.
Show newest at top
Choosing Show newest at top will display the log in reverse order, i. e., the latest log event will be displayed first.
100
Chapter 11. Logging
Time Limits
You can limit the selection by a time interval.
The date is written as a year with two or four digits, month (01-12) and day (01-31). The optional punctuation
between year, month and day must be dash (-). Time is written as two digits for the hour, two digits for the minute
and possibly two digits for the second, although the seconds can be left out. The optional punctuation between
hours, minutes and seconds must be colon (:) or period (.).
Show log from
You can enter a date, a time or both to set an interval for the log display. If you leave the date field blank and enter a
time in the corresponding time field, today’s date is used. If you leave the time field blank and enter a date in the
date field, the time is set to 00:00:00. If both fields are left blank, all events back to the log start will be displayed.
Show log until
You can enter a date, a time or both to set an interval for the log display. If you leave the date field blank and enter a
time in the corresponding time field, today’s date is used. If you leave the time field blank and enter a date in the date
field, the time is set to 23:59:59. If both fields are left blank, all events until the latest log event will be displayed.
Periodical search
Periodical search will cause new events to appear automatically in the log display. You enter the time interval for
updating in the Seconds until next search field. This will only affect log display on your screen.
Show This
You can select the events you want to search for. NB: You must select IP packets as selected to get a log display of
the packets selected in the boxes.
Display log
Below the boxes you can choose to display the log on your computer screen or export it to a file. For screen display,
enter the desired number of lines per page and press Display log.
Export log
You can also save the log to a file. Enter the maximum size of the log file. If you must have the latest log events,
select Show newest at top.
You can choose between different file formats; TAB-separated file, comma-separated file and WELF (WebTrends
Enhanced Log Format). These are text formats, which means that you can import the files in a text editor for
analysis. TAB- and comma-separated files contain all information from the log file. WELF is an open standard used
by several log analyzer tools. However, all WELF compatible syslog messages will not be exported.
WELF uses the Telecommuting Module name you enter on the Basic Configuration page. Some WELF
applications have licenses restricted to a certain number of Telecommuting Modules. This can cause trouble if you
change the name of your Telecommuting Module.
If you export a log to WELF with Show newest at top selected, this may become troublesome when using some
WELF applications, which cannot handle events in reverse order.
Press Export log and enter the file name and path to export to file.
Clear form
Resets the form.
The log
The log shows every packet and event on a separate row.
101
Chapter 11. Logging
The rows show the date and time, type of protocol, from interface, computer and port, to interface, computer and
port, ICMP type for ICMP traffic, flags, whether the packet was accepted, rejected or discarded, and the reason for
this. For TCP traffic, and for UDP traffic which is session managed, only the connection packet is displayed. SIP
media streams are not logged.
The Telecommuting Module’s own IP address is displayed in the log with a purple background color. Rejected and
discarded packets are displayed with a yellowish background.
The following flags are used:
S
SYN
Request for connection
A
ACK
Response to a previous packet
U
Urgent
Contains out-of-band data
P
Push
Packets that must be delivered quickly
F
FIN
Disconnect request
R
RST
Reset - response to incorrect packet
For more information on flags, see RFC 793.
When the clock is reset, the log shows this on a separate line like this:
If the Telecommuting Module is restarted, the log shows this on a line like this:
Display Load
Display Load shows statistics on the traffic load to and from the Telecommuting Module’s interfaces.
102
Chapter 11. Logging
Once every minute the load on all interfaces is scanned and saved to a local file. Every file contains 240 samples
and a file generation consists of 42 files. The first generation of files contains samples for the last week
(approximately). Every new file generation is created by merging two consecutive samples, enabling the storing of
samples for the double time period in the same disk space. Merging the samples include calculation of the
minimum, average and maximum values for the time interval covered by the samples. After ten generations (about
19 years) the samples are deleted.
Time Period
Select a time period or enter a period of your own choice in the bottom fields. The date is written as a year with two
or four digits, month (01-12) and day (01-31). The optional punctuation between year, month and day must be dash
(-). Time is written as two digits for the hour, two digits for the minute and possibly two digits for the second,
although the seconds can be left out. The optional punctuation between hours, minutes and seconds must be colon
(:) or period (.).
Interface
You can select one or more of the Telecommuting Module’s interfaces or the total traffic. Selecting more than one
103
Chapter 11. Logging
interface will generate one graph per interface. You can also select to view only VPN traffic.
Direction
Select one or more of Sent, Received and Sent+Received. Each selection generates a separate graph in the diagram.
Value
Select maximum, average or minimum value of each sample period. If viewing load for time periods within the last
week, all three selections will result in the same graph.
Unit
Select between displaying packets/second or bits/second. The graphs may look different, because all packets aren’t
the same size.
Diagram Size
Enter the desired width and height of the resulting load diagram.
Heading
You can enter a heading for the load diagram. This is useful if you view several diagrams and save them.
Max Value
Enter the maximum value to show in the diagram. If no value is entered, the diagram automatically scales to a
suitable value.
View diagram
Creates a diagram at the top of the page.
For each combination of selections, a graph will be generated. Example: You selected Network Interface 1 and
Total as interfaces, and Sent, Received and Sent+Received as directions. This will generate a total of six graphs of
different colours in the diagram.
104
Chapter 11. Logging
Resource Monitoring
Your Telecommuting Module can send SNMP traps when usage passes certain levels. Set the levels on this page.
The trap receivers are configured on the SNMP page.
For each usage, there is an Alarm by and a Resume by level. When the usage hits the Alarm by level, the
Telecommuting Module sends a trap about this and locks the trap sending for that usage, which means that as long
as the level stays high, no more traps are sent. When the level goes down to below the Resume by level, the lock is
released. Next time the Alarm by level is reached, a new trap is sent.
To avoid excessive trap sending, it is recommended that the Alarm by and Resume by level for a resource are not
set too close.
SIP Sessions Trap Levels
Enter the SIP sessions levels here. When the number of SIP sessions reaches the Alarm by level, an SNMP trap is
sent.
SIP User Registrations Trap Levels
Enter the SIP user registrations levels here. When the number of registered SIP users reaches the Alarm by level, an
SNMP trap is sent.
CPU Load Trap Levels
Enter the CPU load levels here. When CPU usage increases above the Alarm by limit, an SNMP trap is sent.
Memory Usage Trap Levels
Enter the memory usage levels here. When memory usage increases above the Alarm by limit, an SNMP trap is sent.
Save
Saves the Resource Monitoring configuration to the preliminary configuration.
Cancel
Reverts all of the above fields to their previous configuration.
Logging Configuration
Your 3Com VCX IP Telecommuting Module generates log messages for various events and for the traffic to and
through the Telecommuting Module. Here, you select log classes to state what to do with the log messages.
When an IP packet is received by the Telecommuting Module, a log message is generated, containing sender and
receiver IP addresses and other information such as the protocol used and if the packet was allowed, rejected or
discarded. The Telecommuting Module then uses the log settings for Configuration Transport and Log class for
non-SIP packets to know how to process the log message.
105
Chapter 11. Logging
The Telecommuting Module also produces log messages for SIP-related and VPN-related events as well as
administrator events (when the administrator logs on or when a setting is changed). Here, you configure what will
happen to these log messages.
Inbound traffic
Log class for non-SIP packets
Here, you select a log class for packets which are neither SIP packets, SIP session media streams, or
Telecommuting Module administration traffic and are therefore processed by the IP policy (discard or reject) that
you selected on the Basic Configuration page.
Log class for spoofed packets
Here, you select a log class for packets with obviously spoofed addresses. A spoofed IP address can be a
non-existing IP address on a network connection or packets where the sender or receiver address is an IP address in
the range 127.0.0.0 - 127.255.255.255.
Log class for DHCP requests
Here, you select a log class for DHCP requests. DHCP is a protocol used for dynamic allocation of IP addresses.
Requests are sent by broadcast from computers wanting an IP address to a DHCP server. The Telecommuting
Module logs all DHCP related packets using the log class you select here. There are usually a lot of these packets,
so we recommend using the log class "None", meaning that no packets are logged at all.
Log class for SNMP requests to the Telecommuting Module
Here, you select a log class for SNMP requests to the Telecommuting Module. SNMP is a protocol for monitoring
network equipment such as firewalls and routers.
Log class for packets to the Telecommuting Module
Here, you select a log class for traffic addressed to the Telecommuting Module itself. Even if you select not to log
this traffic, the configuration traffic to the Telecommuting Module will be logged according to the log class set on
the Access Control page.
106
Chapter 11. Logging
Warnings
Log class for hardware errors
Some Telecommuting Modules have hardware monitoring, and will generate log messages when the hardware fails
in some way. Here, you select a log class for these messages.
Log class for email errors
If the Telecommuting Module is unable to send email messages, for example, if the mail server won’t reply, the
Telecommuting Module generates a log message. Here, you select a log class for these messages.
Log class for RADIUS errors
Radiusmux (see the RADIUS section in chapter 6, Basic Configuration) generates messages for incomprehensible
RADIUS server responses and for denying logins on account of permissions (a user defined for road warriors is not
automatically allowed to log onto the configuration server). Here, you select a log class for these messages.
Log class for SNMP errors
The Telecommuting Module generates messages about SNMP errors. Here, you select a log class for these
messages.
VPN events
The same settings can also be found on the IPSec Settings and PPTP pages under Virtual Private Networks.
107
Chapter 11. Logging
Log class for IPsec key negotiation
Here, you set the log class for new negotiations of IPsec connections keys.
Log class for IKE and NAT-T packets
Here, you set the log class for the packets used for IKE key negotiations and for NAT-T packets. As they both use
the same port on the Telecommuting Module, it will log both using the same log class.
Log class for ESP packets
Specify what log class the Telecommuting Module should use for encrypted packets (ESP packets to the
Telecommuting Module). Logging of encrypted packets will generate a lot of log events.
Log class for IPsec user authentications
Here, you set the log class for Telecommuting Module messages about road warrior authentications via RADIUS
and their disconnections.
Log class for PPTP negotiations
The Telecommuting Module generates log messages about the progress of the PPTP negotiations. Here, you select a
log class for these messages.
Log class for PPTP packets
PPTP clients wanting to establish a VPN tunnel connects to the Telecommuting Module on port 1723. Here, you
select a log class for these packets.
Log class for GRE packets
The encrypted traffic through the VPN tunnel is sent as GRE packets. Here, you select a log class for these packets.
SIP events
The same settings can also be found on the Basic page under SIP Services.
Log class for SIP errors
The Telecommuting Module sends a message if there are any SIP errors. Select a log class for these log messages.
Log class for SIP signaling
For each SIP packet, the Telecommuting Module generates a message, containing the sender and receiver of the
packet and what type of packet it is. Select a log class for these log messages.
108
Chapter 11. Logging
Log class for SIP packets
The Telecommuting Module logs all SIP packets (one SIP packet is many lines). Select a log class for the SIP
packets.
Log class for SIP debug messages
The Telecommuting Module logs a lot of status messages, for example the SIP initiation phase of a reboot. Select a
log class for these messages.
Other
Log class for configuration server logins
Each time a user logs onto the Telecommuting Module configuration server, a message is generated, containing
information about the type of login and more. Here, you select a log class for these messages.
Log class for administration and configuration
Each time a user logs onto the Telecommuting Module configuration server, a message is generated, containing
information about the type of login and more. Here, you select a log class for these messages.
Save
Saves the Logging Configuration configuration to the preliminary configuration.
Cancel
Reverts all of the above fields to their previous configuration.
Log Classes
Log classes determine the handling of traffic logs, other event logs and alarms. You can select no logging, log to a
local file (on the Telecommuting Module), send the log messages via syslog to a syslog server and send the log
messages as emails. When configuring logging on all other pages, you select between the different log classes
defined here.
109
Chapter 11. Logging
Name
Here, you give the log class a Name.
Log locally?
Select to save log messages to a local file on the Telecommuting Module. Locally saved logs can be searched on the
Display Log page. Yes will cause the log messages using this log class to be saved to file. No will cause the log
messages not to be saved on the Telecommuting Module and thus also not possible to search under Display Log.
Syslog
Syslog sends log messages to a syslog server. You enter the IP address of the syslog server on the Log Sending
page. Select Facility and Level for the syslog message. See your syslog server manual for more information on
facility and level. Selecting None for both Facility and Level turns the syslog alternative off. None must be selected
for both or none of Facility and Level. The Telecommuting Module will display a red warning text until both or
none of them are None.
Email address
The Telecommuting Module may also send the log messages by email to one or more email addresses. Enter the
addresses here (separated by comma). You must specify a mail server on the Log Sending page for the
Telecommuting Module to send the emails properly.
Delete Row
If you select this box, the row is deleted when you click on Add new rows or Save.
Create
Enter the number of new rows you want to add to the table, and then click on Create.
Save
Saves the Log Classes configuration to the preliminary configuration.
Cancel
Clears and resets all fields in new rows and resets changes in old rows.
Log Sending
In 3Com VCX IP Telecommuting Module, there are two ways of sending log messages automatically to somewhere
outside the box; to send to a syslog server and to send an email to an email address. If either method is used, the
Telecommuting Module must know where to send this. On this page, servers for log sending are configured.
110
Chapter 11. Logging
SMTP Server
Here, you set an SMTP server for the log messages that the Telecommuting Module generates. This server will send
the email messages to the email addresses set on the Log Classes page. If the connection between the
Telecommuting Module and the SMTP server isn’t working, an error message will be shown on this page, and be
logged according to the log class set on the Logging Configuration page. However, no error message will be
shown here if the primary SMTP server can’t connect to other mail servers. Therefore you should test if email log
messages to the addresses set under Log Classes really reach their destination addresses.
Every log message does not create a separate email; the Telecommuting Module collects log messages and sends
them every 5 minutes. The first message is sent within a minute.
Email sent from the Telecommuting Module has the From address "3Com VCX IP Telecommuting Module".
Enter the DNS name or IP address of the SMTP server.
Status for outbound email
A message is shown here if the Telecommuting Module can’t connect to the mail server selected under SMTP
server, or if other errors concerning email occur. .
Syslog Server
Here, you set a syslog server for the syslog messages that the Telecommuting Module generates. This is the
computer which receives and stores the syslog log messages.
Enter the DNS name or IP address of the syslog server here.
Save
Saves the configuration for Log Sending to the preliminary configuration.
Cancel
Reverts the fields to the previous configuration.
111
Chapter 12. Failover
The 3Com VCX IP Telecommuting Module failover function makes it possible to have a hot standby unit which
always has the current configuration and which automatically takes over when the active unit goes down. The two
units become a failover team.
This function requires that one interface on the Telecommuting Module is dedicated for failover and can’t be used
for anything else.
Note: This means that failover can only be used when the Telecommuting Module is used in DMZ mode.
Specification of failover
This is a short description of what 3Com Failover can do and what is required to make it work.
Requirements
Failover requires two Telecommuting Modules„ and both units must run the same software version. Any expansion
modules on the active unit must also be present on the standby.
The units must be located in a way which makes it possible to connect them with a cross-over network cable. You
must also connect the other interface on the standby unit to the same router/switch as the active Telecommuting
Module.
Features
The Failover function allows you to create failover teams out of two Telecommuting Modules, where one unit is
active and the other a standby unit. The standby stays in constant contact with the active unit to check if it’s working
and to ask for new configuration whenever the configuration is changed on the active Telecommuting Module.
When the active unit fails, the standby takes over, with the same configuration (including IP addresses).
If either of the units stops working, or if the active unit can’t connect to the standby unit via the cross-over cable,
the Telecommuting Module won’t accept new changes to the configuration. This is because there is no way for the
active Telecommuting Module to transfer the changes to the standby unit. If this should happen, and there is no way
to reestablish the connection between the two units, the active unit must change mode to a standalone unit (which
breaks the failover team) to allow changes in the configuration.
Update interval
30 s
Maximum failover time
30 s + time to apply configuration
TCP/UDP connections (session management) kept after No
failover
TCP/UDP connections (packet filter) kept after failover
Yes
SIP registrations kept after failover
Yes
SIP calls kept after failover
No
Failover Telecommuting Module setup
For the failover function to work properly, you must configure the Telecommuting Modules in the right way, and
connect them correctly. Here is a short guide on how to do this.
Create a new failover team
To create a new failover team, you must initiate the two Telecommuting Modules in different ways. The first
Telecommuting Module is made a member of the team by web interface configuration, the second is added to the
team by means of connecting to it via the serial cable or console.
Telecommuting Module 1
The following procedure will produce a correctly configured Telecommuting Module 1 team member:
112
Chapter 12. Failover
•
Go to the Failover Settings page and select the interface which should be directly connected to the other
Telecommuting Module as Dedicated interface to use. Check the Dedicated network to see that it doesn’t clash
with any of your internal networks.
•
Press the Create new team button to create a new failover team with this Telecommuting Module as its first
member. This will cause a reboot.
Telecommuting Module 2
To make Telecommuting Module 2 (the standby unit) a member of the failover team, you have to connect to it using
the serial cable or console. See chapter 2, Installing 3Com VCX IP Telecommuting Module, for a thorough
description on how to do this.
Log on from your terminal as admin and select 3. Become a failover team member. Select the same interface as
was selected as Dedicated interface for Telecommuting Module 1. All existing configuration will be removed and
the Telecommuting Module will reboot. It will then obtain its configuration from Telecommuting Module 1.
Connecting the Telecommuting Modules
After installing the Telecommuting Modules, you must also connect them properly. They must be located close to
each other, as they will be connected in parallel to all networks.
The interface on Telecommuting Module 1 which was reserved for failover should be connected to the
corresponding interface on Telecommuting Module 2 using a crossover TP cable. If you for example selected
Network Interface 2 as the Dedicated interface to use, you should connect Network Interface 2 on Telecommuting
Module 1 with Network Interface 2 on Telecommuting Module 2.
The other interface should be connected in parallel to the network on which the Telecommuting Module should
operate. If you configured Network Interface 1 to be on the DMZ, both Network Interface 1 interfaces should be
connected to the DMZ network. You can’t have a router between any pair of interfaces; they must be located on the
same logical IP network.
Failover Settings
Here, you configure the Telecommuting Module to enable it to communicate with the other unit of the failover team.
Here is also where you change type between a standalone Telecommuting Module and one which is a team member.
Dedicated interface
For the Telecommuting Modules in the failover team to be able to synchronize configuration and check that the
other unit is still functional, they need to communicate. The communication is sent over a dedicated interface on the
Telecommuting Module. This interface can’t be used for any other traffic.
The dedicated interface to use
Select the interface to be used for communication with the other Telecommuting Module of the team. This interface
should be connected to the corresponding interface of the other Telecommuting Module using a crossover TP cable.
Dedicated network
The failover team needs a network to use for its communication. This network must contain at least four addresses
(one for each Telecommuting Module, one network address and one broadcast address). You can dedicate a larger
network if you like, but since the interfaces will be directly connected to each other, no more addresses will be used.
113
Chapter 12. Failover
DNS name or network address
In the DNS name or network address field, enter the DNS name or IP address of the dedicated network.
Network address
Shows the IP address of the DNS name or network address you entered in the previous field.
Netmask/bits
Netmask/bits is the netmask that will be used to specify the size of the dedicated network. You must use a netmask
of at most 30 (255.255.255.252). See chapter 3, Configuring 3Com VCX IP Telecommuting Module, for
instructions on writing the netmask.
Range
The Range shows all IP addresses of the dedicated network. The range is calculated from the configuration under
DNS name or network address and Netmask/Bits. Check that the correct information was entered in the DNS
name or network address and Netmask/Bits fields.
Failover type
The Telecommuting Module can work Standalone or as a Failover team member. In Standalone mode, it works as
a standard Telecommuting Module. As a Failover team member, it still performs the usual functionality, but in
addition, it communicates with the other team member to transfer configuration when changed. The team members
constantly check whether the other unit is alive.
Change failover type for the Telecommuting Module from standalone to team member or from failover team
member to standalone. When you change type, the Telecommuting Module will reboot.
Create new team
Press Create new team to create a new failover team.
If the Telecommuting Module was standalone, it will reboot and then listen for its team partner on the dedicated
interface, to transfer its configuration.
Deactivate failover
Disconnect the other Telecommuting Module in the team (or turn off the power) and press Deactivate failover to
make the Telecommuting Module standalone again.
Save
Saves all Failover Settings configuration to the preliminary configuration.
Cancel
Clears and resets all fields in new rows and resets changes in old rows.
114
Chapter 12. Failover
Look up all IP addresses again
Looks up the IP addresses for all DNS names on this page in the DNS servers you entered on the Basic
Configuration page.
Reference Hosts
The standby unit in the failover pair can become active if a network interface on the active unit is faulty, as opposed
to the case when the entire unit is down. For the Telecommuting Module to detect a faulty interface, it needs to be
aware of some reference hosts which it should be able to contact.
On this page, enter IP addresses of reference hosts that will reply to ping from the Telecommuting Module. As
faulty reference hosts will cause the failover pair to repeatedly change the active unit, you should select them with
care. As an extra safety measure, it is recommended that you enter more than one host for each interface.
Reference host
DNS name or IP address
The name/IP address of the reference host used to test this interface.
IP address
Shows the IP address of the DNS name or IP address you entered in the previous field.
Interface
Select the interface to be tested. The reference host entered on this line must be reachable via this interface, i.e. not
located behind another interface of the Telecommuting Module.
Save
Saves all Reference Hosts configuration to the preliminary configuration.
Cancel
Clears and resets all fields in new rows and resets changes in old rows.
Look up all IP addresses again
Looks up the IP addresses for all DNS names on this page in the DNS servers you entered on the Basic
Configuration page.
Failover Status
Here the configuration used by the failover team is shown. Here, you can also view the status of the Telecommuting
Modules in the team.
115
Chapter 12. Failover
Failover Status
Here are the settings used by the Telecommuting Module for failover communication.
Type
A Telecommuting Module can be Standalone or a Team member.
Dedicated interface
If the Telecommuting Module is a member of a failover team, the interface used for failover communication is
shown here.
Dedicated network
If the Telecommuting Module is a member of a failover team, the network used for failover communication is
shown here.
Failover team
Here, you can see a list of the members of this failover team and their status.
Serial number
The serial number of each team member.
Status
Status for each team member. A Telecommuting Module can be Active, Standby or Unavaliable, which indicates
that the Telecommuting Module is unaccessable. It could be turned off, failing for some reason or all cables could
have been disconnected.
Leaving a failover team
If you for some reason want to quit using failover and use the Telecommuting Modules as standalone units, you
must do things in the right order to release the team:
1. The Standby Telecommuting Module must be taken away first. Do this by turning the power off, disconnect all
cables or log on as admin via the serial cable and select 4. Leave failover team and become standalone.
116
Chapter 12. Failover
2. Change type of the Active Telecommuting Module on the Failover Settings page by pressing the Deactivate
failover button.
If you want to replace a unit in the failover team, you must first split the team and then make a new one.
117
Chapter 13. Tools
Under Tools, you find handy tools to troubleshoot the Telecommuting Module setup.
Packet Capture
3Com VCX IP Telecommuting Module has a built-in packet capturer which can produce pcap trace files. This
sniffer will capture all IP packets according to your selections, even those you can’t see in the log (like RTP
packets).
The Telecommuting Module capturer needs to be manually activated and deactivated. As this produces a log which
usually contains a lot more packets than the standard log, it is advisable only to run the capturer for short time
periods.
The capture of the packets can be downloaded and analyzed in any tool that handles pcap traces, like Ethereal.
Network Interface Selection
Select on which interface or VLAN the sniffer should listen for packets. You can also select to listen on all
interfaces.
Some network cards have VLAN hardware support. For this type of cards, incoming VLAN tagged traffic is not
logged on the main interface, but only on the VLAN interface. Outgoing VLAN tagged traffic is logged on the main
interface.
Other interfaces do not have VLAN hardware support. For this type of interface, VLAN traffic is logged on the
main interface.
Currently, the only network cards in 3Com products to support VLAN are the Gigabit network cards.
IP Address Selection
You can limit the selection by specifying certain IP addresses.
In these fields, enter a single IP address (e. g., 10.3.27.3), a range of IP addresses (e. g., 10.3.27.1-10.3.28.254), an
IP address followed by a netmask (e. g.,10.3.27.0/24), a combination of these, or nothing at all. If a field is empty,
all IP addresses are selected.
If you want to study all traffic except the one to or from a specific computer or group of computers, enter the IP
address(es) here and mark the "not this address" box.
The selection can be modified by the control boxes under the fields A and B:
A src
A dst
A any
A to B
B to A
Between A&B
not this combination
Packets from the IP address in field A matches. Field B is ignored.
Packets to the IP address in field A matches. Field B is ignored.
Packets to or from the IP address in field A matches. Field B is ignored.
Packets from A to B matches.
Packets from B to A matches.
Packets from A to B, or from B to A, matches.
Packets that do not match the given combination of A and B are shown in
the log.
If you, for example, want to study all packets to or from 10.3.27.18, except those to the file server 10.3.27.2, you
should fill in the form like this:
118
Chapter 13. Tools
Protocol/Port Selection
You can limit the selection by specifying certain protocols.
All IP protocols
No restriction regarding protocols.
TCP/UDP
When selecting TCP or UDP, you can choose all packets or packets to certain ports only.
In these fields, you can enter a single port number (32), a range of port numbers (1-1023), a list of port numbers and
ranges separated by commas (53, 1024-65535) or nothing at all. If the field is empty, any port will match. See
appendix G, Lists of ports, ICMP and protocols, for more information on port numbers.
If you want to study all traffic except the one to or from a specific port or group of ports, enter the port number(s)
here and mark the "not this port" box.
The selection can be modified by the control boxes under the fields A and B:
A src
A dst
A any
A to B
B to A
Between A&B
not this combination
Packets from the port number in field A matches. Field B is ignored.
Packets to the port number in field A matches. Field B is ignored.
Packets to or from the port number in field A matches. Field B is ignored.
Packets from A to B matches.
Packets from B to A matches.
Packets from A to B, or from B to A, matches.
Packets that do not match the given combination of A and B are shown in
the log.
If you, for example, want to search for all packets to a web server, but not packets on the "normal" client and server
ports in your environment, fill in the form like this:
ICMP
ICMP packets contain a type field and a code field. When searching for ICMP packets, you can select all packets or
119
Chapter 13. Tools
only those matching certain criteria.
In the type and code fields, you can enter a single number (e. g., 5), a range of numbers (e. g., 5-10), a list of
numbers and ranges, separated by commas (e. g., 5, 10-20) or nothing at all. If the field is empty, any type or code
will match. See appendix G, Lists of ports, ICMP and protocols, for more information on ICMP types and codes.
If you want to study all traffic except the one of a certain type/code, enter the type/code number(s) here and mark
the "not" box.
ESP
ESP is an authentication/encryption protocol. Select this if you want to search for encrypted packets.
Note that you must have selected a log class which saves to local file, for encrypted packets, to be able to display
them here.
Protocol number
Here, you enter the number(s) of the protocols you want to search for. You can enter a single number (e. g., 5), a
range of numbers (e. g., 5-10), a list of numbers and ranges, separated by commas (e. g., 5, 10-20) or nothing at all.
If the field is empty, any protocol will match. See appendix C, Lists of Reserved Ports, ICMP Types and Codes, and
Internet Protocols, for more information on protocol numbers.
If you want to study all traffic except the one over a certain protocol or protocols, enter the protocol number(s) here
and mark the "not" box.
Collect data
Below the selection boxes, you activate and deactivate the sniffer by pressing the Start sniffing and Stop sniffing
buttons.
When the sniffer has been stopped, the capture log can be downloaded by pressing the Download sniffer data
button. The captured data can be deleted by pressing the Delete sniffer data button.
120
Chapter 14. Firewall and Client Configuration
Additional configuration for the firewall and the SIP clients is required to make the Telecommuting Module work
properly. The amount and nature of the configuration depends on which Telecommuting Module Type was
selected.
The DMZ type
Using the DMZ type, the network configuration should look like this:
The Firewall
The firewall to which the Telecommuting Module is connected should have the following configuration:
SIP over UDP
•
Let through UDP traffic between the Internet (all high ports) and the Telecommuting Module (port 5060). You
must allow traffic in both directions.
•
Let through UDP traffic between the internal networks (all high ports) and the Telecommuting Module (port
5060). You must allow traffic in both directions.
•
Let through UDP traffic between the Internet (all high ports) and the Telecommuting Module (the port interval
for media streams which was set on the Basic page). You must allow traffic in both directions.
•
Let through UDP traffic between the internal networks (all high ports) and the Telecommuting Module (the port
interval for media streams which was set on the Basic page). You must allow traffic in both directions.
•
Let through UDP traffic between the Telecommuting Module (all high ports) and the Internet (port 53). You must
allow traffic in both directions. This enables the Telecommuting Module to make DNS queries to DNS servers on
the Internet. If the DNS server is located on the same network as the Telecommuting Module, you don’t have to
do this step.
•
NAT between the Telecommuting Module and the Internet must not be used.
•
NAT between the Telecommuting Module and the internal networks must not be used.
SIP over TCP/TLS
•
Let through TCP traffic between the Internet (all high ports) and the Telecommuting Module (ports 1024-32767).
You must allow traffic in both directions.
•
Let through TCP traffic between the internal networks (all high ports) and the Telecommuting Module (ports
1024-32767). You must allow traffic in both directions.
•
Let through UDP traffic between the Internet (all high ports) and the Telecommuting Module (the port interval
for media streams which was set on the Basic page). You must allow traffic in both directions.
•
Let through UDP traffic between the internal networks (all high ports) and the Telecommuting Module (the port
interval for media streams which was set on the Basic page). You must allow traffic in both directions.
•
Let through UDP traffic between the Telecommuting Module (all high ports) and the Internet (port 53). You must
allow traffic in both directions. This enables the Telecommuting Module to make DNS queries to DNS servers on
the Internet. If the DNS server is located on the same network as the Telecommuting Module, you don’t have to
do this step.
121
Chapter 14. Firewall and Client Configuration
•
NAT between the Telecommuting Module and the Internet must not be used.
•
NAT between the Telecommuting Module and the internal networks must not be used.
The SIP clients
SIP clients will use the Telecommuting Module as their outgoing SIP proxy and as their registrar (if they can’t be
configured with the domain only). If you don’t want to use the Telecommuting Module as the registrar, you should
point the clients to the SIP registrar you want to use.
Other
The DNS server used must have a record for the SIP domain, which states that the Telecommuting Module handles
the domain, or many SIP clients won’t be able to use it (if you don’t use plain IP addresses as domains).
The DMZ/LAN type
Using the DMZ/LAN type, the network configuration should look like this:
The Firewall
The firewall to which the Telecommuting Module is connected should have the following configuration:
SIP over UDP
•
Let through UDP traffic between the Internet (all high ports) and the Telecommuting Module (port 5060). You
must allow traffic in both directions.
•
Let through UDP traffic between the Internet (all high ports) and the Telecommuting Module (the port interval
for media streams which was set on the Basic page). You must allow traffic in both directions.
•
Let through UDP traffic between the Telecommuting Module (all high ports) and the Internet (port 53). You must
allow traffic in both directions. This enables the Telecommuting Module to make DNS queries to DNS servers on
the Internet. If the DNS server is located on the same network as the Telecommuting Module, you don’t have to
do this step.
•
NAT between the Telecommuting Module and the Internet must not be used.
SIP over TCP/TLS
•
Let through TCP traffic between the Internet (all high ports) and the Telecommuting Module (ports 1024-32767).
You must allow traffic in both directions.
•
Let through UDP traffic between the Internet (all high ports) and the Telecommuting Module (the port interval
for media streams which was set on the Basic page). You must allow traffic in both directions.
•
Let through UDP traffic between the Telecommuting Module (all high ports) and the Internet (port 53). You must
allow traffic in both directions. This enables the Telecommuting Module to make DNS queries to DNS servers on
the Internet. If the DNS server is located on the same network as the Telecommuting Module, you don’t have to
do this step.
•
NAT between the Telecommuting Module and the Internet must not be used.
122
Chapter 14. Firewall and Client Configuration
SIP clients
The SIP clients on the internal network should have the Telecommuting Module’s IP address on that network as
their outgoing SIP proxy and registrar.
Other
The DNS server used must have a record for the SIP domain, which states that the Telecommuting Module handles
the domain, or many SIP clients won’t be able to use it (if you don’t use plain IP addresses as domains).
The Standalone type
Using the Standalone type, the network configuration should look like this:
The SIP clients
SIP clients will use the Telecommuting Module as their outgoing SIP proxy and as their registrar (if they can’t be
configured with the domain only). If you don’t want to use the Telecommuting Module as the registrar, you should
point the clients to the SIP registrar you want to use.
Other
The DNS server used must have a record for the SIP domain, which states that the Telecommuting Module handles
the domain, or many SIP clients won’t be able to use it (if you don’t use plain IP addresses as domains).
123
Part IV. Appendices
In the appendices, you find more thorough information about Internet and computer security, such as descriptions of
Internet services and lists of Internet protocols.
Appendix A. More About SIP
The SIP protocol
SIP (Session Initiation Protocol), defined in RFC 3261 (with various extensions), handles creation, modification and
termination of various media stream sessions over an IP network. It is for example used for Internet telephone calls
and distribution of video streams.
SIP also supports user mobility by allowing registration of a user and proxying or redirecting requests to the user’s
current location. This is performed by the user registering his presence at a machine with the central registrar. The
SIP registrar keeps track of the user, but doesn’t hold any information about which media streams the computers or
clients can manage. This is negotiated between the parts when initiating a SIP session.
Why use SIP?
Today, two protocols for transmitting IP telephony exist; SIP and H.323. The H.323 protocol was originally
designed for video conferences over ISDN and is a mix of several protocols and standards for performing the
various phases of a connection. The SIP protocol was designed for general session initialization over the Internet.
Both protocols have the disadvantage (from a firewall point of view) of needing dynamically allocated ports for the
data transmission, but today no protocol supports tunneling random media streams.
When comparing the two protocols, there is one major drawback to the H.323 protocol: its lack of scalability. H.323
is mostly used in small LANs. When extending to world-wide IP networks, SIP has many advantages:
Loop detection
When trying to locate a user over several domains, loops can occur. H.323 has no support for loop detection,
which can cause network overload.
Loops are easily detected using SIP headers, as they specify all proxies that have handled the SIP packet.
Distributed control
H.323 uses gatekeepers, which are devices used for handling call states and redirecting calls to aliases. As
every call is carried out statefully, the gatekeepers must keep a call state during the entire call. This of course
makes the gatekeepers a major bottleneck in the system.
There is also a need for a central point when performing multi-user calls, which means that someone must
provide this central point, and that this machine must be dimensioned for the size of the call.
SIP sessions are completely distributed, making the need of these central points disappear.
Small connection overhead
Establishing a connection using H.323 takes about three times the data and turnarounds compared to when
using SIP.
Apart from this, there are some more disadvantages with H.323. As it uses many protocols, more ports need to be
opened in a firewall to enable H.323 traffic through. SIP is a single protocol, which means that only one port has to
be opened for SIP traffic. For both protocols, however, more ports must be opened for the data streams.
SIP runs on both TCP and UDP (and, in fact, can be extended to run on almost any transport protocol), making it
possible to use UDP for large servers, thereby enabling stateless sessions. H.323 only runs on TCP, which as
already stated loads the servers by requiring state management.
SIP and firewalls
When trying to use SIP through a firewall, there are some problems.
SIP initiates sessions of other protocols. This means that when a SIP session has been started, various other
protocols are used as well, usually transmitted over TCP or UDP on some port. For a firewall, this is a problem, as it
125
Appendix A. More About SIP
often opens up certain protocols and ports in advance, but now you don’t know which ports to open. To handle SIP
through a firewall which doesn’t understand the SIP concept, all ports must be open all the time, which would make
the firewall somewhat unnecessary. A firewall that understands SIP can open up the ports for the right protocols just
when the SIP traffic needs it.
In the SIP headers there is a lot of information concerning what IP numbers the session participants use. This is a
problem if a SIP session should be established through a firewall using NAT. The IP number on the hidden side
(which appears in the SIP headers) won’t be the same as the one that clients on the outside should use.
SIP sessions
Establishing a SIP session
You start a call (a session) by sending a request to the address of the person you want to communicate with. The
format of the address is <sip:user@host>, where user can be a user name or a telephone number, and host can be a
domain name (e.g. example.com) or a numerical network address (e.g. 172.15.253.12). This means that it usually
looks a lot like a standard e-mail address. In this request information about which media streams the client wants to
send/receive and what ports should be used is also included.
The SIP client sends this request to its default SIP proxy. This proxy resolves the SIP domain in DNS, and sends the
request to the SIP registrar for that domain. The proxy also adds information stating that the request was routed
through the proxy, thus ensuring that the reply will be routed the same way.
The registrar for the domain looks up the user to see where he is registered, and forwards the request to the machine
in question. The SIP client on this machine alerts the user, indicating that someone wants to initiate a SIP session.
The user confirms that he, too, wants the SIP session. The client sends a reply with necessary information about
what ports should be used by this client for sending and receiving media streams.
The first client receives the reply and sends a confirmation packet. After this, the media streams can be sent.
126
Appendix B. Troubleshooting
Troubleshooting the Telecommuting Module largely consists of checking the hardware (the Telecommuting
Module, the network connectors, ...) and checking the Telecommuting Module log. The log is usually an excellent
tool in finding out why the Telecommuting Module does not do what you wanted it to do.
Below is some general advice to help you troubleshoot, almost regardless of which problem you have.
•
Check that the events you look for are really logged (on the Logging Configuration page).
•
Check that the configuration has been applied properly, either by applying it (on the Save/Load Configuration
page) or by checking the Permanent Configuration (on the Show Configuration page).
•
Check that you display the log you want to look for. The correct date and time (or no date or time) should be
filled in, the desired log entries should be checked on the righthand side of the page, and the three boxes
concerning which IP packets to show should be filled in accordingly.
Network troubleshooting
No traffic shown in the log
•
Check that the interface is turned on on the corresponding interface page.
•
Check that the Telecommuting Module has a correct default gateway (on the Basic Configuration page).
•
Check that the client computer has a correct default gateway.
Traffic discarded as spoofed
When traffic is blocked and the reason given is Spoofed, there is a mismatch between the network that the
Telecommuting Module is configured for and the network that the client is configured for. The Telecommuting
Module regards an IP address as spoofed if it detects traffic from that IP address on an interface where the IP
address should not be.
An example of a situation where this occurs is when you move a computer from one Telecommuting Module
interface to another without changing its IP address and netmask.
SIP troubleshooting
Before going into the different error descriptions below, check that the SIP module is turned on and the
configuration applied.
SIP users can’t register on the Telecommuting Module
•
Check that the SIP domain that the users try to register on is listed in the Local SIP Domains table.
•
If you do not use RADIUS authentication, check that the SIP user which tries to register is listed in the Local SIP
User Database table.
•
If you do not use RADIUS authentication, check in the Local SIP User Database table that the SIP user which
tries to register is allowed to register from the network where the SIP client is located.
•
If local SIP authentication is used, check that the SIP user uses the correct password.
SIP users can’t register through the Telecommuting Module
•
Check that the SIP domain that the users try to register on is not listed in the Local SIP Domains table.
•
Check that SIP authentication is not used. If you want the Telecommuting Module to perform SIP authentication,
make sure that the Telecommuting Module and the SIP registrar uses the same SIP realm.
•
If the client sends the REGISTER request to the Telecommuting Module itself and the Telecommuting Module is
supposed to redirect it to the registrar, check on the Routing page that this is configured correctly.
127
Appendix B. Troubleshooting
•
Check that the (on the Logging Configuration page).
A call is established, but there is no voice
•
If you use a DMZ Telecommuting Module Type, check on the Surroundings page that you have separated the
clients into correct networks. Clients that can reach each other without using the Telecommuting Module should
be in the same Surroundings network, and clients that must use the Telecommuting Module to reach each other
should be in different Surroundings networks.
•
If you use a DMZ or DMZ/LAN Telecommuting Module Type, check that the firewall connected to the
Telecommuting Module does not block the media. See chapter 14, Firewall and Client Configuration, for more
information about which ports should be opened in the firewall.
VPN troubleshooting
No IPsec tunnel established
•
Check that VPN negotiation packets (UDP port 500) reach the Telecommuting Module. The other end could be
located behind a NATing device which changes the sender port.
•
Check that packets from the other end can reach the Telecommuting Module and vice versa. A failure to do so
could indicate a faulty routing somewhere between the two VPN units or that some blocking device is located
between them.
•
Check that the VPN negotiation packets to the Telecommuting Module are addressed to the correct IP address
(the one selected on the IPsec Peers page.
•
If preshared secrets are used, check that both units share the same secret. If certificates are used, check that the
right certificates are used.
•
If the unit in the other end is no 3Com VCX IP Telecommuting Module, make sure that it uses PFS (Perfect
Forward Secrecy). 3Com VCX IP Telecommuting Module always uses PFS.
•
If the unit in the other end is no 3Com VCX IP Telecommuting Module, make sure that it uses 3DES or AES.
3Com VCX IP Telecommuting Module accepts both encryption algorithms.
•
Check that the networks to use the VPN tunnel are the same on both VPN units.
IPsec tunnel established, no traffic
•
Check that the networks, between which the traffic should be sent, are allowed to use the IPsec tunnel.
•
Check that there is a rule to let this traffic through. Check that the rule uses a proper network, service, IPsec peer
and time class.
IPsec tunnel established, no traffic after some time
•
Check that the key lifetime for the ISAKMP key is the same for both VPN units.
•
Check that the key lifetime for the IPsec key is the same for both VPN units.
Administration troubleshooting
This section describes problems that can arise when administrating the Telecommuting Module.
The Telecommuting Module reverts to the old version when trying to
upgrade
•
Check the release note for new error checks, which will make some part of your configuration invalid with the
new software version.
128
Appendix B. Troubleshooting
The Telecommuting Module is unaccessible for some time when
trying to apply a configuration
There is something in the new configuration that does not allow you to access the web configuration interface.
•
Check the log to see if your access attempts reached the Telecommuting Module.
•
Check that the configuration IP address (Configuration Transport on the Access Control page) is the one you
use when trying to access the Telecommuting Module. Note that if you apply a configuration which changes the
configuration IP address, your web browser will not automatically be redirected to the new IP address.
•
Check that configuration traffic is allowed via the interface your web browser is located behind (Configuration
Allowed Via Interface on the Access Control page).
•
Check that configuration traffic is allowed from the computer where you run your web browser (Configuration
Computers on the Access Control page).
129
Appendix C. Lists of Reserved Ports, ICMP
Types and Codes, and Internet Protocols
The following lists discuss the most important ports and the server services that belong to them, and the different
types of ICMP messages. Client programs usually use ports between 1024 and 65535.
There are also lists over Internet protocols, reserved IP addresses and a mapping between netmasks and IP address
intervals.
List of the most important reserved ports
This is a list of important ports. See /etc/services and http://www.iana.org/.
Name
echo
echo
discard
discard
systat
daytime
daytime
netstat
qotd
chargen
chargen
ftp-data
ftp
ssh
telnet
smtp
time
time
rlp
nicname
domain
domain
sql*net
sql*net
bootps
bootps
bootpc
bootpc
tftp
tftp
gopher
finger
www-http
Port/protocol
7/tcp
7/udp
9/tcp
9/udp
11/tcp
13/tcp
13/udp
15/tcp
17/tcp
19/tcp
19/udp
20/tcp
21/tcp
22/tcp
23/tcp
25/tcp
37/tcp
37/udp
39/udp
43/tcp
53/tcp
53/udp
66/tcp
66/udp
67/tcp
67/udp
68/tcp
68/udp
69/tcp
69/udp
70/tcp
79/tcp
80/tcp
Description
sink null
sink null
users
quote
ttytst source
ttytst source
ftp data transfer
ftp command
Secure Shell
mail
timeserver
timeserver
resource location
who is
domain name server
domain name server
Oracle SQL*net
Oracle SQL*net
bootp server
bootp server
bootp client
bootp client
Trivial File Transfer
Trivial File Transfer
gopher server
Finger
WWW
130
Appendix C. Lists of Reserved Ports, ICMP Types and Codes, and Internet Protocols
Name
www-http
kerberos
kerberos
pop2
pop3
sunrpc
sunrpc
auth/ident
auth
audionews
audionews
nntp
nntp
ntp
ntp
netbios-ns
netbios-ns
netbios-dgm
netbios-dgm
netbios-ssn
netbios-ssn
imap
imap
sql-net
sql-net
sqlsrv
sqlsrv
snmp
snmp
snmp-trap
snmp-trap
cmip-man
cmip-man
cmip-agent
cmip-agent
irc
irc
at-rtmp
at-rtmp
at-nbp
at-nbp
at-3
at-3
at-echo
Port/protocol
80/udp
88/tcp
88/udp
109/tcp
110/tcp
111/tcp
111/udp
113/tcp
113/udp
114/tcp
114/udp
119/tcp
119/udp
123/tcp
123/udp
137/tcp
137/udp
138/tcp
138/udp
139/tcp
139/udp
143/tcp
143/udp
150/tcp
150/udp
156/tcp
156/udp
161/tcp
161/udp
162/tcp
162/udp
163/tcp
163/udp
164/tcp
164/udp
194/tcp
194/udp
201/tcp
201/udp
202/tcp
202/udp
203/tcp
203/udp
204/tcp
Description
WWW
Kerberos
Kerberos
PostOffice V.2
PostOffice V.3
RPC 4.0 portmapper
RPC 4.0 portmapper
Authentication Service
Authentication Service
Audio News Multicast
Audio News Multicast
Usenet Network News Transfer
Usenet Network News Transfer
Network Time Protocol
Network Time Protocol
NETBIOS Name Service
NETBIOS Name Service
NETBIOS Datagram Service
NETBIOS Datagram Service
NETBIOS Session Service
NETBIOS Session Service
Internet Message Access Protocol
Internet Message Access Protocol
SQL-NET
SQL-NET
SQL Service
SQL Service
CMIP/TCP Manager
CMIP
CMIP/TCP Agent
CMIP
Internet Relay Chat
Internet Relay Chat
AppleTalk Routing Maintenance
AppleTalk Routing Maintenance
AppleTalk Name Binding
AppleTalk Name Binding
AppleTalk
AppleTalk
AppleTalk Echo
131
Appendix C. Lists of Reserved Ports, ICMP Types and Codes, and Internet Protocols
Name
at-echo
at-5
at-5
at-zis
at-zis
at-7
at-7
at-8
at-8
ipx
ipx
imap3
imap3
aurp
aurp
netware-ip
netware-ip
rmt
rmt
microsoft-ds
microsoft-ds
isakmp
fcp
exec
comsat/biff
login
who
shell
syslog
printer
printer
talk
talk
ntalk
ntalk
netnews
uucp
uucp
klogin
klogin
kshell
kshell
ekshell
pcserver
Port/protocol
204/udp
205/tcp
205/udp
206/tcp
206/udp
207/tcp
207/udp
208/tcp
208/udp
213/tcp
213/udp
220/tcp
220/udp
387/tcp
387/udp
396/tcp
396/udp
411/tcp
411/udp
445/tcp
445/udp
500/udp
510/tcp
512/tcp
512/udp
513/tcp
513/udp
514/tcp
514/udp
515/tcp
515/udp
517/tcp
517/udp
518/udp
518/udp
532/tcp
540/tcp
540/udp
543/tcp
543/udp
544/tcp
544/udp
545/tcp
600/tcp
Description
AppleTalk Echo
AppleTalk
AppleTalk
AppleTalk Zone Information
AppleTalk Zone Information
AppleTalk
AppleTalk
AppleTalk
AppleTalk
Interactive Mail Access Protocol v3
Interactive Mail Access Protocol v3
AppleTalk Update-Based Routing
AppleTalk Update-Based Routing
Novell Netware over IP
Novell Netware over IP
Remote mt
Remote mt
ISAKMP/IKE
First Class Server
BSD rexecd(8)
used by mail system to notify users
BSD rlogind(8)
whod BSD rwhod(8)
cmd BSD rshd(8)
BSD syslogd(8)
spooler BSD lpd(8)
Printer Spooler
BSD talkd(8)
talk
New Talk (ntalk)
SunOS talkd(8)
readnews
uucpd BSD uucpd(8)
uucpd BSD uucpd(8)
Kerberos Login
Kerberos Login
Kerberos Shell
Kerberos Shell
krcmd Kerberos encrypted remote shell -kfall
ECD Integrated PC board srvr
132
Appendix C. Lists of Reserved Ports, ICMP Types and Codes, and Internet Protocols
Name
mount
pcnfs
bwnfs
flexlm
flexlm
kerberos-adm
kerberos-adm
kerberos
kerberos
kerberos_master
kerberos_master
krb_prop
socks
socks
kpop
ms-sql-s
ms-sql-s
ms-sql-m
ms-sql-m
pptp
pptp
nfs
nfs
eklogin
rkinit
kx
kauth
lyskom
sip
sip
x11
x11
irc
afs
afs
Port/protocol
635/udp
640/udp
650/udp
744/tcp
744/udp
749/tcp
749/udp
750/tcp
750/udp
751/udp
751/tcp
754/tcp
999/udp
1080/tcp
1080/udp
1109/tcp
1433/tcp
1433/udp
1434/tcp
1434/udp
1723/tcp
1723/udp
2049/tcp
2049/udp
2105/tcp
2108/tcp
2111/tcp
2120/tcp
4894/tcp
5060/tcp
5060/udp
6000-6063/tcp
6000-6063/udp
6667/tcp
7000-7009/tcp
7000-7009/udp
Description
NFS Mount Service
PC-NFS DOS Authentication
BW-NFS DOS Authentication
Flexible License Manager
Flexible License Manager
Kerberos Administration
Kerberos Administration
kdc Kerberos authentication--tcp
Kerberos
Kerberos authentication
Kerberos authentication
Kerberos slave propagation
Applixware
Pop with Kerberos
Microsoft SQL Server
Microsoft SQL Server
Microsoft SQL Monitor
Microsoft SQL Monitor
pptp
pptp
Network File System
Network File System
Kerberos encrypted rlogin
Kerberos remote kinit
X over Kerberos
Remote kauth
LysKOM (conference system)
Session Initiation Protocol
Session Initiation Protocol
X Window System
X Window System
Internet Relay Chat
List of ICMP types
The following list is taken from http://www.iana.org/, ICMP Parameters.
Type
0
1
2
Name
Echo Reply
Unassigned
Unassigned
Reference
[RFC792]
[JBP]
[JBP]
133
Appendix C. Lists of Reserved Ports, ICMP Types and Codes, and Internet Protocols
Type
3
4
5
6
7
8
9
10
11
12
13
14
15
16
17
18
19
20-29
30
31
32
33
34
35
36
37
38
39
40
41-255
Name
Destination Unreachable
Source Quench
Redirect
Alternate Host Address
Unassigned
Echo
Router Advertisement
Router Solicitation
Time Exceeded
Parameter Problem
Timestamp
Timestamp Reply
Information Request
Information Reply
Address Mask Request
Address Mask Reply
Reserved (for Security)
Reserved (for Robustness Experiment)
Traceroute
Datagram Conversion Error
Mobile Host Redirect
IPv6 Where-Are-You
IPv6 I-Am-Here
Mobile Registration Request
Mobile Registration Reply
Domain Name Request
Domain Name Reply
SKIP
Photuris
Reserved
Reference
[RFC792]
[RFC792]
[RFC792]
[JBP]
[JBP]
[RFC792]
[RFC1256]
[RFC1256]
[RFC792]
[RFC792]
[RFC792]
[RFC792]
[RFC792]
[RFC792]
[RFC950]
[RFC950]
[Solo]
[ZSu]
[RFC1393]
[RFC1475]
[David Johnson]
[Bill Simpson]
[Bill Simpson]
[Bill Simpson]
[Bill Simpson]
[Simpson]
[Simpson]
[Markson]
[RFC2521]
[JBP]
ICMP codes
Some ICMP types have codes attached.
ICMP type
0
1
2
3
Name
Echo Reply
Unassigned
Unassigned
Destination Unreachable
Code
0
Description
No Code
0
1
2
3
4
Net Unreachable
Host Unreachable
Protocol Unreachable
Port Unreachable
Fragmentation Needed and Don’t
Fragment was Set
134
Appendix C. Lists of Reserved Ports, ICMP Types and Codes, and Internet Protocols
ICMP type
Name
Code
5
6
7
8
9
10
11
12
4
5
Source Quench
Redirect
0
0
1
2
3
6
7
8
9
10
11
Alternate Host Address
Unassigned
Echo
Router Advertisement
Router Selection
Time Exceeded
12
Parameter Problem
13
14
15
16
17
18
19
20-29
Timestamp
Timestamp Reply
Information Request
Information Reply
Address Mask Request
Address Mask Reply
Reserved (for Security)
Reserved (for Robustness
Experiment)
Traceroute
Datagram Conversion Error
Mobile Host Redirect
IPv6 Where-Are-You
IPv6 I-Am-Here
30
31
32
33
34
0
0
0
0
0
1
0
1
2
0
0
0
0
0
0
Description
Source Route Failed
Destination Network Unknown
Destination Host Unknown
Source Host Isolated
Communication with Destination
Network is Administratively
Prohibited
Communication with Destination
Host is Administratively Prohibited
Destination Network Unreachable for
Type of Service
Destination Host Unreachable for
Type of Service
No Code
Redirect Datagram for the Network
(or subnet)
Redirect Datagram for the Host
Redirect Datagram for the Type of
Service and Network
Redirect Datagram for the Type of
Service and Host
Alternate Address for Host
No Code
No Code
No Code
Time to Live exceeded in Transit
Fragment Reassembly Time
Exceeded
Pointer indicates the error
Missing a Required Option
Bad Length
No Code
No Code
No Code
No Code
No Code
No Code
135
Appendix C. Lists of Reserved Ports, ICMP Types and Codes, and Internet Protocols
ICMP type
35
36
Name
Mobile Registration Request
Mobile Registration Reply
Code
Description
Internet protocols and their numbers
The following table lists common Internet protocols and their protocol numbers. All these protocols run on IP. The
list is extracted from http://www.iana.org/, Protocol Numbers.
Protocol number
0
1
2
3
4
5
6
8
9
10
11
17
18
19
20
21
22
27
28
29
30
31
32
34
37
39
40
46
47
48
50
51
53
54
61
63
Keyword
HOPOPT
ICMP
IGMP
GGP
IP
ST
TCP
EGP
IGP
BBN-RCC-MON
NVP-II
UDP
MUX
DCN-MEAS
HMP
PRM
XNS-IDP
RDP
IRTP
ISO-TP4
NETBLT
MFE-NSP
MERIT-INP
3PC
DDP
TP++
IL
RSVP
GRE
MHRP
ESP
AH
SWIPE
NHRP
Protocol
IPv6 Hop-by-Hop Option
Internet Control Message
Internet Group Management
Gateway-to-Gateway
IP in IP (encapsulation)
Stream
Transmission Control Protocol
Exterior Gateway Protocol
any private interior gateway
BBN RCC Monitoring
Network Voice Protocol
User Datagram
Multiplexing
DCN Measurement Subsystems
Host Monitoring
Packet Radio Measurement
XEROX NS IDP
Reliable Data Protocol
Internet Reliable Transaction
ISO Transport Protocol Class 4
Bulk Data Transfer Protocol
MFE Network Services Protocol
MERIT Internodal Protocol
Third Party Connect Protocol
Datagram Delivery Protocol
TP++ Transport Protocol
IL Transport Protocol
Reservation Protocol
General Routing Encapsulation
Mobile Host Routing Protocol
Encapsulation Security Payload
Authentication Header
IP with Encryption
NBMA Next Hop Resolution Protocol
any host internal protocol
any local network
136
Appendix C. Lists of Reserved Ports, ICMP Types and Codes, and Internet Protocols
Protocol number
64
65
66
68
69
70
75
80
84
85
86
87
88
91
92
93
94
95
97
98
99
100
115
255
Keyword
SAT-EXPAK
KRYPTOLAN
RVD
Protocol
SATNET and Backroom EXPAK
Kryptolan
MIT Remote Virtual Disk Protocol
any distributed file system
SATNET Monitoring
VISA Protocol
Packet Video Protocol
ISO Internet Protocol
TTP
NSFNET-IGP
Dissimilar Gateway Protocol
TCF
EIGRP
Locus Address Resolution Protocol
Multicast Transport Protocol
AX.25 Frames
IP-within-IP Encapsulation Protocol
Mobile Internetworking Control Pro.
Ethernet-within-IP Encapsulation
Encapsulation Header
any private encryption scheme
GMTP
Layer Two Tunneling Protocol
Reserved
SAT-MON
VISA
PVP
ISO-IP
TTP
NSFNET-IGP
DGP
TCF
EIGRP
LARP
MTP
AX.25
IPIP
MICP
ETHERIP
ENCAP
GMTP
L2TP
IP intervals
This is a list of the IP addresses available for different netmasks. The first column shows the number of bits used for
the net address, i. e., is set to 1 in the netmask. The second column maps the number of bits to a netmask on the
usual octet-dot format. The third column shows the address class for this netmask.
The second table shows the IP address interval for each class.
1-set bits
0
1
2
3
4
5
6
7
8
9
10
11
12
Mask
0.0.0.0
128.0.0.0
192.0.0.0
224.0.0.0
240.0.0.0
248.0.0.0
252.0.0.0
254.0.0.0
255.0.0.0
255.128.0.0
255.192.0.0
255.224.0.0
255.240.0.0
IP address class
0
1
2
3
4
5
6
7
0
1
2
3
4
137
Appendix C. Lists of Reserved Ports, ICMP Types and Codes, and Internet Protocols
1-set bits
13
14
15
16
17
18
19
20
21
22
23
24
25
26
27
28
29
30
31
32
Mask
255.248.0.0
255.252.0.0
255.254.0.0
255.255.0.0
255.255.128.0
255.255.192.0
255.255.224.0
255.255.240.0
255.255.248.0
255.255.252.0
255.255.254.0
255.255.255.0
255.255.255.128
255.255.255.192
255.255.255.224
255.255.255.240
255.255.255.248
255.255.255.252
255.255.255.254
255.255.255.255
IP address class
5
6
7
0
1
2
3
4
5
6
7
0
1
2
3
4
5
6
7
8
Example: We want to split the network 130.234.250.0/25 (i.e., 130.234.250.0-130.234.250.127) into four subnets.
The netmask for each subnet will be 27 bits, which means 255.255.255.224. This netmask is in IP class 3. The
second table gives us the following available intervals: 0-31, 32-63, 64-95, and 96-127 (then we are out of IP
addresses). One of the subnets will be 130.234.250.64/27 (130.234.250.64-130.234.250.95).
Class
0
1
2
3
4
5
6
IP
intervals
0-255
0-127
0-63
0-31
0-15
128-143
0-7
64-71
128-135
192-199
0-3
32-35
64-67
96-99
128-131
160-163
192-195
224-227
128-255
64-127
32-63
16-31
144-159
8-15
72-79
136-143
200-207
4-7
36-39
68-71
100-103
132-135
164-167
196-199
228-231
128-191
64-95
32-47
160-175
16-23
80-87
144-151
208-215
8-11
40-43
72-75
104-107
136-139
168-171
200-203
232-235
192-255
96-127
48-63
176-191
24-31
88-95
152-159
216-223
12-15
44-47
76-79
108-111
140-143
172-175
204-207
236-239
128-159
64-79
192-207
32-39
96-103
160-167
224-231
16-19
48-51
80-83
112-115
144-147
176-179
208-211
240-243
160-191
80-95
208-223
40-47
104-111
168-175
232-239
20-23
52-55
84-87
116-119
148-151
180-183
212-215
244-247
192-223
96-111
224-239
48-55
112-119
176-183
240-247
24-27
56-59
88-91
120-123
152-155
184-187
216-219
248-251
224-255
112-127
240-255
56-63
120-127
184-191
248-255
28-31
60-63
92-95
124-127
156-159
188-191
220-223
252-255
138
Appendix C. Lists of Reserved Ports, ICMP Types and Codes, and Internet Protocols
Class
IP
intervals
7
0-1
2-3
4-5
6-7
8-9
10-11
...
254-255
8
0
1
2
3
4
5
...
255
You could have a large network, for example 130.234.128.0/18, which is interpreted from the tables as all IP
addresses from 130.234.128.0 to 130.234.191.255, inclusive (18 is in class no. 2, giving an IP interval of 128-191).
N.B.: The netmask only reaches the third byte, which means that all IP addresses in byte 4 are available.
Reserved IP addresses
The Internet Assigned Numbers Authority (IANA) has reserved the following three blocks of the IP address space
for private internets (see also RFC 1918):
•
10.0.0.0 - 10.255.255.255 (10/8)
•
172.16.0.0 - 172.31.255.255 (172.16/12)
•
192.168.0.0 - 192.168.255.255 (192.168/16)
139
Appendix D. Definitions of terms
AFS, Andrew File System
AFS is a more secure way of distributing file systems over a network. If files are mounted over the Internet,
AFS is fairly secure. Normally, AFS uses Kerberos for security management.
ARP
ARP, Address Resolution Protocol, is a protocol for mapping an IP address to a physical machine address in
the local network. A thorough description of ARP can be found in RFC 826.
Client program
A client program is one that the user runs on her computer. A client program connects to a server. One example
of a client program is Netscape (a WWW client). One benefit of dividing up a service into server and client
programs is that the server program can be run on a larger computer with better resources, and the users do not
have to make their own copies of the databases. This allows the client programs to be run on less powerful
computers.
Cracker
A person who breaks into computer systems and commits other criminal acts using a computer.
Daemon program
A daemon program is a server program for a service. This kind of program waits for and manages external
calls. A typical example is FTP. A user starts his FTP client. The client connects to the FTP server. Now the
user can transfer files to his own computer or to the server. See Server.
Denial of Service, DoS
A type of attack that tries to block a network service by overloading the server.
DHCP
DHCP, Dynamic Host Configuration Protocol, is a protocol for handing out IP addresses and other
configuration information to computers without having to log on to every single machine. Instead, the
computers themselves send out requests about this information at boot, and gets appropriate configuration
parameters from a DHCP server. A thorough description of DHCP can be found in RFC 2131.
DMZ
A DMZ is a computer network that is accessible from two other computer networks that have no direct contact
with each other. Often, one of these networks is the Internet and the other is a local, internal network. There is
no direct connection between the Internet and the local network, but both of them can access an intermediate
network, a demilitarized zone.
DMZs are often used for special servers, such as web servers, which must be accessible from two separate
networks.
DNS
Domain Name System; see Name servers.
Domain
A domain is a country, organization, or subdivision. All countries have one top domain for the country, except
for the USA, which is divided into a commercial domain (.com), a non-profit organizational domain (.org), a
university domain (.edu), a military domain (.mil), a governmental domain (.gov), and a network domain (.net).
All domains are hierarchical and each domain is responsible for the domains directly under it.
A domain can have several sub-domains, which in turn can have sub-domains and so on. The structure
combines the domain name of the organization with the overlying domain name.
For example, Stanford University has the domain name stanford, which is under the university domain of
USA, .edu; together they form the domain stanford.edu. The university also has different departments under
stanford.edu.
The departments of a company or organization can request a sub-domain from the domain manager. So if the
technicians in the company’s service division want their own domain, they can go to their domain manager and
140
Appendix D. Definitions of terms
request a domain called, for instance, service. Below, we have ‘Company Inc.,’ which consists of three
departments: A sales department, a service department, and a computer department. The computer department
is divided into an IBM section and a Unisys section.
Contact your internet service provider to register a domain.
Dynamic routing
Dynamic routing is used when the traffic between two computers have several routes available. The route for
the packets can be changed if a connection is broken or a router is turned off. RIP is a protocol handling
dynamic routing.
Firewall
A device that prevents unauthorized access to a computer network.
Forwarding
See Relay.
FTP (File Transfer Protocol)
Imagine that you have an account on a UNIX machine. You can retrieve and store files on the UNIX machine
with FTP. The program that manages this is called the FTP server. You can also establish an area of files that
are accessible to others. Anyone can log in as user anonymous and enter his e-mail address as a password.
They can then access all files in this area, but nothing else. A computer with an FTP server and a freely
available area is usually called an FTP site.
Gateway
Gateway is an old name for a Router.
Hacker
A person who is skilled and knowledgeable about computers and likes to examine the details of a computer
system and what can be done with it. A hacker is good at programming and achieves good results. A hacker is
not to be confused with a computer criminal; see Cracker.
HTTPS
HTTPS is WWW traffic (HTTP traffic) on an encrypted connection. The encrypted connection is established
with the SSL protocol.
ICMP protocol
ICMP is used to forward information, primarily error messages. To see if a computer is running, the ‘ping’
program sends an echo request, which is part of ICMP. If a problem occurs with a connection, a response is
sent through ICMP that something is not right (the computer is not responding, the network is down, etc). If
there are two possible paths for a connection, a router along the way may tell the computer to use the other
path. The router sends an ICMP redirect. ICMP uses the IP protocol to send data over the network.
IP address
IP addresses are the Internet equivalent to telephone numbers. An IP address is divided into four groups, each
of which is a number from 0 to 255. The groups are separated by dots. An example of an IP address is
141
Appendix D. Definitions of terms
192.165.122.42. Several IP addresses are required to connect several computers in a network; one for each
computer.
IP addresses were previously divided into A networks, B networks and C networks, but that terminology is
now considered obsolete. An A network was one where the first group of numbers is predetermined and you
determine the remaining groups yourself; for example 17.x.y.z . A B network was one where the two first
groups are predetermined; for example 128.42.y.z. A C network was one where the first three groups are
predetermined; for example 192.168.12.z .
IP
IP stands for Internet Protocol. This is a protocol that is used to send data between two computers on the same
or different networks. IP performs no security checks. It works analogous to standard mail. Peter sends four
postcards to Christy from the other side of the world. Christy gets postcard two first, then postcard one and
postcard four. Postcard three disappears on the way. Peter and Christy know each other’s addresses, and the
post office knows how to read addresses and send postcards in the right direction. But Peter and Christy cannot
know if all of their postcards will arrive. And Christy doesn’t know what order the postcards were sent in.
For more information about IP addresses, see IP address.
Kerberos
Kerberos is a system to secure connections between several computers over networks. The Kerberos system
uses a Kerberos server to manage security. Connections that go through Kerberos are often encrypted.
Masquerading
See NAT.
Name server, DNS
A DNS server is the Internet equivalent of dialing telephone information. If you know the name of a computer,
you can access its IP address and vice versa. The server keeps track of names and IP addresses. Imagine that a
user wants to connect to the computer "Tekla" through a Telnet (terminal) connection. The Telnet program
asks the name server about Tekla and receives Tekla’s IP address. If the name server does not know a name, it
asks the nearest name server. See the figure.
Name servers are usually named primary, secondary, or other. If you have several networks with several name
servers, they can communicate with each other. It is a good idea to make them secondary name servers to each
other. Secondary name servers work as extra name servers if the primary server is not working.
A secondary name server updates its information from the primary name server at regular intervals. You can
specify how often. Only the manager of the name server can set it up as a secondary name server for someone
else. In the figure below, we have two local networks with separate name servers. If name server Amanda does
not work, a machine in network 1 may ask the name server in network 2, Bertha, if this server is set up as
secondary name server for Amanda. Other name servers outside network 1 and 2 belong to the other category.
The name server responds to name queries on port 53. Both TCP and UDP is used for name queries.
142
Appendix D. Definitions of terms
NAT
NAT (Network Address Translation), also known as masquerading, is a way to hide a network from outside
computers. Used with firewalls to hide the computers on the internal network from the rest of the world.
Netmask
See network mask.
Network mask
A network mask tells what computers can be accessed locally without using a gateway, and what computers
can only be reached through a gateway. The bits in the network mask determine what is a network and what is
a computer. The total number of bits is 32 and the "one-bits" are for networks. The network mask can be
specified as the number of one-bits grouped in the same way as IP addresses. For what formerly was called a
class C network, the network mask is 24, which can also be expressed as 255.255.255.0 (i.e., 24 one-bits
grouped in octets and then interpreted as binary numbers). If this network is divided into several parts, the
network mask is different, depending on how the division is done. For example, the network mask
255.255.255.224 gives a network with 32 IP addresses in it. See also the table of network masks in appendix
C, Lists of Reserved Ports, ICMP Types and Codes, and Internet Protocols.
News
News is a distributed, loose conference system, which includes the entire Internet and more. News originated
in e-mail, so it has many similarities to e-mail. It can also be called Usenet News and NetNews.
News is a conference system for exchange of ideas, questions and answers, and so on, just like in a BBS or
COM system. What is written in News is not stored on a central computer; it is sent out all over the world and
stored in several places. Your organization may choose to retrieve News and store all texts locally.
To keep track of everything, News is divided into news groups. A news group focuses on a specific area of
interest. Each news group can have divisions and subgroups.
rec.motorcycles.harley is an example of a group name. rec is the main group, Recreational, which includes
hobbies, recreation and the arts. A subgroup of rec is motorcycles, which is solely about motorcycles. A
subgroup of rec.motorcycles is harley, which is only about Harley Davidson motorcycles. Another example is
sci.geo.geology. Anyone can post articles to News; remember that several million people may be reading what
you write. Make sure that all users are aware of this and are restrictive of what they write.
News servers use the NNTP protocol to communicate with each other. Many client programs also use NNTP to
communicate with the news server. NNTP communication uses port 119.
NFS, Network File System
NFS is a protocol for mounting disks from other computers over the network. NFS should be blocked against
unsecure external networks. NFS uses port 2049.
NIS/YP, Network Information Service/Yellow Pages®
NIS/YP is used to distribute central information to client machines in a network. Passwords and e-mail aliases
are typical examples of such information. This also often used to allow users to sit at any work station, log in
as themselves, and access their user accounts. NIS/YP should be blocked against unsecure external networks.
NNTP
See News.
NTP
NTP stands for Network Time Protocol and is used for synchronizing computer clocks. The synchronization
normally uses a computer with a very accurate clock, e. g., a computer with an atomic clock.
A client computer wanting to synchronize with a server via NTP usually uses a high port on the client, port
123 on the server and the UDP protocol. The server returns data using UDP from port 123 to a high port on the
client computer.
143
Appendix D. Definitions of terms
Two NTP servers communicating with each other use port 123 and the UDP protocol.
Open Windows
Open Windows is a window system that is used by several work stations. A similar window system is the X
Window System, which Open Windows is based on. The X Window System and Open Windows use ports
6000 and upward for traffic to the work stations. It is a good idea to block ports 6000-6010 for incoming traffic
from an unsecure outside network.
Packet
When something is sent over a computer network, for example, a file or an e-mail, it is divided up into
sections. These sections are called packets. They make up a sort of jigsaw puzzle, each piece sent individually.
The receiving computer has to reassemble the pieces.
Ping
Ping is used to examine whether a computer works and is accessible over a network. Ping sends ICMP traffic
to the computer in question, and the target computer replies with a reply ICMP packet if it is running and
reachable from the network.
You can also ping a whole network, and thereby use ping to examine which computers exist on a certain
network. Therefore it is not advisable to allow ping into an internal network.
The client computer sends a type 8 ICMP packet, echo-request, to find out whether the target computer is
working and accessible. The target computer ("server" in the picture below) replies with a type 0 ICMP packet,
echo-reply, to tell it is working and accessible over the network.
Ports
When two computers are connected, ports are used. A client machine that wants access to a certain service on
a server connects to the standard port for that particular service on the server. The programs on the client
machine receive an available port over 1023. For example, if a user on the computer Tekla wants to run a
Telnet session to the computer Winona, the user’s Telnet client program receives an available port over 1023 to
connect to port 23 on Winona. If two server programs contact each other, one can act as a client program,
receiving an available port over 1023 on its local machine. However, many server programs have special
definitions of how servers communicate with each other, where both servers user their standard port.
PPP
PPP stands for Point-to-Point Protocol. This is usually used to send IP packets over modem connections. See
also IP.
Protocols
Protocols are sets of rules for how programs communicate with each other. For example, a web server can use
the protocols HTTP and HTTPS.
Proxy
Proxies are devices through which web pages, FTP files, and so on can be retrieved for a local network. This
can be good to combine with a cache memory, which will store pages and files once fetched from the Internet
site. When another user wants to look at a page already in the cache, it acts as a web server, sending the cached
page instead of fetching a new copy through the Internet.
In your web client, specify a computer and cache/proxy to be used to store this information.
144
Appendix D. Definitions of terms
Relay
When the local network is connected to the Internet through a firewall, all types of services are usually
blocked. It is as if the network is not connected to the Internet. Relays can then be set up to allow certain
services, such as the WWW, to pass through under controlled circumstances. Think of it as a giant stone wall
with a gate and a specialized gate keeper. The gate keeper only lets certain visitors pass. To allow others to
pass through, you set up another gate with another specialized gate keeper.
RFC
An RFC (Request For Comments) is a document which standardizes some aspect of the Internet traffic. RFC:s
are available at http://www.rfc-editor.org/rfcsearch.html.
RIP
RIP is a protocol that manages dynamic routing. Dynamic routing means that the path for traffic can be
changed. RIP selects the path that goes through the least number of routers, but does not consider the
bandwidth or load on the network. RIP is only used in local networks. Fixed paths for traffic are called static
routing.
Router
A router is a machine that is used to connect several smaller and larger networks. Often, a router is used to
connect a local network to the Internet. This router only lets traffic to the Internet out; all other traffic remains
on the local network. A router can also be called a gateway.
Routing
A routing is a path for the traffic between different computers.
Server
A server can be a program that performs a service on a network or a computer that runs one or more server
programs. One example is a computer that stores files centrally, which makes it a kind of server, usually called
a file server. The program that manages traffic so that people from the outside can access an organization’s
web pages is a server program.
SIP
SIP, Session Initiation Protocol, is a protocol for creating, maintaining and terminating various media stream
sessions over an IP network. SIP is used to negotiate which media streams the parts can send and receive, and
which parts should be involved in the exchange. When this is established, the media streams are sent according
to their own protocols (e.g. HTTP). A thorough description of SIP can be found in RFC 2543.
SLIP
SLIP stands for Serial Line IP. This is usually used to send IP packets over modem connections. See IP.
SLIRP
SLIRP is a program that sends IP packets over serial connections, such a modem connections. SLIRP is run as
a user program. SLIRP does not need its own IP address; it uses the server’s IP address. The program works
with both SLIP and PPP clients. See IP.
SMTP
Simple Mail Transfer Protocol, a protocol for sending e-mail between e-mail servers. SMTP uses port 25.
SNMP
A protocol used for network monitoring. SNMP uses ports 161 and 162.
Sockets
When two computers connect to each other, they use their IP addresses and port numbers. The combination of
an IP address and a port number is called a socket. See IP addresses and Ports.
SSH, Secure SHell
SSH is a system for secure, encrypted connections between two computers over a network. SSH uses one open
and one secret key. In contrast to Kerberos, SSH does not use a central server for security. SSH uses port 22.
SSL
SSL stands for Secure Sockets Layer. The SSL protocol handles establishing of encrypted computer
connections. Usually HTTP and WWW traffic is sent on SSL. HTTP on SSL is called HTTPS.
145
Appendix D. Definitions of terms
Static Routing
A fixed path for the contact between computers. With a static routing, traffic cannot be redirected to another
path if the connection is broken. This would require dynamic routing, for example, with RIP.
Syslog
Syslog is a service for logging data. In UNIX, regular programs do not log any information; they send all data
to a syslog server that saves data in a log file. One example is a web server that sends data over the computers
that connects to the server and sends error messages for web pages that it could not locate. Messages to a
syslog server can also be sent over the network. Syslog uses the UDP protocol. A syslog server listens to port
514 for syslog messages.
TCP protocol
TCP connects two computers and makes sure that all data gets through and in the right order. TCP uses IP. IP
manages addresses and makes sure that data is sent out to the network. When TCP connects, it receives a
response from the TCP protocol layer on the receiving end. The recipient sends a little data along with a
confirmation that the sender’s data arrived. When a connection is made, a confirmation is always sent with all
data packets. This can be compared with Peter and Christy sending postcards and, along with their message,
commenting that they received the other’s postcard. TCP shortens this confirmation to ACK
(acknowledgment).
You know if a TCP packet is a connection attempt if it does not have ACK.
TCP keeps track of connections for different services using different port numbers. See Ports.
UDP protocol
UDP does not make a connection. It examines data that comes from outside for accuracy, by checksums. This
is like examining a postcard to ensure that it has not been torn up. UDP does not keep track of whether or not
all data gets through or if it is in the right order; this is the job of the application. So the data does not have an
ACK confirmation. Peter and Christy, sending postcards, have to keep track of their own postcards and Peter
has to tell Christy the order in which they should be read. UDP keeps track of the contacts using port numbers,
just like TCP.
UUCP
UNIX to UNIX Copy, an old protocol for copying files between two UNIX computers. This is sometimes used
to send e-mail between two computers.
WWW, World Wide Web
The WWW is currently the best known Internet service. The World Wide Web consists of millions of
documents that are interconnected all over the world. A document can contain text, pictures, sound, and even
video sequences. The WWW is based on the client-server concept. This means that each document is in a
database on a web server. The user runs a client program, such as Netscape or Internet Explorer, that connects
to a server, which could be anywhere in the world, and request a document. This document is displayed on the
user’s screen and the user can use his client program to click on other documents to display them. WWW
usually runs on the HTTP and HTTPS protocols, using ports 80 and 443, respectively.
X Window System
A window system that is used by several work stations. A similar window system is Open Windows. The X
Window System and Open Windows uses port numbers starting at 6000 and upward for traffic to the work
stations. It is a good idea to block ports 6000-6010 from incoming traffic from an insecure outside network.
146
Appendix E. License Conditions
3Com VCX IP Telecommuting Module contains third party software that is subject to the following license
agreements.
To fulfill the license conditions, we must either attach the source code with the software, or send a written offer,
valid at least three years, to give a copy of the source code to anyone who wants it. According to 3b) of the license,
we are entitled to charge for the distribution of the source code.
3Com Corporation offer the source code for all third party software included in 3Com VCX IP Telecommuting
Module and licensed under GPL. This offer is valid for this version of 3Com VCX IP Telecommuting Module and
is valid for three years after deliverance of your 3Com VCX IP Telecommuting Module unit. Contact 3Com
Corporation for current information.
GNU GENERAL PUBLIC LICENSE
Version 2, June 1991
Copyright (C) 1989, 1991 Free Software Foundation, Inc., 59 Temple Place, Suite 330, Boston, MA 02111-1307
USA
Everyone is permitted to copy and distribute verbatim copies of this license document, but changing it is not
allowed.
Preamble
The licenses for most software are designed to take away your freedom to share and change it. By contrast, the GNU
General Public License is intended to guarantee your freedom to share and change free software - to make sure the
software is free for all its users. This General Public License applies to most of the Free Software Foundation’s
software and to any other program whose authors commit to using it. (Some other Free Software Foundation
software is covered by the GNU Library General Public License instead.) You can apply it to your programs, too.
When we speak of free software, we are referring to freedom, not price. Our General Public Licenses are designed
to make sure that you have the freedom to distribute copies of free software (and charge for this service if you
wish), that you receive source code or can get it if you want it, that you can change the software or use pieces of it
in new free programs; and that you know you can do these things.
To protect your rights, we need to make restrictions that forbid anyone to deny you these rights or to ask you to
surrender the rights. These restrictions translate to certain responsibilities for you if you distribute copies of the
software, or if you modify it.
For example, if you distribute copies of such a program, whether gratis or for a fee, you must give the recipients all
the rights that you have. You must make sure that they, too, receive or can get the source code. And you must show
them these terms so they know their rights.
We protect your rights with two steps: (1) copyright the software, and (2) offer you this license which gives you
legal permission to copy, distribute and/or modify the software.
Also, for each author’s protection and ours, we want to make certain that everyone understands that there is no
warranty for this free software. If the software is modified by someone else and passed on, we want its recipients to
know that what they have is not the original, so that any problems introduced by others will not reflect on the
original authors’ reputations.
Finally, any free program is threatened constantly by software patents. We wish to avoid the danger that
redistributors of a free program will individually obtain patent licenses, in effect making the program proprietary.
To prevent this, we have made it clear that any patent must be licensed for everyone’s free use or not licensed at all.
The precise terms and conditions for copying, distribution and modification follow.
GNU GENERAL PUBLIC LICENSE
TERMS AND CONDITIONS FOR COPYING, DISTRIBUTION AND MODIFICATION
147
Appendix E. License Conditions
1. This License applies to any program or other work which contains a notice placed by the copyright holder
saying it may be distributed under the terms of this General Public License. The "Program", below, refers to
any such program or work, and a "work based on the Program" means either the Program or any derivative
work under copyright law: that is to say, a work containing the Program or a portion of it, either verbatim or
with modifications and/or translated into another language. (Hereinafter, translation is included without
limitation in the term "modification".) Each licensee is addressed as "you".
Activities other than copying, distribution and modification are not covered by this License; they are outside its
scope. The act of running the Program is not restricted, and the output from the Program is covered only if its
contents constitute a work based on the Program (independent of having been made by running the Program).
Whether that is true depends on what the Program does.
2. You may copy and distribute verbatim copies of the Program’s source code as you receive it, in any medium,
provided that you conspicuously and appropriately publish on each copy an appropriate copyright notice and
disclaimer of warranty; keep intact all the notices that refer to this License and to the absence of any warranty;
and give any other recipients of the Program a copy of this License along with the Program.
You may charge a fee for the physical act of transferring a copy, and you may at your option offer warranty
protection in exchange for a fee.
3. You may modify your copy or copies of the Program or any portion of it, thus forming a work based on the
Program, and copy and distribute such modifications or work under the terms of Section 1 above, provided that
you also meet all of these conditions:
a) You must cause the modified files to carry prominent notices stating that you changed the files and the date
of any change.
b) You must cause any work that you distribute or publish, that in whole or in part contains or is derived from
the Program or any part thereof, to be licensed as a whole at no charge to all third parties under the terms of this
License.
c) If the modified program normally reads commands interactively when run, you must cause it, when started
running for such interactive use in the most ordinary way, to print or display an announcement including an
appropriate copyright notice and a notice that there is no warranty (or else, saying that you provide a warranty)
and that users may redistribute the program under these conditions, and telling the user how to view a copy of
this License. (Exception: if the Program itself is interactive but does not normally print such an announcement,
your work based on the Program is not required to print an announcement.)
These requirements apply to the modified work as a whole. If identifiable sections of that work are not derived
from the Program, and can be reasonably considered independent and separate works in themselves, then this
License, and its terms, do not apply to those sections when you distribute them as separate works. But when
you distribute the same sections as part of a whole which is a work based on the Program, the distribution of
the whole must be on the terms of this License, whose permissions for other licensees extend to the entire
whole, and thus to each and every part regardless of who wrote it.
Thus, it is not the intent of this section to claim rights or contest your rights to work written entirely by you;
rather, the intent is to exercise the right to control the distribution of derivative or collective works based on the
Program.
In addition, mere aggregation of another work not based on the Program with the Program (or with a work
based on the Program) on a volume of a storage or distribution medium does not bring the other work under the
scope of this License.
4. You may copy and distribute the Program (or a work based on it, under Section 2) in object code or executable
form under the terms of Sections 1 and 2 above provided that you also do one of the following:
a) Accompany it with the complete corresponding machine-readable source code, which must be distributed
under the terms of Sections 1 and 2 above on a medium customarily used for software interchange; or,
148
Appendix E. License Conditions
b) Accompany it with a written offer, valid for at least three years, to give any third party, for a charge no more
than your cost of physically performing source distribution, a complete machine-readable copy of the
corresponding source code, to be distributed under the terms of Sections 1 and 2 above on a medium
customarily used for software interchange; or,
c) Accompany it with the information you received as to the offer to distribute corresponding source code.
(This alternative is allowed only for noncommercial distribution and only if you received the program in object
code or executable form with such an offer, in accord with Subsection b above.)
The source code for a work means the preferred form of the work for making modifications to it. For an
executable work, complete source code means all the source code for all modules it contains, plus any
associated interface definition files, plus the scripts used to control compilation and installation of the
executable. However, as a special exception, the source code distributed need not include anything that is
normally distributed (in either source or binary form) with the major components (compiler, kernel, and so on)
of the operating system on which the executable runs, unless that component itself accompanies the executable.
If distribution of executable or object code is made by offering access to copy from a designated place, then
offering equivalent access to copy the source code from the same place counts as distribution of the source
code, even though third parties are not compelled to copy the source along with the object code.
5. You may not copy, modify, sublicense, or distribute the Program except as expressly provided under this
License. Any attempt otherwise to copy, modify, sublicense or distribute the Program is void, and will
automatically terminate your rights under this License. However, parties who have received copies, or rights,
from you under this License will not have their licenses terminated so long as such parties remain in full
compliance.
6. You are not required to accept this License, since you have not signed it. However, nothing else grants you
permission to modify or distribute the Program or its derivative works. These actions are prohibited by law if
you do not accept this License. Therefore, by modifying or distributing the Program (or any work based on the
Program), you indicate your acceptance of this License to do so, and all its terms and conditions for copying,
distributing or modifying the Program or works based on it.
7. Each time you redistribute the Program (or any work based on the Program), the recipient automatically
receives a license from the original licensor to copy, distribute or modify the Program subject to these terms
and conditions. You may not impose any further restrictions on the recipients’ exercise of the rights granted
herein. You are not responsible for enforcing compliance by third parties to this License.
8. If, as a consequence of a court judgment or allegation of patent infringement or for any other reason (not
limited to patent issues), conditions are imposed on you (whether by court order, agreement or otherwise) that
contradict the conditions of this License, they do not excuse you from the conditions of this License. If you
cannot distribute so as to satisfy simultaneously your obligations under this License and any other pertinent
obligations, then as a consequence you may not distribute the Program at all. For example, if a patent license
would not permit royalty-free redistribution of the Program by all those who receive copies directly or
indirectly through you, then the only way you could satisfy both it and this License would be to refrain entirely
from distribution of the Program.
If any portion of this section is held invalid or unenforceable under any particular circumstance, the balance of
the section is intended to apply and the section as a whole is intended to apply in other circumstances.
It is not the purpose of this section to induce you to infringe any patents or other property right claims or to
contest validity of any such claims; this section has the sole purpose of protecting the integrity of the free
software distribution system, which is implemented by public license practices. Many people have made
generous contributions to the wide range of software distributed through that system in reliance on consistent
application of that system; it is up to the author/donor to decide if he or she is willing to distribute software
through any other system and a licensee cannot impose that choice.
This section is intended to make thoroughly clear what is believed to be a consequence of the rest of this
License.
149
Appendix E. License Conditions
9. If the distribution and/or use of the Program is restricted in certain countries either by patents or by copyrighted
interfaces, the original copyright holder who places the Program under this License may add an explicit
geographical distribution limitation excluding those countries, so that distribution is permitted only in or
among countries not thus excluded. In such case, this License incorporates the limitation as if written in the
body of this License.
10. The Free Software Foundation may publish revised and/or new versions of the General Public License from
time to time. Such new versions will be similar in spirit to the present version, but may differ in detail to
address new problems or concerns.
Each version is given a distinguishing version number. If the Program specifies a version number of this
License which applies to it and "any later version", you have the option of following the terms and conditions
either of that version or of any later version published by the Free Software Foundation. If the Program does
not specify a version number of this License, you may choose any version ever published by the Free Software
Foundation.
11. If you wish to incorporate parts of the Program into other free programs whose distribution conditions are
different, write to the author to ask for permission. For software which is copyrighted by the Free Software
Foundation, write to the Free Software Foundation; we sometimes make exceptions for this. Our decision will
be guided by the two goals of preserving the free status of all derivatives of our free software and of promoting
the sharing and reuse of software generally.
NO WARRANTY
12. BECAUSE THE PROGRAM IS LICENSED FREE OF CHARGE, THERE IS NO WARRANTY FOR THE
PROGRAM, TO THE EXTENT PERMITTED BY APPLICABLE LAW. EXCEPT WHEN OTHERWISE
STATED IN WRITING THE COPYRIGHT HOLDERS AND/OR OTHER PARTIES PROVIDE THE
PROGRAM "AS IS" WITHOUT WARRANTY OF ANY KIND, EITHER EXPRESSED OR IMPLIED,
INCLUDING, BUT NOT LIMITED TO, THE IMPLIED WARRANTIES OF MERCHANTABILITY AND
FITNESS FOR A PARTICULAR PURPOSE. THE ENTIRE RISK AS TO THE QUALITY AND
PERFORMANCE OF THE PROGRAM IS WITH YOU. SHOULD THE PROGRAM PROVE DEFECTIVE,
YOU ASSUME THE COST OF ALL NECESSARY SERVICING, REPAIR OR CORRECTION.
13. IN NO EVENT UNLESS REQUIRED BY APPLICABLE LAW OR AGREED TO IN WRITING WILL ANY
COPYRIGHT HOLDER, OR ANY OTHER PARTY WHO MAY MODIFY AND/OR REDISTRIBUTE THE
PROGRAM AS PERMITTED ABOVE, BE LIABLE TO YOU FOR DAMAGES, INCLUDING ANY
GENERAL, SPECIAL, INCIDENTAL OR CONSEQUENTIAL DAMAGES ARISING OUT OF THE USE
OR INABILITY TO USE THE PROGRAM (INCLUDING BUT NOT LIMITED TO LOSS OF DATA OR
DATA BEING RENDERED INACCURATE OR LOSSES SUSTAINED BY YOU OR THIRD PARTIES OR
A FAILURE OF THE PROGRAM TO OPERATE WITH ANY OTHER PROGRAMS), EVEN IF SUCH
HOLDER OR OTHER PARTY HAS BEEN ADVISED OF THE POSSIBILITY OF SUCH DAMAGES.
END OF TERMS AND CONDITIONS
GNU LESSER GENERAL PUBLIC LICENSE
Version 2.1, February 1999
Copyright (C) 1991, 1999 Free Software Foundation, Inc.
59 Temple Place, Suite 330, Boston, MA 02111-1307 USA
Everyone is permitted to copy and distribute verbatim copies of this license document, but changing it is not
allowed.
[This is the first released version of the Lesser GPL. It also counts as the successor of the GNU Library Public
License, version 2, hence the version number 2.1.]
150
Appendix E. License Conditions
Preamble
The licenses for most software are designed to take away your freedom to share and change it. By contrast, the
GNU General Public Licenses are intended to guarantee your freedom to share and change free software--to make
sure the software is free for all its users.
This license, the Lesser General Public License, applies to some specially designated software packages - typically
libraries - of the Free Software Foundation and other authors who decide to use it. You can use it too, but we
suggest you first think carefully about whether this license or the ordinary General Public License is the better
strategy to use in any particular case, based on the explanations below.
When we speak of free software, we are referring to freedom of use, not price. Our General Public Licenses are
designed to make sure that you have the freedom to distribute copies of free software (and charge for this service if
you wish); that you receive source code or can get it if you want it; that you can change the software and use pieces
of it in new free programs; and that you are informed that you can do these things.
To protect your rights, we need to make restrictions that forbid distributors to deny you these rights or to ask you to
surrender these rights. These restrictions translate to certain responsibilities for you if you distribute copies of the
library or if you modify it.
For example, if you distribute copies of the library, whether gratis or for a fee, you must give the recipients all the
rights that we gave you. You must make sure that they, too, receive or can get the source code. If you link other code
with the library, you must provide complete object files to the recipients, so that they can relink them with the
library after making changes to the library and recompiling it. And you must show them these terms so they know
their rights.
We protect your rights with a two-step method: (1) we copyright the library, and (2) we offer you this license, which
gives you legal permission to copy, distribute and/or modify the library.
To protect each distributor, we want to make it very clear that there is no warranty for the free library. Also, if the
library is modified by someone else and passed on, the recipients should know that what they have is not the original
version, so that the original author’s reputation will not be affected by problems that might be introduced by others.
Finally, software patents pose a constant threat to the existence of any free program. We wish to make sure that a
company cannot effectively restrict the users of a free program by obtaining a restrictive license from a patent
holder. Therefore, we insist that any patent license obtained for a version of the library must be consistent with the
full freedom of use specified in this license.
Most GNU software, including some libraries, is covered by the ordinary GNU General Public License. This
license, the GNU Lesser General Public License, applies to certain designated libraries, and is quite different from
the ordinary General Public License. We use this license for certain libraries in order to permit linking those
libraries into non-free programs.
When a program is linked with a library, whether statically or using a shared library, the combination of the two is
legally speaking a combined work, a derivative of the original library. The ordinary General Public License
therefore permits such linking only if the entire combination fits its criteria of freedom. The Lesser General Public
License permits more lax criteria for linking other code with the library.
We call this license the "Lesser" General Public License because it does Less to protect the user’s freedom than the
ordinary General Public License. It also provides other free software developers Less of an advantage over
competing non-free programs. These disadvantages are the reason we use the ordinary General Public License for
many libraries. However, the Lesser license provides advantages in certain special circumstances.
For example, on rare occasions, there may be a special need to encourage the widest possible use of a certain
library, so that it becomes a de-facto standard. To achieve this, non-free programs must be allowed to use the library.
A more frequent case is that a free library does the same job as widely used non-free libraries. In this case, there is
little to gain by limiting the free library to free software only, so we use the Lesser General Public License.
In other cases, permission to use a particular library in non-free programs enables a greater number of people to use
a large body of free software. For example, permission to use the GNU C Library in non-free programs enables
many more people to use the whole GNU operating system, as well as its variant, the GNU/Linux operating system.
Although the Lesser General Public License is Less protective of the users’ freedom, it does ensure that the user of
a program that is linked with the Library has the freedom and the wherewithal to run that program using a modified
version of the Library.
151
Appendix E. License Conditions
The precise terms and conditions for copying, distribution and modification follow. Pay close attention to the
difference between a "work based on the library" and a "work that uses the library". The former contains code
derived from the library, whereas the latter must be combined with the library in order to run.
GNU LESSER GENERAL PUBLIC LICENSE
TERMS AND CONDITIONS FOR COPYING, DISTRIBUTION AND MODIFICATION
1. This License Agreement applies to any software library or other program which contains a notice placed by the
copyright holder or other authorized party saying it may be distributed under the terms of this Lesser General
Public License (also called "this License"). Each licensee is addressed as "you".
A "library" means a collection of software functions and/or data prepared so as to be conveniently linked with
application programs (which use some of those functions and data) to form executables.
The "Library", below, refers to any such software library or work which has been distributed under these terms.
A "work based on the Library" means either the Library or any derivative work under copyright law: that is to
say, a work containing the Library or a portion of it, either verbatim or with modifications and/or translated
straightforwardly into another language. (Hereinafter, translation is included without limitation in the term
"modification".)
"Source code" for a work means the preferred form of the work for making modifications to it. For a library,
complete source code means all the source code for all modules it contains, plus any associated interface
definition files, plus the scripts used to control compilation and installation of the library.
Activities other than copying, distribution and modification are not covered by this License; they are outside its
scope. The act of running a program using the Library is not restricted, and output from such a program is
covered only if its contents constitute a work based on the Library (independent of the use of the Library in a
tool for writing it). Whether that is true depends on what the Library does and what the program that uses the
Library does.
2. You may copy and distribute verbatim copies of the Library’s complete source code as you receive it, in any
medium, provided that you conspicuously and appropriately publish on each copy an appropriate copyright
notice and disclaimer of warranty; keep intact all the notices that refer to this License and to the absence of any
warranty; and distribute a copy of this License along with the Library.
You may charge a fee for the physical act of transferring a copy, and you may at your option offer warranty
protection in exchange for a fee.
3. You may modify your copy or copies of the Library or any portion of it, thus forming a work based on the
Library, and copy and distribute such modifications or work under the terms of Section 1 above, provided that
you also meet all of these conditions:
a) The modified work must itself be a software library.
b) You must cause the files modified to carry prominent notices stating that you changed the files and the date
of any change.
c) You must cause the whole of the work to be licensed at no charge to all third parties under the terms of this
License.
d) If a facility in the modified Library refers to a function or a table of data to be supplied by an application
program that uses the facility, other than as an argument passed when the facility is invoked, then you must
make a good faith effort to ensure that, in the event an application does not supply such function or table, the
facility still operates, and performs whatever part of its purpose remains meaningful.
(For example, a function in a library to compute square roots has a purpose that is entirely well-defined
independent of the application. Therefore, Subsection 2d requires that any application-supplied function or
table used by this function must be optional: if the application does not supply it, the square root function must
still compute square roots.)
These requirements apply to the modified work as a whole. If identifiable sections of that work are not derived
from the Library, and can be reasonably considered independent and separate works in themselves, then this
152
Appendix E. License Conditions
License, and its terms, do not apply to those sections when you distribute them as separate works. But when
you distribute the same sections as part of a whole which is a work based on the Library, the distribution of the
whole must be on the terms of this License, whose permissions for other licensees extend to the entire whole,
and thus to each and every part regardless of who wrote it.
Thus, it is not the intent of this section to claim rights or contest your rights to work written entirely by you;
rather, the intent is to exercise the right to control the distribution of derivative or collective works based on the
Library.
In addition, mere aggregation of another work not based on the Library with the Library (or with a work based
on the Library) on a volume of a storage or distribution medium does not bring the other work under the scope
of this License.
4. You may opt to apply the terms of the ordinary GNU General Public License instead of this License to a given
copy of the Library. To do this, you must alter all the notices that refer to this License, so that they refer to the
ordinary GNU General Public License, version 2, instead of to this License. (If a newer version than version 2
of the ordinary GNU General Public License has appeared, then you can specify that version instead if you
wish.) Do not make any other change in these notices.
Once this change is made in a given copy, it is irreversible for that copy, so the ordinary GNU General Public
License applies to all subsequent copies and derivative works made from that copy.
This option is useful when you wish to copy part of the code of the Library into a program that is not a library.
5. You may copy and distribute the Library (or a portion or derivative of it, under Section 2) in object code or
executable form under the terms of Sections 1 and 2 above provided that you accompany it with the complete
corresponding machine-readable source code, which must be distributed under the terms of Sections 1 and 2
above on a medium customarily used for software interchange.
If distribution of object code is made by offering access to copy from a designated place, then offering
equivalent access to copy the source code from the same place satisfies the requirement to distribute the source
code, even though third parties are not compelled to copy the source along with the object code.
6. A program that contains no derivative of any portion of the Library, but is designed to work with the Library by
being compiled or linked with it, is called a "work that uses the Library". Such a work, in isolation, is not a
derivative work of the Library, and therefore falls outside the scope of this License.
However, linking a "work that uses the Library" with the Library creates an executable that is a derivative of the
Library (because it contains portions of the Library), rather than a "work that uses the library". The executable
is therefore covered by this License. Section 6 states terms for distribution of such executables.
When a "work that uses the Library" uses material from a header file that is part of the Library, the object code
for the work may be a derivative work of the Library even though the source code is not. Whether this is true is
especially significant if the work can be linked without the Library, or if the work is itself a library. The
threshold for this to be true is not precisely defined by law.
If such an object file uses only numerical parameters, data structure layouts and accessors, and small macros
and small inline functions (ten lines or less in length), then the use of the object file is unrestricted, regardless
of whether it is legally a derivative work. (Executables containing this object code plus portions of the Library
will still fall under Section 6.)
Otherwise, if the work is a derivative of the Library, you may distribute the object code for the work under the
terms of Section 6. Any executables containing that work also fall under Section 6, whether or not they are
linked directly with the Library itself.
7. As an exception to the Sections above, you may also combine or link a "work that uses the Library" with the
Library to produce a work containing portions of the Library, and distribute that work under terms of your
choice, provided that the terms permit modification of the work for the customer’s own use and reverse
engineering for debugging such modifications.
153
Appendix E. License Conditions
You must give prominent notice with each copy of the work that the Library is used in it and that the Library
and its use are covered by this License. You must supply a copy of this License. If the work during execution
displays copyright notices, you must include the copyright notice for the Library among them, as well as a
reference directing the user to the copy of this License. Also, you must do one of these things:
a) Accompany the work with the complete corresponding machine-readable source code for the Library
including whatever changes were used in the work (which must be distributed under Sections 1 and 2 above);
and, if the work is an executable linked with the Library, with the complete machine-readable "work that uses
the Library", as object code and/or source code, so that the user can modify the Library and then relink to
produce a modified executable containing the modified Library. (It is understood that the user who changes the
contents of definitions files in the Library will not necessarily be able to recompile the application to use the
modified definitions.)
b) Use a suitable shared library mechanism for linking with the Library. A suitable mechanism is one that (1)
uses at run time a copy of the library already present on the user’s computer system, rather than copying library
functions into the executable, and (2) will operate properly with a modified version of the library, if the user
installs one, as long as the modified version is interface-compatible with the version that the work was made
with.
c) Accompany the work with a written offer, valid for at least three years, to give the same user the materials
specified in Subsection 6a, above, for a charge no more than the cost of performing this distribution.
d) If distribution of the work is made by offering access to copy from a designated place, offer equivalent
access to copy the above specified materials from the same place.
e) Verify that the user has already received a copy of these materials or that you have already sent this user a
copy.
For an executable, the required form of the "work that uses the Library" must include any data and utility
programs needed for reproducing the executable from it. However, as a special exception, the materials to be
distributed need not include anything that is normally distributed (in either source or binary form) with the
major components (compiler, kernel, and so on) of the operating system on which the executable runs, unless
that component itself accompanies the executable.
It may happen that this requirement contradicts the license restrictions of other proprietary libraries that do not
normally accompany the operating system. Such a contradiction means you cannot use both them and the
Library together in an executable that you distribute.
8. You may place library facilities that are a work based on the Library side-by-side in a single library together
with other library facilities not covered by this License, and distribute such a combined library, provided that
the separate distribution of the work based on the Library and of the other library facilities is otherwise
permitted, and provided that you do these two things:
a) Accompany the combined library with a copy of the same work based on the Library, uncombined with any
other library facilities. This must be distributed under the terms of the Sections above.
b) Give prominent notice with the combined library of the fact that part of it is a work based on the Library, and
explaining where to find the accompanying uncombined form of the same work.
9. You may not copy, modify, sublicense, link with, or distribute the Library except as expressly provided under
this License. Any attempt otherwise to copy, modify, sublicense, link with, or distribute the Library is void, and
will automatically terminate your rights under this License. However, parties who have received copies, or
rights, from you under this License will not have their licenses terminated so long as such parties remain in full
compliance.
10. You are not required to accept this License, since you have not signed it. However, nothing else grants you
permission to modify or distribute the Library or its derivative works. These actions are prohibited by law if
you do not accept this License. Therefore, by modifying or distributing the Library (or any work based on the
Library), you indicate your acceptance of this License to do so, and all its terms and conditions for copying,
distributing or modifying the Library or works based on it.
154
Appendix E. License Conditions
11. Each time you redistribute the Library (or any work based on the Library), the recipient automatically receives
a license from the original licensor to copy, distribute, link with or modify the Library subject to these terms
and conditions. You may not impose any further restrictions on the recipients’ exercise of the rights granted
herein. You are not responsible for enforcing compliance by third parties with this License.
12. If, as a consequence of a court judgment or allegation of patent infringement or for any other reason (not
limited to patent issues), conditions are imposed on you (whether by court order, agreement or otherwise) that
contradict the conditions of this License, they do not excuse you from the conditions of this License. If you
cannot distribute so as to satisfy simultaneously your obligations under this License and any other pertinent
obligations, then as a consequence you may not distribute the Library at all. For example, if a patent license
would not permit royalty-free redistribution of the Library by all those who receive copies directly or indirectly
through you, then the only way you could satisfy both it and this License would be to refrain entirely from
distribution of the Library.
If any portion of this section is held invalid or unenforceable under any particular circumstance, the balance of
the section is intended to apply, and the section as a whole is intended to apply in other circumstances.
It is not the purpose of this section to induce you to infringe any patents or other property right claims or to
contest validity of any such claims; this section has the sole purpose of protecting the integrity of the free
software distribution system which is implemented by public license practices. Many people have made
generous contributions to the wide range of software distributed through that system in reliance on consistent
application of that system; it is up to the author/donor to decide if he or she is willing to distribute software
through any other system and a licensee cannot impose that choice.
This section is intended to make thoroughly clear what is believed to be a consequence of the rest of this
License.
13. If the distribution and/or use of the Library is restricted in certain countries either by patents or by copyrighted
interfaces, the original copyright holder who places the Library under this License may add an explicit
geographical distribution limitation excluding those countries, so that distribution is permitted only in or
among countries not thus excluded. In such case, this License incorporates the limitation as if written in the
body of this License.
14. The Free Software Foundation may publish revised and/or new versions of the Lesser General Public License
from time to time. Such new versions will be similar in spirit to the present version, but may differ in detail to
address new problems or concerns.
Each version is given a distinguishing version number. If the Library specifies a version number of this License
which applies to it and "any later version", you have the option of following the terms and conditions either of
that version or of any later version published by the Free Software Foundation. If the Library does not specify a
license version number, you may choose any version ever published by the Free Software Foundation.
15. If you wish to incorporate parts of the Library into other free programs whose distribution conditions are
incompatible with these, write to the author to ask for permission. For software which is copyrighted by the
Free Software Foundation, write to the Free Software Foundation; we sometimes make exceptions for this. Our
decision will be guided by the two goals of preserving the free status of all derivatives of our free software and
of promoting the sharing and reuse of software generally.
NO WARRANTY
16. BECAUSE THE LIBRARY IS LICENSED FREE OF CHARGE, THERE IS NO WARRANTY FOR THE
LIBRARY, TO THE EXTENT PERMITTED BY APPLICABLE LAW. EXCEPT WHEN OTHERWISE
STATED IN WRITING THE COPYRIGHT HOLDERS AND/OR OTHER PARTIES PROVIDE THE
LIBRARY "AS IS" WITHOUT WARRANTY OF ANY KIND, EITHER EXPRESSED OR IMPLIED,
INCLUDING, BUT NOT LIMITED TO, THE IMPLIED WARRANTIES OF MERCHANTABILITY AND
FITNESS FOR A PARTICULAR PURPOSE. THE ENTIRE RISK AS TO THE QUALITY AND
PERFORMANCE OF THE LIBRARY IS WITH YOU. SHOULD THE LIBRARY PROVE DEFECTIVE,
YOU ASSUME THE COST OF ALL NECESSARY SERVICING, REPAIR OR CORRECTION.
155
Appendix E. License Conditions
17. IN NO EVENT UNLESS REQUIRED BY APPLICABLE LAW OR AGREED TO IN WRITING WILL ANY
COPYRIGHT HOLDER, OR ANY OTHER PARTY WHO MAY MODIFY AND/OR REDISTRIBUTE THE
LIBRARY AS PERMITTED ABOVE, BE LIABLE TO YOU FOR DAMAGES, INCLUDING ANY
GENERAL, SPECIAL, INCIDENTAL OR CONSEQUENTIAL DAMAGES ARISING OUT OF THE USE
OR INABILITY TO USE THE LIBRARY (INCLUDING BUT NOT LIMITED TO LOSS OF DATA OR
DATA BEING RENDERED INACCURATE OR LOSSES SUSTAINED BY YOU OR THIRD PARTIES OR
A FAILURE OF THE LIBRARY TO OPERATE WITH ANY OTHER SOFTWARE), EVEN IF SUCH
HOLDER OR OTHER PARTY HAS BEEN ADVISED OF THE POSSIBILITY OF SUCH DAMAGES.
The Python license
Terms and conditions for accessing or otherwise using Python
PSF LICENSE AGREEMENT
1. This LICENSE AGREEMENT is between the Python Software Foundation ("PSF"), and the Individual or
Organization ("Licensee") accessing and otherwise using Python 2.1.1 software in source or binary form and
its associated documentation.
2. Subject to the terms and conditions of this License Agreement, PSF hereby grants Licensee a nonexclusive,
royalty-free, world-wide license to reproduce, analyze, test, perform and/or display publicly, prepare derivative
works, distribute, and otherwise use Python 2.1.1 alone or in any derivative version, provided, however, that
PSF’s License Agreement and PSF’s notice of copyright, i.e., "Copyright (c) 2001 Python Software Foundation;
All Rights Reserved" are retained in Python 2.1.1 alone or in any derivative version prepared by Licensee.
3. In the event Licensee prepares a derivative work that is based on or incorporates Python 2.1.1 or any part
thereof, and wants to make the derivative work available to others as provided herein, then Licensee hereby
agrees to include in any such work a brief summary of the changes made to Python 2.1.1.
4. PSF is making Python 2.1.1 available to Licensee on an "AS IS" basis. PSF MAKES NO
REPRESENTATIONS OR WARRANTIES, EXPRESS OR IMPLIED. BY WAY OF EXAMPLE, BUT NOT
LIMITATION, PSF MAKES NO AND DISCLAIMS ANY REPRESENTATION OR WARRANTY OF
MERCHANTABILITY OR FITNESS FOR ANY PARTICULAR PURPOSE OR THAT THE USE OF
PYTHON 2.1.1 WILL NOT INFRINGE ANY THIRD PARTY RIGHTS.
5. PSF SHALL NOT BE LIABLE TO LICENSEE OR ANY OTHER USERS OF PYTHON 2.1.1 FOR ANY
INCIDENTAL, SPECIAL, OR CONSEQUENTIAL DAMAGES OR LOSS AS A RESULT OF MODIFYING,
DISTRIBUTING, OR OTHERWISE USING PYTHON 2.1.1, OR ANY DERIVATIVE THEREOF, EVEN IF
ADVISED OF THE POSSIBILITY THEREOF.
6. This License Agreement will automatically terminate upon a material breach of its terms and conditions.
7. Nothing in this License Agreement shall be deemed to create any relationship of agency, partnership, or joint
venture between PSF and Licensee. This License Agreement does not grant permission to use PSF trademarks
or trade name in a trademark sense to endorse or promote products or services of Licensee, or any third party.
8. By copying, installing or otherwise using Python 2.1.1, Licensee agrees to be bound by the terms and
conditions of this License Agreement.
CWI PERMISSIONS STATEMENT AND DISCLAIMER
Copyright (c) 1991 - 1995, Stichting Mathematisch Centrum Amsterdam, The Netherlands. All rights reserved.
Permission to use, copy, modify, and distribute this software and its documentation for any purpose and without fee
is hereby granted, provided that the above copyright notice appear in all copies and that both that copyright notice
and this permission notice appear in supporting documentation, and that the name of Stichting Mathematisch
Centrum or CWI not be used in advertising or publicity pertaining to distribution of the software without specific,
written prior permission.
STICHTING MATHEMATISCH CENTRUM DISCLAIMS ALL WARRANTIES WITH REGARD TO THIS
SOFTWARE, INCLUDING ALL IMPLIED WARRANTIES OF MERCHANTABILITY AND FITNESS, IN NO
EVENT SHALL STICHTING MATHEMATISCH CENTRUM BE LIABLE FOR ANY SPECIAL, INDIRECT
OR CONSEQUENTIAL DAMAGES OR ANY DAMAGES WHATSOEVER RESULTING FROM LOSS OF
156
Appendix E. License Conditions
USE, DATA OR PROFITS, WHETHER IN AN ACTION OF CONTRACT, NEGLIGENCE OR OTHER
TORTIOUS ACTION, ARISING OUT OF OR IN CONNECTION WITH THE USE OR PERFORMANCE OF
THIS SOFTWARE.
Python Imaging Library
Terms
The Python Imaging Library is
Copyright (c) 1997-2001 by Secret Labs AB
Copyright (c) 1995-2001 by Fredrik Lundh
By obtaining, using, and/or copying this software and/or its associated documentation, you agree that you have
read, understood, and will comply with the following terms and conditions:
Permission to use, copy, modify, and distribute this software and its associated documentation for any purpose and
without fee is hereby granted, provided that the above copyright notice appears in all copies, and that both that
copyright notice and this permission notice appear in supporting documentation, and that the name of Secret Labs
AB or the author not be used in advertising or publicity pertaining to distribution of the software without specific,
written prior permission.
SECRET LABS AB AND THE AUTHOR DISCLAIMS ALL WARRANTIES WITH REGARD TO THIS
SOFTWARE, INCLUDING ALL IMPLIED WARRANTIES OF MERCHANTABILITY AND FITNESS. IN NO
EVENT SHALL SECRET LABS AB OR THE AUTHOR BE LIABLE FOR ANY SPECIAL, INDIRECT OR
CONSEQUENTIAL DAMAGES OR ANY DAMAGES WHATSOEVER RESULTING FROM LOSS OF USE,
DATA OR PROFITS, WHETHER IN AN ACTION OF CONTRACT, NEGLIGENCE OR OTHER TORTIOUS
ACTION, ARISING OUT OF OR IN CONNECTION WITH THE USE OR PERFORMANCE OF THIS
SOFTWARE.
The BSD license
Terms
Copyright (c) <YEAR>, <OWNER>. All rights reserved.
Redistribution and use in source and binary forms, with or without modification, are permitted provided that the
following conditions are met:
Redistributions of source code must retain the above copyright notice, this list of conditions and the following
disclaimer. Redistributions in binary form must reproduce the above copyright notice, this list of conditions and the
following disclaimer in the documentation and/or other materials provided with the distribution. Neither the name
of the <ORGANIZATION> nor the names of its contributors may be used to endorse or promote products derived
from this software without specific prior written permission.
THIS SOFTWARE IS PROVIDED BY THE COPYRIGHT HOLDERS AND CONTRIBUTORS "AS IS" AND
ANY EXPRESS OR IMPLIED WARRANTIES, INCLUDING, BUT NOT LIMITED TO, THE IMPLIED
WARRANTIES OF MERCHANTABILITY AND FITNESS FOR A PARTICULAR PURPOSE ARE
DISCLAIMED. IN NO EVENT SHALL THE REGENTS OR CONTRIBUTORS BE LIABLE FOR ANY
DIRECT, INDIRECT, INCIDENTAL, SPECIAL, EXEMPLARY, OR CONSEQUENTIAL DAMAGES
(INCLUDING, BUT NOT LIMITED TO, PROCUREMENT OF SUBSTITUTE GOODS OR SERVICES; LOSS
OF USE, DATA, OR PROFITS; OR BUSINESS INTERRUPTION) HOWEVER CAUSED AND ON ANY
THEORY OF LIABILITY, WHETHER IN CONTRACT, STRICT LIABILITY, OR TORT (INCLUDING
NEGLIGENCE OR OTHERWISE) ARISING IN ANY WAY OUT OF THE USE OF THIS SOFTWARE, EVEN
IF ADVISED OF THE POSSIBILITY OF SUCH DAMAGE.
157
Appendix E. License Conditions
The MIT license
Terms
Copyright (c) 1998 Free Software Foundation, Inc.
Permission is hereby granted, free of charge, to any person obtaining a copy of this software and associated
documentation files (the "Software"), to deal in the Software without restriction, including without limitation the
rights to use, copy, modify, merge, publish, distribute, distribute with modifications, sublicense, and/or sell copies of
the Software, and to permit persons to whom the Software is furnished to do so, subject to the following conditions:
The above copyright notice and this permission notice shall be included in all copies or substantial portions of the
Software.
THE SOFTWARE IS PROVIDED "AS IS", WITHOUT WARRANTY OF ANY KIND, EXPRESS OR IMPLIED,
INCLUDING BUT NOT LIMITED TO THE WARRANTIES OF MERCHANTABILITY, FITNESS FOR A
PARTICULAR PURPOSE AND NONINFRINGEMENT. IN NO EVENT SHALL THE ABOVE COPYRIGHT
HOLDERS BE LIABLE FOR ANY CLAIM, DAMAGES OR OTHER LIABILITY, WHETHER IN AN ACTION
OF CONTRACT, TORT OR OTHERWISE, ARISING FROM, OUT OF OR IN CONNECTION WITH THE
SOFTWARE OR THE USE OR OTHER DEALINGS IN THE SOFTWARE.
Except as contained in this notice, the name(s) of the above copyright holders shall not be used in advertising or
otherwise to promote the sale, use or other dealings in this Software without prior written authorization.
The DHCP license
Terms
Copyright (c) 1996-1999 Internet Software Consortium.
Use is subject to license terms which appear in the file named ISC-LICENSE that should have accompanied this file
when you received it. If a file named ISC-LICENSE did not accompany this file, or you are not sure the one you
have is correct, you may obtain an applicable copy of the license at:
http://www.isc.org/isc-license-1.0.html
This file is part of the ISC DHCP distribution. The documentation associated with this file is listed in the file
DOCUMENTATION, included in the top-level directory of this release.
Support and other services are available for ISC products - see http://www.isc.org for more information.
The OpenSSL license
Terms
Copyright (c) 1998-2001 The OpenSSL Project. All rights reserved.
Redistribution and use in source and binary forms, with or without modification, are permitted provided that the
following conditions are met:
1. Redistributions of source code must retain the above copyright notice, this list of conditions and the following
disclaimer.
2. Redistributions in binary form must reproduce the above copyright notice, this list of conditions and the
following disclaimer in the documentation and/or other materials provided with the distribution.
3. All advertising materials mentioning features or use of this software must display the following
acknowledgment:
"This product includes software developed by the OpenSSL Project for use in the OpenSSL Toolkit.
(http://www.openssl.org/)"
158
Appendix E. License Conditions
4. The names "OpenSSL Toolkit" and "OpenSSL Project" must not be used to endorse or promote products
derived from this software without prior written permission. For written permission, please contact
[email protected] (mailto:[email protected]).
5. Products derived from this software may not be called "OpenSSL" nor may "OpenSSL" appear in their names
without prior written permission of the OpenSSL Project.
6. Redistributions of any form whatsoever must retain the following acknowledgment:
"This product includes software developed by the OpenSSL Project for use in the OpenSSL Toolkit
(http://www.openssl.org/)"
THIS SOFTWARE IS PROVIDED BY THE OpenSSL PROJECT “AS IS” AND ANY EXPRESSED OR
IMPLIED WARRANTIES, INCLUDING, BUT NOT LIMITED TO, THE IMPLIED WARRANTIES OF
MERCHANTABILITY AND FITNESS FOR A PARTICULAR PURPOSE ARE DISCLAIMED. IN NO EVENT
SHALL THE OpenSSL PROJECT OR ITS CONTRIBUTORS BE LIABLE FOR ANY DIRECT, INDIRECT,
INCIDENTAL, SPECIAL, EXEMPLARY, OR CONSEQUENTIAL DAMAGES (INCLUDING, BUT NOT
LIMITED TO, PROCUREMENT OF SUBSTITUTE GOODS OR SERVICES; LOSS OF USE, DATA, OR
PROFITS; OR BUSINESS INTERRUPTION) HOWEVER CAUSED AND ON ANY THEORY OF LIABILITY,
WHETHER IN CONTRACT, STRICT LIABILITY, OR TORT (INCLUDING NEGLIGENCE OR OTHERWISE)
ARISING IN ANY WAY OUT OF THE USE OF THIS SOFTWARE, EVEN IF ADVISED OF THE
POSSIBILITY OF SUCH DAMAGE.
The bzip2 license
Terms
This program, "bzip2" and associated library "libbzip2", are copyright (C) 1996-2000 Julian R Seward. All rights
reserved.
Redistribution and use in source and binary forms, with or without modification, are permitted provided that the
following conditions are met:
1. Redistributions of source code must retain the above copyright notice, this list of conditions and the following
disclaimer.
2. The origin of this software must not be misrepresented; you must not claim that you wrote the original
software. If you use this software in a product, an acknowledgment in the product documentation would be
appreciated but is not required.
3. Altered source versions must be plainly marked as such, and must not be misrepresented as being the original
software.
4. The name of the author may not be used to endorse or promote products derived from this software without
specific prior written permission.
THIS SOFTWARE IS PROVIDED BY THE AUTHOR “AS IS” AND ANY EXPRESS OR IMPLIED
WARRANTIES, INCLUDING, BUT NOT LIMITED TO, THE IMPLIED WARRANTIES OF
MERCHANTABILITY AND FITNESS FOR A PARTICULAR PURPOSE ARE DISCLAIMED. IN NO EVENT
SHALL THE AUTHOR BE LIABLE FOR ANY DIRECT, INDIRECT, INCIDENTAL, SPECIAL, EXEMPLARY,
OR CONSEQUENTIAL DAMAGES (INCLUDING, BUT NOT LIMITED TO, PROCUREMENT OF
SUBSTITUTE GOODS OR SERVICES; LOSS OF USE, DATA, OR PROFITS; OR BUSINESS
INTERRUPTION) HOWEVER CAUSED AND ON ANY THEORY OF LIABILITY, WHETHER IN
CONTRACT, STRICT LIABILITY, OR TORT (INCLUDING NEGLIGENCE OR OTHERWISE) ARISING IN
ANY WAY OUT OF THE USE OF THIS SOFTWARE, EVEN IF ADVISED OF THE POSSIBILITY OF SUCH
DAMAGE.
Julian Seward, Cambridge, UK.
159
Appendix E. License Conditions
[email protected] (mailto:[email protected])
The lilo license
Terms
LILO program code, documentation and auxiliary programs are Copyright 1992-1998 Werner Almesberger. All
rights reserved.
Redistribution and use in source and binary forms of parts of or the whole original or derived work are permitted
provided that the original work is properly attributed to the author. The name of the author may not be used to
endorse or promote products derived from this software without specific prior written permission. This work is
provided "as is" and without any express or implied warranties.
The Vovida license
The Vovida Software License, Version 1.0
Copyright (c) 2000 Vovida Networks, Inc. All rights reserved.
Redistribution and use in source and binary forms, with or without modification, are permitted provided that the
following conditions are met:
1. Redistributions of source code must retain the above copyright notice, this list of conditions and the following
disclaimer.
2. Redistributions in binary form must reproduce the above copyright notice, this list of conditions and the
following disclaimer in the documentation and/or other materials provided with the distribution.
3. The names "VOCAL", "Vovida Open Communication Application Library", and "Vovida Open
Communication Application Library (VOCAL)" must not be used to endorse or promote products derived from
this software without prior written permission. For written permission, please contact [email protected].
4. Products derived from this software may not be called "VOCAL", nor may "VOCAL" appear in their name,
without prior written permission.
THIS SOFTWARE IS PROVIDED "AS IS" AND ANY EXPRESSED OR IMPLIED WARRANTIES,
INCLUDING, BUT NOT LIMITED TO, THE IMPLIED WARRANTIES OF MERCHANTABILITY, FITNESS
FOR A PARTICULAR PURPOSE, TITLE AND NON-INFRINGEMENT ARE DISCLAIMED. IN NO EVENT
SHALL VOVIDA NETWORKS, INC. OR ITS CONTRIBUTORS BE LIABLE FOR ANY DAMAGES IN
EXCESS OF $1,000, NOR FOR ANY INDIRECT, INCIDENTAL, SPECIAL, EXEMPLARY, OR
CONSEQUENTIAL DAMAGES (INCLUDING, BUT NOT LIMITED TO, PROCUREMENT OF SUBSTITUTE
GOODS OR SERVICES; LOSS OF USE, DATA, OR PROFITS; OR BUSINESS INTERRUPTION) HOWEVER
CAUSED AND ON ANY THEORY OF LIABILITY, WHETHER IN CONTRACT, STRICT LIABILITY, OR
TORT (INCLUDING NEGLIGENCE OR OTHERWISE) ARISING IN ANY WAY OUT OF THE USE OF THIS
SOFTWARE, EVEN IF ADVISED OF THE POSSIBILITY OF SUCH DAMAGE.
The Cavium license
The Cavium License
Copyright (c) 2003-2004 Cavium Networks ([email protected]). All rights reserved.
Redistribution and use in source and binary forms, with or without modification, are permitted provided that the
following conditions are met:
1. Redistributions of source code must retain the above copyright notice, this list of conditions and the following
disclaimer.
2. Redistributions in binary form must reproduce the above copyright notice, this list of conditions and the
following disclaimer in the documentation and/or other materials provided with the distribution.
160
Appendix E. License Conditions
3. Cavium Networks’ name may not be used to endorse or promote products derived from this software without
specific prior written permission.
This Software,including technical data,may be subject to U.S. export control laws, including the U.S. Export
Administration Act and its associated regulations, and may be subject to export or import regulations in other
countries.You warrant that You will comply strictly in all respects with all such regulations and acknowledge that
you have the responsibility to obtain licenses to export, re-export or import the Software.
TO THE MAXIMUM EXTENT PERMITTED BY LAW, THE SOFTWARE IS PROVIDED "AS IS" AND WITH
ALL FAULTS AND CAVIUM MAKES NO PROMISES, REPRESENTATIONS OR WARRANTIES, EITHER
EXPRESS,IMPLIED,STATUTORY, OR OTHERWISE, WITH RESPECT TO THE SOFTWARE, INCLUDING
ITS CONDITION,ITS CONFORMITY TO ANY REPRESENTATION OR DESCRIPTION, OR THE
EXISTENCE OF ANY LATENT OR PATENT DEFECTS, AND CAVIUM SPECIFICALLY DISCLAIMS ALL
IMPLIED (IF ANY) WARRANTIES OF TITLE, MERCHANTABILITY, NONINFRINGEMENT,FITNESS FOR
A PARTICULAR PURPOSE,LACK OF VIRUSES, ACCURACY OR COMPLETENESS, QUIET ENJOYMENT,
QUIET POSSESSION OR CORRESPONDENCE TO DESCRIPTION. THE ENTIRE RISK ARISING OUT OF
USE OR PERFORMANCE OF THE SOFTWARE LIES WITH YOU.
The zlib license
Terms
Copyright (C) 1995-1998 Jean-loup Gailly and Mark Adler.
This software is provided ’as-is’, without any express or implied warranty. In no event will the authors be held
liable for any damages arising from the use of this software.
Permission is granted to anyone to use this software for any purpose, including commercial applications, and to
alter it and redistribute it freely, subject to the following restrictions:
1. The origin of this software must not be misrepresented; you must not claim that you wrote the original
software. If you use this software in a product, an acknowledgment in the product documentation would be
appreciated but is not required.
2. Altered source versions must be plainly marked as such, and must not be misrepresented as being the original
software.
3. This notice may not be removed or altered from any source distribution.
Jean-loup Gailly
<[email protected]>
Mark Adler
<[email protected]>
161
Appendix F. Obtaining Support for Your 3Com
Products
3Com offers product registration, case management, and repair services through eSupport.3com.com. You must
have a user name and password to access these services, which are described in this appendix.
Register Your Product to Gain Service Benefits
To take advantage of warranty and other service benefits, you must first register your product at:
http://eSupport.3com.com/
3Com eSupport services are based on accounts that are created or that you are authorized to access.
Solve Problems Online
3Com offers these support tools:
•
3Com Knowledgebase - Helps you to troubleshoot 3Com products. This query-based interactive tool is located at:
http://knowledgebase.3com.com/
It contains thousands of technical solutions written by 3Com support engineers.
Purchase Extended Warranty and Professional Services
To enhance response times or extend your warranty benefits, you can purchase value-added services such as 24x7
telephone technical support, software upgrades, onsite assistance, or advanced hardware replacement.
Experienced engineers are available to manage your installation with minimal disruption to your network. Expert
assessment and implementation services are offered to fill resource gaps and ensure the success of your networking
projects. For more information on 3Com Extended Warranty and Professional Services, see:
http://www.3com.com/
Contact your authorized 3Com reseller or 3Com for additional product and support information. See the table of
access numbers later in this appendix.
Access Software Downloads
You are entitled to bug fix / maintenance releases for the version of software that you initially purchased with your
3Com product. To obtain access to this software, you need to register your product and then use the Serial Number
as your login. Restricted Software is available at:
http://eSupport.3com.com/
To obtain software releases that follow the software version that you originally purchased, 3Com recommends that
you buy an Express or Guardian contract, a Software Upgrades contract, or an equivalent support contract from
3Com or your reseller. Support contracts that include software upgrades cover feature enhancements, incremental
functionality, and bug fixes, but they do not include software that is released by 3Com as a separately ordered
product. Separately orderable software releases and licenses are listed in the 3Com Price List and are available for
purchase from your 3Com reseller.
Contact Us
3Com offers telephone, internet, and e-mail access to technical support and repair services. To access these services
for your region, use the appropriate telephone number, URL, or e-mail address from the table in the next section.
162
Appendix F. Obtaining Support for Your 3Com Products
Telephone Technical Support and Repair
To obtain telephone support as part of your warranty and other service benefits, you must first register your product
at:
http://eSupport.3com.com/
When you contact 3Com for assistance, please have the following information ready:
•
Product model name, part number, and serial number
•
A list of system hardware and software, including revision level
•
Diagnostic error messages
•
Details about recent configuration changes, if applicable
To send a product directly to 3Com for repair, you must first obtain a return materials authorization number (RMA).
Products sent to 3Com without authorization numbers clearly marked on the outside of the package will be returned
to the sender unopened, at the sender’s expense. If your product is registered and under warranty, you can obtain an
RMA number online at http://eSupport.3com.com/. First-time users must apply for a user name and password.
Telephone numbers are correct at the time of publication. Find a current directory of 3Com resources by region at:
http://csoweb4.3com.com/contactus/
Asia, Pacific Rim - Telephone Technical Support and Repair
Country
Telephone Number
Country
Telephone Number
Australia
1 800 678 515
Pakistan
+61 2 9937 5083
Hong Kong
800 933 486
Philippines
1235 61 266 2602 or 1800 1
888 9469
India
+61 2 9424 5179 or 000800 P.R. of China
650 1111
800 810 3033
Indonesia
001 803 61009
Singapore
800 6161 463
Japan
00531 616 439 or 03 5977
7991
S. Korea
080 333 3308
Malaysia
1800 801 777
Taiwan
00801 611 261
New Zealand
0800 446 398
Thailand
001 800 611 2000
You can also obtain support in this region at this e-mail address:
<[email protected]>
Or request a return material authorization number (RMA) by FAX using this number: +61 2 9937 5048
Europe, Middle East, and Africa - Telephone Technical Support and Repair
From anywhere in these regions, call: +44 (0)1442 435529 From the following countries, call the appropriate
number:
Country
Telephone Number
Country
Telephone Number
Austria
01 7956 7124
Luxembourg
342 0808128
Belgium
070 700 770
Netherlands
0900 777 7737
Denmark
7010 7289
Norway
815 33 047
Finland
01080 2783
Poland
00800 441 1357
France
0825 809 622
Portugal
707 200 123
Germany
01805 404 747
South Africa
0800 995 014
Hungary
06800 12813
Spain
9 021 60455
Ireland
01407 3387
Sweden
07711 14453
Israel
1800 945 3794
Switzerland
08488 50112
163
Appendix F. Obtaining Support for Your 3Com Products
Country
Italy
Telephone Number
199 161346
Country
U.K.
Telephone Number
0870 909 3266
You can also obtain support in this region using this URL:
http://emea.3com.com/support/email.html
Latin America - Telephone Technical Support and Repair
Country
Telephone Number
Country
Telephone Number
Antigua
1 800 988 2112
Guatemala
AT&T +800 998 2112
Argentina
0 810 444 3COM
Haiti
57 1 657 0888
Aruba
1 800 998 2112
Honduras
AT&T +800 998 2112
Bahamas
1 800 998 2112
Jamaica
1 800 998 2112
Barbados
1 800 998 2112
Martinique
571 657 0888
Belize
52 5 201 0010
Mexico
01 800 849CARE
Bermuda
1 800 998 2112
Nicaragua
AT&T +800 998 2112
Bonaire
1 800 998 2112
Panama
AT&T +800 998 2112
Brazil
0800 13 3COM
Paraguay
54 11 4894 1888
Cayman
1 800 998 2112
Peru
AT&T +800 998 2112
Chile
AT&T +800 998 2112
Puerto Rico
1 800 998 2112
Colombia
AT&T +800 998 2112
Salvador
AT&T +800 998 2112
Costa Rica
AT&T +800 998 2112
Trinidad and Tobago
1 800 998 2112
Curacao
1 800 998 2112
Uruguay
AT&T +800 998 2112
Ecuador
AT&T +800 998 2112
Venezuela
AT&T +800 998 2112
Dominican Republic
AT&T +800 998 2112
Virgin Islands
57 1 657 0888
You can also obtain support in this region in the following ways:
•
Spanish speakers, enter the URL: http://lat.3com.com/lat/support/form.html
•
Portuguese speakers, enter the URL: http://lat.3com.com/br/support/form.html
•
English speakers in Latin America, send e-mail to: <[email protected]>
US and Canada - Telephone Technical Support and Repair
All locations:
Network Jacks; Wired or Wireless
Network Interface Cards:
All other 3Com products:
1 847-262-0070
1 800 876 3266
164
Index
accounts
for administration, 90
administration, 90
AFS, 140
alarm, 98
e-mail errors, 107
hardware errors, 107
RADIUS errors, 107
SNMP errors, 107
Andrew File System, 140
apply configuration, 16, 87
ARP, 140
authentication
of administrator, 45
via RADIUS, 47
backup, 17, 88
Basic configuration
SIP, 69
via serial console, 37
cache, 144
capture log, 118
certificates, 54
signed, 55
change password, 41, 90
via serial console, 37
clear log, 98
client program, 140
clock, 94
configuration, 13
apply, 16, 87
date and time, 94
display, 89
failover, 113
IP address, 45
IP addresses and masks, 18
logging, 105
overview, 15
permanent, 4, 16
preliminary, 4, 16
RADIUS server, 50
use protocol, 45
via HTTPS, 46
configuration computers, 46
configuration interface, 45
cracker, 140
daemon program, 140
date
manual, 94
dedicated interface, 113
dedicated network, 113
default domain, 42
default gateway, 43
delete log entries, 98
Denial of Service, 140
DHCP, 140
DHCP requests
logging, 106
directly connected networks, 62
DMZ, 140
DMZ type, 57
configuration of DNS server, 122
configuration of firewall, 121
configuration of SIP clients, 122
DMZ/LAN type, 57
configuration of DNS server, 123
configuration of firewall, 122
configuration of SIP clients, 122
DNS, 19, 142
domain, 140
domain name server, 142
DoS, 140
dynamic routing, 141
e-mail server, 111
Edit column, 93
encryption key, 13
export log, 101
file format, 101
factory configuration, 88
failover, 112
configuration, 113
connecting the units, 112
dedicated interface, 113
dedicated network, 113
installation of units, 112
leaving a team, 116
reference hosts, 115
replace unit, 117
specification, 112
status, 115
failover team, 116
failover type, 114
File Transfer Protocol, 141
firewall, 141
flags, 102
FTP, 141
functions in 3Com VCX IP Telecommuting Module, 1
gateway, 43, 141
GNU, 147
GPL, 147
H.323, 125
hacker, 141
HTTPS, 141
for configuration, 46
ICMP, 141
ICMP codes, 134
ICMP type, 133
installing 3Com VCX IP Telecommuting Module, 5
interface, 62
status, 66
interface name, 62
165
interoperability
SIP, 71
IP, 142
IP address, 18, 141
log selection, 99
reserved, 139
via serial console, 37
IP intervals, 137
IP policy, 42
Kerberos, 140
LGPL, 150
license conditions, 147
limited test mode, 87
load
diagram, 103
scanning, 102
load configuration
via serial console, 39
load display, 102
log
clear, 98
log classes, 109
log display, 98
encrypted packets, 100
export to file, 101
flags, 102
IP address selection, 99
packet type selection, 98
protocol selection, 99
log on, 13
log out, 13
logging, 98, 105
configuration, 109
configuration logins, 109
DHCP requests, 106
of configuration, 47
packets to the Telecommuting Module, 106
save locally, 110
SIP, 70
SNMP requests, 106
spoofed packets, 106
via e-mail, 41, 110, 111
via syslog, 110, 111
magic ping, 5
mask/bits, 18
masquerading, 143
media stream, 78
monitor SIP servers, 69
monitoring
via network, 50
name query, 19
name server, 142
NAT, 143
navigation, 14
netmask, 18, 143
Network File system, 143
Network Information System/Yellow Pages, 143
network interface, 62
network mask, 143
network monitoring, 50
network settings, 60
network sniffing, 118
Network Time Protocol, 143
network topology, 67
networks and computers, 60
News, 143
NFS, 143
NIS/YP, 143
NNTP, 143
NTP, 95, 143
Open Windows, 144
packet, 144
log selection, 98
password, 13
change, 41, 90
pcap log, 118
permanent apply, 16
permanent configuration, 4, 16
physical device name, 62
ping, 144
ping policy, 42
port interval for media streams, 69
ports, 144
PPP, 144
preliminary configuration, 4, 16
protocol numbers, 136
protocols, 136, 144
log selection, 99
proxy, 144
RADIUS, 47
authentication, 47
for administrator users, 89
port, 47
secret, 47
RADIUS login, 13
RADIUS server, 47
configuration, 50
status, 49
radiusmux, 49
reboot Telecommuting Module
via web GUI, 96
reference hosts
failover, 115
relays, 145
reserved ports, 130
resource monitoring, 105
restart SIP module
via web GUI, 96
RFC, 145
RIP, 145
router, 43, 64, 145
routing, 145
166
dynamic, 141
of SIP traffic, 83
static, 146
save configuration, 17, 88
via serial console, 39
secret
RADIUS, 47
Secure Shell, 145
serial console, 36
basic configuration, 37
main menu, 36
serial number, 15, 89
server, 145
Service-Type, 50
shared secret
RADIUS, 47
show configuration, 89
signed certificates, 55
SIP, 69, 82, 125, 145
media stream, 78
SIP address, 86
SIP basic configuration, 69
SIP domains
static, 84
SIP headers, 126
SIP interoperability, 71
SIP license, 78
SIP methods, 82
SIP module
restart, 96
SIP servers
surroundings, 67
syslog, 110, 146
syslog server, 111
table look, 93
TCP, 146
Telecommuting Module functions, 1
Telecommuting Module name, 42
Telecommuting Module Type
configuration, 58
DMZ, 57
DMZ/LAN, 57
standalone, 58
test mode, 87
third party software, 147
time
manual, 94
via NTP, 95
time zone, 94
trap sending, 105
turn off the 3Com VCX IP Telecommuting Module, 11
UDP, 146
upgrade, 92
users
administration, 90
UUCP, 146
version control, 42
VLAN, 65
WELF, 101
World Wide Web, 146
WWW, 146
X Window System, 146
monitored, 69
SIP sessions, 126
status, 86
SIP users
status, 86
SLIP, 145
SLIRP, 145
SMTP, 145
sniffing, 118
SNMP, 50, 145
SNMP requests
logging, 106
sockets, 145
specification of failover, 112
SSH, 145
SSL, 145
standalone type, 58
configuration of DNS server, 123
configuration of SIP clients, 123
static routing, 64, 146
status
of failover, 115
STUN server, 80
subgroup
networks, 60
167