1
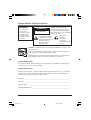
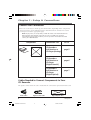
CD Recorder
and Player
User’s Guide
Changing Entertainment. Again.
CDRW120
15920520. Cover
1
9/24/02, 3:54 PM
Important Information
WARNING
To reduce the
risk of fire or
electric shock, do
not expose this
product or AC
charger to rain or
moisture.
WARNING
RISK OF ELECTRIC SHOCK
DO NOT OPEN
To reduce the risk of electric
shock, do not remove cover (or
back). No user serviceable parts
inside. Refer servicing to qualified
service personnel.
This symbol indicates
"dangerous voltage"
inside the product that
presents a risk of
electric shock or
personal injury.
This symbol
indicates
important
instructions
accompanying the
product.
Caution: To prevent electric shock, match wide blade of plug to wide
slot, fully insert.
Refer to the identification/rating label located on the back panel of
your product for its proper operating voltage.
FCC Regulations state that unauthorized changes or modifications to
this equipment may void the user’s authority to operate it.
Product Registration
Please fill out the product registration card and return it immediately. Returning the
card allows us to contact you if needed.
Product Information
Keep your sales receipt to obtain warranty parts and service and for proof of purchase.
Attach it here and record the serial and model numbers in case you need them. The
numbers are located on the back of the product.
Model No. _____________________________________________________________________
Serial No. ______________________________________________________________________
Purchase Date: _________________________________________________________________
Dealer/Address/Phone: __________________________________________________________
i
15920520. Cover
2
9/24/02, 3:54 PM
Table of Contents
Table of Contents
Chapter 1: Connections & Setup
Things to Consider Before Connecting Components ........................... 3
Choose Your Connection ........................................................................ 4
Cables Needed to Connect Components to Your
CD Recorder ............................................................................................ 4
CD Recorder + A/V Receiver or CD Player (Analog) ............................. 5
CD Recorder + A/V Receiver or CD Player (Digital Coaxial) ................. 6
CD Player + CD Recorder (Digital Optical) ............................................ 7
Plug in the CD Recorder ......................................................................... 8
Put Batteries in the Remote ................................................................... 8
Setting the Time ..................................................................................... 9
Setting the Sleep Timer .......................................................................... 9
Front of the CD Recorder ..................................................................... 10
The Buttons on the Remote Control ................................................... 12
Chapter 2: Playing CDs
Loading Discs ........................................................................................ 13
Playing a CD .......................................................................................... 13
Selecting and Searching a Track .......................................................... 13
Programming Tracks ............................................................................. 13
Repeat ................................................................................................... 14
Random ................................................................................................. 14
Chapter 3: Recording CDs
Copying a CD ........................................................................................ 15
Checking Remaining Record and Play Time ........................................ 15
Record Time .................................................................................... 15
Play Time ......................................................................................... 15
High-Speed Dubbing ............................................................................ 16
Finalizing Discs ...................................................................................... 16
Unfinalizing Discs (CD-RWs only) ........................................................ 17
Erasing Discs (CD-RWs only) ................................................................ 17
Erasing Single Tracks ...................................................................... 17
Erasing a Disc .................................................................................. 17
(continued on the next page)
1
15920520. TOC
1
9/24/02, 3:54 PM
Table of Contents
Recording from an External Source Using CD Sync
(Digital Synchronized) .......................................................................... 18
Recording from an External Source (Digital) ...................................... 19
Recording from an External Source (Analog) ..................................... 20
Recording and Dubbing Reminders .................................................... 21
Digital / Optical Recording ............................................................ 21
CD Disc Dubbing ............................................................................. 21
Chapter 4: Additional Information
Troubleshooting .................................................................................... 23
Display Messages ................................................................................. 24
FCC Information .................................................................................... 26
Care and Cleaning ................................................................................ 26
Limited Warranty .................................................................................. 27
2
15920520. TOC
2
9/24/02, 3:54 PM
Chapter 1 : Setup & Connections
Things to Consider Before Connecting Components
Protect Components From Power Surges
•
Connect all components before plugging any power cords into the wall outlet.
•
Always turn off the TV and other components before you connect or disconnect any
cables.
Position Cables to Avoid Audio Hum or Interference
•
Insert all cable plugs firmly into their jacks.
•
Place any Audio/Video (A/V) cables to the side(s) of the TV’s back panel instead of
straight down the back after connecting components.
•
Try not to coil any twin-lead cables and keep them away from all A/V cables as
much as possible.
•
Make sure all antennas and cables are properly grounded. Refer to the Safety Tips
sheet packed with your unit for detailed information.
Protect Components From Overheating
•
Never block ventilation slots in any component. Arrange the components so that air
can circulate freely.
•
Do not stack components.
•
Allow adequate ventilation when placing components in a stand.
•
Place an amplifier or satellite receiver on the top shelf of a stand so heated air rising
from it will not flow around other components.
Chapter 1
15920520.01 Connections
3
3
9/24/02, 3:54 PM
Chapter 1 : Setup & Connections
Choose Your Connection
There are several ways to hook up your CD Recorder, depending on the components
connected. Please use the following chart to determine which connection is best for
you and proceed to the appropriate page.
Note: If you prefer, we can provide you with the name of an Authorized Service
Representative who will visit your home for a fee to install your electronic
entertainment system and to instruct you in its operation. For details about this
service, call 1-888-206-3359.
Components
CD order
Rec
Connection Title
Go To
CD Recorder +
A/V Receiver or
CD Player (Analog)
page 5
CD Recorder +
A/V Receiver or
CD Player
(Digital Coaxial)
CD Recorder +
A/V Receiver or
CD Player
(Digital Optical)
page 6
page 7
Cables Needed to Connect Components to Your
CD Recorder
The pictures below show the cables needed for the connections represented in this book.
Audio cables
Digital Coaxial cable
Digital Optical cable
4
15920520.01 Connections
Chapter 1
4
9/24/02, 3:54 PM
Chapter 1 : Setup & Connections
A/V RECEIVER
A/V eiver
Rec
CD
IN
TV
IN
TAPE
OUT
IN
The back of your
receiver might
not look exactly
like the one
shown here.
VCR
IN
OUT
R
L
2
1
ANALOG
CD order
Rec
L
COAXIAL
DIGITAL
L
R
R
IN
OUT
IN
OUT
OPTICAL IN
CD RECORDER
CD Recorder + A/V Receiver or CD Player (Analog)
1.
Connect audio cables to the ANALOG IN R and L jacks on the back of the recorder
(color coded, red and white). Connect the other ends of the cables to the
corresponding output jacks on your A/V receiver or CD player (sometimes labeled
AUDIO L/MONO and AUDIO R).
2.
Connect audio cables to the ANALOG OUT R and L jacks on the back of the recorder
(color coded, red and white). Connect the other ends of the cables to the
corresponding input jacks on your A/V receiver or CD player (sometimes labeled
AUDIO L/MONO and AUDIO R).
Go To Page 8
Chapter 1
15920520.01 Connections
5
5
9/24/02, 3:54 PM
Chapter 1 : Setup & Connections
A/V RECEIVER
A/V eiver
Rec
CD
IN
TV
IN
TAPE
OUT
IN
The back of your
receiver might
not look exactly
like the one
shown here.
VCR
IN
OUT
COAXIAL
DIGITAL
R
L
OUT
1
CD order
Rec
IN
2
ANALOG
L
COAXIAL
DIGITAL
L
R
R
IN
OUT
IN
OUT
OPTICAL IN
CD RECORDER
CD Recorder + A/V Receiver or CD Player (Digital
Coaxial)
1.
Connect a digital coaxial cable to the COAXIAL DIGITAL IN jack on the back of the
recorder. Connect the other end of the cable to the corresponding output jack on
your A/V receiver or CD player (sometimes labeled DIGITAL COAXIAL OUT).
2.
Connect a digital coaxial cable to the COAXIAL DIGITAL OUT jack on the back of
the recorder. Connect the other end of the cable to the corresponding input jack on
your A/V receiver or CD player (sometimes labeled DIGITAL COAXIAL IN).
Go To Page 8
6
15920520.01 Connections
Chapter 1
6
9/24/02, 3:54 PM
Chapter 1 : Setup & Connections
A/V RECEIVER
A/V eiver
Rec
CD
IN
TV
IN
TAPE
OUT
IN
The back of your
receiver might
not look exactly
like the one
shown here.
VCR
IN
OUT
R
L
OPTICAL OUT
CD order
Rec
ANALOG
L
COAXIAL
DIGITAL
L
R
R
IN
OUT
IN
OUT
OPTICAL IN
CD RECORDER
CD Player + CD Recorder (Digital Optical)
1.
Remove the protective cap from the OPTICAL IN jack on the back of the recorder (if
necessary) and also remove the protective caps from your digital optical cable.
2.
Connect the digital optical cable to the OPTICAL IN jack on the back of the recorder.
Connect the other end of the cable to the corresponding output jack on your A/V
receiver or CD player (sometimes labeled OPTICAL OUT).
Go To Page 8
Chapter 1
15920520.01 Connections
7
7
9/24/02, 3:54 PM
Chapter 1 : Setup & Connections
Plug in the CD Recorder
Plug the power cord into an appropriate wall outlet. Be sure to insert the plug
completely.
Put Batteries in the Remote
1.
Remove the battery compartment cover from the back of the remote by pushing in
the tab and lifting up the cover.
2.
Insert the batteries matching the polarities (+ and -) on the batteries with the diagram
in the battery compartment.
8
Chapter 1
15920520.01 Connections
8
9/24/02, 3:54 PM
Chapter 1 : Setup & Connections
TIME SET/
PROG button
A
OPEN/
CLOSE
Setting the Time
1.
Press the CLOCK/SLEEP button and the TIME
SET/PROG button (12 or 24 hour appears).
2.
To change the hour format, press the Skip/
Search left or right arrow button. Then press
TIME SET/PROG to select it (the hour flashes).
3.
To change the hour, press the Skip/Search left or
right arrow button. Then press TIME SET/PROG
to select it (the minutes flash).
4.
To change the minutes, press the Skip/Search
left or right arrow button. Then press TIME SET/
PROG to select it (the updated clock time
appears).
B
I/
MAKE CD
1
2
3
REPEAT
DUBB
4
5
6
RANDOM
FINALIZE
7
8
9
INTRO
REC •
ERASE
0
TIME SET/PROG
REM
CD A/B
Skip/Search
buttons
SOURCE
IN
AUTO/
MANUAL
CD SYNC
CLOCK/
SLEEP
Setting the Sleep Timer
CLOCK/SLEEP
button
You can set the sleep timer to turn off the recorder
up to 2 hours later. It can be set from 1 minute up to
120 minutes in 10 minute increments.
1.
Press and hold the CLOCK/SLEEP button until
SLP OFF appears.
2.
Press and release CLOCK/SLEEP repeatedly until
the desired sleep time is displayed.
To cancel the sleep timer, repeat steps 1-2 until SLP
OFF appears.
Chapter 1
15920520.01 Connections
9
9
9/24/02, 3:54 PM
Chapter 1 : Setup & Connections
1
2
3
SKIP/SEARCH
I/
STOP
4 5
7
6
8
9 10 11 12 13 14
TIME
SET/PROGR
SOURCE IN
REPEAT
AUTO/MANUAL
PLAY/PAUSE
MAKE CD
SKIP/SEARCH
CLOCK/SLEEP
REC •
DUBB
STOP
PLAY/PAUSE
ERASE
REMAIN
CD SYNC
FINALIZE
DISC A
PHONES
DISC A
DISC B
DISC B
OPEN/CLOSE
OPEN/CLOSE
PHONES VOLUME
MIN •
15
16 17
18 19
20
21
22 23
• MAX
24 25 26 27 28
Front of the CD Recorder
1.
Power Turns the unit on and off.
2.
SKIP/SEARCH previous Skips to the previous track or searches within the track
(disc A only).
3.
SKIP/SEARCH forward Skips to the next track or searches within the track (disc A
only).
4.
REPEAT Plays tracks or discs repeatedly.
5.
TIME/SET PROGRAM Sets the time or programs tracks.
6.
CLOCK/SLEEP Shows the time or sets the sleep time.
7.
Display Shows the status of the recorder (indicators and messages).
8.
ERASE Erases tracks or an entire disc (CD-RW only).
9.
SOURCE IN Selects the input source for digital recording.
10. AUTO/MANUAL Selects the track numbering method.
11. SKIP/SEARCH previous Skips to the previous track or searches within the track
(disc B only).
12. SKIP/SEARCH forward Skips to the next track or searches within the track (disc B
only).
13. REC• Starts record mode.
10
15920520.01 Connections
Chapter 1
10
9/24/02, 3:54 PM
Chapter 1 : Setup & Connections
14. MAKE CD Easily copies the entire disc in tray A.
15. PHONES (headphones) jack
16. DISC A OPEN/CLOSE Open or close tray A.
17. STOP Stops a disc or clears programmed tracks (disc A only).
18. PLAY/PAUSE Plays or pauses a disc (disc A only).
19. REMAIN Displays the remaining play or record time.
20. Tray A
21. Tray B
22. CD SYNC Selects the sychronized recording mode.
23. PLAY/PAUSE Plays or pauses a disc (also confirms selections).
24. STOP Stops a disc or clears programmed tracks (disc B only).
25. DISC B OPEN/CLOSE Open or close tray B.
26. FINALIZE Finalizes a disc for play in other units.
27. PHONES VOLUME Volume adjustment for headphones.
28. DUBB Changes the dubbing speed.
Chapter 1
15920520.01 Connections
11
11
9/24/02, 3:54 PM
Chapter 1 : Setup & Connections
A
OPEN/
CLOSE
The Buttons on the Remote
Control
B
I/
MAKE CD
1
2
3
REPEAT
DUBB
4
5
6
RANDOM
FINALIZE
7
8
9
INTRO
REC •
ERASE
0
TIME SET/PROG
REM
(0-9) Number buttons Selects tracks up to 99 by
pressing two number buttons.
AUTO/ MANUAL Selects the track numbering
method.
CD A/B Selects which tray you want to control.
CD A/B
CD SYNC Selects the synchronized recording mode.
CLOCK/SLEEP Shows the time or sets the sleep time.
DUBB Changes the dubbing speed.
ERASE Erases tracks or an entire disc (CD-RW only).
FINALIZE Finalizes a disc for play in other units.
SOURCE
IN
AUTO/
MANUAL
CD SYNC
INTRO Plays several seconds of each track.
CLOCK/
SLEEP
MAKE CD Easily copies the entire disc in tray A.
OPEN/CLOSE (A/B) buttons Open or close disc trays
A or B.
PLAY/PAUSE Plays or pauses a disc.
Power On/Off Turns the unit on or off.
RANDOM Plays discs A and/or B in random order.
REC Starts record mode.
REMAIN Displays the remaining play or record time.
REPEAT Plays tracks or dics repeatedly.
Skip/ Search buttons Skip to next or previous tracks
or let you search within tracks.
SOURCE IN Selects the input source for digital
recording.
STOP Stops a disc or clears programmed tracks.
TIME SET/PROG Sets the time or programs tracks.
12
15920520.01 Connections
Chapter 1
12
9/24/02, 3:54 PM
Chapter 2: Playing CDs
Loading Discs
1.
Press the OPEN/CLOSE A or B button (the disc tray opens).
2.
Place a disc gently into the tray with the disc’s label facing up.
3.
Press the OPEN/CLOSE A or B button, or press PLAY/PAUSE (the disc tray closes).
Note: Once a disc is loaded, the unit takes several seconds to read the disc
information.
Playing a CD
1.
Put the CD you want to play in the disc tray (label side up) and close the tray (the
track information appears).
2.
Make sure the corresponding disc tray is selected in the display. To change the disc
tray, press the CD A/B button on the remote.
3.
Press PLAY/PAUSE.
Selecting and Searching a Track
Press the track number on the remote control or press and release the SKIP/SEARCH left
or right arrow button until you find the track you want. If the track isn’t already playing,
press PLAY/PAUSE.
To search within a track while it is playing, press and hold the SKIP/SEARCH left or right
arrow button until you reach the part of the song you want to hear.
Note: While the Random, Repeat, or Program feaures are being used, you can
search within the current track only.
Programming Tracks
You can program up to 40 tracks to play back in any desired sequence using either disc A
or B.
1.
Press the TIME SET/PROGRAM button (or TIME SET/PROG on the remote control).
WAIT appears, then 01 flashes to let you know the unit is ready for the first track.
2.
Enter the first track you want to program using the number buttons on the remote or
the SKIP/SEARCH arrow buttons on the front of the recorder.
3.
When the track you want is flashing, press TIME SET/PROGRAM (or TIME SET/
PROG on the remote control) to select it. (OK appears).
Chapter 2
15920520.02 Playing CDs
13
13
9/24/02, 3:55 PM
Chapter 2: Playing CDs
4.
To program the next track, press TIME SET/PROGRAM again (or TIME SET/PROG on
the remote control).
5.
Enter the second track using the number buttons on the remote or the SKIP/SEARCH
arrow buttons on the front of the recorder.
6.
To select the second track, press TIME SET/PROGRAM (or TIME SET/PROG on the
remote control) (OK appears).
7.
Enter any additional tracks using steps 4-6.
8.
When finished, press STOP to stop programming.
•
To review your programmed tracks, press and release the left SKIP/SEARCH arrow
button repeatedly to scroll through the tracks (the tracks appear, with the last track
you programmed showing first).
•
To play your programmed tracks, press PLAY (the tracks play in the order you
programmed them).
•
To clear your programmed tracks, press and release STOP until PROG. disappears
from the display.
Note: Programmed tracks are cleared if either disc tray is opened.
Repeat
You can repeat a single track, an entire disc, just your programmed tracks, or both discs A
and B. All repeat modes will continue to play until you turn them off.
Press and release the REPEAT button repeatedly to scroll through the modes:
REPEAT 1– repeats the current track
REPEAT – repeats the current disc or programmed tracks
REPEAT ALL – repeats all discs or programmed tracks
Random
You can play your programmed tracks and both disc A and B in random order.
1.
To start random play, press the RANDOM button on the remote (RANDOM appears).
2.
To stop random play, press RANDOM again (RANDOM disappears).
Note: If you open either disc tray, random play is stopped.
14
15920520.02 Playing CDs
Chapter 2
14
9/24/02, 3:55 PM
Chapter 3: Recording CDs
Copying a CD
You can use this feature to easily copy an entire CD.
1.
Put the disc you want to copy in tray A.
2.
Put a blank disc in tray B (music or audio CD-R/ CD-RW only. The recoder does
not accept standard computer CD-ROMs).
3.
Press MAKE CD, then PLAY/PAUSE on side B of the unit (MAKE CD and REC
appear).
The disk will be automatically finalized when copying is done.
•
To stop recording, press STOP.
•
To check the remaining recording time, press REMAIN.
Checking Remaining Record and Play Time
You can check the remaining record time left on a disc in tray B or check the remaining
play time for both discs.
Record Time
Press the REMAIN button repeatedly to show the remaining record time (the display
toggles through elapsed time, total record time of the disc, and total remaining time of
the disc).
Play Time
Following the remaining record time displays for disc B, you’ll see the remaining play
time displays for disc A. It loops continually from disc B to disc A.
Press the REMAIN button repeatedly to show the remaining play time (the display
toggles through elapsed time, total play time of the disc, total remaining play time of the
disc, and remaining time of the current track).
Chapter 3
15920520.03 Recording CDs
15
15
9/24/02, 3:55 PM
Chapter 3: Recording CDs
High-Speed Dubbing
You can use the high-speed dubbing feature when copying a CD or programmed tracks
from disc A in order to speed up the recording time. The quality of the recording is the
same as when you record at normal speed.
1.
Put the disc you want to copy in tray A.
2.
If you want to copy programmed tracks, make sure the tracks are programmed
properly (see Programming Tracks, page 13).
3.
Press and release DUBB repeatedly until the desired setting is displayed, DUBB and
1X DISC (normal disc dubb), DUBB and 2X DISC (high-speed disc dubb), DUBB.1
and 1X TRK (normal track dubb), or DUBB.1 and 2X TRK (high-speed track dubb).
4.
Press PLAY/PAUSE on side B of the unit (BUSY appears, then DUBB and REC
appear).
BUSY appears, followed by UPDATE when the unit is finished recording.
•
To check the remaining record time, press REMAIN.
•
To return to normal speed dubbing, select 1X TRK or 1X DISC in step 3.
•
To stop recording, press STOP.
Finalizing Discs
You need to finalize both CD-Rs and CD-RWs to make them readable on other players.
Important: Once a CD-R has been finalized, you can’t record anything else on it. A
CD-RW can be erased and re-recorded once it has been finalized, but you must first
unfinalize it. Also, once you start finalizing a disc, it can’t be cancelled.
1.
Make sure the disc you want to finalize is in tray B.
2.
Press FINALIZE, then PLAY/PAUSE on side B of the unit (FINALIZE appears, then
BUSY appears, and the time left to complete finalization counts down).
Finalization takes 2 minutes or more. When finished, the recorder displays the total
number of tracks and the total time for the disc.
16
15920520.03 Recording CDs
Chapter 3
16
9/24/02, 3:55 PM
Chapter 3: Recording CDs
Unfinalizing Discs (CD-RWs only)
If you want to record additional tracks on a finalized CD-RW or completely erase a CDRW that has been finalized, you’ll need to unfinalize it first. This process removes track
information on the CD, including the Tables of Contents (TOC).
1.
Make sure the CD-RW disc you want to unfinalize is in tray B.
2.
Press ERASE, then PLAY/PAUSE on side B of the unit (ERS TOC and ERASE appear).
Unfinalization takes about 1 minute. When finished, ERS OK appears and the recorder
displays the total number of tracks and the total time for the disc.
Erasing Discs (CD-RWs only)
If a CD-RW is unfinalized, you can erase single tracks or an entire disc.
Erasing Single Tracks
1.
Make sure the CD-RW disc you want to erase is in tray B. Remember, the disc must
be unfinalized (see Unfinalizing Discs above).
2.
Enter the track you want to erase using the SKIP/SEARCH arrow buttons.
3.
Press ERASE, then PLAY/PAUSE on side B of the unit (ERS TRK and ERASE appear).
When finished, ERS OK appears and the recorder displays the remaining disc
information.
Erasing a Disc
1.
Make sure the CD-RW disc you want to erase is in tray B. Remember, the disc must
be unfinalized (see Unfinalizing Discs above).
2.
Press and release ERASE twice, then PLAY/PAUSE on side B of the unit (ERS DISC
and ERASE appear).
Erasing a disc might take up to 2 minutes. When finished, ERS OK and BLK DISC appear.
Chapter 3
15920520.03 Recording CDs
17
17
9/24/02, 3:55 PM
Chapter 3: Recording CDs
Recording from an External Source Using CD Sync
(Digital Synchronized)
This is the preferred method of recording from an external source. It allows you to
choose from optical or coaxial connections, depending on the output connections of the
external source, and also automatically detects when a digital signal is sent to the
recorder. (If your external audio source is compatible with the CD SYNC feature,
the track information and recording cues will be done automatically.)
If the external player is compatible, then all you have to do to start recording is press the
Play/Pause button on your external source to start recording. If the external audio source
is not compatible, automatic recording will not start. You need to record using the analog
connections. Refer to the owner’s manual for your external player for more information.
1.
Put a blank disc in tray B.
2.
Make sure the CD, tape, etc., is ready in the external source.
3.
Press and release SOURCE IN until OPT (optical) or DIG (digital) is displayed.
4.
Press CD SYNC until the desired setting is displayed, CD SNYC and CD SYNC or TRK
SYNC and CD SYNC1.
5.
Press PLAY/PAUSE on side B of the unit, then start the external source audio.
If you start recording in the middle of a track, CD SYNC won’t start recording until
the beginning of the next track.
When finished recording, (BUSY appears, followed by UPDATE ).
•
To check the remaining recording time, press REMAIN.
•
To stop recording, press STOP.
18
15920520.03 Recording CDs
Chapter 3
18
9/24/02, 3:55 PM
Chapter 3: Recording CDs
Recording from an External Source (Digital)
Like synchronized digital recording, this method allows you to choose from optical or
coaxial connections, depending on the output connections of the external source, but this
method does not automatically detect when a digital signal is sent to the recorder.
1.
Put a blank disc in tray B.
2.
Make sure the CD, tape, etc., is ready in the external source.
3.
Make sure the track numbering is set correctly. You can choose between AUTO and
MANUAL by pressing the AUTO/MANUAL button.
•
AUTO — track numbers are automatically incremented after a silence of 3
seconds or more on the source material.
•
MANUAL — track numbers can be manually incremented by pressing the
SKIP/SEARCH right arrow button.
Important: Track numbers can’t be changed after recording.
4.
Press and release SOURCE IN until OPT (optical) or DIG (digital) appears.
5.
Press REC (REC flashes).
6.
Press PLAY/PAUSE on side B of the unit, then start the external source audio.
7.
If you selected manual track numbering, add tracks as needed using the SKIP/
SEARCH right arrow button.
8.
When finished recording, press STOP (BUSY appears, followed by UPDATE ).
•
To add 3 seconds of silence to the beginning of the track, press PLAY/PAUSE.
•
To check the remaining recording time, press REMAIN.
•
To temporarily stop recording, press PLAY/PAUSE. To continue recording, press
PLAY/PAUSE again.
Chapter 3
15920520.03 Recording CDs
19
19
9/24/02, 3:55 PM
Chapter 3: Recording CDs
Recording from an External Source (Analog)
If you don’t have the option of recording from a digital source, you may need to make an
analog recording.
1.
Put a blank disc in tray B.
2.
Make sure the CD, tape, etc., is ready in the external source.
3.
Make sure the track numbering is set correctly. You can choose between AUTO and
MANUAL by pressing the AUTO/MANUAL button.
•
AUTO — track numbers are automatically incremented after a silence of 3
seconds or more on the source material.
•
MANUAL — track numbers can be manually incremented by pressing the
SKIP/SEARCH right arrow button.
Important: Track numbers can’t be changed after recording.
4.
Press and release SOURCE IN until ANALOG appears.
5.
Press REC (REC flashes).
6.
Press PLAY/PAUSE on side B of the unit, then start the external source audio.
7.
If you selected manual track numbering, add tracks as needed.
8.
When finished recording, press STOP (BUSY appears, followed by UPDATE ).
•
To add 3 seconds of silence to the beginning of the track, press PLAY/PAUSE.
•
To check the remaining recording time, press REMAIN.
•
To temporarily stop recording, press PLAY/PAUSE. To continue recording, press
PLAY/PAUSE again.
20
15920520.03 Recording CDs
Chapter 3
20
9/24/02, 3:55 PM
Chapter 3: Recording CDs
Recording and Dubbing Reminders
Digital / Optical Recording
•
After digital recording (Dubbing, Make CD or recording from an external CD player)
is complete, and the copied CD is finalized, it will contain copy protection
information on the disc. COPY PROTECT appears when the finalized CD is inserted
into tray A.
•
When using an external source CD player to make recordings, copy protected CDs
can only be recorded through the analog output and inputs. When attempting a
digital recording by using CD SYNC or REC, COPY PROTECT appears and output is
heard but recording doesn’t start.
•
When dubbing or using MAKE CD to copy a copy protected CD, the recorder will
only record at normal speed. Even when selecting 2x dubbing, the recorder will
change automatically to 1x dubbing. COPY PROTECT appears.
CD Disc Dubbing
•
When finishing a recording, the table of contents (TOC) will be longer compared to
the original CD’s TOC. This is because the CD recorder also includes the time
between tracks.
•
If a CD-R audio only disc is inserted in tray B and is not blank or finalized, NOT BLK
DISC appears.
•
If copy protection information is found on the disc, the unit will select an analog
dubbing mode.
Chapter 3
15920520.03 Recording CDs
21
21
9/24/02, 3:55 PM
This page intentionally left blank.
15920520.03 Recording CDs
22
9/24/02, 3:55 PM
Chapter 4: Additional Information
Troubleshooting
Most problems you encounter with your CD Recorder can be corrected by consulting the
following troubleshooting list.
Recorder Problems
Recorder won’t turn on
• Make sure the unit is plugged in.
•
Check the wall receptacle (or extension cord) to make sure it is “live” by plugging in
something else.
•
Something might be wrong with your remote control. Press the POWER button on
the front of the recorder. If it turns on, check the remote control solutions below.
Buttons don’t work
Unplug the unit for two minutes and then plug it back in. Turn it on and try again.
No sound
• If you have the CD recorder connected to your A/V receiver, make sure all the
connections are snug.
•
Headphones may be connected. Try unplugging them.
OPT or DIG flashes on the display when attempting to record digitally
The external player may not be compatible with the digital or coaxial inputs on the
recorder. You’ll need to do an analog recording.
The Remote Control Doesn’t Work
•
Something might be between the remote and the remote sensor on the component.
Make sure there is a clear path.
•
Maybe batteries in remote are weak, dead, or installed incorrectly. Put new batteries
in the remote.
•
You might need to drain the remote’s microprocessor: remove batteries and press the
number 1 button for at least 60 seconds. Release the 1 button and replace the
batteries.
Chapter 4
15920520.04 Additional
23
23
9/24/02, 3:55 PM
Chapter 4: Additional Information
Display Messages
1X DISC — normal speed disc dubbing is selected
1X PROG — normal speed program dubbing is selected
1X TRK — normal speed track dubbing is selected
2X DISC — 2X high speed disc dubbing is selected
2X PROG — 2X high speed program dubbing is selected
2X TRK — 2X high speed track dubbing is selected
A NO DISC — no disc or disc upside down in tray A
AM — AM time (when clock is in 12 hour mode)
ANALOG — analog source is selected
AUTO — auto track numbering is selected
B NO DISC — no disc or disc upside down in tray B
BLK DISC — a blank CD-R or CD-RW is in tray B
BUSY — unit is processing, please wait
BYE BYE — unit is turning off
CD SYNC — CD synchronous disc record is selected
CLOSE A — closing tray A
CLOSE B — closing tray B
COPY PROTECT — copy protected disc and can’t be copied
DIGITAL — digital source (digital coaxial) is selected
DISC FULL — there are no more available tracks or time on the disc
ERS DISC — erase disc mode is selected or in progress
ERS OK — erase is finished
ERS TOC — unfinalize mode is selected or in progress
ERS TRK — erase track mode is selected or in progress
ERS Y/N — unit is confirming if you want to erase
FINALIZE — finalize mode is selected or in progress
FINALIZED DISC — disc is finalized and can’t be recorded to
24
15920520.04 Additional
Chapter 4
24
9/24/02, 3:55 PM
Chapter 4: Additional Information
INVALID SOURCE — source is set to ANALOG and can’t perform synchronous record
MAKE CD — entire CD copy mode is selected
MANUAL — manual track numbering is selected
NO AUDIO DISC — dubbing is selected while no audio disc is loaded
NO VALID TRK — no tracks are programmed
OPEN A — opening tray A
OPEN B — opening tray B
OPTICAL — optical source is selected
P01 T03 — program selection #1, 3rd track
P01 OK — program selection #1 is programmed
PM — PM time (when clock is in 12 hour mode)
READING — reading disc information
RECOVER — an error has occured; unit is trying recovery
SCAN A — scanning disc A for copy protection
SLP OFF — sleep time is set to off
TRK SYNC — CD synchronous track record is selected
UNRECORDABLE CD — disc is finalized and can’t be recorded to or erased
UNREADABLE — an unreadable disc has been loaded
UPDATE — updating disc information
WAIT — unit is entering program mode
Chapter 4
15920520.04 Additional
25
25
9/24/02, 3:55 PM
Chapter 4: Additional Information
FCC Information
This device complies with Part 15 of the FCC Rules. Operation is subject to the following
two conditions: (1) This device may not cause harmful interference, and (2) this device
must accept any interference received, including interference that may cause undesired
operation.
In accordance with FCC requirements, changes or modifications not expressly approved
by Thomson multimedia Inc. could void the user’s authority to operate this product.
This device generates and uses radio frequency (RF) energy, and if not installed and used
properly, this equipment may cause interference to radio and television reception.
If this equipment does cause interference to radio or television reception (which you can
determine by unplugging the unit), try to correct the interference by one or more of the
following measures:
•
Re-orient the receiving antenna (that is, the anten-na for the radio or television that is
“receiving” the interference).
•
Move the unit away from the equipment that is receiving interference.
•
Plug the unit into a different wall outlet so that the unit and the equipment receiving
interference are on different branch circuits.
If these measures do not eliminate the interference, please consult your dealer or an
experienced radio/television technician for additional suggestions.
Also, the Federal Communications Commission has prepared a helpful booklet, “How To
Identify and Resolve Radio TV Interference Problems.” This booklet is available from the
U.S. Government Printing Office, Washington, DC 20402. Please specify stock number
004-000-00345-4 when ordering copies.
This product complies with DHHS Rules 21 CFR Subchapter J. Applicable at the date of
manufacture.
Care and Cleaning
CAUTION: Turn OFF your unit before cleaning.
You can clean the unit as required, using a soft lint-free cloth. Be sure to occasionally
dust the ventilation slots in the cabinet to help assure adequate ventilation.
Never use strong cleaning agents, such as ammonia-based cleaners, or abrasive powder.
These types of cleaners will damage the unit.
Avoid placing drinks or vases with water on top of the unit. This could increase the risk
of fire or shock hazard or damage to the unit.
26
15920520.04 Additional
Chapter 4
26
9/24/02, 3:55 PM
Chapter 4: Additional Information
Limited Warranty
What your warranty covers:
•
Defects in materials or workmanship.
For how long after your purchase:
•
One year from date of purchase for labor and parts
•
The warranty period for rental units begins with the first rental or 45 days from date
of shipment to the rental firm, whichever comes first.
What we will do:
•
Pay any Authorized RCA Audio Service Center the labor charges to repair your unit.
•
Pay any Authorized RCA Audio Service Center for the new or, at our option,
refurbished replacement parts required to repair your unit.
How you get service:
•
Take your unit to any Authorized RCA Audio Service Center. To identify your nearest
Authorized RCA Audio Service Center, ask your dealer, look in the Yellow Pages, or
call 1-800-336-1900.
•
Show the Authorized Service Center Representative your evidence of purchase date
or first rental.
•
Pick up your unit when repairs are completed.
•
Proof of purchase in the form of a bill of sale or receipted invoice which is evidence
that the product is within the warranty period must be presented to obtain warranty
service. For rental firms, proof of first rental is also required.
What your warranty does not cover:
•
Customer instruction. (Your User’s Guide describes how to install, adjust, and
operate your unit. Any additional information should be obtained from your dealer.)
•
Installation and related adjustments.
•
Signal reception problems not caused by your unit.
•
Damage from misuse or neglect.
Chapter 4
15920520.04 Additional
27
27
9/24/02, 3:55 PM
Chapter 4: Additional Information
•
Cleaning of audio heads.
•
Batteries.
•
A unit that has been modified or incorporated into other products or is used for
institutional or other commercial purposes.
•
A unit purchased or serviced outside the U.S.A.
•
Acts of nature, such as but not limited to lightning damage.
Product Registration:
•
Please complete and mail the Product Registration Card packed with your product.
It will make it easier to contact you should it ever be necessary. The return of the
card is not required for warranty coverage.
Limitation of Warranty:
•
THE WARRANTY STATED ABOVE IS THE ONLY WARRANTY APPLICABLE TO
THIS PRODUCT. ALL OTHER WARRANTIES, EXPRESS OR IMPLIED
(INCLUDING ALL IMPLIED WARRANTIES OF MERCHANTABILITY OR FITNESS
FOR A PARTICULAR PURPOSE) ARE HEREBY DISCLAIMED. NO VERBAL OR
WRITTEN INFORMATION GIVEN BY THOMSON MULTIMEDIA INC., ITS AGENTS
OR EMPLOYEES SHALL CREATE A GUARANTY OR IN ANY WAY INCREASE THE
SCOPE OF THIS WARRANTY.
•
REPAIR OR REPLACEMENT AS PROVIDED UNDER THIS WARRANTY IS THE
EXCLUSIVE REMEDY OF THE CONSUMER. THOMSON MULTIMEDIA INC.
SHALL NOT BE LIABLE FOR INCIDENTAL OR CONSEQUENTIAL DAMAGES
RESULTING FROM THE USE OF THIS PRODUCT OR ARISING OUT OF ANY
BREACH OF ANY EXPRESS OR IMPLIED WARRANTY ON THIS PRODUCT. THIS
DISCLAIMER OF WARRANTIES AND LIMITED WARRANTY ARE GOVERNED BY
THE LAWS OF THE STATE OF INDIANA. EXCEPT TO THE EXTENT PROHIBITED
BY APPLICABLE LAW, ANY IMPLIED WARRANTY OF MERCHANTABILITY OR
FITNESS FOR A PARTICULAR PURPOSE ON THIS PRODUCT IS LIMITED TO THE
APPLICABLE WARRANTY PERIOD SET FORTH ABOVE.
28
15920520.04 Additional
Chapter 4
28
9/24/02, 3:55 PM
Chapter 4: Additional Information
How State Law relates to warranty:
•
Some states do not allow the exclusion nor limitation of incidental or consequential
damages, or limitations on how long an implied warranty lasts, so the above
limitations or exclusions may not apply to you.
•
This warranty gives you specific legal rights, and you also may have other rights that
vary from state to state.
If you purchased your unit outside the United States:
•
This warranty does not apply. Contact your dealer for warranty information.
Service calls which do not involve defective materials or workmanship are not
covered by this warranty. Costs of such service calls are the sole responsibility of
the purchaser.
Chapter 4
15920520.04 Additional
29
29
9/24/02, 3:55 PM
Visit the RCA website at www.rca.com
Please do not send any products to the Indianapolis address listed in this manual or
on the carton. This will only add delays in service for your product.
Thomson multimedia Inc.
10330 North Meridian Street
Indianapolis, IN 46290
©2002 Thomson multimedia Inc.
Trademark(s)® Registered
Marca(s) Registrada(s)
Printed in USA
TOCOM 15920520
15920520.04 Additional
30
9/24/02, 3:55 PM