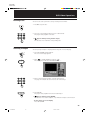
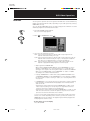
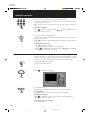
1
XV-D2000BK
LET0091-001A
COMPACT COMPONENT SYSTEM
DVD PLAYER
XV-D2000BK
POWER
OPEN/CLOSE
TV
DVD
MUTE
TV/VIDEO
CATV/SAT
SET
1
2
4
5
7
8
3
6
9
CH RETURN
100+
10
+
+
SLOW
RESUME
+10
0
+
+
TV
VOLUME
CH
ANGLE
SUB TITLIE
AUDIO
VOLUME
TV
DVD
CATV
ON /OFF
XV-D2000
DVD PLAYER
ON SCREEN
DVD MENU
STANDBY
STEP
ON
EEN
SCR
T IT
LE
R ET
DVD M
M ENU
EN
UR
U
UP
LEFT
N
RESUME
POWER
DOLBY DIGITAL 5.1
LINEAR PCM
96KHz SAMPLING
DOLBY DIGITAL DECODER BUILT-IN
ENTER
ON/STANDBY
PHONES
PHONES LEVEL
RIGHT
DOWN
DOLBY
D I G I T A L
EN T ER
MIN
MAX
RM-SVD2000U REMOTE CONTROL
PlayBack
Control
'
INSTRUCTIONS
For Customer Use:
Enter below
belowthe
theModel
Model
Serial
No.No.
andand
Serial
No.
No.
which
are located
either
onbottom
the rear,
which
are located
on the
rear,
or
bottom
or side
of the
cabinet.
Retain this
side of the
cabinet.
Retain
this information
information
for future reference.
for future reference.
Model No.
Serial No.
LET0091-001A
[J]
XV-2000BK/CoverE
1
9/24/97, 1:17 PM
XV-D2000BK
LET0091-001A
Warnings, Cautions and Others
CAUTION
RISK OF ELECTRIC SHOCK
DO NOT OPEN
CAUTION:
TO REDUCE THE RISK OF ELECTRIC SHOCK.
DO NOT REMOVE COVER (OR BACK) .
NO USER SERVICEABLE PARTS INSIDE.
REFER SERVICING TO QUALIFIED SERVICE PERSONNEL.
The lightning flash with arrowhead symbol,
The lightning
flash with
arrowhead
symbol
within
an equilateral
triangle
is intended
to
withinthe
an user
equilateral
alerts
the user to
alert
to the triangle
presence
of uninsulated
the presence
of uninsulated
"dangerous
"dangerous
voltage"
within the
product's
voltage" within
product's
that
enclosure
thatthemay
be enclosure
of sufficient
magnitude
constitute
could cavse to
electric
shock.a risk of electric
shock to persons.
The
exclamation mark
point within
within an
an equilateral
equilateral
The exclamation
triangle is intended to alert the user to the
triangle alerts
user to important
operating
presence
of theimportant
operating
and
and maintenance
(servicing)
instructionsinin the
the
maintenance
(servicing)
instructions
manval for
the appliance.the appliance.
literature
accompanying
ForU.S.A.
U.S.A.
For
This equipment has been tested and found to comply with the limits
for a Class B digital device, pursuant to part 15 of the FCC Rules.
These limits are designed to provide reasonable protection against
harmful interference in a residential installation.
This equipment generates, uses and can radiate radio frequency
energy and, if not installed and used in accordance with the
instructions, may cause harmful interference to radio
communications. However, there is no guarantee that interference
will not occur in a particular installation. If this equipment does cause
harmful interference to radio or television reception, which can be
determined by turning the equipment off and on, the user is
encouraged to try to correct the interference by one or more of the
following measures:
Reorient or relocate the receiving antenna.
Increase the separation between the equipment and receiver.
onon
a circuit
different
from
that
to
Connect the equipment to
intoananoutlet
outlet
a circuit
different
from
that
which
thethe
receiver
is connected.
to
which
receiver
is connected.
Consult the dealer or an experienced radio/TV technician for help.
WARNING: TO REDUCE THE RISK OF FIRE
OR ELECTRIC SHOCK, DO NOT EXPOSE
THIS APPLIANCE TO RAIN OR MOISTURE.
Caution –– POWER switch!
Disconnect the mains plug to shut the power off completely. The
POWER switch in any position does not disconnect the mains line. The
power can be remote controlled.
IMPORTANT FOR LASER PRODUCTS
1. CLASS 1 LASER PRODUCT
2. DANGER: Invisible laser radiation when open and interlock failed or
bypassed. Avoid direct exposure to beam.
3. CAUTION: Do not open the top cover. There are no user serviceable parts inside the player; leave all servicing to qualified service
personnel.
CAUTION
To reduce the risk of electrical shocks, fire, etc.:
1. Do not remove screws, covers or cabinet.
2. Do not expose this appliance to rain or moisture.
XV-2000BK/CoverE
3
9/24/97, 1:17 PM
XV-D2000BK
LET0091-001A
Table of Contents
General Information ................................... 2
Audio CD Operations ............................... 35
Important cautions .......................................................... 2
Safety precautions .......................................................... 2
Playing back from a desired track ............................... 35
Resuming playback ....................................................... 35
Playing back in a desired order ................................... 36
Repeating all tracks ....................................................... 37
Repeating a single track ............................................... 37
Repeating a desired part .............................................. 38
Starting playback from a specified time ..................... 38
Playing back only the beginning of each track .......... 39
Playing back tracks in random order ........................... 40
Selecting the displayed time mode ............................. 40
Introduction ................................................ 3
Introducing the XV-D2000BK .......................................... 3
Controls and functions .................................................... 4
Supplied accessories ...................................................... 8
Before Using for the First Time ................. 9
Before making any connections .................................... 9
Connections ..................................................................... 9
Connecting with a TV. .................................................. 9
Connecting with an audio amplifier or receiver ..... 10
Connecting with an amplifier equipped with
Dolby Digital 5.1-channel inputs ........................... 11
Connecting with an audio equipment with
digital input .............................................................. 12
Connecting with a Dolby Digital decoder/amplifier
with built-in Dolby Digital decoder ....................... 13
Connecting the power cord .......................................... 14
Installing batteries in the remote control unit ............ 14
Preliminary Knowledge ........................... 16
Playable discs by XV-D2000BK .................................... 16
What are title, chapter and track? .................................. 16
How to use numeric keys ............................................. 17
On-screen guide and invalid operation icons ............ 18
On-screen displays ........................................................ 18
Screen saver function ................................................... 20
Dolby Digital .................................................................. 21
Basic Operations ...................................... 22
Video CD Operations ............................... 42
Playing back from a desired track ............................... 42
Advancing a picture frame-by-frame .......................... 42
Playing in slow-motion ................................................. 42
Resuming playback ....................................................... 43
Playing back in a desired order ................................... 43
Repeating all tracks ....................................................... 44
Repeating a single track ............................................... 45
Repeating a part ............................................................ 45
Starting playback from a specified time ..................... 46
Playing back only the beginning of each track .......... 47
Playing back tracks in random order ........................... 47
Selecting audio channels ............................................. 48
Selecting picture character ........................................... 48
Checking total disc time ............................................... 49
Accessing the PBC function ......................................... 49
Controlling Other Equipment .................. 51
Controlling TV ................................................................. 51
Controlling CATV converter or satellite tuner ............... 52
Controlling a JVC amplifier or receiver ......................... 52
Playing back ................................................................... 22
Selecting an item from a menu ................................... 23
Selecting Preferences .............................. 53
DVD Video Operations ............................. 24
Preferences via "PREFERENCE" on-screen display ....... 53
Setting Parental Lock .................................................... 56
Displaying DVD menus ................................................. 24
Locating a title ............................................................... 25
Selecting a chapter ........................................................ 25
Starting playback from a specific time ....................... 26
Advancing a picture frame-by-frame .......................... 26
Playing in slow-motion ................................................. 27
Resuming playback ....................................................... 27
Repeating a title ............................................................. 27
Repeating a chapter ...................................................... 28
Repeating a desired part .............................................. 29
Changing the angle ....................................................... 30
Subtitle on/off ................................................................ 30
Changing the subtitle language ................................... 30
Changing the audio ....................................................... 31
Selecting picture character ........................................... 32
Down Mix ....................................................................... 33
Compression .................................................................. 34
Other Information .................................... 59
Care and handling of discs ........................................... 59
Table of languages and their abbreviations ............... 60
Manufacture's code list ................................................ 61
AV COMPULINK remote control system ..................... 62
Troubleshooting ............................................................ 64
Specifications ................................................................. 65
1
XV-2000BK/1E
1
9/24/97, 1:09 PM
XV-D2000BK
LET0091-001A
General Information
Important cautions
Installation of the player
• Select a place which is level, dry and neither too hot nor too cold (between 5˚C
and 35˚C or 41˚F-95˚F).
• Leave sufficient distance between the player and a TV.
• Do not use the player in a place subject to vibrations.
Power cord
• Do not handle the power cord with wet hands!
• A small amount of power (5 watts) is always consumed while the power cord is
connected to the wall outlet.
• When unplugging the player from the wall outlet, always pull the plug, not the
power cord.
Malfunctions, etc.
• There are no user serviceable parts inside. If anything goes wrong, unplug the
power cord and consult your dealer.
• Do not insert any metallic object into the player.
Safety precautions
Avoid moisture, water and dust
Do not place your player in moist or dusty places.
Avoid high temperatures
Do not expose your player to direct sunlight or place it near a heating device.
When you’re away
When away on travel or otherwise for an extended period of time, pull the plug
from the outlet.
Do not insert foreign objects into the player
Do not insert wires, hairpins, coins, etc. into your player.
Do not block the vents
Blocking the vents may damage your player.
Care of the cabinet
When cleaning your player, use a soft cloth and follow the relevant instructions on
the use of chemically-coated cloths. Do not use benzene, thinner or other organic
solvents and disinfectants. These may cause deformation or discoloring.
If water gets inside the player
Turn off the power switch and pull the plug from the electrical socket, then call the
store where you made your purchase. Using the player in this state may cause a
fire or electrical shock.
2
XV-2000BK/1E
2
9/24/97, 1:09 PM
XV-D2000BK
LET0091-001A
Introduction
Introducing the
XV-D2000BK
DVD is the most innovative creation of audio and video technology. With the same
physical size as the CD, DVD has much more storage capacity and can play back the
finest images and sound. It also realizes revolutionary features such as multilanguage capability, multi-angle function, etc.
The XV-D2000BK DVD player delivers the outstanding performance of DVD, thanks
to JVC’s advanced technology and sophisticated graphical user navigation system.
The XV-D2000BK can also play back CDs and video CDs.
High quality video images
• Amazing color purity and sharpness with extremely low video distortion.
• Greater horizontal resolution than S-VHS or Laser disc.
High quality sound
• The newly developed K2 interface LSI delivers pure sound with no digital distortion.
• 1-bit DD converter that handles 20- bit, 96-kHz Fs audio signals and JVC’s original
PEM (Pulse Edge Modulation) circuit achieve more than double the resolution of
conventional converters.
• By separating and isolating the power supplies for the analog and digital circuitry,
the interference which causes digital noise to enter the analog system is eliminated.
• Separation of the circuits, PLL clock generators and power supplies for the audio
unit and video unit improve sound quality.
Support for various DVD functions
Note: Each function below is available only if the DVD disc to be played back
supports it.
• Multi-language function
Multi-language function for audio and subtitles. You can choose any combinations
of audio and subtitle languages, such as English audio with subtitles, or audio
with no subtitles.
• Multi-angle function
You can select from multiple camera angles of the same scene.
• Parental lock
You can restrict the playback of discs with scenes which you do not wish your
child to see, such as adult or violent films.
• Multi aspects
Images can be viewed normally on a 4:3 (normal) television from a disc made for
16:9-screen (wide) televisions.
• Dolby Digital
The XV-D2000BK is fully equipped with Dolby Digital. It provides both optical and
coaxial digital outputs for connection to an external Dolby Digital decoder, as well
as 5.1 channel analog outputs for be connection to an external AV amplifier
equipped with 5.1 channel analog inputs.
3
XV-2000BK/1E
3
9/24/97, 1:09 PM
XV-D2000BK
LET0091-001A
Introduction
Controls and functions
7 Front panel
XV-D2000
1
DVD PLAYER
STANDBY
POWER
3
4
RESUME
DOLBY DIGITAL 5.1
5 4
LINEAR PCM
6 5
96KHz SAMPLING
2
ON/STANDBY
PHONES
8
PHONES LEVEL
9
DOLBY
D I G I T A L
MIN
MAX
STANDBY indicator
96kHz SAMPLING indicator
Lights when the power cord is connected and the player
is at standby. When the player turns on, the STANDBY
indicator goes off.
Lights when the sampling frequency of linear PCM
audio played back by DVD is 96kHz.
Remote sensor
POWER ON/STANDBY
Turns the player on or off (standby).
PHONES
Connection terminal for headphones.
RESUME indicator
Lights when a point to be resumed is stored.
PHONES LEVEL
DOLBY DIGITAL 5.1 indicator
Adjusts the listening level of headphones connected to
the PHONES jack.
Lights when all the Dolby Digital 5.1-channel audio
outputs (FRONT, REAR, CENTER, SUBWOOFER) on the
rear panel are feeding signals.
Display
LINEAR PCM indicator
DVD indicator
Lights when linear PCM audio is played back by DVD
or CD.
Lights when a DVD disc is inserted.
It blinks just after a disc is inserted.
Indicates the current status of the player.
4
XV-2000BK/1E
4
9/24/97, 1:09 PM
7
DOLBY DIGI
XV-D2000BK
LET0091-001A
Introduction
13
ON SCREEN
10
7
DVD MENU
16
ENTER
17
15
DOLBY DIGITAL DECODER BUILT-IN
14
11
12
18
19
20
18
Disc tray
ENTER
Used to load discs.
Executes a selected item in a DVD menu or on-screen
display.
ON SCREEN
Displays an on-screen display of the player on the
television screen or monitor. (See "On-screen displays"
on page 18.)
4/1, ¢/¡ (Skip/Search)
Performs skip, fast forward/backward, or previous/next.
7 (Stop)
0 (Open/Close)
Stops playback.
Opens and closes the disc tray.
3 (Play/Select)
/ / / (Cursor buttons)
Selects an item in on-screen displays or DVD menus.
Starts playback. Also, used a SELECT button for PBC
of video CD.
DVD MENU
Displays a DVD menu on the television screen or
monitor.
5
XV-2000BK/1E
5
9/24/97, 1:10 PM
XV-D2000BK
LET0091-001A
Introduction
7 Remote control unit
17
POWER
OPEN/CLOSE
TV
DVD
MUTE
TV/VIDEO
CATV/SAT
1
2
SET
19
18
21
20
3
1
2
3
4
5
6
7
8
4
9
CH RETURN
100+
10
5
+
+
SLOW
CH
+
ANGLE
SUB TITLIE
22
+
TV
VOLUME
6
RESUME
+10
0
AUDIO
VOLUME
TV
DVD
23
CATV
7
25
ON /OFF
8
24
9
9
10
STE
11
12
13
14
P
S
ON
EN
CRE
RET
UR
26
N
27
DVD M
MENU
LE
T IT
EN
U
28
UP
LEFT
15
RIGHT
DOWN
16
EN T ER
RM-SVD2000U REMOTE CONTROL
6
XV-2000BK/1E
6
9/24/97, 1:10 PM
XV-D2000BK
LET0091-001A
Introduction
OPEN/CLOSE
Opens and closes the disc tray.
(Cursor buttons)
/ / /
Selects an item in on-screen display, title menus or DVD
menus.
POWER-CATV/SAT
Turns the CATV converter or satellite tuner on or off.
ENTER
Executes a selected item in a menu or on-screen display.
SET
Used to set the manufacturer’s code for operating
another manufacturer’s TV, CATV or satellite tuner from
the remote control unit.
(See "Controlling Other Equipment" on pages 51.)
Infrared light-emitting window
Point this window toward the remote sensor on the
front panel when pressing buttons.
POWER-TV
Numeric keys
Turns the TV on or off.
Depending on the selection of DVD/TV/CATV switch,
they are used for entering a title, track or chapter
number, or selecting a TV channel.
POWER-DVD
SLOW (for DVD/video CD)
Starts slowmotion playback.
(See "Playing in slow-motion" on pages 27 and 42.)
Turns the XV-D2000BK on or off (standby).
MUTE
Turns the mute function of the TV on or off.
CH
TV/VIDEO
Changes the channels of TV or CATV converter/satellite
tuner.
Switches input of the TV (either TV or VIDEO).
TV VOLUME
RESUME
Adjusts the TV volume.
Stores the location to be resumed later.
(See "Resuming Playback" on pages 27, 35 and 43.)
AUDIO VOLUME
Adjusts the volume of a JVC AV amplifier or receiver.
ANGLE (for DVD)
Changes camera angles during playback of a DVD
shooting by multiple cameras.
(See "Changing the Angle" on page 30.)
4/1, ¢/¡ (Skip/Search)
Performs skip, fast forward/backward, or previous/next.
3/SELECT
Starts playback. Also, use as a SELECT button for PBC
of video CD.
8 (Pause)
SUB-TITLE ON/OFF (for DVD)
Turns on or off subtitles.
(See "Subtitle on/off" on page 30.)
DVD/TV/CATV
Selects the function of the numeric keys to control the
corresponding device.
STEP (for DVD/video CD)
Advances pictures frame by frame.
(See "Advancing a picture frame-by-frame" on pages
26 and 42.)
Pauses during playback.
RETURN (for DVD/video CD)
7 (Stop)
Returns to the previous menu.
Stops playback.
DVD MENU
ON SCREEN
Displays an on-screen display of the player on the
television screen or monitor.
(See "On-screen displays" on page 18.)
Displays a DVD menu on the television screen or
monitor.
(See "Displaying DVD menus" on page 24.)
TITLE MENU
Displays a title menu of DVD on the TV screen.
7
XV-2000BK/1E
7
9/24/97, 1:11 PM
XV-D2000BK
LET0091-001A
Introduction
7 Rear panel
1
ATTENUATOR
2CH
RIGHT
OFF
2
FRONT
LEFT
RIGHT
REAR
LEFT
RIGHT
6
CENTER
LEFT
SUBWOOFER
NORMAL
1
GAIN PLUS
ON
AUDIO OUT
VIDEO OUT
VIDEO
S-VIDEO
3
DIGITAL OUT
PCM/DOLBY DIGITAL
COAXIAL
AV COMPU LINK
OPTICAL
4
5
AUDIO OUT (2CH)
DIGITAL OUT
2CH (RIGHT and LEFT) terminals output analog
audio signals.
ATTENUATOR switch attenuates the output level
when it is set to ON.
Outputs digital audio signals.
Both coaxial and optical connectors are provided.
AUDIO OUT (5.1CH)
FRONT (RIGHT and LEFT), REAR (RIGHT and
LEFT), CENTER, and SUBWOOFER terminals
output Dolby digital 5.1ch. analog audio signals.
SUBWOOFER switch boosts the SUBWOOFER
signal when it is set to GAIN PLUS.
AV COMPU LINK
Connects with another JVC equipment supporting the AV
Compulink to facilitate operations.
(See "AV COMPULINK remote control system" on page 62.)
AC POWER CORD
Connects to the wall outlet.
VIDEO OUT
VIDEO outputs composite video signals, while SVIDEO outputs S-video signals.
Supplied accessories
OPE
N/C
LOS
E
CAT
V/S
AT
POWE
TV
R
DVD
SET
MUTE
TV/VID
1
EO
2
4
CH
RET
9
0
+
W
100
+10
+
CH
TV
UME
UME
LE
ON
SUB
/OF
TITL
F
IE
+
+
VOL
ANG
6
8
URN
10
+
SLO
RES
3
5
7
AUD
VOL IO
UME
DVD
TV
CAT
V
O N S C REEN
EP
ST
RE
TU
TIT L E M E NU
RN
DV
D
ME
Audio Cable (x 3)
LEFT
DOWN
EN
RM
-SV
D20
00U
REM
OTE
NU
Audio/video
cable (x 1)
UP
RIG
HT
T ER
CONTR
OL
RM-SVD2000U
Remote Control Unit (x 1)
AV compulink
cord (x 1)
S-video cable (x 1)
R6P(SUM-3)/AA(15F)
batteries (x 2)
for RM-SVD2000U
8
XV-2000BK/1E
8
9/24/97, 1:11 PM
XV-D2000BK
LET0091-001A
Before Using for the First Time
Before making any
connections
• Since different components often have different terminal names, carefully read
the instruction manual supplied with the component you wish to connect.
• Do not connect the AC power cord until all other connections have been made.
Connections
7 Connecting with a TV
You can enjoy the XV-D2000BK by simply connecting it with a television set. To hear
audio sound with better quality, connect the audio outputs with your audio
equipment. (See the following pages.)
Note:
Be sure not to plug in the power cord until all other connections have been
made.
The XV-D2000BK can be connected directly to a television set equipped with stereo
audio input and video input jacks using the supplied audio/video cables.
If your television set has a monaural audio input instead of stereo, you need to use an
optional audio cable which converts stereo audio output to monaural.
If your television set has an S-video input, we recommend you to connect it with SVIDEO of the player using the supplied S-video cable, in addition to the (standard)
video connection, to get a better picture quality.
Connect VIDEO OUT of the player with the video input of a television set. Connecting
VIDEO OUT of the player to a TV via a VCR may cause a monitor problem when
playing back a copy-protected disc.
The ATTENUATOR switch beside the 2CH audio outputs should be normally set to
OFF. If you hear the audio distorted because the sensitivity of the TV’s audio input is
too high, set the ATTENUATOR to ON.
ATTENUATOR switch
ATTENUATOR
2CH
RIGHT
OFF
XV-D2000BK
FRONT
LEFT
RIGHT
REAR
LEFT
RIGHT
CENTER
LEFT
SUBWOOFER
1
NORMAL
GAIN PLUS
ON
AUDIO OUT
VIDEO OUT
VIDEO
DIGITAL OUT
PCM/DOLBY DIGITAL
S-VIDEO
COAXIAL
AV COMPU LINK
OPTICAL
S-Video cable (Supplied)
To S-video inputs
Yellow
To video input
White
To audio input left
Red
To audio input right
TV
Audio/video cable (Supplied)
To VIDEO OUT
Yellow
Yellow
To video input
To 2CH RIGHT
Red
To 2CH LEFT
Audio/video cable (mono)
(optional)
To audio input (mono)
Black
White
TV
DVD Player
9
XV-2000BK/1E
9
9/24/97, 1:11 PM
XV-D2000BK
LET0091-001A
Before Using for the First Time
7 Connecting with an audio amplifier or receiver
You can enjoy high-quality audio by connecting the player's audio outputs (2CH)
to your amplifier or receiver.
Note: Be sure not to plug in the power cord until all other connections have been
made.
Connect the player's AUDIO OUT (2CH) to any line-level inputs (such as AUX,
DVD, CD, etc.) of an audio amplifier or receiver.
The ATTENUATOR switch beside the 2CH audio outputs should be normally set
to OFF. If you hear the audio distorted because the sensitivity of the amplifier’s
line input is too high, set the ATTENUATOR to ON.
If the “DOWN MIX” item in the DVD on-screen display is set to “OFF”, you may
not be able to get the proper audio signal from the player’s 2CH outputs when
playing back a DVD disc with Dolby Digital 5.1-channel audio.
(See “Down Mix” on page 33)
ATTENUATOR switch
ATTENUATOR
2CH
RIGHT
OFF
XV-D2000BK
FRONT
LEFT
RIGHT
REAR
LEFT
RIGHT
CENTER
SUBWOOFER
LEFT
NORMAL
1
GAIN PLUS
ON
AUDIO OUT
VIDEO OUT
S-VIDEO
DIGITAL OUT
PCM/DOLBY DIGITAL
COAXIAL
AV COMPU LINK
OPTICAL
White
Red
VIDEO
Audio cable
(Supplied)
To audio inputs
Amplifier or receiver
10
XV-2000BK/1E
10
9/24/97, 1:11 PM
XV-D2000BK
LET0091-001A
Before Using for the First Time
7 Connecting with an amplifier equipped with Dolby Digital
5.1-channel inputs
Connect the player’s 5.1-channel outputs (FRONT-RIGHT/LEFT, REAR-RIGHT/LEFT,
CENTER, and SUBWOOFER) to the Dolby Digital 5.1-channel inputs of an amplifier
using audio cables. Be sure to connect correctly between corresponding terminals.
Notes: • When using 5.1-channel outputs, you have to set some preferences (CENTER SPEAKER, SURROUND SPEAKERS and BASS REDIRECT) in the
“PREFERENCE” display:. (See “Preferences via “PREFERENCE” on-screen
display” on page 53.)
• The subwoofer output level can be selected between NORMAL and GAIN
PLUS by the SUBWOOFER switch. Normally it should be set to NORMAL
but to enhance the low frequency, set it to GAIN PLUS.
• You can connect the audio outputs from the player to both a Dolby surround system and a TV via the 5.1-channel and 2-channel outputs.
However, be sure to set DOWN MIX in the DVD on-screen display correctly
according to the playback system (surround system or TV) when playing
back a Dolby Digital 5.1-channel source. Otherwise, audio is not played
back correctly. (See “Down Mix” on page 33.)
Therefore, you cannot get proper audio from both the 2-channel and 5.1channel outputs.
SUBWOOFER switch
ATTENUATOR
2CH
RIGHT
OFF
FRONT
LEFT
RIGHT
REAR
LEFT
RIGHT
CENTER
LEFT
XV-D2000BK
SUBWOOFER
NORMAL
1
GAIN PLUS
ON
AUDIO OUT
VIDEO OUT
VIDEO
S-VIDEO
DIGITAL OUT
PCM/DOLBY DIGITAL
COAXIAL
AV COMPU LINK
OPTICAL
SUB
FRONT REAR CENTER WOOFER
Front speaker
Front speaker
Audio cable
(Supplied)
Center speaker
FRONT REAR CENTER SUB
WOOFER
To audio inputs
Sub woofer
Amplifier or receiver
Rear speaker
Rear speaker
11
XV-2000BK/1E
11
9/24/97, 1:11 PM
XV-D2000BK
LET0091-001A
Before Using for the First Time
7 Connecting with an audio equipment with digital input
By connecting the player’s DIGITAL OUT (coaxial or optical) with the digital input
of an amplifier, DAT or MD using a digital cable, the digital stereo audio signal in
a disc is directly transferred.
XV-D2000BK
ATTENUATOR
2CH
RIGHT
OFF
FRONT
LEFT
RIGHT
REAR
LEFT
RIGHT
CENTER
SUBWOOFER
LEFT
1
NORMAL
GAIN PLUS
ON
AUDIO OUT
VIDEO OUT
VIDEO
Coaxial
cable
S-VIDEO
or
DIGITAL OUT
PCM/DOLBY DIGITAL
COAXIAL
AV COMPU LINK
OPTICAL
Optical
digital
cable
To digital input
MD Player
Note: • Before actual usage, set “DIGITAL AUDIO OUTPUT” in the “PREFERENCE”
display to “PCM ONLY,” otherwise, playing back a Dolby Digital encoded
DVD may generate noise and, in the worse case, damage your speakers.
See “Preference via "PREFERENCE" on-screen display” on pages 53.
• Set “DOWN MIX” setting in the DVD on-screen display to “L0/R0” or “Lt/
Rt”. (See “Down Mix” on page 33.)
12
XV-2000BK/1E
12
9/24/97, 1:11 PM
XV-D2000BK
LET0091-001A
Before Using for the First Time
7 Conecting with a Dolby Digital decoder/amplifier with
built-in Dolby Digital decoder
Connect the player’s DIGITAL OUT (coaxial or optical) to the digital input of a
Dolby Digital decoder or an amplifier with built-in Dolby Digital decoder using an
optional digital cable.
Notes: • Before actual usage, set “DIGITAL AUDIO OUTPUT” in the “PREFERENCE”
on-screen display to “PCM/AC-3”. See “Preference via “PREFERENCE” onscreen display” on pages 53.
• With this connection, the player’s settings for COMPRESSION, DOWN MIX,
CENTER SPEAKER, SURROUND SPEAKERS and BASS REDIRECT are invalid. Settings for these items must be done in the decoder.
XV-D2000BK
ATTENUATOR
2CH
RIGHT
OFF
FRONT
LEFT
RIGHT
REAR
LEFT
RIGHT
CENTER
SUBWOOFER
LEFT
1
NORMAL
GAIN PLUS
ON
AUDIO OUT
VIDEO OUT
VIDEO
S-VIDEO
DIGITAL OUT
PCM/DOLBY DIGITAL
COAXIAL
AV COMPU LINK
OPTICAL
Front speaker
Front speaker
Coaxial
digital
cable
or
Optical
digital
cable
Center speaker
To digital input
Sub woofer
Amplifier or receiver
Rear speaker
Rear speaker
13
XV-2000BK/1E
13
9/24/97, 1:11 PM
XV-D2000BK
LET0091-001A
Before Using for the First Time
Connecting the power
cord
When all the connections have been made, insert the power plug into the wall outlet
firmly. The STANDBY indicator lights and the setup is completed.
•
•
•
•
•
Warning
Disconnect the power cord if you are not going to use the player for a long time.
Disconnect the power cord before cleaning the player.
Disconnect the power cord before moving it.
Do not connect or disconnect the power cord with wet hands.
Do not pull the power cord when disconnecting it, as this may damage the cord
and cause fire, electric shock, or other accidents.
Caution
• Do not damage, remodel, twist, or pull the power cord, as this may cause fire,
electric shock, or other accidents.
• Contact a dealer and get a new power cord if the cord is damaged. A damaged
cord may cause fire, electric shock, or other accidents.
• Do not put anything heavy or this player on the power cord, as this may cause
fire, electric shock, or other accidents.
Installing batteries in
the remote control unit
The battery compartment is located on the back of the remote control unit.
1. Press down on the triangular
mark of the compartment cover,
and pull up the cover to open the
compartment.
2. Place the two accessory R6P
(SUM-3)/AA(15F) batteries in the
remote control according to the
polarity markings (“+” and “–”)
inside the compartment and on
the batteries.
3. Place the cover over the compartment, and press down lightly.
14
XV-2000BK/1E
14
9/24/97, 1:11 PM
XV-D2000BK
LET0091-001A
Before Using for the First Time
The batteries will last about one year with normal use. If the functions of the remote
control become erratic, replace the batteries. See “Precautions for the safe use of
batteries” below for more information.
Precautions for the safe use of batteries
Observe the following precautions for the safe use of batteries. If they are
used improperly, their life will be shortened, they may burst or their contents
may leak.
• Remove the batteries from the remote control if it is not going to be used for a
long period of time.
• Remove dead batteries and dispose of them properly.
• Never leave dead batteries lying around, take them apart, mix them with other
refuse, or throw them into an incinerator.
• Never touch liquid that has leaked out of a battery.
• Do not mix new and old batteries, or batteries of different types, when replacing
them.
15
XV-2000BK/1E
15
9/24/97, 1:11 PM
XV-D2000BK
LET0091-001A
Preliminary Knowledge
Playable discs by
XV-D2000BK
The XV-D2000BK can play back DVD video, video CD and audio CD discs.
• DVD players and DVD discs have their own numbers describing the region(s) where
they can be played by retail areas. These numbers are called "Region Codes." The
Region Code for this unit is "1", so any discs whose Region Codes is not "1" cannot
be played.
Examples of playable DVD discs
1
ALL
12
1 2
3 4
• This unit is designed to use the NTSC system.
• Any other discs than listed above (CD-ROM, Photo CD, etc.) cannot be played.
Playing back such discs may generate noise and damage speakers.
• Sound of CD-G discs are playable but pictures are unplayable.
• Do not play back CD-R discs. Playing back a CD-R disc may damage the contents
of the disc.
What are title, chapter
and track?
A DVD disc comprises “titles,” while an audio CD or video CD comprises “tracks.”
Each title may be divided into some “chapters.” For example, if a disc contains
some movies, each movie may have its own title number, and each movie may be
divided into some chapters. In a karaoke disc, each song usually has its own title
number and does not have chapters. In general, each title has an independent
content, while each chapter in the same title has continuity.
Title 1
Chapter 1
Chapter 2
Title 2
Chapter 3
Chapter 1
Chapter 2
For a DVD
Track 1
Track 2
Track 3
For an audio CD
16
XV-2000BK/1E
16
9/24/97, 1:12 PM
Track 4
XV-D2000BK
LET0091-001A
Preliminary Knowledge
How to use numeric
keys
1
2
3
4
5
6
7
8
9
0
+10
CH RETURN
10
According to the setting of the DVD/TV/CATV switch, the numeric key functions
differ.
7 When setting the DVD/TV/CATV switch to “TV”
The numeric keys select TV channels.
100+
7 When setting the DVD/TV/CATV switch to “CATV”
The numeric keys select channels of a CATV converter or satellite tuner.
7 When setting the DVD/TV/CATV switch to “DVD”
The numeric keys are used to select a track or title number, or to enter a specific
time or chapter number.
1) To select a track or title number directly using numeric keys
• To select a number between 1 and 10 ...
Press the corresponding key(s) for the number.
• To select a number higher than 10 ...
Use the +10.
Example 1: To select 13
+10 = 3
Example 2: To select 35
+10 = +10 = +10 = 5
Example 3: To select 40
+10 = +10 = +10 = 10
2) To enter a specific time or chapter number via on-screen
displays
Press the corresponding numeric keys for a desired time or number from left to
right digits, then ENTER.
Example 1: To enter 10:52
1 = 0 = 5 = 2 = ENTER
Example 2: To enter chapter number 14
1 = 4 = ENTER
•
If you enter a wrong number, enter zeros until the wrong number disappears,
then reenter the correct numbers.
17
XV-2000BK/1E
17
9/24/97, 1:12 PM
XV-D2000BK
LET0091-001A
Preliminary Knowledge
On-screen guide and
invalid operation icons
7 On-screen icons
During DVD playback, you may see icons displayed over the picture. These have
the following meanings.
: Displayed at the beginning of a scene recorded from multiple angles.
(See “Changing the angle” on page 30.)
: Displayed at the beginning of a scene recorded with multiple audio
languages. (See “Changing the audio” on page 31.)
: Displayed at the beginning of a scene recorded with multiple subtitles.
(See “Changing the subtitle language” on page 30.)
You can set not to display on-screen icons above via the preference settings
described on pages 53.
7 Invalid operation icon
When you press a button, if the XV-D2000BK does not accept its operation,
appears on your television screen. Operations are occasionally unacceptable even
if
is not displayed.
Note that some operation may not be accepted. For example, some discs may not
allow fast forward, fast backward or slow-motion playback.
On-screen displays
The player provides several On-Screen Displays shown below for choosing
preferences for initial settings and functions which are not frequently used in most
cases.
Opening display
DVD during playback
For preferences
18
XV-2000BK/1E
18
9/24/97, 1:12 PM
XV-D2000BK
LET0091-001A
Preliminary Knowledge
CD (For CD during playback
or stop and for video CD during stop)
For video CD
(during playback)
For DVD parental lock settings
To access on-screen displays, press ON SCREEN (Note that operation for accessing
the “Parental Lock” on screen displays is different.). Depending on the type of disc
inserted (or “no disc”) and the player’s mode, a proper on-screen display is accessed.
See "Setting Parental Lock" on pages 56.
appears at the on-screen display. You can move
used to select items you want to work with.
using
/ / /
.
is
Basic operations in the on-screen display are as follows.
• With an item like
, you can change the setting with / by placing
on
it.
•
- type item works when you place
on the item and press ENTER.
indicates the operation to be done.
• In the message box,
• Numbers are entered using numeric keys.
• Some functions become effective by pressing the ENTER button after specifying
necessary entries.
• Pressing ON SCREEN again exits the on screen display.
19
XV-2000BK/1E
19
9/24/97, 1:13 PM
XV-D2000BK
LET0091-001A
Preliminary Knowledge
In the displays for playback mode of DVD and video CD, the following information
is displayed under the image screen.
DVD
Current
title number
Current relative
position on the
title (B: beginning,
E: end)
Video CD
Current
chapter number
Elapsed time from
the beginning of
the current title
Current
track number
Current relative
position on the track
(B: beginning, E: end)
Elapsed time from
the beginning of
the current track
Refer to the corresponding paragraphs for detailed information.
Screen saver function
A television monitor screen may be burned out if a static picture is displayed for a
long time. To prevent this, the player automatically activates the screen saver function
if a static picture, such as an on-screen display or menu, is displayed for 5 minutes.
Pressing any button of the player or the remote control unit will release the screen
saver function and go back to the previous display.
20
XV-2000BK/1E
20
9/24/97, 1:13 PM
XV-D2000BK
LET0091-001A
Preliminary Knowledge
Dolby Digital
Dolby Digital is a surround system using the digital audio compression technology
developed by Dolby laboratories Licensing Corporation. It is configured with six
channels and reproduced by a speaker system including front (L and R), rear (L and
R), center and sub-woofer. Because a sub-woofer in this system is an auxiliary
speaker, this system is called “5.1 channel system”.
In a DVD video disc, the surround audio data is recorded digitally in a bit-stream.
This information is separated into up to 6 (analog) audio channel signals by a decoder,
which are reproduced by up to 6 corresponding speakers via a 6-channel amplifier.
A disc encoded with Dolby Digital displays the symbol. Note that not all Dolby Digital
encoded DVD video discs contain 6 channel signals. Some may contain only L and
R, while the others L, R and rear.
7 The XV-D2000BK fully supports Dolby Digital.
* Built in Dolby Digital decoder and equipped with 5.1ch. outputs.
You do not need an external Dolby Digital decoder. The player decodes Dolby
Digital signal internally and outputs decoded analog signals from the 5.1
channel outputs, which are to be connected directly to an 6-channel amplifier
equipped with 5.1 channel inputs. (See “Connecting with an amplifier
equipped with Dolby Digital 5.1-channel inputs” on page 11)
* Displaying playback Dolby Digital Channels
The front panel display indicates Dolby Digital channels being played back.
L, R:
LS, RS:
C:
LFE:
S:
for front (L, R) speakers
for rear (L, R) speakers
for a center speaker
for a sub-woofer
for rear speakers (monaural)
* Down Mix selection
Depending on the audio system for playback, you can select the optimum
stereo mix signals. (See “Down Mix” on page 33)
* Selections/settings for 5.1-channel output signals
• Sub-woofer output level selection
You can boost the sub-woofer output level to enhance the low frequency range.
(See “Rear panel” on page 8)
• Selections for Compression (See “Compression” on page 34)
You can select whether or not compressing the dynamic range when playing
back with a 5.1-channel surround system. With no compression, you can enjoy
a dynamic sound DVDs provide. However, we recommend to compress if you
enjoy with low sound level.
• Settings for Center speaker, Surround speakers and Bass redirect
(See See “Preferences via “PREFERENCE” on-screen display” on page 53)
According to your speaker configuration, you can get the optimum sound
balance.
* Manufactured under license from Dolby Laboratories Licensing Corporation.
DOLBY, the double-D symbol
and "AC-3" are trademarks of Dolby Laboratories
Licensing Corpration.
21
XV-2000BK/1E
21
9/24/97, 1:13 PM
XV-D2000BK
LET0091-001A
Basic Operations
This chapter explains the basic playback common for DVD, audio CD and video CD.
The illustrations in the left column here show the buttons of the remote control unit
to be operated, however, you may use the corresponding buttons on the front panel
of the player.
Playing back
1. Press OPEN/CLOSE to open the disc tray.
OPEN/CLOSE
2. Place the disc in the tray with the label side up.
ON SCREEN
/
Notes: When loading a disc in the tray, be sure to position the disc inside the recess.
Otherwise, the disc may be damaged when the tray is closed, and the disc
may not be removed from the player.
3. Press 3 to close the tray.
The player starts playback from the beginning of the disc.
If a menu appears:
Refer to “Selecting from menu items” on the next page.
To stop playback:
Press 7.
To pause playback:
Press 8. Pressing 3 resumes playback.
To move fast forward or fast backward:
Hold down 4/1 or ¢/¡. Releasing the button returns the player to the
normal playback mode.
* Both fast forward and fast backward move slowly for a while and then quickly
thereafter.
* During fast forward or fast backward with a DVD disc or video CD, no audio is
output.
If it seems that the picture’s vertical/horizontal ratio is not correct when
playing back a DVD video disc, set the MONITOR TYPE in the PREFERENCE
display correctly. See “Preferences via “PREFERENCE” on-screen display” on
page 53.
Some functions like fast forward or fast backward are disabled because of the
recording method of DVD discs. In this case, the functions do not work even if
the operations are done.
22
XV-2000BK/1E
22
9/24/97, 1:13 PM
XV-D2000BK
LET0091-001A
Basic Operations
Selecting an item from a
menu
With some DVD and video CD discs, a menu may appear automatically after inserting
a disc or manually during playback or stop.
Example of menu
7 For DVD videodisc
To select an item in the menu:
UP
LEFT
1. Select a desired item using / / / , then press ENTER.
The player starts playback of the selected item.
RIGHT
DOWN
EN T E R
With some discs, you can select the item by entering the corresponding number
using the numeric keys, causing the player to automatically start playback.
7 For video CD
1
2
3
4
5
6
7
8
CH RETURN
10
1. Press the numeric button corresponding to a desired item.
The player automatically starts playback.
9
* If you can see “NEXT” or “PREVIOUS,” or equivalents in the menu, pressing
4/1 or ¢/¡ usually turns the menu pages.
* Pressing “RETURN” returns to the previous menu.
100+
0
+10
The operation procedure may be different depending on discs. Read the manual
for the discs and follow the procedure indicated in the menu.
23
XV-2000BK/1E
23
9/24/97, 1:13 PM
XV-D2000BK
LET0091-001A
DVD Video Operations
This chapter explains all the functions of the player for playing back DVD discs. You
can enjoy DVD in various ways, some of which only DVD can offer.
Read “Basic Operations” on pages 22 and 23 before reading this chapter.
Displaying DVD menus
Most DVD discs have their own menus for selecting an item (title or chapter) to be
played. A menu may be displayed automatically after inserting a disc or manually
during playback or stop.
7 To access a title menu
1. Press TITLE MENU.
A title menu appears.
See “Selecting an item from a menu” on page 23, as well as the operation manual
of the disc, for details of menu operations.
If
appears when pressing the TITLE MENU button:
The disc does not contain a title menu.
Pressing TITLE MENU again turns off the menu and resumes playback from the
previous scene.
7 To access a DVD menu
1. Press DVD MENU.
A DVD menu appears.
See “Selecting an item from a menu” on page 23, as well as the operation manual
of the disc, for details of menu operations.
If
appears when pressing the DVD MENU button:
The disc does not contain any DVD menu.
Pressing DVD MENU again turns off the menu and resumes playback from the
previous scene.
24
XV-2000BK/2E
24
9/24/97, 1:19 PM
XV-D2000BK
LET0091-001A
DVD Video Operations
Locating a title
You can locate a title you want to see by selecting a title number.
1. Press 7 to stop the disc.
1
2
3
4
5
6
7
8
9
0
+10
CH RETURN
2. Press the corresponding numeric keys for a desired title.
The player starts playback of the title.
100+
10
If
appears when pressing numeric key(s):
The disc does not contain the corresponding title.
Selecting a chapter
You can specify a chapter to be played back using the on-screen display.
1. Press ON SCREEN during playback.
The on-screen display appears.
2. Move
to “CHAP. SEARCH” using the / .
The message box indicates “GO TO CHAPTER: “.
UP
LEFT
RIGHT
DOWN
1
2
3
4
5
6
7
8
9
0
+10
CH RETURN
10
3. Enter a desired chapter number using the numeric keys.
See page 17 for details about how to use the numeric keys.
100+
4. Press ENTER.
The player starts playback from the selected chapter.
EN T E R
If
appears when pressing ENTER:
The disc does not contain chapters, or prohibits the chapter search function.
To turn off the on-screen display:
Press ON SCREEN.
25
XV-2000BK/2E
25
9/24/97, 1:19 PM
XV-D2000BK
LET0091-001A
DVD Video Operations
Starting playback from a
specific time
If a DVD disc has time information (such a disc indicates the time in the display on
the front panel), you can specify the time to start playback.
1. Press ON SCREEN during playback.
The on-screen display appears.
2. Move
to the “TIME SEARCH” using / .
The message box indicates “GO TO : : “.
UP
LEFT
RIGHT
DOWN
1
2
3
4
5
6
7
8
9
0
+10
CH RETURN
10
3. Enter a desired time using the numeric keys.
See page 17 for details about how to use the numeric keys.
100+
4. Press ENTER.
The player starts playback from the specified time.
EN T E R
If
appears when pressing ENTER:
The disc does not contain time code or specified time, or prohibits the time
search function.
To turn off the on-screen display:
Press ON SCREEN.
Advancing a picture
frame-by-frame
STE
P
You can advance a still picture frame-by-frame.
1. Press STEP during playback.
The player pauses.
Each time you press STEP, the picture advances one frame.
Pressing 3 returns the player to normal playback.
* The audio is muted during frame-by-frame playback.
* You cannot backward a picture frame-by-frame.
26
XV-2000BK/2E
26
9/24/97, 1:20 PM
XV-D2000BK
LET0091-001A
DVD Video Operations
Playing in slow-motion
You can playback a disc in slow-motion.
1. Press SLOW “+” during playback.
The playback speed slows down to half the normal speed.
+
SLOW
Thereafter, each press of SLOW “+” slows the speed down to 1/3, 1/4, 1/8,
1/16 and 1/32 of the normal speed.
Pressing SLOW “–” speeds up in reverse order of the above.
Pressing 3 returns the player to normal playback.
* Audio is muted during slow-motion playback.
* When the picture is being played back at 1/32 of the normal speed (which is the
slowest), the SLOW “+” button is not effective.
Similarly, “–” button is not effective during 1/2 speed playback.
* Pressing STEP or 8 in slow-motion mode freezes the motion.
Resuming playback
The player can memorize a position on a disc you want to interrupt playback and
resume playback from that position later.
7 Memorizing a position
POWER
CATV/SAT
DVD
TV
RESUME
or
1. During playback, Press RESUME, or press POWER to turn off the power
(STANDBY).
The player memorizes the current playback position of the disc, and the
RESUME indicator on the front panel lights.
To clear the memory:
Take out the disc from the disc tray.
* The last memory overrides the previous memory.
7 Resuming playback
1. Press RESUME when the disc is stopped or the power is off (STANDBY).
RESUME
The player will locate the memory position and resume playback.
Repeating a title
You can repeat playback of the current title.
1. Press ON SCREEN during playback.
The on-screen display appears.
27
XV-2000BK/2E
27
9/24/97, 1:20 PM
XV-D2000BK
LET0091-001A
DVD Video Operations
2. Move
to “REPEAT” using
.
/
UP
LEFT
RIGHT
DOWN
3. Press ENTER once.
The message box indicates “TITLE REPEAT”.
The current title will be repeated.
EN T E R
If
appears when pressing ENTER:
You cannot repeat the title because of the disc contents.
To turn off the on-screen display:
Press ON SCREEN.
Pressing it again turns on the on-screen display again.
To quit Title Repeat:
Press 7.
The player stops playback and quits the title repeat mode.
If you want to quit the title repeat mode but do not want to interrupt playback,
move
to “REPEAT” in the on-screen display and press ENTER twice.
“REPEAT” returns to its original color.
Repeating a chapter
You can repeat a current chapter.
1. Press ON SCREEN during playback.
The on-screen display appears.
2. Move
UP
LEFT
to “REPEAT” using
/
.
RIGHT
DOWN
3. Press ENTER twice.
The current chapter will be repeated.
The message box indicates “CHAPTER REPEAT”.
EN T E R
28
XV-2000BK/2E
28
9/24/97, 1:20 PM
XV-D2000BK
LET0091-001A
DVD Video Operations
If
appears when pressing ENTER:
You cannot repeat the chapter because of the disc contents.
To turn off the on-screen display:
Press ON SCREEN.
Pressing it again turns on the on-screen display again.
To quit Chapter Repeat:
Press 7.
The player stops playback and quits the chapter repeat mode.
If you want to quit the chapter repeat mode but do not want to interrupt
to “REPEAT” in the on-screen display and press ENTER
playback, move
once. “REPEAT” returns to its original color.
Repeating a desired part
You can repeat a desired part in the current title.
1. Press ON SCREEN during playback.
The on-screen display appears.
2. Move
UP
LEFT
to “A-B REPEAT” using
/
.
RIGHT
DOWN
3. At the beginning of the desired part (point A), press ENTER.
EN T E R
4. At the end of the desired part (point B), press ENTER.
The player locates “A” and starts playback between “A” and “B” repeatedly.
EN T E R
To quit A-B Repeat:
Press 7.
The player stops playback and quits the A-B repeat mode.
If you want to quit the A-B repeat mode but do not want to interrupt playback,
to “A-B REPEAT” in the on-screen display and press ENTER.
move
If
appears when pressing ENTER:
You cannot execute the A-B Repeat because of the disc contents.
To turn off the on-screen display:
Press ON SCREEN.
Pressing it again turns on the on-screen display again.
29
XV-2000BK/2E
29
9/24/97, 1:21 PM
XV-D2000BK
LET0091-001A
DVD Video Operations
Changing the angle
Some DVD discs may have “multi-angle” parts, in which multiple cameras were
used to shoot the same scene from different angles. You can select one of these
angles during playback.
1. Press ANGLE on the remote control unit.
Each time you press the button, the angle changes in numerical order.
The ANGLE function is effective only when the current playback scene is recorded
from multiple angles.
ANGLE
Example: Selecting from three different angles
Initial setting:
angle 1
If
Press ANGLE once:
angle 2
Press it again:
angle 3
Press it again:
angle 1
appears when pressing ANGLE:
The current scene is not recorded from multiple angles.
*
You can also select the angle via the “ANGLE” in the on-screen display.
1. Press ON SCREEN during playback.
2. Move
to “ANGLE” using
3. Change the angle number using
/
.
/
.
The current angle number and the total number of recorded angles are
displayed in the box.
Example:
1: currect angle number
3: total number of recorded angles
Subtitle on/off
You can select whether or not subtitles are displayed.
1. Press SUBTITLE ON/OFF on the remote control unit.
The ON/OFF status is switched.
SUB TITLIE
ON /OFF
* Subtitles cannot be displayed unless a DVD includes subtitles.
* With some discs, subtitles are always displayed and SUBTITLE ON/OFF does
not work.
Changing the subtitle
language
You can choose the subtitle language from among the languages included on a disc
during playback.
1. Press ON SCREEN during playback.
The on-screen display appears.
30
XV-2000BK/2E
30
9/24/97, 1:21 PM
XV-D2000BK
LET0091-001A
DVD Video Operations
2. Move
to “SUBTITLE” using
/
.
UP
LEFT
RIGHT
DOWN
The current subtitle number and the total number of recorded subtitles are
displayed in the box.
Example:
The example above indicates that 3 subtitle languages are recorded in the
disc and subtitle language 1 is being played back.
3. Change the subtitle using / .
The subtitle language changes in numerical order.
UP
LEFT
RIGHT
DOWN
Example: Selecting from three subtitle languages
Language 1
Language 2
Language 3
To turn off the on-screen display:
Press ON SCREEN.
Pressing it again turns on the on-screen display again.
Changing the audio
You can change the audio language or sound during playback.
1. Press ON SCREEN during playback.
The on-screen display appears.
2. Move
to "AUDIO" using
/
.
UP
LEFT
RIGHT
DOWN
The current audio channel number and the total number of recorded audio
channels are displayed in the box.
Example:
The example above indicates that 3 audio channels are recorded in the disc
and audio channel 2 is being played back.
31
XV-2000BK/2E
31
9/24/97, 1:21 PM
XV-D2000BK
LET0091-001A
DVD Video Operations
3. Change the audio channel using / .
The audio channel changes in numerical order.
UP
LEFT
RIGHT
DOWN
Example: Selecting from three audio channels
Audio 1
Audio 2
Audio 3
To turn off the on-screen display:
Press ON SCREEN.
Pressing it again turns on the on-screen display again.
Selecting picture
character
You can select from three picture characters; sharp, soft and noise reduction.
1. Press ON SCREEN during playback.
The on-screen display appears.
2. Move
to “PICTURE” using
/
.
UP
LEFT
RIGHT
DOWN
3. Select A, B, C using
/
.
UP
LEFT
RIGHT
A: sharp
B: soft
C: noise reduction
DOWN
* You can set the picture characters for DVDs and video CDs independently.
* The selection is memorized even if the player turns off and on.
To turn off the on-screen display:
Press ON SCREEN.
32
XV-2000BK/2E
32
9/24/97, 1:22 PM
XV-D2000BK
LET0091-001A
DVD Video Operations
Down Mix
You can get the optimum stereo mix signals from DVD discs recorded with Dolby
Digital surround multichannel audio, depending on your audio system by selecting
DOWN MIX correctly.
You can change DOWN MIX setting only when playing back a DVD disc recorded
with Dolby Digital surround multichannel audio.
1. Press ON SCREEN during playback.
The on-screen display appears.
2. Move
to “DOWN MIX” using
/
.
UP
LEFT
RIGHT
DOWN
3. Select from the following selections.
Lt/Rt: If you monitor the player’s 2-channel audio output signals via an
amplifier with built-in Dolby Pro Logic.
Lo/Ro: If you monitor the player’s 2-channel audio output signals via a TV, an
amplifier with no built-in Dolby Pro Logic, or the player’s headphone
jack. Or if you record DVD audio to a cassette tape, MD, etc.
OFF: If you monitor the player’s 5.1-channel audio output signals via an
amplifier equipped with Dolby Digital 5.1-channel inputs.
* Output signal from DIGITAL OUT
When setting “DIGITAL AUDIO OUTPUT” in the PREFERENCE on-screen
display to “PCM ONLY” (see “Selecting Preferences” on page 53”), the
same type of the signal as the analog 2 CH outputs is fed from the DIGITAL
OUT. If you use DIGITAL OUT, select “DOWN MIX” to “Lt/Rt” or “L0/R0”
according to the condition described above.
* If setting “DOWN MIX” to “OFF” while setting “CENTER SPEAKER” and
“SURROUND SPEAKER” in the PREFERENCE on-screen display to “NONE”,
the same signal is output as setting to “Lt/Rt”. (see “Selecting Preferences”
on page 53”)
* If “DOWN MIX” is not correctly selected, you may have a trouble in playing
back a DVD disc recorded with the Dolby Digital surround multichannel
audio as follows.
• Monitoring 2-channel audio with setting “DOWN MIX” to “OFF”: Some
material (such as dialog in a movie) may not be played back. (because
channels except front L and R are not played back.)
• Monitoring 5.1-channel audio with setting “DOWN MIX” to “Lt/Rt” or “L0/
R0”: You cannot hear the sound from speakers except the front L and R.
(because all sounds are mixed into front L and R.)
So if you connect both a Dolby Digital surround system and TV to the player
and use one of them depending on the situation, you must be careful to set
DOWN MIX correctly according to the playback system when playing back a
Dolby Digital 5.1-channel source.
To turn off the on-screen display:
Press ON SCREEN.
33
XV-2000BK/2E
33
9/24/97, 1:22 PM
XV-D2000BK
LET0091-001A
DVD Video Operations
Compression
Most DVD video discs recorded with Dolby Digital offer wider dynamic range than
conventional VHS-videos or video CDs, which usually is too wide for a general homeuse.
When setting “COMPRESSION” to “ON”, audio is played back with dynamic range
compressed. When “OFF”, it is played back as it is recorded.
You can select ON or OFF of “COMPRESSION” only when the DOLBY DIGITAL 5.1
indicator on the player’s front panel lights, which actually means the player is playing
back a DVD disc recorded with Dolby Digital 5- or 5.1-channel surround audio in the
Dolby Digital 5.1-channel playback system.
In other words, the following conditions are satisfied, the indicator lights.
* In the preferences, “CENTER SPEAKER” and “SURROUND SPEAKERS” are
set to “USE”, and “BASS REDIRECT” is set to “SUB”.
* DOWN MIX is set to OFF.
* The front panel display indicates the recorded channels as below.
recorded with 5 channel audio
or
recorded with 5.1 channel audio
In the other cases, the player automatically sets the COMPRESSION setting as below.
* For a DVD disc recorded with linear PCM or MPEG audio: OFF
* For a DVD disc recorded with up to 4-channel Dolby Digital audio: ON
* For a DVD disc recorded with Dolby Digital 5- or 5.1-channel audio but the
player’s preferences are not set as above (=the speaker system does not
contain all units for 5.1 channels: ON
1. Press ON SCREEN during playback.
The on-screen display appears.
2. Move
to “COMPRESSION” using
/
.
UP
LEFT
RIGHT
DOWN
3. Turn compression ON or OFF using
UP
LEFT
/
.
RIGHT
DOWN
To turn off the on-screen display:
Press ON SCREEN.
34
XV-2000BK/2E
34
9/24/97, 1:22 PM
XV-D2000BK
LET0091-001A
Audio CD Operations
This chapter explains all the functions of the player for playing back audio CDs.
Read “Basic Operations” on pages 22 and 23 before reading this chapter.
Playing back from a
desired track
1
2
3
4
5
6
7
8
9
0
+10
CH RETURN
10
7 Using 1/4, ¢/¡ buttons during playback
Pressing ¢/¡ causes the player to jump to the next track and start playback.
Therefore, press ¢/¡ as many times as required to jump to the desired track
and start playback.
Similarly, pressing 1/4 causes the player to jump to the beginning of the
current track and start playback. By pressing it again, the player jumps to the
previous track and starts playback.
7 Using numeric keys
You can also use the numeric keys on the remote control unit to select a track
number. The player automatically starts playback from the selected track regardless
of the player's mode.
100+
See page 17 for details about how to use the numeric keys.
Resuming playback
The player can memorize a position on a disc you want to interrupt playback and
resume playback from that position later.
7 Memorizing a position
POWER
CATV/SAT
DVD
TV
RESUME
1. During playback, Press RESUME, or press POWER to turn off the power
(STANDBY).
The player memorizes the current playback position of the disc, and the
RESUME indicator on the front panel lights.
or
To clear the memory:
Take out the disc from the disc tray.
* The last memory overrides the previous memory.
7 Resuming playback
1. Press RESUME when the disc is stopped or the power is off (STANDBY).
RESUME
The player will locate the memory position and start playback.
35
XV-2000BK/2E
35
9/24/97, 1:22 PM
XV-D2000BK
LET0091-001A
Audio CD Operations
Playing back in a
desired order
You can listen to the tracks on a CD in the order you want.
1. Press ON SCREEN while the disc is stopped.
The on-screen display appears.
2. Move
UP
LEFT
to “PROGRAM” using
/
and press ENTER.
RIGHT
DOWN
EN T E R
or
1
2
3
4
5
6
7
8
CH RETURN
10
3. Select the tracks in the desired order using the numeric keys.
* See page 17 for details about how to use the numeric keys. The entered numbers
are displayed on the screen.
* Up to 16 tracks can be programmed. You may select the same track more than
once.
9
100+
0
+10
If you make a mistake:
Move
to CLEAR in the display using
programmed track is deleted.
/ /
/
and press ENTER. The last
4. Press 3 to start the program playback.
* When all of the programmed tracks have finished playback, the player stops but
the program remains.
* Pressing 7 during the program playback makes the player stop but the program
remains.
To quit the program mode:
Move
to “PROGRAM” in the display using
“PROGRAM” returns to its original color.
36
XV-2000BK/2E
36
9/24/97, 1:23 PM
/ / /
and press ENTER.
XV-D2000BK
LET0091-001A
Audio CD Operations
Repeating all tracks
1. Press ON SCREEN.
The on-screen display appears.
2. Move
UP
LEFT
to “REPEAT” using
.
/
RIGHT
DOWN
3. Press ENTER once.
“REPEAT ALL” is displayed and all tracks are played back repeatedly.
EN T E R
To stop playback
Press 7. The player stops but the All-track repeat mode remains.
To quit All-track Repeat:
Move
to “REPEAT” in the on-screen display and press ENTER twice.
“REPEAT” returns to its original color.
Repeating a single track
1. Press ON SCREEN during playback.
The on-screen display appears.
2. Move
UP
LEFT
to “REPEAT” using
/
.
RIGHT
DOWN
3. Press ENTER twice.
“REPEAT1” is displayed and the current track is played back repeatedly.
EN T E R
To stop playback
Press 7. The player stops but the Single repeat mode remains.
37
XV-2000BK/2E
37
9/24/97, 1:23 PM
XV-D2000BK
LET0091-001A
Audio CD Operations
To quit Single Repeat:
Move
to “REPEAT” in the on-screen display and press ENTER. “REPEAT”
returns to its original color.
Repeating a desired part
UP
LEFT
RIGHT
DOWN
EN T E R
EN T E R
You can repeat a desired part in a CD.
1. Press ON SCREEN during playback.
The on-screen display appears.
2. Move
to “A-B REPEAT” using
/
.
UP
LEFT
RIGHT
DOWN
3. At the beginning of the desired part (point A), press ENTER.
38
XV-2000BK/2E
38
1:23 PMENTER.
4. At the end of the desired part (point9/24/97,
B), press
The player locates “A” and starts playback between “A” and “B” repeatedly.
XV-D2000BK
LET0091-001A
Audio CD Operations
EN T E R
To quit A-B Repeat:
Press 7. The player stops and quits the A-B repeat mode.
1 playback
2
3
Starting
from a
4
5
6
specified time
7
8
9
CH RETURN
100+
10
+10
0
UP
LEFT
RIGHT
DOWN
EN T E R
You can playback a disc from the desired position by specifying the elapsed time
from the beginning of the disc.
(You have to know the corresponding elapsed time in advance. To know the elapsed
time, see “Selecting the displayed time mode” on page 40.)
1. Press ON SCREEN.
The on-screen display appears.
UP
LEFT
RIGHT
DOWN
2. Move
to the “TIME SEARCH” using
/
.
EN T E R
39
XV-2000BK/2E
39
9/24/97, 1:23 PM
XV-D2000BK
LET0091-001A
Audio CD Operations
3. Press ENTER.
You can check the first 10 seconds of each track on a disc.
1.
ON
SCREEN
while
the
disc
is stopped.
4. Press
Enter a
desired
time
using
the
numeric
keys on the remote control unit.
The
on-screen
display
appears.
See page 17 for details about how to use the numeric keys.
2. Move
to “INTRO” using
/
.
UP
LEFT
RIGHT
DOWN
to "TIME SEARCH" using / and press ENTER.
5. Move
The player starts playback from the specified time.
If the specified time does not exist, the entered number disappears so that you
can reenter the time.
Playing back only the
beginning of each track
EN T E R
3. Press ENTER.
The first 10 seconds of each track on a disc are played back from the first track
in numerical order. When all the tracks are played back, the player quits this
function.
To quit this function during execution
Press 7.
Playing back tracks in
random order
UP
LEFT
RIGHT
DOWN
40
XV-2000BK/2E
40
9/24/97, 1:24 PM
XV-D2000BK
LET0091-001A
Audio CD Operations
The player can playback tracks in random order.
EN T E R
1. Press ON SCREEN while the disc is stopped.
The on-screen display appears.
2. Move
to “RANDOM” using
/
.
3. Press ENTER.
The Random play begins.
When all tracks have been played once, the Random play quits.
* The same track will not be played back more than once during the Random play.
To quit this function during execution
Press 7.
Selecting the displayed
time mode
41
XV-2000BK/2E
41
9/24/97, 1:24 PM
XV-D2000BK
LET0091-001A
Video CD Operations
This chapter explains all the functions of the player for playing back video CDs.
Read “Basic Operations” on pages 22 and 23 before reading this chapter.
Playing back from a
desired track
7 Using 1/4, ¢/¡ buttons during playback
Pressing ¢/¡ causes the player to jump to the next track and start playback.
Therefore, press ¢/¡ as many times as required to jump to the desired track
and start playback.
Similarly, pressing 1/4 causes the player to jump to the beginning of the
current track and start playback. By pressing it again, the player jumps to the
previous track and starts playback.
* Note that this operation is disabled during playback with PBC.
1
2
3
4
5
6
7
8
9
0
+10
CH RETURN
10
7 Using numeric keys
You can also use the numeric keys on the remote control unit to select a track
number. The player automatically starts playback from the selected track
regardless of the player's mode.
100+
See page 17 for details about how to use the numeric keys.
* Note that this operation is disabled during playback with PBC.
Advancing a picture
frame-by-frame
You can advance a still picture frame-by-frame.
1. Press STEP during playback.
The player pauses.
Each time you press STEP, the picture advances one frame.
STE
P
Pressing 3 returns the player to normal playback.
* The audio is muted during frame-by-frame playback.
* You cannot backward a picture frame-by-frame.
Playing in slow-motion
You can playback a disc in slow-motion.
1. Press SLOW “+” during playback.
The playback speed slows down to half the normal speed.
+
SLOW
Thereafter, each press of SLOW “+” slows the speed down to 1/3, 1/4, 1/8, 1/16
and 1/32 of the normal speed.
Pressing SLOW “–” speeds up in reverse order of the above.
Pressing 3 returns the player to normal playback.
* Audio is muted during slow-motion playback.
* When the picture is being played back of 1/32 of the normal speed (which is the
slowest) the SLOW “+” button is not effective.
* Similarly, “–” button is not effective during 1/2 speed playback.
* Pressing STEP or 8 in slow-motion mode freezes the motion.
42
XV-2000BK/3E
42
9/24/97, 1:28 PM
XV-D2000BK
LET0091-001A
Video CD Operations
Resuming playback
The player can memorize a position on a disc you want to interrupt playback and
resume playback from that position later.
7 Memorizing a position
POWER
CATV/SAT
DVD
TV
RESUME
or
1. During playback, Press RESUME, or press POWER to turn off the power
(STANDBY).
The player memorizes the current playback position of the disc, and the
RESUME indicator on the front panel lights.
To clear the memory:
Take out the disc from the disc tray.
* The last memory overrides the previous memory.
7 Resuming playback
1. Press RESUME when the disc is stopped or the power is off (STANDBY).
RESUME
The player will locate the memory position and start playback.
* The XV-D2000BK may resume playback from slightly before the memorized
position if you operate when “PBC” is indicated in the front panel display.
Playing back in a
desired order
You can enjoy the tracks on a video CD in the order you want.
1. Press ON SCREEN while the disc is stopped.
The on-screen display appears.
2. Move
UP
LEFT
to “PROGRAM” using
/
and press ENTER.
RIGHT
DOWN
EN T E R
43
XV-2000BK/3E
43
9/24/97, 1:28 PM
XV-D2000BK
LET0091-001A
Video CD Operations
1
2
3
4
5
6
7
8
9
0
+10
CH RETURN
3. Select the tracks in the desired order using the numeric keys.
* See page 17 for details about how to use the numeric keys. The entered numbers
are displayed on the screen.
* Up to 16 tracks can be programmed. You may select the same track more than
once.
100+
10
If you make a mistake:
Move
to CLEAR in the display using
programmed track is deleted.
/ / /
and press ENTER. The last
4. Press 3 to start the program playback.
* When all of the programmed tracks have finished playback, the player stops but
the program remains.
* Pressing 7 during the program playback makes the player stop but the program
remains.
To quit the program mode:
1. Press 7 if the player is playing.
2. Press ON SCREEN to turn on the on-screen display.
to “PROGRAM” in the display using / /
3. Move
“PROGRAM” returns to its original color.
/
and press ENTER.
Repeating all tracks
* Note that this function cannot be used during playback with PBC. To use this
function, press 7 to stop playback and then specify any track number by using
the numeric keys. (See “Playing back from a desired track” on page 42.)
1. Press ON SCREEN during playback.
The on-screen display appears.
2. Move
UP
LEFT
to “REPEAT” using
/
.
RIGHT
DOWN
3. Press ENTER once.
“REPEAT ALL” is displayed and all tracks are played back repeatedly.
EN T E R
To stop playback
Press 7. The player stops but the All-track repeat mode remains.
To quit All-track Repeat:
Move
to “REPEAT” in the on-screen display and press ENTER twice.
“REPEAT” returns to its original color.
To turn off the on-screen display:
Press ON SCREEN.
44
XV-2000BK/3E
44
9/24/97, 1:28 PM
XV-D2000BK
LET0091-001A
Video CD Operations
Repeating a single
track
* Note that this function cannot be used during playback with PBC. To use this
function, press 7 to stop playback and then specify a desired track number by
using the numeric keys. (See “Playing back from a desired track” on page 42.)
1. Press ON SCREEN during playback,.
The on-screen display appears.
2. Move
UP
LEFT
to “REPEAT” using
/
.
RIGHT
DOWN
3. Press ENTER twice.
“REPEAT1” is displayed and the current track is played back repeatedly.
EN T E R
To stop playback
Press 7. The player stops but the Single repeat mode remains.
To quit Single Repeat:
Move
to “REPEAT” in the on-screen display and press ENTER. “REPEAT”
returns to its original color.
To turn off the on-screen display:
Press ON SCREEN.
Repeating a part
You can repeat a desired part in the current track.
1. Press ON SCREEN during playback.
The on-screen display appears.
2. Move
to “A-B REPEAT” using
/
.
UP
LEFT
RIGHT
DOWN
45
XV-2000BK/3E
45
9/24/97, 1:29 PM
XV-D2000BK
LET0091-001A
Video CD Operations
3. At the beginning of the desired part (point A), press ENTER.
EN T E R
4. At the end of the desired part (point B), press ENTER.
The player locates “A” and starts playback between “A” and “B” repeatedly.
EN T E R
To quit A-B Repeat:
Press 7. The player stops and quits the A-B repeat mode.
To turn off the on-screen display:
Press ON SCREEN.
Starting playback from a
specified time
You can playback a disc from the desired position by specifying the elapsed time
from the beginning of the disc.
1. Press “ON SCREEN”.
The on-screen display appears.
2. Move
to “TIME SEARCH” using / .
If the playback is with the PBC function, stop the playback and do the same
operation again.
UP
LEFT
RIGHT
DOWN
For video CD during stop
3. Press ENTER if the disc is in stop.
Skip this process if you are operating during playback.
EN T E R
1
2
3
4
5
6
7
10
4. Enter a desired time using the numeric keys on the remote control unit.
See page 17 for details about how to use the numeric keys.
8
9
0
+10
CH RETURN
100+
5. Move
to “TIME SEARCH” using / and press ENTER.
The player starts playback from the specified time.
UP
LEFT
For video CD during playback
RIGHT
DOWN
EN T E R
If the specified time does not exist, the entered number disappears so that you
can reenter the time.
46
XV-2000BK/3E
46
9/24/97, 1:29 PM
XV-D2000BK
LET0091-001A
Video CD Operations
Playing back only the
beginning of each track
You can check the first 10 seconds of each track on a disc.
1. Press ON SCREEN while the disc is stopped.
The on-screen display appears.
2. Move
UP
LEFT
to “INTRO” using
/
.
RIGHT
DOWN
3. Press ENTER.
The first 10 seconds of each track on a disc are played back from the first track
in numerical order. When all the tracks are played back, the player quits this
function.
EN T E R
To quit this function during execution
Press 7.
Playing back tracks in
random order
The player can playback tracks in random order.
1. Press ON SCREEN while the disc is stopped.
The on-screen display appears.
2. Move
UP
LEFT
to “RANDOM” using
/
.
RIGHT
DOWN
47
XV-2000BK/3E
47
9/24/97, 1:30 PM
XV-D2000BK
LET0091-001A
Video CD Operations
3. Press ENTER.
The Random play begins.
When all tracks have been played once, the Random play quits.
EN T E R
* The same track will not be played back more than once during the Random play.
Selecting audio
channels
In some karaoke discs, one of the audio channels includes vocal while the other
does not. With such discs, you can choose to enjoy karaoke without vocal or with
vocal by selecting the audio channel to be played back.
1. Press ON SCREEN during playback.
The on-screen display appears.
2. Move
UP
LEFT
to AUDIO using
/
.
RIGHT
DOWN
3. Select the audio channel(s) to be played back using
UP
LEFT
DOWN
LR:
L:
R:
Selecting picture
character
You can select from three picture characters; sharp or soft and noise reduction.
2. Move
to “PICTURE” using
/
.
UP
RIGHT
DOWN
48
XV-2000BK/3E
.
You will hear normal stereo playback.
You will hear L (Left) channel signal played back from both left and right
speakers.
You will hear R (Right) channel signal played back from both left and
right speakers.
1. Press “ON SCREEN” during playback.
The on-screen display appears.
LEFT
/
RIGHT
48
9/24/97, 1:30 PM
XV-D2000BK
LET0091-001A
Video CD Operations
3. Select A, B, C using
UP
LEFT
/
.
RIGHT
DOWN
A: sharp
B: soft
C: noise reduction
* You can set the picture characters for DVDs and video CDs independently.
* The selection is memorized even if the player turns off and on.
To turn off the on-screen display:
Press ON SCREEN.
Checking total disc time
You can see the total disc time in the on-screen display and the front panel display
while the disc is stopped.
1. Press ON SCREEN while the disc is stopped.
The on-screen display appears.
2. Move
to “TIME SELECT” using
/
.
UP
LEFT
RIGHT
DOWN
3. Press ENTER until “TOTAL REMAIN” is selected as the display time mode.
EN T E R
* During playback, the elapsed time of the current track is displayed regardless of
the setting above.
Accessing the PBC
function
When the player is playing back a video CD without using the PBC (Playback Control)
function (such cases include playback of the track specified with the numeric keys),
you can go into the PBC mode by two methods.
Method 1:
1. Press 7.
2. Press 3.
The player starts the PBC function.
49
XV-2000BK/3E
49
9/24/97, 1:30 PM
XV-D2000BK
LET0091-001A
Video CD Operations
Method 2:
1. Press ON SCREEN during playback.
The on-screen display appears.
2. Move
to “PBC CALL” using
/
.
UP
LEFT
RIGHT
DOWN
3. Press ENTER.
The player starts the PBC function.
EN T E R
If
appears:
The disc does not support PBC or it is being played back in PBC mode.
50
XV-2000BK/3E
50
9/24/97, 1:31 PM
XV-D2000BK
LET0091-001A
Controlling Other Equipment
The remote control unit supplied with the player can control other manufacturers’
TVs, CATV converters and satellite tuners, as well as JVC’s amplifiers/receivers.
When operating the other manufacturers’ components, refer to the manuals supplied
with them. To operate these components with the remote control, first you need to
set the manufacturers’ code for each TV, CATV converter, or satellite tuner.
When using the remote control, make sure that the DVD/TV/CATV selector is set to
the correct position.
Controlling TV
To change the remote control signals for operating another manufacturer’s TV
POWER
CATV/SAT
DVD
TV
POWER
CATV/SAT
TV
DVD
1
2
3
4
5
6
7
8
9
CH RETURN
100+
10
0
+10
TV
DVD
POWER
CATV/SAT
TV
2. Press and hold POWER-TV, then press SET.
Do not release POWER-TV. Keep holding POWER-TV until the next step is
completed.
3. Holding POWER-TV, enter the manufacturer’s code (two digits) using numeric
buttons 1-9, and 0.
See the lists on page 61 to find the manufacturer’s code.
POWER
CATV/SAT
1. Set the DVD/TV/CATV selector to the “TV” position.
SET
4. Release POWER-TV.
The following buttons can be used for operating the TV (with the DVD/TV/
CATV selector set to “TV” position):
DVD
•
•
•
•
POWER-TV:
CH +/-:
TV VOLUME +/-:
1-9, 0, 100+(+10):
• TV/VIDEO:
• 10 (CH RETURN):
• MUTE:
Turns the TV on and off.
Changes the channels.
Adjusts the volume.
Selects the TV channels. +10 button will function as the
ENTER button if your TV requires pressing ENTER after
selecting a channel number.
Sets the input mode (either TV or VIDEO).
Returns to the previous channel. (only valid for JVC TVs)
Mutes the TV sound.
Note: Refer also to the manual supplied with your TV.
5. Try to operate your TV by pressing POWER-TV.
If your TV turns on or off, you have entered the correct code.
POWER
CATV/SAT
TV
DVD
Note: If there is more than one code listed for your brand of TV, try each one until
the correct one is entered.
51
XV-2000BK/3E
51
9/24/97, 1:31 PM
XV-D2000BK
LET0091-001A
Controlling Other Equipment
Controlling CATV
converter or satellite
tuner
DVD
TV
To change the Remote Control signals for operating a CATV converter or satellite
tuner
CATV
1. Set the DVD/TV/CATV selector to the “CATV” position.
2. Press and hold POWER-CATV/SAT, then press SET.
Do not release POWER-CATV/SAT. Keep holding POWER-CATV/SAT until the
next step is completed.
SET
POWER
CATV/SAT
2
3
4
5
6
7
8
CH RETURN
DVD
TV
1
10
100+
0
POWER
CATV/SAT
TV
9
3. Holding POWER-CATV/SAT, enter the manufacturer’s code (two digits) using
numeric buttons 1-9, and 0.
See the lists on page 61 to find the manufacturer’s code.
DVD
+10
4. Release POWER-CATV/SAT.
The following buttons can be used for operating the CATV converter or
satellite tuner (with DVD/TV/CATV selector set to “CATV” position):
• POWER-CATV/SAT: Turns on and off the CATV converter or satellite tuner.
• CH +/-:
Changes the channels.
• 1-9, 0:
Selects the TV channels. (See “How to use numeric keys”
on page 17)
Note: Refer also to the manual supplied with your CATV converter or satellite tuner.
POWER
CATV/SAT
TV
DVD
5. Try to operate your CATV converter or satellite tuner by pressing POWERCATV/SAT.
If your CATV converter or satellite tuner turns on or off, you have entered the
correct code.
Note: If there is more than one code listed for your brand of CATV converter or
satellite tuner, try each one until the correct one is entered.
Controlling a JVC
amplifier or receiver
AUDIO VOLUME controls the volume of a JVC amplifier or receiver.
52
XV-2000BK/3E
52
9/24/97, 1:31 PM
XV-D2000BK
LET0091-001A
Selecting Preferences
You can set various preferences mainly related with DVD playback via the
“PREFERENCE” and “PARENTAL LOCK” on-screen displays.
Preferences via
“PREFERENCE”
on-screen display
7 How to set up
1. Take out the disc from the disc tray.
You do not have to take out the disc if it is a DVD disc, but press 7 to make it stop.
Close the disc tray before setting up.
2. Press ON SCREEN.
The “PREFERENCE” on-screen display appears on the television screen.
*
The "PREFERENCE" consists of two pages.
To turn the page of the on-screen display:
Move
3. Move
UP
LEFT
to "NEXT PAGE" or "PREV PAGE" using
to the item to be set using
/
/
and press ENTER.
.
RIGHT
DOWN
4. Select the setting you prefer using
UP
LEFT
/
.
RIGHT
DOWN
To turn off the on-screen display:
Press ON SCREEN.
53
XV-2000BK/3E
53
9/24/97, 1:31 PM
XV-D2000BK
LET0091-001A
Selecting Preferences
7 Items
The following preferences can be set.
MENU LANGUAGE
You can select the default “DVD menu” language to be displayed if the disc contains
it.
Each time you press
, the setting language changes as follows.
ENGLISH = SPANISH = FRENCH = CHINESE = GERMAN = ITALIAN =
JAPANESE = language code from AA to ZU (See “Table of languages and their
abbreviations” on page 60.)
Pressing
changes the setting language in the reverse order of the above.
* If the selected language is not played, the disc’s default menu language is
displayed.
AUDIO LANGUAGE
Up to eight audio languages can be recorded in a DVD disc. You can select the
default audio language to be played if the disc contains it.
Each time you press
, the setting language changes as follows.
ENGLISH = SPANISH = FRENCH = CHINESE = GERMAN = ITALIAN =
JAPANESE = language code from AA to ZU (See “Table of languages and their
abbreviations” on page 60.)
Pressing
changes the setting language in the reverse order of the above.
* If the selected language is not recorded, the disc’s default audio language is
reproduced.
SUBTITLE
Up to 32 subtitle languages can be recorded in a DVD disc. You can select the
default subtitle language to be displayed if the disc contains it.
Each time you press
, the setting language changes as follows.
ENGLISH = SPANISH = FRENCH = CHINESE = GERMAN = ITALIAN =
JAPANESE = language code from AA to ZU (See “Table of languages and their
abbreviations” on page 60.)
Pressing
changes the setting language in the reverse order of the above.
* If the selected language is not recorded, the disc’s default subtitle language is
displayed.
ON SCREEN GUIDE
The player can display “on screen guide” icons or characters on the picture, which
show what is happening to the disc or the player.
You can turn the guide display on or off.
54
XV-2000BK/3E
54
9/24/97, 1:32 PM
XV-D2000BK
LET0091-001A
Selecting Preferences
MONITOR TYPE
You can select a monitor type when you playback DVD discs recorded for wide
screen televisions.
If your television has a normal (4:3) screen, select “4:3 PS
” (cuts both sides of
the “wide” picture) or “4:3 LB
” (with masking bars to maintain the “wide”
aspect ratio).
[4:3 (normal) television screen]
[on DVD disc]
converted and output
letter box conversion
squeezed recording [16:9 wide television screen]
pan scan conversion
If your television has a wide (16:9) screen, you have to select “16:9 WIDE”.
AV COMPULINK MODE
If you use the AV Compulink system, you must set this item correctly.
Select from the three options: DVD1, DVD2 and DVD3 according to the equipment
to be connected.
See “AV Compulink remote control system” on pages 62.
DIGITAL AUDIO OUTPUT
To connect the player‘s digital output with an external amplifier or receiver
equipped with a digital input, this item must be set correctly.
PCM ONLY:
PCM/AC-3:
to connect to a PCM digital input of a piece of audio
equipment.
to connect to a Dolby digital input of a Dolby Digital decoder
or an amplifier with built-in Dolby Digital decoder.
The following chart shows the relationship between kinds of playback discs and
output signals.
Playback discs
Output
(PCM/AC-3 mode)
Output
(PCM ONLY
mode)
DVD with 48-kHz, 16-bit linear PCM
48-kHz, 16-bit linear PCM
←
DVD with 48-kHz, 20/24-bit linear PCM 48-kHz, 20-bit linear PCM
←
DVD with 96-kHz, linear PCM
no output
←
DVD with Dolby Digital
Dolby Digital bitstream
48-kHz,
16-bit
linear
PCM
DVD with MPEG audio
48-kHz, 16-bit linear PCM
←
CD
44.1-kHz, 16-bit linear PCM
←
Video CD
44.1-kHz, 16-bit linear PCM
←
55
XV-2000BK/3E
55
9/24/97, 1:32 PM
XV-D2000BK
LET0091-001A
Selecting Preferences
CENTER SPEAKER
When the player is connected to an AV amplifier with Dolby Digital 5.1-channel
inputs;
• set to “USE” if the system includes a center speaker.
• set to “NONE” if the system does not include a center speaker.
The audio output balance between 5.1-channel outputs is adjusted according to
the setting above.
You do not need to select this item when using the 2 CH outputs or DIGITAL OUT.
SURROUND SPEAKERS
When the player is connected to an AV amplifier with Dolby Digital 5.1-channel
inputs;
• set to “USE” if the system includes surround speakers.
• set to “NONE” if the system does not include surround speakers.
The audio output balance between 5.1-channel outputs is adjusted according to
the setting above.
You do not need to select this item when using the 2 CH outputs or DIGITAL OUT.
BASS REDIRECT
It controls the low frequency output of Dolby Digital.
• set to “SUB” if the player is used in a system including a sub-woofer. With this
setting, low-frequency signals in the C, LS and RS channels are fed from the
sub-woofer output if the DVD video disc does not contain the sub-woofer
channel signal in the Dolby Digital bitstream.
• set to “L/R” if the player is used in a system with no sub-woofer. With this
setting, low-frequency signals in the C, LS and RS channels are added to the L
and R outputs if the DVD video disc does not contain the sub-woofer channel
signal in the Dolby Digital bitstream.
You do not need to select this item when using the 2 CH outputs or DIGITAL OUT.
Setting Parental Lock
The Parental Lock is one of the special features of DVD. It restricts playback of DVD
discs which contains violent (and other) scenes according to the level set by the
user. For example, by setting the Parental level strictly, when a movie which includes
violent scenes is played back , the scenes are cut or replayed with other scenes in
order not to be seen by children.
With the XV-D2000BK, you can set or modify its level and password via the Parental
Lock on-screen display.
Setting for the first time
EN T E R
1. While holding down 7, press ENTER on the remote control unit.
The Parental Lock on-screen display appears.
UP
LEFT
RIGHT
2. Select the parental level using / .
You can select the level from among NONE, NC17, R, PG13, PG, and G.
You cannot playback DVD discs rated higher than the selected level.
DOWN
NONE means no restriction. NC17 is the strictest.
56
XV-2000BK/3E
56
9/24/97, 1:32 PM
XV-D2000BK
LET0091-001A
Selecting Preferences
3. Press ENTER.
EN T E R
1
2
3
4
5
6
7
8
4. Enter your 4-digit password using the numeric keys.
9
CH RETURN
100+
10
+10
0
5. Press ENTER.
EN T E R
The parental level and your password are set.
Changing the settings
1.
EN T E R
1
2
3
4
5
6
7
8
9
0
+10
CH RETURN
10
100+
EN T E R
While holding down 7, press ENTER on the remote control unit.
The Parental Lock on-screen display appears.
2. Enter your 4-digit password using the numeric keys and press ENTER.
If you enter a wrong password, the following message appears in the
message box.
"WRONG! RETRY......."
If you forget your password:
Enter "8888".
After entering the correct password, proceed to the following steps.
3. Select the parental level using
UP
LEFT
/
.
RIGHT
DOWN
4. Press ENTER.
The level is changed.
EN T E R
57
XV-2000BK/3E
57
9/24/97, 1:32 PM
XV-D2000BK
LET0091-001A
Selecting Preferences
1
2
3
4
5
6
7
8
CH RETURN
10
5. Enter a new password using numeric keys.
9
100+
0
+10
6. Press ENTER.
The new setting is effective.
EN T E R
Temporary release of the Parental lock
When the parental level is set strictly, some discs may not be played back at all.
When you insert such a disc and try to play it, the player will ask you whether you
want the parental lock to be released temporarily or not.
If you select “YES”, then enter your password, the disc will start playback.
If you enter a wrong password, the following message appears.
"WRONG! RETRY......."
If you select “NO”, the parental lock on-screen display disappears.
58
XV-2000BK/3E
58
9/24/97, 1:32 PM
XV-D2000BK
LET0091-001A
Other Information
Care and handling of
discs
How to handle discs
When handling a disc, do not touch the surface of the disc (reflective silver side ––
the side without the label).
Since discs are made of plastic, they are easily damaged. If a disc gets dirty, dusty,
scratched or warped, the images and sound will not be picked up correctly, and
such a disc may cause the player to malfunction.
Even on label side
Do not damage the label side, stick paper to or use any adhesive on its surface.
Storage
Make sure that discs are kept in their cases. If discs are piled on top of one another
without their protective cases, they can be damaged. Do not put discs in a location
where they may be exposed to direct sunlight, or in a place where the humidity or
temperature is high. Avoid leaving discs in your car!
Maintenance of discs
If there are fingerprints or other dirt adhering to a disc, wipe with a soft dry cloth,
moving from the center outwards.
If a disc is difficult to clean, wipe with a cloth moistened with water. Never use
record cleaners, petrol, alcohol or any anti-static agents.
CAUTION
Sometimes during play noise or images may be garbled. This is sometimes due
to the disc. (It may not be up to industry standards.)
These symptoms are caused by the discs, not by the malfunction of the player.
59
XV-2000BK/3E
59
9/24/97, 1:32 PM
XV-D2000BK
LET0091-001A
Other Information
Table of languages and
their abbreviations
AA
Afar
IK
Inupiak
RN
Kirundi
AB
Abkhazian
IN
Indonesian
RO
Rumanian
AF
Afrikaans
IS
Icelandic
RU
Russian
AM
Ameharic
IW
Hebrew
RW
Kinyarwanda
AR
Arabic
JI
Yiddish
SA
Sanskrit
AS
Assamese
JW
Javanese
SD
Sindhi
AY
Aymara
KA
Georgian
SG
Sangho
AZ
Azerbaijani
KK
Kazakh
SH
Serbo-Croatian
BA
Bashkir
KL
Greenlandic
SI
Singhalese
BE
Byelorussian
KM
Cambodian
SK
Slovak
BG
Bulgarian
KN
Kannada
SL
Slovenian
BH
Bihari
KO
Korean (KOR)
SM
Samoan
BI
Bislama
KS
Kashmiri
SN
Shona
BN
Bengali, Bangla
KU
Kurdish
SO
Somali
BO
Tibetan
KY
Kirghiz
SQ
Albanian
BR
Breton
LA
Latin
SR
Serbian
CA
Catalan
LN
Lingala
SS
Siswati
CO
Corsican
LO
Laothian
ST
Sesotho
CS
Czech
LT
Lithuanian
SU
Sundanese
CY
Welsh
LV
Latvian, Lettish
SV
Swedish
DA
Danish
MG
Malagasy
SW
Swahili
DZ
Bhutani
MI
Maori
TA
Tamil
EL
Greek
MK
Macedonian
TE
Telugu
EO
Esperanto
ML
Malayalam
TG
Tajik
ET
Estonian
MN
Mongolian
TH
Thai
EU
Basque
MO
Moldavian
TI
Tigrinya
FA
Persian
MR
Marathi
TK
Turkmen
FI
Finnish
MS
Malay (MAY)
TL
Tagalog
FJ
Fiji
MT
Maltese
TN
Setswana
FO
Faroese
MY
Burmese
TO
Tonga
FY
Frisian
NA
Nauru
TR
Turkish
GA
Irish
NE
Nepali
TS
Tsonga
GD
Scots Gaelic
NL
Dutch
TT
Tatar
GL
Galician
NO
Norwegian
TW
Twi
GN
Guarani
OC
Occitan
UK
Ukrainian
GU
Gujarati
OM
(Afan) Oromo
UR
Urdu
HA
Hausa
OR
Oriya
UZ
Uzbek
HI
Hindi
PA
Panjabi
VI
Vietnamese
HR
Croatian
PL
Polish
VO
Volapuk
HU
Hungarian
PS
Pashto, Pushto
WO
Wolof
HY
Armenian
PT
Portuguese
XH
Xhosa
IA
Interlingua
QU
Quechua
YO
Yoruba
IE
Interlingue
RM
Rhaeto-Romance
ZU
Zulu
60
XV-2000BK/3E
60
9/24/97, 1:33 PM
XV-D2000BK
LET0091-001A
Other Information
Manufacture's code list
7 TV
7 CATV/SAT
No.
Manufacturer
No.
Manufacturer
01
JVC
01
GI JERROLD
02
MAGNAVOX
02
GI JERROLD
03
MITSUBISHI
03
GI JERROLD
04
PANASONIC
04
GI JERROLD
05
RCA
05
GI JERROLD
06
SHARP
06
GI JERROLD
07
SONY
07
GI JERROLD
08
TOSHIBA
08
GI JERROLD
09
ZENITH
09
SCIENTIFIC ATRANTA
10
HITACHI
10
SCIENTIFIC ATRANTA
11
PANASONIC
11
ZENITH
12
SAMSUNG
12
ZENITH
13
SANYO
13
PIONEER
14
SANYO
14
PIONEER
15
SAMSUNG
15
HAMLIN/REGAL
16
HAMLIN/REGAL
17
HAMLIN/REGAL
18
HAMLIN/REGAL
19
OAK/SIGMA
20
OAK/SIGMA
21
OAK/SIGMA
22
TOCOM
23
TOCOM
24
RCA/PANASONIC
25
RCA/PANASONIC
26
RCA/PANASONIC
27
RCA(SAT)
28
SONY(SAT)
61
XV-2000BK/3E
61
9/24/97, 1:33 PM
XV-D2000BK
LET0091-001A
Other Information
AV COMPULINK remote
control system
When you buy a separate TV, VCR DVD player, receiver or other components and
connect them to each other, you have to operate each component individually. JVC’s
AV COMPULINK remote control system meets the demand for a system made up of
single components and has the ease of operation of a single unit.
7 Operation
You can enjoy pictures and/or sound by just putting a source component (which
plays back the pictures and/or sound such as a DVD player or VCR) into play mode.
You do not have to operate the TV and receiver including power switching.
1. Turn on the main power of the television.
2. Insert a disc into the source component.
3. Press 3 of the source component.
The following actions are performed automatically:
• Turning on the power of the television.
• Setting the source of the television to the external input (VIDEO 1 or VIDEO 2).
• Turning on the power of the receiver.
• Setting the source of the receiver to the component which has just started playback.
7 Connection and Setup
Using the AV COMPULINK cable, connect the AV COMPULINK terminals of each
component to one another.
To AV COMPULINK (II)
TV
DVD player
If you connect a DVD player with a television via AV COMPULINK, set the DVD player’s
AV COMPULINK setting as follows.
• When connecting with VIDEO 1 input terminal of the television: DVD2
• When connecting with VIDEO 2 input terminal of the television: DVD3
To AV COMPULINK (II)
To AV COMPULINK (II)
TV
DVD player
62
XV-2000BK/3E
62
9/24/97, 1:33 PM
Video cassette recorder
XV-D2000BK
LET0091-001A
Other Information
If you connect a DVD player with a television and VCR via AV COMPULINK, set the
VCR’s Remote Control Code and DVD player’s AV COMPULINK setting as follows.
• When connecting with VIDEO 1 input terminal of the television:
DVD player’s AV COMPULINK setting: DVD2
VCR’s Remote Control Code:
B
• When connecting with VIDEO 2 input terminal of the television:
DVD player’s AV COMPULINK setting: DVD3
VCR’s Remote Control Code:
A
To Audio
To TV
TV
Receiver
DVD player
If you connect a DVD player with a television and receiver via AV COMPULINK, set
the DVD player’s AV COMPULINK setting to DVD1.
The DVD player’s AV COMPULINK setting is operated in the “PEFERENCE” on-screen
display. See “Preferences via “PEFERENCE” on-screen display” on pages 53 for
operation.
Notes for connection
• If you connect a DVD player with a receiver via AV COMPULINK in a system
including a Dolby digital decoder, some functions may not be done automatically.
• The AV COMPULINK terminal on some televisions indicates “II”. Do not connect
the terminal indicating “II” with the AV COMPULINK terminal on a receiver. If
connected, the system will not work correctly.
• Connect the AUDIO OUT jacks of the DVD player to the audio input jacks of a
receiver indicating “DVD”. Otherwise, the system will not work correctly.
There is no description about connections to a DVD player in the instruction manual
of a television or VCR. But a television or VCR with AV COMPULINK terminals
indicating II can be connected to a DVD player.
63
XV-2000BK/3E
63
9/24/97, 1:33 PM
XV-D2000BK
LET0091-001A
Other Information
Troubleshooting
What appears to be a malfunction may not always be serious. Please go through
the following list before requesting service.
Symptom
Power does
not come on.
Possible cause
Power plug is not inserted
securely.
Remote control Too far from the player.
does not work.
No picture is
displayed on
the monitor.
Remedy
Plug in securely.
Come closer to the player.
The tip of the remote unit is
not pointed in the right
direction.
Point the infrared lightemittingwindow toward the
remote sensor on the front panel.
Batteries are exhausted.
Replace the batteries with new
ones.
Battery polarity is incorrect.
Take out the batteries and
insert them again in the correct
direction.
Connection of video cable is
incorrect.
Connect the cable correctly
(see page 9).
Input selection of TV is incorrect. Select correctly.
No audio is
reproduced.
Disc is not playable.
(See page 16.)
Connection to stereo system
is incorrect.
Check connections
(see Page 9 to 13).
Input selection of amplifier
is incorrect.
Select correctly.
No sound from PHONES LEVEL is too low.
headphones.
Adjust the PHONE LEVEL.
Sound is
distorted or
noise is
generated.
Picture is
garbled.
Disc is dirty.
Wipe the disc surface
(see page 59).
player is connected to
a VCR.
Connect player with the
TV directly.
Picture does
MONITOR TYPE is not
not fit with the correctly set.
television
Television is not correctly set.
screen.
Operation is
not possible.
The TV
speakers do
not reproduce
dialogs for a
DVD movie
disc.
See “MONITOR TYPE”
on page 55.
Set the television correctly.
Microcomputer malfunctions
due to lightning or static
electricity.
Turn off the power, then
connect the power cord again.
Moisture condensation occurs
by sudden change of
temperature or humidity.
Turn off the power,
then turn it on a few hours
later.
DOWN MIX is set to OFF.
Set DOWN MIX to L0/R0
(see page 33).
There may be causes other than the player. Check the other devices connected to
the player.
64
XV-2000BK/3E
64
9/24/97, 1:33 PM
XV-D2000BK
LET0091-001A
Other Information
Specifications
General
Readable discs:
Video format:
DVD video, CD, Video CD
NTSC color
Other
Power requirements:
Power consumption:
Mass:
Dimensions (W x H x D):
AC 120V Ó , 60Hz
30 W (POWER ON), 5 W (STANDBY mode)
4.8 kg (10.6 lbs)
435 x 112 x 327.5 mm
17-3/16 x 4-7/16 x 12-15/16 inch
Video output
VIDEO OUT (pin jack):
S-VIDEO OUT (S jack):
Horizontal resolution
Signal to noise ratio
1.0 Vp-p (75 ohms)
Y Output:
1.0 Vp-p (75 ohms),
C Output:
286 mVp-p (75 ohms)
500 Lines
65 dB
Audio output
ANALOG OUT (pin jack):
Front
2.0 Vrms (10 k ohms)
Rear
2.0 Vrms (10 k ohms)
Center
2.0 Vrms (10 k ohms)
Sub woofer (BASS REDIRECT = “L/R”)
(NORMAL)
1.0 Vrms (5 k ohms)
(GAIN PLUS)
2.0 Vrms (10 k ohms)
2CH (ATT. OFF)
2.0 Vrms (10 k ohms)
2CH (ATT. ON)
1.0 Vrms (5 k ohms)
DIGITAL OUT:
OPTICAL
-21 to -15 dBm (Peak)
COAXIAL
0.5 Vp-p
Audio characteristics
Frequency response:
CD (sampling frequency 44.1 kHz): 2 Hz to 20 kHz
DVD (sampling frequency 48 kHz): 2 Hz to 22 kHz
DVD (sampling frequency 96 kHz): 2 Hz to 44 kHz
Dynamic range:
16 bit: More than 99 dB
20 bit: More than 108 dB
24 bit: More than 108 dB
Wow and flutter:
Unmeasurable (less than ± 0.002%)
Total harmonic distortion: Less than 0.002%
* Specifications and appearance subject to change without prior notice.
65
XV-2000BK/3E
65
9/24/97, 1:33 PM
XV-D2000BK
LET0091-001A
VICTOR COMPANY OF JAPAN, LIMITED
V
J
EN.
XV-2000BK/CoverE
2
9/24/97, 1:17 PM
C
Printed in Japan
0997FTYUBNPRI