1
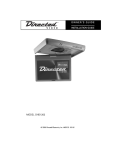
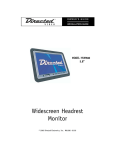
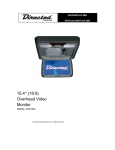
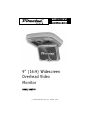
OWNER’S GUIDE INSTALLATION GUIDE 9” (16:9) Widescreen Overhead Video Monitor MODEL OHD 900 © 2004 Directed Electronics, Inc. N82900 08-04 NON-TRANSFERABLE LIMITED CONSUMER WARRANTY Directed Electronics, Inc. (Directed) promises to the original purchaser that the automotive video monitor and/or source unit(s) (the Product), excluding accessories, purchased and installed from a Directed authorized dealer within the ninety (90) days after purchase of the new vehicle, in which the Product is installed, is free from defects in materials or workmanship under normal use and conditions for a period of three (3) years from date of purchase or the first 36,000 miles as registered on the new vehicle's odometer reading at time of delivery of the Product for warranty service, whichever occurs first. Product purchased or installed more than ninety (90) days after the new vehicle is purchased are warranted for a period of one (1) year from date of purchase of the Product. Directed promises to the original purchaser that all video accessories will be free from defects in materials and workmanship under normal use and condition for a period of ninety (90) days after the date of purchase. A sales receipt and/or warranty registration card is required to provide proof of date of purchase of the Product or accessories. Should the Product be determined defective during the applicable warranty period, the Product will be repaired or replaced with a new or comparable reconditioned part(s), at Directed's option. To obtain warranty service, the Product must be returned to a Directed authorized dealer along with proof of purchase and installation. Note: This warranty does not cover labor costs for the removal and reinstallation of the Product. IN ORDER FOR THIS WARRANTY TO BE VALID, YOUR PRODUCT MUST BE SHIPPED WITH PROOF OF PURCHASE AND INSTALLATION BY AN AUTHORIZED DIRECTED DEALER. ALL PRODUCTS RECEIVED BY DIRECTED FOR WARRANTY REPAIR WITHOUT PROOF OF DIRECTED DEALER INSTALLATION WILL BE DENIED. This warranty is non-transferable and does not apply to any Product that has been modified or used in a manner contrary to its intended purpose, and does not cover damage to the Product caused by installation or removal of the Product. This warranty is VOID if the product has been damaged by accident or unreasonable use, negligence, acts of God, neglect, improper service or other causes not arising out of defect in materials or construction. This warranty does not cover the elimination of externally generated static or noise, or the correction of antenna problems or weak television reception, damage to tapes, video games, software, camcorders, discs, speakers, accessories or vehicle electrical systems, cosmetic damage or damage due to negligence, misuse, abuse, failure to follow operating instructions, accidental spills or customer applied cleaners, damage due to environmental causes such as floods, airborne fallout, chemicals, salt, hail, windstorms, lightning or extreme temperatures, damage due to accidents, road hazards, fire, theft, loss or vandalism, damage due to improper connection to equipment of another manufacturer, modification of existing equipment, use of a faulty tape cartridge or cleaning of the VCR head, or Product which has been opened or tampered with for any reason or which has been damaged due to alteration or service performed by anyone other than Directed Electronics, Inc. ALL WARRANTIES INCLUDING BUT NOT LIMITED TO EXPRESS WARRANTY, IMPLIED WARRANTY, WARRANTY OF MERCHANTABILITY, FITNESS FOR PARTICULAR PURPOSE, AND WARRANTY OF NON-INFRINGEMENT OF INTELLECTUAL PROPERTY ARE EXPRESSLY EXCLUDED TO THE MAXIMUM EXTENT ALLOWED BY LAW, AND DIRECTED NEITHER ASSUMES NOR AUTHORIZES ANY PERSON TO ASSUME FOR IT ANY LIABILITY IN CONNECTION WITH THE SALE OF THE PRODUCT. DIRECTED HAS ABSOLUTELY NO LIABILITY FOR ANY AND ALL ACTS OF THIRD PARTIES INCLUDING ITS LICENSED DEALERS OR INSTALLERS. IN NO EVENT WILL DIRECTED ELECTRONICS, INC. BE LIABLE FOR ANY INCIDENTAL, SPECIAL OR CONSEQUENTIAL DAMAGES (INCLUDING LOSS OF PROFITS), BY PURCHASING THIS PRODUCT, THE CONSUMER AGREES AND CONSENTS THAT ALL DISPUTES BETWEEN THE CONSUMER AND DIRECTED SHALL BE RESOLVED IN ACCORDANCE WITH CALIFORNIA LAWS IN SAN DIEGO COUNTY, CALIFORNIA. Some states do not allow limitation on how long an implied warranty lasts. In such states, the limitations or exclusions of this Limited Warranty may not apply. Some states do not allow the exclusion or limitation of incidental or consequential damages. In such states, the exclusion or limitation of this Limited Warranty may not apply to you. This Limited Warranty gives you specific legal rights, and you may have other rights which vary from state to state. Some states do not allow the exclusion or limitation of incidental or consequential damages. In such states, the exclusion or limitations of this Limited Warranty may not apply to you. This Limited Warranty gives you specific legal rights and you may have other rights which vary from state to state. Table of Contents Non-Transferable Limited Consumer Warranty . . . . . . . . . . . . . . . . . . . . . . . . .2 Important Notes . . . . . . . . . . . . . . . . . . . . . . . . . . . . . . . . . . . . . . . . . . . .5 What is Included . . . . . . . . . . . . . . . . . . . . . . . . . . . . . . . . . . . . . . . . . . . .6 Introduction . . . . . . . . . . . . . . . . . . . . . . . . . . . . . . . . . . . . . . . . . . . . . . .6 Important Information . . . . . . . . . . . . . . . . . . . . . . . . . . . . . . . . . . . . . . . .6 FCC Notice ............................................................................................6 Your Warranty........................................................................................7 Installation . . . . . . . . . . . . . . . . . . . . . . . . . . . . . . . . . . . . . . . . . . . . . . .7 Preliminary Preparations .........................................................................7 Electrical Connections ............................................................................7 Typical Wiring Diagram ...........................................................................9 OHV Monitor Controls and Description . . . . . . . . . . . . . . . . . . . . . . . . . . . . .10 Remote Control . . . . . . . . . . . . . . . . . . . . . . . . . . . . . . . . . . . . . . . . . . . .11 Battery Replacement ............................................................................12 Precautions .........................................................................................12 Operation . . . . . . . . . . . . . . . . . . . . . . . . . . . . . . . . . . . . . . . . . . . . . . . .12 Open—LCD Screen................................................................................12 Close—LCD Screen ...............................................................................12 Loading and Unloading Discs .................................................................13 Signal Source Selection.........................................................................13 ON/OFF Control ....................................................................................14 Function Mode (Menu) ..........................................................................14 Door Light On/Off ................................................................................14 Courtesy Light On/Off ...........................................................................15 DVD Playback ......................................................................................15 Audio CD Playback................................................................................16 Fast-Forward (DVD/MP3/CD) ..................................................................16 Fast-Reverse (DVD/MP3/CD)...................................................................16 DVD/MP3/CD Next Track ........................................................................16 DVD/MP3/CD Previous Track...................................................................17 DVD/MP3/CD Play/Pause .......................................................................17 DVD/MP3/CD Stop ................................................................................17 DVD/CD GOTO (Search) ..........................................................................18 Repeat Function...................................................................................18 DVD Angle ..........................................................................................18 Audio DVD ..........................................................................................19 DVD Subtitle .......................................................................................19 DVD Menu ...........................................................................................19 DVD Title ............................................................................................20 DVD Display ........................................................................................20 © 2004 Directed Electronics, Inc. 3 DVD Setup . . . . . . . . . . . . . . . . . . . . . . . . . . . . . . . . . . . . . . . . . . . . . . .21 Setup Menu.........................................................................................21 General Setup ......................................................................................21 aUDIO Setup .......................................................................................22 PREFERENCES.......................................................................................22 Appendix A – Cleaning . . . . . . . . . . . . . . . . . . . . . . . . . . . . . . . . . . . . . . .24 Cleaning the LCD Screen .......................................................................24 cleaning the Enclosure:.........................................................................24 Appendix B – Troubleshooting . . . . . . . . . . . . . . . . . . . . . . . . . . . . . . . . . .24 Specifications . . . . . . . . . . . . . . . . . . . . . . . . . . . . . . . . . . . . . . . . . . . . .26 4 © 2004 Directed Electronics, Inc. Important Notes 1. 2. 3. 4. 5. 6. 7. 8. 9. 10. 11. 12. 13. 14. 15. 16. 17. 18. Before operating your LCD Monitor system, please read these instructions carefully. Retain this manual for future reference. Do not remove any WARNING stickers on the unit. Do not use any chemical solvent, cleaning agent or corrosive detergent to clean away dirt on the surface of the screen. Doing so may cause irreversible damage to the surface of the LCD screen. To clean off dirt or fingerprints, it is recommended that a soft-damp lens-cleaning cloth be used. Using spare parts from another manufacturer may cause permanent damage to the unit. Avoid installing the monitor screen in a position that is exposed to direct sunlight and hot air vents. Install the unit in a dry location, avoid condensation. Ensure that all wiring is properly connected before operating the unit. Should the LCD panel break, avoid contact with the broken glass or fluid leaking out from the enclosure. If you come into contact, flush and clean the affected areas with plenty of water. Seek medical attention immediately. When operating the monitor, avoid touching or pressing on the LCD screen. Excessive force will damage the LCD screen. When installing this unit in a vehicle, ensure that the installation and use of this unit is in compliance with local vehicle rules and regulations. Before replacing a blown fuse, turn the unit off and disconnect all power. Ensure the replacement fuse is of the same rating (5A) of the fuse being replaced. If during operation the unit overheats or malfunctions, turn off the power and contact your dealer. Do NOT disassemble the unit, there are no user serviceable parts in the unit. Ensure that no foreign objects are in the unit when the LCD screen is closed. The battery (CR2025) in the remote control has a useful lifetime of approximately 6-months. To ensure proper and reliable operation, replace the battery in a timely manner. When the unit is used in conjunction with a radio/TV tuner, reception quality will vary depending on the geographic location and weather conditions. The rated operating temperature range of the unit is 32º–92º F. Cool or warm the vehicle to within this temperature range prior to unit operation. The picture viewing quality of this LCD is dependent on the installed location. Adjust the brightness control and/or the angle of the screen to achieve the optimum visual quality. © 2004 Directed Electronics, Inc. 5 What is Included 9” Overhead Monitor/DVD Player Hardware package Trim Ring Adapter 13-pin DIN source cable AV Switch Box (AD-6874) 3-pin, 3-wire cooling fan harness Remote Control Unit/w battery 4-pin, 3-wire power harness Metal mounting plate 5-pin 5-wire dome lights harness Introduction Congratulations on your purchase of the world’s finest video entertainment system. At Directed we are committed to bringing you the most technologically advanced products available. We are pleased that you chose a Directed Video product. Through years of critical testing and hand craftsmanship, we have created a wide range of video entertainment products for your viewing pleasure. This system incorporates the use of on screen display menu controls that allow you to configure the system to suit your own personal preferences. To view other great products from Directed Electronics, please visit the Directed Video page at www.directed.com. Important Information FCC NOTICE This device complies with Part 15 of FCC rules. Operation is subject to the following two conditions: (1) This device may not cause harmful interference, and (2) this device must accept any interference received, including interference that may cause undesirable operation. Changes or modifications not expressly approved by the party responsible for compliance could void the user's authority to operate this device. 6 © 2004 Directed Electronics, Inc. YOUR WARRANTY Your warranty registration must be completely filled out and returned within 10 days of purchase. Your product warranty will not be validated if your warranty registration is not returned. Make sure you receive the warranty registration from your dealer. It is also necessary to keep your proof of purchase, which reflects that the product was installed by an authorized dealer. Installation PRELIMINARY PREPARATIONS NOTE: The unit should be installed by a qualified service technician. This unit is designed to operate with a 12 VDC, negative ground battery system. NOTE: Use only proper sized fasteners and cables during installation. Use of improper fasteners or cables can lead to mechanical failure of the unit or create a fire hazard. 1. Disconnect the ground wire from the battery terminal prior to connecting the unit to the electrical system. NOTE: Some vehicle radios have an anti-theft code system that will disable the radio if the battery is disconnected. If this vehicle has such a radio, ensure you have the access code to restore the radio to normal operation. 2. Pick a location to install the monitor where it will not obstruct the rear view mirror or the air conditioning vents. 3. Do not install this unit at an angle exceeding 30 degrees. ELECTRICAL CONNECTIONS Main Power Harness Color Black Yellow Red © 2004 Directed Electronics, Inc. Description Chassis ground +12V Battery +12V ACC 7 Cooling Fan Harness Note: This harness is provided on some of the units (the cooling fan is not installed on some units). Color Black Yellow Red Description Chassis ground +12V ACC +12V ACC Battery Courtesy Light Harness Color Black Red Gray Purple Yellow Description Chassis ground +12V ACC Door (negative trigger) Door (positive trigger) +12V Battery Audio Connections Color Red IN 1 (RCA) White IN 1 (RCA) Red IN 2 (RCA) White IN 2 (RCA) Red OUT (RCA) White OUT (RCA) Description Audio - #1 Right Input Audio - #1 Left Input Audio - #2 Right Input Audio - #2 Left Input Audio - Right Output Audio - Left Output Video Connections Color Yellow 1 (RCA) Yellow 2 (RCA) Yellow OUT (RCA) 8 Description Video - #1 Input Video - #2 Input Video - Output © 2004 Directed Electronics, Inc. TYPICAL WIRING DIAGRAM RED (+ACC) YELLOW (+ Battery) BLACK (Ground) 3-Pin Cooling Fan Harness Note: This harness is provided on some of the units (the cooling fan is not installed on some units). 13-Pin DIN Source Cable AD-6874 4-Pin Power Harness RED (+ACC) YELLOW (+ Battery) BLACK (Ground) Wireless Headphone (Optional) 5-Pin Dome Light Harness RED (ACC) YELLOW (Battery B+) BLACK (GND) PURPLE (Positive Trigger) GRAY (Negative Trigger) NOTE: The unit will automatically power off once the ACC is turned off (ignition key off). Ensure that the RED (+ACC) wire of the 4-pin power harness is connected to ACC power. © 2004 Directed Electronics, Inc. 9 OHV Monitor Controls and Description 5 6 10 11 12 13 14 15 16 17 18 19 1 3 4 3 2 7 9 8 DISPLAY KEYS 1. 2. 3. 4. LCD display VIDEO Select Button ( ) UP/DOWN buttons (S/T) VIDEO MENU button ( ) UNIT KEYS 5. 6. 7. 8. 9. 10 Door light On/Off button (( Courtesy Light ( ) Remote IR sensor IR transmitter (headphones) Open button 9 DVD KEYS 10. 11. 12. 13. 14. 15. ) 16. 17. 18. 19. PLAY/PAUSE button ( ) STOP button ( ) DVD MENU button ( ) AUDIO button ( ) LED Green (power status) LEFT button ( < ) UP button ( ∧ ) ENTER button (ENT) RIGHT button ( > ) DOWN button ( ∨ ) © 2004 Directed Electronics, Inc. Remote Control NOTE: Ensure that the battery plastic protector has been removed from the remote control battery holder prior to use. POWER MODE MONITOR 1 2 SETUP 3 4 LEFT 5 VIDEO MENU DISPLAY UP RIGHT TITLE ENTER 6 PREV DOWN F.REV PLAY/ PAUSE NEXT MENU 7 8 9 F.FWD STOP 14 15 16 17 18 19 20 21 22 23 10 SUBTITLE AUDIO MUTE REPEAT 11 1/ALL 12 1 2 3 4 5 6 7 8 GOTO ANGLE 24 25 13 9 1. 2. 3. 4. 5. 6. 7. 8. 9. 10. 11. 12. 13. POWER UP (display) DVD SETUP UP cursor LEFT cursor ENTER PREV (previous) DOWN cursor F. REV (fast reverse) PLAY/PAUSE SUBTITLE AUDIO 1–0 (numeric buttons) © 2004 Directed Electronics, Inc. 26 27 0 14. 15. 16. 17. 18. 19. 20. 21. 22. 23. 24. 25. 26. 27. MODE (AV1/AV2/DVD) DOWN (display) VIDEO MENU DISPLAY (on screen) TITLE RIGHT cursor MENU NEXT STOP F.FWD (fast forward) REPEAT (1/ALL) MUTE ANGLE GO TO 11 BATTERY REPLACEMENT NOTE: Before using remote after installation, remove the battery plastic protective slip. Remote Controller + side Battery Latch Battery Holder 1. Move the small latch to the right and slide out the battery holder. 2. Remove old battery and replace it with a new battery (CR2025) with the positive “+” sign facing as shown above. 3. Push battery holder back into its compartment until it is locked. PRECAUTIONS 1. Properly dispose of used battery. 2. Do not misuse battery by shorting the positive “+” and negative “-” terminal or put it into fire. Overheating may cause the battery to explode and cause a fire hazard. 3. If the remote is not to be used for a long period, remove the battery from the remote to prevent damage from battery leakage. 4. To avoid accidents, prevent children from playing with the battery. Operation OPEN—LCD SCREEN To open the LCD screen press the OPEN/CLOSE button and carefully rotate the LCD screen down to its operating position. CLOSE—LCD SCREEN To close the LCD screen rotate the LCD screen up to its stored position until you hear the OPEN/CLOSE button click. 12 © 2004 Directed Electronics, Inc. LOADING AND UNLOADING DISCS You can use single side and dual layer DVDs, VCDs, CD-audio and CD-R compatible 12cm discs with this system. LOADING DISC 1. Press at the upper right corner to open the door. 2. Load with the recorded side (the shiny side) facing up. With double-sided discs, load with the side you want to watch facing up. Ensure that the disc is seated properly before pushing the tray back into its locking position. 3. Push to close the door. UNLOADING DISC 1. Press at the upper right corner to open the door. 2. Remove the disc. (Avoid touching the recorded surface.) 3. Push to close the door, until you hear a click sound from the door mechanism. SIGNAL SOURCE SELECTION Select the input signal for viewing (AV1, AV2, or DVD) by momentarily pressing the MODE button ( ) on the LCD screen or the MODE button on the remote. © 2004 Directed Electronics, Inc. 13 ON/OFF CONTROL Press and hold the ( ) button on the LCD screen or momentarily press the POWER button ( )on the remote. FUNCTION MODE (MENU) Press the MENU button ( ) on the LCD screen or the VIDEO MENU button on the remote to display the following setup options: COLOR BRIGHTNESS DIMMER (on/off) FORMAT (full, normal, and zoom) RESET (restore factory default settings) Use the MENU button ( ) on the LCD screen or use the VIDEO MENU button on the remote to scroll through the menu options. Once the desired setting is selected use the UP/DOWN (S/T) buttons on the LCD screen or the MONITOR (S/T) buttons on the remote to change the setting. After 5-seconds of inactivity the MENU screen will turn off. DOOR LIGHT ON/OFF Press this switch on the LCD screen to have the door open sensor operate the dome lights. NOTE: This feature is operational only if the Gray or Purple door lock trigger wires have been connected to the door sensor. The dome light selector switch contains two separate circuits. One for a positive dome light trigger and one for a negative dome light trigger. Please refer to the wiring table below for each of these triggers. NEGATIVE DOME LIGHT TRIGGER 14 WIRE COLOR CONNECTION Gray Battery ground Blue Battery +12VDC Orange Battery +12VDC Purple Negative door trigger © 2004 Directed Electronics, Inc. POSITIVE DOME LIGHT TRIGGER WIRE COLOR CONNECTION Gray Battery +12VDC Blue Battery ground Orange Battery ground Purple Positive door trigger COURTESY LIGHT ON/OFF Press the Courtesy light switch ( light. ) on the LCD screen to illuminate the dome DVD PLAYBACK 1. Press the on/off power button on the front control panel, or press the button on the remote control to switch on the unit 2. Momentarily press the on/off power button on the front control panel, or press the button on the remote control repeatedly until DVD mode is displayed. 3. Insert the disc into the DVD player as described earlier. 4. The disc will automatically start playing. --- If the DVD does not come with a Menu/Title, the play will continue. --- If the DVD comes with Menu/Title, Menu Options will be shown on the screen. Right/U Up/D Down (W/X/S/T) buttons above the LCD --- Press the Left/R screen, to select the chapter or topic for playing, then press the ENT button to begin play. OR Right/U Up/D Down (W/X/S/T) buttons on the remote --- Press the Left/R ↵) button control, to select the chapter for playing, press the Enter (↵ on the remote to begin play. --- If the message “NO DISC” is displayed on the screen, check the format of the disc being used and ensure that the disc is being loaded with the label facing you (see illustration above). --- If the message “WRONG REGION” is display on the screen, it means the player does not support the regional code for that DVD. © 2004 Directed Electronics, Inc. 15 AUDIO CD PLAYBACK 1. Press the on/off power button on the front control panel, or press the button on the remote control to switch on the unit 2. Momentarily press the on/off power button on the front control panel, or press the button on the remote control repeatedly until DVD mode is displayed. 3. Insert the disc into the unit as described earlier. 4. Press the PLAY/PAUSE button ( ) on either the panel above the LCD screen or on the remote to start playing. FAST-FORWARD (DVD/MP3/CD) 1. During play, press the F.FWD button on the remote control. 2. For DVDs and MP3s, the LCD screen will display FF XX (FastForward Speed), and will increment up to a maximum of 8X fast forward (2X, 4X, 6X, 8X) and then to normal play speed. 3. For CDs, the LCD screen will display FF XX (Fast-Forward Speed), and will increment up to a maximum of 4X fast forward (1X, 2X, 3X, 4X) and then to normal play speed. 4. For DVDs, MP3s and CDs press play/pause (X/) from any fast forward speed to resume normal play speed. POWER MODE MONITOR SETUP VIDEO MENU DISPLAY UP LEFT RIGHT TITLE MENU ENTER PREV DOWN NEXT F.REV PLAY/ PAUSE F.FWD STOP SUBTITLE AUDIO MUTE REPEAT 1 2 3 5 6 9 0 F.Fwd 1/ALL 4 7 8 GOTO ANGLE FAST-REVERSE (DVD/MP3/CD) 1. During play, press the F. REV button on the remote control. 2. For DVDs and MP3s, the LCD screen will display FR XX (FastForward Speed), and will increment up to a maximum of 8X fast backward (2X, 4X, 6X, 8X) and then to normal play speed. 3. For CDs, the LCD screen will display FR XX (Fast-Forward Speed), and will increment up to a maximum of 4X fast backward (1X, 2X, 3X, 4X) and then to normal play speed. 4. For DVDs, MP3s and CDs press play/pause (X/) from any fast backward speed to resume normal play speed. POWER MODE MONITOR DISPLAY SETUP UP LEFT VIDEO MENU RIGHT TITLE MENU ENTER PREV DOWN NEXT F.REV PLAY/ PAUSE F.FWD STOP SUBTITLE AUDIO MUTE REPEAT 1 2 3 5 6 F.Rev 1/ALL 9 4 7 8 GOTO ANGLE 0 DVD/MP3/CD NEXT TRACK 1. During play, press the next NEXT track button on the remote control. 2. DVDs will jump to the the next track or chapter. The Title and Chapter being played will display at the top of the LCD screen. 3. MP3s will jump to the the next track. 4. CDs will jump to the next track. The present track playing and the total number of tracks on the CD is displayed at the top of the LCD screen. 16 POWER MONITOR LEFT MODE DISPLAY SETUP UP VIDEO MENU RIGHT TITLE MENU ENTER PREV DOWN NEXT F.REV PLAY/ PAUSE F.FWD STOP SUBTITLE AUDIO MUTE REPEAT 1 2 3 5 6 Next 1/ALL 9 4 7 8 GOTO ANGLE 0 © 2004 Directed Electronics, Inc. DVD/MP3/CD PREVIOUS TRACK 1. During play, press the previous PREV button on the remote control. 2. DVDs will jump to the the previous track or chapter. The Title and Chapter being played will display at the top of the LCD screen. 3. MP3s will jump to the the previous track. 4. CDs will jump to the previous track. The present track playing and the total number of tracks on the CD is displayed at the top of the LCD screen. POWER MONITOR SETUP MODE VIDEO MENU DISPLAY UP LEFT RIGHT TITLE MENU ENTER PREV DOWN NEXT F.REV PLAY/ PAUSE F.FWD STOP SUBTITLE AUDIO MUTE REPEAT 1 2 3 5 6 Prev 1/ALL 9 4 7 8 GOTO ANGLE 0 DVD/MP3/CD PLAY/PAUSE 1. During play, press the PLAY/PAUSE /X button on the remote control to temporarily stop playback. 2. Press the PLAY/PAUSE /X button on the remote control to resume playback. POWER MODE MONITOR DISPLAY SETUP UP LEFT VIDEO MENU RIGHT TITLE MENU ENTER Play/ Pause PREV DOWN NEXT F.REV PLAY/ PAUSE F.FWD STOP SUBTITLE AUDIO MUTE REPEAT 1 2 3 5 6 9 0 1/ALL 4 7 8 GOTO ANGLE DVD/MP3/CD STOP 1. Press Stop button on the remote control to stop playback when playing an Audio CD. 2. Press Stop button on the remote control when playing a DVD will stop the DVD at the current location, a PRESS PLAY TO CONTINUE message will display on the LCD screen. Press PLAY/PAUSE X/ button to resume playback. 3. Press the Stop button twice will stop the playback. The next time the PLAY/PAUSE X/ button is pressed the DVD will start at the beginning. POWER MONITOR LEFT MODE DISPLAY SETUP UP VIDEO MENU RIGHT TITLE MENU ENTER PREV DOWN NEXT F.REV PLAY/ PAUSE F.FWD STOP SUBTITLE AUDIO MUTE REPEAT Stop 1/ALL 1 2 5 6 9 3 4 7 8 GOTO ANGLE 0 Note: Storage of the current location when stopped is not supported for MP3s or CDs. © 2004 Directed Electronics, Inc. 17 DVD/CD GOTO (SEARCH) Note: GOTO is not supported for MP3s. 1. Allows going to a particular Time/Track/Chapter or Title. 2. Press the GOTO button on the remote control to go to a selected part of the DVD/CD. POWER MONITOR SETUP MODE VIDEO MENU DISPLAY UP LEFT RIGHT TITLE MENU ENTER PREV DOWN NEXT F.REV PLAY/ PAUSE F.FWD STOP SUBTITLE AUDIO MUTE REPEAT 1 2 3 5 6 1/ALL (1) TITLE xx/xx CHAPTER xxx/xxx 9 (2) TITLE xx/xx 4 7 8 GOTO ANGLE Goto 0 xx : xx : xx 3. Use the number keypad on the remote to enter the track, chapter, or time information. 4. Press the ENTER button on the remote to go to the location selected. REPEAT FUNCTION 1. For CDs, press the REPEAT 1/ALL button on the remote control to have the current segment repeat. REP ONE, REP ALL, or REPEAT OFF are selectable by multiple presses of the REPEAT 1/ALL button. Pressing the STOP button while playing will cancel the REPEAT selection. 2. For MP3s, press the REPEAT 1/ALL button on the remote control to have the repeat the current segment. REP ONE, FOLDER REP, DISC, DISC REP, DISC SCAN, SINGLE, or FOLDER are selectable by multiple presses of the REPEAT 1/ALL button. 3. For DVDs, press the REPEAT 1/ALL button on the remote control. CHAPTER REPEAT ON, TITLE REPEAT ON, or REPEAT OFF are selectable by multiple presses of the REPEAT 1/ALL button. Pressing the SEARCH button on the remote control and then the Play/Pause X/ button repeats the selected part of the DVD or when the selected part is finished it then repeats. POWER DISPLAY UP LEFT MODE MONITOR SETUP VIDEO MENU RIGHT TITLE MENU ENTER PREV DOWN NEXT F.REV PLAY/ PAUSE F.FWD STOP SUBTITLE AUDIO MUTE REPEAT 1 2 3 5 6 9 0 Repeat 1/ALL 4 7 8 GOTO ANGLE DVD ANGLE Some DVDs support different viewing angles for the same scene. Press the ANGLE button on the remote control to select a viewing angle. POWER LEFT MODE MONITOR DISPLAY SETUP UP VIDEO MENU RIGHT TITLE MENU ENTER The X/Y will display, where X represents the current camera angle being displayed, and Y represents the total available number of camera angles. PREV DOWN NEXT F.REV PLAY/ PAUSE F.FWD STOP SUBTITLE AUDIO MUTE REPEAT 1 2 3 5 6 1/ALL 9 0 4 7 8 GOTO ANGLE Angle NOTE: This function only works with DVDs that have different viewing angles recorded. 18 © 2004 Directed Electronics, Inc. AUDIO DVD NOTE: This feature only functions with DVDs that have multiple sound tracks. 1. During playing, press the AUDIO button on the remote. AUDIO X/X will display on the LCD screen. The first X represents is the current sound track playing. The second X is the total number of sound tracks available. 2. Continue to press the AUDIO button to advance to the other Audio sound tracks. POWER LEFT MODE MONITOR DISPLAY SETUP UP VIDEO MENU RIGHT TITLE MENU ENTER PREV DOWN NEXT F.REV PLAY/ PAUSE F.FWD STOP SUBTITLE AUDIO MUTE REPEAT 1 2 3 5 6 7 8 GOTO ANGLE 9 0 1/ALL 4 DVD SUBTITLE NOTE: This function can only be used on DVDs that come with multi-language support. 1. During playing, press the SUBTITLE button on the remote. SUBTITLE XX/XX will display on the LCD screen. The first XX represents is the current subtitle playing. The second XX is the total number of subtitles available (along with the current subtitle language to be displayed). 2. Continue to press the SUBTITLE button to advance to the other subtitle languages. 3. When the SUBTITLE button is pressed beyond the maximum number of subtitles, SUBTITLE OFF will display on the LCD screen. POWER LEFT MODE MONITOR DISPLAY SETUP UP VIDEO MENU RIGHT TITLE MENU ENTER SubTitle PREV DOWN NEXT F.REV PLAY/ PAUSE F.FWD STOP SUBTITLE AUDIO MUTE REPEAT 1 2 3 5 6 1/ALL 9 4 7 8 GOTO ANGLE 0 DVD MENU Many DVDs come with different and unique selectable menus. But these all use similar operating methods. POWER LEFT MODE MONITOR SETUP DISPLAY UP VIDEO MENU RIGHT TITLE MENU ENTER 1. Press the MENU button on the remote or on the right hand side of the LCD screen during playback. The root menu for the DVD will be displayed on the LCD screen. Right/U Up/D Down (W/X/S/T) buttons on the 2. Press the Left/R remote control or on the control panel above the LCD screen to select from the menu options. 3. Press the ENTER button on the remote or the ENT button on the control panel above the LCD screen to activate that menu option. © 2004 Directed Electronics, Inc. PREV DOWN NEXT Menu F.REV PLAY/ PAUSE F.FWD STOP SUBTITLE AUDIO MUTE REPEAT 1 2 3 5 6 1/ALL 9 4 7 8 GOTO ANGLE 0 © 2004 Directed Electronics, Inc. DVD TITLE Some DVDs come with selectable titles. POWER 1. Press the TITLE button on the remote during playback. All the titles will be displayed on the LCD screen. Right/U Up/D Down (W/X/S/T) buttons on the 2. Press the Left/R remote control to select the desired title. 3. Press the ENTER button to play that title. MODE MONITOR SETUP VIDEO MENU DISPLAY UP LEFT RIGHT TITLE Title ENTER PREV DOWN NEXT MENU F.REV PLAY/ PAUSE F.FWD STOP SUBTITLE AUDIO MUTE REPEAT 1 2 3 5 6 7 8 GOTO ANGLE 9 0 1/ALL 4 DVD DISPLAY The DISPLAY button on the remote displays the status of the DVD, MP3, or CD presently playing. POWER LEFT MODE MONITOR DISPLAY SETUP UP RIGHT VIDEO MENU TITLE Display ENTER 1. When a CD is playing the following will be displayed on the LCD screen with each DISPLAY button press. SINGLE ELAPSED XX/XX MM:SS SINGLE REMAIN XX/XX MM:SS TOTAL ELAPSED XX/XX MM:SS TOTAL REMAIN XX/XX MM:SS OFF The first XX represents the current track playing. The second XX represents the total number of tracks on the CD. MM:SS represents the time in minutes and seconds. 2. When a MP3 is playing the following will be displayed on the LCD screen with each DISPLAY button press. CHAPTER ELAPSED HH:MM:SS CHAPTER REMAIN HH:MM:SS OFF The HH:MM:SS is the time either elapsed or remaining; in hours, minutes and seconds. 3. When a DVD is playing the following will be displayed on the LCD screen with each DISPLAY button press. PREV DOWN NEXT MENU F.REV PLAY/ PAUSE F.FWD STOP SUBTITLE AUDIO MUTE REPEAT 1 2 3 5 6 1/ALL 9 TITLE XX/XX HH:MM:SS CHAPTER 4 7 8 GOTO ANGLE 0 XXX/XXX TITLE REMAIN HH:MM:SS CHAPTER ELAPSED HH:MM:SS 20 © 2004 Directed Electronics, Inc. CHAPTER REMAIN HH:MM:SS The Title XX/XX shows the current title playing/total titles on the DVD. The Chapter XXX/XXX shows the current chapter playing/total chapters on the DVD. The time (HH:MM:SS) is shown in hours/minutes/seconds. DVD Setup SETUP MENU This option allows the modification and setup of the DVD settings. 1. With the DVD player stopped and in DVD mode, press the SETUP button on the remote to display the following options. NOTE: The setup menu can be accessed with a DVD playing, but some of the menu selections may be inaccessible (“grayed” out). If the DVD is playing, press the remote’s STOP button twice. POWER Setup LEFT MODE MONITOR DISPLAY SETUP UP VIDEO MENU RIGHT TITLE MENU ENTER PREV DOWN NEXT F.REV PLAY/ PAUSE F.FWD STOP SUBTITLE AUDIO MUTE REPEAT 1 2 3 5 6 1/ALL 9 4 7 8 GOTO ANGLE 0 SETUP MENU -- MAIN PAGE GENERAL SETUP SPEAKER SETUP AUDIO SETUP KARAOKE SETUP PREFERENCES EXIT SETUP GENERAL SETUP Use the Up/Down (T/S) buttons on remote or the control panel above the LCD ↵) button. The followscreen to scroll to GENERAL SETUP option and press ENTER (↵ ing will display on the LCD screen. A brief explaination of each of the settings is given at the bottom of the menu dialog box. 1. TV DISPLAY NORMAL/PS NORMAL/LB WIDE 2. PIC MODE AUTO HI-RES N-FLICKER 3. ANGLE MARK ON OFF © 2004 Directed Electronics, Inc. 4. OSD LANG ENGLISH CHINESE 5. CAPTIONS ON OFF 6. SCR SAVER ON OFF 7. VIDEO OUTPUT (not used) 21 SPEAKER SETUP 1. DOWNMIX LT/RT STEREO OFF 2. MAIN PAGE AUDIO SETUP 1. AUDIO OUT (not used) ANALOG SP DIF/RAW SP DIF/PCM 2. OP MODE LINE OUT RF REMOD 3. DUAL MONO STEREO L-MONO R-MONO MIX-MONO 4. DYNAMIC FULL 6/8 4/8 2/8 OFF 5. PROLOG (not Used) 6. LPCM OUTPUT (not Used) 7. MAIN PAGE KARAOKE SETUP 1. KARAOKE MODE OFF KARAOKE 2. MAIN PAGE PREFERENCES 1. TV TYPE MULTI NTSC PAL 2. AUDIO ENGLISH FRENCH SPANISH CHINESE JAPANESE 3. SUBTITLE ENGLISH FRENCH SPANISH CHINESE JAPANESE OFF 4. DISC MENU ENGLISH FRENCH SPANISH 22 7. PASSWORD NOTE: Make sure you write down and retain the new password. Unit is shipped with a factory default of “1234.” Select CHANGE Right (W/X) Use the Left/R button on the remote control, select CHANGE and press the ENTER button. The unit will ask you for the old password, an entry of the new password, and confirmation of the new password. 8. DEFAULTS NOTE: This does not restore the password to the default password (1234). RESET © 2004 Directed Electronics, Inc. CHINESE JAPANESE 5. LOCALE CHINA FRANCE HONG KONG JAPAN TAIWAN GBR USA 6. PARENTAL This restores the settings for the DVD setups to the factory defaults. 9. SMART NAV This option is only for use with MP3s. 1. NO MENU 2. WITH MENU 10. MAIN PAGE Return to SETUP MENU. 11. EXIT SETUP Use the Up/Down (T/S) buttons on remote to scroll to the parental restriction desired and ↵) button. A press the ENTER (↵ dialog box will appear requesting the password. The default password is “1234”. Enter the pass↵) word and press the ENTER (↵ button. The parental levels are listed below. NOTE: You cannot change the parental setting with a DVD playing. 1. 2. 3. 4. 5. 6. 7. 8. © 2004 Directed Electronics, Inc. G PG PG13 PG-R NC-17 ADULT NO PARENTAL 23 Appendix A – Cleaning CLEANING THE LCD SCREEN CAUTION: To avoid possible shock hazard and equipment damage, be sure the LCD system is turned off and unplugged from the main electrical outlet before cleaning. CAUTION: Do not use any form of solvents on the LCD screen or enclosure. 1. Use a soft, clean & dry cloth to gently wipe off the dust on the LCD screen. 2. Use a clean cloth dampened with water to wipe off the dirt. 3. Do not exert excessive force when cleaning the LCD screen. CLEANING THE ENCLOSURE: 1. Use a soft, clean & dry cloth to gently wipe off the dust on the enclosure. 2. Use a clean cloth dampened with water to wipe off the dirt. 3. Do not exert excessive force when cleaning the enclosure. Appendix B – Troubleshooting If the unit fails to operate normally, try solving the problems using the procedures below. If the problem persists, switch off the unit and ask the dealer or technical services for assistance. Do not attempt to repair or open the defective unit as high voltage is present inside the unit. 1. No Picture a. Check that all cables are connected and the LED is illuminated on the control panel above the LCD screen. b. Check the contrast and brightness settings. 24 © 2004 Directed Electronics, Inc. d. Be sure you have selected the correct source mode (AV1, AV2, DVD). 2. DVD Player Not Working Properly a. Ensure disc is correctly inserted into the unit. b. Inspect the disc is not damaged (no scratches on the recorded side of the disc) and is of correct format to play in the unit. c. Please wait as some disc requires longer time to read-in prior to playing. d. Eject and re-insert disc. 3. Picture flickers a. Check that the power coming from the main socket is sufficient. b. Check that unit is not placed too near speakers or magnetic objects. c. Check to see that the unit settings are correct. 4. Color patch on LCD screen(Unevenness) Ensure all connections are correct. 5. Horizontal dots on LCD screen Ensure all connections are correct. 6. No sound a. Ensure that the MUTE function is Off. b. Volume set too low, increase the volume setting. 7. Remote control not working. a. Check to verify that the battery is installed correctly (+ side of battery must be facing the bottom of the remote case), replace if necessary (CR2025). b. Make sure that the remote control is pointed towards the remote sensor located at the front right of the enclosure. © 2004 Directed Electronics, Inc. 25 Specifications Type Display system Display format Roof mount color display monitor 9-inch active matrix color TFT LCD NTSC/PAL auto switch 336,960 pixels Aspect ratio 16:9 Resolution 336,960 DOTS/480 (W) X 234 (H) X 3 RGB Active area 198 (W) X 111 (H) mm Back light 10,000 hours normal operation Mechanism Manual open/close Display angle Source Adjustable Horizontal: Up/Down <110º Composite video input x 2 Composite video output x 1 Audio L/R input x 2 Audio L/R output x 1 Infrared audio transmitter (support IR receiver stereo headphone, L-channel 2.3 MHz/R-channel 2.8 MHz) Effective listening angle: 30° Effective range: 4 meters Wireless audio Dome light 5W X 2 with door sensor connection Operating voltage 11–16 VDC Operating current 1.7 A, typical Operating temperature 0º to 60ºC NOTE: All specifications are subject to change without notice. 26 © 2004 Directed Electronics, Inc. The company behind this system is Directed Electronics, Inc. Since its inception, Directed has had one purpose, to provide consumers with the finest vehicle security, car stereo products, rear seat entertainment, and accessories available. The recipient of more than 20 patents in the field of advanced electronic technology, Directed is ISO 9001 registered. Quality Directed Electronics products are sold and serviced throughout North America and around the world. Call (800) 274-0200 for more information about our products and services. Directed® is committed to delivering world-class quality products and services that excite and delight our customers. Directed Electronics, Inc. Vista, CA 92081 www.directed.com © 2004 Directed Electronics, Inc.—All rights reserved N82900 08-04