1
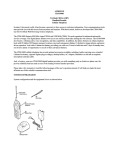
AUDIOVOX
CDM-9000
Tri-Mode CDMA/AMPS
Handheld Portable
Cellular Telephone
In today’s fast paced world, it has become a necessity to have access to real-time information. Your communications tools
must provide you with this access from anywhere and anytime. With that in mind, Audiovox developed the CDM-9000,
our first Tri-Mode Web Browsing wireless telephone.
The CDM-9000 features 800 MHz Amps/CDMA and 1900 MHz CDMA Tri-mode operation for enhanced nationwide
service coverage. The digital phone features two easy to use soft keys that make surfing the web a breeze. The CDM-9000
also boasts a vibrating alert, voice recognition, and data capabilities. In addition, the phone features an enhanced phone
book with 99 Alpha/198 Numeric memory locations, one touch emergency dialing, 15 distinctive ringer options, and menu
driven operation. And with a Lithium Ion battery providing you with over 3 hours of talk time and 7 days of standby time,
you’ll have plenty of opportunity to use all of these advanced features.
The CDM-9000 cellular telephone has several optional accessories available, including: leather carrying case, extended
Lithium Ion battery, cigarette lighter plug-in charger, desktop holder, AC Adapter, Handsfree car kit and an earphone
microphone and data cable.
And, of course, your new CDM-9000 digital handset provides you with something only an Audiovox phone can: the
proven reliability that has made us one of the leading wireless handset providers.
Please take a few moments to read the following pages of the user’s operation manual. It will help you make the most
efficient use of this valuable communications tool.
SYSTEM CONFIGURATION
System configuration and the equipment list are as shown below.
WRIST STRAP ATTACHMENT
Attach the wrist strap to the phone through the strap hole as shown below 1.
Then pull the long loop through the smaller loop as shown below 2.
BATTERY INSTALLATION AND RECHARGING
To Attach the Battery Pack
1.
2.
Insert the hook at the end of the Battery Pack into the slot at the end of the phone.
Press the Battery Pack down to lock the Battery Pack onto the phone.
To Detach the Battery Pack
1.
2.
Slide back the Release Latch as shown below.
Lift up to remove the Battery Pack from the phone gently.
TO RECHARGE BATTERY
Your CDM-9000 has a built in charger function. To re-charge the Battery Pack, always install the Battery Pack to the
phone.
1.
2.
3.
4.
Attach the Battery pack to the Phone
Insert the DC plug of the AC Adapter (CNR-4000) to the Desktop Holder (DTH-4000). Plug the AC Adapter to AC
outlet.
Place the Phone with Battery Pack into the Desktop Holder.
Then the recharging starts. The display indicates “Now Charging” with animation. You can see a battery level
indicator scrolling at the upper-right of the display.
5.
6.
7.
For complete recharging, it is recommended that the phone is turned off during recharging.
When the recharging is completed, the display indicates “Fully Charged”.
It is normal that Battery Pack may become a little warmer during recharging.
The charging time, from empty to full, depends on the environmental temperature, 0 to +35 °C.
Battery Type
Recharging Time
Slim Lithium Ion (BTR4000)
1.5- 2 h
Extended Lithium Ion (BTE4000)
2.5- 3.5 h
Alternatively you can recharge the Phone using AC Adapter as illustrated below.
NOTE: Do not feed the power to the phone without Battery Pack
FUNCTIONS
External View
BASIC OPERATION
Placing Calls
To place a call:
1.
Enter the phone number.( a maximum of 32 digits will be displayed.)
2.
Press
The
·
.
indicator will light.
To Correct a Number
Press
to clear the last digit.
Press and hold
·
to erase all the digits entered.
If the Call Fails to Go Through
Press
, and
to redial the number.
GETTING STARTED
Turning the phone On/Off
Press and hold
indicator
. All the indicators and the digit display will light momentarily, and a tone will be heard. The
will stay while the phone is turned on. To turn the phone off, press and hold .
Antenna Position
The antenna can be used in its fully extended or fully retracted position only. It is recommended that the antenna should
be fully extended for optimum performance and signal strength or while operating in poor signal areas.
Receiving Signal Strength Indicator
The number of lines indicates the Signal Strength in your area. Four lines show maximum level. The display will vary as
you move with the phone. If the signal is not strong enough to place a call,
will appear on the LCD display.
Battery Level Indicator
You can always monitor the battery charge condition with the constant battery level indicator. The number of blocks
indicates the battery conditions as follows:
+
Power Management
Battery
Mode
Talk Time
(up to)
Standby
Time (up to)
Slim Battery
(BTR- 4000)
Digital
190 min.
170 h
Slim Battery
(BTR- 4000)
Analog
65 min.
12 h
Extended
(BTE- 4000)
Digital
380 min.
340 h
Extended
(BTE- 4000)
Analog
130 min.
24 h
BASIC OPERATION
Placing Calls
To place a call:
1.
Enter the phone number.( a maximum of 32 digits will be displayed.)
2.
Press
.
The
indicator will light.
To Terminate a Call
Press
. The
indicator will go out.
Last Number Redial
to recall the last number you dialed, then press
Press
.
To Dial the Last Number Received
Press
,
to dial the last number with caller ID you received, then press
.
See Call History.
Phonebook Dialing
Press
and enter an address (01 to 99) to recall a number from your phonebook, then press
.
See Phonebook Recall.
To Mute A Phone Conversation
Press
to mute your conversation at any time during a call. “MUTE” will be displayed. To return to normal
conversation, Press
again.
Speed Dialing
If you know the phonebook address of the telephone number that you want to call, you may place a call without using
.
1.
Enter the one or two digits of your phonebook address (1~9 or 10~99).
2.
Press
. The phone number will be displayed. The
indicator will light, and the call will be placed.
NOTE: If two telephone numbers are stored in the address, the Primary Number will be dialed.
Quick Dialing
When this feature is on, the Primary number in your Phonebook address 02 to 09 can be dialed with just one push of the
key.
1.
Press a digit key (
2.
The number in your phonebook is automatically dialed. The phone number will be displayed. The
to
) for more than one second
indicator will
light.
is not for Quick Dialing, but for ONE TOUCH EMERGENY CALL
NOTE: The key
Emergency Call
This feature permits you to place an emergency call even if your telephone is in “Phone Lock”, “Keypad Lock” or
“Restrict” mode. Up to 3 numbers can be programmed as Emergency numbers. The emergency number “911” and “*911”
are already preprogrammed.
Example: To Call 911 in “Phone Lock” or “Keypad Lock” mode.
1.
Enter
2.
Press
. The “911” will not be displayed, but “Phone Lock” or “Keypad Lock” will be displayed.
. The “911” will be displayed. The
indicator will light, and the call will be placed.
OneTouch Emergency Call
This feature permits you to dial an emergency number by a single keystroke, even in the “Phone Lock” or “Restrict”
mode. This feature can be turned off to prevent unintentional calls to the emergency number.
1.
Press and hold
2.
Then the
for more than 2 seconds. The number in emergency memory location “1” will be dialed.
indicator will light, and the call will be placed. (The factory preset number is “911”.)
NOTE: The feature cannot be used if the Keypad Lock is on. You need to dial all the digits and
Emergency Call Mode
.
When you dial one of the 3 pre-programmed emergency numbers, your phone will enter the Emergency Call Mode. In this
mode, the phone will attempt to complete the emergency call using any available cellular system from which it can obtain
service.
After it places an emergency call, the phone will stay in the Emergency Call Mode, and will display Emergency Call
Mode, END to exit”. In the Emergency Call Mode, the phone will attempt to continue to receive service from the cellular
system that it used to complete the call. The phone will automatically exit the Emergency Call Mode after 5 minutes or
after you press END.
Receiving Calls
To Receive a Call
When the telephone rings, press
to answer the call. The
indicator will light.
Any Key Answering
This feature permits you to answer an incoming call by pressing any key on the keypad except
and
.
Caller ID with Name
This feature allows you to preview in your display the number and name of the party calling you before you answer the
call. The name is as you programmed it in your phonebook.
1.
When the phone rings, the Calling Number appears in the display.
2.
The last 10 caller ID’s are stored in the memory for your review and redial.
NOTE: “Number Restricted” or “Number Unavailable” is displayed when the caller ID is restricted or not available.
Automatic Calls-in-Absence Indictor
This feature indicates the number of unanswered incoming calls. If incoming calls are not answered, the LCD display will
indicate “Called XX”. ”XX” is the number of calls (01 to 99) missed. Depressing any key will clear the display.
Ringing Tone with Melody
The CDM-9000 offers you 15 styles of ringer tones and melodies for alerting incoming calls. Ringer volume can also be
adjusted. See Ring Type Selection (F32), Alert Tone Volume control (F31), and Vibrator Alert (F8).
Distinctive Ringing (Audible Caller ID)
You may program different ringer styles for different phonebook address. See To Store Ring Type with the Phone
Number.
During Calls
To Adjust the Earpiece Volume
Simply press the
or
to adjust Earpiece Volume during a call.
Scratch Pad Dialing
If you enter a telephone number during a call, the number will be stored in the Scratch Pad memory.
After terminating the call, the number you entered can be dialed by
.
NOTE: You can deactivate “ Sending DTMF” so that keypad tones will not be transmitted to the calling party. See
Sending DTMF (F35).
Automatic Talk Timer
The talk time of the current call will be automatically displayed. For example, “1h23m45s”.
Call Waiting
Your service provider may provide Call Waiting service. When you are on a call, you may hear beep tone alerting you of
another incoming call. Your phone displays “New Caller” and the caller’s ID with the name. The name is as you programmed it in your phonebook.
1.
Press
to answer the new call.
2.
Press
again to switch between the two calls.
Three- Way Calling
Your Service provider may provide Three-Way calling service. When a call is already in progress, you may call the Third
party.
1.
Enter a number and press
2.
Press
to call the third party.
again to connect all three parties.
Ask your service provider for the detailed information.
Standby
Clock Indicator
Date and Time are automatically displayed, if this feature is enabled. See Clock Indicator (F42) to turn this feature on/off.
Clock Alarm
This feature alert you repeatedly at the alarm time that you programmed. See Clock Alarm (F44) for setting.
Countdown Timer
This feature alerts you when the countdown timer expires. The timer can be set to 1 through 99 minutes. See Countdown
Timer (F45) for setting.
End to End Signaling
To utilize certain phone services, such as accessing an alternate long distance network, signaling a pager or banking by
phone etc., Touch Tone™ signaling is required. The following features will make it easy to send frequently used Touch
Tone™ signals. See Link dialing for more information.
Touch Tone™ from Display
When Sending DTMF mode is on, the number will be sent in Touch Tone™ signals during a call as you press digit keys.
When Sending DTMF mode is off, you can send Touch Tone™ signals in the following manner.
1. Enter the number
2. Press
and scroll to “Tone”.
3.
. The number in the display will be sent in Touch Tone™ signals.
Press
Touch Tone™ from Memory
Touch Tone™ signals can be sent from memory during a call.
1.
Press
, and recall the number you want to send in Touch Tone™ signals.
2.
Press
and scroll to “Tone”.
3.
Press
. The number in the display will be sent in Touch Tone™ signals.
PHONEBOOK OPERATIONS
Your phone has an Enhanced Phonebook with 99 dual-number memory addresses. At each address, you can store up to
two telephone numbers under one name, a person’s home and office number, office and mobile number, etc. Stored
numbers can be easily recalled and dialed by pressing
. Numbers can also be marked Secret for added privacy,
Number of Digits per Phonebook Address
Address
Single N umber or
Dual N umbers
Linked N umbers
01 to 90
Up to 32 digits
Up to 40 digits
9 1- 9 9
Up to 32 digits
Up to 80 digits
N ote
Includes Dual
Mark and Manual
Hyphens
Includes Link
Marks and
Manual Hyphens
Phonebook Entry
To program your phonebook, enter the information in the following order. You may skip “Name”, “Option” and/or
“Voice”.
To Store a Number without Name
1.
Press
2.
Press
, then enter the phone number.
, then enter the desired memory address (01 through 99).
Example: To store the phone number 1 2 3 4 5 6 7 8 9 0 in address 07.
1.
Press
2.
Enter
.
.
3.
Press
4.
Enter
..
and press
.
Overwrite Warning
When you attempt to store a number in an address where another number has already been stored, you will have “OVERWRITE” warning.
Example:
1.
Press
2.
Enter
To store the number 9 8 7 6 5 4 3 2 1 0 in the address 07, where another number 1 2 3 4 5 6 7 8 9 0 is
already stored.
.
.
3.
Press
.
4.
Enter
. The number already stored is displayed momentarily.
5.
Two seconds later.
6.
If you accept to overwrite, scroll to “YES” and Press
7.
If you do not want to overwrite, scroll to “NO” and press
.
. The screen returns to the step 3 again.
Auto Hyphenation
With this feature on, hyphens are automatically inserted when you enter telephone numbers and when you recall the
numbers from the Phonebook. See Auto Hyphenation (F23) to activate or deactivate this feature.
Length of N umber
Display Example
10 digits or less
123- 456- 7890
11 to 21 digits
1- 234- 567- 89012
22 digits or more
N o hyphens
Note: When you manually insert hyphens, the “Auto Hyphenation” feature will not work for that particular number.
Manual Hyphenation
You can manually insert a hyphen at any place when you enter a telephone number. The maximum number is 32 digits
long including hyphens.
Example: To insert a hyphen in the number 1 2 3 4 5 6 7 to display it as 123-4567.
1.
Press
2.
Enter
3.
Press
4.
Press
5.
ENTER
.
.
and scroll to “HYPHEN”.
.
.
Automatic Storing in Phonebook
This feature allows convenient automatic storing into a vacant phonebook address. The number will be stored in the first
available memory address which will be indicated in the display. This feature can prevent the possible overwriting of a
previously stored number.
1. Enter the phone number.
2.
.
Press
Example: To store the phone number 1 2 3 4 5 6 7 8 9 0 into a vacant memory address 04.
1.
Press
2.
Enter
.
.
3.
Press
4.
Press
.
To Store Dual Numbers in Phonebook
You can store Dual Numbers with Dual Mark “ \ ” up to 32 digits for all the addresses 01 to 99 in the phonebook.
To store two telephone numbers in one phonebook address, enter the first number, select the Dual Mark “ \ “ by using
Menu, then enter the second number.
Example: To store the primary number 1 2 3 4 5 6 7 8 9 0 and the secondary number 9 8 7 6 5 4 3 2 1 0 in address 08.
1.
Press
2.
Enter
.
.
3.
Press
and scroll to “DUAL MARK”.
4.
Press
. The Dual Mark “ \ “ is inserted.
5.
Enter
.
6.
Press
7.
Enter
.
and press
.
Note: You can add a second number after storing a first number. See To Enter a Second Number.
To Store a Name with the Phone Number
To use this procedure, you will need to refer to “Alpha Mode” below.
1. Enter the phone number.
to select the Alpha Mode.
2.
Press
3.
Enter the name.
4.
Press
, then enter the memory address (01 through 99) to store the number with the name into memory.
Example: To store the phone number 1 2 3 4 5 6 7 8 9 0 with the name Mr. JACKSON into memory address 11.
1.
Enter the phone number;
.
2.
Set Alpha Mode;
.
3.
Enter the Name;
for “M”,
for “r”,
for “A”,
for “C”,
for “O”, and
4.
Press
5.
Enter
for “K”,
for “.”,
for “J”,
for “S”,
for “N”.
.
and press
.
Alpha Mode
You can add an identifying name (“Alpha Tag” up to 2 lines or 20 to 24 characters) to the phone numbers at each
phonebook address.
To Enter Names using Alpha (Letters)
1.
Press
, than enter the phone number.
2.
Press
.
3.
Press digit key repeatedly to display the letter that you want. The following table shows which character is assigned
with each digit key. For example, to enter the letter “D”, press
once. For the letter “F”, press
three
times.
Assigned Alpha Characters
K ey
1 press
2 press
1
Bland
1
3 press
4 press
2ABC
A/a
B/b
C /c
2
3 DEF
D/d
E/e
F/f
3
4 GHI
G/g
H/h
I/i
4
5 JK L
J/j
K /k
L/l
5
6 MN O
M/m
N /n
O /o
6
7 PQ RS
P/p
Q /q
R/r
S/s
8 TUV
T/t
U/u
V/v
8
9 WXYZ
W/w
X/x
Y/y
Z/z
0 O PER
0
4.
To change from upper to lower case characters or vice versa, press
5.
To enter special characters, press
or
5 press
7
9
during entry of Alpha.
and a digit key to select characters from the table below.
Assigned Special Characters
6.
1
!
2
?
3
_
1
(
2
)
3
:
4
+
5
-
6
.
4
<
5
>
6
&
7
*
8
/
9
=
7
"
8
’
9
#
If you make a mistake, press
to erase the last character. Press and hold
to erase the characters on the
display
7.
Press
to move the cursor, which insets a blank space after the last character.
8.
Press
to move the cursor back to insert new characters.
9.
To exit the Alpha Mode, press
.
Note: You must enter the phone number first, then add the name. Entering a number after the name will erase the name.
To Store a Ring Type with the Phone Number (Distinctive Ringing)
You can choose one of 15 ring types for each phonebook address. With this feature, you will be able to distinguish who
is calling by hearing the ringing tone. The ring type is selected while storing the number when the word “OPTION”
appears.
Example: To store a number with Ring Type #02 in the address 12.
.
1.
Enter the phone number, and press
2.
Press
3.
Press
and scroll to one of the numbers, which you want to set.
4.
Press
and scroll to sample the different ring types.
5.
Press
6.
Enter
and scroll to “RING TYPE”.
to set the new ring type.
and press
.
Notes: 1. If you have one number only, the step 3 is skipped.
2. The “COMMON” shown in the step 4 is the ring type you selected with the Function Menu. See Ring Type
Selection (F32).
Recall Menu
Press
·
·
·
key. The following “RECALL” menu will prompt you to recall the number from memory.
“ADDRESS”:
Phonebook Address Mode
“SEARCH”:
Phonebook Sort Scroll Mode or Phonebook Key Word Search Mode
“HISTROY”:Call History Mode
Recall Menu Tree
Notes: 1. The submenu “PRI.CHANGE” will be available only when two telephone numbers are stored in that
address.
2. The submenu “REPLAY” will be available only when your voice is stored in that address.
Phonebook Recall
To recall the numbers stored in your phonebook, you have three methods: Address Mode, Sort Scroll Mode and Key
Word Search Mode.
Phonebook Address Mode
This mode is useful in finding a phone number by recalling a specific address or by scrolling the Phonebook.
1.
Press
2.
Enter the two-digit Memory Address.
3.
Press
.
or
to scroll.
Note: The scroll feature will skip any vacant memory address(es).
Phonebook Sort Scroll Mode
This mode sorts and displays, in alphabetical order, telephone numbers stored with “Alpha Tags” (Names). Blank digits
on tip will be disregarded for scroll.
Example: To display the numbers stored in the memory alphabetically from “J”.
1.
Press
.
2.
Press
for “J”.
3.
Press
.
4.
Press
.
5.
Press
.
Note: When the Alpha Tag is 2 lines long, only the Alpha Tag is displayed without the telephone number. However, a
call can still be made by simply pressing
.
Phonebook Key Word Search Mode
This mode searches and displays the character string of Alpha Tags stored in the Phonebook. Any part of the Alpha Tag
can be used for the search.
Example: To search the character string AN stored in the Phonebook.
1.
Press
.
2.
Press
for “A”.
3.
Press
4.
Press
.
5.
Press
.
6.
Press
.
7.
Press
.
8.
Press
.
for “N”.
Notes: 1. The key word can be searched regardless of upper or lower case letters.
2. When the Alpha Tag is 2 lines long, only the Alpha Tag is displayed without the telephone
However, a call can be made by simply pressing
.
To Dial Dual Numbers
After the numbers is recalled in the display, it can be easily called by pressing
.
number.
·
To dial the primary number, just press
·
To dial the secondary number, press
.
.
To Review Long Numbers
This feature allows you to review all the digits of very long numbers or numbers stored with Alpha Tags.
1. Use any of the previously described Phonebook search modes to recall a number.
2.
Press
and scroll to “VIEW TEL#”, and the entire digits of the number will be displayed.
To Review Long Names
This feature allows you to review whole Alpha Name Tag stored with dual numbers.
1. Use any of the previously described Phonebook search modes to recall a number.
2.
Press
and scroll to “VIEW NAME”. Press
again, and all the characters of the Name will be displayed.
Prepending Dialing
This feature will be convenient when you need to add an area code to the number in the phonebook.
Example: To add 1 2 3 to a number 4 5 6 7 8 9 0.
1.
Recall the number.
2.
Enter
.
3. Press
. Then the call is placed to 123-4567890.
Note: The added digits will not be stored in the phonebook memory.
Phonebook Edit
This section guides you how to modify, move, change priority and erase the phonebook contents.
To Modify Numbers and Names
You can modify any of the phonebook contents you have stored, including Phone Numbers, Names, Ring Type, Secret
and Address.
To Modify Phone Numbers
Recall the number from the phonebook. Press
to select “MENU”, then scroll to “MODIFY” and press
the new digit(s) and delete the old digits(s) by pressing
. To move the cursor, press the
to left,
. Enter
to right.
To Modify Alpha Name Tag
Recall the number and proceed to “MODIFY” as above. Press
clear the letter(s), and enter the new Name.
, and the Name Tag will appear by itself. Press
to
To Modify Address
After you modified number/name, just press
without entering new address, and the current phonebook address will
be overwritten. If you enter a new address, and press
, the modified number/name will be combined to the new
address, while the original address will remain unchanged.
To Enter a Second Number
Example: To add the secondary number 9 8 7 6 5 4 3 2 1 0 in the address 07.
1.
Recall the number stored in the memory address 07.
2.
Press
3.
Press .
4.
Press
and scroll to “DUAL MARK”.
5.
Press
. The Dual Mark “ \ “ is inserted.
6.
Enter
and scroll to “MODIFY”.
.
7.
Press
8.
Press
9.
Two seconds later.
10. Press
.
. The original number is displayed momentarily.
to store in the original address.
To Move Numbers and Names
You can move the phonebook contents to a new address. The original address will then be erased.
Example: To move the number 1 2 3 4 5 6 7 8 9 0 from the address 20 to 15.
1.
Recall the number stored in the address 20.
2.
Press
and scroll to “MOVE”.
3.
Press
.
4.
Enter 1 5 as a new address.
To Change Priority of Dual Numbers
You can interchange the primary and the secondary numbers in a phonebook address. The submenu “PRI.CHANGE” will
only be available when two telephone numbers are stored in that address.
Example:
1.
Recall the number.
2.
Press
and scroll to “PRI.CHANGE”.
3.
Press
. The display shows the status after change.
4.
Press
to decide it.
Note: The primary number will be dialed when you use Speed Dialing and Quick Dialing features.
To Erase Numbers and Names
This feature erases the number already stored in the Phonebook.
Example: To erase the number 9 8 7 6 5 4 3 2 1 0 1 2 3 stored in the memory address 16.
1.
Recall the number stored in the memory address 16.
2.
Press
3.
Press
and scroll to “ERASE”.
. The number is shown again.
4. Two seconds later the screen is changed.
5. To erase the number scroll to “YES”, otherwise “NO”, and press
.
Secret Memory
To Store a Secret Number
This feature permits you to store a phone number that you want to keep secret in your phonebook. The secret number
can be accessed only by entering the security code.
Example: To store the phone number 1 2 3 4 5 6 7 8 9 0 in address 30 as a secret number
1.
Press
2.
Enter
.
3.
Press
,
.
4.
Press
and scroll to “SECRET”.
5.
Press
.
6.
Press
to put a mark “
7.
Press
8.
Enter
” on the number to be secret.
.
and press
to store it.
To Recall a Secret Number
Example: To recall the number 1 2 3 4 5 6 7 8 9 0 stored in the address 30.
1.
Use Phonebook Search Mode to recall a secret number.
2.
Press
3.
Enter the four-digit security code and press
.
.
Link Dialing
This feature permits you to link groups of numbers to be sent in sequence. The linked numbers can be stored in memory.
When dialed, the first group of numbers will be sent in Touch Tone™ group by group each time you press
.
To Store Linked Numbers in Phonebook
Linked Numbers can be stored using any of the procedures described under memory operations (at a specific address,
with a Name Tag, at the next vacant memory location or as secret). The only difference is, that a Link Mark “ = “ must be
entered between the linked numbers. The linked mark is entered using the key sequence
.
You can store Linked Numbers with Link Marks “ = “ up to 40 digits for the address 01-90, and up to 80 digits for the
address 91 to 99 in the phonebook.
The example below shows how to store a Linked Number at a specific memory address.
1. Enter the first number
2.
Press
. A link mark “ = “ will be added at the end of the number.
3.
Enter the second number. If you wish to link additional number(s), return to 2.
4.
Press
, then enter the memory address (01 ~ 99).
Example: To link 3 numbers and store in Address 35.
1.
Enter
.
2.
Press
.
3.
Press
.
4.
Enter
5.
Press
.
6.
Press
.
7.
Enter
.
.
8.
Press
.
Note: While entering a linked number, you may review all the parts of that number, even those already entered. Press
, scroll to “VIEW TEL#” and press
each time you press
. The linked numbers you have just entered will be displayed one by one
.
To Place Calls using Linked Numbers
1.
Press
, and select the linked number you want to call.
2.
Press
. Then the “
3.
Press
. The second linked number will be sent in Touch Tone™ signals. Succeeding numbers can be sent
sequentially by pressing
” indicator will light as the first number is dialed.
again.
Voice Activated Dialing (VAD)
With this feature, you can make a call from your phonebook by just saying the name. You can register, in your own voice,
names for up to 20 numbers in your phonebook.
Voice Registration
Example: Store the telephone number 1 2 3 4 5 6 7 8 9 0, and register the name “Katie”.
1.
Enter the telephone number (1 2 3 4 5 6 7 8 9 0).
2.
Press
3.
Press
4.
6.
After you hear the voice prompt, “Name, please”, speak “Katie” into the microphone of the handset. You will hear
“Katie” repeated from the handset again.
After you hear the voice prompt, “Again”, repeat the name “Katie”. You will hear “Katie” repeated from the handset
again.
If the registration is successful, you will hear the prompt “Entry Completed”.
7.
Your voice registration is displayed.
8.
And your phonebook status is displayed.
5.
.
.
Notes: 1. Please register names with you normal tone of voice, and in a quiet environment.
2. For better recognition, it is recommended that very similar sounding names should not be registered.
3. The maximum length of names that phone will accept is 2 seconds.
4. The same person’s voice that was used to record the names must be used for dialing, otherwise the VAD
feature may not work properly.
Reviewing the Registered Name
1.
Press
to recall the number from the phonebook.
2.
Press
3.
Place the phone near you ear, and press
and scroll to “REPLAY”.
.
4. You will hear the registered name.
Note: Addresses with voice are marked with “V”.
Voice Activated Dialing
Example: Dial the number by speaking “Katie”.
.
1. Press and hold
2. Listen to the phone say “Name, please”, then speak into the microphone “Katie”.
3. You will hear from the phone, “Calling Katie”.
4. Katie’s number in the phonebook will be automatically dialed.
Notes: 1. If you hear “Again” from the handset, please repeat the name.
2. If you hear “Did you say ‘Katie’ ?”, please answer to it “Yes” or “No”.
3. When you use this feature through car kit option, it is recommended that you speak lightly louder for better
recognition.
To Register a Name to a Number Stored in Memory
1.
Press
to recall the number from the phonebook.
2.
Press
, scroll to “MODIFY” and press
3.
Press
,
4.
After the screen displays “PHONEBOOK OVERWRITE”, press
5.
You will have on the screen “VOICE DATA ENTRY”.
again.
,
.
6.
Press
and go to the step 4 of Voice Registration.
Note: In case dual numbers or linked numbers are stored in the phonebook, the primary number of the first number can
be dialed using VAD.
To Delete the Registered Name
to recall the number from the phonebook.
1.
Press
2.
Press
.
Press
4.
After the screen displays “PHONEBOOK OVERWRITE”, press
5.
You will have on the screen “VOICE DATA ENTRY”.
6.
Press
, scroll to “ERASE” and press
again.
.
.
and go to the step 4 of Voice Registration.
Note: In case dual numbers or linked numbers are stored in the phonebook, the primary number of the first number can
be dialed using VAD.
To Delete the Registered Name
1.
Press
2.
Press
3.
Scroll to “VOICE DATA” and press
4.
You will have on the screen “VOICE DATA ERASE”. Scroll to “YES” and press
to recall the number from the phonebook.
, scroll to “ERASE” and press
again.
.
.
Call History
This feature recalls outgoing Call History and incoming Caller ID Numbers. This is convenient for redialing recently
called numbers or for returning missed calls by using the stored Caller ID. See Caller ID with Name.
Call History Memories
Memory
Description
O UTGO IN G
Last 10 numbers you dialed.
Address 01 to 10.
IN C O MIN G
Last 10 numbers you
answered or missed.
Address 01 to 10.
SC RATC HPAD
Last 3 numbers you wrote
during calls. Address 01 to
03.
You can access the memory in two ways, Scroll and Shortcut.
By Scrolling
1.
Press
and scroll to “HISTORY”.
2.
Press
and scroll to the menu item you want.
3.
Press
T to select.
4.
To review the numbers in memory, scroll with
5.
After a number is displayed, it can be easily dialed, by simply pressing
or
.
.
Shortcut:
·
Press
to display the latest number in the outgoing history memory.
·
Press
to display the latest number in the incoming history memory.
To Review Outgoing Call History
Example: To recall a number from Outgoing History.
1.
Press
. The most recent call is displayed.
2.
Scroll with
or
3.
You can place a call by simply pressing
to review other numbers.
.
When duplicate numbers are called, only the latest call is stored in the outgoing call history memory.
To Review Incoming Call History
Example: To recall a received Caller ID from Memory Stack.
1.
Press
. The most recent call is displayed.
2.
Press
. A time stamp is shown, if available.
3.
Press
. A name is shown, if available in your phonebook.
4.
You can place a call by simply pressing
.
In the incoming call history, the call are marked with “¨ ” or “à”. Numbers with “¨ ” represent calls you missed, and
numbers with “à” represent calls that you answered. When duplicate numbers are received, only the latest call is stored
in the incoming call history memory.
To Review Scratch Pad
Example:
1.
Press
.
2.
Scroll with
or
to review other number.
3.
You can place a call by simply pressing
.
To Save a Number to Phonebook
The numbers of Call History and Scratch Pad Memory can be stored in your phonebook. You can add a name in the same
way as “MODIFY”. See To Modify Numbers and Names.
Example: To save a received Caller ID Phonebook.
1.
Recall a number.
2.
Press
and scroll to “SAVE”.
3.
Press
.
4.
Press
5.
Enter 4 0 as an address, and press
.
.
WEB BROWSING
When operating in the Digital mode, you can access various internet websites directly from your cellular phone. Please
contact your Service Provider for details of the available service.
Web Access
1.
Press and hold
. The Web Browser will start. The cached information may be displayed.
2.
To access the network, press and hold
website with a flashing “INUSE”.
while “D” indicator is on. Your phone will display your service providers
3.
Scroll the page by
4.
Press
5.
To return to the previous page, press
6.
To terminate the network access, press
7.
Press
or
or
.
to select the menu option in the bottom line of the display.
.
. The “
” will go out. You can still browse the cached information.
again to close the web browser.
Browser Menu
Press
key while the browser is active to see the browser’s local menu.
1.
2.
3.
4.
5.
6.
7.
Help: To get help information.
will do the same.
Home: To get back to the Home page. Press and hold
Mark Site: To store the current page in your bookmark list.
GoTo URL: To input URL (Uniform Resource Locator), and access that page.
Show URL: To display the URL of the current page.
Restart: To clear the cache memory in your browser.
Phone.com: To display the version of your browser.
8.
Advanced: To use for security.
Alpha Entry in Browser Mode
“Alpha” mode will automatically be active when it is necessary to enter alphabet character such as URL.
Example:
ALPHA/alpha – Alphabet Mode
Press
to switch upper and lower cases. Press
Alphabet Mode, press
to move the cursor to left, and
to right. To exit the
.
SYM – Symbol Mode
By pressing
, “SYM1” (symbol) mode will be active. Scroll “SYM1” to “SYM6” by
corresponding digit key (1 to 6) to select.
NUM – Numeric Mode
Press
to set “NUM” (numeric) mode. Press
again to reset to “Alpha” mode.
Alphabet Mode
K ey
1
2
1
Press
Blank
2
Press
1
3
Press
4
Press
@
/
B/b
C /c
2
5
Press
:
ABC
A/a
3
DEF
D/d
E/e
F/f
3
4
FHI
G/g
H/h
I/i
4
5
JK L
J/j
K /k
L/l
5
MN O
M/m
N /n
O /o
6
P/p
Q /q
R/r
S/s
T/t
U/u
V/v
8
9
WXYZ
W/w
X/x
Y/y
Z/z
9
0
O PER
0
.
,
?
!
6
7
PQ RS
8
TUV
7
or
, and press the
*
@
-
_
/
$
%
(
)
#
.
,
?
!
’
"
;
:
+
Symbol Mode
1
2
3
4
5
6
7
8
9
SYM1
.
!
?
,
-
’
"
(
)
SYM2
@
#
:
/
$
&
%
+
*
SYM3
;
<
>
=
[
]
_
{
}
SYM4
~
‘
^
|
\
MESSAGING FEATURES
Your CDM-9000 Audiovox Cellular Telephone has been engineered to operate with the latest technology that will allow
you to enjoy the benefit of Voice Mail Notification and Text Messages. Please note that operation of these features
depends on the Cellular System and therefore may not be available in all areas.
Message Indicator
A message indicator
shows you the current status as explained below.
Flashing
You have new Text
Messages or new Voice Mail
N otification.
Steady
You have Text Messages or
Voice Mail N otification,
which you have seen already.
O ff
N either Text Message nor
Voice Mail N otification.
In addition to the
indicator, whenever your Voice Mail contains unreviewed messages, you will occasionally hear a
short beep as a reminder.
Voice Mail
Voice Mail Notification
Your cellular telephone notifies you when new messages are in you Voice Mail. When messages are left in your Voice
Mail, the
indicator at the upper right of the display flashes to alert you.
Normal Voice Mail Notification
When your phone is notified by the cellular system that there are messages in your Voice Mail, the following occurs.
1. The phone sounds a short beep tone.
with animation.
3.
The Phone’s Memory Stack is updated as to the number of unreviewed messages in your Voice Mail.
Voice Mail Notification with Mail Retrieval Service (MRS)
1.
The phone sounds a short beep tone.
2.
Press
to answer the incoming call, your phone will be connected to your Voice Message Service so that you
may retrieve your messages.
If you choose not to answer the incoming call, “Message Retrieval” will be stored in the stack for retrieval of your
messages at a later time.
3.
To Display the Number of Voice Mail Messages
Example:
1.
Press
2.
Press
. A mark “ * “ is flashing, when a new message is available.
to select “VOICE”.
The number of messages in your Voice Mail will be displayed.
3.
If a Text Message is attached to the Voice Mail Notification, the text Message can be reviewed by
. Otherwise
this step is skipped.
4.
Press
. Scroll to “QUIT” or “ERASE” the notification you reviewed.
5.
Press
.
6.
To erase the Voice Mail Notification, scroll to “YES”, otherwise NO”, and press
.
Voice Mail Dialing
You can store one set of linked numbers in a specially provided memory, and access these numbers with one touch of the
“Voice Mail Access” key
.
To Store the Voice Mail Access Number
Please see “To Store Linked Numbers in Phonebook” and follow the steps 1 ~ 3 to make a set of linked numbers. Press
to store. Up to 80 digits of linked numbers can be stored including link mark “ = “. You can
also add a Name Tag (up to 20 to 24 characters) with your voice mail number. See To Store a Name with Phone Number.
To Call Your Voice Mail
1. Press and hold
. The first number will be displayed and dialed.
2.
Press
. The second number will be displayed and sent in Touch Tone™ signal.
3.
The succeeding numbers can be sent sequentially by pressing
.
To Review the Voice Mail Access Number
1.
Press
2.
Press
3.
Press
to select the Phonebook Address Mode.
. The first linked number in
will be displayed.
(one or more times) to display the remaining linked numbers in
.
Text Messages (Short Message Service)
Your phone is able to receive and display Text Messages of up to 255 characters long. The Text Message memory stack
can store up to 30 messages. When an SMS message is received, the following occurs.
1. A short beep tone sounds.
2.
The
indicator at the upper right of the display flashes to alert you. The display indicates “NEW MESSAGE”
with animation.
3.
The Text Message just received is stored in the Memory Stack.
4.
If the Memory Stack is full, any new Text Messages will not be stored, and you will have the display:
To Review a Text Message
Text messages are stored in the address 01 to 30 in the memory stack. The address 01 has the last message. Every
message moves to the next address when a new message is stored.
Example: To display a Text Message stored in the Me Stack.
1.
Press
and scroll to “TEXT”. You have now 10 Text Messages out of 30 memories. A mark “*” is flashing,
when a new message is available.
2.
Press
. The first Text Message is displayed. A longer message will be automatically scrolled every 6 sec-
onds.
3.
Press
or wait for 6 seconds to review an optional information.
4.
Press
or wait for 6 seconds. If a Callback Number is displayed, you can dial it by simply pressing
5.
Press
and scroll “QUIT” or “ERASE” for the message that you just reviewed.
6.
Press
to select.
7.
To erase the Text Message, scroll to “YES”, otherwise “NO”, and press
8.
To review another message, scroll with
or
.
.
.
Notes: New Text Messages are marked with “¨ ”. Text Messages you have already reviewed are marked with “à”.
Function Menu
To Access Function Menu
Various phone settings can be changed through Function Menu to customize your phone’s functions to fit your convenience. See Function Menu Tree below. You can reach the Function you want to access in two ways; Scroll and Shortcut.
By Scrolling
1.
Press
2.
Scroll with
3.
Press
4.
Scroll with
5.
Press
to enter Main Menu.
or
key to the desired item in the Main Menu.
to enter the submenu.
or
key to the desired item in the submenu.
to enter the function.
By Shortcut
Each Function has its shortcut number for direct access. For example, to enter the function “RING TYPE” (F32) press
.
To Exit from Function Menu
·
To return from a submenu to the main menu, press
·
To exit from Function Menu, press
Notes: 1. A mark “
2. A mark “
.
.
” at the right in a menu prompt you that you can see its detailed items by pressing
” shows the current setting of the function.
Function Menu Tree
Lock Features
Security Code and Unlock Code
Your phone is equipped with the Security Code and the Unlock Code to access various security features. You may
change the preset codes for added protection.
C ode
Preset
Description
Security
C ode
1234
To access Secret Number, to set
Call Restriction, etc.
Unlock
C ode
12 3 4
To unlock the Phone.
When “SECURITY CODE:” is displayed, you need to enter your four-digit security code.
Keypad Lock (F11)
This mode is used for preventing inadvertent pressing of keys. (For example, when the phone is in a purse or pocket.)
With this feature on, the following functions are still available.
.
·
Incoming calls can be answered with
·
Programmed emergency numbers can be called. (Except for OneTouch Emergency Call.)
When this feature is on, the following functions are not available.
· Automatic Answering
· Any Key Answering
· OneTouch Emergency Call
· Quick Dialing
·
Turning off the phone by
.
To Activate/Deactivate this feature:
1.
Press
to activate “Keypad Lock” mode.
2.
Press
again to deactivate.
Phone Lock (F12)
This mode is useful to prevent unauthorized use of the phone. With this feature on, the following functions are still
available.
· Incoming calls can be answered with
·
·
·
Any Key Answering
Programmed Emergency Call
OneTouch Emergency Call
·
Turning off the phone by
.
.
The following functions are not available when this feature is on.
· Automatic Answering
· Quick Dialing
To Activate:
1.
Press
to activate “Phone Lock” mode.
Note: The phone will remain locked even if the power is turned off.
Automatic Phone Lock (F13)
If you activate this feature, the phone will automatically go into the phone lock condition after it is turned off. When you
turn the phone on, you must enter the four-digit unlock code before it operates. See To Unlock Phone.
1.
Press
.
2.
You can turn this feature on/off by
3.
Press
or
.
1.
Press
2.
Enter the four-digit security code and press
.
3.
The current unlock code will be displayed.
4.
Enter a new four-digit unlock code and press
to set.
To Unlock the Phone
1. Enter the four-digit unlock code.
2. The “Phone Lock” indicator will go out.
To Change the Unlock Code (F14)
.
.
Display Features
Own Telephone Number Display (F21)
This feature enables you to display your own telephone number and the ID number (SID) of your “Home” Cellular
System.
Press
.
Backlight Control (Standby) (F22-1)
The LCD display and keypad are backlighted automatically after Power-On. The Backlighting duration can be changed.
Four modes are available.
1.
Press
.
2.
Press
3.
You can change the current mode by
4.
Press
.
or
.
to set.
· 10SEC – 10 Seconds Mode
Backlight is on for 10 seconds after a key is pressed. It also lights automatically when the power is turned on and for an
incoming call. The duration is variable between 5 to 30 seconds, by pressing
.
· OFF – Off Mode
Backlight is on momentarily when the power is first turned on, but remains off thereafter.
· ALWAYS ON – Always On Mode
Backlight is always on.
Note: You can keep the backlight on while you are engaged in conversation. See Backlight Control (In-Use) (F22-2).
Backlight Control (In-Use) (F22-2)
For ease of operation, you may select to have the backlight always on while you are engaged in a conversation. When
this feature is set to the “ALWAYS ON” mode, the backlight is turned on as long as the call is connected
1.
Press
2.
Press
3.
Scroll with
4.
Press
, and scroll to “IN-USE”.
.
or
to “NORMAL” or “ALWAYS ON”.
to set.
Auto Hyphenation (F23)
1.
Press
2.
Scroll with
.
or
to “ON” or “OFF”.
3.
Press
to set.
SMS Text Lines Selection (F24)
You can select to have Text Messages displayed in either 3 or 4 lines.
1.
Press
2.
Scroll with
3.
Press
.
or
“3LINES” or “4LINES”.
to set.
Contrast Control (F25)
The LCD display contrast can be adjusted in 7 steps for your best condition.
1.
Press
.
2.
Adjust the contrast with
3.
Press
or
.
to set.
Software Version Review (F26)
This feature permits you to review to software version which is installed in your phone.
1.
Press
2.
Press
.
to exit.
Last Rescan SID Indicator (F27)
This menu item permits you to view the System Identification number (SID), which your phone is currently using.
.
1. Press
2. Press
to exit.
PRL ID Review (F28)
This menu permits you to review the Preferred Roaming List (PRL) versions that is programmed in you phone.
1. Press
2. Press
.
to exit.
Volume and Tone Controls
Alert Tone Volume Control (F31)
This feature allows you to adjust the ringert/melody volume. The following adjustment will also change the sound
volume of Clock Alarm and Countdown Timer.
1.
Press
.
2.
Keep pressing
or
until you get the desired sound level, or “silent” mode.
Note: In “silent” alert mode, alert tone is not given for an incoming call. However, if Automatic Answering
feature is ON, alert tone is given with the lowest available volume.
Ring Type Selection (F32)
This feature permits you to select an alert tone pattern from 15 options including memory ringers.
1.
Press
2.
Press
or
3.
Press
to set
.
to select the alert tone.
Key Tone Volume Control (F33)
1.
Press
.
2.
Keep pressing
or
until you achieve the desired sound level, or “silent” mode.
Note: Key tone will be off in “silent mode”, but tone will be heard on the other side of the line.
To Mute a Phone Conversation (F34)
You can mute your conversation at any time during a call.
1.
Press
.
2.
Then the “Mute” indicator is displayed. The transmit audio will be muted but the receive audio will still be heard
from the receiver.
3.
To return to normal conversation, press
4.
Mute is reset when the call is terminated.
again.
Sending DTMF (F35)
This feature allows you to activate or deactivate Sending DTMF (Touch Tone™) when you enter a number during a
call.
1.
Press
.
2.
Scroll to “ON” or “OFF” to select.
3.
Press
to set.
Setting Tones (F36)
This is a group of 9 functions related to the setting of tones.
Key Tone Length (F36-1)
This feature selects the duration of the tone length when a key is pressed.
1.
Press
2.
You can change the current mode by
3.
Press
and
.
or
.
to set.
· NORMAL – Normal Mode
Tone is heard as long as the key is being pressed.
· SHORT – Short Mode
Tone is heard for a short time even if the key remains pressed.
Single Alert Beep Tone (F36-2)
This feature is used to signal incoming call with only a single beep. This feature can only be used with the “silent” alert
mode. See Alert Tone Volume Control (F31).
and
.
1.
Press
2.
You can turn this feature on/off by
3.
Press
or
.
to set.
Voice Mail Alert (F36-3)
This feature audibly alerts you when a Voice Mail Notification is received. A Voice Mail Notification is received if your
Voice Mail contains messages that have not been reviewed.
1.
Press
and
.
2.
You can turn this feature on/off by
3.
Press
or
.
to set.
Text Message Alert (F36-4)
This feature audibly alerts you when a Text Message is received.
and
.
1.
Press
2.
You can turn this feature on/off by
3.
Press
to set.
Caller ID Alert (F36-5)
or
.
This feature audibly alerts you when a Caller ID is received.
1.
Press
and
2.
You can turn this feature on/off by
3.
Press
.
or
.
to set.
Service Mode Alert (F36-6)
With this feature on, an audible tone alerts you when the service mode changes from Digital to Analog, or vice versa.
and
.
1.
Press
2.
You can turn this feature on/off by
3.
Press
or
.
to set.
Voice Privacy Alert (F36-7)
This feature audibly alerts you when the voice privacy service is provided, and also when the service is canceled.
1.
Press
2.
You can turn this feature on/off by
3.
Press
and
.
or
.
to set.
One Minute Beep Tone (F36-8)
With this feature on, you will be notified during a call, once every minute by a short tone. In addition two beep tones will
sound every 5 minutes.
1.
Press
2.
You can turn this feature on/off by
3.
Press
and
.
or
.
to set.
Low Battery Alarm (F36-9)
When activated, this feature warns by an audible alarm when the battery level is low. If the alarm is given, recharge the
battery or replace it with a fully charged battery.
1.
Press
and
2.
You can turn this feature on/off by
3.
Press
to set.
.
or
.
Call Timers
To help you manage your calls, your phone is equipped with several Call Timers.
Last Call Timer (F41-1)
1.
Press
2.
Press
. The talk time of the last call will be displayed.
to exit.
Outgoing Call Timer (F41-2)
1.
Press
2.
Press
and
. The cumulative talk time of all outgoing calls will be displayed.
to exit.
All Calls Timer (F41-3)
1.
Press
2.
Press
and
. The cumulative talk time of all incoming and outgoing calls will be displayed.
to exit.
Note: The above three timers can be reset to zero by using “Call Timer Reset” feature.
Lifetime Timer (F41-4)
1.
Press
and
. The cumulative “lifetime” talk time of all incoming and outgoing calls will be
displayed. This timer cannot be reset to zero.
2.
Press
to exit.
Web Total Timer (F41-5)
1.
Press
2.
Press
and
. The cumulative time of web access call will be displayed.
to exit.
Note: This timer can be reset to zero by using Call Timer Reset (F65-1)
Clock Indicator (F42)
Date and Time are automatically displayed, if this feature is enabled.
1.
Press
.
2.
You can turn this feature on/off by
3.
Press
or
.
to set.
Clock Adjustment (F43)
You can use your clock in AUTO or MANUAL mode. In AUTO mode, your clock synchronizes to the base time of the
CDMA system and displays the local time of the area where you are, while the “D” indicator is on. In MANUAL mode,
your clock always works alone, and can be adjusted manually.
Example: To set the time to 9:15 a.m. Jul. 21, 2000 in MANUAL mode.
.
1.
Press
2.
Scroll to “MANUAL” and press
3.
Enter the year
for a.m. (or
4.
Press
.
, month
, day
, time
and
for p.m.)
to set.
Notes: 1. In the step 3 above, you can correct a digit by
or
, moving the cursor by
or
.
2. The clock works internally during power off, and will display the time in the same mode when you turn the
power on.
Clock Alarm (F44)
This feature alert you repeatedly at the alarm time that you programmed.
Example: To set the alarm time to 7:30 a.m.
1.
Press
.
2.
Scroll to “ON” and press
3.
Enter the alarm time
4.
Press
5.
At the alarm time, the alarm will ring for one minute with animation.
to set. The
.
and
for a.m. (or
for p.m.)
indicator will be displayed.
6. Press any key to stop ringing.
7. The clock alarm will repeat to ring every day until you cancel the feature.
Notes: 1. If it is a time to alarm during a call, the clock alarm will ring after the call.
2. The clock alarm does not ring during power off, but this feature will be activated again when you turn the
power on.
3. The clock alarm may not ring in AUTO mode, if you skip the alarm time traveling into an area with
different local time.
4. In place of the alarm sound, you can use Vibrator Alert (F8).
Countdown Timer (F45)
This feature alerts you when the countdown timer expires. The timer can be set to 1 through 99 minutes.
To Start the Countdown Timer
.
1. Press
2. Enter the duration, 1 to 99 minutes.
3. Press
to start. The
indicator will be displayed.
4. When the timer expires, the alarm will ring for one minute with animation.
5. Press any key to stop ringer.
To Cancel the Countdown Timer
1. Press
again after the timer has started.
2. “TIMER STOP?” is displayed with the remaining minutes to expire.
3. Scroll to “YES” and press
to cancel. The
indicator will go out.
Notes: 1. If the timer expires during a call, the alarm will ring after the call.
2. When you turn the power off, the countdown timer will be cancelled.
3. See Alert Tone Volume Control (F31) to change the alarm sound volume.
4. In place of the alarm sound, you can use Vibrator Alert (F8).
System Features
A/B System Selection (F51)
This feature permits you to select which cellular system (A or B) your phone uses. When you turn the phone on, it
remembers the last A/B setting and will scan the radio channels based on that setting. Leave this setting as it has been
preprogrammed unless you have a reason to alter the system selection.
To alter the system selection:
1.
Press
. The current mode will be displayed.
2.
You can change the current mode by
3.
Press
or
.
to set.
· AUTO ROAM – Auto Roam Mode
The phone will scan the priority systems first, and then non-priority systems. For more information as to how this mode
works, see Enhanced Roaming.
· HOME – Home Only Mode
You can place or receive calls only within your home area or home affiliated area.
· A-ONLY – A-System Only Mode
The phone will scan the A-system only and prevents switching over to the B-system.
· B-ONLY – B-System Only Mode
The phone will scan the B-systems only.
Note: If your LCD displays “AUTO ROAM ONLY”, your phone has been pre-programmed to operate in the Auto
Roam Mode only.
Enhanced Roaming
Cellular systems are identified by a number called System Identifier or SIS. Your phone is equipped with a Preferred
Roaming List (PRL) which can be programmed by your Carrier to take advantage of the families of cellular system
(SIDs) that your Carrier owns, or has special billing arrangements with, in different cities. In your Home System Area,
both “
” and “RM” are off in your display. Outside of the Home System in Service Areas closely associated
with your Carrier, the phone’s display may appear the same as when operating in the Home System. In areas where
your Carrier has Roaming agreements, your phone will display a steady “RM” indication. If your display indicates a
flashing “RM”, you are in a cellular system which is not associated with your Carrier (you can still make or receive
”, you may have to change you’re A/B System Selection or NAM
calls). If your display indicates a flashing“
selection in order to obtain service. If your display indicates
, you are in an area where there is no cellular
service.
NAM Selection (F52)
Some cellular users may find it beneficial to register their phones with multiple numbers, for different cities where they
may frequently travel. To provide this ability, your phone has two NAMs (Number Assignment Modules) enabling
up to two registrations.
If you have multiple registrations, the NAM Selection feature enables you to change the NAM being used by your
phone. Do not use this feature, if you do not have multiple registrations.
To change NAMs:
1.
Press
.
2.
You can change the current NAM by
3.
Press
or
.
to set.
Force Analog Call (F53)
This feature temporarily directs the phone to use the Analog Mode even if the Digital Mode has been previously
selected.
1.
Press
2.
Press
.
when scanning the Analog Mode.
Notes: This feature automatically ends if:
1) The phone is turned off.
2) An outgoing call is made.
3) An incoming call is received.
4) After 10 minutes if items 1) ~ 3) did not occur.
System Settings (F54)
This is a group of several functions for settings related to the system.
NAM Name Displays (F54-1)
You can program a greeting or a name of a maximum 10 to 12 characters in the second line of your LCD display. This will
be displayed when the phone is turned on or when you change the NAM. As you can program different name for each
NAM, you can tell which NAM is currently active when you turn the phone on.
1.
Press
and
.
2.
You can select other NAM by
or
3.
Enter your message.
4.
Press
. Then press
to edit.
to store the message.
Automatic NAM (F54-2)
If you have multiple NAM registrations, your phone will recognize NAMs for which you are registered. The phone will
then automatically switch to the proper NAM for the area in which you are in.
1.
Press
2.
You can turn this feature on/off by
3.
Press
and
.
or
.
to set.
Automatic Retry (F54-3)
With this feature on, your telephone will automatically make up to seven call attempts when the first try is not successful.
The
indicator will stay on, and the speaker will be muted. Press
1.
Press
and
2.
You can turn this feature on/off by
3.
Press
to cancel the Automatic Retry.
.
or
.
to set.
Enhanced Voice Privacy Service (F54-4) (Digital Mode Only)
This feature requests the cellular system to provide the enhanced voice privacy service. This service can only be
provided in the Digital Mode, and its availability depends on the cellular system and your service provider.
To Set Enhanced Voice Privacy Mode:
1.
Press
and
.
2.
To request the cellular system to provide the enhanced voice privacy service, select “ENHANCED” with
or
, and press
.
3.
When the phone is operating in the Enhanced Privacy Mode, “VP” appears in the upper line of the display during
talking.
4.
To request the cellular system not to use the enhanced voice privacy service, select “STANDARD” with
, and press
or
.
Notes: 1. This feature must be activated before the call is initiated.
2. Even if the standard mode is selected the cellular system may direct the phone to use the Enhanced Voice
Privacy Mode.
Anti Fraud Security Features
Your new Audiovox Cellular telephone has been engineered with the latest technology to help protect from the fraudulent
use of your cellular telephone number. You phone is equipped with Authentication and PIN (Personal Identification
Number) Dialing. (Availability of these features depends on your Service Provider). Should your Service Provider require
use of a PIN, your PIN can be sent manually or programmed into the phone for more convenient use.
To Place a Call with the Manual PIN Entry
1. Enter the number you are calling, or recall the number from a specific memory location.
. Your call will be processed. Listen for a double beep, which will prompt you to send your PIN.
2.
Press
3.
Enter your PIN number, and press
. Your call will then be placed.
To Place a Call with the Automatic PIN Feature
1. Enter the number you are calling, or recall the number from a specific memory location.
2.
Press “SEND” key
. As your call is being processed, you will have the display:
3.
Press “SEND” key
again. Your call will then be placed.
Note: Before you can use this feature, you must program your PIN and turn the Automatic PIN feature on. (See
procedures below.)
To Place a Call to Voice Mail using the Automatic PIN Feature
1.
Press
for more than one second. As your call is being processed, you will have the display:
2.
Press
again, your PIN will be sent.
3.
Press
again. The second number is stored in
numbers, if any, can be sent sequentially by pressing
To Turn the Automatic PIN Feature On/Off (F54-5)
will be sent in Touch Tone™ signals. The subsequent
.
1.
Press
and
2.
You can turn this feature on/off by
3.
Press
.
or
.
to set.
To Program of Change your Automatic PIN (F54-6)
1.
Press
and
.
2.
Enter the four-digit security code and press
3.
Enter your new PIN Code. Press
.
to program.
Security Features
Call Restriction (F61)
This feature permits you to impose various kinds of restrictions on outgoing calls. Emergency numbers can be placed
even when this feature is on.
To Set Call Restriction Mode
.
1.
Press
2.
Enter the four-digit security code and press
3.
You can change the current Restriction mode by
4.
Press
.
or
.
to set.
The available Restriction modes are as follows:
· 11DIGITS – 11 Digits Mode
Only phone numbers of 11 digits or less are accepted. Operator assisted dialing is prohibited.
· 7DIGITS – 7 Digits Mode
Only phone numbers of 7 digits or less are accepted. Operator assisted dialing is prohibited.
· OPERATOR – Operator Mode
Operator assisted dialing (0 Origination Call) is prohibited.
· RCL01-09 – Phonebook Address Mode
Only outgoing call to the numbers stored in the phonebook address range 01-09 can be made. If there is a need to expand
this range of addresses please ask your dealer.
· OFF – Off Mode
No restriction.
To Change Emergency Numbers (F62)
You can program your own emergency numbers. Up to 3 numbers of maximum 32 digits can be stored.
Memory Location
Preset Emergency Number
#1
911
#2
*911
#3
Blank
.
1.
Press
2.
Enter the four-digit security code and press
3.
Press
or
.
to select the emergency number memory location (1, 2, or 3) that you want to change or
program, and press
.
.
4. Enter the new emergency number, and press
Note: The emergency number in memory location 1 will be dialed when the OneTouch Emergency Call feature is
used.
To Turn On/Off OneTouch Emergency Call Feature (F63)
1.
Press
2.
Enter the four-digit security code and press
3.
You can turn this feature on/off by
4.
Press
.
.
or
.
to set.
To Change the Security Code (F64)
1.
Press
.
2.
Enter the four-digit security code and press
3.
The current security code is displayed.
4.
Enter a new four-digit security code and press
.
.
Reset Functions (F65)
This is a group of several functions for Function/Memory Reset.
Call Timer Reset (F65-1)
This feature resets all the following three Cal Timers; Last Call Timer, Outgoing Call Timer and All Calls Timer.
1.
Press
.
2.
Enter the four-digit security code and press
3.
Press
4.
Press
.
.
to reset the call timers.
Phonebook All Clear (F65-2)
This feature clears all of Phonebook locations (01 to 99) and the voice mail dialing memory
1.
Press
.
2.
Enter the four-digit security code and press
3.
Press
.
4.
Press
to clear the memory.
.
Call History All Clear (F65-3)
This feature clears all call history for outgoing and incoming calls including Caller ID.
1.
Press
.
2.
Enter the four-digit security code and press
3.
Press
.
4.
Press
to clear the history.
.
Text Message & Voice Mail All Clear (F65-4)
This feature clears all Text Messages and the Voice Mail number.
1.
Press
.
2.
Enter the four-digit security code and press
3.
Press
4.
Press
.
to clear the message.
Function Reset (F65-5)
.
.
This feature permits you to reset the User-Programmable functions to their initial settings.
.
1.
Press
2.
Enter the four-digit security code and press
3.
Press
4.
Press
.
to reset.
Data Communications
Data/Fax Mode (F71)
Your CDM-4500 will work as a wireless modem, if connected to a PC with the optional data cable (DIC-4000). When
operating in the Digital mode, the phone can be used for Async Data or Fax at the speed of up to 14.4kbps. Your CDM4500 also supports QNC (Quick Network Connection) for faster internet access.
To Receive Data/Fax Call
.
1.
Press
2.
Scroll the menu, and press
to select one of the modes described below.
3. During data/fax calls, you can use only
4.
To exit the data/fax mode, press
key.
, and scroll to “OFF”, then press
.
DATA: Data mode until the power is turned off.
FAX: Fax mode until the power is turned off.
DATA ONCE: Data mode for one call only.
FAX ONCE: Fax mode for one call only.
Note: 1. “DATA ONCE” or “FAX ONCE” mode will be automatically reset to “OFF” mode after receiving data/
fax/ once, or in 10 minutes.
2. You can not receive voice calls in data/fax modes.
3. For additional details on connecting your phone to your PC, please refer to instructions in the DIC-4000
Data Cable Kit.
4. To place data/fax call or access internet through a PC, it is not necessary to set the phone in data/fax mode.
Web Browser Setup (F72)
The following features are to set up the Web Browser in your phone.
Web Lock (F72-1)
You can lock the unauthorized access to the internet. If the browser is locked by this feature, you will need to enter your
4 digit Security Code to access the Web. Press
and
to set.
Web Backlight (F72-2)
You can turn on/off the backlight setting during the web access. Press
Web Idle Timer (F72-3)
and
to set.
The Web Idle Timer will automatically terminate the access when your phone is left untouched for the programmed time.
and
Press
to set.
Web IP Address 1 & 2 (F72-4) (F72-5)
Your phone can have up to 4 sets of the server IP (Internet Protocol) addresses and Port Numbers to access your service
provider’s website. These may already be preset or be advised by your service provider.
To install two IP addresses into “Web Link A”;
and
.
1.
Press
2.
Enter your 4-digit Security Code and press
3.
“LINK A PRI.” is displayed.
4.
Enter the primary IP address and press
5.
Enter the primary port number and press
6.
Now “LINK A SEC” is displayed.
7.
Enter the secondary IP address and press
8.
Enter the secondary port number and press
.
.
.
.
.
To install more IP addresses into “Web Link B”;
Press
, and follow the above steps from 2 to 8 for “LINK B PRI.” and “LINK B SEC.”
Notes: 1. An IP address must be 12-digit long to enter. If you have, for example, 123.45.67.8, then enter
,
,
,
.
2. Your phone may display the stored IP addresses or Port numbers in the above steps. Then press
keep them unchanged.
Web User Name (F72-6)
Press
and
. You may program the User Name.
and
. You may program a password.
Web Password (F72-7)
Press
Web Link Change (F72-8)
You may select “Web Link A” or “Web Link B”.
1.
Press
and
2.
Scroll to “WEB LINK A” or “WEB LINK B”.
3.
Press
to set.
Web Browser (F73)
.
to
Press
to start the Web Browser.
Vibrator Alert
1.
To turn the vibrator alert on, press
, then scroll to “ON”. Press
2.
To turn the vibrator alert off, press
, then scroll to “OFF”. Press
to select.
to select.
Notes: 1. When the Vibrator Alert feature is on, the audible ringer/melody will be muted.
2. Be sure to turn the Vibrator Alert feature off when you use the phone in Car Kit option.
Other Functions
Quick Dialing (F01)
When this feature is on, the primary number in your phonebook address 02 to 09 can be dialed with just a single press of
the key.
1.
Press
.
2.
Scroll to “ON” or “OFF” you want and press
.
Automatic Answering (F02)
With this feature on, incoming calls will be automatically answered after a preset duration of alert tones. This feature may
be convenient when your telephone is installed in the handsfree car kit.
1.
Press
.
2.
Scroll to “ON” and press
3.
Enter duration (5 to 30) in seconds.
4.
Press
.
to set.
Note: This feature will not function if the phone is in “Phone Lock”, or “Keypad Lock” mode.
Function Reset Status
The following functions will return to the initial settings after Function Reset.
Functions
Initial Setting
Automatic Lock (F13)
OFF
Backlight Control
(Standby) (F22-1)
Portable Use
10 seconds
With Car Kit
Always ON
Backlight Control (In-Use) (F22-2)
Normal
Auto Hyphenation (F23)
ON
Text Lines Selection (F24)
3 Lines
Contrast Control (F25)
Standard
Earpiece Volume Control
Level 3 (Max = 4)
Alert Tone Volume Control (F31)
Level 4 (Max = 4)
Ring Type Selection (F32)
Ring #1
Key Tone Volume Control (F33)
Level 3 (Max = 4)
Sending DTMF (F35)
ON
Key Tone Length (F36-1)
Normal
Single Alert Beep Tone (F36-2)
OFF
Voice Mail Alert (F36-3)
ON
Text Message Alert (F36-4)
ON
Caller ID Alert (F36-5)
ON
Service Mode Alert (F36-6)
OFF
Voice Privacy Alert (F36-7)
OFF
One Minute Beep Tone (F36-8)
OFF
Low Battery Alarm (F36-9)
ON
Clock Indicator (F42)
ON
Clock Adjustment (F43)
Auto
Clock Alarm (F44)
OFF
A/B System Selection (F51)
Auto Roam
NAM Selection (F52)
NAM #1
Automatic NAM (F54-2)
OFF
Automatic Retry (F54-3)
OFF
Voice Privacy Service (F54-4)
Standard
Automatic PIN Mode (F54-5)
OFF
Call Restriction (F61)
OFF
OneTouch Emergency Call (F63)
ON
Data/Fax Mode (F71)
OFF
Web Lock (F72-1)
OFF
Web Backlight (F72-3)
Always ON
Web Idle Timer (F72-3)
2 minutes
Vibrator (F8)
OFF
Quick Dialing (F01)
ON
Automatic Answering (F02)
OFF
*Call In Absence Indicator (F03)
OFF
*Safety Timer (F04)
8 hours
* Affects Handsfree operation only.