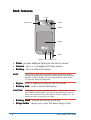
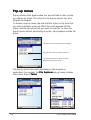
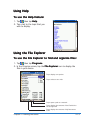
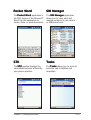
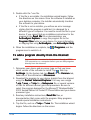
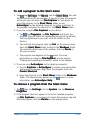
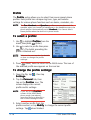
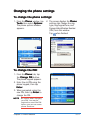
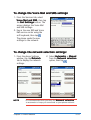
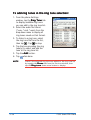
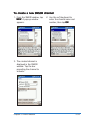
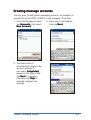
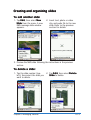
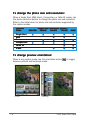
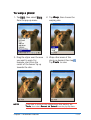
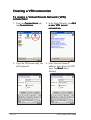
1
E1892
First edition V1
January 2005
Copyright © 2005 ASUSTeK COMPUTER INC. All Rights Reserved.
No part of this manual, including the products and software described in it, may be reproduced,
transmitted, transcribed, stored in a retrieval system, or translated into any language in any form
or by any means, except documentation kept by the purchaser for backup purposes, without the
express written permission of ASUSTeK COMPUTER INC. (“ASUS”).
Product warranty or service will not be extended if: (1) the product is repaired, modified or
altered, unless such repair, modification of alteration is authorized in writing by ASUS; or (2)
the serial number of the product is defaced or missing.
ASUS PROVIDES THIS MANUAL “AS IS” WITHOUT WARRANTY OF ANY KIND, EITHER
EXPRESS OR IMPLIED, INCLUDING BUT NOT LIMITED TO THE IMPLIED WARRANTIES
OR CONDITIONS OF MERCHANTABILITY OR FITNESS FOR A PARTICULAR PURPOSE.
IN NO EVENT SHALL ASUS, ITS DIRECTORS, OFFICERS, EMPLOYEES OR AGENTS BE
LIABLE FOR ANY INDIRECT, SPECIAL, INCIDENTAL, OR CONSEQUENTIAL DAMAGES
(INCLUDING DAMAGES FOR LOSS OF PROFITS, LOSS OF BUSINESS, LOSS OF USE
OR DATA, INTERRUPTION OF BUSINESS AND THE LIKE), EVEN IF ASUS HAS BEEN
ADVISED OF THE POSSIBILITY OF SUCH DAMAGES ARISING FROM ANY DEFECT OR
ERROR IN THIS MANUAL OR PRODUCT.
SPECIFICATIONS AND INFORMATION CONTAINED IN THIS MANUAL ARE FURNISHED
FOR INFORMATIONAL USE ONLY, AND ARE SUBJECT TO CHANGE AT ANY TIME
WITHOUT NOTICE, AND SHOULD NOT BE CONSTRUED AS A COMMITMENT BY ASUS.
ASUS ASSUMES NO RESPONSIBILITY OR LIABILITY FOR ANY ERRORS OR
INACCURACIES THAT MAY APPEAR IN THIS MANUAL, INCLUDING THE PRODUCTS
AND SOFTWARE DESCRIBED IN IT.
Products and corporate names appearing in this manual may or may not be registered
trademarks or copyrights of their respective companies, and are used only for identification or
explanation and to the owners’ benefit, without intent to infringe.
ii
User guide topics
This user guide contains the information you need to efficiently use
the ASUS® P505 Smart PDA Phone.
• Chapter 1 - Getting started ............................. 1 - 1
This chapter introduces the physical features of the P505 Smart
PDA Phone and tells you how to set up and power up the device.
• Chapter 2 - Learning the basics ....................... 2 - 1
This chapter teaches you the basic device functions. You will learn
how to enter text, find and organize information, customize the
device, and know the bundled utilities.
• Chapter 3 - Synchronizing data ........................ 3 - 1
This chapter tells you how to use the Microsoft® ActiveSync®
application that synchronizes data between the device and your
desktop or notebook computer.
• Chapter 4 - Using Pocket Outlook .................... 4 - 1
This chapter details the procedures in using the Microsoft® Pocket
Outlook Calendar, Tasks, Notes, and Contacts.
• Chapter 5 - Phone features ............................. 5 - 1
This chapter provides information on how to use the ASUS Menu
and the device’s phone features.
• Chapter 6 - Messaging features ....................... 6 - 1
This chapter teaches you how to use the device to send MMS,
SMS, and e-mail messages.
• Chapter 7 - Multimedia features ....................... 7 - 1
This chapter introduces the multimedia features of the device
including sections on Camera, Photo Album, and Pictures
applications.
• Chapter 8 - Using companion applications . . . . . . . . . 8 - 1
This chapter includes basic information on how to use Pocket
Word, Pocket Excel, MSN Messenger, Windows Media™ Player for
Pocket PC, and Voice Commander.
iii
• Chapter 9 - Using Pocket Internet Explorer . . . . . . . 9 - 1
This chapter gives information on using Pocket Internet Explorer
and the Mobile Favorites folder.
• Chapter 10 - Getting connected ..................... 1 0 - 1
This chapter provides the procedures for connecting to the Internet,
intranet, and for transferring data using infrared (IR).
• Chapter 11 - Bluetooth® ................................ 1 1 - 1
This chapter provides information on how to use the Bluetooth®
features.
• Appendix - Notices
This part includes the safety notices and regulations.
iv
P505 Smart PDA Phone specifications
Processors
Intel® PXA270 application processor
Infineon E-Gold+ baseband processor
Operating system
Microsoft® Windows Mobile™ 2003 Second Edition for
Pocket PC Phone Edition
Memory
64 MB Flash ROM
64 MB SDRAM*
Display
2.8 cm, transflective TFT LCD
65,536 colors, 240x320 resolution
Frequency band
Tri-band GSM (900/1800/1900 MHz)
GPRS
Class B, Multislot class 10
Camera
SXGA resolution (1.3 million pixels) CMOS camera with
still/video capture support and built-in flash
Connectivity
Bluetooth® : V1.1
Infrared
: Low power Serial Infrared (SIR)
USB
: 1.1
Removable
battery
1050 mAH Lithium Ion
4 hours of talktime and 100 hours standby time**
15 hours of operation time
Expansion
SD/MMC/SDIO card slot
Audio
2.5 mm audio port
Built-in microphone and speaker
64CH polyphonic ringtone support
Applications
Microsoft® Pocket Internet Explorer, Microsoft® Pocket
Word, Microsoft® Pocket Excel, Microsoft® Pocket
Outlook, Windows® Media Player, Microsoft® ActiveSync,
MSN Messenger
Unique features
ASUS Menu: PDA mode (supports touch screen)
Phone mode
LEDs
Power (inside the power button), GSM/GPRS standby,
and Bluetooth®/System notification
Side keys
5-way joystick, Record, Camera, and Voice Commander
Size
108 mm x 60 mm x 22.5 mm (L x W x H)
Weight
165 grams
Specifications are subject to change without notice.
*
9 MB/11 MB allocated for Western/Eastern language support
* * According to Microsoft Logo Test Kit - Battery Life Test
v
P505 Smart PDA Phone package
contents
Your P505 Smart PDA Phone package includes several accessories.
After unpacking, check the items against the list below and make
sure that they are in good condition. If any item is missing or
damaged, contact your dealer or retailer immediately.
Contents
Basic
Deluxe
1
2
1
2
P505 Smart PDA Phone
1050 mAH, 3.7 V Lithium Ion battery
Cradle
DC/USB cable
AC adapter and power cord
Input
: 100 Vac ~ 240 Vac, 0.2 A
Output : 5 Vdc, 1 A
Stylus
Protection case
Stereo headset
ASUS Bonus CD
Microsoft® Companion CD
User guide
Quick Start Guide
Warranty card
Optional items
•
•
•
•
•
•
•
vi
Protection case (Type 2 and 3)
Bluetooth® headset
Bluetooth® Car Kit
Bluetooth® GPS
MMC memory card
SD memory card
Wi-Fi® SDIO card
Chapter 1
Getting started
This chapter introduces the
physical features of the P505
Smart PDA Phone and tells you
how to set up and power up the
device.
Chapter summary
•
Introducing P505 ......................................... 1 - 3
Key PDA features ............................................................
Key mobile phone features ..............................................
Front features (flip closed) ..............................................
Front features (flip open) ................................................
Side features ...................................................................
Top features ....................................................................
Bottom features ..............................................................
Back features ..................................................................
The stylus ........................................................................
The cradle ........................................................................
•
1-3
1-3
1-4
1-5
1-6
1-7
1-7
1-8
1-9
1-9
Setting up P505 ......................................... 1 - 1 0
Installing a SIM card and battery .................................... 1-10
Charging the device battery .......................................... 1-11
Viewing the power status .............................................. 1-12
•
SD/MMC/SDIO card installation ..................... 1 - 1 3
Installing and removing an SD/MMC/SDIO card .............. 1-13
•
Activating the P505 .................................... 1 - 1 4
•
Resetting the P505 ..................................... 1 - 1 4
1-2
P505 Smart PDA Phone
Introducing P505
The P505 Smart PDA Phone is a Personal Digital Assistant (PDA) and
a tri-band mobile phone in one. The P505 versatility lets you enjoy all
the benefits of a powerful PDA while providing you with an efficient
mobile communication solution so you can be connected anywhere
you are.
Powered by an Intel® PXA270 and an Infineon E-Gold+ baseband
processors, built-in 64 MB SDRAM and 64 MB Flash ROM, and bundled
with the Microsoft® Windows Mobile™ 2003 Second Edition for Pocket
PC Phone Edition operating system, P505 is truly a smart companion
for the business professional.
Key PDA features
•
•
•
•
•
•
•
•
•
•
•
•
•
•
Windows Mobile™ 2003OSSE for PPC PE
Built-in digital camera/camcorder
Voice Recorder
Integrated e-mail, MMS, and SMS messaging
Windows® Media Player supports MP3 and video playback
Voice Commander application (English and Chinese only)
ASUS Menu application (PDA mode)
Bluetooth® and Infrared (IR) enabled
Sleek, compact, and stylish design
Navigation buttons and touchpad for easy input
SD/MMC/SDIO card slot for memory expansion or I/O interface
Backup application
SmartKeeper application automatically backs up
system status when battery power is low
Supports Microsoft® ActiveSync application
Key mobile phone features
•
•
•
•
•
•
•
Tri-band GSM Class 10
MMS/SMS messaging
ASUS Menu (phone mode) provides quick access to device
features
64 polyphonic ring tones
Conference call
Photo Contacts application to display photos of callers
SIM Manager for SIM/device phone book management
Chapter 1: Getting started
1-3
Front features (flip closed)
Earpiece
®
Bluetooth /System
notification LED
GSM/GPRS standby LED
Antenna
Power button/Power LED
Navigation keys
Soft key (left)
Call key
Soft key (right)
End key
Flip
Numeric keys
Microphone
• GSM/GPRS standby LED - Refer to the LED indications table
on the next page for details.
• Bluetooth® /System notification LED - Refer to the LED
indications table on the next page for details.
• Earpiece - allows you to listen to incoming/outgoing calls.
• Antenna - allows the device to obtain signals.
• Power button and power LED - press this button to turn on
or off the device. This button lights up amber when the battery is
charging and turns green when the battery is fully-charged.
• Soft-key (right) - displays the phonebook when in idle mode;
performs various functions depending on the menu level and
screen display.
• End key - ends a voice or data call.
• N umeric keys - enters numbers and alphanumeric characters.
• Microphone - used for speakerphone function and to enhance
sound recordings
• F l i p - contains all phone keys for the device phone function.
• Call key - calls a number; answers a call; displays dialled numbers.
• Soft-key (left) - launches the phone menu; enters a phone menu.
1-4
P505 Smart PDA Phone
LED indications table
LED
Color
Status
Indicates that the device
GSM/GPRS standby
Green
Orange
Blinking
Blinking
is connected to a GSM network
is connected to a GPRS network
Bluetooth®/System
notification
Blue
Red
Blinking
Blinking
Bluetooth™ feature is on
OS has generated an alarm;
The device received a new SMS
message or is reminding you of an
appointment, task, etc.
On
On
battery is charging
battery is fully-charged
Power*
Amber
Green
* The Power LED may blink amber and green alternately during charging.
Front features (flip open)
LCD touch screen
Calendar button
Call button
Contacts button
End button
Flip
• LCD touch screen - allows you to enter, read, send, receive, or
edit data by tapping on it. The screen lumination is increased or
decreased by changing the backlight settings.
• Call button - launches the Phone application.
• Calendar button - launches the Calendar application.
• Contacts button - launches the Contacts application.
• End button - ends a call or closes the Phone application.
Chapter 1: Getting started
1-5
Side features
Left side
Software reset switch
Right side
Voice Commander button
Record button
Camera button
5-way joystick
eset switch - allows you to soft or hard reset the
• Software rreset
device. See the section “Resetting the device” on page 1-14 for
details.
• Record button - launches the Notes recorder application.
• Camera button - launches the Camera application; captures a
photo or records video.
• 5-way joystick - by default, the 5-way joystick allows you to
control the device volume settings.
When set as a navigation key, the 5-way joystick functions like
the four arrow keys and the <Enter> key on a keyboard. The
5-way joystick allows you to
- move through the program icons, folders, or files in a menu by
scrolling up, down, right, or left
- launch a selected program, list folder contents, or open a file
by pressing the button
See page 2-28 for details on changing the 5-way joystick
function.
• Voice Commander button - launches the Voice Commander
application.
1-6
P505 Smart PDA Phone
Top features
Audio port
Infrared (IR) port
SD/MMC/SDIO card slot
• Audio port - connects a headphone.
• Infrared (IR) port - allows you to beam data to another device
that has an IR port.
• SD/MMC/SDIO card slot - accommodates an SD/MMC/SDIO
card.
Bottom features
System connector
• System connector - connects the device to the system
connector on the cradle. If you are not using the cradle, connect
the DC/USB cable plug directly to this connector to synchronize
your device with your computer and/or to charge the battery
using the AC adapter or the USB plug.
Chapter 1: Getting started
1-7
Back features
Flash
Camera
Strap holder
Speaker
Battery
Stylus
Battery latch Battery lock
•
•
•
Flash - provides additional lighting for the built-in camera
Camera - this is a 1.3 megapixel still/video camera
Battery - this is a Lithium-Ion battery
NOTE
The device comes with a back-up (internal) battery that is
charged simultaneously with the battery pack. If the back-up
battery is fully charged, you can swap battery packs within
30 minutes without losing data.
• Stylus - used for tapping or writing on the LCD screen
• Battery lock - locks or unlocks the battery
CAUTION!
Unlocking the battery automatically turns off the device and
you lose all unsaved data. The device automatically turns on
when you install and lock the battery. Refer to page 2-31 for
details on how to back-up your data.
• Battery latch - secures the battery on the bay
• Strap holder - allows you to carry the device using a strap
1-8
P505 Smart PDA Phone
The stylus
The stylus functions on the P505 the
same way a mouse functions on a
computer. Use the stylus to open
programs, execute commands, or to enter
information by writing on the screen or by
tapping on the on-screen keyboard.
• T a p . Touch the screen once with the
stylus to open programs and select
options.
• Drag. Hold the stylus on the screen and drag across the screen
to select text and images. Drag in a list to select multiple items.
• Tap and hold. Tap and hold the stylus on an item to see a list of
actions available for that item. On the displayed pop-up menu, tap
the action that you want to perform.
The cradle
Front
Device connector Stylus bay Base
Back
Battery charger slot
DC/USB cable
connector
The cradle has two connectors.
• Device connector - holds the device in place. This is a 26-pin
connector that matches the system connector at the bottom of the
device.
• DC/USB cable connector - connects the DC/USB cable plug.
The DC/USB cable synchronizes the device with your computer
and/or charges the device battery.
Chapter 1: Getting started
1-9
Setting up P505
Installing a SIM card and battery
To avail of the device phone features you must install a Subscriber
Identification Module (SIM) card.
NOTE
•
Your phone operator provides a SIM card for the device,
depending on your network subscription.
•
The battery comes uninstalled in the P505 Smart PDA
Phone package. Install the SIM card first before installing
the battery.
To install a SIM card and the battery:
1
SIM card slot
1. Locate the SIM card slot.
2. Position the SIM card with its
nicked corner on top and its
contacts face down.
3. Insert the SIM card to the slot
until it clicks in place.
4. Install the battery by
matching the battery hooks
to the holes on the
compartment.
5. Slide the battery into the
compartment, then press to
keep it in place. See the
illustration for reference.
6. Use the stylus tip to move
the battery lock to the left to
secure the battery.
2
3
5
4
6
1-10
P505 Smart PDA Phone
Charging the device battery
The device includes a rechargeable Lithium Ion battery. You must fully
charge the battery before using the device for the first time. Initial
battery charging takes about four hours while it takes about 2.5
hours to fully charge the battery after initial use.
To charge the device battery:
Using the AC adapter with the cradle
1. Position the device on the
cradle as shown (A). Match
the connectors and carefully
insert the device until it fits
in place (B).
A
B
1
2
4
3
5
7
6
8
*
9
0
NOTE
You can also charge a
spare battery using the
battery charger slot on the
cradle.
2. Connect the AC adapter plug
to the DC/USB cable plug.
3. Connect the DC/USB cable
plug to the DC/USB cable
connector at the back of the
cradle.
4. Connect the AC power plug
to a grounded wall socket.
#
1
2
4
3
5
7
6
*
8
9
0
#
Charge a spare battery here
3
2
4
The device battery starts charging as soon as you connect the AC
adapter plug to a power source. The cradle base lights up blue to
indicate that the device is properly seated on the cradle. If you
charge a spare battery in the battery charger slot, the cradle base
lights up orange until the spare battery is fully-charged.
The P505 Power LED lights up amber to indicate that the battery is
charging and lights up green when the battery is fully-charged.
I M P O R T A N T To disconnect the DC/USB cable plug from the system connector
or DC/USB cable connector on the cradle, simultaneously press
the release button on both sides of the plug, then pull.
Chapter 1: Getting started
1-11
Using the AC adapter without the cradle
If you are not using the cradle, connect the DC/USB
cable plug directly to the system connector at the
bottom of the device, then connect the AC power plug
to a grounded wall socket.
The P505 Power LED lights up amber to indicate that
the battery is charging and lights up green when the
battery is fully-charged.
Using a computer or notebook USB port
To charge the device battery using a USB port:
1. Connect the DC/USB cable plug to the system connector at the
bottom of the device (no cradle) or to the DC/USB connector at
the back of the cradle.
2. Connect the USB plug of the DC/USB cable to an available USB
port on your computer or notebook.
NOTE
If you charge the device battery using a notebook USB port, make
sure that the notebook is connected to an AC power source.
Viewing the power status
To display the power status when the
device is on and the flip is open:
Settings.
1. Tap , then tap Settings
2. Tap the System tab, then tap the
Power icon.
When the device is on and the flip is
closed, a battery icon appears in the
leftmost corner of the icon bar to
indicate the battery power level.
1-12
P505 Smart PDA Phone
SD/MMC/SDIO card installation
Your device comes with an SD card slot that accommodates either a
SecureDigital™/MMC memory card or SDIO interface card.
NOTE
Install an SD/MMC card (with 64 MB or more free space) if
you wish to use the SmartKeeper backup application.
Installing and removing an SD/MMC/SDIO card
To install an SD/MMC/SDIO card:
1. With the label side (usually the
side with the card manufacturer’s name) face up, and the
bar code/serial number side
face down, insert the card into
the slot.
CAUTION!
An SD/MMC/SDIO card fits only in one orientation, and slides
smoothly into the slot if inserted correctly. DO NOT force the
card into the slot!
2. Push the card all the way into the slot until it fits completely. If
properly installed, the card edge aligns with the top edge of the
device.
To remove an SD/MMC/SDIO card:
Press the card slightly until it ejects.
Chapter 1: Getting started
1-13
Activating the P505
Press the power button to turn on the device, then open the flip. The
first time you start or reset the device, the screen prompts you to
re-calibrate and set the local time zone. Follow onscreen instructions
to proceed.
Screen alignment
NOTE
Setting the local
time zone
It is important that you properly calibrate and activate your
device before using it. This process ensures accurate
positioning when entering text and selecting menus.
Resetting the P505
CAUTION!
You lose all unsaved data when you s o f t reset the device.
Similarly, you lose all personal information management (PIM)
data (contacts, tasks, etc.) and added applications when you
h a r d reset the device.
You can reset the device in case it malfunctions, or when an
application hangs. You can either perform a soft or hard reset.
To soft reset the device, use the tip of the stylus to press the
software reset switch on the left side of the device.
To hard reset the device, press the power button and the software
reset switch simultaneously. A hard reset restores the original
configuration of your device and erases all data.
1-14
P505 Smart PDA Phone
Chapter 2
Learning the
basics
This chapter teaches you the
basic device functions. You will
learn how to enter text, find and
organize information, customize
the device, and know the
bundled utilities.
Chapter summary
•
•
•
•
•
•
•
2-2
Basic Pocket PC screens . . . . . . . . . . . . . . . . . . . . . . . . . . . . . . . . . . . . . . 2 - 3
Today screen .............................................................................. 2-3
Start menu ................................................................................. 2-4
New ............................................................................................ 2-4
ASUS menu ................................................................................. 2-5
Command bar ............................................................................. 2-5
Pop-up menus ............................................................................. 2-6
Entering information . . . . . . . . . . . . . . . . . . . . . . . . . . . . . . . . . . . . . . . . . . . 2 - 7
Entering text using the Input Panel ............................................. 2-7
Writing on the screen ............................................................... 2-11
Drawing on the screen .............................................................. 2-14
Recording a message ................................................................ 2-15
Using a preset message ............................................................ 2-17
Finding and organizing information . . . . . . . . . . . . . . . . . . . . . 2 - 1 8
Using Find ................................................................................. 2-18
Using Help ................................................................................. 2-19
Using the File Explorer .............................................................. 2-19
Customizing your device . . . . . . . . . . . . . . . . . . . . . . . . . . . . . . . . . . . 2 - 2 0
Adjusting settings .................................................................... 2-20
Changing system settings ........................................................ 2-21
Customizing personal settings .................................................. 2-30
Backing up your data . . . . . . . . . . . . . . . . . . . . . . . . . . . . . . . . . . . . . . . . 2 - 3 1
Other applications . . . . . . . . . . . . . . . . . . . . . . . . . . . . . . . . . . . . . . . . . . . . 2 - 3 7
Games ...................................................................................... 2-37
Calculator ................................................................................. 2-37
Camera ..................................................................................... 2-38
File Explorer .............................................................................. 2-38
Conference ............................................................................... 2-38
Find .......................................................................................... 2-38
MIDlet Manager ......................................................................... 2-39
Multimedia Album ..................................................................... 2-39
MSN Messenger ........................................................................ 2-39
Photo Contacts ......................................................................... 2-40
Pocket Excel ............................................................................. 2-40
Pictures .................................................................................... 2-40
Pocket MSN .............................................................................. 2-40
Pocket Word ............................................................................. 2-41
STK ........................................................................................... 2-41
Tasks ........................................................................................ 2-41
Windows Media Player ............................................................... 2-42
Terminal Services ...................................................................... 2-42
Voice Commander .................................................................... 2-42
Adding or removing programs . . . . . . . . . . . . . . . . . . . . . . . . . . . . 2 - 4 3
P505 Smart PDA Phone
Basic P505 screens
Today screen
Normally, the Today screen appears when you turn on your device
and open the phone flip for the first time each day.
NOTE
When the device is already on and the screen displays another
program, you can display the T o d a y screen by tapping the
icon, then tap T o d a y from the menu.
As shown in the capture below, the Today screen lets you see at a
glance the summary of the important information for the day.
Tap to set up or change
the network settings
Tap to switch to a program
Tap to change the date
and time
Tap to set owner information
Tap to change the volume
or mute all sounds
Tap to display the date,
time, and your next
appointment
Your day at a glance
Tap to launch
the ASUS menu
Tap to display
synchronization status*
Tap to create a new item
Tap to display the
Bluetooth™ menu
From the Today screen, tap any of the listed items with the stylus
to display the details.
The following sections explain how to use the Start menu, ASUS
Menu, modify the current tasks or activities, add new items or
information, set the time and owner information, or read e-mail/MMS/
SMS messages.
*
The device must be in the cradle or connected to the computer via the DC/USB cable to
display this icon.
Chapter 2: Learning the basics
2-3
Start menu
From the Start menu, you can select programs, settings, and Help
icon from the top of
topics. To display the Start menu, tap the
the screen.
Tap to open a program
Tap to open a recently used program
Tap to open the Programs menu
Tap to open the Settings menu
Tap to open the Help menu
NOTE
You can add or remove programs from the Start Menu using
the M e n u s option in S e t t i n g ss.
New
Tap N e w at the bottom left corner of the screen to display a list of
programs and tasks you can select from.
NOTE
You can customize
the contents of the
N e w menu using
the M e n u s option
in S e t t i n g ss.
Tap to open the a menu
2-4
P505 Smart PDA Phone
ASUS menu
The ASUS menu provides quick access to commonly used features
mobile applications. You can launch the ASUS menu by tapping the
ASUS logo in the Today screen.
Tap an icon to launch the
application.
NOTE
See page 5-3 for details on how to change the ASUS menu
settings.
Command bar
At the bottom of the screen is the Command bar. You can use the
menus and buttons on the Command bar to perform certain tasks in
an application.
Tap to select
menu commands
NOTE
Tap to select
button commands
Tap to display
the input panel
The menus and buttons vary depending on the programs you
are using.
Chapter 2: Learning the basics
2-5
Pop-up menus
Pop-up menus often appear when you tap and hold an item to help
you choose an action. The actions in the pop-up menus vary from
program to program.
To access a pop-up menu, tap and hold the stylus on the item that
you wish to perform action on. When the menu appears, lift the
stylus, and tap the action that you want to execute. To close the
pop-up menu without performing an action, tap anywhere outside the
menu.
Tap and hold until the pop-up menu appears
Tap the action that you wish to perform
Tap outside the pop-up menu to close it
without performing an action
The pop-up menu items vary depending on the program or
application. For example, the File Explorer pop-up menu includes
more items than in Tasks
Tasks.
2-6
P505 Smart PDA Phone
Entering information
You can enter information in your device in any of the following ways.
• Use the input panel to enter text using the on-screen keyboard or
the Letter Recognizer
• Write directly on the screen with the stylus
• Draw pictures on the screen
• Speak into the device microphone to record a message
• Use the Microsoft® ActiveSync® to synchronize or copy
information from your desktop computer to your device
Entering text using the Input Panel
Use the Input Panel to enter information in any program on your
device, you can either type using the on-screen Keyboard or write
using the Letter Recognizer
Recognizer, Block Recognizer
Recognizer, or
Transcriber
Transcriber. In either case, the characters appear as typed text on
the screen.
To show or hide the input panel, tap the Input Panel button. Tap
the arrow next to the Input Panel button to see your options.
Select an input method
Tap to display the input method options
Tap to show or hide the input panel
Open the Notes application to try out the different options for
creating text.
To open Notes
Notes, tap N e w from the command bar, then select Notes
from the pop-up menu.
Chapter 2: Learning the basics
2-7
To type with the on-screen keyboard:
1. Tap the arrow next to the Input Panel button, then tap Keyboard
Keyboard.
2. Tap the keys with the stylus to enter information.
3. When finished, tap
to save the file.
When you use the Input Panel and the on-screen keyboard, your
device predicts the word you are typing and displays it above the
Input Panel. When you tap the displayed word, it is inserted into your
text at the insertion point. The more you use your device, the more
words it learns to predict.
Tap here if this is the word you wish to use
2-8
P505 Smart PDA Phone
To change the settings for word completion:
1.
2.
3.
4.
5.
6.
Tap
.
Tap Settings
Settings.
Tap Personal tab.
Tap Input
Input.
Tap the Word Completion tab.
Make your desired changes.
7. Tap
to save your changes.
To use Letter Recognizer:
With the Letter Recognizer, you can write letters on the screen with
the stylus as you would on paper.
1. Tap the arrow next to the Input Panel button, then tap Letter
Recognizer
Recognizer.
2. Write a letter or a number in the appropriate on-screen area.
When you write a letter, it is converted to a typed text that
appears on the screen. If the device has trouble recognizing a
character, tap on the question mark next to the writing area and
follow the on-screen instructions to see how to write that
character.
To use Block Recognizer:
With the Block Recognizer, you can input character strokes that are
similar to those used on other devices.
1. Tap the arrow next to the Input Panel button, then tap Block
Recognizer
Recognizer.
2. Write a letter or a number in the appropriate on-screen area.
When you write a letter, it is converted to a typed text that
appears on the screen. If the device has trouble recognizing a
character, tap on the question mark next to the writing area and
follow the on-screen instructions to see how to write that
character.
Chapter 2: Learning the basics
2-9
To use Transcriber:
With Transcriber, you can use the stylus to write anywhere on the
screen as you would on paper. Unlike Letter Recognizer and Block
Recognizer, you can write a sentence or additional information. Pause
after writing and let Transcriber convert the written characters to
typed characters.
1. Tap the arrow next to the Input Panel button, then tap
Transcriber
Transcriber.
2. Write anywhere on the screen.
For instructions and demonstration on using Transcriber, with
Transcriber open, tap the question mark in the lower right
corner of the screen.
To edit typed text:
1. Select the text that you wish to edit using either one of the
following:
• drag the stylus over the text
• tap twice to select a word
• tap three times to select a paragraph
2. Tap Edit on the Command bar and select an action, or use one of
the tools in the Input Panel.
2-10
P505 Smart PDA Phone
Writing on the screen
In any application that accepts writing, such as Notes
Notes, and in the
notes tab in Calendar
Calendar, Contacts
Contacts, and Tasks
Tasks, you can use the
stylus to write directly on the screen, like writing on a piece of paper.
You can edit and format what you have written and convert the
information to text at a later time.
To write on the screen:
1. Open the Notes program.
2. Tap the P e n button to switch to the writing mode. The screen
displays blank space with lines to help you write.
3. Write your text.
Tap the Pen button and use
your stylus like a pen
NOTE
Some applications that accept writing may not have the Pen
button. See the documentation for that application to find
out how to switch to writing mode.
Chapter 2: Learning the basics
2-11
To edit your writing:
1. With the Pen button highlighted (i.e. not in writing mode), tap and
hold the stylus next to the text that you wish to select until the
insertion point appears.
2. Without lifting, drag the stylus across the text to select it.
If you accidentally write on the screen, tap Tools
Tools, then U n d o
and try again. You can also select text by tapping the P e n button
to deselect it, then dragging the stylus across the screen.
3. Tap Edit on the Command bar and select an action, or use one of
the tools in the Input Panel to enter a new text.
To select a zoom level:
• Tap Tools
Tools, then tap a zoom percentage from the options.
To convert writing to text:
1. Tap Tools
Tools, then select Recognize
Recognize.
The writing is turned into text
2. If the conversion is correct, tap
2-12
to save your note.
P505 Smart PDA Phone
If the conversion is incorrect, you can select different words from a
list of alternates or return to the original writing.
1. Tap and hold the incorrect word.
2. When the pop-up menu appears, tap Alternates to display a list
of alternate words for the selection.
3. Tap the word that you want to use, or tap the writing at the top
of the menu to return to the original writing.
Tap an alternate word that you want to use
Or, tap to return to your original writing
Writing recognition tips
• Write neatly.
• Write on the line and draw descenders below the line. Write the
cross of the “t” and apostrophes below the top line so that they
are not confused with the word above. Write periods and commas
above the line.
• For better recognition, try increasing the zoom level to 300%
using the Tools menu.
• Do not spread the letters of a word, keep the letters relatively
close to each other so that the device can easily tell where the
words begin and end.
• Hyphenated words, foreign words that use special characters such
as accents, and some punctuation cannot be converted.
• If you add writing to a word to change it after the word has been
recognized, the writing that you added will be included when you
try to recognize the writing again.
Chapter 2: Learning the basics
2-13
Drawing on the screen
You can draw on the screen in the same way that you write on the
screen. The difference between writing and drawing on the screen is
how you select items and how they can be edited. For example,
selected drawings can be resized, while writing cannot.
To create a drawing:
1. Use the stylus to create a drawing three ruled lines high. A
bounding box appears around the drawing.
2. Start another drawing within the bounding box, then end the
drawing outside the bounding box. The bounding box expands to
include the new drawing.
The bounding box indicates the
drawing boundaries
Pen button
NOTE
To easily work on or view your drawing, change the zoom
level by tapping T o o l s and selecting your desired level.
To edit your drawing:
1. Tap and hold the stylus on the drawing until the selection handle
appears. To select multiple drawings, deselect the P e n button,
then drag to select the drawings you want.
2. Tap and hold the selected drawing, then tap an editing command
on the pop-up menu or tap a command on the Edit menu.
3. Resize the drawing by deselecting the P e n button (if selected)
and dragging a selection handle to your desired size.
2-14
P505 Smart PDA Phone
Recording a message
In any application where you can write or draw on the screen, you can
also quickly capture thoughts, reminders, and phone numbers by
recording a message.
In Calendar
Calendar, Tasks
Tasks, and Contacts
Contacts, you can include a recording in
the Notes tab. In the Notes program, you can either create a
stand-alone recording or include a recording in a written note. If you
want to include the recording in a note, open the note first.
In the Messaging program, you can add a recording to an MMS or
e-mail message.
To create a recording:
1. Tap , then tap Notes or
Tap N e w
w, then N o t e
es
2. Tap the Record icon from the command bar to display the
recording toolbar.
3. Tap the Record button (red button) to begin recording.
4. Hold your device with the microphone near to the source of what
you are recording.
5. To stop recording, tap the Record button. You will hear two
beeps. The new recording appears in the Note list, or as an
embedded icon.
6. To play the recording, tap it from the list, or if embedded in a
note, tap the speaker icon.
Indicates an embedded recording
Tap to begin recording
Tap to show or hide the Recording toolbar
Chapter 2: Learning the basics
2-15
To change the recording format:
1. In Notes
Notes, tap Tools
Tools, then Options
Options.
2. Tap the Global Input Options link.
3. Tap the Options tab.
4. Tap the Voice recording format
field to display available recording
formats, then select from the list.
Notes on recording formats
• G S M is a 2.4KB audio codec. It is the recommended format
because it provides good voice recording and less storage space.
• Pulse Code Modulation (PCM) provides slightly better sound
quality but takes up 50 times more storage space than GSM
recordings.
2-16
P505 Smart PDA Phone
Using a preset message
When composing e-mail, MMS, or SMS
messages, or when using MSN
Messenger, use My Text to quickly
insert preset or frequently used
messages to the text entry area. To
insert a message, tap My Text and
tap your desired message.
To edit a preset message:
1. Tap Tools
Tools, then Edit My Text
Messages
Messages.
2. Select a message and make your
desired changes.
Chapter 2: Learning the basics
2-17
Finding and organizing information
The Find and Help features on your device helps you quickly locate
information.
Using Find
To find information:
1. Tap , tap Programs
Programs, then tap F i n d
d.
2. Enter the text that you want to find, select a data type, then tap
G o to start the search. To quickly find information that is taking
up space on your device, select Larger than 64 KB in Type.
Type a word to find
Tap to search for the word
Topics found containing the searched word
2-18
P505 Smart PDA Phone
Using Help
To use the Help feature:
1. Tap , then tap H e l p
p.
2. Tap a link to the topic that you
wish to display.
Using the File Explorer
To use the File Explorer to find and organize files:
1. Tap , then tap Programs
Programs.
2. In the Program screen, tap the File Explorer icon to display the
files in your device.
Tap to display sort options
Tap to select a sort order
Tap to open a path to a network
Tap to display the contents of the Flash disk or
the storage card
Tap to display the contents of My Documents
folder
Chapter 2: Learning the basics
2-19
Customizing your device
You can customize your device by adjusting the settings, using the
built-in programs, and installing additional software applications.
Adjusting settings
You can adjust the device settings to your preference.
To adjust the device settings:
1. Tap , then tap Settings to display the Settings screen.
2. Tap the Personal
Personal, System or Connections tab on the bottom
of the screen.
2-20
P505 Smart PDA Phone
Changing system settings
To change the audio settings:
1. Tap , then tap Settings to
display the Settings screen.
2. Tap the System tab, then tap
the Audio icon.
3. Use the stylus to move the
Volume
Balance, Treble
Treble,
Volume, Balance
B a s ss, and 3 D
D, sliders to your
desired settings.
4. Tap
to save the changes and
to close the screen. Otherwise,
click Default to revert to the
original settings.
To change the microphone settings:
1. Tap , then tap Settings to
display the Settings screen.
2. Tap the System tab, then tap
the Audio icon.
3. Tap the M I C tab.
4. Tap the Manual option, then
move the slider to the desired
microphone gain.
to save the changes and
5. Tap
to close the screen. Otherwise,
click Load Default to revert to
the original settings.
Chapter 2: Learning the basics
2-21
To change the backlight settings:
1. Tap , then tap Settings to
display the Settings screen.
2. Tap the System tab, then tap
the Backlight icon.
The screen displays the
backlight settings when you are
using the battery power.
Tap the External Power tab
to adjust the backlight settings
when using external power,
3. Adjust the backlight settings, then
press .
To adjust the backlight brightness:
1. Tap , then tap Settings to
display the Settings screen.
2. Tap the System tab, then tap
the Backlight icon.
3. Tap the Brightness tab.
4. Adjust the brightness settings
when the device is on battery or
external power, then press .
NOTE
2-22
Turning off the backlight when the device is not in use or
using a lower level of display brightness saves battery power
and improves battery life.
P505 Smart PDA Phone
To change the date and time settings:
1. Tap Settings
Settings, then the System
System.
2. Tap the Clock & Alarms icon.
3. Make your desired settings.
Tap to select a time zone
Highlight an hour part then tap up or down arrow
to set
Tap this down arrow to display the C a l e n d a r
NOTE
When travelling, setting the home and visiting time zones
ensures that synchronized appointments and messages
appear correctly.
To change the alarm settings:
1. Tap Settings
Settings, then the System
System.
2. Tap the Clock & Alarms icon, then the Alarm tab.
3. Make your desired settings.
Tap and type a description for the alarm
Tap a day of the week for the alarm
Tap to display the clock and specify a time
for the alarm
Chapter 2: Learning the basics
2-23
To view the device memory:
1. Tap , then tap Settings to
display the Settings screen.
2. Tap the System tab, then tap
the Memory icon to view the
main memory information.
3. Tap the Storage Card tab to
view the storage card memory,
if available.
4. Tap the Running Programs
tab to view and/or stop
applications currently running on
the device.
to return to the previous
5. Tap
window.
To view the device power:
1. Tap , then tap Settings to
display the Settings screen.
2. Tap the System tab, then tap
the Power icon to view the
battery power information.
3. Tap the Advanced tab to
adjust the power settings.
4. Tap
to return to the previous
window.
NOTE
You can save battery power by:
1. Turning off the backlight when the device is not in use.
2. Decreasing the display brightness level.
3. Switching the processor to power saving mode.
See page 2-28 for details.
2-24
P505 Smart PDA Phone
To change the regional settings:
1. Tap , then tap Settings to
display the Settings screen.
2. Tap the System tab, then tap
the Regional Settings icon.
3. Tap any from the five tabs at
the bottom of the display to
adjust the region, number,
currency, time, and date
settings.
to return to the previous
4. Tap
window.
To remove a program from your device:
1. Tap , then tap Settings to
display the Settings screen.
2. Tap the System tab, then tap
the Remove Programs icon.
3. From the list, select the program
you wish to remove, then tap
Remove
Remove.
to return to the previous
4. Tap
window.
NOTE
Take caution when removing programs from your device.
You may not bes able to restore the program after removing it.
Chapter 2: Learning the basics
2-25
To change the screen settings:
1. Tap , then tap Settings to
display the Settings screen.
2. Tap the System tab, then tap
the Screen icon. The window
shows the align screen settings.
Refer to the next section for
details.
3. Tap the Clear Type tab to
enable Clear Type. Clear Type
smoothens the screen font
edges.
4. Tap
to return to the previous
window.
To align the screen:
1. Tap the Align Screen button ,
on the Screen window. An
Align Screen window appears.
2. Tap the centre of the target
accurately. The target moves
from one location to another.
Continue tapping the centre of
the target until the screen
alignment is finished.
The window returns to the
Screen window.
NOTE
2-26
Perform a screen alignment if the screen does not respond
correctly to stylus taps.
P505 Smart PDA Phone
To change the SmartKeeper utility settings:
1. Tap , then tap Settings to
display the Settings screen.
2. Tap the System tab, then tap
the SmartKeeper icon. The
window shows the general
screen settings.
3. Check the Automatic system
backup option to allow
SmartKeeper to backup your
files and programs to the SD
card automatically when the
battery is low.
Tap the Manual tab to manually
backup or restore your files and programs. See page 2-27 for
details.
4. Tap
to return to the previous window.
To view the system information:
1. Tap , then tap Settings to
display the Settings screen.
2. Tap the System tab, then tap
the System Infromation icon.
The window shows the device
information.
3. Tap the Version tab to display
the device firmware and
programs version
to return to the previous
4. Tap
window.
Chapter 2: Learning the basics
2-27
To change the device CPU mode:
1. Tap , then tap Settings to
display the Settings screen.
2. Tap the System tab, then tap
the System Settings icon.
The window displays the device
CPU Mode information.
3. Select the Run Mode you want
the processor to run by tapping
the circle preceding the option.
See table below.
Mode
Description
Turbo Mode
Standard Mode
Power Saving Mode
Automatic Mode
4. Tap
Select this mode when playing videos or games on
your device. This mode increases the processor speed
to 400 MHz, thus reducing battery life.
Use this mode when listening to MP3 audio files.
Use this mode when using text-based applications. This
mode uses a lower processing speed, thus extending
battery life.
Sets the processing speed according to the application
you are running. This is the default mode.
to return to the previous window.
5-way joystick functions
By default, the 5-way joystick
allows you to control the device
volume settings by pressing it
backward or forward. See page
5-19 for details.
You can also change the 5-way
joystick function to directional
navigator using the following
instructions.
2-28
P505 Smart PDA Phone
To change the 5-way joystick function:
1. Tap , then tap Settings to display the Settings screen.
2. Tap the System tab, then tap the System Settings icon.
3. Tap the 5-WAY tab to display the current function of the 5-way
joystick.
4. If you want to use the joystick
as directional navigator, tap the
circle preceding the option S e t
as 5-Way Joystick
Joystick. Refer to
the illustration for the directional
functions.
to save your settings
5. Tap
and return to the previous
window.
To format the flash disk:
CAUTION!
The F l a s h D i s k is the
64 MB Read-Only Memory
(ROM) chip that stores
the operating system.
Formatting erases all
data in the flash disk.
1. Tap , then tap Settings to
display the Settings screen.
2. Tap the System tab, then tap
the System Settings icon.
3. Tap the Flash Disk tab, then
tap the Format Flash Disk
button.
Chapter 2: Learning the basics
2-29
Customizing personal settings
Selecting sounds and notifications
Your device can remind you of things you have to do in several ways.
For example, if you have set up an appointment in Calendar
Calendar, a task
with a due date, or an alarm in Clock & Alarms
Alarms, you will be notified
in any of the following ways.
• A message box appears on the screen
• A sound is played (you can select the type of sound)
• A light flashes on the device
To choose the reminder types and sounds:
1. Tap , then tap Settings.
2. From the Settings screen, tap
the Sounds and
Notifications icon to display
the Sounds screen.
3. Adjust the items to your desired
to save
settings, then tap
your settings and return to the
previous window.
4. Tap the Notifications tab and
set the event notification
details.
5. Tap
to save your settings
and return to the previous
window.
2-30
P505 Smart PDA Phone
Backing up your data
Besides the SmartKeeper application that allows you to back up all
your data, the device also includes the Backup utility that lets you
back up your system files and/or data contained in the main system
memory.
Unlike the SmartKeeper application’s automatic backup feature that
backs up the entire system status (system and data) into one backup
file, The Backup utility allows you to manually create separate
backup files for your system files and data files. You may even
categorize the data files and place into different folders.
To access the Backup utility:
1. Tap , then tap Programs
Programs.
2. Tap the Backup icon.
A message appears asking you
to stop other programs before
running the backup utility.
and stop all running
3. Tap
programs.
To stop all running programs:
1. Tap , then tap Settings
Settings.
2. Tap the System tab, then tap
the Memory icon.
3. On the Memory screen, tap the
Running Programs tab.
4. Tap the Stop All button, then
tap .
NOTE
Read the notes in the I n f o r m a t i o n tab of the backup
screen before you backup your data or PIM. See the online
help on your device for online instructions on backing up or
restoring data.
Chapter 2: Learning the basics
2-31
To back up all data on your device:
1. Return to the Programs screen
and tap the Backup icon.
2. Tap the Backup tab on the
Backup screen.
3. Tap All Data button to back up
all data on your device.
NOTE
You need to insert an
SD/MMC memory card if
you wish to save your
backup file on SD/MMC.
Otherwise, you can save
the backup file into the
Flash Disk*.
4. In the Backup File screen:
• specify a file name for the
backup
• specify the folder in which to
store the backup file
(optional)
• select the storage device
Flash Disk* or SD card
(Flash
card)
where you wish to save your
backup file
5. Tap O K to start the backup
process.
NOTE
2-32
* The F l a s h D i s k is the 64 MB Read-Only Memory (ROM)
chip that stores the operating system. The flash disk has
more or less 10 MB of free space that you can use to save or
back up data from your device. Data saved on the flash disk
are permanently stored even after you hard reset the device.
P505 Smart PDA Phone
6. The screen shows the status of the backup process. When done, a
message appears indicating that the backup is complete, and
shows the total size of the backed up files.
In case the program fails to back up any items, it will show the
items on the screen.
7. Tap
.
To back up only PIM data on your device:
1. On the Backup screen, tap P I M
D a t a button to back up only
the personal information
management (PIM) data on your
device.
2. Select the storage device
Flash Disk or SD card
(Flash
card)
where you wish to save your
backup file.
Tapping Cancel returns you to
the previous screen.
3. Tap the Backup tab.
Chapter 2: Learning the basics
2-33
4. Type a name for your backup file
and the folder where you wish to
place it. You may opt not to
specify a folder.
5. Check the boxes opposite the
items that you wish to back up,
or tap Select All to select all
listed items.
If you checked the box U s e r
Defined Folders
Folders, tap Define
to specify the folders that you
wish to include in the backup
file, then tap O K
K.
6. Tap Start to begin the backup
process.
7. When the backup process is
complete, the screen displays
the message “Complete” and a
list of all the backed up items.
8. Tap
2-34
.
P505 Smart PDA Phone
To restore all data:
1. Tap
NOTE
, then tap Programs
Programs.
If you saved your backup file into an SD/MMC memory card,
you need to insert that SD/MMC memory card to the SD card
slot before restoring the data. Otherwise, you will receive the
message “No storage devices are found!”
2. On the Programs screen, tap the
Backup icon. Stop all running
programs when prompted.
3. Tap the Restore tab on the
Backup screen.
4. Tap All Data
Data.
5. In the Backup File screen:
• select the backup file name
(tap the arrow to list down
other backup files, if any)
• select the folder that
contains your backup file
(optional)
• select the storage device
Flash Disk or SD card
(Flash
card)
where you stored your backup
file
6. Tap O K to start the restore
process.
7. When the restoration is done, a
message appears prompting you
to reset the device.
8. Tap
to reset.
Chapter 2: Learning the basics
2-35
To restore PIM data:
1. On the Restore tab, tap P I M
D a t a instead of All Data.
2. When prompted, select the
Flash Disk or
storage device (Flash
SD card
card) where you stored
your backup file.
Otherwise, tap Cancel to return
to the previous screen.
3. Tap the Restore tab.
4. Select the backup file name
(tap the arrow to list down other
backup files, if any).
5. Check the boxes opposite the
items that you wish to restore,
or tap Select All to select all
listed items.
If you checked the box U s e r
Defined Folders
Folders, tap Define
to specify the folders that you
wish to restore, then tap O K
K.
6. Tap Start to begin the restore
process.
7. When the restoration is done, a
message appears prompting you
to reset the device.
8. Tap
2-36
to reset.
P505 Smart PDA Phone
Other applications
Your device includes the most common Windows® applications and
more.
To access programs:
1. Tap , then tap Programs
Programs.
2. Tap any of the icons to
launch a specific application
program.
Games
Calculator
Tap the Games icon to display
the available games.
Tap the Calculator icon to use
the calculator.
Chapter 2: Learning the basics
2-37
Camera
Conference
Tap the Camera icon to launch
and use the built-in camera. Refer
to the “Multimedia features”
chapter for details.
Tap the Conference icon to
start a call conference. Refer to
the “Phone features” chapter for
details.
File Explorer
Find
Tap the File Explorer icon to
access or find your files.
See page 2-19 for details.
Tap the Find icon to find files,
folders, or programs in your
device. See page 2-18 for
details.
2-38
P505 Smart PDA Phone
MIDlet Manager
MSN Messenger
Tap the MIDlet Manager icon
to install, view, or launch Java
programs and applications.
Tap the MSN Messenger icon
to set up the MSN Messenger.
Multimedia Album
Notes
The Multimedia Album allows
you to explore, display, edit, or
share photos, graphics, audio, and
animations via e-mail, MMS, or beam.
The Notes window allows you to
create or record notes and send
them via e-mail or beam.
Chapter 2: Learning the basics
2-39
Photo Contacts
Pictures
The Photo Contacts window
allows you to add photos to
contacts saved in your device or
SIM phonebook.
This window allows you to view,
edit, and manage pictures saved
in your device or in the SD/MMC
memory card.
Pocket Excel
Pocket MSN
The Pocket Excel application
allows you to create spreadsheets in your device.
The Pocket MSN allows you to
browse Internet pages and
connect to the Pocket MSN
website.
2-40
P505 Smart PDA Phone
Pocket Word
SIM Manager
The Pocket Word application is
the PDA version of the Microsoft®
Word. Use this application to
create, share, or send documents.
The SIM Manager application
allows you to view, add, and
manage contacts in your device
or SIM phone book.
STK
Tasks
The S T K window displays the
value-added services offered by
your phone operator.
The Tasks allows you to set and
prioritize task schedules and
reminders.
Chapter 2: Learning the basics
2-41
Terminal Services
Voice Commander
The Terminal Services Client
allows you to connect to a
terminal server.
Tap the Voice Commander
icon to launch the Voice
Commander application. Voice
Commander allows voice dialing
and voice commands.
Windows Media Player
The Windows Media Player
allows you to play video and
audio files on your device.
2-42
P505 Smart PDA Phone
Adding or removing programs
Programs added to your device at the factory are stored in ROM
(Read-Only Memory). You cannot remove these software applications,
and you will never accidentally lose ROM contents. ROM programs can
be updated using installation programs with a *.xip extension.
All other programs and data files added to your device after factory
installation are stored in RAM (Random Access Memory).
You can install any program created for your device, as long as it has
enough memory. The place to find software for your device is on the
Pocket PC web site (http://www.microsoft.com/mobile/pocketpc).
To add programs using ActiveSync:
NOTE
You need to install the Microsoft ActiveSync on your desktop
computer before you can synchronize and/or add programs
to your device. Refer to “Chapter 5: Microsoft ActiveSync”
for installation instructions.
1. Determine your device and processor type so that you know
which version of the software to install. Tap , then tap
Settings
Settings. On the System tab, tap About
About. In the Version tab,
take note of the information in Processor
Processor.
2. Download the program to your desktop computer (or insert the
CD that contains the program into your desktop computer). You
*.exe, or *.zip file, a Setup.exe file, or
may see a single *.xip
*.xip, *.exe
several versions of files for different device types and processors.
Be sure to select the program designed for the Pocket PC and
your device processor type.
3. Read any installation instructions, Read Me files, or
documentation that comes with the program. Many programs
provide special installation instructions.
4. Connect your device to your desktop computer.
Chapter 2: Learning the basics
2-43
5. Double-click the *.exe file.
• If the file is an installer, the installation wizard begins. Follow
the directions on the screen. Once the software is installed on
your desktop computer, the installer automatically transfers
the software to your device.
• If the file is not an installer, you will see an error message
stating that the program is valid but it is designed for a
different type of computer. You need to move this file to your
device. If you cannot find any installation instructions for the
program in the Read Me file or documentation, use
ActiveSync Explore to copy the program file to the
Program Files folder on your device. For more information
Help.
on copying files using ActiveSync®, see ActiveSync Help
6. When the installation is complete, tap
program icon to switch to it.
, Programs
Programs, and the
To add a program directly from the Internet:
NOTE
You need to be connected to the Internet through a GPRS/
CSD connection or a computer before you can add programs
directly from the Internet.
1. Determine your device and processor type so that you know
which version of the software to install. Tap , then tap
Settings
Settings. On the System tab, tap About
About. In the Version tab,
take note of the information in Processor
Processor.
2. Download the program to your device straight from the Internet
using the Pocket Internet Explorer
Explorer. You may see a single
*.xip
*.xip, *.exe
*.exe, or *.zip file, a Setup.exe file, or several versions
of files for different device types and processors. Be sure to
select the program designed for the Microsoft® Windows Mobile ™
2003 Second Edition for Pocket PC Phone Edition and your device
processor type.
3. Read any installation instructions, Read Me files, or
documentation that comes with the program. Many programs
provide special installation instructions.
4. Tap the file, such as a *.xip or *.exe file. The installation wizard
begins. Follow the directions on the screen.
2-44
P505 Smart PDA Phone
To add a program to the Start menu:
1. Tap , tap Settings
Settings, tap Menus
Menus, tap the Start Menu tab, and
tap the check box for the program. If you do not see the program
on the list, you can either use File Explorer on the device to
move the program to the Start Menu folder, or use
ActiveSync on the desktop computer to create a shortcut to
the program and place the shortcut in the Start Menu folder.
2. If you are using the File Explorer on the device:
Programs, tap File Explorer
Explorer, and locate the
a. Tap , tap Programs
program (tap the folder list, labeled My Documents by default,
then tap My Device to see a list of all the folders on the
device).
b. Tap and hold the program, then tap C u t on the pop-up menu.
Open the Start Menu folder located in the Windows folder,
tap and hold a blank area of the window, then tap Paste in
the pop-up menu.
menu. For more
c. The program now appears on the
information on using the File Explorer
Explorer, see the section
“Finding and organizing information” earlier in this chapter.
3. If you are using ActiveSync on the desktop computer:
a. Use the Explorer in ActiveSync to explore your device files
and locate the program. Right-click the program, then click
Create Shortcut
Shortcut.
b. Move the shortcut to the Start Menu folder in the Windows
menu. For more
folder. The shortcut now appears on the
information, see ActiveSync Help
Help.
To remove a program from the Start menu:
1. Tap , then tap Settings
Settings. On the System tab, tap Remove
Programs
Programs.
2. If the program does not appear in the list of installed programs,
use File Explorer on your device to locate the program, tap and
hold the program, then tap Delete on the pop-up menu.
Chapter 2: Learning the basics
2-45
2-46
P505 Smart PDA Phone
Chapter 3
Synchronizing
data
This chapter tells you how to
use the Microsoft® ActiveSync®
application that synchronizes
data between the device and
your desktop or notebook
computer.
Chapter summary
•
Introduction ................................................ 3 - 3
What is ActiveSync®? ...................................................... 3-3
•
Installing ActiveSync® .................................. 3 - 4
Installing ActiveSync® on your computer ......................... 3-4
•
Synchronizing your device ............................ 3 - 7
Connecting your device to a computer ............................ 3-7
Setting up a partnership .................................................. 3-8
Checking synchronized information ................................ 3-10
Manually initiating synchronization ................................. 3-10
Synchronization options ................................................. 3-11
3-2
P505 Smart PDA Phone
Introduction
What is ActiveSync® ?
The Microsoft® ActiveSync® is one of the most important bundled
programs in your P505. With ActiveSync®, you can synchronize the
information on your desktop computer with the information on your
device. Synchronization compares the data on your device with your
desktop computer and updates both computers with the most recent
information.
For example:
• Keep Pocket Outlook data up-to-date by synchronizing your device
with Microsoft® Outlook data on your desktop computer.
• Synchronize Microsoft® Word and Microsoft® Excel files between
your device and desktop computer. Your files are automatically
converted to the correct format.
NOTE
By default, ActiveSync® does not automatically synchronize
all types of information. Use the ActiveSync® options to turn
synchronization on or off for specific information types.
With ActiveSync® , you can also:
• Back up and restore your device data
• Copy (rather than synchronize) files between your device and
desktop computer
• Schedule data synchronization by selecting a synchronization
mode. For example, you can synchronize continually while
connected to your desktop computer or only when you choose to
synchronize.
• Select which information types are synchronized and control how
much data is synchronized. For example, you can choose to
synchronize your appointments of the past two weeks only,
appointments older than two weeks are not synchronized.
For more information about using ActiveSync® :
1. Start ActiveSync® on your desktop computer.
2. From the Activesync® menu bar, click Help then on Microsoft
ActiveSync Help
Help.
Chapter 3: Synchronizing data
3-3
Installing ActiveSync®
The ActiveSync® application is already installed on your device. To
synchronize information on your device with your computer, you
must also install ActiveSync® on your computer. Install ActiveSync®
from the Companion CD that came with your device.
NOTE
Before starting the ActiveSync® installation, make sure that
you have Microsoft® Outlook® installed on your computer. If
you do not have Outlook, install the Microsoft® Outlook®
2002 from the Companion CD. Even if you have Outlook 98
or Outlook 2000 installed, you are encouraged to update to
Outlook 2002.
Installing ActiveSync® on your computer
To install ActiveSync® on your computer:
NOTE
Do not connect the device to your computer until you have
finished installing ActiveSync®.
1. Insert the Companion CD to your computer. The CD runs
automatically and displays the initial screen, then the Main Menu
from which you can start the installation.
2. Click Start Here from the Main Menu to begin.
3-4
P505 Smart PDA Phone
3. Read the Overview
before installing
ActiveSync® 3.7 to
make sure that you
perform the
installation
sequence correctly.
4. If you have not
installed Outlook,
install it now. Click
Install Outlook
2002 and follow the
screen instructions
to complete the
installation.
5. Click Download Connection Wizard and read the overview to
see if you require the wizard. Follow the screen instructions to install
the wizard on your computer. Return to the Main Menu when done.
6. Click Install
ActiveSync® 3 . 7
7,
then click Install
Install.
Chapter 3: Synchronizing data
3-5
7. When prompted, select R u n
this program from its
current location then click
OK
K.
8. Follow the succeeding screen
instructions. Click Finish to
complete the installation.
9. Click the link Configure your Windows Mobile-based
Pocket PC to connect to the Windows® support web site and
set up the device phone features.
9. When prompted, restart your computer, then proceed to the next
section to connect your device to your computer and start
synchronization.
3-6
P505 Smart PDA Phone
Synchronizing your device
Connecting your device to a computer
To connect your device to your computer:
1. Place the device on the cradle.
2. Connect the DC/USB cable plug to the DC/USB cable connector at
the back of the cradle.
3. Connect the USB plug of the DC/USB cable to a USB port on your
computer. See Figure 1.
1
4
7
2
5
8
0
Figure 1
3
6
9
#
Figure 2
To connect your device without the cradle:
1. Connect the DC/USB cable plug to the system connector at the
bottom of the device.
2. Connect the USB plug of the DC/USB cable to an available USB
port on your computer. See Figure 2.
NOTE
During synchronization, the battery is charged through the
AC adapter (if you plugged the AC adapter plug to the
DC/USB cable plug) or through the USB port.
Chapter 3: Synchronizing data
3-7
Setting up a partnership
Immediately after you have completed the installation, the N e w
Partnership wizard will start automatically to help you establish a
partnership and customize your synchronization settings. At this
point, you can decide exactly which types of information you would
like to synchronize with your computer.
A partnership is a file that allows you to synchronize your
device with your desktop computer. This file is stored on your
desktop computer. An additional file that enables your
desktop computer to recognize your device is stored on your
device.
To set up a partnership:
1. When the New Partnership
screen appears, select
Standard partnership for
the type of partnership to
establish between your device
and your computer. Click N e x tt.
2. On the next screen, select
Synchronize with the
desktop computer
computer. Click
N e x tt.
3-8
P505 Smart PDA Phone
3. Select the type of information
that you wish to synchronize.
Click N e x tt.
OR
If you wish to customize a
synchronized item, highlight
the item then click Settings
Settings.
On the Calendar
Synchronization Settings
window, for example, select
from the options how you wish
to synchronize the
appointments on your device
K.
with your computer. Click O K
4. Click Finish to complete
setting a partnership.
Immediately after you set up a
partnership, ActiveSync® starts
automatically and initiates the
first synchronization between
your device and your computer.
Refer to the succeeding
sections for more details on
synchronization.
Chapter 3: Synchronizing data
3-9
Checking synchronized information
After your first synchronization,
take a look at Calendar, Contacts,
and Tasks on your device. You
will notice that the calendar
information in Microsoft® Outlook
on your computer was copied to
your device, and the information
that you have on your device was
copied to your computer.
NOTE
Open Microsoft® Outlook on your desktop computer to see
the details of copied information from your device.
Manually initiating synchronization
Once you have set up ActiveSync® and completed the first
synchronization process, you can initiate synchronization from your
device at any time.
To manually initiate synchronization:
1. Tap
, then tap ActiveSync® to display the ActiveSync®
screen.
Connection status
Tap to connect and synchronize
Tap to stop synchronization
Tap to synchronize via IR or change
synchronization settings
3-10
P505 Smart PDA Phone
2. To start synchronization, make a connection between your device
and your computer, then tap S y n cc.
To end synchronization, tap S t o p
p.
For more information on synchronization:
Tap
while in the ActiveSync® screen, then tap H e l p
p.
Synchronization options
The Microsoft® ActiveSync® program allows you to customize your
synchronization settings at any time. You can select the items to
synchronize, set the synchronization schedule, and specify the
synchronization rules.
To display the synchronization options:
• From the ActiveSync® window on your desktop computer, click on
the Options icon, or
• From the menu bar, click on Tools
Tools, then Options
Options.
To select items to synchronize:
1. Check the box opposite the item that you wish to synchronize.
2. Highlight a checked item then click on Settings to specify
synchronization options for the item.
For example, highlight Calendar then click on Settings to
display the Calendar Synchronization Settings window.
Customize the available settings, then click O K when done.
Chapter 3: Synchronizing data
3-11
3. Do the same for the other checked items.
NOTE
You cannot set the options for unchecked items.
4. Click O K when done.
To set synchronization schedule:
1. Click on the Schedule tab.
2. Select your desired
synchronization schedule.
3. Click O K when done.
To specify synchronization rules:
1. Click on the Rules tab.
2. Select your desired settings
from the available options.
3. Click O K when done.
3-12
P505 Smart PDA Phone
Chapter 4
Using Pocket
Outlook®
This chapter details the
procedures in using the
Microsoft® Pocket Outlook
Calendar, Tasks, Notes, and
Contacts.
Chapter summary
•
Introduction ................................................ 4 - 3
•
Calendar: Scheduling appointments and meetings . . 4 - 3
Creating appointments ....................................................
Using the summary screen ...............................................
Creating meeting requests ...............................................
Sending appointments .....................................................
•
4-4
4-5
4-5
4-7
Tasks: Keeping a to do list ........................... 4 - 8
Creating a task ................................................................ 4-8
Using the summary screen ............................................. 4-10
Sending tasks ................................................................ 4-10
•
Notes: Capturing thoughts and ideas ............ 4 - 1 1
Creating notes ............................................................... 4-11
•
Contacts: Tracking friends and colleagues . . . . . 4 - 1 3
Creating contacts ..........................................................
Using the summary screen .............................................
Changing a contact information display .........................
Getting in touch with your contacts ..............................
Finding a contact ...........................................................
Adding a photo to a contact ..........................................
4-2
4-14
4-15
4-15
4-16
4-19
4-20
P505 Smart PDA Phone
Introduction
Microsoft® Pocket Outlook® includes Calendar, Tasks, Notes,
Contacts, and Messaging. You can use these programs individually or
together. For example, e-mail address stored in Contacts can be used
to address e-mail messages in Messaging.
Using ActiveSync®, you can synchronize information in Microsoft®
Outlook or Microsoft® Exchange on your desktop computer with your
device. You can also synchronize this information directly with a
Microsoft® Exchange server. Each time you synchronize, ActiveSync®
compares the changes you made on your device and desktop
computer or server and updates both computers with the latest
information. For information on using ActiveSync®, see ActiveSync®
Help on your desktop computer.
Calendar: Scheduling appointments
and meetings
Use Calendar to schedule appointments, meetings and other events.
You can check your appointments in one of several views (Agenda,
Hourly, Daily, Weekly, Monthly, and Yearly) and easily switch views
using the View menu.
Tap to move one week forward
Tap to move one week backward
Tap to go to the day’s appointments
Tap to display or edit the appointment details
Tap to create a new appointment
Tap to view appointment options
Tap an icon to change the calendar view to
agenda, hourly, daily, weekly, monthly, or yearly
NOTE
You can customize the Calendar display, such as changing the
first day of the week, by tapping O p t i o n s on the T o o l s menu.
Chapter 4: Using Pocket Outlook®
4-3
Creating appointments
To create an appointment:
1. If you are in Day or Week view, tap your desired date for the
appointment.
2. Tap N e w
w.
Tap to select from a list of predefined subjects
Tap to select from previously entered locations
Tap to specify the time of appointment
Scroll down to see other appointment options
Tap to specify the date of appointment
Tap to set the appointment reminder options
Tap to set the appointment category
Tap to add notes to the appointment
3. Using the input panel, enter a description for the appointment and
the appointment location.
4. If needed, tap the date and time to adjust the appointment
schedule.
5. Enter other desired information. You will need to hide the input
panel or tap to scroll down and see all appointment details.
6. To add notes to your appointment, tap the Notes tab. You can
enter text, draw, or create a recording. For more information on
creating notes, see the “Notes: Capturing thoughts and ideas”
later in this chapter.
7. When done, tap
NOTE
4-4
to return to Calendar.
If you select R e m i n d m e in an appointment, your device will
remind you according to the options set in the S o u n d s a n d
N o t i f i c a t i o n s screen. See page 2-30 for details.
P505 Smart PDA Phone
Using the summary screen
When you tap an appointment in Calendar, a summary screen appears.
To change the appointment, tap E d i tt.
Appointment details
Notes/additional information
on the appointment
Tap to change the appointment details
Creating meeting requests
You can use Calendar to set up meetings with users of Microsoft®
Outlook® and mobile phone users. The meeting request will be
created automatically and sent either when you synchronize Inbox or
when you activate the phone.
To create a meeting request:
1. Create an appointment
2. Tap Tools
Tools, select Options
from the menu, then tap the
Appointments tab to indicate
how you want meeting requests
sent.
Chapter 4: Using Pocket Outlook®
4-5
3. If you send and receive e-mail
messages through ActiveSync®,
select Outlook E-mail
E-mail. If you
wish to send the meeting
request to mobile phone
contacts, select T e x t
Messages
Messages.
NOTE
You can only send a text
message if your contact
has a mobile phone
number in C o n t a c t ss.
To schedule a meeting:
1. Create an appointment.
2. In the appointment details, hide the input panel, then tap
Attendees
Attendees.
3. From the list of e-mail addresses you have entered in Contacts,
select the meeting attendees.
The meeting notice is created automatically and placed in the
Outbox folder. For more information on sending and receiving
meeting requests, see Calendar Help and Messaging Help on the
device.
4-6
P505 Smart PDA Phone
Sending appointments
You can send appointments and other schedules to other devices
using the infrared (IR) and Bluetooth™ capabilities of your device.
NOTE
Refer to “Chapter 10: Getting connected” and “Chapter 11:
Using Bluetooth® for details on infrared and Bluetooth®
connections.
To send an appointment:
1. Select an appointment you wish
to send.
2. Tap and hold the appointment
to display a pop-up menu.
3. Select Send via Bluetooth or
Beam Appointment
Appointment.
4. Follow screen instructions to
send the appointment.
Chapter 4: Using Pocket Outlook®
4-7
Tasks: Keeping a to do list
Use Tasks to keep track or prioritize the things you have to do.
Tap to select the category
of tasks you want to
display
Tap to select a sort order of the task list
Tap to quickly add a new task
Tap to display or edit the task details
Tap and hold a task to display a
pop-up menu of actions
Tap an action for the task
Tap to create a new task
Creating a task
To create a task:
1. Tap , then tap Tasks
Tasks. If Tasks is not listed as an item in the
Start menu, launch it by tapping , tap Programs
Programs, then tap
Tasks from the menu. After launching, Tasks now appears in
the recently used program list.
2. Tap N e w to display a blank task
form.
3. Using the input panel, enter a
description.
4. Enter a start date and due date,
or enter other information by
tapping the field first. If the
input panel is open, you will
need to hide it to see all
available fields.
5. To assign the task to a
category, tap Categories and
select a category from the list.
On the task list, you can display
tasks by category.
4-8
P505 Smart PDA Phone
6. To add notes, tap the Notes
tab. You can enter text, add a
drawing, or create a recording.
For more information on creating
notes, see “Notes: Capturing
thoughts and ideas” later in this
chapter.
7. Tap
to return to the task list
when done.
Chapter 4: Using Pocket Outlook®
4-9
Using the summary screen
Tapping a task on the task list displays a summary screen. To change
the task details, tap E d i tt.
Task details
Tap to show or hide the task details
Notes/additional information on the task
Tap to change the task details
Sending tasks
You can send tasks to other devices using the infrared (IR) and
Bluetooth™ capabilities of your device.
NOTE
Refer to “Chapter 10: Getting connected” and
“Chapter 11: Using Bluetooth® for details on infrared and
Bluetooth® connections.
To send a task:
1. Select the task you wish to
send.
2. Tap and hold the taskto display
a pop-up menu.
3. Select Send via Bluetooth or
Beam Appointment
Appointment.
4. Follow screen instructions to
send the task.
4-10
P505 Smart PDA Phone
Notes: Capturing thoughts and ideas
Quickly capture thoughts, reminders, ideas, and phone numbers with
Notes. You can create a written note or a recording. You can also
include a recording in a note. If a note is open when you create the
recording, it will be included in the note as an icon. If the note is
displayed, it will be created as a stand-alone recording.
Tap to change the
sort order of the list
Tap to record
Tap to show or hide the recording toolbar
Tap to create a new note or recording
Creating notes
Tap to save the note and
return to the Notes list
To create a note:
1. Tap
NOTE
, then tap Notes
Notes.
If N o t e s is not listed as an
item in the S t a r t menu, launch
, tap
it by tapping
Programs
Programs, then tap N o t e ss.
After launching, N o t e s now
appears in the recently used
program list.
2. Tap N e w to display a blank
note.
3. Create your note by writing,
drawing, typing, or recording.
Tap to add a recording
to the note
Tap to write on
the screen
Chapter 4: Using Pocket Outlook®
Tap to show
or hide the
input panel
4-11
NOTE
4. Tap
For more information about using the input panel, writing and
drawing on the screen, and creating recordings, see Chapter 2.
when done.
You may change the default Notes options including the writing
mode, template, file storage, and record button action.
To change the Notes options:
1. Tap , then tap Notes
Notes.
2. Tap Tools
Tools, then Options... to
display the options screen.
3. Make your desired changes.
when done to save your
4. Tap
changes.
4-12
P505 Smart PDA Phone
Contacts: Tracking friends and
colleagues
Contacts maintains a list of your friends and colleagues so that you
can easily find the information you look for, whether you are at home
or on the road.
With the mobile phone features of your device, you can call your
contact’s home, mobile, or office phone number, send an SMS
message or share the contact information to another device using
the infrared port (IR) or Bluetooth®.
Tap to select the category of
contacts you want to display
Tap and enter part of a name
to quickly find it on the list
Tap an entry to display or
edit the contact details
Type of contact information
displayed. Tap to change or select
another contact information.
Tap to sort contacts by name or company
Tap to create a new contact
NOTE
To change the way information is displayed in the list, tap
T o o l s then O p t i o n ss.
Chapter 4: Using Pocket Outlook®
4-13
Creating contacts
You can create or add a contact information by:
• Using the Contacts application
• Using Microsoft® Outlook on your computer. New contacts will be
added to the device, the next time it is synchronized with the
computer. See Chapter 3 for details on synchronization.
• Transferring contact information from your SIM card to the
Contacts using the SIM Manager application. See Chapter 5 for
details.
• Receiving a contact information from other devices using beam or
Bluetooth® features.
To create a contact:
1. Tap , then tap Contacts
Contacts.
2. Tap N e w to display a blank
contact form.
3. Using the input panel, enter a
name and other contact
information. You will need to
scroll down to see all available
fields.
4. To assign the contact a
category, scroll to and tap
Categories
Categories, then select a
category from the list. On the
contact list, you can display the
contacts by category.
5. To add notes, tap the Notes tab. You can enter text, draw, or
create a recording. For more information on creating notes, see
“Notes: Capturing thoughts and ideas” in this chapter.
6. Tap
4-14
to return to the contact list when done.
P505 Smart PDA Phone
Using the summary screen
Tapping a contact on the contact
list displays a summary screen. To
change the contact information, tap
E d i tt.
Contact details
Tap to display notes
Tap to change contact information
Changing a contact information display
If a contact has multiple contact information (e.g. work telephone,
home telephone, car mobile phone, mobile phone), you can change or
select the contact information displayed on screen.
To change a contact information display:
1. Tap the type of contact
information displayed (last
column of the contact line) to
show additional contact
information.
Chapter 4: Using Pocket Outlook®
2. The current displayed contact
information is indicated by a
bullet. Tap another contact
information to change the
contact information display.
4-15
Getting in touch with your contacts
To call a contact:
1. Tap and hold a contact to
display a pop-up menu. Tap
Call Work/Home/Mobile
to place a call.
2. The phone dials the selected
contact number. Tap H i d e to
hide the balloon information
or E n d to cancel the call.
3. Talk to the called party when
connected. The balloon
displays the call duration.
4. Tap E n d to terminate the
call.
4-16
P505 Smart PDA Phone
To send an e-mail message to a contact:
1. Tap and hold a contact, then
tap Send Email from the
pop-up menu.
NOTES
2. The Messaging window
appears. Compose the e-mail
message, then tap Send to
send the message.
•
Refer to Chapter 6 for details on composing and sending
e-mail messages.
•
E-mail messaging features are network dependent and
may require subscription to a particular service. Contact
your phone operator for details.
Chapter 4: Using Pocket Outlook®
4-17
To send a text message to a contact:
1. Tap and hold a contact, then
tap Send Text Message
from the pop-up menu.
NOTES
2. The Messaging window
appears. Compose the text
message, then tap S e n d
d. The
text message is sent to the
contact’s mobile phone.
•
When sending text messages to contacts with multiple
contact information, the Messaging application
automatically selects the mobile phone number entry.
•
Refer to Chapter 6 for details on composing and sending
text messages.
To send a contact info by beam or Bluetooth® :
1. Tap and hold the contact you
wish to send, then tap B e a m
Contact... or Send via
Bluetooth
Bluetooth.
2. Follow screen instructions to
send the contact information.
NOTE
4-18
Refer to Chapters 10 and
11 for details on sending
information via the IR
port and Bluetooth®.
P505 Smart PDA Phone
Finding a contact
There are three ways to find a contact:
1. In the contact list, tap the
category list (labelled A l l
Contacts by default) and select
the type of contact that you
wish to display. To show all
contacts again, select A l l
Contacts
Contacts. To view a contact
not assigned to a category,
select N o Categories
Categories.
1
2. To view the names of companies
your contacts work for, in the
contact list, tap V i e w
w, then
select By Company from the
menu. The number of contacts
that work for that company will
be displayed to the right of the
company name.
Tap the company name to
display the contacts.
2
3. You can also type the name of
the contact in the Find a
n a m e field. When you type a
letter, the device automatically
searches and displays the
available contacts. Tap a
contact entry from the list to
view the details.
Chapter 4: Using Pocket Outlook®
3
4-19
Adding a photo to a contact
The Photo Contacts application allows you to attach photos to
your contacts. The photo is displayed on screen when the contact
calls you.
To add a photo to a contact:
1. Tap and hold a contact, then tap
Arcsoft Photo Contacts
from the pop-up menu.
2. Tap the Thumbnail View
button to display a thumbnail
of each contact.
Tap to view the contact thumbnail
3. Tap and hold a contact, then
tap Attach Photo from the
pop-up menu.
4-20
4. Tap Browse... to locate the
photo you want to attach.
P505 Smart PDA Phone
5. The selected photo is
displayed. Select a template
and/or ringtone if you wish to
customize the contact call
settings. Tap O K when done.
A thumbnail of the attached
photo with the contact name
will appear on screen when
the contact calls.
You can also use the Photo Contacts application to:
•
•
•
•
Call and send e-mail/SMS/MMS messages to contacts
Send the contact information by beam
Save the contact information to the SIM card phone book.
Assign a speed dial key to a contact.
Chapter 4: Using Pocket Outlook®
4-21
4-22
P505 Smart PDA Phone
Chapter 5
Phone features
This chapter provides
information on how to use the
ASUS Menu and the device’s
phone features.
Chapter summary
•
Phone features ............................................ 5 - 3
•
ASUS Menu ................................................. 5 - 3
Customizing the ASUS Menu ............................................ 5-4
The ASUS Menu (Phone mode) ........................................ 5-7
The icon bar ..................................................................... 5-7
Phone functions ............................................................... 5-8
Other phone features .................................................... 5-20
•
P h o n e ........................................................ 5 - 2 3
Placing a call ..................................................................
Receiving a call ..............................................................
Rejecting a call ...............................................................
Changing the phone settings .........................................
•
5-23
5-29
5-30
5-31
Using other phone applications ..................... 5 - 4 0
Conference call .............................................................. 5-40
SIM Manager .................................................................. 5-45
STK (SIM Tool Kit) ......................................................... 5-52
5-2
P505 Smart PDA Phone
Phone features
The P505 Smart PDA Phone is a tri-band mobile phone that allows you
to place a call, send text messages, videos, and audio files to other
mobile phones. You can place a call using the ASUS Menu or the
Windows® Phone applications. The following sections describe the
phone features of your device.
ASUS Menu
The ASUS Menu is an interactive application that transforms your
device into a mobile phone when you close the flip. This application
allows you to enjoy the phone features of your device, while keeping
track of the most common device functions such as reminders,
appointments, and tasks.
NOTE
When the flip is open, tap the ASUS logo in the Today screen
to launch the ASUS Menu.
To enable the ASUS Menu:
1.
2.
3.
4.
Tap .
Tap Settings
Settings.
Tap Personal tab.
Tap the ASUS Menu icon to display
the ASUS Menu settings.
Enable, then tap
5. Tap Enable
.
6. Close the flip to start using the
ASUS Menu
Menu.
NOTE
The touch screen is disabled
when the ASUS Menu is in
phone mode (flip closed).
Open the flip to activate the
touch screen and access the
ASUS Menu in PDA mode.
Chapter 5: Phone features
5-3
7. Open the flip, and now applications
can be selected by tapping on the
and
icons or by tapping on
selecting the application you require.
Customizing the ASUS Menu
To change the ASUS Menu settings:
1. Tap
.
2. Tap Settings
Settings.
3. Tap the ASUS Menu icon to display
the ASUS Menu settings.
4. Check the Auto return to home
option to allow the ASUS Menu to
return to the home screen when idle
for a certain period of time.
5. Check the Auto Keypad Lock
option, then adjust the idle time
before the phone keypad is locked.
6. Tap
5-4
to save your settings.
P505 Smart PDA Phone
To customize the ASUS Menu theme, home
screen, and animation:
1.
2.
3.
4.
5.
Tap
.
Tap Settings
Settings.
Tap the ASUS Menu icon to display the ASUS Menu settings.
Tap the Personalization button.
The Theme tab allows you to
select or change the color
theme for the ASUS Menu
display.
Select a color from the available
color swatches.
6. Tap the Home Screen tab.
The Home Screen tab allows you
to select a new home screen
background image.
7. Tap Browse to locate the new
background image.
Chapter 5: Phone features
5-5
7. Locate the new home screen
background image, then tap
the O K button to select.
8. Tap the Animated Home
Screen tab to select or
change the home screen
animation.
Refer to the screens below
for a comparison of home
screen modes.
Home screen modes
Animation
Clock
Text
9. Tap
to save your settings. Close the phone flip to see if the
display and screensaver changed based on your settings.
5-6
P505 Smart PDA Phone
The ASUS Menu (Phone mode)
The ASUS Menu in phone mode contains
or by
icons that you can select using
pressing the 5-way joystick. Refer to
the table below for the icons and menus
description.
Icon
NOTE
Description
Allows you to
Contacts
view the SIM and PDA phone book entries
Calendar
keep track of your schedules and appointments
Call History
view received, dialled, and missed call information
Messages
read text messages (SMS) sent to your PDA
Profile
change the phone profile or turn the phone on or off
Tasks
keep track of your tasks and to do lists
When you launch an application (i.e. Tasks, Calendar) using
the ASUS Menu phone mode, you can open the flip to access
the application using the touch screen.
The icon bar
Icons at the top of the screen indicate
phone status as follows:
Icon Description
The icon indicates
Battery
the amount of battery power
Profile
the current phone profile
Talking
that the phone is in talking mode
Mute
that the phone speaker is mute
Keylock
that the phone keypad is locked
Missed Call
that you have missed a call
Alarm
that you have scheduled an alarm
SMS
that you received an SMS message
Signal
the signal strength
Volume
phone ring volume level
Chapter 5: Phone features
5-7
Phone functions
Placing a call
To place a call using the keypad:
1. Close the flip. The ASUS Menu phone
mode appears.
NOTE
If you opened an application
before you close the flip, you
(Home)
may have to press
before you place a call.
2. Use the keypad to enter the number of
the party you wish to call, then press
. The phone dials the number.
NOTE
The screen displays the
contact name if you saved
the number of the person you
are calling in Contacts or on
your SIM. Likewise, if you have
associated a picture with this
contact, you will see the
picture on screen.
3. Talk to the called party when
connected.
NOTE
During the call, long press
or press
(Options), then
select S p e a k e r o n from the
menu to switch to speaker
phone mode.
4. Press
anytime to end the call.
5-8
P505 Smart PDA Phone
To place a call using the Call History:
1. Close the flip. The ASUS Menu phone
mode appears. If the flip was closed,
you may have to press
(Menu)
first.
to select Call Log
from
2. Use
the menu, then press
(Enter).
The screen displays the Call Logs.
3. Use
to select from incoming,
outgoing, or missed calls, then press
(Enter). The screen displays the
received/dialled/missed call entries.
4. Use
to highlight the number you
(Call).
wish to call, then press
5. Wait for the called party to answer.
6. Press
anytime to end the call.
To place a call using Contacts:
1. Close the flip. The ASUS Menu phone mode appears. If the flip was
closed, you may have to press
(Menu) first.
to select Contacts
from
2. Use
the menu, then press
(Enter).
The screen displays the list of phone
numbers stored in the PDA Contacts,
including a link to the SIM Phone
Book .
3. Use
to select the phone number you want to call, then press
. If the number is stored in your SIM card, select S I M
Contacts
Contacts, then press
(Enter). The screen displays the phone
to select the phone
numbers stored in the SIM card. Use
number you want to call, then press
.
4. Wait for the called party to answer.
5. Press
anytime to end the call.
Chapter 5: Phone features
5-9
Receiving a call
To receive or reject an incoming call:
1. Depending on your settings, the
device rings, vibrates, or rings and
vibrates when it receives an
incoming call. Press
(Accept) to
answer the call or
(Reject) to
end the call.
When you accept the call, the screen
shows CONNECTED after the
caller’s phone number.
2. Press
anytime to end the call.
To use the call options:
1. After accepting an incoming call,
press
(Options) to display
available call options. Refer to the
table below for the call options.
Option
Description
Speaker on
Hold
Mute
Contacts
Conference*
Leave Conf.*
End Call*
Turns the speaker phone on
Puts the current call on hold
Mutes the current call or a conference call member
Opens the Contacts menu for dialling additional numbers
Opens a conference for two to five parties
Disconnects a member from the conference call
Terminates a conference call member
*Appears only when in conference call mode.
2. Use
5-10
to select an option, then press
(OK).
P505 Smart PDA Phone
Making a conference call
To make a conference call:
1. Place a call to person A.
2. After establishing connection with
person A, press
(Options), then
to select Hold from the
use
menu. Press
(OK) to keep the
current call on hold.
3. Press
(Options), use
to select
Contacts from the menu.
4. Select the phone number of
person B, then press
.
or
Key-in the phone number of
person B using the keypad, then
press
.
5. After you have established a
connection with person B, press
(Options), then use
to select
Conference from the menu. Press
(OK) to begin the conference.
The screen shows the conference
call members.
Chapter 5: Phone features
5-11
To talk privately to a conference call member:
1. During a conference call, use
to
select a member you want to drop
from the conference call.
(Options), then select
2. Press
Leave Conf. from the menu.
3. The selected member drops from
the conference call. You can now
talk privately to the remaining
conference call member.
(Options), select
4. To resume the conference, press
Conference from the menu, then press
(OK).
To end a conference call:
1. Use
2. Press
5-12
to select Conference from the list of members.
to end the conference call.
P505 Smart PDA Phone
Viewing SMS messages
The device alerts you everytime it receives a Short Message Service
(SMS) message from other mobile phones. The ASUS Menu phone
mode allows you to view the SMS message.
To view a new SMS message:
1. Press
(Read) when a “ Y o u
have a new message!!” appears
on the screen. Press
(Ignore) to
read the SMS message later.
2. Read the message, then press
(Back) to return to the previous
menu. Otherwise, press
(Call) to
place a call to the SMS sender.
To read an ignored SMS message:
1. Use
to select Messages
from the menu, then press
(Enter). The screen displays the list
of SMS messages stored in the PDA
and in the SIM memory .
to select the SMS message
2. Use
you wish to read, then press
(Enter) to display the message.
Messages preceded by
are unread
messages
(Back) to return to the
3. Press
previous menu.
Chapter 5: Phone features
5-13
Viewing contacts
The ASUS Menu phone mode allows you to view the contact
information stored in both the device memory and SIM card even
when the flip is closed.
To view your contacts:
1. Put the device in idle mode, close
the flip, then press
(Menu).
2. Use
to select Contacts
from
(Enter).
the menu, then press
The screen displays the list of phone
numbers stored in Contacts
Contacts,
including a link to the
SIM Contacts
Contacts.
3. Use
to select a contact, then
press
(Enter). The screen
displays the contact information.
All the numbers saved for the
contact will be listed. Icons denote
the type of contact as follow:
mobile
office
home
car
pager
radio
fax
assistant
NOTE
5-14
By default, the contact’s mobile phone number is displayed at
the top of the list. If you wish to call the other phone numbers,
use
to select the number, then press
(Send).
P505 Smart PDA Phone
Viewing appointment schedules
You can use the Calendar menu to view your appointments.
To view your appointments:
1. Close the flip. The ASUS Menu phone
mode appears. If the flip is closed, you
(Menu) first.
may have to press
2. Use
to select Calendar
from
(Enter).
the menu, then press
The screen displays a list of your
future
and past due
appointments .
3. Use
to select the appointment
you wish to view, then press
(Enter) to view the appointment
details.
4. Press
(Back) to return to the
previous menu.
5. If you set an appointment reminder,
the screen displays the reminder
during the specified reminder time.
(Dismiss All) to dismiss
6. Press
the appointment and return to the
previous menu.
Chapter 5: Phone features
5-15
Viewing tasks
You can use the Tasks menu to view your tasks.
To view tasks:
1. Close the flip. The ASUS Menu phone
mode appears. If the flip is closed, you
(Menu) first.
may have to press
2. Use
to select Tasks
from the
(Enter). The
menu, then press
screen displays a list of completed
and incomplete tasks.
3. Use
to select a task, then press
(Enter) to view the task details.
(Back) to return to the
4. Press
previous menu.
Viewing call history
You can view incoming, outgoing, or missed calls using the
Call History menu.s
To view the call history:
1. Close the flip. The ASUS Menu phone
mode appears. If the flip is closed, you
(Menu) first.
may have to press
2. Use
to select Call History
from the menu, then press
(Enter).
3. Use
to select the type of call
history you want to view, then press
(Enter) to display the log.
(Back) to return to the
4. Press
previous menu.
5-16
P505 Smart PDA Phone
Changing the phone profile
The Profile menu allows you to enable or disable the phone flight
mode or change the phone profile.
To open the Profile menu:
1. Close the flip. The ASUS menu phone
mode appears. If the flip was closed,
(Menu)
you may have to press
first.
2. Use
to select Profiles
from
(Enter).
the menu, then press
Flight Mode
The phone functions are disabled when the Flight Mode is enabled.
Enable this item if you want to use the device in areas where mobile
communication is prohibited (i.e. on an aircraft).
To enable Flight Mode:
1. Use
to highlight Flight Mode
from the menu, then press
(Enable). A check mark appears inside
the box opposite the option.
(Back) to return to the
2. Press
previous menu.
Chapter 5: Phone features
5-17
Profile
The Profile option allows you to select from seven preset phone
profiles. Each profile has a unique ring tone, type, and volume
settings for various phone functions such as alarms, reminders, etc.
NOTE
The C a rr, H e a d s e tt, and S p e a k e r profiles are auto-detected. For
example, when you connect a headphone to the headphone port, the
phone profile is automatically set to H e a d s e tt. You cannot select
these profiles when the device is in phone mode.
To select a profile:
1. Use
to highlight Profiles from the
menu, then press
(Enter).
2. Use
to select a profile then press
(OK). The bullet preceding the
profile is blacked out.
NOTE
Refer to the next section for details
on how to change the profile
settings.
3. Press
(Back) twice to return to the ASUS menu. The icon of
the selected profile now appears on the icon bar.
To change the profile settings:
1. Open the flip, tap
Settings.
, then tap
2. Tap the Personal tab, then
tap on the Profiles icon. The
screen displays the current
profile and its settings.
NOTE
If you are in the P r o f i l e s
screen of the ASUS Menu
phone mode (see above),
open the flip to go directly to
the Profiles Settings screen.
3. Select another profile from the
profiles section, or tap Modify to change the current profile
settings. Tap
when finished.
5-18
P505 Smart PDA Phone
Adjusting the volume
You can adjust the system (device), ring tone, and incoming call
volumes when the flip is closed.
To adjust the system (device) volume:
1. When the phone is in idle mode,
press the 5-way joystick forward or
backward to open the System
Volume screen.
2. Press the 5-way joystick backward
to decrease the system (device)
volume. Press forward to increase.
Refer to the 5-way joystick direction
on the right.
3. Press the 5-way joystick to return to
the previous phone menu.
to decrease
volume
to increase
volume
To adjust the ring volume
1. When the phone is in idle mode,
press the center button of the
5-way joystick for two seconds to
open the Ring Volume screen.
2. Press the 5-way joystick backward
to decrease the ring volume. Press
forward to increase. Refer to the
5-way joystick direction on the right.
3. Press the 5-way joystick to return to
the previous phone menu.
to decrease
volume
NOTE
to increase
volume
You can only adjust the system and ring volumes when the
phone is not in use.
Chapter 5: Phone features
5-19
To adjust the in call volume
1. After getting connected to the other
party during an incoming or outgoing
call, press the 5-way joystick to
open the In Call Volume screen.
2. Press the 5-way joystick backward
to decrease the in call volume. Press
forward to increase.
3. Press the 5-way joystick to return to
the previous phone menu.
NOTE
You can adjust the in call volume while you are talking to
another party on the line.
Other phone features
Voice dialing
NOTE
Refer to the Voice Commander section on page 8-25 before
using the voice dialing feature.
To use voice dial
1. Press the Voice Commander button
at the right side of the device.
2. Move closer to the microphone, say
C a l ll, then the name of the person
you are calling.
I M P O R T A N T The name and number of the
person you wish to voice dial
must be saved in the
C o n t a c t s list.
When the voice command is
recognized, the phone automatically
dials the number.
5-20
P505 Smart PDA Phone
Recording
You can record a note or meeting when the device is on phone mode.
To do a recording
1. Press the record button at the left
side of the device.
2. Press
(Record) to start
recording.
3. When finished, press
stop recording.
(Stop) to
To listen to your recording
1. Press the record button at the left side of the device.
2. Use
to select the recording you want to listen to, then press
the 5-way joystick.
Chapter 5: Phone features
5-21
Locking the keypad
When the device is not in use, you can lock the keypad to prevent
accidental dialing and application launching. You can lock the keypad
manually or automatically. For automatic keypad locking, see page
5-4 for details.
To lock the keypad manually
Put the device in idle mode, press
(Menu), then press
.
To unlock the keypad
Press
5-22
(Unlock), then press
.
P505 Smart PDA Phone
Phone
To use the Microsoft® application for telephony when the flip is open,
tap , then tap Phone or press the green telephone button below
the screen. This screen will appear.
Signal strength indicator
Network name
Back button; tap to delete
a dialled number
Tap to open Call History
Tap to open Speed Dial
Keypad
Tap to call dialled number
Tap to clear or paste a
phone number
Tap to change the
phone settings
Tap to open N o t e s
Tap to open the
C o n t a c t s menu
Placing a call
You can place a call using:
1.
2.
3.
4.
5.
Phone keypad
Call History
Speed Dial
Contacts menu
Voice Commander application
Refer to the corresponding sections for details.
Chapter 5: Phone features
5-23
To place a call using the keypad:
1. From the phone keypad, tap
the number of the party you
want to call, then tap T a l kk.
NOTE
Use the correct dialling
prefixes when placing a
long distance or
international call.
If the dialled number is stored
in the Contacts
Contacts, the display
shows the name of the contact
and type of phone number
being dialled.
The Talk button toggles to
End
d.
2. Talk to the called party when
connected. The display shows
the duration of the call.
Tap E n d to terminate the call.
5-24
P505 Smart PDA Phone
To place a call using the Call History:
1. Tap the Call History button
to display the incoming,
outgoing and missed call
information.
2. Tap and hold the entry you wish to
call, then select Call from the
pop-up menu. The device dials the
entry.
If the number you wish to call is not
in the list selected, tap All Calls
Calls,
then select from Missed, Outgoing,
or Incoming call folders to locate the
phone number entry.
3. Talk to the called party when
connected. The display shows
the duration of the call.
Tap E n d to terminate the call.
Chapter 5: Phone features
5-25
To place a call using Speed Dial:
NOTE
You must assign a speed dial key to a phone number before
you can use the speed dial feature.
1. From the dialer, tap the Speed
Dial button to open the Speed
Dial window.
2. Tap N e w to display the
Contacts list. Select and tap a
number from the list.
5-26
P505 Smart PDA Phone
3. The screen displays the
contact information. Tap the
Location up/down arrow
button to assign a speed dial
key to the selected contact,
then press .
NOTE
Speed dial key 1 is
reserved for Voice Mail.
You can assign up to 99
speed dial keys.
4. The screen shows the speed dial
number and the assigned contact
information.
5. Tap the speed dial number, then tap
T a l k to call. Otherwise, tap
to
return to the previous menu.
Chapter 5: Phone features
5-27
To place a call in Contacts:
1. Tap
, then select Contacts
from the menu. The Contacts
window appears.
2. Tap and hold a contact, then select
Call Work/Home/Mobile
depending on the saved contact
information.
3. Talk to the called party when
connected. The call balloon
shows the duration of the call.
Tap E n d to terminate the call,
or hide to hide the balloon.
5-28
P505 Smart PDA Phone
Receiving a call
To receive an incoming call:
1. A Phone - Incoming...
callout appears when you
receive an incoming call while
the device is in idle mode.
Tap Answer to accept the
call.
2. The Phone window appears.
Talk to the called party.
Tap E n d to terminate the call.
Chapter 5: Phone features
5-29
Rejecting a call
To reject an incoming call:
1. A Phone - Incoming...
callout appears when you
receive an incoming call while
the device is in idle mode.
Tap Ignore to reject the call.
2. A Phone callout appears telling
you that you have a missed call.
Tap View to open the Call
History window and view the
missed call information.
Otherwise, tap Close to ignore
and close the callout.
5-30
P505 Smart PDA Phone
Changing the phone settings
To change the phone settings:
1. From the Phone window, tap
Tools then select Options
Options.
The phone options window
appears.
2. The screen displays the Phone
settings tab. Change the ring
type, ring/keypad tone, and
Personal Identification Number
(PIN) from this window.
Tap
when finished.
To change the PIN:
1. From the Phone tab, tap
the Change PIN button.
The phone keypad appears.
2. Enter the old PIN using the
phone keypad, then tap
Enter
Enter.
3. When prompted, enter the
new PIN, then tap Enter to
change the PIN.
NOTE
Be careful when changing
your PIN. You may be
required to enter the PIN
before you can use some
phone functions.
Chapter 5: Phone features
5-31
To activate the phone security:
1. From the Phone tab, check
the item Require PIN
when phone is used
used. The
phone keypad appears.
2. Enter the PIN using the
phone keypad, then tap
Enter
Enter.
NOTE
When the phone
security is activated,
you need to enter
the correct PIN
before using the
phone application.
To access the phone network services:
1. From the Phone options
window, tap the Services
tab. The window displays the
available network services.
5-32
2. Tap a service, then tap the
Get Settings button to get
the network settings for the
selected service.
P505 Smart PDA Phone
To change the Call Barring settings:
1. From the Services tab, select
Call Barring
Barring, then tap the G e t
Settings button. The screen
displays the Call Barring
settings.
2. Change the Call Barring settings
from this window, then tap .
The phone sends the new
settings to the network.
To change the Caller ID settings:
1. From the Services tab, select
Caller ID
ID, then tap the G e t
Settings button. The screen
displays the Caller ID settings.
2. Change the Caller ID settings
from this window, then tap .
The phone sends the new
settings to the network.
Chapter 5: Phone features
5-33
To change the Call Forwarding options:
1. From the Services tab, select
Call Forwarding
Forwarding, then tap the
Get Settings button. The
screen displays the Call
Forwarding settings.
2. Adjust the Call Forward settings
from this window, then tap .
The phone sends the new
settings to the network.
To change the Call Waiting settings:
1. From the Services tab, select
Call Waiting
Waiting, then tap the G e t
Settings button. The screen
displays the Call Waiting
settings.
2. Change the Call Waiting settings
from this window, then tap .
The phone sends the new
settings to the network.
5-34
P505 Smart PDA Phone
To change the Voice Mail and SMS settings:
1. From the Services tab, select
Voice Mail and SMS
SMS, then tap
the Get Settings button. The
screen displays the Voice Mail
and SMS settings.
2. Key-in the new SMS and Voice
Mail service center using the
soft keyboard, then tap .
The phone sends the new
settings to the network.
To change the network selection settings:
1. From the phone Settings
window, tap the Network
tab to display the network
settings.
NOTE
2. Select Automatic or Manual
from the Network selection
option, then tap .
It is recommended that you keep the N e t w o r k s e l e c t i o n
to automatic to keep you connected to your phone network.
Chapter 5: Phone features
5-35
To add ring tones in the ring tone selection:
1. From the phone Settings
window, tap the Ring Tone tab
to display available ring tones
you can add to the ring tone list.
2. Select the audio file format
(*.wav, *.mid, *.wma) from the
drop-down menu to display all
ring tones saved on that format.
3. To listen to a ring tone, select
the ring tone file from the list,
. Tap
to stop.
then tap
4. Tap the box preceding the ring
tone(s) to select and add the
tone to the ring tone list.
5. Tap the A d d button.
6. Tap
NOTE
5-36
when done.
Check if the selected ring tone was added to the ring tone list
by tapping the P h o n e tab from the Services window, then
tap the R i n g t o n e down arrow button to display.
P505 Smart PDA Phone
To enable fixed dialling:
1. From the phone Settings
window, tap the FDN Set tab
to display the fixed dial settings.
2. Check the option Enabled
Fixed Dial Number
Number.
3. When prompted, enter the PIN2
using the soft keyboard, then
tap Apply
Apply.
4. When you enter the correct
PIN2, you can modify, add, or
delete an entry in the Fixed Dial
List.
5. Tap
when finished.
Chapter 5: Phone features
5-37
SMSCB shows information about the cell location in which you are
registered.
To enable the SMSCB:
1. From the phone Settings
window, tap the SMSCB tab to
display the SMSCB settings.
2. Check the option Enable
SMSCB
SMSCB.
3. Select the SMSCB language from
the LANGUAGE list.
4. If you want to accept all SMSCB
channels, check the Accept All
Channels option.
The available channels are
displayed.
5. Tap the APPLY button.
5-38
P505 Smart PDA Phone
To create a new SMSCB channel:
1. From the SMSCB window, tap
NEW
W. A pop-up window
appears.
2. Use the soft keyboard to
enter the channel name and
number, then tap O K
K.
3. The created channel is
displayed in the SMSCB
window. Tap the box
preceding the channel to
activate.
Chapter 5: Phone features
5-39
Using other phone applications
The following sections provide information on how to use the
Conference
Conference, SIM Manager
Manager, and S T K applications. You can access
these applications by tapping , then tap Programs
Programs.
Conference call
The conference call feature of the P505 allows you to talk to up to
five parties simultaneously. The Conference application provides a
graphical conference presentation for easy use.
To start a conference call:
1. Tap , Programs
Programs, then tap
Conference
Conference.
2. Tap New Call
Call, then select the way
you want to contact the conference
call members.
OR
Tap and hold an empty seat, then
then select the way you want to
contact the conference call
members from the pop-up menu.
Refer to the next page for details.
5-40
P505 Smart PDA Phone
When you select:
Dial Number
Contacts
Call History
A phone keypad appears on
the left side of the screen.
Tap the phone number of the
conference call member, then
tap
to place the call.
The Photo Contacts window
appears. Tap and hold a
contact, then select C a l l
W o r k / H o m e / M o b i l e from
the menu.
The Call History window
appears. Tap and hold an
entry, then select C a l l from
the menu.
When connected, the party
becomes the first call
conference participant.
Chapter 5: Phone features
3. Call another conference
participant. When connected,
the participant is placed on hold
at the bottom of the screen.
5-41
4. Tap and hold the new participant,
then select Join Conference from
the menu.
or
Tap and hold the first conference
call participant, then tap Invite
Participant
Participant.
The participant is added to the
conference.
5. Follow steps 2 to 4 to call additional
conference participants.
5-42
P505 Smart PDA Phone
To talk privately to a conference call member:
1. Tap and hold the conference call
participant you want to talk with
privately, then select Leave
Conference from the menu.
2. The conference is put on hold, while
the selected member is placed at
the bottom of the screen.
You can now talk privately to the
connected participant.
3. To bring the participant back to the
conference, tap and hold the icon
then select Join Conference.
Otherwise, select Swap from the
menu to talk privately to the other
conference call participant or E n d to
terminate the conference call
participant.
Chapter 5: Phone features
5-43
To terminate a conference call member:
1. Tap and hold the member you want
to leave, then select E n d from the
menu. The selected member leaves
the conference call.
2. Tap and hold the remaining
member(s) to invite other
participants to the call.
To end a conference call:
1. Tap
from the Conference window. The Phone window appears.
2. Tap E n d to terminate the conference call.
5-44
P505 Smart PDA Phone
SIM Manager
The SIM Manager application allows you to:
• add, edit, or delete a SIM card contact information
• copy phone contact information to the SIM contacts
• manage SMS messages stored in the SIM card
To launch SIM Manager:
Tap , Programs
Programs, then tap the SIM Manager icon. The SIM
Manager screen appears.
Tap to select a
phone contact
Tap to delete contact
information
Tap to save contact
information to phone
Tap to select a
SIM card contact
Tap to save contact
information to SIM card
Tap to view SMS messages
stored in the PDA or SIM
card memory
Tap to add a new SIM
phone book entry
Tap to open
Contacts
Tap to exit
Tap to view additional
tools and options
The SIM Manager screen lists the Phone Contacts (upper section) and
the SIM Contacts (lower section).
NOTE
You can manage the phone contacts using the device
C o n t a c t s menu. See chapter 4 for details.
Chapter 5: Phone features
5-45
Copying phone and SIM contacts
With SIM Manager, you can copy contact information from your SIM
to the device Contacts and vice-versa.
To copy a contact from the SIM to the device:
1. Tap the box before the SIM
contact(s) you want to copy, then
tap .
OR
Tap and hold the SIM Contacts
section, then select an option from
the pop-up menu.
2. The screen displays the selected
contact(s). Tap C o p y
y.
3. A Copy Done window appears to
indicate that you have successfully
copied the SIM contact(s) to the device
to close the windows.
Contacts. Tap
5-46
P505 Smart PDA Phone
To copy a phone contact to the SIM:
1. Tap the box before the phone contact you want to copy.
2. Tap and hold the entry to display a
pop-up menu.
3. Select Copy Selected to SIM
Contacts
Contacts.
NOTE
After selecting a contact
information, you can also tap
to save the entry to the
SIM contacts.
4. When prompted, tap C o p y to copy
the contact information to the SIM
contacts. Otherwise, tap cancel to
return to the previous window.
The display returns to the SIM
Manager main window.
5. Check if the contact information is
copied to the SIM Contacts list.
IMPORTANT •
The SIM contacts can only store a contact name of up to
ten characters. A message appears when you attempt to
copy a long contact name to the SIM Contacts.
•
The number of contacts that can be stored on a SIM card
varies. Open the S I M I n f o from the O p t i o n s menu to
view the SIM memory and phone book status.
Chapter 5: Phone features
5-47
Creating a new SIM contact
To create a new SIM contact:
1. Tap Insert from the SIM Manager
main window. A Create SIM
Contact window appears.
2. Use the soft keyboard to enter the
name and telephone number of the
new contact, then tap Insert
Insert.
3. An Entry Added! message appears
indicating that you have successfully
created a new SIM contact.
4. Tap
to close the window.
The created contact is dissplayed in
the SIM Contacts list.
5. Follow the same instructions when
creating new SIM contacts.
5-48
P505 Smart PDA Phone
Managing SMS messages
While you can use the ASUS Menu to view incoming SMS messages,
the SIM Manager application allows you to view, copy, or delete SMS
messages stored in the SIM card memory.
To move an SMS message to the phone SMS inbox:
1. From the SIM Manager main window,
tap the S M S tab at the bottom of
the display.
A list of received SMS messages are
displayed.
2. Check the box before the message
you want to copy.
3. Tap and hold the message entry,
then select Copy Selected to
Phone SMS from the menu.
4. A Copy Done window appears
indicating that you have successfully
copied the SMS message to the phone
SMS inbox. Tap
to close the
window.
5. Tap the View Phone button to view the copied SMS message.
Chapter 5: Phone features
5-49
To delete an SMS message:
1. From the SIM Manager main window,
tap the S M S tab at the bottom of
the display.
A list of received SMS messages are
displayed.
2. Check the box preceding the
message you want to delete.
3. Tap and hold the message entry,
then select Copy Selected to
Phone SMS from the menu.
4. An SMS Delete Done window
appears indicating that you have
successfully deleted the SMS
message. Tap
to close the window.
5-50
P505 Smart PDA Phone
Viewing the SIM status
To view the SMS status
status::
1. From the SIM Manager main window,
tap Tools at the bottom of the
display, then select SIM Info
Info.
2. The window shows the available SIM
phone book and SMS storage,
maximum name and phone number
lenght, and the status of the PIN1
lock.
to close and return to the SIM
Tap
Manager main window.
Chapter 5: Phone features
5-51
STK (SIM Tool Kit)
The STK menu lists value-added services offered by your phone
operator. You can use this application to access or launch these
services.
NOTE
The value-added services may vary according to your phone
operator, location, and/or availability.
To launch STK:
1. Tap , then tap Programs
2. Tap the S T K icon. The STK screen appears.
3. Tap on a service to access or launch.
NOTE
5-52
The STK window shows blank when your phone operator has
no value-added services.
P505 Smart PDA Phone
Chapter 6
Messaging
features
This chapter teaches you how
to use the device to send MMS,
SMS, and e-mail messages.
Chapter summary
•
Messaging features ...................................... 6 - 3
Using the Messaging application ...................................... 6-3
Creating message accounts ............................................. 6-9
•
Multimedia Messaging Service (MMS) ............. 6 - 1 2
Composing an MMS message .........................................
Previewing the message ................................................
Creating and organising slides ........................................
Sending the MMS message .............................................
•
Short Message Service (SMS) ....................... 6 - 2 4
Opening the Text Messages account .............................
Creating text messages .................................................
Sending the text message .............................................
Changing the text message settings ..............................
•
6-24
6-25
6-29
6-30
E-mail ........................................................ 6 - 3 1
Synchronizing e-mail messages ......................................
Connecting directly to an e-mail server ..........................
Using the Inbox ..............................................................
Creating e-mail messages ..............................................
Sending the e-mail message ..........................................
6-2
6-12
6-17
6-19
6-21
6-31
6-31
6-33
6-35
6-40
P505 Smart PDA Phone
Messaging features
The P505 Smart PDA Phone allows you to send Multimedia Messaging
Service (MMS), Short Message Service (SMS), or e-mail messages to a
mobile phone or computer.
The device Messaging application integrates the MMS, SMS, and
e-mail message accounts in one simple interface. From this
application, you can manage, send, store, delete, and share e-mails,
texts, or multimedia messages.
Using the Messaging application
To launch Messaging:
1. Tap .
2. Tap Messaging
Messaging. The screen shows
the Inbox of one of the three
message accounts (MMS, Outlook
E-mail, and Text Messages)
The device shows one folder of
messages at a time. This may be the
Inbox, Outbox, Sent, etc. folder of
MMS, Outlook, a private e-mail
account, etc.
Tap to access the
MMS, Outlook E-mail,
or Text Messages
folders.
Tap to sort
messages
Message type
Tap to connect to
the network.
Tap to send or
receive
messages from
the network.
To move between folders and message types:
1. Tap on the folder name of the
current message(s) displayed (e.g.
Inbox, Sent, Deleted Items).
2. Tap on the name of the account you
want to view.
You may have to expand the folder,
by tapping on + , to see the
message types.
3. Tap
to close.
Chapter 6: Messaging features
Tap to close the
on-screen keyboard
6-3
To change the frequently used message text:
You probably use some phrases frequently in messages. Instead of
writing or entering this text each time, you can select the phrase
from a list of ten messages (called My Text). To see or change the
default text:
Messaging.
1. Tap , then tap Messaging
2. Tap Tools
Tools, then select Edit My
T e x tt.
3. Tap on the text you want to edit or
replace and edit the text displayed.
6-4
P505 Smart PDA Phone
To view e-mail account status:
1. Tap , then tap Messaging
Messaging.
2. Tap the folder name (top left) to
make sure that you are in an E-mail
folder.
Status.
3. Tap Tools
Tools, then select Status
4. View the account status. Press
return to the previous screen.
Chapter 6: Messaging features
to
6-5
To change the account options:
1. Tap , then tap Messaging
Messaging.
2. Tap the folder name (top left) to
make sure that you are in an E-mail
folder.
Options.
3. Tap Tools
Tools, then select Options
4. Select from the tabs at the
bottom of the screen to
change the account options.
Refer to the table below for
the tab description.
6-6
Tab
Allows you to
Accounts
Change, delete, view MMS, SMS, or E-mail accounts
Message
Change reply and other message options
Address
Set the default e-mail address list for the C o n t a c t s menu.
Storage
View the main/storage card memory status and empty the
deleted items folder of the selected account
P505 Smart PDA Phone
To change the MMS settings:
1. Tap , then tap Messaging
Messaging.
2. Tap the folder name (top left) to
make sure that you are in an MMS
folder.
3. Tap Tools
Tools, then select M M S
Settings
Settings.
4. Select a tab to display its contents.
Preferences
The Preferences tab allows you to:
• specify the MMS connection
• specify the MMS connection server
• limit the size of MMS sending
• set the number of send attempts
before aborting
• set the resolution of the photo
attached to an MMS mesage.
Click the down arrow button after each
item to display additional options. Tap
to effect the changes.
Chapter 6: Messaging features
6-7
Servers
The Servers tab allows you specify or change the server name,
gateway, server address, and the port number to use in receiving
MMS messages.
You can change these settings by tapping the item, then type the
new values using the soft keyboard. Tap the O K button to enter the
changes.
About
The About tab displays the MMS
Composer software infomation and
End User License Agreement.
6-8
P505 Smart PDA Phone
Creating message accounts
You may want to add further messaging accounts, for example, an
account for private POP3 or IMAP4 e-mail messages. To do this:
1. From the Messaging screen,
tap Accounts
Accounts, then select
New Account
Account.
2. Enter your e-mail address,
then tap N e x tt.
3. The device tries to
automatically configure the
account settings. If
successful, Completed
appears in the Status field.
Tap Next to continue.
Otherwise, tap Skip to
manually configure the
settings.
Chapter 6: Messaging features
6-9
4. When prompted, key-in your
name, user name, and
password in the fields. Tap
Next when finished.
5. Select the account type from
the drop-down menu. Refer to
the accounts description
below.
Accounts description
• If you select M M S
S, all MMS messages received are automatically
stored in the Inbox folder of the created account.
• If you select POP3 and you move e-mail messages to a folder you
created, the link is broken between the messages on the device
and their copies on the mail server. The next time you connect,
the mail server will see that the messages are missing from the
device Inbox and delete them from the server. This prevents you
from having duplicate copies of a message, but it also means that
you will no longer have access to messages that you move to
folders created from anywhere except the device.
• If you select IMAP4
IMAP4, the folders you create and the e-mail
messages you move are mirrored on the server. Therefore,
messages are available to you anytime you connect to your mail
server, whether it is from your device or desktop computer. This
synchronization of folders occurs whenever you connect to your
mail server, create new folders, or rename/delete folders when
connected.
6-10
P505 Smart PDA Phone
6. Type the account name on
the field, then tap Next when
finished.
NOTE
7. Enter the incoming, outgoing
mail, and domain in the fields.
If you are unsure on the server information, check with your
system administrator, Internet, and/or telephone operator.
8. Tap the Options button to adjust the advanced account
settings. Otherwise, tap Finish
Finish.
9. A Messaging window
appears. Tap Y e s to
download messages to the
created account. Otherwise,
tap N o to close the window.
10.Go to the Messaging main
screen, then tap Inbox to
display the created account.
11.Follow the same instructions
to create other accounts.
Chapter 6: Messaging features
6-11
Multimedia Messaging Service (MMS)
NOTE
You may have to subscribe to your phone operator’s MMS
service to send MMS messages. Contact you phone operator
for details.
Multimedia Messaging Service or MMS is a messaging feature that
allows you to send messages with text, audio, video, or animation
attachments to an MMS-enabled mobile phone or a computer with
e-mail capability. An MMS message is composed of one or many
slides. Each slide can contain a maximum of three objects (text,
audio, and photo or video file).
NOTE
The default maximum file size for an MMS message is 10 KB.
You may change the file size limit in the Preferences tab of the
MMS Settings menu. Your phone operator may limit the size of
the MMS message that you can send. See page 6-7 for details.
Composing an MMS message
To compose an MMS message:
1. Tap , then tap Messaging
Messaging.
2. Tap the folder name (top left)
to make sure that you are in an
MMS folder.
w.
3. Tap N e w
Tap to select
MMS account
Tap to compose new MMS message
6-12
P505 Smart PDA Phone
MMS message screen
Tap to place the text
above or below the photo
or video file.
Tap to navigate
through the slides
Tap to insert photo or
video clip
Tap to insert text
Tap to insert an audio file.
Tap to edit the message
Tap to open the MMS
tools menu.
Tap to preview the
message.
Tap to open the soft keyboard.
Tap to send MMS message.
To add a photo or video clip from Multimedia Album:
1. Tap the photo or video clip
field to open the Multimedia
Album window.
NOTE
2. Tap a photo or a video clip to
insert.
To change the inserted photo or video, tap on it, then select
another photo from the Multimedia Album.
Chapter 6: Messaging features
6-13
To edit an inserted photo:
1. Tap and hold the photo, then
select Edit from the pop-up
menu. The Multimedia Album
screen appears.
NOTE
2. Select a photo editing tool
from the Edit menu, then
edit the photo. When finished,
tap to return to the
messaging screen.
See page 7-30 for detailed information on editing photos
using the Multimedia Album application.
To add a photo or video clip saved elsewhere:
1. From the Multimedia Album,
tap V i e w
w, then Select a
Folder
Folder.
6-14
2. Locate the photo or video clip
folder, then tap O K
K.
P505 Smart PDA Phone
3. The Multimedia Album displays the
contents of the selected folder.
Select and tap a photo or video
clip to insert.
To add text to the MMS message:
1. Tap the text field. The soft
keyboard appears.
Chapter 6: Messaging features
2. Type the text using the input
panel, then press the input
panel icon when finished.
6-15
To add an audio clip to the MMS message:
1. Tap the audio clip field to
open the device My Sounds
folder.
NOTE
The audio clip automatically plays when selected. The
duration of the audio clip and the time elapsed are displayed
on the bottom right corner of the screen.
3. If the audio clip you want to
insert is in another folder, tap
My Sounds
Sounds, then select M y
Device.
6-16
2. Select the audio clip to insert,
then tap .
4. Locate the audio clip from the
folders, then tap to insert.
The audio clip is inserted to
the MMS message.
P505 Smart PDA Phone
Previewing the message
To preview the message:
1. After composing the MMS
message, tap to preview.
2. Tap to pause or
the preview.
to stop
To preview the message objects individually:
1. Tap Objects from the MMS
preview window to display the
message objects.
Chapter 6: Messaging features
2. Tap on an object to display.
You can sort the objects by
name or by file size by
tapping N a m e
e.
6-17
3. The screen displays the
selected object. Tap to
return to the Message
Objects window.
4. Do steps 2 to 3 to preview
another message object.
To reposition the text:
Tap the text alignment (top right of the screen), then select
Top-aligned Text or Bottom-aligned Text from the menu to
reposition the text.
6-18
P505 Smart PDA Phone
Creating and organizing slides
To add another slide:
1. Tap E d i tt, then select N e w
Slide from the menu. A new
MMS message slide window
appears.
2. Insert text, photo or video
clip, and audio file to the new
slide. Refer to the previous
section for details.
3. Preview the MMS slide following the instructions in the previous
section.
To delete a slide:
1. Tap the slide number (topleft), then select the slide you
want to delete.
Chapter 6: Messaging features
2. Tap E d i tt, then select Delete
Slide to delete.
6-19
To organize multiple slides:
1. Tap E d i tt, then select Organize
Slides from the menu. The screen
displays an icon of each slide.
2. Tap and hold a slide icon to display a
pop-up menu. Select an option to
move the slide forward or backward
in the slide sequence, or to delete.
3. Tap
6-20
when finished.
P505 Smart PDA Phone
Sending the MMS message
To send the MMS message to a mobile phone:
1. When you are ready to send the
MMS message, tap
to save and
send the message.
2. Enter the mobile phone number(s) of
the message recipient(s). If there are
two or more recipients, separate the
contact numbers with a semi-colon (;).
OR
Tap the To Phone button to view
your contacts. Tap the box before a
contact to select, then tap .
You can display the contacts in the
SIM card by tapping the S I M tab.
NOTE
The phone list displays only
the mobile phone numbers of
your contacts.
Chapter 6: Messaging features
6-21
3. Enter the message subject.
NOTE
4. Tap the Send button.
Hide the input panel to see the message information.
The outbox icon appears to
indicate that the MMS message is
being sent to the recipient(s).
6-22
P505 Smart PDA Phone
To send the MMS message to an e-mail address:
1. When you are ready to send the
MMS message, tap
to save
and send the message.
2. Enter the e-mail address(es) of
the message recipients. If there
are two or more recipients,
separate the e-mail address with a
semi-colon (;).
OR
Tap the To Email button to
view your contacts’ e-mail
addresses.
Tap the box before a contact to
select, then tap .
3. Enter the message subject.
NOTE
Hide the input panel to
see the message
information.
4. Tap the Send button.
The outbox icon appears to
indicate that the MMS message
is being sent to the recipient(s).
Chapter 6: Messaging features
6-23
Short Messag
e Service ((S
SMS)
Message
Short Message Service or SMS allows you to send text messages to
almost any mobile phone, e-mail, or even to a fax machine. In
Messaging
Messaging, you can manage SMS messages using the Text
Messages account.
Opening the Text Messages account
To open the Text Messages account:
1. Tap , then tap Messaging
Messaging.
2. Tap the folder name (top left) to
make sure that you are in an SMS
folder.
3. Tap N e w to compose a new SMS
message.
Tap to compose new SMS message
SMS main screen
Tap to select the
message recipient(s)
Tap to display the Cc:
and Bcc: fields
Tap to enter the
message subject
Message section
Character count
Tap to compose
new SMS message
Tap to open text
message tools
6-24
Tap to display the
phone contacts
Tap to insert preset
text messages
P505 Smart PDA Phone
Creating text messages
To compose a text message:
1. Tap the To: field to enter the
message recipient(s) manually,
or tap over To: to display the
contact list.
2. Enter the mobile phone
number or select from the
contact list.
3. Tap Subj: , then type the
SMS message subject.
4. Tap to display the C c : and
B c c : fields, then select the
recipients for these fields.
NOTE
Tap
to open, or
Chapter 6: Messaging features
to close the Cc: and Bcc: fields.
6-25
5. Tap the Account field down
arrow, then select T e x t
Messages
Messages.
6. Tap the message section,
then type the message using
the on-screen keyboard.
To insert a preset text
1. From the Text Message main
window, tap My Text
Text.
6-26
2. Select a preset message from
the list to insert.
P505 Smart PDA Phone
To use the spell check:
1. After composing the text
message, tap Tools
Tools, then select
Spell Check
Check.
2. The spell checker searches for
misspelled words, then displays
an alternative word list. Tap the
correct word to replace, or tap
Ignore to leave the word
unchanged.
3. A Spell Check window
appears when spell check is
complete. Tap to close.
Chapter 6: Messaging features
6-27
To compose a text message from the Phone
application:
1. Tap , then tap Phone
Phone.
2. Tap Tools
Tools, then select S e n d
Text Message
Message.
3. The Messaging window
appears. Follow the instructions
in the previous sections to
compose the message.
6-28
P505 Smart PDA Phone
Sending the text message
To send the text message:
1. When finished, tap Send to
send the text message to the
recipient(s).
Chapter 6: Messaging features
The SMS message icon
appears to indicate that the
SMS message is being sent to
the recipients.
6-29
Changing the text message settings
To change the text message options:
1. In the Messaging main
window, select the T e x t
Message account, tap
Tools
Tools, then select Options
Options.
2. Select a tab, then adjust the
settings accordingly. Tap
when finished.
See page 6-7 for details.
To change the SMS service center number:
1. In the Options window, tap
the Accounts tab, then tap
Text Messages
Messages.
NOTE
6-30
2. Tap the new SMS service
center number, then tap .
Contact your phone operator before changing the SMS
service center.
P505 Smart PDA Phone
E-mail
Send and receive e-mail messages by:
• synchronizing with Microsoft® Exchange or Microsoft® Outlook on
your desktop computer by cradle, infrared, or Bluetooth™.
• connecting directly with your Microsoft® Exchange/Outlook or
POP3/IMAP service using GPRS (contact your system
administrator, phone operator, or network provider for more
details).
Synchronizing e-mail messages
Once ActiveSync® has been installed on your desktop computer you
can link your desktop computer to your P505 using the cradle. You
can also use infrared or Bluetooth™, if your computer has these
capabilities. Each time you connect, the P505 and computer compare
e-mail content and synchronize, so you have the same information on
each device.
During synchronization:
• Messages are copied from the mail folders of Exchange or Outlook
on your desktop computer to the ActiveSync folder in Inbox on
your device. By default, you will receive messages from the past
five days only, the first 100 lines of each message, and file
attachments of less than 100 KB in size.
• E-mail messages in the Outbox folder on your device are
transferred to Exchange or Outlook, then sent by the computer.
• E-mail messages in subfolder must be selected in ActiveSync on
your desktop computer in order to be transferred.
NOTE
You can also synchronize e-mail messages with your desktop
computer from a remote location. Refer to the ActiveSync
help file.
You can change how messages are transferred, for example, transfer
all content or download messages from subfolders by changing the
appropriate settings in ActiveSync® on your desktop computer.
Connecting directly to an e-mail server
To send and receive messages using GPRS, you need to set up a
connection to the network and your e-mail or Internet service provider.
Chapter 6: Messaging features
6-31
When you connect to the e-mail server, new messages are
downloaded to the Outlook E-mail account’s Inbox folder,
messages in the device Outbox folders are sent, and messages that
have been deleted on the e-mail server are removed from the device
Inbox folder.
Messages that you receive directly from an e-mail server are linked to
your e-mail server rather than your desktop computer. When you
delete a message on your device, it is also deleted from the e-mail
server the next time you connect based on the settings you selected
in ActiveSync®.
You can work online or offline. When working online, you read and
respond to messages while connected to the e-mail server. Messages
are sent as soon as you tap S e n d
d, which saves space in your device.
When working offline, once you have downloaded new message
headers or partial messages, you can disconnect from the e-mail
server and decide which messages to download completely. The next
time you connect, Inbox downloads the complete messages you have
marked for retrieval and sends the messages you have composed.
6-32
P505 Smart PDA Phone
Using the Inbox
The messages you receive are displayed in the Inbox. By default, the
most recently received messages are displayed first in the list.
Tap to select the folder you wish to display
Tap to select the sort
order for the messages
Tap and hold to display a
pop-up menu of actions
Tap to connect, and to send/receive e-mail
Tap to connect to the selected service
Take note of the following icons that appear before each message:
Icon Indicates that the e-mail message
has already been read
with attachment(s) has already been read
has not been read
with attachment(s) has not been read
Chapter 6: Messaging features
6-33
When you receive a message, tap it to open. Unread messages are
displayed boldface.
Tap to return to the message
list
Tap to delete this message
Tap to reply to or forward this message
Tap to view the next message
Tap to view the previous message
You can mark the messages that you want to retrieve in full during
your next synchronization or e-mail server connection. In the
message list, tap and hold the message that you want to retrieve.
On the pop-up menu, tap Mark for Download
Download.
Tap to mark the e-mail message
6-34
P505 Smart PDA Phone
Creating e-mail messages
To open the e-mail account:
1. Tap , then tap Messaging
Messaging.
2. Tap the folder name (top left) to
make sure that you are in an E-mail
folder.
3. Tap N e w to create a new e-mail
message.
Tap to compose a new e-mail message
E-mail main screen
Tap to select the
message recipient(s)
Tap to display the Cc:
and Bcc: fields
Tap to enter the
message subject
Message section
Tap to edit the
e-mail message
Tap to open e-mail
message tools
Tap to insert
standard messages
Chapter 6: Messaging features
Tap to display the
phone contacts
6-35
To create a new e-mail message:
1. Tap the To: field to enter the
message recipient(s)
manually, or tap over T o : to
display the contact list.
2. Enter the e-mail address of
the recipient(s) using the onscreen keyboard or select
from the contact list.
3. Tap Subj: , then use the
on-screen keyboard to type
the message subject.
4. Tap to display the C c : and
B c c : fields, then select the
recipients for these fields.
NOTE
6-36
Tap
to display, or
to hide the Cc: and Bcc: fields.
P505 Smart PDA Phone
5. Tap the Account field down
arrow, then select Outlook
E-mail
E-mail.
6. Tap the message section,
then type the message using
the on-screen keyboard.
To insert a standard message
1. Tap in the message section at the point you want to insert the
standard message.
2. Tap My Text
Text.
Chapter 6: Messaging features
3. Select a standard message
from the list to insert.
6-37
To attach a file or recording to the e-mail message:
1. Tap Tools
Tools, then select
Add Attachment
Attachment.
2. Locate and tap the file you
want to attach. Otherwise,
tap Cancel to return to the
e-mail message.
3. The selected file is attached
to the message. Tap the
record icon in the command
bar to attach a recording.
4. Tap the record button ( ) to
start recording. Tap to stop
recording.
Tap to insert a recording
6-38
P505 Smart PDA Phone
Your recording is attached to
the message.
To check the spelling in the message:
1. After composing the text, tap
Tools
Tools, then select Spell
Check
Check.
2. The spell checker searches for
misspelled words, then
displays an alternative word
list. Tap the correct word to
replace, or tap Ignore to
leave the word unchanged.
3. A Spell Check window
appears when spell check is
complete. Tap to close.
Chapter 6: Messaging features
6-39
Sending the e-mail message
When finished, tap the S e n d
button to send the e-mail
message.
When you are using
ActiveSync® to send and
receive e-mail messages, the
message is saved in the
Outbox folder of the e-mail
account.
The message is sent to the
recipients when the device
synchronizes with your
computer.
6-40
P505 Smart PDA Phone
Chapter 7
Multimedia
features
This chapter introduces the
multimedia features of the
device including sections on
Camera, Multimedia Album, and
Pictures applications.
Chapter summary
•
Multimedia features ..................................... 7 - 3
•
Camera ....................................................... 7 - 3
Launching the Camera ..................................................... 7-3
Changing the camera settings ......................................... 7-6
Taking photos ................................................................ 7-11
Capturing video ............................................................. 7-17
Using the Camera in phone mode ................................... 7-19
Changing the settings in phone mode ............................ 7-20
Taking photos in phone mode ........................................ 7-20
•
Multimedia Album ....................................... 7 - 2 1
Launching the Multimedia Album ...................................
Finding files and customizing your view .........................
Managing photos and videos ..........................................
Editing photos ...............................................................
Saving photos ................................................................
Sharing photos ..............................................................
•
Pictures ..................................................... 7 - 4 6
Launching the Pictures ..................................................
Editing photos using Pictures .........................................
Starting a photo slide show ...........................................
Using the Tools menu ....................................................
Auto-launching Pictures .................................................
7-2
7-21
7-23
7-26
7-30
7-42
7-43
7-46
7-47
7-50
7-51
7-52
P505 Smart PDA Phone
Multimedia features
The P505 Smart PDA Phone comes with a rich selection of multimedia
applications that allows you to capture, edit, and share photos and
videos with other PDAs, next generation mobile phones, and
computers. The following sections describe these applications in
detail.
Camera
Your device comes with a built-in 1.3 megapixel camera that allows
you to take photos or capture videos whether the device is in PDA or
phone mode.
Launching the Camera
To launch Camera:
1.
2.
3.
4.
Tap
.
Tap Programs
Programs.
Tap the Camera icon.
The Camera screen appears.
Tap to display help information
Tap to close the
application
Preview area
Capture button
Storage information
Tap to change the
capture mode
Tap to change the
advanced camera settings
Tap to change to preview
area to landscape mode
Tap to open the Multimedia
Album
Tap to select or change the folder
where photos or videos are saved
Chapter 7: Multimedia features
7-3
Main panel
The main panel has the information
window and control buttons for
adjusting the camera settings. Refer to
the table below for button functions.
Button
What it does
Changes the capture mode
Captures the photo or video
Zooms the image in the preview area to 1x, 2x, or 4x
Turns the flash on or off
Adjusts the environment settings
Turns the shutter sound on or off
Changes the photo size and resolution
Selects the video capture file type
Storage location and indicator button
The information window displays the the shutter sound setting,
zoom level, storage status, and remaining images/video length time.
The indicator button turns green when the camera is in standby
mode. It turns red when the camera is capturing a photo or video, or
when saving the photo or video file to the SD/MMC card.
Indicator button
Storage location
NOTE
7-4
You can select or change the location where captured photos
. See page 7-9 for
or videos are to be saved by tapping
details.
P505 Smart PDA Phone
Button functions
The function of the following buttons changes when the device is in
camera mode.
Button
5-way joystick
Press
Down
Up
Center
Camera button
Once
To
Zoom out the subject
Zoom in the subject
Capture the photo or start video capture
Change the capture mode
Capture modes
The camera has six capture modes: Single Shot, MMS, Burst,
Composition, Video, and Caller ID. Some main panel buttons are
disabled when the camera is in a particular mode. Refer to the table
below for a description of each mode.
Capture Mode
ess
Description
Single Shot
Captures a photo, then saves it
to the device memory or SD/MMC card
MMS
Captures a photo/video, then inserts
it to an MMS message
Burst
Captures sequential photos in
fixed time interval
Active buttons
Composition Puts a frame design around
the photo before capture
Video
Captures video, then saves the
video file in the SD/MMC card
Caller ID
Captures a photo, then attaches
the photo to a contact for caller ID
Chapter 7: Multimedia features
7-5
Changing the camera settings
You can change the camera settings to capture sharper and clearer
photos. You can change the zoom level
level, environment settings
settings,
capture size
size, and resolution
resolution.
To change the zoom level:
When in Single Shot, MMS, Burst, Composition, or Caller ID modes, tap
the zoom button to adjust the zoom level. Refer to the table below
for zoom level information.
Level
What it does
Displays the subject as is (1:1)
Zooms the subject twice its size
Zooms the subject four times its size
TIP
You can also try to:
• move nearer to or further away from your subject if the zoom
level is very near or very far from the subject, or
•
increase the capture size and resolution.
To turn the flash on or off:
When in Single Shot, MMS, Burst, Composition, or Caller ID modes, tap
the flash button to turn the flash on or off depending on the lighting
condition of your capture environment.
Button
Means
The flash is on
The flash is off
7-6
P505 Smart PDA Phone
To change the environment settings:
When in Single Shot, MMS, Burst, Composition, or Caller ID modes, tap
the environment settings button to choose from nine preset settings
and effects. These settings enhance your photo by auto-detecting
the lighting condition, time, and place of capture. Refer to the table
below for the settings description.
Button
Environment
Setting
Use this setting
Auto
if you want the camera to automatically adjusts to
the current lighting conditions
Sun Light
when taking outdoor photos
Flourescent Light
when your subject is under artificial lighting
Candle Light
when the environment has poor lighting visibility
Beautiful Face
when taking close-up photos of human subjects
Landscape
when taking landscape, mountains, scenic photos
Sepia
to capture photos with vintage sepia finish
Night Scene
when taking night time photos
Negative Art
to apply a negative art effect on photos
To turn the shutter sound on or off:
When in Single Shot, MMS, Burst, Composition, or Caller ID modes, tap
the shutter sound button to turn the shutter sound on or off. When
on, the camera makes a shutter sound everytime you capture a
photo.
Button
Means
The shutter sound is on
The shutter sound is off
Chapter 7: Multimedia features
7-7
To change the photo size and resolution:
When in Single Shot, MMS, Burst, Composition, or Caller ID modes, tap
the photo resolution button to change the photo size and resolution.
Refer to the table below for photo size and resolution supported by
the capture modes.
Capture
Mode
Supported resolution (pixels)
960x1280
480x640
240x320
120x160
60x80
Single Shot
MMS
Burst
Composition
Caller ID
Video
To change preview orientation:
When in any capture mode, tap the orientation button
between portrait and landscape mode.
Portrait
7-8
to toggle
Landscape
P505 Smart PDA Phone
To change the storage location:
1. When in any capture mode, tap
the storage location button
to locate the folder where
captured photos and videos are
saved.
Current
storage
2. Select and tap the folder you
want the captured photos and
videos saved, then tap .
The information window displays the
selected storage location including
the number of captures you can
store using the current capture
mode.
Chapter 7: Multimedia features
7-9
To change the advanced camera settings:
1. When in any capture mode, tap the settings button
to open
the camera’s advanced settings window.
2. Adjust the contract, brightness, white balance, exposure, and
color tone from this window. Preview the changes through the
thumbnail displayed at the bottom left of the screen.
3. Tap OK when finished.
Slide to adjust the
capture contrast
Slide to adjust the
capture brightness
Tap to select a white
balance setting
Slide to adjust the
capture exposure
Tap a color tone
Sample preview
Tap to revert to the
default settings.
NOTE
7-10
Tap the D e f a u l t button to revert to the default settings.
P505 Smart PDA Phone
Taking photos
After learning the camera basics, you are now ready to capture
photos or videos.
To capture a single shot photo (Single Shot mode):
1. Put the device in camera mode, then set the camera capture
.
mode to Single Shot
2. Point the camera to your
subject, then adjust the camera
settings, if necessary.
3. When finished, tap
or press
the joystick to capture the
image.
4. A pop-up menu appears. Tap an
option to save, cancel, or send
the image via MMS or e-mail.
Refer to the table on the next
page for details.
NOTE
The device automatically
saves the image to the
specified location when
no option is selected
from the menu.
Chapter 7: Multimedia features
7-11
Option
Action
Keep
Saves the photo in JPG format (DSC_xxxx.jpg) to your
specified location, then returns the camera to active mode
Abort
Ignores the photo, then returns the camera to active mode
Send by MMS
Saves the photo as an MMS message object, exits the
Camera application, then opens the Messaging application
Send by E-mail
Saves the captured photo as an e-mail attachment, exits the
Camera application, then opens the Messaging application
5. When you select K e e p
p, a progress bar appears to indicate that
the capture is being saved.
NOTE
You can view the saved photo by tapping the M u l t i m e d i a
. See page 7-21 for details.
A l b u m button
6. The camera returns to active mode when you choose Keep or
Ignore
Ignore. The device launches the Messaging application if you
selected Send by MMS/E-mail
MMS/E-mail. Refer to the previous chapter
for more information on sending MMS and e-mail messages.
7-12
P505 Smart PDA Phone
To capture a photo for MMS message attachment
(MMS mode):
NOTE
You can also use the single shot mode pop-up menu to
automatically insert a captured photo to an MMS message.
See the previous section for details.
1. Put the device in camera mode,
then set the camera capture
.
mode to M M S
2. Point the camera to your
subject, then adjust the camera
settings, if necessary.
or
3. When finished, tap
press the joystick to capture the
image.
The device closes the Camera
application, then opens
Messaging
Messaging. The captured
photo appears in the
photo/video clip field.
4. Tap and hold the photo, then
select Edit or Remove from
the pop-menu. For details on
photo editing, see page 7-30.
5. Compose the MMS message
following the instructions on the
previous chapter, then send.
Chapter 7: Multimedia features
7-13
To capture multiple photos ( Burst mode)
mode)::
1. Put the device in camera mode, then set the camera capture
.
mode to Burst
2. Point the camera to your subject, then adjust the camera
settings, if necessary.
or
3. When finished, tap
press the joystick to start
capturing the images.
The camera captures ten
successive photos in fixed
intervals, then saves the photos
in the Multimedia Album.
The camera returns to active
mode when finished.
4. Tap the Multimedia Album
to view the captured
button
photos.
Refer to the Multimedia Album
section for details.
NOTE
7-14
The Burst Mode is best used when capturing action or
sequential photos.
P505 Smart PDA Phone
To add a frame to the photo ( Compostion mode)
mode)::
1. Put the device in camera mode,
then set the camera capture
.
mode to composition
2. The screen displays the available
frames. Tap a frame to select
and display in the preview
window.
Otherwise, tap Cancel to return
to the camera display.
3. Point the camera to your
subject, then adjust the camera
settings, if necessary.
4. When finished, tap
or press
the joystick to capture the
image.
5. Tap the Multimedia Album button
view.
Chapter 7: Multimedia features
, then locate the capture to
7-15
To add a photo to your contacts (Caller ID mode):
1. Put the device in camera mode,
then set the camera capture
.
mode to caller ID mode
2. Point the camera to the person,
then adjust the camera settings,
if necessary.
or press
3. When finished, tap
the joystick to capture the
image.
The ddevice closes the Camera
application, then opens Photo
Contacts
Contacts.
4. Select and tap the contact to
attach the captured photo.
The photo appears in the screen
everytime you place a call to or
receive a call from the contact.
NOTE
7-16
You can use the Photo
Contacts application to
remove or replace the
contact photo.
P505 Smart PDA Phone
Capturing video (Video mode)
The camera is capable of capturing video in ASF, 3GP, and MP4
formats and supports three capture resolutions.
To capture video:
1. Put the device in camera mode, then set the camera capture
mode to Video
.
2. Tap the video format button to select.
3. Tap the capture resolution
button to select. The preview
area changes when you select a
capture resolution.
4. When finished, point the camera
or
to the subject, then tap
press the 5-way joystick to start
capturing.
5. Tap
or press the 5-way
joystick to stop capturing. A
pop-up menu appears.
Tap to select the
capture resolution
Tap to select
the file format
6. To save the recording, tap Keep
Keep.
Otherwise, tap Abort to ignore.
To preview the recording, tap
Play
Play. The video capture plays on
screen.
Tap Send as E-mail to send
the video capture to an e-mail
recipient.
Chapter 7: Multimedia features
7-17
7. Open the Multimedia Album
application, then locate the
video capture file in the
specified folder.
8. Tap the video capture file to
preview. Pause or stop the
preview by tapping the
corresponding button on the
bottom of the screen.
NOTE
7-18
Refer to the Multimedia Album section for details on
previewing videos.
P505 Smart PDA Phone
Using the Camera in phone mode
NOTES
When using the Camera application in phone mode:
•
The preview area is fixed at 240x180 pixels.
•
The display does not support landscape mode. You must
set the preview orientation to P o r t r a i t mode before you
close the flip.
To launch Camera when the flip is open:
Programs, then tap the Camera icon.
1. Tap , Programs
OR
Press the camera button at the left side of the device.
2. The Camera capture screen appears. Close the flip to display the
capture screen in phone mode. Refer to the illustration below.
To launch Camera when the flip is closed:
Press the camera button on the left side of the device.
Camera screen in phone mode
Zoom level
Storage location and
remaining memory
Displays the capture mode
and flash status
Capture mode icon
Flash icon
Chapter 7: Multimedia features
Environment settings icon
7-19
Changing the settings in phone mode
You can the camera settings when in phone mode using the joystick,
side buttons, and the phone keypad buttons.
Settings
Capture mode
Flash
Environment
Zoom
Can be changed by
pressing the c a m e r a b u t t o n located on the side of the
PDA. The capture mode is set to Single Shot by default.
Press the camera button once to change to MMS mode,
press twice to Burst mode, and so on. The screen briefly
displays the selected capture mode.
pressing the r e c o r d b u t t o n located on the side of the
PDA. The flash turns on or off when you press the record
button. The screen briefly displays the flash status.
pressing the v o i c e c o m m a n d on the side of the PDA. The
camera is set to Auto by default. Press the voice command
button once to change to Outdoor setting, press twice to
Flourescent setting, and so on.
pressing
or by pressing the 5-way joystick up/down
(landscape) or left/right (portrait).
You can adjust other camera settings when the camera application is
opened while in PDA mode.
Taking photos in phone mode
1. Select the capture mode by pressing the camera button located
on the right side of the device.
2. Adjust the camera settings, if necessary, then point the camera
to your subject. See the previous section for details on changing
the camera settings.
3. Press the 5-way joystick to start capturing. For video captures,
press the 5-way joystick to stop recording.
4. Depending on the capture mode, the camera:
• saves the photo or video in the specified folder (Single Shot,
Burst, Composition, and Video modes). To view the capture,
open the flip, then launch the Multimedia Album application.
• instructs you to open the flip, then launches the Messaging
application (MMS mode), or Photo Contacts application
(Caller ID mode).
7-20
P505 Smart PDA Phone
Multimedia Album
The Multimedia Album application allows you view, edit, and manage
multimedia files, including stock and captured photos, videos,
animations, and clips.
Launching the Multimedia Album
To launch Multimedia Album from Today screen:
1. Tap
.
2. Tap Programs
Programs.
3. Tap the Multimedia Album
icon to open the application.
To launch Multimedia Album from the ASUS Menu:
NOTE
Make sure that the ASUS Menu is activated. Refer to
Chapter 5 for details.
1. Open the phone flip to display
the ASUS Menu. If the ASUS
Menu does not display, tap the
ASUS logo in the Today screen.
2. Tap the Multimedia Album
icon to open the application.
Chapter 7: Multimedia features
7-21
To launch Multimedia Album from Camera:
Tap the Multimedia Album
button
on the bottom of the
screen.
Multimedia Album main screen
Tap to select another
folder or location
Tap to sort the files by
name, date, size, or type
Tap and hold a file to
display a pop-up menu
Tap to select the file
Tap to start a slideshow
of the files
Tap to open the Camera
Tap to change the
viewing settings
Tap to select a file, view the
options, and application information
NOTE
7-22
By default, the Multimedia Album main screen displays the
photos and videos saved in the M y A l b u m folder.
P505 Smart PDA Phone
Finding files and customizing your view
To find your photos or video clips:
1. If the file you want to view or
edit is not on the list, tap S h o w
or My Album then select
another location (Flash Disk or
SD Card).
The screen shows the contents
of the selected location.
2. If the file you want to view or
edit is in another folder, tap
View
w, then tap Select a
Folder to display all other
folders.
3. Locate the file. The lower
section of the screen shows the
media files inside the selected
folder.
4. After selecting the folder, tap
the O K button to display the
contents in the main screen.
Chapter 7: Multimedia features
7-23
To view a thumbnail of the files:
1. Tap View
View, then Thumbnails
Thumbnails.
The files are displayed based
on your thumbnail settings.
7-24
2. Select and tap a thumbnail
setting from the pop-up menu.
3. Tap V i e w
w, then select S h o w
Name Under Thumbnails
to display the file names.
P505 Smart PDA Phone
To view a file list:
Tap V i e w
w, then L i s tt.
Chapter 7: Multimedia features
The screen displays a list of
the files.
7-25
Managing photos and videos
To delete photos or videos:
1. Tap and hold a file to display
a pop-up menu.
2. Select Delete this Media
Media.
3. Tap O K when a confirmation
window appears to delete the
selected file.
To delete multiple photos or video files:
1. Check the box at the bottom
left corner of the files you
want to delete.
NOTE
7-26
If you want to delete
all photos and video
files in a folder, tap
T o o l s , then select
Check All Media
to select all files.
P505 Smart PDA Phone
2. Tap Tools
Tools, then select
Delete Checked Media
from the pop-up menu.
3. Tap O K when a confirmation
window appears to delete the
files.
To move photos and videos to another folder:
1. Check the box at the bottom
left corner of the files you
want to move to another
location.
Chapter 7: Multimedia features
2. Tap Tools
Tools, then select
Rename/Move Media from
the pop-up menu.
7-27
3. Select the folder and location
where you want the files moved.
to move the files.
4. Tap
Otherwise, tap Cancel to return
to the previous screen.
To rename a photo or video file:
1. Check the box at the bottom
left corner of the file you
want to rename.
7-28
2. Tap Tools
Tools, then select
Rename/Move Media from
the pop-up menu.
P505 Smart PDA Phone
3. Enter the new file name using
the soft keyboard.
Select a new folder and location
if you want to move the file
after renaming it, then click .
4. Display the file names by
tapping View > Show
Name Under Thumbnails
to view the new file name.
To view a file information:
1. Tap and hold a file, then
select Information from the
pop-up menu.
3. Tap
2. The screen displays the file
information including name.
format, size, depth, etc.
to close the window and return to the previous screen
Chapter 7: Multimedia features
7-29
Editing photos
The Multimedia Album comes with several photo editing features that
lets you:
• rotate, flip, crop, and warp photos
• add text, sounds, and cliparts to photos
• create funhouse photos and photo greetings
Before you can edit a photo, you must tap a photo file to display.
Current zoom level
Preview window
Tap to view the
photo editing menu
Tap to adjust the view setting
Tap to open picture tools
Tap to display the previous photo
Tap to display the next photo
Tap to delete the file
Tap to display the file
information
Tap to zoom out
Tap to zoom in
To rotate or flip a photo
1. Tap E d i tt, then tap
Rotate/Flip/Crop
Rotate/Flip/Crop.
7-30
P505 Smart PDA Phone
2. Tap the corresponding button to rotate or flip the photo.
Refer to the illustrations below.
Tap to crop photo
Tap to rotate the photo
counterclockwise
Tap to flip photo
horizontally
Tap to flip the photo
vertically
Tap to rotate the photo
clockwise
Rotate
counterclockwise
Rotate
clockwise
Chapter 7: Multimedia features
Flip vertical
Flip
horizontal
7-31
To crop a photo:
1. Tap Edit
Edit, then select
Rotate/Flip/Crop from the
pop-up menu.
2. The application prompts you
to specify the crop area with
the stylus. Tap to continue.
3. Drag the stylus over the area
you wish to retain after
cropping.
4. Tap to crop the photo,
then tap Tools to save.
NOTE
7-32
If you want to revert to the original photo after cropping, tap
T o o l ss, then select R e v e r t t o S a v e d from the pop-up menu.
P505 Smart PDA Phone
To warp a photo:
1. Tap E d i tt, then select W a r p
from the pop-up menu.
2. Tap W a r p
p, then choose the
warping size.
3. Drag the stylus over the area
you want to warp. For
example, start from the
center of the lioness’ lip up
towards the chin.
4. Warp other areas of the
photo as desired, then tap
Tap Tools to save.
NOTE
.
If you want to revert to the original photo after warping, tap
T o o l ss, then select R e v e r t t o S a v e d from the pop-up menu.
Chapter 7: Multimedia features
7-33
To add a recording to a photo:
1. Tap Edit
Edit, then select Edit
Sound from the pop-up menu.
The recording bar appears at
the bottom of the screen.
Recording slider
Play button
Stop button
Record button
Rewind
Fast forward
2. Tap the record button to
start recording. Tap the stop
button to stop recording.
NOTE
4. Tap
7-34
3. When finished, play the
recording by tapping the play,
rewind, or fast forward buttons
on the recording bar.
Make sure to place the audio source near the device
microphone to achieve clearer recordings.
to save the recording.
P505 Smart PDA Phone
To add a drawing to a photo:
1. Tap E d i tt, then select D r a w
from the pop-up menu.
2. Tap the line weight button,
then select from the list.
3. Tap the line color button to
select the line color. Tap the
color of choice.
4. Use the stylus to draw objects
or texts over the photo, then
tap Tools to save.
NOTE
If you want to revert to the original photo after drawing, tap
T o o l ss, then select R e v e r t t o S a v e d from the pop-up menu.
Chapter 7: Multimedia features
7-35
To add texts to a photo:
1. Tap E d i tt, then select A d d
T e x t from the pop-up menu.
2. Use the on screen keyboard
to type the text, then tap .
3. The text is inserted in the
photo. Tap to change the
text font, size, color, and
style.
4. Change the text settings from
this window, then tap to
save the changes.
Tap to underline text
Tap to italicised text
Tap to boldface text
7-36
P505 Smart PDA Phone
5. Move the text block to the
desired location, then tap .
NOTE
6. To add another text block,
tap T e x tt, then tap Add New
Text from the pop-up menu.
Follow the same instructions
to insert another text block.
If you want to edit the inserted text, tap T e x tt, then select
E d i t C u r r e n t T e x t to display the Add/Edit Text window.
Edit the text using the on screen keyboard, then tap
.
To add a clipart to a photo:
1. Tap E d i tt, then select A d d
Clip Art from the pop-up
menu. The cliparts appear.
Chapter 7: Multimedia features
2. Select and tap a clipart to
insert.
7-37
NOTE
The Multimedia Album comes with two clipart categories:
e m o t i c o n s and f u n c l i p ss. You can switch categories by
tapping the clipart category displayed on the top left corner
of the display.
3. Tap emoticons
emoticons, then select
fun clips to change the
clipart directory. Select and
tap a clipart to insert.
4. The clipart appears over the
photo. Drag the clipart to the
desired location using the stylus.
Tap to save the changes.
Tap to rotate the
clipart clockwise
Tap to rotate the clipart
counterclockwise
5. Tap Clip Art to add a new
clipart, change or delete a
selected clipart, or arrange
the clipart position.
7-38
P505 Smart PDA Phone
To add a Funhouse effect to a photo:
1. Tap E d i tt, then select
Funhouse from the pop-up
menu. The Bobble heads
effects appear.
NOTE
2. Select and tap a Bobble head
effect you want to apply to
the photo.
The Multimedia Album comes with two Funhouse categories:
B o b b l e h e a d s and F u n G a m e ss. You can switch categories
by tapping the category displayed on the top left corner of
the screen.
3. Select and tap the Funhouse
effect you want to apply to
the photo.
Chapter 7: Multimedia features
4. Adjust the photo size, angle,
and position to match the
effect.
7-39
5. Tap Template to change the
Funhouse effect. Select
another effect to apply.
6. When finished, tap
the changes.
to save
To create a photo greeting:
1. Tap E d i tt, then select Photo
Greeting from the pop-up
menu. The Photo Greeting
frames appear.
NOTE
7-40
2. Select and tap a frame you
want to apply to the photo.
The Multimedia Album comes with two Photo Greeting
categories: J u s t f o r F u n and O c c a s s i o n ss. You can switch
categories by tapping the Photo Greeting category displayed
on the top left corner of the display.
P505 Smart PDA Phone
3. After changing categories,
select and tap a frame you
want to apply to the photo.
4. Adjust the photo size, angle,
and position to match the
frame.
5. Tap Template to change the
Photo Greeting frame. Select
another frame to apply.
6. When finished, tap
the changes.
to save
Chapter 7: Multimedia features
7-41
Saving photos
To save the photo:
1. Tap Tools
Tools, then select S a v e
Picture As from the pop-up
menu. The Save As window
appears.
2. Use the on-screen keyboard
to type a file name for the
photo.
3. Select the folder and location
where you want to save the
photo.
4. Select the photo file type.
You can save a photo in .jpg
(JPEG) or .bmp (Bitmap)
format.
5. Tap O K to save the photo.
7-42
P505 Smart PDA Phone
Sharing photos
The Multimedia Album lets you share photos with other devices using
infrared and Bluetooth®, next generation mobile phones via MMS and
GPRS, and notebooks and desktop computers via e-mail.
To send a photo via MMS:
1. From the Multimedia Album
main screen, tap a photo to
display.
2. Tap Tools
Tools, then select
Send via MMS from the
pop-up menu. The
Messaging window appears.
3. The photo becomes an MMS
object. Compose the MMS
message following the
instructions in Chapter 6.
4. When finished, send the MMS
message.
Chapter 7: Multimedia features
7-43
To send a photo via e-mail:
1. From the Multimedia Album
main screen, tap a photo to
display.
2. Tap Tools
Tools, then select
Send via E-mail
E-mail. The
Messaging window appears.
3. The photo becomes an e-mail
attachment. Compose the
e-mail message following the
instructions in Chapter 6.
4. When finished, send the
e-mail message.
7-44
P505 Smart PDA Phone
To send a photo via e-mail:
1. From the Multimedia Album
main screen, tap a photo to
display.
2. Tap Tools
Tools, then select
Beam Picture from the
pop-up menu.
3. The device searches for the IR
port of the recipient’s device
Beam the photo following the
instructions in Chapter 10.
Chapter 7: Multimedia features
7-45
Pictures
The Windows® Pictures application allows you view, manage, and
create slideshows from photos saved in the device.
Launching Pictures
To launch Pictures:
1. Tap
.
2. Tap Programs
Programs.
3. Tap the Pictures icon to open the application.
Pictures main screen
Tap to select another
folder or location
Tap to sort the files by
name, date, size, or type
Tap and hold a file to
display a pop-up menu
Tap to access the
application options
Tap to start a slideshow
NOTE
7-46
Tap to display the pictures
saved in the My Pictures
folder
Tap to display the pictures
saved in the SD card
By default, the Pictures main screen displays the photos
saved in the M y P i c t u r e s folder.
P505 Smart PDA Phone
Editing photos using Pictures
To adjust the photo brightness and contrast:
1. From the Pictures main
screen, tap a photo to display,
tap E d i tt, then tap
Brightness and Contrast
Contrast.
2. Adjust the photo brightness
and contrast by tapping the
appropriate buttons.
Decrease brightness
Increase brightness
Decrease contrast
Increase contrast
3. When finished, tap Done to
save your changes.
Chapter 7: Multimedia features
7-47
To rotate the photo:
1. From the Pictures main
screen, tap a photo to display.
2. Tap the rotate button to
rotate the photo 90º
counterclockwise.
Tap to rotate
3. Tap
to save the changes.
To rotate the photo:
1. From the Pictures main
screen, tap a photo to display,
then tap the crop button.
2. Use the stylus to select the
photo area you want to retain
after cropping.
Crop button
7-48
P505 Smart PDA Phone
3. When prompted, tap inside
the crop to crop the photo.
4. The screen displays the
cropped photo. Tap to save
the changes.
To zoom in/out a photo:
1. From the Pictures main
screen, tap a photo to display,
then tap the zoom button.
Tap to zoom in/out
NOTE
2. From the zoom navigator
window, tap the zoom in or out
button to magnify the photo.
Zoom out
Zoom in
Fit in screen view
Use the stylus to drag the red square inside the navigator
window to the area you want to zoom.
Chapter 7: Multimedia features
7-49
Starting a photo slide show
To adjust the slide show settings:
1. From the Pictures main screen,
tap Tools
Tools, then tap Options
Options.
2. Tap the Slide Show tab to
display the slide show settings.
3. Adjust the slide show settings from this window, then tap
effect your changes.
to
To start a photo slide show:
1. From the Pictures main
screen, tap the slide show
button to begin the slide
show.
7-50
P505 Smart PDA Phone
2. During the slide show, tap the
screen to display the slide
show control buttons. Refer
to the illustration below for
the button description.
Change
orientation*
Play slideshow
Pause slide show
Stop slideshow
Next photo
Previous photo
* Portrait or landscape
Using the Tools menu
The Tools menu allows you to share photos via e-mail or beam, set
the photo as wallpaper, or revert to the original photo.
To access the Tools menu:
1. From the Pictures main screen,
tap a photo to display, then
Tools
Tools.
Chapter 7: Multimedia features
2. Select from the available
options, then follow screen
instructions to continue.
7-51
Auto-launching Pictures
You can auto-launch Pictures everytime you insert a digital camera
SD/MMC card to the device.
To auto-launch Pictures:
1. From the Pictures main screen,
tap Tools
Tools, then tap Options
Options.
3. Tap
7-52
2. Tap the General tab, then
check the option Detect
digital camera storage
cards
cards.
to save your settings.
P505 Smart PDA Phone
Chapter 8
Using companion
applications
This chapter includes basic
information on how to use
Pocket Word, Pocket Excel,
MSN Messenger, Windows
Media Player for Pocket PC, and
Voice Commander.
Chapter summary
•
Companion applications ................................ 8 - 3
•
Pocket Word ............................................... 8 - 3
Creating Pocket Word documents .................................... 8-3
Modes of entering information ......................................... 8-4
Saving Pocket Word documents ...................................... 8-8
Opening an existing Pocket Word document .................. 8-10
•
Pocket Excel .............................................. 8 - 1 1
Creating Pocket Excel spreadsheets ..............................
Saving Pocket Excel spreadsheets .................................
Securing your Excel spreadsheet ...................................
Tips for working in Pocket Excel .....................................
•
8-11
8-12
8-14
8-16
MSN Messenger .......................................... 8 - 1 7
Signing up ...................................................................... 8-18
Working with contacts ................................................... 8-19
Chatting with contacts .................................................. 8-20
•
Windows Media Player for Pocket PC ............. 8 - 2 1
•
Voice Commander ....................................... 8 - 2 3
Changing the Voice Commander settings ......................
Creating voice tags ........................................................
Digit training ..................................................................
Adjusting the advanced settings ...................................
Using the Voice Commander ..........................................
8-2
8-23
8-24
8-26
8-28
8-29
P505 Smart PDA Phone
Companion applications
The companion applications consist of Microsoft® Pocket Word,
Microsoft® Pocket Excel, MSN Messenger, Windows Media™ Player for
Pocket PC, and Voice Commander.
To switch to a companion program on your device, tap , then select
Programs
Programs. Tap the icon of the program that you want to open.
Pocket Word
Pocket Word works with Microsoft® Word on your desktop computer
to give you easy access to copies of your documents. You can create
new documents on your device, or you can copy documents from
your desktop computer to your device. Synchronize documents
between your desktop computer and your device so that you have
the most up-to-date content in both locations.
Use Pocket Word to create documents, such as letters, meeting
minutes, or trip reports.
Creating Pocket Word documents
To create a new Word document:
1. Tap , tap Programs
Programs, tap
Pocket Word to launch the
application.
If you have existing Microsoft®
Word or Pocket Word
documents in your device, a
list of the documents appears.
Chapter 8: Using companion applications
8-3
2. Tap N e w to display a blank document.
NOTE
Tap on T o o l ss, then O p t i o n s to change the format of blank
documents.
3. Use any of the input modes to enter your text. Refer to the
section “Modes of entering information” for details.
Tap to save and close your document
Type your text here
Formatting toolbar
Tap to select an input method
Tap to show or hide
the formatting toolbar
Tap to show or hide
the input panel
Modes of entering information
You can enter information in Pocket Word in one of four modes
(typing, writing, drawing, or recording), which are displayed on the
View menu. Each mode has its own toolbar that you can show or
hide by tapping the Show/Hide Toolbar button on the command
bar.
If you are opening a Word document created on a desktop computer,
select Wrap to Window on the View menu so that you can see
the entire document.
To change the zoom magnification:
1. Tap V i e w
w, then tap Z o o m
m.
2. Select your desired percentage.
Select a higher percentage to enter text and lower one to see
more of your document.
8-4
P505 Smart PDA Phone
Typing Mode
Using the input panel, enter typed text into the document. For more
information on entering typed text, see Chapter 2.
To find and replace text:
1. Highlight the text you wish to change by dragging the stylus
across the text.
2. Press the Back bar to remove
the text and enter new text.
OR
Tap Edit > Find/Replace.
3. Tap Replace or F i n d
d, then
follow screen instructions to
continue.
Chapter 8: Using companion applications
8-5
Writing mode
In writing mode, use your stylus to write directly on the screen. Ruled
lines are displayed as a guide, and the zoom magnification is greater
than in typing mode to allow you to write more easily. For more
information on writing and selecting writing, see Chapter 2.
Write your text here
Click on the Space button, then tap on the
screen at the point at which you want to
insert space, dragging the arrow that
appears to move to the text to a new line.
Space button
Tap to show or hide the
writing/formatting toolbar
Pen button
Tap to wrap text to screen
Tap to display zoom percentages
Tap to display the menu
NOTE
8-6
•
If you cross three ruled lines in a single stylus stroke, the
writing becomes a drawing, and can be edited and
manipulated as described in the next section.
•
Written words are converted to graphics (metafiles) when
a Pocket Word document is converted to a Word
document on your desktop computer.
P505 Smart PDA Phone
Drawing mode
In drawing mode, use your stylus to draw on the screen. Gridlines
appear as a guide. When you lift your stylus off the screen after the
first stroke, you will see a drawing box indicating the boundaries of
the drawing.
Every subsequent stroke within or touching the drawing bounding box
becomes part of the drawing. For more information on drawing and
selecting drawings, see Chapter 2.
Resize an object by
dragging the selection
handles
Tap to select the formatting options
Drawing toolbar
Tap to show or hide the drawing toolbar
Tap an arrow to display the options
Pen button
Recording mode
In recording mode, you can embed
a recording into your document.
Recordings are saved as . w a v
files. For more information on
recording, see Chapter 2.
Embedded
recording
Chapter 8: Using companion applications
8-7
Saving Pocket Word documents
To save a Pocket Word document:
When you have finished editing
your document, tap .
NOTE
If you do not specify a
file name for the
document using the
steps below, then the
first line of the
document is used as
the file name.
To name a file:
1. With the document open, tap
Tools
Tools.
2. From the pop-up menu, tap
File
e, then tap S a v e
Document As... option. The
Save As window appears.
8-8
P505 Smart PDA Phone
3. Change the file name by typing
a new one in the Name field.
4. Tap the down arrow in the
Folder field to select a folder
where you want to save the file.
5. Tap the down arrow in the T y p e
field to select a file format.
You can save the document you
create or edit in a variety of file
formats including:
• Pocket Word Document (.psw)
• Rich Text Format (.rtf)
• Plain Text (.txt)
• Word 97/2000 Template
• Word 97/2000 Document
6. Tap the down arrow in the
Location field to indicate the
location of your saved file, either in the main memory of your
device, or in a storage card, if available.
7. Tap O K when done.
To change a file name:
1. Hold the stylus down on the name of the file in the document list,
then select Rename/Move from the pop-up menu.
2. Enter the new name of the file, then tap
Chapter 8: Using companion applications
.
8-9
Opening an existing Pocket Word document
Pocket Word contains a list of the files stored on your device. Tap a
file in the list to open. To delete, make copies of, and send files, tap
and hold a file in the list, then select the appropriate action on the
pop-up menu.
Tap to select the folder you want to display
Tap to change the sort order of the list
Tap to open a document; tap and hold
to display a pop-up menu
Tap an option from the pop-up menu
Tap to change document settings
Tap to create a new document
NOTE
8-10
You can open only one Pocket Word document at a time;
when you open a second document, you are required to save
the first.
P505 Smart PDA Phone
Pocket Excel
Use Pocket Excel to create spreadsheets such as expense reports and
mileage logs. You can transfer spreadsheets between your device and
desktop computer and vice versa. You can also synchronize
spreadsheets between your desktop computer and your device so
that you have the most up-to-date contents in both locations.
Pocket Excel contains a list of the files stored on your device. Tap a
file in the list to open. To delete, make copies of, and send files, tap
and hold a file in the list, then select the appropriate action on the
pop-up menu.
Pocket Excel provides basic spreadsheet tools such as formulas,
functions, sorting, and filtering. To display the toolbar, tap V i e w
w,
then tap Toolbar
Toolbar.
NOTE
Some Excel spreadsheets may be too complex for viewing and
editing in Pocket Excel.
Creating Pocket Excel spreadsheets
To create a new spreadsheet:
1. Tap , tap Programs
Programs, tap
Pocket Excel
Excel.
NOTE
You can open only one Pocket Excel spreadsheet at a time;
when you open a second spreadsheet, you will be asked to
save the first.
Chapter 8: Using companion applications
8-11
2. Tap N e w to display a blank spreadsheet.
If you selected a template for new spreadsheet in the Options
dialog box, that template appears with the appropriate text and
formatting already provided.
3. A blank spreadsheet appears. Enter texts, numbers, and formulas
using the soft keyboard and the application buttons.
Tap to save and close your spreadsheet
Cell contents appear here as you type,
or when you select the cell
Tap to navigate spreadsheets
Tap to auto-sum selected cells
Formatting toolbar
Tap to select an input method
Tap to show or hide
the formatting toolbar
Tap to show or hide
the input panel
Saving Pocket Excel spreadsheets
To save an Excel spreadsheet:
1. When you have finished editing
your spreadsheet, tap .
8-12
P505 Smart PDA Phone
2. By default, your spreadsheet
will be saved with the file name
Book1
Book1. You can change the
file name to one that is more
descriptive of your document.
See next section for saving
options.
To specify save options:
1. With the spreadsheet open,
tap Tools
Tools.
2. From the pop-up menu, tap
File
e, then tap S a v e
Workbook As... to display
the Save As screen.
3. Change the file name by simply
typing a new one in the N a m e
field.
4. Tap the down arrow in the
Folder field to select a folder
where you wish to place the file.
5. Tap the down arrow in the T y p e
field to select a file format.
You can save the spreadsheet you
create or edit in a variety of
formats:
• Pocket Excel Workbook (.pxl)
• Pocket Excel 1.0 Workbook (.xls)
• Pocket Excel Template
• Excel 97/2000 Workbook
• Excel 97/2000 Template
Chapter 8: Using companion applications
8-13
6. Tap the down arrow in the
Location field to indicate the
location of your saved file,
either in the main memory of
your device, or in a storage
card, if available.
7. Tap O K when done.
NOTE
If you do not wish to save your spreadsheet to a different
format, but would like to change the file name, folder, and
location of your document, simply tap and hold the file from
the File Explorer window, then tap R e n a m e / M o v e . . . from
the pop-up menu to make your changes.
Securing your Excel spreadsheet
If your spreadsheet contains sensitive or confidental information, you
can protect it with a password.
To set a password for your spreadsheet:
1. Open the spreadsheet.
2. Tap Edit from the command
bar, then tap Password... to
display the password setting
screen.
8-14
P505 Smart PDA Phone
3. Type a password in the
Password field.
4. Re-type the password in the
Verify Password field.
5. Tap
when done.
If you have set a password for your
spreadsheet, a password screen appears
asking you to type your password
whenever you try to open the file.
Type your password, then tap O K
K. If
you type in a wrong password, a
message appears telling you so.
NOTE
DO NOT forget your password! You cannot open your
spreadsheet unless you type in the correct password.
Chapter 8: Using companion applications
8-15
Tips for working in Pocket Excel
Take note of the following when working in large spreadsheets in
Pocket Excel:
• View in full-screen mode to see as much of your spreadsheet
as possible. Tap V i e w
w, then tap Full Screen
Screen. To exit full-screen
mode, tap Restore
Restore.
• Show and hide window elements. Tap V i e w
w, then tap the
elements to show or hide.
• Freeze panes on a spreadsheet. First select the cell where
you want to freeze panes. Tap V i e w
w, then tap Freeze Panes
Panes.
You might want to freeze the top and leftmost panes in a
spreadsheet to keep row and column labels visible as you scroll
through a sheet.
• Split panes to view different areas of a large spreadsheet. Tap
View
w, then tap Split
Split. Drag the split bar to where you want it. To
remove the split, tap V i e w
w, then tap Remove Split
Split.
• Show and hide rows and columns. To hide a row or column,
select a cell in the row or column that you want to hide. Tap
Format
Format, then tap R o w or Column
Column, and tap H i d e
e. To show a
hidden row or column, tap Tools
Tools, then tap Go To
To, and type a
reference that is in the hidden row or column. Tap Format
Format, then
tap R o w or Column
Column, and tap Unhide
Unhide.
For more information on using Pocket Excel, tap
8-16
, then tap H e l p
p.
P505 Smart PDA Phone
MSN Messenger
MSN Messenger on your device is an instant messaging program that
allows you to:
• See online friends and colleagues
• Send and receive instant messages
• Have instant message conversations with groups of contacts
To use MSN Messenger:
You must have a Microsoft Passport™ account or a Microsoft
Exchange e-mail account
account.
You must have a Passport to use the MSN Messenger Service. If you
have a Hotmail® or MSN account, you already have a passport. Once
you have obtained either a Microsoft Passport or Microsoft Exchange
account, you are ready to set up your account.
Sign up for a Microsoft Passport account at
http://www.passport.com
http://www.passport.com.
Get a free Microsoft Hotmail e-mail address at
http://www.hotmail.com
http://www.hotmail.com.
To launch MSN Messenger:
1. Tap , then tap Programs
Programs.
2. Tap MSN Messenger
Messenger.
Chapter 8: Using companion applications
8-17
Signing up
To sign in to MSN Messenger service:
1. Tap Tools then tap S i g n
in... from the menu.
OR
Simply tap the screen.
NOTE
8-18
2. In the sign-in screen, enter
your e-mail address and
password, then tap Sign In
In.
If you already use MSN Messenger on your desktop computer,
your contacts will show up on your device without being
added again.
P505 Smart PDA Phone
Working with contacts
The MSN Messenger window shows all of your messenger contacts at
a glance, divided into Online and Not Online categories. From this
view, while connected, you can chat, send an e-mail, block the
contact from chatting with you, or delete contacts from your list
using the pop-up menu.
Tap a contact to start a chat
Tap and hold a contact
to display a pop-up menu
To see others online without being seen, tap My Status in the
Tools menu and select Appear Offline
Offline.
If you block a contact, you will appear offline but will remain on the
blocked contact’s list. To unblock a contact, tap and hold the
contact, then tap Unblock on the pop-up menu.
Chapter 8: Using companion applications
8-19
Chatting with contacts
Tap a contact name to open a chat window. Enter your message in
the text entry area at the bottom of the screen, or tap My Text to
enter a preset message, then tap S e n d
d. To invite another contact to
a multi-user chat, tap Invite in the Tools menu, then tap the
contact that you want to invite.
Type your message here
Tap to send the message
NOTE
To switch back to the main window without closing a chat,
tap the C o n t a c t s button. To go back to your chat window,
tap C h a t s and select the person whom you were chatting
with.
To know if the contact you are chatting with is responding, look for
the message under the text entry area. For more information on
using MSN Messenger, tap , then tap H e l p
p.
Chat screen
Chat status
8-20
P505 Smart PDA Phone
Windows Media
Media™ Player for Pocket PC
Use Microsoft® Windows Media™ Player for Pocket PC to play digital
audio and video files that are stored on your device or on a network.
You can use Microsoft® Windows Media™ Player on your desktop
computer to copy digital audio and video to your device. You can play
Windows Media and MP3 files on your device.
To launch the Windows Media
Media™ Player for Pocket PC:
1. Tap .
2. Tap Programs.
3. Tap the Windows Media
icon.
NOTE
For more information
on using Windows
Media Player for Pocket
PC, tap
, then tap
Help
p.
Windows Media™ Player main screen
Tap to close the application
Tap to open the Windows
Media™ Player website
Displays the first track or
file in the selected playlist
Preview window
Track/file number
Slide to fast forward or
rewind the track/file
Indicates the progress of
the current track or file
Slide to adjust volume
Tap to play or pause
the audio or video file
Tap to open or search a
playlist or audio/video file
Tap to open application
properties and settings
Chapter 8: Using companion applications
Tap to mute sound
Tap to play the next track
Tap to play the previous track
Tap to stop
8-21
To open a Windows Media
Media™ Player playlist:
1. From the Windows Media™ Player
main screen, tap Playlist
Playlist.
The window displays the audio
and/or video files inside a playlist.
2. Select a video or audio file.
3. Use the command buttons at the
bottom of the screen to add, delete,
arrange, display information about,
or play the selected file.
to close the playlist window
4. Tap
and return to the previous window.
Tap to move the file
earlier on the playlist
Tap to move the file
later on the playlist
Tap to play
the file
Tap to add a file to the playlist
Tap to delete the file
Tap to view the
file information
To add an audio/video file to a playlist:
1. From the Windows Media™ Player
main screen, tap Playlist
Playlist.
2. Tap the A d d button.
3. Check the box preceding an
audio/video file to add to the
playlist.
If the audio/video file is not on the
list, tap All Content
Content, then select
another file location.
to add the files to the
4. Tap
playlist.
Tap to view the file information
8-22
P505 Smart PDA Phone
Voice Commander
Voice Commander is a speech recognition technology that allows the
device to launch applications and dial contact numbers via voice
commands. Voice Commander is speaker-independent since it
automatically creates a default voice tag for each of your contacts and
installed applications. You can, however, customize these voice tags
using the Voice Commander Settings menu. Press the voice command
button at the right side of the device to launch the application.
The Voice Commander interprets your voice commands or you can
teach it your own voice commands, for example to call “Mom” who has
been saved as a contact Anne Smith.
Using the Voice Commander
To launch and use the Voice Commander:
1. Press the Voice Commander
button on the right side of the
device to launch the
application.
OR
Tap , tap Programs
Programs, then
tap the Voice Commander
icon.
2. Say a voice command providing
the relevant details as
prompted for between the < >.
Call
For example, say “C
Aaron
Start Explorer
Aaron”, “Start
Explorer”.
Chapter 8: Using companion applications
8-23
3. For voice dial: When multiple contact numbers are detected, the
screen displays the numbers. Tap a contact number to dial.
For voice commands, the application associated with the
command opens. Follow screen instructions to continue.
4. Tap
to close.
I M P O R T A N T For details on each voice command function and other
application features, launch the Voice Commander application,
then say “What can I say?” to display the Voice Commander
help menu.
Customizing the Voice Commander settings
To launch the Voice Commander settings:
1. Tap .
2. Tap Settings.
3. Tap the Voice Commander
Setting icon.
8-24
P505 Smart PDA Phone
Customizing voice tags
To customize a voice tag for a contact:
NOTE
An automatic (hidden) voice tag is attached to all contacts
and applications. You can listen to these tags by tapping the
play button.
1. Select a contact using the stylus.
2. Tap the Voice Tag button to
start recording.
Play button
Voice tag
record button
3. Use the headphone or the device
microphone to record a voice tag
for the selected contact.
Chapter 8: Using companion applications
8-25
4. When prompted, repeat the voice
tag.
NOTE
A message appears if the
device fails to recognize
the voice tag. Try speaking
more loudly or move to a
quieter location for making
the recording.
5. A voice tag icon appears after the
contact to indicate that the voice
tag has been saved.
6. Follow the same instructions when
creating voice tags for other
contacts.
Tap to display
other tabs
8-26
P505 Smart PDA Phone
To customize a voice tag for an application:
NOTE
An automatic (hidden)
voice tag is attached to
all contacts and
applications. You can
listen to these tags by
tapping the play button.
1. Tap the Application tab to
display all applications.
2. Select an applicaton using the
stylus, then check the box
preceding the application to
activate voice command.
3. Follow the instructions in the
previous section to create a
voice tag for an application.
Play button
Voice tag
record button
Customizing the digit dial settings
The Digit Training tab trains you on pronouncing digits when using
the Digit Dial feature of the Voice Commander. The device uses the
digit model adaptation recording to recognize your voice tone and
pronunciation speed.
NOTE
Since Digit Training
serves as the Voice
Commander calibration,
it is recommended that
you record in a quiet
environment for
accurate recognition.
Record button
Chapter 8: Using companion applications
8-27
To customize the digit dial settings
settings::
1. Tap the Digit Training tab,
then tap the record button
to start.
2. Say the first number
sequence on the Digit
model adaptation field.
Record button
3. The device plays back the
recording, then confirms if
the recording is correct. Tap
Y e s to save the recording
and move to the next digit
model, or N o to repeat.
8-28
4. Record the next digit model
adaptation until all 10 are
when done.
recorded. Tap
P505 Smart PDA Phone
Adjusting the advanced settings
To adjust the advanced settings:
1. Tap the Advanced Settings
to display the options.
NOTE
By default, the Voice
Commander application
recognizes three phone
number lengths based
on your settings. Tap
the N o c o n s t r a i n t
option to support
unlimited number of
phone number digits.
2. Assign the length of the
phone number in the first
three fields.
3. Select the voice command
to save
sensivity, then tap
your changes.
Chapter 8: Using companion applications
8-29
8-30
P505 Smart PDA Phone
Chapter 9
Using Pocket
Internet Explorer
This chapter gives
information on using
Pocket Internet Explorer
and the Mobile Favorites
folder.
Chapter summary
•
Introduction ................................................ 9 - 3
•
Pocket Internet Explorer ............................... 9 - 3
Using Pocket Internet Explorer ......................................... 9-3
Changing View settings ................................................... 9-4
Browsing the Internet ...................................................... 9-5
•
Mobile Favorites folder ................................. 9 - 6
Favorite links ...................................................................
Mobile Favorites ...............................................................
Viewing mobile favorites and channels .............................
Adding/Deleting mobile favorites and folders ..................
9-2
9-6
9-6
9-8
9-8
P505 Smart PDA Phone
Introduction
You can view web or WAP pages by connecting to the Internet via
GPRS, CSD or your local area network. See Chapter 10 for information
on creating a connection.
When connected to an ISP or network, you can also download files
and programs from the Internet or intranet.
NOTE
Your phone operator may charge for Internet access or GPRS
use. Contact them for details.
You can copy the links to your favorite pages from your desktop
computer to the device or vice versa using ActiveSync®. In Internet
Explorer, copy those links you wish to use on the P505 into the
Mobile Favorites sub-folder. These links are listed the next time you
synchronize the device with the desktop computer.
NOTE
Internet surfing through GPRS may incur charges. Inquire the
current rate(s) with your phone operator.
Pocket Internet Explorer
You can use Pocket Internet Explorer to browse mobile favorites and
channels that have been downloaded to your device without
connecting to the Internet. You can also connect to the Internet
through an ISP or a network connection to surf the Web.
Using Pocket Internet Explorer
To launch Pocket Internet Explorer:
1. Tap , then Internet
Explorer to display the Pocket
Internet Explorer home page.
Chapter 9: Using Pocket Internet Explorer
9-3
Pocket Internet Explorer home page
Tap to open the
ASUS website
Tap to go back to previous page
Tap to stop/refresh
Tap to launch Favorites
Tap to go to the homepage
2. Tap the Home button to display the Pocket Internet Explorer
welcome screen with links to some useful Web sites.
3. Tap any of the Web site buttons to go to a specific site.
Changing View settings
To change View settings:
1. Tap View to display a pop-up
menu.
2. Tap Address Bar to display the
Web site address bar.
OR
Tap and hold Text Size to display
another pop-up menu with a text
size selection. Select your desired
text size for the screen.
OR
Tap and hold Layout to display
another pop-up menu with a layout
selection. Select your desired
screen layout.
9-4
P505 Smart PDA Phone
Browsing the Internet
To browse the Internet:
1. To browse pages you must have a valid connection established. This
may be automatic or require configuration. See Chapter 10 for details.
2. Do one of the following to connect and start browsing:
• Tap the Favorites
button, then tap the
favorite that you wish to
view.
• Tap V i e w
w, then select
Address Bar from the
menu. Enter the address of
the website that you want
to visit using the on-screen
keyboard, then tap .
3. Use the stylus to move the browser slides up/down or left/right
to browse other sections of the web page.
4. Tap
to close the browser.
Chapter 9: Using Pocket Internet Explorer
9-5
Mobile Favorites folder
Only items stored in the Mobile Favorites sub-folder in the Favorites
folder in the desktop PC Internet Explorer will be synchronized with
your device. The Mobile Favorites folder is automatically created
when you installed ActiveSync®.
Favorite links
During synchronization, any links in your computer’s Mobile Favorites
folder will be synchronized with Pocket Internet Explorer on your
device. Both computers are updated with changes made to either list
each time you synchronize. Unless you mark the favorite link as a
mobile favorite, only the link will be downloaded to your device, and
you will need to connect to your ISP or network to view the content.
For more information on synchronization, see ActiveSync® Help on
the desktop computer.
Mobile Favorites
If you are using Microsoft® Internet Explorer 5.0 or later on your
desktop computer, you can download mobile favorites to your device.
Synchronizing mobile favorites downloads Web content to your
device so that you can view pages while you are disconnected from
your ISP and desktop computer.
Use the Internet Explorer plug-in installed with ActiveSync® to quickly
create mobile favorites.
To create a mobile favorite:
1. In Internet Explorer on your
desktop computer, click Tools
then Create Mobile Favorite
Favorite.
2. To change the link name, enter a
new name in the Name box.
3. Select your desired update
schedule in Update
Update. This is
optional.
4. Click O K
K. Internet Explorer downloads the latest version of the
page to your desktop computer.
9-6
P505 Smart PDA Phone
5. If you want to download the pages
that are linked to the mobile
favorite you just created, in Internet
Explorer on the desktop computer,
right-click the mobile favorite, then
click Properties
Properties. In the Download
tab, specify the number of links
deep you want to download. To
conserve device memory, go only
one level deep.
6. Synchronize your device and your
desktop computer. Mobile favorites
that are stored in the Mobile
Favorites in Internet Explorer are
downloaded to your device.
NOTE
•
If you did not specify an update schedule in step 3, you
will need to manually download content to keep the
information updated on your desktop computer and
device. Before synchronizing with your device, in Internet
Explorer on your desktop computer, click T o o l s then
Synchronize
e. You will see the last time content was
downloaded to the desktop computer, and you can
manually download content if needed.
•
You can add a button to the Internet Explorer toolbar for
creating mobile favorites. In Internet Explorer on your desktop
computer, click V i e w
w, Toolbars
Toolbars, and Customize
Customize.
Saving device memory
Mobile favorites take up storage memory on your device. To minimize
the amount of memory used:
• In the settings for the Favorites information type in ActiveSync®
options, turn off pictures and sounds, or stop some mobile
favorites from being downloaded to the device. For more
information, see ActiveSync® Help.
• Limit the number of downloaded linked pages. In Interner Explorer
on your desktop computer, right-click the mobile favorite you
want to change, then click Properties
Properties. In the Download tab,
specify 0 or 1 for the number of linked pages you want to
download.
Chapter 9: Using Pocket Internet Explorer
9-7
Viewing mobile favorites and channels
To view mobile favorites and channels:
1. Tap
to display your list of favorites.
Tap the favorite that
you wish to view
Tap to add or delete a
folder or favorite link
2. Tap a Favorites page that you wish to view.
You will see the page that was downloaded the last time you
synchronized with your desktop computer. If the page is not on
your device, the favorite is dimmed. You need to synchronize with
your desktop computer again to download the page to your
device, or connect to the Internet to view the page.
Adding/Deleting mobile favorites and folders
To add a favorite:
1. Tap
to display your list of
favorites.
2. Tap the Add/Delete button
to display the Favorites
screen.
3. Tap the Add... button to
show the Add Favorite
screen.
9-8
P505 Smart PDA Phone
4. Type a name for the favorite that
you wish to add in the Name field.
5. Type in the URL address in the
Address (URL) field.
6. Select a folder to place the favorite
from the Create in: box.
7. Tap A d d to return to the Favorites
screen, which now shows the
favorite that you added.
To delete a favorite:
1. Tap
to display your list of
favorites.
2. Tap the Add/Delete button to
display the Favorites screen.
3. Select the favorite that you wish to
delete, then tap Delete
Delete.
4. When prompted to permanently
delete the favorite, tap Y e ss.
Chapter 9: Using Pocket Internet Explorer
9-9
To add a folder:
1.
2.
3.
4.
5.
Tap
to display your list of favorites.
Tap the Add/Delete button to display the Favorites screen.
Tap the New Folder button.
Type a name for the folder that you wish to create.
Tap A d d to return to the Favorites screen, which now shows the
folder that you added.
To delete a folder:
1. Tap
to display your list of
favorites.
2. Tap the Add/Delete button
to display the Favorites
screen.
3. Select the folder that you wish
to delete, then tap Delete
Delete.
4. When prompted to permanently
delete the folder, tap Y e ss.
9-10
P505 Smart PDA Phone
Chapter 10
Getting connected
This chapter provides the
procedures for connecting to
the Internet, intranet, and for
transferring data using
infrared (IR).
Chapter summary
•
Introduction ............................................... 1 0 - 3
•
My ISP connections ..................................... 1 0 - 4
Creating an Internet connection ..................................... 10-4
•
My Work connections .................................. 1 0 - 9
Creating a VPN connection .......................................... 10-10
Adjusting the proxy server settings ............................. 10-12
Network card connections ........................................... 10-13
•
Set up a WAP gateway .............................. 1 0 - 1 5
•
Using dialing rules .................................... 1 0 - 1 7
•
Ending a connection .................................. 1 0 - 1 8
•
Infrared (IR) connection ............................ 1 0 - 1 8
Sending information ..................................................... 10-19
Receiving information .................................................. 10-20
10-2
P505 Smart PDA Phone
Introduction
The connection settings tell the device how you want it to connect to
service/network to browse the Internet, send and receive e-mail,
SMS, MMS, etc.
Connections can be made using a modem
modem, wireless network
network, or
network (Ethernet) cards
cards. A modem connection can be used to
set up connections with an external modem, or with the mobile phone
network using a cellular line (WAP or GPRS).
Your device has two groups of connection settings: My ISP and M y
Work Network
Network. My ISP settings are used to connect to the Internet,
and My Work Network settings can be used to connect to any private
network, such as a corporate network you use at work. Simply fill in
the settings and get ready to start connecting. For more information,
see the sections “My ISP connections” or “My Work connections.”
You may also establish connection to the Internet wirelessly through
another device using infrared (IR) or Bluetooth®. For more
information, see the section “Infrared (IR) connection” or refer to
Chapter 11 “Using Bluetooth®.”
To view the Connections window:
1.
2.
3.
4.
Tap .
Tap Settings
Settings.
Tap the Connections tab.
Tap a connection to use or
configure.
Chapter 10: Getting connected
10-3
My ISP connections
You can connect to the Internet using your device cellular line (WAP),
GPRS, generic IrDA, or Hayes-compatible modem. Refer to the
following sections on how to set up your Internet connection.
Your device is pre-configured to automatically connect to your phone
operator’s services, provided you have subscription. Contact your
operator for details of specific charges and services.
To create a different connection, you need the following information
to set up the device.
Connection
Information required
Cellular Line (WAP)
server phone number, user name, password,
domain, port settings, TCP/IP settings, specific
server addresses
Cellular Line (GPRS)
access point name, user name, password, domain,
TCP/IP settings, specific server addresses
Generic IrDA
server phone number, user name, password,
domain, Baud rate, port settings, TCP/IP settings,
specific server addresses
Hayes-compatible modem server phone number, user name, password,
domain, Baud rate, port settings, TCP/IP settings,
specific server addresses
Creating an Internet connection
To create a Cellular Line (WAP) connection:
1. From the Connections tab,
tap Connections
Connections.
10-4
2. In My ISP, tap Add a new
modem connection
connection.
P505 Smart PDA Phone
3. Type a name for the
connection, then select
Cellular Line from the
modem list. Tap Next when
finished.
4. Use the soft keyboard to type
the number of the phone
network server, then tap
N e x tt.
5. Type the user name,
password, and domain for the
connection, then tap
Advanced
Advanced. Otherwise, tap
Finish to create the
connection.
6. Adjust the Connection
Preferences and Terminal
settings from this tab, then
tap the TCP/IP tab.
Chapter 10: Getting connected
10-5
7. Adjust the TCP/IP settings
from this window, then tap
the Servers tab.
8. Adjust the specific server
address from this window,
then tap .
9. The device creates the
connection. To verify, return
to the Connections main
window, then tap Manage
existing connections
connections.
10.The connection appears in
the list of network
connections. Launch Internet
Explorer to test the
connection.
10-6
P505 Smart PDA Phone
To create a Cellular Line (GPRS) connection:
1. Follow steps 1 to 2 of the previous section.
2. Type a name for the
connection, then select
Cellular Line (GPRS) from
the modem list. Tap N e x tt.
3. Use the soft keyboard to type
the GPRS access point name
of the phone network server,
then tap N e x tt.
4. Follow steps 5, 7 to 10 of the previous section to create the
GPRS connection.
NOTE
To view additional information for any screen in the wizard or
while changing the settings, tap
.
Chapter 10: Getting connected
10-7
To create an IR or Hayes-compatible modem
connection:
1. Follow steps 1 to 2 of the section on creating a cellular line (WAP)
connection on page 10-4.
2. Type a name for the
connection, then select
Generic IrDA or
Hayes-compatible on
COM1: from the modem list.
Tap N e x tt.
3. Use the soft keyboard to type
the number of phone network
server, then tap N e x tt.
4. Follow step 5 of the section on creating a cellular line (WAP)
connection on page 10-5.
5. Set the Baud Rate for the
connection using the General
tab.
6. Follow steps 6 to 10 of the
section on creating a cellular line
(WAP) connection on page 10-5
to 10-6 to create the
connection.
NOTE
10-8
To view additional
information for any screen
in the wizard or while
changing settings, tap
.
P505 Smart PDA Phone
My Work connections
Use My Work connections to connect to a Local Area Network (LAN),
virtual private network (VPN), and edit the firewall proxy settings.
using the device or a network card (Ethernet card). Refer to the
following sections on how to set up your work connections.
Before you proceed
Before setting up your Internet connection in the My Work group,
obtain the following information from your network administrator.
Connection
Information required
Generic IrDA
server phone number, user name, password,
domain, Baud rate, port settings, TCP/IP settings,
specific server addresses
Hayes-compatible modem server phone number, user name, password,
domain, Baud rate, port settings, TCP/IP settings,
specific server addresses
Virtual Private Network
NOTES
host name/IP, VPN type, VPN authentication or
certificate, user name, password, domain, TCP/IP
settings, specific server addresses
•
Refer to the previous sections when setting up modem
connections in My Work.
•
To change modem connection settings in either M y I S P
or M y W o r k N e t w o r k
k, tap M a n a g e e x i s t i n g
c o n n e c t i o n ss. Select the desired modem connection,
tap S e t t i n g ss, and follow the instructions on the screen.
•
To view additional information for any screen in the wizard
or while changing settings, tap
.
Chapter 10: Getting connected
10-9
Creating a VPN connection
To create a Virtual Private Network (VPN)
connection:
1. From the Connections tab,
tap Connections
Connections.
2. In My Work Network, tap A d d
a new VPN server
connection
connection.
3. Type the VPN name using the
soft keyboard.
4. Enter the host name/IP
address, then select the VPN
type. Tap Next when
finished.
10-10
P505 Smart PDA Phone
5. Select the VPN
authentication, then tap
Next to continue.
6. Type the user name,
password, and domain for the
connection, then tap
Advanced
Advanced. Otherwise, tap
Finish to create the
connection.
7. The created VPN network is
displayed in the My Work
Network list. Tap
to
close the window.
8. Launch Internet Explorer to
test the connection.
Chapter 10: Getting connected
NOTE
To view additional
information for any
screen in the wizard
or while changing
settings, tap
.
10-11
Adjusting the proxy server settings
If you are connected to your ISP or private network during
synchronization, your mobile device should download the proper
proxy settings from your computer. If these settings are not on your
computer or need to be changed, ask your network administrator for
the proxy server name, server type, port, type of Socks protocol
used, and your user name and password.
To change proxy server settings:
1. From the Connections tab,
tap Connections
Connections.
2. Tap Edit my proxy server
server.
3. Select This network
connects to the Internet
and This network uses a
proxy server to connect
to the Internet
Internet.
4. In the Proxy server box,
enter the proxy server name.
10-12
P505 Smart PDA Phone
5. Tap the Advanced button to
change the port number, proxy
server type, and other advanced
proxy settings.
6. Tap
to save your changes.
Network card connections
Use a network (Ethernet) card to connect directly to a network. Once
connected, you can view the Internet or intranet, download e-mail or
send and receive MMS messages. You do not need to create a new
connection on your device. Your network administrator can provide
the details of the network settings.
I M P O R T A N T Make sure to purchase and configure a network card that is
compatible with your device.
To set up a network card:
1. Obtain the network settings from
your network administrator.
2. Insert the network card into
your device.
3. The Network Settings window
appears the time you insert the
card so you can configure it
immediately.
If it does not appear, or to change
,
the settings later, tap
Settings
Settings, Connections tab
tab,
then tap the Network Cards
icon.
Chapter 10: Getting connected
10-13
4. If you need to enter specific
server information, tap the
appropriate adapter. Most
networks use DHCP, so you
should not have to change these
settings unless your network
administrator instructs you
otherwise.
5. If necessary, connect the
network card to the network by
using a network cable. For
information, refer to the
documentation that came with
your network card.
6. To start a connection, insert the network card, and begin using a
desired program. For example, switch to Pocket Internet
Explorer and browse a Web page
page. Your device automatically
starts connecting.
If you use your network card with two networks, such as a private
network at work and one at home for the Internet, you need to
change the network to which the network card connects.
NOTE
10-14
•
You may need proxy server and VPN connection settings.
Inquire the network settings with your network
administrator.
•
To view additional information for any screen in the wizard
or while changing the settings, tap
.
P505 Smart PDA Phone
Set up a WAP gateway
Your device is pre-configured to automatically connect to your
Internet service provider or phone operator’s services, provided you
have subscription. Contact your ISP or phone operator for details of
specific charges and services.
If you lose these automatic settings, and do not want to reset your
device completely, then you need the following information to set up
the device: ISP server phone number, user name password, WAP
gateway server name, and port number.
To access WAP sites through Pocket Internet
Explorer:
1. From the Connections tab,
tap Connections
Connections.
Chapter 10: Getting connected
2. Tap Edit my proxy server
server.
10-15
4. Tap the Advanced button
to access the WAP gateway
settings.
NOTE
5. In the W A P box, enter the
WAP gateway server
name
e, then specify the port
number.
The most common WAP port number is 9201.
6. In the Secure WAP box,
enter the Secure WAP
gateway server name
name,
then specify the port number.
7. Tap
10-16
to save your changes.
P505 Smart PDA Phone
Using dialing rules
Depending upon where you use the device, you may have to dial
additional numbers, for example 0 or 9 to dial out of an exchange, or
a particular prefix. The device automatically uses these numbers
when the dialing rule is selected. You can create as many dialing
locations as you require. Three are already created: Home, Mobile,
and Work, edit these to your requirements.
To change the dialing rules:
1. Tap , then tap Settings
2. Tap the Connections tab
tab, tap
Connections
Connections, then tap the
Advanced tab.
3. Tap the Dialing Rules button.
4. Tap Use dialing rules
rules.
5. Select a location.
• H o m e - Dials the number as
a local call without a number
prefix.
• Mobile - Dials the number
with the mobile phone
operator designated prefix.
• W o r k - Dials the number as
local call with a number
prefix.
6. Tap
NOTE
to save your changes.
To create a new location, tap New and follow the directions on
the screen. To view additional information at any time, tap .
Chapter 10: Getting connected
10-17
Ending a connection
Use the following methods to end a network connection.
on the navigation
• When connected via modem or VPN, tap
bar, then tap Disconnect
Disconnect.
• When connected via cable or cradle, detach your device from the
cable or cradle.
• When connected via Infrared, move the device away from the
other computer or device.
• When connected via a network (Ethernet) card, remove the card
from your device.
• When connected to a wireless network using an SDIO Wi-Fi card,
switch off the connection.
Infrared (IR) connection
By default, your device detects incoming infrared (IR) beams and
prompts you to accept them. If you do not want your device to
detect or receive beams, clear the Receive all incoming beams
check box.
To set the Beam options:
1. Tap , then Settings
Settings.
2. Tap the Connections tab.
3. Tap the Beam icon to display
the Settings screen.
10-18
P505 Smart PDA Phone
4. Tap the option Receive all
incoming beams
beams, then tap
the Receive an infrared
beam link to receive beams
from this screen.
NOTE
The device automatically
looks for another device using
infrared.
Turning off the R e c e i v e a l l i n c o m i n g b e a m options
saves battery power.
Sending information
To beam a contact:
1. In Contacts
Contacts, highlight the
contact name to beam.
2. Select Tools
Tools, then tap B e a m
Contacts
Contacts.
3. Align the IR ports of the P505 and
the device to which you are
beaming (the devices should be in
close range of each other and
have clear line-of-sight).
Chapter 10: Getting connected
10-19
To beam a file:
1. Go to the program associated with
the file you want to transfer, and
select it from the list.
2. Align the IR ports of the P505 and
the device to which you are beaming
(the devices should be in close range
of each other and have clear
line-of-sight).
3. Tap and hold the item, then tap
Beam File... on the pop-up menu.
NOTE
You can also send items, but not folders, from File Explorer.
Tap and hold the item that you want to send, then tap B e a m
F i l e on the pop-up menu.
Receiving information
To receive information:
1. Align the IR ports of the devices (the devices should be in close
range of each other and have clear line-of-sight).
2. Have the owner of the other device send the information to you.
Your device automatically receives the information, provided the
beaming option is set to receive incoming beams. See previous
page for details.
10-20
P505 Smart PDA Phone
Chapter 11
Using Bluetooth®
This chapter provides
information on how to use the
Bluetooth® features.
Chapter summary
•
Introducing Bluetooth® ........................................... 1 1 - 3
Bluetooth icon ............................................................... 11-3
•
Bluetooth settings ...................................... 1 1 - 4
•
Bluetooth Manager ...................................... 1 1 - 6
Bluetooth connection wizard ......................................... 11-7
•
Bluetooth® services .................................... 1 1 - 8
Wireless serial port ........................................................ 11-8
Dial-up networking ......................................................... 11-9
Send via Bluetooth ....................................................... 11-10
Bluetooth Personal Area Network ................................ 11-12
11-2
P505 Smart PDA Phones
Introducing Bluetooth®
Bluetooth® is a short-range wireless communications technology.
Devices with Bluetooth® capabilities can exchange information over a
distance of about 10 meters (30 feet) without requiring a physical
connection.
Unlike infrared, you do not need to line up the devices to exchange
information via Bluetooth®. The devices only need to be within a
range of about 10 meters. You can even exchange information to a
device in a different room, as long as it is within the specified range.
The Bluetooth® technology allows your device to:
•
•
•
•
•
Locate other Bluetooth® devices within the vicinity
Discover the services that those devices offer
Connect to, use, and disconnect from those services
Enable or disable individual services
Use security features including authentication, authorization, and
encryption
Bluetooth® icon
The Bluetooth® icon is located on the lower right corner of the Today
screen.
When Bluetooth® is enabled (turned ON),
the icon is blue , and the Bluetooth®
LED on the upper left side of the device
blinks blue.
When Bluetooth® is disabled (turned
OFF), the icon has a red X on its lower
right corner .
Tapping the icon displays a menu that
allows you to:
• turn Bluetooth® on or off
• launch the Bluetooth Manager
• change the Bluetooth Settings
Bluetooth® icon
Chapter 11: Using Bluetooth®
11-3
Bluetooth® settings
To configure the Bluetooth® settings:
1. Tap from the lower right
corner of the Today screen
to display the Bluetooth®
menu.
2. Tap Bluetooth Settings
Settings.
3. Tap one of the tabs at the
bottom of the Bluetooth
Settings window to make
your desired changes.
General
Accessibility
Allows you to:
Allows you to:
• select the user profile
• see the Bluetooth® status
(ON/OFF)
• turn Bluetooth® ON or OFF
• tap a link to the Bluetooth
Manager
• set the device name
• see the Bluetooth Device
Address (BDA)
• select the remote devices you
wish to connect
• set whether to allow remote
devices to see your device
11-4
P505 Smart PDA Phones
Services
Allows you to:
• enable/disable available
Bluetooth® services
• change the advanced settings
of Bluetooth® services
• set authentication and specify
encryption settings for
Bluetooth® services
The available service settings are
enabled when you select a
Bluetooth® service.
Select a service from the list to
adjust its settings (enabled, authorization and authentication).
Refer to the table below for a description of Bluetooth® services that
the P505 supports.
Bluetooth Service
Description
File Transfer
Allows you to transfer to and/or access files
from another Bluetooth® device
Information Exchange
Allows you to set the default business card for
exchange with other Bluetooth® device(s)
Serial Port
The Bluetooth® serial port connects the device
to another Bluetooth® device using a wireless
serial connection
Personal Network Server
Allows you to create your own personal
network server using Bluetooth®
D i a l - u p N e t w o r k i n g S e r v e r Allows other Bluetooth® devices that support
dial-up networking to connect to the Internet
using the device GPRS or CSD connection
Hands Free
Chapter 11: Using Bluetooth®
Allows you to connect a hands-free
Bluetooth® headset or audio module to the
device
11-5
Bluetooth Manager
The Bluetooth Manager allows you to create, manage, and use
Bluetooth® to connect to remote devices.
To launch the Bluetooth Manager:
1. Tap and hold the Bluetooth®
icon in the Today screen.
2. Tap Bluetooth Manager
Manager.
3. The My Shortcuts screen
displays a list of pre-configured
connections, if any.
Tap to make a new connection
Tap to add or remove paired devices
Tap to set view options
Tap to launch the Bluetooth® connection wizard
11-6
P505 Smart PDA Phones
4. Tap the Active Connections
tab to display the active
incoming and outgoing
connections.
Bluetooth® connection wizard
The Bluetooth® connection wizard helps you set up connections with
other Bluetooth® devices.
To launch the Bluetooth® connection wizard:
1. Tap
from the Bluetooth Manager command bar.
The Bluetooth Connection Wizard screen appears.
2. Select a type of connection
that you wish set up, then tap
N e x tt.
Tap Cancel to terminate the
connection process.
NOTE
Refer to the device
online help for other
information on
Bluetooth®
connections.
Chapter 11: Using Bluetooth®
11-7
Bluetooth® services
Bluetooth® serial port
Using a Bluetooth® serial port is equivalent to using a physical cable
serial port connection between two devices. As with a physical
connection, you have to configure the application that will use the
serial port.
To configure the Bluetooth® Serial Port:
1. Tap the Bluetooth® icon
from the Today screen to
display the Bluetooth menu.
2. Tap Bluetooth Settings
Settings,
then tap the Services tab.
3. Select Serial Port from the
available services, then tap the
Advanced button.
4. Note the assigned Outbound COM
Port 6, then assign the same
Outbound COM port to the
application that will use the
Bluetooth® serial port.
5. Tap
NOTE
11-8
to close the screen.
Refer to the documentation
that came with the
application for detailed
information on the Outbound
COM port.
P505 Smart PDA Phones
To use the wireless serial port:
1. Create a connection to the Bluetooth® device that uses the wireless
serial port (i.e. Bluetooth GPS). See the section “Bluetooth
connection wizard” on page 11-7.
2. Tap and hold the Bluetooth® icon on the Today screen, then tap
Bluetooth Manager
Manager.
3. In My Shortcuts screen, tap and hold the device connection
shortcut, then select Connect from the pop-up menu.
4. Enter the required information on the succeeding screens to
complete the connection process.
5. When the connection is active, you can exchange, share, and
browse data and files or launch applications from the remote
Bluetooth® device.
Dial-up networking server
The P505 can function as a dial-up networking server through which
other Bluetooth® devices (clients) can connect to the Internet. Once
connected to P505, the client device(s) can browse the Internet,
check or read emails, etc.
The following devices (with dial-up networking feature) can connect to
the Internet using the dial-up networking server feature of the P505:
• Bluetooth®-enabled desktop computers and notebooks
• Bluetooth®-enabled PDAs
NOTE
For the dial-up networking server feature to function, the
P505 must have a GPRS or CSD connection to the Internet
service provider or phone operator. Contact your ISP or phone
operator for the correct settings.
To use P505 as dial-up networking server:
NOTE
An ASUS A730W PDA was used as the client device for the
following procedures.
1. Turn on the P505 Bluetooth® and the client device Bluetooth®
Chapter 11: Using Bluetooth®
11-9
2. From the client device, create a new
modem connection following the
instructions in the device
documentation. When prompted to
select the modem type, choose
Bluetooth Dialup Modem
Modem.
3. Configure the network settings of
the client device following the
network configuration of the P505
GPRS or CSD connection.
NOTE
Inquire the network configuration settings of the P505 before
configuring the network settings of the client device.
4. Open the Bluetooth®
configuration menu of the
client device, then explore the
P505.
11-10
5. When detected, select the
Dial-up Networking service
of the P505, then create a
shortcut for the Bluetooth®
connection.
P505 Smart PDA Phones
6. Open the Bluetooth®
configuration menu of the
client device, tap and hold the
created shortcut, then connect
the client device to P505.
NOTE
7. When prompted, select the
type of connection to use,
then connect the client
device to P505.
You may be required to enter the passkey for both
Bluetooth® devices. Assign an identical passkey for both
devices to connect.
8. When the client device is
connected, P505 automatically
connects to the Internet using
the GPRS or CSD connection
that the client device specified.
Chapter 11: Using Bluetooth®
9. When the Internet connection
is established, launch the
Pocket Internet Explorer or
web browser from the client
device.
11-11
Sending data using Bluetooth®
You can conveniently send your Pocket Outlook contacts, calendar
items, and tasks individually or collectively to the remote device using
Bluetooth®.
To send data via Bluetooth® :
1. Tap
, then open either
Contacts
Contacts, Calendar
Calendar, or Tasks
Tasks.
2. Highlight an item that you wish to
send to the Bluetooth® device.
3. Tap and hold the item, then tap
Send via Bluetooth from the
pop-up menu.
OR
Tap Tools from the command bar,
then select Send via Bluetooth
Bluetooth.
The device searches and displays
Bluetooth® device(s) in your
location.
11-12
P505 Smart PDA Phones
4. Tap the destination of the file, then
tap
to send.
5. A dialog box appears to indicate that
the file is being sent to the other
device. Tap O K when done.
Chapter 11: Using Bluetooth®
11-13
Bluetooth® Personal Area Network
A Bluetooth® personal area network is a private, temporary, ad-hoc
network of up to eight (8) Bluetooth®-enabled devices. A Bluetooth®
personal area network allows you to easily exchange information that
normally requires a TCP/IP network. Most chat utilities, multi-player
games, etc. are fully functional in a Bluetooth® personal area network
environment.
Bluetooth® private area networks are subject to the same security
settings (service availability, authorization, authentication, and
encryption) that govern other Bluetooth® communications.
One Bluetooth® device must be the host of the personal area
network. Other Bluetooth® devices join the network as clients. The
host can accept and reject clients on an individual basis.
To set up a Bluetooth® personal area network:
1. From the Bluetooth
Manager
Manager, tap N e w
w, tap
Join a personal network
network,
then tap N e x tt.
NOTE
11-14
2. On the wizard screen, select
Host a personal network
network,
then tap N e x tt. The device
scans for Bluetooth® devices.
Adding devices is optional. You do not have to add devices to
the personal network while configuring the host. You can let
other devices join the personal network later.
P505 Smart PDA Phones
3. Tap the devices you want to add
to the personal network, then tap
N e x tt.
4. Add devices to the Bluetooth®
personal network, if desired.
a. Tap the A d d button, then
select the device that you want
to add.
b. Add other devices, if desired.
You can add up to eight
devices, including the host.
5. After adding devices, tap O K to
complete the setup and close the
wizard.
To join a personal network:
1. From the Bluetooth Manager
Manager, tap N e w
w, tap Join a personal
network
network, then tap N e x tt.
2. On the wizard screen, select Join a personal network
network, then
®
tap N e x tt. The Bluetooth browser appears.
3. Select the host of the personal network, then tap Next to
establish a connection to the personal area network.
If you are asked to enter the IP network settings, select U s e
server-assigned IP address
address, then tap .
Chapter 11: Using Bluetooth®
11-15
11-16
P505 Smart PDA Phones
Notices
Notices
•
Federal Communications Commission
Statement ......................................................... A - 3
•
Canadian Department of
Communications Statement . . . . . . . . . . . . . . . . . . . . . . . . . . . . . . . . . A - 3
A-2
P505 Smart PDA Phone
Federal Communications Commission
Statement
This device complies with Part 15 of the FCC Rules. Operation is subject to
the following two conditions:
1) This device may not cause harmful interference, and
2) This device must accept any interference received, including interference
that may cause undesired operation.
This device and its antenna must not be co-located or operating in
conjunction with any other antenna or transmitter.
This equipment has been tested and found to comply with the limits for a
Class B digital device, pursuant to Part 15 of the FCC Rules. These limits are
designed to provide reasonable protection against harmful interference in a
residential installation. This equipment generates, uses and can radiate radio
frequency energy and, if not installed and used in accordance with
manufacturer’s instructions, may cause harmful interference to radio
communications. However, there is no guarantee that interference will not
occur in a particular installation. If this equipment does cause harmful
interference to radio or television reception, which can be determined by
turning the equipment off and on, the user is encouraged to try to correct
the interference by one or more of the following measures:
• Reorient or relocate the receiving antenna.
• Increase the separation between the equipment and receiver.
• Connect the equipment to an outlet on a circuit different from that to
which the receiver is connected.
• Consult the dealer or an experienced radio/TV technician for help.
WARNING!
The use of shielded cables for connection of the monitor to
the graphics card is required to assure compliance with FCC
regulations. Changes or modifications to this unit not
expressly approved by the party responsible for compliance
could void the user’s authority to operate this equipment.
Canadian Department of Communications
Statement
This digital apparatus does not exceed the Class B limits for radio noise
emissions from digital apparatus set out in the Radio Interference
Regulations of the Canadian Department of Communications.
This class B digital apparatus complies with Canadian ICES-003.
Notices
A-3
Replaceable batteries
If an equipment is provided with a replaceable battery and if replacement by
an incorrect type could result in an explosion (e.g. with some lithium
batteries), the following applies:
–
if the battery is placed in an OPERATOR ACCESS AREA, there shall be a
marking close to the battery or a statement in both the operating and
the servicing instructions;
–
if the battery is placed elsewhere in the equipment, there shall be a
marking close to the battery or a statement in the servicing instructions.
The marking or statement shall include the following or similar text:
CAUTION
RISK OF EXPLOSION IF BATTERY IS REPLACED
BY AN INCORRECT TYPE.
DISPOSE OF USED BATTERIES ACCORDING
THE INSTRUCTIONS
Compliance is checked by inspection.
CAUTION
Use only with the battery listed in the user manual.
Operator access with a tool
If a TOOL is necessary to gain access to an OPERATOR ACCESS AREA, either
all other compartments within that area containing a hazard shall be
inaccessible to the OPERATOR by the use of the same TOOL, or such
compartments shall be marked to discourage OPERATOR access.
An acceptable marking for an electric shock hazard is (ISO 3864, No. 5036).
Equipment for restricted access locations
For equipment intended only for installation in a RESTRICTED ACCESS
LOCATION, the installation instructions shall contain a statement to this
effect.
A-4
P505 Smart PDA Phone
RF Exposure Information (SAR)
This model phone meets the government’s requirements for exposure to
radio waves.
This phone is designed and manufactured not to exceed the emission limits
for exposure to radio frequency (RF) energy set by the Federal
Communications Commission of the U.S. Government.
The exposure standard for wireless mobile phones employs a unit of
measurement known as the Specific Absorption Rate, or SAR. The SAR limit
set by the FCC is 1.6W/kg. *Tests for SAR are conducted using standard
operating positions accepted by the FCC with the phone transmitting at its
highest certified power level in all tested frequency bands. Although the SAR
is determined at the highest certified power level, the actual SAR level of the
phone while operating can be well below the maximum value. This is because
the phone is designed to operate at multiple power levels so as to use only
the poser required to reach the network. In general, the closer you are to a
wireless base station antenna, the lower the power output.
The highest SAR value for the model phone as reported to the FCC when
tested for use at the ear is 0.633 W/kg and when worn on the body, as
described in this user guide, is 0.703 W/kg. (Body-worn measurements differ
among phone models, depending upon available enhancements and FCC
requirements.)
While there may be differences between the SAR levels of various phones
and at various positions, they all meet the government requirement.
The FCC has granted an Equipment Authorization for this model phone with
all reported SAR levels evaluated as in compliance with the FCC RF exposure
guidelines. SAR information on this model phone is on file with the FCC and
can be found under the Display Grant section of
http://www.fcc.gov/oet/fccid after searching on FCC ID: MSQ-P505.
For body worn operation, this phone has been tested and meets the FCC RF
exposure guidelines for use with an accessory that contains no metal and the
positions the handset a minimum of 1.5 cm from the body. Use of other
enhancements may not ensure compliance with FCC RF exposure guidelines.
If you do no t use a body-worn accessory and are not holding the phone at
the ear, position the handset a minimum of 1.5 cm from your body when the
phone is switched on.
Notices
A-5
A-6
P505 Smart PDA Phone