1
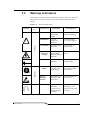
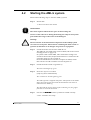
AML/J
Operator
Guide
Copyright © 1998 ADIC/GRAU Storage Systems GmbH&Co.KG
All rights reserved.
This document may be reproduced or transmitted neither in excerpts nor completely in any form
with any media (neither electronically nor mechanically, including photocopying and recording)
and by no data storage or recall system with the exception of an approval on the part of ADIC/
GRAU Storage Systems.
ADIC/GRAU Storage Systems reserves the right to correct, to update or to modify the information
contained in this document.
DAS is a registered trade mark of ADIC/GRAU Storage Systems GmbH
DAS is a trade mark of ADIC/GRAU Storage Systems GmbH
Other trade marks are the property of the relevant owner.
Document number: DOC D00 025-A
Published on: March 31, 1999
ADIC/GRAU Storage Systems GmbH&Co.KG • Eschenstraße 3 • D-89558 Böhmenkirch
Contents
1
Introduction
1.1
Contents . . . . . . . . . . . . . . . . . . . . . . . . . . . . . . . . . . . . . . . . . . . 1-1
1.2
Target group . . . . . . . . . . . . . . . . . . . . . . . . . . . . . . . . . . . . . . . . 1-1
1.3
Layout of the Guide . . . . . . . . . . . . . . . . . . . . . . . . . . . . . . . . . . 1-1
1.4
Further documentation. . . . . . . . . . . . . . . . . . . . . . . . . . . . . . . . . 1-2
1.5
Explanation of the symbols and notes . . . . . . . . . . . . . . . . . . . . 1-2
1.6
Technical support . . . . . . . . . . . . . . . . . . . . . . . . . . . . . . . . . . . . 1-3
1.7
Product observation . . . . . . . . . . . . . . . . . . . . . . . . . . . . . . . . . . . 1-4
2
Description of the system
2.1
Overview of the system components . . . . . . . . . . . . . . . . . . . . . 2-1
2.2
Host connection . . . . . . . . . . . . . . . . . . . . . . . . . . . . . . . . . . . . . 2-1
2.3
Description of function . . . . . . . . . . . . . . . . . . . . . . . . . . . . . . . . 2-2
2.4
Functional units . . . . . . . . . . . . . . . . . . . . . . . . . . . . . . . . . . . . .
2.4.1
Drives . . . . . . . . . . . . . . . . . . . . . . . . . . . . . . . . . . . .
2.4.2
Control cabinet . . . . . . . . . . . . . . . . . . . . . . . . . . . . .
2.4.3
AML Management Unit (AMU) . . . . . . . . . . . . . . .
2.4.4
Storage cells . . . . . . . . . . . . . . . . . . . . . . . . . . . . . . .
2.4.5
Handling unit . . . . . . . . . . . . . . . . . . . . . . . . . . . . . .
2.4.6
I/O unit . . . . . . . . . . . . . . . . . . . . . . . . . . . . . . . . . . .
2.5
Cartridges . . . . . . . . . . . . . . . . . . . . . . . . . . . . . . . . . . . . . . . . . . 2-7
2-2
2-3
2-3
2-3
2-5
2-6
2-7
2.6
3
Safety
3.1
Use as intended . . . . . . . . . . . . . . . . . . . . . . . . . . . . . . . . . . . . . . 3-2
3.2
Warning indications . . . . . . . . . . . . . . . . . . . . . . . . . . . . . . . . . . 3-3
3.3
Scope. . . . . . . . . . . . . . . . . . . . . . . . . . . . . . . . . . . . . . . . . . . . . . 3-5
3.4
Protective devices . . . . . . . . . . . . . . . . . . . . . . . . . . . . . . . . . . . . 3-5
3.4.1
System access . . . . . . . . . . . . . . . . . . . . . . . . . . . . . 3-5
3.4.2
Mechanical lock. . . . . . . . . . . . . . . . . . . . . . . . . . . . 3-5
3.4.3
Main switch . . . . . . . . . . . . . . . . . . . . . . . . . . . . . . . 3-5
4
Operation
4.1
Switches on the control cabinet . . . . . . . . . . . . . . . . . . . . . . . . . . 4-1
4.2
Starting the AML/J system . . . . . . . . . . . . . . . . . . . . . . . . . . . . . 4-3
4.3
Stopping the AML/J system . . . . . . . . . . . . . . . . . . . . . . . . . . . . 4-4
4.3.1
Normal stopping . . . . . . . . . . . . . . . . . . . . . . . . . . . 4-4
4.3.2
Emergency shutdown. . . . . . . . . . . . . . . . . . . . . . . . 4-5
4.4
Restarting the AML/J system . . . . . . . . . . . . . . . . . . . . . . . . . . . 4-6
4.5
Manual operating mode . . . . . . . . . . . . . . . . . . . . . . . . . . . . . . . 4-7
4.6
Switching over to Dual-AMU . . . . . . . . . . . . . . . . . . . . . . . . . . 4-8
5
ii
Technical Data . . . . . . . . . . . . . . . . . . . . . . . . . . . . . . . . . . . . . . . 2-8
2.6.1
Electrical system . . . . . . . . . . . . . . . . . . . . . . . . . . . 2-9
2.6.2
Noise . . . . . . . . . . . . . . . . . . . . . . . . . . . . . . . . . . . . 2-9
2.6.3
Climatic conditions . . . . . . . . . . . . . . . . . . . . . . . . . 2-9
Menus and commands
5.1
Application . . . . . . . . . . . . . . . . . . . . . . . . . . . . . . . . . . . . . . . . . 5-1
5.1.1
Layout of the menu bar . . . . . . . . . . . . . . . . . . . . . . 5-2
5.1.2
Selecting a command . . . . . . . . . . . . . . . . . . . . . . . . 5-2
5.1.3
Change size of the windows . . . . . . . . . . . . . . . . . . 5-3
5.1.4
Move windows. . . . . . . . . . . . . . . . . . . . . . . . . . . . . 5-3
5.1.5
Close window . . . . . . . . . . . . . . . . . . . . . . . . . . . . . 5-3
5.2
Menu overview . . . . . . . . . . . . . . . . . . . . . . . . . . . . . . . . . . . . . . 5-4
5.3
Shutdown menu . . . . . . . . . . . . . . . . . . . . . . . . . . . . . . . . . . . . . 5-5
Contents
DOC D00 025-A
5.4
Edit menu . . . . . . . . . . . . . . . . . . . . . . . . . . . . . . . . . . . . . . . . . . 5-7
5.5
View menu . . . . . . . . . . . . . . . . . . . . . . . . . . . . . . . . . . . . . . . . . 5-8
5.5.1
Archive. . . . . . . . . . . . . . . . . . . . . . . . . . . . . . . . . . . 5-8
5.6
Operations menu . . . . . . . . . . . . . . . . . . . . . . . . . . . . . . . . . . . . 5-19
5.6.1
Operator login . . . . . . . . . . . . . . . . . . . . . . . . . . . . 5-19
5.6.2
Manual Operation . . . . . . . . . . . . . . . . . . . . . . . . . 5-20
5.6.3
Disaster Recovery . . . . . . . . . . . . . . . . . . . . . . . . . 5-22
5.7
Admin menu . . . . . . . . . . . . . . . . . . . . . . . . . . . . . . . . . . . . . . . 5-23
5.7.1
Administrator Login . . . . . . . . . . . . . . . . . . . . . . . 5-23
5.8
Window menu . . . . . . . . . . . . . . . . . . . . . . . . . . . . . . . . . . . . . . 5-24
5.9
Help menu . . . . . . . . . . . . . . . . . . . . . . . . . . . . . . . . . . . . . . . . . 5-25
6
March 31, 1999
Processing media
6.1
Overview . . . . . . . . . . . . . . . . . . . . . . . . . . . . . . . . . . . . . . . . . . . 6-1
6.2
I/O unit/C . . . . . . . . . . . . . . . . . . . . . . . . . . . . . . . . . . . . . . . . . . . 6-3
6.2.1
Inserting cartridges . . . . . . . . . . . . . . . . . . . . . . . . . 6-4
6.2.2
Ejecting cartridges . . . . . . . . . . . . . . . . . . . . . . . . . . 6-5
6.3
I/O unit/D (HICAP) . . . . . . . . . . . . . . . . . . . . . . . . . . . . . . . . . . 6-6
6.3.1
Inserting cartridges . . . . . . . . . . . . . . . . . . . . . . . . . 6-7
6.3.2
Ejecting cartridges . . . . . . . . . . . . . . . . . . . . . . . . . . 6-8
6.4
I/O unit/E . . . . . . . . . . . . . . . . . . . . . . . . . . . . . . . . . . . . . . . . . . 6-9
6.4.1
Inserting cartridges . . . . . . . . . . . . . . . . . . . . . . . . . 6-9
6.4.2
Ejecting cartridges . . . . . . . . . . . . . . . . . . . . . . . . . 6-10
6.5
Disaster Recovery. . . . . . . . . . . . . . . . . . . . . . . . . . . . . . . . . . . 6-11
iii
iv
Contents
DOC D00 025-A
1
Introduction
1.1
Contents
This Guide contains information and instructions for the safe operation
of the AML/J system.
1.2
Target group
This Guide is written for users who work with the AML/J.
1.3
Layout of the Guide
The Guide is broken down into the following chapters:
Chapter 1
Introduction - Notes on the use of the Guide
Chapter 2
Overview - Contains general information on the
AML/J components.
Chapter 3
Safety - Describes the danger symbols, messages, safety functions and considerations for
the safe operation of the AML/J.
Chapter 4
Operation - Describes the functions for switching the AML/J on and off.
Chapter 5
Menus and commands - Describes the menus
and the commands executed by the AML/J.
Chapter 6
Processing media - Describes the I/O unit and its
use.
Index
March 31, 1999
1-1
1.4
1.5
Further documentation
DOC D00 024
AML/J Maintenance Guide
DOC D00 014
AML/J Software Backup
DOC D00 007
AML/J Installation Guide
DOC E00 003
AMU Installation Guide
DOC E00 007
AMU Problem Determination Guide
DOC E00 014
AML Controller User Guide
DOC E00 005
AMU Reference Guide
Explanation of the symbols and
notes
The following symbols and notes draw your attention to important information.
!
For detailed explanation of the symbols see Warning indications on page
3-3.
1-2
Introduction
<1>+<2>
Press keys simultaneously
italics
Heading, e.g. Chapter 3, Safety
File name, e.g. dasdata.ini
Variable, e.g. client_name
&KLFDJR
Term appearing on the workspace of the AMU
bold
Special term, e.g. Scratch-Pool
courier
Lines or terms in an input window
- Program message
- Command
- Parameter or file
[courier]
Optional parameters
Param1 | Param2
Alternative parameters
☞
Reference
DOC D00 025-A
1.6
Technical support
Warning
!
The use of the AML/J by untrained personnel can lead to dangerous
situations. The consequence can be severe to lethal injuries due to
moving or current-conducting parts. For this reason an introductory
course at ADIC/GRAU is recommended for all persons who handle the
AML/J.
The operator is responsible that the following functions are performed on
the system only by qualified personnel:
•
•
•
•
•
•
•
Preparation for operation
Setting up
Starting the system
Application
Shutting the system down
Maintenance
Restart
Warning
!
You may perform certain work and adaptations yourself only if you are
qualified for this by corresponding education and training.
It is extremely important that the user is familiar with all safety rules
before working with the system and follows them.
If you cannot solve a problem with the aid of this document or if you are interested in a recommendation regarding training, please contact your contract partner or the ADIC/GRAU Technical Assistance Center (ATAC).
ADIC/GRAU Storage Systems GmbH
Eschenstrasse 3
89558 Boehmenkirch
Germany
ADIC
10949 East Peakview
avenue
Englewood, CO 80112
U.S.A.
We would be pleased to help you further.
March 31, 1999
Telefax:
+49 (0) 6196-59 08 69
Email:
[email protected]
Telephone:
1 800 827 3822
+49 6142 992364
00800 9999 3822
North America
Germany
(the rest of the world)
1-3
1.7
Product observation
We are legally obliged to observe our products even after delivery.
Therefore please notify us about everything which is of interest to us:
•
•
•
•
Changed setting data
Experience with the product
Repetitive faults
Difficulties with this Guide
ADIC-GRAU Storage Systems GmbH
Eschenstrasse 3
89558 Boehmenkirch
Germany
1-4
Introduction
ADIC
10949 East Peakview
avenue
Englewood, CO 80112
U.S.A.
Telefax:
+49 (0) 6196-59 08 69
Email:
[email protected]
DOC D00 025-A
Telephone:
March 31, 1999
1 800 827 3822
+49 6142 992364
00800 9999 3822
North America
Germany
(the rest of the world)
1-5
1-6
Introduction
DOC D00 025-A
2
Description of the system
2.1
Overview of the system components
Storage media such as magnetic tape cartridges, optical disks and CDROMs are brought automatically into the associated drives and fetched
from there again with the AML/J. The storage media are brought to the
drives with the aid of software in the host and in the AML/J control unit
and discharged from these drives again.
The AML/J is a modular system and consists of
• a basic module
− Handling unit
− Storage racks
− Control cabinet
− I/O unit (E/I/F)
• up to 9 extension modules (optional)
− Storage racks
− I/O unit (E/I/F)
Figure 2-1: AML/J basic module
2.2
Host connection
AML/J is connected through the AMU (AML Management Unit) to one
or several hosts. The possibilities of the connection are described in the
AMU Reference Guide.
March 31, 1999
2-1
2.3
Description of function
The AML/J system can be installed on the unfinished floor or on a false
floor.
The handling unit moves the cartridges between the storage cells, drives
and the I/O unit. The handling unit has a gripper. A barcode scanner on
the gripper identifies the cartridges at the compartments in the archive.
Further details are described under Handling unit on page 2-6. The cartridges can be brought into the AML/J system or moved out from the
system with the aid of the I/O unit without interrupting the work.
Additional details are described under I/O unit on page 2-7.
Manual access to the compartments in the archive, the handling unit and
the drives is through an access door after switching off the power supply.
The cartridges in the AML/J are moved by host requests. Primary
requests are for mounting and discharging cartridges in the drives and
for inserting/ejecting cartridges into/out from the AML/J.
Each cartridge can have an external machine and user readable label to
identify the cartridge in the AML/J at stocktaking and when adding a
cartridge to the AML/J. The AMU stores the physical storage location of
the cartridge in a database which is based on the Volser (Volume Serial
Number).
Apart from the commands for moving the tape cartridges, the host can
also request status, configuration and cartridge storage information from
the AML/J control unit.
2.4
Functional units
The AML/J system consists of the following functional units:
•
•
•
•
•
•
•
2-2
Overview
Drives
Control cabinet with:
AML/J control unit
AMU (AML Management Unit)
Storage cells (linear racks)
Handling unit
I/O units
DOC D00 025-A
2.4.1
Drives
The AML/J system supports a large number of drives for different storage media.
2.4.2
Control cabinet
The control unit of the system is housed in a control cabinet. This control
cabinet contains:
• AMU PC
• Control unit
− Power supply
− Motor control
− Interface converter
− Safety system
• Drive(s) (optional)
AMU PC
Control unit
AMU monitor
Keyboard
Figure 2-2: Control cabinet
2.4.3
AML Management Unit (AMU)
The AMU is the control processor for the AML system. In the normal
mode the host computer sends the commands to the AMU for controlling
the system. The AMU is located next to further power supply components in the control cabinet Figure 2-2: on page 2-3.
It is possible to connect a second AMU PC in parallel to back up against
failures due to failures of the PC hardware. This redundant version is
called Dual-AMU, and a few cables have to be reconnected for the
change.
March 31, 1999
2-3
Hardware components
The AMU hardware consists of:
• A computer (AML controller) with screen, keyboard and trackball or
mouse
• Programmable Multi-Axis Controller (PMAC board)
• Network board (Token Ring, Ethernet or FDDI)
Software components
The AMU software components are:
• Operating system OS/2
• Communication Manager/2 , TCP/IP
• Database Manager/2
• AML Management Software (AMS)
Tasks of the AMU:
• Host communication
− interprets the commands coming from the host computer
− checks these commands for executability
• Archive catalogue administration
− stores the logical coordinates of the compartments
− assigns the cartridges to the compartments
− knows the status of compartments and drives
− stores information on scratchpool administration
• Conversion of the logical coordinates into physical coordinates
• Communication with the control unit
• User interface
− for start-up
− for service
− for the operator
• Configuration (describes the individual structure of the archive)
Information
The AMU does not register the data contents of the cartridges.
2-4
Overview
DOC D00 025-A
2.4.4
Storage cells
The AML/J system contains compartments (storage cells) in linear racks
(stationary storage segments (☞ Figure 2-3:). Table 2-1: Coordinates of
the storage cells on page 2-5 contains the coordinates of the storage cells.
Figure 2-3: Example of storage cells
Table 2-1:
Coordinates of the storage cells
L3 - LD
01 - 99
01
01 - 99
01 - 99
Type
Module
Segment
Row
Compartment
The module number corresponds to the number of the segment whereby
the assignment of the module numbers to the segment can be determined
by the user at start-up and the segment is always 01. The rows are
counted from below to above and the compartments from the left to the
right. Optical disks occupy two compartments in the database.
March 31, 1999
2-5
2.4.5
Handling unit
The handling unit identifies and moves cartridges between the storage
cells, drives and the I/O unit.
Figure 2-4: AML/J handling unit
Access to the archive compartments and the drives is facilitated with the
handling unit. The handling unit executes the commands of the AML
Management Software (AMS) and returns status messages as response.
The handling unit is equipped with a (laser) barcode scanner. Typical
tasks of the handling unit are inserting and ejecting cartridges, placing
and gripping cartridges in the archive, mounting the connected drives
with the cartridges and reading a barcode label attached to the cartridges.
Technical data of the handling unit
• Cartesian robot with 4 axes:
− 3 linear axes
− 1 rotary axis
• Drive with direct current servomotors
• Position measuring system (optical digital encoder) and home position sensors
• Transmission of the torques with toothed drive belts
• Driving axis guided
− with rollers on 2 guide rods below
− by one guide rod with loose bearing (play compensation) above
2-6
Overview
DOC D00 025-A
2.4.6
I/O unit
The I/O unit facilitates inserting and ejecting cartridges without interrupting normal processing (☞ Figure 2-5:).
Figure 2-5: I/O unit/E
2.5
Cartridges
Each cartridge in the AML/J system can have an external user and
machine readable label for identifying the Volsers (Volume Serial
Number). The external label contains between one and 16 characters for
the Volser. The Volser is composed of the uppercase letters A-Z and the
numbers 0-9. The AML/J system supports different types of label (e.g.
“Code 39” and “STK”).
March 31, 1999
2-7
2.6
Technical Data
Dimensions
Table 2-2:
Size of the AML/J components
Width x depth
Height
Basic module
1.00 m x 1.50 m
(3.28 ft x 4.92 ft)
2.05 m
(6.73 ft)
Extension
module
0.75 m x 0.82 m
(2.46 ft x 2.69 ft)
Control cabinet
Weight without/with cartridges (3480/3490)
Table 2-3:
Weight of the AML/J components
Weight in lbs
With
media
Weight in kg
Without
media
With
media
Without
media
Basic module
721
509
326
230 kg
Control cabinet
-
331
-
150 kg
Extension module
688
454
311
205 kg
Maximum floor loading
Table 2-4:
Floor loading of the AML/J components
Basic module
Extension module
2-8
Overview
390 kg/m2
DOC D00 025-A
2.6.1
Electrical system
Table 2-5:
Electrical data of the AML/J
Europe
North America
Total system connection
230 V ± 10% 1, N,
PE
110 V ± 10% 1, N,
PE
Fuses
(by customer)
16 A fuse
slow-blow
10 A fuse
slow-blow
Power section voltage
Frequency
48 V =
50 Hz
Control voltage
Degree of protection
60 Hz
24 V =
IP 50
Heat dissipation
Maximum 1.2 kW
2.6.2
Noise
Table 2-6:
Noise caused by the AML/J
Total system
2.6.3
Climatic conditions
Table 2-7:
March 31, 1999
80 dB (A)
Climatic conditions for operating the AML/J
Temperature
10 .. 32 °C
Humidity
15 .. 80%
2-9
2-10
Overview
DOC D00 025-A
3
Safety
Information
Apart from the safety provisions in this chapter, the local and specific
technical safety regulations apply.
Avoid hazards during maintenance and in operation of the system by
• safety-conscious behaviour
• careful actions
CAUTION!
Knowledge of and observance of these instructions are indispensable
for the safe handling of the ADIC/GRAU Storage Systems AML/J systems.
March 31, 1999
3-1
3.1
Use as intended
The quotation and the order confirmation as well as the scope defined in
this document are part of the AML/J documentation. Any use other than
that specified in this is considered to be not as intended.
This system is intended for processing:
• Magnetic tape cartridges
• Optical disks
• CD-ROMs in the CADDY housing
Any use extending beyond this is not as intended.
ADIC/GRAU Storage Systems is not liable for damages which arise
because of use not agreed with it - the user bears the risk alone.
The following are also included in use as intended
• Compliance with the instructions in the instructions delivered with
the system (this Guide, Operator and AMU Guides)
• Compliance with the inspection and maintenance regulations
3-2
Safety
DOC D00 025-A
3.2
Warning indications
ADIC/GRAU classifies hazards into different categories. Table 3-1: shows the
relation between symbols, signal words, actual hazards and possible consequences.
Table 3-1:
Symbol
Damage
to...
Persons
!
Warning indications
Signal word
Material
Consequences
DANGER!
Directly
threatening
danger
Death or very severe
injuries (maiming)
WARNING!
Possibly
dangerous
situation
Possibly death or
very severe injuries
CAUTION!
Less dangerous
situation
Possibly light or
slight injuries
WARNING!
Dangerous
voltage!
Directly
approaching
electrical danger
situation
Death or severe
injury
CAUTION!
Less dangerous
situation
Possibly light or
medium injury
Situation
possibly causing damage
Possibly damage of
the product and its
environment
Electrostatically
sensitive
Potential risk of
damage to the
electronics
Possibly damage to
the product
Information
Application tips
and other
important/useful information
and hints
No dangerous or
damaging consequences for persons
or things
ATTENTION!
March 31, 1999
Definition
3-3
Especially emphasized paragraphs in this Guide warn against a hazard
or draw your attention to important information.
These include the following paragraphs and symbols:
!
In connection with the signal words of ‘Danger’ or ‘Warning’, this
symbol warns against a dangerous situation in which personal death
or severe injuries are threatening.
In connection with the signal word of ‘Caution’, the symbol warns
against a dangerous situation in which light injuries can be the consequence.
There is risk of a lethal electric shock. Electrical current is possibly
present at places identified with this symbol. Before all work always
ensure that no electrical connections are under voltage.
Caution!
This symbol is a laser warning.
Use only the described procedures for adjusting and setting up the
laser. Injuries can be caused by laser light if other procedures are used.
This symbol refers to specific regulations, rules, instructions and
working procedures which must be observed. Nonobservation of this
symbol can result in equipment damage or destruction or other material damage.
This symbol refers to the risk of equipment damage because of electrostatic discharges.
This symbol indicates a hint or important information for the user. No
risks of personal or material damage are connected with this symbol.
3-4
Safety
DOC D00 025-A
3.3
Scope
These instructions apply for the ADIC/GRAU Storage Systems AML/J
systems.
Further safety regulations for the components used in the system are not
put out of force by these instructions.
Information
The documentation of the external manufacturers are integral part of
the AML/J documentation.
3.4
Protective devices
The AML/J system is equipped with the following protective devices:
• Monitored access to the system
• Mechanical interlock
• Main switch
3.4.1
System access
The AML/J system is surrounded completely by panelling. Access to the
system is possible only through a monitored door (or doors).
The panelling of the AML/J system separates the danger area from the
normal working area. The danger area of the system is the area in which
there is a risk of injury due to a movement of the components.
WARNING!
!
3.4.2
Movements of the mechanical components in the AML/J system can
cause severe injuries. The access to the system may be opened only by
authorized personnel.
Mechanical lock
The access door(s) to the system can be opened from the outside only
with a key. Authorized personnel are responsible for the safety of the
key.
3.4.3
Main switch
If you switch off the main switch, you stop the movement electronics and
separate the system from the power supply. All movements of the robot
are stopped immediately. Switch the main switch off immediately in the
case of risk of injury or possible material damage.
March 31, 1999
3-5
ATTENTION!
Apart from emergency situations, the AML/J system is firstly always
stopped with the normal shutdown routine before the main switch is
switched off. ADIC/GRAU Storage Systems is not liable for damages
because of actuation of the main switch in a manner not intended. The
user bears responsibility solely for this.
WARNING!
!
3-6
Safety
Movements of the mechanical components in the AML/J system can
cause severe injuries. Before switching on the main switch and restarting the AML/J system convince yourself that no risks for persons and
material are caused by this.
DOC D00 025-A
4
Operation
In the normal case the host sends the commands to the AML/J. The
AMU is used by the operator for control purposes. The operator is
responsible for the following tasks:
• Starting the AML/J
• Stopping the AML/J
• Handling the cartridges
You will find information on handling the cartridges under Inserting cartridges on page 6-4 and Ejecting cartridges on page 6-5. In the case of
equipment disturbances the operator can process the cartridges.
4.1
Switches on the control cabinet
You will find several switches for switching the components on and off
in the control cabinet. In addition to the switches on the front of the control unit, a mains switch is located on the back of the control unit.
Figure 4-1: Control unit on page 4-1 shows a view of the front side of the
control unit.
Main switch (S3)
"Control on" button
(only for HICAP)
Figure 4-1: Control unit
The switches on the control unit are described in Table 4-1: .
March 31, 1999
4-1
Table 4-1:
Control panel switches
Switch
1
Main switch S3
Description
Switching on the main supply voltage.
WARNING!
Dangerous voltage!
The following are not in the
circuit of the main switch:
• Drives
• AMU computer
<CONTROL OFF> lights up if the control is
ready but not active.
2
Only in systems
with HICAP
illuminated
pushbutton
(green)
The control lamp lights up after actuation.
Activates the control
Prerequisites
Main switch switched on, all doors are closed
CONTROL
ON
3
4-2
Operation
Mains switch
(back of the
control unit)
Switching on the line voltage including that
for AMU computer and monitor.
DOC D00 025-A
4.2
Starting the AML/J system
Perform the following steps to start the AML/J system.
Step 1
Ensure that:
• the access doors are closed
ATTENTION!
The robot requires sufficient free space for the homing run.
All axes of the robot move during the homing run. Objects and system
parts within the range of the robot can be damaged.
Warning!
!
The movements of the mechanical components in the AML/J system
can cause severe injuries. Ensure before switching the main switch on
(position 1) that there are no dangers for persons or equipment.
Step 2
Switch the mains switch on the AMU PC on
The AMU PC is located in the control cabinet, above the control
unit (Figure 2-2: on page 2-3).
In systems with a Dual-AMU, take care that the change-over
switch for the monitor, keyboard and mouse is switched to the
computer which you just switch on.
Once the initialization of the first computer is ended, switch
this switch over and switch the second computer on.
Step 3
Switch the main switch on (position 1)
The main switch lights up green.
Step 4
Press the <System on> button
(only in systems with HICAP)
The <Control on> button lights up green
The AML/J system is supplied with power. The software in the AMU
and in the control units starts with the initialization. The status is
indicated in the AMU log.
The robot and the storage towers perform a homing run, the gripper
functions are tested in conclusion.
Step 5
Check in the $08/RJ that the system has started correctly.
<0700> STATUS: robot ready.
March 31, 1999
4-3
4.3
Stopping the AML/J system
The AML/J system can be stopped normally or switched off in an emergency.
Information
The method described under Emergency shutdown may be used only in
emergencies.
4.3.1
Normal stopping
Proceed as follows to stop the AML/J system normally:
Step 1
Ensure in your application
that your application is not
endangered by the shutdown
(☞ Documentation of the
host software).
Step 2
Find the "$089" window on the AMU PC
• Open the ":LQGRZ/LVW"
window with the <Esc>
and <Ctrl> keys
• Mark the "$089".
line with the arrow keys
• Press the <Enter> key
Step 3
Click in the "$089"window on the first cell (Shutdown) with the mouse.
Step 4
Click in the now open list
on the
6KXWGRZQFRPSOHWHZLWK
26
4-4
Operation
line
DOC D00 025-A
Step 5
Click with the mouse on the
"<HV" button in the now
open
"727$/6<67(06+87'2:1
$08DQG26" window
The robot ends its current task
and moves into the rest
position.
Step 6
Wait until all windows are
closed and the message
"266\VWHPLVQRZVKXW
GRZQ" is displayed.
The process can last relatively long (5 minutes).
Step 7
Switch the mains switch on
the AMU PC off
(PC is located above in the
control cabinet)
Step 8
Switch the main switch off
The power supply to the AML/J
system is switched off.
4.3.2
Emergency shutdown
Apply the following procedure in an emergency situation.
Except for emergency situations, the AML/J system should be stopped
normally before the main switch is switched off. ADIC/GRAU Storage
Systems accepts no responsibility for damage because of use of the main
switch not as intended. The user bears the entire risk.
WARNING!
Dangerous voltage!
The system is not deenergized completely with the main switch.
March 31, 1999
4-5
Step 1
Actuate the main switch
The power voltage of the AML/J is switched off. All movements of the
robot are stopped.
4.4
Restarting the AML/J system
The AML/J system is restarted as follows after an emergency shutdown.
4-6
Operation
Step 1
Rectify all problems which made stopping the AML/J system
necessary (if required).
Step 2
Start the AML/J system according to the procedure Starting the
AML/J system on page 4-3.
DOC D00 025-A
4.5
Manual operating mode
This operating mode is intended if the AML/J should be operated without the robot because of a robot fault or maintenance. In this operating
mode the requirements are displayed in the AMU but the user performs
the actions instead of the robot.
Step 1
Shut the system down according to Stopping the AML/J system
on page 4-4
Step 2
Open the access doors to the archive
Step 3
Switch the mains switch on the AMU PC on
Step 4
Select the manual operating mode of your host software
(HACC/MVS or ROBAR) or on the AMU:
• Host command MAN with MAN option
• AMS the 0DQXDO2SHUDWLRQcommand in the 2SHUDWLRQV
menu
The Manual Operation window is opened.
Figure 4-2: "Manual Operation" window
Step 5
Start your application or repeat still pending Mount- KEEP or
Eject tasks.
The task is displayed in the Manual Operation window.
March 31, 1999
Step 6
In the case of MOUNT remove the cartridge from the rack and
place it in the stated drive.
In the case of KEEP remove the cartridge from the drive and
place it in the I/O unit.
Step 7
Click on 2Nbutton in the 0DQXDO2SHUDWLRQ window
Step 8
Repeat Step 6 and Step 7 until you start in normal mode again.
4-7
4.6
Switching over to Dual-AMU
On switching over the passive AMU becomes the active AMU and if possible, the active AMU becomes the passive AMU. The connections of the
connection cables between AMU computer and control unit must be
changed over for the change.
Prerequisites
• 2 AMU computers are installed and in operation
• Both AMU computers are configured identically
Procedure
Step 1
Stop the command stream to the system:
• with the “HOLD” command for HACC/MVS
• by “Setting offline” the drives in the system
Step 2
Switch the AML/J off (Stopping the AML/J system on page 4-4).
Step 3
Change over the connections of the following cables at the control rack:
• Scanner interface cable X17 (COM 2)
• Ribbon cables XJ11, XJ5 and XJ3
Step 4
Close the side door of the control cabinet
Step 5
Switch the AMU (B) computer on
Step 6
Open the AMU log in the 9LHZ menu with the /RJcommand
Step 7
Switch the main switch S3 on the control rack on
Step 8
Switch the host to the Dual-AMU with the corresponding host
command
XJ11
XJ3
XJ5
X17
Figure 4-3: Plug board of the AML/J control rack
4-8
Operation
DOC D00 025-A
Step 9
Check that after switching over the components the system
reports that it is ready. If the robots do not report that they are
ready, there is another or a further error in the system.
Step 10 Determine which commands have not yet been acknowledged
by the AMS software:
• HACC/MVS command “DRQ all”
• Search through the log file of the host software for commands to the AMU without acknowledgement
Step 11 Determine where the media belonging to the outstanding commands are located:
• by entering the archive and inspecting the drives and home
positions in the archive
• by the "Stocktaking" command on the home compartments
of the media concerned (refer to the description of your host
software for the syntax of this command)
Step 12 Compare these positions with the data in the database of the
AMU
Step 13 In the case of discrepancies change the AMU database and in
HACC/MVS systems in addition the HACC/MVS database
Step 14 Start the communication to the system
• by the HACC/MVS Release command
• by “Setting online” the drives
Step 15 Repeat the commands which are still outstanding and still
required. Delete the commands which are no longer required
from the command queue.
March 31, 1999
4-9
4-10
Operation
DOC D00 025-A
5
Menus and commands
The entries on the workspace of the AMS are equivalent to host commands for the system.
ATTENTION!
Take special care in the case of the 3XW, *HW, /RRN and 7HDFK commands
that conflicts with the host commands do not arise.
In the case of doubt restart the AMU after working with these commands.
An AMU restart (AMS and DAS) is essential after a change in the configuration.
Make entries on the AMU only in the following case:
• In the case of a host communication fault
• In the case of a fault of the robot (manual updating of the archive catalogue after manual processing ☞ Operator Guide)
• During the installation
• During maintenance
Information
All commands or options which cannot be executed are shown shaded.
5.1
Application
The layout as well as the application correspond to the SAA standard.
Working with the
• Keyboard
• Mouse
You will find further information in the OS/2 Guides.
March 31, 1999
5-1
5.1.1
Layout of the menu bar
Control menu
Title bar
AMU Release
AMU Status *
Menu bar
Minimize
Maximize
* %8' $FWLYH - AMU which currently controls the AML
%8' 3DVVLYH - AMU inactive, router sends to active AMU
%8'$FWLYH3DUWQHUORVW - no connection to the Dual-AMU
6KXWGRZQLQ3URJUHVV - Shutdown command has been executed
Figure 5-1: Layout of the AMS menu bar
Information
In the active window the title bar is dark; in the inactive window the
title bar is light.
The following functions are the same in all windows:
Button
Function
Cancels the current function and closes the window
Opens the online help.
Control menu
Figure 5-2: AMU control menu
5.1.2
Selecting a command
With the mouse
5-2
Menus and commands
Step 1
Move the mouse pointer to the required menu in the menu bar
Step 2
Click on the menu
DOC D00 025-A
The menu opens
Step 3
Click on the command in the menu
The command window opens
With the keyboard
Step 1
Press <ALT> and the letter underlined in the menu bar
The menu opens
Step 2
Now press the letter underlined in the menu to select the command
By shortcuts
If a key or a key combination is stated next to the command, you can
select this command directly with it.
5.1.3
Change size of the windows
Changeable windows have a surrounding frame (e. g. Trace window).
Step 1
Move the mouse to any corner of the active window
The mouse pointer changes its form to a double arrow
Step 2
5.1.4
5.1.5
Move windows
Step 1
Move the mouse pointer into the title bar
Step 2
Move the window with the mouse button pressed
Close window
Step 1
March 31, 1999
Press the mouse button and draw out the window to the
required size with the mouse button pressed
You close the window by double-clicking on the control menu
5-3
5.2
Menu overview
All commands of the AMS workspace are explained here:
Figure 5-3: AMS menu overview
Information
When the Dual-AMU is used, only the Switch command can be executed on the passive AMU (also the View Archive Catalog Management command is not allowed on the passive AMU). Enter all
commands on the active AMU.
5-4
Menus and commands
DOC D00 025-A
5.3
Shutdown menu
Figure 5-4: "Shutdown" menu
Command
6KXWGRZQ
Field
Explanation
Prepare shutdown of the AML system.
$08
Figure 5-5:
"SHUTDOWN OF AMU" window
ATTENTION!
Before shutting down stop the communication with the host computer (e. g. with
HOLD 1,1).
Shortcut: Function key F12
March 31, 1999
<HV
The current command is still processed.
All modules of the AMU are then ended
and the database is closed.
1R
Return to the program, no shutdown.
5-5
Command
6KXWGRZQ
FRPSOHWH
ZLWK26
Field
Explanation
Prepare shutdown of the AML system (as in6KXWGRZQ
) and then break off all processes
under OS/2 and perform OS/2 system shutdown.
RQO\$0/6\VWHP
Fig. 5-6: "TOTAL SYSTEM SHUTDOWN" window
ATTENTION!
Before shutting down stop the communication with the host computer (e. g. with
HOLD 1,1).
5-6
Menus and commands
DOC D00 025-A
5.4
Edit menu
Figure 5-7: "Edit" menu
Command
March 31, 1999
Explanation
&XW
Cutting out the marked object and saving it in the clipboard (memory of the computer).
Shortcut: Key combination <Shift>+<Delete>
&RS\
Copying the marked object into the clipboard.
Shortcut: Key combination <Control>+<Insert>
3DVWH
Inserting the object from the clipboard at the current
cursor position.
Shortcut: Key combination <Shift>+<Insert>
5-7
5.5
View menu
Figure 5-8: "View" menu
Selecting information in different display windows.
5.5.1
Archive
Possibility of controlling and changing archive catalogue entries for the
compartments.
After entry either of the Volser or selection of a coordinate all associated
information from the database is displayed. If a Volser is present several
times, only the first entry in the database is displayed.
Figure 5-9: "Archive Catalog Management" window
5-8
Menus and commands
DOC D00 025-A
.
Field
&RRUGLQDWH
Explanation
Logical coordinates of the medium in the archive.
Information
An optical disk occupies 2 logical coordinates, one each for the front and reverse
side.
The individual places of the coordinates have the following contents:
T T NN S S RR P P
Compartment
Row
Segment
Device No.
Device type
List of all device types (☞ AMU Reference Guide)
Select with the aid of the 4 selection fields the required
coordinate for the display of the data block of a coordinate
9ROVHU
Serial number of the medium, represented by a barcode, also called VSN.
The Volser is alphanumeric and 1 to max. 16 characters
in length.
Inadmissible Volsers are:
• 0000000000000000
• CLEAN
Enter the Volser in the field to find the medium in the
database.
0HGLXP
Type of the medium for monitoring the archive - drive
assignment
Medium cannot be changed in the Archive Catalog
Management.
Information
A distinction is not made basically
between all different types of media
with the same media housing.
List of all media types (☞ AMU Reference Guide)
March 31, 1999
5-9
Field
$WWULEXWH
Explanation
Status of the medium (the characters in brackets are the
variables for the database)
(O)
2FFXSLHG
(E)
(MHFWHG
(M)
0RXQWHG
(I)
Compartment empty, medium ejected
Compartment empty, medium in the
drive
,QLWLDO
Not used attribute
,Q-XNHER[
Compartment empty,
optical disk in the jukebox
(J)
5HYHUVH6LGH
(R)
0RXQWHG
(Y)
Compartment empty,
optical disk in the drive (reverse side)
(PSW\
Compartment empty
8QGHILQHG
Not defined (special attribute for
HACC/MVS)
(U)
7HPS$ZD\
(T)
7HPS+HUH
(A)
7\SH
Medium occupies compartment
In AML/2 twin robot system the compartment in the storage tower is occupied temporarily for passing through
to the other robot
Occupied compartment in the problem
box
Type of the compartment in the archive
(S)
6WRUDJH
(N)
&OHDQ
$08
'\QDPLF
(A)
• Archive compartment for
- hierarchically defined Volser
ranges
- dynamically defined Volser
ranges only in HACC/MVS
- no Clean
Cleaning media compartment
(not in HACC/MVS): Archive compartment for dynamic insertion and
passing through
Type of the compartment in the I/O unit
)RUHLJQ
(F)
3UREOHP
5-10
Menus and commands
(P)
Foreign media compartment
Compartment in the problem box
(I/O unit)
DOC D00 025-A
Field
Explanation
Archive compartment for dynamic use
of the I/O unit under HACC/MVS
+$&&
(D)
'\QDPLF
Archive compartment for dynamic use
of the I/O unit (in HACC/MVS only
for optical disk)
$08
(A)
'\QDPLF
97\SH
Volser type for storage media
•
(U): Undefined (no scratch medium
or scratch media management not on the AMU
• 6FUDWFK (S): Scratch medium
8QGHILQHG
VType cannot be changed in the Archive Catalog Management.
Information
The value of this field can be changed
only with a host command.
8VH&RXQW
Number of accesses to the compartment.
Use Count cannot be changed in the Archive Catalog
Management.
&UDVK&RXQW
not used
5RERW
Access right of the robot to the compartment
$FFHVV
6WDWXV
0HVVDJH
March 31, 1999
Answer of AMS with message number (☞ AMU Reference Guide)
after an unsuccessful command
(e. g. Not found: RC = 1032)
5-11
Commands
Command
9LHZ
&RRUGLQDWH
Explanation
Display of the archive catalogue entry for the entered
logical archive coordinate.
9LHZ1H[W
Display of the archive catalogue entry of the next coordinate of the component. If the last coordinate is
reached, there is no further paging.
9LHZ3UHY
Display of the archive catalogue entry of the previous
coordinate of the component. If the first coordinate is
reached, there is no further paging.
9LHZ9ROVHU
Display of the archive catalogue entry for the entered
Volser.
8SGDWH
Information
This command can be executed only
after logging in as administrator or
supervisor.
Changing the AMU archive catalogue for the archive
coordinate.
ATTENTION!
The existing entry is only overwritten in
the AMU archive catalogue. If there are
incorrect entries, discrepancies in the
archive and to the HACC/MVS archive
catalogue can arise.
5-12
Menus and commands
DOC D00 025-A
5.5.2
Trace
Online or offline trace of the internal processes of the AMU software
(AMS and DAS). You can select the traced processes according to areas
(processes of the AMU).
Information
Processing can be slowed down by selecting Trace!
Change the selection only after consultation with ADIC/GRAU Storage Systems (Support) or ADIC.
Standard selection: no traces
ATTENTION!
The concurrent trace has only a limited memory. Save the trace as
quickly as possible in the case of error.
Figure 5-10: "Trace" window
Field/command
/LVWRI
7UDFH,'·V
7UDFH
✔2QOLQH
March 31, 1999
Explanation
Select the trace levels with <Space bar> or the mouse.
List of all Trace ID’s (☞ AMU Reference Guide)
The current trace is displayed additionally on the
screen with
• Time of day
• Trace-ID (e.g. 03100 means Trace KRN 1)
• Trace entry (depending on trace type)
5-13
Time of day
Figure 5-11:
"Trace" window (Online)
The trace is switched off.
21
Writes the current traces in the main memory (1 MB
reserved). If the memory is exhausted, the oldest entry
is written over.
/
8QVHOHFW$OO
Menus and commands
Trace text
2))
6HOHFW$OO
5-14
Trace ID
All entries in the online trace window are marked or
the marking is removed
)LOHQDPH
Path and file name of the trace in binary format, after
execution of the 6DYHcommand
6DYH
Saving the traces in a file with the name preset in the
Filename field in binary format
Select this command immediately after occurrence of
the problem so that the trace information is not lost.
You can print this file with the OS/2 Print command
only after formatting (☞ )RUPDW).
DOC D00 025-A
)RUPDW
Brings a trace file saved with the 6DYHcommand into a
printable form (ASCII).
Figure 5-12:
"Format Trace Files" window
: Target file name with path
(e. g. D?QDPH or
F?DPX?ORJVWUF?QDPH ).
starts the formatting.
Execution is confirmed by outputting the "IRUPDWWHG
" text.
,QILOH
Path and name of the binary trace file for
conversion into ASCII format
(default: C:?AMU?LOGS-TRC)
2XWILOH
Path and name of the ASCII trace file after
conversion into ASCII format
6WDUW
Execution of formatting
Select this command after you have
entered the file names in the,QILOH and
2XWILOH field.
)RUPDW
WLQJ
fRUPDWW
WHG
March 31, 1999
Status display of formatting, formatting is
completed at .
5-15
5.5.3
Log
The Alerter logs all messages (even if the AMU-Log Control Center window is not opened).
Examples:
•
•
•
•
•
Commands of the host computer
Execution of the commands
Messages to the host computer
User interventions
Error messages
Log files start daily at 0.00 hours. If the available memory on the hard
disk drops below a value defined in the ARTCFG.DAT configuration file
(default 40 MB), the oldest log files are deleted.
Information
Log files cannot extend over several days!
There is only one log file for each day.
.
Date
Time
Message number
Command sequence
number
Message text
Figure 5-13: "AMU Log" window
5-16
Menus and commands
DOC D00 025-A
Field/command
/RJDUFKLYH
Explanation
Opens a window for selecting the saved log files with
automatic display in the OS/2 editor EPM
The log file name is composed of
lo <YY><MM><DD>.001
<YY>: Year
<MM>: Month
<DD>: Day
List with all files
saved in the defined
log folder
Status information
(e.g. number of log
files or selection)
Status information
(e.g. path name or
instruction for opening
file)
Figure 5-14:
View
March 31, 1999
"View Log Files" window
Copies the selected file into a temporary
file (logview.txt). This file is displayed in
the OS/2 editor EPM and can be edited
further as desired.
5-17
)RQWVL]H
Selection of font, size and style for the contents in the
$08/RJwindow
Figure 5-15:
5-18
Menus and commands
"Log Font Dialog" window
1DPH
Drop-down list box for all installed fonts
6L]H
Drop-down list box of the size for the
selected font in pt
6W\OH
Drop-down list box of the style of the
selected font (available only for certain
fonts)
'LVSOD\
Selection of the screen fonts, do not
change the setting
3ULQWHU
not used
2XWOLQH
Outlined type
8QGHUOLQH
Underlined type
6WULNHRXW
Struck through type
6DPSOH
Display of an example of the selected font
2N
Activates the selection for the current
AMU log. On renewed opening of the
AMU Log window, the default font (system VIO) is used again.
DOC D00 025-A
5.6
Operations menu
Figure 5-16: "Operations" menu
5.6.1
Operator login
Command
/RJLQ
2SHUDWRU
Logoff
Field
To use the disabled functions in the Operator menu,
you must log in as operator, administrator or supervisor
For protection against unauthorized use, you should
log off after the application
Figure 5-17:
March 31, 1999
Explanation
"Operator Login" window
3DVVZRUG
Field for entering the operator password.
You receive this password from your system administrator
2N
Execution of the login process
5-19
5.6.2
Manual Operation
Prerequisite: "MANUAL" operating mode
Manual execution of the host commands of 0RXQW and (MHFW by the operator.
Step 1
Switch the main switch off
Step 2
In the case of 0RXQWcommands, mount the cartridge in the
stated drive
Step 3
Confirm the execution of the displayed command with 2.
The executed task is acknowledged to the host computer and this
shows the next command
Step 4
On resumption of the automatic mode, perform an insertion
operation for all cartridges used in the manual mode
.
Figure 5-18: "Manual Operation" window
Command/
field
5-20
Menus and commands
Explanation
&RPPDQG
Command of the host which should be performed by
the operator
9ROVHU
Search in /RFDWLRQ for the Volser or VSN to execute the
command
DOC D00 025-A
Command/
field
/RFDWLRQ
'ULYH
Explanation
Statement of the coordinates in the archive where the
9ROVHU for the command is currently located
8QLW
Number of the storage tower or rack
6HJP
Number of the segments for the storage
towers
5RZ
Row in the segment (counting from below
to above)
3RV
Compartment (counting from left to right)
1DPH
Designation (comment) which is allocated
to the component in the configuration
Place the medium with the 9ROVHU in the drive designated in this field
With an EJECT command (ejection) the field remains
free
1DPH
March 31, 1999
Designation (comment) which is allocated
to the drive in the configuration
2.
Actuate after the command has been executed by the
operator.
Database update is performed, host receives positive
response
5HMHFW
Actuate if the command has not been executed by the
operator.
Database update is not performed, host receives negative response
5-21
5.6.3
Disaster Recovery
Dialog box for starting the ejection of preselected media in an emergency
(Disaster Recovery). The window is divided into two sections for independent rejection of the media in AML/2 twin robot systems.
Figure 5-19: "Disaster Recovery" window
Command/
field
5-22
Menus and commands
Explanation
)LOH
Drop-down list box for selecting the prepared files
with Volsers for ejection.
Display of all files in the C:\AMU\RECOVERY\
folder with file name *.DSR
(☞ AMU Reference Guide)
6WDUW
Starting the ejection of the media from the selected file
6WRS
Interruption of ejection
6WDWXV
Display of the current situation on ejection
DOC D00 025-A
5.7
Admin menu
The functions of the Admin menu item are described in the AMU Reference Guide.
Figure 5-20: "Admin" menu
5.7.1
Administrator Login
Command
/RJLQ
$GPLQLV
Log-
WUDWRU
off
Field
To use the disabled functions in the Admin menu you
must log in as administrator or supervisor
For protection against unauthorized use you should
log off again after the application
Figure 5-21:
March 31, 1999
Explanation
"Administrator Login" window
3DVVZRUG
Field for entering the administrator password.
You receive this password from your service
partner, ADIC/GRAU Storage Systems or
ADIC
2N
Execution of the login process.
5-23
5.8
Window menu
Figure 5-22: "Window" menu
Command
Explanation
&ORVHDOO
Closing all opened windows
:LQGRZ
Selection of the corresponding window
(list of all
opened
windows)
5-24
Menus and commands
DOC D00 025-A
5.9
Help menu
Figure 5-23: "Help" menu
Command
+HOSIRU
KHOS
Explanation
Information of the use of the start page of the help
functions.
Figure 5-24:
March 31, 1999
"Using the Help Facility" window
5-25
Command
([WHQGHG
Explanation
Start page for the AMU online help.
KHOS
Figure 5-25:
5-26
Menus and commands
"Help for AMU - (AML Management
Unit)" window
DOC D00 025-A
Command
+HOSLQGH[
Explanation
Help index
Figure 5-26:
$ERXW
Display of the copyright and of the AMU version No.
Figure 5-27:
March 31, 1999
"Help Index" window
"About AMU" window
5-27
5-28
Menus and commands
DOC D00 025-A
6
Processing media
6.1
Overview
In the normal operating procedure cartridges must be added to the
AML/J or removed from it. Three types of I/O units are available for
inserting or ejecting cartridges.
• I/O unit/C
• I/O unit/D (HICAP)
• I/O unit/E
There are different functional ranges in the I/O unit for the different
applications:
•
•
•
•
March 31, 1999
"Problem" range
"Foreign" range
"HACC Dynamic" range
"AMU Dynamic" range
6-1
The "Foreign", "HACC Dynamic" and "AMU Dynamic" ranges are
defined in the Logical Ranges function in the AMS.
Table 6-1:
Ranges in the I/O unit
Problem
Position Fixed range
with extra large
compartments
Use
HACC
Dynamic
AMU
Dynamic
Configurable range in the magazines
Cartridges
which should
be inserted or
ejected with
HACC/MVS
Cartridges
which should
be inserted or
ejected with
all applications except
for HACC/
MVS
Identifi- Not possible
cation
Not possible With commands of the
HACC/MVS
host software
Automatically after
changes
(removal of
the magazine)
Robot
access
Transport
from and to
the drive, in
the case of
problems to
the problem
box
Transport
from and to
the archive or
to the drive
Volser
Cartridges
which are
mechanically
damaged or
cannot be identified by the system, partially
also storage of
used cleaning
media
Foreign
Only storage
Cartridges
with labels
foreign to the
system (no
or not readable barcode)
Transport
from and to
the archive
6-digit alphaSymbolic
Volser com- numeric
Volser
mencing
with the
symbol "*"
e.g. "*FR001"
Alphanumeric Volser
with one to 16
characters
Before using the I/O unit obtain information about the configuration of
the ranges in your system:
• AMS Graphical Configuration
• HACPARM in HACC/MVS
6-2
Processing media
DOC D00 025-A
6.2
I/O unit/C
I/O unit/C handle
I/O unit/C window
Illuminated pushbutton S85
<I/O unit/C enable>
Figure 6-1: I/O unit/C
Production is not interrupted when inserting cartridges through the I/O
unit. Insert the cartridges in the I/O unit as follows:
March 31, 1999
6-3
6.2.1
Inserting cartridges
New cartridges are inserted in the AML/J through the I/O unit.
Step 1
Press the button on the I/O unit
The button on the I/O unit lights up green and the I/O unit is
unlocked
Step 2
Open the door of the I/O unit
Step 3
Empty the problem box places if cartridges are there
Step 4
Insert the cartridges in the I/O unit. Pay attention to the correct
position.
• Tape head down
• Label to the front
Step 5
Close the door of the I/O unit
The AML/J locks the I/O unit .
According to configuration, the robot checks the magazine (barcode or
empty place) on the cartridges.
Step 6
Move the cartridge with the aid of the host software into the
archive
(exception: foreign mount cartridges)
The cartridges are brought into the archive.
6-4
Processing media
DOC D00 025-A
6.2.2
Ejecting cartridges
Cartridges are ejected from the AML/J through the I/O unit.
Production is not interrupted when ejecting cartridges with the I/O unit.
Eject the cartridges as follows with the I/O unit:
Step 1
Perform the ejection command from your application or HOST
software.
The cartridges are brought into the I/O unit
Step 2
Press the button on the I/O unit
The button on the I/O unit lights up green and the I/O unit is
unlocked
Step 3
Open the door of the I/O unit
Step 4
Empty the problem box places if cartridges are there
Step 5
Remove the cartridges from the I/O unit
Step 6
Close the door of the I/O unit
The AML/J locks the I/O unit .
According to configuration the robot checks the magazine (barcode or
empty place) on the cartridges.
March 31, 1999
6-5
6.3
I/O unit/D (HICAP)
Operating button
Door lock
I/O unit electromagnetic
lock and switch
I/O unit segment 1
(coordinates of E60x010101)
I/O unit segment 2
(coordinates of E60x020101)
Figure 6-2: I/O unit/D
Production is interrupted when inserting cartridges through the I/O
unit/D. Insert the cartridges in the I/O unit as follows:
6-6
Processing media
DOC D00 025-A
6.3.1
Inserting cartridges
New cartridges are inserted in the AML/J through the I/O unit.
Step 1
Press the button on the I/O unit
The robot moves into the rest position. The power voltage of the robot
control is switched off. The button on the I/O unit lights up green and
the I/O unit is unlocked.
Step 2
Open the door of the I/O unit
Step 3
Insert the cartridges in the I/O unit. Pay attention to the correct
position.
• Tape head to the right
• Label to the front
Step 4
Close the door of the I/O unit
Step 5
Press the <Control on> button
The power voltage is switched back on. The AML/J locks the I/O unit.
The robot performs a homing run.
According to configuration the robot checks the magazine (barcode or
empty place) on the cartridges.
Step 6
Move the cartridge with the aid of the host software into the
archive
(exception: foreign mount cartridges)
The cartridges are brought into the archive.
March 31, 1999
6-7
6.3.2
Ejecting cartridges
Cartridges are ejected from the AML/J through the I/O unit.
Production is not interrupted when ejecting cartridges with the I/O unit.
Eject the cartridges as follows with the I/O unit:
Step 1
Perform the ejection command by your application or HOST
software.
The cartridges are brought into the I/O unit
Step 2
Press the button on the I/O unit
The robot moves into the rest position. The power voltage of the robot
control is switched off. The button on the I/O unit lights up green and
the I/O unit is unlocked.
Step 3
Open the door of the I/O unit
Step 4
Remove the cartridges from the I/O unit
Step 5
Close the door of the I/O unit
Step 6
Press the <Control on> button
The power voltage is switched back on. The AML/J locks the I/O unit.
The robot performs a homing run.
According to configuration the robot checks the magazine (barcode or
empty place) on the cartridges.
6-8
Processing media
DOC D00 025-A
6.4
I/O unit/E
Door lock
Requirement button
Shutter
Figure 6-3: Two I/O units/E
6.4.1
Inserting cartridges
New cartridges are inserted in the AML/J through the I/O unit.
Step 1
Press the button on the I/O unit
The button lights up green. On release by the robot control the shutter
is unlocked.
Step 2
Open the shutter of the I/O unit
Step 3
Pull out the slide of the I/O unit
Step 4
Remove the magazine
Step 5
Insert the cartridges in the magazine. Pay attention to the correct position.
• Tape head to the right
• Label to the front
Step 6
Put the magazine back in the I/O unit
Step 7
Push the slide back in
Step 8
Close the shutter of the I/O unit
The AML/J locks the shutter of the I/O unit .
According to configuration the robot checks the magazine (barcode or
empty place) on the cartridges.
Step 9
Move the cartridge with the aid of the host software into the
archive
(exception: foreign mount cartridges)
The cartridges are brought into the archive.
March 31, 1999
6-9
6.4.2
Ejecting cartridges
Cartridges are ejected from the AML/J through the I/O unit.
Production is not interrupted when ejecting cartridges with the I/O unit.
Eject the cartridges as follows with the I/O unit:
Step 1
Perform the ejection command by your application or HOST
software
The cartridges are brought into the I/O unit
Step 2
Press the button on the I/O unit.
The button lights up green. On release by the robot control the shutter
is unlocked.
Step 3
Open the shutter of the I/O unit
Step 4
Pull out the slide of the I/O unit
Step 5
Remove the magazine
Step 6
Remove the cartridges from the magazine
Step 7
Put the magazine back in the I/O unit
Step 8
Push the slide back in
Step 9
Close the shutter of the I/O unit
The AML/J locks the shutter of the I/O unit .
According to configuration the robot checks the magazine (barcode or
empty place) on the cartridges.
6-10
Processing media
DOC D00 025-A
6.5
Disaster Recovery
The Disaster Recovery function enables cartridges to be ejected, corresponding to a previously defined list (file) without host connection. The
function is used after a failure of the host system for preparing the move
into an alternate computer center.
Step 1
Unload all drives
Step 2
Bring these media back into the home position with the .((3
command
Step 3
Perform a login in the operator menu.
Figure 6-4: "Operator Login" window
Step 4
Select the 'LVDVWHU5HFRYHU\ command in the 2SHUDWRU menu
Step 5
Enter the password (defined in 3URFHVV&RQILJXUDWLRQ)
The Disaster Recovery window is opened.
Figure 6-5: "Disaster Recovery" window
Step 6
March 31, 1999
Select the file for ejection
6-11
Information
The entire I/O unit is used for disaster recovery
(incl. foreign mount compartments)
Step 7
Start the ejection with 6WDUW
Step 8
Empty all media from all I/O units as requested
Step 9
Confirm ejection with 2.
The media are ejected in the order specified in the selected file
Step 10 Empty the I/O unit if the request appears on the workspace
Step 11 Continue ejection with 2.
The command is acknowledged positively after ejection of the last
medium.
6-12
Processing media
DOC D00 025-A
Index
A
B
About . . . . . . . . . . . . . . . . . . . . . . . . . . 5-27
Address
ADIC . . . . . . . . . . . . . . . . . . . . . . . . 1-3
ADIC/GRAU Storage Systems . . . . 1-3
Admin menu . . . . . . . . . . . . . . . . . . . . 5-23
AML Controller User Guide . . . . . . . . . 1-2
AML Management Unit . . . . . . . . . . . . 2-3
AML/J control unit . . . . . . . . . . . . . . . . 2-2
AML/J Maintenance Guide . . . . . . . . . . 1-2
AMU . . . . . . . . . . . . . . . . . . . . . . . . . . . 2-3
Communication . . . . . . . . . . . . . . . . 2-4
Copyright/Version . . . . . . . . . . . . . 5-27
Hardware . . . . . . . . . . . . . . . . . . . . . 2-4
Help . . . . . . . . . . . . . . . . . . . . . . . . 5-25
Software . . . . . . . . . . . . . . . . . . . . . 2-4
Tasks . . . . . . . . . . . . . . . . . . . . . . . . 2-4
User interface . . . . . . . . . . . . . . . . . 2-4
Workspace . . . . . . . . . . . . . . . . . . . . 5-1
AMU Installation Guide . . . . . . . . . . . . 1-2
AMU Log . . . . . . . . . . . . . . . . . . . . . . 5-16
AMU Problem Determination Guide . . . 1-2
AMU Reference Guide . . . . . . . . . . . . . 1-2
Attribute . . . . . . . . . . . . . . . . . . . . . . . . 5-10
Barcode scanner . . . . . . . . . . . . . . . . . . . 2-2
C
Cartridge . . . . . . . . . . . . . . . . . . . . . . . . . 2-7
Clean . . . . . . . . . . . . . . . . . . . . . . . . . . . 5-10
Close
all . . . . . . . . . . . . . . . . . . . . . . . . . . 5-24
Command
Select . . . . . . . . . . . . . . . . . . . . . . . . 5-2
Communication . . . . . . . . . . . . . . . . . . . 2-4
Compartment addressing . . . . . . . . . . . . 2-5
Components of the system
Control cabinet . . . . . . . . . . . . . . . . . 2-3
Control cabinet . . . . . . . . . . . . . . . . . . . . 2-3
Control menu . . . . . . . . . . . . . . . . . . . . . 5-2
CONTROL ON . . . . . . . . . . . . . . . . . . . . 4-2
Coordinate . . . . . . . . . . . . . . . . . . . . . . . 5-9
Coordinates . . . . . . . . . . . . . . . . . . . . . . . 2-5
Copy . . . . . . . . . . . . . . . . . . . . . . . . . . . . 5-7
Crash Count . . . . . . . . . . . . . . . . . . . . . 5-11
Cut . . . . . . . . . . . . . . . . . . . . . . . . . . . . . 5-7
D
G
Data
Electrical system . . . . . . . . . . . . . . . 2-9
Description of function . . . . . . . . . . . . . 2-2
Disaster Recovery . . . . . . . . . . . . . . . . 6-11
Drive . . . . . . . . . . . . . . . . . . . . . . . . . . . 2-2
Drives . . . . . . . . . . . . . . . . . . . . . . . . . . . 2-6
Dynamic
AMU . . . . . . . . . . . . . . . . . . 5-10, 5-11
HACC/MVS . . . . . . . . . . . . . . . . . 5-11
Gripper . . . . . . . . . . . . . . . . . . . . . . . . . . 2-2
Guide
Further information . . . . . . . . . . . . . 1-2
Layout . . . . . . . . . . . . . . . . . . . . . . . 1-1
E
Edit
Menu . . . . . . . . . . . . . . . . . . . . . . . . 5-7
Ejected . . . . . . . . . . . . . . . . . . . . . . . . . 5-10
Ejecting cartridges . . . . . . . 6-5, 6-8, 6-10
Electrical data . . . . . . . . . . . . . . . . . . . . 2-9
Electrical fuses . . . . . . . . . . . . . . . . . . . . 2-9
Emergency shutdown . . . . . . . . . . . . . . . 4-5
Empty . . . . . . . . . . . . . . . . . . . . . . . . . . 5-10
F
Fault . . . . . . . . . . . . . . . . . . . . . . . . . . . . 5-1
Field
Maximize . . . . . . . . . . . . . . . . . . . . 5-2
Symbol . . . . . . . . . . . . . . . . . . . . . . 5-2
Font size . . . . . . . . . . . . . . . . . . . . . . . . 5-18
Foreign . . . . . . . . . . . . . . . . . . . . . . . . . 5-10
Format (Trace) . . . . . . . . . . . . . . . . . . . 5-15
Functional unit . . . . . . . . . . . . . . . . . . . . 2-2
Fuses . . . . . . . . . . . . . . . . . . . . . . . . . . . 2-9
in-ii
H
Help menu . . . . . . . . . . . . . . . . . . . . . . . 5-25
HICAP . . . . . . . . . . . . . . . . . . . . . . . . . . 6-6
Homing run . . . . . . . . . . . . . . . . . . . . . . . 4-3
Host connection . . . . . . . . . . . . . . . . . . . 2-1
I
I/O unit . . . . . . . . . . . . . . . . . . . . . 2-6, 2-7
I/O unit/C . . . . . . . . . . . . . . . . . . . . . . . . 6-3
I/O unit/D (HICAP) . . . . . . . . . . . . . . . . 6-6
I/O unit/E . . . . . . . . . . . . . . . . . . . . . . . . 6-9
Illuminated pushbutton
CONTROL ON . . . . . . . . . . . . . . . . 4-2
In Jukebox . . . . . . . . . . . . . . . . . . . . . . . 5-10
Initial . . . . . . . . . . . . . . . . . . . . . . . . . . . 5-10
Inserting cartridges . . . . . . . . 6-4, 6-7, 6-9
K
Keyboard
. . . . . . . . . . . . . . . . . . . . . . . . 5-1
L
Layout of the windows . . . . . . . . . . . . . . 5-2
Log . . . . . . . . . . . . . . . . . . . . . . . . . . . . 5-16
Logical coordinates . . . . . . . . . . . . . . . . . 2-5
Index
DOC D00 025-A
M
Main switch . . . . . . . . . . . . . . . . . . . . . . 3-5
Manual Operation . . . . . . . . . . . . . . . . 5-20
Mechanical lock . . . . . . . . . . . . . . . . . . . 3-5
Menu
Admin . . . . . . . . . . . . . . . . . . . . . . 5-23
Edit . . . . . . . . . . . . . . . . . . . . . . . . . 5-7
Help . . . . . . . . . . . . . . . . . . . . . . . . 5-25
Operations . . . . . . . . . . . . . . . . . . . 5-19
Overview . . . . . . . . . . . . . . . . . . . . . 5-4
Shutdown (AMU) . . . . . . . . . . . . . . 5-5
View . . . . . . . . . . . . . . . . . . . . . . . . 5-8
Window . . . . . . . . . . . . . . . . . . . . . 5-24
Menu bar . . . . . . . . . . . . . . . . . . . . . . . . 5-2
Mounted . . . . . . . . . . . . . . . . . . . . . . . . 5-10
Mouse . . . . . . . . . . . . . . . . . . . . . . . . . . 5-1
N
Normal stopping . . . . . . . . . . . . . . . . . . 4-4
O
Occupied . . . . . . . . . . . . . . . . . . . . . . . 5-10
Operations menu . . . . . . . . . . . . . . . . . 5-19
P
Paste . . . . . . . . . . . . . . . . . . . . . . . . . . . . 5-7
Problem . . . . . . . . . . . . . . . . . . . . . . . . 5-10
Protective devices
Main switch . . . . . . . . . . . . . . . . . . . 3-5
Mechanical lock . . . . . . . . . . . . . . . 3-5
R
Restarting the AML/J . . . . . . . . . . . . . . 4-6
March 31, 1999
Reverse Side Mounted . . . . . . . . . . . . . 5-10
Robot . . . . . . . . . . . . . . . . . . . . . . . . . . . 2-6
Robot system
Homing run . . . . . . . . . . . . . . . . . . . 4-3
S
Scratch-Status . . . . . . . . . . . . . . . . . . . . 5-11
Select online help . . . . . . . . . . . . . . . . . . 5-2
Selecting a command . . . . . . . . . . . . . . . 5-2
Shortcut . . . . . . . . . . . . . . . . . . . . . . . . . . 5-3
Shutdown AMU . . . . . . . . . . . . . . . . . . . 5-5
Shutdown AMU (completely) . . . . . . . . 5-6
Shutdown menu . . . . . . . . . . . . . . . . . . . 5-5
Starting the AML/J . . . . . . . . . . . . . . . . . 4-3
Stopping the AML/J . . . . . . . . . . . . . . . . 4-4
Emergency shutdown . . . . . . . . . . . . 4-5
Normal stoppping . . . . . . . . . . . . . . . 4-4
Storage . . . . . . . . . . . . . . . . . . . . . . . . . 5-10
Storage cells . . . . . . . . . . . . . 2-2, 2-5, 2-6
Switching off with Shutdown AMU . . . . 5-5
Switching off with Shutdown AMU (completely) . . . . . . . . . . . . . . . . . . . . . . . . . . . . . 5-6
Symbols
Warning indications . . . . . . . . . . . . . 3-3
Symbols and notes . . . . . . . . . . . . . . . . . 1-2
System data
Electrical system . . . . . . . . . . . . . . . 2-9
System description . . . . . . . . . . . . . . . . . 2-1
T
Target group . . . . . . . . . . . . . . . . . . . . . . 1-1
Technical support . . . . . . . . . . . . . . . . . . 1-3
Temp
Away . . . . . . . . . . . . . . . . . . . . . . . 5-10
Here . . . . . . . . . . . . . . . . . . . . . . . . 5-10
iii
Title bar . . . . . . . . . . . . . . . . . . . . . . . . . 5-2
U
Undefined . . . . . . . . . . . . . . . . . . . . . . 5-10
Update
Coordinate . . . . . . . . . . . . . . . . . . . 5-12
Use as intended
AML/J-System . . . . . . . . . . . . . . . . 3-2
Use Count . . . . . . . . . . . . . . . . . . . . . . 5-11
V
View
Coordinate . . . . . . . . . . . . . . . . . . . 5-12
Menu . . . . . . . . . . . . . . . . . . . . . . . . 5-8
Volser . . . . . . . . . . . . . . . . . . . . . . 5-12
Volser . . . . . . . . . . . . . . . . . . . . . . . 2-2, 2-7
Volume Serial Number . . . . . . . . . 2-2, 2-7
VType . . . . . . . . . . . . . . . . . . . . . . . . . 5-11
W
Warning indications . . . . . . . . . . . . . . . . 3-3
Window
Corner . . . . . . . . . . . . . . . . . . . . . . . 5-2
Frame . . . . . . . . . . . . . . . . . . . . . . . 5-2
Window menu . . . . . . . . . . . . . . . . . . . 5-24
Windows
Change size . . . . . . . . . . . . . . . . . . . 5-3
Close . . . . . . . . . . . . . . . . . . . . . . . . 5-3
Layout . . . . . . . . . . . . . . . . . . . . . . . 5-2
Move . . . . . . . . . . . . . . . . . . . . . . . . 5-3
in-iv
Index
DOC D00 025-A