1
LX-5_EN.book Page 1 Friday, July 4, 2008 9:35 AM Getting Started LX-5 USER GUIDE Connection and Installation PROJECTOR Network Settings Operation and Settings (lens is optional) Please study this instruction manual carefully before starting to operate the unit, in order to use the unit correctly. We take no responsibility for any problems resulting from misuse of this unit by operating this equipment other than instructed in this manual. Enter below the serial No. which is located on the bottom side of the cabinet. Retain this information for future reference. Model No. R9011221 Serial No. Others For Customer use : LX-5_EN.book Page 2 Friday, July 4, 2008 9:35 AM Getting Started Safety Precautions IMPORTANT INFORMATION WARNING: TO PREVENT FIRE OR SHOCK HAZARDS, DO NOT EXPOSE THIS APPLIANCE TO RAIN OR MOISTURE. WARNING: THIS APPARATUS MUST BE EARTHED. CAUTION: To reduce the risk of electric shock, do not remove cover. Refer servicing to qualified service personnel. This projector is equipped with a 3-blade grounding type plug to satisfy FCC rule. If you are unable to insert the plug into the outlet, contact your electrician. FCC INFORMATION (U.S.A. only) CAUTION: Changes or modification not approved by Barco could void the user’s authority to operate the equipment. NOTE: This equipment has been tested and found to comply with the limits for a Class A digital device, pursuant to Part 15 of the FCC Rules. These limits are designed to provide reasonable protection against harmful interference when the equipment is operated in a commercial environment. This equipment generates, uses, and can radiate radio frequency energy and, if not installed and used in accordance with the instruction manual, may cause harmful interference to radio communications. Operation of this equipment in a residential area is likely to cause harmful interference in which case the user will be required to correct the interference at his own expense. MACHINE NOISE INFORMATION (Germany only) Changes Machine Noise Information Ordinance 3. GSGV, January 18, 1991: The sound pressure level at the operator position is equal or less than 45 dB (A) according to ISO 7779. About the installation place Do not install the projector in a place that cannot support its weight securely. If the installation place is not sturdy enough, the projector could fall or overturn, possibly causing personal injury. 2 IMPORTANT SAFEGUARDS Electrical energy can perform many useful functions. This unit has been engineered and manufactured to assure your personal safety. But IMPROPER USE CAN RESULT IN POTENTIAL ELECTRICAL SHOCK OR FIRE HAZARD. In order not to defeat the safeguards incorporated into this product, observe the following basic rules for its installation, use and service. Please read these Important Safeguards carefully before use. - All the safety and operating instructions should be read before the product is operated. - The safety and operating instructions should be retained for future reference. - All warnings on the product and in the operating instructions should be adhered to. - All operating instructions should be followed. - Place the projector near a wall outlet where the plug can be easily unplugged. - Unplug this product from the wall outlet before cleaning. Do not use liquid cleaners or aerosol cleaners. Use a damp cloth for cleaning. - Do not use attachments not recommended by the product manufacturer as they may be hazardous. - Do not use this product near water. Do not use immediately after moving from a low temperature to high temperature, as this causes condensation, which may result in fire, electric shock, or other hazards. - Do not place this product on an unstable cart, stand, or table. The product may fall, causing serious injury to a child or adult, and serious damage to the product. The product should be mounted according to the manufacturer’s instructions, and should use a mount recommended by the manufacturer. - When the product is used on a cart, care should be taken to avoid quick stops, excessive force, and uneven surfaces which may cause the product and cart to overturn, damaging equipment or causing possible injury to the operator. - Slots and openings in the cabinet are provided for ventilation. These ensure reliable operation of the product and protect it from overheating. These openings must not be blocked or covered. (The openings should never be blocked by placing the product on bed, sofa, rug, or similar surface. It should not be placed in a built-in installation such as a bookcase or rack unless proper ventilation is provided and the manufacturer’s instructions have been adhered to.) For proper ventilation, separate the product from other equipment, which may prevent ventilation and keep a distance (See page 11). - This product should be operated only with the type of power source indicated on the label. If you are not sure of the type of power supply to your home, consult your product dealer or local power company. - This product is equipped with a three-wire plug. This plug will fit only into a grounded power outlet. If you are unable to insert the plug into the outlet, contact your electrician to install the proper outlet. Do not defeat the safety purpose of the grounded plug. LX-5_EN.book Page 3 Friday, July 4, 2008 9:35 AM - The lens for this product is optional. Do not attach the power cord when the lens is not attached. Turning on the power when no lens is attached may result in fire, electric shock, or other hazards. - Power-supply cords should be routed so that they are not likely to be walked on or pinched by items placed upon or against them. Pay particular attention to cords at doors, plugs, receptacles, and the point where they exit from the product. - For added protection of this product during a lightning storm, or when it is left unattended and unused for long periods of time, unplug it from the wall outlet and disconnect the cable system. This will prevent damage to the product due to lightning and power line surges. - Do not overload wall outlets, extension cords, or convenience receptacles on other equipment as this can result in a risk of fire or electric shock. - Never push objects of any kind into this product through openings as they may touch dangerous voltage points or short out parts that could result in a fire or electric shock. Never spill liquid of any kind on the product. - Do not attempt to service this product yourself as opening or removing covers may expose you to dangerous voltages and other hazards. Refer all service to qualified service personnel. - Unplug this product from the wall outlet and refer service to qualified service personnel under the following conditions: a) When the power supply cord or plug is damaged. b) If liquid has been spilled, or objects have fallen on the product. c) If the product has been exposed to rain or water. d) If the product does not operate normally by following the operating instructions. Adjust only those controls that are covered by the Operation Manual, as an improper adjustment of controls may result in damage and will often require extensive work by a qualified technician to restore the product to normal operation. e) If the product has been dropped or damaged in any way. f) When the product exhibits a distinct change in performance - this indicates a need for service. - Do not look into the projection lens while the illumination lamp is turned on. Exposure of your eyes to the strong light can result in impaired eyesight. - Do not look into the inside of this unit through vents (ventilation holes), etc. Do not look at the illumination lamp directly by opening the cabinet while the illumination lamp is turned on. The illumination lamp also contains ultraviolet rays and the light is so powerful that your eyesight can be impaired. - Do not drop, hit, or damage the light-source lamp (lamp unit) in any way. It may cause the light-source lamp to break and lead to injuries. Do not use a damaged light source lamp. If the light-source lamp is broken, ask your dealer to repair it. Fragments from a broken light-source lamp may cause injuries. - The light-source lamp used in this projector is a high pressure lamp. Be careful when disposing of the lightsource lamp. If anything is unclear, please consult your dealer. - Do not ceiling-mount the projector to a place which tends to vibrate; otherwise, the attaching fixture of the projector could be broken by the vibration, possibly causing it to fall or overturn, which could lead to personal injury. - Use only the accessory cord designed for this product to prevent shock. *DO NOT allow any unqualified person to install the unit. Be sure to ask your dealer to install the unit (e.g. attaching it to the ceiling) since special technical knowledge and skills are required for installation. If installation is performed by an unqualified person, it may cause personal injury or electrical shock. - When replacement parts are required, be sure the service technician has used replacement parts specified by the manufacturer or with same characteristics as the original part. Unauthorized substitutions may result in fire, electric shock, or other hazards. - Upon completion of any service or repairs to this product, ask the service technician to perform safety checks to determine that the product is in proper operating condition. - The product should be placed more than one foot away from heat sources such as radiators, heat registers, stoves, and other products (including amplifiers) that produce heat. - When connecting other products such as VCR’s, and DVD players, you should turn off the power of this product for protection against electric shock. - Do not place combustibles behind the cooling fan. For example, cloth, paper, matches, aerosol cans or gas lighters that present special hazards when over heated. 3 LX-5_EN.book Page 4 Friday, July 4, 2008 9:35 AM Getting Started Safety Precautions (Cont’d) POWER CONNECTION The power supply voltage rating of this product is AC110 V to 120 V, AC200 V to 240 V, the power cord attached conforms to the following power supply voltage. Use only the power cord designated by our dealer to ensure Safety and EMC. When it is used by other power supply voltage, power cable must be changed. Ensure that the power cable used for the projector is the correct type for the AC outlet in your country. Consult your product dealer. Power cord For European continent countries: AC200 V to 240 V (3.3 m) Power cord Power supply voltage: AC110 V to 120 V (3.3 m) WARNING: Do not cut off the main plug from this equipment. If the plug fitted is not suitable for the power points in your home or the cable is too short to reach a power point, then obtain an appropriate safety approved extension lead or adapter or consult your dealer. If nonetheless the mains plug is cut off, dispose of the plug immediately, to avoid a possible shock hazard by inadvertent connection to the main supply. If a new main plug has to be fitted, then follow the instruction given below. WARNING: THIS APPARATUS MUST BE EARTHED. 4 IMPORTANT: The wires in the mains lead on this product are colored in accordance with the following cord: Green-and-yellow : Earth Blue : Neutral Brown : Live As these colors may not correspond with the colored making identifying the terminals in your plug, proceed as follows: The wire which is colored green-and-yellow must be connected to the terminal which is marked M with the letter E or the safety earth or colored green or green-and-yellow. The wire which is colored blue must be connected to the terminal which is marked with the letter N or colored black. The wire which is colored brown must be connected to the terminal which is marked with the letter L or colored red. LX-5_EN.book Page 5 Friday, July 4, 2008 9:35 AM EMC Supplement - This equipment is in conformity with the provisions and protection requirements of the corresponding European Directives. This equipment is designed for professional projector appliances and can be used in the following environments. ● Controlled EMC environment (for example purpose built broadcasting or recording studio), and the rural outdoors environment (far away from railways, transmitters, overhead power lines, etc). In order to keep the best performance and furthermore for electromagnetic compatibility we recommend to use the cables not exceeding the following length: Cables Power cord DVI (X4) Cable USB Cable LAN Cable RS-232C Cable Power supply cord Shielded cable Shielded cable Shielded cable Shielded cable Length 3.3 m 5.0 m 2.0 m 2.0 m 1.6 m ● The inrush current of this apparatus is 9.705 amperes. WARNING This is a Class A product. In a domestic environment this product may cause radio interference in which case the user may be required to take adequate measures. In case where the strong electromagnetic waves or magnetism are near the signal cable, the picture will contain noise. In such cases, please keep the cable away from the sources of the disturbance. Dear Customer, This apparatus is in conformance with the valid European directives and standards regarding electromagnetic compatibility and electrical safety. 5 LX-5_EN.book Page 6 Friday, July 4, 2008 9:35 AM Getting Started Contents Getting Started Safety Precautions . . . . . . . . . . . . . . . . . . . . . . . . . . . 2 Features . . . . . . . . . . . . . . . . . . . . . . . . . . . . . . . . . . . 7 Check the Accessories/Optional Accessories . . . . . . . 8 How to Read this Manual . . . . . . . . . . . . . . . . . . . . . . 8 Precautions During Use . . . . . . . . . . . . . . . . . . . . . . . 9 Names and Functions of Parts . . . . . . . . . . . . . . . . . 10 Connection and Installation Installation . . . . . . . . . . . . . . . . . . . . . . . . . . . . . . . . . 12 Optional projection lens . . . . . . . . . . . . . . . . . . . . . 12 Minimum Space Required . . . . . . . . . . . . . . . . . . . 12 Projector Installation Angle . . . . . . . . . . . . . . . . . . 13 Installing the Projector and Screen . . . . . . . . . . . . . . 13 Screen Size and Projection Distance . . . . . . . . . . 16 Connecting Video Signals of the Computer . . . . . . . 18 Connection During Single-Screen Mode Display . . 18 Connection During Two-Screen/ Four-Screen Mode Display . . . . . . . . . . . . . . . . . . 20 Network Settings Connection Using a LAN Cable . . . . . . . . . . . . . . . . . 22 Connection Example . . . . . . . . . . . . . . . . . . . . . . . 22 Specifications of PC for Controlling this Projector . . . . . . . . . . . . . . . . . . . . . . . . . . . . . 22 Turning On the Main Power . . . . . . . . . . . . . . . . . . . . 23 IP Address Settings . . . . . . . . . . . . . . . . . . . . . . . . . . 24 Assigning a static IP address . . . . . . . . . . . . . . . . . 24 Assigning IP Address from the DHCP Server . . . . 27 Using the Mail Delivery Feature . . . . . . . . . . . . . . . . 27 Connection Example (When DHCP Server is Used) . . . . . . . . . . . . . . . . 27 6 Operation and Settings Projecting Image . . . . . . . . . . . . . . . . . . . . . . . . . . . . 28 Useful Features During Projection . . . . . . . . . . . . . 29 Main Menu . . . . . . . . . . . . . . . . . . . . . . . . . . . . . . . 30 Image Menu . . . . . . . . . . . . . . . . . . . . . . . . . . . . . . 32 Setting Menu . . . . . . . . . . . . . . . . . . . . . . . . . . . . . 33 Convergence Menu . . . . . . . . . . . . . . . . . . . . . . . . 34 Lens Menu . . . . . . . . . . . . . . . . . . . . . . . . . . . . . . . 35 Option Menu . . . . . . . . . . . . . . . . . . . . . . . . . . . . . 36 Network Menu . . . . . . . . . . . . . . . . . . . . . . . . . . . . 37 Mail Menu . . . . . . . . . . . . . . . . . . . . . . . . . . . . . . . 38 RS-232C Interface . . . . . . . . . . . . . . . . . . . . . . . . . . 40 Communication Specifications . . . . . . . . . . . . . . . . 40 Command Format . . . . . . . . . . . . . . . . . . . . . . . . . 40 Others Maintenance . . . . . . . . . . . . . . . . . . . . . . . . . . . . . . . 42 Cleaning and Replacing the Filter . . . . . . . . . . . . . 42 Routine Servicing . . . . . . . . . . . . . . . . . . . . . . . . . 43 Replacement of Light Source Lamp . . . . . . . . . . . 43 Troubleshooting . . . . . . . . . . . . . . . . . . . . . . . . . . . . . 44 What to do when these messages are displayed . . . 46 Warnings Using Indicators . . . . . . . . . . . . . . . . . . . . 47 Latest Error . . . . . . . . . . . . . . . . . . . . . . . . . . . . . . . . 48 Specifications . . . . . . . . . . . . . . . . . . . . . . . . . . . . . . 49 Dimensional Outline Drawing . . . . . . . . . . . . . . . . . . 51 LX-5_EN.book Page 7 Friday, July 4, 2008 9:35 AM Features User-friendly interface and high operability Equipped with DVI (Dual-Link)4 input terminals Network-supported Ultra-high resolution, high contrast, and high quality projector Ultra-high resolution of 40962400 This projector comes with a newly developed 1.27" and 40962400 pixel D-ILA (Direct-drive Image Light Amplifier) device, and achieves an ultra-high resolution of 9.83 million pixels, which is four times that of full HD. High contract ratio of 10,000:1 A high contrast ratio of 10,000:1 (native) is achieved through combining the D-ILA device with WireGrid (inorganic reflective polarizing plate) that is employed in the new optical engine. High flexible installation Design is compact and light, and enables stacking ● Its weight is as light as 56 kg (excluding lens). ● Stackable design enhances installation for special applications (e.g. 3D). Vertical/Horizontal lens shift This projector enables not only vertical, but also horizontal lens shift, which enables a larger degree of flexibility in the layout. ● Zoom lens : vertical 100%, horizontal 50% ● Short focal length lens : vertical 30%, horizontal 10% ● In addition to the conventional RS-232C, it also provide support for connection using Ethernet. You can make adjustments or configure settings from the web browser on the PC without having to install any special software. ● Network connection enables you to make perform adjustment or configure settings for multiple projectors using a single PC. ● The Email feature enables you to send reports on the lamp replacement timing or error messages to a remote location. Comes with various built-in test patterns (six types including Cross Hatch, Color Bars, etc.) Enables image adjustment without the need of external signal sources. Features that enable flexible display and expression Supports multi screens (single screen, twoscreen, and four-screen modes) Comes with three types of built-in gamma tables. Enables configuration of gradation expression settings according to the video image Inclined installation This product can be installed at a tilt angle of up to 90°, which provides greater flexibility in the location of the projection screen. Low power consumption This product helps to save power with a consumption of not more than 1.5 kW. 7 LX-5_EN.book Page 8 Friday, July 4, 2008 9:35 AM Getting Started Check the Accessories/ Optional Accessories How to Read this Manual How to Read this Manual Accessories Power Cord Symbols used in this manual CAUTION : Describes precautions to note when operating this product. NOTE : Describes reference information, such as functions and restrictions during use. For the US market (3.3 m x 1) A : Indicates the page or section to refer to. Content of this manual For the EU market (3.3 m x 1) Warranty Card ● Other items include the user guides and other printed materials. Accessories (Sold Separately) Projection lens LXD(1.5 - 1.9) ● 1.50:1 to 1.84:1 1.22x zoom lens (80" to 300") LXD(1:1) ● 1:1.1 Short focal length lens (50" to 250") Replacement filter/sponge (front) B401597K (Filter) B401598K (Sponge) Replacement filter/sponge (right side) B401599K (Filter) B401600K (Sponge) 8 ● Personal computers or computers are expressed as computers or PCs in this manual. ● Contents of this manual are the copyright of Barco. All rights reserved. Unauthorized reproduction and duplication of this manual, in whole or in part, without the permission of Barco is strictly prohibited. ● The names of other companies’ products that appear in this manual are the trademark or registered trademark of the respective companies. Symbols such as ™, , and are omitted in this manual. ● Designs, specifications, and other details described in this manual may be modified for improvement without prior notice. LX-5_EN.book Page 9 Friday, July 4, 2008 9:35 AM Precautions During Use Burning-in of D-ILA Device oDo not allow the same still picture to be projected for a long time or an abnormally bright video image to be projected Do not project still images with a high brightness or high contrast on the screen for a long time. This video image could be burnt into the D-ILA device. Pay special attention when projecting video games and computer program images. Motion images such as normal video playback images do not pose the burning-in problem. Viewing Conditions (Brightness of Room) oBrightness of the room Avoid direct exposure of screen to direct sunlight and lights such as by using a curtain. Images can be well projected by darkening the brightness of the room. Maintenance Procedures oClean dirt on the cabinet Do this with a soft cloth. In case of heavy soiling, soak a cloth in neutral detergent diluted with water, wring dry and wipe, followed by wiping again using a dry cloth. oPay attention to the following to prevent the cabinet from deteriorating in condition, getting damaged, or the paint from coming off. ● ● ● ● ● Do not wipe with a stiff cloth Do not wipe with force Do not wipe with thinner or benzene Do not spray volatile chemicals like insecticide Do not allow prolonged contact with rubber or plastic products oClean dirt on the lens Do this using commercial blowers or lens cleaning papers (for cleaning glasses and cameras). Do not use fluid-type cleaning agents. This may lead to peeling of the surface coating film. Lens surface is fragile. Avoid rubbing it hard or knocking it. oDo not view screen for prolonged hours Looking at the screen continually for a prolonged time is tiring to the eyes. Allow your eyes to rest at intervals. oDo not use this unit when image flickers Image may flicker due to installation conditions and environment. This may cause your eyesight to deteriorate. Environment of Use oDo not use this projector in rooms with cigarette smoke or oily smoke Do not use this projector in rooms with cigarette smoke or oily smoke. This may cause the unit to malfunction. oWhen mounting this projector to the ceiling Check the temperature around the projector unit. When a heater is in use, the ceiling may reach a temperature higher than anticipated, hence leading to malfunction of the unit. Gauging replacement time of components This product comes with replacement components required for maintaining the functions of this product, such as optical components, cooling fan and filters. The timing for replacing components varies considerably according to the frequency and environment of use. For details on replacement of components (except filters), please consult any nearby Barco servicing center. 9 LX-5_EN.book Page 10 Friday, July 4, 2008 9:35 AM Getting Started Names and Functions of Parts Front/Right Side A Intake air Intake air B C D E F A Air Inlet/Filter D Lens Mounting Bracket The air inlets absorb air to cool the interior of the projector. A filter is mounted inside the projector to remove dirt in the air that enters through the inlets. Clean the filter regularly. (A Page 42) Mount the optional projection lens. CAUTION: ● Do not block the air inlets with papers, cloth, or soft cushions. Doing so may cause heat to trap inside the projector and result in fire or malfunction. B Lens Cap (included with the optional lens) Fit the cap on the lens when this projector is not in use to prevent the lens from becoming dirty. CAUTION: ● Do not project images with the lens cap attached. The lens cap may be deformed due to the heat, or the projector may malfunction. C Projection Lens (optional) Zoom lens or short focal length lens is optional. (A Page 8) Remove the lens cap before projection. 10 E Adjustable Feet (x 4) Adjust the feet until the projector is level. The adjustable range is 20 mm for each. (A Page 13) F Air Inlet/Filter The air inlets absorb air to cool the interior of the projector. A filter is mounted inside the projector to remove dirt in the air that enters through the inlets. Clean the filter regularly. (A Page 42) LX-5_EN.book Page 11 Friday, July 4, 2008 9:35 AM Rear G H I J K DVI 1 DVI 2 R Q CONTROL USB Exhaust air DVI 3 LAN OPERATE I/B STANDBY/ON LAMP P DVI 4 WARNING RS-232C O N M L G [DVI 1 to 4] Terminal M [LAMP] Indicator This is an input terminal for video signals. Connect it to the video output terminal of the computer. (A Page 19, 21) This indicator lights up in yellow when the lamp time exceeds 1400 hours. H Vent Hole Warm air exits from the hole after cooling the projector. CAUTION: ● Do not block the vent holes with papers, cloth, or soft cushions. Doing so may cause heat to trap inside the projector and result in fire or malfunction. I Vent Hole (For Lamp) Warm air exits from the hole after cooling the lamp. J Main Power Supply Switch Use this to turn ON/OFF the main power supply of the projector unit. K AC Power Input Terminal Connect the supplied cord to this terminal. L [STANDBY/ON] Indicator NOTE: ● For details on indicator displays during warnings, refer to “Warnings Using Indicators”. (A Page 47) ● A lamp life message appears when the lamp time has exceeded 1500 hours. (A Page 46) N [WARNING] Indicator This indicator lights up in red when abnormality occurs on this projector. For details, refer to “Warnings Using Indicators”. (A Page 47) O [OPERATE I/B] Button Pressing this button for one second or longer when in the standby mode (main power supply is ON) turns on the power of the projector unit. Pressing it for one second or longer when the power is ON switches the projector to the standby mode. P [RS-232C] Terminal Lit (Red) : When in the standby mode. Lit (Green) : When power is supplied. This is the RS-232C interface-specific terminal. This projector can be controlled by connecting it to a computer using a RS-232C cable. Blinking (Red) : When cooling down (cool down mode). (A Page 29) Q [LAN] Terminal Blinking (Green) : When the projected image is temporarily hidden. (A Page 29) Enables control of this projector using a computer that is connected to the network. NOTE: R [USB] Terminal ● For details on indicator displays during warnings, refer to “Warnings Using Indicators”. (A Page 47) Enables control of this projector by connecting it to a computer. 11 LX-5_EN.book Page 12 Friday, July 4, 2008 9:35 AM Connection and Installation Installation Please read the following carefully when installing this unit. Optional projection lens Mount the optional projection lens (A Page 8). For details on mounting the lens, please consult your authorized dealer. Minimum Space Required Do not use a cover that may enclose this unit or block the air inlets/vent holes. Allow sufficient space around this unit. When this unit is enclosed in a space with dimensions as indicated below, ventilate accordingly so that the internal and external temperatures are the same. When using one set of projector 300 mm 300 mm 600 mm 600 mm 600 mm When using two sets of projectors side by side 300 mm 300 mm 640 mm 600 mm 600 mm 1,300 mm When the projector is suspended 300 mm and above NOTE: ● To prevent the projector from falling or toppling, it is recommended that the holder be fastened to the unit using bolts. ● To mount the projector to the ceiling, mount a special shelf to the ceiling, followed by installing the unit on the shelf. For safety and maintenance purposes, equipment that eases adjustment to a suitable height for maintenance is required. CAUTION: ● Special expertise and techniques are required for mounting this unit. Be sure to ask your dealer or a specialist to perform mounting. 12 LX-5_EN.book Page 13 Friday, July 4, 2008 9:35 AM Projector Installation Angle You can install this projector between 90. Images will be properly displayed if the horizontal angle is between the range of 5. Installing the Projector and Screen It is recommended that this projector be installed at right angle to the screen. When a zoom lens (optional) is in use, you can make use of the lens shift feature of this projector to shift the projection screen vertically between 0% to 100%, and horizontally between 0% to 50%. When a short focal length lens (optional) is in use, you can shift the projection screen position vertically between 0% to 30%, and horizontally between 0% to 10%. Below are some examples on the layout when a zoom lens is used. 90 When shift amount in the upward direction is +100 % 90 Install the projector such that the lower end of the projection screen is at the same height as the center of the lens. Screen 90 5 90 90 5 Center Line of Lens CAUTION: ● To ceiling-mount this unit, special expertise and skills are necessary. Make to sure request the authorized dealer or specialized work contractors for installation. ● The projector cannot be installed upside down. When shift amount in the upward/downward direction is 0 % Install the projector such that the center of the projection screen is at the same height as the center of the lens. Screen Adjusting the Inclination Adjust the horizontal angle of the projector. Lift the projector and turn the nut of the adjustable foot with a spanner in the direction indicated by the arrow to extend or retract the foot. The adjustable range is 20 mm. 90 90 90 Center Line of Lens When shift amount in the downward direction is –100 % Extend Retract Install the projector such that the upper end of the projection screen is at the same height as the center of the lens. Center Line of Lens Screen 90 90 90 13 LX-5_EN.book Page 14 Friday, July 4, 2008 9:35 AM Connection and Installation Installing the Projector and Screen (Cont’d) Movable Range of Projected Image LXD (1.5 - 1.9) Zoom lens Projected Image 100 % When shift amount in the right direction is +50 % 50 % 50 % Install the projector such that the center of the lens is aligned with the 1/4 position from the left edge of the screen. 100 % Movable Range LXD (1:1) Short focal length lens 30 % 10 % When shift amount in the left/right direction is 0 % Install the projector such that the center of the lens is aligned with the center of the screen. Projected Image 10 % 30 % Movable Range NOTE: ● When using the lens shift feature, do not exceed the range (shift amount) as shown above. If the shift amount exceeds the range as shown, shadows will appear on the projected image. Lens Fixation Mechanism A screw for securing the lens mechanism is attached in the factory shipment to prevent damage of the equipment during transportation. If the lens does not move horizontally or vertically when you operate AShiftB in the Lens menu, this could be because the screw has not been removed. When this occurs, please consult your authorized dealer. When shift amount in the left direction is –50 % Install the projector such that the center of the lens is aligned with the 1/4 position from the right edge of the screen. 14 LX-5_EN.book Page 15 Friday, July 4, 2008 9:35 AM Overlaying projected images (when zoom lens is in use) When light passes through the glass of projection booth Projecting images by stacking projectors The lens shift feature enables you to use up to three stacked projectors at the same time. Stacking projectors enhances the brightness level, and helps to project images that are sufficiently bright even when the venue is relatively big or bright. NOTE: CAUTION: ● When the projectors are stacked together during use, ensure that the installation site is sufficiently strong and there is proper air cooling around the projectors. Take the necessary measures to prevent the projectors from toppling or falling off so as to ensure safety during emergency situations, such as earthquakes, and to prevent accidents from occurring. For details, please consult your authorized dealer. ● When light passes through the glass, the quantity of light decreases. Make sure that the glass of the projection booth is not more than one piece. ● Do not use glass if possible. ● When projecting light on an inclined glass surface, adjust the glass angle as well as installation angle of this unit accordingly to prevent impact on the image due to diffuse reflection. Projecting images by arranging projectors side by side The lens shift feature enables you to use up to two projectors that are arranged side by side. Arranging two projectors side by side enhances the brightness level, and helps to project images that are sufficiently bright even when the venue is relatively big or bright. When projecting images by arranging the projectors side by side, adjust the shift amount of both projectors accordingly to superimpose the images. NOTE: ● When using the projectors by arranging them side by side, ensure that the installation site is sufficiently strong and there is proper air cooling around the projectors. For details, please consult your authorized dealer. (A Page 12) 15 LX-5_EN.book Page 16 Friday, July 4, 2008 9:35 AM Connection and Installation Installing the Projector and Screen (Cont’d) Screen Size and Projection Distance Adjust the distance from the lens to the screen to achieve your desired screen size. LXD (1.5 - 1.9) Zoom lens Projection Screen Size (Diagonal Length) Image Width 80" (Approx. 2.03 m) 90" (Approx. 2.29 m) Projection distance Tele End Wide End 1.75 m 3.19 m 2.58 m 1.97 m 3.60 m 2.91 m 100" (Approx. 2.54 m) 2.19 m 4.01 m 3.25 m 110" (Approx. 2.79 m) 2.41 m 4.42 m 3.58 m 120" (Approx. 3.05 m) 2.63 m 4.83 m 3.91 m 130" (Approx. 3.30 m) 2.85 m 5.24 m 4.25 m 140" (Approx. 3.56 m) 3.07 m 5.65 m 4.58 m 150" (Approx.3.81 m) 3.29 m 6.06 m 4.91 m 160" (Approx. 4.06 m) 3.51 m 6.46 m 5.25 m 170" (Approx. 4.32 m) 3.73 m 6.87 m 5.58 m 180" (Approx. 4.57 m) 3.94 m 7.28 m 5.91 m 190" (Approx. 4.83 m) 4.16 m 7.69 m 6.24 m 200" (Approx. 5.08 m) 4.38 m 8.10 m 6.58 m 210" (Approx. 5.33 m) 4.60 m 8.51 m 6.91 m 220" (Approx. 5.59m) 4.82 m 8.92 m 7.24 m 230" (Approx. 5.84 m) 5.04 m 9.33 m 7.58 m 240" (Approx. 6.10 m) 5.26 m 9.74 m 7.91 m 250" (Approx. 6.35 m) 5.48 m 10.15 m 8.24 m 260" (Approx. 6.60 m) 5.70 m 10.55 m 8.58 m 270" (Approx. 6.86 m) 5.92 m 10.96 m 8.91 m 280" (Approx. 7.11 m) 6.14 m 11.37 m 9.24 m 290" (Approx. 7.37 m) 6.36 m 11.78 m 9.57 m 300" (Approx. 7.62 m) 6.57 m 12.19 m 9.91 m NOTE: ● The distance indicated in the table is an estimated value when an image with a resolution of 40962400 is projected. Please use them as reference during installation. 16 LX-5_EN.book Page 17 Friday, July 4, 2008 9:35 AM LXD (1:1) Short focal length lens Projection Screen Size (Diagonal Length) Image Width Projection distance 50" (Approx. 1.27 m) 1.10 m 1.16 m 60" (Approx. 1.52 m) 1.31 m 1.41 m 70" (Approx. 1.78 m) 1.53 m 1.66 m 80" (Approx. 2.03 m) 1.75 m 1.91 m 90" (Approx. 2.29 m) 1.97 m 2.16 m 100" (Approx. 2.54 m) 2.19 m 2.41 m 110" (Approx. 2.79 m) 2.41 m 2.66 m 120" (Approx.3.05 m) 2.63 m 2.91 m 130" (Approx. 3.30 m) 2.85 m 3.17 m 140" (Approx. 3.56 m) 3.07 m 3.42 m 150" (Approx. 3.81 m) 3.29 m 3.67 m 160" (Approx. 4.06 m) 3.51 m 3.92 m 170" (Approx. 4.32 m) 3.73 m 4.17 m 180" (Approx. 4.57 m) 3.94 m 4.42 m 190" (Approx. 4.83m) 4.16 m 4.67 m 200" (Approx. 5.08 m) 4.38 m 4.92 m 210" (Approx. 5.33 m) 4.60 m 5.17 m 220" (Approx. 5.59 m) 4.82 m 5.43 m 230" (Approx. 5.84 m) 5.04 m 5.68 m 240" (Approx. 6.10 m) 5.26 m 5.93 m 250" (Approx. 6.35 m) 5.48 m 6.18 m NOTE: ● The distance indicated in the table is an estimated value when an image with a resolution of 40962400 is projected. Please use them as reference during installation. 17 LX-5_EN.book Page 18 Friday, July 4, 2008 9:35 AM Connection and Installation Connecting Video Signals of the Computer Connection During Single-Screen Mode Display The single-screen mode displays signals (up to four signals) from a computer as a single video image. To select to the single-screen mode, set “Display Mode” in the Setting menu to “Single”. (A Page 33) Possible Input Signals and Projected Image Computer Resolution 40962400 40962160 Channel Link Status Projector Terminal for Connection 2ch Dual DVI 1, DVI 3 4ch Single DVI 1 to DVI 4 2ch Dual DVI 1, DVI 3 Output Status 2 Stripes 20482400 Cross 20481200 4 Stripes 10242400 2 Stripes 20482160 Cross 20401080 4 Stripes 10242160 2 Stripes 19202400 Displayed Projector Image 40962400 40962160 4ch Single DVI 1 to DVI 4 2ch Dual DVI 1, DVI 3 4ch Single DVI 1 to DVI 4 2ch Dual DVI 1, DVI 3 4ch Single DVI 1 to DVI 4 4 Stripes 9602160 20481200 1ch Single DVI 1 Normal 20481200 40962400 20481080 1ch Single DVI 1 Normal 20481080 40962160 19201200 1ch Single DVI 1 Normal 19201200 38402400 19201080 1ch Single DVI 1 Normal 19201080 38402160 16001200 1ch Single DVI 1 Normal 16001200 32002400 12801024 1ch Single DVI 1 Normal 12801024 25602048 1024768 1ch Single DVI 1 Normal 1024768 20481536 800600 1ch Single DVI 1 Normal 800600 16001200 640480 1ch Single DVI 1 Normal 640480 1280960 38402400 38402160 Cross 19201200 4 Stripes 9602400 2 Stripes 19202160 Cross 19201080 38402400 38402160 NOTE: ● This projector converts the frame rate to 60 Hz regardless of the synchronizing signal frequency at the computer’s end. ● If the resolution of the PC is 20481200 or lower, images are displayed upon doubling the number of the vertical and horizontal pixels. 18 LX-5_EN.book Page 19 Friday, July 4, 2008 9:35 AM Normal 2 Stripes DVI 1 DVI 1 DVI 3 4 Stripes DVI 1 DVI 2 Cross DVI 3 DVI 4 DVI 1 DVI 2 DVI 3 DVI 4 Connection During Single-Screen Mode Display Below is the connection example for four-channel signals from the computer. For two-channel signals from the computer, connect to the [DVI 1] and [DVI 3] terminals of this projector. Desktop Computer DVI-D Cable (Sold Separately) DVI 1 To DVI Terminal DVI 2 CONTROL USB DVI 3 LAN OPERATE I/B STANDBY/ON LAMP DVI 4 WARNING RS-232C NOTE: ● Depending on your DVI-D cable, the signal may attenuate and the image become unstable. ● Use of DVI-D cables compliant with the DDWG standard is recommended. 19 LX-5_EN.book Page 20 Friday, July 4, 2008 9:35 AM Connection and Installation Connecting Video Signals of the Computer (Cont’d) Connection During Two-Screen/FourScreen Mode Display The two-screen/four-screen mode enables simultaneous display of signals from two or four computers. To select the two-screen mode, set “Display Mode” in the Setting menu to “Double”. To select the four-screen mode, set it to “Cross”. (A Page 33) Possible Input Signals and Projected Image Computer 1, Computer 2 Output Status Resolution Channel Link Status 20481200 1ch Single Normal 20481200 20481080 1ch Single Normal 20481080 19201200 1ch Single Normal 19201200 19201080 1ch Single Normal 19201080 16001200 1ch Single Normal 16001200 12801024 1ch Single Normal 12801024 1024768 1ch Single Normal 1024768 800600 1ch Single Normal 800600 640480 1ch Single Normal 640480 NOTE: ● This projector converts the frame rate to 60 Hz regardless of the synchronizing signal frequency at the computer’s end. ● The respective signals are displayed at the center of the split screen. ● When in the two-screen mode, the screen appears blue (or black depending on the setting) when there is no input. Two-Screen Mode (Example) DVI 1: 19201080, DVI 3: 19201080 Four-Screen Mode (Example) DVI 1: 20481200, DVI 2: 19201080, DVI 3: 1024768, DVI 4: 16001200 4096 2400 DVI 1 2048 20 4096 DVI 3 DVI 1 DVI 2 DVI 3 DVI 4 2400 2048 1200 LX-5_EN.book Page 21 Friday, July 4, 2008 9:35 AM Connection Example During Two-Screen Mode Desktop Computer To DVI Terminal DVI 1 DVI-D Cable (Sold Separately) DVI 2 Laptop Computer CONTROL USB DVI 3 LAN OPERATE I/B STANDBY/ON LAMP DVI 4 WARNING RS-232C To DVI Terminal Connection Example During Four-Screen Mode Desktop Computer To DVI Terminal DVI-D Cable (Sold Separately) To DVI Terminal DVI 1 DVI 2 Laptop Computer CONTROL USB DVI 3 LAN OPERATE I/B STANDBY/ON LAMP DVI 4 WARNING RS-232C To DVI Terminal To DVI Terminal NOTE: ● Depending on your DVI-D cable, the signal may attenuate and the image become unstable. ● Use of DVI-D cables compliant with the DDWG standard is recommended. 21 LX-5_EN.book Page 22 Friday, July 4, 2008 9:35 AM Network Settings Connection Using a LAN Cable Connect this projector, the computer for controlling this projector, and the switching hub using LAN cables, followed by configuring the network. Connection Example When assigning a static IP address You can acquire the IP address from the controlling computer simply by configuring a network that consists of this projector, the controlling computer, and switching hub. Please refer to technical books on networks for details. Switching Hub DVI 1 DVI 2 CONTROL USB DVI 3 LAN OPERATE I/B STANDBY/ON LAMP To Network To LAN Terminal Terminal DVI 4 WARNING RS-232C NOTE: ● Make use of Cat. 5 (equivalent or higher) straight 100Base-TX LAN cables. CAUTION: ● Configure a network using only this projector, the controlling computer, and switching hub. Configuring the IP address settings when the LAN cable is connected to another network equipment or a hub that is connected to a different network may cause troubles to occur. When assigning IP address from the DHCP server Router (DHCP Server) LAN WAN LAN1 LAN2 LAN3 LAN4 DVI 1 DVI 2 CONTROL USB DVI 3 LAN OPERATE I/B STANDBY/ON LAMP To Network Terminal To LAN Terminal DVI 4 WARNING RS-232C NOTE: ● Make use of Cat. 5 (equivalent or higher) 100Base-TX LAN cables. 22 Specifications of PC for Controlling this Projector OS Windows XP Professional SP2 / Windows XP Home Edition SP2 CPU Pentium3 1 GHz or higher Memory 256 MB and above NOTE: ● Make use of Internet Explorer Ver. 6.0. ● Windows® is either registered trademark or trademark of Microsoft Corporation in the United States and/or other countries. CAUTION: ● The PC specifications above are reference values for the application software to run smoothly, and are not intended to guarantee their operation. Note that the applications may not run smoothly depending on the condition of use of the respective users even when the system requirements are satisfied. LX-5_EN.book Page 23 Friday, July 4, 2008 9:35 AM Turning On the Main Power 1 Check to ensure that this projector, computer, and switching hub are properly connected 2 Connect the power cord to the power input terminal of this projector CAUTION: Power Cord (Supplied) ● Do not connect the power cord when a lens (optional) is not attached. 2 3 5 3 Insert plug into the power outlet on the wall 4 Remove the lens cap 5 Turn on the main power of the projector to set to [I] ● The [STANDBY/ON], [LAMP], and [WARNING] indicators light up for about 45 seconds, after which the [STANDBY/ON] indicator turns red. NOTE: ● The default IP address of all LX-5 is “192.168.0.2”. If multiple units of LX-5 are used on the same network, do not turn on the main power of more than one projector unit at the same time. Doing so will result in duplication of the IP address, and thereby preventing proper access. ● When using multiple units of LX-5, turn on the main power of the second unit and configure accordingly only after configuration of the first unit is complete. Configure subsequent units using the same procedure. ● When duplication occurs in the IP address, make sure that only one unit of LX-5 is connected on the same network (turn off the main power of the other LX-5 units). Allow a time interval of at least 10 minutes before accessing. If access fails, turn off the power of all network equipments on the same network, followed by turning them on again. 23 LX-5_EN.book Page 24 Friday, July 4, 2008 9:35 AM Network Settings IP Address Settings Set the IP address for this projector. There are 2 methods to set the IP address. Assigning a static IP address Assigning an IP address from the DHCP Server Assigning a static IP address The AIP Address SettingB of this projector is set to AStatic IPB (the DHCP client function is OFF) by default. Upon turning on the power, this projector starts running with the following IP address. IP Address Subnet Mask Default Gateway : 192.168.0.2 : 255.255.255.0 : 192.168.0.254 IP address setting at the computer Set the computer to an IP address that enables communication with this projector. 1 Click AStartB and select AControl PanelB 2 Double click ANetwork ConnectionsB 3 Right-click on ALocal AreaB and select APropertiesB ● Check to ensure that the AClient for Microsoft NetworksB and AInternet Protocol(TCP/IP)B check boxes are selected. 4 Select AInternet Protocol(TCP/IP)B and click APropertiesB 5 Set the IP address A Select AUse the following IP addressB B Set the AIP addressB (For example, use 192.168.0.100 when LX-5 is in its default settings) NOTE: ● Make sure that you take note of the original IP address before altering. ● When setting, ensure that a duplicate IP address is not used within the same network environment. C Set ASubnet maskB Set to a value that is appropriate for the setting operation. Clarify with the network administrator if you have any queries. (Use 255.255.255.0 when the camera is in its default settings) D When a ADefault gatewayB is present, make use of the IP address (e.g., 192.168.0.254) E Click AOKB 6 Click AOKB on the ALocal Area Connection PropertiesB screen 24 LX-5_EN.book Page 25 Friday, July 4, 2008 9:35 AM Setting (Changing) the IP address of this projector 1 Launch the Internet Explorer on the computer 2 Check if the proxy has been set in the ALAN SettingB of the Internet Explorer A Click AToolsB and select AInternet OptionsB B Click AConnectionsB and click ALAN SettingB C Check if the check for AUse a proxy server for your LANB has been selected ● If the check mark has been selected, deselect it. 3 Check if the AActive scriptingB of the Internet Explorer is disabled A Click AToolsB and select AInternet OptionsB B Click in the order of ASecurityB ASitesB ATrusted SitesB C Deselect the check in ARequired server verification (https:) for all sites in this zoneB D Enter Ahttp://192.168.0.2B under AAdd this web site to the zoneB and click AAddB E Click AOKB F Select ATrusted SitesB and click ACustom LevelB G Check if the check for AActive scriptingB under AScriptingB has been selected ● If the check mark has been deselected, select it. Deselect the check Select AEnableB 25 LX-5_EN.book Page 26 Friday, July 4, 2008 9:35 AM Network Settings 7 Click ANetworkB in the main menu IP Address Settings (Cont’d) host PJ-1 user: root Logout Main Image Power Latest Error ON OFF STANDBY 00 Setting Assigning a static IP address (Cont’d) Convergence Lens Option Network 4 Enter Ahttp://192.168.0.2B in the address field Signal Status Temperature DVI Rate(Hz) Pixel H Pixel V Link 1 60.00 2048 2400 Dual 60.00 2048 2400 Dual Temp. 1 36.0 deg.C 2 3 Temp. 2 25.5 deg.C Mail 4 of the web browser, and click AGoB Projector Usage ● A login screen for this projector appears. Lamp Time http://192.168.0.2 4 1035h24m Reset 8 Set the IP address for this projector host PJ-1 user: root Logout Main Image Host Name Setting Host Name LZZZZZZZ SET Setting Convergence Lens Option Network Mail IP Address Setting DHCP Client IP Address Subnet Mask Default Gateway Mac Address DHCP A Static IP 192.168.1.100 B 255.255.255.0 192.168.1.1 01:23:45:67:89:AB SET C Login Password Change User Name root New Password Confirm New Password SET NOTE: ● When ALAN SettingB in Internet Explorer is set to AUse a proxy server for your LANB it may not be possible to designate addresses directly. Change the proxy settings. ● If a ASecurity WarningB screen appears, click AOKB and continue. 5 Enter ArootB in Login Name Input Your Login Name & Password Login Name root Password LOGIN 6 Click ALOGINB ● The main menu for this projector appears. NOTE: ● You can alter the user name and password in the ANetworkB menu. Specify a user name and password of not more than eight single-byte alphanumeric characters. (A Page 37) ● If you have forgotten the password, please consult your authorized dealer. 26 A Select AStatic IPB in ADHCP ClientB B Enter the values for AIP AddressB, ASubnet MaskB and ADefault GatewayB C Click ASETB NOTE: ● Access from computers may not be sucessful as this projector’s IP address has been changed. Set and change the computer’s IP address when accessing this projector. LX-5_EN.book Page 27 Friday, July 4, 2008 9:35 AM Assigning IP Address from the DHCP Server Using the Mail Delivery Feature The IP address is automatically assigned by the DHCP server. 1 After connecting, turn on the main power. ● Refer to page 22 on the details of connection. ● Refer to page 23 for procedures to turn on the main power. 2 Set the ADHCP ClientB setting of this projector to ADHCPB. ● The AIP Address SettingB of this projector is set to AStatic IPB (the DHCP client function is OFF) by default. When assigning an IP address from the DHCP server, access this projector from the computer to alter the settings. For details on the setting procedures, refer to “Setting (Changing) the IP address of this projector”. (A Page 25) This feature enables delivery of mail (error message) to the preset e-mail address when error occurs inside this projector unit. Connection Example (When DHCP Server is Used) To Internet Connection ADSL modem, etc. ETHER NOTE: ● Please consult the network administrator on the IP address assigned to this projector. ● When ADHCP ClientB is set to ADHCPB, and if the projector is started up in a LAN where a DHCP server does not exist, the projector will start up using the default IP address instead. LAN WAN LAN1 LAN2 LAN3 LAN4 DHCP Server DVI 1 CAUTION: ● Configure the DHCP server such that the same IP address is assigned to the AMac AddressB of this projector by the DHCP server at all times. Connection may fail if the above setting is not performed. DVI 2 CONTROL USB DVI 3 LAN OPERATE I/B STANDBY/ON To LAN Terminal LAMP DVI 4 WARNING RS-232C Connecting this projector and the computer using a USB cable You can connect this projector and the controlling computer using a USB cable. ● You need to install a driver in order to connect the projector and computer using a USB cable. NOTE: ● For details on the installation of the USB driver, please consult your authorized dealer. 27 LX-5_EN.book Page 28 Friday, July 4, 2008 9:35 AM Operation and Settings 3 Adjust the zoom ratio (screen size) (when Projecting Image zoom lens is in use) You can adjust the focus using the AZoomB item of the Lens menu. host PJ-1 user: root If setting for this projector is not completed, refer to the “Setting Menu” (A Page 30) upon turning on the power and configure the settings accordingly. Once the basic settings are configured, this projector can be used by simply performing the following operation procedures. PREPARATION: 1 Set this projector to the standby mode, and display the main menu ● Refer to “Turn on the main power” (A Page 23), and steps 4 to 6 of “Assigning an IP Address” (A Page 26). ● The [STANDBY/ON] indicator lights up in red. 2 Click the AONB button under the APowerB item of the main menu to project the image ● The power of this projector turns on, and formatting is done taking a few minutes. A gray image will be displayed during formatting. The projected image appears once formatting ends. ● The [STANDBY/ON] indicator lights up in green. host PJ-1 user: root Logout Image Power Latest Error ON OFF STANDBY 00 Setting Convergence Lens Option Network Signal Status Temperature DVI Rate(Hz) Pixel H Pixel V Link 1 60.00 2048 2400 Dual Temp. 1 36.0 deg.C 2 3 60.00 2048 2400 Dual Temp. 2 25.5 deg.C Mail 4 w Image Lamp Time Focus Shift U + Setting Convergence Lens L Option T R _ Mail D To enlarge the screen size: Press the AWB (Wide) end of AZoomB To reduce the screen size: Press the ATB (Tele) end of “Zoom” NOTE: ● The screen size changes each time you click on the inner buttons ( / ). (Fine control) The outer buttons ( / ) change the screen size when they are depressed. (Coarse control) 4 Adjust the position of the projection screen You can adjust the focus using the AShiftB item of the Lens menu. To shift the image upward: Press the AUB end of AShiftB To shift the image downward: Press the ADB end of AShiftB To shift the image rightward: Press the ARB end of AShiftB To shift the image leftward: Press the ALB end of AShiftB NOTE: Projector Usage 1035h24m Reset NOTE: ● You can also turn on the power by pressing the [OPERATE I/B] button on the projector unit for more than one second. ● The image may flicker for a few seconds immediately after projection starts. This is not a malfunction. ● After the lamp lights up, it takes about 1 minute or longer for the brightness of the video image on the screen to stabilize. 28 Zoom Main Network ● Remove the lens cap. ● Connect this projector to the computer. (A Page 19, 21) ● Connect the LAN cable. (A Page 22) Main Logout ● When a zoom lens is used, the adjustment range for lens shift is between 0% to 100% in the vertical direction, and between 0% to 50% in the horizontal direction (during single-screen display). When a short focal length lens is used, the adjustment range for lens shift is between 0% to 30% in the vertical direction, and between 0% to 10% in the horizontal direction (during single-screen display). (A Page 14) ● The position changes each time you click on the inner buttons ( / ). (Fine control) The image shifts when the outer buttons ( / ) are depressed. (Coarse control) ● The lens shift feature does not function if the lens mechanism is secured. (A Page 14 ALens Fixation MechanismB) LX-5_EN.book Page 29 Friday, July 4, 2008 9:35 AM 5 Adjust the focus 8 Turn the main power at the rear of the You can adjust the focus using the AFocusB item of the Lens menu. To move the focus point closer: Press the A+B (Near) end of AFocusB Press the A B (Far) end of AFocusB NOTE: ● The focus changes each time you click on the inner buttons ( / ). (Fine control) The outer buttons ( / ) change the focus when they are depressed. (Coarse control) 6 Select a screen mode for projection You can specify the screen mode using ADisplay ModeB of the Setting menu. (A Page 33) host PJ-1 user: root Logout Input Level Image Standard Setting Display Mode Enhanced Convergence 1 Lens 1 3 ● The [STANDBY/ON] indicator on the projector unit goes off. CAUTION: To move the focus point away: Main projector unit to off [O] ● Do not turn off the main power supply switch when in the cool down mode. Doing so may shorten the lamp life and cause a malfunction. ● Upon using, attach the lens cap to prevent soiling of the lens. ● When the projector is not to be used for a long time, disconnect the power plug. Useful Features During Projection Hiding the projected image temporarily The projected image can be hidden by clicking the AONB button under the AHideB item of the Image menu. ● When the image is not displayed, pressing AOFFB under the AHideB item to display the hidden image. 1 2 host PJ-1 user: root 3 4 Logout Option Network Mail Main Brightness Image Setting Red -30 Green -30 Blue -30 Red -30 Green -30 Blue -30 0 0 Convergence Lens NOTE: ● The projected image varies according to the mode of connection. (A Page 19, 21) +30 +30 Option Network Contrast Mail 7 Click the AOFFB button under the APowerB 0 0 0 Gamma item of the Main menu to end the projection ● A gray image will be displayed for a few minutes during the ending process. When the process ends the projector switches to the cool down mode, and the [STANDBY/ON] indicator appears blinking in red. ● After exiting the cool down mode, the projector switches automatically to the standby mode, and the [STANDBY/ON] indicator lights up in red. ● You can also turn off the power by pressing the [OPERATE I/B] button on the projector unit for more than one second. 0 +30 A +30 +30 +30 Hide B C OFF ON NOTE: ● When the image is hidden, the [STANDBY/ON] indicator appears blinking in green. Cool down mode The cool down mode is a function that cools down the lamp for an interval of about 180 seconds after projection ends (ending process). This function is to prevent deformation and damage of the internal components of the projector due to heat from the overheated lamp. It also prevents lamp breakage and shortened lamp life. ● When the projector is in the cool down mode, the [STANDBY/ON] indicator appears blinking in red. ● Do not shut down the main power supply or unplug the power cord when in the cool down mode. Also, do not block the air inlets and vent holes. Doing so may shorten the lamp life and cause a malfunction. 29 LX-5_EN.book Page 30 Friday, July 4, 2008 9:35 AM Operation and Settings Setting Menu (Cont’d) After installation and connection are complete, perform the necessary adjustment and setting. Operate the menus using the computer’s browser to make adjustments and configure settings. Main Menu This menu displays the ON/OFF status of the power supply and information on signals input to the projector. host PJ-1 user: root Logout Main Image Power Latest Error ON OFF STANDBY 00 Setting Convergence Lens Option Network Signal Status Temperature DVI Rate(Hz) Pixel H Pixel V Link 1 60.00 2048 2400 Dual 60.00 2048 2400 Dual 36.0 deg.C 2 3 Temp. 2 25.5 deg.C Mail 4 Projector Usage Lamp Time NOTE: ● When the power of this unit is off (main power is on), the AMainB, AImageB, ASettingB, AConvergenceB, ALensB and AOptionB menus will be grayed out and will not be selectable. 30 Temp. 1 1035h24m Reset LX-5_EN.book Page 31 Friday, July 4, 2008 9:35 AM Item Power Setting Value ON OFF Description For turning the power ON/OFF. ON : Turns on the power. OFF : Turns off the power. NOTE: ● The following operating modes of the projector are displayed to the right of the OFF button. STANDBY : Standby (OFF) PROJECTION : Lamp Illuminated (ON) FAN ENABLE : FAN Enable (OFF ON) LAMP ENABLE : LAMP Enable (OFF ON) DEVICE ENABLE : Elemental Device Enable (OFF ON) COOLING : Cooling (OFF) EMERGENCY : Error Occurred (Cooling not performed) EMERGENCY COOLING : Error Occurred (Cooling performed) ● When in the standby mode, clicking the ON button each time switches the mode in the sequence of STANDBY DEVICE ENABLE LAMP ENABLE FAN ENABLE PROJECTION. ● Clicking the OFF button when the power is on switches the projector to the cooling mode. The power of the projector cannot be turned on during the cooling process (180 seconds). Latest Error — Displays the latest error number. Refer to ALatest ErrorB for information on the error number and details. (A Page 48) Displays information on the input signals. Signal Status DVI — DVI : Displays the input terminal number. Rate(Hz) — Rate(Hz) : Displays the vertical frequency. Pixel H — Pixel H : Displays the horizontal resolution. Pixel V — Pixel V : Displays the vertical resolution. Link — Link : Displays the link status of the DVI terminal. Temperature Displays the interior temperature of the projector. Temp. 1 — Temp. 2 — Projector Usage Reset Temp. 1 : External Temperature Temp. 2 : Internal Temperature Displays the time interval during which the lamp is in use. — CAUTION: ● Do not click on AResetB unless the lamp is replaced. 31 LX-5_EN.book Page 32 Friday, July 4, 2008 9:35 AM Operation and Settings Setting Menu (Cont’d) Image Menu This menu is used for adjusting the picture quality. host PJ-1 user: root Logout Brightness Main Image Setting Red -30 Green -30 Blue -30 Red -30 Green -30 Blue -30 0 0 Convergence Lens 0 +30 +30 +30 Option Network Contrast Mail 0 0 0 Gamma A +30 +30 +30 Hide B C OFF ON Q denotes the factory default. Item Setting Value Brightness For adjusting the brightness of the red, green, and blue colors. Red –30 to +30 (Default Value: 0) Green –30 to +30 (Default Value: 0) Blue –30 to +30 (Default Value: 0) For adjusting the contrast of the red, green, and blue colors. Contrast Red –30 to +30 (Default Value: 0) Green –30 to +30 (Default Value: 0) Blue –30 to +30 (Default Value: 0) Gamma Hide QA B C Q OFF ON 32 Description For specifying the tone characteristics of the image. A : Sets gamma to 2.2. B : Sets gamma to 1.8. C : Sets gamma to 2.6. Enables temporary hiding of the image. OFF : Do not hide image. ON : Hides image. LX-5_EN.book Page 33 Friday, July 4, 2008 9:35 AM Setting Menu This menu is used for specifying the input level of the terminal and the display mode. host PJ-1 user: root Logout Main Input Level Image Standard Setting Enhanced Display Mode Convergence 1 1 3 Lens 1 2 3 4 Option Network Mail Single Double Cross Q denotes the factory default. Item Input Level Display Mode Setting Value Q Standard Enhanced Q Single Double Cross Description For specifying the input level of the video signals. Standard : Set to this value under normal circumstances. (Signal level 0 to 255) Enhanced : For specifying when the signal level is between 16 and 235. For specifying the display mode of the projection screen. Single : Displays input signals on a single screen. Double : Displays two different input signals on two screens. The left screen displays images of the DVI 1 terminal, and the right screen displays images of the DVI 3 terminal. Cross : Displays four different input signals on four screens. The top left screen displays images of the DVI 1 terminal, the top right screen displays images of the DVI 2 terminal, the bottom left screen displays images of the DVI 3 terminal, while the bottom right screen displays images of the DVI 4 terminal. NOTE: ● Please refer to AConnecting Video Signals of the ComputerB for details. (A Page 18 to 21) 33 LX-5_EN.book Page 34 Friday, July 4, 2008 9:35 AM Operation and Settings Setting Menu (Cont’d) Convergence Menu This menu is used for correcting color shifts in the optical system. host PJ-1 user: root Logout Main Red Blue U Image U Setting Convergence Lens L R L R Option Network Mail D Item Red Blue Setting Value — — D Description For adjusting the horizontal/vertical position of red and blue colors on the image. NOTE: ● The green color value is fixed. ● The outer buttons are used for adjustment in units of 1/4 pixels, and the inner buttons in units of 1/10 pixels. ● When the image is flipped horizontally or vertically, the horizontal and vertical directions are reversed. ● Use images with a clear outline (such as color cross hatch patterns available in this projector (A Page 36)) for adjustment. CAUTION: ● When the movement exceeds the limit, the color of the button turns red. 34 LX-5_EN.book Page 35 Friday, July 4, 2008 9:35 AM Lens Menu This menu is used for adjusting the projection lens. host PJ-1 user: root Logout Main Image Zoom w Focus Shift U + Setting Convergence Lens L Option Network T R _ Mail D Item Zoom Setting Value — Description For adjusting the zoom ratio (screen size). NOTE: ● The zoom position changes each time the inner button is clicked. The zoom position changes when the outer button is depressed. Focus — For adjusting the focus position. NOTE: ● The focus position changes each time the inner button is clicked. The focus position changes when the outer button is depressed. Shift — For adjusting the horizontal and vertical positions of the projection screen. NOTE: ● The shift position changes each time the inner button is clicked. The shift position changes when the outer button is depressed. CAUTION: ● When the movement exceeds the limit, the color of the button turns red. 35 LX-5_EN.book Page 36 Friday, July 4, 2008 9:35 AM Operation and Settings Setting Menu (Cont’d) Option Menu This menu is used for specifying settings for flipping images and screen displays. host PJ-1 user: root Logout Main Flip Horz. Image ON Vert. OFF ON OFF Setting Convergence Lamp Power 100% Lens Option 100% Back Color SET Message Display Network Blue Black ON OFF Mail Test Pattern OFF OFF OFF Color Bars Color Cross Hatch Cross Hatch Staircase Ramp Flat SET Q denotes the factory default. Item Flip Horz. Vert. Lamp Power Setting Value ON Q OFF ON Q OFF Q 100 % to 80 % Back Color Q Blue Black Message Display Q ON OFF Test Pattern Q OFF Color Bars Color Cross Hatch Cross Hatch Staircase Ramp Flat 36 Description For specifying settings if images are vertically or horizontally flipped when they are projected from the opposite side of the screen, or when mirrors are used for projection. ON : Flips image horizontally. OFF : Do not flip image horizontally. ON : Flips image vertically. OFF : Do not flip image vertically. For setting the brightness of the light source lamp. NOTE: ● Brightness switches in about a step of 3 % between the 80 % to 100 % range. For specifying the background color during message display or when projection fails, such as when there is no input signal. Blue : Sets the screen to blue color. Black : Sets the screen to black color. For specifying whether to display the messages. ON : Displays the messages. OFF : Do not display the messages. For projecting the test pattern. OFF : Do not display the test pattern. Color Bars : Displays the color bar. Color Cross Hatch : Displays the color cross hatch pattern. Cross Hatch : Displays the cross hatch pattern. Staircase : Displays the staircase. Ramp : Displays the ramp pattern. Flat : Displays the flat pattern. LX-5_EN.book Page 37 Friday, July 4, 2008 9:35 AM Network Menu For configuring the network settings. host PJ-1 user: root Logout Host Name Setting Main Host Name Image LZZZZZZZ SET Setting Convergence IP Address Setting Lens Option Network Mail DHCP Client DHCP IP Address 192.168.0.2 Static IP Subnet Mask 255.255.255.0 Default Gateway 192.168.0.254 Mac Address 01:23:45:67:89:AB SET Login Password Change User Name root New Password Confirm New Password SET Q denotes the factory default. Item Host Name Setting Host Name Setting Value — (Default Value: LZZZZZZZ) IP Address Setting DHCP Client IP Address Subnet Mask Default Gateway Mac Address Description For specifying the host name. NOTE: ● You can change it to a random name. Input up to 8 characters using single-byte alphanumeric characters and “ - ” (hyphen or minus). ● “ZZZZZZZ” displays the lower 7 digits of the Serial No. of this unit. For configuring the network settings. DHCP Q Static IP (Default Value: 192.168.0.2) (Default Value: 255.255.255.0) (Default Value: 192.168.0.254) — DHCP : Select this to acquire the IP address from the DHCP server automatically. Static IP : Select this to configure the IP address manually. IP Address : Specify the IP address. Subnet Mask : Specify the subnet mask. Default Gateway : Specify the default gateway. Mac Address : Displays the MAC address. (Cannot be specified) For changing the login name and password. Login Password Change User Name : For changing the login name. User Name root New Password : For changing the login password. New Password — Confirm New Password — Confirm New Password : Re-enter the new password. (For confirmation) NOTE: ● You can change it to a random name. Specify a name up to eight singlebyte alphanumeric characters and “ - ” (hyphen or minus). ● If you have forgotten the password, please consult your authorized dealer. 37 LX-5_EN.book Page 38 Friday, July 4, 2008 9:35 AM Operation and Settings Setting Menu (Cont’d) Mail Menu This menu is for configuring the mail settings, which sends out an error message to the computer of the preset address when error occurs on this projector. host PJ-1 user: root Logout Main E-Mail Setting Image E-Mail Setting E-Mail Address Convergence ON OFF user@localhost SMTP Server Address 1.1.1.1 E-Mail Auth. ON Lens Option Network Mail Auth. Type OFF PLAN LOGIN Auth. User Account Auth. Password Port No. 25 465 SET Tset Mail SEND Error message sent from this projector (Example) When error occurs at the DD-RB board Mail title: 4KPJ1 report mail Message: Error Code System Time Lamp Time Inside temp Outside temp 32 “Trouble with DD-RB circuit board” 25 h 40 m 0h9m 31 deg.C 25 deg.C NOTE: ● Refer to the code in the ALatest ErrorB for the error code. (A Page 48) 38 587 CRAM-MD5 LX-5_EN.book Page 39 Friday, July 4, 2008 9:35 AM Q indicates the factory default Item Setting Value E-Mail Setting E-Mail E-Mail Address Description For configuring the e-mail feature. ON Q OFF — (Default Value: user@localhost) ON : Use the mail feature. OFF : Do not use the mail feature. For specifying the destination e-mail address. NOTE: ● Specify an address up to a maximum of 64 characters. ● Make use of single-byte alphanumeric characters, “-”, “.”, “_”, and “@”. SMTP Server Address — (Default Value: 1.1.1.1) For specifying the address of the outgoing mail server. NOTE: ● Specify an address up to a maximum of 15 characters. ● Make use of numbers and “.”. E-Mail Auth. Auth. Type ON Q OFF Q PLAIN LOGIN CRAM-MD5 ON : Enable the e-mail authentication feature. OFF : Disable the e-mail authentication feature. For configuring the e-mail authentication type. PLAIN : Set e-mail authentication to APLAINB. LOGIN : Set e-mail authentication to ALOGINB. CRAM-MD5 : Set e-mail authentication to ACRAM-MD5B. Auth. User Account — For configuring the account name during e-mail authentication. NOTE: ● Specify an address up to a maximum of 31 characters. ● Make use of single-byte alphanumeric characters and “-”. Auth. Password — For configuring the password during e-mail authentication. NOTE: ● Specify an address up to a maximum of 31 characters. ● Make use of single-byte alphanumeric characters and “-”. Port No. Test Mail Q 25 465 587 — For configuring the SMTP server port number. When the ASENDB button is clicked, the test mail with the contents configured in the E-Mail Setting will be sent. 39 LX-5_EN.book Page 40 Friday, July 4, 2008 9:35 AM Operation and Settings RS-232C Interface You can control this projector by connecting the computer to this unit using a RS-232C cross cable (D-sub 9 pins). The commands to control this unit and the response data format against the received commands are explained here. For details, please consult your authorized dealer. Communication Specifications Communication specifications for this unit are as follows: Transfer Rate 19200 bps Data Length 8 bit Parity None Stop Bit 1 bit Flow Control None Command Format Command Data Format (PC Projector) When sending a control command to this unit, use the following data format: Header Header ID SP Command [ SP Parameter SP Parameter SP ••• ] CR : Designates the head of data and the data type. “!” (21h): Assigns command to the projector (Command) “?” (3Fh): Query to the projector (Asking command) ID : “1”: Identification number of the projector (Factory setting is 1) SP : Designates the delimiter between ID and command, command and parameter, as well as parameter and parameter. (20h) CR : Designates the terminal of the data. (0Dh) * [ ] is not necessary for Asking command. Response Data Format (Projector PC) Upon executing a control command, this unit sends back response data to the computer in this format. Header ID SP Header Normal Termination Status [ SP Parameter SP Parameter SP • • • ] CR : Designates the head of the response data. “@” (40h): Fetches data from the projector ID : “1”: Identification number of the projector (Factory setting is 1) SP : Designates the delimiter between ID and normal termination status, normal termination status and parameter, as well as parameter and parameter. (20h) Normal Termination Status : “0” (30h) CR : Designates the terminal of the data. (0Dh) * [ ] is not applicable when sending commands to the projector. 40 LX-5_EN.book Page 41 Friday, July 4, 2008 9:35 AM Parameters used for the data format The following 2 types of parameters are used for command and response data: (1) ON/OFF (2) Special Parameter Each parameter is as follows: (1) ON/OFF Shows the status (ON or OFF) of the unit, such as POWER and HIDE. Character Hex Meaning 0 30 OFF 1 31 ON (2) Special parameters Operation mode parameters Character Hex Meaning 0000 30 30 30 30 Standby state 0001 30 30 30 31 Power ON state 0002 30 30 30 32 Cooling state 0003 30 30 30 33 Emergency cooling state 0004 30 30 30 34 Emergency state DHCP client parameters Character Hex 0 30 DHCP Meaning 1 31 Static IP IP address parameters Display the IP address using the dot (“.” (2HE)) delimiter. Example: “192.168.0.10” External control command table Function Command Setting Asking Data Type Power On ELSE Power On ELSE ON/OFF Special Parameter 3 3 3 3 3 3 3 3 3 3 3 - - Power U0F 3(OFF) 3(ON) Hide U00 Operation Mode UA0 DHCP Client UD2 IP Address UD3 Network Restart UDC 3 3 3 3 3 3 3 Standby... DHCP... 192.168. ... [0] Fixed NOTE: ● After configuring the ADHCP ClientB and AIP AddressB, execute ANetwork RestartB. 41 LX-5_EN.book Page 42 Friday, July 4, 2008 9:35 AM Others Maintenance Turn off the power of the projector unit, and unplug the power cord when cleaning or replacing the filter. Cleaning and Replacing the Filter Clean the filter regularly. If the filter is soiled, air intake efficiency may deteriorate, thus resulting in malfunction of the product. Replace with a new one if the filter fails to remove dust thoroughly or if it is damaged. Failure to do so may cause dust to enter the projector and shadows to appear on the projected image. If dirt has entered this product or if you need to purchase the filter, please consult your authorized dealer. Filter Sponge CAUTION: Filter Cover Filter Cover Filter Cover Filter Sponge CAUTION: ● Remove the four screws on the inner side (for fastening the filter cover). 42 ● Remove the four screws on the inner side (for fastening the filter cover). LX-5_EN.book Page 43 Friday, July 4, 2008 9:35 AM 1 Remove the filter cover The filter is located at the front and side of the projector unit. 2 Remove the sponge and filter Hold the center of the filter using your fingers, and pull the filter toward you to remove it. 3 Clean the sponge and filter Remove any dirt or dust using a vacuum cleaner. CAUTION: ● Do not clean using a flammable air duster. This may cause fire. 4 Mount the sponge and filter Mount the filter and sponge to the projector using the reverse removed procedure. Finally, check to ensure that the filter cover is firmly mounted. NOTE: ● Mount the filter correctly. Failure to do so may cause the projector to malfunction. ● The projector may stop operating if a damaged filter or filter panel is used. In this case, replace the filter or filter panel with a new one. Routine Servicing Clean dirt on the cabinet Do this with a soft cloth. In case of heavy soiling, soak a cloth in neutral detergent diluted with water, wring dry and wipe, followed by wiping again using a dry cloth. Pay attention to the following to prevent the cabinet from deteriorating in condition, getting damaged, or the paint from coming off. ● Do not wipe with a stiff cloth ● Do not wipe with force ● Do not wipe with thinner or benzene ● Do not spray volatile chemicals like insecticide ● Do not allow prolonged contact with rubber or plastic products Remove dirt that is attached to the vent holes Do this using a vacuum cleaner. Wipe using a cloth if a vacuum cleaner cannot be used. Leaving dust attached may prevent adjustment of the internal temperature and result in malfunction of the projector. Clean dirt on the lens Do this using commercial blowers or lens cleaning papers (for cleaning glasses and cameras). Do not use fluid-type cleaning agents. This may lead to peeling of the surface coating film. Lens surface is fragile. Avoid rubbing or knocking it. Replacement of Light Source Lamp The light source lamp is a consumable item. Replace with a new lamp unit if the image appears dull or if the lamp burns out. ● When the lamp needs to be replaced soon, users will be notified through a message on the screen and the indicator. (A Page 46, 47) ● The life of the lamp used for this projector is about 1500 hours. This is the average life of lamps, and not a guaranteed value. ● The lamp life may not reach 1500 hours depending on the operating conditions. ● Deterioration progresses rapidly when the remaining lamp usable time is short. ● If the image is dark or color tone abnormal, replace the lamp unit as soon as possible. ● For details on replacement of the lamp unit, please consult your authorized dealer. ● Lamp has to be replaced by an authorized person. Do not remove PANEL BACK and lamp Unit. This may cause fire and electric shock hazards. Access to the lamp unit only possible with use of tool. 43 LX-5_EN.book Page 44 Friday, July 4, 2008 9:35 AM Others Troubleshooting ● Device noise is heard from the interior of the projector ● There is color bleeding on the screen When the projector fails to run properly due to external noises, perform the following operations. Check the following points before sending this product for repair. The following phenomena are not malfunctions. If there is no abnormality on the screen when the phenomena below appear, they are not malfunctions. ● The top or front part as well as the rear of the projector unit is hot ● A creaking sound is heard from the projector Symptom Probable Cause A Check to ensure that the power is shut down. Unplug the power cord, and insert again. B Turn on the power of the projector. A sound maybe heard when the lamp burn out. However, this is not a hazard. D-ILA devices are manufactured using extremely high-precision technology. However, some of the pixels may not lit up or remain permanently lit up. Corrective Action Reference Page ● Is the power cord disconnected? ● Insert the power cord (plug) properly. A Page 23 ● Is the main power supply switched turned on? ● Turn on the main power supply switch of the projector unit. A Page 23 ● Is the lamp in the cool down mode? ● Turn on the power again after the cool down mode ends. A Page 29 ● Is the lamp protection function triggered? (This function is triggered when the power shuts down such as during power failures.) ● Wait till the temperature of the lamp has gone down. (Turn on the main power supply switch to run the fan and cool down the lamp.) Turn on the power after about 180 seconds. ^ Image is dark ● Is the lamp near exhaustion? ● Check the ALamp TimeB setting of the Main menu. When the lamp life is near its end, please consult your authorized dealer. A Page 30 Projector works when the power is turned on, but stops abruptly after a few minutes ● Are the air inlets and vent holes blocked? ● Turn off the main power supply switch, and remove the blockage. After removing, turn on the power again. A Page 10 to 12, 29 ● Is the temperature of the room high? ● Set the temperature of the room or the surrounding temperature of this projector to an appropriate level. A Page 49 ● Are the filters dirty? ● Clean the filters. A Page 42 ● Is the lens cap removed? ● Remove the lens cap. A Page 10 ● Are devices properly connected? ● Connect the devices correctly. A Page 19, 21 ● Is the power of the connected devices turned on? ● Turn on the power of the connected devices. ^ ● Are correct signals being output from the connected devices? ● Configure the connected devices correctly. ^ ● Are the signals of the connected devices possible input signals? ● Check to ensure that they are possible input signals, and input compatible signals accordingly. A Page 18, 20 ● Is the image temporarily hidden? ● Set AHideB of the Image menu to AOFFB to display the image. A Page 29, 32 ● Is the projector out of focus? ● Adjust the focus using AFocusB of the Lens menu. A Page 29, 35 ● Is the projection distance too short or too long? ● Set it to a correct distance. A Page 16, 17 Power is not supplied Video image does not appear Video image is blur 44 LX-5_EN.book Page 45 Friday, July 4, 2008 9:35 AM Symptom Probable Cause Image is unusually dark or bright ● Is the brightness level properly adjusted? Coloring of the image is poor or distorted Corrective Action Reference Page ● Adjust accordingly using ABrightnessB of the Image menu. ● Adjust ALamp PowerB in the Option menu. A Page 32 ● Is the contrast level properly adjusted? ● Adjust accordingly using AContrastB of the Image menu. A Page 32 ● Are the signals of the connected devices possible input signals? ● Check to ensure that they are possible input signals, and input compatible signals accordingly. A Page 18, 20 ● Is the input cable correctly connected? ● Connect the input cable correctly. A Page 19, 21 Projection position on the screen has shifted ● Has the setup position of the projector been shifted? ● Check the setup position of the projector. ^ Image disappears suddenly ● Are the video signals correctly input? ● Check the signals and connection. A Page 18 to 21 Images do not appear on the two-screen mode display ● Are the DVI 1 and DVI 3 terminals connected for input? ● To display images in the two-screen mode, connect the DVI 1 and DVI 3 terminals. The left screen displays images of the DVI 1 terminal, and the right screen displays images of the DVI 3 terminal. A Page 20, 21 Images do not appear immediately after power is turned on. ● Formatting is in progress. ● Please wait for a few minutes for the formatting progress to end. A Page 28 The screen does not darken immediately when the projection has ended ● The ending process is in progress. ● Please wait for a few minutes for the ending process to complete. A Page 29 A Page 36 45 LX-5_EN.book Page 46 Friday, July 4, 2008 9:35 AM Others What to do when these messages are displayed Messages are displayed when the lamp life has expired and when there is input of signals that cannot be used. Message Lamp Time Over Message Lamp Time Over Out of Range Cause (Details) ● Displayed when the lamp time has exceeded 1500 hours. The message is displayed for a period of 3 minutes during each projection. Replace with a new lamp unit. For details on replacement of the lamp unit, please consult your authorized dealer. ● When there is input of video signals that cannot be used with this unit Input video signals that can be used. No Input ● When no device is connected to the input terminal ● When the input terminal is connected but there is no signal Input the video signals. 46 LX-5_EN.book Page 47 Friday, July 4, 2008 9:35 AM Warnings Using Indicators The lamp time and warning mode are indicated using the indicator. For details on indicator displays during normal operation, refer to the note below. No. Indicator STANDBY/ON LAMP Description WARNING About time to replace lamp (Lamp time has exceeded 1400 hours) 1 *1 Light On (Yellow) — *2 Blinking (Yellow) Light On (Red) 2 When the lamp life has expired (Lamp time has exceeded 1500 hours. Message displayed. (A Page 46)) 3 When lamp does not light up and projection fails 4 When the lamp goes off during projection 5 Temperature around the lamp is high 6 When the internal temperature is unusually high 7 *2 8 When the external temperature is unusually high Light On (Red) — When the cooling fan stops running 9 When error occurs in the circuit operation *1: The indicator lights up in red when in the standby mode, and in green when in the operating mode. *2: The indicator lights up in red when in the warning mode, and blinks in red when in the cool down mode. Measures when the warning mode appears When the projector switches to the warning mode (Nos. 3 to 9), projection stops automatically, and the cooling fan runs for about 180 seconds. After the cooling fan stops running, turn off the main power supply switch, and remove the power plug from the outlet. Perform the following checks and take the corresponding measures. No. Check 3 ● Check whether the projector has been subject to shock during operation. ● Turn on the power again. ● Check whether the air inlets are blocked by objects. ● Check to ensure that the external temperature of the projector is normal. ● Allow some time for the projector to cool down. 4 Measure 5 6 7 8 9 If the warning indication is displayed again, turn off the main power supply switch after the cooling fan stops running. Then pull out the power plug from the power outlet. Call your authorized dealer for repair. NOTE: ● Normal indicator display Indicator STANDBY/ON Description LAMP WARNING Light On (Red) ^ ^ When in the standby mode. Light On (Green) ^ ^ When power is supplied (operating mode). Blinking (Red) ^ ^ When cooling down (cool down mode). (A Page 29) Blinking (Green) ^ ^ When the projected image is temporarily hidden. (A Page 29) 47 LX-5_EN.book Page 48 Friday, July 4, 2008 9:35 AM Others Latest Error The latest error number appears in the Main Menu when an error occurs in the projector. Error details are as follows: Error Number 48 Meaning 01 The lamp does not turn on. 02 Accumulated lamp time has exceeded 1500 hours. 06 The lamp goes off during projection. 08 Abnormal temperature in the projector. 09 Abnormal temperature around the intake vent. 0A Abnormal temperature around the exhaust vent. 15 The lamp cover is open. 30 Trouble with CPU circuit board. 31 Trouble with MAIN circuit board. 32 Trouble with DD-RB circuit board. 33 Trouble with DD-G circuit board. 40 FAN1 (the cooling fan for DD) has stopped. 41 FAN2 (the cooling fan for the lamp) has stopped. 42 FAN3 (the cooling fan for over all exhaust) has stopped. 43 FAN4 (the cooling fan for the MAIN circuit board) has stopped. 44 FAN5 (the cooling fan for the lighting system (PCS) ) has stopped. 46 FAN7 (the cooling fan for the device) has stopped. 47 FAN8 (the cooling fan for the power supply of the lamp) has stopped. 49 FAN10 (the cooling fan for DD) has stopped. 4A FAN11 (the cooling fan for DD) has stopped. LX-5_EN.book Page 49 Friday, July 4, 2008 9:35 AM Specifications DVI clock (Rx clock) to 165 MHz (Single) to 330 MHz (Dual) Display resolution 40962400 Terminal Video input DVI-D (dual link) 24 pins (supports 12-bit extended input) 4 (supports HDCP*3) LAN RJ45 1 USB Type B (Slave) 1 RS-232C D-sub 9 pins (male) 1 General Power supply AC 110 V to 120 V, AC 200 V to 240 V 50/60 Hz Power consumption 1230 W (Standby mode: 2.7 W) Current consumption Max 10.9 A (AC 110 V to 120 V) Max 6 A (AC 200 V to 240 V) Calorific power 4428 kJ/h (1058 kcal/h) Air capacity Intake: Approx. 3 m³/min Discharge: Approx. 3 m³/min Allowable operating temperature range 10C to 35C Allowable operating humidity range Less than 80 % (no condensation) Allowable storage temperature range –5C to 60C Installation height Operation guarantee: 2000 m and below Performance guarantee: 1500 m and below Dimensions (WidthDepthHeight) 663 mm803 mm342 to 362 mm (Excluding lens, and small protrusions) Mass 56 kg (Excluding lens) Optical System Projection method D-ILA element *1, *2 Projection lens (optional) Light-source Lamp Screen size Projection distance D-ILA analog drive system 3 1.27" (40962400 pixels) 3 pcs (total no. of pixels: 29,491,200 pixels) LXD(1.5 - 1.9) (1.50:1 to 1.84:1 zoom lens) LXD(1:1) (1:1.1 Short focal length lens) 825 W xenon lamp 80" to 300" (zoom lens) 50" to 250" (Short focal length lens) Approx. 2.6 m to 12 m (zoom lens) Approx. 1.2 m to 6 m (Short focal length lens) Accessories Power cord (A Page 8) Warranty card *1 D-ILA is the abbreviation for Direct drive Image Light Amplifier. *2 D-ILA devices are manufactured using extremely highprecision technology. Pixel effectiveness is 99.99 %. Only 0.01 % or less of the pixels would either not lit up or remain permanently lit up. *3 HDCP is the abbreviation for High-bandwidth Digital Content Protection system. Images from the DVI input terminal may not be displayed due to HDCP specification changes. ● Specifications and appearance of this product may be subject to change for improvement without prior notice. ● Please note that some of the pictures and illustrations may have been abridged, enlarged or contextualized in order to aid comprehension. Images may differ from the actual product. Signal System Digital video Input format 40962400, 40962160, 38402400, 38402160, 20481200, 20481080, 19201200, 19201080, 16001200, 12801024, 1024768, 800600, 640480 49 LX-5_EN.book Page 50 Friday, July 4, 2008 9:35 AM Others Specifications (Cont’d) Pin Assignment RS-232C Terminal 5 9 6 1 Pin No. 2 3 5 1,4,6 to 9 Signal RxD TxD GND NC Operation Incoming Data Outgoing Data Signal Ground ^ Signal Direction This Projector PC This Projector PC ^ ^ DVI-D Terminal 8 7 6 5 4 3 2 1 24 23 22 21 20 19 18 17 16 15 14 13 12 11 10 9 Pin No. 1 2 3 4 5 6 7 8 9 10 11 12 Signal TMDS Data 2– TMDS Data 2+ TMDS Data 2/4 Shield TMDS Data 4– TMDS Data 4+ DDC Clock DDC Data NC TMDS Data 1– TMDS Data 1+ TMDS Data 1/3 Shield TMDS Data 3– TMDS = Transition Minimized Differential Signaling DDC = Display Data Channel 50 Pin No. 13 14 15 16 17 18 19 20 21 22 23 24 Signal TMDS Data 3+ TMDS +5 V Power Supply Earth (+5 V) Hot Plug Detection TMDS Data 0– TMDS Data 0+ TMDS Data 0/5 Shield TMDS Data 5– TMDS Data 5+ TMDS Clock Shield TMDS Clock + TMDS Clock– LX-5_EN.book Page 51 Friday, July 4, 2008 9:35 AM Dimensional Outline Drawing (Unit: mm) Side 30 Top 827 (Including the optional projection lens) 257.6 199 803 688 342 to 362 449 677 36 M10 hole (x 12) Tightening depth: 10 to 20 30 (Projection lens is optional) 127 663 Front Rear 434 457 Center of lens 315 211 136 DVI 1 317 DVI 2 CONTROL USB DVI 3 LAN OPERATE STANDBY/ON LAMP DVI 4 WARNING 26 to 46 RS-232C 43.5 CAUTION: ● Using screws with dimensions other than those specified in the above diagram may cause the projector to drop or malfunction. 51 LX-5_EN.book Page 52 Friday, July 4, 2008 9:35 AM R9011221 PROJECTOR © 2008 Barco Presentation and Simulation


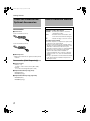


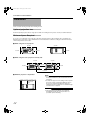

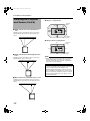
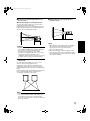
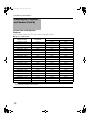
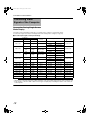

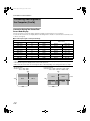

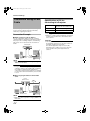

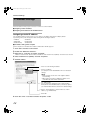
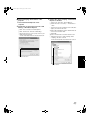


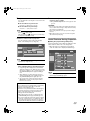
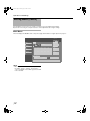
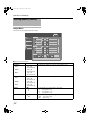
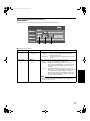

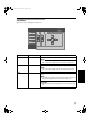
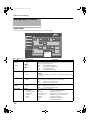


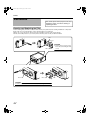

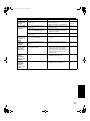


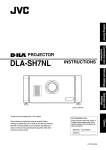
![LX-5 [v00]](http://vs1.manualzilla.com/store/data/006244360_1-624cec927e79b61b282e5fd0ce5f96b6-150x150.png)
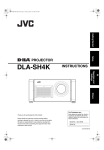
![LX-5 [v00]](http://vs1.manualzilla.com/store/data/006344111_1-3e322822a61703d702d728a6fa7aeea0-150x150.png)


