Download Dish Network Hopper User guide

Transcript
HOPPER
WHOLE-HOME HD DVR SYSTEM
USER GUIDE
Warning and Attention Symbols
You must be aware of safety when you install and use this system. This User Guide provides various procedures. If you do
some of these procedures carelessly, you could injure or kill yourself or damage equipment or property. Some other
procedures require special attention.
The lightning flash with arrowhead symbol, within an equilateral triangle, is intended to alert the user to
the presence of uninsulated “dangerous voltage” within the product’s enclosure that may be of sufficient
magnitude to constitute a risk of electric shock to persons.
The exclamation point within an equilateral triangle is intended to alert the user to the presence of
important operating and maintenance (servicing) instructions in the literature accompanying the
appliance.
For Your Safety
Do not try to open the case of the receiver. There is risk of electrical shock, which may cause damage to
the receiver and/or personal injury or death to you. There are no user-serviceable parts inside the
receiver. Opening the receiver case or making unauthorized changes will void the warranty.
Warning: To reduce the risk of fire or electric shock, do not expose this appliance to rain or moisture.
Important Software Notice
As with all software controlled products, unexpected behavior could arise if the user tries to perform operations in a nonroutine manner. This product, like almost any other high tech product, is subject to bugs and hence EchoStar CANNOT
AND DOES NOT GUARANTEE OR WARRANT THAT ALL FEATURES, SUCH AS PARENTAL CONTROLS, WILL WORK
AS INTENDED UNDER ALL CIRCUMSTANCES. EchoStar endeavors to improve such conditions and will periodically
download improvements.
In compliance with the terms of the GNU Public License (GPL), EchoStar is making some source code available to the
public to download from www.echostar.com.
Equipment and Software Covered by this User’s Guide
This User Guide covers the Hopper HD DVR receiver, and software models Hopper 2000. This Guide may cover other
devices, not listed here.
Copyright Notice
Copyright © 2012 EchoStar Technologies L.L.C., Englewood, Colorado 80112. All rights reserved.
The information in this User Guide may change without notice. We may issue revisions to tell you about such changes.
Please send comments or questions about this User Guide to: Technical Publications, EchoStar Corporation, 100 Inverness Terrace East,
Englewood, Colorado 80112.
Part Number: 195004
DISH and DISH Network are registered trademarks of DISH Network L.L.C. For information about DISH Network, please visit our website
at www.dish.com.
We acknowledge all product names, trade names, or corporate names we mention in this User Guide to be the proprietary property of the
registered owners.
Manufactured under license from Dolby Laboratories. Dolby and the double-D symbol are trademarks of Dolby Laboratories.
HDMI, the HDMI logo and High-Definition Multimedia Interface are trademarks or registered trademarks of HDMI Licensing LLC.
This equipment may incorporate copyright protection technology that is protected by U.S. patents, patent applications, and/or other
intellectual property rights. Use of such copyright protection technology is intended for home and other limited pay-per-view uses only
unless otherwise authorized. Reverse engineering or disassembly is prohibited.
Important Safety Instructions ......................... vii
Introduction ........................................................ 1
WELCOME ................................................................... 2
HOW TO USE THIS USER GUIDE ................................... 2
ABOUT YOUR DISH ACCOUNT .................................... 4
WATCHING TV NOW .................................................... 5
ADDITIONAL SERVICES ................................................ 7
ABOUT SATELLITE TV RECEPTION ............................... 7
WHY CONNECT TO A PHONE LINE OR BROADBAND INTERNET? 8
MOVING ON-SCREEN LOGO ......................................... 8
Receiver & Remote Control ............................. 11
HOPPER HD DVR OVERVIEW .................................... 12
REMOTE CONTROL .................................................... 12
HOPPER FRONT PANEL ............................................. 17
HOPPER BACK PANEL ............................................... 17
USING THE ON-SCREEN MENUS ................................. 18
USING TEXT FIELDS .................................................. 19
i
Table of Contents
Finding Programs to Watch ............................ 21
CHANGING CHANNELS ............................................... 22
USING THE PROGRAM GUIDE ..................................... 22
USING THE BROWSE BANNER .................................... 24
USING THEMES AND SEARCH ..................................... 24
USING PICTURE-IN-PICTURE (HOPPER ONLY) ............. 26
USING MULTI-CHANNEL RECALL ................................ 26
STARTING IN ONE ROOM AND FINISHING IN ANOTHER 27
HOMES WITH A SECOND HOPPER INSTALLED ............. 28
Pay-Per-Programs ............................................ 29
PAY-PER-VIEW ......................................................... 30
DISH ON DEMAND .................................................... 30
BLOCKBUSTER @HOME™ ......................................... 31
DISHONLINE.COM ...................................................... 31
ORDERING CONSIDERATIONS ..................................... 32
Favorites Lists .................................................. 35
WHAT ARE FAVORITES LISTS? .................................. 36
CREATING OR CHANGING FAVORITES LISTS ............... 36
NAMING FAVORITES LISTS ......................................... 37
USING FAVORITES LISTS ........................................... 37
Parental Controls ............................................. 39
WHAT ARE LOCKS AND RESTRICTIONS? .................... 40
CREATING OR CHANGING A PASSWORD .....................41
COPYING LOCKS FROM YOUR HOPPER TO A JOEY ..... 41
CREATING OR CHANGING RATINGS RESTRICTIONS ..... 42
CREATING OR CHANGING CHANNEL LOCKS ............... 45
HIDING ADULT CONTENT OR LOCKED CHANNELS ....... 45
Multimedia and Apps ....................................... 47
USING THE HOME MEDIA FEATURE ............................48
ii
Table of Contents
USING APPS ON YOUR HOPPER ................................. 49
MY ACCOUNT CUSTOMER SUPPORT .......................... 49
Digital Video Recordings ................................. 51
WHAT IS A DVR? ...................................................... 52
PAUSING A PROGRAM ............................................... 52
REVERSE, FAST FORWARD, AND SKIP ....................... 53
SLOW MOTION AND FRAME-BY-FRAME ...................... 53
RECORDING A LIVE PROGRAM ...................................54
PLAYING A RECORDED PROGRAM .............................. 54
RECORDING WHILE WATCHING DIFFERENT PROGRAMS 54
OTHER RECORDING OPTIONS .................................... 55
GROUPING AND SORTING RECORDINGS .....................56
Recording Future Programs ........................... 57
USING PRIMETIME ANYTIME™ ...................................58
TIMERS AND RECORDINGS ......................................... 60
USING THE TIMERS LIST ............................................ 63
USING THE DAILY SCHEDULE ..................................... 63
SETTING UP AN EVENT TIMER ...................................64
SETTING UP A SEEK & RECORD™ TIMER .................. 64
CHANGING OR DELETING A TIMER ............................. 65
Remote Control Setup ..................................... 67
PAIRING YOUR REMOTE CONTROL ............................. 68
CONTROLLING OTHER COMPONENTS ......................... 71
THE LOCATE REMOTE FEATURE ................................. 79
SENDING DISCRETE POWER ON AND OFF .................. 80
Receiver Customization .................................. 83
USING MULTIMEDIA ................................................... 84
USING CALLER ID ..................................................... 86
CUSTOMIZING THE GUIDE AND CHANNEL LISTS .......... 87
CHANGING LANGUAGES ............................................. 88
iii
Table of Contents
USING CLOSED CAPTIONING ...................................... 88
USING AUDIO OUTPUT ............................................... 89
RESETTING TO FACTORY DEFAULTS .......................... 91
SCHEDULING RECEIVER UPDATES .............................. 91
USING TV EVERYWHERE ........................................... 91
Connections and Setup ................................... 97
CONNECTING THE HOPPER HD DVR ......................... 98
CONNECTING THE JOEY RECEIVER(S) ...................... 101
CONNECTING TO YOUR DISH ANTENNA .................... 102
CONNECTING THE PHONE LINE ................................ 103
CONNECTING TO BROADBAND INTERNET .................. 104
USING TROUBLESHOOTING TOOLS ........................... 105
Reference ........................................................ 108
TROUBLESHOOTING TABLES .................................... 109
REMOTE CONTROL DEVICE CODES ..........................120
Appendix ......................................................... 122
RESIDENTIAL CUSTOMER AGREEMENT ..................... 125
FCC COMPLIANCE .................................................. 133
Index ................................................................ 129
Inside Back Cover to Record Codes & Settings
iv
Important Safety Instructions
1
Read these instructions.
2
Keep these instructions.
3
Heed all warnings.
4
Follow all instructions.
5
Do not use this apparatus near water.
6
Clean only with a dry cloth.
7
Do not block any ventilation openings. Install in accordance with the manufacturer’s instructions.
8
Do not install near any heat sources such as radiators, heat registers, stoves, or other apparatus
(including amplifiers) that produce heat.
9
Do not defeat the safety purpose of the polarized or grounding-type plug. A polarized plug has
two blades with one wider than the other. A grounding-type plug has two blades and a third
grounding prong. The wide blade or the third prong are provided for your safety. If the provided
plug does not fit into your outlet, consult an electrician for replacement of the obsolete outlet.
10 Protect the power cord from being walked on or pinched, particularly at plugs, convenience
receptacles, and the point where they exit from the apparatus.
11 Use only attachments/accessories specified by the manufacturer.
12 Unplug this apparatus during lightning storms or when unused for long periods of time.
13 Refer all servicing to qualified service personnel. Servicing is required when the apparatus has
been damaged in any way, such as the power supply cord or plug is damaged, liquid has been
spilled or objects have fallen into the apparatus, the apparatus has been exposed to rain or
moisture, does not operate normally, or has been dropped.
14 The power plug must be readily accessible so that the apparatus can be easily disconnected from
the AC power.
15 Tighten all of the coaxial cable connections only by hand. If you use a wrench, you may
overtighten the connections and damage your equipment.
16 The receiver is still connected to the AC power whenever it is plugged into a live power outlet,
even if it is “turned off” (in standby mode) using a remote-control or front-panel POWER button.
vii
Safety
Apparatus shall not be exposed to dripping or splashing and no objects filled with liquids, such
as vases, shall be placed on the apparatus. Also, no sources of flame, such as lit candles, shall
be placed on the apparatus.
Note to Satellite TV System Installer: This reminder is provided to call the satellite TV system installer’s
attention to Article 820-40 of the National Electrical Code (NEC) that provides guidelines for proper grounding
and, in particular, specifies that the cable ground shall be connected to the grounding system of the building as
close to the point of cable entry as practical.
Satellite Dish
Coaxial Cable
from Satellite Dish
Ground Clamp
Antenna Discharge
Unit
Grounding Conductors
(NEC Section 810-21)
Electric Service Equipment
Ground Clamps
Power Service Grounding
Electrode System
(NEC Art. 250, Part H)
•
Operate the receiver using only the type of power source indicated on the marking label. Unplug the
receiver power cord by gripping the power plug, not the cord.
•
Do not overload wall outlets or extension cords; this can result in a risk of fire or electrical shock.
•
Never insert objects of any kind into the receiver through openings, as the objects may touch dangerous
voltage points or short out parts. This could cause fire or electrical shock.
•
Do not locate the antenna near overhead light or power circuits, or where it can fall into such power lines or
circuits. When installing the antenna, take extreme care to avoid touching such power lines or circuits, as
contact with them can be fatal.
•
Do not attempt to service the receiver yourself, as opening or removing covers may expose you to
dangerous voltage, and will void the Limited Warranty. Refer all servicing to authorized service personnel.
Proper Care of Your Equipment
•
Always handle the satellite receiver carefully. Excessive shock and vibration can damage the hard drive.
•
Unplug the receiver from the AC power outlet before cleaning.
•
Always turn the receiver off, unplug it and let it sit for at least 30 seconds before moving it.
•
The use of accessories or attachments not recommended by the receiver manufacturer will void the Limited
Warranty.
•
Do not place the receiver in an enclosure (such as a cabinet) without proper ventilation.
•
Do not stack the receiver on top of or below other electronic devices as this can cause heat build-up and
vibration.
•
Do not install the receiver in any area where the temperature can be less than 40°F or more than 113°F. If
the receiver is cold to the touch, do not plug it in immediately. Let it sit unplugged at room temperature for at
least 45 minutes before plugging it in.
•
Use an outlet that contains surge suppression or ground fault protection. During an electrical storm or when
the receiver is left unattended and unused for long periods of time, unplug the power cord from the wall
outlet, disconnect the lines between the receiver and the antenna, and disconnect the telephone line. This
will provide additional protection against damage caused by lightning or power line surges.
On some TVs, the presence of fixed images for extended periods of time may cause them to be
permanently imprinted on the screen. Consult your TV user guide for information on whether this is
a problem for your TV, what operating/viewing restrictions apply to avoid this problem, and
associated TV warranty coverage.
viii
Introduction
Introduction and Welcome to DISH!
What you’ll find in this chapter:
• WELCOME
• HOW TO USE THIS USER GUIDE
• ABOUT YOUR DISH ACCOUNT
• WATCHING TV NOW
• ADDITIONAL SERVICES
• ABOUT SATELLITE TV RECEPTION
• WHY CONNECT TO A PHONE LINE OR
BROADBAND INTERNET? INTERNET
• MOVING ON-SCREEN LOGO
1
Chapter 1
Welcome
WELCOME
Thanks for choosing DISH. You are about to experience the excitement and convenience
of our Direct Broadcast Satellite (DBS) service, which delivers the very best picture and
sound quality. DISH consistently provides the latest products and satellite services—with
high performance, ease of operation, and a wide variety of entertainment options.
Your new Hopper is a Whole-Home HD DVR that offers full digital video recording
functionality, including pausing live TV, to every TV in your house that is a part of your
Whole-Home DVR network. The Hopper HD DVR is the hub for all things entertainment.
It's a three-tuner HD DVR that lets you record up to three HD channels at once and play
them back from any room in your home. Plus, you can record up to six HD channels at
once with PrimeTime Anytime™ (with your local ABC, CBS, FOX AND NBC channels in
HD, which may not be available in all markets). It is one HD DVR that works independently
on as many as four different TVs at the same time, so everyone can be in different rooms
watching TV.
The Joey Receiver connects to other TVs in your home and links with the Hopper to create
a Whole-Home DVR network. It offers all of the features of the Hopper (except for PictureIn-Picture) and offers an identical user interface and remote control as the Hopper. You
can connect a Joey to a high-definition or standard-definition TV.
HOW TO USE THIS USER GUIDE
This section explains how the user guide is divided and the conventions used throughout.
Guide Overview
The information in this guide is separated into several chapters to make it easy for you to
find exactly what you’re looking for:
•
•
•
•
•
•
•
•
•
•
•
2
Chapter 1: Introduction gives you a brief overview of DISH and your new Hopper.
Chapter 2: Receiver & Remote Control explains the basic features of your system and
how to use the remote controls, front panel buttons, and back panel connections.
Chapter 3: Finding Programs to Watch describes how to change channels and look for
programs.
Chapter 4: Pay-Per-Programs shows you how to order and watch Pay-Per-View
events and DISH On Demand programming.
Chapter 5: Favorites Lists explains how to create, name, and use favorites lists.
Chapter 6: Parental Controls explains how to set locks and passwords for parental
controls.
Chapter 7: Multimedia and Apps describes how to use the home media and interactive
features of your satellite TV system.
Chapter 8: Digital Video Recording explains how to use the integrated recording
features of your Hopper HD DVR to maximize your viewing pleasure.
Chapter 9: Record Future Programs shows you how you can set your DVR to record
and then play back your favorite programs when you want to watch them.
Chapter 10: Remote Control Setup contains instructions for programming your remote
to control your Hopper HD DVR and equipment like a TV or VCR/DVD player.
Chapter 11: Receiver Customization shows you how to customize your Hopper.
Introduction
How to Use this User Guide
•
Chapter 12: Connections and Setup explains how to connect your Hopper HD DVR to
your TV, as well as to other equipment, such as a VCR.
Guide Conventions
•
•
•
•
•
•
The labels of the remote-control buttons are all in capital letters.
Example: Press SAT to control your Hopper or Joey.
Select means to move the highlight to an on-screen option or choice in a menu list and
then press the SELECT button on the remote control.
Example: Select the Locks option.
This user guide uses HD to refer to high definition and SD for standard definition.
Where this guide mentions nearby TV, it is referring to the TV nearest the Hopper. The
nearby TV receives menus and programming from the Hopper’s outputs and is
connected using relatively short audio/video cables.
Where this guide mentions remote TV, it is referring to one or more TV(s) located in
other rooms and connected to Joey Receivers.
The instructions in this guide are shown in two ways:
–
Instructions in the form of pictures are handy if you’d like to learn something
quickly. These instructions are numbered left to right as shown in the sample
below.
–
Instructions that are written out are helpful if you’d like to learn more details.
3
Chapter 1
About Your DISH Account
ABOUT YOUR DISH ACCOUNT
This section describes how to order your packages and provides information on how to
find information about your DISH account.
Ordering Your Programming Packages
Before you can enjoy your new Hopper HD DVR, order your programming packages.
1 Press POWER on the front panel to turn on the Hopper.
2 Press SYSTEM INFO on the front panel to display the Hopper’s System Information menu
on the nearby TV screen.
3 Call 1-800-333-DISH (3474) and tell the Customer Service Center representative that the
system has been installed and you would like to begin receiving services. A representative
will explain the available DISH packages. Give the representative information from the
System Information screen displayed on the nearby TV, as requested.
4 The representative will send a signal via the satellite to activate your services. This process usually takes just a few minutes.
5 If the System Information menu screen is still displayed, select Done.
Where to Find Information on Your Account
If you want to know about charges to your DISH account or if you would like to make
changes to your programming packages, be sure to have your account information handy
and choose one of the following:
•
Go to our website at www.mydish.com/myaccount
•
Press MENU on your remote control and then select Customer Support.
•
Call the DISH Customer Service Center at 1-800-333-DISH (3474).
Note: Additional authorization may be required before certain certain types of programs
and/or optional over-the-air broadcasts can be viewed; certain additional fees may apply.
4
Introduction
Watching TV Now
WATCHING TV NOW
After you have ordered your programming package, you can begin enjoying the features
of your new Hopper HD DVR. When you complete these simple tours, you’ll be familiar
with the remote control and be able to find a program to watch, pause live TV, and record
your favorite shows.
Finding a Program to Watch
If you want to know more about watching TV, see Chapter 3: Finding Programs to Watch
starting on page 21.
5
Chapter 1
Watching TV Now
Pausing Live TV
Here’s something you can’t do with regular old TV: pause live TV because someone’s at
the door or calling you on the phone, or there’s something else you have to do right now.
For more about the pause feature of your Hopper, see Pausing a Program on page 52.
Recording and Playing Back a Program
Take this tour to learn how to make basic recordings of your favorite shows. For more
about the DVR features of your Hopper, see Chapter 8: Digital Video Recordings starting
on page 51.
2
1
OK
Record Remainder of This Event:
"Cliffhanger"
300
00 HBO-E, End Time:
T
8:00 pm
OK
Options
Cancel
Select OK
to record
the remainder
of the program
While watching
a program,
press RECORD
REC
REC
3
STOP
Yes
7-8
5
6
Start
DVR Events
5:18pm
18hr 41min Avail
Today
Start Over
STOP
Press STOP
to stop playback
of the recorded
program
6
0:34
Happy Days
0:34
SpongeBob SquarePants
0:34
SportsCenter
1:04
Mystic River (All Day)
Select Start or
Start Over
(the recorded
program will
begin playback)
3:04
The Brady Bunch
DVR
1
Today
7/30 6:59am
9 KUSA
3:04
News/Business. (2004) Comic/talk-show
host Dennis Miller ('Dennis Miller'): Norah
Jones performs. (CC) (Stereo)
2:30
215 TRAV
Sort
Edit
Schedule
Done
Help
History
SELECT
Select the
program you
recorded
4
After a few minutes,
press STOP and select
Yes to stop recording
To begin watching
your recorded
program,
press DVR twice
Introduction
Additional Services
ADDITIONAL SERVICES
Pay-Per-View
Catch all the action on Pay-Per-View. Take a break from regular TV and order the latest
movies, sports, and special events. For details on ordering Pay-Per-View events, see
page 30. Be sure to connect your Hopper to an active phone line or broadband Internet
before you order a Pay-Per-View event (see the instructions on page 100). For more
information, visit the mydish.com/ppv website.
On Demand
Press the DISH button on your remote control and enjoy movies and other programming
any time without perusing schedules, waiting around for programs to get started, and
without leaving your own home.
DISH Online
DISH Online lets you download movies and other programs to the Hopper HD DVR if it is
connected to a broadband Internet connection. For steps to connect your Hopper to the
Internet, refer to Connecting to Broadband Internet on page 100. For steps to order DISH
Online programs, refer to DishOnline.com on page 31. For more information, visit the
mydish.com/dishonline website.
ABOUT SATELLITE TV RECEPTION
Satellite television service uses satellites in a stationary orbit over the Earth to deliver TV
and audio programming. This type of orbit enables the satellites to stay aligned over one
place on the surface of the Earth. Once the satellite dish has been aimed at the satellite,
the dish does not have to move to follow it.
Rain and Snow Fade
Heavy rain, snow, or dense cloud cover can
reduce the satellite signal, which may interrupt
your programming service. Your service will
return after the weather condition has passed.
Aiming the satellite dish to get the strongest
signal during installation, will help prevent rain
and snow from interrupting the signal.
7
Chapter 1
Why Connect to a Phone Line or Broadband Internet?
Solar Interference
Twice a year, the sun moves to a position behind
the DISH satellites as they orbit the Earth. This
event occurs during a few days at the beginning
of spring and the beginning of autumn, and lasts
only a few minutes.
During these brief periods, you will not be able to
see programs on DISH. When the sun move
from behind the satellites, the programs will
reappear. This is an unavoidable natural event
and has an adverse effect on many providers of
satellite services.
WHY CONNECT TO A PHONE LINE OR BROADBAND
INTERNET?
Your Hopper is equipped with a standard telephone jack and two Ethernet ports that you
use to connect to an active telephone line and to broadband Internet, respectively. Keep
the Hopper connected so that you will be able to order pay-per-view programs using your
remote control, use all of the interactive TV features and Hopper apps, and access other
services from DISH (see the instructions on page 100). A connected telephone line also
supports the Caller ID feature of your Hopper (see the instructions on page 99).
Your Hopper can be connected to your broadband home network. Currently this
connection allows you to order additional content not usually available through your
satellite TV subscription, and you can order on demand and pay-per-view events using
your remote control (just as you do if connected to a phone line). See the connection
instructions on page 100, and more information about DISH Online on page 31.
MOVING ON-SCREEN LOGO
Whenever the Hopper is turned off using the remote control or front panel POWER button,
you will see the DISH logo and helpful tips still displayed on your TV screen. This feature
is included with your Hopper to assure you that the connections between your Hopper and
TV(s) are OK, and also provides useful information about your Hopper and its features.
Press the POWER or SELECT button on the front panel or your remote control to resume
8
Introduction
Tips
watching satellite TV programming. Make sure you are using the correct remote control for
your TV-viewing location (see page 12 for details).
TIPS
•
•
Always have the latest software—Press POWER to turn off the the Hopper when
you’re not using it. This way, the satellite can send updated software and guide data.
Order Pay-Per-View programs and events with your remote control—Keep an
active telephone line or broadband Internet connected to the Hopper. Not only will you
have Pay-Per-View ordering at your fingertips, but you’ll also avoid any unnecessary
charges.
QUESTIONS
•
•
•
How do I find something to watch? Refer to page 5. For more information on finding
something to watch, see Chapter 3: Finding Programs to Watch.
Why are some of the channels red in the Program Guide? The channels that are
red in the Program Guide are those which are not currently included with your DISH
package. If you’d like to watch those channels, call 1-800-333-DISH (3474) or visit the
website at: www.mydish.com.
I’m looking at program information in a guide I bought at the grocery store, but
nothing matches what’s on my Hopper; is something wrong? No, nothing’s
wrong. DISH programming data may vary from what you’ll find in a local TV
publication. For best results, use the Electronic Program Guide (EPG) on your system
or you can order DISH Entertainment Magazine.
9
Chapter 1
Notes
Notes
10
Receiver & Remote Control
About Your Hopper HD DVR
What you’ll find in this chapter:
• HOPPER HD DVR OVERVIEW
• REMOTE CONTROL
• HOPPER FRONT PANEL
• HOPPER BACK PANEL
• USING THE ON-SCREEN MENUS
• USING TEXT FIELDS
11
Chapter 2
Hopper HD DVR Overview
HOPPER HD DVR OVERVIEW
This section gives you an overview of your DISH satellite TV system.
Satellite Receiver
This three-tuner satellite receiver with integrated digital video recorder can view/record
high-definition (HD) and standard-definition (SD) DISH programming on multiple TVs.
•
•
Nearby TV—Connect the Hopper to an HDTV to access, view and record HD and SD
DISH programming. The programming from the receiver is delivered to the nearby TV
using one or more audio/video interconnect cables.
Remote TV(s)—The Hopper HD DVR is also the host for Whole-Home DVR services,
delivered to the remote TV(s) using existing in-home coaxial cable connections. The
Joey Receiver connects to an HDTV to view HD programming or an SDTV to view SD
and down-converted HD broadcasts.
Remote Controls
A remote control comes with each Hopper or Joey receiver. The remotes use Ultra-High
Frequency Second Generation (UHF-2G) radio frequencies to control programming. Be
sure to set up each remote control to pair with and operate the correct receiver in your
home (see page 68).
REMOTE CONTROL
The included remote control(s) give you access to all the features of your satellite TV
system, including whole-home DVR services. You can set up each remote to control the
receiver, via radio frequency (RF) signals, and as many as three other devices in the same
room, via infrared (IR) signals (see page 71). These devices can be a TV, a DVD or Bluray Disc™ player (or VCR), and a third device (such as an audio component or even a
second satellite TV receiver).
The following sections describe how to use the various features on the remote control(s)
included with your DISH satellite TV system.
Lost Your Remote?
Your Hopper HD DVR and Joey Receiver(s) have a feature to help you find a lost remote
control. Press the LOCATE REMOTE button on the front panel and in a few seconds the
remote will begin to beep to help you locate it. See “The Locate Remote feature” on
page 79.
12
Satellite Receiver
Remote Control
Remote Control Batteries
Each remote control comes with four AAA batteries. When you replace old
batteries, you should replace all of the batteries. Use batteries of the same
type together, for example, all alkaline or carbon zinc. Don’t mix batteries of
different types/chemistries. Alkaline batteries last longer than carbon zinc.
1 Press down on the dimple at the top of the battery cover on the back of the
remote control and slide off the cover.
2 Take out all four of the old batteries.
3 Put in the new batteries. Make sure you match the plus (“+”) ends with the
plus markings on the battery case.
4 Slide the battery cover back into place on the back of the remote.
Low Battery Warning
When you see a low-battery warning message on your screen below the Program Banner,
the batteries in your remote control are weak and need to be replaced.
Attach the Remote Control Antenna
Attach the remote-control antenna to the REMOTE ANTENNA connection on the Hopper
back panel so you can use your UHF-2G remote. Without the remote-control antenna
attached, you cannot use this remote to control the receiver. See Adjusting the Remote
Control Antenna on page 69 for more detailed information about improving the
performance of your UHF-2G remote control. (Image may vary.)
13
Chapter 2
Remote Control
Remote Control Buttons
SAT Mode
Pair/Input
Access receiver
features and settings
Menu
Access receiver
features and settings
Volume and
Mute Buttons
Control TV volume
Programming required
Themes
Search for programs
using Themes
Recall
Return to previously
viewed TV channel(s)
Info
Retrieve info on
programs or set a timer
Search
Search for a program
Colored Buttons
Provides shortcuts to
frequently used menus
Press this
button for
SAT Mode
Power & TV Power
Top Button turns the receiver on/off
Bottom button turns the TV on/off
Page Buttons
Page up/down in the
Program Guide and
event content
Guide
Display current and
future satellite program
listings
Browse
See what is on other
channels while
watching TV
Arrow/Select Buttons
Channel up/down,
navigate through
menus, and select a
desired option
Cancel
Return to previous
menu or to watch a
program
View Satellite
Programming
Exit out of any menu o
the guide and return to
viewing live TV
Digital Video Recorde
(DVR) Buttons
Pause live TV and play
or record programming
Format
Format the picture to
the desired width to
match the program
you are viewing
PIP (Picture-InPicture) Buttons
Watch two separate
programs at the
same time
14
Number Buttons
Enter a channel
number or navigate
through menus and
the program guide
System Wizard
Press and hold to go
to the backup and
restore screen
Satellite Receiver
Remote Control
Press this
button for
TV Mode
TV Mode
Power & TV Power
Top Button turns the TV on/off
Bottom button turns the TV on/off
Pair/Input
Switch between TV
inputs
(available only for certain
makes and models of TVs)
TV Menu
Access menu features
available on some TVs
Mute
Turn TV volume
on or off
Select Button
Select a program or
menu
Volume
Control TV volume
Up/Down Arrow
Buttons
Channel up/down on
the TV
Recall
Return to the last
channel viewed
Number Buttons
Enter a channel
number
PIP (Picture-InPicture) Buttons
Watch two separate
programs at the
same time
(Note: May not be
available)
15
Chapter 2
Remote Control
Power & TV Power
Top Button turns the DVD/BR/VCR on/off
Bottom button turns the TV on/off
Press this
button for
Mode
DVD DVD
Mode
Pause
Pause a DVD, Blu-ray
disc, or videotape
Back
Rewind a DVD, Blu-ray
disc, or videotape
Stop
Stop playing or
recording a videotape,
or stop playing a DVD
or Blu-ray disc
Record
Record on a videotape
16
FWD (Forward)
Forward a DVD, Blu-ray
disc, or videotape
Play
Play a DVD, Blu-ray
disc, or videotape
Number Buttons
Use to get to specific
chapters on the DVD;
the function of the
remote number
buttons depends on
the device
Satellite Receiver
Hopper Front Panel
HOPPER FRONT PANEL
Power
Turns Select
receiver Chooses
power an item
on/off or channel
Sys Info
Reset
Displays Press to
information reset the
on system receiver
POWER
MENU
SMARTCARD
SYS INFO
SELECT
RESET
JUMP
LOCATE
REMOTE
INFO
PWR
WR
W
RE
EC
REC
Menu
Arrows
Jump
Locate
Smart
Info
Remote
Card
Displays Displays Navigates Moves to
another
Locates
Slot for
program the Main through
smart card information Menu menus or selection the remote
screen channels
control
HOPPER BACK PANEL
Digital Audio
Audio/Video Output
Output
High-quality
Ethernet
Optical connecstandard-definition
Connects to a
tion to a highconnection to the TV
broadband
quality soundaudio and video input decoding system home network
Remote Antenna
Connects to a
UHF-2G remote
control antenna
125
LICENSED UNDER U.S.
PATENT NO. 6,233,389
FCC ID: DKNTK421
US: 5G6MM00BID050
Satellite In
Connects to
the satellite
dish
HDMI® USB Ports
YPbPr/Component
eSATA
Output Connects to Connects to
Output
Provides multimedia an external
Video connection
to a high-definition digital audio devices,
hard drive
and video such as an
TV video input
(feature
to an HDTV external coming soon)
hard drive
Phone Jack
Connects to a
telephone line
Note: Your receiver may look slightly different than the unit shown above.
17
Chapter 2
Using the On-screen Menus
USING THE ON-SCREEN MENUS
The menus make using the receiver and selecting programs quick and easy. Use the
menus to control the receiver and to use its features, such as setting parental controls and
locks, choosing a program, or creating a favorites list.
Open and Close Menus
You can open the menus in either of two ways:
•
•
Press the MENU button on the receiver front panel or remote control to open the Main
Menu, then access any of the other menus from the Main Menu.
Use the following buttons on the remote control:
–
Press GUIDE to open the Program Guide.
–
Press THEMES (LEFT ARROW) when watching a program to open the Themes
and Search menu.
–
Press BROWSE (RIGHT ARROW) to display the Browse Banner.
To close a menu screen and return to watching a program, press VIEW LIVE TV.
Highlighting Menu Options
Use the remote control ARROWS to move the on-screen highlight to the menu option.
When you move the on-screen highlight to an option, the name becomes orange.
Selecting Menu Options
You can select a menu option in either of two ways:
•
•
Move the highlight to the menu option using the remote
control ARROWS. Then press SELECT. In the example,
the option for the Program Guide is highlighted.
If the option has a color next to it, press the matching color
button (red, green, yellow or blue) on the remote control.
When you use the color button, your choice both highlights
and selects the option.
List of Choices in the Menus
When you make a choice in a list, the receiver does not apply the change until you select
Save or Done on the screen. If you do not want to save any changes, select Cancel to
discard all the changes made in the current menu. There are two types of lists:
18
Satellite Receiver
Using Text Fields
•
A single choice list allows you to select only one choice at a time.
If you select another choice, your previous choice is deselected.
•
A multiple choice list allows you to select more than one choice at
one time. If you select another choice, your previous choice(s)
also stays selected, as indicated by a check mark.
Canceling a Procedure
You can cancel a procedure in any of three ways:
•
•
•
If you want to return to watching a program, press the VIEW LIVE TV button.
If you want to return to the previous menu, press the CANCEL button.
If you do nothing in the menu for a few moments, the menu will close automatically,
discarding any changes you have made in that menu.
USING TEXT FIELDS
When you use some of the features on your receiver, you might be required to enter
information, such as the name of a movie when using the Search feature, into areas on
the screen called text fields. There are two basic ways for you to enter this information:
•
•
Using the alphanumeric characters on screen
Pressing the remote-control NUMBER PAD buttons
Using the On-screen Keyboard
Use the keyboard letters and numbers to type in the
information. Use the LEFT, RIGHT, UP, and DOWN
ARROWS to navigate around the keyboard on screen. Press
SELECT to choose each character.
Using the Number Pad
Use the letters printed with the NUMBER PAD digits on the
remote control—just like on some phones—while the highlight
is in the field. For example, when looking for the channel and
times to watch Rudy Friml Presents, you press the 7 button
three times for an R, the 8 button two times for a U, 3 one time
for a D, and 9 three times for a Y, to type in the word “Rudy.”
19
Chapter 2
Questions
While in the Text Field
When the cursor is in the text field:
•
Press the LEFT ARROW to delete characters.
•
Press FORMAT/* to backspace without deleting characters.
•
Press 0 to enter a blank space character, such as between words.
•
Use the RIGHT ARROW to move forward without deleting characters.
QUESTIONS
•
•
When can I use the Picture-In-Picture (PIP) feature on the Hopper? When the
Hopper has any two tuners available, you can use the PIP functions on the nearby TV.
The remote TV(s) connected to the Joey Receiver(s) do not support these functions.
Can I watch and use the DVR functions on the same program on all of the TVs in
my house? Put the Hopper’s remote control down, go to another room with a Joey
connected TV, and its remote control will operate the same DVR functions.
TIPS
•
•
•
20
You can put your receiver in a remote location (such as inside a closet or cabinet), but
be sure to use the remote control you have linked to that receiver. Call your DISH
retailer or visit the www.mydish.com website, select Upgrades, then Products, and
click on Remotes & Accessories.
To use the UHF-2G remote, be sure to attach the remote-control antenna to the
connection on the back of your Hopper HD DVR. See page 13 for more details.
Press the FORMAT(*) button on the remote to change the aspect ratio (image shape
displayed) for any HD programming being shown. Press the button again to view a
different display format, and keep pressing the button until the display is acceptable.
Finding Programs to Watch
Watching TV
What you’ll find in this chapter:
• CHANGING CHANNELS
• USING THE PROGRAM GUIDE
• USING THE BROWSE BANNER
• USING THEMES AND SEARCH
• USING PICTURE-IN-PICTURE (HOPPER ONLY)
• USING MULTI-CHANNEL RECALL
• STARTING IN ONE ROOM AND FINISHING IN
ANOTHER
• HOMES WITH A SECOND HOPPER INSTALLED
21
Chapter 3
Changing Channels
CHANGING CHANNELS
There are two basic ways to change the channel on your satellite TV receiver:
•
•
Use UP and DOWN ARROWS on your remote control
Enter a channel number with the NUMBER PAD buttons
Using the Up and Down Arrows
While watching live TV, if you want to change the channels one at a time
to see what’s on, press the UP and DOWN ARROWS on your remote
control. You can also change the channels the same way using the UP
and DOWN ARROWS on the receiver front panel.
Entering a Channel Number
While watching live TV, if you know the specific channel you
want to watch, enter the digits of the channel number using
the NUMBER PAD buttons on the remote control.
USING THE PROGRAM GUIDE
You can use the Electronic Program Guide (EPG) to see what programs are on, to change
channels, and to set up timed recordings. To access the program guide, press GUIDE.
•
•
•
22
A red background behind a channel name usually means the channel is not in your
DISH package. After you add a channel to your package, you can watch it. To add a
channel, visit our website at www.mydish.com or call 1-800-333-DISH (3474).
A green background behind a channel name means that you can use the SELECT
button on your remote control to confirm the channel addition to your package.
The Program Guide shows which Favorites List is active. If All Channels is the active
list, the Program Guide displays all the channels. The My Channels Favorites List
Finding Programs to Watch
Using the Program Guide
•
displays only the channels included in your current DISH package. And the My HD
Channels Favorites List displays only the high-definition channels in your package.
If you set up another list, then the Program Guide displays only the channels that you
included on that list. See page 36 for more information on using Favorites Lists.
The Program Guide displays information for programs on now and those coming on
within the next nine days. The guide does not include programs that have ended.
Use the UP and DOWN
ARROWs to highlight
a program currently broadcasting
While accessing the on-screen Program Banner (top) and Browse Banner, you can:
•
•
•
•
Press PAGE UP/PAGE DOWN to move a page of program data at a time, allowing
you to view guide information about programs on other channels.
Enter the number of hours you want to skip, and then press the RIGHT/LEFT ARROW
to move forward/back in the schedule. You cannot move back to programs that ended.
Press FWD/BACK to move forward or back a day at a time, allowing you to view guide
information about future programs on the current channel.
Press SKIP FWD/SKIP BACK to move forward or back three hours at a time, allowing
you to view guide information about future programs on the current channel.
While browsing Program Guide information, you can move the highlight to a program and:
•
•
Press the INFO button to see a pop-up screen of more detailed program information.
Press the RECORD button to set an event timer for a program in the future.
Note: You must be able to receive satellite programming from either the 119°W or 72.7°
orbital location for the Program Guide to display up to nine days of program information. If
your satellite TV system cannot access either of these two orbital locations, then the
Program Guide displays up to two days of program information.
Expanding and Collapsing Channel Ranges
Certain types of programming are available on a range of channels in the Program Guide.
And sometimes, the range of channels is collapsed into one row of the guide to make it
easier to scroll through programming. For example, the range of SiriusXM™ Satellite
Radio music channels are accessed from DISH channel 99, as indicated by the + sign on
the row in the Progam Guide. Highlight and select the row for channel 99 and the display
of dozens of specific channels within this range will expand upwards (if your Channel
Order in Format Guide under Guide Settings is set to Descending) or downwards (if
your Channel Order is Ascending) on screen. Scroll to and select a specific music
channel. Or if you know the number of your favorite music channel, you can type 99
followed by the number on your remote control NUMBER PAD to directly access it.
23
Chapter 3
Using the Browse Banner
USING THE BROWSE BANNER
Use the Browse Banner to see what other programs are on or coming on soon, while not
missing any of the program you are watching.
When the Browse Banner is open, you will see the Program Banner information about the
current program displayed at the top of the screen, and on the left-hand side of the Browse
Banner at the bottom of the screen. At the bottom right of the screen is guide information
about the program or event that is coming on next on the same channel.
USING THEMES AND SEARCH
Use the Themes and Search Feature to find exactly what you want to watch. This section
shows you how to use these features to find your favorite programs by type (for example,
movies, sports, news), or by keyword (if you’re looking for a particular title or name).
24
Finding Programs to Watch
Using Themes and Search
Using Themes
You can list programs by the theme of their contents, (for example, just movies or just
sports). Use Themes and Search to quickly find programs based on:
•
•
•
•
Theme. You can look for something to watch by the program’s category or theme
(Movies, Sports, News/Business, etc.), which makes your search easier and your
television viewing time more enjoyable.
Sub-theme. You can use this selection to help you narrow the type of program or
event even further. The Sub-Theme feature is different for each Theme category. For
example, you can search Movies for Comedy or Sports for Football.
Media Source. Use this selection if you want your search results to be limited to a
particular source, such as the Program Guide listings, or just the My Recordings list.
By default, results are returned for all available source listings.
Scheduled. Use this selection if you want your search results to be limited to a
particular time (for example, to programs that are On Now or coming On Next). You
can even find Sports events that are being broadcast live right now! By default, results
are returned for programs and events at any scheduled time.
Using Predictive Search
Predictive Search makes it easier than ever to locate programs saved on your Hopper HD
DVR or find what you are lokking for on live TV. To search for programming:
1 Press the SEARCH button on your remote control, or press the MENU button and select
the Search tile from the Main Menu screen.
2 Using the on-screen keyboard, start to type a title, actor’s name or keyword.
3 Results of your search will start to be displayed as soon as you start typing. Typing more
characters narrows the results.
Using Search History
After you have searched for programs or keywords, your receiver keeps a history. You can
access separate Search History information for each TV in your Whole-Home DVR
25
Chapter 3
Using Picture-In-Picture (Hopper only)
system. Each TV’s Search History is available using that receiver’s remote. You can use
Search History to re-search programming instead of typing the information again.
Press the Search button, access the drop-down list on the menu bar and select the History
item to see a list of your recent searches. Highlight one of the listed searches and press
the Select button to repeat it. Searches done on different days will often yield new results.
USING PICTURE-IN-PICTURE (HOPPER ONLY)
The Picture-In-Picture (PIP) feature of the Hopper lets you watch two programs at once on
your nearby TV screen. The following instructions describe how to use the PIP feature.
1 Press the PIP button on your Hopper remote control to access the feature. By default, a
small window showing the programming from a second Hopper tuner will be displayed.
PIP Controls also will be displayed across the bottom of the screen on your nearby TV.
2 You can use the on-screen controls to reposition or resize the PIP window, Swap the
images in the main and PIP windows, or display them side by side on your TV screen. You
can also choose to Close the PIP window, or select X to cancel out of the PIP Controls. If
you have closed/canceled, you can display the on-screen controls again at any time by
pressing the PIP button.
3 Note that the POSITION and SWAP buttons on your Hopper remote perform the same
functions as the on-screen PIP Controls for these two functions.
USING MULTI-CHANNEL RECALL
Another helpful feature to find the program you want to watch is channel RECALL. You
can quickly go back to a channel you were previously watching on your TV. Both your
Hopper HD DVR and each Joey Receiver support the multi-channel recall feature,
allowing easy access to the four most recent satellite channels you viewed on your TV.
To enable, change, or disable the multi-channel recall feature, do the following:
1 Press the MENU button on your remote control and select the Settings tile.
2 Select Guide Settings, and then Format Guide.
3 Under Multi-Channel Recall, select one of the following options:
•
•
26
On. This is the default setting. Pressing the RECALL button on your remote allows
you to select one of the four most recent channels you viewed on this receiver.
On, immediate. Choose this setting if you want the RECALL button to change
immediately to the previous channel you viewed, but also display all four most recent
Finding Programs to Watch
Starting in One Room and Finishing in Another
channels for you to choose from, as it does when the On option is set.
•
Off. If you turn off the receiver’s multi-channel recall feature, the RECALL button
goes immediately to the previous channel you viewed. Older channels are not shown.
4 When you are finished changing these settings, highlight and select the Save option. If
you have made changes you do not want saved, press the remote CANCEL button.
STARTING IN ONE ROOM AND FINISHING IN ANOTHER
To start watching a program in one room and resume it in another, do the following:
1 Press the pause button on your current receiver remote control and leave it behind.
2 Go to another room with a connected Hopper HD DVR or Joey Receiver and pick up the
DISH remote control for this location.
3 Press the red button on the remote control to display the TV Viewing Status screen.
4 From the TV Viewing Status screen, select the program you want to resume and continue
watching from where you paused it.
27
Chapter 3
Homes With a Second Hopper Installed
HOMES WITH A SECOND HOPPER INSTALLED
To access the DVR library on a second Hopper from any Joey Receiver in your WholeHome DVR system, do the following:
1 Press the MENU button and select the Settings tile on the Main Menu screen.
2 Select Network Setup, and then Whole-Home.
3 Using the ARROW buttons, highlight and select the other Hopper in your home to link to it.
4 Highlight and select the Save option when you have finished.
Now you will see the DVR library on your newly linked Hopper when you press the DVR
button. Repeat these steps to re-link to your original Hopper to access its DVR library.
TIPS
•
•
•
Press INFO to view more information about a program or event you have highlighted.
Press VIEW LIVE TV to cancel almost any menu screen and return to watching TV.
On your Hopper remote control, press SWAP, without pressing the PIP button first, to
switch among your available TV tuners.
QUESTIONS
•
•
•
•
28
How can I customize the Program Guide? You can set up a Favorites List (
page 36). You can change how the Program Guide is displayed (page 87).
Why does my Program Guide show only two days of programming? Your
receiver may not be connected to a signal from the 119°W or 72.7° satellite. Refer to
Point Dish and Check Switch on page 102 to see if you’re receiving the signal(s).
Why are some of my channels missing?
–
Parental controls may be set to lock or hide the channels. See Chapter 6: Parental
Controls on page 39 for detailed information on locking or hiding channels.
–
The Program Guide may be displaying the wrong list of channels. Press the
GUIDE button to access the Program Guide and display the default Favorites List.
Press GUIDE again to highlight the next available list. Press GUIDE repeatedly to
scan through all the available lists. You can also choose to edit your own Favorites List. See Chapter 5: Favorites Lists on page 35 for more information.
Why isn’t PIP working? If the PIP feature is not working on your Hopper, at least two
of the three tuners are probably in use. Check with other Whole-Home DVR users.
Pay-Per-Programs
Available On Demand and PPV
What you’ll find in this chapter:
• PAY-PER-VIEW
• DISH ON DEMAND
• BLOCKBUSTER @HOME™
• DISHONLINE.COM
• ORDERING CONSIDERATIONS
29
Chapter 4
Pay-Per-View
PAY-PER-VIEW
To order Pay-Per-View programming using your remote control, you must connect the
receiver to an active phone line or broadband Internet connection. After you order a PayPer-View program, you can watch it on all of the receivers on your DISH account. Using
the remote control, you can order the exact same program for each receiver but you pay
for the program only once. However, replays of most programs are separate events. Visit
www.mydish.com/ppv for a detailed description of the types of Pay-Per-View events.
Ordering a Pay-Per-View Program
2
1
Fri 1/14
508
PPV
507
PPV
506
PPV
6:30 pm
7:00 pm
Shrek 2 (All
Shrek 2 (All Day, DD)
Shrek 2 (All
Shrek 2 (All Day, DD)
Shrek 2 (All
505
PPV
DayNHL
After...
Hockey
Day After Tomorrow (All Day, DD)
504
PPV
Day After...
Day After Tomorrow (All Day, DD)
GUIDE
Press GUIDE and
select a Pay-Per-View
program from the
Program Guide
3
Dish-On-Demand
7:30 pm
Do you wish to purchase this program?
Event:
Date/Time:
Channel:
Cost:
Shrek 2 (All Day, DD)
Friday 1/14/05 10:00 pm
503-PPV
$3.99
Order
Cancel
Confirmation
No
You have indicated that you wish to purchase a
DISH-On-Demand event
Is this correct?
Select Order to
buy the program
Yes
Cancel
No
Select Yes or OK
to confirm you want to
buy the program
Note: Once you confirm an order for a Pay-Per-View program, you cannot cancel the
order and you will be billed for it.
If your receiver is not connected to a phone line or broadband Internet, and you wish to
order a Pay-Per-View program or event, you may do so online at mydish.com by logging
in to your account and then selecting “Order Pay-Per-View.”
DISH ON DEMAND
DISH On Demand is the DISH Video On Demand service. Enjoy movies, TV shows, and
other exciting DISH On Demand events. Through DISH Cinema, for example, you have
immediate access to the latest movies on DISH. You can even use your remote’s DVR
buttons (such as PAUSE, PLAY, FWD, and BACK) to control your viewing experience. For
more information, visit the www.mydish.com website.
To Order a Movie or Program
1 Press the DVR button to access the DISH On Demand menu screen.
2 Select the option for the type of on-demand programming you wish to order. Select DISH
Cinema, for example, to Explore or Search movies, see a list of New Releases, or view
movies that you have rented. Select TV Shows to Explore or Search TV entertainment,
see a list of Most Popular shows, or view the programs that you have rented. If applicable,
you can select Midnight Lounge to view and choose adult-only programming.
30
Pay Per Programs
Blockbuster @Home™
3 Use the UP and DOWN ARROW buttons to scroll through the choices, if available.
4 Highlight and select the movie, TV program, or on-demand event you want to watch.
5 Select Rent.
Rental Considerations
•
You can repeatedly watch a rented program for the period of time (for example, 24 or
48 hours) listed. Rented programs cannot be saved to the My Recordings list.
•
The My Rentals option shows you information about DISH On Demand Programs you
have rented, including how much time you have remaining to watch them.
•
Be sure to keep Updates and Inactivity Standby enabled so that your receiver always
has the latest DISH On Demand programs. See Scheduling Receiver Updates on
page 91.
BLOCKBUSTER @HOME™
Now you can bring the big screen to your home screen. DISH has joined with Blockbuster
to offer customers the most extensive library of movies, games and shows available. With
Blockbuster @Home™, you get access to:
•
•
•
Movies, TV shows and games—over 100,000 titles delivered to your door. Plus, instore exchanges.
Thousands of movies to stream on your TV, computer and iPad® (Streaming to TV
requires HD programming and a broadband Internet connection to your Hopper.)
More than 20 additional entertainment channels, including STARZ® Cinema, EPIX 1,
Sony Movie Channel, Palladia and many more!
Visit mydish.com/blockbuster online to learn more or subscribe.
In order to enjoy full access to the Blockbuster @Home™ video library, your Hopper must
be connected to the internet. For steps to connect your Hopper to the Internet, refer to
Connecting to Broadband Internet on page 100. For more information, also visit
mydish.com/getconnected online.
DISHONLINE.COM
DISH Online.com lets you view authorized programming right over the Internet, as long as
you’re connected to a broadband (high-speed) Internet connection. For steps to connect
your Hopper HD DVR to the Internet, refer to Connecting to Broadband Internet on
page 100. For more information, also visit the dishonline.com website.
31
Chapter 4
Ordering Considerations
Use Considerations
•
Your receiver must be connected to a network with broadband Internet access to view
the DISH Online content. Contact your Internet service provider to verify download
speeds and any terms or conditions affecting your broadband Internet connection.
•
Most Internet service providers have a “Fair Access Policy” which sets usage limits on
the amount that can be downloaded in a given time or billing period. Contact your
Internet service provider to find out about their Fair Access Policy.
•
Download-speed of programs or events varies depending on the speed of your
Internet connection, the program being downloaded, and shared usage of the Internet
connection by other devices in your home, such as personal computers.
•
You have a limited time frame to watch rented content before it is automatically
deleted from your receiver. You will typically have 7 days to begin watching a program,
and then you will typically have 24 hours to finish watching it. Review the list on the
My Rentals screen on your Hopper for the time remaining to watch rentals.
•
You are billed for a rental or on-demand program or event when you begin watching it
(which may be while the rest of the program continues downloading) or when
downloading of the program or event is completed, whichever occurs first.
ORDERING CONSIDERATIONS
Keep in mind these important considerations about pay-per-view types of programs.
•
When you confirm an order for a rental program or event, you cannot cancel the order
and you will be billed for it.
•
You can use the Parental Controls feature and receiver locks to control the programs
or events that your family views. See What are Locks and Restrictions? on page 40.
•
You can review what you have rented during the last 30-60 days by looking in your
Purchase History. Press the MENU button on your remote control, scroll down the
Main Menu, then highlight and select the Purchase History tile.
•
The rental program titles you order will appear on your next DISH bill.
TIPS
•
•
32
You can set up the Hopper HD DVR to record Pay-Per-View programs. See page 60
for more details. You cannot record or re-record On Demand programs or events.
You can prevent others from purchasing Pay-Per-View programs by setting parental
controls for your receiver (see page 40).
Pay Per Programs
Questions
•
Keep an active phone line or broadband Internet connection attached to your receiver
at all times so you can order Pay-Per-View programs with your remote control.
QUESTIONS
•
•
•
•
•
•
How can I order an event for all my whole-home receivers?
–
Order the event with your remote on your Hopper receiver, attached to an active
phone line or broadband Internet connection. For each Joey Receiver you want
to play the event, make sure that it is linked to the correct Hopper.
–
Order the event over the phone at 1-877-DISH-PPV (347-4778). Fees may apply.
–
Order the event online at www.mydish.com/ppv.
I ordered a Pay-Per-View program but can only see it on one receiver. Some PayPer-View programs or events are restricted to watching on one receiver per account.
Will I be charged more than once for viewing the same Pay-Per-View program
using two or more receivers? If you are using the remote control to order and view
the content, you won’t be charged more than once as long as it is the exact same
program or event (for example, a movie starting at the same time or the same All Day
event) and the rental content has not expired.
Why doesn’t my Program Guide show any Pay-Per-View channels? The currently
active Favorites List may not display Pay-Per-View channels. Press the GUIDE button
repeatedly on your remote control to open the Program Guide and cycle through your
Favorites List options until you see All Channels highlighted in the drop-down list.
Then press the SELECT button. See Chapter 5: Favorites Lists on page 35 for more
information on using Favorites Lists. Also, parental controls may be set to lock and
hide Pay-Per-View channels. See Chapter 6: Parental Controls on page 39.
Why are some Pay-Per-View programs blacked out? Sporting events and other
programs are sometimes blacked out because of local restrictions. Note that the
provider of such programming determines these restrictions, not DISH.
Why did my All-Day Pay-Per-View program shut off while I was watching it? The
all-day events run from 3 AM to 3 AM (Mountain Time). You should ensure you can
finish watching an event that you have ordered by this time.
33
Chapter 4
Notes
Notes
34
Favorites Lists
Setting Up Your Favorite Channels
What you’ll find in this chapter:
• WHAT ARE FAVORITES LISTS?
• CREATING OR CHANGING FAVORITES LISTS
• NAMING FAVORITES LISTS
• USING FAVORITES LISTS
35
Chapter 5
What are Favorites Lists?
WHAT ARE FAVORITES LISTS?
Favorites Lists are custom lists of your favorite channels. You can create and change the
lists yourself, adding and removing channels as you wish. Your favorite channels can be
grouped in as many as four lists (for each whole-home receiver).
•
•
•
•
•
•
•
When using a Favorites List, the Program Guide and Browse Banner display only the
channels in that Favorites List. Also, when you use the remote control UP or DOWN
ARROW to change channels, the receiver skips channels that are not on the list.
Unlisted channels (included in your current programming package) are still accessible
by entering the channel number directly.
The All Channels list contains all the channels, including channels not in your current
DISH package. You cannot make any changes to the default All Channels list.
The My Channels list contains all the channels in your DISH package. You cannot
make any changes to the My Channels list, except by modifying your DISH package.
The My HD Channels list contains all the high-definition channels in your package.
You can give each of your custom Favorites Lists a unique name. When you first
install your receiver, by default the four lists are named List 1, List 2, List 3, and List 4.
These lists are empty until you edit them to add channels.
From your Hopper HD DVR and remote control, only the Favorites Lists for the nearby
TV are available. However, when you go to a different room and acess the Joey
Receiver and remote control there, the Favorites Lists for that TV are available.
If you choose a program using the Themes feature, or directly enter a channel number
using the NUMBER PAD on the remote control, then the receiver tunes to the channel
for that program whether or not that channel is included on the active Favorites List.
Parental controls can be used to lock certain channels from being accessed this way.
CREATING OR CHANGING FAVORITES LISTS
You can edit any channels on the four Favorites Lists. When you use your Favorites List,
only those channels in the list are shown in the Program Guide and Browse Banner.
36
Favorites Lists
Naming Favorites Lists
NAMING FAVORITES LISTS
You can rename your Favorites Lists whatever you want, up to eight characters long.
USING FAVORITES LISTS
Press the GUIDE button to open the Program Guide. Press the GUIDE button
again to highlight the next Favorites List; press GUIDE repeatedly to scan
through all the available lists.Then press the SELECT button to choose a list.
37
Chapter 5
Tips
TIPS
•
•
•
Two lists on the same TV cannot have the same name. For example, the nearby TV
cannot have two lists named “Dad’s List.” When the receiver is connected to a WholeHome DVR system, different receiver users can have lists with the same names.
While in the program guide, press the GUIDE button to switch Favorites List functions
only if you have added channels to a Favorites List. If you have not created a
Favorites List by adding channels to it, then pressing GUIDE scans only the default
My Channels, My HD Channels, and All Channels lists.
Channels locked and hidden by parental controls do not display in Favorites Lists.
QUESTIONS
•
•
38
Why are channels missing from the Program Guide?
–
You might have a Favorites List that does not contain those channels. Press the
GUIDE button until the All Channels, My Channels, or My HD Channels list displays.
–
You might have channels locked and hidden by parental controls. For more information, see Parental Controls starting on page 35.
Why are my Favorites Lists missing? When the receiver is in a Whole-Home DVR
system, Favorites Lists created by different receiver users are not available on your
TV.
Parental Controls
Setting Receiver’s Parental Controls
What you’ll find in this chapter:
• WHAT ARE LOCKS AND RESTRICTIONS?
• COPYING LOCKS FROM YOUR HOPPER TO A
JOEY
• CREATING OR CHANGING A PASSWORD
• CREATING OR CHANGING RATINGS
RESTRICTIONS
• CREATING OR CHANGING CHANNEL LOCKS
• HIDING ADULT CONTENT OR LOCKED
CHANNELS
39
Chapter 6
What are Locks and Restrictions?
WHAT ARE LOCKS AND RESTRICTIONS?
Locks and restrictions are parental controls that allow you to password-protect
programming based on ratings, or on a channel-by-channel basis. When you set locks:
•
If you try to access a locked channel or restricted program, or open the Parental
Controls menu, the receiver displays a message asking you to enter the password.
•
The receiver permits three attempts to enter the correct password. If you fail to enter
the correct password, the receiver does not allow you to try again for several minutes.
•
If you enter the correct password, then you can access the locked or restricted item or
access the Parental Controls screen to make changes locks and restrictions.
•
If you exit a locked or restricted item or close the Parental Controls screen, then you
must enter the password to access the item or screen again.
•
When the receiver is in a Whole-Home DVR system, parental control locks and
restrictions for other TVs are not available.
Locks for programming on the TV near the Hopper are set using the Hopper’s on-screen
menus. Locks for programming on the remote TVs connected to Joey Receivers are set
using those TV’s on-screen menus. Locks set for the nearby TV’s programming are
separate from locks set for remote TV’s programming. The information in this chapter
applies to locks set using either menu.
When you unlock programming delivered through the HOME VIDEO NETWORK
output to your in-home coaxial cabling system, you are allowing all the TVs
connected to your in-home system to have access to this programming. In this
case, you must rely on the V-Chip technology and control settings in the
individual TVs to prevent viewing of inappropriate programming on each TV.
Consult your TVs’ user guides for instructions to set up the V-Chip protection.
Locking your receiver is a two-step process:
1 Create the parental-control locks that you want. Available types of locks are:
•
Ratings Restrictions—to lock programs based on their ratings.
•
Channel Locks—to lock channels, regardless of content.
•
Hide Adult Channels or Hide Locked Channels—to hide adult channels or locked
channels from being displayed in the Program Guide, Browse Banner, and Themes
list screens.
2 Set a password. When you have set locks and restrictions, the receiver is locked, and anyone who wants to access locked items must enter the password each time they do so.
40
Parental Controls
Creating or Changing a Password
CREATING OR CHANGING A PASSWORD
You should set up your password before using the receiver locks.
1 Press the MENU button, select the Settings tile, and then select Parental Controls.
2 If the receiver is locked, enter the password using the remote control’s NUMBER PAD.
The receiver displays stars (*) as you enter the digits of your password. Then select OK.
3 If you are changing an existing password, select Edit Password. If you are creating a new
password for the first time, you will be prompted for the password after setting controls. If
you want to erase the current password, you will need to enter it to access the Parental
Controls screen, set all restrictions to None/No, and ensure no channel locks are set.
4 Enter the current password using the remote control’s NUMBER PAD.
5 Enter the new password using the remote control’s NUMBER PAD.
6 Enter the new password again for confirmation, also using the NUMBER PAD. The
receiver displays stars (*) as you enter the digits of the password.
7 Memorize your new password. From now on, enter this password to lock or unlock the
receiver. If you forget the password, you will need to call DISH Customer Service.
COPYING LOCKS FROM YOUR HOPPER TO A JOEY
Once you have set Parental Controls on your Hopper HD DVR, you can copy the same
settings to one or more Joey Receiver(s) in your whole-home DVR system, as follows:
1 Press the MENU button on your remote and select the Settings tile on the Main Menu.
2 Select Parental Controls, and then highlight and select the option to Copy Settings.
3 In the pop-up Location List, select each location to which you want to copy the Hopper’s
settings for Parental Controls. A check mark appears next to each selected location.
4 You can select a location again to uncheck it, highlight and select the Cancel option to
ignore and start over, or when finished selecting locations, select OK to initiate copying.
41
Chapter 6
Creating or Changing Ratings Restrictions
CREATING OR CHANGING RATINGS RESTRICTIONS
You can lock programs based on Motion Picture Association of America (MPAA) ratings
(PG, PG-13, etc.) and expanded ratings (violence, language, etc.).
1 Press the MENU button, select the Settings tile, and then select Parental Controls.
2 If the receiver is locked, enter the password using the remote control’s NUMBER PAD.
The receiver displays stars (*) as you enter the digits of the password.
3 To create or change parental controls based on program ratings, select Edit Ratings.
4 Highlight the least restrictive rating that you want to block. Press SELECT to lock the
highlighted rating and all ratings that are more restrictive than it (for example, locking the
PG-13 rating automatically locks R, NC-17 and NR/AO ratings).
MPAA Ratings
G—General Audiences. A G-rated motion picture contains nothing in theme, language,
nudity, sex, violence or other matters that, in the view of the Rating Board, would offend
parents whose younger children view the motion picture. The G rating is not a “certificate
of approval,” nor does it signify a “children’s” motion picture. Some snippets of language
may go beyond polite conversation but they are common everyday expressions. No
stronger words are present in G-rated motion pictures. Depictions of violence are minimal.
No nudity, sex scenes, or drug use are present in the motion picture.
PG—Parental Guidance Suggested. Some Material May Not Be Suitable For
Children. A PG-rated motion picture should be investigated by parents before they let
their younger children attend. The PG rating indicates, in the view of the Rating Board,
that parents may consider some material unsuitable for their children, and parents should
make that decision. The more mature themes in some PG-rated motion pictures may call
for parental guidance. There may be some profanity and some depictions of violence or
brief nudity. But these elements are not deemed so intense as to require that parents be
strongly cautioned beyond the suggestion of parental guidance. There is no drug use
content in a PG-rated motion picture.
42
Parental Controls
Creating or Changing Ratings Restrictions
PG-13—Parents Strongly Cautioned. Some Material May Be Inappropriate For
Children Under 13. A PG-13 rating is a sterner warning by the Rating Board to parents to
determine whether their children under age 13 should view the motion picture, as some
material might not be suited for them. A PG-13 motion picture may go beyond the PG
rating in theme, violence, nudity, sensuality, language, adult activities or other elements,
but does not reach the restricted R category. The theme of the motion picture by itself will
not result in a rating greater than PG-13, although depictions of activities related to a
mature theme may result in a restricted rating for the motion picture. Any drug use will
initially require at least a PG-13 rating. More than brief nudity will require at least a PG-13
rating, but such nudity in a PG-13 rated motion picture generally will not be sexually
oriented. There may be depictions of violence in a PG-13 movie, but of the harsher
sexually-derived words, though only as an expletive, initally requires at least a PG-13
rating. More than one such expletive requires an R rating, as must even one of those
words used in a sexual context. The Rating Board nevertheless may rate such a motion
picture PG-13 if, based on a special vote by a two-thirds majority, the Raters feel that most
American parents would believe that a PG-13 rating is appropriate because of the context
or manner in which the words are used or because the use of those words in the motion
picture is inconspicuous.
R—Restricted. Children Under 17 Require Accompanying Parent or Adult Guardian. An
R-rated motion picture, in the view of the Rating Board, contains some adult material. An
R-rated motion picture may include adult themes, adult activity, hard language, intense or
persistent violence, sexually-oriented nudity, drug abuse or other elements, so that
parents are counseled to take this rating very seriously. Children under 17 are not allowed
to attend R-rated motion pictures unaccompanied by a parent or adult guardian. Parents
are strongly urged to find out more about R-rated motion pictures in determining their
suitability for their children. Generally, it is not appropriate for parents to bring their young
children with them to R-rated motion pictures.
NC-17—No One 17 and Under Admitted. An NC-17 rated motion picture is one that, in
the view of the Rating Board, most parents would consider patently too adult for their
children 17 and under. No children will be admitted. NC-17 does not mean “obscene” or
“pornographic” in the common or legal meaning of those words, and should not be
construed as a negative judgment in any sense. The rating simply signals that the content
is appropriate only for an adult audience. An NC-17 rating can be based on violence, sex,
aberrational behavior, drug abuse or any other element that most parents would consider
too strong and therefore off-limits for viewing by their children.
NR/AO—Not Rated. Programs created before MPAA rating system have an NR/AO
rating. Also, if connection to the satellite is lost, the NR/AO rating appears.
TV Ratings
TV Ratings contain information about the audience and a content label.
Audience Ratings of TV Ratings
TV-Y—All Children. This program is designed to be appropriate for all children. Whether
animated or live-action, the themes and elements in this program are specifically designed
for a very young audience, including children from ages 2-6. This program is not expected
to frighten younger children.
43
Chapter 6
Creating or Changing Ratings Restrictions
TV-Y7—Directed to Older Children. This program is designed for children age 7 and
above. It may be more appropriate for children who have acquired the developmental
skills needed to distinguish between make-believe and reality. Themes and elements in
this program may include mild fantasy violence or comedic violence, or may frighten
children under the age of 7. Therefore, parents may wish to consider the suitability of this
program for their very young children.
TV-Y7FV—Directed to Older Children (Fantasy Violence). For those programs where
fantasy violence may be more intense or more combative than other programs in this
category, such programs will be designated TV-Y7 FV.
TV-G—General Audience. Most parents would find this program suitable for all ages.
Although this rating does not signify a program designed specifically for children, most
parents may let younger children watch this program unattended. It contains little or no
violence, no strong language and little or no sexual dialogue or situations.
TV-PG—Parental Guidance Suggested. This program contains material that parents
may find unsuitable for younger children. Many parents may want to watch it with their
younger children. The theme itself may call for parental guidance and/or the program may
contain one or more of the following: some suggestive dialogue (D), infrequent coarse
language (L), some sexual situations (S), or moderate violence (V).
TV-14—Parents Strongly Cautioned. This program contains some material that many
parents would find unsuitable for children under 14 years of age. Parents are strongly
urged to exercise greater care in monitoring this program and are cautioned against letting
children under the age of 14 watch unattended. This program may contain one or more of
the following: intensely suggestive dialogue (D), strong coarse language (L), intense
sexual situations (S), or intense violence (V).
TV-MA—Mature Audience Only. This program is specifically designed to be viewed by
adults and therefore may be unsuitable for children under 17. This program may contain
one or more of the following: crude indecent language (L), explicit sexual activity (S), or
graphic violence (V).
Content Labels of TV Ratings
TV Parental Guidelines may have one or more letters added to the basic rating to let
parents know when a show may contain violence, sex, adult language, nudity, or
suggestive dialogue.
V—violence
L—coarse or crude language
N—nudity
SC—sexual content or situations
D—suggestive dialogue (usually means talks about sex)
5 Select the expanded rating code(s), if you want to also lock these program ratings.
6 To unlock a rating code, select the code again.
44
Parental Controls
Creating or Changing Channel Locks
7 Select Save. To ensure new parental controls take effect, you will need to set a password
if you have not already. See the instructions for creating a new password on page 41.
CREATING OR CHANGING CHANNEL LOCKS
You can lock any channel, including Pay-Per-View channels. Locked channels can be
accessed or recorded only after you enter the password created for your receiver.
1 Press the MENU button, select the Settings tile, and then Parental Controls.
2 If the receiver is locked, enter the password using the remote control NUMBER PAD. The
receiver displays stars (*) as you enter the digits of the password.
3 To create or change parental controls for specific channels, select Lock Channels.
4 Highlight and select each channel that you want to lock or unlock. Press the ARROW but-
tons to navigate to each channel, and then SELECT it. You can also move the list of channels by entering a number using the remote control NUMBER PAD. If the checkbox next to
the channel has a checkmark, the channel is selected. Select it again to unlock it.
5 You can choose to view only the channels you have selected to be locked, and you can
choose to hide the locked channels so they are not displayed in the Program Guide. (You
can still enter the number of a locked channel directly using the remote NUMBER PAD.)
6 Select Save.
HIDING ADULT CONTENT OR LOCKED CHANNELS
When you hide adult channels or locked channels, you prevent the Program Guide,
Themes lists, and the Browse Banner from displaying these channels. When you Hide
Adult Channels, you also prevent anyone from choosing these channels by using the UP
or DOWN ARROWS or by directly entering the digits of the channel number using the
NUMBER PAD on their remote control.
45
Chapter 6
Tips
1 Press the MENU button, select the Settings tile, and then Parental Controls.
2 If the receiver is locked, enter the password using the remote control NUMBER PAD. The
receiver displays stars (*) as you enter the digits of the password.
3 Select the option to Lock Channels.
4 Select Yes under Hide Adult Channels.
5 Select Save.
TIPS
•
•
•
If the receiver displays a message prompting you to enter a password, then this
confirms that there are parental controls set for this receiver.
If you want to unlock the receiver or undo any specific parental-control lock, use the
password for the TV you’re watching. For example, use the Hopper password to
unlock nearby TV locks and the Joey password to unlock the remote TV locks.
When you restrict by rating, you also lock all other more restrictive ratings. For
example, using MPAA ratings, if you restrict PG-13 rated programs, then all other
programs with the R, NC-17, and NR/AO ratings are also restricted.
QUESTIONS
•
•
46
Why don’t the locks I set for a remote TV work? If the receiver is in a Whole-Home
DVR system, any locks you have set on other TVs are not available. Locks and
restrictions are specific to each Hopper HD DVR and Joey Receiver in your system.
You can copy the same parental controls settings you have made on your Hopper to
one or more linked Joey Receivers in your whole-home DVR system. See Copying
Locks from Your Hopper to a Joey on page 41. You cannot copy settings made on a
Joey Receiver to any other Joey (or Hopper HD DVR) in your whole-home system.
What do I do if I forget my password? If you forget your password, then you will
need to contact a DISH Customer Service Representative.
Multimedia and Apps
Using Home Media and Apps on TV
What you’ll find in this chapter:
• USING THE HOME MEDIA FEATURE
• USING APPS ON YOUR HOPPER
• MY ACCOUNT/CUSTOMER SUPPORT
47
Chapter 7
Using the Home Media Feature
USING THE HOME MEDIA FEATURE
To use the Home Media feature on your Hopper, press the MENU button and select the
Home Media tile from the MAIN MENU. A list of compatible devices should be displayed.
The Home Media application connects your compatible digital media devices together.
These devices are designed to work together even though they come from different
manufacturers, and may include audio/video systems, Blu–ray Disc™ players, digital
cameras, game consoles, network-attached storage (NAS) devices, personal computers
and mobile devices running a compatible software.
To be able to listen to audio, view pictures and/or watch videos, you should:
1 Ensure your Hopper is connected to your local area network (LAN) and has been
assigned a valid IP address
2 Have compatible media server software running on a device connected to the same LAN
as your Hopper
3 Confirm access to the media server is not blocked by a firewall or security software
4 Select the Device List item from the drop–down menu on the Home Media screen and
refresh the list
5 Optionally, you can select the Settings item from the drop–down menu to change the
defaults for playing slideshows and/or audio.
Make sure your Hopper remains connected to broadband Internet to access all the
features of the Home Media app. You can enjoy this feature on one TV at a time.
48
Interactive TV
Using Apps on Your Hopper
USING APPS ON YOUR HOPPER
To use apps on your TV, press the MENU button and select the Apps tile from the MAIN
MENU screen. You can order additional channels, check the news and weather, and even
play games. Make sure you connect your Hopper to broadband Internet to access all the
features of your apps. You can enjoy this feature on one TV at a time.
Apps are software applications bringing you the best of the Web to your TV that you can
run right on your broadband Internet–connected Hopper. These include news, sports,
music, weather and game apps. And you can even follow and share with friends on
Twitter®.
Note also that you can use The Weather Channel app by selecting its tile directly on the
MAIN MENU screen.
MY ACCOUNT/CUSTOMER SUPPORT
An important feature of your Hopper is the My Account tile. It provides convenient access
to your DISH account to add programming, review your statement, pay your bill, and more.
Attach an active telephone line or broadband Internet connection to your DISH receiver to
ensure access to this feature.
Press the MENU button on your remote control and then select My Account.
TIPS
•
•
Whenever you want to exit an app and return to watching DISH programming, press
VIEW LIVE TV and you’ll return to the last channel you were watching.
You can also access Customer Support on the DISH website. Visit mydish.com
online for more information.
49
Chapter 7
Notes
Notes
50
Digital Video Recordings
Recording & Pausing Live Programs
What you’ll find in this chapter:
• WHAT IS A DVR?
• PAUSING A PROGRAM
• REVERSE, FAST FORWARD, AND SKIP
• SLOW MOTION AND FRAME-BY-FRAME
• RECORDING A LIVE PROGRAM
• PLAYING A RECORDED PROGRAM
• RECORDING WHILE WATCHING DIFFERENT
PROGRAMS
• OTHER RECORDING OPTIONS
• GROUPING AND SORTING RECORDINGS
51
Chapter 8
What is a DVR?
WHAT IS A DVR?
The Hopper is a Whole-Home HD Digital Video Recorder (DVR) that lets you watch TV the
way that you want. You can pause, reverse, or skip back through a program. Then you can
resume watching TV. Also, you can record and play back programs with full digital audio
and video quality, without a VCR.
For example, if you get a phone call while you are watching a live or recorded program,
you can pause the program, talk on the phone for an hour, resume the program from
where you left off (or restart the program), and not miss any of the action.
You can move through a program forward and backward in slow motion or frame-by-frame
using your DVR auto-recording features while watching live or recorded programs.
PAUSING A PROGRAM
On some TVs, the presence of fixed images for extended periods of time
may cause them to be permanently imprinted on the screen. Consult your
TV user’s guide for information on whether this is a problem for your TV,
what operating/viewing restrictions apply to avoid this problem, and any
associated TV warranty coverage.
For a live TV program, the on-screen pause timer shows how long you have paused the
program. The pause timer shows how far you are behind the live program. You can pause
a live program for as long as an hour. (Each receiver in your whole-home DVR service can
do this.) If you think you might be away from the TV for more than an hour, but don’t want
to miss any of the program, consider recording the program (see page 54).
52
Digital Video Recording
Reverse, Fast Forward, and Skip
REVERSE, FAST FORWARD, AND SKIP
This section describes how to use your remote control’s DVR buttons to move forward and
back quickly while you watch TV.
Press BACK once to reverse the program 4 times as fast as normal play. Press
BACK twice to reverse at 15 times normal speed, three times to reverse at 60
times normal speed, and four times to reverse at 300 times normal speed. The
on-screen bar shows how far you’ve gone. For a live program, you can only
reverse back to the last channel change or back one hour, whichever occurs first.
Press FWD (forward) once to fast forward through the program at 4 times normal
speed. Press FWD twice to forward at 15 times normal speed, three times to
forward at 60 times normal speed, and four times to forward at 300 times normal
speed. The on-screen bar shows how far you’ve gone. Of course, you can’t go
forward into the part of a live program that hasn’t been broadcast yet.
Press SKIP BACK to skip back about 10 seconds in a program. Press this button
repeatedly to skip back another 10 seconds at a time.
Press SKIP FWD to skip ahead about 30 seconds in the program. Press this
button repeatedly to skip ahead another 30 seconds at a time.
SLOW MOTION AND FRAME-BY-FRAME
Your satellite receiver has features that allow you to slow down live TV. This section
describes how to use the DVR buttons to use slow motion and frame-by-frame advance or
reverse while you watch TV. Press PLAY to exit any of the features described below.
Press PAUSE and then press BACK to reverse the program in slow motion.
Press BACK once to reverse the program 1/4 the speed of normal play. Press
BACK twice to reverse at normal speed.
Press PAUSE and then press FWD to forward the program in slow motion.
When you press FWD once the program advances at 1/15 the speed of normal
play. Press FWD twice to forward at 1/4 as fast as normal play. Press FWD
three times to play the program at normal speed. Of course, you can’t go
forward into the part of a live program that hasn’t been broadcast yet.
Press PAUSE and then press SKIP BACK repeatedly to reverse the recording
frame-by-frame.
Press PAUSE and then press SKIP FWD repeatedly to advance the recording
frame-by-frame.
53
Chapter 8
Recording a Live Program
RECORDING A LIVE PROGRAM
To record the rest of the program you are watching, PRESS the record button on your
remote control. You can press the RECORD button again at any time during the current
recording and follow the on-screen instructions if you want to extend the end of the
recording past the scheduled end time.
To stop a recording you are watching, press the STOP button on your remote control. A
pop-up screen will ask you to confirm you want to stop recording the current program.
Select Yes to stop the recording now, or No to continue recording.
If all Hopper tuners are in use when you request a new recording, you will see the TV
Viewing Status screen, from which you can decide to watch the same content as one of
the tuners, choose to order a DISH On Demand program or event, or to play back a
previously recorded program from your DVR, including any PrimeTime Anytime™ shows.
Note: Programs recorded in high definition require up to six times more storage space
than programs recorded in standard definition.
PLAYING A RECORDED PROGRAM
To play a program or event recorded on your Hopper HD DVR, do the following:
1 Press the DVR button on your remote control to display the My Recordings screen.
2 Highlight a tile for a program (or folder of programs, if applicable). If you want to watch the
program (or the latest recording in a folder of programs), then press the PLAY button. If
you want to see more options, press the SELECT button to show a pop-up menu.
3 For a single program or event, choose from the following options:
•
•
•
•
Start Over. Watch this recording from the beginning. If you have previously played a
part of the show, you can also select Resume to watch the rest of the program.
Edit. You can move the recording to a folder or protect it from automatic erasure.
Delete. Delete this recording from the DVR. This does not delete the associated timer.
More Info. Display the full Information screen about this program or event.
For a program folder, choose from the following options:
•
•
•
•
54
Start Over. Watch this recording from the beginning. If you have previously played a
part of the show, you can also select Resume to watch the rest of the program.
Edit. You can move the recording to a folder or protect it from automatic erasure.
Delete. Delete this recording from the DVR. This does not delete the associated timer.
More Info. Display the full Information screen about this program or event.
Digital Video Recording
Recording While Watching Different Programs
RECORDING WHILE WATCHING DIFFERENT PROGRAMS
This section describes the basic ways to record a program while watching a different
program at the same time.
Recording a Different Program
You can set up your Hopper HD DVR to record one or two programs while you are
watching another program live or playing an existing recording.
1 Make sure your Hopper HD DVR is powered on by the indicator light on the front panel.
2 Press GUIDE to access the Program Guide. Find a program on now you want to record.
3 Highlight and press the SELECT button to tune the receiver to that program.
4 Press the RECORD button on your remote control.
5 Select OK to begin recording now with your default DVR recording settings, or Options to
customize your recording settings.
6 If you selected Options, see Other Recording Options on page 55 for more on your
choices.
7 Choose another program to record, as described in Step 2.
8 Press the RECORD button on your remote control and select OK when the pop-up screen
displays. You are now recording two programs at the same time.
9 Press DVR twice on the remote control to access the My Recordings screen. You should
see the two programs that are recording indicated by the red dots next to the listings.
10 Select another program to watch, if applicable, or an event that you recorded earlier and
start the playback.
11 You should now be watching one program or event while the receiver is also recording the
other two programs or events.
OTHER RECORDING OPTIONS
When you set up a new DVR timer for a future program or event, you can choose from the
following options:
•
•
•
•
Type—You can change the type of timer from DVR to Auto Tune. An Auto Tune timer
changes the channel to the program or event, but does not record it.
Episodes—You can select to record all New and Reruns, Only New episodes, only
Once, once Weekly or Daily at the same time, or only on weekdays (Mon-Fri).
Folders—The DVR feature can save new event recordings inside an existing folder.
Protect—You can choose to protect this timer’s recordings from accidental erasure.
55
Chapter 8
Grouping and Sorting Recordings
•
•
•
•
Keep—By default, an event timer keeps the 20 newest recordings it has made before
it replaces older recordings with newer ones. You can change this number here.
Start Early—You can extend the start time for the recording. This option is useful for
programs that might start a minute or two early, like some network reality shows.
End Late—You can extend the stop time for the recording. This option is useful for
programs that might run overtime, like sporting events or awards shows.
Priority—By default, new timers have a higher priority assigned to them than existing
timers, for purposes of resolving conflicts when multiple recordings overlap.
Note: If you tune to a program after it has begun, then you can record only the part of the
program after you tuned to it. To do this, reverse as far as you can in the auto-recording.
GROUPING AND SORTING RECORDINGS
1 Press the DVR button (or press MENU, and then select DVR).
2 Choose a group or sort option to help you quickly find the program you want to watch:
•
To group programs into folders, select Folders by Title, then select another option,
like Folders by Genre, My Folders or No Folders.
•
By default, recordings are sorted by date. To sort them by name (A-Z) or rating categories, select DVR Date, and then choose an option.
The My Recordings list re-arranges itself to match your sorting or grouping selection(s).
TIPS
•
•
•
If you have a program paused, press PLAY to watch the program. Also, press PLAY to
switch from forward or reverse back to normal playback.
Press VIEW LIVE TV to catch up with the program as it’s showing now, if applicable.
As you fill your internal DVR, you may want more space to store additional programs.
You can connect your own compatible, external USB 2.0 hard-disk drive (HDD) and
use the Archiving feature. See External Hard-Disk Drive on page 84 for more
information.
QUESTIONS
•
56
How can I fast forward through commercials? If you are watching a pre-recorded
program, or have delayed a live program, press the SKIP FWD or FWD button on your
remote control. However, you cannot skip/forward while watching live TV.
Recording Future Programs
Setting Up and Using Event Timers
What you’ll find in this chapter:
• USING PRIMETIME ANYTIME™
• TIMERS AND RECORDINGS
• USING THE TIMERS LIST
• USING THE DAILY SCHEDULE
• SETTING UP AN EVENT TIMER
• SETTING UP A SEEK & RECORD™ TIMER
• CHANGING OR DELETING A TIMER
57
Chapter 9
Using PrimeTime Anytime™
USING PRIMETIME ANYTIME™
The PrimeTime Anytime™ feature is exclusive to your Hopper HD DVR and once enabled,
will provide instant access to your favorite shows on ABC, CBS, FOX and NBC in high
definition. (Note if any of your local HD channels are not available in your market, these
shows cannot be recorded.) Programs airing during prime-time hours, 8-11 p.m. ET on
Monday through Saturday, and 7-11 p.m. ET on Sunday, will be recorded and accessible
for eight days from their initial air dates. And you can always save the shows to your DVR
library to be able to watch them at any time.
Enabling the PrimeTime Anytime™ feature
To enable the PrimeTime Anytime™ feature on your Hopper HD DVR, do the following:
1 Press the MENU button on your DISH remote control, highlight the PrimeTime Anytime
tile and press SELECT.
2 Select the Enable option to turn on the feature, then highlight and select Save.
3 If you Enabled the feature, it will begin recording HD prime-time shows each night. Note
that Enabling the feature does not instantly populate the folder with content; recordings
will begin during the next applicable nightly interval and gradually populate the folder contents, day-by-day.
Disabling the PrimeTime Anytime™ feature
To disable the PrimeTime Anytime™ feature after it has been enabled, do the following:
1 Press the MENU button on your DISH remote control, highlight the Settings tile on the
Main Menu screen and press SELECT.
2 Highlight and select DVR Defaults and then select PrimeTime Anytime.
3 Select the Disable option to turn off the feature, then highlight and select Save.
If you Disabled the feature, it will stop recording shows automatically. (You can still set up
event timers to record any individual shows you want, of course.) In order to stop tonight’s
58
Record Future Programs
Using PrimeTime Anytime™
recordings, you must disable the feature at least 20 minutes before the nightly prime-time
interval begins (8 p.m. ET/PT, 7 p.m. CT/MT on Monday through Saturday; and 7 p.m.
ET/PT, 6 p.m. CT/MT on Sunday).
Note that Disabling the PrimeTime Anytime™ feature will not alter or delete the current
contents of the PrimeTime Anytime™ folder.
Accessing PrimeTime Anytime™ content
To view your PrimeTime Anytime™ shows, do any of the following:
•
•
•
Press the DVR button twice on your DISH remote control.
Use the ARROW buttons to highlight the PrimeTime Anytime™ folder on your DVR
My Recordings screen and press the SELECT button.
Select the PrimeTime Folder option from the PrimeTime Anytime™ tile on the Main
Menu screen.
Saving PrimeTime Anytime™ content
The shows recorded in the PrimeTime Anytime™ folder will expire in eight days. The
oldest recording for each program then will be deleted automatically, unless you highlight
the item in your folder, select it and use the Save option for that individual recording.
Disabling the PrimeTime Anytime™ feature does not delete the current contents of the
PrimeTime Anytime™ folder. Enabling the feature does not instantly save any content in
the folder.
59
Chapter 9
Timers and Recordings
TIMERS AND RECORDINGS
A timer is your instruction telling the satellite TV receiver the programs you want to watch
in the future. For most Digital Video Recorder (DVR) timers, you select a specific program
on a specific channel, and tell the receiver how often you want to record that program.
DVR recordings are listed in the My Recordings screen, which you can find quickly by
pressing the DVR button on your remote control.
Timer Types
There are three types of event timers:
•
DVR—to record an event onto your receiver’s hard-disk drive for later viewing.
•
Auto Tune—to automatically change the channel for live viewing of the event.
Timer Frequency
Deciding how often you want to watch a program will help you make the best choice:
•
New and Reruns—to record every time that program is on that channel.
•
Only New—to record the current season’s programs each time they occur on that
channel. This is the initial default for recurring DVR timers, unless you change it.
•
Once—to record a program or event once (good for movies, sporting events, etc.).
•
Weekly—to record a program once a week, at the same time, on the same channel.
•
Daily—to record a program once a day, at the same time, on the same channel.
•
Mon-Fri—to record a program once a day, Monday through Friday, at the selected
time, on the same channel.
Seek & Record™—to record programs on all channels (by default) or a specific channel,
based on your own specified criteria. See page 64 for more details.
Timer Priorities
Priorities are used by the receiver to know which program you would prefer to record, if
multiple timers are scheduled to start at the same time. For example, having seven
programs scheduled to record at the same time cannot be done on a triple-tuner receiver;
therefore, the receiver will record only the programs with the highest priority timers.
60
•
All timers have an associated priority that you can change at any time.
•
The larger the number, the lower the priority (for example, priority 1 is higher than
priorities 2, 3, and 4).
•
You can override a specific timer's priority with a one-time skip or by restoring it. Press
the remote control DVR button three times and select a timer in the Daily Schedule.
Then you'll have an option to Skip or Restore (if it’s skipped) that timer. See page 63.
Record Future Programs
Timers and Recordings
Timer Options
The Timer Options screen lets you set the following (not used on all options screens):
•
•
•
•
•
•
•
Protect Event—to prevent your programs from being erased when the DVR fills up.
Set Frequency—to record only new episodes of a program. By default, all episodes
of a Seek & Record event will be recorded.
Set Channel—to select a specific channel. When setting manual timers, you select a
channel from a scrolling list of all channels in your guide.
Start Early—to begin a timed recording a few minutes earlier than its scheduled start.
End Late—to continue recording after the program’s scheduled ending time.
Save as Defaults—to use the Start Early, End Late, Maximum Events to Keep, and
Priority (highest/lowest) settings for this event as the new defaults for future timers.
Maximum Events to Keep—to automatically delete the oldest unprotected
recordings after a specified number of them are accumulated for this particular timer.
Note: This option is especially valuable for certain Seek & Record™ timers, which
might otherwise fill your DVR storage with too many episodes of a single program.
Note: When setting Seek & Record™ timers for programs available in both HD and SD, by
default, the receiver will automatically select the HD program for recording.
Daily Schedule
The Daily Schedule lists the timers that are planned for today, the future (up to nine days,
if applicable to your satellite system), and have occurred in the recent past. Press the DVR
button three times and use the Daily Schedule, as shown on page 63, to:
•
•
•
Review today's timers. You can choose to skip a scheduled timer, or restore a timer
that was not planned to occur, perhaps because of a conflict with another program.
See Timer Priorities on page 60.
Review future timers, up to nine days in advance, and make changes as necessary.
Review past timers to see which occurred, and the reason why one or more did not, if
applicable. See Reasons Why Timers are Skipped on page 62.
Timers List
Press the DVR button four times and use the Timers List, as shown on page 63, to:
•
•
•
•
View the general list of all event timers.
Select a timer from this list to see a detailed listing with specific dates and times of
upcoming timers for that program/event or Seek & Record™ search term(s).
Set user-selected priorities for each event timer. See Timer Priorities on page 60.
Select Edit Event to edit an individual occurrence of a recurring event timer or Edit
Timer to change all occurrences or delete the entire event timer.
61
Chapter 9
Timers and Recordings
Reasons Why Timers are Skipped
If a timer is skipped, the reason is stated on the Timers List.
•
•
•
•
•
•
Priority—This timer had a lower priority than other events being recorded at the time.
User—A user chose to skip that timer.
Duplicate event—There is already another timer which is set to record that program.
Event exists in DVR—The program was already recorded and can be found now in
the My Recordings list.
Not a new episode—Used for New Episode timers. A New Episode is one that has
the word New or the current year listed in the associated Program Guide information.
Incorrect event—For Weekly, Daily, and Monday-Friday timers. If the guide has a
different event listed, then the timer will be skipped. For example, the event timer was
set up as a Daily timer on a Saturday, but the specified program is broadcast only
weekdays, so the timer will be skipped on the weekends.
When a Timer Needs Your Tuner to Record
If the three TV tuners of the Hopper are needed for scheduled recordings while you are
watching live TV, then you will see a pop-up message screen.
Choose Allow and the timer will change the channel and record the program. Choose
Stop and the timer will skip recording the scheduled event. Note that stopping one event
recording does not delete a series timer, so future episodes will continue to be recorded.
When the Receiver is Off
If the receiver is off when a scheduled type of event timer occurs, the receiver will:
•
•
62
DVR—Remain powered off (in standby mode), but will record the scheduled event.
Auto Tune—Turn on at the scheduled time and for the event duration. After a period
of time, if you do nothing, the receiver will turn off (enter standby mode) again.
Record Future Programs
Using the Timers List
Special Considerations When Using Timers
•
For Locked or Restricted Programs—You must enter the receiver password before
you can create an automatic event timer for a program restricted by rating or on a
locked or hidden channel. If you do this, and the restrictions or locks are subsequently
changed, then when the timer starts, note that the receiver may display only an error
or password-entry menu screen.
•
For Pay-Per-View Programs—You must order a Pay-Per-View program or event at
the time that you create an event timer for it.
•
For Blacked Out Programs—If you set a timer for a program or event that is blacked
out in your area, then when the timer occurs, the receiver may only display an error.
Note that the original provider of a program or event decides the black-out restrictions,
not DISH.
USING THE TIMERS LIST
To use the Timers screen to help manage your event timers, do the following:
1 Press the DVR button on your remote control four times to display the Timers List.
2 Scroll the list of timers. As you do so, detailed information about the highlighted timer
appears on the right. From the drop-down menu bar, you choose to sort the list by Priority
or select multiple Timers to edit at once (for example, to change Priority or Delete them).
Highlight and select one listed Timer if you want to see its Daily Schedule or Delete it.
USING THE DAILY SCHEDULE
To use the Daily Schedule screen to help manage your event timers, do the following:
1 Press the DVR button on your remote control three times to display the Daily Schedule.
2 Scroll the list of timers for today and the next few days. As you do so, detailed information
about the highlighted timer appears on the right. You Show or Hide events to be skipped.
Highlight and select a future program if you want to Skip or Restore an event. You can
also choose to Protect the recording, or edit the Start Early or End Late settings.
•
To edit the Start Early/End Late settings for an individual occurrence, select its event
timer and then select Edit Event. To edit an event’s associated timer, select it and
then select Edit Timer. This will access the Timers List with the Timer highlighted.
•
If the program is included in a Seek & Record™ timer, you cannot change the Start
Early or End Late times for an individual occurrence; it must be changed within the
Seek & Record™ timer, selected from the full Timers List. Refer to page 64.
•
If the PrimeTime Anytime™ feature is enabled, you will see it on the Daily Schedule.
You cannot edit an individual event or settings from this screen. Refer to page 58.
63
Chapter 9
Setting Up an Event Timer
•
Press PAGE UP to see the previous days' timers. Review these timers if you want to
see the result of these timers (for example, if a timer recorded successfully or why it
might have been skipped).
SETTING UP AN EVENT TIMER
1 Find a program or event to record that starts in the future using the Program Guide or
Browse Banner.
2 Highlight and select the future program or event. The Create Timer screen displays.
3 Select one of the Timer Types (see page 60 for more details).
4 Select the Timer Frequency (see page 60 for more details).
5 Select any other recording Options (see page 61 for more details), as applicable.
6 Select Priority if you would like to change the current priority of the event timer (see
page 60 for more details).
7 Select Create to save the new event timer.
SETTING UP A SEEK & RECORD™ TIMER
The Seek & Record™ feature lets you create timers to record programs or events
automatically based on results of your search criteria. When the DVR finds programs
listed that meet your search criteria, it will automatically set a timer to record that program.
As the Program Guide is updated, the Seek & Record feature will continue to find and
record newly listed programs or events based upon your search criteria.
An example of how to use the Seek & Record feature might be that you saw a movie in a
theater and you want to watch it again as soon as it is available on a movie channel. Use
the Exact Match and Title options, and then type the exact title of the movie. If the movie
is made available on a movie channel included in your DISH package, the receiver will
automatically set a one-time DVR timer to record that movie for you.
1 Press your remote’s SEARCH button. If you need to, clear or delete the text in the box.
2 Select Seek & Record.
3 Select your preferred Search Method:
•
•
•
•
64
Titles—Search for programs or events by one or more words in their titles.
Descriptions—Search for programs whose descriptions contain specified terms.
Actors—Search for programs by the actors’ names listed with their information.
History—Search for programs by repeating a recent search you have performed.
Record Future Programs
Changing or Deleting a Timer
4 Enter your search criteria. You can use the virtual on-screen keyboard below the text box,
or you can use the letters above the NUMBER PAD buttons on the remote control (similar
to texting on many mobile phones) while the on-screen cursor is in the text box. See Using
Text Fields on page 19 for instructions.
5 Select any Options for the Seek & Record timers, as described on page 61, if applicable.
6 Select Create. When the receiver has completed your search, the Timers list and Daily
Schedule screens will display the results.
Note: After entering your search words and selecting Create, be sure to review the timers
the Seek & Record feature created—some may not be what you are expecting. You can:
•
•
Choose any selected events you want to Skip. Review timers for future events often
by pressing the DVR button three times to access the Daily Schedule screen.
Adjust your search terms and/or method. Select Priority to change the priority of your
Seek & Record timers. To adjust your search further, delete any unwanted Seek &
Record timer(s) and try the following:
— Change your Seek & Record search term(s) to be more specific.
— If you press the SEARCH button when you have highlighted a future program
within the Program Guide, Browse Banner, Themes list or Search results, then the
program's exact title will be entered in the text box for you.
CHANGING OR DELETING A TIMER
1 Press the DVR button three times for the Daily Schedule or four times for the Timers list.
2 Highlight a program or event in the list and press the SELECT button.
3 Select Skip Event if you wish to skip the selected occurrence of the event timer; Edit
Event. if you wish to change recording options for this occurrence only; or Edit Timer if
you wish to change or delete all occurrences of this timer from the list.
4 Select Delete. A pop-up window asks you to confirm your choice(s).
5 Select Yes on the pop-up screen. The timer(s) you selected are now deleted.
TIPS
•
•
Make sure the Updates feature is enabled, as described on page 91. By enabling this
feature, the Electronic Program Guide (EPG) always will have the most up-to-date
information, and your DVR can automatically adjust or create timers accordingly.
Weekly, Daily, and Monday-Friday timers move only if the program is within one hour
earlier or four hours later than the original time for which the timer was set. These
timer frequencies will adjust their length if their event’s time block is extended.
65
Chapter 9
Questions
•
•
Seek & Record™ recordings may fill DVR storage quickly. If you have other timers
you know you don't want to be recorded over, choose Protect on those important
programs.
DVR Timers set for sporting events automatically end late by 60 minutes to allow for
overtime. If you want to change this setting, use Options when you set up the timer.
QUESTIONS
•
•
•
66
Why is my receiver recording programs I didn’t schedule? Seek & Record™
timers may include more programs than you initally planned. If you’d like to refine your
search, delete the Seek & Record™ timer and start again as described on page 64.
Why did the receiver delete a program that I recorded? If your recording was
unprotected and the receiver’s hard-disk drive fills up, your DVR deletes the oldest
unprotected recording. You can protect your recordings as described on page 61.
Where can I go to find out why the receiver didn’t record something that I had
scheduled? Look at your Daily Schedule screen and refer to Reasons Why Timers
are Skipped on page 62.
Remote Control Setup
Personalizing Your Remote Controls
What you’ll find in this chapter:
• PAIRING YOUR REMOTE CONTROL
• CONTROLLING OTHER COMPONENTS
• SETTING UP BY LEARNING FROM ANOTHER
REMOTE
• CONTROLLING A TUNER OR AMPLIFIER
• THE LOCATE REMOTE FEATURE
• SENDING DISCRETE POWER ON AND OFF
• TIPS
• QUESTIONS
67
Chapter 10
Pairing Your Remote Control
PAIRING YOUR REMOTE CONTROL
These instructions help you pair your remote control to your Hopper or Joey receiver. Your
Hopper adn Joey come with a Universal UHF/IR remote control that uses proprietary
ZigBee® RF4CE technology. It includes two-way learning functionality and the ability to
control up to three additional devices such as TVs and DVD players via IR commands.
You will not be able to pair a remote that is already paired to a Hopper or Joey receiver in
your home. To identify which Hopper or Joey a remote is paired with, you can use the
Locate Remote feature (press the LOCATE REMOTE button on your receiver front panel)
to have the remote paired with the receiver emit a series of beep tones to identify it.
To pair your remote control
Press SAT
If no operation,
press SYSTEM INFO
on the receiver
(image may vary)
Close
Press Close
1 Make sure the remote control has fresh batteries installed and is in SAT mode.
2 Press the SYSTEM INFO button on the receiver front panel to display the System
Information screen on the nearby TV.
3 Press and release the SAT button on the remote control:
•
Remote 1—Press SYS INFO on the receiver front panel. The System Information
screen lists your remote control. Typically, the remote control for the nearby TV is
shown on the Hopper’s screen and the remote control for a remote TV on the Joey’s.
•
Remote 2, 3, ..., 8—As many as eight remote controls can be paired to a receiver and
listed in the System Information screen. If you have more than two DISH remote
controls, then consult the SYSTEM INFO screen on each of the receivers to ensure
that all the remote controls are paired with the correct receivers.
4 Select Close to close the System Information screen.
68
Remote Controls
Pairing Your Remote Control
Adjusting the Remote Control Antenna
Be sure to point the remote control antenna (back of the receiver) straight up so you can
use the remote control from as far away as possible. Don't let the antenna touch anything.
If your remote control isn't working well from far away or another room, you
may be experiencing interference from objects near your receiver. To
improve your remote control's range, try the following:
– Place the receiver higher than all of the other equipment in your cabinet
or entertainment center.
– Provide space above the receiver so that the remote control antenna can
be installed pointing straight up. If you cannot install the antenna straight
up, tilt the antenna at no more than a 30° angle from vertical.
– Place the remote control antenna outside the entertainment center by
using an optional coaxial cable to connect the antenna to the receiver.
– Try moving the receiver itself to other suitable locations.
– Move any nearby over-the-air antennas away from the remote control
antenna. Do not sit an over-the-air antenna on top of your receiver.
– Install a UHF attenuator. See Installing a UHF Attenuator on page 70 for
more details.
69
Chapter 10
Pairing Your Remote Control
Installing a UHF Attenuator
Unwanted UHF signals may interfere with signals from the remote control to the receiver.
To prevent such interference, you can install a 10 dB attenuator (available from many
electronics parts stores). Adding this attenuator will help keep out stray UHF signals, but it
will also cut down how far away your remote control can operate the receiver.
1 Remove the remote control antenna from the
REMOTE ANTENNA input on the receiver’s back
panel.
2 Attach a 10 dB attenuator directly to the REMOTE
ANTENNA input.
3 Attach the remote control antenna to the newly
installed attenuator.
70
Remote Controls
Controlling Other Components
CONTROLLING OTHER COMPONENTS
To use the remote to control other devices (such as a TV, DVD or Blu-ray Disc™ player or
VCR, an audio tuner/preamp or amplifier, or another compatible DISH receiver), you must
first program the remote to control these devices. You can do this by any of the following
procedures:
•
•
•
•
Setting Up Using the Remote Manager on page 71
Setting Up Using Device Code Tables on page 72
Setting Up Using Device Codes Scan on page 73
Setting Up by Learning from Another Remote on page 76
Remote Control Modes
Use the remote control’s mode buttons, SAT (Hopper or Joey receiver), TV (for a TV),
DVD (for a a disc player or VCR), and AUX (“auxiliary,” for a second TV, DVD/BD or VCR,
tuner/preamp, audio amplifier, or a second DISH receiver via IR) to set the remote control
to the right mode for each device. To change the mode, firmly press the button for the
device you want the remote to control. The mode button lights for about two seconds to
show you have set the remote to that mode.
Setting Up Using the Remote Manager
To set up your remote to control your devices, use the Remote Manager, as follows:
1 Press MENU, highlight and select the Settings tile, and then Remote Manager.
2 Highlight and select the option for the device mode you want to program:
•
Select TV Code and follow the on-screen instructions to program the remote in TV
Mode to control your TV. After programming is complete, the TV Power button will also
turn your TV on and off in any device mode. When Limited Mode is enabled, only the
POWER, MUTE and VOLUME buttons will operate your TV.
•
Select DVD Code and follow the on-screen instructions to program the remote in
DVD Mode to control your DVD or Blu-ray Disc™ player or VCR. When Limited Mode
is enabled, only the POWER and VCR-function (PLAY, PAUSE, etc.) buttons will
operate your device.
•
Select AUX Code and follow the on-screen instructions to program the remote in AUX
Mode to control your auxiliary device, like an audio receiver or amplifier. You can also
program AUX mode to control a second TV or disc player, or even certain other DISH
receivers (via IR commands only).
3 Highlight and select Save when you are finished.
Limited Mode
Your remote control is programmed automatically in Limited Mode to prevent inadvertent
commands from being sent to your TV, such as an accidental channel or input change.
When you use the remote to control your TV in Limited Mode, you will only be able to use
the POWER, MUTE, and VOLUME buttons. Also, when you use the remote to control your
71
Chapter 10
Controlling Other Components
VCR (using the mode button for a DVD or AUX device) in Limited Mode, you will only be
able to use the POWER and VCR-function buttons (like PLAY, PAUSE, etc.).
Turning Limited Mode On and Off
To turn off Limited Mode so that you can use all of the buttons on your DISH remote to
control your TV or disc player, do the following:
1 Press MENU, highlight and select the Settings tile, and then Remote Manager.
2 Highlight and select the option for Limited Mode:
•
Select Enabled to turn Limited Mode on. This is the default.
•
Select Disabled to turn Limited Mode off. Now buttons function in TV and DVD modes.
3 Highlight and select Save when you are finished.
Note: Limited Mode is not used if an audio amplifier is programmed on the AUX button.
Combination Devices
If you are programming the remote to control a combination device, such as a TV/VCR or
a TV/DVD, program the remote control in one mode (TV), and then repeat the procedure
in the other mode. For example, to program the remote to control a TV/VCR combo device
using codes 622 and 815, follow the instructions to program the remote in TV mode using
TV code 622, and then repeat the instructions to program in DVD mode to control the VCR
using code 815. When Limited Mode is enabled, use POWER and VCR-function buttons.
Setting Up Using Device Code Tables
Set up the remote to control other devices using the codes listed in the Remote Manager.
In the instructions below, the column on the left contains basic procedures to perform and
the column on the right provides any additional information, if applicable.
Instructions
72
Additional Information
1
Turn the device on.
Use the device’s front panel buttons or its own
remote control.
2
Find the brand name of the device in the
tables in Remote Manager.
If the brand isn’t listed, see Setting Up Using Device
Codes Scan on page 73.
3
Press and hold the mode button until all the
other mode buttons light up, then release
the button. The mode button flashes.
For example, for a TV, press and hold the TV mode
button until all of the other mode buttons light. When
you let go of it, the TV mode button will flash.
4
For AUX mode only. Press 0 for a TV, 1 for
a VCR, or 2 for a tuner or amplifier.
If you’re not programming in AUX mode, skip to
step 5.
Remote Controls
Controlling Other Components
Instructions
Additional Information
5
Enter one of the three-digit device codes
from the table using the NUMBER buttons.
The three-digit device code is for the brand name of
your device that you found in step 2.
6
If you want to program Limited Mode, press
1. If not, skip to step 7.
See Limited Mode for more information.
7
Press the POUND (#) button.
If you entered the code correctly, then the device
mode button flashes three times.
8
Press POWER to turn off the device. If the
device does not turn off, go to step 10.
If the code works, then the device should turn off.
9
Turn the device back on and try some other
buttons to make sure they work. If the code
works for other buttons, you can stop here.
Sometimes POWER works when other buttons
don’t. If in Limited Mode, try VOLUME or MUTE.
10
If the code doesn’t work, repeat steps 3
through 9 with another device code from
the tables.
Try every code listed in the tables for your brand
until one works for your device.
11
If you can’t find a code that works, then try
Setting Up Using Device Codes Scan on
page 73.
Setting Up Using Device Codes Scan
If the code for your device is not listed in the tables in Remote Manager, or if you could not
find a code that worked for your device, use this procedure to scan through the remote
control’s memory for the device code. In the instructions below, the column on the left
contains basic instructions and the column on the right provides additional information.
Instructions
Additional Information
1
Turn the device on.
Use the device’s front panel buttons or its own
remote control.
2
Press and hold the mode button until all the
other mode buttons light up, and then
release the button. The device mode button
flashes.
For example, hold the TV mode button until all of the
other mode buttons light up. When you let go, the TV
mode button will flash.
73
Chapter 10
Controlling Other Components
3
For AUX mode only. Press 0 for TV, 1 for
VCR, or 2 for an audio tuner or amplifier.
Then press the STAR (*) button.
This step is for specifying the type of device that will
be programmed in AUX mode. If you’re not
programming in AUX mode, please skip to step 4.
4
Press the remote’s POWER button.
This puts your remote into code scanning mode.
5
Press the UP or DOWN ARROW
repeatedly until the device turns off.
As you press the UP or DOWN ARROW, the
remote tries each code in its memory to see if it can
turn off your device. When the device turns off, you
have found a code that might work with your device.
Note: The mode button for the device will flash
rapidly eight times when you’ve scanned through all
the available codes for the specified device.
6
Press the POUND (#) button.
The device mode button flashes three times if you
have entered the code correctly, and saves the code
you found.
7
Turn the device back on and try some other
buttons to make sure that they work also.
Sometimes POWER works when other buttons
don’t. If in Limited Mode (see step 6 on page 73),
also try VOLUME or MUTE.
8
If necessary, repeat this procedure until
you’ve tried all the different codes and
chosen the one that works best with your
device.
You may need to repeat the scan to find the best
code for your particular device.
Note: This process could be lengthy, because of this
remote control’s very large device-code database.
Checking the Device Codes
Use these steps to find the device code you’ve set for each of the remote control modes
(TV, DVD/BD or VCR, and AUX).
Instructions
1 Press and hold the mode button until
all the other mode buttons light up, and
then release the button. The device
mode button flashes.
74
Additional Information
For example, hold the TV button until all of the
other mode buttons light. When you let go, the
TV mode button will flash.
Remote Controls
Controlling Other Components
2 Press the POUND (#) button twice.
Watch the mode light to determine your
code. The mode button flashes the
number for each digit of the device
code, with a pause between the groups
of flashes. A quick flash is for zero (0).
For example, if the code is 570, the mode
button flashes five times, pauses briefly,
flashes seven times, pauses again, and flashes
once very quickly.
For AUX mode: The first group of
flashes indicates what the AUX mode
controls. A quick flash (zero) before the
three-digit code is for a TV, one regular
flash is for a VCR, and two flashes is
for an audio tuner or amplifier.
For example, if the TV code is 570, the AUX
mode button flashes once very quickly
(indicating 0 for TV), pauses briefly, flashes five
times, pauses again, flashes seven times,
pauses once more, and flashes once quickly.
For a satellite receiver programmed in
AUX mode: The AUX device mode
button will flash the same number of
times as the remote address number.
For example, if the receiver address is 3, the
AUX mode button flashes three times.
For Limited Mode: If you have
programmed a TV (or VCR) in Limited
Mode, the device mode button flashes
once at the end of the flash sequence.
For example, if the TV code is 570, the AUX
mode button flashes once very quickly
(indicating 0 for TV), pauses briefly, flashes five
times, pauses again, flashes seven times,
pauses once more, flashes once quickly, and
then flashes once normally (indicating the TV
device is in Limited Mode).
75
Chapter 10
Controlling Other Components
Setting Up by Learning from Another Remote
After you have programmed your DISH remote to control your devices (in TV, DVD, and/or
AUX modes), you may find not all of the commands used by the devices’ original remote
controls function as you expect. The learning function of your new DISH remote control
can support these commands.
The remote control can learn commands in two ways:
1 You can follow the instructions for using device codes to program a specific mode, and
then learn commands that add new or overwrite existing functions of the remote control’s
buttons in this mode. For this type of learning, any remote control button without a learned
command keeps the pre-existing command (if any) for that programmed device code.
2 Each button on this remote control can learn a command from the equipment’s original
remote control. For this type of learning, any remote control button without a learned
command will have no function for that programmed device.
To “teach” your DISH remote control buttons specific commands for your devices,
complete the following:
Instructions
Additional Information
1 Ensure the the desired remote address is
See Checking the Device Codes on page 74.
2 Place both your DISH remote and the origi-
Holding either remote control in your hand may
cause learning to fail.
3 On the DISH remote, press and hold the
Your selected mode button will blink.
programmed to the DISH remote.
nal equipment’s remote control on a flat,
stable surface.
mode button for your equipment for about
three seconds until all the mode buttons
light up, and then release it.
76
Remote Controls
Controlling Other Components
4 To start learning commands for this mode:
•
•
If you've found a code for that
device, first program the code.
Now press and release RECALL,
then press and hold the RECORD
button for about three seconds.
If you have not programmed a
code for that device, press and
hold RECORD for three seconds.
To find and program the device code, use the
instructions for Setting Up Using Device Code
Tables on page 72 or Setting Up Using Device
Codes Scan on page 73.
The device mode button that you selected
remains lit while learning.
5 Point the front of the original device remote
to face the small square (IR window) on the
front, left-hand side of the DISH remote
control, as shown on page 76.
6 On the DISH remote control, press the button you want to teach.
7 On the original device’s remote control,
press and hold the button for the command
that you want learned.
•
•
You may need to try pressing the button on the
original device’s remote several times for the
DISH remote to learn the command.
If the DISH remote learns the
command, the device mode light
blinks off and then back on.
If the mode light blinks three times
or remains lit, the DISH remote did
not learn the command.
8 After a button has learned a command successfully, repeat step 6 and step 7 until all
commands you want have been learned.
9 To end the learning sequence:
•
•
Press one of the mode buttons on
the DISH remote. This saves all
the commands for that mode, and
exits learning to return to normal
remote control operation.
To cancel learning, do not press
any buttons on either remote
control for at least 30 seconds. The
DISH remote control times out of
learning and returns to its normal
operation.
Note that no learned commands
are saved if the DISH remote
control times out before completion
of learning.
The learning sequence also ends if the remote:
• Runs out of memory for learned
commands, whereupon it saves
the commands you have learned
for equipment in this mode, exits
learning and returns to its normal
remote control operation. Then the
DISH remote cannot learn any
additional commands.
• Batteries are too low for learning,
when all the mode buttons blink
quickly eight times. Learning ends
with no learned commands
saved, and the DISH remote
control returns to its normal
operation.
Change the remote’s batteries.
77
Chapter 10
Controlling Other Components
Controlling a Tuner or Amplifier
Use the following remote control buttons to control a tuner or amplifier. When the remote
control is set up as described on pages 71 and 78, press the AUX device mode button to
set the remote to AUX mode. The AUX mode button will stay lit for two seconds to show
you’ve set the remote to AUX mode. Make sure to keep the remote in AUX mode to use
the following buttons.
AUX Mode
To use the features described in this section, make sure
you are in AUX mode by pressing the AUX Mode button.
Power
AUX
Press this
button for
AUX Mode
Turns the
tuner/amplifier
on and off
Volume & Mute Buttons
Control tuner/amplifier
volume
Select/Arrows
Button
Channel up/down
with the Arrow buttons.
Change tuner/amplifier
inputs with the Select
button
Switching Between TV and Tuner/Amplifier Volume
Adjustment
When the remote control is set up to operate your TV, the VOLUME and MUTE buttons
will adjust your TV volume by default. If you prefer the volume and mute functions of the
remote control to adjust the volume of a remote-controllable tuner/preamp, audio receiver
or amplifier device instead of the TV, this capability can be set up using AUX mode of the
remote control.
To set the remote to adjust the tuner/preamp or audio amplifier volume (steps 1-5 set up
the remote control and steps 6-7 verify that the remote has been set up correctly):
78
Remote Controls
The Locate Remote feature
To set the remote control back to adjusting the TV’s device volume by default (steps 1-5
set up the remote control and steps 6-7 verify that the remote has been set up correctly):
Programming to Control a Second Satellite Receiver
If you have another DISH satellite receiver installed in your home, you can use this new
remote in AUX mode to control it along with your new receiver. When you program the
remote to control another receiver, the remote will send out IR signals to the receiver. You
can program the remote to control certain other DISH satellite TV receivers, such as the
ViP® 922 SlingLoaded® DVR.
THE LOCATE REMOTE FEATURE
Ever misplace your remote control somewhere in your home and wonder where it is?
Press the LOCATE REMOTE button on the front panel of your Hopper HD DVR (behind
the left panel door) or Joey Receiver if you cannot find your remote.
Within a few seconds you should hear your remote control emitting a series of beep tones
to help you locate it. (If the remote control is out of range of the DISH receiver or its
batteries are dead, you will not hear these tones.)
When you find your remote control, press and hold the SELECT button on it and the
beeping will stop. Then you can use the remote control normally.
79
Chapter 10
Sending Discrete Power On and Off
SENDING DISCRETE POWER ON AND OFF
Installers use discrete power on and power off IR commands when programming macro
commands into universal remote controls. Using an on-only or off-only command is more
effective than a toggle on/off command when trying to make sure the satellite TV receiver
is reliably in one state or the other. To use these discrete power on and power off
commands, complete the following:
1
2
SAT
Press
SAT Mode
until all mode
buttons light up
Program the
remote control
3
4
or
5
Press VOLUME UP
for discrete power on
or press VOLUME DOWN
for discrete power off
Press any
button
to end this
procedure
Press
POWER
TIPS
•
If you don’t want to accidentally change channels on your TV (or VCR, if applicable),
then you may place the remote control in Limited Mode, as described on page 71.
•
Make sure you have a remote-control antenna properly connected to the remoteantenna jack on the back panel of your Hopper HD DVR. See page 13 for instructions.
QUESTIONS
•
•
80
My remote doesn’t control my receiver or other components. What should I do?
–
Make sure the remote control is in the correct device mode (page 71).
–
Check that the batteries are working and installed correctly (page 13).
–
Verify (page 13) or adjust (page 69) the remote-control antenna connection.
Why does my receiver change channels or display menus at random? A close
neighbor may have a DISH remote control set on the same address. If there is
significant radio-frequency interference with remote signals, then you may have to
install a UHF attenuator as described on page 70.
Receiver Customization
Personalizing Your Hopper HD DVR
What you’ll find in this chapter:
• USING MULTIMEDIA
• USING CALLER ID
• CUSTOMIZING THE GUIDE AND CHANNEL
LISTS
• CHANGING LANGUAGES
• USING CLOSED CAPTIONING
• USING AUDIO OUTPUT
• RESETTING TO FACTORY DEFAULTS
• SCHEDULING RECEIVER UPDATES
• USING TV EVERYWHERE
83
Chapter 11
Using Multimedia
USING MULTIMEDIA
Photos
You can view photos on the TV connected to your Hopper HD DVR using the Home Media
feature. Now you don’t have to pass photos around or have a crowd of people hover
around your digital camera. See “Using the Home Media Feature” on page 48.
External Hard-Disk Drive
The Hopper HD DVR has generous internal storage space for hundreds of hours of
recorded programming. But if you start to notice the hard drive of your integrated DVR
getting full, you can expand the storage capacity by connecting a compatible, external
USB 2.0 hard-disk drive (HDD) between 50 GB and 2 TB in size. You can transfer any
recordings from the Hopper to your external storage device (by using the Recordings
Transfer feature on the Main Menu screen) to archive them, and play back any programs
directly from the connected external drive. This feature is free and automatically enabled
on your Hopper HD DVR.
To choose a compatible external hard-disk drive, consider the following:
•
•
•
•
•
84
The hard-disk drive must have a USB 2.0 data connection.
The capacity of the hard drive should be a minimum of 50 GB up to a maximum of
2 TB.
Using a hard-disk drive with an external power supply is recommended. Portable or
pocket hard drives powered only by a single USB cable may not function properly with
your Hopper.
Do-it-yourself expansion kits and expandable storage racks may not be compatible.
Dedicate the hard-disk drive for use only with your DISH receiver; do not use the drive
for any other purposes, such as the backup and storage of computer files.
Receiver Customization
Using Caller ID
To use the external hard-disk drive feature:
1 Purchase a USB 2.0 hard-disk drive from a consumer electronics retailer.
2 Connect the drive to one of the receiver’s three USB ports, making sure to follow any
connection instructions that came with the hard-disk drive.
Note: Currently, the receiver supports having one USB device connected at a time. If you
have a second USB device such as a flash drive or portable device connected to the
receiver, you should disconnect it before connecting the external hard-disk drive.
3 If the hard-disk drive is compatible, you’ll see a pop-up message screen confirming the
device’s connection and asking if you want to manage its contents. Select Yes.
4 Follow the on-screen prompts.
5 Once the external device is recognized, you’ll see a pop-up message asking if you want to
format the drive—formatting is necessary to store your recorded programs on the external
hard-disk drive. Note that selecting Yes will cause anything stored on the external harddisk drive to be erased, the drive to be formatted for use with your receiver, and then the
receiver to reboot. You can use the Manage Device option to view and manage programs
stored on the external hard drive. Use the Send to Device option to transfer programs
from your receiver to the external hard-disk drive. Copy protection for certain content may
apply. Visit our website at mydish.com/copyprotection for more information.
6 Press the MENU button and then highlight and select the Recordings Transfer tile to
transfer DVR content from your Hopper HD DVR to your external hard drive.
USING CALLER ID
Caller ID displays on your TV if you subscribe to Caller ID from your local phone company.
To use this feature, make sure you have a phone line connected to the receiver, Caller ID
is enabled on your phone line, and that the Caller ID option is selected on your receiver.
Setting Up Caller ID Display
Use these instructions to enable or disable the Caller ID feature on your receiver:
1 Press the MENU button, highlight and select the Settings tile from the Main Menu screen.
2 Highlight and select Network Setup, and then Caller ID.
85
Chapter 11
Using Caller ID
3 Select Enable or Disable for this feature, then select the option to Save..
Caller ID Screens
When you receive a call, you will see a Caller ID pop-up screen.
You can select OK to eliminate the message. If you do nothing, the message will
disappear after about 20 seconds.
If you are using a menu screen when a call comes in, you will see a different Caller ID
pop-up screen. You can select OK to eliminate the message.
86
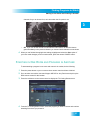
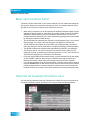
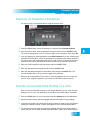
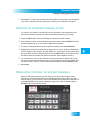
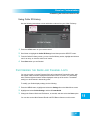
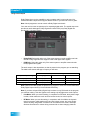
Receiver Customization
Customizing the Guide and Channel Lists
Using Caller ID History
Use the following instructions to view and delete numbers from your Caller ID History.
1 Press the MENU button on your remote control.
2 Scroll down to highlight the Caller ID History tile and then press the SELECT button.
3 From the Caller ID History screen, you can view Call History entries, highlight and delete a
row for an entry, or clear the entire list of entries.
4 Press Save when you are finished.
CUSTOMIZING THE GUIDE AND CHANNEL LISTS
You can set up the on-screen Program Guide to list channels in Descending order, with
the highest channel number displayed at the bottom of the TV screen, or in Ascending
order, with the highest channel number displayed at the top of the screen. The default
setting is to list channels in descending order.
To modify your Guide display settings, do the following:
1 Press the MENU button, highlight and select the Settings tile on the Main Menu screen.
2 Highlight and select Guide Settings, and then Format Guide.
3 Change the Channel Order and Preference, as needed, and then select the Save option.
You can also set the Multi-Channel Recall and EPG Banner features on this screen.
87
Chapter 11
Changing Languages
Changing the Guide Display
The receiver comes set to display the Program Guide. However, you can change the way
the Electronic Program Guide and EPG Banner display on your TV screen.
CHANGING LANGUAGES
You may be able to change the language of some programs. Some programs, such as
movies, indicate at the beginning whether an alternate language or descriptive video is
available.
An alternate language applies only to the audio portion of specific programs or events and
does not change the language used in the menus displayed by your receiver.
Descriptive video—not included on all channels or programs—is a feature for the visually
impaired that describes what is happening on the screen during a program or event.
To adjust alternate audio settings, do the following:
1 Press MENU and highlight and select the Settings tile on the Main Menu screen.
2 Highlight and select Audio, then Alternate Audio.
3 Select the audio language you want from the list, and then select the option to Save.
USING CLOSED CAPTIONING
The receiver has many options for Closed Captioning (CC), which allow you to change the
feature to suit your needs. Also, you can display captions when you play back programs
recorded on the integrated Hopper HD DVR, even if you didn't have them turned on at the
time the program or event was recorded.
88
Receiver Customization
Using Audio Output
Note: Not all programming contains any CC information.
Press MENU, select the Settings tile, and then highlight and select Closed Captioning.
Choose from the lists the display options matching your preferences, then select Save.
•
Closed Captioning: Turn the Closed Captioning (CC) service On or Off. The other
options on this screen are enabled when On is selected.
•
Text Size: Select a comfortable type size for the caption letters, or use the CC
Provider’s default choice.
•
Text Color: Set the color of the caption letters from the list of eight color options, or
use the CC Provider’s default choice. Choose the color combinations that make the
captioning easy for you to see.
•
Background Color: Set the color of the caption background from the list of eight color
options, or use the CC Provider’s default choice. Choose the color combinations that
make the captioning easy for you to see.
•
Background Opacity: Choose from Provider, Transparent (see-through),
Translucent (semi-see-through), and Solid.
•
Reset Defaults: Select this option to reset all the closed-captioning options on your
receiver to their original default settings.
USING AUDIO OUTPUT
To access the Audio Output settings screen for your receiver, do the following:
1 Press the MENU button and select the Settings tile from the Main Menu screen.
2 Highlight and select the Audio tile, and then select Audio Output.
3 From this screen, you can select your external digital-audio signal decoder’s capabilities
(for example, if your audio equipment supports decoding Dolby® Digital soundtracks), as
well as whether to enable the volume-leveling feature provided by SRS® TruVolume. TruVolume leveling helps prevent annoying volume fluctuations, such as loud commercials.
89
Chapter 11
Using Audio Output
Dolby Digital gives you the capability to enjoy program audio in surround sound. An
external decoder is required to enjoy this feature. Refer to your decoder’s user’s guide.
Note: Not all programs or events contain a Dolby Digital sound track.
Your new receiver uses an optical port for outputting digital audio. The optical output can
provide two audio data types: Dolby Digital and Linear PCM (only Dolby Digital can
provide full 5.1-channel sound).
•
•
Dolby/PCM: Select this option only if the stereo system or audio amplifier can both
decode Dolby Digital and also support Linear PCM digital audio signals.
PCM Only: Select this option only if the stereo system or amplifier cannot decode
Dolby Digital audio signals.
The audio output is also dependent on what is present in the program you are watching.
The table below shows what type of output you will hear:
Signal Present in Program
Optical Output Setting
Dolby Digital
PCM
Both
Dolby Digital Only
PCM Only
Dolby Digital/PCM
Dolby Digital
PCM (downmix)
Dolby Digital
PCM
PCM
PCM
Dolby Digital
PCM
Dolby Digital
Note: When both audio signals are present for a program or event, the receiver defaults to
Dolby Digital output unless you have selected PCM Only.
Note: If you have selected Dolby Digital Only but there is only PCM audio in the program,
you will hear nothing. This also applies to the analog-only left/right stereo audio outputs.
90
•
Line Mode: When you use this setting, in comparison to RF Mode, the dynamic range
is wider, which makes the music and loud noises louder, but voices quieter.
•
RF Mode: When you use this setting, in comparison with Line Mode, the dynamic
range is narrower, which makes music and loud noises quieter, but voices louder.
Volume leveling using SRS® TruVolume can be enabled in this mode, and helps
eliminate fluctuations in volume during commercials or when changing channels.
Receiver Customization
Resetting to Factory Defaults
RESETTING TO FACTORY DEFAULTS
You can reset the receiver to discard any changes you have made to receiver settings,
except for remote control addresses and locks. Resetting the receiver to factory default
settings also discards all Favorite Lists except for the All Chan, All Sub, and All HD lists.
You cannot reset the receiver to default settings to discard or reset a password you have
forgotten. No one but a DISH Customer Service Representative can reset the receiver to
bypass a password-protected parental control setting or lock.
1 Press the MENU button, select System Setup, and then Factory Defaults. The receiver
displays a Warning message to confirm that you want to reset the receiver’s preferences.
2 Select Yes.
SCHEDULING RECEIVER UPDATES
Your receiver comes scheduled to update Electronic Program Guide (EPG) information at
3:00 a.m. every day. This section describes how to change the settings for Updates. This
feature is enabled so that your DVR event data and Seek & Record timers remain current.
Note: This feature does not interfere with any scheduled event timers.
USING TV EVERYWHERE
Only DISH allows all the same live TV channels and everything saved to your DVR you
watch at home while on the go via your computer, smartphone or tablet. All you need is
Sling® Adapter and a broadband Internet connection to your Hopper HD DVR.
1 Connect your Hopper to broadband Internet. See “Connecting to Broadband Internet” on
page 100. You can verify your connection on the Broadband screen in Network Settings.
2 Plug in the Sling Adapter to a free USB port on your Hopper.
3 Log into dishonline.com on your computer, or download and install our free DISH Remote
Access mobile app for your smartphone or tablet.
4 Enjoy watching your live TV and recordings from your DVR wherever you go!
91
Chapter 11
Tips
TIPS
•
To take full advantage of Dolby Digital 5.1 surround sound, you need a digital optical
audio cable and audio equipment that supports this feature.
•
To use the Caller ID feature on the Hopper HD DVR, be sure to have the it connected
to an active telephone line and have Caller ID service from your phone company.
QUESTIONS
92
•
How can I see who has called me in the past? Open your Caller ID History by
pressing the MENU button, selecting System Setup, and then Caller ID History.
•
Why is my audio in another language? An alternate language may have been
selected. See the instructions on page 88 to change your preferred language.
•
How can I change the channel order in the Program Guide? You can switch from
ascending order (lowest numbered to highest) to descending order (highest numbered
to lowest) or back, by following the instructions on page 87.
Connections and Setup
How to Connect Your Hopper HD DVR
What you’ll find in this chapter:
• CONNECTING THE HOPPER HD DVR
• CONNECTING THE JOEY RECEIVER(S)
• CONNECTING TO YOUR DISH ANTENNA
• CONNECTING THE PHONE LINE
• CONNECTING TO BROADBAND INTERNET
• USING TROUBLESHOOTING TOOLS
93
Connections and Setup
Connecting the Hopper HD DVR
CONNECTING THE HOPPER HD DVR
This section describes how to connect the output ports on the back of your Hopper HD
DVR to a nearby TV. Select one of the following methods.
Note: If you would like to put your receiver in a location, for example, inside a closet or
cabinet, etc., be sure to test that the UHF-2G signals control the correct TV. If you need
another remote control, contact your DISH retailer, oryou can visit www.mydish.com
online, select Upgrades, then Products, and click on Remote & Accessories.
HDMI Connections
The HDMI connection provides high-quality audio and HD/SD video to your HDTV or HD
monitor using one cable. If your HDTV or HD monitor has an HDMI connection available,
this is the recommended connection.
Note: Connecting your TV directly to the audio/video outputs of your DISH receiver with
short cable(s) will assure a more vivid picture and enhance your viewing enjoyment.
2-4
1
HDMI
Connect receiver
and monitor with
HDMI cable
Turn monitor
and receiver on
and confirm picture
5
Confirm
sound and
volume
1 Connect an HDMI cable between the HDMI connection on the DISH receiver and HDTV
set or HD monitor.
2 Turn on your Hopper HD DVR or Joey Receiver and the connected TV/monitor using the
front panel buttons.
3 Confirm that you are getting a picture from the DISH receiver. Consult your HDTV user’s
guide if you need to change your HDTV to display from the correct Digital Audio/Video
input.
4 If you do not see a picture, see No Picture on TV Connected to Hopper on page 95.
Note: In most cases connecting the HDMI cable will provide plug-and-play control of the
HDTV or monitor’s display resolution and other settings. However, your HDTV set may
require selecting a different format to display video from the receiver during its setup.
5 Turn up the volume on your HDTV and confirm you have sound. If you don’t have sound,
your system may require you to connect stereo audio (red and white) RCA-type cables
between the receiver’s analog audio outputs and your system’s audio input connections.
94
Chapter 12
Connecting the Hopper HD DVR
YPbPr Connections (Hopper only)
The YPBPR (component) connections provide high-quality video from your Hopper HD
DVR to your HDTV or HD monitor. If an HDMI audio/video connection between your
Hopper and nearby TV is unavailable, then you should use a component video and
separate audio cables.
1
2
L
R
3
AUDIO
Connect receiver
and monitor with
YPbPr Component
connections
Connect receiver and
monitor with Audio cables
Turn monitor
and receiver on
and confirm
picture
4
Confirm
sound and
volume
1 Connect between the YPBPR component video connections on the Hopper HD DVR and
the nearby TV using component (usually red/green/blue) video cables.
2 Connect audio (red and white) RCA-type cables between the Hopper AUDIO OUTPUTS and
audio input connections that go with the YPbPr connectors on your HDTV or monitor.
3 If you do not see a picture yet, change the resolution setting on the Hopper. Use the steps
below and Setting Up to Display in HD on page 96.
4 Turn up the volume on your HDTV and confirm that you hear sound. Check the audio
cable connections if you don’t hear sound.
No Picture on TV Connected to Hopper
This section will help you make a picture appear on the nearby TV connected to Hopper in
case you could not do so in the previous sections.
1 Connect the three RCA-type cable connections (yellow for video and red/white for audio)
between the receiver outputs and the nearby TV.
2 Make sure that both the receiver and nearby TV are turned on (not in standby or powersaving mode).
3 Make sure the nearby TV is set to view the RCA-type audio/video inputs or source. Look
on the back of your HDTV or consult your HDTV user’s guide for more information.
4 Change the receiver’s HDTV settings, as described on page 96.
5 Switch to the nearby TV to display from the HD inputs (HDMI or component video) that
you selected in the previous sections. If you have a picture on the TV, you are finished.
6 Repeat steps 4 and 5 until the nearby TV displays a video image from Hopper.
95
Connections and Setup
Connecting the Hopper HD DVR
Setting Up to Display in HD
Once the receiver has been activated with qualifying DISH programming, you will be able
to receive high-definition programs to watch. Use the following steps to select the desired
HDTV format to display these programs on your TV.
1 Consult your HDTV user’s guide for the best HD-format resolution that the TV supports
(typically, this is either 1080i/1080p or 720p).
Note:
If you choose to view an On Demand event in 1080p, the receiver performs a brief
video test to determine your HDTV’s compatibility with that higher resolution.
2 Press the MENU button, select the Settings tile, then select Format TV, and then HDTV.
3 Select the TV Type that matches the high-definition resolution that your TV supports.
4 Also from this screen, you can select the Aspect Ratio option that matches your TV:
•
•
•
16x9 is the typical setting for a wide-screen HDTV display.
4x3 #1 is the setting to use on a 4x3 TV which uses vertical compression. When
viewing a 16x9 program using this setting, a compatible TV automatically makes the
picture in letterbox format (with black bars across the top and bottom of the screen), to
preserve the correct horizontal and vertical proportions of the wide-screen HD image.
4x3 #2 is the setting to use on a standard 4x3 TV which does not use internal vertical
compression. When viewing a 16x9 program on such a TV, black bars at the top and
bottom will not be displayed, and a high-definition image will appear tall and skinny.
5 When you are finished, highlight and select the Save option.
6 If required, set up your HDTV to display in the best format. If you are connected using an
HDMI cable, some HDTVs will automatically adjust the resolution setting to the receiver.
96
Chapter 12
Connecting the Joey Receiver(s)
CONNECTING THE JOEY RECEIVER(S)
This section describes how to connect the receiver’s HOME VIDEO NETWORK connection to
one or more cable-ready remote TV(s) located in other room(s) away from the Hopper.
You can use these instructions to connect TVs in your home to see live and recorded
programming from the Hopper. This installation uses your in-home coaxial cable system. If
your home does not have built-in cabling, it will be necessary to run these cables from the
Hopper HD DVR to each Joey Receiver conected to a remote TV. Due to the potential
complexity of this installation, you should have this professionally installed. Call the DISH
Customer Service Center at 1-800-333-DISH (3474) for more information.
If you need another remote control, be sure to order the replacement remote control kit for
Hopper and Joey that uses UHF-2G signals. Call your DISH retailer, or visit
www.mydish.com online, select Upgrades, then Products, and click on Remote &
Accessories.
1 Connect the HOME VIDEO NETWORK output on the back of the Hopper HD DVR to an
existing wall cable outlet using a coaxial cable.
2 Connect the Joey Receiver(s) in other room(s) to existing wall cable outlet(s) using
coaxial cable(s).
3 Connect the Joey Receiver(s) to an audio/video input of the remote TV in each room.
•
•
If it is a high-definition TV or monitor and an HDMI connection is available on the
remote TV, use a single HDMI cable from the output on the back of the Joey Receiver
to provide high-quality audio and HD/SD video. See page 94.
If it is a standard-definition TV or an HDMI connection is not available on the remote
TV, use composite (yellow) video and stereo audio cables from the outputs on the
back of the Joey Receiver. See page 95.
4 Turn on every Joey Receiver and remote TV connected to the in-home cabling system. If
you have not already done so, you may need to pair a remote control to each Joey.
5 Follow the on-screen prompts or included instructions for linking each Joey Receiver to
your Hopper HD DVR. (The Hopper is the host for DISH Whole-Home DVR services.)
6 Confirm that you see a picture from your Joey Receiver(s) on your remote TV(s).
•
•
97
If your picture looks good, then you are finished with this procedure.
If your TVs do not display a picture or if the picture is not as clear as you would like it
to be, repeat the steps to confirm all the connections. Coaxial connections should be
hand-tightened.
Connections and Setup
Connecting to Your Dish Antenna
CONNECTING TO YOUR DISH ANTENNA
Professional installers perform the installation of the Hopper Whole-Home DVR and Joey
Receiver(s). In general, the steps involved include the following:
1 Before you can begin connecting your Hopper HD DVR to your dish antenna, you must
first complete the preceding sections for connecting your TVs to the receiver.
2 Connect two RG-6 coaxial cables between the SATELLITE IN 1 and SATELLITE IN 2 ports on
the receiver’s back panel to two available ports on either the switch, DISH Pro Plus
Separator, or LNBF in your existing satellite system.
Note: If you are installing your receiver into a system with DISH Pro or DISH Pro Plus
LNBFs (and/or switches), you can have as much as 200 feet of cable between the LNBF
and the receiver. However, you must use only RG-6 coaxial cables rated up to at least
2150 MHz. Some cables may say “Swept tested for 2150 MHz.” If you have any doubt
about this, ask your DISH retail installer, or look on the container that the cable came in.
Do not use cable-company TV cables or cables from other satellite TV systems not rated
up to at least 2150 MHz. These other cables may cause signal loss. Do not any use
existing coax cables such as RG-59. Make sure to use waterproof F-connectors outdoors.
3 Peel off the blue stickers and affix them to the cables close to where they connect to the
SATELLITE IN 1 and SATELLITE IN 2 connections on the back of the receiver. The stickers
are inside the front cover of this guide.
4 On a paired remote control, press the MENU button, highlight and select the Settings tile,
then Diagnostics, and then Point Dish to display the Point Dish screen on the nearby TV.
5 When directed to do so by DISH instructions, select Check Switch. Then select Test.
6 The receiver begins performing the Check Switch tests. See Point Dish and Check Switch
on page 102. When it is finished, the Installation Summary screen is displayed.
7 Make sure the information on the Installation Summary screen identifies your system
correctly, showing all transponders and satellites applicable to your system. (For example,
to display nine days of guide data, you must receive either the 119°W or 72.7° signal.)
8 Select Close.
9 Select Close to exit the Point Dish screen. At this point, the receiver may walk you
through a procedure to download software. If this prompt displays, follow the instructions
and do not disturb the receiver until the nearby TV displays live TV from DISH. Otherwise,
press VIEW LIVE TV. After just a few minutes, you should be watching TV!
98
Chapter 12
Connecting the Phone Line
CONNECTING THE PHONE LINE
You must keep the receiver attached to an active phone line (or broadband Internet
connection) to order Pay-Per-View programs or events, access all of the DishHOME
Interactive features, or use other DISH services with your remote control.
Note: You may be able to use a wireless modem jack. However, this may not support all
the features of your receiver, such as Caller ID. Visit www.mydish.com online for more
information about compatible wireless modem products.
Note: If you have a Digital Subscriber Line (DSL), then you may have to install a DSL filter
between the Hopper back panel PHONE JACK and the telephone wall jack to successfully
connect with DISH. You can obtain a filter from your DSL provider.
Phone Line Connection
Run a telephone cable with a standard RJ-11 connector from the Hopper back panel
PHONE JACK to an active telephone wall-jack connection, as shown below.
Note: Do not try to connect a telephone cord to an Ethernet connection. (Images may
vary.)
Phone Jack
Optional
Phone Coupler
Phone Jack
Phone
Y-Adapter
Optional
Phone Coupler
99
Connections and Setup
Connecting to Broadband Internet
Phone System Setup
You must set up the receiver for your telephone system (touch-tone or rotary-phone
dialing), and set a telephone number prefix, if you need a prefix to dial an outside call.
Note: A prefix is different than an area code, which is required for all 10-digit dialing.
1 Press MENU button, select the Settings tile, then Network Setup, and then Phone Line.
2 Select the Touch Phone or the Rotary Phone option under Phone Type.
3 Select either the No Prefix or the Prefix Code option under Outside Line.
Note: Usually, you need a telephone number prefix only for business phone installations.
For most residential installations, all you need to do is set the telephone system type. The
default setting of No Prefix will allow correct dialing. If this is the case, select the Save
option to save the above settings, and stop here. If you know that you need to set a prefix,
then instead of selecting the Save option, skip to step 5.
4 If you selected No Prefix, then select Save.
5 If you selected Prefix Code, the receiver highlights the box where you must enter the
exact sequence used when dialing via an outside line. Use the on-screen number pad.
6 If you haven’t already, now select the option to Save.
CONNECTING TO BROADBAND INTERNET
If you have broadband (high-speed) Internet access at home, connect your receiver to
your home network. You can use this connection to order Pay-Per-View programming
using your remote control if you are not able to connect a telephone line. It also provides
access to additional content not usually available through your DISH package.
Refer to www.mydish.com/connectivity to view more detailed instructions on making this
type of connection.
100
Chapter 12
Using Troubleshooting Tools
USING TROUBLESHOOTING TOOLS
Your receiver and the remote control(s) have troubleshooting tools that a DISH Customer
Service Representative may ask you to use if you should ever run into issues while using
your equipment. Even though these tools are quite helpful, it is recommended that you
only use them when directed to on the phone by a DISH Customer Service representative.
Running System Wizard
A Customer Service Representative will instruct you when to access and run this wizard.
1 Press and hold the System Wizard (NUMBER 0) button on your remote control until the
SAT mode light blinks.
2 When the SAT mode light goes out, release the System Wizard button.
The receiver may take several minutes to complete the data-sharing process.
Resetting Your Receiver
A Customer Service Representative will instruct you when you should reset the receiver.
1 Press the red RESET button behind the door on the front panel of the receiver.
2
The receiver’s front-panel lights will blink and the receiver will restart.
The receiver may take several minutes to restart, reacquire the satellite signals, complete
any software downloads, and display live video again.
Receiver Tests
The Customer Service Representative may ask you to access the Diagnostics screen.
Remember to have an active phone line or broadband Internet connected to your receiver.
1 Press the MENU button, select the Settings tile, then Network Setup, and then Tests.
The Network Setup Tests screen contains various tests that a DISH Customer Service
Representative may ask you to initiate for your receiver:
•
•
•
•
•
Test Connection: Tests for a valid receiver telephone connection.
Call Out: If “No Dial Out Pending” is displayed, the receiver does not need to have its
smart card records updated.
View Counters: Shows you a list of diagnostic counters. Use PAGE UP and PAGE
DOWN to scroll through the list of counters displayed, if applicable.
Send Status: Sends data about your system to DISH for analysis. This should be
performed only as directed by a DISH Customer Service Representative.
HDMI: Select an available HDMI connection analysis from the list and test data will be
displayed on the right. Tests should be performed as directed by DISH instructions.
2 Select Close.
101
Connections and Setup
Using Troubleshooting Tools
Point Dish and Check Switch
The Point Dish and Check Switch screens are often helpful when you call the Customer
Service Center. You may be asked to display these screens when you contact DISH. Even
though there are items that can be changed, only change them when specifically directed
to do so when speaking to a DISH Customer Service Representative.
Warning: Running the Check Switch test while is receiving low or no signal will
result in incorrect receiver settings and cause you to lose channels. Do not run a
Check Switch test unless directed to do so when speaking to a Customer Service
Representative or DISH technician.
1 Press the MENU button, highlight and select the Settings tile on the Main Menu screen.
2 Highlight and select Diagnostics, and then Point Dish.
3 This screen shows you information to help maximize your satellite signal. The bar at the
bottom of the screen indicates the signal strength. Green shows a good signal, yellow is a
marginal signal, and red indicates the signal is not acceptable or is from the wrong satellite
transponder or orbital location.
4 Do not run a Check Switch test unless directed to do so when speaking to a Customer
Service Representative or DISH technician.
102
Reference
Troubleshooting and Remote Codes
What you’ll find in this chapter:
• TROUBLESHOOTING TABLES
• REMOTE CONTROL DEVICE CODES
103
Reference
Troubleshooting Tables
TROUBLESHOOTING TABLES
Use these tables if you have problems using your DISH system. Look in this section for a
description of the problem before calling the Customer Service Center. Some issues may be basic
misunderstandings of how the system works, especially when one is just becoming familiar with it.
To solve a particular problem, do the following:
1 Review the section in this Guide that relates to the problem.
2 If you cannot find a solution, then find the section in the following tables that relates to the problem.
•
Scan through the What’s Happening column until you find the problem.
•
Read more information in the Possible Reason column.
•
Try each of the suggested solutions in the What to Do column.
3 Sometimes resetting the receiver can fix a minor problem. See Resetting Your Receiver on
page 101.
4 Make sure your TV is tuned to the correct channel or input/source to view satellite TV programs.
5 Make sure your remote control has fresh batteries installed. If you see the Remote Battery Low
warning on your TV screen, it’s time to change the batteries. See the instructions on page 13.
6 Make sure that your receiver is connected to an active telephone line or home network with broadband Internet access. See more information and instructions on page 100.
7 Check for anything that might be blocking the dish antenna’s view of the sky, such as tree
branches or accumulated snow.
8 For more information, call the DISH Customer Service Center at 1-800-333-DISH (3474), or visit
the www.dish.com website, or www.mydish.com/support online for technical support information.
Note: Before contacting the DISH Customer Service Center, have ready the date of purchase and
either your customer account number, or the receiver conditional access number and receiver
model number. Press the SYSTEM INFO button on the receiver’s front panel to display the System
Information screen and find these numbers (See Ordering Your Programming Packages on
page 4). Also, write down any error messages that the receiver has displayed on your TV screen.
104
Reference
Troubleshooting Tables
Message Numbers
Message
Number
001
Possible Reason
There may be a problem with the
multi-dish switch.
What to Do
Check the coaxial cables and their connections to and from the
multi-dish switch. Make sure that all required cables are in place,
and check that all the cable connections are tight (and dry,
especially for outdoor cables). Call the Customer Service Center
at 1-800-333-DISH (3474) for help and to run Check Switch as
described on page 102. .
•
002
Heavy rain, snow, or thick cloud
cover may be interfering with the
transmission of the satellite signal,
or there may be other interference.
•
•
•
Note the local weather conditions. Remove any snow or other
debris which may have collected on the satellite dish itself.
Make sure that the satellite dish has a clear line of sight to the
satellite. Check whether tree branches or leaves have grown
into the line of sight.
Make sure that the satellite dish is aimed at the satellite.
Check the strength of the signal using the Point Dish screen
as described on page 102. Consult your installer to re-aim the
dish, if necessary, to obtain the strongest possible signal.
Make sure the system uses RG-6 coaxial cable; if not, call
your DISH system dealer, technician, or installer.
Check the dish-to-receiver cable run length. If your system is
DISH Pro, it can be as long as 200 feet. If it is a Legacy
system, it should not be more than 100 feet. Check the coaxial
cables and their connections to and from the multi-dish switch.
Make sure that all required cables are in place, and check that
all cable connections are tight (and dry, especially for outdoor
cables). If this does not work, contact DISH Customer Service
at 1-800-333-DISH (3474) for help and to perform the Check
Switch test described on page 102.
003, 004
The wrong type or quality of coaxial
cable may be used in the system, or
the cable run length may be too long.
There may also be a problem with
the multi-dish switch.
005
The receiver may not have received
authorization for programming yet.
The satellite dish may have moved
so that it is no longer picking up the
satellite signal. The cable
connections may have loosened or
have moisture inside. There may be
an interruption of the satellite signal.
006
An active telephone line or a
broadband Internet connection may
not be attached to your receiver.
You must connect each installed receiver to an active telephone
line or to a home network with broadband Internet access.
011, 012
Viewers in specific areas are
prohibited from watching certain
programs. For example, viewers
who live close to a particular football
stadium may be prohibited from
watching live football games that are
played in that stadium.
Program and event providers specify which programs are
blacked out for specific areas, and not DISH.
•
•
•
013, 014
You may have tried to tune to a
program on a channel that you don’t
subscribe to.
•
If you have authorized the receiver (added it to your account),
wait a few minutes to see if the message is removed. Make
sure that all required cables are in place, and check that all
cable connections are tight (and dry, for outdoor cables).
Make sure that the satellite dish has a clear line of sight to the
satellite. Check whether branches or leaves have grown into
the line of sight. Check that the Signal Strength bar on the
Point Dish screen is green and displays the word Locked, as
described on page 102. If not, contact your installer to re-aim
the satellite dish. If you have not authorized the receiver, call
DISH Customer Service Center at 1-800-333-DISH (3474).
Before you can tune to a program on a channel, it must be part
of your DISH package. Call DISH Customer Service Center at
1-800-333-DISH (3474) to add to your subscription, or if you
believe this message was displayed on your screen by
mistake.
If you already subscribe to the channel and you see these
messages, then first try resetting the receiver (page 101).
105
Reference
Troubleshooting Tables
Message
Number
Possible Reason
What to Do
•
015
You may have just plugged in the
receiver and it is acquiring the
satellite signal or the receiver may
have temporarily lost the signal.
018
The receiver may not be connected
to an active telephone line or
broadband Internet connection.
•
•
•
•
•
Wait a few minutes to see if the message goes away. Make
sure that all required cables are in place, and check that all
cable connections are tight and dry (for outdoor cables).
Make sure that the satellite dish has a clear line of sight to the
satellite. Check whether branches or leaves have grown into
the line of sight.
Check that the Signal Strength bar in the Point Dish screen is
green and displays the word Locked, as described on
page 102. If not, contact your installer to re-aim the satellite
dish.
You must connect the receiver to an active telephone line or
broadband Internet connection at all times.
Call the Customer Service Center at 1-800-333-DISH (3474)
for help checking the credit limit and/or to get authorization to
make a purchase.
If you have authorized the receiver, wait a few minutes to see
if the message is removed. Make sure that all required cables
are in place, and check that all cable connections are tight and
dry (for outdoor cables).
Make sure that the satellite dish has a clear line of sight to the
satellite. Check whether branches or leaves have grown into
the line of sight.
Check that the Signal Strength bar in the Point Dish screen is
green and displays the word Locked, as described on
page 102. If not, contact your installer to re-aim the satellite
dish. If you have not authorized the receiver, call the
Customer Service Center at 1-800-333-DISH (3474).
022
The receiver may not have received
authorization for programming yet.
The satellite dish may have moved
so that it is no longer picking up the
satellite signal. The cable
connections may have loosened or
have moisture inside. There may be
an interruption of the satellite signal.
028
The receiver may need to get new
software before you can use it to
order Pay-Per-View programs.
Turn the receiver off. Doing this allows the receiver to download
new software via the satellite signal. The download may take
several minutes; do not disturb or unplug the receiver during this
time. When the download is done, you will be able to use it to
order Pay-Per-View programs.
059
You may have tried to close an
installation menu without having
done the Check Switch test.
If your setup includes a multi-dish switch, you must contact DISH
Customer Service at 1-800-333-DISH (3474) for help and to run
the Check Switch test as described on page 102.
060
You may have aimed the satellite
dish at one satellite, but selected the
option for another satellite on the
Point Dish screen.
061
The receiver is downloading current
software.
It is very important for the receiver to get the latest software to
function properly. The download may take several minutes. Do
not disturb or unplug the receiver during this time.
074
The receiver gives you three
chances to enter the correct
password. If you fail to do so, the
receiver “times out” and will not allow
you to try again for several minutes.
Wait a few minutes and then try again to enter the password.
Note: The “time out” feature is designed to prevent someone
from trying password after password until he or she happens to
guess the right one and gains unauthorized access to the
receiver.
You may not have connected the
receiver to an active telephone line
or broadband Internet connection, or
the telephone line or Internet
connection may be defective.
Connect the receiver to an active telephone line or broadband
Internet connection. Make sure that the telephone line or Internet
connection to which you connect the receiver is working
properly.
Note: To order Pay-Per-View programs, you must keep each
receiver connected to an active telephone line or broadband
Internet connection. The receiver uses the telephone line to
make toll-free calls (when the phone is not in use) or the Internet
connection to send purchase information to DISH.
You may have selected the Reset
Factory Defaults option.
IIf you want to reset the receiver to its factory default settings,
select Yes. If you do not want to reset factory defaults, select No.
078, 079,
080
093
106
•
•
•
•
Make sure that you have selected the option for the right
satellite on the Point Dish screen, as described on page 102.
Make sure that the cable(s) for the satellite you have selected
is connected to the LNBF that receives signals from that
satellite. Re-aim the satellite dish at the right satellite.
Reference
Troubleshooting Tables
Changing Channels
What Is Happening
Possible Reason
You enter a desired channel
number. The channel changes,
but the new channel is not
exactly the channel you
entered.
• You may have made a
mistake entering the
channel number, or the
channel number you
entered may be invalid. If so,
the channel displayed is the
closest possible to the
channel you entered.
• If a Favorites List other than
All Channels is applied, the
receiver will skip channels
that are not on the applied
list.
•
When changing channels, using
the Program Guide, Browse, or
other channel lists, some of
your channels are not listed.
•
If you entered the number for
a channel that is not inlcuded
in your DISH package, the
receiver will change to the
channel and display a
message indicating it is not
part of your subscription.
If a Favorites List other than
All Channels is applied, the
receiver will skip channels that
are not on the applied list.
• If you have set up the
receiver to hide adult
channels or to hide locked
channels, these channels
are not displayed in the
Program Guide or other
channel lists.
What to Do
•
•
•
•
•
•
Carefully try entering again the channel number
that you want.
Reset your receiver (page 101).
Press GUIDE on the remote control and change
the Favorties List.
If you want to add a channel to your DISH
package, visit www.mydish.com/myaccount,
select the My Account option from the receiver’s
main menu, or contact the DISH Customer
Service Center at 1-800-333-DISH (3474).
Press the GUIDE button on the remote control,
and press it again until it says All Channels at the
top of the screen.
Change the Hide Adult or Hide Locked setting to
include these channels in the Program Guide and
other channel lists.
Remote Control
What Is Happening
Possible Reason
You cannot find the remote control.
N/A
When you press a button on the remote
control, the receiver does not do what
you expect.
• The remote control may be
missing batteries, the batteries
may be incorrectly placed in the
remote, or the batteries may be
weak or dead.
• The remote control may be in the
wrong mode.
What to Do
Press the LOCATE REMOTE button on
the receiver front panel (the control
buttons are behind the left front-panel
door of the Hopper). If it is within range
of the receiver and the batteries are not
dead, the remote control will emit a
series of tones to help you find it. If the
remote control is permanently lost or too
damaged to use, you may order a
replacement by visiting mydish.com
online, logging in to your account, and
selecting Remotes & Accessories under
Upgrade Products.
•
•
If the batteries are missing or dead,
insert fresh AAA-size batteries.
If the remote has fresh batteries,
check whether they are placed
according to the label diagram. If not,
remove them and place correctly.
Press the mode button for the device
you want to control.
107
Reference
Troubleshooting Tables
What Is Happening
Possible Reason
What to Do
•
Make sure the remote control
antenna is connected to the REMOTE
ANTENNA port on the receiver’s back
panel.
Make sure the remote control
antenna is not touching any other
equipment or any back panel
connections on your receiver.
Provide space above the receiver so
the antenna can be installed straight
up.
Place the receiver higher than the
other equipment in your
entertainment center.
Move the antenna away from the
back of the entertainment center
wiring and other electronics using a
short piece of coaxial cable (3 to 5
feet).
Connect an F-connector attenuator
between the back panel REMOTE
ANTENNA port on the Hopper and the
remote control antenna. Refer to
page 69.
•
Your UHF Pro remote control does not
work well from far away.
You may be experiencing UHF
interference from objects near your
receiver antenna.
•
•
•
When you press the remote control
POWER button to turn the receiver on,
the receiver front panel power light
does not light up.
•
•
The remote control may be in the
wrong mode.
Other lights are too bright.
•
•
Press the mode button for the device
you want to control.
Try other remote control buttons to
see if the receiver is responding.
•
Replace the remote batteries with
fresh ones.
•
Remote control is not operating
properly or the batteries are weak or
dead.
•
The receiver power cord is not
plugged into a power outlet, or there
may be a problem with the power.
•
Check that the receiver power cord is
not damaged, and that the plug is
inserted correctly into the outlet.
•
You may be using the wrong remote
control for the menus you are trying
to operate.
•
Make sure you are using the correct
remote control to control your TV
and receiver menus.
Program Guide or the Browse Banner
What Is Happening
Possible Reason
What to Do
•
In the Program Guide, some channels
have a red background.
Red means that you have not
subscribed to that channel. You must
subscribe to a channel before you can
tune the receiver to it.
•
If you want to subscribe to a new
channel or channels, go to
mydish.com/myaccount, select the
My Account tile from the receiver’s
Main Menu screen, or call the DISH
Customer Service Center at
1-800-333-DISH (3474).
Reset the receiver (page 101).
You try to display future programs in
the Program Guide or Browse Banner,
but you cannot.
The Program Guide and Browse
Banner can display the scheduled
programming for up to nine days.
Try displaying the Program Guide
again later. By that time, it may show
programs for the time and date you
want.
You try to display programs that have
ended in the Program Guide or
Browse Banner, but find you cannot.
The Program Guide and Browse
Banner can display only programs that
have not yet ended. These features
cannot display a time earlier than the
present.
Contact the program providers (for
example, the channel or network
affiliate that broadcast the program) for
details on past programs.
108
Reference
Troubleshooting Tables
What Is Happening
Possible Reason
What to Do
• You may have applied a Favorites
List other than the list named All
Chan.
• You can change the applied
Favorites List while using the
Program Guide by pressing the
remote control GUIDE button.
You can choose another custom
Favorites List, the All Chan list,
which includes all the channels,
the All Sub list, which includes all
subscribed channels, and the All
HD list, which includes all
subscribed HD channels.
• You may have set up the Program
Guide so that when the receiver is
locked, the Guide hides adult
channels
• Unlock the receiver for the
Program Guide to display adult
channels.
When you are using the Program
Guide or Browse Banner, some
channels are missing.
Watching a Program
What Is Happening
The TV Viewing Status screen is
displayed when you turn on the TV.
The receiver’s front panel power light
is on, but the TV image is black, blue,
or snowy.
Possible Reason
•
All three Hopper tuners are
currently in use across your
Whole-Home DVR system.
•
The TV set may not be
working properly.
The TV may be connected to
the wrong input.
If the TV and the receiver are
working properly, there may
be interference with the
satellite signal.
•
•
What to Do
•
From this screen, you can choose to join
one of the live TV programs being viewed on
another TV, play back a DVR recording of a
PrimeTime Anytime™ or other program, or
view an On Demand program or event.
•
Verify the TV is set to the correct input or
channel for your setup.
Make sure that the TV set is plugged into a
working electrical outlet.
Make sure that the TV is turned on.
Make sure that the TV is connected properly
to the receiver.
Make sure that the TV’s text mode and
Closed Captioning features are turned off.
Make sure that the TV brightness and
contrast are adjusted correctly.
•
•
•
•
•
•
•
The TV image has pixels (small
squares), is freezing, or you have
intermittent black screens.
The receiver’s front panel power light
is on, and there is a picture on the TV
screen, but the picture:
•
•
•
•
•
Your receiver may be
experiencing signal loss due to
something blocking your dish’s
view of the sky, the dish being
mis-aligned, or weather.
•
has sparkles or is grainy
has a herringbone pattern
lacks color or vertical hold
wobbles
looks “washed out” or fuzzy.
•
If the receiver is connected to
the remote TV using the RF or
VHF connections, there may
be a strong local broadcast on
the same channel, or a
channel adjacent to the one to
which the TV is tuned.
The TV set may not be
working properly.
•
•
Make sure that the satellite dish has a clear
line of sight to the satellite.
Check whether branches or leaves have
grown into the line of sight.
Make sure that the satellite dish is aimed at
the satellite. Check the strength of the signal
using the Point Dish screen, as described
on page 102. Consult your DISH installer to
re-aim the dish, if necessary, to obtain the
maximum possible signal strength.
Note the local weather conditions. Heavy
rain, snow, or cloud cover may be interfering
with transmission of the satellite signal.
Remove any snow or other debris which
may have collected on the satellite dish.
•
Make sure that the TV is connected properly
to the receiver.
•
Make sure that the TV brightness and
contrast are adjusted correctly, and that the
TV is working properly.
109
Reference
Troubleshooting Tables
What Is Happening
Possible Reason
What to Do
•
•
There may be interference
from other nearby electrical
devices (such as radio towers,
cellular telephones,
computers, microwave ovens,
radios, stereos, or TVs).
•
•
•
•
A “black box” fills almost all of the TV
screen.
You may have turned on the
Closed Captioned feature on the
TV, and put that feature into Text
mode.
The TV screen is all blue.
You may have connected the
receiver to an input on the TV
that is incorrect for the signal
output from the receiver.
Check other nearby electrical devices as
possible sources of interference.
Check that all required coaxial cables are in
place.
Check for moisture or water leaking into all
connections. Dry them out if needed, then
seal them with coaxial cable sealant.
Check the length of cable between your dish
and receiver. If it is greater than 200 feet,
contact the person who installed your
system.
Make sure the system is properly grounded.
Using the TV remote control and/or menus
displayed by the TV (not the receiver remote
control or the menus displayed by the
receiver), turn off the Closed Caption feature.
•
Check your TV owner’s manual for the
correct TV input to use for the signal output
from the receiver (1080i or 720p for HD).
Favorites Lists
What Is Happening
Possible Reason
What to Do
You press the remote GUIDE
button while the Program Guide
is displayed. You find that you
can apply only the lists for My
Channels, My HD Channels or
All Channels.
If you have not added channels
to any custom Favorites List, you
will be able to apply only the My
Channels, My HD Channels or
All Channels lists.
You must add channels to a custom Favorites List
before you can apply it.
You try to apply an empty
Favorites List. The receiver
displays an ERROR message.
The receiver will not allow you to
apply an empty list.
Choose another list to apply, or add at least one
channel to the empty list.
A Favorites List does not show
channels that you know you
have added to it.
If you have set the receiver to
hide adult channels or hide
locked channels, these channels
are not included in the Program
Guide or other channel lists.
Change the Hide Adult or Hide Locked setting on
your receiver if you do not want these channels
excluded from the Program Guide or other channel
lists. Refer to page 45.
Possible Reason
What to Do
You disabled the PrimeTime
Anytime™ feature, but you
notice that a tuner is still
recording during prime time.
Enabling or disabling the
PrimeTime Anytime™ feature
must be completed at least 20
minutes before prime-time hours
begin. Otherwise, the change will
not apply until the next day.
Make sure you make any changes to the PrimeTime
Anytime feature at least 20 minutes before the
prime-time hours begin. See “Using PrimeTime
Anytime™” on page 58.
You try to set up an event timer
and the receiver displays a
message noting that the
program is locked.
You must enter the password
before you can create an event
timer for a locked program.
To create an event timer for the program, first enter
the password.
Timers
What Is Happening
110
Reference
Troubleshooting Tables
What Is Happening
Possible Reason
What to Do
You try to set up an event timer
and the receiver displays a
message noting that the
program is a Pay-Per-View
event.
You must order a Pay-Per-View
event before you can create an
event timer for it.
To create an event timer for the event, first order it.
You try to set up an event timer,
but the receiver displays an
Error message giving you the
option to delete an event timer
that was set up earlier.
You already have set up the
maximum number of event
timers.
To create a new event timer, delete one of the event
timers you set up earlier.
You set up an event timer, but
the receiver does not tune to the
channel of the program, or does
not record the program.
You may have set up a
Reminder, but what you should
have set up is an Auto-Tune or a
DVR timer.
Remember that a Reminder just reminds you that
the program is about to start. An Auto-Tune timer
reminds you and tunes the receiver to the program.
A DVR timer reminds you, tunes the receiver, and
records the program to the receiver’s hard drive. A
DVR timer can operate only if the receiver memory
has enough space.
You set up an event timer for a
program that is repeated (such
as a regularly scheduled
program), but the timer does not
operate for a showing of the
program.
•
•
•
•
You set up an event timer, but
the timer does not operate at all.
•
You may have set up a timer
with an incorrect frequency.
You may have set up a
duplicate timer.
The timer may not be current.
Remember that a Once event timer operates just
one time. A Mon.-Fri. event timer operates Monday
through Friday on the same channel at the same
time. A Daily event timer does the same, Monday
through Sunday. A Weekly event timer operates
once a week on the same channel at the same time.
All Episodes timers will record all episodes of that
program, while New Episodes timers will record only
the current season. Seek & Record™ timers record
all programs matching your search term. See
Reasons Why Timers are Skipped on page 62.
You may have several timers
set up for the same time and
the event timer you set is at a
lower priority than others.
•
Check the Priorities as described on page 60.
•
Check the Timer Frequency as described on
page 60.
See Reasons Why Timers are Skipped on
page 62.
You may have selected New
Episodes and the timer you
set was for an episode that is
not new.
•
You set up a Seek & Record™
timer and you notice that you
have no space left on your My
Recordings.
The Seek & Record™ timer may
have included more matching
programs than what you
expected.
Delete that Seek & Record™ timer and begin again.
See page 64.
You stop the operation of an
event timer for one showing of a
program that is repeated (such
as a regularly scheduled
program), but the timer
operates for the next showing.
Stopping the event timer applies
only to the current showing of the
program.
To stop all operations of a repeated event timer, you
must delete the event timer.
Note: The receiver deletes a Once event timer
when it operates.
The receiver does not display
the program name for a manual
event timer.
The receiver may not be able to
display a program name for a
manual event timer.
Use the Program Guide or a printed schedule to find
the program name.
You set an event timer.
The event timer misses the
beginning or the end of a
program.
The program may have started a
little earlier than scheduled, or it
may have run over its scheduled
ending time.
•
•
Use the Start Early & End Late options, except for
a Pay-Per-View event.
Use a manual event timer to start any event timer
at the times you set yourself, except for a PayPer-View event.
111
Reference
Troubleshooting Tables
Hearing a Program
What Is Happening
Possible Reason
•
The receiver’s front panel power
light is on and there is a good
picture on the TV set, but you do
not hear any sound.
You hear a foreign language
with a program.
•
•
You may have muted the
sound, or set the volume so
low that you cannot hear it.
The audio connections may
not be properly connected.
You have selected Dolby
Digital Only when there is no
Dolby Digital soundtrack.
What to Do
•
•
•
•
Check the volume level on the TV or audio
device. Turn off the mute or turn up the volume,
as required.
Check the audio connectors and cables from the
receiver to the TV or the sound system.
Check the TV speakers or the sound system.
In the Dolby Digital menu, select Dolby Digital/
PCM for the audio output. If your decoder/
amplifier will not accept Linear PCM digital input,
use the analog connections instead.
You may have set the receiver to
select an alternate audio
language. The program may be
in a foreign language.
Press the MENU button on your remote. From the
Main Menu, select Preferences, then Alternate
Audio, and choose the language that you prefer.
Possible Reason
What to Do
Caller ID
What Is Happening
Caller ID is not working.
•
You do not have Caller ID
service from your local phone
company.
•
Your phone line is not
connected to the phone jack
on the back of the receiver.
•
You do not have the Caller ID
option enabled.
•
Verify that Caller ID is a service provided by your
local phone company and you subscribe to it.
•
Verify that you have connected the phone line to
the phone jack on the back of the receiver.
•
Press the MENU button on your remote. From
the Main Menu, select Settings, then Network
Setup, and then Caller ID. Select the Enable
option and then Save.
Telephone for Voice/Data/FAX
What Is Happening
Possible Reason
What to Do
While you are making a
telephone call, you hear
“clicks.”
The receiver may have tried to
send Pay-Per-View purchase
information to DISH using your
phone line. When the receiver
found that the telephone was
busy, it automatically
disconnected.
You do not have to do anything. You can always use
your telephone line, because the receiver
automatically hangs up if it finds the line is busy.
You pick up the telephone to
make a call, but you do not hear
a dial tone.
The receiver was sending PayPer-View purchase information
to DISH using your phone line.
When the receiver found that the
telephone was busy, it
automatically disconnected.
Hang up, and then pick up the telephone again to get
a dial tone.
112
Reference
Troubleshooting Tables
What Is Happening
Possible Reason
What to Do
Your computer or FAX machine
tries to send a FAX or modem
transmission, but fails.
The receiver was sending PayPer-View purchase information
to DISH using your phone line.
When the receiver found that the
telephone was busy, it
automatically disconnected. The
fax or modem found that there
was no dial tone, and cancelled
the transmission.
Re-send the FAX or modem transmission.
Your computer or FAX machine
was receiving a FAX or modem
transmission, but an error
occurred.
The receiver may have tried to
send Pay-Per-View purchase
information to DISH using your
phone line during the fax or
modem call. When the receiver
found that the telephone was
busy, it automatically
disconnected. This generated
“clicks” that caused an error in
the FAX or modem transmission.
Have the sender resend the FAX or modem
transmission.
Locks
What Is Happening
Possible Reason
What to Do
You set a lock (for example, a lock on
programs by ratings), but the lock
does not take effect.
You may not have locked the
receiver.
You must lock the receiver to apply any lock
that you have set.
You forgot the password, so that you
are unable to unlock the receiver.
You may not have written down
the password.
Call the Customer Service Center at 1-800333-DISH (3474).You must be able to verify
your account information with the customer
service representative.
Buying a Pay-Per-View Program
What Is Happening
Possible Reason
What to Do
Someone orders a Pay-PerView program without your
permission.
You may have been away from
the receiver, and someone else
used it.
Lock the purchase of Pay-Per-View programs.
Remember that you are responsible for all Pay-PerView purchases, whether or not you authorize such
purchases. If you lock Pay-Per-View purchases,
then anyone who wants to order a Pay-Per-View
program must enter the password.
You find that you are not able to
order a Pay-Per-View program.
The receiver may not be
connected to an active telephone
line or broadband Internet
connection.
Connect each receiver to a phone line or a
broadband Internet connection for Pay-Per-View
ordering using the remote control.
You find that you are not able to
cancel a Pay-Per-View
program.
You ordered a Pay-Per-View
program, and then decided not to
watch it.
You cannot cancel an order for a Pay-Per-View
program, whether it was just ordered or ordered
earlier.
Your setup includes more than
one receiver. You order a PayPer-View program, but it does
not appear on all of the
receivers.
You ordered a Pay-Per-View
program, and want it to be
available on all the receivers in
your setup.
If you want to watch a Pay-Per-View program on
TVs connected on each receiver, you must order the
program for each receiver but you only pay for the
program once.
113
Reference
Troubleshooting Tables
Menus
What Is Happening
You were using a menu, and it
suddenly closed.
114
Possible Reason
What to Do
You may not have done anything
with the remote control or front
panel buttons for several
minutes.
The receiver has a time-out feature that
closes any menu after several minutes of no
activity. This will discard any changes you
have made, but otherwise does no harm to
the receiver. Start over again.
Reference
REMOTE CONTROL DEVICE CODES
Remote Control Device Codes
The Hopper contains manufacturer codes for programming the remote to control your TV, VCR,
Blu-ray Disc™ or DVD player, or audio amplifier. Every attempt has been made to include all
codes. If your device brand is not listed or if the codes do not work, the remote may not control
your device. In some cases, codes may operate some but not all buttons shown in this guide.
115
Reference
Remote Control Device Codes
116
Appendix
What you’ll find in this chapter:
• LIMITED WARRANTY
• RESIDENTIAL CUSTOMER AGREEMENT
• FCC COMPLIANCE
117
Appendix
LIMITED WARRANTY
This Limited Warranty is a legal document. Keep it in a safe place. Remember to retain your Bill of Sale for
warranty service! Any items returned without a copy of the Proof of Purchase will be considered out of
warranty.
What the Warranty Covers
This warranty extends only to the original user of the equipment and is limited to the purchase price of each part.
EchoStar Technologies Corporation and its affiliated companies (“EchoStar”) warrant this system against defects in
materials or workmanship as follows:
•
Labor: For a period of one (1) year from the original date of purchase, if EchoStar determines that the
equipment is defective subject to the limitations of this warranty, it will be replaced at no charge for labor.
EchoStar warrants any such work done against defects in materials or workmanship for the remaining
portion of the original warranty period.
•
Parts: For a period of one (1) year from the original date of purchase, EchoStar will supply, at no charge,
new or re-manufactured parts in exchange for parts determined to be defective subject to the limitations of
this warranty. EchoStar warrants any such replacement parts against defects in materials or workmanship
for the remaining part of the original warranty period. Note: “Parts” means items included in this package,
which may include the satellite dish assembly, receiver, LNBF, remote control, or dish mounting hardware.
It does not include other parts purchased separately.
What the Warranty Does Not Cover
•
This warranty does not cover installation of the system. If applicable, such installation will be warranted
under a separate installation agreement.
•
This warranty does not cover consumer instruction, physical setup or adjustment of any consumer
electronic devices, remote control batteries, signal reception problems, loss of use of the system, or
unused programming charges due to system malfunction.
•
This warranty does not cover cosmetic damage, damage due to lightning, electrical or telephone line
surges, battery leakage, fire, flood, or other acts of Nature, accident, misuse, abuse, repair or alteration by
other than authorized factory service, use of accessories not recommended by the receiver manufacturer,
negligence, commercial or institutional use, or improper or neglected maintenance.
•
This warranty does not cover equipment sold AS IS or WITH ALL FAULTS, shipping and handling,
removal or reinstallation, shipping damage if the equipment was not packed and shipped in the manner
prescribed, nor equipment purchased, serviced, or operated outside the continental United States of
America.
Legal Limitations
REPLACEMENT AS PROVIDED UNDER THIS WARRANTY IS YOUR EXCLUSIVE REMEDY. ECHOSTAR
SHALL NOT BE HELD LIABLE FOR ANY INCIDENTAL OR CONSEQUENTIAL DAMAGES FOR BREACH OF
ANY EXPRESSED OR IMPLIED WARRANTY ON THIS SYSTEM, NOR FOR ANY INCIDENTAL OR
CONSEQUENTIAL DAMAGES RESULTING FROM THE USE OF, OR INABILITY TO USE, THIS SYSTEM.
UNDER NO CIRCUMSTANCES SHALL ECHOSTAR'S LIABILITY, IF ANY, EXCEED THE PURCHASE PRICE
PAID FOR THIS SYSTEM. EXCEPT TO THE EXTENT PROHIBITED BY APPLICABLE LAW, ANY IMPLIED
WARRANTY OF MERCHANTABILITY OR FITNESS FOR A PARTICULAR PURPOSE ON THIS SYSTEM IS
LIMITED IN DURATION TO THE PERIOD OF THIS WARRANTY. ECHOSTAR RESERVES THE RIGHT TO
REFUSE TO HONOR THIS WARRANTY IF ECHOSTAR DETERMINES ANY OF THE ABOVE EXCEPTIONS TO
HAVE CAUSED THIS SYSTEM NOT TO HAVE PERFORMED PROPERLY. THIS WARRANTY SHALL BE VOID IF
ANY FACTORY-APPLIED IDENTIFICATION MARK, INCLUDING BUT NOT LIMITED TO SERIAL OR
CONDITIONAL ACCESS NUMBERS, HAS BEEN ALTERED OR REMOVED. THIS WARRANTY SHALL ALSO BE
VOID IF THE RECEIVER HAS BEEN OPENED BY AN UNAUTHORIZED PERSON.
If You Need Assistance
1
118
Call the DISH Customer Service Center at 1-800-333-DISH (3474). Have the date of purchase and either
your customer account number, the receiver conditional access number, or the receiver model number
ready. Display the System Info menu to find these numbers.
Appendix
2
3
4
5
6
A Customer Service Representative will assist you.
If the Representative determines you should return any equipment, you will be directed to call a Return
Authorization representative. Before shipping any equipment, you must talk to a Return Authorization
representative and must obtain a Return Authorization (RA) number.
You will be given the appropriate address for which to return your equipment. Whether under warranty or
not, you will be responsible for the cost of shipping back the defective equipment. For faster service, see
the Advance Exchange Program below.
Returned equipment must be packaged properly, using either the original shipping materials or the
packaging in which the replacement equipment is shipped. Include a copy of the Bill of Sale. Any items
returned without a copy of the Proof of Purchase will be considered out of warranty. Follow the instructions
given to you by the Customer Service Representative.
Write the RA number in large, clearly visible characters on the outside of the shipping box that you use to
return the equipment. To avoid confusion and misunderstandings, shipments without an RA number
clearly visible on the outside of the box will be returned to you at your expense.
DISH Network’s Exchange Programs
DISH Network offers two options if you need to replace your satellite receiver equipment or its accessories.
Advance Exchange Program
The Advance Exchange Program allows you to have replacement equipment shipped immediately to you
(depending upon where you live, it could take three to five business days). Along with replacement equipment, you
will receive a prepaid shipping label and instructions on how to return the defective equipment. The shipping charge,
for receiving replacement equipment and returning the defective equipment, is a one-time fee based on EchoStar's
competitive bulk shipping rates (additional charges may apply outside of the continental US). This fee will be
charged to your billing account or your valid credit card. If you do not ship the defective equipment to EchoStar
within ten days after receiving the replacement, your billing account or credit card will be charged the market price of
the replacement. If you return the defective equipment after ten days, you will receive a full refund less an
administrative fee.
If your equipment is out of warranty and can be repaired your billing account or credit card will be charged the
standard repair fee for the replacement. If damage to the defective equipment is found, which EchoStar in its sole
discretion determines has voided the warranty, or makes the equipment unrepairable, billing account or credit card
will be charged the market price of the replacement.
Post Receipt Exchange Program
You may choose to ship the equipment to us at your cost. To provide faster service, upon receipt of your equipment
you will be shipped a replacement. Your original equipment will not be available for return.
The equipment you return will be checked to verify whether it is covered under this warranty. If the defective
equipment is covered under this warranty, it will be replaced and shipped back to you at no additional cost
(additional charges may apply outside of the continental US).
If your equipment is out of warranty and can be repaired your billing account or credit card will be charged the
standard repair fee for the replacement. If damage to the defective equipment is found, which EchoStar in its sole
discretion determines has voided the warranty, or makes the equipment unrepairable, your billing account or credit
card will be charged the market price of the replacement.
Accessory Warranty
An accessory is any DISH Network branded equipment, displaying the DISH Network logo, excluding the receiver,
cables and hookups, and non-mechanical components. A one-year warranty becomes effective upon the activation
of the DISH system or date of purchase, if bought separately. A proof of purchase is required to verify the purchase
date. If an accessory has an expired warranty, no exchange will be issued. You may purchase replacement
accessories from DISH Network or your local retailer.
119
Appendix
Residential Customer Agreement
RESIDENTIAL CUSTOMER AGREEMENT
Thank you for choosing DISH Network®.
To view this Residential Customer Agreement in Spanish, please visit dish.com or call us at
800-333-DISH (3474) and we will send you a copy. Para ver este acuerdo en español por favor visite dish.com o
llame all 1-800-333-DISH (3474) y le enviaremos una copia.
DISH Network is happy to answer any questions you may have (including questions regarding billing, installation,
equipment and service) and to provide you with technical and other customer support. You may contact us 24 hours
a day, any day of the year:
Phone:
Email:
Mail:
Website:
800-333-DISH (3474)
[email protected]
DISH NETWORK CUSTOMER SERVICE CENTER
P.O. BOX 9033
LITTLETON, CO 80160
dish.com
For purposes of this Residential Customer Agreement (the “Agreement”) and any customer agreement(s)
applicable to the package plan(s) under which you are receiving Services and/or equipment from DISH Network
(each, a “Package Plan Agreement”): (i) “you” and “your” refer to you, the DISH Network subscriber; and (ii) "DISH
Network", “DISH”, "we," "us" or “our” refer to DISH Network L.L.C. (formerly known as EchoStar Satellite L.L.C.) or,
where applicable under the particular circumstances, third party billing agents.
“DISH Network” is a registered trademark of DISH Network L.L.C.
THIS AGREEMENT, TOGETHER WITH ANY APPLICABLE PACKAGE PLAN AGREEMENT, SETS FORTH THE
TERMS AND CONDITIONS UNDER WHICH DISH NETWORK WILL PROVIDE ITS SERVICES AND EQUIPMENT
TO YOU. THIS AGREEMENT IS EFFECTIVE UNTIL WE CHANGE OR REPLACE IT. IF YOU ARE A NEW DISH
NETWORK CUSTOMER, YOUR ACTIVATION OF A DISH NETWORK ACCOUNT AND RECEIPT OF DISH
NETWORK SERVICES OR EQUIPMENT SHALL CONSTITUTE YOUR ACCEPTANCE OF THIS AGREEMENT. IF
YOU ARE AN EXISTING DISH NETWORK CUSTOMER, WE WILL NOTIFY YOU OF ANY CHANGES TO, OR
REPLACEMENT OF, THIS AGREEMENT, AND YOUR CONTINUED RECEIPT OF DISH NETWORK SERVICES
OR EQUIPMENT FOLLOWING RECEIPT OF SUCH NOTICE SHALL CONSTITUTE YOUR ACCEPTANCE OF
SUCH CHANGED OR REPLACED AGREEMENT. IF YOU ARE AN EXISTING CUSTOMER AND DO NOT WISH
TO ACCEPT ANY CHANGED OR REPLACED AGREEMENT, YOU MUST NOTIFY US IMMEDIATELY AND WE
WILL, AT OUR OPTION, EITHER CANCEL YOUR SERVICE OR ALLOW YOU TO CONTINUE TO RECEIVE
YOUR SERVICES UNDER THE PREVIOUS VERSION OF THIS AGREEMENT.
1.
THE DISH NETWORK SERVICE
A. Services Defined. "Services" shall mean all video, audio, data, interactive and other programming services and
all other services that are currently available from DISH Network (whether subscription, pay-per-view or otherwise)
and that we may provide to customers in the future.
B. Minimum Programming Levels. If your applicable Package Plan Agreement specifies required minimum
programming, you must subscribe to such programming. Otherwise, you must subscribe to one or more of the
following programming packages: Welcome Pack, Latino Welcome, DISH America or a higher version of such
packages; a qualifying International package plus one of the following: International Basic Package, Chinese Basic
Package, or a previously listed package. We may change such minimum programming requirements at any time.
For select customers based on when activation of service occurred, an International Service Access Fee (as
detailed in Exhibit 1) may apply. If you subscribe to Racetrack TV, but do not subscribe to applicable minimum
programming a Service Access Fee (as detailed in Exhibit 1) may appply.
C. Programming Availability. Certain Services, including without limitation, some subscription Services, sporting
events and broadcast network Services, may be blacked out in your viewing area; if you circumvent or attempt to
circumvent any of these blackouts, you may be subject to legal action. If the location at which you are receiving
Services is a wagering location, you are not eligible to receive certain channels, including without limitation,
Racetrack TV. You must be at least 18 years of age, or the applicable age of majority where you reside, to order or
receive adult-oriented programming services.
D. Changing Your Programming Selection. Unless otherwise specified in this Agreement or any applicable Package
Plan Agreement(s), you may change your programming selection at any time by notifying us. A Programming
Change Fee (as detailed in Exhibit 1) may apply to such programming changes, unless you are receiving Services
and/or Equipment (as defined in Section 4(A)) pursuant to a Package Plan Agreement that requires you to pay in full
for all Services and/or Equipment prior to receiving such Services and/or Equipment (a “Pre-Pay Promotion”).
E. Multi-Month Subscriptions. For multi-month subscriptions, you may downgrade your Services only when you
renew. You may not downgrade your Services during the term of a multi-month subscription.
F. Ordering Pay-Per-View. You may use your remote control and on-screen program guide to order pay-per-view
Services through your television if your DISH Network receiver is connected to a land-based telephone line and/or a
broadband home network. You may also order DISH Network pay-per-view Services by calling 877-DISH-PPV
(3474-778) and using our automated system, or by visiting dish.com/orderppv, or by speaking with a live operator at
one of our customer service centers (an Agent Assist Fee will apply as detailed in Exhibit 1). Pre-Pay Promotion
customers may only order pay-per-view Services by calling 877-DISH-PPV (3474-778).
120
Appendix
Residential Customer Agreement
G. Accessing the Internet Through Your Receiver. Some of our receivers can be used to access websites and
information on the Internet. DISH Network does not have any control over such websites and information, and we
do not make any representations, warranties or guarantees as to the availability or content of such websites and
information, including without limitation: (i) the accuracy, availability, sequence, completeness, timeliness, copyright
compliance, legality, content, validity, or quality of any such websites or information; or (ii) whether using the
software contained in such receivers may result in accessing unintended, inappropriate or objectionable content.
We may change, limit, suspend, disable and/or remove your ability to access the Internet using your receiver at any
time without notice. We may also limit or restrict the websites and information that you may access on the Internet
using your receiver at any time without notice.
H. Private Home Viewing Only. DISH Network provides Services to you solely for viewing, use and enjoyment in
your private home. You agree that no Services provided to you will be viewed in areas open to the public,
commercial establishments or other residential locations. Services may not be rebroadcast or performed, and
admission may not be charged for listening to or viewing any Services. If your Services are viewed in an area open
to the public, a commerical establishment or another residential location, we may disconnect your Services and, in
addition to all other applicable fees, you must pay us the difference between the price actually paid for Services and
the full applicable rate for such Services, regardless of whether we have the right to distribute such Services in such
other location.
I. Changes in Services Offered. We may add, delete, rearrange and/or change any and all programming,
programming packages and other Services that we offer, as well as the prices and fees related to such
programming, programming packages and Services, at any time, including without limitation, during any term
commitment period to which you have agreed. If a change affects you, we will notify you of such change and its
effective date. In the event that we delete, rearrange or change any programming, programming packages or other
Services, we have no obligation to replace or supplement such programming, programming packages or other
Services. You are not entitled to any refund because of a deletion, rearrangement or change of any programming,
programming packages or other Services.
J. Promotional Offers and Items. If a third party, such as an independent DISH Network retailer, integrator or private
cable operator, offered you a promotional offer or item in connection with your subscription to the Services, such
third party is wholly responsible for fulfilling such promotional offer or providing such promotional item, and DISH
Network is not in any way responsible for such fulfillment unless the promotional offer or item was offered with DISH
Network’s prior authorization, approval, permission or knowledge.
2.
BILLING POLICIES; PAYMENTS FOR SERVICES; FEES
A. Payments. You agree to pay all amounts billed for Services, as well as all taxes, fees and other charges, if any,
that are now or may in the future be assessed in connection with any Services you receive from us, and any other
charges due and owing to us. State and local taxes or reimbursement charges for gross earnings taxes imposed on
satellite providers for transmission of programming in some states may apply. Unless you prepay for a multi-month
subscription to Services or prepay for all Services as required by your participation in a Pre-Pay Promotion, we will
bill you monthly in advance for most Services and in arrears for other Services such as pay-per-view ordered by you
or anyone who uses your Equipment, whether with or without your permission, until you cancel your Services. Multimonth subscription customers and Pre-Pay Promotion customers will be billed based on your pre-pay period (multimonth subscriptions) or monthly (Pre-Pay Promotion customers), and must make all payments in advance of the
due date on your bill in order to continue receiving your Services; you must also pre-pay for all other Services, such
as pay-per-view, ordered by you or anyone who uses your Equipment, whether with or without your permission.
B. Billing Policies. Your bills will show the total amount due, the payment due date, payments, credits, purchases
and other charges to your account. You may submit your payment by mail, on our website, through our AutoPay
program, by calling a DISH Network customer service representative, or by any other means that we designate.
Partial payments will be applied first to the oldest outstanding bill. You must make your payment regardless of
whether you receive a bill. We do not assume the risk of undelivered mail. If you send checks or money orders
marked with a designation such as “payment in full,” we can accept them without waiving any of our rights, including
without limitation, our rights to collect any other amounts owed by you, notwithstanding your characterization of
such payment. DISH Network does not extend credit to our customers, and the Late Payment Fee (as detailed in
Exhibit 1) is not interest, a credit service charge or a finance charge. Certain fees and charges may apply in certain
circumstances to your payment for the Services, including without limitation, those expressly set forth in Exhibit 1
attached hereto and incorporated herein by reference.
C. AutoPay and Paperless Billing. If you accept a promotion that requires you to sign up for and maintain AutoPay
and/or Paperless Billing and later discontinue AutoPay and/or Paperless Billing, then you may no longer be eligible
for that promotion and you may lose the promotional price.
D. Alterations to Payment Terms. If you paid for a monthly subscription (other than a Pre-Pay Promotion) and your
account is past due on more than one occasion, we may require that you pay for all Services and Equipment before
you receive them and you will be deemed to be receiving your Service under a Pre-Pay Promotion, at which point,
all terms and conditions of such Pre-Pay Promotion will apply to you. If you paid for a multi-month subscription to
any Services and your account is past due for any amount, we may convert your multi-month subscription to a
monthly subscription, and we will first apply the amount you paid for your multi-month subscription to any past due
amounts and then to any obligations you incur in the future.
E. Restarting your Services. If you do not pay your bill in full by its due date, or you at any time otherwise fail,
neglect or refuse to make timely payment for your Services, we may disconnect your Services, and in such event
we will be wholly relieved from any and all of our duties and obligations under this Agreement. If your Services are
disconnected for non-payment or any other reason, DISH Network may require that you pay, and you agree to pay,
before we reconnect your Services, all past due charges, a deposit equal to a minimum of one month of service
charges, and all outstanding balances accrued through the date of such disconnection. If your Services are
disconnected for non-payment or any other reason, you will no longer be eligible, even if you pay to restart your
121
Appendix
Residential Customer Agreement
Service, to receive any remaining credits or promotional pricing that you would have been eligible to receive had
your Services not been disconnected. Unless required by applicable law, deposits will not be held segregated from
other funds and will not earn or accrue interest. Promotional pricing is valid only at the time of installation.
F. Attorneys’ Fees/Collections. If we use an attorney or a collection agency to collect any money you owe us or to
assert any other right that we may have against you, including without limitation, any breach of any agreement you
may have with DISH Network or one of our affiliates, you agree to pay the reasonable costs of such collection or
other action. These costs may include, without limitation, the costs of a collection agency, reasonable attorneys’
fees and court costs. If you believe you have been billed in error or you would like to make any other requests for a
billing statement credit, you must contact our customer service center by telephone or in writing within twenty (20)
days after the date you receive the bill for which you are seeking correction. Failure to timely notify us of a dispute
will constitute your acceptance of the corresponding bill. You must pay undisputed portions of any billing statement
before the next billing statement is issued or you must pay a Late Payment Fee. All payments for Services must be
made directly by you to us, unless we authorize otherwise; for example, DISH Network shall have no obligation to
provide Services for which payment is made by you to a third party or payment is made by a third party on your
behalf.
G. Billing Agent Payments. Different or other payment and billing terms, conditions, options and fees may apply
when billing is provided through a third-party billing agent, including without limitation, a local telephone company.
H. Early Termination Fees. Depending on your specific Package Plan Agreement, you may incur fees for
disconnecting your service before the expiration of a commitment period or downgrading your programming below
any applicable minimum programming requirement during a commitment period (each an “Early Termination Fee”).
Please reference your Package Plan Agreement for details regarding any Early Termination Fee that may apply.
3.
CANCELLATION OF SERVICE
A. Continuation of Services. Your subscription to Services will automatically renew until you cancel your Services or
we otherwise disconnect your Services, in each case as provided herein or in any applicable Package Plan
Agreement.
B. Cancellation Policies. You may cancel your Services for any reason at any time by notifying us at the phone
number, e-mail address or mailing address set forth at the top of this Agreement. Please be aware that certain
Package Plan Agreements have an optional or mandatory term commitment period and if you cancel your Services
prior to the expiration of an applicable optional or mandatory term commitment period, certain early termination or
cancellation fees may apply.
C. Disconnection of Services. In addition to all other rights that DISH Network may have to disconnect your
Services, DISH Network may disconnect your Services if: (i) you fail to pay any bill in full when it is due; (ii) we
receive confirmation that you have received Services, or any part of the Services, without paying for them; (iii) you
otherwise violate the terms and conditions of this Agreement or any applicable Package Plan Agreement; (iv) you
transfer, encumber or relocate any leased Equipment (unless you relocate such Equipment as part of a residential
move into an area within which you can permissibly continue to receive such Services); (v) you assign or attempt to
assign any of your rights, duties or obligations under this Agreement or any applicable Package Plan Agreement;
(vi) you are receiving Services through a third-party billing agent and become ineligible to receive applicable
services provided by such third-party billing agent; or (vii) you commence any act or filing of bankruptcy or
bankruptcy proceedings are commenced against you.
D. No Credits. If your Services are cancelled or disconnected for any reason, you still must pay all outstanding
balances accrued, including without limitation, any applicable fees. Except in certain limited circumstances, charges
for Services, once charged to your account, are non-refundable, and no refunds or credits will be provided in
connection with the cancellation of Services. If you received a discounted price due to a promotion, and you cancel
prior to any applicable expiration of that promotion, you are not entitled to any refund or credit for the unused
portions of such discounted price. If you received a discounted price in exchange for your agreement to pay for your
Services on a multi-month basis, and you cancel your Services prior to the expiration of your multi-month
subscription, you are not entitled to any refund or credit for the unused portions of your multi-month subscription.
122
Appendix
Residential Customer Agreement
4. EQUIPMENT
A. Equipment. In order to receive Services you must purchase or lease certain reception equipment consisting
primarily of a DISH Network compatible satellite receiver(s) and applicable Smart Card(s), remote control(s),
satellite antenna(s), and sometimes low noise block converter(s) with integrated feed(s) (collectively, “Equipment”).
B. Additional Tuners and Receivers. We may choose to allow you to place additional receivers on your account. If
we allow you to do so, each additional receiver will be authorized to receive the same Services as your initial
receiver, subject to the limitations of your television equipment. All of your receivers must be located at the same
residence and continuously connected to the same land-based telephone line and/or broadband home network. If
you wish to receive Services at two different residential locations, you must open a separate account for each
location, unless otherwise specifically authorized by DISH Network. You may not directly or indirectly use a single
account for the purpose of authorizing Services for multiple DISH Network receivers that are not all located in the
same residential location and connected to the same land-based telephone line and/or broadband home network. If
we later determine that you did, we may disconnect your Services and, in addition to all other applicable fees, you
agree to pay us the difference between the amounts actually received by us and the full retail price for the Services
authorized for each DISH Network receiver on your account.
C. Smart Cards. Receiver(s) are equipped with a conditional access card (“Smart Card”) inserted into a slot or
otherwise installed in such receiver. Not all receivers with a Smart Card slot require a Smart Card for proper
authorization. Smart Cards remain the property of DISH Network at all times and must be returned to us upon our
request. Smart Cards are not transferable. Your Smart Card will only work in the DISH Network receiver to which it
was assigned by DISH Network. If you report to our customer service center that your Smart Card has been lost,
damaged, defective or stolen, we will replace it, unless there is evidence of unauthorized tampering or modification,
and a Smart Card Replacement Fee will apply. In addition, in order to minimize downtime for your Equipment, DISH
Network will, upon your request, deliver a replacement Smart Card to you via overnight delivery, in which case an
Overnight Delivery Fee will apply.
D. DVR. DISH Network’s digital video recorder (“DVR”) products allow you to record programming in digital format.
Total available recording time varies depending on your receiver and the nature of the programs being recorded.
DISH Network does not guarantee access to or recording of any particular programming, or that any such
programming will not be deleted from your DVR product. Most programming is the copyrighted material of the third
party that supplies it; is protected by copyright and other applicable laws; and may not be reproduced, published,
broadcast, rewritten, or redistributed without the written permission of the third party that supplied it (except as
permitted by the “fair use” provisions of the U.S. copyright laws).
E. Telephone/Broadband Connection. To optimize the operation of your Equipment, you must continuously connect
each DISH Network receiver on your account to the same land-based telephone line and/or a broadband home
network. Failure to connect each receiver to the same land-based telephone line and/or a broadband home network
may result in interruption or disconnection of Services. We may charge you a TV2 Receiver Connection Fee for
each dual tuner receiver that is not connected to the same land based telephone line and/or a broadband network
(as detailed in Exhibit 1).
F. Receiver Alterations. DISH Network may, through periodic downloads, alter the software, features and/or
functionality in your DISH Network receivers; provide data and content to DVR products; store and remove data and
content on the hard drives of DVR products; and send electronic counter-measures to your DISH Network
receivers. DISH Network will use commercially reasonable efforts to schedule these downloads to minimize
interference with or interruption to your Services, but shall have no liability to you for any interruptions in Services
arising out of or related to such downloads. DISH Network may from time to time cease supporting one or more
DISH Network receiver models.
G. Proprietary Components and Software. DISH Network receivers and Smart Cards contain components and
software that are proprietary to DISH Network and its licensors. You agree that you will not try to reverse-engineer,
decompile or disassemble, nor will you tamper with or modify, any software or hardware contained within any
receiver or Smart Card. Such actions are strictly prohibited and may result in the termination of this Agreement,
disconnection of your Services and/or legal action.
H. Software License. You are licensed to use the software provided in your DISH Network receiver(s), as updated
by DISH Network, its licensors and/or its suppliers from time to time, solely in executable code form, solely in
conjunction with lawful operation of the DISH Network receiver(s) that you purchased or leased, and solely for the
purposes permitted under this Agreement. You may not copy, modify or transfer any software provided in your DISH
Network receiver(s), or any copy of such software, in whole or in part. You may not reverse-engineer, disassemble,
decompile or translate such software, or otherwise attempt to derive its source code, except to the extent allowed
under any applicable laws. You may not rent, lease, load, resell for profit or distribute any software provided in your
DISH Network receiver(s), or any part thereof. Such software is licensed, not sold, to you for use only under the
terms and conditions of this license, and DISH Network, its licensors and its suppliers reserve all rights not
expressly granted to you. Except as stated above, this license does not grant to you any intellectual property rights
in the software provided in your DISH Network receiver(s). Any attempt to transfer any of the rights, duties or
obligations of this license is null and void. If you breach any term or condition of this license, this license will
automatically terminate.
I. Stolen Equipment. If any of your Equipment is stolen or otherwise removed from your premises without your
authorization, you must notify our customer service center by telephone or in writing immediately, but in any event
not later than three (3) business days after such removal, to avoid liability for payment for unauthorized use of your
Equipment. You will not be liable for unauthorized use that occurs after we have received your notification.
123
Appendix
Residential Customer Agreement
5. LEASED EQUIPMENT
A. Lease Terms. We may choose to lease certain Equipment to subscribers. Unless otherwise specified in an
applicable Package Plan Agreement(s), such Equipment (including without limitation, the LNBFs, but not the
satellite antenna), shall at all times remain the sole and exclusive property of DISH Network, and we may provide or
replace leased Equipment with new or reconditioned Equipment at any time, and upon cancellation or
disconnection of your Services, remove or require the return of such Equipment. No leased Equipment provided to
you by DISH Network shall be deemed fixtures or part of your real property. We may make such filings and
recordings that we may consider necessary to evidence our ownership rights in such Equipment, and you agree to
execute any and all documents that we may consider necessary for us to make such filings. Our ownership of such
Equipment may be displayed by notice contained on it. You have no right at any time to pledge, sell, mortgage,
otherwise encumber, give away, remove, relocate, alter or tamper with such Equipment, or to tamper with or alter
any notice of our ownership on such Equipment. Any reinstallation, return, or change in the location of such
Equipment must be performed by DISH Network at our then-current service rates. You shall not attach any electrical
or other devices to, or in any way alter, any such Equipment without our prior written consent. You are responsible
for preventing the loss or destruction of leased Equipment and we recommend that such Equipment be covered by
your homeowners, renters or other insurance policy.
B. Return of Leased Equipment. It is your responsibility to return all leased Equipment within thirty (30) days
following cancellation or disconnection of your Services. You must call 800-333-DISH (3474) to receive a return
authorization number and instructions regarding acceptable methods for returning the Equipment. Options to return
your Equipment include, but are not limited to, the use of a shipping label and empty box provided by DISH Network
by paying a Box Return Fee (as detailed in Exhibit 1) (which price is subject to change at any time) or scheduling a
DISH Network in-home service call to remove the Equipment by paying a Service Call Fee (as detailed in Exhibit 1)
charge (which price is subject to change at any time). Equipment will not be deemed returned until received by
DISH Network. If you do not return such Equipment undamaged and in working order, normal wear and tear
excepted, and in accordance with the procedures set forth herein, then you are responsible and must pay us certain
charges as described in the Package Plan Agreement.
C. Defects and Damages. You must notify us immediately of any defect in, damage to, or accident involving your
leased Equipment. All maintenance and repair of such Equipment must be performed by us or our designee(s).
DISH Network may charge you for any repairs that are necessitated by any damage to, or misuse of, such
Equipment.
6.
TRANSFER OF ACCOUNT, SERVICES OR EQUIPMENT
You may not assign or transfer your Services without our written consent, which will not be unreasonably withheld.
Provided however, if you lease Equipment or your account has an outstanding balance, then the withholding of
consent to assign or transfer your Services shall not be deemed unreasonable.
7.
LIMITATION OF OUR LIABILITY
A. INTERRUPTIONS AND DELAYS. NEITHER WE NOR OUR THIRD-PARTY BILLING AGENTS, NOR ANY OF
OUR OR THEIR AFFILIATES, WILL BE LIABLE FOR ANY INTERRUPTION IN ANY SERVICE OR FOR ANY
DELAY OR FAILURE TO PERFORM, INCLUDING WITHOUT LIMITATION: IF SUCH INTERRUPTION, DELAY OR
FAILURE TO PERFORM ARISES IN CONNECTION WITH THE TERMINATION OR SUSPENSION OF DISH
NETWORK'S ACCESS TO ALL OR ANY PORTION OF SERVICES; THE RELOCATION OF ALL OR ANY
PORTION OF THE SERVICES TO DIFFERENT SATELLITE(S); A CHANGE IN THE FEATURES AVAILABLE
WITH YOUR EQUIPMENT; ANY SOFTWARE OR OTHER DOWNLOADS INITIATED BY US; OR ANY ACTS OF
GOD, FIRES, EARTHQUAKES, FLOODS, POWER OR TECHNICAL FAILURE, SATELLITE OR UPLINK
FAILURE, ACTS OF ANY GOVERNMENTAL BODY OR ANY OTHER CAUSE BEYOND OUR REASONABLE
CONTROL.
B. ALTERATIONS TO EQUIPMENT. NONE OF DISH NETWORK, ECHOSTAR OR OUR THIRD-PARTY BILLING
AGENTS, OR ANY OF OUR OR THEIR AFFILIATES, WILL BE LIABLE FOR ANY ALTERATION TO ANY
EQUIPMENT, INCLUDING WITHOUT LIMITATION, REMOVING OR DISABLING FEATURES (SUCH AS THE
ABILITY TO ACCESS THE INTERNET VIA A RECEIVER).
C. LOSS OF RECORDED MATERIAL. NEITHER WE NOR OUR THIRD-PARTY BILLING AGENTS NOR ANY OF
OUR OR THEIR AFFILIATES WILL BE LIABLE FOR ANY DAMAGE RESULTING FROM LOSS OF RECORDED
MATERIAL OR THE PREVENTION OF RECORDING, INCLUDING WITHOUT LIMITATION, ANY LOSS OR
PREVENTION OF RECORDING DUE TO ANY FAULT, FAILURE, DEFICIENCY OR DEFECT IN SERVICES OR
EQUIPMENT.
D. NO WARRANTIES. EXCEPT AS EXPRESSLY PROVIDED TO THE CONTRARY BY APPLICABLE STATE
LAW, NEITHER WE NOR OUR THIRD-PARTY BILLING AGENTS, NOR ANY OF OUR OR THEIR AFFILIATES,
MAKE ANY WARRANTY, EITHER EXPRESSED OR IMPLIED, REGARDING YOUR DISH NETWORK
EQUIPMENT OR ANY OTHER EQUIPMENT OR ANY SERVICES FURNISHED TO YOU. ALL SUCH
WARRANTIES, INCLUDING WITHOUT LIMITATION, ANY IMPLIED WARRANTY OF MERCHANTABILITY OR
FITNESS FOR A PARTICULAR PURPOSE, ARE HEREBY EXPRESSLY DISCLAIMED AND EXCLUDED.
E. CONTENT RESTRICTIONS. IT IS YOUR RESPONSIBILITY TO IMPOSE ANY PROGRAMMING, INTERNET
OR OTHER CONTENT RESTRICTIONS ON YOURSELF, MEMBERS OF YOUR FAMILY AND HOUSEHOLD,
AND GUESTS, AS YOU DEEM APPROPRIATE. NONE OF DISH NETWORK, ECHOSTAR, OUR THIRD-PARTY
BILLING AGENTS, OR OUR AND THEIR AFFILIATES SHALL HAVE ANY LIABILITY TO ANYONE DUE TO, OR
BASED UPON, ANY CONTENT (INCLUDING WITHOUT LIMITATION, ANY INACCURACIES, ERRORS IN OR
OMISSIONS FROM SUCH CONTENT): (i) CONTAINED IN ANY OF THE SERVICES FURNISHED TO YOU; OR
(ii) ACCESSED USING THE SERVICES OR EQUIPMENT FURNISHED TO YOU.
124
Appendix
Residential Customer Agreement
F. DAMAGES LIMITATION. NEITHER WE NOR OUR THIRD-PARTY BILLING AGENTS, NOR ANY OF OUR OR
THEIR AFFILIATES, SHALL HAVE ANY LIABILITY WHATSOEVER FOR ANY SPECIAL, INDIRECT, INCIDENTAL
OR CONSEQUENTIAL DAMAGES ARISING OUT OF OR RELATING TO: DISH NETWORK EQUIPMENT OR
ANY OTHER EQUIPMENT; OUR FURNISHING OR FAILURE TO FURNISH ANY SERVICES OR EQUIPMENT TO
YOU; OR ANY FAULT, FAILURE, DEFICIENCY OR DEFECT IN SERVICES OR EQUIPMENT FURNISHED TO
YOU.
8.
LEGAL COMPLIANCE; PIRACY AND INFRINGEMENT; TRADEMARKS; PUBLIC RIGHTS OF WAY
A. Piracy. Receiving any portion of the Services without paying for them and/or any direct or indirect act or
attempted act to engage or assist in any unauthorized interception or reception of any portion of the Services is a
violation of various U.S. federal and state laws and of this Agreement. The penalties for violating such laws can
include imprisonment and civil damage awards of up to $110,000 per violation.
B. Infringement. Section 605(e)4 of Title 47 of the United States Code makes it a federal crime to modify Equipment
to receive encrypted (scrambled) television programming without payment of required subscriptions. Conviction can
result in a fine of up to $500,000 and imprisonment for five years, or both. Any person who procures Equipment that
has been so modified is an accessory to that offense and may be punished in the same manner. Investigative
authority for violations lies with the Federal Bureau of Investigation. The Equipment may incorporate copyright
protection technology that is protected by U.S. patents and/or other intellectual property rights. Use of such
copyright protection technology must be authorized by DISH Network or its suppliers or licensors, and is intended
for home and other limited pay-per-view uses only, unless otherwise authorized by DISH Network or its suppliers or
licensors. Reverse engineering or disassembly is prohibited.
9.
GENERAL
A. Notice. Any notice required or permitted to be given by us under this Agreement may be provided via the mail, on
your bill, as a bill insert, via broadcast on a television channel, through publication on the website set forth at the top
of this Agreement, by telephone, or by any other reasonable means. If we send you notice by mail, on your bill or as
a bill insert, it will be considered given the day after it is deposited in the U.S. mail, addressed to you at your thencurrent billing address in our records. If we send you notice via broadcast on a television channel or through
publication on the website set forth at the top of this Agreement, it will be considered given when first broadcast or
published. If we send you notice by telephone, it will be considered given when personally delivered to you or when
left as a message at your then-current phone number in our records. Unless otherwise specified in this Agreement,
any notice required or permitted to be given by you under this Agreement shall be in writing and shall be sent by
first-class mail addressed to us at the mailing address set forth at the top of this Agreement, and shall be deemed
given when received by us at such mailing address.
B. Physical Address/Change of Address. When setting up your DISH Network account, you must provide us with
the physical address where your Equipment will be located and your Services will be provided. A post office box
does not meet this requirement. You must give us immediate notice of any change of name, mailing address,
telephone number, or physical address where your Equipment is located. You may do this by notifying our customer
service center by telephone or in writing at the phone number, mailing address, or e-mail address set forth at the top
of this Agreement.
C. Online Account Information. If you have an online account with us, you are responsible for maintaining the
confidentiality of your account username and password and for all activities that occur under your account
username and/or password. You must: (i) keep your account username and password confidential and not share
them with anyone else; and (ii) immediately notify us of any unauthorized use of your password and/or account
username or other breach of security.
D. Third-Party Billing Agents. We may enter into relationships with third parties to provide billing and other services
on our behalf, in which case the terms and conditions of this Agreement shall apply to such third parties as
applicable under the circumstances. Additional terms and conditions imposed by our third-party billing agents may
apply. For example and without limitation: (i) late fees imposed by our third-party billing agents may be administered
according to our third-party billing agent's billing procedures and applicable state tariffs and regulations; (ii) our thirdparty billing agents may require that you to pay all past due charges for Services, a restart fee, and/or a prepayment
before we reconnect your Services; and (iii) other services provided by our third-party billing agents, including
without limitation, local telephone service, may need to be restored before DISH Network Services can be restored,
and a restoral fee and/or deposit may be required to restore third-party billing agent services. Partial payments on
third-party billing agent bills may be applied first to the balance due for other services billed on your third-party billing
agent bill, including without limitation, local telephone service, according to the third-party billing agent's billing
procedures and applicable state statutes and regulations. Please contact your third-party billing agent for details.
Failure to pay all or any part of your third-party billing agent bill may result in disconnection of Services. If your
account is assigned to a third-party billing agent we will provide you notice of such assignment.
E. Credit Checks. You authorize DISH Network to investigate your financial responsibility and creditworthiness,
including without limitation, acquiring credit reports and histories, and to report any payment defaults to credit
reporting agencies. Such credit checks may require you to provide DISH Network with your social security number.
Under the Fair Credit Reporting Act, you have the right to notify DISH Network if you believe we have reported
inaccurate information about your account to any credit reporting agency. Please include in any such notice the
specific item of dispute and why you believe the information reported is in error.
F. Applicable Law. This Agreement, including without limitation, all matters relating to its validity, construction,
performance and enforcement, and any claim, complaint or dispute arising out of or related to this Agreement, the
Services or the Equipment shall be governed by the laws and regulations of the State of Colorado without giving
effect to its conflict of law provisions. This Agreement is subject to amendment, modification or termination if
required by such laws or regulations. If any provision in this Agreement is declared to be illegal or in conflict with any
125
Appendix
Residential Customer Agreement
law or regulation, that provision will be considered modified to the minimum extent necessary to make such
provision legal and no longer in conflict with such law or regulation, without affecting the validity of any other
provisions.
G. Remedies Cumulative. The rights and remedies provided under this Agreement to DISH Network in case of your
default or breach of this Agreement are cumulative and without prejudice to any other rights and remedies that
DISH Network may have by reason of such default or breach at law, in equity, under contract or otherwise (all of
which are expressly reserved).
H. Other. No salesperson, installer, customer service representative, authorized retailer, or other similarly situated
individual is authorized to change or override this Agreement. DISH Network may, however, change this Agreement
at any time and will notify you if that occurs. The terms and conditions of this Agreement that either are expressly
stated to survive or by their nature would logically be expected to survive its expiration or termination will continue
thereafter. This Agreement is in addition to any other written agreement(s), if any, between you and DISH Network,
including without limitation, any applicable Package Plan Agreement, and except as provided to the contrary herein,
all such written agreements shall remain in full force and effect. Except as expressly set forth in this Agreement to
the contrary, this Agreement replaces and supersedes any and all prior DISH Network Residential Customer
Agreements in their entirety, and such prior DISH Network Residential Customer Agreements shall be of no further
force or effect whatsoever. In the event of any ambiguity between this Agreement and any applicable Package Plan
Agreement, DISH Network shall have the sole and exclusive authority to interpret and/or make a final determination
concerning any issue arising from such ambiguity.
EXHIBIT 1 - FEES
In addition to any amounts due for your Services and any other amounts due under this Agreement or any
applicable Package Plan Agreement, you agree to pay the fees listed in the table below (“Fees”) if and when
applicable. DISH may change these Fees, increase or decrease these Fees, or impose additional Fees at any time
upon notice to you. Discounts on certain Fees may be available from time to time if you subscribe to certain
programming packages and/or use certain Equipment. Additional Fees may apply for non-standard installations or if
you upgrade your Equipment after installation. You may call 800-333-3474 to request an itemization of any cost that
you will incur in order to purchase and/or lease or receive DISH equipment and/or DISH Services.
Type of Fee
Amount
Description of When Fee Applies
Monthly Fees
Additional Receiver
Fee*
$7.00
You have more than one (1) receiver on your
account. Per additional high definition (HD)
receiver.
$10.00
You have more than one (1) receiver on your
account. Per additional DVR receiver.
$14.00
You have more than one (1) receiver on your
account. Per additional Duo receiver.
$17.00
You have more than one (1) receiver on your
account. Per additional DuoDVR or SlingLoaded
receiver.
$7.00
You have a Hopper 2000 receiver on your account.
$7.00
You have a Joey 1.0 receiver on your account.
Whole Home DVR
Service Fee
$4.00
You have a Whole Home DVR Hopper 2000 on
your account.
DVR Service Fee
$6.00
You purchase or lease a digital video recording
receiver and you do not subscribe to a “with DVR”
programming package. (If you have a HD Duo
SlingLoaded DVR receiver on your account, a
$10.00 fee will also apply.)
Protection Plan
$6.00
You participate in the Protection Plan.
DISH Pause
$5.00
You are eligible for and participate in DISH Pause.
(*In determining the
Additional Receiver Fee
amount, the receiver
with the highest
associated fee shall be
deemed activated prior
to all other receivers on
your account.)
Receiver Fees
126
Appendix
Residential Customer Agreement
Type of Fee
Amount
Description of When Fee Applies
Service Access Fee
$6.00
You subscribe to Racetrack TV but do not
subscribe to applicable required minimum
programming.
International Service
Access Fee
$10.00
You do not subscribe to applicable required
minimum programming.
TV2 Receiver
Connection Fee
$5.00
You purchase or lease a dual tuner receiver and it
is not connected to a phone line and/or a
broadband network.
DISH 500 Upgrade Fee
$5.00
You receive Services in Alaska (AK) or Hawaii (HI).
Transactional Fees
Agent Assist Fee
$5.00
You order PPV or make a credit/debit card or Bank
Account payment over the phone with an agent.
External Hard Drive
Activation Fee
$40.00
One-time fee charged if you have a ViP receiver
and you choose to connect an external hard drive
to that receiver.
Late Payment Fee
$7.00
You do not pay your bill in full on or before its due
date (unless you are receiving Services pursuant to
a Pre-Pay Promotion).
Returned Payment Fee
$10.00
You make an EFT or check payment to DISH
Network and it is subsequently returned.
Shipping and Handling
Fee
$15.00
DISH Network delivers hardware to you via regular
delivery. (A $20.00 Extended Delivery Fee also
applies to AK, HI, Puerto Rico, or Virgin Islands.)
Overnight Delivery Fee
$20.00
DISH Network delivers an item to you via overnight
delivery (not available in Alaska, Hawaii, Puerto
Rico, or the U.S. Virgin Islands).
Box Return Fee
$17.00
DISH Network delivers return boxes and labels to
return leased equipment.
Smart Card
Replacement Fee
$50.00
We replace your Smart Card because it was lost,
damaged, defective or stolen, as long as there is no
evidence of tampering or modification.
Out of Warranty
Receiver Replacement
Fee
$75.00
You need to replace or repair an out of warranty
receiver.
Service Call Fee
$95.00
We send a certified technician to you.
Programming Change
Fee
$5.00
You change your programming selection in 30 days
or less from the same service being added (but not
regarding adult programming).
$20.00
Changes to your programming selection include
adult programming.
127
Appendix
FCC Compliance
FCC COMPLIANCE
The following text is extracted from Federal Communications Commission (FCC) regulations, as of this Guide’s
publication date. Contact the FCC (see following) or a library for complete text of the regulations.
Telephone Communication
This equipment complies with Part 68 of the FCC rules and the requirements adopted by the ACTA. On the back panel of
this equipment is a label that contains, among other information, a product identifier in the format US:AAAEQ##TXXXX. If
requested, this number must be provided to the telephone company.
A plug and jack used to connect this equipment to the premises wiring and telephone network must comply with the
applicable FCC Part 68 rules and requirements adopted by the ACTA. A compliant telephone cord and modular plug is
provided with this product. It is designed to be connected to a compatible modular jack that is also compliant, such as RJ11. See installation instructions for details.
The REN is used to determine the number of devices that may be connected to a telephone line. Excessive RENs on a
telephone line may result in the devices not ringing in response to an incoming call. In most but not all areas, the sum of
RENs should not exceed five (5.0). To be certain of the number of devices that may be connected to a line, as determined
by the total RENs, contact the local telephone company. For products approved after July 23, 2001, the REN for this
product is part of the product identifier that has the format US:AAAEQ##TXXXX. The digits represented by ## are the REN
without a decimal point (e.g., 03 is a REN of 0.3). For earlier products, the REN is separately shown on the label.
If this equipment causes harm to the telephone network, the telephone company will notify you in advance that temporary
discontinuance of service may be required. But if advance notice isn't practical, the telephone company will notify the
customer as soon as possible. Also, you will be advised of your right to file a complaint with the FCC if you believe it is
necessary.
The telephone company may make changes in its facilities, equipment, operations or procedures that could affect the
operation of the equipment. If this happens the telephone company will provide advance notice in order for you to make
necessary modifications to maintain uninterrupted service.
If trouble is experienced with this equipment, for repair or warranty information, please contact DISH Network at 1-800-333DISH (3474). If the equipment is causing harm to the telephone network, the telephone company may request that you
disconnect the equipment until the problem is resolved.
There are no user serviceable parts inside.
Connection to party line service is subject to state tariffs. Contact the state public utility commission, public service
commission or corporation commission for information.
If your home has specially wired alarm equipment connected to the telephone line, ensure the installation of this equipment
does not disable your alarm equipment. If you have questions about what will disable alarm equipment, consult your
telephone company or a qualified installer.
Compliance Information Statement
EchoStar Technologies Corporation, 94 Inverness Terrace East, Englewood CO., (303) 706-4000, declares that: This
device complies with Part 15 of the FCC Rules. Operation is subject to the following two conditions: (1) this device may not
cause harmful interference, and (2) this device must accept any interference received, including interference that may
cause undesired operation.This equipment has been tested and found to comply with the limits for a Class B digital device,
pursuant to Part 15 of the FCC Rules. These limits are designed to provide reasonable protection against harmful
interference in a residential installation. This equipment generates, uses and can radiate radio frequency energy and, if not
installed and used in accordance with the instructions, may cause harmful interference to radio communications. However,
there is no guarantee that interference will not occur in a particular installation. If this equipment does cause harmful
interference to radio or television reception, which can be determined by turning the equipment off and on, the user is
encouraged to try to correct the interference by one or more of the following measures:
•
Reorient or relocate the receiving antenna.
•
Increase the separation between the equipment and receiver.
•
Connect the equipment into an outlet on a circuit different from that to which the receiver is connected.
•
Consult the dealer or an experienced radio/TV technician for help.
Signal Strength Present at the Television
The software-based attenuator within the satellite receiver will limit the signal present at your television set to below the
FCC signal strength limit of 75.6dBuV. If you choose not to enable the attenuator, you must ensure that the signal strength
present at the TV set does not exceed 75.6dBuV.
128
A
Account Information 4
Adult Content, Hiding 45
Antenna
Adjusting 69
Remote Control 13
Apps 49
Attenuator 70
Audio
Dolby Digital 90
Dolby Digital and Linear PCM audio
signals 90
PCM Only 90
Troubleshooting 117
Automatic Timer 64
B
Back Button 53
Back Panel 17
Batteries, Remote Control 13
Blockbuster @Home™ titles 31
Broadband Internet Connection 8, 104
Browse Banner 24
Troubleshooting 113
C
Caller ID 86
Enabling/Disabling 86
History 87
Troubleshooting 118
Canceling a Procedure 19
Changing Channels 22, 112
Changing Languages 88
Troubleshooting 117
Channel Locks 45
Channel Number, Entering 22
Channels
Customizing Lists 87
Check Switch 106
Closed Captioning 88
Closing Menus 18
Combination Devices 72
Component Cables 99
Connections, Back Panel 17
Controlling Other Components 71
Controls and Indicators, Front Panel 17
Customer Service 49
D
Daily Schedule 61
Defaults, Reset to Factory 91
Deleting a Timer 65
Descriptive Video 88
Device Codes 72, 74
Device Codes Scan 73
Digital Video Recorder (DVR) 52
Discrete Power On and Off 80
DISH Account 4
Dish Antenna 102
DISH Logo, Moving 8
DISH On Demand 7, 30
Ordering 30
Reviewing Orders 31
DISH Online services 7
DishHOME Interactive TV 48
Dolby audio 89
Dolby Digital Surround Sound 90
E
Entering a Channel Number 22
External Hard-Disk Drive 84
F
Fast Forwarding 53
Favorites Lists 36
Creating or Changing 36
Naming 37
Troubleshooting 115
Using 37
Finding a Program to Watch 5
Frame-By-Frame 53
Front Panel 17
Locking 46
FWD Button 53
G
Grouping Recorded Programs 56
Guide Display
Changing 88
H
HDMI connection 98
HDTV Setup 100
Hiding Adult Content 45
History
Caller ID 87
Purchase 31
Home Media feature 48
I
Improving Receiver Control 68
Internet Connection 8, 104
L
Languages, Changing 88
Learning from Another Remote 76
Limited Mode 71
Lists
Choices in Menus 18
Customizing Channels 87
Locks 40
Channel Locks 45
Front Panel 46
Hiding Adult Content 45
Password 41
Pay-Per-View Channels 45
Ratings Restrictions 42
Troubleshooting 119
Low Battery Warning 13
M
Maximum Recorded Events 61
Menus 18
Canceling a Procedure 19
Highlighting Options 18
List of Choices 18
Open and Close 18
Selecting Options 18
Troubleshooting 119
Using 18
Midnight Lounge 30
Multimedia 84
Apps on Your Hopper 49
External Hard-Disk Drive 84
Transferring Photos 84
Viewing Photos 84
N
Nearby TV 3, 12
Connecting to TV 98
Display in HD 100
No Picture 99
YPbPr Connections 99
Network Setup 105
New Episodes 60
Number Pad, Remote Control 19
O
Opening Menus 18
Ordering a Pay-Per-View 30
Ordering Your Program Packages 4
P
Password
Creating or Changing 41
Pause Button 53
Pausing a Program 52
Pausing Live TV 6
Pay-Per-View 7, 30
Blockbuster @Home™ 31
Locks 45
Ordering 30
Reviewing Orders 31
Troubleshooting 119
Phone Line 103
Troubleshooting 118
Phone System Setup 104
Photos
Transferring 84
Viewing 84
Picture-In-Picture feature 26
PIP 26
Playing a Recorded Program 54
Point Dish 106
Predictive Search 25
PrimeTime Anytime™ feature 58
Accessing content 59
Enabling or disabling 58
Saving or deleting content 59
Program Guide 22
Changing the Display 88
Troubleshooting 113
Programs
DISH Cinema 30
129
DISH On Demand 30
Pay-Per-View 30
Reviewing Orders 31
R
Rain and Snow Fade 7
Ratings Restrictions 42
Receiver
Back Panel 17
Front Panel 17
Updates 91
Recording
Grouping and Sorting 56
Live Program 54
Maximum # Recorded Events 61
Options 55
Playing Back a Recorded Program
54
Receiver is Off 62
Single Mode 54
While Watching Different Programs
54
Recover Button 79
Remote Antenna 69
Remote Battery Low 13
Remote Control 12
Antenna 13, 69
AUX Mode 78
Batteries 13
Buttons, DVD/VCR Control 16
Buttons, Receiver Control 14
Buttons, TV Control 15
Checking Device Codes 74
Combination Devices 72
Controlling Other Components 71
Device Code Tables 72
Device Codes Scan 73
DVD Mode 16
Learning Commands 76
Limited Mode 71
Low Battery Warning 13
Modes 71
Programming to Control a Second
Satellite Receiver 79
Replacement 98
SAT Mode 14
Switching Between TV and Device
Volume Control 78
Troubleshooting 112
TV Mode 15
UHF Attenuator 70
Remote TV 3, 12, 101
Reset to Factory Defaults 91
Resetting Your Receiver 105
Reversing 53
Running System Wizard 105
S
Satellite TV Reception 7
Search 24
Search History 26
130
Second Satellite Receiver 79
Seek & Record™ feature 60, 64
Single Mode
Recording 54
Skip Back Button 53
Skip FWD Button 53
Skipped Timers 62
Skipping 53
Slow Motion and Frame-By-Frame 53
Solar Interference 8
Sorting Recorded Programs 56
Sound, Dolby Surround 89
Sub-theme, Search by 25
T
Text 20
Themes 24
Timers and Recordings 60, 62
Automatic Timers 64
Daily Schedule 61, 63
Deleting a Timer 65
Maximum Recorded Events 61
Seek & Record™ Timer 64
Special Considerations When Using
Timers 63
Timer Frequency 60
Timer Options 61
Timer Priorities 60
Timer Types 60
Timers List 61, 63
Troubleshooting 116
Why Timers are Skipped 62
Troubleshooting 105, 109
Audio/Sound/Volume 117
Browse Banner 113
Caller ID 118
Changing Languages 117
Favorites Lists 115
Hearing a Program 117
Locks 119
Menus 119
Message Numbers 110
Nearby TV 99
Pay-Per-View 119
Phone Line 118
Point Dish and Check Switch 106
Program Guide 113
Receiver Tests 105
Remote Control 112
Resetting Your Receiver 105
Running System Wizard 105
Timers and Recordings 116
Video/Picture/Images 114
Watching a Program 114
Tuner/Amplifier
Controlling Audio Equipment 78
Using for Volume Adjustment 78
TV Everywhere 91
TV Viewing Status screen 27
U
UHF Attenuator Installation 70
Unlocking Pay-Per-View Channels 45
Unlocking the Front Panel 46
Updates 91
Using History 25
Using Menus 18
Using Multimedia 84
Using Number Pad 19
Using Picture-In-Picture 26
Using Search 26
Using Text Fields 20
Using Themes 25
Using Themes and Search 24
Using Up/Down Arrows 22
V
Video
Troubleshooting 114
Virtual Keyboard 19
Volume Control 78
W
Watch TV 5
Y
YPbPr Connections 99
Receiver Information
Write the following information in the spaces provided below. You may need to provide this information if you call
the Service Center. To get the Conditional Access Numbers, display the System Info menu
(see Ordering Your Programming Packages).
Purchase Location Name:
Purchase Location Telephone Number:
Receiver Serial Number:
Receiver Conditional Access Number
Smart Card Conditional Access Number:
Remote Control Settings
Remote Control 1
Remote Control 2
Nearby TV (Hopper)
Remote TV(s)
Remote Control Location (SAT Mode)
TV Code (TV Mode)
DVD/BD Player or VCR Code (DVD Mode)
Auxiliary Device Code (AUX Mode)
TV Input/Channel Settings
TV Input for DISH receiver
For all your customer needs,
go to mydish.com/chat or call
the Customer Service Center
at 1-800-333-DISH (3474).
195004
DN000364