Download RHB314 updated Instruction Manual
Transcript
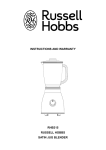
RUSSELL HOBBS BRUSHED STAINLESS STEEL FINISH BLENDER
MODEL NO: RHB-314
INSTRUCTIONS AND WARRANTY
Thank you for purchasing the Russell Hobbs 1.5L Brushed S/Steel finish
Blender. Each unit has been manufactured to ensure safety, reliability and ease
of use. Before use, please read these instructions carefully and keep them for
further reference.
Important safeguards
When using electrical appliances, basic safety precautions should always be
followed, including the following:
1. Do not put the motor unit in water or any other liquid; do not use it in a
bathroom or near any source of water and do not use outdoors.
2. The blender must be used only by a responsible adult.
3. Unplug before dismantling or cleaning.
4. The blender is fitted with a safety switch to prevent the motor operating
unless the jug is in place. Do not use this to switch the blender on and off.
5. Turn the switch to standby OFF before fitting the jug to the motor unit.
6. Turn the switch to standby OFF and wait until the blades come to a complete
stop before removing the lid from the jug, and before removing the jug from
the motor unit.
7. This appliance is not intended for use by persons (including children) with
reduced physical, sensory or mental capabilities, or lack of experience and
knowledge, unless they have been given supervision or instruction
concerning use of the appliance by a person responsible for their safety.
8. Children should be supervised to ensure that they do not play with the
appliance.
9. Do not use the blender without first locking the lid in place.
10. Do not fill the jug with boiling liquids.
11. Do not put your hand into the jug, even when it has been removed for
cleaning – the blades are very sharp.
12. Do not put any other object (spoon, spatula, etc.) into the jug while the
blender is plugged in.
13. Do not leave the blender unattended when plugged in.
14. Position the motor unit on a dry, firm, level surface, close to a power socket
and out of reach of children.
15. Route the mains lead so that it cannot be caught accidentally or tripped over.
16. Keep the blender and the mains lead away from hotplates, hobs and burners.
17. Store the blender away from direct sunlight and fluorescent light where
possible.
18. Do not let the jug overflow. If liquid gets under the motor unit, it may be
sucked into the motor, damaging it.
19. Do not fill the jug above the 1500 ml. If you do, the contents may force the lid
off when you start the motor.
20. Do not run the motor for more than 3 minutes, either continuously, or using
the pulse setting, otherwise it may overheat. After 3 minutes use, switch it off
for at least 3 minutes, to allow it to recover.
21. Do not use the blender for any purpose other than those described in these
instructions.
22. Do not run the blender empty, as it may overheat.
23. Do not operate the blender after it malfunctions. If the mains lead or plug is
damaged, return the blender to the manufacturer in order to avoid a hazard.
24. This appliance is not intended for use by persons (including children) with
reduced physical, sensory or mental capabilities, or lack of experience and
knowledge, unless they have been given supervision or instruction concerning
use of the appliance by a person responsible for their safety.
25. Children should be supervised to ensure that they do not play with the appliance.
SAVE THESE INSTRUCTIONS
FOR HOUSEHOLD USE ONLY
Name and Parts location
1. Measuring Cup
1
2. Lid
2
3. Glass Jar
4. Blade Assembly
5. Control Panel
3
6. Motor Unit
4
5
6
Before Use
Before using your Blender for the first time wash the jug, lid and cap in warm
soapy water, rinse well and dry. NOTE: The blades are sharp-edged, handle
with care.
Preparation
1. Position the motor unit on a dry, firm, level surface, close to a power
socket and out of reach of children.
2. Check that the control knob is set to OFF.
3. Insert the blade assembly into the base of the glass jar, and rotate it anticlockwise until it is locked.
4. Place the glass jar assembly on top of the base/motor of the blender.
Ensure that the jug is firmly in place by turning it in a clockwise direction to
lock it. There are ‘Lock’ and ‘Unlock’ markings on the unit. It is
recommended that you place the jug handle away from the controls
situated at the front of the blender.
5. Plug the motor unit into the power socket
6. Put the ingredients into the jug. Do not fill it past the 1500 ml mark. If you
do, the contents may force the lid off when you start the motor.
Fitting the Lid
1. Always fit the lid to the jug before using it.
2. Press well on the lid until the flanges of embedding are well fixed in the
jug.
3. Put the cap into the hole in the lid and press it down to fit properly.
4. It is not a good idea to run the blender without the cap, especially if only
solid ingredients are used. They may be ejected through the hole when
they hit the blades.
The Switch
Turn the control knob clockwise to the speed you require.
“OFF” - switch off, “1” – slow, “Max” - fast
Pulse Function
Pressing the pulse button will give you a short burst at maximum
speed, regardless of the current speed of the blades. The button is
spring-loaded. When you stop pressing, it will return to the speed the
switch is pointing at.
Do not run the motor continuously for more than 3 minutes, or it may
overheat. After 3 minutes switch off for at least 10 minutes to cool down.
Do not use pulse function for crushing ice.
Crushed ice
Before using the blender to crush ice, make sure it is clean and rinse it out
thoroughly. Any remaining trace of detergent may affect the taste of the
crushed ice and will flatten any drink to which it has been added.
Ice cubes come in many shapes and sizes. You will have to experiment
with the ice from your ice cube tray. Start with half to three quarters of a
cup of ice, or 4 to 6 cubes, add 15ml (1 tablespoon) of fresh cold water.
Put the lid on the blender and turn the control knob to 1. While the unit is
mixing, press the ICE CRUSH button 3 or 4 times, with short pauses in
between. The blades will turn faster to crush the ice. Check the results
and adjust the speed accordingly. Too much blending will reduce the ice
to liquid, too little will merely chip the edges/corners off the ice.
Do not try to crush ice without adding water to the jug.
Do not be tempted simply to increase the amount of ice and blend for
longer – this will not work. Too much ice will never give you satisfactory
results. Do not use pulse button for crushing ice.
Adding ingredients
If you need to add ingredients while the blender is working, lift the
cap off, pour the new ingredients through the hole, then replace the cap.
Make sure that the added ingredients do not push the volume in the jug
past the 1500ml mark.
Finished
Turn the switch to OFF, wait until the blades have stopped moving before
removing the lid from the jug – or removing the jug from the motor unit.
Hold the motor unit with one hand, grasp the handle with the other hand,
and then lift it off the motor unit. Lift the lid off the jug.
Auto Clean Function
Fit the blender jug onto the base, making sure it is firmly in place.
Pour some hot water and dish washing liquid into the jug. Press the pulse
button for a few seconds, repeat this twice and rinse thoroughly with clean
water. Let dry before storing away.
SMOOTHIE MAKER RECIPES
Banana Smoothie
Ingredients:
1Banana Peeled & Sliced
¼ Cup Oats
1Tbsp Honey
1 Tbsp Peanut Butter
100g flax seeds
150ml Yogurt
1 Cup Ice
Method:
1. Add all ingredients into the blender.
2. Pulse it at first to break the ice.
3. Blend for about 2 minutes until smooth.
Tip
This smoothie is great for sustained energy throughout the day. The banana has
high levels of potassium, helping you to quickly replenish electrolytes. (The riper a
banana, the higher sugar content), the peanut butter is high in protein and the raw
oats is a Low GI filler. Flax seed is a great source of fibre and Omega 3 fatty acids,
and yoghurt contains protein, calcium, riboflavin, vitamin B6 and vitamin B12.
Berry smoothie
Ingredients:
1 Cup Strawberry, blueberry & Raspberry
150ml low fat ice cream/ frozen yogurt
1 Banana
1 Cup Ice
Method:
1. Add all ingredients into the blender.
2. Pulse it at first to break the ice.
3. Blend for about 2 minutes until smooth.
Tip.
-
Strawberry – high in vitamin C and antioxidants
-
Blueberry - high level of antioxidants and may be considered most nutritional
berry
-
Raspberry - sweet taste along with vitamin C, vitamin E, and a good weight loss
supplement
-
Banana-high in dietry fibre
Coconut Smoothie
Ingredients:
1 Tin coconut milk
1 tablespoon sesame oil
1 tablespoon flax seeds
1 teaspoon vanilla extract
1 Tbsp Honey
1 Cup ice
Method:
1. Add all ingredients into the blender.
2. Pulse it at first to break the ice.
3. Blend for about 2 minutes until smooth.
Tip
-
Sesame oil is a source of vitamin E which is an anti-oxidant and has been
correlated with lowering cholesterol levels.
-
Flax seed is a great source of fibre and Omega 3 fatty acids.
Fruit & Muesli smoothie
Ingredients:
1½ cups low-fat milk
2 tablespoons low-fat natural or vanilla yoghurt
1 ripe banana
¼ cup chopped berries: strawberries, raspberries, blueberries
1-2 tablespoons muesli
½ Cup Rolled Oats
1 cup ice
Method:
1. Add all ingredients into the blender.
2. Pulse it at first to break the ice.
3. Blend for about 2 minutes until smooth.
Tip:
This delicious smoothie is a meal in itself, rich in protein, complex carbohydrates, dietary
fibre, vitamin C and antioxidants. Sweetened naturally with berries and banana.
Green tea Smoothie
Ingredients:
250ml Green Tea
1Tbsp Honey
1 Tsp Chopped Mint
100ml Vanilla flavoured low fat ice cream/ frozen yoghurt
Method
1. Brew a cup of green tea using 2 tea bags and chill.
2. Add all ingredients into the blender.
3. Pulse it at first to break the ice.
4. Blend for about 2 minutes until smooth.
Tip:
-
Green tea has tons of antioxidants, helps boost metabolism, and stabilizes
Cholesterol.
-
Fresh mint works as a decongestant for illness such as the common cold.
High Fiber/ Low GI Smoothie
Ingredients:
½ Papino
1Tbsp Flax Seeds
2Tbsp Digestive Bran
1/2Cup 100% Orange juice
1/2Cup Low Fat Cultured Yogurt
1 Tbsp Honey
1 Cup Ice
Method:
1. Add all ingredients into the blender.
2. Pulse it at first to break the ice.
3. Blend for about 2 minutes until smooth.
Tip:
-
Papaya fruit is an excellent source of dietary fiber, folate, vitamin A, C and E. It
also contains small amount of calcium, iron, riboflavin, thiamine and niacine. It is
also very rich in antioxidant nutrients flavonoids and carotenes, very high in
vitamin C plus A, and low in calories and sodium.
-
Flax seed is a great source of fibre and Omega 3 fatty acids, and yogurt contains
protein, calcium, riboflavin, vitamin B6 and vitamin B12.
Low fat Chocolate Crunch Smoothie
Ingredients:
1 Cup 2% milk
1 Tbsp Cocoa Powder
½ Cup peanuts/ cashews
1 Tbsp Honey
¼ tsp Vanilla essence
1 Cup Ice
Method
1. Add all ingredients into the blender.
2. Pulse it at first to break the ice.
3. Blend for about 2 minutes until smooth.
Tip:
-
This smoothie is low fat and delicious.
-
For an iced coffee, replace the cocoa powder with instant coffee powder or a
chilled espresso.
Spiced Mango lassi
Ingredients:
1 Large Mango, peeled & Chopped
1 Cup Plain Low Fat Yogurt
1 Tbsp Honey
¼ Tsp Ground Cinnamon
1/8 Tsp Ground Cardamom
½ Tsp vanilla Extract
1 Cup Ice
Method:
1. Add all ingredients into the blender.
2. Pulse it at first to break the ice.
3. Blend for about 2 minutes until smooth.
Tip:
-
This rendition of India's popular yogurt shake makes a cooling counterpoint to
any spicy dish
-
For a great cocktail, add 50 ml dark rum.
Sweet Melon Smoothie (Serves 4)
Ingredients:
½ Honey Melon
Thumb size Ginger, peeled
1 medium Cucumber
1 TBSP Honey
150 ml Yogurt
1 Cup Ice
Method:
1. Add all ingredients into the blender.
2. Pulse it at first to break the ice.
3. Blend for about 2 minutes until smooth.
Tip:
-
Cucumbers, part of the melon family, are rich in Vitamin C and dietry fibre.
-
Ginger is a great source of anti-oxidants, making this smoothie a delightfully
fresh way to strengthen your immune system.
Tomato Smoothie
Ingredients:
2 tomatoes (chopped then frozen)
1 small tin of tomato juice
¼ Cup Chopped Celery juice and rind of 1/2 lemon
Tbsp Chopped basil leaves
Tobasco To taste
Salt & Pepper to taste
1 Cup Ice
Method:
1. Add all ingredients into the blender.
2. Pulse it at first to break the ice.
3. Blend for about 2 minutes until smooth.
Tip:
-
Tomatoes contain vital anti-oxidants that help to fight against many diseases
known today.
-
Tomatoes also contain many nutrients integral for good health, such as vitamin
C, A, potassium and iron to name but a few.
-
Why not consider growing your own tomatoes for a continuous source of this
wonder fruit.
Cleaning
• Unplug the blender from the mains before cleaning and storing away.
• Clean soon after use, to prevent residues settling inside the jug.
• Remove the jug from the motor unit. Wash the jug, sieve, lid and
warm soapy water, rinse well, then turn the jug upside down
dry.
• Keep hands out of the jug – BLADES ARE VERY SHARP.
cap in
to drain and
• If it is left for too long without cleaning and bits have glued themselves to
the inside of the jug, use a nylon brush to remove. If this does not work –
crush a few ice cubes in it.
• It is not recommended to put the jug, sieve, lid or cap into the dishwasher
as this can affect the surface finishes. Do not use harsh or abrasive
cleaning agents or solvents.
• Wipe the outside of the motor unit with a clean damp cloth.
• Do not put the motor unit in water or any other liquid.
CONNECTING 3-PIN PLUG
Should the need arise to change the fitted/moulded plug, follow these
instructions:
Mains (AC) Operation
This unit is designed to operate on 230V current only. Connecting to other
power sources may damage the unit.
Connect three-pin plug as follows:
The wires in this mains lead are coloured in accordance with the following code:
Green/Yellow = Earth
Blue = Neutral
Brown = Live
If the supply cord is damaged, it must be replaced by the manufacturer or its
service agents in order to avoid a hazard. If service becomes necessary within
the warranty period, the appliance should be returned to an approved Tedelex
Trading Pty Ltd Service Centre. Servicing outside the warranty period is still
available but this will be chargeable.
PLEASE AFFIX YOUR PROOF OF PURCHASE/RECEIPT HERE
IN THE EVENT OF A CLAIM UNDER WARRANTY THIS RECEIPT MUST BE PRODUCED.
WARRANTY
1.
Tedelex Trading (Pty) Limited (“Tedelex”) warrants to the original purchaser of this product (“the
customer”) that this product will be free of defects in quality and workmanship which under normal
personal, family or household use and purpose may manifest within a period of 1 (one) year from
the date of purchase (“warranty period”).
2.
Where the customer has purchased a product and it breaks, is defective or does not work
properly for the intended purpose, the customer must notify the supplier from whom the customer
bought the product (“the supplier”) thereof within the warranty period. Any claim in terms of this
warranty must be supported by a proof of purchase. If proof of purchase is not available, then
repair, and/or service charges may be payable by the customer to the supplier.
3.
The faulty product must be taken to the supplier's service centre to exercise the warranty.
4.
The supplier will refund, repair or exchange the product in terms of this warranty subject to
legislative requirements. This warranty shall be valid only where the customer has not broken the
product himself, or used the product for something that it is not supposed to be used for. The
warranty does not include and will not be construed to cover products damaged as a result of
disaster, misuse, tamper, abuse or any unauthorised modification or repair of the product.
5.
This warranty will extend only to the product provided at the date of the purchase and not to any
expendables attached or installed by the customer.
6.
If the customer requests that the supplier repairs the product and the product breaks or fails to
work properly within 3 (three) months of the repair and not as a result of misuse, tampering or
modification by or on behalf of the customer, then the supplier may replace the product or pay a
refund to the customer.
7.
The customer may be responsible for certain costs where products returned are not in the original
packaging, or if the packaging is damaged. This will be deducted from any refund paid to the
customer.
TEDELEX TRADING (PTY) LTD (JOHANNESBURG)
JOHANNESBURG
TEL NO. (011) 490-9600
CAPE TOWN
TEL NO. (021) 535-0600
DURBAN
TEL NO. (031) 792-6000
www.amap.co.za
11


