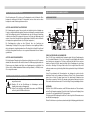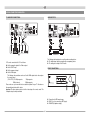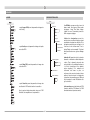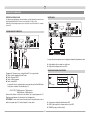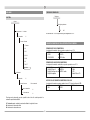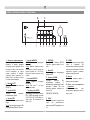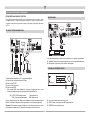
1
VC 2
2.1 Virtual Surround DVD Receiver-Set
incl. Sub-Sat-System
Wichtige Hinweise zur Installation / Garantieurkunde
Important notes for installation / warranty card
Mode d’emploi / certificat de garantie
Avvertenze importanti per l’installazione / certifcato di garanzia
Notas importantes sobre la instalación y certificado de garantía
Важная информация по инсталляции / гарантия
D
GB
F
3
3
I
E
RUS
D
INHALT
■ OSD-MENÜ
Hauptseite des OSD Menüs...........................................................................................13
Sprache...........................................................................................................14
Audio Setup.................................................................................................................14
Video Setup..................................................................................................................15
Sicherung.................................................................................................16
Grundeinstellung.............................................................................................16
■ KOMPATIBLE FORMATE ZUR MEDIENWIEDERGABE
Kompatible Disk-Formate..............................................................................................16
Kompatible Audio-/Video-Formate...............................................................................16
Über USB unterstützte Formate................................................................................16
■ TECHNISCHE DATEN
Technische Daten des VC 2.......................................................................................17
■ ALLGEMEINE INFORMATIONEN
Zubehör..............................................................................................................3
Vor Inbetriebnahme........................................................................................................4
Wichtige Sicherheitshinweise........................................................................................4
Entsorgungshinweise.........................................................................................4
Ländercode-Information................................................................................................4
■ BEDIENUNGSELEMENTE UND ANSCHLÜSSE
Front Panel....................................................................................................................5
Fernbedienung...................................................................................................6
Rückseite / Anschlüsse...................................................................................................7
■ DAS LAUTSPRECHERSET DES VC 2
8
■ VERSCHIEDENE ANSCHLUSSMÖGLICHKEITEN
Audio-Anschlüsse................................................................................................8
Frontlautsprecher und Subwoofer .............................................................................8
Antennen....................................................................................................8
Zusätzliche Audiogeräte.........................................................................................9
TV/Monitor-Anschlüsse........................................................................................9
Audio-Ausgänge.............................................................................................
9
Front-Anschlüsse...............................................................................................
9
■ DAS DISPLAY
10
■ GERÄT IN BETRIEB NEHMEN
Netzkabel............................................................................................................10
Fernbedienung....................................................................................................10
■ DIE FUNKTIONEN DES VC 2
DVD-Wiedergabe........................................................................................................11
CD-, WMA-, MPEG-4-Wiedergabe......................................................................................11
Tuner................................................................................................................12
RDS (Radio Data System)-Funktionen des Tuners............................................................12
Klangeinstellungen..................................................................................................13
ZUBEHÖR
1)
Bedienungsanleitung
3)
Batterien für Fernbedienung (2x AA)
2)
4)
5)
6)
7)
8)
9)
Fernbedienung
Netzkabel
MW Rahmenantenne
UKW Innenantenne
AV-Kabel
2 St. Frontlautsprecher
Subwoofer
10) Lautsprecherkabel für Frontlautsprecher und Subwoofer
11) Gummifüße für Frontlautsprecher, selbstklebend
3
D
Das Dreieck mit Blitzsymbol warnt den Benutzer, dass innerhalb des Gerätes hohe Spannungen verwendet werden, die
gefährliche Stromschläge verursachen können.
VOR INBETRIEBNAHME
Sehr geehrter Kunde,
vielen Dank, dass Sie sich für das Magnat VC 2 entschieden haben.
Bitte lesen Sie unsere folgenden Hinweise vor Inbetriebnahme des VC 2 genau durch.
Das Dreieck mit Ausrufezeichen macht den Benutzer darauf
aufmerksam, dass in der beigefügten Bedienungsanleitung
wichtige Hinweise enthalten sind, die unbedingt beachtet werden müssen.
WICHTIGE SICHERHEITSHINWEISE
■
■
■
■
■
■
■
■
■
■
■
■
■
■
■
Bitte die Bedienungsanleitung vor Inbetriebnahme sorgfältig durchlesen und
aufbewahren.
Betreiben Sie das Gerät nur bei einer Umgebungs-/Raumtemperatur von 10°C bis
40°C.
Sorgen Sie für eine ausreichende Belüftung des Gerätes. Ein Mindestabstand von
10 cm zu Gegenständen seitlich, nach hinten und oben sollte nicht unterschritten
werden.
Die Belüftungslöcher dürfen nicht mit Gegenständen bedeckt werden (z. B. Vorhänge,
Zeitung), um eine ausreichende Belüftung des Gerätes zu gewährleisten. Bitte keine
Hitzequellen wie Radiatoren, Öfen, offene Flammen oder andere Geräte, die Hitze
erzeugen in die Nähe des Gerätes stellen.
Das Gerät und die Fernbedienung dürfen weder Tropf- oder Spritzwasser noch
Wasser oder hoher Luftfeuchtigkeit ausgesetzt werden.
Ebenfalls darf das Gerät nicht zum Abstellen von Vasen oder anderen mit Feuchtigkeit
gefüllten Behältern benutzt werden.
Bei Kontakt mit Feuchtigkeit oder Flüssigkeiten sofort den Netzstecker ziehen.
Reinigen Sie das Gerät nur mit einem trockenen Tuch.
Verwenden Sie keine Reinigungsmittel oder chemische Lösungsmittel, da sonst die
Oberfläche beschädigt werden könnte.
Öffnen Sie niemals das Gerät.
Das Netzkabel muss immer betriebsbereit sein. Bei sichtbaren Beschädigungen des
Netzkabels darf das Gerät nicht mehr betrieben werden. Ein beschädigtes Kabel darf
nicht repariert, sondern muss ausgetauscht werden.
Das Netzkabel nicht mit feuchten Händen anschließen oder entfernen.
Überlassen Sie Wartungs- und Reparaturarbeiten immer qualifiziertem Fachpersonal.
Wird das Gerät längere Zeit nicht benutzt, ist das Gerät mittels des Netzschalters
(POWER) auf der Rückseite des Gerätes auszuschalten.
Bei Gewitter bitte den Netzstecker und das Antennenkabel ziehen.
Nicht öffnen! Gefahr des elektrischen Schlages! Um die Gefahr
von Feuer oder eines elektrischen Schlages zu verringern, darf
das Gerät nicht Regen oder Feuchtigkeit ausgesetzt werden.
Dieses Zeichen macht den Benutzer des Geräts darauf
aufmerksam, dass innerhalb des Gerätes ein Laserstrahl der
Klasse 1 arbeitet, der außerhalb des Gerätes keinerlei
gefährliche Strahlung verursachen kann.
ENTSORGUNGSHINWEISE
Gemäß der europäischen Richtlinie 2002/96/EC müssen alle
elektrischen und elektronischen Geräte über lokale
Sammelstellen getrennt entsorgt werden. Bitte beachten Sie
die lokalen Vorschriften und entsorgen Sie Ihre Altgeräte nicht
mit dem normalen Hausmüll.
LÄNDERCODE-INFORMATION
Sowohl DVD-Player als auch die DVD-Disks sind nach Regionen codiert. Diese regionalen
Codes müssen für die fehlerfreie Wiedergabe übereinstimmen. Andernfalls kann die Disk
nicht abgespielt werden.
Der Code für dieses Gerät lautet „2“. Andere regionale Codes können mit diesem Gerät
nicht wiedergegeben werden. Discs mit der Kennung „All“ können ebenfalls abgespielt
werden.
4
Folgende Liste beinhaltet die verschiedenen DVD-Regionen:
Region 1
USA, Kanada
Region 2
Europa, Naher Osten, Südafrika, Japan
Region 3
Südostasien, Taiwan
Region 4
Mittel- und Südamerika, Mexiko, Australien, Neuseeland
Region 5
Russische Föderation, Afrika (Teil), Indien, Pakistan
Region 6
China
D
BEDIENUNGSELEMENTE UND ANSCHLÜSSE – FRONT-PANEL
14
13
IR
1
1 ON / STANDBY Taste
Schaltet das Gerät ein, wenn es sich im
Standby Modus befindet (LED leuchtet
rot). Leuchtet die LED nicht, müssen Sie
den Netzschalter auf der Rückseite des
Gerätes einschalten. Umgekehrt kann
das Gerät vom Power-Betrieb (LED
leuchtet grün) auf Standby geschaltet
werden.
2 ▲ EJECT Taste
Öffnet oder schließt die DVD/CDSchublade (8).
3 ►/II PLAY Taste
Startet
bzw.
unterbricht
Medienwiedergabe.
4 ■ STOP Taste
die
Stoppt die Medienwidergabe.
Tuner: Schaltet bei UKW-Empfang
zwischen FM-Auto und FM-Mono um.
2
3
4
5
6
7 89
10
11 12
8 DVD VIDEO
5 I◄◄SEARCH Taste
CD/DVD: Springt zum vorigen Titel.
Tuner: Mit einem kurzen Druck kann die
Senderfrequenz
zur
manuellen
Abstimmung um 5 kHz erhöht werden.
Ein längerer Druck startet den
Sendersuchlauf.
DVD/CD-Schublade. Legen Sie die
DVD/CD mit der Beschriftung nach oben
in diese Schublade.
9 USB-Eingang
Zum
Anschluss
Speichermedien.
6 ►►I SEARCH Taste
CD/DVD: Springt zum nächsten Titel.
Tuner: Wie Punkt 5, aber die Suche
startet vorwärts.
von
USB-
10 VOLUME Regler
Stellt die Lautstärke ein. Um von
minimaler auf maximale Lautstärke zu
stellen, benötigen Sie etwa 2
Umdrehungen. Die Lautstärke wird dabei
im Display (13) angezeigt.
7 SOURCE Schalter
Zur Auswahl der Eingangsquelle, DISC,
TUNER oder externe Quellen AUX 1,
AUX 2, AUX 3, LINE, Digital Optisch,
Digital Coax. Sie wird auf dem Display
(13) angezeigt.
(VOLUME 00 - VOLUME 40).
11 LINE IN
3,5 mm Stereo-Klinkeneingang für eine
zusätzliche Audioquelle (MP3-Player
o.ä.).
5
12 PHONES
3,5 mm Stereo-Klinkenausgang für
Kopfhörer. Bei Benutzung schalten sich
die Lautsprecher aus. Stellen Sie die
Lautstärke niedrig, wenn Sie einen
Kopfhörer anschließen.
13 Display
Zeigt Ihnen Ihre
Einstellungen an.
vorgenommenen
14 Sensor für Fernbedienung
Um die Fernbedienung zu benutzen,
zielen Sie bitte auf diese Stelle.
D
BEDIENUNGSELEMENTE UND ANSCHLÜSSE – FERNBEDIENUNG
wird. Ein weiteres Antippen bringt die Disk dann
wieder auf normale Geschwindigkeit. Dies kann
man auch mit einem Druck auf die PLAY-Taste
erreichen.
Tuner: Mit einem kurzen Druck kann die
Senderfrequenz zur manuellen Abstimmung
um 50 kHz erhöht werden. Ein längerer Druck
startet den Sendersuchlauf.
AM um.
1
6
3
4
2
5
36
35
7
7 AUX
Aktiviert die Eingangsquellen
AUX 2, AUX 3 und LINE.
9
11
15
14
12
16
18
20
27
29
17
19
21
28
30
13
22
24
23
26
33
31
5 USB
Aktiviert den USB-Eingang.
6 DIGITAL IN
Aktiviert die Eingangsquellen
OPTISCH und DIGITAL COAXIAL.
8
10
4 MONO/ST
Schaltet bei UKW-Empfang zwischen FM-Auto
und FM-Mono um.
17 TUNING ►►
Wie Punkt 16, aber die Suche startet vorwärts.
DIGITAL
AUX
18 I◄◄ PRESET
Springt zum vorigen Titel.
Tuner: Wählt den nächst
Senderspeicherplatz.
1,
8 Numerische Tasten
Zur direkten Anwahl von Titeln auf einer
CD/DVD oder von voreingestellten Sendern
des Tuners.
25
34
32
9 MEM
Zum Speichern von Radiosendern.
2 DISC
Zur Auswahl der Eingangsquelle „Disk“, CDoder DVD-Spieler.
3 TUNER
Aktiviert
die
Eingangsquelle
„Tuner“.
Mehrfaches Drücken schaltet zwischen FM und
21 II► PLAY
Startet bzw. unterbricht die Medienwiedergabe.
22 EQ
Auswahl gespeicherter Klangeinstellungen:
LINEAR – FILM – MUSIK – SPRACHE MANUELL.
zur
23 TONE
Einstellung von Bass, Höhen und der Balance.
Mit den PRESET-Tasten kann die jeweilige
Einstellung geändert werden.
12 TITLE
Aufruf des DVD Titel-Menus.
13 MENU
Zum Aufrufen des DVD Menus.
24 VOLUME
Zur Einstellung der Lautstärke.
14 Cursortasten
Zur
Bedienung
des
Bildschirmmenüs
(OSD=On Screen Display) und Setup.
25 MUTE
Schaltet das Gerät stumm.
15 OK
Taste zur Bestätigung der mit den Cursertasten
gewählten Einstellungen.
16 ◄◄ TUNING
Ein Antippen der Taste startet die Suche
rückwärts mit 2, 4, 8 oder 16-facher
Geschwindigkeit, je nachdem, wie oft gedrückt
höheren
20 ■ STOP
Stoppt die Medienwiedergabe.
10 SEARCH/RDS
CD/DVD: Direkte Anwahl eines Kapitels, Titels
oder Sprung zu einer bestimmten Zeitmarke
Tuner: Anzeige der gewählten RDS-Funktion.
11 SETUP
Öffnet
das
OSD-Bildschirmmenü
Einstellung der Setups im DISC-Modus.
1 POWER
Schaltet das Gerät ein, wenn es sich im
Standby-Modus befindet. Leuchtet die LED
nicht, müssen Sie den Netzschalter auf der
Rückseite des Gerätes einschalten. Umgekehrt
kann das Gerät vom Power-Betrieb auf Standby
geschaltet werden.
19 ►►I PRESET
Springt zum nächsten Titel.
Tuner:
Wählt
den
nächst
Senderspeicherplatz.
niedrigeren
26 DVS SET
Aktiviert die virtuelle Dolby® Sourround
Wiedergabe über Stereolautsprecher.
Bei angeschlossenem Kopfhörer wird die
Dolby®-Headphone-Funktion
einbzw.
ausgeschaltet.
6
27 REPEAT 1/ALL
Wiederholfunktion des aktuellen Titels oder der
gesamten CD/DVD.
28 REPEAT A-B
Wiederholfunktion eines
Ausschnitts einer CD/DVD
frei
wählbaren
29 ZOOM
DVD-Wiedergabe: Zoom-Funktion
30 ANGLE
DVD-Wiedergabe: Auswahl verschiedener
Kameraperspektiven (sofern die DVD diese
Funktion unterstützt)
31 SUBTITLE
DVD-Wiedergabe:
Einstellung
unterschiedlicher Untertitel (sofern die DVD diese
Funktion unterstützt)
32 AUDIO
DVD-Wiedergabe: Einstellung der zur
verfügung stehenden Sprachspuren der DVD
(sofern die DVD diese Funktion unterstützt)
33 PROG
DVD-Wiedergabe: Selektierte Programmierung
einzelner Titel oder Kapitel.
34 HDMI RES
Wahl der Auflösung des HDMI-Ausgangs.
35 VIDEO OUT
Wählt den Videoausgang in folgender
Reihenfolge aus: SCART, Component
Interleased (COMP I), Component Progressive
(COMP P), HDMI, S-Video. Der Composite
(CVBS) Ausgang ist immer aktiv.
36 ▲ Eject
DVD/CD-Betrieb: Öffnet oder schließt die
Schublade. Beendet hierdurch DVD/CDWiedergabe bzw. startet sie.
D
BEDIENUNGSELEMENTE UND ANSCHLÜSSE – RÜCKSEITE / ANSCHLÜSSE
12 13
11
1 NETZANSCHLUSS
Zum Anschluss des
Netzkabels.
10
mitgelieferten
2 FUSE
Als Sicherung darf nur der Typ verwendet
werden, der auf der Rückseite des
Gerätes angegeben ist.
3 ON / OFF
Netzschalter. Schaltet das Gerät ein und
bringt es in den Standby-Modus. Ist der
Schalter in Position "OFF", ist das Gerät
vom Netz getrennt.
4 SPEAKER OUT SUB
Ausgang
zum
Anschluss
mitgelieferten Subwoofers.
15 16 17
14
des
9
8
7
18
6
5
5 SPEAKER OUT R/L
Ausgang
zum
Anschluss
der
mitgelieferten Satelliten-Lautsprecher
unter Beachtung der richtigen Polarität.
4
10 HDMI OUTPUT
HDMI-Ausgang.
(High
Multimedia Interface).
1
Definition
11 DIGITAL OUTPUT
Optischer und koaxialer digitaler AudioAusgang.
6 OUTPUT R / L
Analoger rechter und linker AudioAusgang.
12 ANT FM
Antennenanschluss. Zum Anschluss der
beigefügten FM-Innenantenne oder an
eine Hausantennenanlage.
7 OUTPUT S-VIDEO
S-Video (Y/C)-Ausgang.
8 OUTPUT COMPOSITE
Video-Composite (FBAS)-Ausgang.
13 ANT AM
Antennenanschluss. Zum Anschluss der
beigefügten AM-Rahmenantenne.
9 OUTPUT COMPONENT
Analoger Video-Komponentenausgang
(YUV).
14 DIGITAL INPUT
Optischer und koaxialer digitaler Audio
Eingang.
7
2
3
15 INPUT AUX 1
Analoger Audio-Eingang.
16 INPUT AUX 2
Analoger Audio-Eingang.
17 INPUT AUX 3
Analoger Audio-Eingang.
18 SCART OUT
SCART-Ausgang.
D
DAS LAUTSPRECHERSET DES VC 2
VERSCHIEDENE ANSCHLUSSMÖGLICHKEITEN
Zum Lieferumfang des VC 2 gehören zwei Frontlautsprecher und ein Subwoofer. Diese
Lautsprecher sind speziell auf das VC 2 abgestimmt, und es sollten auch nur diese
Lautsprecher an das Gerät angeschlossen werden.
AUDIO-ANSCHLÜSSE
Subwoofer
Speaker R Speaker L
AUFSTELLUNG DER FRONTLAUTSPRECHER
Die Frontlautsprecher werden links und rechts mit möglichst gleichem Abstand zum
Fernseher, möglichst in Ohrhöhe platziert. Zwischen den Lautsprechern und dem Hörplatz
sollte Sichtverbindung bestehen. Schallabsorbierende oder reflektierende Hindernisse
verfälschen den Klang. Die Lautsprecher können auf ein Regal oder Sideboard gestellt
werden. Hierzu sollten die mitgelieferten selbstklebenden Gummifüße auf der Unterseite
der Lautsprecher angebracht werden (vier Stück pro Lautsprecher).
zusätzliches Audiogerät
AM-Antenne
digital
analog
R
FM-Antenne
Die Frontlautsprecher verfügen an ihrer Rückseite über eine Vorrichtung zur
Wandmontage. Befestigen Sie eine geeignete Schraube an einer tragfähigen Wand, in
die der Lautsprecher eingehängt werden kann. Die mitgelieferten Gummifüße sollten auf
der Rückseite angebracht werden, um einen gewissen Abstand der Box zur Wand zu
gewährleisten.
FRONTLAUTSPRECHER UND SUBWOOFER
Dem VC-2-Set liegen vorkonfektionierte Lautsprecherkabel für beide Frontlautsprecher
(2 x 3 m) und den Subwoofer (1 x 5 m) bei. Verwenden Sie nach Möglichkeit diese Kabel
zum Anschluss der Lautsprecher. Sie können bei Bedarf die Kabel kürzen und neu
abisolieren. Beachten Sie bitte, dass beide Kabel für die Frontlautsprecher gleich lang
sein sollten. Benötigen Sie längere Kabel sollten Sie die mitgelieferten Kabel nicht
verlängern, sondern neue, gleichwertige Kabel mit der gewünschten Länge im Fachhandel
besorgen.
AUFSTELLUNG DES SUBWOOFERS
Die Aufstellung des Subwoofers ist im Allgemeinen unkritisch, da er nur tiefe Frequenzen
abstrahlt, die das menschliche Ohr nicht orten kann. Die Erfahrung zeigt aber, dass eine
Platzierung vor dem Hörplatz in der Nähe eines Frontlautsprechers vorteilhaft ist. Des
Weiteren sollte ein Mindestabstand zu Wänden und Gegenständen (z. B. Möbel) von ca.
25 cm eingehalten werden.
Lösen Sie nacheinander die Klemmschrauben der Lautsprecher und stecken die
abisolierten Enden in die vorhandenen Bohrungen. Ziehen Sie die Klemmschrauben
wieder fest an. Achten Sie darauf, dass keine evtl. abstehenden Drahtadern einen
Kurzschluss verursachen. Schließen Sie dann das jeweils andere Kabelende in gleicher
Weise an die Anschlussklemmen des VC 2 an. Auf richtige Polung ist unbedingt zu achten.
VERSCHIEDENE ANSCHLUSSMÖGLICHKEITEN
Schließen Sie das Netzkabel erst an, wenn alle Verbindungen
angeschlossen sind.
Beachten Sie bei der Durchführung der Verbindungen auch die
Handbücher der anderen Komponenten
Achten Sie bei den Kabeln auf Qualität. Insbesondere das HDMI-Kabel
sollte auf jeden Fall HDMI-zertifiziert sein.
ANTENNEN
Schließen Sie die UKW-Innenantenne an die FM-Antennenbuchse an. Falls vorhanden,
nutzen Sie die Hausantennenanlage. Diese bietet in der Regel besseren Empfang. Hierzu
verwenden Sie ein Handelsübliches IEC-Antennenkabel.
Zur Nutzung des MW-Empfangsteils schließen Sie die mitgelieferte Rahmenantenne an
den AM-Antenneneingang an.
Richten Sie die Antennen jeweils so aus, dass bestmöglicher Empfang gewährleistet wird.
8
D
VERSCHIEDENE ANSCHLUSSMÖGLICHKEITEN
ZUSÄTZLICHE AUDIOGERÄTE
Besitzen die Geräte einen digitalen Ausgang, sollte man diesen nutzen und mit einem der
mit digitalen Eingänge des VC 2 verbinden, entweder mit einem Coaxkabel (75 Ohm) oder
mit einem optischen Kabel.
Geräte mit analogem Ausgang können Sie über eine Cinchleitung mit den Aux-Buchsen
des VC 2 verbinden.
AUDIO-AUSGÄNGE
TV/MONITOR-ANSCHLÜSSE
Für Audioaufnahmegeräte können folgende Audio Ausgänge verwendet werden:
Der digitale Ausgang: Optisch oder koaxial mit entsprechenden Kabeln.
Der analoge Stereoausgang: via Cinchkabel.
FRONT-ANSCHLÜSSE
Ein TV-Gerät kann folgendermaßen an das VC 2 angeschlossen werden:
Über den Composite -Ausgang oder den S-Video-Ausgang.
Über den SCART-Ausgang.
Über den Component-Ausgang.
Über den HDMI-Ausgang.
Für den HDMI-Ausgang können folgende Videoauflösungen über das Video-Setup
oder die Fernbedienung (16) ausgewählt werden:(
IR
(PAL / NTSC) 576/480 progressive 720 progressive
1080 interlaced
1080 progressive
Bitte vergewissern Sie sich, welche Videoauflösung für Ihr TV-Gerät optimal ist.
Beachten Sie hierzu die Bedienungsanleitung des Gerätes.
ACHTUNG: Die Video Ausgänge müssen entweder über das Video-Setup oder die
Fernbedienung (35) ausgewählt werden. Der Composite-Ausgang ist immer aktiv.
Anschluss für USB-Massenspeicher.
LINE IN (z. B. zum Anschluss eines MP3-Players)
PHONES (Kopfhörerausgang)
9
D
DISPLAY
GERÄT IN BETRIEB NEHMEN
NETZKABEL
6
Wenn alle Verbindungen hergestellt sind, schließen Sie die Netzkabel an.
Kontrollieren Sie nochmals alle Verbindungen, auch unter Beachtung der Handbücher der
anderen Geräte.
Kontrollieren Sie, ob die rechten und linken Kanäle richtig angeschlossen sind (Links mit
Links, Rechts mit Rechts).
Bündeln Sie die Netzkabel zur Vermeidung von Brummen und anderen Störungen nicht
mit den Verbindungskabeln.
Schalten Sie die Geräte ein.
GG
2
1
2
3
1
3
4
5
Statusanzeige der Laufwerksfunktion (Play, Pause, schneller Vorlauf/Rücklauf)
Alphanumerische Anzeige: Information über aktuelle Einstellungen, Operationen und
RDS Informationen. Im CD/DVD-Modus werden hier das aktuelle Kapitel, der aktuelle
Track und die bereits gespielte Zeit angezeigt.
Anzeigen bei FM Empfang:
ST.: Stereoempfang
TUNED: Sender richtig eingestellt
4
5
6
RDS: RDS-Daten verfügbar
Anzeige Dolby® Digital Dekodierung
Anzeige der zur Decodierung zur Verfügung stehenden Kanäle
FERNBEDIENUNG
Anzeige ist aktiv, wenn DVS REF oder DVS WIDE aktiv ist (Dolby Virtual Speaker
Processing).
Legen Sie die Batterien in das entsprechende Fach der Fernbedienung.
Zur Benutzung der Fernbedienung richten Sie diese auf den Infrarotsensor des VC 2 (14).
10
D
FUNKTIONEN DES VC 2
Wiederholfunktionen (REPEAT 1/ALL, REPEAT A-B, Pos. 27, 28)
Drücken Sie REPEAT 1/ALL, um den aktuellen Titel oder die ganze DVD zu
wiederholen. Ein erneuter Druck auf die Taste schaltet die Wiederholfunktion aus.
Drücken sie die REPEAT A-B um den Anfang des zu wiederholenden Abschnitts zu
bestimmen. Der nächste Druck markiert das Ende des Abschnitts. Ein erneuter Druck
auf die Taste schaltet die Wiederholfunktion aus.
DVD-WIEDERGABE
Stellen Sie mit SOURCE an der Front des VC 2 (Pos. 7) oder mit DISC an der
Fernbedienung (Pos. 2) den Eingang auf DISC (wird im Display angezeigt).
Öffnen Sie mit EJECT an der Front (Pos. 2) oder der Fernbedienung (Pos. 36) die
Schublade, legen Sie eine DVD ein und schließen die Schublade wieder mit EJECT.
Das Gerät liest die DVD und auf dem Bildschirm wird das DVD-Menu angezeigt (sofern
die DVD diese Funktion unterstützt). Zur Navigation im Menu benutzten Sie die Cursor und
OK Tasten (Pos. 14, 15).
CD-, WMA-, MPEG-4-WIEDERGABE
Die Eingangswahl und das Einlegen der CD geschehen wie im DVD-Modus.
Als Speichermedium kann auch ein USB-Massenspeicher verwendet werden. Dieser wird
an den USB-Eingang auf der Front des VC 2 angeschlossen (Pos. 9). Als Eingangsquelle
muss über die SOURCE-Taste auf der Front des VC 2 (Pos. 7) oder der USB-Taste auf
der Fernbedienung (Pos. 5) der USB-Eingang aktiviert werden.
Während der Wiedergabe stehen folgende Funktionen zur Verfügung:
Steuerung der Wiedergabe durch die Laufwerkssteuertasten an der Front (Pos. 3-6)
oder der Fernbedienung (Pos. 16-21).
Aufruf des DVD-Menus bzw. des DVD-Titelmenus mit den Tasten MENU bzw. TITLE
auf der Fernbedienung (sofern die DVD diese Funktion unterstützt).
Direkte Anwahl eines Titels, Kapitels oder Sprung zu einer bestimmten Zeitmarke
(SEARCH/RDS-Taste auf der Fernbedienung, Pos. 10)
Auf dem Bildschirm wird die Titelliste angezeigt.
Wählen Sie hierzu das entsprechende Eingabefeld mit den Cursor-Tasten aus und
geben die Titel bzw. Kapitel Nummer ein. Die Zeitmarke wird im Format
Stunden:Minuten:Sekunden (jeweils zweistellig) eingegeben. Benutzen Sie hierzu
NICHT die „>10“-Taste!
Selektierte Programmierung (SEARCH/RDS-Taste auf der Fernbedienung, Pos. 33)
Es kann mit den Cursor-Tasten und der OK-Taste ein einzelner Titel ausgewählt werden
oder mit PLAY die Wiedergabe der gesamten CD gestartet werden. Des Weiteren kann der
Wiederhol- und der Wiedergabemodus ausgewählt werden.
Während der Wiedergabe stehen folgende Funktionen zur Verfügung:
Steuerung der Wiedergabe durch die Laufwerkssteuertasten an der Front (Pos. 3-6)
oder der Fernbedienung (Pos. 16-21).
Direkte Anwahl eines Titels, oder Sprung zu einer bestimmten Zeitmarke
(SEARCH/RDS-Taste auf der Fernbedienung, Pos. 10)
Wählen Sie mit den Cursor Tasten (Pos. 14) den gewünschten Titel oder das
gewünschte Kapitel aus der linken Liste aus und fügen es mit der OK-Taste (Pos. 15)
der Play-Liste (rechts) zu. Mit den Schaltflächen unten können Sie einzelne Titel oder
die gesamte Play Liste löschen oder die Auswahl abspielen.
11
D
FUNKTIONEN DES VC 2
Sendervoreinstellungen
• Es können je 20 FM- und AM-Sender im Speicher abgelegt werden.
• Stellen Sie den gewünschten Sender ein (FM oder AM). Öffnen Sie den Speicher mit der
MEM-Taste auf der Fernbedienung (Pos. 9).
• Wählen Sie die gewünschte Sendernummer mit den numerischen Tasten auf der Fernbedienung (Pos. 8).
• Die Sendernummer blinkt auf dem Display.
• Drücken Sie erneut die MEM-Taste, um den Sender abzuspeichern.
• Die Sendernummer hört auf zu blinken.
• Wiederholen Sie die Prozedur, um weitere Sender abzuspeichern.
Wählen Sie hierzu das entsprechende Eingabefeld mit den Cursor-Tasten aus und
geben die Titel Nummer ein. Die Zeitmarke kann im aktuellen Titel oder innerhalb der
CD gesetzt werden und wird im Format Stunden:Minuten:Sekunden (jeweils
zweistellig) eingegeben. Benutzen Sie hierzu NICHT die „>10“-Taste!
Wiederholfunktionen (REPEAT 1/ALL, REPEAT A-B, Pos. 27, 28). Drücken Sie die
REPEAT 1/ALL Taste, um den aktuellen Titel oder die ganze CD zu wiederholen. Ein
erneuter Druck auf die Taste schaltet die Wiederholfunktion aus. Drücken sie die
REPEAT A-B um den Anfang des zu wiederholenden Abschnitts zu bestimmen. Der
nächste Druck markiert das Ende des Abschnitts. Ein erneuter Druck auf die Taste
schaltet die Wiederholfunktion aus.
Auswahl der voreingestellten Sender
• Drücken Sie eine der PRESET-Tasten auf der Fernbedienung (Pos. 18, 19), um die gewünschte Sendernummer auszuwählen. Der Senderplatz kann auch mit den numerischen Tasten direkt angewählt werden.
Für viele Mediendateien gibt es keine allgemeingültigen Standards. Wir
können deshalb nicht garantieren, dass alle Dateien immer korrekt
wiedergegeben werden.
Sehr große Videodateien können über USB Probleme bei der Wiedergabe
bereiten. Diese sollten dann über eine CD oder DVD wiedergegeben
werden.
RDS (RADIO DATA SYSTEM)-FUNKTIONEN DES TUNERS
RDS ist ein System, mit dem Informationen über UKW-Sendungen zusammen mit dem Signal des Senders ausgestrahlt werden. Der VC 2 kann diese Informationen (über den
Sender, die Sendung usw.) im Display anzeigen. Die RDS-Funktionen können über die
SEARCH/RDS-Taste der Fernbedienung (Pos. 10) eingestellt werden.
TUNER
RDS Funktionen des VC 2
Rundfunkband auswählen
• Wählen Sie mit SOURCE (VC 2, Pos. 7) oder TUNER (Fernbedienung, Pos. 3) TUNER
FM oder TUNER AM als Audioquelle aus.
• Wählen Sie mit MONO/ST (Fernbedienung, Pos. 4) zwischen Monoempfang (bei
schlechten Empfangsbedingungen empfehlenswert) oder Stereoempfang aus.
• PS (Program Service Name): Zeigt den Namen des Senders an.
• PTY (Program Type Identification): Zeigt den Typ der Sendung an.
• RT (Radio Text): Zeigt alle Meldungen des Senders an.
Anzeigereihenfolge bei wiederholter Betätigung der SEARCH/RDS-Taste: PS, Senderfrequenz, PTY, RT.
Sendersuche
• TUNER als Audioquelle und Band auswählen (siehe oben).
• Benutzen Sie die TUNING-Tasten auf der Front des VC 2 (Pos. 5, 6) oder die TUNINGTasten auf der Fernbedienung (Pos. 16, 17):
• Ein kurzer Druck auf die Tasten erhöht bzw. verringert die Abstimmfrequenz um
50 kHz.
• Ein langer Druck auf die Tasten sucht den nächsten Sender im Band aufwärts bzw.
abwärts.
Wird trotz RDS Signals eine dieser Funktionen vom Sender nicht unterstützt, erscheint
auf dem Display “N/A”.
12
D
FUNKTIONEN DES VC 2
OSD-MENU
KLANGEINSTELLUNGEN
Das VC 2 ist mit einem OSD (On Screen Display)-Menü ausgestattet. Alle notwendigen
Grundinstellungen können anhand dieses Menüs vorgenommen werden, wenn als
Eingangsquelle “DISC” ausgewählt wurde.
Sie öffnen das Menü mit der Setup-Taste der Fernbedienung (Pos. 11).
Mit den Cursortasten (Pos. 14) wählen Sie einen Menüpunkt aus, der dann hell unterlegt
bzw. eingerahmt wird. Den Menüpunkt können Sie mit der OK Taste auswählen, oder aber
mit den Cursortasten durch weitere Untermenüs navigieren. Mit der OK-Taste können Sie
eine Einstellung ändern.
Mit der SETUP-Taste verlassen Sie das OSD-Menü wieder.
Einstellen der Lautstärke
Die Lautstärke kann mit den VOLUME-Reglern auf dem Front-Panel (Pos. 10) oder auf
der Fernbedienung (Pos. 24) eingestellt werden. Auf dem Display erscheint dann VOL
und ein Wert zwischen 00 und MAX (40).
MUTE (Fernbedienung, Pos. 25)
Mit dieser Taste kann der Ton stumm geschaltet werden. Auf dem Display blinkt
MUTING.Ein weiterer Druck auf diese Taste oder ein Ändern der Lautstärke schaltet den
Ton wieder ein.
HAUPTSEITE DES OSD-MENÜS
Einstellen von Bass/Höhen
Drücken Sie die TONE Taste auf der Fernbedienung (Pos. 23) so oft, bis BASS oder TREB
im Display erscheint.
Stellen Sie den Klang mit den TUNING-Tasten der Fernbedienung (Pos. 16, 17) ein.
Sprache
Video
Einstellen der Balance
Die Balance wird wie die Klangregelung angewählt. Die entsprechende Taste so oft
drücken, bis BAL L00 - 00R im Display erscheint. Mit TUNING (16) kann dann der
Stereomittelpunkt nach links oder rechts verschoben werden.
Audio
Rating
Sicherung
Grundeinst.
EQ-Funktion
Mit der EQ-Taste auf der Fernbedienung (Pos. 22) können unterschiedliche
Voreinstellungen der Klangregler abgerufen werden. Es stehen folgende Einstellungen
zur Auswahl: LINEAR, FILM, MUSIK, SPRACHE. Sie werden durch wiederholtes
Betätigen der EQ-Taste ausgewählt.
Von dieser Seite aus gelangen Sie in die verschiedenen Untermenüs:
Unter Sprache können Sie die Sprache für verschiedene Menüs des VC 2 wählen.
Unter Video gelangen Sie ins Video Setup, wo sie verschiedene Bildeinstellungen
vornehmen können.
DVS-Funktion
Mit DVS SET (Fernbedienung, Pos. 26) können Sie den virtuellen 5-Kanal-Ton über
Stereolautsprecher ausschalten, oder zwischen “DVS Ref” und “DVS Wide” wählen.
DVS Ref ist der Standardmodus, mit dem Sie den 5-Kanal-Ton mit den beiden
Frontlautsprechern wahrnehmen können.
DVS Wide erzeugt ein erweitertes (breiteres) Soundfeld für die Frontkanäle.
Unter Audio gelangen Sie ins Audio Setup, wo sie verschiedene Toneinstellungen
vornehmen können.
Unter Sicherung können Sie Berechtigungen zur Wiedergabe von Filmen einstellen.
Unter Grundeinstellung können Sie das VC 2 auf die Werkseinstellungen
zurücksetzen.
13
D
OSD-MENÜ
SPRACHE
AUDIO SETUP
Audio
Unter OSD Menu können Sie die Sprache des SetupMenüs einstellen.
EQ Modus
Linear
Film
Musik
Sprache
Manuell
Unter Audio können Sie die Sprache der Tonspur einer
DVD einstellen.
Bässe
Höhen
Balance
Lautsprecher Position
Unter DVD Menu können Sie die Sprache der Menüs
auf einer DVD einstellen.
Regal
Wandmontage
Subwoofer Lauts.
Digital Ausgang
PCM
Unter Untertitel können Sie die Sprache der Untertitel
auf einer DVD einstellen, oder Sie können die Untertitel
ausschalten.
RAW
Unter EQ-Modus können Sie Klang und Balance
der Audiowiedergabe einstellen. Es können vier
Voreinstellungen abgerufen werden: Linear, Film,
Musik, Sprache. Unter dem Menüpunkt ‚Manuell‘
können Sie eigene Einstellungen vornehmen.
Unter Lautsprecher Position können Sie eine
Frequenzgang Korrektur abhängig von der
Platzierung
der
Satelliten-Lautsprecher
vornehmen. Sind die Lautsprecher auf einem Regal
aufgestellt und beträgt der Abstand zur Wand
mindestens 15 cm, ist die Einstellung ‚Regal‘
empfehlenswert. Sind die Lautsprecher direkt an
einer Wand platziert, stellen Sie bitte
‚Wandmontage‘ ein.
Unter Subwoofer Lautstärke können Sie die
Lautstärke des Subwoofers auf die räumlichen
Gegebenheiten einstellen. Je näher der Subwoofer
an Wänden platziert ist desto stärker ist die
Basswiedergabe und muss evtl. abgesenkt werden
(negative Werte). Steht der Subwoofer relativ frei
im Raum, ist oft eine Verstärkung notwendig
(positive Werte). Die richtige Einstellung sollten Sie
durch diverse Hörversuche mit unterschiedlichen
Musik und Filmmaterial austesten. Dabei sollte der
EQ-Modus auf Linear eingestellt sein.
Unter Digital Ausgang können Sie zwischen PCM
(Zweikanal
PCM-Datenformat)
und
RAW
(Mehrkanal Datenformat) wählen.
Bitte beachten Sie bei den letzten drei Punkten, dass
diese Spracheinstellungen von der verwendeten DVD
auch unterstützt werden müssen.
14
D
OSD-MENÜ
VIDEO SETUP
Mit TV-Format können Sie
Bildschirmformate einstellen.
Unter SCART können Sie zwischen der SCARTVideoausgabe im RGB oder CVBS Format
wählen, sofern SCART als Videoausgang aktiv ist.
verschiedene
Unter Component können Sie zwischen der
Componenten-Videoausgabe im Interleased oder
Progressive Format wählen, sofern Component als
Videoausgang aktiv ist.
Mit TV-Darstellung können Sie verschiedene
Anpassungen
der
Bildformats
an
dasFernsehgerät einstellen.
Mit HD Auflösung lässt sich die Auflösung des
HDMI-Ausgangs einstellen. Folgende Auflösungen
können gewählt werden:
Sie können zwischen folgenden Optionen
wählen:
Vollbild: Das Bild wird formatfüllend auf dem
Bildschirm dargestellt. Das Seitenverhältnis des
Original Bildes wird dem Bildschirm angepasst.
Original: Das Original Format wird dargestellt
(nur MPEG).
Autom. Anpassung: Die maximale Breite bzw.
Höhe des Bildes wird auf dem Bildschirm
dargestellt.
Das
Seitenverhältnis
des
Originalbildes bleibt erhalten. Der Bildschirm wird
ggf. nicht ganz ausgefüllt.
Pan & Scan: Das Bild wird formatfüllend auf dem
Bildschirm dargestellt. Das Seitenverhältnis des
Originalbildes bleibt erhalten. Ggf. werden
Bildinhalte an den Rändern nicht dargestellt.
(PAL / NTSC) 576/480 progressive
720 progressive
1080 interlaced
1080 progressive
Bitte
vergewissern
Sie
sich,
welche
Videoauflösung für Ihr TV-Gerät optimal ist.
Beachten Sie hierzu die Bedienungsanleitung des
Gerätes.
Unter TV-Typ können Sie zwischen den
Farbfernsehnormen PAL, NTSC und Multisystem
wählen.
Unter Video Ausgang können Sie zwischen den
Ausgängen S-Video, SCART, Componente, und
HDMI wählen. Der Composite-Ausgang ist
unabhängig von der Einstellung aktiv.
Unter Bild Einstellung können Sie Helligkeit,
Kontrast, Farbton und Farbsättigung einstellen.
Es sind drei Einstellungen gespeichert (Standard,
Lebendig, Kühl). Unter dem Menüpunkt ‚Manuell‘
können Sie eigene Einstellungen vornehmen.
Wenn HDMI als Videoausgang gewählt ist, kann
nur die Bildhelligkeit verändert werden.
15
D
OSD-MENÜ
GRUNDEINSTELLUNG
SICHERUNG
Grundeinst.
Sicherung
Rating
Auf Grundeinstellung zurücksetzen
Elternkontrolle
JA
8. Erwachsene
Passwort eingeben
Nach Bestätigung mit JA werden die Grundeinstellungen des VC 2 wieder hergestellt.
KOMPATIBLE FORMATE ZUR MEDIENWIEDERGABE
****
Passwort richtig
Passwort falsch
Kompatible Disc-Formate
Folgende Disc-Formate können vom VC 2 wiedergegeben werden:
CD-DA
VCD
DVD-R/DVD+R/RW
HDCD
S-VCD
CD-R/CD-RW
DVD Video
1.Kid Safe
2.G
3.PG
4.PG-13
Kompatible Audio-/Video-Formate
Folgende Audio-/Video-Formate können vom VC 2 wiedergegeben werden:
Dolby® Digital
MPEG-4
AAC
Dolby® Prologic II
MPEG-2
WMA
Dolby® Virtual speaker MPEG-1 Audio
JPG
Dolby® Headphone
Kodak Picture CD
5.PG-R
6.R
7.NC-17
8.Adult
Set Password
Passwort eingeben
Formate, die über USB wiedergegeben werden
Folgende Formate können vom VC 2 über USB wiedergegeben werden:
AAC
MP4
WMA
MP4
JPEG
****
Passwort richtig
Neues PW eingeben
NEIN
Passwort falsch
****
Neues P W bes tätigen ****
Nach Eingabe des richtigen Passwortes können Sie die einstufung der Elternkontrolle
ändern. Das voreingestellte Passwort ist 8888.
Unter Passwort ändern können Sie das gültige Passwort wie folgt ändern:
Geben Sie das gültige Passwort ein.
Geben Sie zweimal das neue Passwort ein.
16
D
TECHNISCHE DATEN
CD-RECEIVER
Verstärker
Ausgangsleistung:
Nennleistung SAT (4 Ohm):
Nennleistung SUB (4 Ohm):
Impulsleistung (gesamt):
Frequenzgang-Linearität:
CD/AUX/Line
Geräuschspannungsabstand:
CD/AUX/Line
Eingangsempfindlichkeit:
AUX/Line
Klangregelung:
Bass
Höhen
Sub
FRONTLAUTSPRECHER
Konfiguration:
Belastbarkeit RMS/max:
Impedanz:
Frequenzbereich:
Wirkungsgrad (1 Watt/1 m):
Maße (BxHxT):
2 x 50 W
1 x 100 W
350 W
20 Hz – 20 kHz (-1,0 dB)
SUBWOOFER
95 dB
Konfiguration:
Belastbarkeit RMS/max:
Impedanz:
Frequenzbereich:
Wirkungsgrad (1 Watt/1 m):
Maße (BxHxT):
450 mV/47kOhm
±10 dB/100 Hz
±10 dB/10 kHz
± 6 dB
FM Tuner
Frequenzbereich
87.5 – 108 MHz
Geräuschspannungsabstand Mono: 70 dB
Stereo: 65 dB
AM Tuner
Frequenzbereich
531-1602 MHz
Geräuschspannungsabstand 40 dB
Sonstiges
Netzspannung:
Leistungsaufnahme:
Abmessungen (BxHxT):
Hauptgerät:
Inkl. Bedienelementen
und Anschlussklemmen:
Fernbedienung:
Gewicht:
Bassreflex
140 / 200 Watt
4 Ohm
25 – 180 Hz
90 dB
235 x 390 x 388 mm
Besonderheiten:
Dolby® Virtual Speaker Processing für perfekten Kinosound aus 2 Lautsprechern
Dolby® Headphone
Digitale 3-Kanalendstufe
Zoran Vaddis® Video-Prozessor
Upscale-Funktion bis 1080p (Full HD Resolution) für DVD
Superhet UKW/MW Tuner mit RDS/Radiotext-Funktion
Digitales Netzteil
Standby-Funktion mit geringer Stromaufnahme
230 VAC/50 Hz
Maximal 200 W
Standby 0,9 W
Technische Änderungen vorbehalten.
400 x 98 x 289 mm
400 x 98 x 332 mm
53 x 220 x 22 mm
4.8 kg
2 Wege geschlossen
70 / 120 Watt
4 Ohm
60 – 35 000 Hz
90 dB
108 x 202 x 152 mm
17
D
GB
CONTENTS
GENERAL INFORMATION
Accessories . . . . . . . . . . . . . . . . . . . . . . . . . . . . . . . . . . . . . . . . . . . . . . . . . . . . . . . 18
OSD MENU
Main page of the OSD menu . . . . . . . . . . . . . . . . . . . . . . . . . . . . . . . . . . . . . . . . . . 28
Important safety notes . . . . . . . . . . . . . . . . . . . . . . . . . . . . . . . . . . . . . . . . . . . . . . . 19
Audio setup . . . . . . . . . . . . . . . . . . . . . . . . . . . . . . . . . . . . . . . . . . . . . . . . . . . . . . . 29
Before starting . . . . . . . . . . . . . . . . . . . . . . . . . . . . . . . . . . . . . . . . . . . . . . . . . . . . . 19
Language . . . . . . . . . . . . . . . . . . . . . . . . . . . . . . . . . . . . . . . . . . . . . . . . . . . . . . . . . 29
Instructions for disposal . . . . . . . . . . . . . . . . . . . . . . . . . . . . . . . . . . . . . . . . . . . . . . 19
Video setup . . . . . . . . . . . . . . . . . . . . . . . . . . . . . . . . . . . . . . . . . . . . . . . . . . . . . . . 30
Regional coding . . . . . . . . . . . . . . . . . . . . . . . . . . . . . . . . . . . . . . . . . . . . . . . . . . . . 19
Rating . . . . . . . . . . . . . . . . . . . . . . . . . . . . . . . . . . . . . . . . . . . . . . . . . . . . . . . . . . . . 31
Default settings. . . . . . . . . . . . . . . . . . . . . . . . . . . . . . . . . . . . . . . . . . . . . . . . . . . . . 31
OPERATIONAL ELEMENTS AND CONNECTIONS
Front panel . . . . . . . . . . . . . . . . . . . . . . . . . . . . . . . . . . . . . . . . . . . . . . . . . . . . . . . . 20
COMPATIBLE FORMATS FOR MEDIA PLAYBACK
Compatible disc formats. . . . . . . . . . . . . . . . . . . . . . . . . . . . . . . . . . . . . . . . . . . . . . 31
Remote control . . . . . . . . . . . . . . . . . . . . . . . . . . . . . . . . . . . . . . . . . . . . . . . . . . . . . 21
Compatible audio / video formats. . . . . . . . . . . . . . . . . . . . . . . . . . . . . . . . . . . . . . . 31
Rear/connections . . . . . . . . . . . . . . . . . . . . . . . . . . . . . . . . . . . . . . . . . . . . . . . . . . . 22
THE VC 2 SPEAKER SET
VARIOUS CONNECTION POSSIBILITIES
Formats supported by USB . . . . . . . . . . . . . . . . . . . . . . . . . . . . . . . . . . . . . . . . . . . 31
23
SPECIFICATIONS
Specifications of the VC 2 . . . . . . . . . . . . . . . . . . . . . . . . . . . . . . . . . . . . . . . . . . . . 32
Audio connections . . . . . . . . . . . . . . . . . . . . . . . . . . . . . . . . . . . . . . . . . . . . . . . . . 23
Front Speakers and Subwoofer . . . . . . . . . . . . . . . . . . . . . . . . . . . . . . . . . . 23
Antennas. . . . . . . . . . . . . . . . . . . . . . . . . . . . . . . . . . . . . . . . . . . . . . . . . . . . 23
Auxiliary audio devices . . . . . . . . . . . . . . . . . . . . . . . . . . . . . . . . . . . . . . . . . 23
ACCESSORIES
TV / monitor connections . . . . . . . . . . . . . . . . . . . . . . . . . . . . . . . . . . . . . . . . . . . . . 24
1) Instruction manual
Audio outputs . . . . . . . . . . . . . . . . . . . . . . . . . . . . . . . . . . . . . . . . . . . . . . . . . . . . . . 24
2) Remote control
Front connections. . . . . . . . . . . . . . . . . . . . . . . . . . . . . . . . . . . . . . . . . . . . . . . . . . . 24
THE DISPLAY
3) Batteries for remote control (2x AA)
25
4) Mains cable
STARTING UP THE DEVICE
Mains cable. . . . . . . . . . . . . . . . . . . . . . . . . . . . . . . . . . . . . . . . . . . . . . . . . . . . . . . . 25
5) MW loop antenna
6) FM indoor antenna
Remote control . . . . . . . . . . . . . . . . . . . . . . . . . . . . . . . . . . . . . . . . . . . . . . . . . . . . . 25
7) AV cable
THE FUNCTIONS OF THE VC 2
DVD playback. . . . . . . . . . . . . . . . . . . . . . . . . . . . . . . . . . . . . . . . . . . . . . . . . . . . . . 26
8) 2 front speakers
9) Subwoofer
CD, WMA, MPEG-4 playback . . . . . . . . . . . . . . . . . . . . . . . . . . . . . . . . . . . . . . . . . 26
10) Speaker cables for front speakers and subwoofer
Tuner . . . . . . . . . . . . . . . . . . . . . . . . . . . . . . . . . . . . . . . . . . . . . . . . . . . . . . . . . . . . 27
11) Rubber pucks for front speakers, self adhesive
RDS (Radio Data System) Functions of the Tuner. . . . . . . . . . . . . . . . . . . . . . . . . . 27
Sound settings.. . . . . . . . . . . . . . . . . . . . . . . . . . . . . . . . . . . . . . . . . . . . . . . . . . . . . 28
18
GB
The triangle with lightning symbol warns the user that high
voltage is used within the device which can result in electric
shock.
BEFORE STARTING
Dear Customer,
Thank you for choosing the Magnat VC 2.
Please read the following information carefully before starting to use the VC 2.
The triangle with exclamation point makes the user aware that
there are important notes in the enclosed instruction manual
which must be observed.
IMPORTANT SAFETY INSTRUCTIONS
Do not open! Danger of electric shock! To reduce the danger of
fire or of an electric shock, the device may not be subjected to
rain or humidity.
Please read the instruction manual carefully before use and keep it in a safe place.
Only operate the device at an ambient/room temperature from 10°C to 40°C.
This symbol informs the user that there is a class 1 laser
operating inside the device which does not pose any hazardous
threat outside the device.
Make sure there is sufficient ventilation for the device. A minimum distance of 10 cm
to objects on the side, towards the back, and above should be maintained.
The ventilation slots should not be covered by any items (e.g. curtains, newspaper,
etc.) in order to ensure sufficient ventilation for the device. Please do not position any
sources of heat, such as radiators, ovens, naked flames or other devices that generate
heat in close proximity to the device.
INSTRUCTIONS FOR DISPOSAL
The device and the remote control should not be exposed to dripping or splash water
or high levels of humidity.
In accordance with European Directive 2002/96/EC all
electrical and electronic appliances must be disposed of
separately via local collection points. Please observe the local
regulations and do not dispose of your old appliances with
normal household waste.
Similarly, no vases or other containers filled with liquid should be set on top of the
device.
In the event of contact with moisture or liquids unplug the mains plug immediately.
Only clean the device using a dry cloth.
Do not use any cleaning agents or chemical solvents when cleaning, as these could
damage the surface of the device.
REGION CODE
Never open the device.
Both the DVD-Player and discs are coded by region. These region codes must match in
order for the disc to play. If the codes do not match, the disc won’t play. This unit’s code
is 2. DVDs with other region codes cannot be played in this unit. Discs marked “all” will also
play in this player.
The mains cable must always be operational. The device should not continue to be
operated if there is visible damage to the mains cable. A damaged cable should not be
repaired, but must be replaced.
Do not connect or remove the mains cable with damp hands.
Always refer to a qualified specialist for any maintenance or repair work.
The following list shows the various DVD regions of the world.
If the device is not going to be used for a longer period, switch off the device using the
mains switch (POWER) on the back side of the device.
1
2
In case of thunderstorms, please unplug the mains plug and the antenna cable.
3
4
5
6
19
North America; U.S. territories; Bermuda
Europe; Western Asia; Egypt, Japan, Lesotho, South Africa, Swaziland; British
overseas territories, French overseas territories; Greenland
East and Southeast Asia
Oceania; Central and South America; Caribbean; Mexico
Africa, Central and South Asia, Belarus, India, Mongolia, North Korea, Russia, Ukraine
Mainland China
GB
OPERATIONAL ELEMENTS AND CONNECTIONS - FRONT PANEL
14
13
IR
1
1 ON / STANDBY button
Switches the device on when it is in the
standby mode (LED lights up red). If the
LED does not illuminate, actuate the
power switch located on the rear of the
device. Conversely the device can be
switched from power operation to the
standby mode (LED lights up green).
2
▲ EJECT button
3
►/II PLAY button
4
■ STOP button
Opens or closes
compartment (8).
the
DVD/CD
Starts or interrupts the media playback.
Stops the media playback.
Tuner: Switches between FM-Auto and
FM-Mono for FM stations.
2
5
3
4
5
I◄◄ SEARCH button
CD/DVD: Jumps to previous title.
Tuner: With a short press, the station
frequency can be increased by 5 kHz for
manual tuning. A longer press starts the
station search.
6
7 89
8
DVD VIDEO
9
USB input
10
11 12
DVD/CD compartment. Insert the
DVD/CD into the compartment with the
label facing upwards.
For connecting USB storage media.
►►I SEARCH button
10 VOLUME regulator
CD/DVD: Jumps to next title.
Tuner: Like point 5, but the search starts
Adjusts the volume. The knob needs to
be turned through approximately two
revolutions to alternate between minimum
and maximum volume. The volume is
shown on the display (13).
(VOLUME 00 - VOLUME 40).
forwards.
7
6
SOURCE switch
For the selection of the input source,
DISC, TUNER or external sources AUX
1, AUX 2, AUX 3, LINE, Digital Optical,
Digital Coaxial. It is indicated on the
display (13).
11 LINE IN
3.5 mm stereo input jack for an auxiliary
audio device (e.g. MP3 player, etc.).
20
12 PHONES
3.5 mm stereo output jack for
headphones.
The
speakers
are
deactivated when this jack is used. Set
the volume to a low level when
connecting headphones.
13 Display
Displays the settings you have made.
14 Sensor for remote control
Please aim at this sensor when using the
remote control.
GB
OPERATIONAL ELEMENTS AND CONNECTIONS - REMOTE CONTROL
1
6
3
4
2
5
36
35
8
9
11
15
14
12
16
18
20
27
29
1
17
19
21
28
30
13
22
24
23
26
33
31
25
34
32
For selecting the input source “Disk”, CD or
DVD player.
4
MONO/ST
7
AUX
8
Numeric keys
Activates the input sources DIGITAL
OPTICAL and DIGITAL COAXIAL.
Activates the input source “tuner”. Several
pushes switches between “FM” and “AM”.
FM reception: Switches between FM auto
and FM mono.
CD/DVD: To repeat a selected segment
between two points (A and B).
Like point 16, but the search starts forwards.
DVD mode: zoom function.
18 I◄
◄ PRESET
Activates the input sources “Aux 1”,
“Aux 2”, “Aux 3”.
Jumps to the previous title.
For the direct selection of titles on a CD/DVD
or of pre-set stations on the tuner.
Jumps to the next title.
Tuner: Selects the next lower preset.
19 ►►I PRESET
MEM
Tuner: Selects the next higher preset.
20 ■ Stop
Stops the media playback.
CD/DVD: Direct selection of chapters, tracks
or jump to a certain time point.
Opens the OSD screen menu for setting the
setups in DISC mode.
12 TITLE
For calling up the DVD menu.
24 VOLUME
14 Cursor keys
For setting the volume.
For operating the screen menu (OSD=On
Screen Display) and setup.
25 MUTE
15 OK
Mutes the device.
Button for confirming the settings made with
the cursor keys.
26 DVS SET
Activates the virtual Dolby® Surround
playback via stereo speakers.
16 ◄◄ TUNE
Touching this button starts the search
backwards with 2, 4, 8 or 16x speed,
depending on how often it is pushed.
Another touch brings the disk back to the
normal speed. You can also achieve this by
pressing the PLAY button.
With connected headphones, the Dolby®
headphone function is switched on or off.
27 REPEAT 1/ALL
Repeats the current track or the complete
CD/DVD.
21
31 SUBTITLE
DVD mode: to select a subtitle language (if
available).
32 AUDIO
DVD mode: Selected programming of single
tracks or chapters.
Setting of bass, highs and balance. The
respective setting can be altered using the
PRESET buttons.
13 MENU
DVD mode: Selects the camera angle (only
if the DVD supports that feature).
Selection of stored sound settings: LINEAR
– FILM – MUSIC – LANGUAGE - CUSTOM.
23 TONE
For calling up the DVD title menu.
30 ANGLE
Starts or interrupts the media playback.
22 EQ
11 SETUP
29 ZOOM
DVD mode: to select one of the available
audio formats or languages (only if the DVD
supports that feature).
21 ►/II Play
Tuner: display of the selected RDS function.
28 REPEAT A-B
Tuner: With a short press, the station
frequency can be increased by 50 kHz for
manual tuning. A longer press starts the
station search.
17 TUNE►►
10 SEARCH/RDS
DISC
TUNER
DIGITAL IN
For storing radio stations.
POWER
3
6
9
Switches the device on when it is in the
standby mode. If the LED does not illuminate,
actuate the power switch located on the rear
of the device. Conversely the device can be
switched from power operation to the standby
mode.
2
USB
Activates the USB input.
7
10
5
33 PROG
34 HDMI RES
Selection of the resolution of the HDMI
output.
35 VIDEO OUT
Selection of the video output (in the following
sequence): SCART, Component Interleased
(COMP I), Component Progressive (COMP
P), HDMI, S-Video. The Composite (CVBS)
output is always activated.
36 ▲ Eject
DVD/CD operation: Opens or closes the
compartment. Thus ends or starts the
DVD/CD playback.
GB
OPERATIONAL ELEMENTS AND CONNECTIONS - BACK SIDE/CONNECTIONS
12 13
11
15 16 17
14
10
1 POWER AC 230V
Mains supply. For connecting the supplied
mains cable.
2 FUSE
Only use a fuse with the parameters
indicated on the rear of the device.
3 On / Off
Mains switch. Switches the device on and
sets it in the standby mode. If the switch
is set to the “OFF” position, the device is
disconnected from the mains supply.
4 SPEAKER OUT SUB
Output for connecting the supplied
subwoofer.
9
8
7
18
6
5
4
1
5 SPEAKER OUT R/L
Output for the connection of the supplied
satellite speakers (the correct polarity
must be taken into account).
11 Digital OUTPUT
Optical and coaxial digital audio output.
7 OUTPUT S-VIDEO
S-video (Y/C) output.
13 ANT AM
Antenna connection. For connecting the
supplied AM loop antenna.
12 ANT FM
Antenna connection. For connecting the
supplied FM indoor antenna or a house
antenna.
6 OUTPUT R / L
Analog right and left audio output.
8 OUTPUT COMPOSITE
Video composit (FBAS) output.
14 Digital INPUT
Optical and coaxial digital audio input.
9 OUTPUT COMPONENT
Analog video component output (YUV)
15 INPUT AUX1
Analog audio input.
10 HDMI OUTPUT
HDMI output. (High Definition Multimedia
Interface).
16 INPUT AUX2
Analog audio input.
22
2
3
17 INPUT AUX 3
Analog audio input.
18 SCART OUT
SCART output.
GB
THE VC 2 SPEAKER SET
VARIOUS CONNECTION POSSIBILITIES
The VC 2 set includes two front speakers as well as a subwoofer. These speakers have
been adapted to perfectly match the VC 2 and we recommend to use these speakers
together with the VC 2 CD receiver only.
AUDIO CONNECTIONS
Subwoofer
Speaker R Speaker L
POSITIONING OF THE FRONT SPEAKERS
The front loudspeakers are positioned at ear height on the left and right as equidistant from
the television as possible. There should be a clear line of sight between the loudspeakers
and the listening position. Any sound-absorbing or reflecting obstacles in the path will distort
the sound.
Auxiliary audio device
AM-Antenna
digital
analog
R
FM-Antenna
The speakers can be placed on a shelf or a sideboard. Please fix the supplied self-adhesive
rubber pucks on the bottom side of the speakers (4 pieces per speaker).
The front speakers are provided with a bracket for wall mounting at the rear. Insert a
suitable screw, which can be used to mount the speaker, into a load-bearing wall. We
recommend to fix the supplied rubber pucks on the rear side of the speakers to grant a
certain distance between the box and the wall.
FRONT SPEAKERS AND SUBWOOFER
The VC 2 set comes with prefabricated speaker cables for the two front speakers (2x3m)
and the subwoofer (1x5m). If possible, use these cables when connecting the speakers.
If required, you can shorten and strip the cables yourself. Please note that the cables for
the front speakers should be the same length. If you need longer cables, do not extend the
cables supplied, but purchase new, equivalent cables in the desired length from a
specialised store.
POSITIONING OF THE SUBWOOFER
The frequency range reproduced by the subwoofer cannot be pinpointed by the human
ear. That's why positioning generally doesn't present any problems. However, it is
preferable to place the speaker close to the front loudspeaker in front of the listening
position. You should also make sure that the distance from the sides and from the rear to
items and walls is at least 25 centimetres as otherwise bass reproduction may be impaired.
Loosen the terminal screws of the speakers one after the other and insert the stripped
ends into the designated holes. Then re-tighten the terminal screws. Please ensure that
any protruding wires do not cause a short circuit. Then connect the other end of the cable
to the connecting terminals on the VC 2 unit in the same way. Make sure you pay attention
to the correct polarity.
VARIOUS CONNECTION POSSIBILITIES
Only connect the mains cable when all connections have been made.
When making the connections, observe the manuals of the other
components
With cables, heed the quality. The HDMI cable in particular should
absolutely be HDMI-certified.
ANTENNAS
Connect the FM indoor antenna to the FM antenna socket. If you have one, use the house
antenna system. This generally offers better reception. For this, use a commercial IEC
antenna cable.
To use the MW receiver, connect the included frame antenna to the AM antenna input.
Direct the antenna so that the best possible reception is guaranteed.
23
AUXILIARY AUDIO DEVICES
If the devices have a digital output, you should use it and connect it to one of the digital
inputs of the VC 2, either with a coax cable (75 ohms) or with an optical cable.
You can connect devices with analog output via a RCA line with the Aux outputs of the
VC 2.
GB
VARIOUS CONNECTION POSSIBILITIES
TV / MONITOR CONNECTIONS
AUDIO OUTPUTS
A TV can be connected to the VC 2 as follows:
The following audio outputs an be used for audio recording devices:
The digital output: optical or coaxial with corresponding cables.
The analog stereo output: Via RCA cable.
Via the composite output of the S-video output.
Via the SCART input.
Via the component output.
Via the HDMI output.
The following video resolutions can be set for the HDMI output via the video setup or
the remote control.
(PAL / NTSC) 576/480 progressive
1080 interlaced
FRONT CONNECTIONS
IR
720 progressive
1080 progressive
Please make sure you know which video resolution is optimal for your TV. Also observe
the operating instructions for the device.
Important: The video outputs must be set via the video setup or the remote control. The
Composite output is always activated.
Connection for USB mass storage.
LINE IN (e.g. for connecting a MP3 player)
PHONES (headphone output)
24
GB
DISPLAY
STARTING UP THE DEVICE
6
MAINS CABLE
GG
2
1
2
3
1
3
4
Once you have made all connections, connect the mains cable.
Check all connections again, observing the manuals for the other devices.
Check whether the right and left channels are connected correctly (left with left, right with
right).
Do not bundle the mains cable with the connecting cables to prevent buzzing and other
disturbances.
Switch the devices on.
5
Status display of the drive function (play, pause, fast forward/rewind)
Alphanumeric display: Details about current settings, operations and RDS information.
When the CD/DVD mode is active the current chapter, current track and elapsed time
are displayed here.
Displays during FM reception:
ST.: Stereo reception
TUNED: Station set correctly
RDS: RDS data available
4
Display for Dolby® Digital decoding
6
The display is visible when DVS REF or DVS WIDE is active (Dolby® Virtual Speaker
Processing).
5
Display of the channels available for decoding
REMOTE CONTROL
Insert the batteries in the appropriate compartment on the remote control.
When using the remote control aim it at the infrared sensor on the VC 2 (14).
25
GB
THE FUNCTIONS OF THE VC 2
Repeat functions (REPEAT 1/ALL, REPEAT A-B, pos. 27, 28)
Press REPEAT 1/ALL to repeat the current track or the entire DVD. Pressing this button
again switches off the repeat function.
Press the REPEAT A-B button to define the start of the section to be repeated. Press
the button again to specify the end of the section.
DVD PLAYBACK
Use SOURCE on the front of the VC 2 (pos. 7) or DISC on the remote control (pos. 2) to
set the input to DISC (indicated on the display).
Use EJECT on the front (pos. 2) or the remote control (pos. 36) to open the compartment,
insert a DVD and close the compartment again with EJECT.
The unit reads the disc and displays the DVD menu on the screen (only if the DVD supports
that feature). Use the cursor and OK buttons (pos. 14, 15) for navigation in the menu.
CD, WMA, MPEG-4 PLAYBACK
The input selection and insertion of the CD are the same as in the DVD mode.
The following functions are available during playback:
A USB mass storage device can also be used as a storage medium. This is connected to
the USB input on the front of VC 2 unit (pos. 9). The USB input must be activated as the
input source by pressing the SOURCE button on the front of the VC 2 unit (pos. 7) or the
USB button on the remote control (pos. 5).
Control playback by using the buttons on the front of the unit (pos. 3-6) or the remote
control (pos. 16-21).
Access the DVD menu or the DVD title menu by pressing the MENU or TITLE button
on the remote control respectively (only if the DVD supports that feature).
Selecting a track/chapter directly or jumping to a specific time marker
(SEARCH/RDS button on the remote control (pos. 10))
The track list is displayed on the screen.
Select the appropriate input field using the cursor buttons and then enter the relevant
track or chapter number. The time marker is entered in the following format:
Hours:Minutes:Seconds (two digits each). Do NOT use the ">10" button when doing
this!
Selected programming (SEARCH/RDS button on the remote control, pos. 33).
An individual track can be selected by using the cursor buttons and the OK button or
playback of the entire CD can be started by pressing PLAY. The repeat and playback mode
can also be selected here.
The following functions are available during playback:
Control playback by using the buttons on the front of the unit (pos. 3-6) or the remote
control (pos. 16-21).
Selecting a track/chapter directly or jumping to a specific time marker
(SEARCH/RDS button on the remote control (pos. 10))
Use the cursor buttons (pos. 14) to select the desired track or chapter from the list on
the left and press the OK button (pos. 15) to add it to the playlist (on the right). You can
use the buttons below to delete individual tracks or the entire playlist or play the
selection.
26
Select the appropriate input field using the cursor buttons and then enter the relevant
track number. The time marker, which can be set in the current track or within the CD,
is entered in the following format: Hours:Minutes:Seconds (two digits each). Do NOT
use the ">10" button when doing this!
GB
THE FUNCTIONS OF THE VC 2
Selecting the preset stations
Press one of the PRESET buttons on the remote control (18, 19) to select the desired station number.
The memory slot can also be selected directly by using the numerical buttons.
Repeat functions (REPEAT 1/ALL, REPEAT A-B, pos. 27, 28)
Press REPEAT 1/ALL to repeat the current track or the entire CD. Pressing this button
again switches off the repeat function.
Press the REPEAT A-B button to define the start of the section to be repeated. Press
the button again to specify the end of the section. Pressing this button again switches
off the repeat function.
RDS (RADIO DATA SYSTEM) FUNCTIONS OF THE TUNER
RDS is a system which provides information about FM stations that is broadcast together
with the station's signal. The VC 2 can present this information (about the station, broadcast, etc.) in the display. The RDS functions can be set via the SEARCH/RDS button on
the remote control (10).
For many media files, there are no generally-valid standards. Therefore, we
cannot guarantee that all files will always play back correctly.
Very large video files can cause problems during playback via USB. These
should then be played back from a CD or DVD.
RDS functions of the VC 2
• PS (Program Service Name): Displays the name of the programme.
• PTY (Program Type Identification): Displays the type of programme.
• RT (Radio Text): Displays all information for the programme.
TUNER
Display sequence when repeatedly pressing the SEARCH/RDS button: PS, station frequency, PTY, RT.
Selecting the tuner band
• Select TUNER FM or TUNER AM as the audio source using the SOURCE (VC 2, pos.
7) or TUNER button (on the remote control, pos. 3).
• Press the MONO/ST button (remote control (pos. 4)) to switch between mono reception
(recommended for poor reception) or stereo reception.
If one of these functions is not supported despite reception of an RDS signal, "N/A" will appear in the display.
Station search
• Select TUNER as the audio source and choose the band (see above).
• Use the TUNING buttons on the front of the VC 2 (5, 6) or the TUNING buttons on the
remote control (16, 17):
• Briefly pressing these buttons increases or decreases the tuning frequency by 50 kHz.
• Pressing and holding these buttons searches for the next or previous station on the
band.
Station presets
• 20 FM and AM stations can be stored in the memory.
• Select the desired station (FM or AM). Open the memory using the MEM button on the
remote control (9).
• Choose the desired station number via the numerical buttons on the remote control (8).
• The station number flashes in the display.
• Press the MEM button again to store the station.
• The station number stops flashing.
• Repeat this procedure to store other stations.
27
GB
THE FUNCTIONS OF THE VC 2
OSD MENU
SOUND SETTINGS
The VC 2 is equipped with an OSD (On Screen Display) menu. All necessary basic settings
can be made using this menu if “DISC” was selected as input source.
Setting the volume
The volume can be adjusted by using the VOLUME regulator on the front panel (10) or on
the remote control (24). VOL and a value between 00 and MAX (40) then appears in the
display.
You open the menu with the setup button on the remote control (pos. 11).
Use the cursor buttons (pos. 14) to select a menu item. This will then appear in a frame
or on a light background. You can select the menu element with the OK button or navigate
through additional submenus with the cursor keys. You can change a setting with the OK
button.
MUTE (remote control, pos. 25)
The sound can be deactivated using this button. MUTING flashes on the display.
The sound can be reactivated by pressing this button again or by altering the volume.
Press the SETUPkey to quit the OSD menu.
MAIN PAGE OF THE OSD MENU
Adjusting the bass/treble
Repeatedly press TONE on the remote control (23) until BASS or TREB appears in the
display. Adjust the tone by using the TUNING buttons on the remote control (16, 17).
Language
Adjusting the balance
The balance setting is selected in the same way as the tone regulator. Press the corresponding button repeatedly until BAL L00 - 00R appears in the display. The balance can
be adjusted to the left or right by using TUNING (16).
Video
Audio
Rating
Rating
EQ Function
Various equaliser settings can be called up by pressing the EQ button on the remote control (22). The following settings can be selected: LINEAR, MOVIE, MUSIC, VOCAL. These
can be selected by repeatedly pressing the EQ button.
Default
From this page you can access the various submenus:
DVS Function
With DVS SET (remote control, pos. 26) you can switch off the virtual 5-channel sound via
stereo speakers (Dolby® Virtual Speaker) or select between “DVS Ref” and “DVS Wide”.
DVS Ref is the standard mode with which you can create the 5-channel sound with the
two front speakers.
DVS Wide generates an expanded (broader) sound field for the front channels.
Under Language you can select the language for various menus of the VC 2.
Under Video you can reach the Video Setup, where you can make various picture
settings.
Under Audio you can reach the AUDIO SETUP, where you can make various sound
settings.
Under Rating you can set authorizations for the playback of films.
Under Default you can reset the VC 2 to the factory settings.
28
GB
OSD MENU
LANGUAGE
AUDIO SETUP
Under OSD Menu you can set the language of the setup
menu.
You can adjust the tone and balance for audio
playback under EQ mode. Four presets can be
selected here: Linear, Film, Music, Spoken. You
can adjust your own settings under the "Manual"
menu.
Audio
EQ Mode
Linear
Movie
Music
Vocal
Custom
Under Audio you can set the language of the soundtrack
of a DVD.
Bass Control
Treble Control
Balance
Speaker Position
Under Disk menu you can set the language of the menu of
a DVD.
Bookshelf
Wallmount
Subwoofer Gain
Digital out
PCM
RAW
Under Subtitle you can set the language of the subtitles
on a DVD or you can switch off the subtitles.
Please note for the last three points that these language
settings must also be supported by the DVD used.
29
Under Speaker Position you can implement a
frequency response correction based on the
location of the satellite speakers. If the speakers
are set up on a shelf and the distance to the wall
is at least 15cm, the "Shelf" setting is
recommended. If the speakers are mounted
directly on a wall, please select the "Wall
mounting" option.
You can adjust the volume of the subwoofer to
match the acoustic properties of the room under
Subwoofer Gain. The closer the subwoofer is
positioned to a wall, the greater the bass
response; therefore it may need to be reduced
(negative values). If the subwoofer is set up
relatively freely in the room, an amplification is
often necessary (positive values). You should test
the settings by conducting various listening tests
with different films and pieces of music. When
doing this the EQ mode should be set to Linear.
You can choose between PCM (two-channel PCM
data format) and RAW (multi-channel data format)
under Digital Output.
GB
OSD MENU
VIDEO SETUP
Under the SCART option you can choose between
SCART video output in RGB or CVBS format
(provided SCART is selected as the video output)
With TV Format you can set various screen
formats.
The View Mode allows you to make various
adjustments to the image format on the TV.
You can select one of the following options:
Under the Component option you can choose
between component video output in interleased or
progressive format (provided Component is
selected as the video output).
Original: Fit the original screen size. (Only for Divx
and MPEG).
With HD Resolution you can set the resolution of
the HDMI output. The following resolutions can be
selected:
Pan & Scan: Take the maximum value of
horizontally fit scale ratio and vertically fit scale
ratio.
(PAL / NTSC) 576/480 progressive
720 progressive
1080 interlaced
1080 progressive
Fill: Scale up/down the image in horizontal and
vertical direction respectively to fill the screen
height and width.
Auto Fit: Take the type value of horizontally fit
scale ratio and vertically fit scale ratio.
With TV Display you can select between the
colour standards PAL, NTSC and Multisystem.
Please make sure you know which video
resolution is optimal for your TV. Also observe the
operating instructions for the device.
With Video Output you can select between the
outputs “S-Video”, “SCART”, “Component” and
“HDMI”. The composite output is active
independent of the setting.
You can adjust the brightness, contrast, hue and
colour saturation under Smart Picture. Three
settings are stored (standard, vivid and cool). You
can adjust your own settings under the "Custom"
menu.
If HDMI is selected as the video output, only the
brightness level can be changed.
30
GB
OSD MENU
Menu
DEFAULT SETTING
RATING
Rating
Default
Use Default Settings
Parental control
8.Adult
YES
Enter Password
Correct Password
Wrong Password
COMPATIBLE FORMATS FOR MEDIA PLAYBACK
1.Kid Safe
2.G
COMPATIBLE DISC FORMATS
The following disc formats can be played back by the VC 2:
CD-DA
VCD
DVD-R/DVD+R/RW
HDCD
S-VCD
CD-R/CD-RW
DVD Video
3.PG
4.PG-13
5.PG-R
6.R
7.NC-17
COMPATIBLE AUDIO/VIDEO FORMATS
The following audio/video formats can be played back by the VC 2:
Dolby® Digital
MPEG-4
AAC
Dolby® Prologic II
MPEG-2
WMA
Dolby® Virtual speaker MPEG-1 audio
JPG
Dolby® Headphone
Kodak Picture CD
8.Adult
Set Password
Enter Password
****
Correct Password
Enter New Password
NO
After confirming with "YES" the default settings of the VC 2 unit are restored.
****
ABOUT FORMATS SUPPORTED BY USB
The following formats can be played back by the VC 2 via USB:
AAC
MP4
WMA
MP4
JPEG
Wrong Password
****
Confirm New Password ****
After entering the correct password you can change the parental control settings. The
preset password is 8888.
Under Set Password you can change the valid password as follows:
Enter the valid password.
Enter the new password twice.
31
GB
SPECIFICATIONS
CD RECEIVER
Amplifier
Output:
Rated power SAT (4 Ohm)
Rated power SUB (4 Ohm)
Peak power (total):
Frequency response-linearity:
CD/AUX/Line
Signal-to-Noise ratio:
CD/AUX/Line
Input sensitivity:
AUX/Line
Equalizer:
Bass
Treble
Sub
FM tuner
Frequency range
Signal-to-Noise ratio:
AM tuner
Frequency range
Signal-to-Noise ratio:
Miscellaneous
Mains voltage:
Power input:
FRONT SPEAKERS
Configuration:
Power Handling RMS/max:
Impedance:
Frequency Response:
Efficiency (1 W/1 m):
Dimensions (w x h x d):
2 x 50 W
1 x 100 W
350 W
20 Hz - 20 kHz (-1.0 dB)
SUBWOOFER
Configuration :
Power Handling RMS/max:
Impedance :
Frequency Response:
Efficiency (1 W/1 m):
Dimensions (w x h x d):
95 dB
450 mV/47kOhm
±10 dB/100 Hz
±10 dB/10 kHz
± 6 dB
87.5 – 108 MHz
Mono: 70 dB
Stereo: 65 dB
531-1602 MHz
40 dB
230 VAC/50 Hz
Subject to technical change.
Maximum 200 W
Standby 0.9 W
4.8 kg
Bass reflex
140 / 200 W
4 Ohm
25 – 180 Hz
90 dB
235 x 390 x 388 mm
Special features
Dolby® virtual speaker processing for perfect cinema sound from 2 speakers
Dolby® Headphone
Digital 3-channel power amp
Zoran vaddis® video processor
Upscale function up to 1080p (full HD resolution) for DVD
Superhet FM/MW tuner with RDS / Radiotext function
Digital mains adapter
Standby function with low power consumption
Dimensions (w x h x d):
Main device:
400 x 98 x 289 mm
Main device incl. operational elements/connecting terminals:
400 x 98 x 332 mm
Remote control:
53 x 220 x 22 mm
Weight:
2 way, sealed
70 / 120 W
4 Ohm
60 – 35 000 Hz
90 dB
108 x 202 x 152 mm
32
GB
F
SOMMAIRE
Menu OSD
Page principale du menu OSD. . . . . . . . . . . . . . . . . . . . . . . . . . . . . . . . . . . . . . . . . 43
Informations générales
Langue . . . . . . . . . . . . . . . . . . . . . . . . . . . . . . . . . . . . . . . . . . . . . . . . . . . . . . . . . . . 44
Configuration audio . . . . . . . . . . . . . . . . . . . . . . . . . . . . . . . . . . . . . . . . . . . . . . . . . 44
Accessoires . . . . . . . . . . . . . . . . . . . . . . . . . . . . . . . . . . . . . . . . . . . . . . . . . . . . . . . 33
Configuration vidéo . . . . . . . . . . . . . . . . . . . . . . . . . . . . . . . . . . . . . . . . . . . . . . . . . 45
Avant la mise en marche . . . . . . . . . . . . . . . . . . . . . . . . . . . . . . . . . . . . . . . . . . . . . 34
Niveau . . . . . . . . . . . . . . . . . . . . . . . . . . . . . . . . . . . . . . . . . . . . . . . . . . . . . . . . . . . 46
Consignes de sécurité importantes . . . . . . . . . . . . . . . . . . . . . . . . . . . . . . . . . . . . . 34
Ajustage d’usine . . . . . . . . . . . . . . . . . . . . . . . . . . . . . . . . . . . . . . . . . . . . . . . . . . . . 46
Consignes d’élimination . . . . . . . . . . . . . . . . . . . . . . . . . . . . . . . . . . . . . . . . . . . . . . 34
Formats de lecture compatibles
Marque de régions . . . . . . . . . . . . . . . . . . . . . . . . . . . . . . . . . . . . . . . . . . . . . . . . . 34
Éléments de commande et connexions
Formats disque compatibles . . . . . . . . . . . . . . . . . . . . . . . . . . . . . . . . . . . . . . . . . . 46
Formats audio / vidéo compatibles. . . . . . . . . . . . . . . . . . . . . . . . . . . . . . . . . . . . . . 46
Panneau frontal . . . . . . . . . . . . . . . . . . . . . . . . . . . . . . . . . . . . . . . . . . . . . . . . . . . . 35
Formats compatibles via USB . . . . . . . . . . . . . . . . . . . . . . . . . . . . . . . . . . . . . . . . . 46
Télécommande. . . . . . . . . . . . . . . . . . . . . . . . . . . . . . . . . . . . . . . . . . . . . . . . . . . . . 36
Caractéristiques techniques
Face arrière/connexions. . . . . . . . . . . . . . . . . . . . . . . . . . . . . . . . . . . . . . . . . . . . . . 37
Le Kit de haut-parleurs du VC 2 . . . . . . . . . . . . . . . . . . . . . . . . . . 38
Différentes possibilités de connexions
Caractéristiques techniques du VC 2 . . . . . . . . . . . . . . . . . . . . . . . . . . . . . . . . . . . . 47
Connexions audio . . . . . . . . . . . . . . . . . . . . . . . . . . . . . . . . . . . . . . . . . . . . . . . . . 38
ACCESSOIRES
Haut-parleurs frontaux et subwoofer . . . . . . . . . . . . . . . . . . . . . . . . . . . . . . 38
Antennes. . . . . . . . . . . . . . . . . . . . . . . . . . . . . . . . . . . . . . . . . . . . . . . . . . . . 38
1)
Notice d’utilisation
Connexions TV / moniteur . . . . . . . . . . . . . . . . . . . . . . . . . . . . . . . . . . . . . . . . . . . . 39
3)
Piles pour télécommande (2x AA)
Appareils audio supplémentaires . . . . . . . . . . . . . . . . . . . . . . . . . . . . . . . . . 39
2)
Sorties audio . . . . . . . . . . . . . . . . . . . . . . . . . . . . . . . . . . . . . . . . . . . . . . . . . . . . . . 39
4)
Connexions frontales . . . . . . . . . . . . . . . . . . . . . . . . . . . . . . . . . . . . . . . . . . . . . . . . 39
5)
L’Ecran . . . . . . . . . . . . . . . . . . . . . . . . . . . . . . . . . . . . . . . . . . . . . . . . . . . . . 40
Mise en marche de l’appareil
6)
7)
8)
Cordon d’alimentation . . . . . . . . . . . . . . . . . . . . . . . . . . . . . . . . . . . . . . . . . . . . . . . 40
9)
Télécommande. . . . . . . . . . . . . . . . . . . . . . . . . . . . . . . . . . . . . . . . . . . . . . . . . . . . . 40
Télécommande
Cordon d’alimentation
Antenne-cadre AM
Antenne intérieure FM
Câble AV
2 x Haut-parleurs frontaux
Subwoofer
10) Câbles haut-parleur pour les haut-parleurs frontaux et le subwoofer
Les fonctions du VC 2
11) Pieds en caoutchouc autoadhésifs pour les haut-parleurs frontaux
Lecture de DVD . . . . . . . . . . . . . . . . . . . . . . . . . . . . . . . . . . . . . . . . . . . . . . . . . . . . 41
Lecture CD, WMA et MPEG-4 . . . . . . . . . . . . . . . . . . . . . . . . . . . . . . . . . . . . . . . . . 41
Tuner . . . . . . . . . . . . . . . . . . . . . . . . . . . . . . . . . . . . . . . . . . . . . . . . . . . . . . . . . . . . 42
RDS (Radio Data Service)-Fonctions du Tuner . . . . . . . . . . . . . . . . . . . . . . . . . . . . 42
Réglages de la sonorité.. . . . . . . . . . . . . . . . . . . . . . . . . . . . . . . . . . . . . . . . . . . . . . 43
33
F
AVANT LA MISE EN MARCHE
Le triangle comportant le symbole d’un éclair avertit l’utilisateur
que l’appareil est traversé par des tensions élevées pouvant
entraîner des décharges électriques dangereuses.
Cher client,
Nous vous remercions d’avoir opté pour le VC 2 de Magnat.
Avant de mettre en marche votre VC 2, veuillez lire attentivement les consignes suivantes.
Le triangle comportant le point d’exclamation indique à
l’utilisateur de l’appareil que la notice d’utilisation jointe avec
l’appareil contient des consignes importantes devant
impérativement être respectées.
CONSIGNES DE SECURITE IMPORTANTES
Avant la mise en marche de l’appareil, lisez attentivement la notice d’utilisation et
conservez-la.
Utilisez l’appareil uniquement à une température ambiante comprise entre 10°C et
40°C.
Veillez à ce que l’appareil soit suffisamment aéré. Garantissez un écartement minimum
de 10 cm avec des objets situés sur les côtés de l’appareil ainsi qu’à l’arrière et audessus de l’appareil.
Les trous d’aération ne doivent pas être recouverts par des objets (par ex. des rideaux,
journaux) afin de garantir une aération suffisante de l’appareil. Ne placez pas de
sources de chaleur, telles que des radiateurs, des poêles, des flammes nues ou
d’autres appareils produisant de la chaleur, à proximité de l’appareil.
L’appareil et la télécommande ne doivent être exposés ni aux gouttes d’eau et
projections d’eau ni à l’eau ni à une humidité de l’air importante.
De même, l’appareil ne doit pas être utilisé pour poser des vases ou des récipients
contenant un liquide.
En cas de contact avec des objets humides ou des liquides, débranchez
immédiatement le cordon d’alimentation.
Nettoyez l’appareil uniquement avec un chiffon sec.
N’utilisez pas de produits de nettoyage ou de solvants chimiques afin de ne pas
endommager la surface de l’appareil.
N’ouvrez jamais l’appareil.
Le cordon d’alimentation doit toujours être en état de fonctionner. En cas
d’endommagement visible du cordon d’alimentation, l’appareil ne doit plus être utilisé.
Tout cordon d’alimentation endommagé ne doit pas être réparé mais remplacé.
Ne branchez ou ne débranchez pas le cordon d’alimentation avec les mains humides.
Faites toujours effectuer les travaux de maintenance et de réparation par du personnel
spécialisé et qualifié.
En cas de non utilisation prolongée, éteignez l’appareil à l’aide de l’interrupteur
d’alimentation (POWER) situé au dos de l’appareil.
En cas d’orage, débranchez le cordon d’alimentation et le câble d’antenne.
Ne pas ouvrir ! Risque de décharge électrique! Afin d’éviter tout
risque d’incendie ou de décharge électrique, l’appareil ne doit
pas être exposé à la pluie ou à l’humidité.
Ce symbole indique à l’utilisateur que l’appareil contient un
rayon laser de classe 1 qui ne présente aucun danger en
dehors de l’appareil.
CONSIGNES D’ELIMINATION
Conformément à la directive européenne 2002/96/CE, tous les
appareils électriques et électroniques doivent être éliminés
dans des centres de collecte locaux. Veuillez respecter les
dispositions locales et ne déposez pas vos appareils usagés
dans vos ordures ménagères.
MARQUES DE RÉGIONS
Tous les lecteurs DVD et disques DVD-Vidéo portent une marque de région. Cette marque
définit une certaine compatibilité. Les disques portant une marque de région différente de
celle du lecteur ne sont pas compatibles avec le lecteur. Le code de région de cet appareil
est “2”. Disques DVD-vidéo avec un autre code de région ne peuvent pas être lus. Les
disques portant la marque “ALL” sont aussi compatibles avec ce lecteur.
La liste ci-dessous indique les régions DVD du monde.
1: États-Unis, Canada
2: Europe, Moyen-Orient, Égypte, Afrique du Sud, Japon
3: Asie du Sud-Est, Asie de l’Est, Hong Kong, Taïwan,
4: Amérique centrale, Amérique du Sud, Mexique, Australie, Nouvelle-Zélande
5: Russie, Afrique, Inde,
6: Chine
34
F
ELEMENTS DE COMMANDE ET CONNEXIONS - PANNEAU FRONTAL
14
13
IR
1
1
Touche ON / STANDBY
Permet d’allumer l’appareil lorsque celuici se trouve en mode de veille (LED
rouge). Si la LED n’est pas allumée,
mettez en marche l’appareil à l’aide de
l’interrupteur d’alimentation situé au dos
de l’appareil. À l’inverse, ce bouton
permet de mettre en veille l’appareil
lorsque celui-ci est en marche (LED
verte).
2
▲Touche EJECT
3
Touche ►/II PLAY
4
Touche ■ STOP
Permet d’ouvrir ou de fermer le tiroir de
DVD/CD (8).
Permet de démarrer ou d’interrompre la
lecture.
Permet d’arrêter la lecture.
Tuner: Permet de passer de la réception
FM-Auto à la réception FM-Mono.
2
5
3
4
5
Touche I◄◄SEARCH
CD/DVD: Permet de passer à la plage
précédente.
Tuner: une brève pression sur cette
touche
permet
d’augmenter
manuellement de 5 kHz la fréquence de
la station de radio. Une longue pression
permet de démarrer la recherche des
stations de radio.
6
Touche ►►l SEARCH
7
Interrupteur SOURCE
6
7 89
8
DVD VIDEO
9
Entrée USB
10
Tiroir DVD/CD. Insérez le DVD/CD dans
le tiroir, face imprimée vers le haut.
Permet de brancher des supports de
stockage USB.
10 Bouton VOLUME
Permet de régler le volume sonore. 2
tours env. sont nécessaires pour passer
du volume minimum au volume
maximum. Le volume sonore s’affiche à
l’écran (13).
(VOLUME 00 - VOLUME 40).
CD/DVD: Permet de passer à la plage
suivante.
Tuner: Fonction identique au point 5, mais
la recherche démarre vers l’avant.
11 LINE IN
Entrée jack stéréo 3,5 mm permettant de
connecter
une
source
audio
supplémentaire (lecteur MP3 ou autre).
Permet de sélectionner la source d’entrée
(DISC, TUNER) ou des sources externes
(AUX 1, AUX 2, AUX 3, LINE, numérique
optique, numérique coaxial). La source
sélectionnée est affichée à l’écran (13).
35
11 12
12 PHONES
Sortie jack stéréo 3,5 mm pour casque.
Lorsque cette sortie est utilisée, les hautparleurs sont désactivés. Baissez le
volume sonore avant de brancher un
casque à cette sortie.
13 Écran
Affiche les réglages effectués.
14 Capteur de télécommande
Pour pouvoir utiliser la télécommande,
orientez-la vers ce point.
F
ELEMENTS DE COMMANDE ET CONNEXIONS - TELECOMMANDE
1
6
3
4
2
5
36
35
7
9
12
16
18
20
27
29
17
19
21
28
30
13
22
24
23
26
33
31
5
USB
6
DIGITAL IN
7
AUX
8
Touches numériques
Tuner: une brève pression sur cette touche
permet d’augmenter manuellement de 50 kHz
la fréquence de la station de radio. Une longue
pression permet de démarrer la recherche des
stations de radio.
17
Permettent de sélectionner directement la
plage d’un CD/DVD ou une station de radio
préréglée.
25
34
32
9
MEM
10
SEARCH/RDS
POWER
Permet d’allumer l’appareil lorsque celui-ci se
trouve en mode de veille. Si la LED n’est pas
allumée, mettez en marche l’appareil à l’aide de
l’interrupteur d’alimentation situé au dos de
l’appareil. À l’inverse, ce bouton permet de
mettre en veille l’appareil lorsque celui-ci est en
marche.
Fonction identique au point 16, mais la
recherche démarre vers l’avant.
18 ◄
I ◄ PRESET
Permet d’enregistrer des stations de radio.
CD/DVD: Sélection directe d'un chapitre, titre
ou saut vers un repère de temps donné.
19
Tuner: affichage
sélectionnée.
de
la
fonction
Tuner: Permet de sélectionner la mémoire
précédente.
►►l PRESET
Permet de passer à la plage suivante.
RDS
Tuner: Permet de sélectionner la mémoire
suivante.
SETUP
Permet d’ouvrir le menu OSD afin de procéder
aux configurations en mode DISC.
20
■ Stop
Appel du menu Titre du DVD.
21
Touche II► PLAY
Permet de démarrer ou d’interrompre la lecture.
22
EQ
12
TITLE
13
MENU
14
Touches de direction
Permet d’arrêter la lecture.
Sélection des paramètres sonores enregistrés: LINEAR – FILM – MUSIC – LANGUAGE
Permet d’ouvrir le menu Disque.
2
DISC
3
TUNER
Touche permettant de confirmer les paramètres
sélectionnés à l’aide des touches de direction.
Permet d’activer la source d’entrée “Tuner”.
Pour commuter entre FM et AM, appuyez
plusieurs fois sur la touche.
TUNE ►►
Permet de passer à la plage précédente.
Permettent de naviguer dans le menu affiché à
l’écran (OSD=On Screen Display) et de
procéder à la configuration.
Permet de sélectionner la source d’entrée
“Disque”, lecteur CD ou DVD.
◄◄ TUNE
Permet de démarrer la recherche vers l’arrière
(vitesse x2, x4, x8 ou x16 selon le nombre de
fois que vous appuyez sur la touche). En
appuyant une nouvelle fois sur la touche, la
lecture du disque redémarre à la vitesse
normale. Ceci est également possible en
appuyant sur la touche PLAY.
Permet d’activer l’entrée USB.
11
1
16
Permet d’activer les sources d’entrée “Aux 1”,
“Aux 2”, “Aux 3” et “LINE”.
11
15
14
MONO/ST
Schaltet bei UKW-Empfang zwischen FM-Auto
und FM-Mono um.
Permet d’activer les sources d’entrée umérique
opctique et coaxiale.
8
10
4
15
- CUSTOM
23
TONE
Réglages des graves et des aigus, ajustement
de la balance et le niveau du subwoofer. Les
touches Preset permettent de modifier le
réglage.
OK
24
VOLUME
Permet de régler le volume sonore.
36
25
MUTE
26
DVS SET
Permet de mettre en sourdine l’appareil.
Permet d’activer la restitution virtuelle Dolby®
Sourround par les haut-parleurs stéréo.
Lorsque le casque est branché, la fonction
Casque Dolby® est activée ou désactivée.
27
REPEAT 1/ALL
28
REPEAT A-B
29
ZOOM
Fonction de répétition du titre en cours ou du
CD/DVD.
Fonction de répétition d'une partie du DC/DVD
à choisir librement.
DVD: Fonction de zoom.
30 ANGLE
DVD: Choix de différentes perspectives de la
caméra (si le DVD propose cette fonction).
31 SUBTITLE
DVD: Réglage de différents sous-titres (si le
DVD propose cette fonction).
32 AUDIO
DVD: Réglage des langues proposées par le
DVD (si le DVD propose cette fonction).
33 PROG
DVD: Programmation sélectionnée de titres ou
chapitres individuels.
35 VIDEO OUT
Sélection de la sortie vidéo dans l'ordre suivant:
SCART, Component Interleased (COMP I),
Component Progressive (COMP P), HDMI, SVideo. La sortie composite (CVBS) est toujours
active.
34
HDMI RES
Sélection de la résolution de la sortie HDMI.
36 ▲ Eject
Mode DVD/CD: permet d’ouvrir ou de fermer le
tiroir. Permet ainsi d’arrêter ou de démarrer la
lecture du DVD/CD.
F
ELEMENTS DE COMMANDE ET CONNEXIONS - FACE ARRIERE/CONNEXIONS
12 13
11
10
1 PRISE SECTEUR
Prise secteur. Permet de brancher le
cordon d’alimentation fourni avec
l’appareil.
2 FUSE
Utilisez exclusivement des fusibles du
type indiqué sur le côté arrière de
l’appareil.
3 On / Off
Interrupteur
d’alimentation.
Permet
d’allumer l’appareil et de le mettre en
veille. Si l’interrupteur est en position
« OFF », l’appareil n’est plus sous tension.
4 SPEAKER OUT SUB
Sortie permettant de brancher
subwoofer fourni.
15 16 17
14
le
9
8
7
18
6
5
4
11 Digital OUTPUT
Sortie audio numérique
coaxiale.
5 SPEAKER OUT R/L
Sortie permettant de brancher les hautparleurs fournis. Respecter la bonne
polarité.
1
optique
et
12 ANT FM
Prise d’antenne. Permet de brancher
l’antenne intérieure FM livrée avec
l’appareil ou à un système d’antennes
domestique.
6 OUTPUT R / L
Sortie audio analogique droite et gauche.
7 OUTPUT S-VIDEO
Sortie S-Video (Y/C).
8 OUTPUT COMPOSITE
Sortie Video-Composite (FBAS).
13 ANT AM
Prise d’antenne. Permet de brancher
l’antenne-cadre AM livrée avec l’appareil.
10 HDMI OUTPUT
Sortie HDMI. (High Definition Multimedia
Interface).
15 INPUT AUX 1
Entrée audio analogique.
14 Digital INPUT
Entrée audio numérique optique et
coaxiale.
9 OUTPUT COMPONENT
Sortie composant vidéo analogique (YUV)
37
2
3
16 INPUT AUX 2
Entrée audio analogique.
17 INPUT AUX 3
Entrée audio analogique.
18 SCART OUT
Sortie SCART.
F
LE KIT DE HAUT-PARLEURS DU VC 2
DIFFERENTES POSSIBILITÉS DE CONNEXIONS
Le VC 2 est fourni avec deux haut-parleurs avant et un subwoofer. Ces haut-parleurs sont
spécialement adaptés au VC 2. Aucun autre haut-parleur ne doit être raccordé à cet
appareil.
CONNEXIONS AUDIO
Subwoofer
Hautparleur
D
INSTALLATION DES HAUT-PARLEURS AVANT
Les haut-parleurs doivent être placés à gauche et à droite de la télévision, si possible à
la même distance et à hauteur d’écoute. Les enceintes doivent être entièrement visibles
depuis l’emplacement d’écoute. Tout obstacle capable d’absorber ou de réfléchir le son déformera les sons. Les haut-parleurs peuvent être placés sur un meuble ou une étagère. Il
faut pour cela installer sous les haut-parleurs les pieds autocollants en caoutchouc fournis (quatre pieds par haut-parleur).
L'arrière des haut-parleurs avant présente un dispositif de montage mural. Fixez une vis
adaptée à un mur porteur auquel les haut-parleurs peuvent être accrochés. Les pieds
autocollants fournis doivent être installés sur l'arrière pour garantir un espacement suffisant
entre l'enceinte et le mur.
Hautparleur
G
Appareil audio supplémentaire
Antenne AM
numérique
analogique
R
Antenne FM
INSTALLATION DU SUBWOOFER
La direction de la bande passante reproduite par le subwoofer n’est pas identifiable par
l’oreille humaine. L’installation ne pose donc en général aucun problème. Un positionnement devant l’endroit d’écoute à proximité des haut-parleurs frontaux est cependant préférable. De plus, veuillez veiller au fait que la distance avec les objets et les murs soit d’au
moins 20 cm sur les côtés ainsi que vers l’arrière, afin que la reproduction sonore de la
basse ne soit pas altérée.
HAUT-PARLEURS FRONTAUX ET SUBWOOFER
Le VC 2 est fourni avec des câbles de haut-parleurs préconfectionnés pour les deux hautparleurs avant (2 x 3 m) et pour le subwoofer (1 x 5 m). Utilisez si possible ces câbles pour
le raccordement des haut-parleurs. Vous pouvez si nécessaire raccourcir et dénuder ces
câbles. Les deux câbles des haut-parleurs avant doivent avoir une longueur identique. Si
vous avez besoin de câbles plus longs, ne prolongez pas les câbles fournis mais utilisez
de nouveaux câbles de longueur appropriée et de mêmes caractéristiques, que vous
trouverez dans les magasins spécialisés.
Desserrez les bornes vissées des haut-parleurs et insérez les extrémités dénudées dans
les trous. Resserrez les bornes vissées. Veillez à ce qu'aucun fil mal raccordé ne risque
de générer un court-circuit. Branchez alors les autres extrémités des câbles de la même
manière dans les connexions du VC 2. Respectez impérativement la polarité.
DIFFERENTES POSSIBILITÉS DE CONNEXIONS
Ne branchez le cordon d’alimentation que lorsque tous les autres branchements ont été effectués.
Lors du branchement des autres composants, respectez les consignes figurant dans leur manuel
Veillez à ce que les câbles soient de bonne qualité. En particulier le câble
HDMI doit impérativement être certifié HDMI.
ANTENNES
Branchez l’antenne intérieure FM à la prise d’antenne FM. Si vous en possédez un, utilisez
votre système d’antennes domestique. Celui-ci offre en général une meilleure réception.
Pour cela, utilisez un câble d’antenne IEC en vente dans le commerce.
Pour pouvoir utiliser la partie réception AM, branchez l’antenne-cadre fournie avec
l’appareil à l’entrée pour antenne AM.
Orientez les antennes de sorte que la meilleure réception soit garantie.
38
F
DIFFERENTES POSSIBILITÉS DE CONNEXIONS
APPAREILS AUDIO SUPPLÉMENTAIRES
Si les appareils possèdent une sortie numérique, utilisez-la et raccordez-la avec l’une des
entrées numériques du VC 2 à l’aide d’un câble coaxial (75 ohms) ou d’un câble optique.
Les appareils dotés d’une sortie analogique peuvent être raccordés aux prises AUX du VC
2 à l’aide d’un câble cinch.
SORTIES AUDIO
CONNEXIONS TV / MONITEUR
Les sorties audio suivantes peuvent être utilisées pour les enregistreurs audio:
La sortie numérique : optique ou coaxiale à l’aide des câbles correspondants.
La sortie stéréo analogique : à l’aide d’un câble cinch.
CONNEXIONS FRONTALES
Un téléviseur peut être raccordé au VC 2 de la manière suivante :
À la sortie Composite ou à la sortie S-Video.
À la sortie SCART.
À la sortie Component.
À la sortie HDMI.
Pour la sortie HDMI, les résolutions suivantes peuvent être sélectionnées dans la
configuration vidéo ou à l’aide de la télécommande (pos. 34).
(PAL / NTSC) 576/480 progressive 720 progressive
1080 interlaced
1080 progressive
Vérifiez quelle est la meilleure résolution vidéo pour votre téléviseur. Tenez compte de la
notice d’utilisation de l’appareil.
Attention: Les sorties vidéo doivent être choisies à l'aide de la configuration vidéo ou de
la télécommande (35).
IR
Prise pour mémoire de masse USB.
LINE IN (par ex. pour raccorder un lecteur MP3)
PHONES (sortie casque)
39
F
ÉCRAN
MISE EN MARCHE DE L’APPAREIL
CORDON D’ALIMENTATION
6
Lorsque tous les branchements ont été effectués, branchez le cordon d’alimentation.
Contrôlez une nouvelle fois tous les branchements en respectant les manuels des autres
appareils.
Vérifiez que les canaux droit et gauche sont correctement connectés (gauche avec
gauche, droit avec droit).
Afin d’éviter tout bourdonnement ou toute autre perturbation, éloignez le cordon
d’alimentation des câbles de connexion.
Mettez en marche les appareils.
GG
2
1
2
3
1
3
4
5
Affichage d'état de fonction du lecteur (lecture, pause, avance/retour rapide).
Affichage alphanumérique: Informations sur les réglages actuels, les opérations et les
informations RDS. En mode CD/DVD, le chapitre et la piste actuels et la durée déjà lue
apparaissent ici.
Affichages en réception FM:
ST.: Réception stéréo
TUNED: Station de radio correctement réglée
4
5
6
RDS: données RDS disponibles
Affichage décodage numérique Dolby®
TELECOMMANDE
Affichage des canaux disponibles pour le décodage
Insérez les piles dans le compartiment de la télécommande.
Pour pouvoir utiliser la télécommande, orientez-la vers le capteur infrarouge du VC 2 (14).
L'affichage est actif si DVS REF ou DVS WIDE est actif (Dolby® Virtual Speaker
Processing).
40
F
LES FONCTIONS DU VC 2
Fonctions de répétition (REPEAT 1/ALL, REPEAT A-B, pos. 27, 28)
Appuyez sur REPEAT 1/ALL pour répéter le titre en cours ou le DVD entier. Pour
désactiver la fonction de répétition, appuyez à nouveau sur cette touche.
LECTURE DE DVD
À l’aide du bouton SOURCE situé sur le panneau avant du VC 2 (pos. 7) ou de la touche
DISC de la télécommande (pos. 2), commutez l’entrée sur DISC (affichage à l’écran).
Appuyez sur REPEAT A-B pour sélectionner le début de la partie à répéter. La pression
suivante permet de définir la fin de cette partie. Pour désactiver la fonction de
répétition, appuyez à nouveau sur cette touche.
À l’aide de la touche EJECT située sur le panneau avant (pos. 2) ou sur la
télécommande(pos. 36), ouvrez le tiroir, insérez un DVD et refermez le tiroir à nouveau à
l’aide de la touche EJECT.
L'appareil lit le DVD et le menu du DVD apparaît à l'écran (si le DVD propose cette fonction).
Pour la navigation dans le menu, vous utilisez les touches du curseur et OK (14, 15).
LECTURE CD, WMA ET MPEG-4
La sélection de l’entrée et la mise en place du CD s’effectuent de manière identique au
mode DVD.
Pendant la lecture, les fonctions suivantes sont disponibles:
Gestion de la lecture depuis les touches du lecteur à l'avant (3-6) ou depuis la
télécommande (16-21).
Appel du menu ou menu de titres du DVD avec les touches MENU ou TITLE de la
télécommande (si le DVD propose cette fonction).
Sélection directe d'un chapitre, titre ou saut vers un repère de temps donné
(touche SEARCH/RDS de la télécommande (10))
Vous pouvez utiliser un support mémoire USB. Vous devez le brancher à l'entrée USB à
l'avant du VC 2 (9). Utilisez la touche SOURCE à l'avant du VC 2 (7) ou la touche USB de
la télécommande (5) pour sélectionner la source d'entrée USB.
La liste des titres est affichée à l'écran..
Sélectionnez pour cela le champ de saisie correspondant avec les touches du curseur
et entrez le numéro de titre ou de chapitre. Le repère de temps est entré au format
heures:minutes:secondes (deux caractères chaque). N'utilisez pas ici la touche >10 !
Programmation sélectionnée (touche SEARCH/RDS de la télécommande, 33)
Vous pouvez sélectionner un titre unique à l'aide des touches du curseur et de la touche
OK ou lancer la lecture de tout le CD à l'aide de la touche PLAY. Vous pouvez également
choisir le mode de répétition et de lecture.
Pendant la lecture, les fonctions suivantes sont disponibles:
Gestion de la lecture depuis les touches du lecteur à l'avant (3-6) ou depuis la
télécommande (16-21).
Sélection directe d'un chapitre, titre ou saut vers un repère de temps donné
(touche SEARCH/RDS de la télécommande (10)).
Sélectionnez à l'aide des touches du curseur (14) le titre ou chapitre souhaité depuis
la liste de gauche et ajoutez-le à la liste de lecture (droite) à l'aide de la touche OK (15).
Les boutons inférieurs permettent de supprimer des titres ou l'ensemble de la liste de
lecture ou de lire la sélection.
41
F
LES FONCTIONS DU VC 2
Préréglages des stations de radio
• 20 stations de radio FM et 20 stations AM peuvent être enregistrées dans la mémoire.
• Réglez la station de radio souhaitée (FM ou AM). Ouvrez la mémoire à l'aide de la touche MEM située sur la télécommande (pos. 9).
• Sélectionnez le numéro de la station de radio souhaitée à l'aide des touches numériques
de la télécommande (pos. 8).
• Le numéro de station de radio cligne à l'écran.
• Appuyez à nouveau sur la touche MEM pour mémoriser la station de radio.
• Le numéro de la station de radio s'arrête de clignoter.
• Répétez cette procédure pour mémoriser d'autres stations de radio.
Sélectionnez pour cela le champ de saisie correspondant avec les touches du curseur
et entrez le numéro de titre. Le repère de temps peut être placé dans le titre en cours
ou dans le contenu du CD. Il est entré au format heures:minutes:secondes (deux
caractères chaque). N'utilisez pas ici la touche >10 !
Fonctions de répétition (REPEAT 1/ALL, REPEAT A-B, pos. 27, 28).
Appuyez sur REPEAT 1/ALL pour répéter le titre en cours ou le CD entier. Pour
désactiver la fonction de répétition, appuyez à nouveau sur cette touche.
Appuyez sur REPEAT A-B pour sélectionner le début de la partie à répéter. La pression
suivante permet de définir la fin de cette partie. Pour désactiver la fonction de
répétition, appuyez à nouveau sur cette touche.
Sélection des stations de radio préréglées
Appuyez sur l'un des boutons PRESET de la télécommande (pos. 18, 19) pour sélectionner le numéro de la station de radio souhaitée. Le numéro de station de radio peut également être sélectionné directementl'aide des touches numériques.
De nombreux fichiers ne sont pas soumis à des normes universelles. Par
conséquent, nous ne pouvons pas garantir que tous les fichiers puissent
toujours être lus correctement.
La lecture de gros fichiers vidéo par le port USB peut rencontrer des
problèmes. Ils doivent alors être stockés sur CD ou sur DVD.
wiedergegeben werden.
RDS (RADIO DATA SERVICE)-FONCTIONS DU TUNER
Le système RDS est un système avec lequel des informations sur les émissions FM sont
diffusées avec le signal de la station de radio. Le VC 2 est capable d'afficher à l'écran ces
informations (sur la station de radio, l'émission, etc.). Les fonctions RDS peuvent être réglées à l'aide de la touche SEARCH/RDS de la télécommande (pos. 10).
TUNER
Fonctions RDS du VC 2
• PS (Program Service Name) : affiche le nom de la station de radio.
• PTY (Program Type Identification) : affiche le type d'émission.
• RT (Radio Text): affiche tous les messages de la station de radio.
Ordre d'affichage lors de l'actionnement répété de la touche SEARCH/RDS: PS, fréquence
de la station de radio, PTY, RT.
Sélection de la bande radio
• À l'aide de la touche SOURCE (VC 2, pos. 7) ou TUNER (télécommande, pos. 3), sélectionnez TUNER FM ou TUNER AM comme source audio.
• Sélectionnez à l'aide de FM-MODE (télécommande (4)) entre la réception mono (recommandé en cas de mauvaises conditions de réception) et stéréo.
Si, malgré le signal RDS, l'une de ces fonctions n'est pas prise en charge par la station
de radio, le message "N/A" s'affiche à l'écran.
Recherche des stations de radio
• Sélectionnez TUNER comme source audio puis une bande (voir ci-dessus).
• Utilisez les touches TUNING situées sur le panneau frontal du VC 2 (5, 6) ou les touches
TUNING de la télécommande (16, 17):
• Une brève pression sur les touches permet d'augmenter ou de réduire de 50 kHz la
fréquence d'accord.
• Une longue pression sur les touches permet de rechercher vers l'avant ou vers l'arrière la station de radio suivante/ précédente dans la bande de fréquences.
42
F
LES FONCTIONS DU VC 2
MENU OSD
RÉGLAGES DE LA SONORITÉ
Le VC 2 est doté d’un menu OSD (On Screen Display). Tous les réglages de base
nécessaires peuvent être effectués dans ce menu lorsque la source d’entrée “DISC” a été
sélectionnée.
Réglage du volume sonore
Le volume sonore peut être réglé à l'aide des boutons de réglage VOLUME situé sur le
panneau frontal (10) ou sur la télécommande (24). VOL s'affiche alors à l'écran avec une
valeur comprise entre 00 et MAX (40).
Pour ouvrir le menu, appuyez sur la touche SETUP de la télécommande (pos. 11).
À l'aide des touches de direction (14), sélectionnez un point de menu. Celui-ci est alors
représenté sur fond clair ou encadré. Celui-ci est alors représenté sur fond clair. Pour
sélectionner le point de menu, appuyez sur la touche OK. Vous pouvez également
naviguer dans d’autres sous-menus à l’aide des touches de direction. La touche OK vous
permet de modifier un paramètre.
Touche MUTE (télécommande, pos. 25)
Cette touche permet de mettre en sourdine l'appareil. MUTING s'affiche à l'écran.
Le son est à nouveau activé en appuyant une nouvelle fois sur cette touche ou en modifiant le volume sonore.
Pour quitter le menu OSD, appuyez sur la touche SETUP.
Réglage des basses/aigus
Appuyez plusieurs fois sur la touche TONE de la télécommande (23) jusqu'à ce que BASS
ou TREB s'affiche à l'écran.
PAGE PRINCIPALE DU MENU OSD
Réglez la sonorité à l'aide des touches TUNING de la télécommande (16, 17).
Langue
Réglage de la balance
La balance peut être sélectionnée de manière identique au réglage de la sonorité. Appuyez plusieurs fois sur la touche jusqu'à ce que BAL L00 - 00R s'affiche à l'écran. La touche TUNING (16) permet de déplacer le son stéréo vers la gauche ou vers la droite.
Video
Audio
Rating
Niveau
Fonction EQ
La touche EQ de la télécommande (22) permet de sélectionner différents préréglages du
correcteur de son. Les réglages suivants sont proposés: LINEAR, MOVIE, MUSIC,
VOCAL. Ils peuvent être choisis en appuyant plusieurs fois sur la touche EQ.
Ajust. d'usine
Ce menu vous permet d’accéder aux différents sous-menus :
Fonction DVS
Le point MODE SET (télécommande, pos. 26) permet de désactiver le son virtuel 5
canaux via les haut-parleurs stéréo (Dolby® Virtual Speaker) ou de choisir entre “DVS
Ref” et “DVS Wide”.
DVS Ref est le mode standard permettant d’entendre le son 5 canaux avec les deux
haut-parleurs frontaux.
DVS Wide produit un champ sonore étendu (plus large) pour les canaux frontaux.
Le point de menu Langue permet de sélectionner la langue des différents menus du
VC 2.
Le point de menu Vidéo permet d’accéder au sous-menu Config. vidéo dans lequel
vous pouvez effectuer différents réglages de l’image.
Le point de menu Audio permet d’accéder au sous-menu Config. audio dans lequel
vous pouvez effectuer différents réglages de la sonorité.
Le point de menu Niveau permet de paramétrer les droits de visualisation de films.
Le point de menu Ajust. d’usine permet de rétablir les réglages par défaut du VC 2.
43
F
OSD-MENÜ
LANGUE
CONFIGURATION AUDIO
Audio
Le point Langue OSD permet de paramétrer la langue du
menu Config.
Sous EQ Mode, vous pouvez régler le son et la
balance audio. Vous pouvez utiliser quatre
préréglages : Linear, Film, Music, Langue.
L'option de menu Personnalisé permet de
définir vos propres réglages.
EQ Mode
Linear
Film
Music
Langue
Personnalisé
Bass Control
Le point Audio permet de paramétrer la langue de la piste
sonore d’un DVD.
Treble Control
Balance
Position ht-parleur
Le point Menu DVD permet de paramétrer la langue des
menus d’un DVD.
Étagère
Montage mural
Subwoofer vol
Sortie numérique
PCM
Le point Sous-titre permet de paramétrer la langue des
sous-titres d’un DVD ou de désactiver les sous-titres.
RAW
Position des haut-parleurs permet de
procéder à une correction de fréquence suivant
la position des haut-parleurs satellites. Si les
haut-parleurs sont posés sur une étagère et si
l'écart avec le mur est d'au moins 15 cm, le
réglage Étagère est recommandé. Si les hautparleurs sont contre un mur, réglez sur Montage
mural.
Subwoofer Vol. permet de régler le volume du
subwoofer en fonction des caractéristiques de
la pièce. Plus le subwoofer est proche des
murs, plus faible est la restitution des basses,
et elle doit éventuellement être abaissée
(valeurs négatives). Si le subwoofer est
relativement isolé dans la pièce, un
renforcement est souvent nécessaire (valeurs
positives). Vous devez tester les réglages lors
de plusieurs tests acoustiques avec différents
films et musiques. Le mode EQ doit alors être
réglé sur Linéaire.
Sortie numérique permet de choisir entre PCM
(format de données PCM bicanal) et RAW
(format de données à plusieurs canaux).
Dans le cas des trois derniers points, notez que le DVD
utilisé doit être compatible avec ces paramètres.
44
F
OSD-MENÜ
CONFIGURATION VIDÉO
Le point Format d’image permet de régler
différents formats d’écran.
Scart permet de choisir entre la sortie vidéo
SCART au format RGB ou CVBS, si la sortie vidéo
SCART est active.
Mode d’affichage permet de procéder à plusieurs
ajustements des formats d'image pour le
téléviseur.
L'utilisateur peut choisir l'une des options
suivantes:
Remplir: agrandir/réduire l'image horizontalement
et verticalement pour remplir l'écran en hauteur et
en largeur.
Original: respecter la taille d'écran d'origine
(uniquement pour Divx / MPEG)
Ajustement auto: prendre la valeur type du taux
de mise à l'échelle horizontale et du taux de mise
à l'échelle verticale.
Pan & Scan: prendre la valeur maximale du taux
de mise à l'échelle horizontale et du taux de mise
à l'échelle verticale.
Component permet de choisir entre la sortie vidéo
composante au format Interleased ou Progressive,
si la sortie vidéo composante est active.
Le point Résolution HD permet de régler la
résolution de la sortie HDMI. Vous pouvez choisir
les résolutions suivantes:
(PAL / NTSC) 576/480 progressive
720 progressive
1080 interlaced
1080 progressive
Vérifiez quelle est la meilleure résolution vidéo
pour votre téléviseur. Tenez compte de la notice
d’utilisation de l’appareil.
Le point Système TV permet de choisir entre les
normes PAL, NTSC et Multi system.
Le point Sortie vidéo permet de choisir entre les
sorties “S-Video”, “SCART”, “Component” et
“HDMI”. La sortie composite est active suivant les
réglages.
Smart Picture (réglage de l'image) permet de
régler la luminosité, le contraste, la teinte et la
saturation. Trois réglages sont enregistrés
(standard, vif, froid). L'option de menu
Personnalisé permet de définir vos propres
réglages.
Lorsque la sortie vidéo HDMI est sélectionnée,
seule la luminosité peut être modifiée.
45
F
MENU OSD
AJUSTAGE D’USINE
NIVEAU
Ajust. d'usine
Niveau
Paramètres par défaut
Verr. parental
8. Adultes
OUI
Mot de passe
Après avoir confirmé avec Oui, les réglages de base du VC 2 sont restaurés.
****
M d passe correct
FORMATS DE LECTURE COMPATIBLES
M d passe incorr.
FORMATS DISQUE COMPATIBLES
Les formats de disques suivants peuvent être lus par le VC 2:
1.Sécurité enfant
2.G
CD-DA
HDCD
CD-R/CD-RW
3.PG
4.PG-13
5.PG-R
VCD
S-VCD
DVD Video
DVD-R/DVD+R/RW
FORMATS AUDIO / VIDEO COMPATIBLES
6.R
Les formats audio / vidéo suivants peuvent être lus par le VC 2:
7.NC-17
8.Adultes
Set Password
Mot de passe
NON
Dolby® Digital
Dolby® Prologic II
Dolby® Virtual speaker
Dolby® Headphone
MPEG-4
MPEG-2
MPEG-1 audio
AAC
WMA
JPG
Kodak Picture CD
****
M d passe correct
FORMATS COMPATIBLES VIA USB
Les formats suivants peuvent être lus par le VC 2 via USB :
M d passe incorr.
Nv. mot de pas s e
****
C onfirm nv m pas s
****
AAC
MP4
Après avoir saisi le bon mot de passe, vous pouvez modifier le réglage du contrôle
parental. Le mot de passe par défaut est 8888.
Le point Mot de passe permet de modifier le mot de passe de la manière suivante :
Saisissez le mot de passe correct.
Saisissez deux fois le nouveau mot de passe.
46
MP4
JPEG
WMA
F
CARACTERISTIQUES TECHNIQUES
RECEPTEUR CD
HAUT-PARLEURS FRONTAUX
Type:
2 voies
Puissance nominale:
70 / 120 Watt
Impédance:
4 Ohm
Bande passante:
60 – 35 000 Hz
Efficacité (1W/ 1m):
90 dB
Dimensions (L x H x P):
108 x 202 x 152 mm
Amplificateur
Puissance de sortie :
Puissance nominale SAT (4 Ohm):
Puissance nominale SUB (4 Ohm):
Puissance d’impulsion (totale):
Linéarité de la réponse en fréquence :
CD/AUX/Line
20 Hz - 20 kHz (-1,0 dB)
Ecart signal / bruit :
CD/AUX/Line
Sensibilité d’entrée :
AUX/Line
Réglage de la sonorité :
Basses
Aigus
Sub
Tuner FM
Gamme de fréquence
Ecart signal / bruit
Tuner AM
Gamme de fréquence
Ecart signal / bruit
Divers
Tension secteur :
Puissance absorbée :
Dimensions (l x h x p) :
Poids :
2 x 50 W
1 x 100 W
350 W
SUBWOOFER
Type:
Puissance nominale:
Impédance:
Bande passante:
Efficacité (1W/ 1m):
Dimensions (L x H x P):
95 dB
450 mV/47kOhm
±10 dB/100 Hz
±10 dB/10 kHz
± 6 dB
Particularités
Traitement Dolby® Virtual Speaker pour un son home-cinéma parfait avec 2 haut-parleurs
Casque Dolby®
Etage de puissance numérique à 3 canaux
Processeur vidéo Zoran vaddis®
Fonction upscale jusqu’à 1080p (résolution Full HD) pour DVD
Tuner FM/AM superhétérodyne avec fonction RDS / texte radio
Bloc d’alimentation numérique
Fonction Standby à faible consommation de courant
87,5 – 108 MHz
Mono: 70 dB
Stéréo: 65 dB
531-1602 MHz
40 dB
SOUS TOUTES RESERVES DE MODIFICATIONS TECHNIQUES.
230 VAC/50 Hz
200 W maxi
Veille 0,9 W
Appareil principal :
400 x 98 x 289 mm
Appareil principal, éléments de commande et bornes de
raccordements inclus :
400 x 98 x 332 mm
Télécommande :
53 x 220 x 22 mm
4,8 kg
Bass reflex
140 / 200 Watt
4 Ohm
25 – 180 Hz
90 dB
235 x 390 x 388 mm
47
I
INDICE
Menu OSD
Pagina principale del menu OSD . . . . . . . . . . . . . . . . . . . . . . . . . . . . . . . . . . . . . . . 58
Informazioni generali
Lingua. . . . . . . . . . . . . . . . . . . . . . . . . . . . . . . . . . . . . . . . . . . . . . . . . . . . . . . . . . . . 59
Configurazione audio . . . . . . . . . . . . . . . . . . . . . . . . . . . . . . . . . . . . . . . . . . . . . . . . 59
Accessori . . . . . . . . . . . . . . . . . . . . . . . . . . . . . . . . . . . . . . . . . . . . . . . . . . . . . . . . . 48
Configurazione video . . . . . . . . . . . . . . . . . . . . . . . . . . . . . . . . . . . . . . . . . . . . . . . . 60
Prima di cominciare . . . . . . . . . . . . . . . . . . . . . . . . . . . . . . . . . . . . . . . . . . . . . . . . . 49
Restrizione . . . . . . . . . . . . . . . . . . . . . . . . . . . . . . . . . . . . . . . . . . . . . . . . . . . . . . . . 61
Avvertenze importanti per la sicurezza . . . . . . . . . . . . . . . . . . . . . . . . . . . . . . . . . . 49
Predifinito . . . . . . . . . . . . . . . . . . . . . . . . . . . . . . . . . . . . . . . . . . . . . . . . . . . . . . . . . 61
Istruzioni per lo smaltimento. . . . . . . . . . . . . . . . . . . . . . . . . . . . . . . . . . . . . . . . . . . 49
Formati compatibili per la riproduzione dei supporti multimediali
Codifica regionale: . . . . . . . . . . . . . . . . . . . . . . . . . . . . . . . . . . . . . . . . . . . . . . . . . . 49
Elementi e connessioni per il funzionamento
Pannello anteriore . . . . . . . . . . . . . . . . . . . . . . . . . . . . . . . . . . . . . . . . . . . . . . . . . . 50
Formati disco compatibili . . . . . . . . . . . . . . . . . . . . . . . . . . . . . . . . . . . . . . . . . . . . . 61
Pannello posteriore/Connessioni . . . . . . . . . . . . . . . . . . . . . . . . . . . . . . . . . . . . . . . 52
Formati supportati attraverso la porta USB . . . . . . . . . . . . . . . . . . . . . . . . . . . . . . . 61
Formati audio/video compatibili . . . . . . . . . . . . . . . . . . . . . . . . . . . . . . . . . . . . . . . . 61
Telecomando . . . . . . . . . . . . . . . . . . . . . . . . . . . . . . . . . . . . . . . . . . . . . . . . . . . . . . 51
Specifiche
Gli altoparlanti del VC 2 . . . . . . . . . . . . . . . . . . . . . . . . . . 53
Possibilità di connessione
Specifiche dell’unità VC 2. . . . . . . . . . . . . . . . . . . . . . . . . . . . . . . . . . . . . . . . . . . . . 62
Connessioni audio . . . . . . . . . . . . . . . . . . . . . . . . . . . . . . . . . . . . . . . . . . . . . . . . . 53
Altoparlanti frontali e subwoofer . . . . . . . . . . . . . . . . . . . . . . . . . . . . . . . . . . 53
ACCESSORI
Antenne. . . . . . . . . . . . . . . . . . . . . . . . . . . . . . . . . . . . . . . . . . . . . . . . . . . . . 53
Dispositivi audio ausiliari. . . . . . . . . . . . . . . . . . . . . . . . . . . . . . . . . . . . . . . . 54
1)
2)
3)
4)
5)
6)
7)
8)
9)
10)
11)
Connessioni con TV/monitor . . . . . . . . . . . . . . . . . . . . . . . . . . . . . . . . . . . . . . . . . . 54
Uscite audio . . . . . . . . . . . . . . . . . . . . . . . . . . . . . . . . . . . . . . . . . . . . . . . . . . . . . . . 54
Connessioni pannello anteriore . . . . . . . . . . . . . . . . . . . . . . . . . . . . . . . . . . . . . . . . 54
Display . . . . . . . . . . . . . . . . . . . . . . . . . . . . . . . . . . . . . . . . 55
Accensione dell’apparecchio
Cavo di alimentazione. . . . . . . . . . . . . . . . . . . . . . . . . . . . . . . . . . . . . . . . . . . . . . . . 55
Telecomando . . . . . . . . . . . . . . . . . . . . . . . . . . . . . . . . . . . . . . . . . . . . . . . . . . . . . . 55
Funzioni dell’unità VC 2
Riproduzione di DVD
Riproduzione di CD, WMA, MPEG-4
56
56
Funzioni del Sintonizzatore . . . . . . . . . . . . . . . . . . . . . . . . . . . . . . . . . . . . . . . . . . . 57
Funzioni RDS (Radio Data System) del sintonizzatore . . . . . . . . . . . . . . . . . . . . . . 57
Impostazioni del suono. . . . . . . . . . . . . . . . . . . . . . . . . . . . . . . . . . . . . . . . . . . . . . . 58
48
Manuale di istruzioni
Telecomando
Batterie per il telecomando (2 batterie AA)
Cavo di alimentazione
Antenna loop per onde medie
Antenna FM per interni
Cavo AV
2 x altoparlanti frontali
Subwoofer
Cavi altoparlanti per gli altoparlanti frontali e il subwoofer
Piedini di gomma autoadesivi per gli altoparlanti frontali
I
Il simbolo del triangolo con il fulmine segnala all’utente che la
corrente ad alto voltaggio presente all’interno dell’apparecchio
può comportare il pericolo di scossa elettrica.
PRIMA DI COMINCIARE
Gentile cliente,
grazie per aver scelto l’unità Magnat VC 2.
Prima di cominciare a utilizzare l’unità VC 2, ti consigliamo di leggere attentamente le
seguenti informazioni.
Il simbolo del punto esclamativo all’interno di un triangolo
equilatero segnala all’utente che il manuale di istruzioni in
dotazione contiene informazioni importanti che è necessario
osservare.
IMPORTANTI ISTRUZIONI DI SICUREZZA
Prima di utilizzare l’apparecchio, leggere attentamente il manuale di istruzioni e
conservarlo in un luogo sicuro.
L’apparecchio dovrebbe essere usato solamente in ambienti con temperatura
compresa tra 10 e 40 °C.
Verificare che l’apparecchio sia sufficientemente ventilato. A tal fine, si consiglia di
mantenere almeno 10 cm di distanza tra l’apparecchio e gli oggetti circostanti.
Per garantire la necessaria ventilazione dell’apparecchio, le fessure di ingresso e
uscita dell’aria non devono essere ostruite da alcun oggetto (ad esempio tendaggi,
giornali ecc.). Non posizionare l’apparecchio in prossimità di fonti di calore quali
radiatori, forni, fiamme libere o altri dispositivi che generino calore.
L’apparecchio e il suo telecomando non devono essere esposti a all’acqua o ad alti
livelli di umidità.
Inoltre, si consiglia di non posizionare sull’apparecchio vasi o altri contenitori di
sostanze liquide.
In caso di contatto con umidità o liquidi, scollegare immediatamente il cavo di
alimentazione.
Per pulire l’apparecchio, utilizzare esclusivamente un panno asciutto.
Non usare prodotti per la pulizia o solventi chimici, che possono danneggiare la
superficie dell’apparecchio.
Non aprire mai l’apparecchio.
Il cavo di alimentazione deve essere mantenuto sempre in perfette condizioni di
funzionamento. Qualora il cavo di alimentazione risulti visibilmente danneggiato,
cessare immediatamente l’utilizzo dell’apparecchio. Sostituire, e non riparare, il cavo
danneggiato.
Non collegare o rimuovere il cavo di alimentazione con le mani umide.
Per ogni operazione di manutenzione o riparazione, rivolgersi sempre a personale
specializzato e qualificato.
Se si prevede di non utilizzare l’apparecchio per un lungo periodo, spegnerlo agendo
sull’interruttore di alimentazione (POWER) sul lato posteriore dell’unità.
In caso di temporale, scollegare i cavi di alimentazione e dell’antenna.
Non aprire! Pericolo di scossa elettrica! Per ridurre il rischio di
incendio o di folgorazione, l’apparecchio non deve essere
esposto a pioggia o umidità.
Questo simbolo segnala all’utente che all’interno
dell’apparecchio è presente un dispositivo laser classe 1 che
non comporta alcun pericolo all’esterno dell’unità.
ISTRUZIONI PER LO SMALTIMENTO
Nel rispetto della direttiva della Comunità Europea 2002/96/EC, tutti gli
apparati elettrici ed elettronici devono essere smaltiti separatamente tramite
punti di raccolta locali. Rispettare le normative locali e non smaltire i vecchi
apparecchi tra i normali rifiuti domestici.
CODIFICA REGIONALE
Sia il lettore che il disco DVD dispongono di un codice regionale. Questi codici regionali
devono corrispondere nell’ordine al disco da riprodurre. In caso contrario, il disco non
viene riprodotto. Il codice di questa unità è 2. I DVD con altri codici regionali non possono
essere riprodotti in questa unità. Anche i dischi contrassegnati con “ALL” possono essere
riprodotti su questo lettore.
49
La lista seguente mostra le varie regioni DVD del mondo.
1 - Canada, USA e suoi territori
2 - Europa, Giappone, Sudafrica, Medio Oriente
3 - Sudest asiatico
4 - Australia, Nuova Zelanda, America centrale e meridionale
5 - Russia, India, Asia nordovest e Africa del nord
6 - Repubblica Popolare Cinese (tranne Hong Kong e Macao)
I
ELEMENTI DI FUNZIONAMENTO E COLLEGAMENTI – PANNELLO ANTERIORE
14
13
IR
1
1
Pulsante ON / STANDBY
Accende l’apparecchio quando questo si
trova in modalità di attesa (il LED si
illumina di colore rosso). Se il LED non si
accende, azionare l’interruttore di
alimentazione situato sul lato posteriore
dell’apparecchio. Premendo nuovamente
il pulsante, l’apparecchio passa dalla
modalità di funzionamento alla modalità
in attesa (il LED si illumina di colore
verde).
2
▲ Pulsante EJECT
Apre o chiude
DVD/CD (8).
3
l’alloggiamento
►/II Pulsante PLAY
per
Avvia o interrompe la riproduzione dei
supporti multimediali.
2
4
■ Pulsante STOP
5
l◄◄ Pulsante SEARCH
3
4
5
7
7 89
10
Pulsante SOURCE
Seleziona l’ingresso tra DISC, TUNER e
gli ingressi esterni AUX 1, AUX 2, AUX 3,
LINE, digitale ottico e digitale coassiale.
L’ingresso prescelto è indicato sul display
(13).
Termina la riproduzione dei supporti
multimediali.
Tuner: Passaggio tra FM auto e FM mono
durante la ricezione FM.
CD/DVD: Passa al titolo precedente.
Tuner: Sintonizzatore: una breve
pressione consente di aumentare di
5 kHz la frequenza della stazione per la
sintonizzazione manuale. Una pressione
prolungata avvia la ricerca della stazione.
6
6
8
DVD VIDEO
9
Ingresso USB
Alloggiamento per DVD/CD. Inserire il
DVD/CD nell’alloggiamento con l’etichetta
rivolta verso l’alto.
Consente di connettere un supporto di
archiviazione USB.
►►l Pulsante SEARCH
CD/DVD: Passa al titolo successivo.
Tuner: Come al punto 5, ma procedendo
in avanti.
10 Controllo VOLUME
50
Regola il volume. Per passare dal volume
minimo al volume massimo, la manopola
deve compiere circa due giri completi. Il
volume selezionato appare sul display
(13).
(VOLUME 00 - VOLUME 40).
11 12
11 LINE IN
Jack di ingresso stereo da 3,5 mm per
dispositivi audio ausiliari (ad esempio
lettori MP3 ecc.).
12 PHONES
Jack di uscita stereo da 3,5 mm per cuffie
auricolari. Inserendo questo jack, gli
altoparlanti
vengono
disattivati
automaticamente. Prima di collegare le
cuffie auricolari, si consiglia di abbassare
il volume.
13 Display
Visualizza le regolazioni effettuate.
14 Sensore del telecomando
Durante l’uso, puntare il telecomando in
direzione del sensore.
I
ELEMENTI DI FUNZIONAMENTO E COLLEGAMENTI – TELECOMANDO
1
6
3
4
2
5
36
35
7
8
11
15
14
12
16
18
20
27
29
17
19
21
28
30
13
22
24
23
26
33
31
tornare alla normale velocità di riproduzione del
disco; ciò è possibile anche premendo il
pulsante PLAY.
Sintonizzatore: una breve pressione consente
di aumentare di 50 kHz la frequenza della
stazione per la sintonizzazione manuale. Una
pressione prolungata avvia la ricerca della
stazione.
5 USB
Attiva l’ingresso USB.
6 DIGITAL IN
Attiva gli ingressi “Digitale ottico” et “Digitale
Coassiale”.
17 TUNE ►►
Come al punto 16, ma procedendo in avanti.
7
AUX
Attiva gli ingressi “Aux 1”, “Aux 2” “Aux 3” e
“LINE”.
9
10
4
MONO/ST
Passaggio tra FM auto e FM mono durante la
ricezione FM.
18 l◄◄ PRESET
Passa al titolo precedente.
Sintonizzatore: Seleziona lo spazio memoria
inferiore successivo.
8
Tasti numerici
Permettono di selezionare direttamente i titoli
su un CD/DVD o le stazioni preselezionate del
sintonizzatore.
25
34
32
19 ►►l PRESET
Passa al titolo successivo.
Sintonizzatore: Seleziona lo spazio memoria
superiore successivo.
9
MEM (Memoria)
Memorizza le stazioni radio preferite.
10 SEARCH/RDS
CD/DVD: Selezione diretta di un capitolo, brano
o salto ad un marcatore orario specifico.
Sintonizzatore: visualizza la funzione RDS
selezionata.
20 ■ Stop
Termina la
multimediali.
2
DISC (Disco)
Seleziona l’ingresso “Disk” per il lettore CD o
DVD.
3
TUNER
Permette di attivare l’ingresso “Tuner”. Premere
nuovamente per selezionare in sequenza FM e
AM.
supporti
22 EQ
Selezione delle impostazioni del suono memorizzate: LINEAR – FILM – MUSIC –
LANGUAGE - CUSTOM.
12 TITLE
Richiamo del menu Titolo del DVD.
13 MENU
Richiama il menu DVD.
23 TONE
Regola i livelli di bassi, altezzi, et del
bilanciamento. Le varie impostazioni possono
essere modificate mediante i pulsanti PRESET.
14 Tasti cursore
Permettono di eseguire la configurazione
all’interno del menu a video (OSD=On Screen
Display).
24 VOLUME
Regola il volume.
15 OK
Conferma le impostazioni eseguite mediante i
tasti cursore.
16 ◄◄ TUNE
A seconda del numero di volte che viene
premuto, permette di tornare indietro con
velocità pari a 2, 4, 8 o 16 volte la velocità
normale. Un’ulteriore pressione consente di
dei
21 ►/II Pulsante PLAY
Avvia o interrompe la riproduzione dei supporti
multimediali.
11 SETUP
Accede al menu OSD per procedere alla
configurazione in modalità DISC.
1
POWER (Alimentazione)
Accende l’apparecchio quando questo si trova
in modalità di attesa. Se il LED non si accende,
azionare l’interruttore di alimentazione situato
sul lato posteriore dell’apparecchio. Premendo
nuovamente il pulsante, l’apparecchio passa
dalla modalità di funzionamento alla modalità in
attesa.
riproduzione
25 MUTE (Disattiva audio)
Esclude l’audio.
26 DVS SET
Attiva la riproduzione attraverso gli altoparlanti
stereo in modalità Dolby® Surround virtuale.
Quando si collegano le cuffie, la funzione
Dolby® delle cuffie viene attivata o disattivata.
51
27 REPEAT 1/ALL
Funzione di ripetizione del brano attuale o
dell'intero CD/DVD.
28 REPEAT A-B
Funzione di ripetizione di una parte di brano
definibile a piacere da un CD/DVD.
29 ZOOM
DVD: Funzione ZOOM.
30 ANGLE
DVD: Scelta tra varie angolazioni della
fotocamera (purché il DVD supporti la
funzione).
31 SUBTITLE
DVD: Impostazione di sottotitoli differenti
(purché il DVD supporti la funzione).
32 AUDIO
DVD: Impostazione delle tracce audio
disponibili su DVD (purché il DVD supporti la
funzione).
33 PROG
DVD: Programmazione selettiva di singoli brani
o capitoli.
34 HDMI RES
Seleziona la risoluzione dell’uscita HDMI.
35 VIDEO OUT
Compie la selezione dell'uscita video nel
seguente ordine: SCART, Component
Interleased (COMP I), Component Progressive
(COMP P), HDMI, S-Video. L'uscita Composite
(CVBS) e sempre attiva.
36 ▲ Eject
Azionamento DVD/CD: apre o chiude
l’alloggiamento e termina o avvia la
riproduzione di DVD/CD.
I
ELEMENTI DI FUNZIONAMENTO E COLLEGAMENTI – CONNESSIONI POSTERIORI
12 13
11
1
10
COLLEGAMENTO ALLA RETE
Presa di alimentazione. Per la
connessione del cavo di alimentazione in
dotazione.
2
FUSE
Devono essere impiegati solo fusibili del
tipo indicato sul retro dell’apparecchio.
3
ON / OFF
Interruttore di alimentazione. Permette di
accendere l’apparecchio e lo pone in
modalità di attesa. Se l’’interruttore viene
posizionato su “OFF”, l’apparecchio viene
disconnesso dall’alimentazione elettrica.
4
SPEAKER OUT SUB
15 16 17
14
Uscita per il collegamento del subwoofer
compreso nella fornitura.
9
5
8
7
18
6
5
SPEAKER OUT R/L
4
1
16 INPUT AUX 2
12 ANT FM
17 INPUT AUX 3
Collegamento per l’antenna. Consente di
collegare l’antenna FM per interni in
dotazione o un’altra antenna disponibile.
6
OUTPUT R / L
7
OUTPUT S-VIDEO
8
OUTPUT COMPOSITE
Collegamento per l’antenna. Permette di
collegare l’antenna loop per AM in
dotazione.
9
OUTPUT COMPONENT
Ingresso audio digitale ottico e coassiale.
Uscite audio analogiche destra e sinistra.
13 ANT AM
Uscita S-video (Y/C).
Uscita video composito (FBAS).
14 Digital INPUT
Uscita video Component analogica (YUV).
15 INPUT AUX 1
10 HDMI OUTPUT
Ingresso audio analogico.
Uscita HDMI (High Definition Multimedia
Interface).
52
3
11 Digital OUTPUT
Uscita audio digitale ottica e coassiale.
Uscita per il collegamento degli
altoparlanti compresi nella fornitura.
Rispettare la corretta polarità.
2
Ingresso audio analogico.
Ingresso audio analogico.
18 SCART OUT
Uscita SCART.
I
GLI ALTOPARLANTI DEL VC 2
POSSIBILITÀ DI CONNESSIONE
La fornitura di VC 2 include due diffusori acustici frontali e un subwoofer. Gli altoparlanti
sono concepiti specificamente per il VC 2 e si consiglia pertanto di collegare solo questi
diffusori al dispositivo.
CONNESSIONI AUDIO
Subwoofer
INSTALLAZIONE DEGLI ALTOPARLANTI FRONTALI
Gli altoparlanti frontali vengono sistemati a destra ed a sinistra del televisore all’altezza
delle orecchie e possibilmente alla stessa distanza dal televisore. Gli altoparlanti devono
essere visibili dal punto d’ascolto. Ostacoli fonoassorbenti o riflettenti producono distorsioni
del suono. Gli altoparlanti possono essere posizionati su uno scaffale o su un mobile a credenza. Applicare allo scopo i piedini di gomma autoadesivi forniti in dotazione sul lato inferiore del diffusore acustico (quattro pezzi a diffusore).
Altoparlante
D
Altoparlante
S
Dispositivi audio ausiliari
Antenna onde medie
segnale digitale
R
segnale
analogico
Antenna FM
Gli altoparlanti frontali presentano sul retro un supporto per il montaggio a parete.
Prevedere una vite idonea su una parete portante sulla quale si intende montare
l'altoparlante. I piedini di gomma forniti in dotazione vanno applicati sul retro in modo da
garantire una certa distanza tra altoparlante e parete.
INSTALLAZIONE DEL SUBWOOFER
La frequenza trasmessa dal subwoofer non è percepibile dall’udito umano e per questo
in generale il montaggio non risulta particolarmente difficile. Si consiglia tuttavia una sistemazione davanti alla postazione di ascolto vicino agli altoparlanti frontali. Si consiglia
inoltre di mantenere una distanza laterale e dalla parte posteriore verso oggetti e pareti di
almeno 25 cm. In caso contrario potrebbe essere compromessa la riproduzione dei bassi.
ALTOPARLANTI FRONTALI E SUBWOOFER
Il set VC 2 è corredato di cavi per altoparlanti preconfezionati per i due diffusori (2x3m) ed
il subwoofer (1x5m). Utilizzare possibilmente questi casi in sede di allacciamento degli
altoparlanti. I cavi possono essere accorciati all'occorrenza facendo attenzione a
ripristinare il rivestimento isolante. Tenere presente che i cavi dei due altoparlanti frontali
devono avere la stessa lunghezza. In caso si avesse bisogno di cavi più lunghi, evitare di
prolungare i cavi forniti in dotazione, ricorrendo invece a cavi equivalenti nuovi con la
lunghezza richiesta reperibili in negozi specializzati.
Rilasciare una dopo l'altra le viti di fissaggio degli altoparlanti ed introdurre le estremità
nude nei fori presenti. Stringere quindi di nuovo saldamente le viti di fissaggio. Evitare un
eventuale cortocircuito causato dal contatto accidentale di fili nudi non fissati
correttamente. Seguire quindi la stessa procedura per collegare l'altra estremità del cavo
al terminale di attacco del VC 2. Osservare necessariamente la corretta polarità.
POSSIBILITÀ DI CONNESSIONE
Collegare il cavo di alimentazione solo dopo avere eseguito tutte le altre
connessioni.
Durante l’esecuzione delle connessioni, rispettare quanto specificato nei
manuali degli altri dispositivi.
Per quanto riguarda la scelta dei cavi, si consiglia di privilegiare la qualità.
In particolare, il cavo HDMI deve essere certificato per tale uso.
ANTENNE
Collegare l’antenna FM per interni alla presa FM Antenna.
Se disponibile, è possibile utilizzare anche un’antenna esterna. Solitamente, questo
sistema consente di ottenere una ricezione migliore. A tal fine, si consiglia di impiegare un
cavo commerciale per antenne IEC.
Per utilizzare il ricevitore in onde medie, collegare l’antenna in dotazione alla presa AM
antenna.
53
Direzionare l’antenna in modo da ottenere la migliore ricezione possibile.
I
POSSIBILITÀ DI CONNESSIONE
DISPOSITIVI AUDIO AUSILIARI
USCITE AUDIO
Se i dispositivi impiegati dispongono di un’uscita digitale, è possibile utilizzarla per connetterli a uno
degli ingressi digitali dell’unità VC 2 tramite un cavo coassiale (a 75 Ohm) o ottico.
I dispositivi con uscita analogica possono essere collegati alle uscite AUX dell’unità VC 2 mediante
un cavo RCA.
CONNESSIONI CON TV/MONITOR
Le seguenti uscite audio possono essere impiegate per i dispositivi di registrazione audio:
Uscita digitale: ottica o coassiale con relativi cavi.
Uscita stereo analogica: tramite cavo RCA.
CONNESSIONI PANNELLO ANTERIORE
Gli apparecchi TV possono essere collegati all’unità VC 2 nei seguenti modi:
Tramite l’uscita composita dell’uscita S-video.
Tramite l’ingresso SCART.
Tramite l’uscita Component.
Tramite l’uscita HDMI.
Le risoluzioni video che seguono possono essere impostate per l’uscita HDMI tramite
Config. video o mediante il telecomando (pos. 34).
IR
(PAL / NTSC) 576/480 progressiva 720 progressiva
1080 interlacciata 1080 progressiva
Assicurarsi di utilizzare la risoluzione video ottimale per il proprio apparecchio TV.
Rispettare quanto indicato nelle istruzioni per l’uso dell’apparecchio.
ATTENZIONE: Le uscite video vanno selezionate tramite setup della funzione video o
tramite telecomando (pos. 35). L'uscita Composite è sempre attiva.
54
Connessione per dispositivi di archiviazione USB
LINE IN (ad esempio per il collegamento di un lettore MP3)
PHONES (uscita per cuffie auricolari)
I
DISPLAY
ACCENSIONE DELL’APPARECCHIO
CAVO DI ALIMENTAZIONE
6
Una volta eseguite tutte le connessioni, è possibile collegare il cavo di alimentazione.
Verificare nuovamente tutte le connessioni controllando i manuali degli altri apparecchi
utilizzati.
Assicurarsi che i canali destro e sinistro siano collegati correttamente rispettandone
l’ordine.
Non raggruppare il cavo di alimentazione insieme ai cavi di collegamento, per evitare di
causare ronzii e altri disturbi.
Accendere gli apparecchi.
GG
2
1
2
3
1
3
4
5
Indicazione di stato della funzione del drive (Play, Pause, Avanzamento/
Riavvolgimento rapido).
Visualizzazione alfanumerica: Informazioni su impostazioni, operazioni e informazioni
RDS attuali. Consente la visualizzazione, in modalità CD/DVD, del capitolo attuale,
del brano attuale e del tempo di riproduzione trascorso.
Visualizzazioni durante la ricezione FM:
ST.: Ricezione stereo
TUNED: Stazione non è impostata correttamente
RDS: Disponibilità di dati RDS
4
Visualizzazione della decodifica Dolby® Digital
6
La visualizzazione è attiva con DVS REF o DVS WIDE attivi (Dolby® Virtual Speaker
Processing).
5
TELECOMANDO
Inserire le batterie nell’apposito vano del telecomando.
Durante l’uso del telecomando, puntarlo in direzione del sensore a infrarossi dell’unità
VC 2 (pos. 14).
Visualizzazione dei canali a disposizione per la decodifica
55
I
FUNZIONI DELL’UNITÀ VC 2
Funzioni di ripetizione (REPEAT 1/ALL, REPEAT A-B, pos. 27, 28)
Premere REPEAT 1/ALL per ripetere la riproduzione del brano attuale o di tutto il DVD.
Per disattivare la funzione di ripetizione, premere di nuovo sul tasto.
RIPRODUZIONE DI DVD
Premere SOURCE sul pannello anteriore dell’unità VC 2 (pos. 7) o DISC sul telecomando
(pos. 2) per impostare l’ingresso su DISC (indicato sul display).
Premere il tasto REPEAT A-B per definire l'inizio della sezione che si intende ripetere.
Premendo ancora una volta si definisce la fine della sezione interessata. Per disattivare
la funzione di ripetizione, premere di nuovo sul tasto.
Premere EJECT (Espulsione) sul pannello anteriore (pos. 2) o sul telecomando (pos. 36)
per aprire l’alloggiamento e inserire un DVD, quindi premerlo nuovamente per chiudere
l’alloggiamento.
Il dispositivo riproduce il DVD visualizzando sullo schermo il menu DVD (purché il DVD
supporti la funzione). Per navigare nel menu, utilizzare i tasti cursore e OK (pos. 14, 15).
RIPRODUZIONE DI CD, WMA, MPEG-4
La selezione dell’ingresso e l’inserimento del CD avvengono esattamente come nella
modalità DVD.
Come supporto di memoria è anche possibile utilizzare un supporto di memoria di massa.
Questo è collegato alla porta USB sulla parte frontale del VC 2 (pos. 9). Come fonte di ingresso è necessario selezionare tramite il tasto SOURCE sulla parte frontale del VC 2
(pos. 7) o del tasto USB sul telecomando (pos. 5) l'ingresso USB.
Con riproduzione in corso sono disponibili le seguenti funzioni:
Controllo della riproduzione tramite i tasti di controllo drive sulla parte frontale (pos.
3-6) o sul telecomando (pos. 16-21).
Richiamo del menu DVD o del menu Titolo del DVD tramite i tasti MENU o TITLE
sul telecomando (purché il DVD supporti la funzione).
Selezione diretta di un brano, capitolo o salto ad un marcatore orario specifico
(tramite il tastoSEARCH/RDS sul telecomando, pos. 10).
Sullo schermo è visualizzata la lista dei brani.
Selezionare il rispettivo campo di immissione con i tasti cursore e inserire il numero del
brano risp. del capitolo. Il marcatore orario va inserito nel formato Ore:Minuti:Secondi
(sempre con due cifre). Il tasto „>10“ NON va utilizzato!
Programmazione selettiva (tasto SEARCH/RDS sul telecomando, pos. 33).
Con i tasti cursore ed il tasto OK è possibile selezionare un singolo brano oppure avviare
la riproduzione dell'intero CD premendo PLAY. È anche possibile selezionare la modalità
Ripetizione e Riproduzione.
Con riproduzione in corso sono disponibili le seguenti funzioni:
Controllo della riproduzione tramite i tasti di controllo drive sulla parte frontale (pos.
3-6) o sul telecomando (pos. 16-21).
Selezione diretta di un brano, capitolo o salto ad un marcatore orario specifico
(tramite il tastoSEARCH/RDS sul telecomando, pos. 10).
Selezionare con i tasti cursore (pos. 14) il brano o il capitolo richiesto dalla lista a
sinistra aggiungendolo con il tasto OK (pos. 15) alla play list (a destra). Con i pulsanti
in basso è possibile cancellare singoli brani o l'intera play list oppure riprodurre la
selezione.
56
I
FUNZIONI DELL’UNITÀ VC 2
Selezionare il rispettivo campo di immissione con i tasti cursore e inserire il numero del
brano. Il marcatore orario può essere definito per il brano attuale o all'interno del CD
e va inserito nel formato Ore:Minuti:Secondi (sempre con due cifre). Il tasto „>10“ NON
va utilizzato!
Funzioni di ripetizione (REPEAT 1/ALL, REPEAT A-B, pos. 27, 28)
Premere REPEAT 1/ALL per ripetere la riproduzione del brano attuale o di tutto il CD.
Per disattivare la funzione di ripetizione, premere di nuovo sul tasto.
Premere il tasto REPEAT A-B per definire l'inizio della sezione che si intende ripetere.
Premendo ancora una volta si definisce la fine della sezione interessata. Per disattivare
la funzione di ripetizione, premere di nuovo sul tasto.
• Selezionare il numero della stazione desiderata con i tasti numerici sul telecomando
(8).
• Il numero della stazione lampeggia sul display.
• Premere nuovamente il tasto MEM per salvare la stazione.
• Il numero della stazione smette di lampeggiare.
• Ripetere la procedura per salvare altre stazioni.
Selezione delle stazioni preimpostate
Premere uno dei tasti PRESET sul telecomando (18, 19) per selezionare il numero della
stazione desiderata. La posizione della stazione può essere selezionata anche direttamente con i tasti numerici.
Per molti file multimediali non esistono standard universalmente validi.
Pertanto non è possibile garantire la corretta riproduzione di tutti i file. .
FUNZIONI RDS (RADIO DATA SYSTEM) DEL SINTONIZZATORE
I file video di grandi dimensioni possono causare problemi durante la
riproduzione attraverso la porta USB. In tal caso, si consiglia di riprodurre
questi da un CD o DVD.
RDS è un sistema con il quale vengono trasmesse delle informazioni attraverso delle trasmissioni FM con il segnale del trasmettitore. Il VC 2 può visualizzare queste informazioni
(attraverso il trasmettitore, la trasmissione ecc.) sul display. Le funzioni RDS possono essere impostate con il tasto SEARCH/RDS del telecomando (10).
Funzioni RDS del MC 2
• PS (Program Service Name): Mostra il nome del trasmettitore.
• PTY (Program Type Identification): Visualizza il tipo di trasmissione.
• RT (Radio Text): Mostra tutti i messaggi del trasmettitore.
FUNZIONI DEL SINTONIZZATORE
Selezione della banda di radiodiffusione
• Selezionare con SOURCE (VC 2, pos. 7) o TUNER (telecomando, pos. 3) TUNER FM
o TUNER AM come fonte audio.
• Scegliere con MONO/ST (telecomando (4)) tra ricezione mono (consigliato in caso di
cattive condizioni di ricezione) o ricezione stereo.
Sequenza di visualizzazione in caso di azionamento ripetuto del tasto SEARCH/RDS: PS,
frequenza stazione, PTY, RT.
Ricerca della stazione
• Selezionare TUNER come fonte audio e banda (vedi sopra).
• Utilizzare i tasti TUNING sul alto frontale del VC 2 (5, 6) oppure i tasti TUNING sul telecomando (16, 17).
• Una breve pressione sui tasti aumenta o riduce la frequenza di sintonizzazione di
50 kHz.
• Con una pressione lunga sui tasti, si cerca la stazione successiva nella banda in modo
ascendente o discendente.
Se nonostante il segnale RDS una di queste funzioni non è supportata dal trasmettitore,
sul display viene visualizzato "N/A".
Preimpostazione della stazione
• È possibile salvare in memoria rispettivamente 20 stazioni FM ed AM.
• Impostare la stazione desiderata (FM o AM). Aprire la memoria con il tasto MEM sul telecomando (9).
57
I
FUNZIONI DELL’UNITÀ VC 2
MENU OSD
IMPOSTAZIONI DEL SUONO
L’unità VC 2 è dotata di menu OSD (On Screen Display). Tutte le impostazioni base
necessarie possono essere effettuate da questo menu dopo aver selezionato “DISC” come
ingresso.
Impostazione del volume
Il volume può essere impostato con i regolatori VOLUME sul pannello frontale (10) o sul
telecomando (24). Sul display viene quindi visualizzata la voce VOL ed un valore compreso tra 00 e MAX (40).
Il menu può essere visualizzato premendo il pulsante SETUP sul telecomando (11).
Selezionare con i tasti cursore (pos. 14) una voce di menu evidenziata in seguito da uno
sfondo chiaro o da un cornice. Le voci di menu possono essere selezionate premendo il
pulsante OK o spostandosi tra i sottomenu aggiuntivi con i tasti cursore. Le impostazioni
possono essere modificate premendo il pulsante OK.
MUTE (telecomando, pos. 25)
Con questo tasto è possibile disattivare il volume. Sul display lampeggia la voce MUTING.
Un'ulteriore pressione su questo tasto o una modifica del volume lo riattiva.
Premere il tasto SETUP per uscire dal Menu OSD.
Impostazione dei bassi/altezze
Premere il tasto TONE sul telecomando (23) ripetutamente fino a quando sul display viene
visualizzata la voce BASS o TREB. Impostare il suono con i tasti TUNING sul telecomando (16, 17).
PAGINA PRINCIPALE DEL MENU OSD
Impostazione del bilanciamento
Il bilanciamento viene selezionato come la regolazione del suono. Premere il relativo tasto
fino a quando sul display appare BAL L00 - 00R. Con TUNING sarà quindi spostare il
centro stereo verso sinistra o destra.
Lingua
Video
Audio
Funzione EQ
Con il tasto EQ sul telecomando (22) è possibile richiamare per i regolatori del suono una
serie di preimpostazioni differenti. È possibile scegliere tra le seguenti impostazioni: LINEAR, MOVIE, MUSIC, VOCAL. Per scegliere le varie impostazioni, premere ripetutamente il tasto EQ.
Rating
Restriz.
Predifinito
Funzione DVS
SET DVS (telecomando, pos. 26) consente di disattivare l’audio del quinto canale virtuale
per altoparlanti stereo (Dolby® Virtual Speaker) o selezionare tra le modalità “DVS Ref”
e “DVS Wide”:
DVS Ref è la modalità standard con cui è possibile ricreare il segnale audio del quinto
canale attraverso i due altoparlanti frontali.
DVS Wide genera un campo sonoro espanso (più ampio) attraverso i canali frontali
Da questa pagina è possibile richiamare i seguenti sottomenu:
Lingua consente di selezionare la lingua dei menu dell’unità VC 2.
Video permette di accedere al sottomenu CONFIG. VIDEO, da cui è possibile
effettuare alcune regolazioni delle impostazioni dell’immagine.
Audio permette di accedere al sottomenu CONFIG. AUDIO, da cui è possibile
effettuare alcune regolazioni delle impostazioni audio.
Restriz. permette di definire le autorizzazioni necessarie per la riproduzione dei film.
Predefinito (Impostazioni base) permette di ripristinare le impostazioni di fabbrica
dell’unità VC 2.
58
I
MENU OSD
LINGUA
CONFIGURAZIONE AUDIO
Audio
Menu OSD consente di impostare la lingua del menu di
configurazione.
La modalità EQ (EQ MODE) consente di
impostare suono e bilanciamento della
riproduzione audio. Sono quattro le
preimpostazioni tra cui è possibile scegliere:
Linear, Film, Music, Lingua. La voce di menu
,Personale‘ consente di personalizzare le
proprie impostazioni.
EQ Mode
Linear
Film
Music
Lingua
Personale
Audio permette di scegliere la lingua della colonna sonora
di un DVD.
Bass Control
Treble Control
Balance
Menu DVD consente di selezionare la lingua del menu di
un DVD.
Posizione diffusori
Scaffale
Monta a parete
Subwoofer vol
Uscita digitale
PCM
Sottotitolo permette di impostare la lingua dei sottotitoli di
un DVD o di disattivarne la visualizzazione.
RAW
Notare che la disponibilità delle tre opzioni precedenti è
condizionata al supporto delle impostazioni relative alla
lingua da parte del DVD utilizzato.
Con Posizione diffusori è dato modo di
compiere una correzione della frequenza in
base all'ubicazione degli altoparlanti satelliti.
Se gli altoparlanti si trovano su uno scaffale e
con una distanza minima di 15 cm, si consiglia
l'impostazione ‚Scaffale‘. Con altoparlanti
posizionati direttamente vicino ad una parete,
impostare ‚Montaggio a parete‘.
Con subwoofer Volume è possibile impostare
il volume del subwoofer conformemente alle
condizioni dell'ambiente di ubicazione.
Maggiore è la vicinanza dei subwoofer ad una
parete, maggiore è la riproduzione dei bassi
che è quindi necessario ridurre (valori
negativi). Se il subwoofer è posizionato
relativamente libero nella stanza, spesso è
necessaria un'ulteriore amplificazione (valori
positivi). Si consiglia di procedere alla corretta
impostazione sulla base di test acustici con
musiche e materiale video differenti. La
modalità EQ andrebbe impostata su Lineare.
Con Uscita digitale è possibile scegliere tra
PCM (formato dati PCM a due canali) e RAW
(formato dati multicanale).
59
I
MENU OSD
CONFIGURAZIONE VIDEO
Con SCART è possibile scegliere tra l'uscita video
SCART in formato RGB o CVBS, purché SCART
risulti attivo come uscita video.
Display TV permette di scegliere tra i vari formati
schermo disponibili.
Con Component è possibile scegliere tra l'uscita
video Component in formato Interleased o
Progressive, purché Component risulti attivo come
uscita video.
Con Visualizzazione TV è possibile compiere
impostazioni varie del formato immagine in base
al televisore.
L'utente ha modo di selezionare una delle seguenti
opzioni:
Riempi: Consente di ridurre/ingrandire il formato
dell'immagine in orizzontale e verticale in modo da
riempire lo schermo in altezza e larghezza.
Originale: Adatta l'immagine alla dimensione
schermo iniziale (solo per Divx / MPEG).
Adatta autom.: L'opzione consente di adattare
l'immagine in orizzontale e verticale a schermo
intero senza perdite di informazioni.
Panoramica: Consente di visualizzare l'immagine
a tutto schermo senza distorsioni.
Risoluzione HD consente di impostare la
risoluzione dell’uscita HDMI. È possibile
scegliere tra le seguenti risoluzioni:
(PAL / NTSC) 576/480 progressive
720 progressive
1080 interlaced
1080 progressive
Assicurarsi di utilizzare la risoluzione video
ottimale per il proprio apparecchio TV. Rispettare
quanto indicato nelle istruzioni per l’uso
dell’apparecchio.
Sistema TV consente di scegliere tra gli standard colore PAL, NTSC e Multi system.
Uscita video permette di selezionare tra le uscite
“S-Video”, “SCART” “Componente” e “HDMI”.
L'uscita Composite è attiva indipendentemente
dall'impostazione.
Con Immagine ottim. è consentito impostare
Luminosità, Contrasto, Colore e Saturazione del
colore. Quando HDMI è selezionato come uscita
video, l’unico parametro che è possibile modificare
è la luminosità.
60
I
MENU OSD
PREDIFINITO
RESTRIZIONE
Predefinito
Restriz.
Rating
Usa impostazioni di fabbrica
Controllo genitori
Password
SI
8.no control
Una volta confermato con ‚SÌ‘, il dispositivo VC 2 passa nuovamente alla configurazione
iniziale.
****
Password corretta
FORMATI COMPATIBILI PER LA RIPRODUZIONE DEI SUPPORTI MULTIMEDIALI
Password errata
1.Kid Safe
FORMATI DISCO COMPATIBILI
Sull’unità VC 2 possono essere riprodotti dischi dei seguenti formati:
2.G
3.PG
CD-DA
HDCD
CD-R/CD-RW
4.PG-13
5.PG-R
6.R
VCD
S-VCD
DVD Video
DVD-R/DVD+R/RW
FORMATI AUDIO/VIDEO COMPATIBILI
Sull’unità VC 2 possono essere riprodotti i seguenti formati audio/video:
7.NC-17
8.Adult
8.no
control
Set Password
Password
NO
Dolby® Digital
Dolby® Prologic II
Dolby® Virtual speaker
Dolby® Headphone
MPEG-4
MPEG-2
MPEG-1 audio
AAC
WMA
JPG
Kodak Picture CD
****
Password corretta
Nuova pas s word
C onferma pas s word
INFORMAZIONI SUI FORMATI SUPPORTATI ATTRAVERSO LA PORTA USB
La porta USB dell’unità VC 2 consente di riprodurre i seguenti formati:
Password errata
AAC
MP4
****
****
Una volta immessa la password corretta sarà possibile modificare il livello del Controllo
genitori. La password preimpostata è 8888.
Cambiare Password consente di modificare la password attuale come segue:
Immettere la password attuale.
Immettere due volte la nuova password.
61
MP4
JPEG
WMA
I
SPECIFICHE TECNICHE
RICEVITORE CD
Amplificatore
Uscita:
Potenza stimata SAT (4 Ohm):
Potenza stimata SUB (4 Ohm):
Potenza massima (totale):
2 x 50 W
1 x 100 W
350 W
Linearità della risposta in frequenza:
CD/AUX/Linea
da 20 Hz a 20 kHz (-1,0 dB)
Rapporto segnale/disturbo:
CD/AUX/Linea
95 dB
Sensibilità in ingresso:
AUX/Linea
Equalizzatore:
Bassi
Acuti
Sub
450 mV/47 kOhm
±10 dB/100 Hz
±10 dB/10 kHz
± 6 dB
Sintonizzatore FM
Gamma di frequenze
Rapporto segnale/disturbo:
Sintonizzatore AM
Gamma di frequenze
Rapporto segnale/disturbo:
Varie
Tensione di alimentazione:
Alimentazione:
Dimensioni (l x a x p):
Peso:
2 vie
70 / 120 W
4 Ohm
60 – 35 000 Hz
90 dB
108 x 202 x 152 mm
SUBWOOFER
Configurazione:
Potenza RMS/max.:
Impedenza:
Gamma di frequenze:
Rendimento (1 Watt/1 m):
Dimensioni (largh x alt x prof):
Bassreflex
140 / 200 W
4 Ohm
25 – 180 Hz
90 dB
235 x 390 x 388 mm
Caratteristiche speciali
Dolby® Virtual Speaker per garantire il perfetto audio da cinema da due soli altoparlanti
Dolby® per cuffie auricolari
Amplificatore digitale a 3 canali
Processore video Zoran vaddis®
Funzione di upscale fino a 1080p (risoluzione Full HD) per DVD
Sintonizzatore FM/AM supereterodina con funzione RDS/Radio Text
Adattatore di alimentazione digitale
Funzione di standby con ridotto consumo di corrente
da 87,5 a 108 MHz
70 dB (modalità mono)
65 dB (modalità stereo)
da 531 a 1.602 MHz
40 dB
CON RISERVA DI APPORTARE MODIFICHE TECNICHE.
230 VAC/50 Hz
Massimo 200 W
0,9 W (modalità di attesa)
Unità principale: 400 x 98 x 289 mm
Unità principale inclusi componenti operativi/terminali di
connessione:
400 x 98 x 332 mm
Telecomando:
53 x 220 x 22 mm
4,8 kg
ALTOPARLANTI FRONTALI
Configurazione:
Potenza RMS/max.:
Impedenza:
Gamma di frequenze:
Rendimento (1 Watt/1 m):
Dimensioni (largh x alt x prof):
62
E
ÍNDICE
Información general
Menú OSD
Accesorios . . . . . . . . . . . . . . . . . . . . . . . . . . . . . . . . . . . . . . . . . . . . . . . . . . . . . . . . 63
Página principal del menú OSD . . . . . . . . . . . . . . . . . . . . . . . . . . . . . . . . . . . . . . . . 73
Antes de empezar . . . . . . . . . . . . . . . . . . . . . . . . . . . . . . . . . . . . . . . . . . . . . . . . . . 64
Lenguaje. . . . . . . . . . . . . . . . . . . . . . . . . . . . . . . . . . . . . . . . . . . . . . . . . . . . . . . . . . 74
Notas importantes de seguridad . . . . . . . . . . . . . . . . . . . . . . . . . . . . . . . . . . . . . . . 64
Configuración de audio . . . . . . . . . . . . . . . . . . . . . . . . . . . . . . . . . . . . . . . . . . . . . . 74
Instrucciones de eliminación . . . . . . . . . . . . . . . . . . . . . . . . . . . . . . . . . . . . . . . . . . 64
Configuración de vídeo . . . . . . . . . . . . . . . . . . . . . . . . . . . . . . . . . . . . . . . . . . . . . . 75
Codificación regional . . . . . . . . . . . . . . . . . . . . . . . . . . . . . . . . . . . . . . . . . . . . . . . . 64
Controles paternos . . . . . . . . . . . . . . . . . . . . . . . . . . . . . . . . . . . . . . . . . . . . . . . . . . 76
Elementos operativos y conexiones
Configuración básica . . . . . . . . . . . . . . . . . . . . . . . . . . . . . . . . . . . . . . . . . . . . . . . . 76
Panel frontal . . . . . . . . . . . . . . . . . . . . . . . . . . . . . . . . . . . . . . . . . . . . . . . . . . . . . . . 65
Formatos compatibles de reproducción de medios
Control remoto . . . . . . . . . . . . . . . . . . . . . . . . . . . . . . . . . . . . . . . . . . . . . . . . . . . . . 66
Formatos de disco compatibles . . . . . . . . . . . . . . . . . . . . . . . . . . . . . . . . . . . . . . . . 76
Panel posterior / conexiones . . . . . . . . . . . . . . . . . . . . . . . . . . . . . . . . . . . . . . . . . . 67
Formatos de audio / vídeo compatibles . . . . . . . . . . . . . . . . . . . . . . . . . . . . . . . . . . 76
El Conjunto de altavoces del VC 2 . . . . . . . . . . . . . . . . . . . . . . . 68
Distintas posibilidades de conexión
Formatos compatibles con USB. . . . . . . . . . . . . . . . . . . . . . . . . . . . . . . . . . . . . . . . 76
Especificaciones
Especificaciones de VC 2. . . . . . . . . . . . . . . . . . . . . . . . . . . . . . . . . . . . . . . . . . . . . 77
Conexiones de audio . . . . . . . . . . . . . . . . . . . . . . . . . . . . . . . . . . . . . . . . . . . . . . . 68
Altavoces frontales y subwoofer . . . . . . . . . . . . . . . . . . . . . . . . . . . . . . . . . 68
Antenas. . . . . . . . . . . . . . . . . . . . . . . . . . . . . . . . . . . . . . . . . . . . . . . . . . . . . 68
Dispositivos auxiliares de audio . . . . . . . . . . . . . . . . . . . . . . . . . . . . . . . . . . 68
Salidas de audio. . . . . . . . . . . . . . . . . . . . . . . . . . . . . . . . . . . . . . . . . . . . . . . . . . . . 69
ACCESORIOS
1) Manual de instrucciones
Conexiones delanteras. . . . . . . . . . . . . . . . . . . . . . . . . . . . . . . . . . . . . . . . . . . . . . . 69
Pantalla . . . . . . . . . . . . . . . . . . . . . . . . . . . . . . . . . . . . . . . . . . . . . . . . . . . . . 70
Iniciar el dispositivo
2)
Control remoto
3)
Baterías para control remoto (2x AA)
4)
Cable de alimentación
5)
Antena AM en bucle
Cable de alimentación . . . . . . . . . . . . . . . . . . . . . . . . . . . . . . . . . . . . . . . . . . . . . . . 70
6)
Antena FM de interior
Control remoto . . . . . . . . . . . . . . . . . . . . . . . . . . . . . . . . . . . . . . . . . . . . . . . . . . . . . 70
Las funciones de VC 2
7)
Cable AV
8)
2 x altavoces frontales
Reproducción de DVD . . . . . . . . . . . . . . . . . . . . . . . . . . . . . . . . . . . . . . . . . . . . . . . 71
9)
Subwoofer
Reproducción de CD, WMA, MPEG-4 . . . . . . . . . . . . . . . . . . . . . . . . . . . . . . . . . . . 71
10) Cable para altavoces frontales y subwoofer
Funciones del sintonizador. . . . . . . . . . . . . . . . . . . . . . . . . . . . . . . . . . . . . . . . . . . . 72
11) Patas de goma autoadhesivas para altavoces frontales
Conexiones de TV / monitor. . . . . . . . . . . . . . . . . . . . . . . . . . . . . . . . . . . . . . . . . . . 69
Funciones RDS (Servicio de dator de radio) del sintonizador . . . . . . . . . . . . . . . . . 72
Configuración de sonido. . . . . . . . . . . . . . . . . . . . . . . . . . . . . . . . . . . . . . . . . . . . . . 73
63
E
El símbolo formado por un triángulo y un rayo advierte al
usuario de la presencia de altos niveles de tensión utilizados
en el dispositivo que podrían provocar descargas eléctricas.
ANTES DE EMPEZAR
Estimado cliente,
Gracias por elegir Magnat VC 2.
Lea la siguiente información detenidamente antes de comenzar a utilizar su VC 2.
El símbolo formado por un triángulo y un signo de exclamación
advierte al usuario de la existencia de notas importantes en el
manual de instrucciones adjunto que deben respetarse.
PRECAUCIONES IMPORTANTES DE SEGURIDAD
¡No abrir! ¡Peligro de descarga eléctrica! Para reducir el peligro
de incendio o descarga eléctrica, no someta el dispositivo a la
lluvia o la humedad.
Lea detenidamente el manual de instrucciones antes del uso y manténgalo en un lugar
seguro.
Utilice el dispositivo únicamente a una temperatura ambiente / de sala entre 10 ºC y
40 ºC.
Asegúrese de que existe ventilación suficiente para el dispositivo. Debe mantenerse
siempre una distancia mínima de separación de 10 cm entre los objetos situados a los
lados, en la parte trasera, y sobre el dispositivo.
No cubra las ranuras de ventilación con ningún objeto (p. ej. cortinas, periódicos, etc.) para
asegurar la ventilación suficiente en el dispositivo. No coloque fuentes de calor, como
radiadores, hornos, llamas desnudas u otros dispositivos que generen calor en las
proximidades del dispositivo.
No exponga el dispositivo y el control remoto a derrames o salpicaduras de agua, o altos
niveles de humedad.
De igual forma, no coloque jarrones u otros contenedores llenos de líquido encima del
dispositivo.
En caso de contacto con humedad o líquidos, desconecte inmediatamente la toma de
alimentación.
Limpie el dispositivo utilizando únicamente un paño seco.
No utilice productos de limpieza o disolventes químicos durante la limpieza. Ello podría
dañar la superficie del dispositivo.
No abra el dispositivo.
El cable de alimentación debe funcionar correctamente. No continúe utilizando el dispositivo
si existen señales visibles de deterioro en el cable de alimentación. Un cable deteriorado
no debe ser reparado, sino reemplazado.
No conecte ni extraiga el cable de alimentación con las manos húmedas.
Consulte siempre con un especialista profesional antes de realizar cualquier operación de
mantenimiento o reparación.
Si no piensa utilizar el dispositivo durante un periodo largo de tiempo, apáguelo utilizando
el interruptor de alimentación (POWER) situado en la parte trasera del dispositivo.
En caso de que se produzca una tormenta eléctrica, desconecte el cable de alimentación
y el cable de antena.
Este símbolo informa al usuario de la existencia de un láser de
clase 1 en el interior del dispositivo que no supone ninguna
amenaza en el exterior del mismo.
INSTRUCCIONES DE ELIMINACIÓN
De acuerdo con la Directiva Europea 2002/96/EC, todos los
aparatos eléctricos y electrónicos deben ser eliminados por medio
de puntos de recogida locales e independientes. Respete la
normativa local y no elimine los aparatos usados junto a los
residuos domésticos.
CODIFICACIÓN REGIONAL
Tanto el reproductor DVD como los discos contienen un código de región. Estos códigos
de región deben coincidir para que el disco se reproduzca. Si los códigos no coinciden,
el disco no se reproducirá. El código de este aparato es el 2. Los discos DVD con otros
códigos de región no se podrán reproducir en este aparato.
Los discos marcados con “ALL” se reproducirán también en esto
reproductor.
64
La siguiente lista muestra las distintas regiones DVD del mundo.
1 Bermudas, América del Norte (Excepto México y Groenlandia) y territorios
estoadounidenses (incluyendo Puerto Rico)
2 Groenlandia, Centro y occidente de Europa, Oeste de Asia, Egipto, Sudáfrica, Japón
y territorios de países europeos
3 Sudeste de Asia y Corea del Sur
4 América Central, América Latina (Excepto Guyana Francesa), Caribe y Oceanía
(Excepto Nueva Caledonia)
5 África (excepto Sudáfrica y Egipto) y norte, centro y sur de Asia
6 China
E
ELEMENTOS Y CONEXIONES OPERATIVAS - PANEL DELANTERO
14
13
IR
1
1
Botón ON / STANDBY
Enciende el dispositivo si se encuentra en
el modo de suspensión (con los
indicadores LED iluminados en color rojo).
Si el LED no se ilumina, accione el
interruptor de alimentación que se
encuentra en la parte posterior del
dispositivo. Igualmente, el dispositivo
puede pasar del modo de funcionamiento
al modo de suspensión (con los
indicadores LED iluminados en color
verde).
2
▲ Botón EJECT
Abre o cierra el compartimento de CD /
DVD (8).
3
Botón ►/II PLAY
Inicia o interrumpe la reproducción
multimedia.
2
4
3
4
5
7
Botón ■ STOP
Tuner: En la frecuencia FM cambia entre
FM-Auto y FM-Mono.
Botón I◄◄ SEARCH
CD/DVD: Salta al título anterior.
Tuner: Si lo pulsa brevemente, se puede
aumentar la frecuencia de la emisora en
5 kHz para sintonizarla manualmente. Si
lo mantiene pulsado, se iniciará la
búsqueda de emisoras.
6
7 89
10
11 12
Conmutador SOURCE
Para seleccionar la fuente de entrada y
cambiarla a DISCO, SINTONIZADOR, o a
las fuentes externas AUX 1, AUX 2, AUX
3, LÍNEA, coaxial óptica y digital. Se
indica en la pantalla (13).
Detiene la reproducción del medio.
5
6
8
DVD VIDEO
9
Entrada USB
Compartimento de DVD/CD. Inserte el
DVD/CD en el compartimento con la
etiqueta orientada hacia arriba.
Permite conectar un
almacenamiento USB.
Botón ►►l SEARCH
CD/DVD: Salta al título siguiente.
10 Regulador VOLUME
Tuner: Similar al punto 5, pero la
búsqueda se realiza hacia delante.
65
medio
de
Ajusta el volumen. El mando gira
aproximadamente dos vueltas para
recorrer todos los niveles de volumen
disponibles. El volumen se mostrará en la
pantalla (13). (VOLUME 00 - VOLUME
40).
11 LINE IN
Conector de entrada estéreo de 3,5 mm
para un dispositivo de audio auxiliar (p. ej.
un reproductor MP3, etc).
12 PHONES
Conector de salida estéreo de 3,5 mm
para auriculares. Los altavoces se
desactivarán durante el uso de este
conector. Baje el volumen antes de
conectar los auriculares.
13 Display
Muestra la configuración actual.
14 Sensor del control remoto
Apunte a este sensor durante el uso del
control remoto.
E
ELEMENTOS Y CONEXIONES OPERATIVAS - CONTROL REMOTO
1
6
3
4
2
5
36
35
8
9
12
16
18
20
27
29
1
17
19
21
28
30
13
22
24
23
26
33
31
25
34
32
POWER
DISC
TUNER
Activa la fuente de entrada “sintonizador”.
Pulsando este botón varias veces conmutará
entre los modos “FM” y “AM”.
4
MONO/ST
7
AUX
Activa las fuentes de entrada digital óptica y
digital coaxial.
17
Activa las fuentes de entrada “Aux 1”, “Aux 2”,
“Aux 3” o “LINE”.
18 ◄
I ◄ PRESET
Salta al título anterior.
Sintonizador: Selecciona la próxima memoria
hacia abajo.
Teclado numérico
9
MEM
10
SEARCH/RDS
19
En la frecuencia FM cambia entre FM-Auto y
FM-Mono.
muestra
11
SETUP
12
TITLE
13
MENU
14
Teclas de cursor
15
OK
la
función
■ Stop
21
Botón PLAY ►/II
22
EQ
Inicia o interrumpe la reproducción multimedia.
RDS
Selección de ajustes de sonido almacenados:
LINEAR – FILM – MUSIC – LANGUAGE CUSTOM.
23 TONE
Permite configurar el volumen de las frecuencias
altas y bajas y configurar el balance. La opción
correspondiente se puede cambiar utilizando los
botones PRESET.
Abrir el menú de títulos de DVD.
Permite abrir el menú de DVD.
24
VOLUME
25
MUTE
26
DVS SET
Permite configurar el volumen.
Permite utilizar el menú en pantalla (OSD) y
realizar la configuración.
Silencia el dispositivo.
Este botón permite confirmar la configuración
realizada con las teclas de cursor.
Activa la reproducción en modo Virtual Dolby®
Surround por medio de los altavoces estéreo.
TUNE ◄◄
Toque este botón para iniciar la búsqueda
hacia atrás a una velocidad de 2, 4, 8 o 16,
dependiendo cuántas veces lo pulse. Si vuelve
a tocarlo, la reproducción volverá a la velocidad
normal. También puede hacer esto pulsando el
botón PLAY.
20
Detiene la reproducción del medio.
Permite abrir el menú OSD en pantalla para
configurar los parámetros del modo DISC.
16
►►l PRESET
Salta al título siguiente.
Sintonizador: Selecciona la próxima memoria
hacia arriba.
CD/DVD: Selección directa de un capítulo,
título o avance hasta una marca temporal
definida.
Sintonizador:
seleccionada.
TUNE ►►
Similar al punto 16, pero la búsqueda se realiza
hacia delante.
Permite almacenar emisoras de radio.
Permite seleccionar la fuente de entrada de
“Disco”, CD o DVD.
3
DIGITAL IN
Sintonizador: Si lo pulsa brevemente, se puede
aumentar la frecuencia de la emisora en 50 kHz
para sintonizarla manualmente. Si lo mantiene
pulsado, se iniciará la búsqueda de emisoras.
Permite seleccionar directamente los títulos de
un CD/DVD o las emisoras predefinidas del
sintonizador.
Enciende el dispositivo si se encuentra en el
modo de suspensión. Si el LED no se ilumina,
accione el interruptor de alimentación que se
encuentra en la parte posterior del dispositivo.
De igual forma, le permite apagar el dispositivo
si está encendido.
2
6
8
11
15
14
USB
Activa la entrada “USB”.
7
10
5
Con los auriculares conectados se puede
activar o desactivar la función de auricular
Dolby®.
66
27
REPEAT 1/ALL
28
REPEAT A-B
29
ZOOM
Función de repetición del último título o del
CD/DVD en total.
Función de repetición de una escena que
puede ser seleccionada a gusto en un
CD/DVD.
DVD: Función de zoom.
30 ANGLE
DVD: Elección de distintas perspectivas de
cámara (siempre que el DVD respalde dicha
función).
31 SUBTITLE
DVD: Ajuste de diferentes subtítulos (siempre
que el DVD respalde dicha función).
32 AUDIO
DVD: Ajuste de las pistas de voz disponibles en
el DVD (siempre que el DVD respalde dicha
función).
33 PROG
DVD: Programación seleccionada de títulos o
capítulos.
34
HDMI RES
Permite seleccionar la resolución de la salida
HDMI.
35 VIDEO OUT
Selecciona la salida de video en el siguiente
orden: SCART, Component Interleased
(COMP I), Component Progressive (COMP P),
HDMI, S-Video. La salida compuesta (CVBS)
está siempre activa.
36 ▲ Eject
Durante el uso de DVD/CD: Abre o cierra el
compartimento. Finaliza o inicia así la
reproducción de DVD/CD.
E
ELEMENTOS Y CONEXIONES OPERATIVAS - PANEL TRASERO / CONEXIONES
12 13
11
15 16 17
14
10
1 POWER AC 230V
Fuente de alimentación. Para conectar el
cable de alimentación suministrado.
2 FUSE
Como fusible debe utilizarse sólo el tipo
indicado en el dorso del dispositivo.
3 On / Off
Interruptor de encendido. Enciende el
dispositivo si se encuentra en el modo de
suspensión. Si el interruptor está en la
posición “OFF”, el dispositivo se
desconecta de la alimentación principal.
4 SPEAKER OUT SUB
Salida para la conexión del altavoz de
subgraves suminstrado.
9
8
7
18
6
5
1
10 HDMI OUTPUT
Salida HDMI. (Interfaz multimedia de alta
definición).
5 SALIDA DE ALTAVOZ R / L
Salida para la conexión de los altavoces
suministrados (debe considerarse la
polaridad correcta).
11 Digital OUTPUT
Salida de audio óptica y digital coaxial.
6 SALIDA R / L
Salida de audio analógico izquierdo y
derecho.
12 ANT FM
Conexión de antena. Para conectar la
antena FM de interior, o una antena
doméstica.
7 SALIDA S-VIDEO
Salida S-video (Y/C).
13 ANT AM
Conexión de antena. Para conectar la
antena AM en bucle suministrada.
8 SALIDA S-VIDEO / COMPUESTO
Salida S-video (Y/C) y de vídeo
compuesto (FBAS).
9 SALIDA EN COMPONENTES
Salida
analógica
de
vídeo
componentes (YUV).
4
14 Digital INPUT
Entrada de audio óptica y digital coaxial.
en
15 INPUT AUX1
Entrada de audio analógico.
67
2
3
16 INPUT AUX2
Entrada de audio analógico.
17 INPUT AUX 3
Entrada de audio analógico.
18 SCART OUT
Salida Scart.
E
EL CONJUNTO DE ALTAVOCES DEL VC 2
DISTINTAS POSIBILIDADES DE CONEXIÓN
El suministro del VC 2 incluye dos altavoces frontales y un subwoofer. Estos altavoces
están especialmente sintonizados con el VC 2 y sólo se debería conectar dichos altavoces
al aparato.
CONEXIONES DE AUDIO
Altavoz de subgraves
Altavoz
D
MONTAJE DE LOS ALTAVOCES FRONTALES
Los altavoces frontales deberán colocarse a la derecha e izquierda de la televisión, a ser
posible a la misma distancia de la misma y a la altura de los oídos. Entre los altavoces y
el lugar de escucha debe haber posibilidad de contacto visual. Los obstáculos absorbedores del sonido y reflectores falsifican el sonido. Los altavoces pueden ponerse sobre
una estantería o un aparador. En este caso se debería colocar en la parte de abajo de los
altavoces las patitas de goma autoadhesivas que se incluyen en el envío (cuatro para
cada altavoz).
Altavoz
I
Dispositivos de audio auxiliares
Antena MW
digital
analógico
R
Antena FM
Las patitas de goma suministradas deben colocarse en la parte trasera, para garantizar
así una cierta distancia de la caja a la pared.
LOS ALTAVOCES FRONTALES Y EL SUBWOOFER
El conjunto VC 2 incluye para ambos altavoces frontales (2x3m) y para el subwoofer
(1x5m) cables especialmente confeccionados para altavoces. Utilice en lo posible dichos cables para la conexión de los altavoces. De acuerdo a sus requerimientos, usted
podrá acortar el cable y desaislarlo nuevamente. Ponga atención por favor a que
ambos cables para los altavoces frontales tengan el mismo largo. Ahora si usted necesita cables más largos, no debe alargar los cables suministrados sino adquirir nuevos
cables equivalentes en el comercio especializado para el largo deseado.
MONTAJE DEL SUBWOOFER
El campo de frecuencia que da el subwoofer no es localizable por el oído humano, por lo
que la colocación no suele resultar problemática. No obstante, es preferible colocarlo delante del lugar de audición, cerca del altavoz frontal. Asimismo, se recomienda que la distancia lateral y la trasera de objetos y paredes sea de al menos 25 cm, ya que en caso
contrario la reproducción de sonidos bajos puede verse afectada.
Afloje una a una las abrazaderas de los tornillos de los altavoces e inserte los extremos
desaislados en los agujeros predispuestos. Vuelva a apretar firmemente las abrazaderas.
Asegúrese de que no haya hilos de cable que sobresalgan y puedan causar un
cortocircuito. A continuación conecte de la misma forma el otro extremo del cable al
terminal de conexión del VC 2. Preste absoluto cuidado a una correcta polaridad.
DISTINTAS POSIBILIDADES DE CONEXIÓN
Conecte únicamente el cable de alimentación una vez realizadas todas las
conexiones.
Al realizar una conexión, respete las instrucciones de los demás
componentes
Considere la calidad de los cables. El cable HDMI debe tener la
certificación HDMI para funcionar a pleno rendimiento.
ANTENAS
Conecte la antena FM interior al conector de antena FM.
Si dispone de una, utilice su sistema de antena doméstico. Normalmente permite disfrutar
de una mejor calidad de recepción. Para ello, utilice un cable de antena IEC comercial.
Para utilizar un receptor MW, conecte la antena incluida a la entrada de antena AM.
Dirija la antena de forma que se garantice la mejor recepción posible.
DISPOSITIVOS AUXILIARES DE AUDIO
68
Si los dispositivos tienen una salida digital, debe utilizarla y conectarla a las entradas
digitales de VC 2, bien utilizando un cable coaxial (de 75 ohmios), o un cable óptico.
Puede conectar dispositivos con salida analógica por medio de un cable RCA con las
salidas Aux de VC 2.
E
DISTINTAS POSIBILIDADES DE CONEXIÓN
CONEXIONES DE TV / MONITOR
SALIDAS DE AUDIO
Puede conectarse una TV a VC 2 de la siguiente manera:
Las siguientes entradas de audio se pueden utilizar con dispositivos de grabación de audio:
La salida digital: óptica o coaxial con los cables correspondientes.
La salida analógica estéreo: Por medio del cable RCA.
Por medio de la salida de vídeo compuesto S-video.
Por medio de la entrada SCART.
Por medio de la salida en componentes.
Por medio de la salida HDMI.
Pueden configurarse las siguientes resoluciones de vídeo como salida HDMI por
medio de la configuración de vídeo o el control remoto (pos. 34):
(PAL / NTSC) 576/480 progresivo
CONEXIONES DELANTERAS
720 progresivo
IR
1080 entrelazado 1080 progresivo
Asegúrese de que conoce la resolución de vídeo óptima de su TV. Respete también las
instrucciones de uso del dispositivo.
ATENCIÓN: Las salidas de video hay que seleccionarlas con la configuración de video o
bien con el mando distancia (pos. 35). La salida compuesta está siempre activa.
69
Conexión para unidad de almacenamiento USB
LINE IN (p. ej. para conectar un reproductor MP3)
PHONES (salida de auriculares)
E
PANTALLA
INICIAR EL DISPOSITIVO
CABLE DE ALIMENTACIÓN
6
Después de hacer las conexiones, conecte el cable de alimentación.
GG
2
1
2
3
1
3
4
Compruebe de nuevo todas las conexiones, respetando las instrucciones de los otros
dispositivos.
Compruebe si los cables derecho e izquierdo están conectados correctamente (izquierdo
con izquierdo, derecho con derecho).
No una el cable de alimentación a los otros cables para evitar que se produzcan zumbidos
u otras perturbaciones.
5
Indicador de la función de la unidad (reproducir, pausa, avance/retroceso rápido).
Indicador alfanumérico: información sobre ajustes actuales, operaciones y datos RDS.
En el modo CD/DVD, se muestra el capítulo actual, la pista actual y el tiempo ya
reproducido.
Encienda los dispositivos.
Indicadores de recepción FM:
ST.: Estéreo
TUNED: Emisor sintonizado correctamente
RDS: Datos RDS disponibles
4
Indicador de decodificación Dolby® digital
6
Indicador activo cuando DVS REF o DVS WIDE está activo (Dolby® Virtual Speaker
Processing)
5
Indicador de los canales disponibles para decodificación
CONTROL REMOTO
Inserte las baterías en el compartimetno apropiado del control remoto.
Si utiliza el control remoto, apunte con él al sensor de infrarrojos de VC 2 (pos. 14).
70
E
LAS FUNCIONES DE VC 2
REPRODUCCIÓN DE DVD
Utilice el botón SOURCE del panel delantero de VC 2 (pos. 7) o el botón DISC en el
control remoto (pos. 2) para fijar la entrada a DISC (como se indica en la pantalla).
Funciones de repetición (REPEAT 1/ALL, REPEAT A-B, pos. 27, 28)
Presionar REPEAT 1/ALL para repetir el título actual o todo el DVD. Si se vuelve a
presionar la tecla, se apaga la función de reproducción.
El dispositivo lee el DVD y aparece el menú de DVD en la pantalla (siempre que el DVD
respalde dicha función). Para desplazarse dentro del menú, utilizar las teclas del cursor
y OK (14, 15).
REPRODUCCIÓN DE CD, WMA, MPEG-4
Presionar REPEAT A-B para definir el inicio de lo que se desea repetir y volver a
presionar la misma tecla para definir el final. Si se vuelve a presionar la tecla, se apaga
la función de reproducción.
Utilice el botón EJECT en el panel delantero (pos. 2) o en el control remoto (36) para abrir
el compartimento. Inserte un DVD y cierre de nuevo el compartimento pulsando EJECT.
La selección de entrada de inserción del CD se realiza de forma similar al caso del DVD.
Las siguientes funciones están disponibles durante la reproducción:
También es posible emplear un dispositivo de almacenamiento masivo USB como medio
de almacenamiento, conectándolo a la entrada USB ubicada en el frente del VC 2 (9).
Como fuente se debe activar la entrada USB por medio de la tecla SOURCE en el frente
del VC 2 (7) o la tecla USB del control remoto (5).
Control de la reproducción: teclas de control de la unidad del frente (3 a 6) o del
control remoto (16 a 21).
Acceso al menú de DVD y/o del menú de títulos de DVD: teclas MENU y/o TITLE
del control remoto (siempre que el DVD respalde dicha función).
Selección directa de un título, capítulo o avance hasta una marca temporal
definida (Tecla SEARCH/RDS del control remoto (10)).
En la pantalla aparece la lista de títulos.
Seleccionar el campo correspondiente con el cursor e ingresar el número del título o
capítulo. La marca temporal se ingresa con el formato "minutos:segundos" (dos dígitos
para cada uno). No utilizar con este fin la tecla ">10"
Programación seleccionada (Tecla SEARCH/RDS del control remoto (33))
Con el cursor o la tecla OK es posible seleccionar un título o con la tecla PLAY, iniciar la
reproducción de todo el CD. También se puede seleccionar el modo de repetición y de
reproducción.
Las siguientes funciones están disponibles durante la reproducción:
Control de la reproducción: teclas de control de la unidad del frente (3 a 6) o del
control remoto (16 a 21).
Selección directa de un título, capítulo o avance hasta una marca temporal
definida (Tecla SEARCH/RDS del control remoto (10)).
Seleccionar con el cursor (14) el título o capítulo deseado de la lista de la izquierda y
agregarlo con la tecla OK (15) a la lista de reproducción (a la derecha). Los botones
inferiores permiten eliminar títulos o toda la lista de reproducción, o reproducir la
selección.
71
LAS FUNCIONES DE VC 2
E
Emisoras predefinidas
• En la memoria se pueden almacenar 20 emisoras FM y AM.
• Seleccione la emisora que desee (FM o AM). Abra la memoria pulsando el botón MEM
situado en el control remoto (9).
• Seleccione el número de la emisora que desee por medio del teclado numérico del control remotom (8).
• Se mostrará el número de la emisora en la pantalla.
• Pulse de nuevo el botón MEM para almacenar la emisora.
• El número de emisora dejará de parpadear.
• Repita el procedimiento para almacenar otras emisoras.
Seleccionar el campo correspondiente con el cursor e ingresar el número del título. La
marca temporal se define en el título actual o dentro del CD, y se ingresa con el
formato "minutos:segundos" (dos dígitos para cada uno). No utilizar con este fin la
tecla ">10".
Funciones de repetición (REPEAT 1/ALL, REPEAT A-B, pos. 27, 28)
Presionar REPEAT 1/ALL para repetir el título actual o todo el CD. Si se vuelve a
presionar la tecla, se apaga la función de reproducción.
Presionar REPEAT A-B para definir el inicio de lo que se desea repetir y volver a
presionar la misma tecla para definir el final. Si se vuelve a presionar la tecla, se apaga
la función de reproducción.
Selección de emisoras predefinidas
• Pulse uno de los botones PRESET del control remoto (18, 19) para seleccionar el número de emisora que desee. También puede seleccionar la memoria de emisora utilizando el teclado numérico.
No existen estándares válidos en muchos archivos multimedia. Por tanto, no
es posible garantizar que se reproduzcan siempre correctamente.
Los archivos de vídeo muy grandes podrían provocar problemas durante la
reproducción por USB. Dichos archivos deberán reproducirse desde un CD
o DVD.
FUNCIONES RDS (SERVICIO DE DATOR DE RADIO) DEL SINTONIZADOR
RDS es un sistema que ofrece información acerca de emisoras FM, y que se emite junto
con la señal de la emisora. El VC 2 puede mostrar dicha información (de emisora, emisión,
etc.) en la pantalla. Las funciones RDS se pueden configurar utilizando el botón
SEARCH/RDS en el control remoto (10).
FUNCIONES DEL SINTONIZADOR
Seleccionar la banda de sintonía
• Seleccione el TUNER FM o TUNER AM como fuente de audio utilizando el botón
SOURCE (VC 2, pos. 7)) o TUNER (en el control remoto, pos. 3).
• Seleccionar el modo mono (recomendado cuando las condiciones de recepción son
malas) o estéreo con MONO/ST (control remoto (4)).
Funciones RDS del VC 2
• PS (nombre del servicio de programa): muestra el nombre del programa.
• PTY (identificación de tipo de programa): muestra el tipo de programa.
• RT (texto de radio): muestra toda la información del programa.
Búsqueda de emisoras
• Seleccione el TUNER como fuente de audio y seleccione la banda (consulte la sección
anterior).
• Utilice los botones de TUNING situados en la parte frontal del VC 2 (5, 6), o los botones de TUNING en el control remoto (16, 17).
• Pulse brevemente cualquiera de estos botones para aumentar o reducir la frecuencia en pasos de 50 kHz.
• Mantenga pulsados los botones para buscar la emisora anterior o siguiente en la
banda.
Secuencia de pantalla al pulsar repetidamente el botón SEARCH/RDS: PS, frecuencia
de emisora, PTY, RT.
Si alguna de las funciones no es compatible a pesar de la recepción de una señal RDS
aparecerá en la pantalla el mensaje "N/A".
72
E
LAS FUNCIONES DE VC 2
MENÚ OSD
CONFIGURACIÓN DE SONIDO
VC 2 está equipado con un menú OSD (menú en pantalla). Utilizando este menú es
posible realizar toda la configuración básica necesaria si se selecciona “DISC” como
fuente de entrada.
Fijar el volumen
Puede ajustar el volumen utilizando el control VOLUME situado en el panel frontal (10) o
en el control remoto (24). Aparecerá entonces en la pantalla VOL y un valor entre 00 y
MAX (40).
Puede abrir el menú utilizando el botón de configuración de su control remoto (pos. 11).
Utilizar el cursor (14) para seleccionar el punto deseado del menú. Una vez seleccionado,
el punto aparece destacado con un color más claro. Aparecerá entonces marcado con
fondo claro. Puede seleccionar el elemento del menú pulsando el botón OK o navegar por
los demás submenús utilizando las teclas de cursor. Puede cambiar un parámetro
pulsando el botón OK.
MUTE (control remoto, pos. 25)
Es posible desactivar el sonido utilizando este botón. Se mostrará la palabra MUTING en
la pantalla. Es posible volver a activar el sonido pulsando de nuevo este botón o cambiando el volumen.
Presione el botón SETUP para salir del menú OSD.
Ajustar el nivel de bajos/agudos
Pulse repetidamente el botón TONE en el control remoto (23) hasta que aparezca en la
pantalla BASS o TREB.
Ajuste el tono utilizando los botones TUNING en el control remoto (16, 17).
PÁGINA PRINCIPAL DEL MENÚ OSD
Ajustar el balance
La configuración de balance se selecciona de la misma forma que el regulador de tono.
Pulse repetidamente el botón correspondiente hasta que aparezca en la pantalla
BAL L00 - 00R. Es posible ajustar el balance a la izquierda o la derecha utilizando los botones TUNING (16).
Lenguaje
Video
Función EQ
Con la tecla EQ del control remoto (22) se accede a diferentes ajustes predefinidos del
conmutador para control de sonido. Las opciones son: LINEAR, MOVIE, MUSIC, VOCAL.
Se seleccionan presionando dos veces la tecla EQ.
Audio
Rating
Control
Preajuste
Función DVS
Gracias al DVS SET puede desactivar el sonido de 5 canales por medio de altavoces
estéreo (Dolby® Virtual Speaker) o seleccionar “DVS Ref” o “DVS Wide”.
DVS Ref es el modo estándar con el que podrá crear el sonido de 5 canales por medio
de los dos altavoces delanteros.
DVS Wide genera y expande (más amplio) el campo sonoro de los canales
delanteros.
Desde esta página puede acceder a varios submenús:
En Lenguaje, puede seleccionar el idioma de los distintos menús de VC 2.
En Video puede acceder a Conf. video, donde podrá cambiar la configuración de
imagen.
En Audio puede acceder a Conf. audio, donde podrá cambiar la configuración de
sonido.
En Control , puede definir las autorizaciones de reproducción de películas.
En Preajuste, puede reiniciar VC 2 a su configuración predeterminada.
73
E
OSD-MENÜ
LENGUAJE
CONFIGURACIÓN DE AUDIO
Audio
En Leng. menús puede configurar el idioma del menú de
configuración.
EQ Mode
Linear
Película
Music
Lenguaje
En Audio puede configurar el idioma de la banda sonora
de un DVD.
Personale
Bass Control
Treble Control
Balance
Posición altavoz
En Menú DVD puede configurar el idioma del menú de un
DVD.
Estante
Montaje pared
Subwoofer vol
Salida digital
PCM
En Subtítulo puede configurar el idioma de los subtítulos
de un DVD o desactivar los subtítulos.
RAW
El modo EQ (EQ Mode) permite ajustar el sonido
y el balance de la reproducción de audio. Existen
cuatro ajustes predefinidos: Linear, Film, Music,
Lenguaje.
Seleccionando "Personale" en el menú es posible
definir ajustes personalizados.
Bajo posición altavoz se puede corregir la
frecuencia en función de la ubicación de los
altavoces satélites. Si los altavoces se
encuentran sobre un estante y la distancia con la
pared es de por lo menos 15 cm, se recomienda
el ajuste "Estante". En cambio, si están ubicados
contra la pared, se recomienda el ajuste "Montaje
pared".
Bajo volumen subwoofer se puede ajustar el
volumen del subwoofer en función de las
condiciones circundantes. Cuanto más cerca está
el subwoofer de las paredes, más fuerte es la
reproducción de los bajos y es posible que se la
deba atenuar (valores negativos). Si el subwoofer
está ubicado relativamente lejos de las paredes
puede ser necesario realzar los bajos (valores
positivos). Para definir el ajuste correcto es
necesario hacer pruebas con diferentes tipos de
música y películas, con el modo EQ definido
como "Linear".
Bajo salida digital es posible seleccionar entre
PCM (datos PCM en dos canales) y RAW (datos
en múltiples canales).
Por favor, recuerde que la configuración de idioma debe
ser admitida por el DVD utilizado.
74
E
OSD-MENÜ
CONFIGURACIÓN DE VIDEO
Bajo SCART se puede optar entre el formato RGB
o CVBS para la salida de video SCART, siempre
que esté activada la salida de video
correspondiente.
Gracias a la función Relación Aspecto podrá configurar los distintos formatos de pantalla.
Bajo “modo visualización” es posible adaptar de
diferentes maneras el formato de la imagen al
aparato de televisión.
Bajo Component es posible optar entre el formato
"interleased" o "progressive" para la salida de
video de los componentes, siempre que esté
activada la salida de video correspondiente.
El usuario puede seleccionar una de las siguientes
opciones:
Relleno: Ampliar/reducir la imagen en sentido
horizontal y vertical, respectivamente, para
rellenar la pantalla.
Original:Adecuar al tamaño original de la pantalla
(Solamente Divx/MPEG).
Ajuste auto: Tomar el valor tipo de la razón de la
escala de ajuste horizontal y de ajuste vertical.
Panorámico: Tomar el valor máximo de la razón
de la escala de ajuste horizontal y de ajuste
vertical.
Utilizando la función Resolución HD puede configurar la resolución de la salida HDMI Se pueden
seleccionar las siguientes resoluciones:
(PAL / NTSC) 576/480 progressive
720 progressive
1080 interlaced
1080 progressive
Asegúrese de que conoce la resolución de vídeo
óptima de su TV. Respete también las
instrucciones de uso del dispositivo.
Por medio de la función Sistema TV, podrá seleccionar entre las normas de color PAL, NTSC y
Multisystem.
Con la función Salida de video podrá seleccionar
entre las salidas
“S-Video”, “SCART”,
“Component” y “HDMI”.
Bajo ajuste imagen (Imag Intelig.) es posible
ajustar el brillo, el contraste, el color y la
saturación. Existen tres ajustes predefinidos
(estándar, vivo, frío) y seleccionando en el menú
"manual" es posible definir ajustes personalizados.
Cuando la salida de video seleccionada es HDMI
solamente se puede corregir el brillo de la imagen.
75
E
OSD-MENÜ
CONFIGURACIÓN BÁSICA
CONTROL
Preajuste
Rating
Control
Usar ajust. predeterm.
Control parental
Contraseña
SI
8. Adultos
Al confirmar con "SI" se recuperan los ajustes originales del VC 2.
****
FORMATOS COMPATIBLES CON LA REPRODUCCIÓN DE MEDIOS
Contras. Correcta
1.Tolerado
FORMATOS DE DISCO COMPATIBLES
Los siguientes formatos de disco se pueden reproducir en su VC 2:
CD-DA
VCD
DVD-R/DVD+R/RW
HDCD
S-VCD
CD-R/CD-RW
DVD Video
2.G
3.PG
4.PG-13
5.PG-R
FORMATOS DE AUDIO/VIDEO COMPATIBLES
Los siguientes formatos de audio/vídeo se pueden reproducir en su VC 2:
Dolby® Digital
MPEG-4
AAC
Dolby® Prologic II
MPEG-2
WMA
Dolby® Virtual speaker MPEG-1 audio
JPG
Dolby® Headphone
Kodak Picture CD
6.R
7.NC-17
8.Adult
8.Adultos
Set Password
Contraseña
NO
ACERCA DE LOS FORMATOS COMPATIBLES CON USB
Los siguientes formatos se pueden reproducir en su VC 2 a través del puerto USB:
AAC
MP4
WMA
MP4
JPEG
****
Contras. Correcta
Nueva contras eña
C onf contras nva
Error contraseña
****
****
Tras ingresar la contraseña correcta es posible variar el nivel de control parental. La
contraseña predefinida es 8888.
En Contraseña puede cambiar la contraseña válida de la siguiente forma:
Introduzca la contraseña válida.
Introduzca la contraseña nueva.
76
E
ESPECIFICACIONES
RECEPTOR CD
Amplificador
Salida:
Potencia nominal SAT (4 Ohmios) 2 x 50 W
Potencia nominal SUB (4 Ohmios) 1 x 100 W
Potencia de pico (total):
350 W
Respuesta en frecuencia-linealidad:
CD/AUX/Línea
20 Hz - 20 kHz (-1,0 dB)
Relación señal a ruido:
CD/AUX/Línea
Sensibilidad de entrada:
AUX/Línea
Ecualizador:
Bajos
Agudos
Sub
95 dB
450 mV/47 kOhm
±10 dB/100 Hz
±10 dB/10 kHz
± 6 dB
Potencia de entrada:
230 VAC/50 Hz
Máximo:
200 W
Suspensión: 0,9 W
4,8 Kg
SUBWOOFER
Configuración:
Resistencia:
Impedancia:
Gama de frecuencias:
Rendimiento (1 vatio/1 m):
Dimensiones (an x al x pr):
Reflejo bajo
140 / 200 W
4 Ohmios
25 – 180 Hz
90 dB
235 x 390 x 388 mm
RESERVADOS LOS DERECHOS DE REALIZAR CAMBIOS TÉCNICOS.
Dimensiones (A x H x P):
Dispositivo principal:
400 x 98 x 289 mm
El dispositivo principal incluye elementos operativos / terminales de conexión:
400 x 98 x 332 mm
Control remoto:
53 x 220 x 22 mm
Peso:
2 vias
70 / 120 W
4 Ohmios
60 – 35 000 Hz
90 dB
108 x 202 x 152 mm
Funciones especiales
Procesado de altavoz Dolby® Virtual Speaker para conseguir un sonido perfecto de
cine con 2 altavoces
Dolby® Headphone
Amplificador de potencia digital de 3 canales
Procesador de vídeo Zoran vaddis®
Función de interpolación hasta 1080p (resolución full HD) para DVD
Sintonizador superheterodino FM/MW con función RDS / Radiotext
Adaptador de alimentación digital
Función de suspensión con bajo consumo de energía
Sintonizador FM
Rango de frecuencias: 87,5 – 108 MHz
Relación señal a ruido: Mono:
70 dB
Estéreo: 65 dB
Sintonizador AM
Rango de frecuencias: 531 - 1602 MHz
Relación señal a ruido: 40 dB
Miscelánea
Voltaje de alimentación:
ALTAVOCES FRONTALES
Configuración:
Resistencia:
Impedancia:
Gama de frecuencias:
Rendimiento (1 vatio/1 m):
Dimensiones (an x al x pr):
77
RUS
СОДЕРЖАНИЕ
Меню OSD
Общая информация
Принадлежности. . . . . . . . . . . . . . . . . . . . . . . . . . . . . . . . . . . . . . . . . . . . . . . . . . . 78
Главная страница меню OSD . . . . . . . . . . . . . . . . . . . . . . . . . . . . . . . . . . . . . . . . 88
Важные указания по технике безопасности . . . . . . . . . . . . . . . . . . . . . . . . . . . . . 79
Настройка звука . . . . . . . . . . . . . . . . . . . . . . . . . . . . . . . . . . . . . . . . . . . . . . . . . . . 89
Язык . . . . . . . . . . . . . . . . . . . . . . . . . . . . . . . . . . . . . . . . . . . . . . . . . . . . . . . . . . . . . 89
Перед включением . . . . . . . . . . . . . . . . . . . . . . . . . . . . . . . . . . . . . . . . . . . . . . . . . 79
Настройка изображения. . . . . . . . . . . . . . . . . . . . . . . . . . . . . . . . . . . . . . . . . . . . . 90
Указания по утилизации. . . . . . . . . . . . . . . . . . . . . . . . . . . . . . . . . . . . . . . . . . . . . 79
Рейтинг . . . . . . . . . . . . . . . . . . . . . . . . . . . . . . . . . . . . . . . . . . . . . . . . . . . . . . . . . . 91
Код региона . . . . . . . . . . . . . . . . . . . . . . . . . . . . . . . . . . . . . . . . . . . . . . . . . . . . . . . 79
Элементы управления и разъемы
Сброс (заводские настройки). . . . . . . . . . . . . . . . . . . . . . . . . . . . . . . . . . . . . . . . . 91
Совместимые форматы для воспроизведения медиа
Передняя панель . . . . . . . . . . . . . . . . . . . . . . . . . . . . . . . . . . . . . . . . . . . . . . . . . . 80
Совместимые форматы дисков . . . . . . . . . . . . . . . . . . . . . . . . . . . . . . . . . . . . . . . 91
Пульт дистанционного управления . . . . . . . . . . . . . . . . . . . . . . . . . . . . . . . . . . . . 81
Совместимые форматы аудио/видео . . . . . . . . . . . . . . . . . . . . . . . . . . . . . . . . . . 91
Задняя сторона/разъемы . . . . . . . . . . . . . . . . . . . . . . . . . . . . . . . . . . . . . . . . . . . . 82
Акустическая система VC 2 . . . . . . . . . . . . . . . . . . . . . . 82
Различные возможности подсоединения
Форматы, поддерживаемые через USB . . . . . . . . . . . . . . . . . . . . . . . . . . . . . . . . 91
Технические характеристики
Подсоединения аудио . . . . . . . . . . . . . . . . . . . . . . . . . . . . . . . . . . . . . . . . . . . . 83
Технические характеристики VC 2 . . . . . . . . . . . . . . . . . . . . . . . . . . . . . . . . . . . . 92
Передний громкоговоритель и сабвуфер . . . . . . . . . . . . . . . . . . . . . . . . . 83
Антенны . . . . . . . . . . . . . . . . . . . . . . . . . . . . . . . . . . . . . . . . . . . . . . . . . . . . 83
ПРИНАДЛЕЖНОСТИ
1) Руководство по эксплуатации
Дополнительные аудиоустройства . . . . . . . . . . . . . . . . . . . . . . . . . . . . . . 84
Разъемы телевизора/монитора . . . . . . . . . . . . . . . . . . . . . . . . . . . . . . . . . . . . . . . 84
2) Пульт дистанционного управления
Аудиовыходы . . . . . . . . . . . . . . . . . . . . . . . . . . . . . . . . . . . . . . . . . . . . . . . . . . . . . 84
3) Аккумуляторные батареи для пульта дистанционного управления (2x AA)
Разъемы на передней панели . . . . . . . . . . . . . . . . . . . . . . . . . . . . . . . . . . . . . . . . 84
4) Сетевой кабель
Дисплей . . . . . . . . . . . . . . . . . . . . . . . . . . . . . . . . . . . . . . . 85
Включение устройства
5) Рамочная антенна диапазона метровых волн
6) Внутренняя антенна диапазона ультракоротких волн
Сетевой кабель. . . . . . . . . . . . . . . . . . . . . . . . . . . . . . . . . . . . . . . . . . . . . . . . . . . . 85
7) Кабель AV
Пульт дистанционного управления . . . . . . . . . . . . . . . . . . . . . . . . . . . . . . . . . . . . 85
Функции VC 2
Воспроизведение DVD
Воспроизведение CD, WMA, MPEG-4
8) 2 x Фронтальные громкоговорители
9) Активный сабвуфер
10) Кабель громкоговорителя для переднего громкоговорителя и сабвуфера
86
11) Липкие резиновые ножки для переднего громкоговорителя
86
Функции Тюнера . . . . . . . . . . . . . . . . . . . . . . . . . . . . . . . . . . . . . . . . . . . . . . . . . . 87
Функции rds (Radio Data Service) тюнера . . . . . . . . . . . . . . . . . . . . . . . . . . . . . . . 87
Регулирование звучания. . . . . . . . . . . . . . . . . . . . . . . . . . . . . . . . . . . . . . . . . . . . . 88
78
RUS
Треугольник с символом молнии предупреждает
пользователя о том, что внутри устройства используются
высокое напряжение, которые могут вызывать опасные
удары электрическим током.
ПЕРЕД ВКЛЮЧЕНИЕМ
Уважаемый покупатель!
Благодарим за то, что Вы решили приобрести Magnat VC 2.
Внимательно прочтите наши следующие указания перед включением VC 2.
Треугольник с восклицательным знаком обращает
внимание пользователя на то, что в прилагаемом
руководстве по эксплуатации содержатся важные указания,
которые должны обязательно соблюдаться.
ВАЖНЫЕ УКАЗАНИЯ ПО БЕЗОПАСНОСТИ
Перед использованием устройства внимательно прочитайте руководство по
эксплуатации и сохраните его.
Эксплуатируйте устройство только при температуре окружающей среды/в
помещении в диапазоне от 10°C до 40°C.
Позаботьтесь о достаточной вентиляции устройства. Минимальное расстояние к
предметам сбоку, вниз и вверх не должно выходить за пределы 10 см.
Вентиляционные отверстия не должны закрываться предметами (например,
занавесками, газетой), чтобы обеспечить достаточную вентиляцию устройства.
Не располагать вблизи устройства источники тепла, такие как радиаторы, плиты,
открытое пламя, которые генерируют тепло.
Не подвергать устройство и пульт ДУ воздействию воды, а также водяных капель
и брызг и высокой влажности воздуха.
Также нельзя использовать прибор для подставки для ваз или других
заполненных жидкостью сосудов.
В случае контакта с влагой или жидкостью немедленно отсоедините устройство
от сети питания.
Вытирать устройство можно только сухой салфеткой.
Не используйте чистящие средства или химические растворители, так как они
могут повредить поверхность.
Никогда не открывайте устройство.
Сетевой кабель должен быть всегда готов к эксплуатации. Если на сетевом
кабеле будут обнаружены повреждения, эксплуатировать устройство больше
нельзя. Поврежденный кабель ремонтировать нельзя, его нужно заменить.
Не присоединять или не отсоединять сетевой кабель влажными руками.
Работами по техническому обслуживанию и ремонту устройства должны
заниматься только квалифицированные специалисты.
Если устройство не используется в течение долгого времени, его нужно
выключить с помощью сетевого выключателя на задней стороне устройства.
Во время грозы вынимать сетевой выключатель из розетки.
Не открывать! Опасность удара электрическим током!
Чтобы
уменьшить
опасность
возгорания
или
электрического удара, необходимо защищать устройство
от дождя или влаги.
Этот знак обращает внимание пользователя прибора на то,
что внутри устройства работает лазерный луч класса 1,
который за пределами устройства никак не может
вызывать опасное излучение.
УКАЗАНИЯ ПО УТИЛИЗАЦИИ
Согласно европейской директиве 2002/96/EC все
электрические и электронные приборы для утилизации
должны сдаваться отдельно в местные сборные пункты.
Выполняйте местные предписания и не выбрасывайте
старые устройства вместе с обычным домашним мусором.
КОД РЕГИОНА
Проигрыватели DVD и диски DVD закодированы для различных регионов. Для
безупречного воспроизведения эти коды должны совпадать. В противном случае
диск воспроизвести нельзя. Код для этого прибора – «2». Другие коды регионов на
этом приборе воспроизводиться не могут. Диски с обозначением „All“ также могут
проигрываться.
На рисунке, приведенном ниже, представлены различные регионы
мира для DVD:
1:
2:
3:
4:
5:
79
Канада, США и территории Соединённых Штатов
Европейский Союз, Египет, Япония, Южная Африка
Юго-Восточная Азия, Гонконг, Макао, Южная Корея, Тайвань
Центральная Америка, Океания, Южная Америка, Мексика
Африка, Россия, республики бывшего СССР, Южная Азия, Монголия, Северная
Корея
6: Китайская Народная Республика (за исключением Макао и Гонконга)
RUS
ЭЛЕМЕНТЫ УПРАВЛЕНИЯ И РАЗЪЕМЫ - ПЕРЕДНЯЯ ПАНЕЛЬ
14
13
IR
1
2
3
4
1 Кнопка вкл. / режима ожидания
Включает устройство, если оно
находится
в
режиме
ожидания
(светодиод светится красным). Если
светодиод не горит, нужно включить
сетевой выключатель на задней
стороне устройства. И наоборот,
устройство можно переключить из
режима Power (светодиод светится
зеленым) в режим ожидания.
5 Кнопка l◄◄SEARCH
CD/DVD: Переходит к предыдущей
композиции.
Тюнер: Коротким нажатием может
увеличиваться частота станции для
ручной настройки по 5 кГц. Более
длительное нажатие запускает поиск
станции.
3 Кнопка ►/II PLAY
Запускает
или
воспроизведение медиа.
7 Переключатель SOURCE
Для выбора источника входа: а именно
DISC, TUNER или внешние источники
AUX 1, AUX 2, AUX 3, LINE, цифр. опт.,
цифр. коакс. Он показывается на
дисплее (13).
2 Кнопка ▲ EJECT
Открывает или закрывает лоток для
DVD/CD (8).
прерывает
4 Кнопка ■ STOP
Останавливает
воспроизведение
медиа.
Тюнер: Переключается при приеме УКВ
между режимами FM-авто и FM-моно.
5
6
7 89
10
11 12
8 DVD VIDEO
Лоток DVD/CD. Положите DVD/CD
стороной с надписью вверх на этот
лоток.
9 Вход USB
Для подсоединения запоминающих
устройств USB.
10 Регулятор VOLUME
Регулирует
громкость.
Для
регулирования
громкости
от
минимальной до максимальной нужно
примерно 2 оборота. При этом
показания громкости выводятся на
дисплей (13).
(VOLUME 00 - VOLUME 40).
6 Кнопка ►►l SEARCH
CD/DVD: Переходит к следующей
композиции.
Тюнер: CКак пункт 5, но поиск
запускается вперед.
80
11 LINE IN
Вход для контактного штекера 3,5 мм
стерео
для
дополнительного
аудиоисточника (МР3-проигрыватель и
т.п.)
12 PHONES
Выход для контактного штекера 3,5 мм
стерео
от
наушников.
При
использовании наушников динамики
самостоятельно отключаются. Если Вы
подключаете наушники, установите
громкость на низкий уровень.
13 Дисплей
На дисплее выводятся данные о
произведенных настройках.
14 Датчик для дистанционного
управления
Чтобы
использовать
пульт
дистанционного управления, цельтесь
им в эту точку.
RUS
ЭЛЕМЕНТЫ УПРАВЛЕНИЯ И РАЗЪЕМЫ - ПУЛЬТ ДИСТАНЦИОННОГО УПРАВЛЕНИЯ
1
6
3
4
2
5
5
USB
Включает вход USB.
36
35
7
8
11
15
14
12
16
18
20
27
29
17
19
21
28
30
13
22
24
23
26
33
31
7
AUX
Включает источники входа „AUX 1“, „AUX 2“,
„AUX 3“, “LINE”.
34
32
21 Кнопка ►/II PLAY
Запускает или прерывает воспроизведение
медиа.
для
22 EQ
Выбор сохраненных установок тембра
звучания: LINEAR – FILM – MUSIC –
LANGUAGE - CUSTOM.
12 TITLE
Вызов меню диска DVD.
1
POWER
Включает устройство, если оно находится в
режиме ожидания. Если светодиод не горит,
нужно включить сетевой выключатель на
задней стороне устройства. И наоборот,
устройство можно переключить из режима
Power в режим ожидания.
2
DISC
Для выбора источника входа
проигрыватель CD или DVD.
„Disk“,
3
TUNER
Включает источник входа „Tuner“. Многократное
нажатие переключает режимы работы между
“FM” и “AM”.
4
MONO/ST
Переключается при приеме УКВ между
режимами FM-авто и FM-моно.
30 ANGLE
DVD: Выбор различных ракурсов камеры
(если DVD поддерживает эту функцию).
20 ■ Stop
Останавливает воспроизведение медиа.
10 SEARCH/RDS
CD/DVD: Прямой выбор главы, названия или
переход к определенной временной метке.
Тюнер: индикация выбранной функции RDS.
11 SETUP
Открывает экранное меню OSD
настройки установок в режиме DISC.
18 I◄◄ PRESET
Переходит к предыдущей композиции.
Тюнер: Выбирает следующее более низкое
место памяти.
19 ►►l PRESET
Переходит к следующей композиции.
Тюнер: Выбирает следующее более высокое
место памяти.
9
MEM
Для сохранения радиостанций.
25
28 REPEAT A-B
Функция повтора произвольно выбираемого
фрагмента диска CD/DVD.
17 TUNE►►
Как пункт 16, но поиск запускается вперед.
8
Кнопки с цифрами
Для прямого выбора композиций на
CD/DVD-диске
или
предварительно
настроенных станций тюнера.
9
10
6
DIGITAL IN
Включает источники входа Цифровой
оптический и Цифровой коаксиальный.
Коротким
нажатием
может
Тюнер:
увеличиваться частота станции для ручной
настройки по 50 кГц. Более длительное
нажатие запускает поиск станции.
23 TONE
Настройка низких частот, высоких частот и
баланса. С помощью кнопок PRESET можно
изменять конкретную настройку.
13 MENU
Для вызова меню DVD.
14 Кнопки управления курсором
Для
обслуживания
экранного
меню
(OSD=On Screen Display) и настройки.
24 VOLUME +
Для настройки громкости.
15 OK
Кнопка для подтверждения выбранных
кнопками управления курсором установок.
25 MUTE (ВЫКЛЮЧЕНИЕ ЗВУКА)
Включает устройство в режим молчания.
26 DVS SET
Включает виртуальное воспроизведение
Dolby® Sourround через стереодинамики.
При подключенных наушниках функция
Dolby®-Headphone
включается
и
выключается.
16 ◄◄ TUNE
Нажатие кнопки запускает поиск назад с 2,
4, 8 или 16-кратной скоростью, в
зависимости
от
частоты
нажатий.
Следующее нажатие переводит вращение
диска затем снова на обычную скорость.
Этого можно также достичь нажатием кнопки
PLAY.
27 REPEAT 1/ALL
Функция повтора текущей записи или всего
диска CD/DVD.
81
29 ZOOM
DVD: Функция масштабирования.
31 SUBTITLE
DVD: Einstellung unter-schiedlicher Untertitel
(если DVD поддерживает эту функцию).
32 AUDIO
DVD: Настройка имеющихся звуковых
дорожек DVD. (если DVD поддерживает эту
функцию).
33 PROG
DVD:
Выбранное
программирование
отдельных композиций или глав.
34 HDMI RES
Выбор разрешения выхода HDMI.
35 VIDEO OUT
Выбирает видеовыход в следующей
последовательности: SCART, Component
Interleased (COMP I), Component Progressive
(COMP P), HDMI, S-Video. Композитный
(CVBS)ыход постоянно активный.
36 ▲ Eject
Работа с DVD/CD: Открывает или закрывает
лоток.
Завершает
тем
самым
воспроизведение DVD/CD или запускает их.
RUS
ЭЛЕМЕНТЫ УПРАВЛЕНИЯ И РАЗЪЕМЫ - ЗАДНЯЯ СТОРОНА / РАЗЪЕМЫ
12 13
11
15 16 17
14
10
1 POWER AC 230V
Сетевой разъем. Для подключения
входящего в комплект сетевого кабеля.
2 FUSE (Предохранитель)
Применять разрешено только тот тип
предохранителя, который указан на
задней стороне устройства.
3 On/Off (вкл./выкл.)
Сетевой
выключатель.
Включает
устройство и переводит его в режим
ожидания.
Если
выключатель
находится
в
положении
“OFF”,
устройство отделено от сети.
4 SPEAKER OUT SUB
Выход
для
подсоединения
поставляемого в комплекте сабвуфера.
9
8
7
18
6
5
и
1
10 HDMI OUTPUT
Выход
HDMI.
(мультимедийный
интерфейс высокой четкости).
5 SPEAKER OUT R/L
Выход
для
подсоединения
поставляемых
в
комплекте
сателлитных громкоговорителей с
учетом правильной полярности.
6 OUTPUT R / L
Аналоговый
правый
аудиовыход.
4
11 Digital OUTPUT
Оптический и коаксиальный цифровой
аудиовыход.
левый
12 ANT FM
Антенный ввод. Для подключения
приложенной внутренней антенны FM
или домовой антенной установки.
7 OUTPUT S-VIDEO
Выход S-Video (Y/C).
13 ANT AM
Антенный ввод. Для подключения
приложенной рамочной антенны АМ.
8 OUTPUT COMPOSITE
Выход Video-Composite (FBAS).
9 OUTPUT COMPONENT
Аналоговый выход компонента видео
(YUV).
14 Digital INPUT
Оптический и коаксиальный цифровой
аудиовход.
82
2
3
15 INPUT AUX1
Аналоговый аудиовход.
16 INPUT AUX2
Аналоговый аудиовход.
17 INPUT AUX 3
Аналоговый аудиовход.
18 SCART OUT
Выход SCART.
RUS
АКУСТИЧЕСКАЯ СИСТЕМА VC 2
РАЗЛИЧНЫЕ ВОЗМОЖНОСТИ СОЕДИНЕНИЯ
В объем поставки VC 2 входят два передних громкоговорителя и один сабвуфер.
Эти громкоговорители специально согласованы с VC 2, также к устройству
необходимо подключать только эти громкоговорители.
АУДИОРАЗЪЕМЫ
Сабвуфер
Динамики Динамики
L
R
УСТАНОВКА ПЕРЕДНИХ ГРОМКОГОВОРИТЕЛЕЙ
Фронтальные громкоговорители размещаются слева и справа по возможности на
равном расстоянии от телевизионного приемника и на уровне ушей слушателя.
Между громкоговорителями и позицией прослушивания должна сохраняться прямая
видимость. Любое препятствие создает эффекты поглощения или отражения звука
и снижает качество звучания. Громкоговорители могут устанавливаться на полку или
подставку. Для этого необходимо разместить поставляемые в комплекте самоприклеиваемые резиновые ножки на нижней стороне громкоговорителей (четыре ножки
на громкоговоритель).
Передние громкоговорители имеют на задней стороне приспособление для
настенного монтажа. Прикрепить соответствующий винт к прочной стене, на который
можно навесить громкоговоритель. Поставляемые в комплекте резиновые ножки
должны размещаться на задней стороне, чтобы обеспечить определенное
расстояние корпуса к стене.
Дополнительные аудиоприборы
Антенна диапазона AM
цифровое
аналоговое
R
Антенна
диапазона FM
ПЕРЕДНИЙ ГРОМКОГОВОРИТЕЛЬ И САБВУФЕР
К акустической системе VC 2 прилагаются типовые кабели для обеих передних
громкоговорителей (2 x 3 м) и сабвуфера (1 x 5 м). По возможности применять эти
кабели для подсоединения громкоговорителей. При необходимости кабели можно
укоротить и заново зачистить. Следует соблюдать одинаковую длину обоих кабелей для передних громкоговорителей. Если необходимо использовать более длинные кабели, не следует удлинять поставляемые в комплекте кабели, а необходимо
в специализированных торговых центрах приобрести новые, аналогичные кабели
с необходимой длиной.
Открутить друг за другом зажимные винты громкоговорителей и вставить
зачищенные концы в имеющиеся отверстия. Снова затянуть зажимные винты.
Обращать внимание на то, чтобы возможно оголенные жилы провода не вызывали
короткое замыкание. Подсоединить затем соответственно другой конец кабеля
аналогичным образом к соединительным клеммам VC 2. Обязательно следить за
правильной полюсностью.
САБВУФЕР
Человеческое ухо не может определить местонахождение в помещении воспроизводимого сабвуфером частотного диапазона, поэтому установка, в общем, не представляет собой проблемы. Но расположение перед местом слушания вблизи
фронтальных громкоговорителей является всё же более благоприятным. Кроме того
Вы должны следить за тем, чтобы расстояние к предметам и стенам составляло со
стороны - не менее 20 см, а сзади - не менее 25 см, иначе воспроизведение низких
тонов может быть нарушено.
РАЗЛИЧНЫЕ ВОЗМОЖНОСТИ СОЕДИНЕНИЯ
Подсоединить сетевой кабель только в том случае, если подключены все
соединения.
Соблюдать при проведении соединений также указания справочников
других компонентов
Обращать внимание при использовании кабелей на качество. Особенно
кабель HDMI должен в любом случае быть сертифицирован HDMI.
АНТЕННЫ
Подсоединить внутреннюю антенну диапазона УКВ к антенному разъему FM. При
наличии использовать домашнюю антенную установку. Как правило, она предлагает
улучшенный прием. Для этого применять стандартный антенный кабель IEC.
Для использования приемного блока СВ подсоединить поставляемую рамочную
антенну к антенному входу АМ.
Направить антенны соответственно таким образом, чтобы обеспечивался
наилучший прием.
83
RUS
РАЗЛИЧНЫЕ ВОЗМОЖНОСТИ СОЕДИНЕНИЯ
ДОПОЛНИТЕЛЬНЫЕ АУДИОУСТРОЙСТВА
АУДИОВЫХОДЫ
Если устройства имеют цифровой выход, его необходимо использовать и соединить с одним
из цифровых входов VC 2, при помощи коаксиального кабеля (75 Ом) или оптического кабеля.
Устройства с аналоговым выходом можно соединить через провод с фиксатором с разъемами
AUX VC 2.
РАЗЪЕМЫ ТЕЛЕВИЗОРА/МОНИТОРА
Для звукозаписывающих устройств могут применяться следующие аудиовыходы:
Цифровой выход: Оптически или коаксиально с соответствующими кабелями.
Аналоговый стереовыход: Через кабель с фиксатором.
РАЗЪЕМЫ НА ПЕРЕДНЕЙ ПАНЕЛИ
Телевизор можно подключать к VC 2 следующим образом:
Через выход Composite или выход S-Video.
Через выход SCART.
Через выход Component.
Через выход HDMI.
Для выхода HDMI могут выбираться следующие разрешения видео через
настройку изображения или пульт дистанционного управления (34):
(PAL / NTSC) 576/480 прогрессивное
1080 с чересстрочной разверткой
IR
720 прогрессивное
1080 прогрессивное
Следует убедиться в том, какое разрешение изображения является оптимальным для
Вашего телевизора. Соблюдать для этого руководство по эксплуатации устройства.
Внимание: Видеовыходы должны выбираться через видеонастройку или пульт
дистанционного управления (35). Композитный выход постоянно активный.
Разъем для памяти большой емкости USB.
LINE IN (напр., для подключения MP3-проигрывателя)
PHONES (выход для наушников)
84
RUS
ДИСПЛЕЙ
ВКЛЮЧЕНИЕ УСТРОЙСТВА
СЕТЕВОЙ ВЫКЛЮЧАТЕЛЬ
6
После выполнения всех соединений подключите сетевой кабель.
GG
Еще раз проверьте все соединения, также с учетом справочников других устройств.
Проверьте, правильно ли подсоединены правый и левый каналы (левый с левым,
правый с правым).
2
1
2
3
1
3
4
Во избежание гудения и других неисправностей не связывайте сетевые кабели с
соединительными кабелями.
5
Включите сетевой выключатель.
Индикация состояния функции ходового механизма (Play, пауза, быстрая
перемотка вперед/назад)
Алфавитно-цифровой индикатор: Информация о текущих настройках, действиях
и информация RDS. В режиме CD/DVD здесь показывается текущая глава,
текущий трек и еже проигранное время.
Индикация при приеме FM:
ST.: Стереоприем
TUNED: Приемник настроен правильно
RDS: Данные RDS доступны
4
Индикация декодирования Dolby®-Digital
6
Индикация активна, если DVS REF или DVS WIDE активны (Dolby® Virtual
Speaker Processing).
5
ПУЛЬТ ДИСТАНЦИОННОГО УПРАВЛЕНИЯ
Индикация декодирования имеющихся каналов
Вставьте аккумуляторные батареи в соответствующий отсек пульта дистанционного
управления.
Для использования пульта дистанционного управления направляйте его на
инфракрасный датчик на VC 2 (14).
85
RUS
ФУНКЦИИ VC 2
Функции повторения (REPEAT 1/ALL, REPEAT A-B, поз. 27, 28)
Нажмите REPEAT 1/ALL, для повторения текущей композиции или всего DVD.
Еще одно нажатие кнопки выключает функцию повторения.
ВОСПРОИЗВЕДЕНИЕ DVD
Установите с помощью SOURCE на передней панели VC 2 (поз. 7) или с помощью
DISC на пульте дистанционного управления (поз. 2) вход на DISC (отображается на
дисплее).
Нажмите кнопку REPEAT A-B, чтобы определить начало отрезка для повторения.
Еще одно нажатие отмечает окончание отрезка. Еще одно нажатие кнопки
выключает функцию повторения.
Откройте лоток с помощью EJECT на передней панели (поз. 2) или пульта дистанционного
управления ( (поз. 36), вложите DVD-диск и снова закройте лоток с помощью EJECT.
Устройство читает DVD и на экран выводится меню DVD (если DVD поддерживает
эту функцию). Для навигации в меню используйте кнопки курсора и OK (поз. 14, 15).
ВОСПРОИЗВЕДЕНИЕ CD, WMA, MPEG-4
Выбор входа и укладка CD-диска происходит точно так же, как и для DVD-режима.
В качестве носителя информации может использоваться USB-накопитель. Он подсоединяется к USB-входу на передней стороне VC2 (поз. 9). В качестве источника
приема с помощью кнопки SOURCE на передней стороне VC2 (поз. 7) или кнопки
USB на пульте ДУ (поз. 5) должен активизироваться USB-вход.
Во время воспроизведения доступны следующие функции:
Управление воспроизведением кнопками управления спереди (поз. 3-6) или
пультом ДУ (поз. 16-21).
Вызов меню DVD или меню композиции DVD кнопками MENU и TITLE на
пульте ДУ (если DVD поддерживает эту функцию).
Прямой выбор композиции, главы или прыжок к определенной метке по
времени (кнопкаSEARCH/RDS на пульте ДУ (поз. 10)).
На экране выводится страница композиции.
Для этого выберите соответствующее поле ввода кнопками курсора и введите
номер композиции или главы. Метка по времени вводится в формате
часы:минуты:секунды (по два символа). НЕ используйте для этого кнопку „>10“!
Выбранное программирование (кнопкаSEARCH/RDS на пульте ДУ, поз. 33)
С помощью кнопок курсора и кнопки OK можно выбрать отдельную композицию или
с помощью кнопки PLAY включить воспроизведение всего CD. Кроме того, можно
выбрать режим повторения и воспроизведения.
Во время воспроизведения доступны следующие функции:
Управление воспроизведением кнопками управления спереди (поз. 3-6) или
пультом ДУ (поз. 16-21).
Прямой выбор композиции, главы или прыжок к определенной метке по
времени (кнопкаSEARCH/RDS на пульте ДУ (поз. 10)).
Выберите кнопками курсора (поз. 14) нужную композицию или главу из списка
слева и добавьте ее кнопкой OK (поз. 15) с плейлисту (справа). С помощью
кнопок внизу вы можете удалять отдельные композиции или весь плейлист или
проигрывать выбранное.
86
Для этого выберите соответствующее поле ввода кнопками курсора и введите
номер композиции. Метку по времени можно устанавливать в текущей
композиции или в CD, она вводится в формате часы:минуты:секунды (по два
символа). НЕ используйте для этого кнопку „>10“!
RUS
ФУНКЦИИ VC 2
•
•
•
•
Функции повторения (REPEAT 1/ALL, REPEAT A-B, поз. 27, 28)
Нажмите REPEAT 1/ALL, для повторения текущей композиции или всего CD. Еще
одно нажатие кнопки выключает функцию повторения.
Нажмите кнопку REPEAT A-B, чтобы определить начало отрезка для повторения.
Еще одно нажатие отмечает окончание отрезка. Еще одно нажатие кнопки
выключает функцию повторения.
Выбор предварительно настроенной станции
Пнажмите одну из кнопок PRESET на пульте ДУ (18, 19), чтобы выбрать нужный
номер станции. Станцию в памяти можно выбрать и напрямую с помощью кнопок с
цифрами.
Для многих мультимедийных файлов отсутствуют общепринятые
стандарты. Поэтому мы не можем гарантировать то, что все файлы
будут всегда правильно воспроизводиться.
ФУНКЦИИ RDS (RADIO DATA SERVICE) ТЮНЕРА
Очень большие видеофайлы через USB могут быть причиной проблем
при воспроизведении. Они должны затем воспроизводиться через CD
или DVD.
RDS – это система, с помощью которой во время передач в диапазоне УКВ вместе
с сигналом станции передается дополнительная информация. На VС 2 эта информация (о станции, передаче и т.д.) может выводиться на дисплей. Функции RDS
можно устанавливать с помощью кнопки SEARCH/RDS на пульте ДУ (10).
Функции RDS VC 2
• PS (Program Service Name): Показывает название станции.
• PTY (Program Type Identification): Показывает тип передачи.
• RT (Radio Text): Показывает все сообщения станции.
ФУНКЦИИ ТЮНЕРА
Выбор радиодиапазона
• С помощью SOURCE (VC 2, 7) или TUNER (пульт ДУ, 3) выберите в качестве аудиоисточника TUNER FM или TUNER AM.
• Выбрать с помощью режима MONO/ST (блок дистанционного управления (4)) монофонический прием (рекомендуется при плохих условиях приема) или стереофонический прием.
Последовательность показа при последовательном нажатии на кнопку SEARCH/RDS: PS, частота станции, PTY, RT. Если несмотря на сигнал RDS одна из
этих функций станцией не поддерживается, на дисплее появляется сообщение "N/A".
Поиск станции
• Выберите TUNER в качестве аудиоисточника и диапазон (см. выше).
• Воспользуйтесь кнопками TUNING на передней панели VC 2 (5, 6) или кнопками
TUNING на пульте ДУ (16, 17).
• Короткое нажатие на кнопки увеличивает или уменьшает частоту на 50 кГц.
• Продолжительное нажатие на кнопки приводит к поиску следующей станции
выше или ниже по частоте.
Предварительная настройка станций
• Ввести в память можно по 20 станций диапазонов FM и AM.
• Настройте нужную станцию (FM или AM). Откройте память с помощью кнопки MEM
на пульте ДУ (9).
• Выберите желаемый номер станции с помощью кнопок с цифрами на пульте ДУ
(8).
На дисплее мигает номер передачи.
Снова нажмите на кнопку MEM, чтобы ввести станцию в память.
Номер станции перестает мигать.
Повторите процедуру, чтобы ввести в память другие станции.
87
RUS
ФУНКЦИИ VC 2
МЕНЮ OSD
РЕГУЛИРОВАНИЕ ЗВУЧАНИЯ
VC 2 оснащен меню OSD (экранным дисплеем). Все необходимые основные
установки могут выполняться на основе этого меню, если в качестве источника входа
был выбран “DISC”.
Вы открываете меню с помощью кнопки Setup на пульте дистанционного управления
(поз. 11). Кнопками курсора (поз. 14) выберите пункт меню, который затем
выделяется более светлым цветом или рамкой. Пункт меню можно выбрать при
помощи кнопки OK или в то же время выполнять навигацию при помощи кнопок
управления курсором благодаря дополнительным подменю. С помощью кнопки OK
можно изменить установку.
Нажмите на кнопку SETUP для выхода из меню OSD.
Регулирование громкости
Громкость можно настраивать с помощью регулятора VOLUME на передней панели
(10) или на пульте ДУ (24). На дисплее появляется VOL и значение в диапазоне от
00 до MAX (40).
MUTE 8 (пульте ДУ, 25)
С помощью этой кнопки отключается звук. На дисплее мигает MUTING. Еще одно нажатие на эту кнопку или изменение уровня громкости снова включает звук.
Настройка басов/высоких частот
Нажимайте кнопку TONE на пульте ДУ (23) пока на дисплее не появится BASS или
TREB.
Настраивайте звучание с помощью кнопок TUNING на пульте ДУ (16, 17).
ГЛАВНАЯ СТРАНИЦА МЕНЮ OSD
Регулирование баланса
Баланс выбирается как и регулирование звучания. Нажимать соответствующую
кнопку до тех пор, пока на дисплее не появится BAL L00 - 00R. С помощью TUNING
(16) стереобазу можно передвинуть налево или направо.
Язык
Видео
Ауд.
Функция EQ
С помощью клавиши EQ на блоке дистанционного управления (22) могут вызываться
различные предварительные настройки регуляторов тембра. Можно выбирать следующие настройки: LINEAR, MOVIE, MUSIC, VOCAL. SОни выбираются повторным
нажатием клавиши EQ.
Rating
Рейтинг
Сброс (з.настр.)
С этой страницы Вы попадаете в различные подменю:
Функция DVS
С помощью DVS SET (пульте ДУ, 26)можно выключить виртуальное 5-канальное звучание
через стереодинамики (Dolby® Virtual Speaker) или выбрать между “DVS Ref” и “DVS Wide”.
DVS Ref представляет собой стандартный режим, при помощи которого можно
воспринимать 5-канальное звучание через оба передних динамика.
DVS Wide генерирует расширенное (более широкое) поле звучания для
передних каналов.
Под Язык можно выбирать язык для различных меню VC 2.
Под Видео попадаете в Настр. изображ., где можно выполнять различные
настройки изображения.
Под Аудио попадаете в Настр. звука, где можно выполнять различные
настройки звучания.
Под Рейтинг можно настраивать рейтинги МРАА для воспроизведения фильмов.
Под Сброс (з.настр.) можно сбрасывать VC 2 на заводские настройки.
88
RUS
МЕНЮ OSD
ЯЗЫК
НАСТРОЙКА ЗВУКА
Ауд.
Под Язык меню можно установить язык меню
настройки.
Eq Mode
Linear
Кино
Music
Язык
Пользв.
Bass Control
Под Аудио можно установить язык звуковой дорожки
DVD-диска.
Treble Control
BAL
Положение громкогов.
Под Меню DVD можно установить язык меню на DVDдиске.
Полка
Настен. монтаж
Sub Громкость
Цифровой выход
PCM
Под Субтитры можно установить язык субтитров на
DVD-диске или выключить субтитры.
Все
Относительно последних трех пунктов следует обращать
внимание на то, что должны также поддерживаться эти же
языковые установки на используемых DVD-дисках.
В режиме EQ (Eq Mode) можно
регулировать
тембр
и
баланс
воспроизведения звука. Можно вызывать
четыре
предварительные
настройки:
линейный, кино, музыка, речь. В пункте
меню ‚Вручную‘ можно производить
собственные настройки.
В
Положение
динамиков
можно
производить корректировку частотных
характеристик
в
зависимости
от
расположения динамиков-сателлитов. Если
динамики установлены на полке, и
расстояние до стены составляет не менее
15 см, рекомендуется настройка ‚Полка‘.
Если динамики располагаются прямо у
стены, используйте настройку ‚Настенный
монтаж‘.
В Громкость сабвуфера
можно
регулировать громкость сабвуфера. Чем
ближе сабвуфер расположен к стене, тем
сильнее воспроизводятся басы и может
понадобиться
их
ослабление
(отрицательные значения). Если сабвуфер
расположен в пространстве относительно
свободно, зачастую необходимо усиление
(положительные значения) Правильную
настройку можно определить путем проб с
помощью разной музыки и фильмов. При
этом режим EQ должен быть установлен на
Линейный.
В Цифровой выход можно выбрать PCM
(двухканальный формат данных PCM) или
RAW (многоканальный формат данных).
89
RUS
МЕНЮ OSD
НАСТРОЙКА ИЗОБРАЖЕНИЯ
С помощью
устанавливать
изображения.
В SCART можно выбрать вывод видео
SCART в формате RGB или CVBS, если
SCART активен в качестве видеовыхода.
Формат экрана можно
различные
форматы
В Component можно выбрать компонентный
вывод видео в формате Interleased или
Progressive, если Component активен в
качестве видеовыхода.
С помощью представления TV (Режим
просмотра)
вы
можете
производить
регулирование
различных
параметров
форматов изображения на телевизоре.
Пользователь может выбрать одну из
следующих опций:
Заполнить:
Изменение
размера
изображения по горизонтали и вертикали для
заполнения экрана по высоте и ширине.
Исходный: Оригинальный размер экрана
(Только для Divx / MPEG).
Автоустановка: Автоматический выбор
размера изображения по горизонтали и
вертикали.
Pan
Scan:
Переформатирование
анаморфного изображения.
С помощью HD разрешение можно
установить разрешение выхода HDMI.
Можно выбрать следующие разрешения:
(PAL / NTSC) 576/480 progressive
720 progressive
1080 interlaced
1080 progressive
Следует убедиться в том, какое разрешение
изображения является оптимальным для
Вашего телевизора. Соблюдать для этого
руководство по эксплуатации устройства.
С Телесистема можно выбирать между
стандартами телевещания PAL, NTSC и Multisystem.
С помощью Видеовыход можно выбирать
между
выходами
“S-Video”,
“SCART”
“Component” и “HDMI”. Композитный выход
активен независимо от настройки.
В Смарт-картинка можно регулировать
яркость, контраст, цветность и насыщенность
цвета. Сохранены три настройки (стандарт,
живой, прохладный). В пункте меню ‚Вручную‘
можно производить собственные настройки.
Если в качестве видеовыхода выбран HDMI,
может
изменяться
только
яркость
изображения.
90
RUS
МЕНЮ OSD
СБРОС (ЗАВОДСКИЕ НАСТРОЙКИ)
РЕЙТИНГ
Сброс (з.настр.)
Рейтинг
Rating
Настройки по умолчанию
Controllo genitori
Да
8. только для взрослых
Установить пароль
После подтверждения ‚ДА‘ восстанавливаются базовые настройки VC 2.
****
Правильный пароль
СОВМЕСТИМЫЕ ФОРМАТЫ ДЛЯ ВОСПРОИЗВЕДЕНИЯ МЕДИА
Непр. пароль
1. замок от дет
СОВМЕСТИМЫЕ ФОРМАТЫ ДИСКОВ
VC 2 может воспроизводить следующие форматы диска:
CD-DA
VCD
DVD-R/DVD+R/RW
HDCD
S-VCD
CD-R/CD-RW
DVD Video
2.G
3.PG
4.PG-13
5.PG-R
6.R
СОВМЕСТИМЫЕ ФОРМАТЫ АУДИО/ВИДЕО
VC 2 может воспроизводить следующие форматы аудио/видео:
Dolby® Digital
MPEG-4
AAC
Dolby® Prologic II
MPEG-2
WMA
Dolby® Virtual speaker MPEG-1 audio
JPG
Dolby® Headphone
Kodak Picture CD
7.NC-17
8.только для взрослых
Установить пароль
ввести пароль
Нет
****
Правильный пароль
вести новый пароль
Пдтв. нов.пароль
ФОРМАТЫ, ПОДДЕРЖИВАЕМЫЕ ЧЕРЕЗ USB
VC 2 может воспроизводить следующие форматы через USB:
AAC
MP4
WMA
MP4
JPEG
Непр. пароль
****
****
После ввода правильного пароля можно изменять степень родительского контроля.
Предварительно установленный пароль - 8888.
Под Изменить пароль можно изменить действующий пароль следующим образом:
Ввести действующий пароль.
Ввести два раза новый пароль.
91
RUS
ТЕХНИЧЕСКИЕ ХАРАКТЕРИСТИКИ
CD-РЕСИВЕР
ГРОМКОГОВОРИТЕЛЬ
Усилитель
Выходная мощность:
Номинальная мощность SAT (4 Ом) 2 x 50 Вт
Номинальная мощность SUB (4 Ом) 1 x 100 Вт
Импульсная мощность (общей):
350 Вт
Линейность частотной характеристики:
CD/AUX/LINE
20 Гц - 20 кГц (-1,0 дБ)
Относительный уровень шумов:
CD/AUX/LINE
Чувствительность входа:
AUX/LINE
Регулирование звучания:
Басы
Высокие
Sub:
Тюнер FM
Диапазон частот
Относительный уровень шумов
Тюнер AM
Диапазон частот
Относительный уровень шумов
Прочее
Номинальное напряжение:
Потребляемая мощность:
95 дБ
450 мВ/47 кОм
±10 дБ/100 Гц
±10 дБ/10 кГц
± 6 дБ
87,5 – 108 МГц
моно 70 дБ
стерео 65 дБ
531-1602 МГц
40 дБ
230 В перем. тока/50 Гц
САБВУФЕР
Конфигурация :
Нагрузочная способность :
Импеданц:
Частотный диапазон:
Коэф. полезного действия (1 Вт/1 м):
Габариты (ШxВxГ):
басрефлекс
140 / 200 Вт
4 Ом
25 – 180 Гц
90 дБ
235 x 390 x 388 мм
ВОЗМОЖНЫ ТЕХНИЧЕСКИЕ ИЗМЕНЕНИЯ.
макс. 200 Вт
Режим ожидания: 0,9 Вт
4,8 кг
2 полосные
70 / 120 Вт
4 Ом
60 – 35 000 Гц
90 дБ
108 x 202 x 152 мм
Особенности
Dolby ® Virtual Speaker Processing для отличного звучания домашнего кинотеатра
из 2 динамиков
Dolby® наушники
Цифровая 3-канальная конечная ступень
Zoran vaddis® видеопроцессор
Высококачественная функция до 1080p (полное HD разрешение) для DVD
Супергетеродинный приёмник УКВ/СВ с функцией RDS / Radiotext
Цифровой сетевой блок
Функция режима ожидания с незначительным потреблением тока
Габаритные размеры (ШxВxГ):
Основное устройство:
400 x 98 x 289 мм
Основное устройство, вкл. элементы
управления и соединительные зажимы: 400 x 98 x 332 мм
Пульт дистанционного управления:
53 x 220 x 22 мм
Вес:
Конфигурация:
Нагрузочная способность:
Импеданц:
Частотный диапазон:
Коэф. полезного действия (1 Вт/1 м):
Габариты (ШxВxГ):
92
D
Wir gratulieren Ihnen! Durch Ihre kluge Wahl sind Sie Besitzer eines MAGNAT HiFi-Produktes geworden.
Die Produkte werden während des gesamten Fertigungsvorganges laufend kontrolliert und geprüft. Im Servicefall beachten Sie bitte
folgendes:
1. Die Gewährleistungszeit beginnt mit dem Kauf des Produktes und gilt nur für den Erstbesitzer.
2. Während der Gewährleistungszeit beseitigen wir etwaige Mängel, die nachweislich auf Material- oder Fabrikationsfehler beruhen,
nach unserer Wahl durch Austausch oder Nachbesserung der defekten Teile. Weitergehende Ansprüche, insbesondere auf Minderung,
Wandlung, Schadenersatz oder Folgeschäden sind ausgeschlossen. Die Gewährleistungszeit wird von einer Garantieleistung durch
uns nicht berührt.
3. Am Produkt dürfen keine unsachgemäßen Eingriffe vorgenommen worden sein.
4. Bei Inanspruchnahme der Gewährleistung wenden Sie sich bitte zunächst an Ihren Fachhändler. Sollte es sich als notwendig erweisen, das Produkt an uns einzuschicken, so sorgen Sie bitte dafür, dass • das Produkt in einwandfreier Originalverpackung verschickt
wird, • die Kontrollkarte ausgefüllt dem Produkt beiliegt • die Kaufquittung beigefügt ist.
5. Von der Gewährleistung ausgenommen sind: • Leuchtmittel • Röhren • Batterien/Akkus • Verschleißteile • Transportschäden, sichtbar oder unsichtbar (Reklamationen für solche Schäden müssen umgehend bei der Transportfirma, Bahn oder Post eingereicht werden.) • Kratzer in Metallteilen, Frontabdeckungen u.s.w. (Diese Defekte müssen innerhalb von 5 Tagen nach Kauf direkt bei Ihrem
Händler reklamiert werden.) • Fehler, die durch fehlerhafte Aufstellung, falschen Anschluss, unsachgemäße Bedienung (siehe Bedienungsanleitung), Beanspruchung oder äußere gewaltsame Einwirkung entstanden sind. • Unsachgemäß reparierte oder geänderte Geräte, die von anderer Seite als von uns geöffnet wurden. • Folgeschäden an fremden Geräten • Kostenerstattung bei
Schadensbehebung durch Dritte ohne unser vorheriges Einverständnis.
G ARANTIEKARTE
WARRANTY C ARD
Typ/ Type
Serien-Nr./Serial-No.
GB
Congratulations! You have made a wise selection in becoming the owner of a MAGNAT HiFi equipment.
The equipments are checked and tested continously during the entire production process. In case you have problems with your MAGNAT HiFi equipment, kindly observe the following:
1. The warranty period commences with the purchase of the component and is applicable only to the original owner.
2. During the warranty period we will rectify any defects due to faulty material or workmanship by replacing or repairing the defective
part at our discretion. Further claims, and in particular those for price reduction, cancellation of sale, compensation for damages or subsequential damages, are excluded. The warranty period is not altered by the fact that we have carried out warranty work.
3. Unauthorized tampering with the equipment will invalidate this warranty.
4. Consult your authorized dealer first, if warranty service is needed. Should it prove necessary to return the component to the factory,
please insure that • the component is packed in original factory packing in good condition • the quality control card has been filled out
and enclosed with the component • your enclose your receipt as proof of purchase.
5. Excluded from the warranty are: • Illuminates • Valves • Batteries • Wear parts • Shipping damages, either readily apparent or concealed (claims for such damages must be lodged immediately with forwarding agent, the railway express office or post office). • Scratches in cases, metal components, front panels, etc. (You must notify your dealer directly of such defects within three days of purchase.)
• Defects caused by incorrect installation or connection, by operation errors (see operating instructions), by overloading or external
force. • Equipments which have been repaired incorrectly or modified or where the case has been opened by persons other than us.
• Consoquential damages to other equipments. • Reimbursement of cools, without our prior consent, when repairing damages by third
parties.
F
Toutes nos félicitations!
Vouz avez bien choisi et êtes le propriétaire heureux d’un produit MAGNAT.
Les appareils sont soumis pendant toutes les opérations de fabrications à des contrôles et vérifications constants. Si, pourtant, vous
rencontrez des difficulés avec votre appareil MAGNAT veuillez tenir compte de ce qui suit:
1. La garantie débute avec l’achat de l’appareil et est valable uniquement pour le premier propriétaire.
2. Pendant la période de garantie nous réparons les dommages provenant des défauts de matériel ou de fabrication et nous procédons, à notre guise, à l’échange ou à la réparation des pièces défectueuses.
3. Aucune réparation impropre ne doit avoir été effectuée à l’appareil.
4. Lors d’une demande de garantie, veuillez vous adresser en premier lieu à votre distributeur. Si ce dernier décide que l’appareil doit
nous être retourné, veuillez tenir compte que: • l’appareil soit expédié dans son ermballage d’origine, • la carte de contrôle dûment remplie soit jointe, • le bon d’achat soit joint.
5. Ne sont pas compris dans la garantie: • Matériel d´eclairage • Tubes • Batteries • Pièces d’usure • Avaries de transport, visibles ou
non (de telles réclamations doivent être faites immédiatement auprès du transporteur, du chermin de fer ou de la poste). • Des rayures sur le boîtier, pièces métalliques, couvercles etc. (ces dommages doivent être signalés directement à votre distributeur dans les
trois jours suivant l’achat). • Dommages résultant d’un raccordement incorrect, maniement incorrect (voir instructions de service), surcharge ou application de force extérieure.
• Appareils réparés non conformément ou modifiés et qui ont été ouverts par une personne autre que nous. • Dommages ultérieurs à
d’autres appareils. • Remboursement des frais à des tiers ayant effectué les réparations sans notre accord préalable.
Name und Anschrift des Händlers /Stempel
Name and address of the dealer/stamp
Käufer/Customer
Name/Name
Straße/Street
PLZ, Ort/City
Land/Country
Kaufdatum/buying date
Nur gültig in Verbindung mit Ihrer Kaufquittung!
No warranty without receipt!
Magnat Audio-Produkte GmbH
Lise-Meitner-Str. 9
50259 Pulheim, Germany
Tel. ++49 (0) 2234 807-0 · Fax ++49 (0) 2234 807-399
www.magnat.de