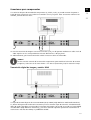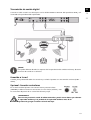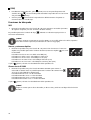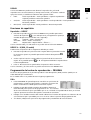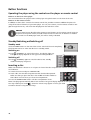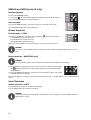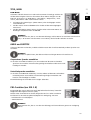
1
83533 ES ALDI ES Cover RC1.FH11 Thu Nov 18 07:52:29 2010 Seite 1 C M Y CM MY CY CMY K Reproductor DVD Slimline de diseño IIa/05/11 MEDION® LIFE® P71014 (MD 83533) Schwarz Medion Service Center Visonic S.A. c/ Miguel Faraday, 6 Parque Empresarial "La Carpetania", N-IV Km. 13 28906 Getafe, Madrid España Hotline: 902196437 · Fax: 914604772 E-Mail: [email protected] www.medion.es Manual de instrucciones Instruction Manual Bedienungsanleitung Índice ES Vista general.......................................................................................................................5 Aparato principal ............................................................................................................................... 5 Pantalla ............................................................................................................................................. 6 Mando a distancia ............................................................................................................................. 7 Acerca de las presentes instrucciones .................................................................................9 Símbolos de aviso y palabras clave utilizadas en estas instrucciones .................................................. 9 Advertencias de seguridad .............................................................................................. 10 No permita que los niños toquen los aparatos eléctricos ................................................................. 10 Coloque el aparato de forma segura ................................................................................................ 10 Conexión a la red ............................................................................................................................ 10 Nunca efectúe Usted mismo la reparación del aparato..................................................................... 10 El reproductor de CDs ..................................................................................................................... 11 Auriculares ...................................................................................................................................... 11 En caso de problemas de funcionamiento ....................................................................................... 11 Manejo seguro de las pilas .............................................................................................................. 11 Limpiar el aparato............................................................................................................................ 11 Aspectos generales .......................................................................................................... 12 Acerca de los DVDs .......................................................................................................................... 12 Otros formatos reproducibles .......................................................................................................... 12 Formatos de sonido surround disponibles ....................................................................................... 13 Preparación ..................................................................................................................... 14 Desembalar el aparato ..................................................................................................................... 14 Compruebe el volumen de suministro............................................................................................. 14 Colocación de las pilas en el mando a distancia ............................................................................... 14 Conexiones y posibilidades de conexión .......................................................................... 15 Colocación del aparato .................................................................................................................... 15 Posibilidades de conexión entre el reproductor DVD y el televisor ................................................... 15 Conexiones para componentes ....................................................................................................... 17 Conexión TV con función Progressive Scan ...................................................................................... 18 Transmisión de sonido digital .......................................................................................................... 19 Conexión a la red ............................................................................................................................ 19 Opcional: Conectar auriculares........................................................................................................ 19 Funciones de las teclas ..................................................................................................... 20 Control en el aparato o desde el mando a distancia ......................................................................... 20 Standby/Encender/Apagar............................................................................................................... 20 Colocar el disco ............................................................................................................................... 20 Leer tarjetas de memoria o Stick de memoria USB ............................................................................ 21 Bloqueo de teclas – KEY LOCK ......................................................................................................... 21 Funciones de reproducción ............................................................................................................. 21 Funciones de búsqueda ................................................................................................................... 22 Funciones de repetición................................................................................................................... 23 Programación del orden de reproducción – PROGRAM ................................................................... 23 Selección directa de título/tiempo – SEARCH ................................................................................... 24 Marcar un "punto de localización" – BOOKMARK ............................................................................ 25 Seleccionar síntesis – DIGEST (DVD y VCD) ..................................................................................... 25 RANDOM e INTRO (sólo CD Audio) ................................................................................................. 26 Funciones de imagen ...................................................................................................................... 26 Posición de la cámara – ANGLE (sólo DVD) ...................................................................................... 27 Funciones de sonido ........................................................................................................................ 27 TITLE MENU, DVD MENU ................................................................................................................. 28 MENU AUDIO y SUBTITLE ................................................................................................................ 28 Función PBC (sólo VCD 2.0) ............................................................................................................ 28 Navegar en los soportes de datos MP3 y JPEG.................................................................................. 29 3 EN DE Ajustes en el menú SETUP ................................................................................................ 30 Navegar en los menús ................................................................................................................... 30 Submenús y menús de selección .................................................................................................. 30 Abandonar el menú ....................................................................................................................... 30 Menú General Setup Page ................................................................................................ 31 TV Display ....................................................................................................................................... 31 Angle Mark ...................................................................................................................................... 31 OSD Lang ........................................................................................................................................ 31 Captions.......................................................................................................................................... 31 Screensaver ..................................................................................................................................... 31 Last Memory ................................................................................................................................... 31 Menú Audio ...................................................................................................................... 32 Speaker Configuration ..................................................................................................................... 32 SPDIF............................................................................................................................................... 32 Channel Delay ................................................................................................................................. 33 Equalizer ......................................................................................................................................... 33 3D-Processing ................................................................................................................................. 33 Menú DOLBY DIGITAL ....................................................................................................... 34 Dual Mono ...................................................................................................................................... 34 Dynamic.......................................................................................................................................... 34 Menú Video ...................................................................................................................... 35 Menú PREFERENCES .......................................................................................................... 36 TV-Type ........................................................................................................................................... 36 Seleccionar idiomas ......................................................................................................................... 36 Audio .............................................................................................................................................. 36 Subtitles .......................................................................................................................................... 36 Disc menu ....................................................................................................................................... 36 Parental ........................................................................................................................................... 36 Password ......................................................................................................................................... 37 Default ............................................................................................................................................ 37 El mando a distancia universal ......................................................................................... 38 Advertencias de seguridad ............................................................................................................... 38 Aplicaciones .................................................................................................................................... 38 Programar códigos de aparatos ....................................................................................................... 38 Emisión cada segundo o cada tres segundos ................................................................................... 40 Funcionamiento normal ................................................................................................... 41 Controlar aparatos por separado ..................................................................................................... 41 Función "Apagar todo" .................................................................................................................... 41 EPG – Programación electrónica ...................................................................................................... 41 Funciones universales ("Punch Through") ........................................................................................ 41 Solución de problemas ..................................................................................................... 43 El mando a distancia no funciona: ................................................................................................ 43 Para la marca de mi aparato hay listados varios códigos de dispositivo. ¿Cómo puedo averiguar el código correcto? ........................................................................................................................ 43 Los aparatos sólo reaccionan a algunos de los comandos del mando a distancia: ..................... 43 En caso de problemas ....................................................................................................... 44 Eliminación ...................................................................................................................... 46 Especificaciones técnicas .................................................................................................. 47 Reproductor DVD ............................................................................................................................ 47 Características técnicas del mando a distancia universal .................................................................. 47 4 Vista general ES Aparato principal EN Parte frontal 1. Piloto LED azul para el modo standby 2. Compartimento para los discos 3. PLAY: Reproducción 4. OPEN/CLOSE: Abrir y cerrar el compartimento para los discos 5. STANDBY: Encender desde el modo standby y volver al modo standby 6. STOP/RES: Parar la reproducción; DE Pulsar repetidas veces: Seleccionar la resolución para HDMI y Progressive Scan 7. IR : Receptor para el emisor del mando a distancia 8. USB: Piloto LED para el modo USB 9. Pantalla (ver más abajo) 10. Lector de tarjetas para diferentes tarjetas de memoria 11. Conexión USB 12. PHONES: Toma de auriculares 13. VOLUME: Regulador de volumen para los auriculares Parte posterior 1. Cable de red 2. Interruptor de funcionamiento 3. S-VIDEO: Salida S-VIDEO (transmisión de la imagen al televisor) 4. VIDEO OUT: Salida VIDEO (transmisión de la imagen al televisor) 5. OPTICAL: Salida de audio digital 6. HDMI: Salida HDMI (transmisión digital de imagen y sonido) 7. Y Pr Pb: Salidas de componentes 8. SCART: Euroconector para el televisor o el aparato de vídeo 9. FRONT: Conexiones para los altavoces delanteros izquierdo/derecho 10. SURROUND: Conexiones para los altavoces traseros izquierdo/derecho 11. SUB: Conexión para subwoofer (altavoz de bajos) 12. CENT: Conexión para el altavoz central 13. COAXIAL: Salida de audio digital 14. AUDIO L/R: Salida de audio analógica 5 Pantalla 1. Medio: VCD 2. Medio: DVD 3. Reproducción 4. Pausa activada 5. Repetición activada 6. Disco en formato de sonido "dts" 7. Disco en formato de sonido Dolby Digital 8. Tiempo transcurrido en formato H:MM:SS título actual / capítulo actual PBC: Función Playback-Control activada (video-CD ) 9. Medio: CD 10. Medio: MP3 6 ES Mando a distancia En estas instrucciones están descritas las funciones de las teclas para el manejo del reproductor DVD. No obstante, con este mando a distancia se podrá manejar aún más aparatos. La funcionalidad del mando a distancia como mando a distancia universal se describe en el capítulo "El mando a distancia universal", page 38. Si el reproductor DVD no reaccionase al pulsar una tecla, pulse primero la tecla de fuentes DVD. 1. Encender desde el modo standby y viceversa 2. TV: Tecla de selección de fuente: Control de otro aparato 3. STB: Tecla de selección de fuente: Control de otro aparato (p. ej. receptor de satélite, descodificador) 4. DVD: Tecla de selección de fuente: Control del reproductor DVD 5. VCR: Tecla de selección de fuente: Control de otro aparato 6. AUX: Tecla de selección de fuente: Control de otro aparato 7. CODE: Introducir el código para otros tipos de aparatos 8. SUBTITLE: Seleccionar el idioma de los subtítulos; abrir el teletexto en el modo TV 9. TITLE: Acceder al menú título (DVD); EPG: "Electronic Program Guide" 10. Teclas de dirección: Navegar dentro de los menús 11. ENTER: Confirmar la selección 12. RETURN/EXIT: Volver al menú 13. MENU: Acceder al menú 14. DIGEST: Avance de imágenes 15. PROGRAM: Programar el orden de los títulos 16. BOOKMARK: Función marca de lectura 17. SEARCH: Seleccionar título/tiempo 18. AUDIO: Selección directa del idioma (DVD) 19. ZOOM: Ampliar la imagen 20. USB/CARD: Seleccionar el modo USB o el modo de tarjeta 21. CARD SELECT: Tecla sin función en este modelo 22. Indicador LED para la confirmación de la pulsación de una tecla 23. 0-9: Teclas numéricas, p. ej., para la selección directa del título y capítulo 24. CLEAR / -/--: Cancelar selección (menús) / Operación TV: Entrada de números de programa (1-2 cifras) 25. SETUP/AV: Abrir el menú de configuración / Control de otros aparatos 26. : Saltar título hacia delante/atrás (SKIP); P+/P–: Selección de programa en el TV 27. 28. : Selección función sin sonido en el TV +/–: Subir/bajar volumen en el TV 29. : Retroceso rápido 30. : Reproducción 31. : Avance rápido 32. / KEY LOCK: Empezar grabación / Bloqueo de las teclas en la parte frontal del aparato 33. : Parar la reproducción 34. : Interrumpir la reproducción 35. OPEN/CLOSE: Abrir y cerrar el compartimento para los discos 36. SLOW/F: Avance lento 37. SLOW/R: Retroceso lento 38. REPEAT: Repetición 7 EN DE 39. REPEAT A-B: Repetición de un fragmento definido 40. RANDOM: Reproducir el título de forma aleatoria 41. ANGLE: Posición de cámara (ángulo de vista) 42. 3D: Efectos de sonido como Rock, Pop, etc. 43. DISPLAY:Indicación título actual / tiempo transcurrido 8 Acerca de las presentes instrucciones ES Rogamos lea este capítulo y todas las instrucciones detenidamente y tenga en cuenta todas las advertencias contenidas. De esta manera garantizará un funcionamiento fiable y una larga vida de su reproductor MP3. EN Mantenga este manual de instrucciones siempre a mano, cerca del aparato y guárdelo para, en caso de vender o ceder el aparato, poder pasarlo a su nuevo propietario. DE Símbolos de aviso y palabras clave utilizadas en estas instrucciones ¡PELIGRO! ¡Advertencia ante peligro de muerte inminente! ¡ADVERTENCIA! ¡Advertencia ante un posible peligro de muerte y/o graves lesiones irreversibles! ¡ATENCIÓN! ¡Observe las indicaciones para evitar lesiones y daños materiales! ¡ATENCIÓN! ¡Observe las indicaciones para evitar daños materiales! ¡NOTA! ¡Informaciones más detalladas para el uso del aparato! ¡NOTA! ¡Observe las indicaciones del manual de instrucciones! ¡ADVERTENCIA! ¡Advertencia de peligro de descarga eléctrica! ¡ADVERTENCIA! ¡Aviso de peligro por volumen excesivo! Signo de enumeración / información sobre eventos durante la operación Indicación de una acción a realizar 9 Advertencias de seguridad No permita que los niños toquen los aparatos eléctricos Los niños desconocen los peligros que pueden surgir del uso de aparatos eléctricos. No deje los aparatos eléctricos al alcance de niños pequeños sin vigilancia. Mantenga también los embalajes alejados de los niños. Existe peligro de asfixia. Coloque el aparato de forma segura Coloque el aparato sobre una superficie firme y lisa. No está diseñado para funcionar en espacios con un alto nivel de humedad (como, por ejemplo, el cuarto de baño). Preste atención a las siguientes condiciones ambientales: Procure siempre que el espacio esté suficientemente ventilado. No se debe bloquear la ventilación tapando los orificios de ventilación con objetos como revistas, manteles, cortinas, etc.. No permita que el aparato esté expuesto a fuentes directas de calor (p.ej., la calefacción). Preste atención a que el aparato no esté expuesto a la luz solar directa. No exponga el aparato a gotas de agua o salpicaduras y no coloque recipientes llenos de líquido, p.ej., floreros, sobre el aparato. No instale el aparato cerca de campos magnéticos (p.ej., televisores o altavoces). No se deben colocar fuentes de fuego (p. ej., velas encendidas) encima de o junto al aparato. Conexión a la red Conecte el aparato sólo a una toma de corriente bien accesible (230 V ~ 50 Hz) cercana al lugar de emplazamiento. Para que el aparato pueda desconectarse rápidamente de la corriente, el enchufe debe permanecer accesible. No ponga en marcha el aparato cuando éste o el cable de conexión presenten daños visibles o el aparato se haya caído. En caso de desperfectos en la clavija, en el cable de conexión o en el aparato, desenchúfelo inmediatamente. Preste atención para que el cable de conexión no pueda ser causa de tropiezos. El cable de conexión no se debe doblar o aplastar. Si el aparato es trasladado de un lugar frío a un lugar caliente, espere un rato antes de conectarlo a la red. El agua condensada que se forma podría dañar el aparato. Cuando el aparato haya alcanzado la temperatura ambiental, se podrá poner en funcionamiento sin ningún peligro. Tormenta En caso de ausencia prolongada o de tormenta, desconecte el aparato de la red eléctrica y de la antena. Nunca efectúe Usted mismo la reparación del aparato ¡ADVERTENCIA! No intente en ningún caso abrir y/o arreglar Usted mismo el aparato. ¡Existe peligro de recibir una descarga eléctrica! Tampoco manipule el cable de red del aparato. Con el fin de evitar accidentes, en caso de mal funcionamiento del aparato diríjase a nuestro servicio de reparación o a otro taller especializado. 10 ES El reproductor de CDs El reproductor de CDs es un producto láser de Clase 1. El aparato está equipado con un sistema de seguridad que impide la salida de los peligrosos rayos láser durante su uso normal. Para evitar lesiones en los ojos, no manipule o dañe nunca el sistema de seguridad del aparato. EN DE Auriculares ¡ADVERTENCIA! Una excesiva presión de sonido al utilizar auriculares puede causar daños que reduzcan la capacidad auditiva y/o la pérdida de la capacidad auditiva. Antes de la reproducción, ponga el volumen al nivel más bajo. En caso de problemas de funcionamiento Si el aparato mostrara problemas de funcionamiento es posible que se hubiese producido una descarga electroestática. Desenchufe la clavija de red y extraiga las pilas. A continuación vuelva a poner las pilas y vuelva a enchufar el aparato a la toma de corriente. De ese modo se reinicializa el aparato. Manejo seguro de las pilas El mando a distancia del aparato necesita pilas. Para ello, observe las siguientes indicaciones: Mantenga las pilas alejadas de los niños. Las pilas pueden representar un peligro de muerte si se tragan. En caso de ingestión accidental de una pila hay que avisar inmediatamente a un médico. No arroje las pilas al fuego, no las cortocircuite y no las abra. Antes de colocarlas, limpie los contactos de las pilas y del aparato, en caso de que sea necesario. Cambie siempre todas las pilas al mismo tiempo. Utilice solamente pilas del mismo tipo. No utilice tipos diferentes; no mezcle pilas usadas con nuevas. Al colocar las pilas tenga en cuenta su polaridad (+/–). Si no va a utilizar el aparato durante algún tiempo, extraiga las pilas. ¡Retire inmediatamente del aparato las pilas gastadas! ¡Existe un alto peligro de derrame! No exponga las pilas a condiciones extremas. ¡No coloque el aparato por ejemplo sobre radiadores! ¡Existe un alto peligro de derrame! ¡No intente jamás recargar pilas normales! ¡Existe peligro de explosión! Retire inmediatamente del aparato las pilas que derramen líquido. Limpie los contactos antes de introducir pilas nuevas. ¡Existe peligro de causticación por el ácido de las pilas! ¡En caso de que hubiera salido ácido de las pilas, evite en todo caso que el líquido entre en contacto con la piel, los ojos y las mucosas! Si el ácido hubiera entrado en contacto con la piel, enjuague inmediatamente las zonas afectadas con abundante agua limpia y acuda a un médico. Limpiar el aparato Antes de proceder a limpiar el aparato, desconéctelo de la toma de alimentación. Para limpiarlo, emplee un paño seco y suave. Evite emplear detergentes y productos químicos de limpieza, puesto que podrían dañar las superficies y/o las inscripciones del aparato. 11 Aspectos generales Acerca de los DVDs El DVD - Digital Versatile Disc (inglés para "disco digital versátil") es un medio de almacenamiento digital de información. Los DVDs están señalizados con uno de los símbolos que aparecen en el margen. Dependiendo de cómo ha sido grabada la información, existen diferentes tipos de DVD con diferentes capacidades de almacenamiento. Estructura de un DVD Los DVDs de vídeo están divididos en títulos y capítulos. Un DVD puede tener varios títulos que a su vez pueden tener varios capítulos. Los títulos y capítulos están numerados consecutivamente: Normalmente el primer título de un DVD contiene indicaciones legales e información sobre el fabricante. El siguiente título suele ser la película. Los siguientes títulos pueden ser p. ej. reportajes sobre el "making-of", avances de películas o información sobre los actores. Idiomas y subtítulos En los DVDs se pueden almacenar hasta ocho idiomas de audio y 32 idiomas de subtítulos. Durante la reproducción se pueden combinar el idioma hablado y los subtítulos según se desee. Ángulo visual En algunos DVDs también se puede cambiar de perspectiva, siempre y cuando la película se haya rodado con diferentes posiciones de cámara. Códigos regionales Debido a estrategias de distribución a escala mundial, se ha desarrollado un código para los DVD que sólo permite la reproducción en aparatos que han sido adquiridos en determinadas regiones. Este código se basa en un sistema que divide el mundo en seis regiones. Europa pertenece a la zona 2. Por tal motivo, su reproductor DVD puede reproducir DVDs que lleven el código regional 2. El código regional se encuentra impreso en el embalaje del DVD (véase el logotipo que aparece en el margen). Además de DVDs con el código regional 2, con este aparato sólo se pueden reproducir DVDs con el código regional 0 (apto para cualquier reproductor DVD). ¡NOTA! En caso de producirse algún problema durante la reproducción de ciertos DVDs, asegúrese de que el DVD tenga el código de país 2 ó 0. Otros formatos reproducibles MP3 y WMA Los títulos en formato WMA están señalizados en pantalla con el siguiente símbolo. Los formatos MP3 y WMA son formatos de compresión para datos de audio. WMA significa "Windows Media Audio" y es más reciente que el formato MP3. Para ser reconocidos, los archivos MP3/WMA deben estar almacenados con la correspondiente extensión de archivo *.mp3 o *.wma. 12 MPEG4 MPEG4 es una tecnología de compresión para datos de vídeo y multimedia ("MPEG" = "Moving Picture Experts Group"). Formatos de sonido surround disponibles ES EN DE El aparato puede leer dos formatos de sonido surround. Dolby Digital 5.1 Con el formato de sonido Dolby-Digital el material de audio se memoriza en forma digital. Se almacenan por separado hasta cinco canales de audio de plena frecuencia (delantero izquierdo y derecho, central, trasero izquierdo y derecho), así como un canal de efectos y de bajos (5.1) por separado. Los soportes de sonido del formato Dolby-Digital están señalizados con el símbolo de la marca registrada que aparece en el margen. Por el hecho de que cada canal es completamente independiente, se crea un campo de sonido realista con una sensación de audición "tridimensional" lo que da al sonido distancia, movimiento y una posición relativa dentro del espacio. Su equipo es capaz de leer o decodificar estos datos de audio y emitirlos por las salidas 5.1. Por otra parte, la señal original puede ser transmitida a un decodificador /amplificador externo por las salidas digitales. dts (Digital Theatre Systems) La abreviatura dts hace referencia a un formato de sonido, hasta la fecha menos conocido, con el que también se pueden almacenar hasta seis (5.1) canales por separado en un único soporte de sonido. Los soportes de sonido del formato dts están señalizados con el símbolo de la marca registrada que aparece en el margen. Su aparato puede leer estos datos de audio y los transmite para su descodificación a las salidas digitales ("DIGITAL OUT"). 13 Preparación Desembalar el aparato Retire la totalidad del material de embalaje, incluidas las láminas plásticas en la parte frontal del aparato. ¡PELIGRO! No permita que los niños pequeños jueguen con el plástico. ¡Existe peligro de asfixia! Compruebe el volumen de suministro Cuando desembale la caja, asegúrese de que están incluidos los siguientes artículos: Reproductor DVD Cable Euroconector Mando a distancia 2 pilas micro (1,5 V; tamaño AAA/LR03) Instrucciones de funcionamiento y documentos de garantía Colocación de las pilas en el mando a distancia Con el mando a distancia se incluyen dos pilas micro de 1,5 V (tamaño AAA/LR03). Retire la tapa del compartimento de las pilas en la parte posterior del mando a distancia, empujándola en dirección de la flecha. Coloque las pilas de tal modo que el polo negativo esté en contacto con los muelles. Vuelva a colocar la tapa del compartimento de las pilas. ¡ADVERTENCIA! Las pilas incluidas en el volumen de suministro no pueden recargarse ni abrirse ni ser arrojadas al fuego ni ser puestas en cortocircuito . Las pilas pueden representar un peligro de muerte si se tragan. Mantenga por ello las pilas y el mando a distancia fuera del alcance de niños pequeños. En caso de ingestión accidental hay que avisar inmediatamente a un médico. 14 Conexiones y posibilidades de conexión ES El aparato puede conectarse de muchas formas distintas con otros aparatos de entrada o salida. EN ¡ATENCIÓN! Apague todos los aparatos antes de conectarlos. No conecte los aparatos a la red hasta que no haya realizado todas las conexiones. DE Colocación del aparato Coloque el aparato sobre una superficie firme y lisa. Para ello observe también las indicaciones de seguridad en pagina 9. Algunos barnices agresivos pueden dañar los pies de goma del aparato. Para evitar este efecto puede colocar el aparato sobre una base. Posibilidades de conexión entre el reproductor DVD y el televisor Conexión con el televisor a través del cable Euroconector El cable Euroconector es la forma más sencilla de conexión entre el reproductor DVD y el televisor. Con esta opción logrará una excelente calidad de imagen, siempre y cuando su televisor pueda procesar señales RGB. 15 Conexión con el televisor a través de un cable S-Video. En caso de que su televisor no disponga de una conexión de Euroconector, puede utilizar un cable SVideo para conectarlo al aparato (enchufe S-VIDEO) . De este modo conseguirá una buena calidad de imagen. Adicionalmente se deberá conectar un cable cinch de audio. Tenga en cuenta los colores de las clavijas cinch que indican izquierda y derecha. Para la reproducción del sonido estéreo coloque la opción Downmix en el Speaker Se tup del menú AUDIO en ST ER EO . ¡NOTA! El cable cinch de audio, además de con el televisor, también puede conectarse con un equipo Dolby-Surround (equipo estereofónico). Conexión con el televisor a través de un cable cinch de vídeo En caso de que su televisor no disponga ni de una conexión de Euroconector ni de un enchufe S-VIDEO, también puede conectarlo al aparato mediante un cable cinch de vídeo. Adicionalmente se deberá conectar un cable cinch de audio. Tenga en cuenta los colores de las clavijas cinch que indican izquierda y derecha. Para la reproducción del sonido estéreo coloque la opción Downmix en el Speaker Se tup del menú AUDIO en ST ER EO . 16 Conexiones para componentes ES Si su televisor dispone de entradas de componentes (Y, Cb/Pb, Cr/Pr), se puede conectar el aparato a través de estas conexiones con el televisor o también con un proyector. Estas conexiones realizan el así llamado „formato de color YUV". EN DE Para la transmisión de imagen conecte los enchufes Y, Pb y Pr del aparato mediante un cable cinch de vídeo tripolar con los correspondientes enchufes del televisor o del proyector. Adicionalmente, para la transmisión de sonido conecte un cable cinch de audio. ¡NOTA! Para la conexión a través de las tomas de componentes para establecer la función de escaneo progresivo, seleccione en el menú Video > TV-Out el ajuste YUV y bajo la resolución 57 6p . Transmisión digital de imagen y sonido: HDMI Su reproductor DVD dispone de una toma HDMI (OUT). HDMI ("High Definition Multimedia Interface") es, dentro de la gama de la electrónica recreativa, el único interfaz capaz de transmitir simultáneamente datos de audio y de vídeo. Procesa todos los formatos de imagen y de sonido conocidos en la actualidad, incluido HDTV (High Definition Television) y por ello es también capaz de representar actualmente las resoluciones más altas de 1 080 p sin pérdida de calidad. 17 Puede conectar el reproductor DVD a un televisor con HDMI, así como también con entrada DVI (HDMI es retrocompatible con DVI, "Digital Visual Interface"). Para la conexión a una entrada HDMI solamente se necesita un cable HDMI. En caso de que su televisor disponga de una toma DVI, necesitará Usted, además, un adaptador (HDMI – DVI) que puede adquirir en un comercio especializado. ¡NOTA! Cuando ya tenga conectado el aparato HDMI o DVI, encienda en primer lugar solamente ese mismo aparato. A continuación espere aprox. 30 segundos y solamente entonces conecte el reproductor DVD. Para la conexión a través de HDMI para la realización de la función Progressive-Scan seleccione las resoluciones 4 80 P, 5 76P, 72 0p ( 50Hz ) , 10 80p ( 50Hz) , según la resolución con la que es compatible su televisor. ¡NOTA! La salida HDMI ha sido certificada según el estándar HDMI actual. No obstante, puede darse el caso de que la conexión con una toma DVI o HDMI de otro aparato no sea compatible y por ello puedan producirse transmisiones no exentas de fallos. No obstante, en este caso no se trata de un fallo de su reproductor DVD. Conexión TV con función Progressive Scan Progressive Scan A través de las conexiones de componentes y la conexión HDMI el aparato puede transmitir las señales de vídeo en el formato PROGRESSIVE SCAN y por ello alcanzar una muy buena calidad de imagen. Esto presupone, por supuesto, que su televisor (o proyector) también pueda procesar este formato. Con este formato Progressive-Scan la imagen se emite, en lugar de en 50 semiimágenes, en 50 imágenes completas. De este modo se reduce al mínimo el parpadeo de la imagen y los movimientos se presentan de forma mucho más fluida. Resoluciones „p” e „i” Con la tecla STOP/RES y en el menú Setup General Setup Page > Setup HDMI se pueden seleccionar las resoluciones para el formato de imagen Progressive-Scan („p“) y el formato de imagen estándar („i“ = „interlaced). Conecte la función Progessive Scan, seleccionando una resolución con „p“. Desconecte la función Progessive Scan (resolución con „i“), si no se ha conectado el televisor a través de las tomas de componentes o de las tomas HDMI. 18 Transmisión de sonido digital ES Conecte un cable coaxial o un cable óptico con la salida COAXIAL o OPTICAL del reproductor DVD y con la entrada correspondiente del amplificador. EN DE ¡NOTA! Para poder disfrutar de todos los aspectos de la reproducción de sonido envolvente, desactive la emisión de sonido en su televisor. Conexión a la red Cuando ya haya efectuado todas las conexiones, enchufe el aparato con una toma de corriente (230 V ~ 50 Hz). Opcional: Conectar auriculares En la cara frontal del aparato se encuentra la toma para auriculares (PHONES). Puede conectar unos auriculares con una clavija jack de 6,3 mm. Los auriculares disponen de un control de volumen propio. ¡ADVERTENCIA! Una excesiva presión de sonido al utilizar auriculares puede causar daños que reduzcan la capacidad auditiva y/o la pérdida de la capacidad auditiva. Antes de la reproducción, ponga el volumen al nivel más bajo. 19 Funciones de las teclas Control en el aparato o desde el mando a distancia Teclas de función en la parte frontal del aparato Las teclas en la parte frontal del aparato le permiten activar las funciones de reproducción esenciales de su aparato. Las teclas del mando a distancia Además de estas funciones básicas, el mando a distancia le ofrece muchos otros elementos de control para la plena funcionalidad del aparato. En particular, sólo podrá navegar por los menús que aparecen en la pantalla del televisor a través del mando a distancia. ¡NOTA! En el presente manual de instrucciones, siempre que hablamos de las teclas de función hacemos referencia a las del mando a distancia, ya que el mando a distancia abarca todas las funciones del aparato (con excepción del conmutador de alimentación). Para referirnos a las teclas que hay en el aparato mismo, los mencionaremos explícitamente. Standby/Encender/Apagar Modo Standby Pulsando el interruptor POWER en la parte posterior del aparato el equipo entrará en modo standby y/o se volverá a desconectar. En el modo standby se enciende el indicador LED azul del aparato. Encender Pulse (STANDBY) para encender el aparato. Se enciende la pantalla. El tipo de las indicaciones en la pantalla depende del medio de reproducción. Desconectar Vuelva a pulsar la tecla (STANDBY) para volver a poner el aparato en el modo Standby. La pantalla se apagará. Colocar el disco Tenga en cuenta que delante del aparato debe haber un espacio mínimo de 15 cm para no bloquear la bandeja de discos al abrirse. Cuando el aparato esté encendido, pulse OPEN/CLOSE. Coloque un disco en el compartimento con la cara impresa hacia arriba. Preste atención a que el disco se encuentre en el centro de la bandeja, a fin de evitar que se encalle al cerrar el compartimento. Pulse la tecla OPEN/CLOSE. El compartimento se cerrará. En el caso de los DVDs, transcurridos unos segundos la reproducción del disco se inicia automáticamente. La indicación en la pantalla depende del tipo del disco. Eventualmente deberá pulsar ( PLAY) o aparecerá un menú en el que, con la ayuda de las teclas de navegación , deberá seleccionar una opción.. 20 Leer tarjetas de memoria o Stick de memoria USB ES Su reproductor DVD dispone de un lector de tarjetas de memoria para tarjetas SD, tarjetas multimedia y un Stick de memoria, así como una conexión para un Stick de memoria USB u otro reproductor USB. EN Tarjeta de memoria Introduzca una tarjeta de memoria con los contactos hacia abajo y la parte biselada hacia delante y a la derecha dentro del lector de tarjetas de memoria del frontal del aparato. Si la tarjeta está completamente introducida, ésta sobresale un poco del lector. De esta manera podrá volver a retirarla. DE ¡ATENCIÓN! No introduzca la tarjeta de memoria bajo ningún concepto con violencia. Si no se puede colocar la tarjeta, tal vez haya sido introducida incorrectamente o no se trata de una adecuada para este lector. Reproductor USB Introduzca el aparato USB en el puerto de conexión USB. En el modo USB, el LED de control USB en la parte frontal del aparato se enciende. Seleccionar el lector Con la tecla USB/CARD se puede seleccionar el lector de tarjetas, el lector USB o el lector de discos. En caso necesario, pulse la tecla repetidas veces. ¡NOTA! La reproducción de los datos de la tarjeta de memoria y del stick USB funciona igual que la de los discos (DVD, CD audio, CD JPEG, etc.). La siguiente descripción para discos también es válida para las tarjetas de memoria y el Stick de memoria USB. Bloqueo de teclas – KEY LOCK Mientras el aparato está encendido, pulse la tecla KEY LOCK. Todas las teclas en la parte frontal del aparato quedarán bloqueadas, excepto la tecla POWER. Vuelva a pulsar KEY LOCK otra vez, para desbloquear las teclas. Funciones de reproducción (PAUSE/STEP) (reproducción imagen a imagen) Para interrumpir la reproducción, pulse aparecerá el símbolo de pausa: (PAUSE/STEP). En pantalla . (PAUSE/STEP) repetidas veces, para avanzar imagen a imagen. Pulse En pantalla aparecerá el símbolo de la reproducción imagen a imagen: . (PLAY) Para continuar con la reproducción, pulse el símbolo de reproducción: (PLAY). En pantalla aparecerá . Indicaciones especiales en pantalla Si selecciona una función de la que no dispone el medio colocado o que no se puede activar en el modo actual, aparecerá en pantalla el símbolo de „no válido“ representado en el margen. Tras algunos segundos desaparece el símbolo. 21 (STOP) Para detener la reproducción, pulse símbolo de Stop sitio pulsando (STOP) una vez. En pantalla aparecerá el . En este modo puede reanudar la reproducción en este mismo (PLAY). Vuelva a pulsar para finalizar la reproducción definitivamente. El aparato se encuentra ahora en modo Stop. Funciones de búsqueda SKIP Durante la reproducción pulse la tecla o , para avanzar o retroceder (en DVDs: de capítulo a capítulo; en caso contrario: de título a título). En pantalla aparecerá el símbolo de Skip: encuentra actualmente. . Además se indicará en qué posición se ¡NOTA! Por favor, tenga en cuenta que en muchos DVDs, no es posible saltarse los títulos/capítulos antes del inicio de la película (las advertencias sobre el copyright). Avance y retroceso rápidos Durante la reproducción pulse la tecla o para iniciar el avance o el retroceso rápidos. En pantalla aparecerá el símbolo de avance/retroceso rápidos la velocidad: Pulsando una sola vez o : doble velocidad (x2 ) Pulsando o dos veces: velocidad por cuatro (x4) Pulsando o tres veces: velocidad por ocho (x8 ) Pulsando o cuatro veces: velocidad por dieciséis (x16 ) Pulsando o cinco veces: velocidad por octreinta y dos (x32 ) Si pulsa así como (PLAY) volverá a la velocidad normal de reproducción. Cámara lenta ñ SLOW Durante la reproducción pulse la tecla SLOW/R o SLOW/F para avanzar o retroceder a cámara lenta. En pantalla aparecerá el símbolo de cámara lenta así como la velocidad de la cámara lenta: Pulsando SLOW una vez: 1 / 2 de velocidad Pulsando SLOW dos veces: 1 /4 de velocidad Pulsando SLOW tres veces: 1 /8 de velocidad Pulsando SLOW cuatro veces: 1 / 16 de velocidad Si pulsa (PLAY) volverá a la velocidad normal de reproducción. ¡NOTA! Tenga en cuenta que en discos de audio, en discos VCD y Xvid no está disponible la función SLOW/R. 22 DISPLAY ES Con la tecla DISPLAY puede mostrar durante la reproducción, pulsando repetidas veces consecutivamente, el tiempo transcurrido y el restante. Cada vez que pulse la tecla, se modifica la indicación del siguiente modo: DVD: Título reproducido > Título pendiente > Capítulo reproducido > Capítulo pendiente >Desactivar pantalla. CD/VCD: Título reproducido > Título pendiente > Total reproducido > Total pendiente > Desactivar pantalla. MP3/Xvid: Título reproducido >Título pendiente > Desactivar pantalla. EN DE Funciones de repetición Repetición – REPEAT Durante la reproducción pulse la tecla REPEAT. En pantalla aparecerá el símbolo de repetición y, con cada pulsación, el fragmento a repetir (la entrada desaparece transcurridos unos segundos): DVD: Capítulo > Título > Desactivar ; CD audio: Título > Todos > Desactivar; MP3: Repetir título > Repetir álbum > Álbum > .... . Con los CDs de vídeo y los CDs Xvid no es posible activar la función REPEAT-. REPEAT A - B (DVD, CD audio) Puede activar la repetición de un fragmento definido por Usted. Durante la reproducción pulse la teclaA - B para definir el punto de inicio de la secuencia a repetir. En pantalla aparecerá el símbolo de repetición más un A. Vuelva a pulsar la tecla A - B para definir el punto final de la secuencia a repetir. En la pantalla aparece ininterrumpidamente. A B. El fragmento definido se repetirá ahora Pulse A - B una tercera vez para finalizar la repetición de la secuencia. Con los CDs MP3 y los CDs Xvid no es posible activar la función REPEAT A-B. Programación del orden de reproducción – PROGRAM La función de programación le permite reproducir hasta 20 capítulos (DVD) o títulos (Audio) en un orden definido por Usted mismo. En los medios MP3 no se puede efectuar ninguna programación. DVDs Pulse PROGRAM. En pantalla aparece una tabla con posiciones de programación. La tabla contiene títulos y capítulos. El número de títulos contenidos en el DVD aparece en la línea superior. Indique a través del teclado numérico del mando a distancia el título deseado para la posición de programación 01 . Los números de una sola cifra tienen que ir precedidos por un 0 . ñ Cuando se haya definido el título, en la línea superior aparecerá el número de capítulos contenido en este título. Indique con el teclado numérico del mando a distancia el número del capítulo. Los números de una sola cifra tienen que ir precedidos por un 0 . El cursor salta a la posición de programación 02 . Si lo desea, indique otras posiciones de programación procediendo de la misma forma. 23 CDs audio / VCD Pulse la tecla PROGRAM. En pantalla aparece una tabla con posiciones de programación. En el encabezamiento aparece el número de títulos que contiene el CD. La posición de programación 0 1 aparece sobre un trasfondo en color. Indique a través del teclado numérico del mando a distancia el título deseado para la posición de programación 01 . Los números de una sola cifra tienen que ir precedidos por un 0 . Iniciar la lista Tan pronto como haya programado el primer número, en el margen inferior del menú aparece la entrada ST ART . Con las teclas de navegación mueva el cursor sobre la indicación S T AR T y pulse (PLAY) o ENTER. En pantalla aparecerá por unos instantes PR OGR AM M . Se inicia la lista programada. Mediante PROGRAM puede acceder de nuevo a la lista y modificarla. Pulse (STOP) dos veces para borrar la lista. Finalizada la reproducción, el reproductor DVD cambia al modo standby. ¡NOTA! La lista programada no se almacena. Selección directa de título/tiempo – SEARCH Con la tecla SEARCH se puede acceder directamente a un capítulo, título o tiempo. Además, aquí podrá ajustar la pista sonora, el subtítulo, el ángulo de la cámara y la función de repetición. Durante la reproducción, pulse la tecla SEARCH. Seleccione la función deseada con las teclas de navegación y pulse ENTER. Introduzca ahora con el teclado numérico, por ejemplo, el número del capítulo deseado o seleccione el ajuste en una lista. Para finalizar, confirme con ENTER. La modificación se realiza inmediatamente. 24 Marcar un "punto de localización" – BOOKMARK ES Tiene la opción de crear „ marcas de lectura", para volver a iniciar la reproducción en un punto determinado. EN Durante la reproducción pulse la tecla BOOKMARK. En pantalla aparecerá el menú BOOKMAR K con doce casillas. DE Para cancelar esta función, vuelva a pulsar BOOKMARK . Para definir la primera "marca de lectura" pulse (PLAY). Quedará marcado el punto en el que está el disco en ese mismo momento (en el siguiente ejemplo en el título no 01, capítulo no 4, a los 15 minutos y 23 segundos). Para que la reproducción se vuelva a iniciar a partir de este (PLAY). momento, vuelva a pulsar Si quiere borrar la marca de lectura, pulse CLEAR. Si quiere cerrar el menú y volver a la reproducción de la película vuelva a pulsar BOOKMARK . Si quiere definir más marcas de lectura vuelva al menú BO O KMAR K y vaya a la próxima casilla libre mediante la tecla de navegación lectura. . Vuelva a pulsar (PLAY) para definir una marca de Para seleccionar una marca de lectura diferente, vaya a la casilla correspondiente con las teclas de (PLAY). navegación y pulse ¡NOTA! Las marcas de lectura se conservan si pulsa dos veces (STOP) (modo Stop). En el modo standby o si apaga el aparato por completo, no obstante, las marcas de lectura se perderán. Con algunos formatos no funciona la función Bookmark. Encontrará un resumen de las marcas de lectura con un avance de la imagen en el punto quinto del menú DIGEST (véase apartado siguiente). Seleccionar síntesis – DIGEST (DVD y VCD) Con la función DIGEST puede navegar por su DVD mediante un avance de imágenes. Durante la reproducción pulse la tecla DIGEST. Aparecerá el menú D IG E ST con las siguientes opciones (B OO K M AR K D IG E ST sólo si ha definido marcas de lectura, ver más abajo): Sinopsis de títulos ¡NOTA! Con las teclas de navegación puede desplazarse por las imágenes y los textos del menú. Los puntos activos aparecen sobre un trasfondo de color. Para seleccionar un punto, pulse ENTER. Confirme T i tle D iges t pulsando ENTER. Después de unos momentos en los que se cargan las imágenes, aparecen las imágenes iniciales de todos los títulos existentes en el DVD. Se muestran hasta seis imágenes por pantalla. En el menú debajo de las imágenes se indica detrás del punto Se lec t el número total de títulos. Seleccione un título marcando una imagen inicial con las teclas de navegación o introduciendo el número de la imagen inicial mediante las teclas numéricas del mando a distancia (los números de una sola cifra precedidos por un 0). A continuación, pulse ENTER para iniciar la reproducción del título seleccionado. Con las teclas y puede navegar entre las páginas en pantalla. Seleccione EXIT para volver a la reproducción de la escena original. A través de la entrada M e n u vuelve al menú DIGEST. 25 Sinopsis de capítulos Vaya al menú Digest, seleccione la opción C hap ter D iges t y confirme con ENTER. Después de unos momentos en los que se cargan las imágenes, aparecen todos los capítulos del título actual en pequeñas ventanas. Se muestran hasta seis capítulos por pantalla. Seleccione el capítulo de la misma forma que seleccionaría un título (ver más arriba). Intervalo de tiempo Vaya al menú Digest, seleccione la opción T i t l e I n te r va l y confirme con ENTER. Verá un avance de las escenas del título en un intervalo preajustado de diez minutos. Si aparece sólo una imagen, es que el título tiene menos de diez minutos. Intervalo de capítulos Vaya al menú Digest, seleccione la opción C h a p t e r I n t e r va l y confirme con ENTER. Verá un avance de las escenas del capítulo en un intervalo preajustado de diez minutos. Si aparece sólo una imagen, es que el capítulo tiene menos de diez minutos. ¡NOTA! Si pulsa la tecla DIGEST en el modo Stop, el menú Digest aparece sólo con la entrada Ti tle D iges t y eventualmente Bo okma rk D iges t . Sinopsis de marcas Si ha definido marcas de lectura en este submenú podrá ver un resumen de las marcas de lectura (véase apartado anterior) y también podrá seleccionar las respectivas marcas. RANDOM e INTRO (sólo CD Audio) Reproducción aleatoria Pulse la tecla RANDOM. (PLAY) para iniciar la reproducción en orden aleatorio (a partir Pulse del título siguiente). Después de 20 títulos la reproducción se detiene. Vuelva a pulsar RANDOM para volver a la reproducción normal. Función Intro Pulse la tecla DIGEST. Se reproducen los primeros seis segundos de cada título. Vuelva a pulsar DIGEST para volver a la reproducción normal. Funciones de imagen Ampliar una imagen ñ ZOOM Pulse la tecla ZOOM. En pantalla aparecerá el símbolo de ampliación más el factor de ampliación. La imagen se amplía desde el centro. Pulsando ZOOM una vez: Factor de ampliación x2 Pulsando ZOOM una vez: Factor de ampliación x3 Pulsando ZOOM una vez: Factor de ampliación x4 . Si pulsa ZOOM una cuarta vez, volverá a la reproducción normal. ¡NOTA! Con las teclas de navegación puede seleccionar una sección de imagen dentro de la imagen ampliada. 26 ES Posición de la cámara – ANGLE (sólo DVD) EN ¡NOTA! Algunos DVDs disponen de escenas especiales grabadas con distintas posiciones de cámara. DE Pulse la tecla ANGLE, para activar la función. Si la escena dispone de distintas posiciones de cámara, aparecerá el símbolo así como la posición de cámara actual/el número total de posiciones de cámara. Vuelva a pulsar ANGLE para pasar a la siguiente posición de cámara. Tras unos segundos, cambiará la imagen. El símbolo aparecerá automáticamente durante las escenas correspondientes, si en el menú G ene ra l S e t up Page > An g le M ar k > ON . Funciones de sonido Función MUTE Pulse Vuelva a pulsar , para desactivar el sonido por completo. , para activar otra vez el sonido. ¡NOTA! Tenga en cuenta que la función de volumen se indica en pantalla permanece activada si sube o baja el volumen y el cambio Sonido 3D Los CDs que hayan sido codificados con los formatos Dolby Pro Logic, Dolby Digital o dts, le permitirán reproducir un sonido con efecto 3D o surround, siempre y cuando tenga conectados dos altavoces. Pulse varias veces la tecla 3D , para acceder a uno de los siguientes efectos de sonido: Su rro und : R ock > Pop > Live > D ance > T echn o > C lass ic > Soft > Off. No utilice esta función, si tiene conectados más de dos altavoces, si para el sonido digital emplea un cable coaxial o un conector óptico digital, si uno de los aparatos conectados a su aparato, tiene ya activado un efecto surround. Modo audio (sólo CDs audio) Pulse varias veces la tecla AUDIO MENU , para seleccionar una de estas formas de reproducción: Mono left, M on o r i gh t, M i x- Mon o y Stereo . En función del medio también pueden aparecer otras indicaciones. 27 TITLE MENU, DVD MENU Los menús del DVD Normalmente los DVDs disponen de uno o varios menús mediante los que puede navegar por ellos. Los nombres de dichos menús dependen de cada DVD; pueden denominarse, por ejemplo, "Menú DVD", "Menú Disco", "Menú Principal", "Menú Título", "Root Menu" o "Menú Raíz". Si, en cambio, desea acceder al menú de su reproductor de DVDs (menú SETUP) pulse la tecla SETUP. Con las teclas TITLE y DVD MENU accederá a los menús grabados en el disco DVD. Con las teclas de navegación puede acceder a las distintas opciones del menú del DVD. Confirme cada selección pulsando ENTER. ¡NOTA! Tenga en cuenta que depende del DVD qué menús aparecen con qué selección. P. ej. algunos DVDs sólo tienen un único menú que aparece en pantalla. MENU AUDIO y SUBTITLE Estas teclas son el método más rápido para seleccionar otros idiomas, siempre y cuando el DVD disponga de ellos. ¡NOTA! Pero rogamos tenga en cuenta que muchos DVDs no disponen de esta función. Seleccionar el idioma hablado Vuelva a pulsar AUDIO para poder escoger otro de los idioma de los que dispone el DVD. Este ajuste se activa inmediatamente; no es necesario confirmarlo. Seleccionar el idioma de los subtítulos Pulse varias veces SUBTITLE para escoger uno de los idiomas de subtítulos de los que dispone el DVD. Este ajuste se activa inmediatamente; no es necesario confirmarlo. Tras algunos segundos desaparece la indicación. Función PBC (sólo VCD 2.0) Algunos VCDs del tipo 2.0 que poseen una estructura de títulos/capítulos ofrecen la posibilidad del Playback Control (PBC). Con la tecla TITLE se activa el Playbackcontrol (tecla TITLE). Dispondrá de algunas funciones ampliadas para el control de títulos/capítulos, como, por ejemplo, Selección directa de títulos/capítulos Funciones SKIP ¡NOTA! Por favor, tenga en cuenta que el número exacto de funciones a disposición dependerá de cada VCD. 28 Navegar en los soportes de datos MP3 y JPEG ES En los soportes de datos MP3 y JPEG los títulos de música y las imágenes se almacenan en carpetas, como en un medio de datos. EN Coloque un medio de reproducción MP3 o JPEG en el reproductor. En pantalla aparece un menú con la estructura superior de carpetas del CD. DE Si el soporte de datos tiene carpetas, estas aparecerán en la parte izquierda del menú (ver la ilustración al margen). El título aparecerá con un símbolo MP3 o un símbolo de imagen. La superficie de la carpeta activa o del archivo activo aparece sobre un trasfondo naranja. En pantalla aparecerá el número total de archivos, p.ej. 105 F ILES. Desplácese con las teclas de navegación o hasta una de las carpetas y confirme con ENTER. Puede abrir otras subcarpetas. En dicho caso, puede regresar al menú superior a través del punto superior del menú ( ) o con la tecla . Para escuchar un título o ver una imagen, selecciónelo/la y confirme con (PLAY) o ENTER. MP3: Selección directa a través del teclado numérico Introduzca el número del título deseado. Introduzca los números de varias cifras rápidamente uno tras otro. Confirme la selección con Ahora se puede seleccionar un número dentro del archivo activado. En caso necesario, cambie de archivo. (PLAY) o ENTER. Imágenes JPEG En caso de imágenes JPEG aparecerá una vista previa de la imagen en el lado derecho del menú. Seleccione una imagen y confirme pulsando ENTER, para poder ver la imagen en tamaño grande. Aparecen todas las imágenes de la carpeta activa, una tras otra comenzando por la imagen seleccionada ("Dia-Show"). Con (STOP) se vuelve al menú. Si pulsa las teclas de navegación durante la reproducción, cambiará la orientación de la imagen actual: Si pulsa varias veces la tecla de navegación derecha de las agujas del reloj; Si pulsa varias veces la tecla de navegación izquierda contrario a las agujas del reloj. Si pulsa la tecla de navegación o : la imagen girará cada vez 90º en el sentido : la imagen girará cada vez 90º en sentido : la imagen se invertirá. La imagen permanecerá parada en pantalla en este estado de rotación o inversión. Para continuar con la (PLAY) o ENTER.. reproducción, pulse 29 Ajustes en el menú SETUP En el menú SETUP, al que se accede pulsando la tecla SETUP , pueden efectuarse todos los ajustes. Tales como, por ejemplo, los formatos de imagen, los ajustes de sonido o el bloqueo infantil. Pulse SETUP. En la pantalla aparece la página principal del menú SETUP con los cuatro menús G ene r a l S et u p P ag e , A u di o S e tup P age , D ol b y D ig i ta l S e t up , Vi de o Se tu p asi como P r e f ere nc e P a ge . El menú activo está siempre marcado por un trasfondo color naranja. Con las teclas de navegación o puede seleccionar un menú diferente. ¡NOTA! Si no se puede acceder al menú Pre fer ence Pa ge, es debido a que ha abierto el menú SETUP durante la reproducción. Salga del menú SETUP mediante la tecla SETUP Navegar en los menús Mediante las teclas de navegación puede desplazarse por los menús. Los puntos activos aparecen sobre un trasfondo de color. En el margen inferior del menú aparecen las explicaciones relativas a cada menú seleccionado. Con seleccionará el primer punto del menú. Submenús y menús de selección En la mayoría de los submenús, se abre un menú de selección en el lado derecho de la pantalla. La selección actual aparecerá sobre un trasfondo de color. Desplácese hacia la derecha con . El punto activo aparece marcado. Escoja otro punto con o . Ahora la nueva selección aparece sobre un trasfondo de color. El trasfondo de la selección anterior permanece de momento. Pulse ENTER para confirmar la nueva selección. El trasfondo de la selección anterior (NORMAL/LB) desaparece. Pulsando regresará al lado izquierdo del menú. Abandonar el menú Con puede regresar al nivel superior del menú. Pulsando SETUP puede abandonar el menú SETUP en cualquier momento. 30 Menú General Setup Page ES TV Display EN En este submenú puede ajustar el aparato al formato de imagen de su televisor. DE Normal/PS películas Selección para televisores con formato 4:3. El formato Pan Scan presenta las Normal/LB formatos Selección para televisores con formato 4:3. El formato Letterbox reduce los en formato 16:9 en su altura íntegra; los dos laterales quedan recortados. de película 16:9 al ancho de pantalla. W ide Para modificar un ajuste, desplácese hasta el ajuste deseado y confírmelo pulsando ENTER. Selección para televisores con formato 16:9. Angle Mark O n: Siempre y cuando el DVD disponga de escenas grabadas con distintas posiciones de cámara, en O f f: dichas escenas aparecerá automáticamente un símbolo en pantalla. Con este ajuste, no aparecerá dicho símbolo. OSD Lang Aquí puede ajustar el idioma del OSD („ On-Screen-Display"), es decir, el idioma de los menús del reproductor DVD. Puede escoger entre inglés, español, alemán francés, italiano y neerlandés. Cuando seleccione uno de los idiomas, el menú cambiará también inmediatamente de idioma. Captions Seleccione aquí si al reproducir DVDs se han de mostrar subtítulos adicionales para sordos. Esta función no es compatible con todos los medios. O n: Los subtítulos para sordos aparecen automáticamente a cada inicio de un DVD. O f f: Con este ajuste no se muestra ningún subtítulo. Screensaver En este ajuste se selecciona si se ha de activar el protector de pantalla si no utiliza el aparato durante un intervalo prolongado (en modo de pausa o de parada). Last Memory Con esta función, el reproductor DVD memoriza el punto en el que se ha detenido el DVD insertado en último lugar. Al insertar de nuevo el mismo DVD en el aparato, comienza la reproducción en la última posición. 31 Menú Audio Speaker Configuration Dow nmix: En caso de que utilice la salida analógica 5.1, en este menú puede realizar los correspondientes ajustes. L T /RT Se emite el sonido a través de los canales izquierdo y derecho. Ster eo El sonido se emite en estéreo. V SURR El sonido estéreo analógico se convierte virtualmente en sonido surround. 5 . 1CH Seleccione este ajuste si ha conectado un amplificador de audio digital o un sistema surround. F ron t ( de lan tero) D e f in a el tamaño del altavoz delantero: L ar g e ( gr an de) : Seleccione este ajuste si la membrana del altavoz delantero tiene un diámetro superior a los 12 cm. Small ( pequ eño ): Seleccione este ajuste para altavoces más pequeños. C e n ter , R ea r ( c en tr a l , p os ter ior ) (sólo con el ajuste de altavoces V SURR y 5.1.CH activo): Defina el tamaño de los altavoces central y posteriores o desactívelos: L ar g e ( gr an de) : Seleccione este ajuste si la membrana del altavoz delantero tiene un diámetro superior a los 12 cm. Small ( pequ eño ): Seleccione este ajuste para altavoces más pequeños. O ff ( desac tivar) : Puede cambiar los ajustes para los altavoces centrales y posteriores a Aus ( desac tivar) si desea utilizar el aparato sólo con los altavoces delanteros. Su bwoo fer : O n ( ac t i var) : Con esta opción se conecta el subwoofer O ff ( desac tivar) : Puede cambiar los ajustes para el subwoofer a Aus ( desactivar) si desea utilizar el dispositivo sólo con los altavoces delanteros. D ia log Pos t DRC : Con DRC (Dynamic Range Control) se compensan las diferencias de volumen, especialmente en la música, de modo que la música se reproduce con el mismo volumen. Se puede activar la función (On ), desactivarla (O ff) o activarla automáticamente si está disponible (Auto ). En este menú se ajusta el volumen de diálogos. SPDIF S P D IF- O u t SPD IF /Raw un Si ha conectado un receptor AV a una salida de audio digital, ajuste la función en Seleccione SPD IF /PC M en caso de que su televisor/amplificador no disponga de descodificador Dolby Digital o MPEG. 32 L PC M OUT Seleccione aquí la descodificación con la que se deberá transmitir el sonido. Cuanto mayor sea el valor, mejor será la calidad del sonido. Channel Delay ES Si conecta altavoces independientes, la forma ideal de colocarlos es en disposición circular (ver el lado izquierdo de la ilustración). Si eso no es posible, en esta opción puede compensar las desviaciones de la línea circular. EN DE En el ejemplo que aparece más abajo (ver el lado derecho de la ilustración), el valor para el altavoz trasero izquierdo se desplazaría unos 50 cm; y para el altavoz trasero derecho, 40 cm. Con la tecla de navegación , desplácese a la casilla que hay al lado de la entrada Ch ann el Delay. Seleccione otro altavoz con o . Mediante las teclas o puede aumentar o disminuir el valor de desviación en pasos de 10 centímetros. La desviación máxima es de 600 cm. Confirme pulsando ENTER y abandone el menú con . La línea circular se define a partir de los altavoces frontales. Por eso no puede seleccionar los altavoces frontales. Equalizer E Q T yp : Si desea adaptar el sonido con la ayuda del ecualizador, se pueden realizar los siguientes preajustes de audio en EQ Typ: L ine ar , Rock , Po p, L i ve , D ance , Tech no, C lass ic , So ft . Si selecciona la opción Linear, se emite el sonido directamente sin modificar. Bass Bo os t, Super Bass : En estos menús se intensifican los sonidos graves. Seleccione O n para activar la intensificación de graves. Con O f f se transmite el sonido directamente sin modificar. T reb le Boos t: Con este ajuste se intensifican los sonidos agudos. Seleccione On para activar la intensificación de sonidos agudos. Con O f f se transmite el sonido directamente sin modificar. 3D-Processing P R O L OG IC I I: Aquí dispone de amplias opciones de ajuste para Pro Logic II. Con esta opción se puede simular un sonido virtual surround si no hay conectado ningún amplificador de surround. Si reproduce el sonido mediante un amplificador de audio o de surround, ponga la función PRO L OG IC I I en O f f. Hall Mode : Con esta opción se puede dotar al sonido de reverberación adicional. Puede elegir entre las siguientes opciones: Sala de conciertos, sala de estar, nave, baño, cueva, estadio, iglesia. Si reproduce el sonido mediante un amplificador de audio o de surround o no desea aplicar reverberación adicional, ponga la función Hall mode en O f f. 33 Menú DOLBY DIGITAL Dual Mono Algunos DVDs/VCDs son compatibles con un canal doble de sonido con el que se pueden representar varias pistas sonoras por separado o simultáneamente. Seleccione aquí si se ha de reproducir sólo la pista sonora izquierda, la derecha o ambas. Si el soporte de datos insertado no es compatible con el canal de doble sonido, este ajuste no tiene ninguna función. Dynamic El formato de sonido Dolby Digital es compatible con un ajuste dinámico que le permite equilibrar el volumen de sonido entre los pasajes más silenciosos y los más ruidosos en una escala de nueve pasos entre O FF y FU LL . O FF : El sonido permanece inalterado; es decir, los pasajes de mayor volumen y con más graves, se reproducen a más volumen; y los pasajes silenciosos, se reproducen silenciosos ("sonido cine"). Este ajuste sólo es apropiado si sabe que no va a molestar a nadie. FU LL : La diferencia de sonido se minimiza; es decir, en los pasajes fuertes se reduce el volumen; y en los pasajes silenciosos, se sube. Esta opción es apropiada, por ejemplo, durante la noche. 34 Para modificar este ajuste, desplácese con hasta la escala que hay en la derecha y seleccione con o el valor deseado. Confírmelo con ENTER. Menú Video ES Vide o-Ou t : Aquí se seleccionan los ajustes para la salida de vídeo deseada. Seleccione la opción RGB si por la salida normal del euroconector también debe emitirse una señal RGB. Seleccione la opción S- Vid eo para que la señal de vídeo se emita por la salida S-Video. Para lograr la mejor calidad de imagen posible, emplee la salida de componentes y seleccione la opción YU V, siempre y cuando su televisor sea compatible con este formato. Res olution : Para poder realizar la función de escaneo progresivo seleccione la resolución adecuada para su televisor HDMI o DVI. ¡NOTA! Observe que para el estándar de TV PAL debe seleccionar un ajuste de 5 0 H z , para el estándar de TV N T SC uno de 6 0 H z . Para una conexión a través de las conexiones de componentes YPbPr, seleccione la resolución 576i o 720p. Si no emplea la conexión HDMI, seleccione 480i, 576i o 1080i (i = "interlaced"). También puede cambiar las resoluciones con la tecla STOP/RES en el frontal del aparato. Video Quality Setup : Normalmente no resulta necesario realizar aquí ajustes. Sin embargo, en este menú podrá llevar a cabo una gran variedad de ajustes de imagen. Podrá, por ejemplo, ajustar la nitidez de imagen, el brillo, el contraste, la gama de colores, el color, el tono de color y Luma Delay. HD MI Setup : Active o desactive en este menú la conexión HDMI. Si ha conectado el televisor con un cable HDMI, deberá estar activada la conexión. 35 EN DE Menú PREFERENCES Únicamente podrá acceder al menú Pre f ere nc e cuando el aparato esté en modo Stop. Si el aparato está reproduciendo, pulse dos veces (STOP). En este menú podrá realizar los ajustes de los idiomas, el control para padres así como la contraseña. TV-Type Seleccione aquí el estándar de color para la reproducción de imagen. PAL : Formato de color habitual en muchos países europeos. A U T O: Ajuste automático del formato de color correcto. NTSC : Formato de color habitual en Norteamérica. Seleccionar idiomas ¡NOTA! Por favor, tenga en cuenta que en la selección de idiomas: Sólo se pueden reproducir aquellos idiomas que realmente existan en el DVD. Si selecciona un idioma inexistente en el DVD, el reproductor DVD reproducirá el primer idioma grabado en el disco. Normalmente el menú de cada DVD le indicará los idiomas grabados en el disco entre los que puede elegir. Audio Aquí se preselecciona uno de los idiomas hablados en el DVD. Puede escoger entre inglés, francés, español, alemán, italiano, neerlandés, japonés, rusó y tailandés. Subtitles Aquí se preselecciona uno de los idiomas para los subtítulos grabados en el DVD. Puede escoger entre inglés, francés, español, alemán, italiano, neerlandés, japonés, rusó y tailandés. Selección O f f: No se muestran los subtítulos. Disc menu Aquí puede seleccionar uno de los idiomas disponibles para los menús grabados en el DVD. Puede escoger entre inglés, francés, español, alemán, italiano, neerlandés, japonés, rusó y tailandés. Parental Aquí puede ajustar la autorización para los DVDs ( control para padres). Algunos DVDs y CDs van marcados con los códigos establecidos por la Motion Picture Association para indicar el nivel de autorización. Estos son los ocho niveles de autorización: 1 KID SAF 2G 3 PG 4 PG 13 5 PGR 6R 7 NC 17 8 ADU LT 36 ("kid safe") también apto para niños pequeños; ("General") para todas las edades; ("Parental Guidance") se recomienda la supervisión de los padres; se recomienda absolutamente la supervisión de los padres; algunas escenas no son aptas para menores de 13 años; ("Parental Guidance Restriction") para menores de 17 años se recomienda la supervisión de los padres; ("Restriction") para menores de 17 años se recomienda absolutamente la supervisión de los padres; no es apta para menores de 17 años; únicamente para adultos. Si un DVD ha sido codificado, por ejemplo, con el nivel de autorización 7 (NC 17 ) u 8 (Adult) y Usted ha seleccionado uno de los niveles entre 1 y 6 aparecerá un aviso solicitando la contraseña. También es posible que sólo partes del DVD, es decir determinadas escenas de la película, estén codificadas con uno u otro nivel de autorización. Para poder modificar el nivel de autorización se debe introducir la contraseña (véase el párrafo siguiente). ES EN DE Password Aquí puede introducir una contraseña para controlar el acceso de otras personas. Para cambiar la contraseña, confirme el punto C ha ng e (modificar). Se abrirá un nuevo menú: O ld Pas s w o r d : [Contraseña antigua] Indique con el teclado numérico del mando a distancia la contraseña actual. Se compone exactamente de cuatro cifras. Si todavía no ha introducido ninguna contraseña, aún tiene validez la contraseña de fábrica: 12 34 . Si ha introducido la contraseña correcta, se activará el siguiente campo. New Password : [Contraseña nueva] Indique con el teclado numérico del mando a distancia un número de cuatro cifras. El cursor saltará al siguiente campo. C o n fi r m PW : [Confirmar la contraseña] Vuelva a introducir el número de cuatro cifras. Pulse ENTER para confirmar la nueva contraseña. En caso de que haya olvidado su contraseña, introduzca la contraseña maestra: 1 369 . Default En este menú se pueden restablecer todos los ajustes de fábrica. 37 El mando a distancia universal Advertencias de seguridad ¡Jamás trate de reparar el mando a distancia usted mismo! El mando a distancia universal dispone de un diodo de infrarrojos de la clase 1M. ¡No mire jamás el láser a través de instrumentos ópticos! No exponga el mando a distancia a polvo, luz solar intensa, humedad, altas temperaturas o sacudidas fuertes. No utilice productos de limpieza corrosivos o agresivos. Aplicaciones Este mando a distancia universal puede ser utilizado con los siguientes tipos de dispositivos: TV Televisor STB descodificador o receptor de satélite o TDT DVD Reproductor DVD MD 82533 VCR grabadora de vídeo, DVD o disco duro AUX Otros aparatos (p. ej. amplificador, sintonizador, etc.). La inscripción indica el tipo de aparato que no se puede programar. Sirve para una orientación más cómoda. Programar códigos de aparatos Aspectos generales Tiene que programar un código de dispositivo de cuatro dígitos para cada aparato que desee controlar mediante el mando a distancia universal en una de las teclas de selección de fuente (TV, STB, VCR, AUX). Puede asignar cualquier aparato a cualquier tecla ("Modo Flex") a excepción de la tecla TV a la que se puede asignar exclusivamente un televisor. Grabadora de vídeo: introduzca una cinta de vídeo antes de iniciar la búsqueda de códigos. Introducir el código de aparato de la lista de códigos Los códigos de los dispositivos correspondientes están listados en la lista de códigos adjunta a estas instrucciones de funcionamiento. Proceda de la siguiente forma: Encienda manualmente el aparato correspondiente. Pulse brevemente la tecla de fuentes (TV, STB, VCR, AUX). Mantenga pulsada la tecla CODE durante 3 segundos aprox. hasta que el LED se encienda permanentemente después de haber parpadeado brevemente. Introduzca el código de cuatro dígitos correspondiente de la tabla de códigos. Para confirmar cada una de sus pulsaciones el LED se apagará durante un instante. Si ha introducido un código válido, el LED se apagará en cuanto haya introducido el último dígito. Si ha introducido un código incorrecto, el LED parpadeará durante tres segundos antes de apagarse. Si el aparato no reaccionara debidamente, repita el proceso de programación con otro código del fabricante. Seleccione el código con el que la mayoría de comandos disponibles en su mando a distancia reaccionen debidamente. Si con ello tampoco tiene éxito, inténtelo con uno de los métodos de búsqueda indicados en los siguientes apartados. 38 Búsqueda manual de códigos ES Así puede buscar los códigos de forma manual: Encienda manualmente el aparato correspondiente. EN Pulse brevemente la tecla de fuentes (TV, STB, VCR, AUX). Mantenga pulsada la tecla CODE durante 3 segundo aprox. hasta que el LED se encienda permanentemente después de haber parpadeado brevemente. DE Pulse repetidamente (hasta 350 veces) la tecla (STANDBY), P+ o Pñ, o (PLAY) (sólo para VCR), hasta que el dispositivo que desea controlar se apague, cambie de canal o reaccione debidamente. La búsqueda de códigos se iniciará con el número almacenado actualmente. Pulse brevemente la tecla ENTER para almacenar el código. Debido a la gran cantidad de números de códigos diferentes por tipo de dispositivo hay preprogramados hasta 350 códigos diferentes. En algunos casos puede suceder que sólo estén disponibles las funciones principales más usuales. En el caso de algunos modelos especiales puede suceder que el procedimiento descrito anteriormente no tenga éxito. Búsqueda automática Si su aparato no reaccionara al mando a distancia aunque haya probado con todos los códigos indicados para su tipo de dispositivo y la marca correspondiente, también puede activar la búsqueda automática. De este modo podrá encontrar los códigos de aquellas marcas que no aparezcan en el listado de códigos de dispositivos. Encienda manualmente el aparato correspondiente. Pulse brevemente la tecla de fuentes (TV, STB, VCR, AUX). Mantenga pulsada la tecla CODE durante 3 segundo aprox. hasta que el LED se encienda permanentemente después de haber parpadeado brevemente. Oriente el mando a distancia hacia el aparato y pulse una vez brevemente la tecla P+. Si el dispositivo no dispusiera de funciones de programas, en vez de pulsar P+ pulse la tecla (PLAY) o (STANDBY). Después de 6 segundos, el mando a distancia iniciará la búsqueda de códigos y emitirá todos los códigos uno a uno cada segundo (véase también el apartado siguiente). Cada vez que se emita un código, el LED se iluminará. En cuanto el aparato reaccione al mando a distancia, pulse la tecla ENTER . ñ Si no logra pulsar la tecla ENTER a tiempo, puede retroceder paso a paso pulsando la tecla P– hasta llegar al código ante el que ha reaccionado el dispositivo. ¡NOTA! Si en un momento anterior o posterior, pone fin a la búsqueda de código con ENTER sin que el aparato reaccione, el código correcto no se guardará y deberá volverse a realizar la búsqueda de código. Para interrumpir la búsqueda, pulse EXIT. 39 Búsqueda de códigos por marcas Esta función le ofrece la posibilidad de buscar por marcas (véase listado de códigos). Proceda como sigue: Encienda manualmente el aparato correspondiente. Pulse brevemente la tecla de fuentes (TV, STB, VCR, AUX). Mantenga pulsada la tecla CODE durante 3 segundo aprox. hasta que el LED se ilumine permanentemente después de haber parpadeado brevemente. Introduzca el código de un dígito según la siguiente tabla: Tecla 1 = Medion, Tchibo Tecla 2 = Philips, Radiola, Philco, Erres, Pye Tecla 3 = Sony, Akai, Panasonic, JVC, Sharp, Toshiba, Daewoo Tecla 4 = Thomson, Brandt, Fergusson Tecla 5 = Saba, Nordmende, Telefunken Tecla 6 = Grundig, Blaupunkt Tecla 0 = todas las marcas. (STANDBY) o (PLAY)), Pulse repetidamente la tecla P+ (o, en el caso de grabadoras de vídeo, hasta que el dispositivo reaccione debidamente. Proceda rápidamente antes de que se inicie la búsqueda automática. Almacene el código pulsando la tecla ENTER. Cuando se hayan probado todos los códigos, el LED parpadeará durante 3 segundos aproximadamente. Identificación del código Mediante la identificación del código puede ver los códigos que ya están almacenados en el mando a distancia. Proceda de la siguiente forma: Encienda manualmente el aparato correspondiente. Pulse brevemente la tecla de fuentes (TV, STB, VCR, AUX). Mantenga pulsada la tecla CODE durante aprox. 3 segundos hasta que el LED se encienda permanentemente después de haber parpadeado brevemente. Pulse brevemente la tecla CODE. El LED se apagará durante un instante al pulsar la tecla. Para encontrar el primer número, pulse las teclas numéricas de 0 a 9. Si el LED se apaga brevemente, entonces se trata del primer número memorizado. Para determinar el segundo número, vuelva a pulsar las teclas numéricas de 0 a 9. Repita el proceso para el tercer e el cuarto número. El LED se apagará en cuanto haya pulsado la tecla del cuarto dígito. Con ello la identificación de códigos ha terminado. Emisión cada segundo o cada tres segundos Si desea que el mando a distancia emita un código nuevo cada tres segundos en vez de cada segundo, proceda de la siguiente forma: 40 Vuelva a pulsar en un plazo de 6 segundos, después de haber pulsado la tecla P+ (o bien (PLAY) o (STANDBY)), como se describe en el punto 4, la tecla P+ o P– . Ahora el mando a distancia emitirá un código nuevo cada tres segundos. Así tendrá más tiempo para reaccionar, pero también tardará más. Funcionamiento normal ES Controlar aparatos por separado EN Cuando haya concluido la programación del mando a distancia para sus aparatos de audio y vídeo, el mando a distancia controlará las funciones principales más usuales, igual que el mando original del respectivo aparato. DE Oriente el mando a distancia hacia el dispositivo que desea controlar y pulse la tecla de selección de fuentes correspondiente. El LED se iluminará durante un instante, pero no seguirá iluminado. A continuación, puede activar las funciones pulsando las teclas correspondientes de su mando a distancia universal. Por favor, tenga en cuenta lo siguiente: eventualmente no todas las funciones del mando a distancia original están directamente disponibles en el mando a distancia universal. especialmente, en el caso de aparatos más modernos, puede suceder que las funciones no estén asignadas a las teclas en las que se espera encontrar las o que no estén disponibles. Función "Apagar todo" Puede apagar todos los aparatos preprogramados a la vez. Proceda como sigue: (STANDBY). El dispositivo seleccionado se apaga y el LED se ilumina. 1. Pulse brevemente la tecla 2. Enseguida, pulse otra vez (STANDBY) y mantenga la tecla pulsada durante 3 segundos. Ahora se apagarán todos los aparatos preprogramados uno tras otro. Este proceso dura unos 3 segundos. Si un aparato preprogramado ha estado desconectado, se conecta con la función "Apagar todo". EPG – Programación electrónica La tecla EPG ("EPG" = "Electronic Program Guide") tiene varias funciones según con qué código se ejecute: En el caso de códigos de DVD, la tecla abre el menú de títulos. En el caso de códigos de SAT ó VCR, con esta tecla puede programar el aparato, siempre que su vídeo disponga de la función "EPG". Funciones universales ("Punch Through") Las funciones universales (también denominadas funciones "Punch Through") le permiten ejecutar algunas funciones para un tipo de aparato diferente del que tenga seleccionado actualmente. Estas son las funciones volumen, MUTE, así como las funciones de reproducción. Si su mando a distancia se encuentra en uno de los modos VCR, DVD, SAT o CBL, las teclas de volumen y mute controlarán el televisor (siempre que los otros aparatos no dispongan de un control de volumen propio); si el mando a distancia está en el modo TV u otro modo sin funciones de reproducción, las teclas de reproducción, pausa, stop y, eventualmente, grabación controlarán una grabadora de vídeo, o DVD o un reproductor DVD conectado. Siempre se controla el último aparato que se haya seleccionado. 41 Asignar la función universal volumen / MUTE a un tipo de dispositivo diferente o a un dispositivo determinado De fábrica, el mando a distancia universal está ajustado de tal forma que las funciones de volumen y MUTE controlen automáticamente el televisor siempre que haya pulsado una tecla de selección de fuentes asignada a un dispositivo que reproduzca imágenes (DVD, vídeo, etc.). También puede programar el mando a distancia universal de tal forma que las funciones universales volumen y MUTE controlen otro tipo de aparatos que no sea el televisor. Mantenga pulsada la tecla CODE durante aprox. 3 segundos hasta que el LED se encienda permanentemente después de haber parpadeado brevemente. Pulse la tecla (MUTE) hasta que el LED se apague durante un instante. Pulse la tecla de selección de fuentes del dispositivo al que desea transferir las funciones de volumen y MUTE. El LED sigue encendido. Pulse la tecla (MUTE); el LED se apaga. Volver a activar la función universal de volumen / MUTE En caso de que haya modificado las funciones universales de volumen y MUTE como se describe en los dos apartados anteriores, puede volver a restablecer los ajustes de fábrica para volver a disponer del efecto "Punch-Through". Mantenga pulsada la tecla CODE durante aprox. 3 segundos hasta que el LED se encienda permanentemente después de haber parpadeado brevemente. Mantenga pulsada la tecla (MUTE) hasta que el LED se apague durante un instante. Vuelva a pulsar (MUTE). El LED se apaga definitivamente. Las funciones de volumen y MUTE se encuentran ahora ajustadas como en su estado original. 42 Solución de problemas ES El mando a distancia no funciona: EN Compruebe si sus dispositivos están correctamente conectados y encendidos. Compruebe si las pilas del mando a distancia están colocadas correctamente teniendo en cuenta su polaridad +/– . Si las pilas estuvieran demasiado gastadas, cámbielas por pilas nuevas. Para la marca de mi aparato hay listados varios códigos de dispositivo. ¿Cómo puedo averiguar el código correcto? Para encontrar el código correcto para su dispositivo, pruebe todos los códigos uno tras otro, hasta que la mayoría de las funciones del aparato funcionen debidamente. Los aparatos sólo reaccionan a algunos de los comandos del mando a distancia: Pruebe con otros códigos, hasta que los aparatos reaccionen debidamente a los comandos. Si no ha tenido éxito ni con la indicación manual de códigos ni con la búsqueda automática, en algunos casos muy especiales puede ser que su aparato no sea compatible con su mando a distancia universal. 43 DE En caso de problemas En caso de que se produzca algún problema, compruebe primero si puede solucionarlo Usted mismo. La siguiente tabla puede ayudarle a ello. ¡ATENCIÓN! En ningún caso trate de arreglar Usted mismo el aparato. Si fuera necesario reparar el aparato, diríjase a nuestro servicio de reparación o a un taller especializado. PROBLEMA POSIBLES CAUSAS / MEDIDAS A ADOPTAR Características generales No se enciende el piloto del modo standby Compruebe la conexión a la red eléctrica: ¿El aparato está bien enchufado? Ninguna función (STANDBY) en el Pulse POWER en el aparato y a continuación mando a distancia. En caso de que el aparato tenga un problema que haya surgido debido a una tormenta, una carga electroestática u otro factor externo, intente lo siguiente: Ponga el interruptor POWER en el aparato en OFF. Desenchufe el aparato y vuelva a enchufarlo. El disco no gira, a pesar de haber ¿Ha colocado el disco con el lado impreso hacia arriba? Compruebe si el disco está dañado introduciendo otro disco en el (PLAY), o se para pulsado reproductor. En caso de que el disco esté sucio, límpielo inmediatamente. cuidadosamente con un paño suave y seco desde el centro hacia afuera. DVD: ¿Tiene el DVD el código regional correcto (2)? Si se ha formado agua de condensación, deje que el aparato se seque durante una a dos horas. El aparato no reacciona al mando a distancia. Compruebe que las pilas no están gastadas y que han sido colocadas correctamente. Si fuera necesario, retire los obstáculos existentes entre el emisor de infrarrojos del mando a distancia y el sensor del aparato. ¿Se ha alejado demasiado del aparato (más de 7 metros)? ¿Ha pulsado una tecla de fuentes correcta (p. ej. DVD para el reproductor DVD)? Ninguna imagen ¿Se han efectuado correctamente las conexiones entre el reproductor DVD y el televisor y están los cables en buen estado? ¿Está encendido el televisor? ¿Ha seleccionado el canal de vídeo en el televisor? ¿Ha escogido la salida de vídeo correcta del reproductor DVD? Si ha realizado una conexión sin la función PROGRESSIVE SCAN (p. ej. SCART), compruebe si se ha seleccionado una resolución Interlaced. En caso necesario ajuste la resolución 480i, 576i o 1080i (Tecla STOP/RES en el frontal del aparato). Si el televisor está conectado al reproductor DVD mediante un cable HDMI, compruebe si está activada la salida HDMI (menú > HD MI Setup > On ). Dado el caso, conecte el televisor antes de conectar el reproductor DVD. De este modo se puede reconocer automáticamente el modo de imagen del reproductor DVD en el televisor. 44 Imagen distorsionada ES Compruebe si el DVD está sucio y, si fuera necesario, límpielo cuidadosamente con un paño suave y seco desde el centro hacia afuera. Pequeños defectos de imagen son normales. EN Imagen muy distorsionada Imagen sin colores Imagen defectuosa Eventualmente la norma de su DVD no coincide con la norma de su televisor (PAL – NTSC, menú SETU P> G ener a l Se tup Pa ge > T V T ype ). Ha seleccionado una señal de salida de vídeo que no es compatible con el televisor (Menú SETU P > G ene ra l Se tup Pa ge> Vide oO u t). Formato de imagen erróneo (4:3, 16:9) Compruebe en el menú SETU P > Gen er a l Se tup P age > TV D isp la y si el formato seleccionado corresponde al televisor. No hay sonido ¿Está activada la función (MUTE)? Específicos del DVD Idioma erróneo Subtítulos erróneos Modifique los ajustes de idioma en el menú SETUP a través de la tecla AUDIO o en el menú DVD (Tecla MENU o TITLE). Compruebe en la caja del DVD o en el menú del DVD, si el disco dispone del idioma seleccionado. No es posible efectuar las funciones SKIP Algunos DVDs tienen títulos/capítulos con la función SKIP bloqueada. No es posible cambiar la posición de cámara. Las distintas posiciones de cámara sólo existen en muy pocos DVDs y, por regla general, únicamente en algunas escenas. Ha olvidado su contraseña. Emplee la contraseña maestra 1369. 45 DE Eliminación Embalaje Su reproductor DVD está embalado para protegerlo contra eventuales daños durante el transporte. Los embalajes son materias primas y por ello son reutilizables o aptos para ser devueltos al ciclo de reciclaje de materias primas. Aparato Al final de la vida útil del reproductor DVD no lo tire bajo ningún concepto a la basura doméstica normal. Consulte en su ayuntamiento o autoridad local la posibilidad de una eliminación apropiada y respetuosa con el medio ambiente. Elimine el aparato y las pilas por separado. Pilas No tire las pilas usadas a la basura doméstica. Las pilas deben ser depositadas en un punto de recogida para pilas usadas. 46 Especificaciones técnicas ES Reproductor DVD EN Alimentación: 230 V ~ 50 Hz Potencia: 20 W Consumo de energía en standby: <1W Tensión de salida de los auriculares: máx. 150 mV DE Conexión USB: max. 100 mA Pilas para el mando a distancia: 2 x 1,5 V - AAA/LR03 Sistema de color del televisor: PAL/NTSC Potencia del láser: Láser clase 1 Formatos de disco compatibles: DVD (Digital Versatile Disc), DVD+R, DVD+RW, DVD-R, DVD-RW, VCD, SVCD, CD-Audio, CD-R, CD-RW, CD-JPEG, CD-MP3, WMA, Xvid, Divx. Tarjetas de memoria compatibles: tarjetas SD, tarjetas multimedia, Memory Sticks, Memory Stick PRO ¡NOTA! Por favor, tenga en cuenta que: en la actualidad existen muchas formas no estandarizadas de grabación y protección contra copias de CDs, así como diversos tipos de CD-R y CD-RW vírgenes. Por ello, cabe la posibilidad de que en algunos casos se produzcan retrasos o errores de lectura. Dichos fallos no implican un defecto del aparato. Vídeo Formatos de vídeo: 4:3 / 16:9 Descodificador: MPEG 2 Audio Descodificador: MPEG; Dolby Digital (AC-3) dts únicamente con un descodificador externo complementario Conversor digital-analógico: 24 Bit / 96 kHz Este aparato cumple con las normativas básicas y recomendaciones importantes relativas a la directiva sobre el diseño ecológico 2009/125/EG (Reglamento 1275/2008). Características técnicas del mando a distancia universal Pilas: 2 x 1,5 V Micro (LR03/AAA) (se recomiendan pilas alcalinas) Clase LED: 1M ¡Las especificaciones técnicas están sujetas a cambios sin previo aviso! Copyright © 2010 Reservados todos los derechos. Este manual está protegido por la ley de propiedad intelectual. Queda prohibida por las leyes de copyright la reproducción de esta información de forma, mecánica, electrónica o por cualquier otro medio sin el consentimiento escrito del fabricante. El Copyright pertenece a la empresa MEDION. 47 48 Table of contents ES Table of contents ................................................................................................................3 EN Overview .............................................................................................................................5 Main device ....................................................................................................................................... 5 Remote control .................................................................................................................................. 7 Information about these instructions .................................................................................9 Symbols and key words used in these instructions............................................................................. 9 Safety instructions ........................................................................................................... 10 Keep electrical equipment out of reach of children .......................................................................... 10 Setting the appliance up safely ........................................................................................................ 10 Power connection ........................................................................................................................... 10 Never undertake your own repairs................................................................................................... 10 CD player ........................................................................................................................................ 10 Headphones .................................................................................................................................... 11 In the event of functional damage ................................................................................................... 11 Safe handling of batteries ................................................................................................................ 11 Cleaning the unit............................................................................................................................. 11 General information ........................................................................................................ 12 About DVDs .................................................................................................................................... 12 Other playable formats .................................................................................................................... 12 Available surround sound formats ................................................................................................... 13 Preparation ..................................................................................................................... 14 Unpacking the device ...................................................................................................................... 14 Check package contents .................................................................................................................. 14 Inserting the batteries into the remote control ................................................................................. 14 Connections and connection options ............................................................................... 15 Setting up the unit .......................................................................................................................... 15 Connection options between the DVD player and television ........................................................... 15 Component connections ................................................................................................................. 17 TV connection with progressive scan function ................................................................................. 18 Digital sound transfer ...................................................................................................................... 19 Power connection ........................................................................................................................... 19 Optional: Connecting headphones .................................................................................................. 19 Button functions .............................................................................................................. 20 Operating the player using the controls on the player or remote control ......................................... 20 Standby/Switching on/Switching off ............................................................................................... 20 Inserting a disc ................................................................................................................................ 20 Reading the memory card and USB Memory Stick. .......................................................................... 21 KEY LOCK ........................................................................................................................................ 21 Playback functions ........................................................................................................................... 21 Search functions .............................................................................................................................. 22 Repeat functions.............................................................................................................................. 23 Program playback sequence - PROGRAM......................................................................................... 23 Direct title/time – SEARCH ............................................................................................................... 24 Setting bookmarks – BOOKMARK .................................................................................................... 24 Select section – DIGEST (DVD and VCD) .......................................................................................... 25 RANDOM and INTRO (audio CD only) ............................................................................................. 26 Picture functions ............................................................................................................................. 26 Sound functions .............................................................................................................................. 26 TITLE MENU, DVD MENU ................................................................................................................. 27 AUDIO and SUBTITLE MENU ............................................................................................................ 27 PBC function (VCD 2.0 only) ........................................................................................................... 28 Locating tracks or pictures on MP3 and JPEG data carriers ............................................................... 28 3 DE Settings in the SETUP menu ............................................................................................. 29 Navigating in the menus ............................................................................................................... 29 Sub- and selection menus ............................................................................................................. 29 Exit menu ....................................................................................................................................... 29 System menu .................................................................................................................................. 30 Audio menu...................................................................................................................... 31 Speaker configuration ..................................................................................................................... 31 SPDIF............................................................................................................................................... 31 Channel delay ................................................................................................................................. 32 Equalizer Setting ............................................................................................................................. 32 3D processing ................................................................................................................................. 32 Dolby Digitalmenu ........................................................................................................... 33 Dual Mono ...................................................................................................................................... 33 Dynamic.......................................................................................................................................... 33 Video menu ...................................................................................................................... 34 Preferences menu ............................................................................................................ 35 TV type............................................................................................................................................ 35 Select language ............................................................................................................................... 35 Audio .............................................................................................................................................. 35 Subtitles .......................................................................................................................................... 35 Disc menu ....................................................................................................................................... 35 Parental ........................................................................................................................................... 35 Password ......................................................................................................................................... 36 Default ............................................................................................................................................ 36 The universal remote control ........................................................................................... 37 Safety instructions ........................................................................................................................... 37 Scope of application ........................................................................................................................ 37 Programming device codes ............................................................................................................. 37 1 second or 3 second intervals......................................................................................................... 39 Normal operation ............................................................................................................ 40 Operating individual devices ........................................................................................................... 40 "All off" function .............................................................................................................................. 40 EPG – Electronic Programme Guide ................................................................................................. 40 Universal functions ("Punch Through") ............................................................................................ 40 Troubleshooting .............................................................................................................. 42 The remote control does not work: ................................................................................................. 42 There are several device codes listed under the brand name of my device. How do I determine the correct device code? ........................................................................................................................ 42 The devices only respond to a few remote control commands: ....................................................... 42 Troubleshooting .............................................................................................................. 43 Disposal ............................................................................................................................ 45 Technical data .................................................................................................................. 46 DVD-Player ...................................................................................................................................... 46 Universal remote control technical specifications ............................................................................. 46 4 Overview ES Main device EN Front view 1) Blue LED light for standby mode 2) Disc compartment 3) PLAY: Play 4) OPEN/CLOSE: Open and close disc compartment 5) STANDBY: Switch standby mode on and off 6) STOP/RES: Stop playback; Press repeatedly: Select resolution for HDMI and Progressive Scan 7) IR: Receiver field for the remote control 8) USB: LED light for USB mode 9) Display (see below) 10) Drives for various memory cards 11) USB connection 12) PHONES: Ear/headphone connection 13) VOLUME: Volume control for ear/headphones DE Rear 1) Power cable 2) Operating switch 3) S-VIDEO: S-VIDEO output (image transfer to television set) 4) VIDEO: VIDEO output (image transfer to television set) 5) OPTICAL: Digital audio output 6) HDMI: HDMI output for (digital image and audio transmission) 7) Y Pr Pb: Component outputs 8) SCART: SCART connection to television or video recorder 9) FRONT: Front loudspeaker connections left/right 10) SURROUND: Surround loudspeaker connections left/right 11) SUB: Subwoofer (bass loudspeaker) connection 12) CENT: Centre loudspeaker connection 13) COAXIAL: Digital audio output 14) AUDIO L/R: Analogical audio output 5 Display 1) Medium: VCD 2) Medium: DVD 3) Playback 4) Pause active 5) Repeat active 6) Disc in dts sound format 7) Disk in Dolby Digital sound format 8) Expired time in H:MM:SS format Current title/chapter PBC: Playback control active (video CD) 9) Medium: CD 10) Medium: MP3 6 Remote control ES This view describes the button functions on the remote control. The remote control can be used for other devices. The use of the remote control as a universal remote control is described in the section "The universal remote control", page 37. EN If the DVD player fails to react to a button press the source button DVD. 1) Switching on from standby mode and vice-versa 2) TV: Source key for selecting the device 3) STB: Source key for selecting the device (i. e. Set-Top-Box, SAT-Receiver) 4) DVD: Controlling the DVD player 5) VCR: Source key for selecting the device 6) AUX: Source key for selecting the device 7) CODE: Enter code for other device types 8) SUBTITLES: Select sub-title language; open Teletext in TV mode 9) TITLE: Call up title menu (DVD); EPG: "Electronic Program Guide" 10) Arrow buttons: Navigate within menus 11) ENTER: Confirm selection 12) RETURN/EXIT: Return to menu 13) MENU: Call up DVD menu 14) DIGEST: Preview function 15) PROGRAM: Programme order of titles 16) BOOKMARK: Bookmark function 17) SEARCH : Title/time direct selection 18) AUDIO: Direct language selection (DVD) 19) ZOOM: Enlarge image 20) USB/CARD: Select USB operation or card operation 21) CARD SELECT: Button has no function in this model 22) LED-display for confirming button selection 23) 0-9: Number buttons, e. g. for direct track and title selection 24) CLEAR: Delete selection (menus) TV use: Enter two-digit numbers 25) SETUP/AV: Open setup menu, controlling other devices 26) : Skip tracks (SKIP); P+/P–: Television program selection 27) 28) : Television mute mode +/–: Television volume high/low 29) : Fast rewind 30) : Play 31) : Fast forward 32) / KEY LOCK: Press twice to Start recording / Key lock for the buttons on the front of the player 33) : Stop playback 34) : To pause playback 35) OPEN/CLOSE: Open and close disc compartment 36) SLOW/F: Slow forward 37) SLOW/R: Slow rewind 38) REPEAT: Repeat functions 39) REPEAT A-B: Repeat a defined section 40) RANDOM: Play tracks in random order 7 DE 41) ANGLE: Camera position (perspective) 42) 3D: Virtual surround function 43) DISPLAY:Display current title/lapsed time 8 Information about these instructions ES Please read these instructions carefully before using the device. Note the warnings on the device and in the operating instructions EN Always keep the operating instructions close to hand. If you sell or give the unit away, please ensure that you also pass on these instructions. DE Symbols and key words used in these instructions DANGER! Warning: immediate mortal danger! WARNING! Warning: possible mortal danger and/or serious irreversible injuries! CAUTION! Please note the following guidelines to avoid injuries and property damage! CAUTION! Please note the following guidelines to avoid property damage! NOTICE! Additional information on using the device. NOTICE! Observe the notes in the instruction manual! WARNING! Warning: risk of electric shock! WARNING! Health hazard posed by excessive volume Bulleted item/information on operating steps and results Tasks to be performed 9 Safety instructions Keep electrical equipment out of reach of children Children can be injured by electrical devices. Never allow children to use electrical appliances unattended. Keep plastic packaging out of the reach of children. There is a risk of suffocation. Setting the appliance up safely Place the device on a sturdy, level surface. It is not designed for use in rooms that are very humid (e.g. bathrooms). Please observe the following installation conditions: Ensure that ventilation is adequate. The ventilation unit should not be obstructed by placing objects such as newspapers, table cloths, curtains, etc. on the vents. Do not place the device near heat sources (e.g. heaters) that could affect the unit. Do not place the unit in direct sunlight. Avoid contact with water droplets or spray and do not place vases or anything containing water on the unit. Never set up the appliance near magnet fields. (e.g. television sets or speakers). Naked flames, such as lit candles, must not be placed on or near the device. Power connection Only connect the appliance to a power socket (230 V ~ 50 Hz) that is easy to reach and is close to the place where you have set up the appliance. The power socket must be freely accessible so that you can unplug the appliance quickly, if necessary. Do not use the device if the mains plug, cable or device itself has been dropped. If the plug, cable or appliance is damaged, immediately remove the plug from the power supply. Ensure the mains cable is out of harms way and will not trip people up. There should be no kinks or folds in the power cable. Do not connect the device immediately to the mains if the unit has been moved from a cold to a warm room. Any condensation which forms could damage the unit. The device can be operated as soon as the unit has reached room temperature. Thunder storms Unplug the device and pull out the aerial if you are away for a long period of time or there is a storm. Never undertake your own repairs WARNING! Never try to open and/or repair the device yourself. There is a risk of electric shock! Do not interfere with the unit’s power cable. If there is a fault contact our Service Centre or other suitable specialist workshop. CD player The CD player is a class 1 laser product. The device has a safety system that prevents dangerous laser rays escaping during normal use. In order to avoid injury to the eyes, never interfere with or damage the unit's security system. 10 ES Headphones WARNING! Listening to the unit at a high volume with headphones or ear phones can damage your hearing. Lower the volume before putting on head/earphones Your hearing can be damaged if you listen at high volumes over a long period or if the volume is increased too suddenly. In the event of functional damage If the unit is malfunctioning there might have been a electrical discharge. If this is the case unplug the unit from the power source and remove the batteries. Insert the batteries again and re-attach the unit to the power source . This will reset the unit. Safe handling of batteries The remote control is battery operated. Please note the following: Keep the batteries out of reach of children. They can be fatal if swallowed. If a battery is swallowed, please obtain immediate medical assistance. Do not throw batteries into a fire, do not short-circuit them and do not dismantle them. If necessary clean the battery and device contacts before insertion. Always change all batteries at the same time. Only use batteries of the same type. Do not use different types of batteries; do not use a mix of used and new batteries. Please take note of the polarity (+/-) when inserting the batteries. Remove the batteries if the unit is not going to be used for long periods. Remove the empty batteries immediately from the unit! There is an increased risk of leakage. Do not expose batteries to extreme conditions; for example, do not place the unit on top of radiators. There is an increased risk of leakage. Never try to recharge non-rechargeable batteries. There is a risk of an explosion! Remove leaking batteries from the device immediately. Clean the contacts before inserting new batteries. There is a risk of skin irritations from battery acid! If battery acid leaks out it is essential to avoid contact with the skin, eyes and mucous membranes! If the acid does come into contact with skin, immediately rinse the affected areas with plenty of clear water and contact a doctor immediately. Cleaning the unit Remove the mains plug from the socket before cleaning. Use a dry, soft cloth to clean the appliance. Avoid the use of chemical solutions and cleaning products because these may damage the unit's surface and/or inscriptions. 11 EN DE General information About DVDs A DVD – Digital Versatile Disc – is a digital medium for storing information. DVDs are marked with one of the symbols shown here. There are different types of DVD with different storage capacities depending on how the information is stored. DVD structure Video DVDs are divided into titles and chapters. A DVD can have several titles, which may, in turn, consist of several chapters. The titles and chapters are each numbered sequentially: The first title of a DVD usually comprises licence details and manufacturer's information. The next title is usually the film itself. Other titles may include such items e. g. as "making of" documentaries, film previews or information on the actors. Languages and subtitles Up to eight languages and subtitles in as many as 32 different languages can be stored on DVDs. Any combination of languages and subtitles can be selected for playing back discs. Camera angle Some DVDs even allow the viewer to select multiple camera angles, provided that the film was recorded from different camera positions. Regional codes For reasons connected with global DVD sales strategy, a code has been developed for DVDs that allows the recording to be played only on devices purchased in a particular region. This code is based on a system that divides the world into six regions. As Europe is in Zone 2, your DVD player will only play DVDs that have the regional code 2. The regional code is printed on the DVD packaging. (See the logo shown here.) Apart from DVDs with regional code 2, the unit will only play DVDs with the regional code 0 (suitable for any DVD player). NOTICE! If you have problems when playing certain DVDs make sure that the DVD has the regional code 2 or 0. Other playable formats MP3s and WMA files WMA tracks are shown on the screen with the following symbol: MP3 and WMA formats are compression formats for audio data. WMA stands for "Windows Media Audio" and was introduced more recently than the MP3 format. MP3 and WMA files have to be saved with the file extension *.mp3 or *.wma in order to be recognised. 12 MPEG4 ES MPEG4 is a compression technology for multimedia/video data ("MPEG" = "Moving Picture Experts Group"). EN Available surround sound formats DE The unit recognises two different surround sound formats. Dolby Digital 5.1 In Dolby Digital sound format the audio material is saved digitally. In this instance, up to five separate full-frequency audio channels (front left and front right, centre, rear left and rear right) as well as an effect or depth channel (5.1) are stored separately. Discs and media recorded in the Dolby Digital format are marked with the trademarks shown here. Because each channel is completely independent, a realistic, almost "three-dimensional" effect is produced, creating the impression of distance, movement, and relative position in the room. Your unit can read and decode this audio data and outputs to the 5.1 outputs. On the other hand the original signal can be sent to an external decoder/amplifier via the digital outputs. dts (Digital Theatre Systems) The dts abbreviation is used for a less frequently used sound format in which up to 6 (5.1) separate channels are saved to a sound medium. Discs and media recorded in the dts format are marked with the trademarks shown here. Your unit can read this audio data and sends it to the digital outputs ("DIGITAL OUT") for decoding. 13 Preparation Unpacking the device Remove all packaging materials including the film on the front of the unit. WARNING! Do not let children play with the plastic wrapping. There is a risk of suffocation. Check package contents When unpacking, ensure that the following parts are included: DVD player SCART cable Remote control 2 x batteries (AAA/LR03 type, 1.5V) Instructions and guarantee documents Inserting the batteries into the remote control Two 1.5 V batteries (AAA/LR03 type) are supplied for the remote control. Open the battery compartment by sliding the panel on the back of the remote control in the direction of the arrow. Insert the batteries so that the negative end is placed next to the springs. Close the battery compartment. WARNING! The batteries supplied should not be charged, disassembled, thrown into a fire or shortcircuited. If swallowed, batteries may endanger life. For this reason keep the batteries and remote control out of reach of children. If a battery is swallowed, please obtain immediate medical assistance. 14 Connections and connection options ES The unit can be connected in various ways to other input and output devices. EN CAUTION! Switch off all devices before connecting them. Only connect the units to the mains when the other connections are complete. Setting up the unit Place the unit on a sturdy, level surface. Please take note of the safety instructions on page 9. Some aggressive furniture paints can weaken the device’s rubber feet. If necessary, place the devices on a suitable underlay. Connection options between the DVD player and television Connection with the television via the SCART cable The SCART cable is the simplest connection between the DVD player and the television. As long as your television can process RGB signals you will get a very good quality image from this option. 15 DE Connection with the television via the S-VHS cable If your television does not have a SCART connection you can connect with the unit via the S-VHS cable (S-VIDEO socket). This will provide good image quality. An audio cinch cable must also be connected. Please note the colour codes for left/right on the cinch plugs. To play in STEREO set the downmix option in the Speaker Se tup section of the audio menu to S T ER EO . NOTICE! Instead of connecting the audio cinch cable to the television it can also be connected with a Dolby Surround Sound (stereo) system. Connection with the television using the video cinch cable If your television does not have a SCART connection or an S-VIDEO socket you can also connect the unit via the video cinch cable. An audio cinch cable must also be connected. Please note the colour codes for left/right on the cinch plugs. To play in STEREO set the downmix option in the Speaker Se tup section of the audio menu to S T ER EO . 16 Component connections ES If your unit has so-called component connections (Y, Cb/Pb, Cr/Pr), you can also connect the unit to the television or data projector using theses connections. These connections use the so-called „YUV colour format". EN Connect the unit’s Y, Pb and Pr socket to the corresponding socket via a three-pole video-cinch cable with the corresponding sockets on the television set or image projector. For sound transmission also connect the audio-cinch cable. NOTICE! For connection via the component sockets for generating the progressive scan function select the resolution 5 76p . Digital image and sound: HDMI Your DVD player has a HDMI (OUT) connection. HDMI ("High Definition Multimedia Interface") is the only interface in the consumer entertainment electronics sector that can digitally transmit audio and video data simultaneously. It can process all current picture and sound formats, including HDTV (High Definition Television), and can do this at the highest current resolution of 1 08 0p without losing quality. 17 DE You can connect the device to the television set with HDMI and DVI inputs (HDMI is downwards compatible to DVI – "Digital Visual Interface"). You will also need a HDMI cable for connecting to a HDMI input. If your television set has a DVI socket, you will also need an adapter (HDMI – DVI), which is also available is specialist stores. NOTICE! Once you have connected the HDMI or DVU unit then switch on this unit only. Wait approximately 30 seconds and then switch on the DVD player. To establish the progressive scan function for the HDMI connection select the resolution 4 80 P, 7 20P (6 0Hz) , 1 080 P ( 60Hz) , 5 76 P, 7 20p (50Hz) , 1 08 0p (5 0Hz), depending on the resolution of you television set. NOTICE! The HDMI output has been certified according to the valid HDMI standard. It may happen in certain cases that the connection is not compatible with the DVI or HDMI connection on another device, which will make error-free transmission impossible. The fault in this case has nothing to do with the DVD itself. TV connection with progressive scan function To Progressive Scan The unit can transmit video signals in PROGRESSIVE SCAN format via the component connections and the HDMI connection, which gives good image quality. It goes without saying that your TV (or data projector) must be able to process this format. In the progressive scan format the image is transmitted in 50 half and 50 full images. This reduces flickering images to a minimum and displays movements in a more fluid manner. p- and i-resolutions With the button STOP/RES and in the setup menu General Setup Page > HDMI Setup you can select the resolution for the progressive scan image format („p“) and the standard image format („i“ = „interlaced). Switch on the progressive scan function by selecting a resolution with „p“. Switch off the progressive scan function (resolution with „i“), if you have not connected the television set via the component or HDMI sockets. 18 Digital sound transfer ES Connect either a coaxial cable or an optical cable to the COAXIAL or OPTICAL output on the DVD/ player and the corresponding input on the amplifier. EN DE NOTICE! Switch off the sound output at your television, in order to enjoy digital sound reproduction completely. Power connection Once you have made all the connections, connect the plug to the mains (230 V ~ 50 Hz). Optional: Connecting headphones There is a headphone connection on the front of the unit (PHONES). Connect the headphones with a 6.3 mm ratchet plug. The headphones have their own volume control. WARNING! Excessive sound levels when using earphones and headphones can result in damage to hearing and/or loss of hearing. Before pressing play, set the volume to the lowest setting. 19 Button functions Operating the player using the controls on the player or remote control Buttons on the front of the player You can activate the main play functions of the player using the buttons on the front of the unit. Buttons on the remote control In addition to these basic controls the remote control also provides numerous additional options for using all functional elements of your DVD player. You can, for instance, use the remote control to navigate through the menus, which are then displayed on the television screen. NOTICE! In this manual we are describing the remote control buttons as the remote control (with the exception of the power switch) includes all the functions of the unit. If reference is made to the controls on the DVD player itself, this will be clearly indicated. Standby/Switching on/Switching off Standby mode Use the POWER button on the rear of the unit to switch off the unit completely. The blue LED comes on when the device is in standby mode. Switching on Press (STANDBY), to switch the unit on. The display lights up. The type of display depends on the type of recording medium. Switching off Press (STANDBY) again to switch the device into standby mode. The display will go out. Inserting a disc Make sure that there is about 15 cm of space in front of the disc compartment so that it can open without hindrance. Switch the unit on and press OPEN/CLOSE. Insert a disc into the disk compartment with the title side upwards. Make sure that you place the disc in the middle of the disc holder so that it does not stick when you close the compartment. Press the OPEN/CLOSE button. The disc compartment closes. DVDs start playing automatically after a few seconds. The type of display depends on the type of disc. , otherwise a menu may appear in which you need You may need to press PLAY to make a selection using the arrow keys. 20 Reading the memory card and USB Memory Stick. ES Your DVD player has a special memory card drive for SD cards, multi-media cards and a memory stick, as well as a connection for a USB Memory Stick or other USB EN Memory card DE Insert a memory card into the memory drive at the front of the unit with the contacts facing down and the bevelled corners on the front right-hand side. The card will stick out somewhat when it has been inserted fully. This way it can be removed again. CAUTION! Do not use force to insert the memory card. If you are unable to insert the card, you may have inserted it incorrectly or it may not be the correct size for this drive. USB player Insert the USB device into the USB connection interface. The hard disk indicator on the front of the device lights up during USB mode. Select the drive You can use the button USB/CARD to select the card drive, USB drive or the disc drive. Press the button several times if required. NOTICE! Data on the memory cards and USB stick is played in the same way as discs (DVD, Audio-CD, JPEG-CD etc.). The following description for discs also applies to memory cards and the USB Memory Stick. KEY LOCK While the unit is switched on press the KEY LOCK button twice. All buttons on the front of the player are now locked. Press KEY LOCK again to remove the lock. Playback functions PAUSE/STEP (plays a single image) You can interrupt the play mode by pressing PAUSE/STEP. The pause icon is displayed on the screen: . Press PAUSE/STEP repeatedly to move from image to image. The icon for the single image display appears on the screen: . PLAY To continue playing press PLAY . The play icon is displayed on the screen: . Special screen message If you select a function which does not start or cannot be accessed in the current mode, the ‘not-valid’ sign as shown here will appear on the screen. The sign disappears after a few seconds. 21 STOP/RES Press STOP screen . Press once to stop playing. The stop symbol is displayed on the . In this mode you can continue on from the same point with again to stop the DVD. The unit is now in stop mode. Search functions SKIP During playback press the SKIP or button to skip backwards or forwards (for DVDs: from chapter to chapter; for CDs: from title to title). The skip icon is displayed on the screen: point you are on now. . The display also shows which NOTICE! Please note that on many DVDs it is not possible to skip over the titles/chapters before the actual film starts (license notes). Fast forward During playback, press the FAST or button repeatedly to fast-forward or rewind to a particular section. The fast forward symbol displayed on the screen. or press once: double speed (2 x): or press twice: 4 x speed (4 x): or press three times: 8 x speed (8x) or four times: 16 x speed (1 6 x) Press PLAY and level are to return to the normal playback speed. Slow motion – SLOW During playback press the SLOW/R or SLOW/F to play forward or backwards in slow motion. The slow motion symbol on the screen. SLOW press once: 1 /2 Speed SLOW press twice: 1 / 4 Speed SLOW press three times: 1/8 Speed SLOW press four times: 1 /1 6 Speed Press PLAY and level are displayed to return to normal playback speed. NOTICE! Please note that with audio CDs, VCD discs, and also Xvid discs the SLOW/R function cannot be used. 22 DISPLAY ES You can press DISPLAY repeatedly during playback to display the elapsed and remaining time. The display changes each time you press the button: EN DVD: Title elapsed > Title remaining > Chapter elapsed > Chapter remaining > Display off. CD/VCD: Title elapsed > Title remaining > Total elapsed> Total remaining > Display off. MP3/Xvid: Title elapsed >Title remaining > Display off. DE Repeat functions REPEAT Press the REPEAT during playback. The repeat symbol appears and, each time the button is pressed, the section to be repeated (the entry disappears after a few seconds): DVD: To move to the previous title or chapter Audio-CD: Title> All > out; MP3: Repeat title > Repeat album > Album > .... . The REPEAT-function is not possible for Video CDs and Xvid. REPEAT A - B (DVD, Audio-CD) You can repeat a section you have defined yourself. During playback press the A-B button to set the start of the repeat sequence. The repeat symbol appears with the addition A. Press A - B again to set the end of the repeat sequence. The display will show A B. The defined sections will be repeated endlessly. Press the A-B button a third time to end the repeat sequence. It is not possible to use the REPEAT A-B function for MP3 and Xvid. Program playback sequence - PROGRAM The program function allows you to play up to 20 chapters (DVD) or titles (audio) in your own, defined sequence. Programming is not possible with MD3 media. DVDs Press PROGRAM. A table with spaces for programs appears on the screen. The table contains titles and chapters. The title number on the DVD appears in the header. Use the remote control buttons to enter the number of the title selected for the program place0 1 . Please place a 0 in front of singledigit numbers. – When a title has been entered the number of chapters in this title will appear in the header. Use the remote control buttons to enter the desired chapter. Please place a 0 in front of single-digit numbers. The cursor jumps to the program position 0 2 . Enter additional program places in the same way. Audio CDs/VCD Press the PROGRAM button. A table with spaces for programs appears on the screen. The number of titles on the CD is displayed in the table header. The program position 0 1 is coloured. Use the remote control buttons to enter the number of the title selected for the program place01 . Please place a 0 in front of single-digit numbers. 23 Start list As soon as the first program place has been entered the word START appears in the lower edge of the table. Use the navigation buttons to move the cursor to the S T AR T and press PLAY or ENTER. The word PRO GRAM is displayed briefly on the screen. The programmed list starts to play. You can use the button PROGRAM to access and change the list. Press the STOP button twice to delete the list. After the unit has finished playing, the DVD player switches to standby mode. NOTICE! The programmed list is not saved. Direct title/time – SEARCH You can use the SEARCH button to jump to a chapter, title or time. You change the selection each time the button is pressed. Playback starts at the selected spot. Press the SEARCH button during the reproduction. Select the function required with the navigation buttons and press ENTER. Now, enter the setting with the numbers field, e.g. the required Chapter number, or select it from a list. Confirm finally with ENTER. The change will take place immediately. Setting bookmarks – BOOKMARK You can set "bookmarks" to start playback from a particular point. During playback press the BOOKMARK button. The BOOKMARKmenu with 12 positions is displayed. If you want to cancel the function press BOOKMARK again. . A marker is placed at this point (in To set the first bookmark press PLAY the example shown here in title 01, chapter 4, 15 minutes and 23 seconds). To start the film from this point press PLAY . To delete the bookmark press CLEAR. If you want to hide the menu and play the film press BOOKMARK again. If you want to set more bookmarks invoke the B O O K M AR Kusing menu again and move to the next available position the navigation buttons. Press PLAY to set a bookmark. To select another bookmark use the navigation buttons to . move to the appropriate field and press PLAY NOTICE! The bookmarks remain stored after pressing STOP twice (stop mode). However, the bookmarks are deleted if the unit goes in to standby mode or is switched off. The bookmark function will not work with some formats An overview of the bookmarks with a preview can be found under the fifth menu item of the DIGEST menu. See next section. 24 Select section – DIGEST (DVD and VCD) ES You can use the DIGEST function with the help of image preview to navigate through your DVD. EN Press the button DIGEST during playbeck. You can invoke the D IG E S T menu using the following options (B OO K MAR K D I G E ST only if bookmarks have already been set , see below): DE List of titles NOTICE! You can move between the image and text entries in the menu using the navigation keys. The active points are highlighted. To select an item press ENTER. Confirm T i t le D ig es t with ENTER. After a brief pause while the images are loading, the screen displays the initial screens of all titles contained on the DVD. Up to six images are shown at a time. The full titles are displayed under the Se lec t menu item. Select a title by using the navigation buttons to select a start image or enter the number of the start image using the numbered buttons on the remote control (place 0 before single-digit numbers). The press ENTER to play the selected title. Use the SKIP buttons and to navigate through the screen pages. Select EXIT to return to the original position and play. You can return to the Digest menu with M e n u . List of chapters Select the C ha p ter D ig es t option from the digest menu and confirm with ENTER. After a short pause where the images imformation is loaded, all chapters of the current title are displayed as thumbnails and brief sections of the tracks are played. Up to six chapters are displayed at a time. Select the chapter in the same manner as you selected the title (see above). Time interval. Select the Ti tl e in te r va l option from the digest menu and confirm with ENTER. A preview of the scenes within the title will be played for a default interval of 10 minutes If only one image is displayed, the title is shorter than 10 minutes. Chapter interval Select the C ha p ter in t er v a l option from the digest menu and confirm with ENTER. A preview of the scenes within the chapter will be played for a default interval of 10 minutes If only one image is displayed, the chapter is shorter than 10 minutes. NOTICE! If you press DIGESTin the STOP mode the gigest menu will appear with the entry T i t le D ig es t and possibly also Book mark D iges t . Marker overview Any previously set bookmarks will be listed under this menu item (see previous section). You can select the bookmarks from here. 25 RANDOM and INTRO (audio CD only) Random playback Press the RANDOM button. Press PLAY to start random playback. Playback stops after 20 minutes. Press RANDOM again for normal playback. Intro function Press the DIGEST button. This plays the first six seconds of each title. Press DIGEST again for normal playback. Picture functions Enlarge image – ZOOM Press the ZOOM key. The zoom symbol appears Press ZOOM once: Zoom factor 2 x Press ZOOM once: Zoom factor 3 x Press ZOOM once: Zoom factor 4 x with the zoom factor. When you press ZOOM for the fourth time you return to the normal view. NOTICE! You can use the navigation keys to select the section of the enlarged image that you wish to view. Camera position – ANGLE (DVD only) NOTICE! On some DVDs certain scenes have been recorded from multiple camera angles. Press ANGLE to activate this function. If the scene has various camera angles the symbol and the current perspective/total number of camera angles are displayed. Press the ANGLE key again to switch to the next camera position. The image changes after a few seconds. The symbol appears in certain scenes if G ene r a l S et u p P ag e > A n gl e Ma r k > O n is selected in the menu. Sound functions Switch sound off – MUTE Press MUTE to switch the sound off completely. Press MUTE again to switch the sound on. NOTICE! Please note that the sounds remains switched off if you change the volume and the volume is displayed on screen. 26 3D sound ES You can achieve a 3D or surround effect for CDs that are coded in Dolby Pro Logic, Dolby Digital or dts formats if two loudspeakers are connected. EN Press the 3D button repeatedly to call up one of the following sound effects: Su rround: Rock > Pop > Live > Dance > Techno > Class ic > So ft > Off. Do not use the functions DE if more than two loudspeakers are connected, if you are using coaxial or optical digital out for digital sound, if a surround effect is switched on in one of the connected units. Audio Mode (audio CDs only) Press the AUDIO button repeatedly to select one of the following playback modes: M on o l e f t, M on o r i gh t , Mix-Mono und Ster eo . Depending on the disk other messages may also be displayed. TITLE MENU, DVD MENU DVD menus DVDs usually have one or more menus stored on them and you can use these to navigate through the DVD. The names of these menus depend on the DVD; they may be called "DVD menu", "Disc menu", "Main menu", "Title menu", "Root menu" or "Master menu". You DVD player menu (SETUP menu) can be called up with the SETUP button. You can call up the menus stored on the DVD using the TITLE and DVD MENU buttons. You navigate to the items in the DVD menu using the navigation keys. Confirm each entry with ENTER. NOTICE! Please note that the menus that are available when you press a button will depend on the DVD. E. g. some DVDs only have one menu that appears for the two call-up methods. AUDIO and SUBTITLE MENU If other languages are available on the DVD this is the quickest method of selecting them. NOTICE! Please note, however, that this function has not been implemented on many DVDs. Select audio language Press AUDIO repeatedly to select another available language. The change is made immediately and does not need to be confirmed. Select sub-title language Press the SUBTITLE key repeatedly to select another sub-title language stored on the DVD. The change is made immediately and does not need to be confirmed. The message disappears after a few seconds. 27 PBC function (VCD 2.0 only) Some type-2.0 VCDs that have a title/chapter structure, have a playback control (PBC) option. Use TITLE MENU to activate playback control (Taste TITLE MENU). Additional functions for controlling the title/chapter are available, such as –Direct selection of titles/chapters – SKIP functions NOTICE! Please note that the precise functions available depend on the VCD. Locating tracks or pictures on MP3 and JPEG data carriers The music titles on MP3 and JPEG data carriers may be organised into folders just like on data carriers. Insert an MP3 or JPEG CD into the player. A menu showing the top-level folders saved on the CD appears on the screen. Provided that the data carrier actually contains folders, they are listed on the left-hand side of the menu (see diagram). Titles are displayed with an MP3 symbol or image symbol. The active folder or file is highlighted in orange. The display also shows the total number of files on the CD, for example 10 5 F ILES. Use the navigation buttons or to select one of the files and confirm your selection with ENTER. The other sub-folders may also be opened if required. In this case you can use the highest menu item ) or the button to return to the menu item above. ( To hear a title or view an image, select it and confirm with PLAY or ENTER. MP3: Direct selection using the number keys Enter the number of the title you want. Enter multi-digit numbers rapidly in sequence. Confirm with PLAY or ENTER. You can only select one number within the selected folder. Change folder where required. JPEG images With JPEG images you will see a preview of the image on the right-hand side of the menu. Select an image and confirm with ENTER to view a large image. All images within the active folder can be displayed in succession (slide show). Press STOP to return to the menu. You can change the orientation of the current image by pressing the navigation buttons during playback. Pressing the right navigation key repeatedly: rotates the image by 90° clockwise each time; Pressing the left navigation key repeatedly: rotates the image by 90° anticlockwise each time; Pressing the navigation key or : produces a mirror image. The image stays on the screen even when rotated or reflected. Press PLAY playback. 28 or ENTER to resume Settings in the SETUP menu ES All settings are made in the SETUP menu, which you can open using the SETUP key. These settings relate to such items as image format, sound settings and child protection. EN DE Press SETUP. The main page of the SETUPmenu appears on the screen with the four main Sys tem, Au dio , Do lb y, Vide o and Pre fer ence page. The active menu is highlighted in yellow. Select a different menu using the or navigation buttons or select a different menu. NOTICE! If you are unable to access the Pre ferenc e menu, this means you have opened the SETUP menu during playback . Exit the SETUP menu via the SETUP button, stop playback (2 x STOP ) and call up SETUP again. Navigating in the menus You can move through the menus using the navigation keys. The active points are highlighted. An explanation of each menu selected is given at the lower edge of the menu. Use to select the first menu item. Sub- and selection menus A selection menu on the right-hand side of the screen opens for most sub-menus. The current selection is highlighted. Move right with . The active item is marked. Use or to select another item. The new selection is now highlighted. The bar underlining the previous selection remains visible initially. Press ENTER to confirm the selection. The bar underlining the previous selection disappears. With you can return to the left-hand side of the menu. Exit menu Press to return to the superior menu level. With SETUP you can leave the SETUP menu at any time. 29 System menu TV Display Here you set the unit's display format to match that of the television. Normal/PS: Selection for televisions with 4:3 format. The Pan Scan format depicts 16:9 film formats in full height, the sides of the image will be cropped. Normal/LB: Selection for televisions with 4:3 format. The letterbox format reduces the 16:9 film format to the size of the screen. W ide : Selection for televisions with 16:9 format. Angle Mark O n: If scenes on the DVD ahave been shot from various camera angles and stored, an icon will ap- pear on the screen to indicate this . O f f: The symbol does not appear with this setting. OSD Lang This sets the OSD (On-Screen-Display) language, i.e. the language for the DVD player menus. You can choose between English, Spanish, German, French, Italian or Dutch. When selecting a language the menu changes immediately. Captions Select whether additional sub-titles for the deaf should be displayed in the case of DVDs here. This function is not supported by all media. O n: Sub-titles for the deaf will be represented automatically each time a DVD is started. O f f: No sub-titles will be displayed with this setting. Screensaver You will select whether the screen saver should be activated if you do not use the device for a longer period (the pause or stop mode) in this setting. Last memory The DVD player will remember the position at which you stopped the most recently inserted DVD, with this function. The replay will begin at the most recent position, if the same DVD is reinserted in the device. The last position on the DVD will even be retained if you switch off the device. 30 Audio menu ES Speaker configuration EN Dow nmix: If you use the analogue 5.1 output you can change the loudspeaker settings from this menu. L T /RT : The left and right audio channels are used. Ster eo : This option produces stereo sound. V SURR : The analog stereo sound will be converted virtually as surround sound. 5 . 1CH : Select this setting if you have connected a digital audio amplifier or a surround sound system. Fron t D ec id e on the size for the front speaker: L ar g e: Choose this setting if the diameter of the front speaker diaphragm is larger than 12 cm. Small : Choose this setting for smaller loudspeakers. C e n tr e , R ea r (only enabled in speaker setting V SURR and 5.1.CH): Decide on the size of the centre and rear speakers or disable: L ar g e: Choose this setting if the diameter of the front speaker diaphragm is larger than 12 cm. Small : Choose this setting for smaller loudspeakers. O f f: You can set the centre and rear speakers to O f f if you want to operate the unit with the front loudspeakers only. Su bwoo fer : O n: Choose this option to switch the subwoofer on. O f f: You can set the subwoofer to O f f if you want to operate the unit with the front loudspeakers only. D ia log : You will set the dialogue volume in this Menu. Pos t DRC : Differences in volume, particularly in the case of music, are balanced with DRC (Dynamic Range Control), so that the music reproduced is output at the same volume. You can switch on the function (On ), switch it off (O f f) or activate it automatically, if this is available(A u to ). SPDIF S P D IF- O u t: Set the function to S PD IF /R aw , if you have connected an AV receiver to a digital audio output. Select SPDIF/PC M , if your television device/amplifier does not have a Dolby Digital or MPEG decoder. L PC M OUT: Select the decoder with which the sound should be transmitted here. The higher the value, the better the sound quality. 31 DE Channel delay If you connect separate loudspeakers they should ideally be set up in a circle (refer to left side of the diagram). If this is not possible you can compensate for differences in the circle shape here. In the example below (see the right side of the illustration) the left and rear left loudspeakers are moved by 50 cm and by 40 cm for the rear right loudspeakers. Use the navigation button to enter the graphical fields next to the Ch ann el De la y entry. Select one of the loudspeakers by pressing or . Using the or buttons to increase or reduce the value in units of 10 cm. The maximum distance that can be set between speakers is 600 cm. Confirm with ENTER and exit the menu with . The circle is defined by the front loudspeakers. That is why you cannot select the front loudspeakers. Equalizer Setting EQ Type : You can make the following audio pre-settings under EQ Typ if you want to adjust the sound with the aid of the equalizer: L in ear , R ock, Pop , Live, Da nce , Tec hno , C lass ic , S o f t. The sound will be replayed unchanged if you select the Linear point. Bass Bo os t, Super Bass : You will amplify the bass in these Menus. Select On, to activate the bass amplification. The sound will be replayed directly unchanged with Off. T reb le Boos t: The treble sound will be amplified with this setting. Select On, to activate the treble amplification. The sound will be replayed directly without change with Off. 3D processing 32 P R O L OG IC I I: You will have the comprehensive possible settings of Pro Logic II here. If you do not have surround sound, it can be simulated virtually with it. Set the P R O L OG IC I I function to O f f, if you are replaying sound through an audio or a surround amplifier. Hall mode : The sound can be provided with an additional reverberation here. You can choose between the following options: Concert hall, living room, hall, bathroom, caverns, stadium and church. Set the Hall mode function to O f f if you are replaying the sound through an audio or surround amplifier or do not want to introduce any additional reverberation. Dolby Digitalmenu ES Dual Mono EN Some DVDs/VCDs support a dual-channel sound, with which you can represent several tracks separately or at the same time. Select whether only the left, only the right audio track or both audio tracks should be replayed here. DE This setting will be functionless, if the inserted data media does not support the function. Dynamic The Dolby Digital sound format supports a dynamic setting, which you can use to set the volume difference between quiet and loud passages with a scale of OF F to FUL L in nine steps. O FF : The sound is reproduced without changes, i. e. loud passages and bass sounds are loud and quiet passages are quiet (cinema sound). This setting is only appropriate if nobody will be disturbed. FU LL : The volume difference is minimised, i. e. loud passages are quieter and quiet passages are louder. This setting is appropriate, for example, at night. To change the setting use to access the scale on the right hand side and then use lected the desired value. Confirm with ENTER. or to se- 33 Video menu V i de o Ou t: Here you can choose your preferred video output settings. Choose RGB if you also want an RGB signal to be relayed via the normal SCART output. Choose S- Vid eo to have the video signal emitted at the S-Video output. Use the component output to attain the best picture quality and choose Y U V if this format is supported by your TV set. Res olution : Select the resolution appropriate to your HDMI or DVI television device, to implement the progressive scanning function. NOTICE! Pay attention to the fact that you will have to select a setting with 5 0 H z for the PAL TV standard and a setting with 60 Hz for the NTSC TV standard. Select the 5 76 i or 7 20p resolution for a connection through the Y P b Pr component connections. Select 4 80 i , 5 76 i or 1 080 i (i = "interlaced"), if you are not using the HDMI connection. You can also reset the resolutions with the STOP/RES button on the front of the device. 34 Video Quality Setup : It is not normally necessary to make settings here. However, you have the possibility of making comprehensive image settings in this Menu. You can set the image sharpness, brightness, contrast, gamma, colour and Luma delay in this way. HD MI Setup : Switch the HDMI connection on or off in this Menu. The connection must be activated if you have connected the television device with an HDMI cable. Preferences menu ES You can only access the Pre f ere nc es menu in stop mode. If playback is in progress press STOP twice. EN In this menu you choose the settings for the language, parental control and password. DE TV type Select the colour standard for the image replay here. PAL : The usual colour format in many European countries. A U T O: Automatic setting to the correct colour format. NTSC : The usual colour format in North America. Select language NOTICE! Please note, for every language selection: It is only possible to playback a language that is actually on the DVD. If you select a different language the DVD player will instead play the first language stored on the DVD. The languages that you can select for a specific DVD are normally listed in the DVD's disc menu. Audio One of the audio languages in on the DVD is programmed as a default. You can choose between English, French, Spanish, German, Italian, Dutch and Japanese. Subtitles You can use this to preset one of the sub-title languages on the DVD. You can choose between English, French, Spanish, German, Italian, Dutch and Japanese. Selection O f f: No sub-titles are displayed. Disc menu Here you can choose the language for the menus stored on the DVD, (TITLE MENU, DVD MENU) if the disk supports them. You can choose between English, French, Spanish, German, Italian, Dutch and Japanese. Parental You can set the authorisation level for DVDs (parental control) here. Some DVDs and CDs are encoded with encryption signals in line with the authorisation classes established by the Motion Picture Association. The eight authorisation classes are: 1 Kid Sa f: 2 G: 3 PG : 4 PG 13 : 5 PGR : 6 R: 7 NC 17: 8 Adult: ("kid safe") suitable for small children; ("General") For all age groups; ("Parental guidance") Parental guidance recommended Parental guidance strongly recommended; Some scenes not suitable for children under 13; ("Parental Guidance Restriction") for young people under-17s parental guidance recommended; ("Restriction") for young people under 17 parental Parental guidance strongly recommended; Not suitable for young people under 17; For adults only. 35 For example , if you have inserted a DVD that is coded with authorisation class 7 (NC 17 ) or 8 (Adult) and you have selected authorisation classes 1 to 6, a message appears and the viewer must enter a password. Parts of a DVD – certain scenes, for example – may also be encoded with an authorisation class or a range of authorisation classes. You have to enter the password to change the authorisation class. Password With this option a password can be entered so as to restrict access to the player by others. To change the password, confirm the Ch ang e item. A new menu opens: O ld Pas s w o r d : Enter the existing password with the number keys on the remote control. It comprises exactly four digits. If no password has been entered, the default password is valid: 12 34 . – The next entry field becomes active when you enter the correct password. New Password : Enter a four-digit password using the number keys on the remote control. The bar moves to the next field. C o n fi r m PW : Enter the four-digit number again. Press ENTER to confirm the new password. If you forget the new password, enter the master password 13 69. Default Here you can reset all menu settings to the default settings. 36 The universal remote control ES Safety instructions EN Do not repair the device yourself DE The universal remote control has a class 1M infrared diode. Do not examine the laser with optical instruments! Do not subject your remote control to dust, strong sunlight, moisture, high temperatures or strong vibrations. Do not use any corrosive or aggressive cleaning products. Scope of application This universal remote control can operate the following types of devices: TV Television STB Set-top box or SAT or DVB-T receiver DVD DVD player MD 82533 VCR Video, hard drive or DVD recorder AUX Other devices (e.g. amplifier, tuner, etc.) The label indicates the device type to be programmed. It is used to provide an easier overview. Programming device codes General information For every device that you would like to operate using the universal remote control, you must program a three-digit device code to a source key (TV, SAT, AUX). You can assign any key to any device ("flex mode") with the exception of the TV button, which can only be assigned one television. Video recorder: Perform the code search when a video is in the machine. Enter the device code according to the code list The codes of the corresponding devices can be found in the Code List enclosed with these operating instructions. Proceed as follows: Switch the relevant device on manually. Briefly press the required souce key(TV, STB, VCR, AUX). Keep the CODE key pressed for approx. 3 seconds until the blue LED remains solid. Enter the four-digit code from the Code Table. The key lighting will extinguish briefly each time the key is pressed. If the entered code was valid, the light of the source key will extinguish after the last digit has been entered. If an invalid code was entered, the blue LED flashes for three seconds before extinguishing. If the device does not respond as expected, repeat the programming, or try a different manufacturers code. Select the code to which most of the remote control commands react correctly. If this is also unsuccessful, the try one of the search methods described in the following sections. 37 Manual code search Carry out a manual search as follows: Switch the relevant device on manually. Briefly press the required source key (TV, STB, VCR, AUX). Keep the CODE key pressed for approx. 3 seconds until the blue LED remains solid. Keep pressing (up to 350 times) , P+ or P– or (VCR only) until the device that is to be controlled switches off, changes channels, or responds accordingly. The code search begins at the currently stored number. Briefly press ENTER to save the code. Due to the considerable quantity of different code numbers, up to 350 different codes are preprogrammed per device type. In individual cases it may be possible that only the most common main functions are available. The process described here may not work for some special models. Automatic search If your device does not respond to the remote control, even though you have tried all of the codes listed for your device type and the relevant brand, then try using the automatic search. This will enable you to find codes for brands that were not listed in the device Code List. Switch the relevant device on manually. Briefly press the required souce key(TV, STB, VCR, AUX). Keep the CODE key pressed for approx. 3 seconds until the blue LED remains solid. Point the remote control at the device and briefly press the button P+ once. If the device has no program function, press (PLAY) or instead. The remote control starts the code search after 6 seconds and transmits all codes consecutively at 1second intervals (see also next section). The LED will lights up for each transmission. As soon as the device responds to the remote control, press ENTER . – If you did not press ENTER at the right time, you can return to the code to which the device responded step by step by pressing P– key. NOTICE! The correct code will not be stored and the code search will have to be repeated, if you have ended the code search with ENTER at an earlier or later time, without any reaction by the device. To cancel the search, press EXIT. Code searching by brand name This function gives you the option of searching by brand name (see code list). This is done as follows: Switch the relevant device on manually. Briefly press the required source key (TV, STB, VCR, AUX). Keep the CODE key pressed down for approx. 3 seconds until the blue LED briefly flashes and then remains on. Enter the one-digit code according to the following table: Key 1 = Medion, Tchibo Key 2 = Philips, Radiola, Philco, Erres, Pye Key 3 = Sony, Akai, Panasonic, JVC, Sharp, Toshiba, Daewo Key 4 = Thomson, Brandt, Fergusson Key 5 = Saba, Nordmende, Telefunken Key 6 = Grundig, Blaupunkt Key 0 = all brands. or PLAY), until the device responds ac Continue pressing the P+ key (or for video recorders cordingly. Proceed quickly, otherwise the automatic code search will start. Save the code by pressing ENTER . If all the codes have been searched, the blue LED will flash for approx. 3 seconds. 38 Code identification ES Code identification gives you the opportunity to determine codes that have already been entered and stored in the remote control. Proceed as follows: EN Switch the relevant device on manually. Briefly press the required source key (TV, STB, VCR, AUX). DE Keep the CODE key pressed for approx. 3 seconds until the blue LED remains solid. Briefly press the CODE button. The blue LED will briefly extinguish after the key has been pressed. To find the first number, press the number keys from 0 to 9. If the blue LED extinguishes briefly, then it is the first stored number. To determine the second number, press the number keys again from 0 to 9. Repeat the procedure for the third and fourth number. The blue LED will extinguish as soon as the button for the fourth number has been pressed. Code identification has now been completed. 1 second or 3 second intervals If you want the remote control to transmit a new code every 3 seconds instead of every second, proceed as follows: (PLAY) or ) key as described in Point 4 press the P+ or Within 6 seconds of pressing the P+ (or P– key again. The remote control will now only transmit a new code every 3 seconds. This gives you more time, but the procedure will also take longer. 39 Normal operation Operating individual devices After you have finished programming your remote control for your audio/video devices, the remote control will work in the common main functions just like the original remote control of the respective device. Point your remote control at the desired device and press the relevant source key. The key will light up briefly but will not remain lit. Activate the functions by pressing the corresponding function key of your universal remote control. The source key will light up briefly each time the key is pressed. Please note: In certain circumstances, not every function of your original remote control may be directly available on the universal remote control. Especially for newer devices, it might be possible that the functions are stored to different keys than expected or may not even be available at all. "All off" function You can switch off all pre-programmed devices at the same time. This is done as follows: Briefly press the light up. (STANDBY) key. The selected device switches off and the relevant source key will (STANDBY) key again and keep it pressed for 3 seconds. Now all pre Immediately press the programmed devices will be switched off consecutively. This takes about 3 seconds. If a default device was switched off, it can be switched on via the "All off" function. EPG – Electronic Programme Guide The EPG ("Electronic Programme Guide") key has various functions depending on which code has been used: The button will open the electronic television channel in the case of TV and satellite codes (e. g. SAT-TV or DVB-T). For DVD codes the button opens the title menu. You will be able to program with the button in the case of VCR codes, provided that your video recorder has a showview function. Universal functions ("Punch Through") The universal functions (also called "Punch Through" functions) enable you to carry out certain functions on a different device type than the programmed one. These are the volume, mute and playback functions. If the remote control is in VCR, DVD, SAT or CBL mode, the volume and mute keys control the TV set (provided the other devices do not have their own volume control); if the remote control is in TV mode or in another mode without playback function, the Play, Pause, Stop and perhaps Record will actuate any video recorder, DVD player or DVD recorder which is connected. The last selected device is actuated. Programming the volume/mute universal functions for another or a particular type of unit In its delivered state, the universal remote control is programmed in such a way that the volume and mute functions automatically control the TV set if a source key for a device with image transmission (DVD, video recorder) is pressed. You can program the universal remote control so that the universal functions "Volume" and "Mute" will actuate another device type than the TV set. Keep the CODE key pressed down for approx. 3 seconds until the background lighting of the source key briefly flashes and then remains on. Keep the 40 (MUTE) key pressed down until the blue LED goes off. Press a source key for the device for which you want to control the volume and mute functions. The blue LED will turn on. Press the (MUTE) key; the blue LED will go out. EN Restoring the universal volume/mute functions If you have changed the universal volume and mute functions, as described in the previous two sections, you can reset the functions back to the factory settings and thus restore the "Punch Through" effect. Keep the CODE key pressed down for approx. 3 seconds until the background lighting of the source key briefly flashes and then remains on. Press the ES (MUTE) key until the blue LED goes out. Press the (MUTE) key again. The blue LED will extinguish completely. The volume and mute functions are now restored to their factory defaults. 41 DE Troubleshooting The remote control does not work: Check whether your devices have been properly connected and are switched on. Check whether the remote control batteries have been correctly inserted and have matching +/– polarity. If the batteries are too weak then replace them with new ones. There are several device codes listed under the brand name of my device. How do I determine the correct device code? To determine the correct device code for your device, try each consecutive code until most of the functions of the device function properly. The devices only respond to a few remote control commands: 42 Continue testing further codes until the devices respond to the commands accordingly. If manual code entry and automatic code search are unsuccessful, it may be that the device is not compatible to your universal remote control. Troubleshooting ES If errors occur, check first whether you can correct the problem yourself. The following overview may help you. EN CAUTION! Never try to repair the device yourself. Contact our service centre or other qualified personnel if a repair is necessary. PROBLEM POSSIBLE CAUSE / REMEDY General No standby display Check the mains connection: Is the plug firmly inserted in the mains socket? The player does not work Press the POWER button on the player then STANDBY on the remote control. If the unit has been affected by a storm, static charging or other external factor, try the following procedure: Press the POWER button on the player (standby mode). Then pull out the mains cable and plug it back in. The disc does not play even has been though PLAY pressed, or stops again immediately Is the disc inserted with the title (printed) side facing upwards? Check whether the disc has been damaged by trying another disc. If the disc is dirty, clean it carefully, wiping it from the centre to the edge with a soft, dry cloth. DVD: Does the DVD have the correct regional code (2)? If condensation has formed: give the player one to two hours to dry off. The device does not respond to the remote control Check whether the batteries need changing and have been inserted correctly. Remove anything which may be blocking the signal between the infrared transmitter, the remote control and the unit's sensor. Is the distance between the remote control and the player too great (over 7 m)? Did you press the correct source key (e. g. DVD for the DVD player)? No picture Are the cable connections between the DVD and television correct and undamaged? Is the television switched on? Have you selected the video channel on the television? Have you selected the correct video output on the DVD player? If you have established a connection without the PROGRESSIVE SCAN function (e. g. SCART), ensure an Interlaced Resolution is selected. If required, set the resolution to 480i, 576i or 1080i (button STOP/RES at the front of the unit). Check whether the HDMI output has been activated (Menu > HDMI Setup > On), if the television device is connected to the DVD player by an HDMI cable. Switch the television device on, if necessary, before you switch on the DVD player. The image mode of the DVD player will be recognised automatically at the television device with this. 43 DE Distorted picture Check whether the DVD is dirty and if necessary clean it carefully, wiping it from the centre to the edge with a soft, dry cloth. Slight picture distortion is not a malfunction. Very distorted picture Image has no colours Poor image Your DVD standard may not match your television set standard (PAL – NTSC, SETUP menu > Sys te m > T V T ype ). You have set a video output signal which is not supported by the television set (SETU P menu > Ge ner al Se tup Page > Vid eo O u t ). Incorrect image format (4:3, 16:9) In the SETUP menu > Ge ner al Se tu p Pag e > T V D is p la y check whether the selected format matches that of the TV set. No sound Has the sound been switched off (MUTE)? DVD-related problems Wrong language Wrong subtitle language Change the language settings in the SETUP menu by using the AUDIO button to in the DVD menu (button DVD MENU or TITLE). Check on the DVD cover or DVD menu whether the selected language is actually on the DVD. SKIP function does not work Some DVDs disable the SKIP function for certain titles or chapters. The camera angle cannot be changed. Only a few discs allow camera angles to be selected and usually only for selected scenes on any one DVD. You have forgotten the password. Use the master password 1369. 44 Disposal ES Packaging Your DVD player is wrapped in packaging to protect it from damage during transport. Packaging is a raw material and can be re-used or added to the recycling system. Appliance At the end of its life, the DVD player must not be disposed of in household rubbish. Seek the advice of your local authority on correct, environmentally-friendly disposal. Dispose of the unit and the batteries separately. Batteries Do not put used batteries in the household rubbish. Batteries should be deposited at a collection point for used batteries. 45 EN DE Technical data DVD-Player Voltage supply: 230 V ~ 50 Hz Power consumption: 20 W Standby power consumption: <1W Output voltage, headphones: max. 150mV USB connection: max. 100mA Batteries for remote control: 2 x 1,5 V AAA/LR03 Colour TV system: Laser output: Compatible disc formats: VCD, PAL/NTSC Class 1 laser product DVD (Digital Versatile Disk), DVD+R, DVD+RW, DVD-R, DVD-RW, SVCD, CD-Audio, CD-R, CD-RW, JPEG-CD, MP3-CD, WMAs, XviD, DivX Compatible memory cards: SD cards, multimedia cards, Memory Sticks, Memory Stick PRO NOTICE! These days there are many non standard CD recording and copy protection procedures as well as various blank CD-R and CD-RW discs. This can occasionally lead to read errors or delays. This does not mean the device is faulty. Video Video Formats: 4:3 / 16:9 Decoder: MPEG 2 Audio Decoder: MPEG; Dolby Digital (AC-3) dts only possible with additional external decoder Digital analogue converter: 24 Bit / 96 kHz This device fulfils the basic requirements and the relevant regulation of the Ecodesign Guideline 2009/125/EG (Commission Regulation 1275/2008) Universal remote control technical specifications Batteries: 2 x 1,5 V Micro (LR03/AAA) (alkaline recommended) LED class: 1M Technical and visual changes and printing errors reserved. Copyright © 2010 All rights reserved. This Handbook is protected by copyright. Duplicating in mechanical, electronic or any other form is forbidden without the written permission of the manufacturer. The copyright lies with the MEDION Company. 46 Inhalt ES Übersicht ............................................................................................................................5 Hauptgerät ........................................................................................................................................ 5 Fernbedienung .................................................................................................................................. 7 EN Hinweise zu dieser Anleitung .............................................................................................8 In dieser Anleitung verwendete Warnsymbole und Signalwörter ....................................................... 8 Sicherheitshinweise ............................................................................................................9 Elektrische Geräte nicht in Kinderhände ............................................................................................. 9 Das Gerät sicher aufstellen................................................................................................................. 9 Netzanschluss.................................................................................................................................... 9 Niemals selbst reparieren ................................................................................................................... 9 Der CD-Spieler ................................................................................................................................ 10 Kopfhörer ........................................................................................................................................ 10 Im Falle von Funktionsstörungen ..................................................................................................... 10 Sicherer Umgang mit Batterien ........................................................................................................ 10 Das Gerät reinigen ........................................................................................................................... 10 Allgemeines ..................................................................................................................... 11 Über DVD ........................................................................................................................................ 11 DVD-Aufbau .................................................................................................................................... 11 Andere spielbare Formate ................................................................................................................ 11 Verfügbare Surround-Tonformate ................................................................................................... 12 Vorbereitung ................................................................................................................... 13 Gerät auspacken .............................................................................................................................. 13 Lieferumfang prüfen ........................................................................................................................ 13 Batterien in die Fernbedienung einlegen ......................................................................................... 13 Anschlüsse und Anschlussmöglichkeiten ......................................................................... 14 Gerät aufstellen ............................................................................................................................... 14 Anschlussmöglichkeiten zwischen DVD-Player und Fernsehgerät .................................................... 14 TV-Anschluss mit Progressive Scan-Funktion .................................................................................... 17 Digitale Tonübertragung ................................................................................................................. 18 Netzanschluss.................................................................................................................................. 18 Optional: Kopfhörer anschließen ..................................................................................................... 18 Tastenfunktionen ............................................................................................................ 19 Steuerung am Gerät oder über die Fernbedienung .......................................................................... 19 Standby/Einschalten/Ausschalten .................................................................................................... 19 Disk einlegen ................................................................................................................................... 19 Speicherkarte und USB Memory Stick einlesen................................................................................. 20 Tastensperre – KEY LOCK ................................................................................................................ 20 Wiedergabefunktionen .................................................................................................................... 20 Suchfunktionen ............................................................................................................................... 21 Wiederholungsfunktionen ............................................................................................................... 22 Abspielreihenfolge programmieren – PROGRAM ............................................................................. 22 Direktanwahl Titel/Zeit – SEARCH .................................................................................................... 23 "Lesezeichen" setzen – BOOKMARK ................................................................................................. 24 Auszug wählen – DIGEST (DVD und VCD) ....................................................................................... 24 RANDOM und INTRO (nur Audio-CD) ............................................................................................. 25 Bildfunktionen ................................................................................................................................. 25 Klangfunktionen .............................................................................................................................. 26 TITLE, MENU.................................................................................................................................... 27 AUDIO und SUBTITLE ...................................................................................................................... 27 PBC-Funktion (nur VCD 2.0) ............................................................................................................ 27 Navigieren auf MP3- und JPEG-Datenträgern ................................................................................... 28 Einstellungen im SETUP-Menü ......................................................................................... 29 Navigieren in den Menüs ................................................................................................................. 29 Unter- und Auswahlmenüs .............................................................................................................. 29 Menü verlassen ............................................................................................................................... 29 3 DE Menü System .................................................................................................................... 30 TV-Format ....................................................................................................................................... 30 Kamerapos. Anz. ............................................................................................................................. 30 OSD-Sprache ................................................................................................................................... 30 Gehörlos.Titel .................................................................................................................................. 30 Bildschirmschoner ........................................................................................................................... 30 Auto-Mark. ...................................................................................................................................... 30 Menü Audio ...................................................................................................................... 31 Lautsprecherkonfiguration .............................................................................................................. 31 SPDIF............................................................................................................................................... 31 Kanalverzögerung ........................................................................................................................... 32 Klangeinstellung ............................................................................................................................. 32 3D-Bearbeitung ............................................................................................................................... 32 Menü Dolby Digital .......................................................................................................... 33 Zweikanalton .................................................................................................................................. 33 Dynamik.......................................................................................................................................... 33 Menü Video ...................................................................................................................... 34 Menü Voreinstellungen .................................................................................................... 35 TV-Norm ......................................................................................................................................... 35 Sprachen auswählen ....................................................................................................................... 35 Audio .............................................................................................................................................. 35 Untertitel ......................................................................................................................................... 35 Disk-Menu ....................................................................................................................................... 35 Sperren ........................................................................................................................................... 35 Passwort.......................................................................................................................................... 36 Zurücksetzen ................................................................................................................................... 36 Die 5 in 1 IR-Fernbedienung ............................................................................................ 37 Sicherheitshinweise ......................................................................................................................... 37 Anwendungsumfang ...................................................................................................................... 37 Gerätecode programmieren ............................................................................................................ 37 1-Sekunden- oder 3-Sekundentakt................................................................................................... 39 Normaler Betrieb ............................................................................................................. 40 Einzelgeräte bedienen ..................................................................................................................... 40 "Alles-aus"-Funktion ........................................................................................................................ 40 EPG – Elektronisches Programm ...................................................................................................... 40 Universal-Funktionen ("Punch Through")......................................................................................... 40 Fehlerbehebung ............................................................................................................... 42 Die Fernbedienung funktioniert nicht .............................................................................................. 42 Es sind mehrere Gerätecodes unter dem Markennamen meines Geräts aufgeführt. Wie ermittle ich den richtigen Gerätecode? ..................................................................................................................... 42 Die Geräte reagieren nur auf einige Befehle der Fernbedienung:...................................................... 42 Wenn Störungen auftreten .............................................................................................. 43 Entsorgung ...................................................................................................................... 45 Technische Daten ............................................................................................................. 46 DVD-Player ...................................................................................................................................... 46 Technische Daten 5 in 1 IR-Fernbedienung ...................................................................................... 46 4 Übersicht ES Hauptgerät EN Vorderseite 1 2 3 4 5 6 7 8 9 10 11 12 13 DE Blaue LED-Leuchte für Standby-Modus Diskfach PLAY: Wiedergabe OPEN/CLOSE: Diskfach öffnen und schließen STANDBY: Vom Standby-Modus ein- und wieder in Standby schalten STOP/RES: Wiedergabe stoppen; Wiederholt drücken: Auflösung wählen IR: Empfangsfeld für den Sender der Fernbedienung USB: LED-Leuchte für USB-Modus Display (siehe unten) Kartenlesegerät für verschiedene Speicherkarten USB-Anschluss PHONES: Ohr-/Kopfhöreranschluss VOLUME: Lautstärkeregler für Ohr-/Kopfhörer Rückseite 1 2 3 4 5 6 7 8 9 10 11 12 13 14 Netzkabel Betriebsschalter S-VIDEO: S-VIDEO-Ausgang (Bildübertragung zum Fernsehgerät) VIDEO OUT: VIDEO-Ausgang (Bildübertragung zum Fernsehgerät) OPTICAL: Digitaler Audio-Ausgang HDMI: HDMI-Ausgang (digitale Bild- und Tonübertragung) Y Pr Pb: Komponentenausgänge SCART: SCART-Anschluss zum Fernsehgerät o. Videorecorder FRONT: Anschlüsse vordere Lautsprecher links/rechts SURROUND: Anschlüsse hintere Lautsprecher links/rechts SUB: Anschluss Subwoofer (Basslautsprecher) CENT: Anschluss Center-Lautsprecher COAXIAL: Digitaler Audio-Ausgang AUDIO L/R: Analoger Audio Ausgang 5 Display Medium: VCD Medium: DVD Wiedergabemodus Pause aktiv Wiederholung aktiv Disk im dts-Tonformat Disk im Dolby Digital-Tonformat Ablaufende Zeit im Format H:MM:SS Aktueller Titel / aktuelles Kapitel PBC: Playback-Control aktiv (Video-CD) 9 Medium: CD 10 Medium: MP3 1 2 3 4 5 6 7 8 6 Fernbedienung ES DVD-Fernbedienung und 5 in 1 IR-Fernbedienung EN In dieser Übersicht sind die Tastenfunktionen für die Bedienung des DVD-Players beschrieben. Mit dieser Fernbedienung können Sie jedoch noch weitere Geräte bedienen. Die Funktionalität der Fernbedienung als Universalfernbedienung wird im Kapitel "Die 5 in 1 IR-Fernbedienung", Seite 37 beschrieben. Falls der DVD-Player nicht auf einen Tastendruck reagiert, drücken Sie ggf. vorher die Quellentaste DVD. Vom Standby-Modus anschalten und umgekehrt 1 2 3 TV: Quellentaste: Bedienung eines anderen STB: Quellentaste: Bedienung eines anderen Gerätes 4 5 6 7 8 DVD: Quellentaste: Bedienung des DVD-Players VCR: Quellentaste: Bedienung eines anderen Gerätes AUX: Quellentaste: Bedienung eines anderen Gerätes CODE: Code für andere Gerätetypen eingeben. SUBTITLE: Untertitelsprache auswählen; im TV- 9 10 11 12 13 14 15 16 17 18 19 20 21 TITLE: Titelmenü (DVD) aufrufen; EPG: im TV-Betrieb (z. B. SAT-Receiver, Set-Top-Box) Betrieb Teletext öffnen 22 23 24 25 26 27 28 29 30 31 32 33 34 35 36 37 38 39 40 41 42 43 Pfeiltasten: In Menüs navieren ENTER: Auswahl bestätigen RETURN/EXIT: Zurück im Menü/Menü verlassen MENU: Menü aufrufen DIGEST: Sonderfunktionen aufrufen PROGRAM: Titelreihenfolge programmieren BOOKMARK: Lesezeichen-Funktion SEARCH: Titel/Zeit direkt anwählen AUDIO: Direkte Sprachauswahl (DVD) ZOOM: Bild vergrößern USB/CARD: USB-Betrieb oder Kartenbetrieb wählen CARD SELECT: Taste bei diesem Modell ohne Funktion LED-Anzeige zur Bestätigung eines Tastendrucks 0-9: Zifferntasten, z. B. für Direktauswahl von Titel/Kapitel CLEAR / -/--: Auswahl löschen (Menüs), TV-Betrieb: Eingabe von 1- bzw. 2-stelligen Programmnummern SETUP/AV: Setup-Menü öffnen / AV: Steuerung anderer Geräte : Titel vor-/zurückspringen (SKIP); P+/P–: Programmwahl am TV : Stummschaltung am TV; die Stummschaltung funktioniert auch im DVD-Modus +/–: Lautstärke am TV hoch/runter :Schneller Rücklauf : Wiedergabe : Schneller Vorlauf / KEY LOCK: 2x drücken für Aufnahme beginnen / Tastensperre : Wiedergabe stoppen : Wiedergabe unterbrechen OPEN/CLOSE: Diskfach öffnen und schließen SLOW/F: Langsamer Vorlauf SLOW/R: Langsamer Rücklauf REPEAT: Wiederholfunktionen REPEAT A-B: Wiederholung eines definierten Abschnitts RANDOM: Titel in zufälliger Reihenfolge abspielen ANGLE: Kameraposition (Blickwinkel) 3D: Sound-Effekte wie Rock, Pop etc. DISPLAY: Anzeige aktueller Titel/ abgelaufene Zeit 7 DE Hinweise zu dieser Anleitung Lesen Sie vor Inbetriebnahme die Sicherheitsvorschriften aufmerksam durch. Beachten Sie die Warnungen auf dem Gerät und in der Bedienungsanleitung. Bewahren Sie die Bedienungsanleitung immer in Reichweite auf. Wenn Sie das Gerät verkaufen oder weitergeben, händigen Sie unbedingt auch diese Anleitung aus. In dieser Anleitung verwendete Warnsymbole und Signalwörter GEFAHR! Warnung vor unmittelbarer Lebensgefahr! WARNUNG! Warnung vor möglicher Lebensgefahr und/oder schweren irreversiblen Verletzungen! VORSICHT! Hinweise beachten, um Verletzungen und Sachschäden zu vermeiden! ACHTUNG! Hinweise beachten, um Sachschäden zu vermeiden! HINWEIS! Weiterführende Informationen für den Gebrauch des Gerätes! HINWEIS! Hinweise in der Bedienungsanleitung beachten! WARNUNG! Warnung vor Gefahr durch elektrischen Schlag! WARNUNG! Warnung vor Gefahr durch zu hohe Lautstärke! 8 Aufzählungspunkt / Information über Ereignisse während der Bedienung Auszuführende Handlungsanweisung Sicherheitshinweise ES Elektrische Geräte nicht in Kinderhände EN Kinder können Gefahren, die von elektrischen Geräten ausgehen, nicht erkennen. Lassen Sie Kinder daher niemals unbeaufsichtigt elektrische Geräte benutzen. DE Halten Sie auch die Verpackungsfolien von Kindern fern. Es besteht Erstickungsgefahr. Das Gerät sicher aufstellen Stellen Sie das Gerät auf eine feste, ebene Oberfläche. Es ist nicht für den Betrieb in Räumen mit hoher Luftfeuchtigkeit (z. B. Badezimmer) ausgelegt. Achten Sie auf folgende Umgebungsbedingungen: Gewährleisten Sie immer eine ausreichende Belüftung. Die Belüftung darf nicht durch Bedecken der Lüftungsöffnungen mit Gegenständen wie Zeitschriften, Tischdecken, Vorhängen usw. behindert werden. Halten Sie einen Mindestabstand von 10 cm zu allen Seiten ein. Lassen Sie keine direkten Wärmequellen (z. B. Heizungen) auf das Gerät wirken. Achten Sie darauf, dass kein direktes Sonnenlicht auf das Gerät trifft. Setzen Sie das Gerät nicht Tropf- oder Spritzwasser aus und stellen Sie keine mit Flüssigkeit gefüllten Gegenstände – z. B. Vasen – auf das Gerät. Stellen Sie das Gerät nicht in unmittelbarer Nähe von Magnetfeldern (z. B. Fernsehgeräten oder Lautsprechern) auf. Offene Brandquellen, wie z. B. Kerzen, dürfen nicht in die Nähe des Geräts oder auf das Gerät gestellt werden. Netzanschluss Schließen Sie das Gerät nur an eine gut erreichbare Steckdose (230 V ~ 50 Hz) an, die sich in der Nähe des Aufstellortes befindet. Für den Fall, dass Sie das Gerät schnell vom Netz nehmen müssen, muss die Steckdose frei zugänglich sein. Nehmen Sie das Gerät nicht in Betrieb, wenn Gerät oder Anschlussleitungen sichtbare Schäden aufweisen oder das Gerät heruntergefallen ist. Ziehen Sie bei Beschädigungen des Steckers, der Anschlussleitung oder des Geräts sofort den Stecker aus der Steckdose. Achten Sie darauf, dass die Anschlussleitung nicht zur Stolperfalle wird. Die Anschlussleitung darf nicht geklemmt und gequetscht werden. Warten Sie mit dem Anschluss an das Stromnetz, wenn das Gerät von einem kalten in einen warmen Raum gebracht wird. Das dabei entstehende Kondenswasser kann unter Umständen das Gerät zerstören. Wenn das Gerät Zimmertemperatur erreicht hat, kann das Gerät gefahrlos in Betrieb genommen werden. Gewitter Bei längerer Abwesenheit oder Gewitter ziehen Sie den Netzstecker und das Antennenkabel ab. Niemals selbst reparieren WARNUNG! Versuchen Sie auf keinen Fall, das Gerät selber zu öffnen und/oder zu reparieren. Es besteht die Gefahr des elektrischen Schlags! Manipulieren Sie nicht das Netzkabel des Geräts. Wenden Sie sich im Störungsfall an unser Service Center oder eine andere geeignete Fachwerkstatt, um Gefährdungen zu vermeiden. 9 Der CD-Spieler Der CD-Spieler ist ein Laserprodukt der Klasse 1. Das Gerät ist mit einem Sicherheitssystem ausgerüstet, das das Austreten von gefährlichen Laserstrahlen während des normalen Gebrauchs verhindert. Um Augenverletzungen zu vermeiden, manipulieren oder beschädigen Sie niemals das Sicherheitssystem des Geräts. Kopfhörer WARNUNG! Übermäßiger Schalldruck bei der Verwendung von Ohrhörern oder Kopfhörern kann zum Verlust des Hörsinns führt. Bevor Sie einen Ohr- Kopfhörer aufsetzen, stellen Sie die Lautstärke auf ein Minimum! Ihr Gehör kann Schaden nehmen, wenn es zu lange oder zu plötzlich hohen Lautstärken ausgesetzt wird. Im Falle von Funktionsstörungen Sollte das Gerät Funktionsstörungen zeigen, kann es sein, dass eine elektrostatische Entladung stattgefunden hat. Ziehen Sie in diesem Fall das Netzkabel ab und nehmen Sie die Batterien heraus. Legen Sie dann die Batterien wieder ein und nehmen Sie das Gerät wieder ans Netz. Das Gerät wird auf diese Weise zurückgesetzt. Sicherer Umgang mit Batterien Die Fernbedienung des Geräts benötigt Batterien. Beachten Sie hierzu folgende Hinweise: Halten Sie Batterien von Kindern fern. Sie können bei Verschlucken lebensgefährlich sein. Wurde eine Batterie verschluckt, muss sofort medizinische Hilfe in Anspruch genommen werden. Werfen Sie die Batterien nicht ins Feuer, schließen Sie sie nicht kurz und nehmen Sie sie nicht auseinander. Reinigen Sie die Batterie- und Gerätekontakte vor dem Einlegen bei Bedarf. Tauschen Sie immer alle Batterien gleichzeitig aus. Setzen Sie nur Batterien des gleichen Typs ein. Verwenden Sie keine unterschiedlichen Typen; mischen Sie keine gebrauchten und neue Batterien. Beachten Sie beim Einlegen der Batterien die Polarität (+/–). Wenn Sie das Gerät längere Zeit nicht verwenden, nehmen Sie die Batterien heraus. Entfernen Sie erschöpfte Batterien umgehend aus dem Gerät! Es besteht erhöhte Auslaufgefahr! Setzen Sie Batterien keinen extremen Bedingungen und direkter Sonneneinstrahlung aus; stellen Sie das Gerät z. B. nicht auf Heizkörpern ab ! Es besteht erhöhte Auslaufgefahr! Versuchen Sie niemals, normale Batterien wieder aufzuladen! Es besteht Explosionsgefahr! Nehmen Sie ausgelaufene Batterien sofort aus dem Gerät. Reinigen Sie die Kontakte, bevor Sie neue Batterien einlegen. Es besteht Verätzungsgefahr durch Batteriesäure! Sollte Batteriesäure ausgelaufen sein, vermeiden Sie unbedingt den Kontakt mit Haut, Augen und Schleimhäuten! Falls die Säure doch mit Haut in Kontakt gekommen ist, spülen Sie die betroffenen Stellen sofort mit reichlich klarem Wasser und suchen Sie umgehend einen Arzt auf. Das Gerät reinigen Ziehen Sie vor der Reinigung den Netzstecker aus der Steckdose. Für die Reinigung verwenden Sie ein trockenes, weiches Tuch. Verwenden Sie keine chemischen Lösungs- und Reinigungsmittel, weil diese die Oberfläche und/oder Beschriftungen des Geräts beschädigen können. 10 Allgemeines ES Über DVD EN Die DVD - Digital Versatile Disc (englisch für "vielseitige digitale Scheibe") ist ein digitales Speichermedium für Informationen. DVDs sind durch eins der nebenstehenden Symbole gekennzeichnet. DE Abhängig davon, wie die Informationen aufgebracht sind, ergeben sich verschiedene DVD-Typen mit unterschiedlichen Speicherkapazitäten. DVD-Aufbau Video-DVDs sind in Titel und Kapitel unterteilt. Eine DVD kann mehrere Titel haben, die wiederum aus mehreren Kapiteln bestehen können. Titel und Kapitel sind jeweils fortlaufend nummeriert: Normalerweise besteht der erste Titel einer DVD aus Lizenzhinweisen und Informationen zum Hersteller. Der nächste Titel ist meist der Film selbst. Weitere Titel können z. B. "Making-Of"-Reportagen, Filmvorschauen oder Informationen zu den Schauspielern enthalten. Sprachen und Untertitel Auf DVDs können bis zu acht Sprachen und Untertitel in bis zu 32 Sprachen gespeichert werden. Sprache und Untertitel können bei der Wiedergabe beliebig kombiniert werden. Blickwinkel Bei manchen DVDs kann sogar der Blickwinkel geändert werden, sofern der Film mit unterschiedlichen Kamerapositionen aufgenommen wurde. Regionalcodes Aufgrund weltweiter Vertriebsstrategien wurde für die DVD ein Code entwickelt, der das Abspielen nur auf Geräten erlaubt, die in bestimmten Regionen erworben wurden. Dieser Code basiert auf einem System, das die Welt in sechs Regionen einteilt. Europa gehört zur Zone 2. Auf Ihrem DVD-Player lassen sich daher DVDs abspielen, die mit dem Regionalcode 2 versehen sind. Der Regionalcode ist auf der Verpackung der DVD aufgedruckt (siehe nebenstehendes Logo). Außer DVDs mit dem Regionalcode 2 lassen sich nur DVDs mit dem Regionalcode 0 (geeignet für jeden DVD-Player) auf dem Gerät wiedergeben. HINWEIS! Sollten beim Abspielen bestimmter DVDs Probleme auftreten, versichern Sie sich, dass die DVD den Ländercode 2 oder 0 hat. Andere spielbare Formate MP3 und WMA WMA-Titel werden auf dem Bildschirm mit folgendem Symbol gekennzeichnet: Das MP3- und WMA-Format sind Kompressionsformate für Audio-Daten. WMA steht für "Windows Media Audio" und ist jünger als das MP3-Format. MP3-/WMA-Dateien müssen zur Erkennung mit den entsprechenden Dateierweiterung *.mp3 bzw. *.wma abgespeichert sein. 11 MPEG4 Bei MPEG4 handelt es sich um eine Kompressionstechnologie für Multimedia-/Video-Daten ("MPEG" = "Moving Picture Experts Group"). Verfügbare Surround-Tonformate Das Gerät kann zwei Surround-Tonformate lesen und ausgeben. Dolby Digital 5.1 Beim Dolby-Digital-Tonformat wird das Audiomaterial digital gespeichert. Dabei werden bis zu fünf separate Vollfrequenz-Audiokanäle (vorne links und rechts, Mitte, hinten links und rechts) sowie ein Effekt- bzw. Tiefenkanal (5.1) separat gespeichert. Tonträger im Dolby-Digital-Format sind mit nebenstehendem Warenzeichen gekennzeichnet. Da jeder Kanal vollkommen unabhängig ist, wird ein realistisches Klangfeld mit einem "dreidimensionalen" Hörgefühl geschaffen, wodurch der Ton Distanz, Bewegung und eine relative Position im Raum erhält. Ihr Gerät kann diese Audiodaten lesen oder dekodieren und gibt sie an den 5.1-Ausgängen aus. Andererseits kann das Originalsignal über die Digitalausgänge an einen externen Dekoder/Verstärker geführt werden. dts (Digital Theater Systems) Hinter der Abkürzung dts verbirgt sich ein bisher weniger verbreitetes Tonformat, mit dem ebenfalls bis zu sechs (5.1) getrennte Kanäle auf einem Tonträger gespeichert werden. Tonträger im dts-Format sind mit nebenstehendem Warenzeichen gekennzeichnet. Ihr Gerät kann diese Audiodaten lesen und leitet sie zur Dekodierung an die digitalen Ausgänge weiter ("DIGITAL OUT"). 12 Vorbereitung ES Gerät auspacken EN Entfernen Sie sämtliches Verpackungsmaterial, auch die Folien an der Gerätefront. DE GEFAHR! Lassen Sie kleine Kinder nicht mit Folie spielen. Es besteht Erstickungsgefahr! Lieferumfang prüfen Vergewissern Sie sich beim Auspacken, dass folgende Teile mitgeliefert wurden: DVD-Player SCART-Kabel Fernbedienung 2 Batterien (1,5 V; Typ AAA/LR03) Bedienungsanleitung mit Garantiedokumenten Batterien in die Fernbedienung einlegen Für die Fernbedienung sind zwei 1,5 V-Batterien (Typ AAA/LR03) mitgeliefert. Schieben Sie den Batteriefachdeckel auf der Rückseite der Fernbedienung in Pfeilrichtung ab. Legen Sie die Batterien so ein, dass der Minuspol der Batterien an den Federn anliegt. Schieben Sie den Batteriefachdeckel wieder auf. WARNUNG! Die beiliegenden Batterien dürfen nicht geladen, nicht auseinander genommen, in Feuer geworfen oder kurzgeschlossen werden. Batterien können bei Verschlucken lebensgefährlich sein. Bewahren Sie Batterien und Fernbedienung daher für Kleinkinder unzugänglich auf. Wurde eine Batterie verschluckt, muss sofort ärztliche Hilfe gesucht werden. 13 Anschlüsse und Anschlussmöglichkeiten Das Gerät kann auf vielseitige Weise mit anderen Eingangs- und Ausgangsgeräten verbunden werden. ACHTUNG! Schalten Sie alle Geräte aus, bevor Sie sie anschließen. Nehmen Sie die Geräte erst ans Netz, wenn die Anschlüsse vorgenommen wurden. Gerät aufstellen Stellen Sie das Gerät auf eine ebene, feste Oberfläche. Beachten Sie hierzu auch die Sicherheitshinweise auf Seite 8. Einige aggressive Möbellacke können die Gummifüße des Geräts angreifen. Stellen Sie das Gerät ggf. auf eine Unterlage. Anschlussmöglichkeiten zwischen DVD-Player und Fernsehgerät Verbindung mit dem Fernseher über das SCART-Kabel Das SCART-Kabel stellt die einfachste Verbindung zwischen DVD-Player und Fernseher dar. Sofern Ihr Fernsehgerät zur Verarbeitung von RGB-Signalen in der Lage ist, erreichen Sie über diese Option eine gute Bildqualität. 14 Verbindung mit dem Fernseher über S-Video-Kabel ES EN DE Falls Ihr Fernsehgerät nicht über einen SCART-Anschluss verfügt, können Sie ihn über ein S-Video-Kabel mit dem Gerät (S-VIDEO-Buchse) verbinden. Sie erreichen damit eine gute Bildqualität. Zusätzlich muss ein Audio-Cinch-Kabel angeschlossen werden. Achten Sie bei den Cinch-Steckern auf die Farbkodierung für links/rechts. Stellen Sie zur Wiedergabe des STEREO-Tons die Downmix-Option im Menü La u ts pr ec herk on f ig . des Audio -Menüs auf Stereo. HINWEIS! Das Audio-Cinch-Kabel kann statt mit dem Fernsehgerät auch mit einer Dolby-SurroundAnlage/Stereo-Anlage verbunden werden. Verbindung mit dem Fernseher über Video-Cinch-Kabel Falls Ihr Fernsehgerät weder über einen SCART-Anschluss noch über eine S-VIDEO-Buchse verfügt, können Sie das Gerät auch über ein Video-Cinch-Kabel verbinden. Zusätzlich muss ein Audio-Cinch-Kabel angeschlossen werden. Achten Sie bei den Cinch-Steckern auf die Farbkodierung für links/rechts. Stellen Sie zur Wiedergabe des Stereo-Tons die Downmix-Option im Menü L au ts pr ec herk o n fi g . des Audio -Menüs auf Stereo. 15 Komponentenanschlüsse Wenn Ihr Fernseher über Komponenteneingänge verfügt (Y, Cb/Pb, Cr/Pr), können Sie das Gerät über diese Anschlüsse mit dem Fernseher, oder auch mit einem Beamer, verbinden. Diese Anschlüsse realisieren das so genannte „YUV-Farbformat“. Verbinden Sie zur Bildübertragung die Y-, Pb- und Pr-Buchse des Geräts über ein dreipoliges VideoCinch-Kabel mit den entsprechenden Buchsen des Fernsehers oder Beamers. Schließen Sie zur Tonübertragung zusätzlich ein Audio-Cinch-Kabel an HINWEIS! Wählen Sie für den Anschluss über die Komponentenbuchsen zur Herstellung der Progressive Scan-Funktion im Menü Video > TV-O u t die Einstellung YUV und unter Auflösung 5 76p . Digitale Bild- und Tonübertragung: HDMI Ihr DVD-Player verfügt über einen HDMI (OUT)-Anschluss. HDMI ist im Bereich der Unterhaltungselektronik die einzige Schnittstelle, die gleichzeitig Audio- und Videodaten digital überträgt. Sie verarbeitet alle heute bekannten Bild- und Tonformate, einschließlich HDTV (High Definition Television) und kann somit auch die derzeit höchste Auflösung von 108 0p ohne Qualitätsverlust darstellen. 16 Sie können den DVD-Player sowohl an einen Fernsehgerät mit HDMI- als auch mit DVI-Eingang anschließen (HDMI ist abwärtskompatibel zu DVI – "Digital Visual Interface") . Für den Anschluss an einen HDMIEingang benötigen Sie lediglich ein HDMI-Kabel. Falls Ihr Fernsehgerät eine DVI-Buchse besitzt, benötigen Sie zusätzlich einen Adapter (HDMI – DVI), der ebenfalls im Fachhandel erhältlich ist. HINWEIS! Wenn Sie das HDMI- oder DVI-Gerät angeschlossen haben, schalten Sie zunächst nur dieses Gerät ein. Warten Sie dann ca. 30 Sekunden und schalten Sie dann erst den DVD-Player ein. Wählen Sie für den Anschluss über HDMI zur Herstellung der Progressive Scan-Funktion die Auflösung 48 0 P, 57 6P, 7 20p (50Hz) , 1 08 0p (5 0Hz) , je nachdem, welche Auflösung Ihr Fernsehgerät unterstützt. HINWEIS! Der HDMI-Ausgang wurde nach dem gültigen HDMI-Standard zertifiziert. Trotzdem kann es in Einzelfällen vorkommen, dass der Anschluss mit einem DVI- oder HDMI-Anschluss eines anderen Geräts nicht kompatibel ist und dadurch keine fehlerfreie Übertragung möglich ist. Hierbei handelt es sich jedoch nicht um einen Fehler Ihres DVD-Players. TV-Anschluss mit Progressive Scan-Funktion Zu Progressive Scan Über die Komponenentenanschlüsse und den HDMI-Anschluss kann das Gerät die Videosignale im PROGRESSIVE SCAN-Format übertragen und dadurch eine sehr gute Bildqualität erzielen. Voraussetzung ist natürlich, dass Ihr TV-Gerät (oder Beamer) dieses Format ebenfalls verarbeiten kann. Im Progressive Scan-Format wird das Bild statt in 50 Halb- in 50 Vollbildern ausgegeben. Bildflimmern wird auf diese Art und Weise auf ein Minimum reduziert, Bewegungsabläufe werden flüssiger. p- und i-Auflösungen Mit der Taste STOP/RES an der Gerätfront und im Setup-Menü Systemeinstellungen > HDMI Setup können Sie Auflösungen für das Progressive Scan-Bildformat („p“) und das Standard-Bildformat („i“ = „interlaced) wählen. Sie schalten die Progessive Scan-Funktion ein, indem Sie eine Auflösung mit „p“ wählen. Schalten Sie die Progessive Scan-Funktion aus (Auflösung mit „i“), wenn Sie das TV-Gerät nicht über die Komponenten- oder HDMI-Buchsen angeschlossen haben. 17 ES EN DE Digitale Tonübertragung Verbinden Sie entweder ein Koaxialkabel oder ein optisches Kabel mit dem Ausgang COAXIAL bzw. OPTICAL am DVD-Player und dem entsprechenden Eingang am Verstärker. HINWEIS! Um in den vollen Genuss der digitalen Klangwiedergabe zu kommen, schalten Sie die Tonausgabe bei Ihrem Fernseher aus. Netzanschluss Wenn Sie alle Anschlüsse vorgenommen haben, verbinden Sie das Netzkabel mit einer geeignete Steckdose (230 V ~ 50 Hz). Optional: Kopfhörer anschließen An der Frontseite des Geräts finden Sie den Kopfhöreranschluss (PHONES). Schließen Sie einen Kopfhörer mit einem 6,3-mm-Klinkenstecker an. Der Kopfhörer verfügt über einen eigenen Lautstärkeregler. WARNUNG! Übermäßiger Schalldruck bei Verwendung von Ohrhörern und Kopfhörern kann zu Schäden am Hörvermögen und/oder zum Verlust des Hörsinns führen. Stellen Sie die Lautstärke vor der Wiedergabe auf den niedrigsten Wert ein. Wenn ein DVD-Player längere Zeit mit erhöhter Lautstärke über einen Kopfhörer betrieben wird, kann das Schäden am Hörvermögen des Zuhörers verursachen. 18 Tastenfunktionen ES Steuerung am Gerät oder über die Fernbedienung EN Tasten an der Gerätefront DE Mit den Tasten an der Gerätefront können Sie die wesentlichen Wiedergabefunktionen Ihrem Geräts aktivieren. Tasten an der Fernbedienung Die Fernbedienung bietet über diese Grundfunktionen hinaus zahlreiche zusätzliche Bedienelemente für die volle Funktionalität Ihres Geräts. Insbesondere können Sie sich nur mit der Fernbedienung in den Menüs, die auf dem Fernsehbildschirm dargestellt werden, bewegen. HINWEIS! In der Anleitung beziehen wir uns bei der Beschreibung der Tasten auf die Fernbedienung, da die Fernbedienung (mit Ausnahme des Netzschalters) alle Funktionen des Geräts umfasst. Wenn die Tasten am Gerät gemeint sind, wird dies ausdrücklich gesagt. Standby/Einschalten/Ausschalten Standby-Modus Mit dem POWER-Schalter an der Geräterückseite schalten Sie das Gerät in den Standby-Modus (ON) und komplett aus (OFF). Im Standby-Modus leuchtet die blaue LED-Leuchte am Gerät. Einschalten Drücken Sie (STANDBY), um das Gerät einzuschalten. Das Display leuchtet auf. Die Art der Anzeigen im Display hängt vom Wiedergabemedium ab. Ausschalten Drücken Sie die Taste (STANDBY) erneut, um das Gerät wieder in den Standby-Modus zu schalten. Das Display erlischt. Disk einlegen Achten Sie darauf, dass vor dem Gerät ca. 15 cm Platz ist, damit das Diskfach beim Ausfahren nicht behindert wird. Drücken Sie bei eingeschaltetem Gerät OPEN/CLOSE. Legen Sie eine Disk mit der beschrifteten Seite nach oben in das Diskfach ein. Achten Sie darauf, dass die Disk mittig in der Diskvertiefung liegt, damit sie beim Schließen nicht verklemmt. Drücken Sie die Taste OPEN/CLOSE. Das Diskfach schließt sich. Nach einigen Sekunden beginnt bei DVDs normalerweise automatisch die Wiedergabe der Disk. Die Anzeige im Display hängt wiederum von der Art der Disk ab. Eventuell müssen Sie (PLAY) drücken, oder es erscheint ein Menü, in dem Sie mit den Navigationstasten eine Auswahl treffen müssen. 19 Speicherkarte und USB Memory Stick einlesen Ihr DVD-Player verfügt über ein Speicherkarten-Laufwerk für SD-Karten, Multimedia-Karten oder Memory Sticks, sowie einen Anschluss für einen USB Drive oder anderes USB-Abspielgerät. Speicherkarte Schieben Sie eine Speicherkarte mit den Kontakten nach unten und der abgekanteten Ecke nach vorne rechts in das Speicherkarten-Laufwerk an der Gerätefront ein. Wenn die Karte ganz eingeschoben ist, steht sie etwas aus dem Laufwerk heraus. Auf diese Weise können Sie sie wieder herausziehen. ACHTUNG! Schieben Sie die Speicherkarte keinesfalls mit Gewalt ein. Wenn die Karte sich nicht einsetzen lässt, wurde sie vielleicht falsch eingeschoben oder passt nicht für dieses Laufwerk. USB-Abspielgerät Schieben Sie das USB-Gerät in die USB-Anschluss-Schnittstelle. Im USB-Modus leuchtet die USB-Kontrolleuchte an der Gerätefront auf. Laufwerk auswählen Mit der Taste USB/CARD können Sie das Kartenlaufwerk, das USB-Laufwerk oder das Disk-Laufwerk auswählen. Drücken Sie die Taste ggf. wiederholt. HINWEIS! Die Wiedergabe der Daten auf den Speicherkarten und dem USB-Stick verhält sich ebenso wie die auf den Disks (DVD, Audio-CD, JPEG-CD etc.). Die folgende Beschreibung für Disks gilt daher auch für die Speicherkarten und den USB Memory Stick. Tastensperre – KEY LOCK Drücken Sie, während das Gerät eingeschaltet ist, zweimal die Taste KEY LOCK. Alle Tasten am Gerät, mit Ausnahme des POWER-Schalters, sind jetzt gesperrt. Drücken Sie KEY LOCK erneut, um die Tastensperre wieder aufzuheben. Wiedergabefunktionen (PAUSE/STEP) Einzelbildwiedergabe Unterbrechen Sie die Wiedergabe, indem Sie (PAUSE/STEP) drücken. Auf dem Bildschirm erscheint das Pause-Symbol: . Drücken Sie (PAUSE/STEP) weitere Male, um Bild für Bild weiterzugehen. Auf dem Bildschirm erscheint das Symbol für die Einzelbildwiedergabe: . (PLAY) Um die Wiedergabe fortzusetzen, drücken Sie schirm erscheint das Play-Symbol (PLAY). Auf dem Bild- . Spezielle Bildschirmmeldung Wenn Sie eine Funktion wählen, die auf dem eingelegten Medium nicht realisiert oder die im aktuellen Modus nicht aufrufbar ist, erscheint das nebenstehend abgebildete Nicht-gültigZeichen auf dem Bildschirm. Das Zeichen verschwindet nach wenigen Sekunden. 20 (STOP) ES Drücken Sie (STOP) einmal, um die Wiedergabe zu stoppen. Auf dem Bildschirm erscheint das Stopp-Symbol . In diesem Modus können Sie die (PLAY) fortsetzen. Wiedergabe an derselben Stelle mit EN Drücken Sie (STOP) ein weiteres Mal, um die DVD endgültig zu stoppen. Das Gerät befindet sich jetzt im Stopp-Modus. DE Suchfunktionen SKIP Drücken Sie während der Wiedergabe die Taste oder , um zurück- oder vorzuspringen (bei DVDs: von Kapitel zu Kapitel; ansonsten: von Titel zu Titel). Auf dem Bildschirm erscheint das Skip-Symbol: an welcher Stelle Sie sich gerade befinden. . Außerdem wird angezeigt, HINWEIS! Beachten Sie, dass bei vielen DVDs die Titel/Kapitel vor Start des eigentlichen Films (Lizenzhinweise) nicht übersprungen werden können. Schnelllauf Drücken Sie während der Wiedergabe die Taste oder , um den Schnelllauf rückwärts oder vorwärts zu starten. Auf dem Bildschirm erscheinen das Schnelllaufsymbol sowie die Schnelllaufstufe: oder einmal drücken: doppelte Geschwindigkeit (2 x) oder zweimal drücken: vierfache Geschwindigkeit (4 x) oder dreimal drücken: achtfache Geschwindigkeit (8 x) oder viermal drücken: sechzehnfache Geschwindigkeit (16 x) oder fünfmal drücken: zweiunddreißigfache Geschwindigkeit (3 2 x) Mit (PLAY) kehren Sie zur normalen Abspielgeschwindigkeit zurück. Zeitlupe – SLOW Drücken Sie während der Wiedergabe die Taste SLOW/R oder SLOW/F, um in Zeitlupe zurück- oder vorzugehen. Auf dem Bildschirm erscheinen das Zeitlupensymbol sowie die Zeitlupenstufe: SLOW einmal drücken: 1 / 2 Geschwindigkeit SLOW zweimal drücken: 1/4 Geschwindigkeit SLOW dreimal drücken: 1/8 Geschwindigkeit SLOW viermal drücken: 1 /1 6 Geschwindigkeit Mit (PLAY) kehren Sie zur normalen Abspielgeschwindigkeit zurück. HINWEIS! Beachten Sie, dass bei Audio, VCD sowie im Xvid-Format die SLOW/R-Funktion nicht möglich ist. 21 DISPLAY Mit der Taste DISPLAY können Sie sich während der Wiedergabe durch wiederholtes Drücken nacheinander die abgelaufene und verbleibende Zeit anzeigen lassen. Mit jedem Tastendruck erhalten Sie eine entsprechende Bildschirmmeldung: T i te l abg ela u fen > Tite l ve rb le ibe nd > Ka pite l a bge Ka pitel verb le ib en d > D isp la y a us . T i te l abg ela u fen > Tite l ve rb le ibe nd > G esa mt ab ge lau fen > Gesamt ver bleibend > D isplay aus . MP3/Xvid: T i te l abg ela u fen > T itel ver bleiben d > Dis play a us . DVD: lau fen CD/VCD: Wiederholungsfunktionen Wiederholung – REPEAT Drücken Sie während der Wiedergabe die Taste REPEAT. Auf dem Bildschirm erscheint das Wiederholungssymbol und, mit jedem Tastendruck, der zu wiederholende Abschnitt (der Eintrag verschwindet nach ein paar Sekunden): DVD: Kapitel > Titel > Aus ; Audio-CD: T i te l > A ll e > Aus ; MP3: T i te l w ie der ho len > Alb um w ie der ho len > Alle > Aus Bei Video-CDs und Xvid ist die REPEAT-Funktion nicht möglich. REPEAT A - B (DVD, Audio-CD) Sie können einen selbstdefinierten Abschnitt wiederholen. Drücken Sie während der Wiedergabe die Taste A - B, um den Anfang der Wiederholsequenz festzulegen. Auf dem Bildschirm erscheint das Wiederholungssymbol mit dem Zusatz A. Drücken Sie wiederum A - B, um das Ende der Wiederholsequenz festzulegen. Auf dem Bildschirm A B. Der definierte Abschnitt wird jetzt endlos wiederholt. erscheint Drücken Sie ein drittes Mal A - B, um die Wiederholung der Sequenz zu beenden. Bei MP3 und Xvid ist die REPEAT A-B-Funktion nicht möglich. Abspielreihenfolge programmieren – PROGRAM Die Programmier-Funktion ermöglicht Ihnen, bis zu 20 Kapitel (DVD) oder Titel (Audio) in einer selbstdefinierten Reihenfolge abzuspielen. Bei MP3-Medien ist keine Programmierung möglich. DVDs Drücken Sie PROGRAM. Auf dem Bildschirm erscheint eine Tabelle mit Programmplätzen. Die Tabelle enthält Titel und Kapitel. Die Anzahl der Titel auf der DVD erscheint in der Kopfzeile. Geben Sie mit den Zifferntasten der Fernbedienung den gewünschten Titel für Programmplatz 01 ein. Einstelligen Ziffern stellen Sie bitte eine 0 voraus. – Wenn ein Titel eingegeben ist, erscheint die Anzahl der Kapitel in diesem Titel in der Kopfzeile. Geben Sie mit den Zifferntasten der Fernbedienung das gewünschte Kapitel ein. Einstelligen Ziffern stellen Sie eine 0 voraus. Der Cursor springt auf Programmplatz 02 . Geben Sie nach Wunsch weitere Programmplätze genauso ein. 22 Audio-CDs/VCD ES Drücken Sie die Taste PROGRAM. Auf dem Bildschirm erscheint eine Tabelle mit Programmplätzen. Im Tabellenkopf steht die Anzahl der Titel auf der CD. Der Programmplatz 0 1 ist farbig unterlegt. EN DE Geben Sie mit den Zifferntasten der Fernbedienung den gewünschten Titel für Programmplatz 0 1 ein. Einstelligen Ziffern stellen Sie eine 0 voraus. Liste starten Sobald der erste Programmplatz eingeben ist, erscheint am unteren Menürand der Eintrag S T AR T. Bewegen Sie den Cursor mit den Navigationstasten auf den Eintrag S T ART und drücken Sie (PLAY) oder ENTER. Auf dem Bildschirm erscheint kurz PR OGR AMM . Die programmierte Liste startet. Mit PROGRAM können Sie die Liste wieder aufrufen und ändern. Drücken Sie zweimal (STOP), um die Liste zu löschen. Nach Ende der Wiedergabe springt der DVD-Player in den Standby-Modus. HINWEIS! Die programmierte Liste wird nicht gespeichert. Direktanwahl Titel/Zeit – SEARCH Mit der Taste SEARCH können ein Kapitel, einen Titel oder eine Zeit direkt ansteuern. Außerdem können Sie hier die Tonspur, Untertitel, den Kamerawinkel und die Wiederholungsfunktion einstellen. Drücken Sie während der Wiedergabe die Taste SEARCH. Wählen Sie mit den Navigationstasten die gewünschte Funktion an und drücken ENTER. Geben Sie nun mit dem Zahlenfeld z. B. die gewünschte Kapitelnummer ein oder wählen aus einer Liste die Einstellung aus. Bestätigen Sie abschließend mit Enter. Die Änderung erfolgt unmittelbar. 23 "Lesezeichen" setzen – BOOKMARK Sie haben die Möglichkeit, "Lesezeichen" zu setzen, um die Wiedergabe an einer bestimmten Stellen wieder zu starten. Drücken Sie während der Wiedergabe die Taste BOOKMARK. Auf dem Bildschirm erscheint das BOOKMAR K-Menü mit zwölf Feldern. Wenn Sie die Funktion abbrechen möchten, drücken Sie BOOKMARK erneut. Um das erste Lesezeichen zu setzen, drücken Sie (PLAY). Es wird eine Markierung an der aktuellen Stelle gesetzt (im nebenstehenden Beispiel im Titel 01, Kapitel 4, 15 Minuten und 23 Sekunden). Um den Film an dieser Stelle starten zu lassen, drücken Sie wiede(PLAY). rum Wenn Sie das Lesezeichen löschen möchten, drücken Sie CLEAR. Wenn Sie das Menü ausblenden und den Film weiterlaufen lassen möchten, drücken Sie BOOKMARK erneut. Wenn Sie weitere Lesezeichen setzen möchten, rufen Sie das BOOKMAR K-Menu ggf. wieder auf und gehen mit der Navigationstaste in das nächste freie Feld. Drücken Sie wiederum (PLAY), um ein Lesezeichen zu setzen. Um ein anderes Lesezeichen auszuwählen, gehen Sie wiederum mit den Navigationstasten in das (PLAY). entsprechende Feld und drücken Sie HINWEIS! Die Lesezeichen bleiben erhalten, wenn Sie zweimal (STOP) gedrückt haben (StoppModus). Im Standby-Modus oder wenn Sie das Gerät ausschalten, gehen die Lesezeichen jedoch verloren. Bei einigen Formaten funktioniert die Bookmark-Funktion nicht. Eine Übersicht der Lesezeichen mit Bildvorschau erhalten Sie unter dem fünften Menüpunkt des D IG E S T-Menüs, siehe nächsten Abschnitt. Auszug wählen – DIGEST (DVD und VCD) Mit der DIGEST-Funktion können Sie mithilfe einer Bildervorschau auf Ihrer DVD navigieren. Drücken Sie bei laufender Wiedergabe die Taste DIGEST. Sie erhalten das D IG E ST-Menü mit den folgenden Optionen (MARKER ÜBERSICHT nur bei gesetzten Lesezeichen, s. u.): Titelübersicht HINWEIS! Mit den Navigationstasten bewegen Sie sich zwischen den Bildern und den Texteinträgen im Menü. Die aktiven Punkte sind farbig unterlegt. Um einen Punkt auszuwählen, drücken Sie ENTER. Bestätigen Sie T i te lü bers ich t mit ENTER. Nach einer kurzen Ladezeit werden die Startbilder aller auf der DVD vorhandenen Titel in kleineren Fenstern angezeigt. Pro Bildschirmseite werden bis zu sechs Bilder dargestellt. Im Menü unter den Bildern steht hinter dem Punkt Auswahl die Gesamtzahl der Titel. Wählen Sie einen Titel aus, indem Sie mit den Navigationstasten ein Startbild wählen oder mit den Zifferntasten der Fernbedienung die Nummer des Startbilds eingeben (einstelligen Ziffern stellen Sie eine 0 voran). Drücken Sie anschließend ENTER, um die Wiedergabe des ausgewählten Titels zu starten. Mit den Tasten und navigieren Sie zwischen den Bildschirmseiten. Wählen Sie EXIT, um zur Wiedergabe an der ursprünglichen Stelle zurückzukehren. Über den Eintrag Men ü kehren Sie zum DigestMenü zurück. 24 Kapitelübersicht Wählen Sie im Digest-Menü die Option Ka pitelübe rsic h t an und bestätigen Sie mit ENTER. Nach einer kurzen Ladezeit werden alle Kapitel des aktuellen Titels in kleineren Fenstern angezeigt und kurz angespielt. Pro Bildschirmseite werden bis zu sechs Kapitel dargestellt. Wählen Sie das Kapitel genauso aus wie einen Titel (siehe oben). ES EN DE Zeitintervall Wählen Sie im Digest-Menü die Option Z e i t : I n ter v a l l an und bestätigen Sie mit ENTER. Sie erhalten eine Vorschau der Szenen des Titels in einem voreingestellten Abstand von zehn Minuten. Wenn nur ein Bild angezeigt wird, ist der Titel kürzer als zehn Minuten. Kapitelintervall Wählen Sie im Digest-Menü die Option Ka p i t e l : In t e r va l l an und bestätigen Sie mit ENTER. Sie erhalten eine Vorschau der Szenen des Kapitels in einem voreingestellten Abstand von zehn Minuten. Wenn nur ein Bild angezeigt wird, ist das Kapitel kürzer als zehn Minuten. HINWEIS! Wenn Sie die DIGEST-Taste im Stopp-Modus drücken, erscheint das Digest-Menü nur mit dem Eintrag T i te lübers ich t und ggf. Marke rüb ers ich t . Markerübersicht Wenn Sie Lesezeichen gesetzt haben, erhalten Sie unter diesem Menüpunkt eine Übersicht der Lesezeichen (siehe vorigen Abschnitt ) und können sie auch auswählen. RANDOM und INTRO (nur Audio-CD) Zufallswiedergabe Drücken Sie die Taste RANDOM. (PLAY), um die Wiedergabe in zufälliger Reihenfolge (ab dem Drücken Sie nächsten Titel) zu starten. Nach dem 20. Titel stoppt die Wiedergabe. Drücken Sie RANDOM erneut für die normale Wiedergabe. Intro-Funktion Drücken Sie die Taste DIGEST. Die ersten sechs Sekunden jedes Titels werden gespielt. Drücken Sie die Taste DIGEST erneut für die normale Wiedergabe. Bildfunktionen Bild vergrößern – ZOOM Drücken Sie die Taste ZOOM. Auf dem Bildschirm erscheint das Vergrößerungssymbol mit dem Vergrößerungsfaktor. Das Bild wird mittig vergrößert. ZOOM einmal drücken: Vergrößerungsfaktor 2 x ZOOM einmal drücken: Vergrößerungsfaktor 3 x ZOOM einmal drücken: Vergrößerungsfaktor 4 x Mit dem vierten ZOOM kehren Sie zur normalen Ansicht zurück. HINWEIS! Mit den Navigationstasten können Sie innerhalb des vergrößerten Bilds einen Bildausschnitt wählen. 25 Kameraposition – ANGLE (nur DVD) HINWEIS! Auf wenigen DVDs sind einzelne Szenen aus verschiedenen Kamerapositionen aufgenommen. Drücken Sie die Taste ANGLE, um die Funktion zu aktivieren. Sofern die Szene verschiedene Blickwinkel enthält, werden das Symbol sowie der aktuelle Blickwinkel/die Gesamtzahl der Blickwinkel eingeblendet. Drücken Sie ANGLE erneut, um auf die nächste Kameraposition umzuschalten. Nach wenigen Sekunden wechselt das Bild. Das Symbol erscheint von selbst bei den entsprechenden Szenen, wenn im Menü Sys teme ins tellu ng en > Ka me r ap os .A nz > An gewählt ist. Klangfunktionen Stummschaltung – MUTE Drücken Sie , um den Klang ganz abzuschalten. Drücken Sie erneut, um den Klang wieder anzuschalten. HINWEIS! Beachten Sie, dass die Stummschaltung auch eingeschaltet bleibt, wenn Sie die Lautstärke ändern und die Lautstärkeänderung im Display angezeigt wird. 3D-Klang Bei CDs, die in den Formaten Dolby Pro Logic, Dolby Digital oder dts kodiert sind, können Sie einen 3D- oder Surround-Effekt erzielen, wenn zwei Lautsprecher angeschlossen sind. Drücken Sie die Taste 3D wiederholt, um einen der folgenden Klangeffekte aufzurufen: Surround: Rock > Pop > Live > Dance > Techno > Classic > Soft > Aus. Benutzen Sie die Funktion nicht, wenn mehr als zwei Lautsprecher angeschlossen sind, wenn Koaxialkabel oder optical digital output für digitalen Klang verwendet werden, wenn in einem der angeschlossenen Geräte ein Surround-Effekte eingeschaltet ist. Audio Mode (nur Audio-CDs) Drücken Sie die Taste AUDIO wiederholt, um zwischen folgenden Wiedergabearten zu wählen: Mono links , Mon o r ec h ts , Mi x-M on o und Ster eo . Je nach Medium können auch andere Anzeigen erscheinen. 26 TITLE, MENU ES DVD-Menüs EN Auf DVDs sind üblicherweise ein oder mehrere Menüs hinterlegt, mit dem Sie auf der DVD navigieren können. Die Namen dieser Menüs hängen von der DVD ab; sie können z. B. "DVD-Menü", "Disk-Menü", "Hauptmenü", "Titelmenü", "Root-Menü" oder "Stammmenü" heißen. DE Das Menü Ihres DVD-Players (SETUP-Menü) rufen Sie dagegen mit der Taste SETUP auf. Mit den Tasten TITLE und MENU rufen Sie die auf der DVD abgelegten Menüs auf. Mit den Navigationstasten steuern Sie die Punkte in den DVD-Menüs an. Bestätigen Sie jede Auswahl mit ENTER. HINWEIS! Bitte beachten Sie, dass es von der DVD abhängt, welche Menüs bei welchem Aufruf erscheinen, z. B. besitzen manche DVDs nur ein Menü, das bei beiden Aufrufen erscheint. AUDIO und SUBTITLE Sofern auf der DVD vorhanden, sind diese beiden Tasten die schnellste Methode, andere Sprachen auszuwählen. HINWEIS! Beachten Sie jedoch bitte, dass diese Funktion auf einigen DVDs nicht realisiert ist. Gesprochene Sprache auswählen Drücken Sie AUDIO wiederholt, um eine andere auf der DVD vorhandene Sprachen auszuwählen. Die Umstellung erfolgt unmittelbar und braucht nicht bestätigt zu werden. Untertitelsprache auswählen Drücken Sie SUBTITLE wiederholt, um eine andere auf der DVD vorhandene Untertitelsprache auszuwählen. Die Umstellung erfolgt unmittelbar und braucht nicht bestätigt zu werden. Die Einblendung verschwindet nach wenigen Sekunden. PBC-Funktion (nur VCD 2.0) Einige VCDs des Typs 2.0, die eine Titel-/Kapitelstruktur besitzen, bieten die Möglichkeit des Playback-Controls (PBC). Mit der Taste TITLE aktivieren Sie das Playbackcontrol. Es stehen erweiterte Funktionen für Ansteuerung der Titel/Kapitel zur Verfügung, wie etwa – Direktanwahl von Titel/Kapitel – SKIP-Funktionen HINWEIS! Bitte beachten Sie, dass es von der VCD abhängt, welche Funktionen genau zur Verfügung stehen. 27 Navigieren auf MP3- und JPEG-Datenträgern Auf MP3- und JPEG-Datenträgern können die Musik-Titel bzw. Bilder wie auf einem Datenmedium in Ordnern zusammengefasst sein. Legen Sie ein Wiedergabemedium mit MP3- oder JPEG-Daten ein. Auf dem Bildschirm erscheint ein Menü mit der obersten Ordnerstruktur auf der CD. Sofern der Datenträger Ordner enthält, werden sie auf der linken Seite des Menüs aufgeführt. Titel wird mit einem MP3-Symbol bzw. einem Bildsymbol angezeigt. Die Fläche des aktiven Ordners oder der aktiven Datei erscheint orange unterlegt. Im Display wird die Gesamtzahl der Dateien eingeblendet, z. B. 105 F IL ES. Gehen Sie mit den Navigationstasten oder in einen der Ordner und bestätigen Sie mit ENTER. Ggf. öffnen sich weitere Unterordner. In diesem Fall können Sie über den obersten Menüpunkt ( oder mit der Taste zum übergeordneten Menü zurückgehen. ) Um einen Titel zu hören bzw. ein Bild zu sehen, wählen Sie ihn/es aus und bestätigen Sie mit (PLAY) oder ENTER. MP3: Direktanwahl über Zifferntasten Geben Sie die Nummer des gewünschten Titels ein. Mehrstellige Nummern geben Sie bitte zügig hintereinander ein. Bestätigen Sie mit (PLAY) oder ENTER. Sie können nur eine Nummer innerhalb des aktiven Ordners wählen. Wechseln Sie ggf. den Ordner. JPEG-Bilder Bei JPEG-Bildern erhalten Sie auf der rechten Seite des Menüs eine Bildvorschau. Wählen Sie ein Bild aus und bestätigen Sie mit ENTER, um es sich groß anzeigen zu lassen. Alle Bilder des aktiven Ordners werden ab dem ausgewählten Bild nacheinander angezeigt ("Dia-Show"). Mit (STOP) kommen Sie ins Menü zurück. Wenn Sie während der Wiedergabe die Navigationstasten drücken, ändern Sie die Ausrichtung des aktuellen Bildes: Navigationstaste rechts wiederholt drücken: dreht das Bild um jeweils 90° im Uhrzeigersinn; Navigationstaste links wiederholt drücken: dreht das Bild um jeweils 90° gegen den Uhrzeigersinn; Navigationstaste oder drücken: spiegelt das Bild. Im gedrehten oder gespiegelten Zustand bleibt das Bild auf dem Bildschirm stehen. Um die Wiedergabe (PLAY) oder ENTER. wiederaufzunehmen, drücken Sie 28 Einstellungen im SETUP-Menü ES Im SETUP-Menü, das Sie über die Taste SETUP aufrufen, nehmen Sie alle Einstellungen vor. Diese Einstellungen umfassen z. B. Bildformate, Toneinstellungen oder die Kindersicherung. EN Drücken Sie SETUP. Auf dem Bildschirm erscheint die Hauptseite des SetupMenüs mit den Menüs S ys te m , Audio , D ol b y, Video sowie Vo re ins t . Das aktive Menü ist mit einer gelben Fläche unterlegt. DE Mit den Navigationstasten oder wählen Sie ein anderes Menü aus. HINWEIS! Wenn das Menü Vo re ins . nicht aufgerufen werden kann, haben Sie das Setup-Menü während der Wiedergabe aufgerufen. Verlassen Sie das Setup-Menü über die SETUP-Taste, stoppen Sie die Wiedergabe (2 x (STOP) und rufen Sie SETUP erneut auf. Navigieren in den Menüs Mit den Navigationstasten bewegen Sie sich in den Menüs. Die aktiven Punkte sind farbig unterlegt. Am unteren Menürand wird eine Erläuterung zum jeweils gewählten Menü gegeben. Mit wählen Sie den ersten Menüpunkt an. Unter- und Auswahlmenüs Bei den meisten Untermenüs wird auf der rechten Seite ein Auswahlmenü geöffnet. Die zur Zeit eingestellte Auswahl ist farbig unterlegt. Gehen Sie mit nach rechts. Der aktive Punkt wird markiert. Wählen Sie mit oder einen anderen Punkt. Jetzt wird die neue Auswahl farbig unterlegt. Die Unterlegung unter der alten Auswahl bleibt zunächst bestehen. Drücken Sie ENTER, um diese Auswahl bestätigen. Die Unterlegung unter der alten Auswahl verschwindet. Mit gehen Sie auf die linke Menüseite zurück. Menü verlassen Mit kommen Sie zur übergeordneten Menü-Auswahl. Mit SETUP können Sie das Setup-Menü an jeder Stelle verlassen. 29 Menü System TV-Format Stellen Sie hier das Gerät auf das Anzeigeformat des Fernsehgeräts ein. Normal/PS: Auswahl für Fernsehgeräte mit 4:3-Format. Das Pan Scan-Format stellt 16:9Filmformate in voller Höhe dar, seitliche Bildanteile werden abgeschnitten. Normal/LB: Auswahl für Fernsehgeräte mit 4:3-Format. Das Letterbox-Format verkleinert das 16:9Filmformat auf Bildschirmbreite. B r e i t ( 1 6 :9) : Auswahl für Fernsehgeräte im 16:9-Format. Kamerapos. Anz. E i n : Sofern Szenen auf der DVD in verschiedenen Kamerapositionen gespeichert sind, werden diese automatisch durch ein Symbol im Bildschirm angezeigt. Aus : Mit dieser Einstellung erscheint das Symbol nicht. OSD-Sprache Hier stellen Sie die Sprache des OSD („On-Screen-Display“) ein, das heißt die Sprache für die Menüs des DVD-Players. Sie haben die Auswahl zwischen Englisch, Spanisch, Deutsch, Französisch, Italienisch und Niederländisch. Bei der Auswahl einer Sprache stellt sich das Menü unmittelbar um. Gehörlos.Titel Wählen Sie hier, ob bei DVDs zusätzliche Untertitel für Gehörlose angezeigt werden sollen. Diese Funktion wird nicht von allen Medien unterstützt. E i n : Untertitel für Gehörlose werden automatisch bei jedem Start einer DVD dargestellt. Aus : Mit dieser Einstellung werden keine Untertitel angezeigt. Bildschirmschoner In dieser Einstellung wählen Sie, ob der Bildschirmschoner aktiviert werden soll, wenn Sie das Gerät längere Zeit nicht benutzen (im Modus Pause oder Stopp). Auto-Mark. Mit dieser Funktion merkt sich der DVD-Player die Stelle der zuletzt eingelegten DVD, an der sie gestoppt wurde. Wenn Sie die gleiche DVD erneut in das Gerät einlegen, beginnt die Wiedergabe an der letzten Position. Die letzte Position auf der DVD bleibt auch erhalten, wenn Sie das Gerät ausschalten. 30 Menü Audio ES Lautsprecherkonfiguration EN Dow nmix: Falls Sie einen analogen Audio-Ausgang benutzen, können Sie in diesem Menü hierfür Einstellungen vornehmen. L T /RT : Es werden der linke und der rechte Kanal ausgegeben. Ster eo : Es wird ein Stereoton ausgegeben. V SURR : Der analoge Stereoton wird virtuell als Surroundton umgewandelt. 5 . 1CH : Wählen Sie diese Einstellung, wenn Sie einen digitalen Audioverstärker oder ein Surroundsystem angeschlossen haben. Fron t L ege n Si e die Größe für den Front-Lautsprecher fest: Gr oss : Wählen Sie diese Einstellung, wenn die Front-Lautsprechermembran größer als ca. 12 cm im Durchmesser ist. Klein : Wählen Sie diese Einstellung für kleinere Lautsprecher. C e n ter , R ea r (nur in der Lautsprechereinstellung V SURR und 5.1.CH aktiv): Legen Sie die Größe der Center- und Rear-Lautsprecher fest oder deaktivieren Sie diese: Gr oss : Wählen Sie diese Einstellung, wenn die Front-Lautsprechermembran größer als ca. 12 cm im Durchmesser ist. Klein : Wählen Sie diese Einstellung für kleinere Lautsprecher. Aus : Sie können Center-, Rear-Lautsprecher auf Aus stellen, wenn Sie Ihr Gerät nur mit den FrontLautsprechern betreiben möchten. Su bwoo fer : An : Diese Option schaltet Subwoofer ein Aus : Sie können den Subwoofer auf Aus stellen, wenn Sie Ihr Gerät nur mit den FrontLautsprechern betreiben möchten. D ia log : In diesem Menü stellen Sie die Dialoglautstärke ein. Pos t DRC : Mit DRC (Dynamic Range Control) werden Lautstärkeunterschiede, insbesondere bei Musik, ausgeglichen, sodass die wiedergegebene Musik in gleicher Lautstärke wiedergegeben wird. Sie können die Funktion einschalten (An ), ausschalten (Aus ) oder automatisch aktivieren, wenn verfügbar (A u to). SPDIF S P D IF- Au s g .: Wenn Sie einen AV-Receiver an einem digitalen Audioausgang angeschlossen haben, stellen Sie die Funktion auf SPDIF/Raw. Wählen Sie S PD IF/ P C M, falls Ihr Fernsehgerät/Verstärker keinen Dolby Digital- oder MPEG-Decoder besitzt. L PC M OUT: Wählen Sie hier die Dekodierung, mit der der Ton übertragen werden soll. Je höher der Wert, desto besser ist die Qualität des Tons. 31 DE Kanalverzögerung Wenn Sie separate Lautsprecher anschließen, werden diese idealerweise kreisförmig aufgestellt (siehe linke Seite der Abbildung). Wenn dies nicht möglich ist, können Sie Abweichungen von der Kreislinie hier ausgleichen. Im unten stehenden Beispiel (siehe rechte Seite der Abbildung) würde der Wert für den linken RearLautsprecher um 50 cm und für den rechten Rear-Lautsprecher um 40 cm versetzt. Gehen Sie mit der Navigationstaste in das grafische Feld neben dem Eintrag Ka na lverz öge run g . Mit oder wählen Sie einen Lautsprecher aus. Mittels der oder Taste vergrößern oder verkleinern Sie den Wert in Zehn-cm-Schritten. Die maximale Abweichung ist 600 cm. Bestätigen Sie mit ENTER und verlassen Sie das Menü mit. Die Kreislinie wird von den Frontlautsprechern definiert. Deshalb sind die Front-Lautsprecher nicht anwählbar. Klangeinstellung E Q T yp : Wenn Sie den Ton mithilfe des Equalizers anpassen möchten, können Sie unter EQ Typ folgende Audio-Voreinstellungen vornehmen: Linear , Rock , Pop , Live , Danc e , Tec hno , Kl ass ik , Soft. Wenn Sie den Punkt Linear wählen, wird der Ton direkt ohne Veränderung weiter gegeben. Bass Bo os t, Super Bass : In diesen Menüs verstärken Sie den Bass. Wählen Sie An, um die BassVerstärkung zu aktivieren. Mit Aus wird der Ton direkt ohne Veränderung weiter gegeben. T reb le Boos t: Mit dieser Einstellung werden die Höhen verstärkt. Wählen Sie An, um die HöhenVerstärkung zu aktivieren. Mit Aus wird der Ton direkt ohne Veränderung weiter gegeben. 3D-Bearbeitung 32 P R O L OG IC I I: Hier haben Sie umfangreiche Einstellmöglichkeiten zu Pro Logic II. Damit lässt sich ein virtueller Surroundsound simulieren, wenn Sie keinen Surroundverstärker angeschlossen haben. Wenn Sie den Ton über einen Audio- oder Surround-Verstärker wiedergeben, setzen Sie die Funktion P R O L OG IC I I auf Aus. Ha llmodus : Hier lässt sich der Ton mit einem zusätzlichen Hall versehen. Sie können zwischen folgenden Optionen wählen: Konzertsaal, Wohnraum, Halle, Bad, Höhle, Stadion, Kirche. Wenn Sie den Ton über einen Audio- oder Surround-Verstärker wiedergeben oder keinen zusätzlichen Hall einbringen möchten, setzen Sie die Funktion Ha llmodus auf Aus. Menü Dolby Digital ES Zweikanalton EN Einige DVDs/VCDs unterstützen einen Zweikanalton, mit dem Sie mehrere Tonspuren separat bzw. gleichzeitig darstellen können. Wählen Sie hier, ob nur der linke, nur der rechter oder beide Tonspuren wiedergegeben werden sollen. DE Unterstützt der eingelegte Datenträger nicht den Zweikanalton, ist diese Einstellung ohne Funktion. Dynamik Das Dolby-Digital-Tonformat unterstützt eine Dynamik-Einstellung, mit der Sie den LautstärkeUnterschied zwischen leisen und lauten Passagen in einer Skala von AU S bis VO LL in neun Schritten einstellen können. A U S: Der Ton wird unverändert, d. h. laute Passagen und Bässe werden laut, leise Passagen leise wiedergegeben ("Kino-Sound“). Die Einstellung ist nur geeignet, wenn niemand gestört werden kann. V O L L : Der Lautstärkeunterschied wird minimiert, d. h. laute Passagen werden reduziert, leise Passagen angehoben. Diese Einstellung ist z. B. nachts angebracht. Um die Einstellung zu ändern, gehen Sie mit in die Skala auf der rechten Seite und wählen Sie mit oder den gewünschten Wert aus. Bestätigen Sie mit ENTER. 33 Menü Video Vide o-Ou t : Hier wählen Sie die Einstellungen für den gewünschten Videoausgang. Wählen Sie die Option RBG, wenn über den normalen SCART-Ausgang auch ein RGB Signal gesendet werden soll. Wählen Sie die Option S-Vi de o, um das Videosignal am S-Video-Ausgang ausgeben zu lassen. Damit Sie die beste Bildqualität erzielen, verwenden Sie den Komponentenausgang und wählen hier die Option YU V, sofern Ihr TV-Gerät das Format verarbeiten kann. Au flös ung : Um die Progressive Scan-Funktion zu realisieren, wählen Sie die zu Ihrem HDMI- oder DVI-Fernsehgerät passende Auflösung. HINWEIS! Beachten Sie, dass Sie für den TV-Standard PAL eine Einstellung mit 50 Hz , für den TVStandard N TS C eine Einstellung mit 60 Hz wählen müssen. Für einen Anschluss über die Komponentenanschlüsse YPbPr wählen Sie die Auflösung 5 76 i oder 72 0p . Wenn Sie den HDMI-Anschluss nicht benutzen, wählen Sie 48 0i , 5 76 i oder 10 80 i (i = "interlaced"). Sie können die Auflösungen auch mit der Taste STOP/RES an der Gerätefront umstellen. 34 B i l d e in s te l lu n g e n : Normalerweise ist es nicht notwendig hier Einstellungen vorzunehmen. In diesem Menü haben Sie jedoch die Möglichkeit, umfangreiche Bildeinstellmöglichkeiten vorzunehmen. So können Sie Bildschärfe, Helligkeit, Kontrast, Gamma, Farbe, Farbton und Luma Delay einstellen. HD MI Setup : Schalten Sie in diesem Menü den HDMI-Anschluss ein oder aus. Wenn Sie das Fernsehgerät mit einem HDMI-Kabel angeschlossen haben, muss der Anschluss aktiviert sein. Menü Voreinstellungen ES Auf das Menü VOR EIN ST ELLUNG EN können Sie nur im Stopp-Modus zugreifen. Bei laufender Wiedergabe drücken Sie zweimal (STOP). EN TV-Norm DE Wählen Sie hier den Farbstandard für die Bildwiedergabe aus. PAL : in vielen europäischen Ländern übliches Farbformat. A U T O: Automatische Einstellung auf das korrekte Farbformat. NTSC : in Nordamerika übliches Farbformat. Sprachen auswählen HINWEIS! Bitte beachten Sie, dass für jede Sprachauswahl folgendes gilt: Es kann nur eine Sprache wiedergegeben werden, die auf der DVD auch existiert. Wenn Sie eine andere Sprache auswählen, wird der DVD-Player ersatzweise die erste auf der DVD abgelegten Sprache ausgeben. Welche Sprache Sie auf einer konkreten DVD auswählen können, wird Ihnen normalerweise im Disk-Menü der DVD angegeben. Audio Hier wird eine der auf der DVD gesprochenen Sprache voreingestellt. Sie haben die Auswahl zwischen Englisch, Französisch, Spanisch, Deutsch, Italienisch, Niederländisch, Russisch und Thai. Untertitel Hier können Sie eine Sprache für die auf der DVD abgelegten Untertitel voreinstellen. Sie haben die Auswahl zwischen Englisch, Französisch, Spanisch, Deutsch, Italienisch, Niederländisch, Russisch und Thai. Auswahl Aus: Kein Untertitel wird eingeblendet. Disk-Menu Hier wählen Sie die Sprache der auf der DVD abgelegten Menüs aus, sofern auf der Disk vorhanden. Sie haben die Auswahl zwischen Englisch, Französisch, Spanisch, Deutsch, Italienisch, Niederländisch, Russisch und Thai. Sperren Hier stellen Sie die Freigabeklasse für DVDs ein (Elternkontrolle). Einige DVDs und CDs sind mit Verschlüsselungssignalen der von der Motion Picture Association etablierten Freigabeklassen kodiert. Die acht Freigabeklassen lauten: 1 Kid Sa f: 2 G: 3 PG : 4 PG 13 : 5 PGR : 6 R: 7 NC 17: 8 Adult: ("kid safe") auch für kleine Kinder geeignet; ("General") für alle Altersgruppen; ("Parental Guidance") elterliche Aufsicht empfohlen; elterliche Aufsicht strengstens empfohlen; einige Szenen für Jugendliche unter 13 nicht geeignet; ("Parental Guidance Restriction") für Jugendliche unter 17 elterliche Aufsicht empfohlen; ("Restriction") für Jugendliche unter 17 elterliche Aufsicht strengstens empfohlen; nicht für Jugendliche unter 17 Jahren; nur für Erwachsene. 35 Wurde eine DVD z. B. mit der Freigabeklasse 7 (N C 17 ) oder 8 (Ad ul t) kodiert und Sie haben eine der Freigabeklassen 1 bis 6 eingestellt, so erfolgt eine Meldung und es muss das Passwort eingegeben werden. Es können auch nur Teile der DVD, das heißt bestimmte Filmszenen, mit einer Freigabeklasse oder verschiedenen Freigabeklassen kodiert sein. Um die Freigabeklasse zu ändern, müssen Sie das Passwort eingeben (s. nächster Abschnitt). Passwort Hier können Sie ein Passwort eingeben, um den Zugang für andere Personen zu kontrollieren. Um das Passwort zu ändern, bestätigen Sie den Punkt Ä n d er n . Es öffnet sich ein neues Menü: Altes Passwor t: Geben Sie hier mit den Zifferntasten der Fernbedienung das bestehende Passwort ein. Es besteht aus genau vier Ziffern. Wurde noch kein Passwort eingerichtet, gilt das werkseitige Passwort 1 234 . Wenn Sie das richtige Passwort eingegeben haben, wird das nächste Feld für die Eingabe aktiviert. Ne ues Passwo r t: Geben Sie hier mit den Zifferntasten der Fernbedienung eine vierstellige Zahl ein. Die Markierung springt auf das nächste Feld. PW bes tä tig en : Geben Sie die vierstellige Zahl noch einmal ein. Drücken Sie ENTER, um das neue Passwort zu bestätigen. Sollten Sie das neue Passwort vergessen haben, geben Sie das Master-Passwort 1 369 ein. Zurücksetzen In diesem Menü setzen Sie alle Einstellungen auf die Werkseinstellungen zurück. 36 Die 5 in 1 IR-Fernbedienung ES Sicherheitshinweise EN Reparieren Sie die Fernbedienung nicht selbst! DE Die 5 in 1 IR-Fernbedienung besitzt ein Infrarot-Diode der Klasse 1M. Betrachten Sie die Infrarot-Diode nicht mit optischen Instrumenten! Setzen Sie die Fernbedienung keinem Staub, starker Sonneneinstrahlung, Feuchtigkeit, hohen Temperaturen oder starken Erschütterungen aus. Verwenden Sie keine ätzenden oder aggressiven Reinigungsmittel. Anwendungsumfang Diese 5 in 1 IR-Fernbedienung kann folgende Gerätetypen bedienen: TV Fernsehgerät STB Set-Top-Box bzw. SAT- oder DVB-T-Receiver DVD DVD-Player MD 82533 VCR Video-, Festplatten oder DVD-Recorder AUX Andere Geräte (z. B. Verstärker, Tuner etc.) Die Beschriftung bezeichnet nicht den zu programmierenden Gerätetyp. Sie dient der leichteren Übersicht. Gerätecode programmieren Allgemeines Sie müssen einen vierstelligen Gerätecode für jedes Gerät, das Sie mit der 5 in 1 IR-Fernbedienung bedienen möchten, auf eine Quellentaste (TV, STB, VCR, AUX) programmieren. Sie können jede Taste mit jedem Gerät belegen ("Flex-Mode"), mit Ausnahme der Taste TV, die nur mit einem Fernsehgerät belegt werden kann. Videorecorder: Führen Sie die Codesuche mit eingelegtem Band durch. Gerätecode nach Codeliste eingeben Die Codes der entsprechenden Geräte sind der Codeliste, die dieser Bedienungsanleitung beiliegt, zu entnehmen. So gehen Sie vor: Schalten Sie das betreffende Gerät manuell ein. Drücken Sie die gewünschte Quellentaste (TV, STB, VCR, AUX) kurz. Halten Sie die Taste CODE für ca. 3 Sekunden gedrückt, bis die blaue LED nach kurzem Blinken dauerhaft aufleuchtet. Geben Sie den vierstelligen Code aus der Code-Tabelle ein. Zur Bestätigung jedes Tastendrucks geht die blaue LED kurz aus. Wenn die Codeeingabe gültig war, erlischt die blaue LED nach der Eingabe der letzten Stelle. Wenn ein ungültiger Code eingegeben wurde, blinkt die LED drei Sekunden lang, bevor Sie erlischt. Wenn das Gerät nicht erwartungsgemäß reagiert, wiederholen Sie die Programmierung mit einem anderen Code des Herstellers. Wählen Sie den Code aus, auf den die meisten Befehle der Fernbedienung korrekt reagieren. Wenn Sie damit auch keinen Erfolg haben, dann versuchen Sie es mit einer der in den folgenden Abschnitten beschriebenen Suchmethoden. 37 Manueller Code-Suchlauf So führen Sie einen manuellen Suchlauf durch: Schalten Sie das betreffende Gerät manuell ein. Drücken Sie die gewünschte Quellentaste (TV, STB, VCR, AUX) kurz. Halten Sie die Taste CODE für ca. 3 Sekunden gedrückt, bis die blaue LED nach kurzem Blinken dauerhaft aufleuchtet. Drücken Sie mehrmals nacheinander (bis zu 350 Mal) die Taste (STANDBY), P+ oder P– oder (PLAY) (nur bei VCR), bis das Gerät, das gesteuert werden soll, ausgeschaltet, den Kanal wechselt oder entsprechend reagiert. Die Code-Suche wird bei der momentan gespeicherten Nummer begonnen. Drücken Sie kurz ENTER, um den Code zu speichern. Aufgrund der umfangreichen Anzahl der verschiedenen Code-Nummern sind pro Gerätetyp bis zu 350 unterschiedliche Codes vorpogrammiert. In Einzelfällen ist es möglich, dass nur die gebräuchlichsten Hauptfunktionen verfügbar sind. Bei einigen speziellen Gerätemodellen kann es sein, dass die beschriebene Vorgehensweise nicht zum Erfolg führt. Automatischer Suchlauf Wenn Ihr Gerät nicht auf die Fernbedienung anspricht, obwohl Sie alle für Ihren Gerätetyp und die entsprechende Marke aufgeführten Codes ausprobiert haben, versuchen Sie es mit dem automatischen Suchlauf. Hierdurch können Sie auch solche Codes solcher Marken finden, die in der Gerätecodeliste nicht aufgeführt sind. Schalten Sie das betreffende Gerät manuell ein. Drücken Sie die gewünschte Quellentaste (TV, STB, VCR, AUX) kurz. Halten Sie die Taste CODE für ca. 3 Sekunden gedrückt, bis die blaue LED nach kurzem Blinken dauerhaft aufleuchtet. Richten Sie die Fernbedienung auf das Gerät und drücken Sie einmal kurz die Taste P+. Hat das Gerät keine Programm-Funktion, drücken Sie statt P+ die Taste (PLAY) oder BY). (STAND- Die Fernbedienung startet nach 6 Sekunden die Code-Suche und sendet im Sekundentakt (siehe auch nächsten Abschnitt) nacheinander alle Codes. Bei jedem Senden leuchtet die LED auf. Sobald das Gerät auf die Fernbedienung reagiert, drücken Sie ENTER, um den Code abzuspeichern – Hat das Gerät reagiert und Sie haben es verpasst, rechtzeitig ENTER zu drücken, können Sie mit der Taste P– schrittweise zum Code zurückspringen, auf den das Gerät reagiert hat. Nachdem das Gerät dann reagiert hat, drücken Sie ENTER, um den Code zu speichern. HINWEIS! Sollten Sie zu einem früheren oder späteren Zeitpunkt die Codesuche mit ENTER beenden, ohne dass das Gerät reagiert hat, wird nicht der korrekte Code gespeichert und die Codesuche muss wiederholt werden. Um die Suche abzubrechen, drücken Sie EXIT. 38 Codesuche nach Handelsname Diese Funktion bietet Ihnen die Möglichkeit, nach Handelsnamen zu suchen (siehe Code-Liste). Gehen Sie wie folgt vor: Schalten Sie das betreffende Gerät manuell ein. Drücken Sie die gewünschte Quellentaste (TV, STB, VCR, AUX) kurz. Halten Sie die Taste CODE für ca. 3 Sekunden gedrückt, bis die blaue LED nach kurzem Blinken dauerhaft aufleuchtet. Geben Sie den einstelligen Code laut folgender Tabelle ein: Taste 1 = Medion, Tchibo Taste 2 = Philips, Radiola, Philco, Erres, Pye Taste 3 = Sony, Akai, Panasonic, JVC, Sharp, Toshiba, Daewoo Taste 4 = Thomson, Brandt, Fergusson Taste 5 = Saba, Nordmende, Telefunken Taste 6 = Grundig, Blaupunkt Taste 0 = alle Marken. (STANDBY) oder (PLAY)), bis das Drücken Sie mehrfach die Taste P+ (oder bei Videorecordern Gerät entsprechend reagiert. Gehen Sie dabei zügig vor, da sonst die automatische Codesuche gestartet wird. Speichern Sie den Code durch Drücken von ENTER. Wurden alle Codes durchsucht, blinkt die blaue LED für ca. 3 Sekunden. Code-Identifizierung Die Code-Identifizierung bietet Ihnen die Möglichkeit, bereits eingegebene Codes, die in der Fernbedienung gespeichert sind, zu bestimmen. So gehen Sie vor: Schalten Sie das betreffende Gerät manuell ein. Drücken Sie die gewünschte Quellentaste (TV, STB, VCR, AUX) kurz. Halten Sie die Taste CODE für ca. 3 Sekunden gedrückt, bis die blaue LED nach kurzem Blinken dauerhaft aufleuchtet. Drücken Sie kurz die CODE-Taste. Die LED erlischt kurz beim Tastendruck. Um die erste Zahl zu finden, drücken Sie die Zifferntasten von 0 bis 9. Wenn die LED kurz ausgeht, ist es die erste gespeicherte Zahl. Um die zweite Zahl festzustellen, drücken Sie wiederum die Zifferntasten von 0 bis 9. Wiederholen Sie den Vorgang für die dritte und die vierte Zahl. Die LED erlischt, sobald die Taste für die vierte Zahl gedrückt wurde. Die Code-Identifizierung ist jetzt abgeschlossen. 1-Sekunden- oder 3-Sekundentakt Wenn die Fernbedienung statt sekündlich nur alle 3 Sekunden einen neuen Code senden soll, gehen Sie folgendermaßen vor: (PLAY) oder Drücken Sie innerhalb von 6 Sekunden nach Drücken der Taste P+ (bzw. (STANDBY)) wie in Punkt 4 beschrieben, die Taste P+ oder P– noch einmal. Die Fernbedienung sendet jetzt nur alle 3 Sekunden einen neuen Code. Dadurch gewinnen Sie mehr Zeit, der Vorgang dauert aber auch länger. 39 ES EN DE Normaler Betrieb Einzelgeräte bedienen Nachdem Sie die Programmierung Ihrer Fernbedienung für Ihre Audio/Video-Geräte vorgenommen haben, arbeitet die Fernbedienung in den gebräuchlichsten Hauptfunktionen wie die OriginalFernbedienung des jeweiligen Gerätes. Richten Sie Ihre Fernbedienung auf das gewünschte Gerät und drücken Sie die entsprechende Quellentaste. Die LED leuchtet kurz auf, bleibt aber nicht beleuchtet. Sie aktivieren die Funktionen nun durch Drücken der entsprechenden Funktionstaste Ihrer 5 in 1 IRFernbedienung. Bitte beachten Sie: Unter Umständen ist nicht jede Funktion Ihrer Original-Fernbedienung auf der 5 in 1 IRFernbedienung direkt verfügbar. Insbesondere bei neueren Geräten ist es möglich, dass die Funktionen zunächst unter anderen Tasten als erwartet abgelegt oder gar nicht verfügbar sind. "Alles-aus"-Funktion Sie können alle vorprogrammierten Geräte gleichzeitig auszuschalten. Gehen Sie wie folgt vor: Drücken Sie kurz die Taste leuchtet auf. (STANDBY). Das ausgewählte Gerät schaltet sich aus und die LED (STANDBY) und halten Sie sie für 3 Sekunden gedrückt. Jetzt wer Drücken Sie sofort noch einmal den alle vorprogrammierten Geräte nacheinander ausgeschaltet. Dieses dauert ca. 3 Sekunden. War ein vorprogrammiertes Gerät ausgeschaltet, wird es mit der "Alles-aus"-Funktion eingeschaltet. EPG – Elektronisches Programm Die Taste EPG ("Electronic Program Guide") hat verschiedene Funktion je nachdem, auf welchen Code sie angewendet wird: Bei TV- und Satellitencodes (z. B. SAT-TV oder DVB-T) öffnet die Taste das elektronische Fernsehprogramm. Bei DVD-Codes öffnet die Taste das Titel-Menü. Bei VCR-Codes können Sie mit der Taste eine Programmierung vornehmen, sofern Ihr Videorecorder über eine Showview-Funktion verfügt. Universal-Funktionen ("Punch Through") Die Universal-Funktionen (auch "Punch Through"-Funktionen genannt) ermöglichen Ihnen, bestimmte Funktionen an einem anderen Gerätetyp als dem eingestellten auszuführen. Dies sind die Funktionen Lautstärke, Stummschaltung sowie die Abspielfunktionen. Wenn die Fernbedienung im VCR-, DVD-, SAT- oder CBL-Betrieb ist, steuern die Tasten Lautstärke und Stummschaltung das TV-Gerät an (sofern die anderen Geräte nicht über eine eigene Lautstärkeregelung verfügen); wenn die Fernbedienung im TV-Betrieb oder in einem anderen Betrieb ohne Abspielfunktionen ist, steuern die Tasten Wiedergabe, Pause, Stopp und ggf. Aufnahme einen angeschlossenen Videorecorder, DVD-Player oder DVD-Rekorder an. Es wird immer das zuletzt gewählte Gerät angesteuert. 40 Universal-Funktion Lautstärke/Stummschaltung auf einen anderen oder bestimmten Gerätetyp programmieren ES Im Auslieferungszustand ist die 5 in 1 IR-Fernbedienung so eingestellt, dass die Funktionen Lautstärke und Stummschaltung automatisch das TV-Gerät steuern, wenn gerade eine Quellentaste für ein Gerät mit Bildübertragung (DVD, Videorecorder etc.) gedrückt ist. EN Sie können die 5 in 1 IR-Fernbedienung auch so einstellen, dass die Universal-Funktionen Lautstärke und Stummschaltung einen anderen oder bestimmten Gerätetyp als das TV-Gerät ansteuern. Halten Sie die CODE-Taste für ca. 3 Sekunden gedrückt, bis die LED nach kurzem Blinken dauerhaft aufleuchtet. Drücken Sie die Taste (MUTE), bis die LED kurz ausgeht. Drücken Sie eine Quellentaste für das Gerät, auf das die Lautstärke- und Stummschaltung-Funktion übertragen werden soll. Die LED geht wieder an. Drücken Sie die Taste (MUTE); die LED geht aus. Universal-Funktion Lautstärke/Stummschaltung wieder einstellen Falls Sie die Universal-Funktionen Lautstärke und Stummschaltung wie im vorangehenden Abschnitt beschrieben verändert haben, können Sie die Funktionen wieder auf ihre Werkseinstellung zurückstellen und so den "Punch-Through"-Effekt wiederherstellen. Halten Sie die CODE-Taste für ca. 3 Sekunden gedrückt, bis die LED nach kurzem Blinken dauerhaft aufleuchtet. Halten Sie die Taste (MUTE), bis die LED kurz ausgeht. Drücken Sie die Taste (MUTE) noch einmal. Die LED erlischt ganz. Die Funktionen Lautstärke und Stummschaltung sind jetzt im Auslieferungszustand. 41 DE Fehlerbehebung Die Fernbedienung funktioniert nicht Überprüfen Sie, ob Ihre Geräte korrekt angeschlossen und eingeschaltet sind. Überprüfen Sie, ob die Batterien der Fernbedienung korrekt eingelegt sind und die Polung +/– übereinstimmt. Falls die Batterien zu schwach sind, tauschen Sie diese durch neue aus. Es sind mehrere Gerätecodes unter dem Markennamen meines Geräts aufgeführt. Wie ermittle ich den richtigen Gerätecode? Um den richtigen Gerätecode für Ihr Gerät zu bestimmen, probieren Sie die Codes nacheinander aus, bis die meisten Funktionen des Gerätes ordnungsgemäß funktionieren. Die Geräte reagieren nur auf einige Befehle der Fernbedienung: 42 Testen Sie weitere Codes, bis die Geräte auf die Befehle entsprechend reagieren. Wenn die manuelle Codeeingabe und die automatische Codesuche nicht zum Erfolg führt, kann es in besonderen Einzelfällen vorkommen, dass das Gerät nicht kompatibel zu Ihrer 5 in 1 IRFernbedienung ist. Wenn Störungen auftreten ES Sollten Störungen auftreten, prüfen Sie bitte zunächst, ob Sie das Problem selbst beheben können. Die folgende Übersicht kann Ihnen dabei helfen. EN ACHTUNG! Versuchen Sie auf keinen Fall, das Gerät selbst zu reparieren. Wenn eine Reparatur notwendig ist, wenden Sie sich bitte an unser Service-Center oder eine andere geeignete Fachwerkstatt. STÖRUNG MÖGLICHE URSACHE / MASSNAHME Allgemein Keine Standby-Anzeige Prüfen Sie den Netzanschluss: sitzt der Stecker fest in der Steckdose? Keine Funktion Stellen Sie den POWER-Schalter am Gerät auf ON, dann BY) an der Fernbedienung. (STAND- Falls das Gerät durch ein Gewitter, eine statische Aufladung oder einen anderen externen Faktor gestört ist, versuchen Sie folgendes Vorgehen: Stellen Sie den POWER-Schalter am Gerät auf OFF. Ziehen Sie dann das Netzkabel und stecken es wieder ein. Die Disk läuft nicht an, obwohl (PLAY) gedrückt ist, oder stoppt sofort wieder Ist die Disk mit der beschrifteten Seite nach oben eingelegt? Prüfen Sie, ob die Disk beschädigt ist, indem Sie eine andere Disk einlegen. Falls die Disk verschmutzt ist, wischen Sie sie mit einem weichen, trockenen Tuch von der Mitte zum Rand vorsichtig ab. DVD: Hat die DVD den richtigen Regionalcode (2)? Es hat sich Kondenswasser gebildet; geben Sie dem Gerät ein bis zwei Stunden Zeit zum Trocknen. Das Gerät reagiert nicht auf die Fernbedienung Prüfen Sie, ob die Batterien nicht verbraucht und richtig eingelegt sind. Entfernen Sie eventuelle Hindernisse zwischen dem Infrarotsender der Fernbedienung und dem Sensor am Gerät. Sind Sie eventuell zu weit (mehr als 7 m) vom Gerät entfernt? Haben Sie die richtige Quellentaste gedrückt (z. B. DVD für den DVDPlayer)? Kein Bild Sind die Kabelverbindung zwischen DVD-Player und Fernsehgerät richtig vorgenommen und einwandfrei? Ist das Fernsehgerät eingeschaltet? Haben Sie am Fernsehgerät den Video-Kanal gewählt? Ist der richtige Video-Ausgang am DVD-Player gewählt? Wenn Sie ein Verbindung ohne PROGRESSIVE SCAN-Funktion vorgenommen haben (z. B. SCART), prüfen Sie, ob eine InterlacedAuflösung gewählt ist. Stellen Sie ggf. die Auflösung 480i, 576i oder 1080i ein (Taste STOP/RES an der Gerätefront). Wenn das Fernsehgerät per HDMI-Kabel am DVD-Player angeschlossen ist, prüfen Sie, ob der HDMI-Ausgang aktiviert ist (Menü > HDMI Setup > An). Schalten Sie ggf. das Fernsehgerät ein, bevor Sie den DVD-Player einschalten. Damit wird der Bildmodus des DVD-Players am Fernsehgerät automatisch erkannt. 43 DE Verzerrtes Bild Kontrollieren Sie, ob die DVD verschmutzt ist und wischen Sie sie ggf. mit einem weichen, trockenen Tuch von der Mitte zum Rand vorsichtig ab. Kleine Bildstörungen sind keine Fehlfunktionen. Sehr verzerrtes Bild Keine Farbe im Bild Schlechtes Bild Die Norm Ihrer DVD stimmt eventuell nicht mit der Norm Ihres Fernsehgeräts überein (PAL – NTSC, SETUP -Menü > Sys te me ins te llun gen > TV- Stan dar d ). Es ist ein Video-Ausgangssignal eingestellt, das das Fernsehgerät nicht unterstützt (S E T U P-Menü > Sys teme ins te llun gen > Vide oAus gan g ). Falsches Bildformat (4:3, 16:9) Prüfen Sie im S E T U P-Menü > Sys teme ins te llun gen > T VF or m a t, ob das gewählte Format dem Fernsehgerät entspricht. Kein Ton Ist eventuell die Stummschaltung (MUTE) eingeschaltet? DVD-Spezifisch Falsche Sprache falsche Untertitelsprache Ändern Sie die Spracheinstellung im SETUP-Menü, über die Taste AUDIO oder im DVD-Menü (Taste MENU oder TITLE). Prüfen Sie auf dem DVD-Cover oder im DVD-Menü, ob die gewählte Sprache auf der DVD existiert. Keine SKIP-Funktion möglich Einige DVDs haben Titel/Kapitel, für die die SKIP-Funktion gesperrt sind. Die Kameraposition kann nicht geändert werden. Verschiedene Kamerapositionen sind nur auf wenigen Disks, und in der Regel nur für einige ausgewählte Szenen, auf einer DVD vorhanden. Sie haben das Passwort vergessen. Verwenden Sie das Master-Passwort 1369. 44 Entsorgung ES Verpackung Ihr Gerät befindet sich zum Schutz vor Transportschäden in einer Verpackung. Verpackungen sind Rohstoffe und somit wiederverwendungsfähig oder können dem Rohstoffkreislauf zurückgeführt werden. Gerät Werfen Sie das Gerät am Ende seiner Lebenszeit keinesfalls in den normalen Hausmüll. Erkundigen Sie sich in Ihrer Stadt- oder Gemeindeverwaltung nach Möglichkeiten einer umwelt- und sachgerechten Entsorgung. Entsorgen Sie das Gerät und die Batterien getrennt von einander. Batterien Verbrauchte Batterien gehören nicht in den Hausmüll. Die Batterien müssen bei einer Sammelstelle für Altbatterien abgegeben werden. 45 EN DE Technische Daten DVD-Player Spannungsversorgung 230 V ~ 50 Hz Leistungsaufnahme 20 W Standby-Stromaufnahme <1W Kopfhörer-Ausgangspannung: max. 150 mV USB Eingang max. 100 mA Batterien für Fernbedienung 2 x 1,5 V AAA/LR03 Farbfernsehsystem PAL/NTSC Laserleistung Laser Klasse 1 Kompatible Disk-Formate DVD (Digital Versatile Disk), DVD+R, DVD+RW, DVD-R, DVD-RW, VCD, SVCD, CD-Audio, CD-R, CD-RW, JPEG-CD, MP3-CD, WMAs, XviD, DivX Kompatible Speicherkarten SD-Karten, Multimedia-Karten, Memory Sticks, Memory Stick PRO HINWEIS! Bitte beachten Sie: Es gibt heute viele, zum Teil nicht standardisierte CD-Aufnahmeverfahren und Kopierschutzverfahren, sowie unterschiedliche CD-R- und CD-RW-Rohlinge. Darum kann es in Einzelfällen zu Einlesefehlern oder -verzögerungen kommen. Dies ist kein Defekt des Geräts. Video Video-Formate 4:3 / 16:9 Decoder MPEG 2 Audio Decoder MPEG; Dolby Digital (AC-3) dts nur mit zusätzlichem externen Decoder möglich Digital-Analog-Wandler 24 Bit / 96 kHz Dieses Gerät erfüllt die grundlegenden Anforderungen und relevanten Vorschriften der Ökodesign Richtlinie 2009/125/EG (Verordnung 1275/2008). Technische Daten 5 in 1 IR-Fernbedienung Batterien: 2 x 1,5 V Typ LR03/R03/AAA (Alkaline empfohlen) Laserklasse: 1M Technische und optische Änderungen sowie Druckfehler vorbehalten. Copyright © 2010 Alle Rechte vorbehalten. Dieses Handbuch ist urheberrechtlich geschützt. Vervielfältigung in mechanischer, elektronischer und jeder anderen Form ohne die schriftliche Genehmigung des Herstellers ist verboten. Das Copyright liegt bei der Firma MEDION. 46 Índice / Table of content / Inhaltsverzeichnis Índice / Table of content / Inhaltsverzeichnis ......................................................................................... 1 TV ......................................................................................................................................................... 2 VCR....................................................................................................................................................... 6 DVD ...................................................................................................................................................... 8 CD ...................................................................................................................................................... 10 SAT ..................................................................................................................................................... 11 DVD-R ................................................................................................................................................. 14 DECODER ........................................................................................................................................... 15 HDD Digital Video Recorder (Hard Disk Drive, DVR, PVR, etc) .............................................................. 16 TV/VCR (COMBOS) ............................................................................................................................. 16 TV/DVD (COMBOS) ............................................................................................................................ 17 DVD/VCR (COMBOS) .......................................................................................................................... 18 DVB-T ................................................................................................................................................. 18 Distintos descodificadores / Auxiliary Set-Top Boxes / Verschiedene Set-Top Boxen ............................. 19 HTIB .................................................................................................................................................... 19 AUX .................................................................................................................................................... 20 Búsqueda de códigos por nombres comerciales / Code Searching By Brand Name / Code-Suche nach Handelsname ...................................................................................................................................... 21 1 BUSH TV A ACME ADA ADC ADMIRAL ADYSON AGAZI AGB AIKO AIWA AKAI 0011 0018 0006 0019 0003 0002 0123 0003 0184 0011 0008 0133 AKIBA 0011 AKURA 0169 ALBA 0028 0083 0062 ALBIRAL 0037 ALKOS 0164 ALLORGAN 0157 ALLSTAR 0051 ALTUS 0042 AMPLIVISION 0003 AMSTRAD 0011 0071 ANAM 0009 ANGLO 0009 ANITECH 0009 ANSONIC 0009 ARC EN CIEL 0126 ARCAM 0003 ARISTONA 0169 ARTHUR MARTIN 0158 ASA 0017 ASBERG 0051 ASTRA 0009 ASUKA 0011 ATLANTIC 0169 ATORI 0009 AUDIOSONIC 0009 0157 AUDIOTON 0003 AUSIND 0043 AUTOVOX 0003 0043 0007 0108 0002 0009 0248 0086 0051 0141 0004 0291 0009 0061 0069 0074 0027 0169 0002 0009 0047 0001 0047 0000 0068 0088 0004 0169 0006 0200 0009 0011 0245 0011 0003 0248 0071 0068 0162 0026 0009 0069 0065 0068 0030 0109 0074 0123 0002 0014 0045 0043 0109 0002 0013 0108 0139 0051 0110 0043 0016 0018 0002 0003 0003 0051 0157 0003 0090 0169 1062 0011 0002 0101 0157 0139 0199 0245 0000 0011 0051 0245 0118 0083 0051 0076 0034 0141 1064 0000 0021 0051 0139 0000 0125 0032 0051 0139 0120 0009 0068 0167 0062 0011 0169 0245 0019 0107 0248 DAEWOO 0095 0245 0135 0045 0022 0169 0000 0008 0036 0002 0027 0009 0051 0168 0051 0000 0129 0009 0009 0169 0009 0129 COMBITECH 0248 CONCORDE 0009 CONDOR 0198 CONTEC 0003 CONTINENTAL EDISON 0139 COSMEL 0009 CROSLEY 0129 CROWN 0009 0121 CS ELECTRONICS 0011 CTC 0129 CTC CLATRONIC 0014 CYBERCOM 0177 0205 0044 0068 0185 0248 CYBERMAXX 0177 0200 0169 0049 0103 0168 0218 0248 CYBERTRON 0011 CYTRON 0177 0200 0169 0049 0103 0168 0218 0248 0131 0043 0051 0043 0002 0083 0003 0051 0009 0022 0046 0083 0027 0111 0003 0030 0036 0245 0029 0045 0126 0131 0169 0043 0129 0000 0083 0043 0047 0051 0245 0038 0207 0127 0103 0228 0291 0038 0205 0015 0061 0107 0170 1005 0291 0171 0208 0047 0107 0209 0002 0210 0061 0115 0343 0009 0169 0063 0154 0924 0206 0042 0067 0168 0933 0171 0207 0042 0063 0115 0185 0894 0002 0208 0044 0067 0127 0228 0343 0009 0210 0047 0068 0154 0229 0924 0206 0211 0048 0087 0155 0209 0933 0038 0205 0015 0061 0107 0170 1005 0291 0171 0207 0042 0063 0115 0185 0894 0002 0208 0044 0067 0127 0228 0343 0009 0210 0047 0068 0154 0229 0924 0206 0211 0048 0087 0155 0209 0933 0009 0191 0003 0051 0115 0169 0161 0051 0169 0088 0034 0113 0006 0169 0033 0004 0051 0123 0030 0002 0042 0067 0126 0210 0291 0009 0044 0068 0131 0228 0125 0206 0127 0003 0139 0343 0089 0018 0000 0169 0205 0169 0047 0028 0037 0011 0030 0003 D 0132 0007 0245 0202 CAPSONIC CARREFOUR CASCADE CATHAY CENTRUM CENTURION CENTURY CGE CIMLINE CITY CLARIVOX CLATRONIC 0022 0126 0100 0139 DAINICHI DANSAI DANTAX DATSURA DAYTON DAYTRON DE GRAAF DECCA DECCACOLOR DCE DELL DESMET DIGITOR DISNEY DIXI DTS DUAL 0007 0026 DUAL-TEC DUMONT 2 0027 0039 0131 0132 C B BAIRD 0111 BANG & OLUFSON BARCO 0112 BASIC LINE 0009 BASTIDE 0003 BAUR 0169 BEKO 0042 BEON 0169 BEST 0113 BESTAR 0051 BINATONE 0003 BLACK DIAMOND 0171 BLACK PANTHER LINE BLACK STAR 0129 BLAUPUNKT 0117 BLUE SKY 0011 BLUE STAR 0120 BONDSTEC 0129 BOOTS 0003 BPL 0120 BRANDT 0127 0046 BRION VEGA 0051 BRITANNIA 0003 BROKSONIC 0920 BRUNS 0000 BSR 0131 BTC 0011 0028 0205 0115 0024 0094 0245 0011 0002 0171 0121 0009 0245 0019 0003 0015 0205 0025 0051 0227 0148 0009 0009 0177 0207 0047 0103 0154 0924 0009 0003 0042 0169 0228 0169 0051 0038 0208 0061 0107 0160 0933 0131 0014 0171 0169 0063 0115 0168 0248 0003 0017 DURABRAND DUX DYNATRON 0228 1085 0169 0051 1006 1086 1007 1087 1008 1088 1009 0933 HISAWA HISENSE HITACHI 0169 E ELBE ELCIT ELECTRO TECH ELEKTA ELIN ELITE ELMAN ELTA EMERSON ERAE ERRES ESC ETRON EURO-FEEL EUROLINE EUROMANN EUROPHON EXPERT 0108 0000 0009 0120 0051 0011 0014 0009 0141 1003 0169 0245 0009 0002 0149 0002 0003 0157 0157 0037 0003 0051 0131 0169 0127 0000 0016 HORNYPHON HOSHAI HUANYU HYGASHI HYPER HYPSON HYUNDAI 0018 0051 ICE IMPERIAL 0169 0051 0051 FIDELITY FINLANDIA FINLUX FIRSTLINE FISHER FLINT FORMENTI FORTRESS FRONTECH FUJITSU FUNAI 0009 0127 0052 0003 0019 0061 0167 0017 0042 0003 0006 0027 0051 0001 0043 0001 0019 0120 0116 0002 0115 0166 0111 0019 0006 0087 0110 0018 0129 0003 0029 0113 0169 0125 0000 0002 0021 0004 0026 0088 0003 0051 0131 INDESIT INDIANA INGELEN INGERSOL INNO HIT 0123 0050 0047 0009 0169 0123 GELOSO 0019 GENERAL TECHNIC GENEXXA 0011 GERICOM 1064 GOLDSTAR 0084 0131 GOODMANS 0009 0028 0245 GORENJE 0083 GPM 0011 GRAETZ 0141 GRANADA 0127 0031 0138 GRANDIN 0009 GRUNDIG 0117 0017 0169 0037 0074 0128 0003 0157 0000 0036 0004 0169 0123 0016 0051 0043 0009 0018 0040 0051 0083 0062 0131 0026 0000 0003 0131 0133 0000 INTERTRONIC INTERVISION IRRADIO ISUKAI ITC ITS ITT 0009 0068 0118 0129 ITT/NOKIA ITV 0096 HANTAREX HARWOOD HCM HIFIVOX 0343 1003 0228 0002 0003 0009 0118 0009 0171 0002 0139 0009 0248 0113 0011 0043 0120 0027 0137 0051 0006 0019 0144 0041 0139 0123 0085 0003 0045 0141 0142 0134 0118 0047 1013 0153 0004 0131 0021 0213 0016 0133 0046 0009 0003 0129 0051 0131 0169 0120 0002 0051 0003 0083 0011 0129 0051 0131 0068 0021 0011 0093 0111 0068 0177 0129 0129 0003 0123 0002 0103 0248 0109 0169 0004 0051 0169 0009 0107 0291 0169 0115 0061 0154 0139 0141 0000 0003 0011 0014 0051 0109 0169 0068 0131 0051 0009 0142 0142 0171 0068 0143 0132 0021 0009 0120 0031 0133 0088 0245 0053 0027 0068 0011 0003 0120 0021 0003 0014 0157 0009 0028 0016 0108 0229 0011 0002 0119 0088 0093 0004 0129 0131 0051 0149 0169 0026 0019 0171 0003 0009 0009 0111 0177 0061 0115 0205 0067 0154 0291 0068 0168 0103 0169 0115 INTERBUY INTERFUNK 0009 0047 0043 0024 0051 0021 0009 0009 0245 0171 0067 0168 0009 0051 0021 0894 0002 0009 0011 0003 0011 0061 0021 0133 0169 0101 0169 0141 J 0157 JEC JVC 0164 0051 K 0083 0027 0003 0132 0009 0009 0051 0049 0129 0169 0111 0051 0283 0131 0248 0021 1022 0003 0171 0002 0068 0093 0142 0019 0051 0128 0169 0091 0136 0021 0003 0054 0040 0011 0114 0043 0006 0004 0043 0245 0101 0228 0168 0095 0015 0003 0131 0123 0027 0141 0003 0009 0131 0004 0041 1023 0009 0261 0004 0115 0051 0019 0012 0027 0127 0169 0064 0123 0120 0135 0141 0051 0093 0169 0171 0027 0133 KAISUI KAMOSONIC KAMP KAPSCH KARCHER KENDO KENNEDY KINGSLEY KING TV KNEISSEL KOLSTER KONKA KORPEL KORTING KOYODA KTV KURO KYOTO 0008 L 0042 1011 LENCO LENOIR LESA LEYCO LG 0169 0007 0051 0026 0083 LIESENK LIFE 0074 0120 H H&B HB HAAZ HALIFAX HAMPTON HANSEATIC INNOVATION 0035 0163 0068 0110 0063 0131 0014 G GALAXY GBC GEC 0171 0169 0011 0156 0027 0140 0023 0138 0033 0051 0011 0003 0003 0003 0002 1010 I F FENNER FERGUSON HINARI 0003 0009 0003 0003 0157 0169 0019 0131 0003 0015 0174 0051 0047 0051 0000 0009 0003 0121 0037 0009 0003 0129 0169 0084 0051 0261 0169 0002 0107 0171 0068 0169 0037 0245 0245 0009 3 LIFETEC LOEWE LOGIK LUMA LUMATRON LUX MAY LUXOR 0177 0205 0015 0061 0107 0170 1005 0291 0097 0030 0019 0002 0169 0051 0141 0093 0038 0207 0042 0063 0115 0185 0894 0171 0208 0044 0067 0127 0228 0343 0002 0210 0047 0068 0154 0229 0924 0009 0211 0048 0087 0155 0209 0933 0206 0169 0049 0103 0168 0218 0248 0098 0051 0169 0000 0169 0171 0107 0141 0019 0141 0157 0088 0157 0051 0245 0074 0019 0132 0047 0003 0077 0138 MANDOR MANESTH MARANTZ MARELLI MARK MATSUI MATSUSHITA MCMICHAEL MEDIATOR MEDION MELECTRONIC MEMOREX MEMPHIS METZ MICROMAXX MICROSTAR MINERVA MINOKA MITSUBISHI MIVAR MOTION MT LOGIC MTC MULTI SYSTEM MULTITECH MURPHY 4 NOBLIKO NOGAMATIC NOKIA NORDVISION 0003 0083 0051 0129 0011 0009 0003 0002 0169 0003 0139 0061 0031 0111 0139 0169 0169 0118 0068 0008 0132 0169 0019 0000 0113 0022 0051 0003 0164 0004 0011 0051 0014 0043 0143 0021 0127 0046 0063 0132 0036 0000 0141 0142 0045 0021 0077 0133 0051 0024 0126 1011 0142 0021 1089 0147 0154 0123 0026 0159 0169 0142 0009 0171 0030 0212 0920 0013 0002 0003 0004 0074 0029 0169 0111 0121 0008 0118 0132 0001 0131 0027 0139 0051 0141 0051 O 0133 0014 0003 0002 0067 0168 0002 0002 0051 0000 0051 0173 0147 0068 0123 0065 0041 0051 0177 1015 0211 0048 0087 0154 0229 0924 0009 0051 0109 0009 0004 0201 0206 0211 0048 0087 0155 0209 0933 0177 0200 0169 0049 0103 0168 0218 0248 0017 0051 0000 0060 0055 0043 0090 0132 0169 0003 0045 0003 0129 0014 0111 0068 0177 0131 0043 0009 0103 0200 0169 0123 0169 0107 0291 0000 0123 0171 0115 0061 0154 0169 0169 0003 0028 0051 0169 0099 0003 0101 0013 0091 0004 0164 0062 0027 0009 0169 0026 0180 0019 0248 0030 0028 0051 0113 0169 0038 0200 0169 0049 0103 0155 0209 0933 0016 0068 0171 0205 0015 0061 0107 0168 0218 0248 0169 0110 0002 0207 0042 0063 0115 0170 1005 0291 0018 0115 0009 0208 0044 0067 0127 0185 0894 1014 0003 0139 0206 0210 0047 0068 0148 0228 0343 0036 0021 0920 0009 0135 0177 0200 0169 0049 0103 0168 0218 0248 0038 0205 0015 0061 0107 0170 1005 0291 0101 0151 0038 0205 0015 0061 0107 0170 1005 0291 0171 0207 0042 0063 0115 0185 0894 0152 0171 0207 0042 0063 0115 0185 0894 0000 0002 0208 0044 0067 0127 0228 0343 0075 0009 0210 0047 0068 0154 0229 0924 0002 0208 0044 0067 0127 0228 0343 0009 0210 0047 0068 0154 0229 0924 0206 0211 0048 0087 0155 0209 0933 0027 0098 0083 0030 0101 0003 0051 0135 0093 0054 0205 0123 0043 0014 0131 0018 0019 0043 0169 0027 0135 0141 0099 0019 0064 0185 0057 1062 0009 0129 0133 N NAD NAIKO NAONIS NATIONAL NEC NEI NESCO NEW WORLD NEWTECH NICAMAGIC NIKKAI NORDMENDE M M+P MAGNADYNE MAGNAFON MAGNUM NECKERMANN 0108 0101 0027 0056 OCEANIC OKANO ONCEAS ONWA ORBIT ORION 0141 0083 0003 0069 0051 0099 0051 0283 0075 ORMOND 0205 OSAKI 0011 OSO 0011 OSUME 0004 OTTO VERSAND 0003 0076 0120 0028 0248 0062 P PACKARD BELL PAEL PALLADIUM PANAMA PANASONIC 0204 0003 0003 0002 0065 0101 0152 PATHE CINEMA 0003 PATHE MARCONI 0022 PAUSA 0009 PERDIO 0004 PHILCO 0047 PHILHARMONIC 0003 PHILIPS 0200 0003 0111 0043 PHOCUS 0042 PHOENIX 0051 PHONOLA 0051 PIONEER 0010 0021 PLANTRON 0002 POPPY 0009 PORTLAND 0245 PRANDONI-PRINCE PRECISION 0003 PRIMA 0009 PRINZ 0047 PRO2 0177 0200 0169 0049 0103 0168 0218 0248 PROFEX 0009 PROFILO 0171 PROFI-TRONIC 0051 PROLINE 0004 PROSONIC 0161 0107 PROTECH 0002 0129 PROVISION 0169 PYE 0169 PYMI 0009 0203 0083 0003 0067 0141 0012 0009 0064 0021 0197 0151 0072 0142 0186 0124 0083 0045 0131 0126 0037 0139 0037 0046 0129 0131 0000 0043 0088 0041 0115 0089 0095 0169 0169 0145 0217 0181 0131 0202 0339 0141 0020 0051 0154 0169 0083 0000 1064 0000 0000 0036 0051 0139 0169 0141 0123 0038 0205 0015 0061 0107 0170 1005 0291 0141 0171 0207 0042 0063 0115 0185 0894 0002 0208 0044 0067 0127 0228 0343 0009 0210 0047 0068 0154 0229 0924 0206 0211 0048 0087 0155 0209 0933 0051 0169 0200 0003 0131 0171 0051 0062 0003 0068 0009 0132 0015 0068 0015 0245 0169 0113 0042 0088 0014 0051 0051 0019 0021 0043 Q QUASAR QUELLE QUESTA 0129 0169 0051 0018 0027 0205 0129 0026 0002 0131 0030 0003 0135 0016 0141 0022 0017 R RADIOLA RADIOMARELLI RADIONETTE RADIOTONE RANK RBM RCA REDIFFUSION REVOX REX RFT R-LINE ROADSTAR ROBOTRON RTF 0051 0129 0016 0051 0017 0017 0031 0141 0051 0019 0000 0051 0002 0000 0000 0169 0000 0018 0007 0027 0169 0002 0007 0169 0009 0108 0157 0011 0245 0127 0141 0021 SACCS 0037 SAISHO 0028 0123 SALORA 0019 0118 0128 SAMBERS 0014 SAMSUNG 0090 0002 0105 SANDRA 0003 SANSUI 0051 SANYO 0004 0018 0030 SAVILLE 0248 SBR 0041 SCHAUB LORENZ 0141 0095 SCHNEIDER 0177 0131 0125 SCHWAIGER 1024 SEG 0171 0014 0043 SEI-SINUDYNE 0014 0000 SELECO 0019 SENCORA 0009 SENTRA 0164 SHARP 0001 0029 SHORAI 0026 SIAREM 0014 SICATEL 0037 SIEMENS 0008 SIERRA 0051 SIESTA 0160 SILVER 0027 SINGER 0014 SINUDYNE 0014 0013 SKANTIC 0138 SKYMASTER 0016 SKYWORTH 0228 SOLAVOX 0092 SONITRON 0006 SONOKO 0009 SONOLOR 0006 SONTEC 0051 SONY 0165 0127 SOUND & VISION 0011 SOUNDWAVE 0051 STANDARD 0003 STARLIGHT 0169 0111 0245 0126 0142 0036 0046 0045 0000 0139 0123 0002 0013 0031 0131 0132 0169 0104 0160 0093 0009 0920 0006 0083 0040 0003 0009 0248 0030 0047 0138 0021 0043 0009 0003 0061 0141 0107 0093 0108 0121 0123 0051 0004 0172 0312 0083 0030 0031 0127 0043 0003 0160 0027 0131 0016 0029 0142 0042 0169 0160 0205 1011 0011 0245 1003 0168 0051 0264 0068 0071 0123 0169 0021 0015 0003 0139 TANDBERG TANDY TARGA TASHIKO TATUNG TCM 0021 0002 0027 0168 0013 0205 0088 0003 0129 0169 0131 0009 1014 0021 0026 0075 0123 0027 0131 0108 0157 0021 0005 0027 0187 0188 0131 0000 0123 0022 0200 0135 0029 0131 0131 0026 0021 0129 0169 0015 0228 0028 0000 0000 0169 0003 0051 0245 0160 0183 0004 0106 0182 0076 0029 0027 0030 0011 0051 0245 0021 0031 0002 0021 0169 0130 0009 0014 0169 0009 0157 0026 0051 0021 0062 0157 0001 0185 0003 0051 0177 1015 0210 0063 0127 0209 0291 0003 0065 0154 0042 0022 0166 0163 0052 0169 0003 0011 0051 0177 1015 0211 0048 0087 0155 0209 0343 0003 0166 0045 0052 0046 0004 0127 0004 0003 0120 0117 0920 0131 0013 0026 0003 1018 0019 0003 0038 1017 0169 0067 0154 1005 0004 1003 0027 0004 0171 1119 0042 0068 0168 0343 0011 1004 0041 0169 0002 0205 0044 0103 0185 0924 0133 0021 0056 0123 0009 0207 0047 0107 0211 0933 0128 0009 0129 0131 0133 0036 0111 0101 0078 0009 0157 0168 0045 0127 0102 0108 0088 0118 0018 0111 0190 0036 0126 0129 0132 0051 0126 0022 0050 0139 0113 0038 0200 0169 0049 0103 0168 0214 0924 0171 0205 0015 0061 0107 0170 0218 0933 0002 0207 0042 0063 0115 0185 1005 0248 0009 0208 0044 0067 0127 0228 1016 0291 0206 0210 0047 0068 0154 0229 0894 1064 0127 0176 0126 0111 0101 0139 0003 0102 0163 0022 0050 0185 0036 0051 0245 0018 0141 0051 0169 0164 0035 0037 0054 0111 0164 0082 0021 0123 0189 0027 0146 0017 UHER 0051 ULTRAVOX 0003 UNITED 0088 UNITED QUICK STAR UNIVERSUM 0102 0169 0143 UNIVOX 0037 0157 0014 0169 0245 0002 0083 0021 0129 0043 0131 0133 0000 0016 0110 0018 0122 0051 0129 0061 0131 0051 0107 0195 0009 0051 0169 0118 0205 0171 0129 0021 0083 0131 1014 0092 0138 TEC TECHNICS TECHNISAT TECHNISSON TELEAVIA TELEFUNKEN TELETECH TELETON TENSAI TESMET TEVION TEXET THOMSON THORN 0059 0120 0019 0009 0009 0003 0118 0009 0011 0009 0003 0169 T S SABA STENWAY STERN SUNKAI SUNWOOD SUPERLA SUPERTECH SUPRA SUSUMU SUTRON SYDNEY SYSLINE 0075 TOKAI TOKYO TOMASHI TOSHIBA TOWADA TRIUMPH 0206 0208 0061 0115 0228 0248 0139 0035 0051 0079 0026 0082 U V VESTEL 0019 0103 0168 VEXA 0169 VICTOR 0027 VIDEO SYSTEM 0051 VIDEOLOGIQUE 0011 VIDEON 0248 VIDEOSAT 0129 VISIOLA 0003 VISION 0051 VISOREX 0096 VISTAR 0133 VORTEC 0051 0065 0003 0169 5 VOXSON 0019 0051 0108 0021 WALTHAM 0003 WATSON 0051 WATT RADIO 0003 WEGA 0000 WELLTECH 0042 WELTBLICK 0051 WESTON 0131 WHARFEDALE 0099 WHITE WESTINGHOUSE WORLD OF VISION 0133 0169 0014 0027 0138 0037 0131 0037 0043 0000 ELTA EMERSON ESC ETZUKO W FERGUSON 0003 0014 0043 Y YAKUMO YOKO YORX 1012 0009 0011 0011 0051 0019 0157 0108 0169 0002 0003 Z ZANUSSI A 0230 0291 0300 0239 0275 0275 0275 0247 0311 0250 0253 0275 0949 0257 0275 0233 0256 0293 0231 0248 0329 0293 0307 0237 0236 0238 0244 0233 0293 0250 BAIRD 0259 BASIC LINE BAUR 0263 BESTAR 0250 BLACK PANTHER LINE BLAUPUNKT 0263 0271 BONDSTEC 0250 BRANDT 0303 BROKSONIC 0277 BUSH 0275 0288 0231 0275 0257 0245 0245 0257 AKAI AKIBA AKURA ALBA ALLORGAN AMBASSADOR AMSTRAD ANITECH APEX ASA ASUKA 0231 0256 0257 0245 0248 0246 0254 0231 0256 0258 0233 0245 0250 0237 0245 0293 0262 0260 0309 0325 0245 0248 0246 0247 C CATRON CGE CIMLINE CINEVISION CLATRONIC COMBITECH CONDOR CROWN CYBERCOM CYBERMAXX CYTRON 0250 0231 0275 0256 0250 0248 0250 0275 0233 0248 0233 0248 0233 0248 0293 0233 DUMONT 6 0274 0275 0233 0245 GRAAF 0257 0233 0293 0266 0339 0294 0305 FIDELITY 0311 FINLANDIA 0266 FINLUX 0266 0237 FIRSTLINE 0266 FISHER 0258 FLINT 0233 FORMENTI-PHEONIX FRONTECH 0250 FUJITSU 0231 FUNAI 0231 0259 0271 0278 0293 0281 0231 0257 0298 0258 0257 0231 0258 0293 0233 0265 0298 0256 0233 0311 0248 0259 0256 0231 0245 0240 0256 0263 0275 0288 0258 0231 0235 0286 0271 0245 0243 0287 0257 0290 0248 0288 0301 0257 0275 0268 0231 0293 0250 0311 0257 0262 0275 0248 0245 0291 0275 0279 0257 0339 GALAXY 0231 GBC 0275 GEC 0257 GELOSO 0275 GENERAL 0250 GENERAL TECHNIC GOLDHAND 0275 GOLDSTAR 0231 GOODMANS 0275 0283 GO-VIDEO 0338 GRAETZ 0258 GRANADA 0257 GRANDIN 0275 GRUNDIG 0273 0260 0315 0250 0262 0256 0250 0282 0367 0293 0266 0250 0270 0272 0271 0971 HAAZ HANSEATIC HCM HINARI HISAWA HITACHI HYPSON 0233 0257 0275 0275 0233 0266 0233 0256 0288 0233 0387 I IMPEGO IMPERIAL INNO INNOVATION INTERBUY INTERFUNK INTERVISION IRRADIO ITT ITV 0250 0231 HIT 0233 0256 0257 0231 0275 0237 0256 0256 0293 0245 0258 0292 0294 0295 0293 0400 0250 0265 0300 0256 0256 0311 0291 0325 0261 0907 0262 0338 0262 0269 0905 0257 0245 0258 0237 0281 0258 J JVC K 0245 0250 0311 0291 0311 0291 0311 0291 0245 0262 0338 0262 0338 0262 0338 0269 0905 0269 0905 0269 0905 0319 0906 0319 0906 0319 0906 0256 0250 0265 0319 0245 0971 0266 0231 0256 0248 0257 0257 0293 0257 0291 0231 0256 0256 0311 0338 0258 0262 0905 KAISUI KARCHER KENDO KENWOOD KORPEL 0275 0257 0233 0237 0293 0275 0245 0236 0319 0906 0256 0256 L D DAEWOO DANSAI DANTAX DAYTRON DE DECCA DUAL 0301 H B 0305 0967 0233 0256 G VCR AIWA 0275 0231 0245 0275 F 0169 0169 1021 E 0319 0906 LENCO LEYCO LG LIFE LIFETEC LOEWE LOGIK LUMATRON LUXOR 0245 0275 0231 0291 0233 0248 0267 0275 0274 0298 0271 SANSUI SANYO SAVILLE SBR SCHAUB SCHNEIDER M MAGNASONIC MAGNAVOX MAGNUM MANESTH MARANTZ MATSUI MEDIATOR MEDION MELECTRONIC MEMOREX MEMPHIS METZ MICROMAXX MICROSTAR MIGROS MINERVA MITSUBISHI MULTITECH MURPHY 0258 0914 0291 0275 0257 0233 0257 0233 0248 0231 0240 0275 0262 0233 0248 0233 0248 0231 0263 0298 0275 0231 0285 0265 0271 0256 0281 0248 0299 0301 0311 0291 0262 0338 0269 0905 0319 0906 0256 0231 0258 0279 0263 0311 0291 0311 0291 0267 0262 0338 0262 0338 0273 0269 0905 0269 0905 0325 0319 0906 0319 0906 0271 0257 0250 0289 0257 0294 0231 0231 0256 0271 0256 0256 N NATIONAL NEC NECKERMANN NEI NESCO NIKKAI NOKIA NORDMENDE 0262 0294 0257 0257 0275 0250 0240 0293 0294 STANDARD STRONG SUNKAI SUNSTAR SUNTRONIC SUNWOOD SYLVANIA 0260 0293 0293 0299 0301 0302 0300 0307 0258 0293 0303 0305 0231 0300 0233 0293 0304 0231 0256 0237 0240 0233 0234 0246 ORSON 0231 OSAKI 0275 OTTO VERSAND 0257 0248 0275 0262 0970 PATHE CINEMA 0301 PATHE MARCONI 0293 PENTAX 0266 PERDIO 0231 PHILCO 0299 PHILIPS 0235 0285 PHONOLA 0257 PIONEER 0294 POLAROID 0949 PORTLAND 0250 PRINZ 0231 PRO2 0233 0248 PROFEX 0275 PROLINE 0231 PROSONIC 0233 PYE 0257 0300 0267 0256 0260 0283 0301 0293 0321 0325 0258 0257 0257 0242 0290 0271 0257 1084 0315 0293 0327 0969 0286 0245 0311 0291 0262 0338 0269 0905 0319 0906 0256 0257 0293 0250 0275 0324 0275 0298 0311 0250 THORN TIVO TOKAI TONSAI TOSHIBA TOWADA TOWIKA TRIUMPH TVA UHER UNITED UNIVERSUM 0258 0233 0264 0319 0237 0265 0245 0231 0250 0241 0258 0328 0281 0256 0258 0271 0308 0255 0309 0402 0293 0257 0256 0310 0313 0249 0262 0338 0269 0905 0319 0906 0295 0323 0280 0269 0905 0323 0319 0906 0326 0256 0245 0231 0233 0263 0256 0240 0257 0233 0375 0250 0262 0293 0306 0293 0275 0275 0233 0248 0294 0242 0258 0242 0275 0275 0320 0293 0275 0275 0301 0250 0907 0231 0231 0256 0248 0293 0311 0291 0260 0294 0303 0324 0305 0231 0311 0291 0324 0293 0293 0256 0262 0338 0295 0305 0301 0256 0257 0265 0298 0319 0362 0256 QUICK 0290 0231 STAR 0235 0237 0245 0263 0239 0257 0253 0315 0271 0256 0294 0233 0295 0262 0311 0248 0250 0256 V 0263 0258 0231 0271 0301 VICTOR VIDEON W WELTBLICK 0257 0256 0245 0233 0258 0312 0281 0248 0237 0338 0256 Y 0245 S SABA SAISHO SALORA SAMSUNG SAMURAI 0920 U 0288 0245 R RADIOLA REX RFT ROADSTAR TENOSAL TENSAI TEVION THOMSON Q QUARTZ QUELLE TAISHO TANDBERG TARGA TASHIKO TATUNG TCM TEC TECHNICS TELEAVIA TELEFUNKEN 0271 0314 0293 0279 T P PALLADIUM PANASONIC 0244 0258 0292 O OCEANIC OKANO ORION SEG SEI-SINUDYNE SELECO SENTRA SENTRON SHARP SHINTOM SHIVAKI SIEMENS SILVA SILVERCREST SINUDYNE SOLAVOX SONOKO SONOLOR SONTEC SONY 0294 0284 0248 0257 LORENZ 0275 0231 0275 0257 0293 0250 0275 0240 0275 0256 0263 0256 0256 0257 0250 0245 0240 0256 0232 0251 0245 0244 0233 0231 0231 0275 0339 0293 0301 0292 0963 0303 0305 YAMISHI YOKAN YOKO 0275 0275 0275 Z ZENITH 0256 7 D DVD DAEWOO A ACCOUSTIC SOLUTIONS AEG 0894 AFREEY 0386 AIRIS 0357 AIWA 0383 AKAI 0369 AKASHI 0346 ALBA 0384 ALL-TEL 0333 AMES 0383 AMSTRAD 0350 AMW 1053 ANABA 0961 ANSONIC 0356 APEX 0921 1083 ARENA 0923 ASPIRE 0952 A-TREND 0347 AUDIOSONIC 0382 AUDIOVOX 0942 AXION 0942 0383 0333 0350 0377 0333 0382 0350 0894 0350 0381 0357 0370 0351 0357 0911 0390 0913 1054 0384 0949 1062 B B&K 0978 BAIER 0349 BAZE 0357 BEKO 1064 BLACK DIAMOND 0350 BLAUPUNKT 0384 BLUE NOVA INTERNATIONAL BLUE SKY 0373 0357 BOMAN 0894 0351 BRANDT 0373 0360 BROKSONIC 0920 0967 BUSH 0384 0382 DURABRAND DVD CONTEL CRITERION CROWN C-TECH CURTIS CYBERCOM CYBERHOME CYBERLINK CYBERMAXX CYTRON 8 0376 0357 0357 0932 0932 0346 0350 0375 0383 0357 0923 0332 0948 0894 0344 0373 0341 0950 0356 0340 0371 0338 0347 1101 0356 0339 0358 0899 0923 1067 0343 0372 0356 0339 0358 0898 0904 1071 0905 0338 0965 0355 0347 0380 0356 0984 0337 0352 0343 0375 0356 0383 0340 0358 0338 0924 0933 0956 0392 0371 0372 0933 1085 0373 0341 0923 0334 0382 0894 0333 1057 0339 0375 0357 0351 0907 0382 1059 0972 0350 1061 0333 0338 0351 0367 0971 0370 0333 0380 0373 0378 0376 0894 1086 E E-BENCH ELTA ELTAX EMERSON ENCORE ENZER ESA EUROLINE 1051 0350 0362 0350 0381 0356 C CAMBRIDGE CELESTIAL CENTREX CENTRIOS CENTRON CENTRUM CINETEC CINEVISION CLASSIC CLATRONIC CMI COBY DANSAI DAYTRON DCE DENON DENVER DENZEL DESAY DIAMOND DIGIFRAME DIGIHOME DIGITOR DIGITREX DIGITRON DIGIX DIK DISNEY DiViDo DIVX DK DMTECH DRAGON DUAL 0353 0354 0925 0971 0351 0925 0356 0364 0389 0381 1051 0392 0958 0373 0341 0930 0350 0382 0357 0386 0962 0356 0339 0902 0380 0375 0932 DIGITAL 0356 0351 0333 SYSTEMS 0350 0356 0330 0335 0342 0345 0351 0333 0344 0664 0333 0375 1087 1088 1024 0929 0341 0365 1051 0380 0386 0392 0956 0894 F 0951 0954 0955 0926 0928 0350 FARENHEIT FERGUSON FINLUX FINTEC FIRSTLINE FISHER FUNAI 0927 G 0894 0916 0960 0373 0375 0350 0373 0378 0339 0946 0947 0357 1051 0382 0948 0930 0341 0923 0334 0912 0932 0342 0375 0344 0985 0330 0345 0343 0664 1075 0335 0352 0924 0372 0930 0340 0371 0900 0893 1066 0924 0334 0930 0340 0371 0899 0923 1067 0343 0372 0373 0341 0895 0901 0959 1068 0933 0344 0373 0341 0380 0900 0893 1066 0924 0334 0932 0342 0896 0902 1069 1117 0375 0664 0932 0342 0895 0901 0959 1068 0933 0344 0330 0345 0897 0903 1070 1118 0906 0894 0330 0345 0896 0902 1069 1117 0375 0664 0339 0358 0933 0373 0335 0352 0898 0904 1071 0905 0338 0335 0352 0897 0903 1070 1118 0906 0894 GE GERICOM GOLDEN SPHERE GOLDSTAR GOODMANS GO-VIDEO GPX GRADIENTE GRAETZ GRAN PRIX GRANDIN GRUNDIG 0384 1064 0341 0375 0373 0383 0351 0910 0373 0392 0356 0357 0385 0350 H H&B 0350 HB 1089 HAAZ 0341 HANSEATIC 0375 HARMON/KARDON HCM 0894 HE 0383 HITACHI 0367 HITEKER 0357 HOHER 0356 HOME ELECTRONICS HOMITA 0934 HOYO 0392 HYUNDAI 0351 0343 0342 0351 0395 0333 0368 0392 0387 0350 0383 0935 0936 0937 0938 MICROSTAR I ILO INITIAL INTEGRA INTERTRONIC 0959 0384 0374 0893 0933 0894 J JATON JBL JDB JVC JWIN 0392 0395 0383 0361 1072 1076 1058 0362 0400 0964 0662 1083 K KARCHER KAWASHI KENDO KENNEX KENWOOD KISS KLH KONKA KOSS 0351 0333 0356 0350 0393 0392 0384 0908 0358 0923 0350 LIMIT LINN LITEON LODOS LOEWE LOGIX LUMATRON LUXMAN LUXOR 0341 0341 0376 0373 0931 0375 0372 0356 0339 0358 0899 0923 1067 0343 0372 0341 0336 0982 0350 0370 0351 0332 0367 0350 NAD NAKAMICHI NEC NEOTEK NEUFUNK NEVIR NEXXTECH NORCENT NORDMENDE NORIKO 0909 0373 0380 0350 0346 0907 0373 0930 0340 0371 0900 0893 1066 0924 0334 0356 0382 0972 1117 0373 0341 0895 0901 0959 1068 0933 0344 1118 0932 0342 0896 0902 1069 1117 0375 0664 1056 1059 0959 0375 0380 0342 1051 MANHATTAN MARANTZ MARK MASTEC MATSUI MAXDORF MAXIM MBO MEDION MEMOREX MERIDIAN METZ MICROMAXX MICROMEGA MICROSOFT 0362 0350 0350 1079 0350 0335 0373 0894 0331 0396 0356 0339 0358 0898 0904 1071 1117 0375 0664 0356 0362 0368 0356 0335 0352 0898 0904 1067 0343 0372 0370 0399 0350 0330 0345 0897 0903 1070 1118 0906 0894 0383 0335 0352 0898 0904 1071 0905 0338 0380 0379 0914 0380 0370 0979 0980 0981 0370 0379 0981 0375 0362 0357 0350 0932 0342 0895 0901 0959 1068 0343 0372 0330 0345 0896 0902 1069 1115 0924 0334 0335 0352 0897 0903 1070 1116 0933 0344 0350 0893 0339 0358 0899 0923 1066 0924 0334 0382 0373 0341 0351 0900 0893 1066 0905 0338 0330 0345 0897 0903 1070 1118 0906 0894 0375 0398 0375 0386 0392 0356 0932 0332 0356 0349 0394 0335 0352 0898 0904 1071 0905 0338 0955 0944 0956 0945 0948 0350 0940 0333 1101 1052 0364 0403 0970 0974 0379 1123 1064 0979 1128 0980 0969 0981 0339 0362 0977 0949 0922 0968 0976 1084 0930 0340 0371 0900 0893 1066 0375 0664 0373 0341 0895 0901 0959 1068 0906 0894 0932 0342 0896 0902 1069 0905 0338 0330 0345 0897 0903 1070 0343 0372 0335 0352 0898 0904 1071 0924 0334 0357 0333 0376 0397 0341 1051 0349 0366 1062 0954 0982 OCEANIC OKANO OMNI ONIX ONKYO OPTIMUS ORION ORITRON 1089 0349 0382 0346 0374 0368 0920 0373 0362 0975 0922 0335 PACIFIC PACKARD BELL PALSONIC PANASONIC PANDA PHILIPS PHOCUS PHONOTREND PIONEER POLAROID PORTLAND PRINZ PRISM PRO2 PROCASTER PROLINE PROSCAN PROSON PROSONIC PROVISION 0356 0939 0357 0401 0351 0370 1080 1063 0916 0368 0957 0382 0356 0335 0356 0339 0358 0899 0923 1067 0933 0344 0905 0373 0399 0350 0332 0381 Q 0920 0922 0930 0340 0371 0900 0959 1068 0933 0344 0932 0342 0896 0902 1069 1117 0375 0664 P 0383 0350 0383 0930 0340 0371 0899 0923 1067 1118 0906 0894 0339 0373 0341 0895 0901 0959 1068 0933 0344 O M MAGNAVOX 0930 0340 0371 0900 0893 1066 0924 0334 N 0364 L LASONIC LAWSON LECSON LENCO LENOXX LG LIFE LIFETEC MINATO MINERVA MINTEK MIRROR MITSUBISHI MONYKA MT MUSTEK MxONDA MYSTRAL 0356 0339 0358 0899 0923 1067 0343 0372 0349 0380 0384 0349 0350 0392 LOGIC 0383 0373 0356 QUARTEK 0373 0341 0895 0901 1069 1117 0375 0664 0932 0342 0896 0902 1070 1118 0906 0894 0330 0345 0897 0903 1071 0905 0338 1077 R RADIONETTE RAITE RCA REDSTAR RELISYS REOC REX ROADSTAR RONIN 0375 0392 0399 0894 0923 0341 0346 0350 0397 0384 0895 0383 0382 9 ROTEL ROWA RTL 0361 0384 0923 TRUTECH 0922 U UMAX UNITED UNIVERSUM S SABA SAIVOD SALORA SAMPO SAMSUNG SANSUI SANYO SCAN SCHAUB LORENZ SCHNEIDER 0373 0356 0375 0341 0367 0341 0350 0380 0894 0350 0333 SCHWAIGER 0349 SCIENTIFIC LABS SCOTT 0373 SEG 0350 SHARP 0371 SHERWOOD 0391 SHINCO 0384 SHINSONIC 0384 SILVA 0894 SILVA SCHNEIDER 0356 SILVERCREST 0341 SINGER 0341 SKYMASTER 0382 SM ELECTRONIC 0382 SMART 0350 SONY 0363 SOUNDMASTER 0341 SOUNDMAX 0341 SOUNDSTORM 0330 SOUNDWAVE 0351 STANDARD 0373 STRONG 0350 SUNGALE 0953 SUPERVISION 0382 SVA 0349 SYLVANIA 0339 SYNN 0341 0915 0360 0386 1050 0920 0333 0923 0338 0895 0963 1060 0378 0356 0373 1089 0352 0380 0341 0357 0341 0394 0392 1055 0351 1090 VENTURER VESTEL VIETA VOXSON 0894 0350 1091 0989 1092 0350 1051 0375 1094 TCM 0356 0339 0352 0924 0664 TEAC 0368 TECHNICS 0364 TECHNIKA 0356 TECHWOOD 0394 TECO 0923 TEDELEX 0382 TELEDEVICE 1051 TELEFUNKEN 0894 TELETECH 0350 TENSAI 0373 TERAPIN 0943 TEVION 0356 0337 0352 0896 0902 0959 1067 0343 0917 0894 THETA DIGITAL 0368 THOMSON 0360 TINY 1051 TOKAI 0894 TOKIWA 0380 TOSHIBA 0973 1111 TRANS-CONTINENTS TRANSONIC 0357 TREDEX 0941 10 0357 0333 0333 0350 0380 0383 0356 0382 0349 0341 0386 0905 0979 0382 0980 0894 W WALKVISION WELKIN WESTAR WHARFEDALE WILSON 0384 0356 0350 0376 0356 0402 0399 0373 0341 0894 0358 Y 0986 YAKUMO YAMAHA YAMAKAWA YUKAI 0357 0364 0397 0383 1083 0388 0392 0375 0907 0370 Z ZENITH CD 0383 A T TANDBERG TANGENT TARGA 0348 0375 X 0341 0988 0382 0333 0350 V 1051 0919 X-BOX XENIUS XLOGIC XMS 1093 0382 0383 0383 0380 0987 1075 1115 1121 0930 0340 0358 0933 0959 1041 0373 0333 0371 0338 0891 0907 0932 0341 0923 0372 1117 0972 0330 0342 1119 0334 0335 0345 0343 0344 0333 0399 0341 0384 0375 0350 0895 0370 ADCOM AIWA AKAI ALBA ARCAM BESTAR BSR BUSH CYBERMAXX 0382 0932 0341 0891 0899 0923 1069 1118 0375 0334 0359 0399 1078 0330 0342 0892 0900 0966 1070 0890 0906 0344 0851 0855 0751 0663 0807 0860 0843 0730 0747 0818 0843 0730 0747 0818 0843 0730 0747 0818 0664 0742 0801 0819 0664 0742 0801 0819 0664 0742 0801 0819 0668 0743 0802 0674 0744 0803 0675 0745 0807 0694 0746 0809 0668 0743 0802 0674 0744 0803 0675 0745 0807 0694 0746 0809 0668 0743 0802 0674 0744 0803 0675 0745 0807 0694 0746 0809 0665 0843 0730 0747 0666 0848 0742 0798 0664 0743 0801 0668 0744 0802 0675 0745 0803 0694 0746 0811 0667 0848 0668 0859 0693 0694 0745 0859 0860 0661 C 0333 0373 0340 0371 0898 0904 1068 1117 0933 0372 0850 0854 B CARRERA CLASSIC CONDOR CYBERCOM 0930 0339 0358 0897 0903 1065 1066 0924 0918 1064 0848 0849 0853 0856 0732 0335 0345 0895 0901 0893 1071 0905 0338 0664 CYTRON D DENON DUAL E 0392 1110 1120 0356 1051 0362 0983 0920 E-BENCH ELTA EMERSON F FISHER 0669 G GENEXXA S 0859 0677 0663 0678 0680 0671 0672 0673 0679 0697 0698 0732 HARMON/KARDON HITACHI 0848 0683 0685 GOLDSTAR GOODMANS GRUNDIG 0675 0676 H 0686 I INNOVATION 0746 0730 0747 0742 0743 0744 0662 0687 0669 0688 0689 0690 0762 0843 0730 0747 0818 0663 0732 0691 0664 0742 0801 0819 0668 0743 0802 0674 0744 0803 0675 0745 0807 0730 0747 0695 0696 0843 0730 0747 0818 0848 0732 0742 0745 TANDBERG TCM K KENWOOD L LIFETEC LG LINN LUXMAN 0694 0746 0809 M MAGNUM MARANTZ MATSUI MEDION MEMOREX MERIDIAN MICROMAXX 0694 0746 0809 MICROMEGA MICROSTAR MISSION 0843 0730 0747 0818 0732 0732 0732 0664 0742 0801 0819 0859 0743 0744 0745 0746 0668 0743 0802 0674 0744 0803 0675 0745 0807 0694 0746 0809 0843 0730 0747 0818 0732 0664 0742 0801 0819 0664 0742 0801 0819 0668 0743 0802 0674 0744 0803 0675 0745 0807 0668 0743 0802 0674 0744 0803 0675 0745 0807 0694 0746 0809 PROTON 0733 0735 0736 0737 0800 0700 0840 0701 0702 0661 0847 CD-V 0673 0843 0730 0747 0818 0732 0705 0706 0840 0677 0664 0742 0801 0819 0703 0785 0792 0753 0668 0743 0802 0732 R REALISTIC ROADSTAR ROTEL 0711 0732 0712 0713 0714 0716 0750 0717 0718 0741 0748 0664 0742 0801 0824 0668 0743 0802 0825 0674 0744 0803 0675 0745 0807 0694 0746 0809 0721 0763 0787 0664 0742 0801 0814 0668 0743 0802 0816 0674 0744 0803 0818 0675 0745 0807 0819 0694 0746 0809 0821 0827 0828 0415 0416 0417 0424 0804 0848 0723 U 0732 V VECTOR RESEARCH VICTOR 0687 WELLTECH 0663 0675 0694 0744 0811 0712 0708 0720 0725 0771 Y YAMAHA YORX SAT 0848 0706 0732 0859 0708 0675 AKAI ALBA ALDES ALLSAT ALLSONIC AMPERE AMSTRAD ANKARO ANTTRON APOLLO ARCON 0732 Q QUAD 0710 A 0671 0732 0699 0866 P PANASONIC PHILIPS PHILIPS PIONEER PRO2 0709 0732 W 0677 O ONKYO 0732 0843 0730 0747 0823 TEAC 0795 TECHNICS 0705 TELEFUNKEN 0848 TEVION 0843 0730 0747 0813 0822 THEORIE & ANWENDING THOMSON 0842 TOSHIBA 0722 UNIVERSUM N NAD NAIM NAKAMICHI NUVO 0848 0732 0768 0847 0860 0859 0672 0782 0811 0803 0778 0671 0749 T J JVC SABA SAE SAMSUNG SANSUI SCHNEIDER SCOTT SHARP SHERWOOD SILVERCREST SINGER SKYMASTER SONY 0674 0744 0803 0675 0745 0807 0694 0746 0809 ARMSTRONG ASAT AST ASTON ASTRA ASTRO AUDIOTON AURORA AUSTAR AXIS 0552 0508 0408 0462 0408 0422 0584 0419 0408 0405 0405 0415 0463 0552 0435 0594 0429 0428 0462 0602 0602 0428 0562 0409 0410 0428 0405 0407 0555 0541 0428 0407 0424 0422 1154 0419 1155 1144 1153 0406 0419 0439 0407 0431 0569 0432 0407 0502 0409 0643 0415 0642 0432 0456 0552 B BARCOM BEST BLAUPUNKT BOCA BRAIN 0424 0428 0439 0419 WAVE 0424 0502 0444 1131 11 BRANDT BSKYB BT SATELLITE BUSH 0565 0584 0574 0508 0566 0555 0567 0562 0410 FORTEC STAR FOXTEL 0602 FRACARRO 0562 FRANCE SATELLITE/TV FREECOM 0405 FTE 0422 FUBA 0548 0431 0480 0552 FUNTACH 0587 0574 C CANAL SATELLITE 0569 CANAL+ 0569 CHAPARRAL 0507 CHESS 0547 CITYCOM 0508 CLATRONIC 0444 CLEMENS KAMPHUS CNT 0409 COLUMBUS 0477 COMAG 0471 COMMLINK 0408 COMTECH 0456 CONDOR 0428 CONNEXIONS 0438 CONRAD 0640 CONTEC 0456 COSAT 0462 CROWN 0419 CYBERCOM 0412 0504 0586 CYBERMAXX 0412 0478 0535 0618 1130 CYTRON 0412 0478 0535 0618 1130 0599 0599 0586 0640 0459 GALAXIS GALAXY GLOBECAST GLOBO GMI GOLDSTAR GOODING GOODMANS GRANADA GROTHUSEN GRUNDIG 0640 0454 1156 0459 0423 0514 0618 0423 0493 0566 0644 1137 0423 0493 0566 0644 1137 0428 0546 0619 0428 0504 0583 0650 0442 0566 0493 0583 0442 0511 0586 0652 0466 0514 0587 0653 0428 0504 0583 0650 0442 0511 0586 0652 0466 0514 0587 0653 D DAERYUNG DANSAT D-BOX DECCA DEW DIAMOND DIGIALITY DISKXPRESS DITRISTRAD DMT DNT DRAKE DREAMBOX DStv DUAL 0583 0438 0410 0564 0460 0456 0461 0640 0424 0462 0412 0438 0557 0658 0602 0412 0511 0586 0604 EINHELL ELEKTA ELTA EMANON EMME ESSE EMTECH EP E-TEK EUROPHON EUROSAT EUROSKY EUROSPACE EUROSTAR EVA EXATOR 12 0438 0405 0424 0428 0582 0424 1141 1156 0419 0489 0483 0508 0429 0405 0439 0469 0408 0583 0462 0602 0478 0619 0484 0432 0535 0456 0489 0436 0602 0483 0584 0495 0407 0508 0550 0544 0547 0504 0444 0409 1162 0422 0439 1174 0444 0508 0462 0485 0408 0486 1167 0547 0488 0548 0491 1156 0558 1165 0517 0411 0582 0444 0462 0419 0491 0428 0587 0493 0618 0504 0511 0583 0508 0548 0454 0487 0537 0549 0459 0489 0407 0439 0405 0617 0496 0491 0631 0507 0496 0607 0552 0635 0439 0428 0409 0405 0444 0462 0479 0489 0583 0412 0504 0586 0412 0478 0535 0618 1130 0468 1156 0489 0565 0502 0489 0566 0567 1156 1157 0503 0413 0511 0587 0413 0484 0546 0619 1138 0423 0514 0618 0423 0493 0566 0644 1137 0428 0546 0619 0428 0504 0583 0650 0442 0566 0493 0583 0442 0511 0586 0652 0466 0514 0587 0653 H HANDAN HANSEATIC HANTOR HANURI HB HELIOCOM HIRSCHMANN HISAWA HITACHI HOUSTON HUMAX HUTH HYUNDAI IMPERIAL INNOVATION 0454 INTERTRONIC INTERVISION IRDETO ITT/NOKIA 0552 0463 0405 0413 0522 0487 0537 0562 0586 0419 0462 0602 0429 J 0413 0566 0587 0423 0428 0618 0514 0581 0580 0586 0657 0425 0659 0417 0405 0419 0462 0405 0552 0508 0491 0508 0491 0493 0504 0481 0464 0578 0465 JOHANSSON JSR JVC 0444 0462 0483 K 0640 0579 0467 0408 0409 0428 0405 0428 1162 SAT 1140 0640 0419 0428 0468 0438 0588 0405 KATHREIN KOSMOS KR KREISELMEYER KYOSTAR L LASAT 0640 1156 LENCO LENG LENNOX LENSON LG LIFE LIFESAT 0419 0419 0589 0407 F FERGUSON FIDELITY FINLANDIA FINLUX FINNSAT FORCE 0428 I E ECHOSTAR 0477 0489 0496 0439 0477 0584 G 0491 0413 0511 0587 0413 0484 0546 0619 1138 0413 0484 0546 0619 1138 0470 0643 LIFETEC 0508 0415 0508 0508 0603 0577 0472 0417 0603 0410 0473 0429 0456 0553 0608 0475 0480 0535 0487 LION LORENTZEN LORRAINE LUPUS LUXOR 0428 0417 0429 0548 PANTECH PBI PHILIPS 0537 M MACAB MANHATTAN 0603 0462 0409 MARANTZ 0552 MARMITEK 0641 MARMITEK OCTOPUS MASCOM 0409 MASPRO 0483 MATSUI 0483 MB 0504 MBOX 0442 MEDIABOX 0569 MEDIAMARKT 0419 MEDIASAT 0569 MEDION 0412 0478 0535 0618 1130 MEGA 0552 METRONIC 0408 0632 METZ 0439 MICRO TECHNOLOGY MICROMAXX 0412 0478 0535 0618 1130 MICROSTAR 0412 0478 0535 0618 1130 MINERVA 0483 MITSUBISHI 0508 MITSUMI 0502 MORETV 0644 MORGAN SYDNEY MORGANS 0611 MULTICHOICE 0602 MULTISTAR 0496 MULTITEC 0586 MURATTO 0437 0508 0557 0507 0558 0633 0421 0655 0508 0574 0432 0413 0484 0546 0619 1139 0423 0493 0566 0644 1138 0428 0504 0583 0650 1137 0442 0511 0586 0652 1181 0466 0514 0587 0653 0575 0409 0612 0424 0613 0405 0614 0407 0615 0423 0493 0566 0644 1138 0423 0493 0566 0644 1137 0428 0504 0583 0650 1137 0428 0504 0583 0650 0442 0511 0586 0652 0466 0514 0587 0653 QUADRAL QUELLE QUIERO 0442 0511 0586 0652 0466 0514 0587 0653 RADIOLA RADIX RAINBOW REDIFFUSION REDPOINT REDSTAR RFT RUEFACH 0468 0413 0484 0546 0619 1139 0413 0484 0546 0619 1138 0439 0439 0423 0611 0419 NOMEX NORDMENDE NOVIS 0444 0509 0462 0414 0419 0530 0563 0622 0549 0444 0574 1130 1181 0502 0552 0424 0461 0405 0419 0462 0602 0435 0405 0468 0407 0439 0510 0479 0585 0432 0564 0531 0425 0454 0429 0487 0508 0604 0548 0472 0508 0603 0405 0409 0456 0496 0656 P PACE PACIFIC PALCOM PALLADIUM PALTEC PANASONIC PANDA PANSAT 0584 0410 0461 0479 0483 0431 0584 0508 0490 0493 0574 0456 0495 0605 0515 0508 0618 0604 0462 0491 0652 0462 0569 0542 0442 0604 0419 0413 0484 0546 0619 1138 0423 0493 0566 0644 1137 0428 0504 0583 0650 0442 0511 0586 0652 0466 0514 0587 0653 0565 0409 0562 0555 0617 0439 0431 0419 0477 0508 0410 0542 0559 0408 0439 0603 0428 0417 R SAB SABA 0587 0489 0468 0407 0491 0459 0483 0569 0550 0552 0630 0407 0438 0632 0510 0432 0428 0408 0503 0552 S O OAK OCEANIC OCTAGON OKANO OPTEX OPTUS ORBIT ORBITECH ORIGO OSAT OTTO VERSAND PROFI PROMAX PROSAT PROTEK PROVISION 0436 0434 0561 Q N NAVEX NEC NEUHAUS NEXTWAVE NIKKO NOKIA PHOENIX PHONOTREND PINNACLE PIONEER POLSAT POLYTRON PREDKI PREMIER PREMIERE PREMIUM X PRIESNER PRO2 0591 1138 0552 0543 0455 0456 0408 0654 0569 0603 0459 0444 0569 0564 1134 0445 0412 0478 0535 0618 1130 0503 0508 0408 0461 0409 0527 0508 1137 0472 0571 0468 SABRE 0508 SAGEM 0570 SAKURA 0456 SALORA 0429 SAMSUNG 0426 SAT 0415 SATCOM 0640 SATEC 0508 SATPARTNER 0444 SCHAUB LORENZ 1147 SCHNEIDER 0428 0618 SCHWAIGER 0411 0440 0575 0585 0633 1173 SEEMANN 0438 SEG 0428 0405 SELECO 0462 SIEMENS 0439 SILVA 0489 SKARDIN 0432 SKY 0584 SKY DIGITAL 0584 SKY+ 0555 SKYMASTER 0408 0587 0621 1162 SKYMAX 0552 SKYPEX 1156 SKYVISION 0462 1144 0508 0572 1145 0543 0573 1146 0556 0574 1147 0562 0575 0604 0599 0603 0648 0527 0405 0435 0504 0509 0520 0405 1162 0455 0407 0409 0489 0491 0511 0583 0586 0587 0412 0504 0576 0587 0635 0459 0419 0444 0413 0508 0577 0598 1132 0427 0516 0582 0616 1133 0430 0566 0514 0630 1147 0433 0573 0583 0631 1152 0432 0504 0541 0631 0634 0586 1151 0555 0546 1160 0504 0588 1140 1167 0506 0589 1138 0546 0590 1159 0547 0591 1161 0586 0592 1160 0437 0523 1157 13 SM ELECTRONIC 0408 0586 1140 1162 SONY 0584 SR 0472 STAR TRAK STARLAND 0586 STARRING 0444 STRONG 0562 0405 SUMIDA 0419 SUNSTAR 0527 0412 0587 1138 1167 0569 0419 0405 0504 0588 0592 0506 0589 1159 0418 0502 0446 0428 0407 0602 0545 0419 0502 0546 0591 1161 0547 0621 1160 TECHNIHALL TECHNISAT TECHNOMATE TECO TELASAT TELEFUNKEN TELEKA TELEMASTER TELESAT TELESTAR TELEVES TELEWIRE TEVION THOMSON THORENS THORN TIOKO TONBURY TONNA TOPFIELD TPS TPS PLATINUM TRIAD TRIASAT TRIAX TWINNER 0603 0407 0508 1195 0460 0412 0504 0586 0416 0438 0441 0419 0640 0560 0405 0438 0409 0504 0479 0508 0462 0412 0478 0535 0618 1130 0472 0560 0461 0508 0459 0445 0508 0497 0570 1178 0435 0480 0439 0610 VIVANCO VORTEC V-TECH 0439 0468 0552 0568 0568 0594 0596 0536 0405 0437 0479 0477 0413 0511 0587 0423 0514 0618 0428 0546 0619 0442 0566 WITTENBERG WOORISAT WYSI 14 0632 0479 1142 0502 0569 0623 0528 0529 0508 0565 0566 0567 0574 0640 0407 0419 0911 0923 0952 BLUE NOVA INTERNATIONAL 0493 0583 1051 C CENTRIOS CMI COBY CYBERCOM CYBERHOME CYBERMAXX CYTRON 0951 0923 1051 0923 0912 0895 1117 0895 1117 0905 0906 0923 0959 1071 0905 0906 0923 0959 1071 1059 1061 0923 0959 1071 D 0569 0610 0611 0413 0484 0546 0619 1140 0601 0568 0423 0493 0566 0644 1138 0570 0569 0410 0473 DENVER DUAL 0428 0504 0583 0650 1137 0574 0603 0442 0511 0586 0652 0466 0514 0587 0653 0492 0427 0508 1156 1051 0923 E ELTAX EMERSON 1051 1057 G GO-VIDEO 0383 H HB HITACHI 1159 0462 0505 0506 0437 0533 0489 0479 0611 0565 0609 1089 0387 I ILO 0959 J JVC 0619 1058 1072 K 0923 L 1156 0475 LG LIFE LIFETEC 0487 LITEON LUMATRON 0907 1117 0895 1117 1056 1051 0905 0906 1059 0959 0980 0905 0906 0923 0959 1071 0895 1117 0905 0905 0906 0923 0959 0906 0923 0959 1071 0940 1052 0980 1080 M 0444 0597 0624 0435 0462 0586 0593 0595 MAGNAVOX MEDION 0979 0895 1117 MICROMAXX 0515 0537 MICROSTAR MUSTEK 0508 0508 0444 0435 0538 0627 0415 0409 1156 0631 B W WEVASAT WEWA WINERSAT WISI 0541 A APEX ARENA ASPIRE 0456 0424 0483 0635 0496 DVD Recorder (DVD-R, DVD-RW, etc) V VARIOSTAT VECTOR VENTANA VIA DIGITAL VIA SAT VISIOSAT 0437 0424 0489 KENDO 0534 0419 0444 0439 0428 0409 0407 DVD-R 0454 U UNIDEN UNISAT UNITOR UNIVERSUM ZEHNDER ZODIAC T TANDBERG TANDY TANTEC TARGA TATUNG TCM Z 1071 0895 1117 0383 O OCEANIC 0437 0539 0628 0438 0540 0629 0439 0597 0508 0625 0533 0626 1089 P PACKARD PANASONIC PHILIPS PHOCUS BELL 0403 0979 1063 1128 PIONEER PRO2 PROVISION 0977 0895 1051 1084 0905 0906 0923 0959 1071 R RTL 0923 S SAMPO SAMSUNG SANYO SCHAUB LORENZ SHARP SONY 1051 1050 1060 1089 1055 0987 1051 1115 0923 1051 0890 0959 THOMSON 0360 TINY 1051 TOSHIBA 0973 TRANS-CONTINENTS 0988 NOKIA NOOS NTL NUMERICABLE 0989 OPTUS 0959 0891 1117 0907 1121 P 0891 1065 0359 0895 1071 1078 0905 1117 0906 0923 PACE PHILIPS PIONEER PVP 0983 1051 0362 1111 0905 0979 0980 1158 1175 1183 A VISIONETICS VISIOSAT B 0636 0554 0524 0525 0474 0474 0606 1189 0554 0554 1143 1175 1184 1185 0487 D 0606 DENON 0449 0452 0252 0318 0450 G GRUNDIG 0318 M MITSUBISHI E 0603 0318 N NAD F 0474 0474 0318 P PIONEER 0318 T G 0452 0494 0521 LD C FILMNET 0474 FILMNET CABLECRYPT FILMNET COMCRYPT FOXTEL 0602 0606 0487 0518 0554 V 0494 CABLE AND WIRELESS CABLECRYPT 0474 CABLETIME 0448 CANAL PLUS 0474 CLYDE CABLEVISION COMCRYPT 0474 CRYPTOVISION 0458 0494 U UNITED UPC GEC GI 0602 S TELE+1 TELEPIU TELEWEST THOMSON 0907 DECODER EURODEC 0474 T Z BMB BT 0564 1143 0606 0603 SAGEM 0604 SAMSUNG 1148 SCIENTIFIC ATLANTA STS 0551 Y AUSTAR 0636 0554 0602 0494 0551 0474 O TANGENT TARGA TCM TELEDEVICE TEVION ZENITH MARMITEK MELITA MNET MOTOROLA MOVIE TIME MULTICHOICE N T YAKUMO YAMAHA M TELEFUNKEN THORN 0318 0322 0554 I IMPULSE 0554 J JERROLD 0554 0494 K KABELVISION 0554 L LYONNAISE 1183 15 P HDD Digital Video Recorder (Hard Disk Drive, DVR, PVR, etc) HDD-DVR SAGEM SCHWAIGER SIEMENS SKARDIN SKY SKY DIGITAL SKY+ SKYMASTER SKYPEX SM ELECTRONIC SONY 0555 C CANAL SATELLITE 0599 CANAL+ 0599 CONRAD 1156 CYBERCOM 0412 CYBERMAXX 0905 1130 CYTRON 0905 1130 0423 0412 0959 0412 0959 0514 0423 1071 0423 1071 0514 1117 0514 1117 0644 0653 0644 0653 D DIGIFUSION DMT DREAMBOX DUAL 0647 0412 0658 0412 0423 0514 TARGA TCM TEVION UNIVERSUM WYSI 0470 YAKUMO 1156 AIWA ALBA 0959 LITEON LORENTZEN 1072 1156 1117 0412 0905 1130 0959 1156 MARMITEK OCTOPUS MEDION 0905 1130 1117 MICROMAXX 0653 MICROSTAR 0905 1130 MORETV 0644 N 16 1152 1165 1159 1160 0506 0988 1165 0989 1159 1160 1115 0412 0890 0653 0532 0242 1159 0506 0983 1117 0423 0905 1130 0242 1195 0514 0412 0959 0326 0423 1065 1156 0514 1071 1078 1111 1156 1196 1196 1156 0905 0248 0245 0291 0248 BAIRD 0245 BASIC LINE 0245 BESTAR 0245 BLACK PANTHER LINE BUSH 0245 0245 0248 1157 0423 0412 0959 0514 0423 1071 C 0514 1117 0644 0653 M NEUF TELECOM NEUF TV 1158 1132 B L LASAT LIFE LIFESAT LIFETEC 1143 0514 A J JVC 0599 0412 1157 1160 1151 0555 0555 0506 1156 0412 0987 TV/VCR (COMBOS) 1156 0651 0486 I ILO 0514 Y H HIRSCHMANN HUMAX HYUNDAI 0423 1071 W 0553 STAR 1182 G GLOBO 0412 0959 U 0659 1156 F FORCE FORTEC FREEBOX 1128 0644 0653 T THOMSON TIVO TONBURY TOPFIELD TOSHIBA E ECHOSTAR EUROSKY 0453 S 0555 1144 B BSKYB 0555 1052 0403 0242 1063 0654 0977 0905 1130 0905 PROCASTER A AMSTRAD ARCON PACE PACKARD BELL PANASONIC PHILIPS PHOCUS PINNACLE PIONEER PRO2 0655 0412 0959 0423 1071 0514 1139 0644 1115 0653 1181 0905 1130 0412 0959 1130 0412 0959 0423 1071 1181 0423 1071 0514 1117 0514 1139 0644 0644 1117 0653 COMBITECH CONDOR CROWN CYBERCOM CYBERMAXX CYTRON 0248 0245 0245 0248 0248 0248 0291 0291 0291 0245 0245 0248 0291 D DAEWOO DAYTRON DUAL E ESC 0245 G GENERAL TECHNIC GOLDSTAR 0261 GOODMANS 0245 GRANDIN 0245 0248 0283 0644 1117 H HINARI C 0248 CYBERCOM I INNO HIT INNOVATION ITV CYBERMAXX 0245 0248 0291 0245 CYTRON K KENDO 0245 L LENCO LG LIFE LIFETEC LUMATRON 0245 0261 0291 0248 0245 0291 0248 0248 0248 DUAL 0291 DURABRAND 0291 0248 0291 GERICOM 0245 0248 0245 INTERTRONIC 0245 0248 0312 0248 0245 0245 0245 LIFETEC 0343 1089 & & 0228 1011 & & & 0228 0210 0228 & & & 0228 0210 0228 0248 0248 0245 & & & 0228 0210 0228 & & & & 0228 0210 0228 0090 1089 0920 & 1011 0339 1064 0894 0343 0924 0933 & 0181 & & & 0228 0210 0228 MEDION 0291 0291 MICROSTAR 0245 MT LOGIC 0248 Los aparatos combinados de TV-DVD se controlan sólo con el código DVD, o bien necesitan tanto el código TV como también el código DVD. TV-DVD combos operate with either a single DVD code or some require both TV & DVD codes. TV-DVD-Kombigeräte werden entweder nur mit dem DVD-Code gesteuert oder benötigen sowohl den TV-als auch den DVD-Code. DVD & & 0090 A 1062 0894 0343 0924 0933 0920 0894 0343 0924 0933 0894 0343 0924 0933 1062 O TV/DVD (COMBOS) TV/DVD Combos 0894 0343 0924 0933 M 0264 V TV OCEANIC ORION P PHILIPS PHOCUS PRO2 S SANSUI SCHAUB LORENZ 1089 1064 0920 0920 & 1011 T TCM B BEKO BROKSONIC 0228 0210 0228 0228 1006 1007 1008 1008 1009 0894 MEMOREX MICROMAXX UNITED QUICK STAR AUDIOSONIC & & & & & & & & & L 0245 U VIDEON 0343 0924 0933 0933 1085 1085 1086 1087 1088 I 0291 T TCM TEVION THOMSON 0228 0210 0228 1064 S SABA SAISHO SAMSUNG SAVILLE SCHNEIDER SONOKO STANDARD & & & G R ROADSTAR 0228 0210 0228 0283 P PORTLAND PRO2 PROSONIC & & & H H&B HB 0248 0228 0210 0228 0291 O ORION & & & D M MAGNUM MATSUI MEDION MICROMAXX MICROSTAR 0343 0924 0933 0894 0343 0924 0933 0894 0343 0924 0933 TEVION 0343 0924 0933 1119 0894 0343 0924 0933 1064 & & & 0228 0210 0228 & & & 0228 0210 0228 17 TOSHIBA 0920 P DVD/VCR (COMBOS) Los aparatos combinados de DVD-VCR se controlan sólo con un código DVD, o bien necesitan tanto el código DVD como también el código VCR. DVD-VCR combos operate with either a single DVD code or some require both DVD & VCR codes. DVD-VCR-Kombigeräte werden entweder nur mit dem DVD-Code gesteuert oder benötigen sowohl den DVD-als auch den VCR-Code. DVD/VCR Combos DVD A APEX 0949 CYBERMAXX CYTRON & 0285 & 0256 & & 0258 0256 & 0231 0375 0907 0375 0338 0375 0338 0896 0906 0375 0362 & 0256 & 1041 & 0256 & 0256 0375 & 0256 S SAMSUNG SANSUI SANYO SILVERCREST SONY SYLVANIA TARGA 0920 0967 C CINEVISION CYBERCOM VCR 0970 0969 1084 0949 0338 0896 0906 0375 0338 0963 0920 0378 0402 0339 T B BROKSONIC & PANASONIC PHILIPS PIONEER POLAROID PRO2 TCM 0375 0338 0375 0338 0896 0906 0375 0338 0896 0906 0375 & 0256 & 0256 TEVION TOSHIBA & 0256 Z ZENITH & 0256 DVB-T D DAEWOO DUAL 0971 0338 0375 & 0256 0339 0375 & & 0231 0256 E EMERSON 0339 & 0231 GOLDSTAR CANAL + CYBERMAXX CYTRON & 0256 D 0387 & 0231 DIGENIUS DIGIFUSION DIGIO2 DMT DURABRAND J JVC LIFETEC ECHOSTAR 0907 0375 0338 0896 0906 0375 0914 0338 0896 0906 0375 MICROMAXX MICROSTAR 18 0646 0451 0032 1177 0645 0645 0650 0650 0645 0647 1150 0412 0526 E & 0256 & 0256 & 0285 0896 0906 0375 0338 0896 0906 0375 & 0338 0256 & 0256 & 0256 0657 F FREEBOX FREEVIEW M MAGNAVOX MEDION 0451 0400 L LG BUSH 0338 0367 0971 0375 H HITACHI ALBA C G GO-VIDEO A B F FUNAI DVB-T Terrestial Digital Television (DTV, Freeview, iDTV, etc) 1182 0447 0513 0647 0451 0519 0648 0443 0451 1163 0512 0526 1164 1172 G GERICOM GOODMANS GOODWAY GRUNDIG H HAUPPAUGE HB HITACHI HUMAX 0482 1011 0526 0651 0453 0526 0649 0457 0532 0651 0482 0600 0512 0646 J Scart Switch Boxes JVC 0526 COUNTRYMAN FUNK MARMITEK SKARDIN VIVANCO L LABGEAR LIDCOM LIFETEC 0513 0451 0645 0650 Digital Set Top Boxes M MARMITEK OCTOPUS MATSUI 0649 MEDION 0645 MICO 1135 MICROMAXX 0645 MICROSTAR 0645 0655 0526 0650 ECHOSTAR TEVION YUNG 0451 0519 1183 PARDY 1011 1136 0527 0656 0531 0453 0526 0072 0600 0457 0600 0645 0620 0403 A AIWA AMW 0620 0519 0650 CENTRUM COBY CRITERION CURTIS CYBERCOM 0476 0648 1011 0630 0059 0656 0656 0412 0447 1143 1017 0645 0427 TV 1119 0650 0532 0527 CYBERMAXX 1165 0656 1171 & Audio 0377 1054 C 1165 1163 1164 CYTRON T TCM TEVION THOMSON TOP-UP BOX Home Cinema Systems DVD S SAGEM SCHAUB LORENZ SCHWAIGER SHARP SKARDIN SKYMASTER SM ELECTRONIC SONY LIGHT 0527 R REBOX 0423 (Los sistemas de cine en casa se controlan sólo con el código DVD, o bien necesitan tanto el código DVD como también el código AUDIO.) (Home Cinema Systems operate with either a single DVD code or some require both DVD & AUDIO codes). (Heimkinosysteme werden entweder nur mit dem DVD-Code gesteuert oder benötigen sowohl den DVD- als auch den AUDIOCode). P PACE PACIFIC PANASONIC PHILIPS PIONEER PREMIERE PRO2 0645 1166 HTIB 0531 O OCEANIC OGGLE ON-DIGITAL OPTEX 0657 0650 FU Misc. Set Top Boxes 0650 0650 N NOKIA NOOS 1168 1170 0641 1169 0684 0531 0657 0927 0948 0344 0948 0334 0372 0344 0334 0372 0344 1069 1066 1118 0334 0372 0344 1069 1066 1118 & 0775 & 0775 & 0775 & 0775 & 0775 & 0775 D Y YUNG FU 1166 Distintos descodificadores / Auxiliary Set-Top Boxes / Verschiedene Set-Top Boxen Web & Computer TV BUSH CYBERLINK GERICOM HAUPPAUGE NOW TV PACKARD BELL PANASONIC PINNACLE PREMIERE THOMSON 0039 1101 0443 0482 1186 1101 0542 1199 0542 0603 DUAL DURABRAND F FISHER Media Receivers SONY NETWORK MEDIA RECEIVER 0446 0378 J JVC 0662 0964 K KOSS 1198 0334 0372 0344 0375 0373 L LENOXX LG LIFE LIFETEC 0931 0972 1118 0334 0372 0344 1069 1066 1118 19 SANSUI SCHNEIDER SHERWOOD SONY 0727 0791 0782 0739 0760 TCM 0841 TEAC 0794 TECHNICS 0764 TEVION 0775 THEORIE & ANWENDING THOMSON 0842 XANTECH 0867 YAMAHA 0724 M MEDION 0334 0372 0344 1069 1066 1118 0334 0372 0344 1069 1066 1118 0334 0372 0344 1069 1066 1118 MICROMAXX MICROSTAR & & 0775 0775 AIWA 0790 DENON 0780 GRUNDIG 0729 HARMON KARDON KENWOOD 0761 MAGNAVOX 0729 MARANTZ 0729 NAD 0799 ONKYO 0784 PHILIPS 0729 SANSUI 0729 SHERWOOD 0783 SONY 0754 TEAC 0794 TECHNICS 0764 THOMSON 0842 YAMAHA 0724 0775 0948 O ONKYO 0975 P PANASONIC PIONEER 0974 0968 0976 0334 0372 0344 1069 1066 PRO2 & AIWA CYBERCOM CYBERMAXX 0919 0986 CYTRON DUAL T TARGA 0972 1041 0334 0344 0334 0372 0892 0917 0918 0344 1069 1066 1118 TCM TEVION & E-BENCH ELTA GRUNDIG INTERTRONIC LIFETEC 0775 MEDION & MICROSTAR PIONEER PRO2 SAMSUNG SHARP SILVERCREST SONY TCM Audio Amplifiers/Tuners/Receivers 20 0775 0775 0775 0781 0775 0668 0698 0682 TEVION 0776 0776 0776 WELLTECH 0797 0776 0775 0775 0775 0736 0863 0792 0727 0775 0776 0776 0776 0737 0864 0793 0776 0775 0796 0777 0776 0805 0766 0776 0806 0788 0815 0817 0841 0752 0770 0771 0772 0758 0759 0704 0745 0808 0810 0704 0820 0704 0820 0704 0745 0819 0745 0819 0745 0808 0810 0808 0810 0797 0820 0858 0812 0858 0812 0852 0811 0858 0812 0704 0820 0704 0820 0858 0812 0704 0820 0745 0819 0745 0819 0704 0820 0745 0819 0808 0810 0808 0810 0745 0819 0808 0808 0858 0812 0704 0820 0745 0819 0808 0810 0829 0868 0858 0819 0858 0812 0810 0827 0704 0694 0704 0820 0820 0745 0823 0745 0819 0819 0808 0824 0808 0821 0694 0810 0825 0810 0822 0803 0698 0681 0755 0756 0777 0786 0772 0810 0852 0811 0753 0852 0811 0768 0789 0811 0741 0852 0820 0852 0811 0852 0811 0774 0858 0819 0858 0812 0858 0812 0858 0745 Misc. APPLE iPOD AUDIO COMBI CAR RADIO CDR DBS iPOD SWITCH BOX VIDEO CD 0727 0775 0773 0852 0820 0852 0811 0852 0811 0852 0819 0811 0693 0707 0811 0852 0811 0852 0811 MICROMAXX 0775 AUX CENTRUM 0692 CRITERION 0775 CYBERCOM 0841 CYBERMAXX 0841 CYTRON 0841 DENON 0779 DUAL 0841 ELTA 0667 GRUNDIG 0697 HARMON/KARDON KENWOOD 0761 LIFETEC 0841 LINN 0857 MARANTZ 0727 MEDION 0841 MICROMAXX 0841 MICROSTAR 0841 NAD 0735 NUVO 0862 ONKYO 0785 PHILIPS 0846 PRO2 0841 0757 MINI Systems 0775 S SAMSUNG SONY 0755 Audio Tape Players & N NORCENT 0740 0738 0865 0826 0799 0800 0885 0844 0861 0847 0845 0884 0684 0840 0675 0810 Búsqueda de códigos por nombres comerciales / Code Searching By Brand Name / Code-Suche nach Handelsname TV 1 MEDION / LIFETEC / MICROMAXX / MICROSTAR / TEVION / VIDEON / TCM / GENERAL TECHNIC / INNOVATION / MAGNUM 2 PHILIPS / ERRES / PYE / PHILCO / RADIOLA 3 SONY / AKAI / PANASONIC / SHARP / TOSHIBA / JVC / DAEWOO 4 THOMSON / BRANDT 5 TELEFUNKEN / SABA / NORMENDE / FERGUSON / BAIRD 6 GRUNDIG / BLAUPUNKT 7 NOKIA / FINLUX / ITT VCR 1 MEDION / LIFETEC / MICROMAXX / MICROSTAR / TEVION / TCM / GENERAL TECHNIC / INNOVATION 2 PHILIPS / PHILCO 3 SONY / AKAI / PANASONIC / SHARP / TOSHIBA / JVC / DAEWOO 4 THOMSON / BRANDT 5 TELEFUNKEN / SABA / CORMENDE / FERGUSON 6 GRUNDIG / BLAUPUNKT 7 NOKIA / FINLUX / ITT SAT 1 MEDION / LIFETEC / MICROMAXX / MICROSTAR / INNOVATION / GALAXIS 2 PHILIPS / PHILCO 3 PACE / ECHOSTAR 4 THOMSON / UNIVERSUM / BRANDT 5 TELEFUNKEN / SABA / NORMENDE / FERGUSON 6 GRUNDIG 7 NOKIA / FINLUX / ITT / HIRSCHMANN 21 83533 ES ALDI ES Cover RC1.FH11 Thu Nov 18 07:52:29 2010 Seite 1 C M Y CM MY CY CMY K Reproductor DVD Slimline de diseño IIa/05/11 MEDION® LIFE® P71014 (MD 83533) Schwarz Medion Service Center Visonic S.A. c/ Miguel Faraday, 6 Parque Empresarial "La Carpetania", N-IV Km. 13 28906 Getafe, Madrid España Hotline: 902196437 · Fax: 914604772 E-Mail: [email protected] www.medion.es Manual de instrucciones Instruction Manual Bedienungsanleitung