1
Starting Out – Using NavDive for the first time
This section will cover the basic operation of NavDive using a few of the key features. It will
detail the features most divers will use the first few dives before detailing the more advanced
capabilities of the system. In this scenario, the diver will learn how to successfully get NavDive
powered up, operational, and use the realtime display on the diver console to view current GPS
position, to save GPS position to memory on demand, and to enable the tracing feature to track
the dive as it progresses
Using NavDive to conduct a dive
To get setup for your first use of NavDive, follow the steps below:
1) Remove the NavDive unit from its carrying case.
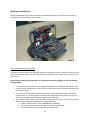
2) Determine how you want to mount the GPS receiver to your flag float. There are many
options / choices here, so we will not attempt to detail installation. The only important
thing to keep in mind is that the receiver needs a clear line-of-sight to the sky to work
properly. Once the receiver is mounted, route the cable to the diver console so that it
will provide a secure tether that will withstand underwater handling by the diver. It’s
recommended that some cable strain relief be implemented by attaching the cable itself
to the float so that the receiver mount does not bear all of the pressure from cable
handling.
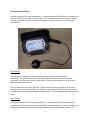
3) On the diver console – be sure that a SD memory card is installed and properly
configured for use with NavDive.
4) Also on the diver console, be sure that the unit is properly closed and latched.
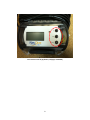
5) Turn the power on to the NavDive diver console. Note that the console also supplies
power to the GPS receiver. The red LED on the side of the GPS receiver will begin
flashing as the unit attempts to sync to the satellites to determine your initial position.
6) When the red LED on the GPS receiver goes from flashing to steady ON, the receiver has
locked onto satellite reception and you are ready to proceed with your dive.
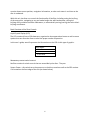
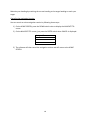
7) On the diver console, you will see the following:
Main Menu
> 1 Pre Dive
2 Start Dive
3 Post Dive
8) As we will not use any advanced features on this first dive, we’ll skip the PRE DIVE
option. Press the DOWN switch on the console to move the cursor to 2 START DIVE and
then press the ENTER switch on the console. You should now see the following:
Select Dive Num:
1
9