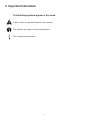
1
HYDRIM L110w G4 Operator’s Manual 95-113645 Rev. 1.0. Copyright 2013 SciCan Ltd. All rights reserved. HYDRIM L110w G4 ® Operator’s Manual Mode d’emploi Bedienerhandbuch Manual del operador Manuale d’uso Table of Contents 1. Introduction . . . . . . . . . . . . . . . . . . . . . 1 2. Important Information . . . . . . . . . . . . . 2 3. Disclaimers . . . . . . . . . . . . . . . . . . . . . . 3 4. Installation Instructions . . . . . . . . . . . . 4 5. Instructions for Use . . . . . . . . . . . . . . . 9 5.1 Instrument Reprocessing Recommendations . . . . . . . . . . . . . . . . . 9 5.2 Cycle Description Chart . . . . . . . . . . . . 10 5.3 Hints and tips for best cleaning results . 11 5.4 Recommended load configurations . . . 12 5.5 Baskets and Accessories . . . . . . . . . . . 14 5.6 Touchscreen Overview . . . . . . . . . . . . . 15 5.7 Set up menu overview . . . . . . . . . . . . . 16 5.8 - 5.22 Setup menu options . . . . . . . . . . . 17 5.23 Connecting to a network . . . . . . . . . . . . 22 5.24 Connecting to a wireless network . . . . . 22 5.25Activating the HYDRIM L110w G4 . . . . 23 5.26Interrupting / aborting a cycle . . . . . . . . 24 5.27Additional user and setup menu functions . . . . . . . . . . . 25 5.28Opening the Door in Case of Power Failure . . . . . . . . . . . . . 26 5.29Storing and Retrieving Cycle Information . . . . . . . . . . . . . . . . . 27 5.30Printer / Data Logger Setup . . . . . . . . . 29 6. Care and Maintenance . . . . . . . . . . . 30 6.1 Replacing the HIP™ Cleaning Solution . . . . . . . . . . . . . . . . . . 6.2 Refilling the Water Softener Salt Reservoir . . . . . . . . . . . . . . . . . . . . . . 6.3 Cleaning the HYDRIM L110w G4 . . . . . 6.4 Filter and Wash Arm Maintenance . . . . . 6.5 Preparing the unit for shipping . . . . . . . . 6.6 Annual maintenance . . . . . . . . . . . . . . . Manufactured by: SciCan Ltd. 1440 Don Mills Road, Toronto ON M3B 3P9 CANADA Phone: (416) 445-1600 Fax: (416) 445-2727 Toll free: 1-800-667-7733 32 32 33 33 34 7. Troubleshooting . . . . . . . . . . . . . . . . 36 8. Specifications . . . . . . . . . . . . . . . . . . 38 9. Serial Number Plate . . . . . . . . . . . . . 38 10. Warranty . . . . . . . . . . . . . . . . . . . . . 39 HYDRIM and STATIM are registered trademarks of SciCan Ltd. BRAVO, HIP, and SysTM are a trademarks of SciCan Ltd. All other trademarks referred to in this manual are the property of their respective owners. For all service and repair inquiries: In Canada 1-800-870-7777 United States: 1-800-572-1211 +49 (0)7561 98343 - 0 Germany: International: (416) 446-4500 Email: [email protected] 30 EU Representative SciCan GmbH Wangener Strasse 78 88299 Leutkirch GERMANY Tel.: +49 (0)7561 98343 - 0 Fax: +49 (0)7561 98343 - 699 SciCan Inc. 701 Technology Drive Canonsburg, PA 15317 USA Phone: +1 724 820 1600 Fax: +1 724 820 1479 Toll free: 1-800-572-1211 SciCan Medtech Alpenstrasse 16 CH-6300 ZUG SWITZERLAND Phone: +41 (0) 41 727 7027 Fax: +41 (0) 41 727 7029 1. Introduction Thank you for selecting the HYDRIM L110w G4 instrument washer. The HYDRIM complements the STATIM® and BRAVO™ autoclaves by quickly and hygienically preparing soiled instruments for sterilization. To ensure years of safe, trouble-free service, carefully review this Operator’s Manual before operating the unit. The HYDRIM L110w G4 is suitable only for the applications listed in this manual. Using the HYDRIM for other purposes may be dangerous. The manufacturer cannot be held responsible for damage caused by improper use. Operational, maintenance and replacement instructions must be followed for the product to perform as designed. All trademarks referred to in this manual are the property of their respective owners. Contents of this manual are subject to change without notice to reflect changes and improvements to the HYDRIM product. The HYDRIM L110w G4 should only be installed and serviced by a qualified contractor as it is an Installation Category 2 device. Before connecting the unit, the installer should check that the voltage and frequency of the electrical supply correspond with the details in the installation instructions. The unit must only be plugged into a grounded outlet. Please note that this unit is completely isolated from the electrical supply only when it is unplugged or the circuit breaker is turned OFF. This must be done before any repair work is carried out. The HYDRIM L110w G4 uses HIP™ Cleaning Solution exclusively. The unit will not perform as described if other detergents / cleaning products are used. Other detergents / cleaning products may damage the unit, the instruments, cause excessive foaming, and void the warranty. Do not use solvents in this unit. Do not allow small children or unauthorized personnel access to this unit or its controls. 1 2. Important Information The following symbols appear in this book. Caution, there is a potential hazard to the operator. This situation may lead to a mechanical failure. This is important information. 2 3. Disclaimers Do not permit any person other than authorized personnel to supply parts for service or maintenance for your HYDRIM. SciCan is not liable for incidental, special or consequential damages caused by any maintenance or services performed on the HYDRIM by unauthorized personnel, or for the use of equipment or parts manufactured by a third party, including lost profits, any commercial loss, economic loss, or loss arising from personal injury. Never remove any unit panels and never insert objects through holes or openings in the cabinetry. Doing so may damage the unit and/or pose a hazard to the operator. If the unit is used in a manner other than that specified, the protection provided by the equipment may be impaired. Cleaning solutions may irritate. Avoid contact with eyes, skin and mouth. Never sit, stand or lean on the open door. The unit may tip forward causing injury. Always turn the unit OFF before adding softener salt, adding solutions or performing routine maintenance to the unit. The owner shall not allow any personnel other than the trained and authorized personnel to operate the unit. SciCan recommends leaving the unit turned ON at all times, in particular over times when no staff is in the office or when no water shut-off mechanism is installed. Leaving the unit turned ON will activate the drain pump if water is leaking into the chamber as a result of any faulty circumstance. For further information or questions about the HYDRIM L110w G4, contact your authorized dealer. 3 4. Installation Instructions To open the wash chamber door, plug in the unit, turn it on and press the unlock symbol. Alternatively, remove the screw in the kickplate and pull the ring. See section 5.28. Tools and supplies required for installation: Specifications: 208 – 240 V Frequency: 60 Hz Rated load: 2.5 kW Circuit breaker: 15 A per phase Height: 850 mm / 33.5” Width: 600 mm / 23.75” Depth: 600 mm / 23.75” Depth with door open: 1200 mm / 47” Weight: Installation should be undertaken by a SciCan approved technician. The use of an unapproved installer may invalidate the warranty. If the HYDRIM is installed in a Sterilization Center, the manufacturer of the Sterilization Center should allow a 10mm / 1/2” space at the top, back and both sides of the HYDRIM. This will facilitate installation, and service access to the HYDRIM. • Slot screwdriver • Channel locks Voltage: Installation: 80 kg / 176 lbs Do not move the HYDRIM into place by maneuvering the open wash chamber door. This may cause to door to become misaligned and leak. During installation, all consumables should have been added to the machine as appropriate. It is important that this be done before starting the machine. Max. Running Noise: 78 dBA For safety reasons, do not install the HYDRIM without the top cover. Utility Hook-ups Hose / Length / Max. Distance Water Shut-off Cord Diameter Distance from Pressure valve inlet / drain Hot Inlet 1.9 m / 6 ft. 1.5 m / 5 ft. 1-10 bar / 3/4” 14.5-145 psi Cold Inlet 1.9 m / 6 ft. 1.5 m / 5 ft. 1-10 bar / 3/4” 14.5-145 psi R/O Inlet 1.9 m / 6 ft. 1.5 m / 5 ft. 3/4” Yes Yes 1-10 bar / 14.5-145 psi Yes Drain 1.5 m / 5 ft. 3/4” — — — Electrical — — — 1.8 m awg 14-3 Levelling the HYDRIM: The unit is standing on three supports: rollers (wheels) at the back and two legs at the front. Rear of Unit ethernet connector RS-232 connector power connector 1.Remove the front kickplate. Push the HYDRIM into place while lifting the strap at the front to allow the unit to roll on the rollers. 2.Adjust the front legs as required until the HYDRIM is level. drain hose 3.The rear two legs are used only if the floor is uneven or cannot provide support to the rollers. 4.Tuck the strap under the machine before replacing the kickplate, so as not to interfere with the exhaust air vents. cold water inlet hose RO water inlet hose 4 hot water inlet hose 4. Installation Instructions Connecting the water inlet hoses: Connect the hot and cold water inlet hoses to the hot and cold water supply. Drain requirements: Connect the drain hose to the drain outlet. The drain hose can be attached to existing drain lines using a 3.5 cm / 1.5” or larger standpipe / P-trap combination. If the hose is connected directly to the drain line, fittings and adapters should not reduce water flow. The drain hose should be attached to the main drain at a point no more than 1 metre /3 ft. above the base of the HYDRIM. A floor drain is acceptable (check local codes). Electrical requirements: Connect the electrical cord to the power supply. The HYDRIM must have a dedicated circuit equipped with a 15A fuse. The outlet must be grounded. • • • • • Additional Information: The HYDRIM unit is heavy. Use a forklift or dolly and exercise caution when moving it. The HYDRIM should be serviced on site. The HYDRIM is equipped with an air gap / anti-suction device to prevent backflow of dirty water into the water supply. No other air gap device is necessary. If you need to extend the water inlet and drain hoses, ensure that you use commercial grade plumbing hose. The maximum length of the drain hose is 3.3 m / 13 ft. Installing the water softener salt: Unscrew the salt container lid and pour 1 litre / 1 quart of water into the water softener. Add 1 kg / 2.2 lbs of water softening salt in the same manner. Screw the salt container cap on tightly. Handling and installing the HIP™ cleaning solution The HIP™ cleaning solution is used in dilute form as a detergent for the cleaning of surgical instruments in the HYDRIM range of washers and washer disinfectors. It is a colourless and almost odourless liquid which is completely soluble in water. The pH range of the concentrated solution is between 9.3 to 9.8 and the solution is therefore alkaline. It is therefore advised that certain precautionary measures are observed when handling and during the loading of the solution into the machine, and when removing and disposing of the empty box. 5 4. Installation Instructions Recommended precautionary measures with regard to safe handling of HIP™ cleaning solution. • Always wear undamaged gloves made of natural or butyl rubber, nitrile, or neoprene (Surgical gloves are ideal). • Always wear eye protection. • Protect exposed skin on arms. • If solution is spilled on clothing, remove the item of clothing and wash affected skin with plenty of water, in accordance with the Material Safety Data Sheet requirements. • Use good industrial hygiene practices in handling this material. When handling, do not eat or drink. • After handling the product, remove and dispose of gloves and wash hands prior to removing eye protection. • Do not use the personal protective equipment you use for clinical activities to handle HIP™ products. • Always ensure that personal protective equipment, if contaminated with HIP™ cleaning solution, is cleaned, or disposed of as appropriate. For comprehensive data on HIP™ cleaning solution, please visit SciCan.com to view or download a PDF of the Material Safety Data Sheet. To install the HIP™ cleaning solution box, follow these steps: salt container Installing Cleaning Solution: Install HIP™ Cleaning Solution as follows: Technician Installation Test: Turn on the shut-off valves. Run a cycle, checking for leaks in the plumbing connections. 6 4. Installation Instructions Water quality The quality of the water being used in the HYDRIM to clean the instruments is very critical to achieving satisfactory cleaning results and to protecting the instruments and the internal parts of the unit from deterioration. Drinking water typically contains many dissolved solids. The amount of dissolved solids greatly depends on the local natural geological conditions and they can cause stains, spots and corrosion on instruments and on the internal parts of the HYDRIM. Among others, Iron, Manganese, Chloride, and Calcium Carbonate (CaCO3) are the dominant dissolved solids that affect the cleaning results when using a washer. Iron and Manganese can cause orange and brown or black stains on the instruments and on the internal parts of the HYDRIM. Chloride is usually responsible for causing stains, spotting, pitting and scaling. If the instruments or the inner parts of the HYDRIM L110w G4, such as the chamber, show any of these spots or stains, a water test may be required to determine the cause. The installation of a water treatment system may be required to reduce the amount of dissolved solids in the water and to improve the cleaning performance of the HYDRIM. Calcium Carbonate is the principle cause of water hardness and leaves white spots or scales. The HYDRIM is equipped with a built-in water softening system that must be adjusted according to the local water hardness. Please see the next section of this manual for recommended regeneration settings. Before using the HYDRIM, SciCan recommends testing the water and recording the results for water hardness, pH value, and water conductivity for future reference. IMPORTANT: The HYDRIM's water softening system reduces the water hardness by taking out Calcium Carbonate. If your water testing results show that your water hardness is outside the unit's range of adjustment, or if other dissolved solids in the water cause stains or deposits on the instruments or chamber, an external water treatment system may be required. 7 4. Installation Instructions Testing water quality Water Hardness Conversion and salt regeneration levels Typically Very Soft No Treatment Necessary (values from 18-143) The HYDRIM L110w G4 is equipped with a built-in water softening system that must be adjusted according to the local water hardness. To read local water hardness, proceed as follows: 1. The water test kit included with your HYDRIM contains three water hardness test strips in bags. Take a water sample from the location where the machine will be installed. 3. Compare the color of the strip with the chart on the back of the bag Determine the water hardness according to the chart on the water test kit envelope. 4. Power the unit on and select the Settings key from the main menu. 5. Go to the Setup Menu and select “Set Regeneration”. May Require External Treatment (values from 150-535) 2. Open one of the bags, remove the test strip and dip it into the water. 6. Using the up and down arrows, set the water softener regeneration level according to the water hardness table in this section. If your water hardness falls between two settings, select the higher setting. °dH US GPG 1 2 3 4 5 5.6 6 6.2 7 8 8.4 9 10 10.1 11 11.2 11.8 12 13 14 15 1.0 2.1 3.1 4.2 5.2 5.8 6.3 6.4 7.3 8.3 8.8 9.4 10.4 10.5 11.5 11.7 12.3 12.5 13.6 14.6 15.6 18 36 54 71 89 100 107 110 125 143 150 161 178 180 196 200 210 214 232 250* 268 16 16.8 17 18 19 19.6 20 20.2 21 22 22.4 23 24 25 25.2 26 27 28 28.6 29 30 16.7 17.5 17.7 18.8 19.8 20.5 20.9 21.0 21.9 22.9 23.4 24.0 25.0 26.1 26.3 27.1 28.2 29.2 29.8 30.2 31. 3 286 300 303 321 339 350 357 360 375 393 400 411 428 446 450 464 482 500 510 518 535 External Treatment Required (values >535) 7. Unscrew the water softener container lid from the bottom right of the chamber and pour at least 1.0 litres (0.26 gal) of water ≥30.3 ≥31.6 into the water softener container. Then fill the salt container to the top (maximum 1 kg/ 2.2 lbs.) with salt. Close by screwing the lid tightly back into place and run a complete cycle with no instruments. An improper seal can lead to corrosion. PPM (mg CaCO3 / Litre) ≥540 *Please note: The water test strip is only accurate up to 250 ppm. If the reading on the test strip exceeds 250 ppm and/or if the location in which the HYDRIM is installed has known water quality problems, having a more detailed and accurate water test done by a test lab is strongly recommended. 8 Regen. 1 2 3 4 5 6 7 8 Additional Water Treatment Required 5. Instructions for Use 5.1 Instrument Reprocessing Recommendations The HYDRIM L110w G4 is designed to clean general dental and medical instruments. Terminal sterilization MUST follow processing in the HYDRIM L110w G4. Prior to placing instruments in the HYDRIM, consult the instrument manufacturer’s reprocessing instructions. Examples of medical and dental instruments suitable for cleaning in the HYDRIM L110w G4 include: • Stainless steel scalers, spatulas and hemostats. •S tainless steel retractors, needle holders, skin hooks, tissue forceps, scissors, curettes, and other stainless steel instruments free of deep cavities. For best results, instruments processed in the HYDRIM L110w G4 should have the following properties: • Heat resistance to a temperature of up to 70°C / 158°F • Corrosion resistance in the presence of heat and alkalinity. Burs, microkeratomes, phaco tubing, fiberoptics and electrical equipment should not be processed in the HYDRIM. Nickel-plated instruments, or instruments containing aluminum or colour anodized aluminum as well as single use instruments are not suited for processing in the HYDRIM. HIP™ (HYDRIM Cleaning Solution with Instrument Protection) has been carefully formulated to provide outstanding material compatibility with a wide range of metals and coatings. However, some manufacturers’ instruments or instrument coatings may not be compatible. Please consult the instrument manufacturer for their recommended cleaning procedures. In general, it is not recommended to process carbon steel and chrome plated instruments in the HYDRIM. All hinged instruments should be placed in open position in open baskets or in the hinged instrument rack (SciCan part number 01-110409S) in P3 Heavy-Duty cycle. When processing small or light objects in the HYDRIM use the basket with lid (SciCan part number 01-109966S). Only the outer surfaces of dental handpieces can be cleaned in the HYDRIM L110w G4 with the handpiece holder (9 handpieces, PN 01-113113S or 21 Handpieces, PN 01-113112S). Set-able materials, such as cements, amalgam, and composites need to be removed from the instruments after use at chairside. The HYDRIM will not be able to clean them off the instruments. . 9 5. Instructions for Use 5.2 Cycle Description Chart Cycle P0 – Machine Cleaning Cycle No initial draining. P1 – Rinse and Hold Cycle* Use to prevent soil from drying on instruments when they will not be washed within one hour. Wash Rinse Dry <30ºC/86°F (cold) 3 minutes N/A <30ºC (cold) 2 minutes N/A 7 minutes 16 L 4.23 Gal <30ºC/86°F (cold) 3 minutes N/A 60ºC/140°F 1 minute N/A 17 minutes 16 L 4.23 Gal N/A 50ºC/122°F 5-15 minutes 60ºC/140°F*** 1-20 minutes 1-10 minutes (default 10 minutes) 25 minutes 24L 6.34 Gal 50ºC/122°F 5-15 minutes 60ºC/140°F 1 minute 34 minutes 32L 8.45 Gal P2 – Regular Cycle (no disinfection) – Use for moderately soiled loose instruments. P3 – Heavy Duty Cycle Use for heavily soiled instruments and cassettes. Total Time** Water w/o Drying Consumption Prewash (default 5 minutes) <30ºC/86°F (cold) 3 minutes (default 9 minutes) (default 1 minute) * This is not a wash cycle. Always run a wash cycle following the rinse & hold cycle. ** Cycle times depend on the temperature and pressure of incoming water. *** Rinse times are adjustable up to 10 minutes by an authorized technician. 10 1-20 minutes (default 10 minutes) 5. Instructions for Use 5.3 Hints and tips for best cleaning results Remove all cement, composite material and amalgam from instruments at chairside prior to processing in the Hydrim. • Use only accessories, such as baskets, cassettes, trolleys and racks to hold instruments that are designed for the HYDRIM L110w G4. • Use accessories for their intended purpose only. For example, do not place hinged instruments in cassettes. Use the hinged instrument rack instead. • Disassemble instruments if possible. • Do not overlap instruments. Each instrument must be kept separate. • All instruments must be placed in the instrument washer in such a way as to allow good rinsing of all surfaces. Any surface that is shielded from water and detergent cannot be cleaned. • Open hinged instruments widely when placed in baskets or hinged instrument rack (PN 01-110409S). Closed hinged instruments cannot be cleaned. • Place suction tubes in the rack for vertical instruments and ensure that water can flow unrestricted in and out of the tubes. Do not place suction tubes horizontally in a basket or in a cassette. For instruments containing lumens, such as dental handpieces, only the external surfaces are cleaned. • Place trays and other concave shaped items at an angle to ensure water can run off surfaces easily. • Do not overload the HYDRIM. • Verify the Hydrim setup: – Ensure that the washer spray arms are free of any blockage and can rotate freely. – Ensure that the mesh filters in the chamber drain are free from debris. • To achieve best cleaning results, instruments should be processed in the HYDRIM as soon as possible. If immediate cleaning is not possible, it is recommended to process the instruments using the P1 Rinse and Hold program immediately after use on the patient. • Visually inspect instruments for cleanliness and integrity (corrosion, material changes) after cleaning and repair or replace instruments if necessary. • If process enforced is activated, the operator must confirm that the instruments are visually clean after a complete cycle is finished. 11 5. Instructions for Use 5.4 Recommended load configurations The intended purpose of the L110w G4 washer is a clinical general instrument washer, predominantly aimed at the general dental and medical markets. There will be many combinations of instruments that can be processed in the L110w G4 unit depending on: • Size of practice • Types of procedures undertaken at any one time • Specialization of practice • Instrument management protocols It is difficult to illustrate all the possible combinations available, so below we have given examples of the most common typical basket loadings, the recommended loading of general instruments, and the worst case loading, for which the unit has been type tested and validated. Handle all instruments with care to prevent personal injuries through punctures for example. Follow local health and safety regulations for preventing accidents, bodily harm and personal injuries. Observe the instrument manufacturer’s recommendations for cleaning and care. When loading the unit, arrange loose instruments so that they do not touch one another. Instruments with concave surfaces or cavities should be placed so that water can drain freely. Sample loading: Example 1 – solid straight & hinged instruments Example 2 – solid straight instruments 12 5. Instructions for Use Example 3 – hinged instruments, solid instruments and open hollow instruments For example: Scalers, curettes, dental elevators, single part mirrors, suction tubes etc. For example: Rongeurs, forceps, scissors etc. Example 4 – small & disassembled instruments For example: Two piece mirrors, scalpel knife handles, etc. Example 5 – instrument sets in cassettes – full load For example: Bone files, pluggers, curettes, excavators, etc. Example 6 – instrument sets in cassettes – half load For example: Bone files, pluggers, curettes, excavators, etc. Example 7 – instrument trays 13 5. Instructions for Use 5.5 Baskets and Accessories The following are included with the HYDRIM: Rack for five 8” x11” cassettes, for upper or lower trolley. Full size (1/1). Part-number 01-109963S Basket with lid. Quarter size (1/4). Part-number 01-109966S Rack for five medium size cassettes, for upper or lower trolley. Half-size (1/2). Part-number 01-109964S Hygiene basket for loose instruments. Quarter size (1/4). Part-number 01-109967S The following are optional: Rack for four 11” x 14” cassettes, for upper or lower trolley. Full size (1/1). Part-number 01-109965S STATIM 5000 basket. Part-number 01-107241 Hinged instrument rack. Part-number 01-110409S Long Basket. Part-number 01-108232 STATIM 2000 basket. Part-number 01-107240 Full Size Basket. Part-number 01-111598 14 5. Instructions for Use 5.6 Touchscreen overview Programs Unlock door Network connectivity (green when active) Settings USB status (green when active) Water softener, detergent level, and door status 15 5. Instructions for Use 5.7 Set up menu overview User Technician Setup Cleaning Language Baud Rate Set Drying Time Country Set EOL CR/LF Set Wash Time Date/Time Set Regeneration Cycle Count Unit No. LCD Contrast Process Enforced Network Setup Theme User Screen Saver Remote Screen Temperature C/F Instructions Set Button Beep Instructions Delay Beep Volume Remote Access Set Printer Prepare for Shipping 16 5. Instructions for Use 5.8 Setting the language The messages displayed by your HYDRIM can be presented in a number of different languages. To change the current language, follow these steps: 1. 2. Scroll to Language and select. 3. From the Language screen, press to scroll through the list of languages. to save your selection and return When you have found the desired language, press to the Setup menu. 5.9 Setting the country 1. 2. Scroll to Country and select. 3. Using the keypad, type the name of the country and press EN to select. Press to save and return to the Setup menu. 5.10 Setting the time 1. 2. Scroll to Date / Time and select TIME. 3. From the TIME screen, use the keypad to set the time. Press EN to save and to return to the Setup menu. NOTE: If the HYDRIM is connected to a network, it is important to also enter the correct Time Zone. Enter the Time submenu, select Time Zone and scroll and select your local time zone. 4. To change your unit to display 12-hour time format (24-hour time format is the default to scroll to TIME 12/24, select it and setting), go to the Setup menu and use to save and return to the Setup menu. toggle to 12. Press 5. To activate daylight savings time (DST), go to the Setup menu and use to scroll to toggle DST ON or OFF and press the to DST ON/OFF and select. Use to save and return to the Setup menu. If connected to the network, the time will automatically adjust to DST. 17 5. Instructions for Use 5.11 Setting the date 1. 2. Scroll to Date / Time and select DATE. 3. From the DATE screen, use the keypad to set the date. Press EN to save and to return to the Setup menu. 4. To change the format in which the date appears, return to the Setup menu and use to scroll to DATE FORMAT. Select it, and follow the prompts to have to save and return to the date displayed in the desired format. Press the Setup menu. 5.12 Assigning unit identifier number 1. 2. Scroll to Unit No and select. 3. Using the keypad, select a maximum of 3 digits to be used as the unit’s identifier number. Press EN to save and to return to the Setup menu. 5.13 Adjusting the screensaver delay To change the length of time before the screensaver is activated, follow these steps: 1. 2. Scroll to Screensaver and select. 3. Use to scroll through your time options. When you have found the amount of to save and return to the Setup menu. time you require, press it. Press 5.14 Adjusting the temperature display 1. 2. Scroll to Temperature C/F and select. 3. Use to choose between having information displayed in degrees Celsius or to save and return to the Setup menu. Fahrenheit. Press 18 5. Instructions for Use 5.15 Turning the button sound ON or OFF The HYDRIM is preset to beep when a button is pressed. If you would like to turn the button sound off, follow these steps: NOTE: Turning OFF the button sound does NOT turn off other alarms and cycle notification beeps. 1. 2. Scroll to 3. Use Press Beep ON/OFF and select. to scroll through your ON or OFF options and select it by pressing it. to save and move back to the Setup menu. 5.16 Adjusting the button beep volume If you would like to adjust the beep volume, follow these steps: 1. 2. Scroll to Beep Volume and select. 3. Use to scroll through the volume settings. Select the one you want by to save and move back to the Setup menu. pressing it. Press 5.17 Adjusting the salt regeneration Salt regeneration should be set according to the local water hardness. See section 4 Testing Water Quality for instructions on determining correct settings. To set salt regeneration, follow these steps: 1. 2. Scroll to Set Regeneration and select. 3. Use to change the value. The default setting is 1. Press to the Setup menu. 19 to save and return 5. Instructions for Use 5.18 Adjusting the screen contrast The touchscreen is calibrated for the lighting condition of most sterilization centers. Should you need to adjust the contrast for your office, follow these steps: 1. 2. Scroll to LCD Contrast and select. 3. Use to scroll through your contrast options. When you have found the contrast to save and return to the Setup menu. you require, press it. Press 5.19 Changing the touchscreen display themes The touchscreen themes (i.e. icons and background colours) can be changed to one of the preset options. To change themes follow these steps: 1. 2. Scroll to 3. In the Theme and select. Change Theme screen, use to scroll through your available options. to select your As you scroll, each theme will display on the touchscreen. Press theme and return to the Setup menu. 5.20 Creating a User Name Up to four unique User Names can be created. To assign a User Name follow these steps: 1. 2. Scroll to User and select. 3. To assign a user name, select User Name a name (up to 12 characters) and press 20 EN and use the alphabetic keypad to enter to save. 5. Instructions for Use 5.21 Creating a User PIN From the User PIN screen, you can assign up to four PINs. To assign a PIN, follow these steps: 1. 2. Scroll to User and select. 3. To assign a user PIN, select User PIN a number (up to 4 digits) and select EN and use the numeric keypad to enter to save and to move to the confirmation screen. 5. If all of the information presented in the confirmation screen is correct, press OK to be returned to the User PIN screen. To make a correction, select the User PIN you want to change and repeat the process described above. 5.22 Setting up process enforced usage When process enforced usage is activated, users are required to enter a PIN at the end of a cycle. For process enforced usage to function, User IDs and PINs must first be assigned. To set up User ID and PINs, refer to sections 5.19 and 5.20 on creating a user name and PIN. To activate process enforced usage, follow these steps: 1. 2. Scroll to Process Enforced and select. 3. Use to toggle process enforced function ON or OFF. Press to save your selection and return to the Setup menu. NOTE: Any user can stop a cycle even with process enforced usage ON. However, the cycle data will record that an unauthorized user has stopped the cycle. 21 5. Instructions for Use 5.23 Connecting to a network The HYDRIM L110w G4 has a 10/100Base-T Ethernet port located at the back of the unit. To connect your HYDRIM to a network using a router, follow these steps: 1. Connect your network cable to the Ethernet port at the back of the unit. If your office uses a router, the router should automatically assign the unit an IP address. A red X on the network icon means the unit is not connected. A yellow check mark means the unit has an IP address but is not connected to the Internet and cannot send emails. A green check mark means the Internet connection is set up properly and the unit can send out emails. NOTE: In some circumstances, where you do not have a router, for example when using Windows Network Sharing, you may have to assign a dedicated or ‘static’ IP address. To assign a static IP address, contact your local network administrator. 2. From the main screen, press the Network icon. The Network screen displays information about your HYDRIM’s connectivity, including its IP address. 3. Type the IP address displayed on the touchscreen into the browser of any web enabled device to access your unit’s web portal. When the Network icon is active (for example when sending email) it will turn green. NOTE: Use QR code if connecting to a mobile device. NOTE: Connection time will vary depending on your network speed, and making an initial connection can take longer. In Canada and USA you can call our network support line at 1-800-635-5179 for additonal networking support. 5.24 Connecting to a wireless network The HYDRIM can be configured for wireless use by connecting the Ethernet port to an external wireless bridge / access point. SciCan currently recommends the use of the D-Link® DAP-1522 Xtreme N® Duo Wireless Bridge. Contact your network administrator to learn more about setting up a wireless bridge. 22 5. Instructions for Use 5.25 Activating the HYDRIM L110w G4 Prior to activating the washer, check that the water supply is on and follow these steps: 1 Open the chemical door and ensure that a box of HIP™ Cleaning Solution has been installed. 3 2 Touch the screen to begin. Turn the unit on. 5 6 4 Press to unlock door. 7 Select the desired cycle. (Use a heavy duty cycle for cassettes, hinged instruments or heavily soiled instruments.) Load instruments into the baskets or cassettes, place them in the machine and close the door. 23 Press START. 5. Instructions for Use 87.The cycle will begin. The cycle will start by draining the unit. The bar on the screen indicates the progression of the cycle. The stage within the cycle is shown beneath the bar (e.g. Filling, Rinsing). The estimated time remaining (in minutes) is always displayed. Please note that the time will increase or decrease depending on the projected cycle completion. 98.The cycle is complete. When the cycle is complete, the program name and “Cycle Complete” is displayed, and the unit beeps three times. Press “OK” to open the door. Use gloves to unload the instruments. After all cycles, exercise caution as the instruments, trolley, baskets and cassettes may be hot. Inspect the instruments for debris prior to packaging / sterilizing. 5.26 Interrupting / aborting a cycle The door of the HYDRIM is locked during the cycle. If the STOP button is pressed, the cycle is aborted and cannot be re-started. The message “Draining. Please wait” will appear. The unit will drain. Then the message “Instruments not processed” will appear. Press . Use gloves if handling the OK. Open the door by pressing instruments. Exercise caution as instruments, trolley, baskets and cassettes may be hot. The cycle must be repeated to ensure that instruments are properly processed. Note: If the drying phase of the cycle is interrupted, the critical parts of the cycle are complete and the message displaying the program name and “Cycle Complete. Drying interrupted” will appear. 24 5. Instructions for Use 5.27 Additional user and setup menu functions To access the user or setup menus, follow these steps: OR Chamber cleaning This cycle is used to periodically remove hardwater deposits from the chamber walls and racks. Pour 1.0 litres (0.26 gal) of vinegar into the chamber before starting the cycle. Touch “cleaning.” A cleaning cycle, similar to a normal wash cycle, will run. Failure to clean chamber can promote corrosion. Set drying time The drying times for P2 and P3 can be set independently. Touch the cycle for which you want to set the drying time. Use the up and down arrows to select the desired drying time. Touch “default” if you wish to return to the factory default. Use the back arrow to return to the previous screen. Set wash time The wash time for P2 and P3 can be set independently. P2 and P3 cycles can be adjusted from 5 to 15 minutes. Touch the cycle for which you want to set the wash time. Use the up and down arrows to select the desired wash time. Touch “default” if you wish to return to the factory default. Use the back arrow to return to the previous screen. Cycle count This allows the user to see how many cycles have been run on the HYDRIM. Touch cycle count and the number of cycles (completed and aborted) will be displayed. This cannot be reset. Touch the back arrow to return to the previous menu. Instructions Users can access a database of pictorial instructions on how to perform routine maintenance such as installing the cleaning solution. 25 5. Instructions for Use 5.28 Opening the Door in Case of Power Failure If there is a power failure, remove the kickplate of the HYDRIM. Remove the screw with a screwdriver and lift the kickplate up and toward you. Locate the ring and pull it to open the door. Exercise caution! There may be fluid remaining in the unit and the instruments may be hot. Instruments that have not completed the cycle should not be used and should be reprocessed. When replacing the kickplate, ensure that the grounding wire is attached. Ring Grounding wire Kickplate Screw 26 5. Instructions for Use – 5.29 Storing and Retrieving Cycle Information The HYDRIM L110w G4 has an internal Data Logger capable of storing all the data on every cycle, whether successful or incomplete, for the lifetime of the unit. You can access this information through the touchscreen, through the web portal or by using a USB storage device. Retrieving cycle information using the touchscreen 1. From the main menu, press the USB icon. 2. The unit will record up to the last five successful cycles and the last five incomplete cycles. If you select a cycle from the list, it will display cycle information in a format similar to how it would be printed. 3. Use the arrow keys to scroll through and read. NOTE: Regardless of whether you have a USB storage device attached to the unit or not, you can always see the last five successful cycles and the last five incomplete cycles. Use the HYDRIM L110w G4 web portal to access all the cycle information stored on your Hydrim from your computer. To connect your HYDRIM see section 5.23 Connecting to a Network. 27 5. Instructions for Use – Retrieving cycle information using the USB data back up The USB storage device can be used to transfer cycle information stored in the unit to a computer. Best practice suggests this should be done once a week. To transfer data using the USB port, follow these steps: 1. Plug the USB storage device into the USB port. 2. The HYDRIM keeps track of what data has already been transferred to the USB storage device and will automatically load only new data. Data stored in the internal memory of the HYDRIM can be copied once only. Access to previously transferred information can be made from the web portal. 3. When the activity light on your USB storage device stops blinking or the USB icon on the LCD turns from a flashing green to a solid grey, remove the USB storage device and transfer the information to your computer. NOTE: If you select the USB storage device icon from the main menu, you will only be able to view the last five complete cycles and the last five incomplete cycles. To view all the cycles stored on the USB storage device, you must use your computer. NOTE: If you lose your USB storage device and would like to transfer your unit’s cycle history to a new device, follow these steps: 1. Plug the new USB storage device into the USB port. 2. Select the USB icon. 3. From the cycle information screen, select the USB icon again. 4. Select Copy and the unit will copy all cycle information to the USB storage device. 28 5. Instructions for Use – 5.30 Printer / Data Logger Setup The HYDRIM L110w G4 has an RS-232 port at the back, and can be used with an external printer or the SciCan Data Logger. The printers in the chart below have been tested with the HYDRIM. To add or change a printer or SciCan Data Logger, follow these steps: Turn off the HYDRIM and the printer or Data Logger before connecting these devices to the unit. 1.With the printer or Data Logger connected, turn on the HYDRIM and press the i to move to the Menu screen. 2.In the Setup Menu, select Printer Selection. 3.Select Serial Printer if connecting a printer, or USB Flash/MSD if connecting the SciCan Data Logger. Press the back arrow to return to the Setup Menu. 4.In the Setup Menu, select Baud rate. 5.Select the rate required (refer to chart below for recommended Baud rates). Use the back arrow to return to the Start screen. Printer Model Serial Port Baud Rate Epson TM-U220D (C31C515603) 9600 Citizen IDP-3110-40 RF 230B 9600 Star Micro SP212FD42-230 9600 Star Micro SP216FD42-230 9600 Star Micro SP512MD42-R 9600 SciCan Data Logger Serial Port Baud Rate For Mass Storage Device 9600 6.Ensure that the date and time have been set (see Setup Menu – Date / Time) 7.Now the HYDRIM will write its cycle information to the device chosen. 29 6. Care and Maintenance 6.1 Replacing the HIP™ Cleaning Solution The HYDRIM L110w G4 uses a 3.8L / 1 gallon container of HIP™ Cleaning Solution (Part number CS-HIPL). Use only the recommended cleaning solution and read the MSDS before inserting into the unit. HIP™ cleaning solution is used in dilute form as a detergent for the cleaning of surgical instruments in the HYDRIM washer. It is a colourless and almost odourless liquid that is completely soluble in water. Some precautions must be taken to safely handle this chemical. For more information, see Chapter 4 Handling and Installing the HIP™ cleaning solution. NOTE: To avoid spillage, replace the solution container only when the message appears and be sure to wear gloves. When a red X appears on the water softener/detergent icon. Press on the icon to determine if the problem is with the water softener or cleaning solution level. If the cleaning solution must be replaced, a red X will appear next to it. To order additional HIP™ Cleaning Solution, contact your local dealer. When the message “no detergent” appears on the screen, the cleaning solution container is empty and is in need of changing. To avoid spillage, replace the solution container only when the message appears and be sure to wear gloves. NOTE: Each cleaning solution container will last approximately 30 cycles, depending on which cycles are used. To replace the cleaning solution container, follow these steps: 1. Turn the power switch OFF. 2. Open the cleaning solution door. 3. Disconnect the cleaning solution connector. Remove any dried chemical by immersing the connector in a cup of water. 4. Remove the empty cleaning solution container and discard or recycle. 30 6. Care and Maintenance 5. Connect new container and insert into the cleaning solution compartment. Follow the instructions printed on each cleaning solution container. 6. Close the door. 7. Turn the power switch ON To prime the cleaning solution dosing pump, press the water softener/detergent icon on the main screen. In the water softener/detergent screen, press the red X next to “Detergent”. The unit will prime the dosing system and a green check mark will appear in place of the red X when it is ready for use. NOTE: The system can also be primed by simply starting a cycle and selecting “Detergent Replaced”, when prompted. 31 6. Care and Maintenance 6.2 Refilling the Water Softening Salt Reservoir When a red X appears on the detergent and water softener level indicator, press on the icon to determine if the problem lies with the water softener or cleaning solution level. If the water softener must be refilled, follow these steps: To fill the salt reservoir, follow these steps: 1. Unscrew the salt container lid. 2. F ill the salt container to the top (maximum 1 kg / 2.2 lbs.) 3. Screw the salt container lid on tightly. 4. Run a complete cycle, with no instruments. salt container 6.3 Cleaning the HYDRIM L110w G4 To clean outer surfaces and the decal covering the touchscreen, use a soft cloth moistened with soap and water or a surface disinfectant. Do not use harsh cleaning chemicals. 32 6. Care and Maintenance 6.4 Filter and Wash Arm Maintenance Filter Maintenance: Inspect the filter in the bottom of the chamber daily for debris and clean if necessary. To clean, remove the filter, rinse under a tap and replace. Ensure that the filter is firmly locked into position when replaced. Wash arms Wash Arm Maintenance: If the wash arms are not turning easily, remove them, rinse under a tap and reassemble. To remove the upper or middle arm, unscrew the collar counterclockwise. To remove the lower arm unscrew the collar clockwise. Filter 6.5 Preparing the unit for shipping If preparing the unit for transport or storage, waste water should be removed from the sump. Waste water in the unit may contain biological contaminants. From the Setup menu, select the Prepare for Shipping function. Use a mechanical means or absorbent material to siphon the contents from the sump. Wear disposable rubber gloves. Dispose of absorbent material according to biological waste disposal regulations. 33 6. Care and Maintenance 6.6 Annual maintenance If the message “Preventative Maintenance Required. Call for Service” appears, the annual maintenance is required. To continue using the HYDRIM, press OK. Call for service as soon as possible. The annual maintenance should be done after 365 days have elapsed since the initial installation or since the last service call was performed. When Who Daily tests and checks By the user Annually By a SciCan-approved technician Bi-Annually By a SciCan-approved technician What Tests • • • • • • door lock check wash arm rotation check door seal check load carrier check check and clean chamber filters visual examination of each load for residual soil. • Annual maintenance schedule as outlined in the service manual • Re-validation if required by local regulations. To ensure that the ongoing efficacy of the machine is assured, SciCan recommends that the following periodic testing protocols are observed. IMPORTANT NOTES: • This document outlines the minimum requirements to ensure that the equipment performs to specification. In some regions, local/national guidance documents may require additional testing. Please contact your dealer or local medical authorities for details. • Installation, commissioning, annual servicing MUST be undertaken by SciCan approved technicians. Failure to maintain this equipment may invalidate the results of the following testing regime. 34 6. Care and Maintenance Tests to be performed by the user: Door lock check This test is to ensure that the door cannot be opened while a cycle is running or a cycle will not start with the door open. To check that these features are working correctly, attempt to open the door using the handle immediately after a cycle has started. Caution – DO NOT attempt this when the wash arms are rotating and/or the water is above ambient temperature. The door should not open. When you attempt to start a cycle with the door open, the cycle should not start. If the unit fails this test, stop using it immediately and call your dealer for technical service. Wash arm rotation check Run a P1 cycle and check that wash arms are rotating. If wash arms are not rotating, remove, visually check and clean as described in Section 6.4. Door seal check Visually check the door seal for debris or wear. If the seal is worn or damaged, call your dealer for technical service. Load carrier check Visually check load carriers (trolleys) for wear and tear, damage and that the runners move freely over their full range. Chamber filter check Remove, visually check and clean as described in section 6.4. Load check Visually inspect each load for residual soil. Washers are designed to ensure that the surfaces of instruments are free from debris that may compromise the sterilization process. A visual check of the instruments processed in each load should be undertaken prior to sterilization to ensure that no residual debris is present on the instrument. If debris is still apparent, the instrument should not be considered clean and should be reprocessed through the HYDRIM again prior to sterilization. Note: Some set-able materials such as cements, amalgam, and composites, if set on the instrument will not be removed in a HYDRIM. If these materials are noticed on the instrument then abrasive removal may be required. 35 7. Troubleshooting Problem Possible Causes and Solutions Instruments are not clean • Do not overload cassettes or instrument baskets. • Do not load too many cassettes into the HYDRIM. • Use the Heavy Duty cycle for cassettes and hinged instruments. • Check filters and wash arms for debris. Touchscreen / Unit does not come on • Ensure that the power button is turned ON. • Ensure that the plug is properly inserted into the wall socket. • Check if a fuse or circuit is blown – call service for assistance. The wash arms do not rotate • Remove the wash arms, clean and reinstall them. The door cannot be opened • The cycle is not complete. • The cycle was aborted and the unit has not completed draining yet. Operating cycles appear to be taking too long to complete •T he water is not hot enough. Check that the incoming hot water temperature is in the recommended range. • Check that the hot and cold hoses are not reversed. “No detergent” message comes on when there is still chemical left in the container • Check for a kink in chemical tubing. Drying Performance is inadequate • Increase the drying time (user menu). NOTE: Fuses should NOT be replaced by the operator. Call an authorized service technician for assistance. 36 7. Troubleshooting Error Messages Cause Solution CF1 Water Heating failure The water does not reach the required temperature in the specified time Call for service. CF2 Chamber Filling Failure The water does not fill the chamber within the specified time. Check that the water hoses are not kinked. Open the water shut-off valves. CF3 Chamber temperature reading failure Faulty sensor. Call for service. CF4 Draining failure Water cannot drain from the unit. Check that the drain hose is not kinked. Check that the filter in the bottom of the chamber is not obstructed. CF9 Software or PCB Failure Cycle length is more than 3hr 30 min. Call for service. CF14 Water Temperature too high Water in prewash stage too hot. Check water connections at back of unit. CF19 Pressure Sensor Pressure sensor is stuck. Call for service. Error CF21 No detergent CF28 No water pressure Flow switch did not detect detergent during wash phase. Not enough water during cycle. Replace detergent box if empty. If the problem persists, call for service. Check water hoses are not kinked. Open water shut-off valves. Check for leaks. Call for service. 37 8. Specifications Height, freestanding: 850 mm / 33.5” Width: 600 mm / 23.75” Depth: 600 mm / 23.75” Depth with door open: 1200 mm / 47” Weight: 80 kg / 176 lbs. Maximum Running Noise: 78 dB(A) Hot and cold water connections: 3/4” Inlet water pressure: 1-10 bar Incoming hot water temperature: 50-70°C / 122-158°F Drain: 3/4” Water softener: 1 kg / 2.2 lbs salt capacity Filling System: 5.5L / 1.5 gallon safety maximum Drying System: Heater 1 kW Electrical Connection: 208-240 V 60 Hz 15 A Equipment pollution degree: Pollution Degree 2 Equipment installation category: Installation category II Maximum relative humidity: 8 0% for temp up to 31°C / 88°F 50% for temp up to 40°C / 104°F Operating temperature range: +5°C to 40°C / 41-104°F Max. altitude: 2000m / 6561.7 ft. Mains supply: + / -10% of nominal 9. Serial Number Plate When ordering supplies, spare parts or requesting service, please ensure that the information contained on the serial number plate is available (Model number, serial number etc.). The serial number plate is located at the bottom left on the rear panel of the HYDRIM L110w G4 unit. A small label is located on the left hand side of the chemical door. 38 10. Warranty Limited Warranty For a period of one year, SciCan guarantees that the HYDRIM L110w G4, when manufactured in new and unused condition, will not fail during normal service due to defects in material and workmanship that are not due to apparent abuse, misuse, or accident. In the event of failure due to such defects during this period of time, the exclusive remedies shall be repair or replacement, at SciCan’s option and without charge, of any defective part(s), provided SciCan is notified in writing within thirty(30) days of the date of such a failure and further provided that the defective part(s) are returned to SciCan prepaid. This warranty shall be considered to be validated, if the product is accompanied by the original purchase invoice from the authorized SciCan dealer, and such invoice identifies the item by serial number and clearly states the date of purchase. No other validation is acceptable. After one year, all SciCan’s warranties and other duties with respect to the quality of the product shall be conclusively presumed to have been satisfied, all liability therefore shall terminate, and no action or breach for any such warranty or duty may thereafter be commenced against SciCan. Any express warranty not provided hereon and any implied warranty or representation as to performance, and any remedy for breach of contract which, but for this provision, might arise by implication, operation of law, custom of trade or course of dealing, including any implied warranty of merchantability or of fitness for particular purpose with respect to all and any products manufactured by SciCan is excluded and disclaimed by SciCan. To register your product warranty with SciCan, go to Scican.com, click on the appropriate country, and then click on the Register Your Warranty tab. 39