1
358.348321
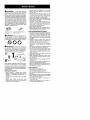
Instruction
Manual
English
Manuel
d'instructions
Franqais
Bedienungsanweisung
Deutsch
Manual
de instrucciones
Espahol
Libretto
d'lstruzioni
Italiano
Handleiding
Nederlands
C
E
I
Please read these instructions carefully and make
sure you understand them before using this unit.
Avant d'uti]iser cet appareil, veuil]ez
ment les instructions et assurez-vous
comprises.
lire attentivede les avoir
Lesen Sie diese Hinweise zur Handhabung des
Ger_ts aufmerksam
dutch. Verwenden Sie es
erst, wenn Sie sicher sind, dab Sie alle Anweisungen verstanden haben.
Lea atentamente
las instrucciones y asegt_rese
entenderlas
antes de utilizar este unidad.
Leggere attentamente
si di avede comprese
de
queste istruzioni e accertarprima di usare I'unita.
Lees deze instructies zorgvuldig en wees er zeker
van dat u ze begrijpt alvorens dit apparaat te gebruiken.
530164554
1/1/04
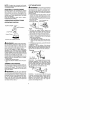
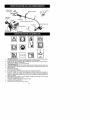
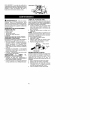
Fuel
tank
Assist
handle
anual
Tube
ON/OFF
Switch
Throttle
Choke
Assist handle adjustment
Trimmer
head
Shield
Wrench
Starter
Handle
Primer
Bulb
6
i
i
K
A.
B.
C.
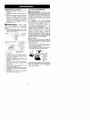
WARNING!
This trimmer can be dangerous! Careless or improper use can cause
serious or even fatal k/jury.
Read and understand the instruction manual before using the trimmer.
Never use blades with this tool.
D. WARNING!
E.
E
G.
H.
k
J.
K.
The trimmer line can throw objects violently. You can be blinded or
injured. Always wear eye protection.
Always use:
Ear protection
Protective glasses or visor
Assist handle to be positioned only below the arrow.
The operator of the machine must insure that no one comes within a 15 meter radius
while worki ng. When several operators are working within the same area a safety distance of at least 15 meters must be observed.
Use unleaded or quality leaded
Engine ON/OFF Switch.
Sound powerlevel
Max speed of output axle, rpm
petrol and two-stroke
oil mixed at a ratio of 2.5%.
ZIL
...__....._
/IJWANNIN(J:
When using gardening
appliances, basic safety precauticns should always be followed to reduce the risk of fire and
serious injury. Read and follow all instructions.
This power unit can be dangerous! Operator is
responsible for following instructions and warnings on unit and in manual. Read entire instruction manual before using unit! Be thoroughly familiar with the controls and the proper use of the
unit. Restrict the use of tNs unit to persons who
read, understand, and follow instructions and
warnings on unit and in manual. Never allow
children to operate this unit.
INSTRUCTION
MANUAL
SAFETY INFORMATION
ON THE UNIT
_k DANGER:
Never use blades, wire, or
flailing devices. This unit is designed for line
th miner use only. Use of any other accessedes
or attachments will increase the risk of injury.
@©O
A'I
oWARNING:
Trimmer line throws objects violently. You and others ca n be blinded/
injured. Wear safety glasses and leg protection. Keep body parts clear of rotating line.
Safety Glasses
or similar
eye protection
Keep children, bystanders, and animals 15 meters away. If approached stop unit immediately.
If situations occur which are not covered in
this manual, use care and good judgement.
If
you need assistance, contact your authorized
service dealer.
OPERATOR
SAFETY
• Dress
properly.
Atways
wear safety
glasses or similar eye protection when operating, or performing
maintenance,
on
your unit.
• Always wear face or dust mask if operation
is dusty.
• Always
wear heavy,
long pants, long
sleeves, boots, and gloves. WeN ring safety
leg guards is recommended.
• Always wear foot protection.
Do not go
barefoot or wear sandals.
Stay clear of
spinning line.
• Secure hair above shoulder length. Secure
or remove loose clothing or clothing with
loosely hanging ties, straps, tassels, etc.
They can be caught in moving parts.
• Being fully covered also helps protect you
from debris and pieces of toxic plants
thrown by spinning line.
• Stay Alert. Do not operate this unit when you
are tired, ill, upset or under the influence of aF
cobel, drugs, or medication. Watch what you
are doing; use comi'aon sense.
• Wear hearing protection.
• Never start or run inside a closed room or
building. Breathing exhaust fumes can kill.
• Keep handles free of oil and fuel.
UNIT / MAINTENANCE
SAFETY
• Disconnect the spark plug before performing
maintenance except carburetor adjustments.
• Look for and replace damaged or loose
parts before each use. Look for and repair
fuel leaks before use. Keepin goodworking
condition.
• Replace
trimmer
head parts that are
chipped, cracked, broken, or damaged in
any other way before using the unit.
• Maintain unit according to recommended
procedures.
Keep cutting line at proper
length.
• Use only 2 mm diameter Craftsman@ brand
line. Never use wire, rope, string, etc.
• thstall required shield properly before usthg
the unit. Use only specified trimmer head;
make sure it is properly installed and securely fastened.
• Make sure unit is assembled correctly as
shown in this manual.
• Make carburetor
adjustments
with lower
end supported to prevent line from contacting any object.
• Keep others away when makthg carburetor
adjustments.
• Use only recommended
Craftsman@
accessories and replacement
parts.
• Have all maintenance
and service not explained in this manual performed by an authorized service dealer.
FUEL SAFETY
• Mix and pour fuel outdoors.
• Keep away from sparks or flames.
• Use a container approved for fuel.
• Do not smoke or allow smoking near fuel or
the unit.
• Avoid spilling fuel or oil. Wipe up all fuel spills.
• Move at least 3 meters away from fueling
site before starting engine.
• Stop engine and allow to cool before removing fuel cap.
• Always store gasoline in a container approved for flammable
liquids.
CUTTING
SAFETY
_kWARNING:
Inspect the area before
each use. Remove objects (rocks, broken
gblaSs, nails, wire, etc.) which can be thrown
y or become entang(ed in line. Hard objects
can damage the trimmer head and be thrown
causing serious injury.
• Use only for trimming,
scalping,
mowing
and sweeping. Do not use for edging, pruning or hedge trimming.
• Keep firm footing and balance. Do not overreach.
• KeepalJ partsofyour
bodyawayfrommuftier and spinning line. Keep engine below
waist levek A hot muffler can cause serious
burns.
• Cut from your right to your left. Cutting on
left side of the shield will throw debris away
from the operato£
• Use only in daylight or good artificial light.
• Use only for jobs explained in this manual.
TRANSPORTING
AND STORAGE
• Allow the engine to cool; secure unit before
storing or transporting
in vehicle.
• Empty fuel tank before stodng or transporting the unit. Use up fuel left in the carburetor
by starting engine and letting it run until it
stops.
• Store unit and fue( in an area where fuel vapors cannot reach sparks or open flames
from water heaters,
e(ectdc motors
or
switches, furnaces, etc.
• Store unit so line (imiter cannot accidental(y
cause injury. Unit can be hung by the tube.
• Store the unit out of the reach of children
SPECIAL
NOTICE:
Exposure to vibrations through pro(onged use of gasoline powered hand tools cou(d cause b(ood vesse( or
nerve damage
in the fingers,
hands, and
joints of people prone to circulation disorders
or abnormal swellings. Prolonged use in cold
weather has been linked to b(ood vessel damage in otherwise healthy people. If symptoms
occur such as numbness,
pain, loss of
strength, change in skin color or texture, or
(oss of feeling in the fingers, hands, or joints,
discontinue the use of this tool and seek medical attention. An anti-vibration
system does
not guarantee the avoidance of these problems. Users who operate power tools on a
continual
and regular basis must monitor
close(y their physical condition and the condition of this tool.
ATTACHING
WARNING:
Make sure unit is properly assembled and all fasteners are secure.
CARTON
CONTENTS
Check carton contents against the following
(ist:
Model 358.348321
• Trimmer
• Shield
• Nut (screwed onto shield)
• Wrench for shield assembly
• 2-cycle engine oil
Examine parts for damage. Do not use damaged parts.
It is normal for the fuel filter to rattle in the
empty fuel tank.
Finding fuel or oil residue on muffler is normal
due to carburetor
adjustments
and testing
done by the manufacture£
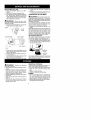
ADJUSTING
THE HANDLE
_k_WARNING:
When adjusting
THE
WARNING:
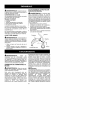
SHIELD
The shield must be prop-
erly installed.
The shield provides
partial
protection from the risk of thrown objects to
the operator and others and is equipped with
a line limiter which cuts excess line. The line
limiter (on underside of shield) is sharp and
can cut you.
1. Remove nut from shield.
2. insert bracket into slot on shield.
3. Pivot shield until bolt passes through hole
in bracket.
4. Reinstall nut and tighten securely.
/S(ot
Sh(e(d
./
the han-
dle, be sure it remains below the safety label.
Assist handle must be positioned only be(ow
the arrow.
1. Loosen wing nut on handle.
2. Rotate the handle on the tube to an upright position; retighten wing nut.
__
Line Limiter
/
Bracket
Blade
(
_
Nut
A'IL
...__....._
Starter Handle
4_WAI_NIN{J:
Be sure to read the fuel
information in the safety rules before you begin. If you do not understand the safety rules,
do not attempt to fuel your unit. Contact an
authorized service dealer.
FUELING
ENGINE
,_WARNING:
Remove
Choke
Lever
fuel cap slowly
when refueling.
This engine is certified to operate on unleaded gasoline. Before operation, gasoline
must be mixed with a good quality 2-cycle aircooled engine oil. We recommend
Crafts_
man@ brand oil mixed at a ratio of 40:1
(2.5%). A 40:1 ratio is obtained by mixing 4
liters of unleaded gasoline with 95 ml of oil.
DO NOT USE automotive
oil or boat oil.
These oils will cause engine damage. When
mixing fuel, follow instructions
printed on oil
container.
Once od is added to gasohne,
shake container momentarily
to assure that
thefuel is thoroughlymixed.
Always readand
follow the safety rules relating to fuel before
fueling your unit.
IMPORTANT
Experience
indicates
that alcohol blended
fuels (called gasohot or using ethanol or
methanol) can attract moisture which leads to
separation and formation of acids dudng storage. Acidic gas can damage the fuel system
of an engine while in storage. To avoid engine
problems, empty the fuel system before storage for 30 days or longer. Drain the gas tank,
start the engine and let it run until the fuel lines
and carburetor are empty. Use fresh fuel next
season. Never use engine or carburetor
cleaner prod ucts in the fuel tank or permanent
damage may occur.
HOW TO STOP YOUR UNIT
• To stop the engine, move the ON/OFF
switch to the OFF position.
HOW
TO START
_WARNING:
YOUR
UNIT
The trimmer
head
will
turn while starting the engine. Avoid any contact with the muffler. A hot muffler can cause
serious burns.
STARTING A COLD ENGINE (or a
warm engine after running out of fuel)
Starting
Position
Muffler
1.
2.
3.
4.
Set unit on a flat surface.
Move ON/OFF switch to the ON position.
Slowly press the primer bulb 6 times.
Move choke lever to FULL CHOKE position.
5. Squeeze and hold trigger through all remaining steps.
6. Pull starter rope handle sharply until engine sou nds as if it is trying to start, but do
not pull rope more than 6 times.
7. As soon as engine sounds as ff it is trying
to start, move choke lever to HALF
CHOKE.
8. Pull starter rope sharply until engine runs,
but no more than 6 pulis. If the eng_ine
doesn't start after 6 pulis (at the HALF
CHOKE position), move the choke lever
to the FULL CHOKE position and press
the primer bulb 6 times. Squeeze and hold
the throttle trigger and pull the starter rope
2 more times. Move the choke lever to the
HALF CHOKE position and pull the starter rope until the engine runs, but no more
than 6 pulis.
NOTE:
If engine still doesn't start, it is
probably flooded. Proceed to STARTING
A FLOODED ENGINE.
9. Once the engine starts, allow it to run 10
seconds, then move the choke lever to
OFF CHOKE. Allow the unit to run for 30
more seconds at OFF CHOKE before releasing the throttle trigger.
NOTE:
ff engine dies with the choke ]ever in the OFF CHOKE position, movethe
choke lever to the HALF CHOKE position
and pull the rope until engine runs, but no
more than 6 pulls.
STARTING
A WARM
ENGINE
1. Move ON/OFF switch to the ON position.
2. Move the choke lever to the HALF
CHOKE position.
3. Squeeze
and hold the throttle trigger.
Keep throttle trigger fully squeezed until
the engine runs smoothly.
4. Pull starter rope sharply until engine runs,
but no more than 5 pulls.
5. Allow engine to run 15 seconds, then
move the choke lever to the OFF CHOKE
position.
NOTE:
If engine has not started, pull starter
rope 5 more pulls. If engine still does not ru n, it
is probably flooded.
CUTTING
STARTING
A FLOODED
ENGINE
Flooded engines can be started by placing
the choke lever in the OFF CHOKE position;
then, pull the rope to clear the engine of excess fuel This could require pulling the starter
handle many times depending on how badly
the unit is flooded.
If the unit still doesn't start, refer to TROUBLESHOOTING
TABLE.
do not crowd the line when cutting around
hard objects (rock, gravel, fence posts, etc.),
which can damage thetrimmer
head, become
entangled in the line, or be thrown causing a
serious hazard.
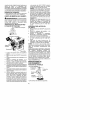
• The tip of the line does the cutting. You will
achieve the best performance
and minimum line wear by not crowding the line into
the cutting area. The right and wrong ways
are shown below.
Tip of the Line
Line Crowded Into
DoesTheCutting
Work Area
OPERATING
OPERATING
INSTRUCTIONS
POSITION
METHODS
_k WARNING:
Useminimumspeedand
ALWAYS WEAR:
Eye Protection
i
Heavy Shoes
Cut from your right to your left.
_k WARNING:
Always
wear eye protec-
tion and hearing protection. Never lean over
the trimmer head. Rocks or debris can ricochet or be thrown into eyes and face and
cause blindness or other serious injury.
Do not run the engine at a higher speed than
necessary. The cutting line will cut efficiently
when the engine is run at tess than full throttle.
At lower speeds, there is less engine noise and
vibration. The cuttJeg line will last longer and wilt
be less likely to "weld" onto the spool.
Always release the throttle trigger and allow the
engine to return to idle speed when not cutting.
To stop engine:
• Release the throttle trigger.
• Move the ON/OFF switch to the OFF position.
TRIMMER
LINE ADVANCE
Advance tine by ta pping the bottom of the cutting head lightly on the ground while engine is
running at full speed. The metal line IJmJter
blade attached to the guard will cut the line to
the proper length.
_WARNING:
Wrong
• The line will easily remove grass and
weeds from around walls, fences, trees and
flower beds, but it also can cut the tender
bark of trees or shrubs and scar fences.
• For trimming or scalping, use less than full
throttle to increase line life and decrease
head wear, especially:
** During light duty cutting.
Near objects around which the line canwrap such as small posts, trees or fence
wire.
• For mowing or sweeping, use full throttle for
a good clean job.
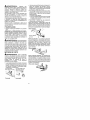
TRIMMING - Hold the bottom of the trimmer
head about 80 mm above the ground and at an
angle. Allow only the tip of the line to make contact. Do not force trimmer line into work area.
Trimming
3 in. (
)
Above Ground
/
_,
.
A"_'_\
_
_" _"_-_"
SCALPING - The scalping technique removes
unwanted vegetation. Hold the bottom of the
trimmer head about 80 mm above the ground
and at an angle. Allow the tip of the line to strike
the ground around trees, posts, monuments,
etc. This technique increases line wean
Scalping
....
Use only 2 mm diameter
line. Other sizes and shapes of Ithe will not advance properly and will result in improper cutting head function or can cause serious injury.
Do not use other materials
such as wire,
string, rope, etc. Wire can break off during
cutting and become a dangerous missile that
can cause serious injury.
MOWING - Your trimmer is ideal for mowing
Jn places conventional
lawn mowers cannot
reach. In the mowing position, keep the line
parallel to the ground. Avoid pressing the
head into the ground as this can scalp the
ground and damage the tool.
Swe
Mowin_
22-
--
._ii
,;,',
SWEEPING
- Thefanning
action of therotating line can be used for a quick and easy
clean up. Keep the line parallel to and above
the surfaces
being swept and move the tool
from side to side.
1.
,II_WARNING:
Disconnect
the spark
plug before performk/g maintenance
except
for carburetor adjustments.
CHECK
FOR LOOSE
FASTENERS
AND PARTS
• Spark Plug Soot
• Air Filter
• Housing Screws
• Assist Handle Screw
• Debris Shield
CHECK
FOR DAMAGED
OR
WORN
PARTS
Contact an authorized service dealer for replacement of damaged or worn parts.
• ON/OFF Switch - Ensure ON/OFF switch
functions properly by moving the switch to
the OFF position. Make sure engine stops;
then restart engine and continue.
• Fuel Tank - Discontinue
use of unit if fuel
tank shows signs of damage or leaks.
• Debris Shield - Disconfinue
use of unit if
debris shield is damaged.
INSPECT
AND CLEAN
UNIT AND
LABELS
• After each use, inspect complete unit for
loose or damaged parts. Clean the unit and
labels using a damp cloth with a mild detergent.
• Wipe off unit with a clean dry cloth.
CLEAN
AIR FILTER
A dirty air filter decreases
engine performance and increases
fuel consumption
and
harmful emissions. Always clean after every
5 hours of operation.
Clean the cover and the area around it to
keep dirt from falling into the carburetor
chamber when the cover is removed.
2. Remove parts as illustrated.
NOTE:
Do not clean filter in gasoline orother
flammable solvent to avoid creating a fire hazard or producing harmful evaporative emissions.
3. Wash the filter in soap and water.
4. Allow filter to dry.
5. Add a fewdrops of oil tothe filter; squeeze
the filter to distribute oil.
6. Replace parts.
_Filter
_
Screws
Cover
REPLACE
SPARK
PLUG
Replace the spark plug each year to ensure
the engine starts easier and runs better. Set
spark plug gap at 0,6 mm. Ignition timing is
fixed and nonadjustable.
1. Twist, then pull off spark plug boot.
2. Remove spark plug from cylinder and discard.
3. Replace with Champion
RCJ-6Y spark
plug and fighten securely with a 19 mm
socket wrench.
4. Reinstall the spark plug boot.
REPLACING
THE LINE
1. Move the ON/OFF switch to the OFF
position.
2. Disconnect the spark plug lead wire.
3. Remove spool by firmly pulling on tap button. Clean entire surface of hub and
spool. ReplacewJth a pre-wound spool, or
cut two lengths of 4 meters of 2 m m diameter Craftsman c"_brand line.
_kWARNING:
Never
use wire,
rope,
string, etc., which can break off and become a
dangerous missile.
4. Insert ends of the line about 1 cm into the
small hole on the inside of spool.
Spool
_.
Line exit holes
_-
Line in Notch
9.
Push spool into hub until Jt snaps into
place.
10. Pull the lines extending outside of the hub
to release them from the notches.
CARBURETOR
ADJUSTMENT
_I_WARNING:
Keep others away when
making idle speed adjustments.
Thetrimmer
head will be spinning during this procedure.
Wear your protective eq uipment and observe
all safety precautions.
The carburetor has been carefully set at the
factory. Adjustments may be necessary if you
notice any of the following conditions:
• Engine will not idle when the throtfle is released.
Make adjustments with the unit supported so
the cutting attachment
Js off the ground and
will not make contact with any object.
Hold
the unit by hand while running and making edjustments.
Keep all parts of your body away
from the cutting attachment and muffler.
Idle Speed
Adjustment
Allow engine to idle. Adjust speed until engine
runs without stalling (idle speed too slow).
• Turn idle speed screw clockwise
to increase engine speed Jfengine stalls or dies.
• Turn idle speed screw counterclockwise
to
decrease engine speed.
Line in Notch
/
Hub
5.
6.
7.
8.
Wind the line evenly and tightly onto the
spool. Wind in the direction of the arrows
found on the spool.
Push the line into the notches, leaving 7 ~
12 cm unwound.
Insert the line into the the exit holes in the
hub as shown in the illustration.
Align the notches with the line exit holes.
It= ...__....._
4_I_WAI_NIN(J:
Perform the following
steps after each use:
• Allow enginetocool
beforestoring
or transporting.
• Store unit and fuel in a well ventilated area
where fuel vapors cannot reach sparks or
open flames from water heaters, electric
motors or switches, furnaces, etc.
• Empty fuel tank before storing or transporting the unit.
• Store unit and fuel well out of the reach of
children.
• Store unit with all guards Jn place. Position
unit so that any sharp object cannot accidentally cause injury.
Screw
I_dle Speed
Air Filter
Cover
If you require further assistance or are unsure
about performing
this procedure, contact an
authorized service dealer.
SEASONAL
STORAGE
Prepare unit for storage at end of season or Jf
it will not be used for 30 days or more.
If your unit is to be stored for a period of time:
• Clean the entire unit before lengthy storage.
• Store in a clean dry area.
• Lightly oil external metal surfaces.
ENGINE
• Remove spark plug and pour 1 teaspoon of
40:t, 2-cycle engine oil (air cooled) through
the spark plug opening. Slowly pull the
starter rope 8 to 10 times to distribute oil.
• Replace spark plug with new one of recommended type and heat range.
• Clean
air filter.
• Check entire unit for loose screws, nuts,
and bolts. Replace any damaged, broken,
or worn parts.
• At the beginning of the next season, use
only fresh fuel having the proper gasoline to
oil ratio.
TROUBLESHOOTING
TABLE
,1_ WARNING:
recommended
Always stop unit and disconnect spark plug before performing all of the
remedies below except remedies that require operation of the unit.
TROUBLE
CAUSE
Engine
start.
1. ON/OFF switch
position.
2. Engine flooded.
will not
OTHER
• Do not store gasoline from one season to
another
• Replace your gasoline can if it starts to rust.
REMEDY
in OFF
3. Fuel tank empty.
4. Spark plug not firing.
5. Fuel not reaching
carburetor
6. Carburetor requires
adjustment.
1. Move ON/OFF switch to ON position.
2. See "Starting a Flooded Engine" in
Operation Section.
3. Fill tank with correct fuel mixture.
4. Install new spark plug.
5. Check for dirty fuel filter; replace.
Check for kinked or split fuel line;
repair or replace.
6. Contact an authobzed service dealer.
Engine will
not idle
properly.
1. Carburetor requires
adjustment.
2. Crankshaft seals worn.
3. Compression
low.
1. See "Carburetor Adjustment"
in
Service and Adjustments Section.
2. Contact an authorized service dealer.
3. Contact an authobzed service dealer.
Engine will not
accelerate,
lacks power,
or dies under
a load.
1. Air filter dirty.
2. Spark plug fouled.
1. Clean or replace air filten
2. Clean or replace plug
and regap.
3. Contact an authorized service
dealer.
4. Contact
an authorized
service
dealer.
5. Contact
an authobzed
service
dealer.
Engine
smokes
9xcessively.
3. Carburetor requires
adjustment.
4. Carbon build-up on
muffler outlet screen.
5. Compression
low.
1. Choke partially on.
2. Fuel mixture incorrect.
3. Air filter dirty.
4. Carburetor requires
adjustment.
Engine
hot.
runs
1. Fuel mixture
incorrect.
2. Spark plug incorrect.
3. Carburetor requires
adjustment.
4. Carbon build-up on
muffler outlet screen.
1. Adjust choke.
2. Empty fuel tank and refill with
correct fuel mixture.
3. Clean or replace air filter.
4. Contact an authorized service dealer.
I. Empty fuel tank and refill with
correct fuel mixture.
2. Replace with correct spark plug.
3. Contact an authorized service dealer.
4. Contact
an authorized
service dealer.
ECDeclaration
of Conformity
relating
to 2000/14/EC
We, Electrolux Home Products, Inc., Texarkana, TX, 75501, USA, T6]. : +1 903 223
4100, declare under sole responsibility
that the Craftsman
model 358,348321
grass
trimmer
was assessed in accordance with Annex M of the DIRECTIVE and from serial
numbers 2002-001N00001
and onwards, conforms to the provisions of the DIRECTIVE.
The cutting width is 431 m m. The measured sound power is 108,4 d B and the guaranteed
sound power is 112 dB.
Texarkana
02-04-15
Michael
Product
EC Declaration
Europe)
of Conformity
S. Sounds, Director
Safety and Standards
(Directive 98/37/EC,
Annex t], A) (Only applies to
We, Electrolux
Home Products, Inc., Texarkana, TX, 75501, USA, T61. : +1 903 223
4100, Declare under sole responsibility
that the Craftsman
model 358.348321
grass
trimmer from serial numbers 2002-001 N0000f and onwards, follows the provisions of the
DIRECTIVES
: g8/37/EC (machinery)
and 8g/336/EEC
(electromagnetic
compatibility),
including amendments
and is in conformity with the following standards: EN 292-2, EN
ISO 11806 and ClSPR 12.
SMP, The Swedish Machinery Testing Institute, Fyrisborgsgatan
3 S~754 50 Uppsala,
Sweden, has carried out voluntary
type approval.
The certificate(s)
are numbered:
SEC/g7/552.
Texarkana
02-04-15
_
_._
Michael
Product
10
S. Sounds, Director
Safety and Standards
MODEL:
Craftsman
358.348321
ENGINE
Displacement,
cm 3
Maximum engine power, measured in
accordance with ISO 8893, kW
ENGINE ROTATIONAL
SPEEDS
At maximum engine power
Recommended
maximum speed
Recommended
speed idling
FUEL AND LUBRICATION
SYSTEM
Fuel tank volume capacity, cm 3
Fuel consumption
at maximum engine power,
measured in accordance with ISO 8893, gift
Specified fuel consumption
at max. engine power,
measured in accordance with ISO 8893, g/kWh
WEIGHT
Without cutting attachment or shield, empty tank, kg
CUTTING ATTACHMENT
Cutting head assembly, part number
NOISE LEVELS (Octave Band Analysis 1OO-10OOOhz 1!3 Octave)
SOUND PRESSURE LEVELS measured in accordance with ISO 7917
Idling, dB(A)
Racing, dB (A)
SOUND POWER
Idling. dB(A)
Racing, dB(A)
25
0,7
8000
8000
4000
480
407
768
3,7
#71-85818
78
96
LEVELS
VIBRATION
LEVELS
FRONT HANDLE
Idling, m/s 2
Racing, m/s 2
REAR HANDLE
Idling, m/s 2
Racing, m/s 2
measured
in accordance
with ISO 10884
91
106
measured
YEAR OF CONSTRUCTION:
MANUFACTURER'S
ADDRESS:
in accordance
with ISO 7916
3,0
4,8
7,4
11,3
2004
Sears, Roebuck and Co.
3333 Beverly Road
Hoffman Estates, IL 60179
1I
Dep6sito
de
combustible
Mango de apoyo
anual
Eje
Interruptor
ON/OFF
Cebador
Acelerador
Ajuste delmango
de apoyo
Protector
Uave
Cuerda
de arranque
'_
/
Bombeador
C.
iADVERTENCIA!
Estecortabordespuedeserpeligroso.
Suusoimprudente
o inadecuado puede ocasionar lesiones graves e incluso rnortales.
Antes de usar el cortabordes,
lea atentamente
este manual de instrucciones
aseg0rese de habedo comprendido.
Nunca utilice cuchillas con esta herramienta.
D.
iADVERTENCIA!
A.
B.
E.
F.
G.
H.
I.
J.
K.
y
Elhilocortadorpuededespedirobjetosviolentamente.
Esto
puede ocasionarle
ceguera o lesiones. Utilice siempre una proteccion para los ojos.
Utilice siempre:
Protectores ac_sticos
Visor o gafas de protecci6n
El mango de apoyo debe colocarse siempre por debajo de la flecha.
Durante el trabajo, el operador debe asegurarse de que ninguna otra persona se
aproxime a menos de un radio de 15 metros de la maquina. Cuando se trabaje en
equipo, los operadores deber_n mantener entre si una distancia de seguridad de al
menos 15 metros.
Utilice gasolina sin plomo o de gran calidad y aceite para motores de dos tiempos
mezclado en proporci6n al 2,5%.
Interruptor ON/OFF (marcha y parada) del motor.
La fuerza sonido garantizada.
Velocidad maxima del eje rotatodo, en rpm
36
_AUVI::I_/I:::NL;IA:
Siempre que se
utilicen
herramientas
de jardineria,
deben
respetarse las normas de seguridad basicas
para reducir el riesgo de incendio y graves
lesiones.
Lea y Ileve a cabo todas
las
instrucdones.
i Este aparato mec&nico puede ser peligroso!
El operador es responsable del cumplimiento
de las instrucciones y advertencias indicadas
en este aparato yen
el manual
Antes de
utilizar el aparato, lea [ntegramente el manual
de instrucciones.
Familiaricese
con
los
mandos y el uso correcto de{ aparato. Permita
el uso de este aparato soto a personas que
previamente
hayan leido y comprendido,
y
postedormente
cumplan, {as advertencias
e
instrucciones
indicadas en este manual yen
el aparato. Nunca permita que este aparato
sea utilizado por nifios.
MANUAL DE
INSTRUCCIONES
INFORMACI6N
DE
SEGURIDAD SOBRE
EL APARATO
_PELI_RO:
Nunca acople cuchillas,
hilos metalicos ni cortadores de latigo a este
aparato.
Este
aparato
est_
dise6ado
exclusivamente
como cortabordes
de hilo
cortador. El uso de cualquier otro accesorio o
elemento adicional
aumentara
el riesgo de
lesiones.
@©O
EIbAUVI:::I_/I:::NL;IA:
El hilo cortador
despide objetos violentamente.
Esto puede
ocasionar ceguera o lesiones al operador o a
las personas que se encuentren cerca. Utilice
protectores para los ojos y las pJernas. No
acerque
ninguna parte del cuerpo al hilo
mientras este gire.
Gafas de seguridad o una protecck_n de ojos
similar
Mantenga alejados a ni6os, observadores
animales amas
de 15 metros. Detenga
aparato en cuanto alguien se le aproxime.
y
el
En caso
de producirse
situaciones
no
descritas
en
este
manual,
actge
con
precauci6n
y sentido
comgn. Si necesita
ayuda,
p6ngase
en contacto
con
su
distribuidor.
SEGURIDAD
DEL OPERADOR
• Vistase
adecuadamente.
Use
siempre
gafas de seguridad
o alggn otro tipo de
protecci6n
para
los ojoscuando
est6
operando
o dando mantenimiento
a su
unidad
(hay
gafas
de
seguridad
disponibles).
La protecci6n de los ojos debe
estar identificada por Z87.
• Use siempre una mascarilla protectora para
la cara si esta trabajando en un ambiente
polvoriento.
• Use pantalones
largos de tela gruesa,
mangas
largas,
botas y guantes.
Es
recomenda ble el uso de protecci6n para las
piernas.
• Use proteccion para tos pies. No opere la
maquina
descalzo
o con
sandalias.
Mant_ngase alejado de la linea giratoria.
• Asegure el cabello a la altura del hombro.
Asegure o remueva
toda pieza de ropa
suelta, cordones, tira ntes, flecos, etc. Estos
pueden
enredarse
en las partes
en
movimiento.
• El encontrarse
completamente
cubierto 1o
ayudara
a protegerse
de desechos
y
pedazos de plantas t6xicas que puedan set
arrojadas por la linea giratoria.
• Este alerta. No opere esta unidad cuando
este cansado, enfermo, molesto o bajo la
influencia
de alcohot,
dragas
o alggn
medicamento.
Este consciente
de Io que
esta haciendo, use su sentido comDn.
• Use protecci6n para los oidos.
• Nurlca ponga en l'narcha el aparato en un
lugar cerrado. La inhalaci6n de los gases de
escape del motor puede resultar letal.
• Mantenga los mangos limpios de aceite y
combustible.
SEGURIDAD
Y MANTENIMIENTO
DEL APARATO
• Antes
de realizar
cualquier
tarea
de
mantenimiento,
salvo
ajustes
en
el
carburador, desconecte la bujia.
• Antes de cada uso, aseggrese de que no
haya
piezas
daiiadas
o sueltas,
y
sustitgyalas
si fuera necesario.
Antes de
cada uso, aseggrese de que no haya fugas
de combustible,
y reparelas si las hubiera.
Mantenga
el aparato en buen estado de
funcionamiento.
• Antes de cada uso, sustituya
cualquier
pieza de{ ca bezal q ue este doblada, partida,
rota o deteriorada de alggn modo.
37
• Mantenga
su
unidad
seggn
el
procedimiento
recomendado.
Mantenga {a
linea de corte a una extensi6n adecuada.
• Use gnicamente
una linea de 2 mm de
diametro de la marca Craftsman@.
Nunca
utilice alambre, soga, hilo, etc.
• Instale adecuadamente
el protector antes
de usar la unidad. Use gnicamente
el
cabezal de corte especificado;
aseggrese
que se encuentre debidamente
instalado y
ajustado.
• Aseggrese
de
que
la
unidad
este
correctamente
ensamblada
como
se
muestra en este manual.
• Ajuste el carburador
con la parte inferior
apoyada para impedir que el hilo entre en
contacto con alggn objeto.
• Cuando realice ajustes en el carburador, no
permita que nadie se acerque.
• Utilice exclusivamente
los accesorios
y
recambios Craftsman@ recomendados.
• Deje que todo tipo de mantenimiento
y
servicio no explicado en este manual, sea
realizado
por
un agente
de servicio
autonzado.
SEGURIDAD
EN EL USO DE
COMBUSTIBLE
• Mezcle y trasvase el combustible
s61o en
lugares abiertos.
• No manipule
el combustible
en lugares
donde puedan producirse chispas o Ilamas.
• Utilice recipientes
homologados
para el
almacenamiento
de combustible.
• Impida que se fume cerca del combustible o
del aparato.
• Evite derramar el combustible
o el aceite.
Limpie cualquier resto de combustible que
haya podido derramarse.
• Antes de poner en marcha el motor, al_jese
al menos 3 metros del lugar de repostaje.
• Antes de quitar el tap6n del combustible,
detenga el motor y dejelo enfriar.
• Guarde
siempre
combustible
en
un
recipiente
aprobado
para
los liquidos
inflamables.
SEGURIDAD
AL CORTAR
_ADVERTENCIA:
Antes
de
cada
uso, inspeccione
ta zona de trabajo. Retire
cualquier
objeto (piedras,
cristales
rotos,
clavos, cabtes, etc.) q ue pueda ser despedido
o quedar enredado
en el hilo. Los objetos
duros pueden da_iar el cabezal podadory salir
despedidos,
con el consiguiente
riesgo de
lesiones graves.
• Utilicelo gnicamente para trabajos de poda,
siega y barrido. No Io utilice para recortar,
podar setos no cortar bordes.
• Pise siempre sobre suelo firme y mantenga
el equilibrio en todo momento. No estire el
cuerpo excesivamente.
• Mantenga todo su cuerpo bien alejado dei
silenciador y del hilo giratorio. Mantenga el
motor por debajo de la cintura. Cuandoesta
caliente,
el silenciador
puede
causar
graves quemaduras.
• Cortede su derecha a izquierda. Si corta del
lado izquierdo del protector, v_ a arrojar los
deshechos lejos del operado£
• Opere Qnicamente bajo la luz del dia o bajo
una buena luz artificial.
• Use tinicamente
para trabajos detallados
en este manual
TRANSPORTE
Y ALMACENAMIENTO
• Antes de guardar el aparato o transportar{o
en un veh[culo,
deje enfriar el motor y
asegQrelo bien.
• Antes de guardar o transportar el aparato,
vacie el dep6sito
de combustible.
Para
consumir el combustible
que quede en el
carburador, arranque el motor y dejelo en
marcha basra que se detenga.
• Guarde el aparato y el combustible
en un
lugar
donde
las
emanaciones
de
combustible
no puedan entrar en contacto
con chispas
ni llamas
procedentes
de
calentadores
de agua, motores electricos,
interruptores,
hornos, etc.
• GuardeeI aparatode modoqueel
limitador
de hilo cortador
no pueda
ocasionar
lesiones
accidentalmente.
Este aparato
puede colgarse por la eje.
• Guarde el aparato alejado del alcance de
los ni_os.
NOTA
ESPECIAL:
La
exposici6n
prolongada alas vibraciones
generadas por
herramientas
de manejo manual accionadas
por motores
de gasolina
puede
causar
lesiones vasculares o nerviosas en los dedos,
l;qanos
y
articulaciones
de
personas
propensas
a
padecer
des6rdenes
circulatorios
o
hinchazones
an6malas.
Algunos estudios ban Ilegado a reiacionar el
uso prolongado
de estas herramientas
a
bajas temperaturas
col/lesiones
vasculares
en
personas
normalmente
sanas.
Si
aparecen
sintomas
tales
corno
entumecimientos,
dolor, p6rdida de fuerza,
cambios en el color o la textura de la piel o
p6rdida de sensibilidad
en los dedos, las
manos o las articulaciones,
deje de utilizar la
herramienta y acuda a un medico. E{ uso de
sistemas para la reducci6n de vibraciones no
garantiza que se eviten estos problemas. Los
usuarios
que
utilicen
herramientas
motorizadas
con regulabdad
deben vigilar
estrechamente
su estado fisico y el correcto
funcionamiento
de esta herramienta.
38
,l_lkADVERTENCIA:
AsegQrese
deque
el aparato est6 correctamente
ensamb]ado
todas ]as sujeciones firmes.
CONTENIDO
DE LA CAJA
,_ADVERTENCIA:
Es normal que el filtro del combustible go]pee
el tanque de combustible
cuando 6ste se
encuentre vacio.
Es normal encontrar combustible
o residuos
de aceite en e] silenciador
dado al ajuste de]
carburadory a pruebas hechas por la f_brica.
DEL
El protector debe
estar propiamente
insta]ado.
El protector
provee una protecci6n
parcia] a] usuado y a
otros de1 riesgo de objetos arrojados pot la
unidad, y est_ equipado con una cuchi]la de
linea que corta el exceso de linea giratoria a
una extensi6n adecuada. La cuchil]a de ]inea
(por debajo del protector) es afilada y podria
causar cortaduras.
1. Remueva la tuerca de {a protector
2. ]ntroduzca el extremo
de ]a soporte a
trav6s de la ranura de ]a protector.
3. Haga pivotar ]a protector hasta conseguir
que el torni]lo pasador atraviese el orificio
de la soporte.
4. Reinstale la tuerca y apriete firmemente
con una Ilave (incluidas).
MANGO
Protector
,_ADVERTENCIA:
Cuando ajusteel
2.
Afloje la tuerca en forma de ala en el
mango.
Rote el mango en e] tubo y p6ngalo en
posici6n vertical; enderece la tuerca en
forma de ala.
,l_lkADVERTENCIA:
Antes
de
comenzar,
lea
]a
informaci6n
sobre
combustible que aparece en las instrucciones
de seguridad.
Si tiene alguna duda con
respecto alas instrucciones
de seguddad, no
Ilene el aparatocon combustible.
P6ngase en
contacto con e] Distbbuidor Autorizado.
SUMINISTRO
MOTOR
DE COMBUSTIBLE
AL
,_ADVERTENCIA:
Retire ]a tapa de]
tanque de combustible
lentamente
cuando
vaya a abastecer el aparato.
Este motor
esta
homologado
para set
utilizado con gaso]ina sin p]omo. Antes de
ponerlo
en marcha,
]a gasolina
debe
mezclarse
con aceite de a]ta calidad para
motores de 2 tiempos refrigerados
por aire.
Recomendamos
utilizar aceite de ta marca
Craftsman@
mezclado
en proporci6n
40:1
(mezcla
a] 2,5%).
Para
obtener
una
proporci6n de 40:1 deben mezclarse 4 litros
_
/Ranura
Soporte
mango, aseg0rese que 6ste se mantenga por
debajo de la etiqueta de seguridad.
El mango
de apoyo debe colocarse siempre por debajo
de la flecha.
1.
PROTECTOR
y
Use la siguiente ]ista para verificar que todas
la piezas hayan sido incluidas:
Modelo
358.348321
• Cortadora de hierba
• Protector
• Tuerca (atomi]lada en la protector)
• Llave para el montaje del protector
• Recipiente de Aceite
Examine las piezas daSadas. No ]as uti]ice.
AJUSTE
COLOCACION
DE LA
PARA RECORTADORA
Cu
de gasolina sin plomo con 95 ml de aceite. NO
USE aceite de autos o botes. Estos aceites
pueden causar da6os a] motor.
Cuando
mezcle e] combustible,
siga las instrucciones
en el envase de aceite. Una vez el aoeite es
aSadido a la gasolina, agite el envase por un
breve espacio de tiempo pa ra asegu rat q ue el
combustible
sea mezclado comp]etamente.
Siempre
lea y siga las instrucciones
de
seguridad relacionadas
al combustible
antes
de abastecer el tanque de combustible de su
aparato.
IMPORTANTE
La experiencia demuestra que los combustibles
con mezcla de alcohol (denominadas gasoho], o
bien uti]izando etano] o metanol) pueden atraer
]a humedad, Io que provoca su separaci6n y {a
formaci6n
de
acidos
durante
su
almacenamierto.
Los gases _cidos pueden
dafiar el sistema de suministro de combustible
de] motor mientras este guardado. Para evitar
problemas en el motor, vacie ei sistema de
combustible si va a guardarlo durante mas de un
mes. Purgue el del_Ssito de gasoJina, ponga en
39
marcha el motor y d6jelo funcionar haste que se
vacien
los tubos
y el carburador.
Use
combustible
nuevo la pr6xJma temporada.
Nunca utilice productos limpiadores de motores
o carburadores pare el del_sito de combustible,
ya que podrian producirse da5os Jrreparables.
PARADA
DEL APARATO
• Pare apagar el motor mueva el interruptor
ON/OFF ala posici6n OFF u PARADA.
PUESTA
EN MAROHA
DEL APARATO
_IkADVERTENCIA:
9.
Elcabezalcortador
comenzar_ a girar a_mismo tiempo que el motor.
Evite cualquier contacto con el silenciado£
Cuando esta caliente, el silenciador
puede
causer graves quemaduras.
ARRANQUE
DEL MOTOR
EN FRIO
(o despu_s
del
repostaje)
Posici6n
Cuerda
de arranque
de arranque
cebador
Bombeador
Silenciador
1.
2.
3.
4.
5.
6.
7.
8.
Coloque el aparato sobre una superficie
plana.
Mueva el interruptor ON/OFF ala posici6n
ON.
Presione lentamente el bombeador de 6
veces.
Mueva la palanca del cebador
a la
posicion FULL CHOKE (a toda marcha).
Oprima y sujete el gatillo del acelerador
durante todos los pesos restantes.
Tire de la cuerda de arranque firmemente
hasta que el motor suene como si fuera a
encender, pero no hale la cuerda m _s de 6
veces.
Tan pronto el motor suerle como si fuera a
encender, mueva la palanca del cebadora
HALF CHOKE.
Hale la cuerda de arranque haste que el
motor encienda, pero no hale m_s de 6
veces. Si el motor no enciende
despues
de 6 veces (en la posici6n de HALF
CHOKE ) mueva la palanca del cebador a
la posici6n de FULL CHOKE y presione el
born beador 6 veces. Opd maw sostenga
el
acelerador y hale la cuerda de arranq ue 2
veces mas. Mueva la palanca del cebador
ala posici6n de HALF CHOKE y hale la
cuerda de arranque haste que el motor
encienda, pero no mas de 6 veces.
AVISO:
Si el motor sigue sin encender,
probablemente
este ahogado. Proceda a
ARRANQUE
DEL MOTOR AHOGADO.
Una vez el motor este encendido, dejelo
funcionar por 10 segundos, luego mueva
la palanca del cebador a OFF CHOKE.
Deje la aparato funcionando
por otros 30
segundos en OFF CHOKE antes de soltar
el acelerador.
AVISO:
Si el motor deja de funcionar en
la posicion de OFF CHOKE, mueva la
palanca del cebador
ala
posici6n de
HALF CHOKE y hale la cuerda haste que
el motor encienda, pero no mas de 6
veces.
ARRANQUE
DEL MOTOR
EN
CALIENTE
1. Mueva el interruptor ON/OFF ala posici6n
de ON.
2. Mueva
la palanca
del cebador
ala
posicion de HALF CHOKE.
3. Oprima
y
sostenga
el
acelerador.
Mantenga
el acelerador
oprimido haste
que el motor funcione normalmente.
4. Optima la cuerda de arranque haste que
el motor encienda, pero no mas de 5
veces.
5. Deje que el motor funcione
pot 15
segundos,
luego mueva la palanca det
cebador a {a posici6n de OFF CHOKE.
AVISO:
Si el motor no ha encendido, halela
cuerda de arranque otras 5 veces. Si el motor
sigue
sin encender,
probablemente
este
ahogado.
ARRANQUE
DEL MOTORAHOGADO
Los
motores
ahogados
pueden
ser
encendidos
poniendo la palanca del cebador
en la posici6n de OFF CHOKE; luego, hale la
cuerda de arranque haste eliminar el exoeso
de combustible.
Esto puede requerir que se
tire det mango de arranque varies veoes,
dependiendo
cu_n ahogado est6 la unidad.
Si la unidad sigue sin encender, refierase ala
TABLA DIAGNOSTICA.
INSTRUCCIONES
DE
FUNCIONAMIENTO
POSICI()N
UTILICE
DE TRABAJO
StEMPRE:_
acgsticos
Protecci6n
Protectores_ r
Pantalone
largos
_
resistente_-J_
Calzado
_
Corte siempre
4O
_
ocular
}
:
de derecha
a izquierda.
_kADVERTENClA:
Siempre
use
protecci6n para los ojos y protecci6n para los
oidos. Nunca se apoye sobre el cabezal de la
podadora. Piedras o desechos
pueden ser
arrojados a la cara u ojos por la unidad y causar
ceguera u otros ddics senos.
No encienda el motor a una velocidad m_s
alta de la necesada.
La linea de de corte
cortar_ eficJerltemerlte
cuando el motor es
utilizado a una velocidad m_s baja.
A velocidades
mas bajas, habra menos ruido
y vibraci6n.
La linea de corte tendra mas
duraci6n y tendra menos probabilidades
de
fundirse en la bobina.
Siempre suelte el aceierador
y deje que el
motor regrese a la velocidad inactiva cuando
no este cortando.
Para detener el motor :
• Suelte el aceierador.
• Mueva el interruptor ON/OFF a la posici6n
OFF.
• La linea removera f_cilmente et c6sped y la
hierba de alrededor de paredes, cercas,
_rboles y lechos de flores, pero tambi6n
puede cortar l a corteza tierna de los arbotes
o arbustos y da6ar las cercas.
• Para arreglar o dar forma, use menos de la
aceleraci6n completa para a u mentar la vida
0til de la linea y reducir el uso del cabezal,
especialmente:
• Durantecortes
ligeros
• Cerca de objetos d6nde la linea se pueda
enredar como peque6os postes, arboles
o alambres de cercas.
• Para cortar o barrer, use la aceleracion
maxima para un trabajo limpio.
PAPA RECORTAR
- Mantenga la base del
cabezal de la podadora alrededor de 80 mm
sobre el terreno yen angulo. Deje que soto el
extremo de la linea haga contacto. No fuerce
la linea de la podadora a el area de trabajo.
Para recortar
/
_,
,
AVANZAR LA PODADORA EN LINEA
El linea cortador avanzara cada vez que el
cabezal golpee IJgeramente contra el suelo
con e{ motor a plena potencJa. La cuchilla
metalica Iimitadora de linea, que est_ unida a
la protector
para recortadora,
mantiene
el
linea con la Iongitud ideal
_11_ADVERTENCIA:
Use_nicamentela
linea de 2 mm de diametro de linea redonda.
Otros
tamafios
y formas
de linea
no
avanzaran adecuadamente
y puede resultar
en el real funcionamiento
del cabezal de corte
o puede causar serios dafios. No use otros
materiales como alambre, soga, hilo, etc. E{
alambre se puede romper mientras se est_
cortando y resulta r en un objeto peligroso que
puede causar senos da6os.
METODOS
DE CORTE
_kADVERTENCIA:
Correcta
ground
Use la velocidad
minima y no bloquee la linea cuando est_
cortando alrededor de objetos duros (piedras,
arena gruesa, postes de cercas, etc.), que
pueden
daiiar
el cabezal
de code,
o
enredarse
en la linea,
o set arrojados
causando un serio peligro.
• La punta de la linea hace el corte. Alcanzara
un
desempeiio,
mejor
}/ un minimo
dela,uso
hnea sl no bloquea la hnea del area a cortar.
Las formas correctas e incorrectas
est_n
mostradas a continuaci6n.
La punta de la
La linea est_ metilinea hace el corte
da dentro de] ma-
___,
80
PARA ESCALPAR
- La t6cnica de arrancar
remueve vegetaci6n no deseada del terreno.
Mantenga la base del cabezal de la podadora
alrededor de 88 mm sobre el terreno yen
angulo. Deje que solo el extremo de la linea
toqueel terreno alrededor de _rboles, postes,
rnonumentos,
etc. Esta t6cnica aul;qenta el
uso de la line&
Para esc_l ar
PAPA CORTAR CESPED - Su podadora es
ideal en lugares donde cortadoras de cesped
convencionales
no pueden alcanzar. En la
posici6n de cortar, mantenga la {inea paralela
a l terreno. Evite presionar el cabezal contra el
terrenoya que esto puede arrancar el terreno
y da6ar el instrumento.
Para cortar c_sped
te
ri._il d._
e tra_..___baj_
Incorrecta
41
, •
PARA BARRER ~ La acci6n de ventilar de la
l inea giratoria puede ser usada para soplar los
desechos fuera del area. Mantenga la {inea
paralela y sobre la superficie
del area y
balancee el instrumento de lado a lado.
4;_AUVI:::ff/I:::NL;IA:
Antes de realizar
cualquier
tarea
de mantenimiento,
salvo
ajustes en el carburador, desconecte la bujia.
Se recomienda encomendar a un distribuidor
todas tas reparaciones
y ajustes no desedtos
en este manual.
VERIFIQUE
LOS SUJETADORES
PIEZAS
SUELTAS
• Caja de bujias
• Filtro de aire
• Tornillos de la caja
• Tornillo del mango de apoyo
• Protector
VERIFIQUE
DA_IADAS
QUE NO HAYA
O GASTADAS
Y
PIEZAS
Encargue la sustituci6n de piezas da_adas o
desgastadas a un distribuidor autodzado.
• Interruptor ON/OFF - AsegQrese de que la
interruptor
ON/OFF
funcione
apropiadamente moviendota
a ta posici6n
OFR
AsegQrese de que el motor se detenga;
luego, vuelva a poner el motor en marcha y
continue.
• Dep6sito de combustible
- Si el dep6sito
est_ daiiado o tiene fugas, deje de utilizar la
unidad inmediatamente.
• Protector ~ descontinue el uso de la unidad
si el protector esta da5ado.
INSPECCIONE
Y
LIMPIE
EL
APARATO
Y SUS ETIQUETAS
• Despu6s
de cada uso, inspeccione
el
aparato por completo para verificar que no
hayan piezas sueltas o daSadas.
• Limpie el aparato y sus etiquetas utilizando
un trapo hQmedo con un detergente suave.
Para ._
i!_i
LIMPIE EL FILTRO
DE AIRE
Un fiitro de aire sucio reduce el rendti;qiento det
motor y aumenta el consumo de combustible y
las emisiones nocivas. Umpie puntualmente el
fittro cada 5 horas de funcionamiento.
1. Limpie la cubierta y la zona que la rodea
para evitar que penetre suciedad en la
o_rnara del oarburador en el momento de
abrir la cubierta.
2. Retire las piezas como se indica en la
ilustraci6n.
AVISO:
No limpie el filtro con gasolina ni con
otros disolventes inflamables. De Io contrabo,
podria crear un desgo de incendio o producir
emanaciones
perjudiciales.
3. Lave el filtro con agua y jab6n.
4. Deje secar el filtro.
5. Aplique varias gotas de aceite al filtro;
apriete el filtro para distribuir el aceite
6. Vuelva a colocar las piezas.
_ro
_'_
de aire
Tomillo
filtro de aire
REEMPLAZO
DE LA BUJIA
Cambie la bujia anualmente para asegurarse
de que el rnotor se ponga en marcha con
mayor facilidad y que funcione mejor. Fije la
separaci6n
de la bujia en 0,6 mm. La
regulaci6n de tiempo de arranque es fija y no
ajustable.
1. Gire y luego tire del casco de la bujia.
2. Retire la bujia del cilindro y desk, chela.
3. Reemplace
con una bujia de la marca
Champion
RCJ~6Y y ajuste firmemente
con una Ilave de dados de 19 ram.
4. Vuetva a instalar el casco de la bujia.
42
REEMPLAZO
1.
2.
3.
DE LA UNEA
AJUSTE
Mueva el interruptor a ta posici6n OFF u
PARADA.
Desconecte el cable de alimentaci6n
dela
buj{a.
Desmonte]a
bobina tirandocon fuerza det
bot6n
de
bloqueo.
Limpie
toda
la
superficie del recept_culo y de {a bobina.
Utilice
como
recambio
una
bobina
prebobinada, o bien corte dos ]argos de 4
metros
de hilo Craftsman _ con
un
diametro de 2 ram.
_kADVERTENCIA:
Nunca
utilice
cable, cuerda,
alambre,
etc. que pueda
partirse y transformarse
en un peligroso
proyectiL
4. Inserte aproximadamente
1 cm de cada
extremo del hilo por los peque_os orificios
interiores de la bobina.
Bobina
Orificios
hilo _
\
de salida del
Hilo insertado en
]a muesca
\
Hi]o insertado
Receptaculo
AL
CARBURADOR
,_ADVERTENCIA:
Mantenga a otras
personas alejadas de la zona en donde se
encuentre haciendo ajustes de marcha lenta.
El cabezal de corte se mantendr_
girando
durante este procedimiento.
Use su equipo
protector y observe todas 1as precauciones
de seguridad.
El
carburador
ha
sido
ajustado
cuidadosamente
en la f_brica. Posiblemente
sea neoesario
Racer ajustes
si se nora
cua]quiera de las siguientes condiciones:
• El motor no funciona
en marcha lenta
cuando se suelta el aceleradolt
Haga los ajustes sosteniendo
e] equipo de
manera
que el acoesorio
de corte
se
encuentre
alejado
det sueto y no haga
contacto
con ningQn objeto.
Sostenga
e]
aparato manualmente
l;qientras el motor se
encuentre
enoendido y mientras usted se
encuentre
haciendo los ajustes.
Mantenga
todas las partes de su cuerpo a]ejadas de los
accesodos
de corte y del silenciador.
Marcha
Lenta
Deje el motor en marcha lenta. Ajuste las
revo]uciones hasta que el motor se mantenga
en marcha sin ca]arse (]a marcha ]enta es
demasiado lenta).
• GJre el tornil]o de marcha lenta hacJa ]a
derecha para aumentar las revoluciones si el
motor se ahoga o se para.
• Gire el tornil]o de marcha lenta hacJa la
izquierda para reducJr las revoluciones.
en
la muesca
5.
Enrolle el hi]o uniforme y fuertemente en la
bobina. E nrolle en el sentido de las flechas
indicadas en la bobina.
6. Introduzca
el hilo a presJ6n
en las
muescas,
dejando entre 7 y 12 cm sin
enrol]ar.
7. Introduzca el hilo por los orificios de sa]ida
de{ receptaculo,
segQn se muestra en la
ilustraci6n.
8. Haga coincidir
]as muescas
con los
orificios de salida del hilo.
9. ]ntroduzca
la bobina a presi6n
en el
receptaculo basra que quede encastrada
en su sitio.
10. ]qre de] hi]o que asoma pot el recept_culo
para liberarlo de la muesca.
Ajuste de
la Marcha
Lenta
Tornillo
de
Tapa del
Filtro de
Aire
Si requiriera ayuda adicional o no se sintiera
seguro al desempeSar
este procedimiento,
entre
en contacto
con
el distribuidor
autorizado del servicio.
43
_AUVI::K/I::NUIA:
Prepare la unidad
para su almacenamiento al final de la temporada
o en caso de que no vaya a _lizarse durante 30
dias o mas.
• Antes de almacenar o transpodar el aparato,
deje enfdar el motor y asegQrelo bien.
• Guarde el aparato y el combustible en un
lugar bien ventJtado donde los vapores
emanados del combustible no puedan entrar
en contacto
con chispas
ni llamas de
calentadores
de agua, motores el_,ctdcos,
interruptores, homos, etc.
• Antes de guardar o transportar el aparato,
vacle el dep6sito de combustible.
• Guarde el aparato y d combustible fuera de_
alcance de los niiios.
• Almacene
el
aparato
con
todas
las
protecciones montadas. Coloque el aparato
de modo que ningQn objeto afilado pueda
ocasionar lesiones accidentales.
ALMACENAJE
DE LA UNIDAD
POR
TEMPORADAS
Prepare su unidad para ser almacenada
por
fin de temporada o si no lava a usar por mas
de 30 dias.
Si su unidad va a ser almacenada
por un
pedodo de tiempo :
TABLA
• Limpie
la unidad
completa
antes
de
almacenarla
por un periodo largo.
• Almacenela en un lugar limpio y seco.
• Engrase
ligeramente
las
superficies
externas de metal.
MOTOR
INTERNO
• Extraigalabujiayvierta
1 cucharadapeque_a
de aceite para motores
de 2 flempos
(refrigerados por aire) a trav6s del hueco de la
bujia. ]]re despacio de la cuerda de arranque
de 8 a 10 veces para distribuir el aceite.
• Sustitwa
la bujia ]3or una nueva del tipo y
grado termico recomendados.
• Umpie el filtro de aire.
• Compruebe que no haya tomiltos, tuercas ni
pasadores
sueltos en toda la m_quina.
Sustitwa cualquier pieza desgastada, rota o
da6ada.
• En la siguiente ternporada, utilice solamente
combustible nuevo con la proporci6n correcta
de aceite y gasolina.
OTROS
• No almacene gasolina de una temporada a
otra.
• Cambie el recil_ente de gasolina si comienza
a oxidarse.
DIAGNOSTICA
_k ADVERTENCIA:
Siempre apague el aparatoy desconecte la bujia antes de hacer cualquiera de las reparaciones recomendadas a continuaci6n que no requieran que
la unidad est6 en operaci6n.
SINTOMA
CAUSA
El motor no
arral/ca.
I. El interruptor ON/OFF esta
en la posici6n OFR
2. El motor esta ahogado.
SOLUCION
3. El tanque de combustible
esta vacio.
4. La bujia no est_ haciendo
chispa.
5. El combustible no est_
Ilegando al carburador.
6. El carburador
ajuste.
El motor no
anda en
marcha lenta
como debe.
requier
I. El carburador requier
ajuste,
2. Las lunas del cigue6al
estan gastadas,
3. La compresi6n est_ baja.
1. Mueva el interruptor ON/OFF a la
posici6n ON.
2. Yea "Arranque de Motor Ahogado"
en la secci6n Uso.
3. Llene el tanque con la mezcla
correcta de combustible.
4. instale una bujia nueva.
5. Verifique si el filtro de combustible
no
est6 sucio; cambielo. Verifique si hay
dobleces en la linea de combustible
o si est_ partida; reparela o cambiela.
6. Entre en contacto con el distribuidor
autobzado del servicio.
I. Vea "Ajuste al Carburador"
en la
secci6n Servicio y Ajustes.
2. Entre en contacto con el distribuidor
autorizado del servicio.
3. Entre en contacto con el distribuidor
autorizado del servicio.
44
TABLA
DIAGNOSTICA
SINTOMA
El motor
acelera,
falta
potencia
se para
carga.
(continuado)
CAUSA
no
le
o
bajo
SOLUCION
1. El filtro de aire esta sucio.
2. La bujia est_ carbonizada.
3. Slcarburadorrequiere
ajuste.
4. Acumulaci6n
de carb6n.
5. La compresi6n
est_ baja.
f. Limpie o cambie el filtro
2. Limpie o cambie la bujia
la separaci6n.
3. Entre en contacto con el
autorizado del servicio.
4. Entre en contacto con el
autorizado del servicio.
5. Entre en contacto con el
autorizado del servicio.
de aire.
y calibre
distribuidor
distribuidor
distribuidor
El motor
hu f'rlea excesivamente
1. El cebador esta parcialmente accionado.
2. La mezcla de combustible
se ha hecho incorrectameRte.
3. El filtro de aire esta sucio.
4. El carburador requiere
ajuste.
1. Ajuste el cebador.
Slmotor
marcha con
temperatura
elevada.
1. La mezcla de combustible
est_ se he hecho
incorrectamente.
2. Se ha instalado la bujia
incorrecta.
3. El carburador requiere
ajuste.
4. Acumulaci6n
de carb6n.
1. Vaci6 el tanque de combustible
y
Ilenelo de combustible con la mezcla
correcta.
2. Cambie por la buj{a correcta.
Dectaracibn
de conformidad
2. Vacie el tanque de combustible y
116nelo de combustible
con la mezcla
correct&
3. Limpie o cambie el filtro de aire.
4. Entre en contacto con el distribuidor
autobzado del servicio.
3. Entre en contacto con el distdbuidor
autorizado del servicio.
4. Entre en contacto con el distbbuidor
autorizado del servicio.
de la CE relacionada
con 2000/14/CE
Nosotros, Electrolux
Home Products, Inc., Texarkana, TX 75501, EE.UU., tel6fono: +1
903 223 4100, declara bajo responsabilidad
exclusiva
que la cortadora
de hierba
Craftsman
modelo
358.348321,
ha sido evaluada de acuerdo con et Anexo V de ta
DIRSCTIVA y a partir de los nQmeros de serie 2002-001 N00001 en adelante, se ajusta
alas estipulaciones
de la DIRECTtVA
La anchura det corte es 431 ram. La medicion de
fuerza de sonido es de 108,4 dB y la fuerza sonido garatizada es de 112 dE.
Texarkana 02-04-15
Michael S. Bounds, Director
Safety and Standards (Seguridad
45
y Normas)
Declaraci6n
en Europa)
de conformidad
de la CE (Directiva
98/37/CE_ Anexo II, A) (s61o aplicable
Nosotros, Electrolux Home Products,
Inc., Texarkana, TX 75501, EE.UU., tei6fono: +1
903 223 4100, declara bajo su exctusiva responsabilidad
que la cortadora
de hierba
Craftsman
modelo
358.348321,
desde el n0mero de sede 2002-001N00001
en
adelante, cumpie lo estipulado en las DIRECTIVAS:
98/37/CE (maquinaria) y 89/336/CE
(compatibilidad
electromagn6tica),
incluyendo enmiendas,
y que cumple las siguientes
normas: EN 292-2, EN ISO 11806 y ClSPR 12.
SMP, el Instituto Sueco de Pruebas de Maquinaria,
Fydsborgsgatan
3 S-754 50 en
Uppsala, Sueeia, ha realizado una homotogaci6n
votuntaria.
Los certificados
estan
numerados:
SEC/97/55Z
Texarkana
02-04-15
Michael S. Bounds,
Director
Safety and Standards
(Seguddad
MODELO:
Craftsman
358.348321
MOTOR
Cilindrada, en cm 3
Melocidad maxima del motor, medida
seg0n iSO 8893, en kW
VELOCIDADES
DE ROTACl0N
DEL MOTOR
A plena potencia
Regimen de giro maximo recomendado
Regimen de giro al ralenti recomendado
SISTEMAS
DE COMBUSTIBLE
Y LUBRICACI(_N
Capacidad del dep6sito de combustible,
en cm 3
Consumo de combustible
con el motor a plena potencia,
medido seg0n ISO 8893, en g/h
Consumo especifico de combustible
con el motor a plena potencia,
medido segQn ISO 8893, en g/kWh
PESO
Sin el accesobo cortador o protector y con el dep6sito vacio, en kg
ACCESORIO
CORTADOR
Cabezal de corte, no. de pieza
NIVELES DE RUIDO (an_lisis de banda de oetavas 100-10000
Hz
1/3 de octava)
NIVELES DE PRESION ACOSTICA,
medidos seg_n ISO 7917
AI ralenti, en dB(A)
En aceleraci6n, en dB(A)
NIVELES DE POTENClA AC0STICA,
medidos seg0n lSO 10884
AI ralenti, en dB(A)
En aceleraci6n, en dB(A)
NIVELES DE VIBRAClON,
medidos segQn ISO 7916
MANGO DELANTERO
AI ralenti, en m/s 2
En aceleracJ6n, en m/s 2
MANGO TRASERO
AI ralenti, en m/s 2
En aceleraci6n, en m/s 2
Ai_lO DE FABRICACION:
DIRECCION
POSTAL DEL FABRICANTE:
2OO4
Bears, Roebuck and Co.
3333 Beverly Road
Hoffman Estates, IL 60179
46
y Normas)
25
0,7
8000
8000
4000
450
407
768
3,7
#71-85818
78
96
91
106
3,0
4,8
7,4
1I ,3