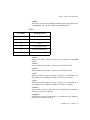
1
ScanShop
®
Users Guide
Scan, print, store,
retrieve and display
your images.
ScanShop makes your
scanner easy to use!
For version 4.6
Copyright Notices
Copyright © 1992 - 2001 Vividata, Inc. All Rights Reserved Worldwide.
ScanShop is a registered trademark of Vividata, Inc. All other names are the marks of their respective holders.
This manual, as well as the software described in it, is furnished under license and may only be used or copied in accordance with the
terms of the Vividata End-User License Agreement license.
Except as permitted by such license, no part of this publication may be reproduced, transmitted, transcribed, stored in a retrieval system, or
translated into any language, human or computer, in any form or by any means, electronic, mechanical, recording, or otherwise, without
the prior written permission of Vividata, Inc.
The information in this manual is furnished for informational use only, is subject to change without notice, and should not be construed as
a commitment by Vividata, Inc. Vividata, Inc. assumes no responsibility or liability for any errors or inaccuracies that may appear in this
manual.
The gsc driver for AI/X is Copyright © 1997 by Matthew Jacob, [email protected], http://www.feral.com, and is provided under the
terms the GNU Public License. Its source code is available from the URL above for no fee.
Portions of this code use the “libtiff” public domain TIFF support software which has the following copyrights:
Copyright (c) 1988-1996 Sam Leffler
Copyright (c) 1991-1996 Silicon Graphics, Inc.
The license manager portion of this product is based on:
FLEXlm v6.1, Copyright 1988-2001, Globetrotter Software, Inc.
This software is based in part on the work of the Independent JPEG Group.
If this product’s marketing or other materials include the IBM “AIX Ready” mark, IBM Corporation does not warrant and is not responsible for the operation of this Software, which carries the AIX READY trademark of the IBM Corporation used under license.
X Window System is a trademark of The Massachusetts Institute of Technology. UNIX is a registered trademark of AT&T Bell Laboratories. DEC and DECWindows are trademarks of Digital Equipment Corporation. Postscript is a trademark of Adobe Systems. The appearance of the 3-D widget set shown in these documents and manuals is copyrighted by the Hewlett-Packard Company. Motif is a trademark
of the Open Software Foundation. SunOS, OpenWindows, and ToolTalk are trademarks of Sun Microsystems, Inc. Ultrix and DECstation
are registered trademarks of Digital Equipment Corporation.
The following statement appears in M.I.T.’s X documents:
Copyright 1985, 1986, 1987, 1989 Massachusetts Institute of Technology, Cambridge, Massachusetts, and Digital Equipment
Corporation, Maynard, Massachusetts.
Permission to use, copy, modify, and distribute this documentation for any purpose and without fee is hereby granted, provided
that the above copyright notice appears in all copies and that both that copyright notice and this permission notice appear in
supporting documentation, and that the name of M.I.T. nor Digital not be used in advertising or publicity pertaining to distribution of the software without specific, written, or prior permissions.
M.I.T. and Digital make no representations about the suitability of the software described herein for any purpose. It is provided
“as is” without express or implied warranty.
U.S. Government Provision
ScanShop User’s Guide - i
Copyright Notices
If this Software is acquired by or on behalf of a unit or agency of the United States Government this provision applies. This Software:
a) Was developed at private expense, and no part of it was developed with government funds,
b) Is a trade secret of Vividata, Inc. for all purposes of the Freedom of Information Act,
c) Is “commercial computer software” subject to limited utilization as provided in the contract between the vendor and the governmental
entity, and
d) In all respects is proprietary data belonging solely to Vividata, Inc.
For units of the Department of Defense (DoD), this Software is sold only with “Restricted Rights” as that term is defined in the DoD Supplement to the Federal Acquisition Regulations, 52.227-7013 (c)(1)(ii) and:
Use, duplication or disclosure is subject to restrictions as set forth in subdivision (c)(1)(ii) of the Rights in Technical Data and Computer
Software clause at FAR 52.227-7013. Manufacturer:
Vividata, Inc.
1300 66TH Street
Emeryville, CA 94608
U.S.A.
If this Software was acquired under a GSA Schedule, the U.S. Government has agreed to refrain from changing or removing any insignia
or lettering from the Software or the accompanying written materials that are provided or from producing copies of manuals or disks
(except for backup copies) and:
(e) Title to and ownership of this Software and documentation and any reproductions thereof shall remain with Vividata, Inc.,
(f) Use of the Software and documentation shall be limited to the facility for which it was acquired except under special contract, and:
(g) If use of the Software is discontinued to the installation specified in the purchase/delivery order and the U.S. Government desires to use
it at another location (except under special contract), it may do so giving prior written notice to Vividata, Inc., specifying the type of computer and the new site. U.S. Government personnel using this Software, other than under DoD contract or GSA Schedule, are herby on
notice that use of this Software is subject to restrictions which are the same as or similar to those specified above.
Request for Comments
In our effort to provide you with the best documentation possible, we welcome
any comments and suggestions you may have about our products. Please direct
communications to us at:
Vividata, Inc.
1300 66TH Street
Berkeley, CA 94608
U.S.A.
Phone: (510) 658-6587
Fax: (510) 658-6597
Toll-free Sales: (800) 704-2640
Email: [email protected]
World Wide Web: http://www.vividata.com
ii - ScanShop User’s Guide
Table of Contents
Chapter 1: Introduction to Image Processing.............................................. 1
Overview..........................................................................................1
About Scanners ................................................................................1
About Resolution .............................................................................1
Matching Scan to Output .................................................................3
Common Image Processing Features...............................................3
Chapter 2: Before You Begin ........................................................................ 5
ScanShopType Conventions.............................................................5
System Requirements.......................................................................5
Memory Requirements.....................................................................6
Customer Support ............................................................................7
Chapter 3: Software and Hardware Installation......................................... 9
Overview..........................................................................................9
Installation Summary .......................................................................9
SCSI Printer and Scanner Installation Details .................................9
Installing ScanShop .......................................................................11
Chapter 4: Starting Up ScanShop............................................................... 23
Overview........................................................................................23
Running ScanShop.........................................................................23
Command Line Options.................................................................23
Chapter 5: Using ScanShop......................................................................... 33
Overview........................................................................................33
The Main Screen ............................................................................33
ScanShop User’s Guide - iii
Table of Contents
The ScanShop Menu Bar ...............................................................35
File .................................................................................................36
View ...............................................................................................38
Edit.................................................................................................40
Rotate .............................................................................................41
Scan................................................................................................42
Print................................................................................................43
Help................................................................................................44
Chapter 6: The Scanner Set-up Window ...................................................45
Overview........................................................................................45
The Scanner Set-up Window..........................................................46
Chapter 7: The Printer Set-up Window .....................................................53
Overview........................................................................................53
The Printer Set-up Window............................................................54
Printer Selection.............................................................................55
Appendix A:
Scanner and Printer Specific Features ........................................................59
Bell & Howell Scanners.................................................................59
Canon Scanners..............................................................................65
Epson Scanners ..............................................................................73
Fuji Pictrography 3000 and 4000...................................................80
Fujitsu Scanners .............................................................................86
Hewlett-Packard Scanners .............................................................94
Kodak Printers..............................................................................100
Microtek Scanners .......................................................................107
Panasonic Scanners ......................................................................112
Ricoh Scanners.............................................................................117
Sharp Scanners.............................................................................124
UMAX Scanners..........................................................................130
iv - ScanShop User’s Guide
Table of Contents
Appendix B: Troubleshooting ................................................................... 137
Overview......................................................................................137
Getting Help.................................................................................137
Identifying the Problem ...............................................................137
How to Get a License...................................................................143
Patches .........................................................................................143
Appendix C: License Manager Commands ............................................. 145
Overview......................................................................................146
FLEXlm Utilities .........................................................................146
The License Daemon ...................................................................146
LM_LICENSE_FILE environment variable................................146
Obtaining your lmhostid ..............................................................147
Command Reference....................................................................149
lmdiag ..........................................................................................149
lmdown ........................................................................................150
lmgrd ............................................................................................151
lmhostid .......................................................................................152
lmremove .....................................................................................153
lmreread .......................................................................................154
lmstat............................................................................................155
lmutil ............................................................................................156
Appendix D: Glossary ................................................................................ 157
Index ............................................................................................................. 159
ScanShop User’s Guide - v
Table of Contents
vi - ScanShop User’s Guide
Chapter 1: Introduction to Image Processing
Overview
In operation, ScanShop uses some underlying concepts that are basic to image
scanners, scanning, and processing the scanned image.
About Scanners
Image scanners are computer peripheral devices that scan and convert images
into digital data which are often referred to as bitmap or raster data. These
scanned image data can then be processed and reproduced by computers and
other devices.
The two popular kinds of scanners are the flatbed and the hand-held types. A
flatbed scanner has a moving carriage similar to that of a copier. A hand-held
scanner requires the user to drag the scanning device over the hard copy being
scanned.
All scanners have a photoelectric sensor and a light source. The sensor detects
the light that is reflected off the paper by the source and translates it into an
electric signal. The electrical signals are further translated into digital data
(rasters) which are in turn passed on to the computer. The computer then either
stores the image data or goes on to additional processing (for example, Optical
Character Recognition) to convert the data to another format.
About Resolution
Pixels (PIX [picture] ELEMENTS) are the dots that make up the screen image.
Resolution is a measure of the density of these pixels in the image, and it is
expressed in units of dpi (dots per inch). For any particular image, the higher the
dpi, the more pixels it takes to compose. There are four types of resolution that
are important to comprehend in understanding the scanning process:
ScanShop User’s Guide - 1
Chapter 1:Introduction to Image Processing
Monitor Resolution
Monitor resolution is the measure of the dpi which can be displayed on your
monitor screen. A critical fact of scanning is that no matter how high your scan
resolution is, you will only be able to view the image at the dpi supported by your
monitor.
Scanner Resolution
Scanner resolution on the other hand, is the number of dots per inch that a
scanner is capable of capturing. ScanShop allows you to designate a dpi which
may be higher or lower than the base or true optical capability of your scanner.
The scanner always scans at its base resolution but may have the ability to
interpolate or extrapolate to other resolutions you specify. The following is a list
of the base resolutions of some scanners supported by ScanShop:
Table 1:
Scanner
Resolution
Epson ES-300C
300 dpi
Fujitsu 3096G/H
400 dpi
Hewlett-Packard ScanJet 3C
400 dpi
Ricoh IS50
400 dpi
Ricoh IS60
600 dpi
Sharp JX-610
600 dpi
Output Device Resolution
Output device resolution is a measure of the output dpi capability of your printer
or other such peripheral. Most laser printers produce output images at 300 or 600
dpi while imagesetters offer between 1270 and 3386 dpi.
Bit Resolution
Bit resolution, sometimes called “depth”, is a measure of the number of bits per
pixel. The number of shades or colors that can be represented as output from a
scanned image is a function of the bit resolution. The higher the number of bits
2 - ScanShop User’s Guide
Chapter 1:Introduction to Image Processing
per pixel, the more information there is that can be used to represent an image,
and the larger the resulting file size. Black and white line art, for instance, has
only 1 bit per pixel, that is, a bit in the image can be either 1 or 0 (black or white).
Gray scale output, on the other hand, may have 4, 6 or 8-bits per pixel, yielding
from 16 to 256 shades of gray. Color images typically have 24 bits per pixel (8
each for red, green and blue) and can represent up to 16.7 million colors.
Matching Scan to Output
For best results, it is important to scan images at the dpi which your output device
will support. As a general rule, when a resolution value is specified for a scanning
operation, it should be made the same as, or as close as possible to, the resolution
of the output device that will be used for reproducing the image, i.e., the printer
resolution.
When importing images into desktop publishing applications, any needed size
modification of the image or the printout is generally done by the application
itself to the user’s specifications. When working with image editing applications
however, the user is directly responsible for the image sizing. You need to be very
much aware of the differences between input and output resolution because they
can affect the size of the image dramatically. For instance, if you scan an image
at 600 dpi but print it on a laser printer with only 300 dpi, your image will be
twice as large as the original.
Common Image Processing Features
This section describes the fundamental ideas behind certain image processing
functions. The scanners that offer these features implement them differently.
These implementations are to be found in another section, “Appendix A: Scanner
and Printer Specific Features” on page 59 for specific information on scanners.
Dithering
Dithering allows you to create the appearance of a continuous-tone image for line
art (black and white) images (one bit/pixel scan). Dithering is similar to
halftoning but dithering uses only dots of uniform size. Dithering is a method by
which the scanner organizes the image into geometric configurations of black
and white dots that give the illusion of gray. These dots can seem random, as seen
in error diffusion dithering, or can be displayed in patterns of dots. Dithering
options are particular to each scanner.
ScanShop User’s Guide - 3
Chapter 1:Introduction to Image Processing
Gamma Tables
Gamma tables are useful for improving the appearance of scanned images or for
removing undesirable components of scanned originals. This effect is attained by
substituting values for pixels different from those read by the scanner’s image
sensor.
Monitors and output devices, being different kinds of devices, have different
physics associated with their display of images — monitors transmit light; paper
printouts absorb and reflect light. As a result, a scanned image displayed on a
monitor or printed on paper will look different from its original. The difference
between the original and a reproduction can be characterized by a gamma
function.
Gamma features are provided in most scanners and provide results with no
scanning-time penalty. ScanShop provides gamma table selections you can
control to get the processing that you desire.
4 - ScanShop User’s Guide
Chapter 2: Before You Begin
ScanShopType Conventions
Different kinds of typefaces used throughout this manual indicate text that will
appear on the screen or need to be entered by the user.
Type:
Indicates text is:
courier
courier bold
<brackets>
text generated by the computer
text typed in by user
text to be replaced by user
When asked to enter commands preceded by a pound sign (‘#’), the user should
be in super-user mode or ‘root’ first. (The command to be entered does not
include the pound sign itself.)
System Requirements
ScanShop is available for a variety of Unix-based workstations. The following
platforms are currently supported:
Manufacturer
Operating System / CPU
Sun
Solaris SPARC (Solaris 2.7+)
Sun
Solaris x86 (Solaris 2.7+)
DEC
OSF/1 Digital Unix Alpha
HP
HP-UX PA-RISC
IBM
AIX RS/6000, PowerPC
Table 1: Supported Platforms
ScanShop User’s Guide - 5
Chapter 2:Before You Begin
Manufacturer
Operating System / CPU
Linux: RedHat, Caldera, etc.
Linux x86 (Kernel 2.0 and higher)
SGI
IRIX MIPS
Table 1: Supported Platforms
If your platform is not listed above, you can contact Vividata, Inc. to see if your
platform has been added since this printing of the manual.
- When printing a PostScript file you will need additional space in your
temporary directory equal to the output size of your image. Examples:
Memory Requirements
- Minimum 32-64 MB RAM, depending on workstation configuration
- An additional RAM/swap space of at least twice the raw size of the image you
are scanning/viewing (raw size = bits per pixel * width in inches * height in
inches * dpi / 8). For better performance, ratio of swap space to RAM should not
exceed 2:1.
Examples
Table 3:
Image Size
Resolution
Pixel depth
Additional memory
required
8.5" x 11"
300 dpi
1 bit
3 MB
8.5" x 11"
300 dpi
8 bit
18 MB
8.5" x 11"
300 dpi
24 bit
50 MB
8.5" x 14"
300 dpi
24 bit
64 MB
8.5" x 11"
400 dpi
24 bit
88 MB
8.5" x 11"
600 dpi
24 bit
196 MB
6 - ScanShop User’s Guide
Chapter 2:Before You Begin
Customer Support
You can reach the Vividata, Inc. technical support staff by:
•
Email: [email protected]
•
Fax: USA (510) 658-6597
•
Telephone: USA (510) 658-6587
•
World wide web: http://www.vividata.com/SupportShop
Customer Service is available from 8:00 AM to 5:00 PM (PST/PDT).
ScanShop User’s Guide - 7
Chapter 2:Before You Begin
8 - ScanShop User’s Guide
Chapter 3: Software and
Hardware Installation
Overview
This section describes the installation procedures for ScanShop, including the
License Manager and scanner hardware. Please consult the release notes
supplied with this product for any last-minute information relevant to your
particular system.
Installation Summary
There are two aspects to installing ScanShop software and your scanner
hardware:
•
Hardware installation
•
Software installation
SCSI Printer and Scanner Installation Details
The following sections discuss the requirements and procedure for connecting
your printer or scanner to the SCSI bus
SCSI ID's
You must select a SCSI ID for your printer(s) or scanner(s) that does not conflict
with any other SCSI devices that are already on your system. Possible ID's range
from 0 to 7 (some SCSI buses may support more, but our SCSI drivers only
support this range). Typically, ID 7 is reserved for the computer's own SCSI host
adapter. Other ID's are frequently taken by disk, CD-ROM, and tape drives. On
most platforms, you will see a list of occupied SCSI ID's on the system console
during boot up, or listed in a system-specific command display of device ID's.
After you determine what ID's are not being used, consult your printer or scanner
manual for setting its SCSI ID.
ScanShop User’s Guide - 9
Chapter 3:Software and Hardware Installation
SCSI Cable Lengths
If you have a SCSI bus with SCSI-1 and SCSI-2 devices that do not operate in
fast SCSI mode, the bus's total physical cable length should not exceed 6 meters
(19.6 feet). On a bus with fast SCSI devices, the length should not exceed 3
meters (9.8 feet). On a bus with Ultra SCSI (SCSI-3) devices, the length should
not exceed 1.5 meters (4.9 feet). At longer lengths, data integrity and
transmission speed can be degraded significantly. The total cable length must
take into account all external cabling as well as internal cabling in the system
chassis or expansion boxes. Substandard cables will also affect the quality of
transmission at longer lengths. If your cable configuration exceeds the lengths
suggested above, you should either remove a device from your SCSI bus, use
shorter cables to interconnect the components on the bus, or add another SCSI
host adapter to your system. If you have a mixture of devices with different SCSI
transfer speeds on a single bus, the cable length may be different from those
listed above.
Termination
The last device at each end of each SCSI chain must have proper SCSI
termination. An active terminator can be helpful in making a marginal SCSI
configuration more reliable.
General Procedure for Attaching a SCSI Device
You need to power down your system and all attached SCSI peripherals
completely before attaching any SCSI devices.
After you set the printer's ID as described above, re-cable the peripherals on the
SCSI chain to include the printer. Make sure this chain is properly terminated.
Power on all SCSI peripherals, then power on the system. If necessary, take the
appropriate steps to boot your system.
On Solaris 2.x systems, you may need to indicate that the /devices directory links
should be rebuilt at boot time with “boot -r” from the monitor prompt (“ok”) on
SPARC platforms, “b -r” from the secondary OS loader on x86 platforms, or with
a “reboot -- -r” command from the Unix shell. On other systems, the new device
will be recognized automatically by the operating system.
If your system does not boot, power down the system and all SCSI peripherals,
and re-check the cabling, termination, and SCSI ID settings
10 - ScanShop User’s Guide
Chapter 3:Software and Hardware Installation
Installing ScanShop
Installing ScanShop on your system consists of a few simple steps. If you
obtained your software from the Internet or on tape, proceed directly to “Internet
or Tape Distribution” below. If you have your software on CD-ROM, you should
skip the “Internet or Tape Distribution” section and proceed directly to “Running
the Installer”.
Internet or Tape Distribution
Before you install ScanShop, you must unspool the installation files into a
temporary directory.
First, choose a temporary directory to use. You may use an existing one or create
a new one. Then change to the directory and extract the installation files from
your media or tar file:
•
from 8mm tape, enter:
# tar xf <tape device>
•
from a file, enter:
# tar xf <file name>
After you extract the files, your temporary directory should contain a number of
new files, including:
File Name
File Contents
README.<product>
Read this first! If present, it contains information about installing the software that
may not present in the manual.
RELEASE.<product>
Read this next! If present, it contains product version information, known bugs, and
other release notes.
installer
The Vividata Installer, a GUI installation
tool. Run this after you have read the
README and RELEASE files.
ScanShop User’s Guide - 11
Chapter 3:Software and Hardware Installation
File Name
File Contents
<product_name>.desc
Contains installation information for the
Installer. Do not edit this file.
<product>.tar.Z
A compressed product archive file used by
the Installer to install the software onto
your system. Do not uncompress this file
yourself.
Running the Installer
The Vividata Installer is a Motif-based graphical user interface (GUI) tool that
will aid in the installation of Vividata's products onto your system. You must
start the Installer from a console or terminal window within a X-based window
manager. You may be required to interact with terminal messages, so do not
launch the Installer from a file manager utility such as “dtfile”.
Note to IRIX users: If you do not have the file /usr/lib/libsocket.so on your
system, Installer will not run properly. You need to install this file from your IRIX
Operating System CD-ROM under the package “IRIX Execution Environment”,
sub-package “System V Release 4 Networking” (you only need to install the
sub-package).
If you extracted your installation files from an Internet or tape distribution,
change to the directory where you extracted your files to, switch to superuser, and
run “installer”:
% cd <spool directory>
% su
# ./installer
If you have your software distribution on CD-ROM, change to your CD-ROM's
root directory, switch to superuser, and run “Install”:
% cd <CD-ROM directory>
% su
# ./Install
There are some problems users commonly experience. If you get an error
message such as:
Xlib: Client is not authorized to connect to Server
12 - ScanShop User’s Guide
Chapter 3:Software and Hardware Installation
you need to first disable X server access control as the owner of the X session by
entering:
% xhost +
If you get an error message such as:
ld.so.1: ./installer: fatal: libXm.so.3: can't open file:
errno=2
either you do not have the LD_LIBRARY_PATH environment variable set
properly or you do not have Motif 1.2 installed on your system. If Motif is not on
your system, you need to install it. If Motif is on your system but in a
non-standard path, you need to set the LD_LIBRARY_PATH environment
variable to reflect its path:
# setenv LD_LIBRARY_PATH <everything it already has>:<Motif
libraries directory>
Directories where the Motif libraries often can be found
/usr/dt/lib
/usr/openwin/lib
/usr/lib/X11R5
/usr/X11/lib
ScanShop User’s Guide - 13
Chapter 3:Software and Hardware Installation
Using the Installer
When you run the Installer, a welcome screen will be displayed.
Figure 3-1 Installer Welcoming Screen
Click Next, unless you have already installed the software and are re-running the
Installer in order to enter your license keys (in which case, click Jump to
Licensing, and go to “Installing the License Keys” on page 14).
The Installer will detect all available Vividata software packages and select all
the packages it finds. To install all listed packages in the default directory, click
Next. Otherwise, click Change Options to change the selection of packages or to
change the destination directory.
Installing the License Keys
Your lmhostid will now be displayed (see Figure 3-2). If you have not yet
obtained a license key, you will need to provide this lmhostid ready when you
request your key(s) from Vividata. You will need to obtain your keys before
PostShop can print. Key requests can be sent to [email protected].
14 - ScanShop User’s Guide
Chapter 3:Software and Hardware Installation
Figure 3-2 Your lmhositd information
If you have already received your license keys from Vividata, click Next.
Otherwise, note your lmhostid, as this and your host name will be used to
generate your license keys. Key requests should be e-mailed to
[email protected]. You will need to obtain your keys before ScanShop can be
run normally
The License Setup dialog will now be displayed:
Figure 3-3 License Server Configuration
ScanShop User’s Guide - 15
Chapter 3:Software and Hardware Installation
If you have your license key ready, you can select “Enter by hand” in which case
you will be presented with a dialog as shown in Figure 3-4. This will allow you
to enter your key or drag and drop it from an e-mail program. When finished
press “Next”.
Figure 3-4 Enter by hand Dialog
If you choose “Select saved e-mail or text” the Installer will search the file you
designate for the key data and display it in the License(s) box as shown in
Figure 3-5.
16 - ScanShop User’s Guide
Chapter 3:Software and Hardware Installation
Figure 3-5 Select File Dialog
Installing the Kernel SCSI Driver for SunOS 4.x, HP-UX 10.x & AIX
Now you are ready to invoke the installation script. This script will lead you
step-by-step through the kernel driver installation, prompting you where
necessary. To begin, go to the ScanShop directory and enter:
# ./bin/vv_install
The install script installs device drivers into the current kernel of the system. This
system must be the one to which your scanner your printer will be connected. If
the installation is NOT running from the target host, exit the installation program
and install on the correct machine.
ScanShop User’s Guide - 17
Chapter 3:Software and Hardware Installation
Configuring the Environment
Please see “# rm -r Vividata_directoryConfiguring the EnvironmentEnvironment
Variables” on page 19 for details on setting up your environment.
Installation Complete
You are now ready to use ScanShop.
Demo Mode
If desired, you can verify your ScanShop installation before you get your license
key(s) from Vividata, by running ScanShop in “demo” mode. This is the default
mode if no license server can be found on your network, and it is identical to
running with licensing, except that only preview scans are permitted.
Removing ScanShop
Should it be necessary to remove ScanShop from your system, follow the
following procedures:
If you have a SunOS 4.x, HP-UX 10.x or AIX system...
You can remove the vvsc SCSI kernel driver using the uninstall script. After
switching to super-user mode, enter:
# cd scanshop_directory
# ./bin/vv_uninstall
From outside this directory, the software can then be removed by entering:
# rm -r Vividata_directory
# pkgrm VVvvsc
# pkgrm VVlicense
# pkgrm VVsshopmtTo remove the software, switch to super-user mode and
enter:
18 - ScanShop User’s Guide
Chapter 3:Software and Hardware Installation
#
rm
-r
Vividata_directoryConfiguring
the EnvironmentEnvironment
Variables
A number of environment variables affect the operation of PostShop (and the
applications that may use PostShop). These are normally either unnecessary or
set automatically during installation, but you may want to change their default
values if you are customizing your system. If you would like to check on their
settings, you can inspect the wrapper script(s) in $VV_HOME/bin. An
explanation of each environment variable follows:
VV_HOME is the location where ScanShop is installed. By default,
/opt/Vividata on Solaris 2.x, and /usr/vividata on all other systems. It is
set by default when the program is executed and need only be changed
if there is some specific reason for doing so.
LM_LICENSE_FILE tells Vividata products where to look for the
FLEXlm license file. For further information, please see the section
“LM_LICENSE_FILE environment variable” on page 146.
VVP_FILTER provides a way for ScanShop to read file formats
through a filter the user provides, thus extending the built-in set of file
formats that are recognized. If a file fails to read through a built-in file
reader, then the input is passed through the designated external filter to
be converted to a recognized format. The value set should be the path to
an external filter and any command-line options it requires. The filter
must take stdin and output the results via stdout. The default filter is the
mpage utility, which converts ASCII text to PostScript. Refer to any
available references or help files for information regarding the usage of
mpage and other common filters.
VV_JPEG_QUALITY affects JPEG file writing, ranging from 0 to
100. Values from 5 to 95 are generally the most useful; 100 is the best
quality. Default is 75.
VV_JPEG_SMOOTHING affects JPEG file writing, ranging from 0 to
100. 0 is none; 100 is the most. Default is 0.
VV_MWM may be needed to make ScanShop interact with certain
window managers properly. If images appear black or the colormap
appears incorrect, try setting VV_MWM to 1. Otherwise, do not set this
variable
ScanShop User’s Guide - 19
Chapter 3:Software and Hardware Installation
VVNET enables ScanShop to access the manuals via the internet.
Setting this variable (e.g. assigning it the value 1) activates linking to the
completeScanShop documentation in HTML via Netscape (version 3.0
or later), and switches On-line Help to use HTML files within Netscape
as well.
VVPRE_FILTER is similar to the VVP_FILTER, but different in that it
is applied before any of the usual file format readers (or VVP_FILTER
for that matter) are applied. Any designated filter needs to either process
or pass-through any data intended to be read by ScanShop. The value set
should be the path to an external filter and any command-line options it
requires. The filter must take stdin and output the results via stdout. The
default setting is “none”.
Setting the Environment Variables
You can set the appropriate environment variable(s) in your .cshrc or .profile file.
When the next C or Bourne shell is started, its environment will be automatically
configured for Vividata's environment variables.
You can also add the name of the directory that contains PostShop to the PATH
environment variable assignment in your .cshrc or .profile file. This will allow
you to launch the user-level vvlpr and postshop gui applications from any
directory.
After modifying your .cshrc or .profile file, logout from the system and then login
again to start your session with the modified initialization files.
If you are running in a networked environment and you want to have only one
license manager daemon running, make sure that each user's shell environment
assigns the name of the host running the license server to the variable Printer
Interface Script
Once you have configured PostShop to work with the Unix lp system, each print
job you submit via postshop, vvlpr, lp, or lpr, will cause the Unix lp system to
execute the appropriate printer interface script to properly configure the
environment for calling PostShop's vvprint command-line driver. If you used
ps_install to configure your printer, the interface script should already be
configured properly. However, there may be instances where you need to
customize a particular setting. You will find the printer interface script in one of
the following directories:
20 - ScanShop User’s Guide
Chapter 3:Software and Hardware Installation
Operating System
Directory
SunSolaris 2.x
/etc/lp/interfaces
SunOS 4.x
OSF/1, AIX
/usr/vividata/config
HP-UX 10.x
/etc/lp/interface
HP-UX 9.x
/usr/spool/lp/interface
IRIX 5 & 6
/var/spool/lp/interface
The name of the script is identical to the name of the printer, except that on some
systems, an “.if” extension is added.
The following section describes user configurable environment variables in the
printer interface script.
Installing the license keys using the character-based interface
If you are running in an environment without an X windows display, you can
install the software manually (see any enclosed release notes and README
files). After doing so, you can then use the character-based license installer
program. When it starts up, you should see something like this:
.
ScanShop User’s Guide - 21
Chapter 3:Software and Hardware Installation
22 - ScanShop User’s Guide
Chapter 4: Starting Up ScanShop
Overview
The ScanShop application can be run with or without the graphical user interface
or GUI. Both ways are covered in the following sections:
•
Running ScanShop
•
Command Line Options
Running ScanShop
To run ScanShop using the GUI and the current default settings, simply go to the
directory where you installed ScanShop and type:
./scanshop
(If you included the ScanShop directory in your PATH environment variable
assignment, then you may begin running the program from any directory.)
The graphical user interface will then pop up and ScanShop will ready to be used.
Alternatively, if you want to pre-set certain program options from the command
line, a number of command line options are available to run ScanShop without
the graphical user interface.
Command Line Options
ScanShop has a command line interface which allows you to set certain program
options at the time that you call up the program. In addition, a version of the
program is provided which bypasses the graphical user interface, allowing you
to scan and save images directly from the command line, or from within shell
scripts, C programs, and other applications.
The command line syntax is as follows. For ScanShop with graphical user
interface:
ScanShop User’s Guide - 23
Chapter 4:Starting Up ScanShop
scanshop [options]
Without graphical user interface:
sshop_cli [options]
ScanShop options may be specified in any order in any or all of the following
ways (in decreasing priority):
•
On the command line,
•
In an ifs settings file
•
In the user’s .scanshoprc file.
Only the first three letters of options are matched. The values assigned to options
are either numbers, filenames, or dimensions. Native units for dimensions are
“twelfths” (1/1200 inch), but a suffix beginning with letter m, i, t, or p indicates
millimeters, inches, twelfths or pixels respectively.
Unless indicated otherwise, options that are not specified default to “0”.
The individual options are described below:
-help
Print a screen of help text about CLI options to the standard output.
-v
Prints the version number of the application and of the Vividata vvsc
SCSI driver if it is installed.
-id=[SCSI, GPIB]:[BUS #]:id
Select the scanner at id, if multiple scanners are present. For example,
to select a SCSI scanner at ID 3 on BUS 0, use the following option:
-id=SCSI:0:3
-ifs=filename
Read ScanShop settings from filename, prior to processing settings
from the command line (this is so command-line definitions will
override file-based settings). ScanShop settings files may contain any
number of ascii lines with “option value” pairs separated by a tab or
space. Comments to be ignored are introduced by “#” and continue up
to a newline.
-ofs=filename
Write latest ScanShop settings to filename, just before exiting.
24 - ScanShop User’s Guide
Chapter 4:Starting Up ScanShop
-mode=n
Scan images in mode n, depending on whether image composition is text
or photographs, etc. (use in conjunction with bits option).
Table 1:
=n option
Resulting Mode
0
binary
1
halftone
2
gray
3
color (special binary)
4
color (special halftone)
5
color
-bits=n
Scanner will return n bits per pixel (use in conjunction with mode
option).
-xres=n
Scan resolution (x direction) is n dots-per-inch. Default is 200.
-yres=n
Scan resolution (x direction) is n dots-per-inch. Default is 200.
-ulx=n
Define scan window, upper left corner, x offset, at n. A suffix of m, i, t,
or p indicates units; otherwise twelfths, (1/1200 in), is assumed.
-uly=n
Define scan window upper left corner, y offset, at n. A suffix of m, i, t,
or p indicates units, otherwise twelfths, (1/1200 in), is assumed.
-width=n
Scan window is n wide. A suffix of m, i, t, or p indicates units, otherwise
twelfths, (1/1200 in), is assumed.
-length=n
Scan window is n long. A suffix of m, i, t, or p indicates units, otherwise
twelfths, (1/1200 in), is assumed.
ScanShop User’s Guide - 25
Chapter 4:Starting Up ScanShop
-scanarea=size
Set scan area to standard paper size. This is equivalent to specifying
values for ulx, uly, width, and length for standard paper sizes. Note
that when feeder or xfeed:yfeed values are specified, the scanarea
and ulx:uly:width:length values default to the same area as that of
the feeder.
Table 2:
Size
Dimensions
letter
8.5" x 11"
letterL
11" x 8.5"
legal
8.5" x 14"
11x17
11" x 17"
a2
420mm x 594mm
a3
297mm x 420mm
a3L
420mm x 297mm
a4
210mm x 297mm
a4L
297mm x 210mm
a5
148mm x 210mm
a5L
210mm x 148mm
b4
257mm x 364mm
b4L
364mm x 257mm
b5
182mm x 257mm
b5L
257mm x 182mm
-feeder=size
Enable automatic document feeding of page size. Default is 0 (off)
which disables the feeder and causes a flatbed scan. Values for the size
parameter are the same as for the scanarea option above.
26 - ScanShop User’s Guide
Chapter 4:Starting Up ScanShop
-feeder=xfeed:yfeed
Enable automatic document feeding of custom page size xfeed by yfeed.
A suffix of m, i, t, or p on xfeed or yfeed specifies units, otherwise
twelfths, (1/1200 in), is assumed.
-xfeed=n
See above.
-yfeed=n
See above.
-double
Scan in duplex or double sided mode on duplex scanners..
-compress=n
Perform compression on the image data, using compression hardware in
the scanner, if available. Use in conjunction with “format=0” (tiff
format). These values are read in from (any and/or all of) the .scanshoprc
file, the ifs file, and the command line. They are then used for scanning
and finally written out to an ofs file (when specified).
Table 3:
=n option
Compression Type
0
none
1
g3.1
2
g3.2
3
g4.2
5
lzw
6
packbits
-swcompress=n
Override use of image compression hardware; always use software
image compression. (Default value is 0, indicating that hardware
compression will be used when the scanner has this ability.)
-contrast=n
Sets level of contrast used during scanning to n.
ScanShop User’s Guide - 27
Chapter 4:Starting Up ScanShop
-bright=n
Sets level of brightness used during scanning to n.
-thresh=n
Level at which scan data is converted to binary data is n. The default, 0,
indicates automatic thresholding; otherwise, values from 1 to 255
indicate increasing threshold levels.
-binfilter=n
Binary filtering parameter (emphasis) is n. Combinations may be
constructed by bitwise “OR”-ings of values together:
Table 4:
=n option
Binary filtering
0x00
none
0x10
mixed
0x20
lowemp
0x40
mediumemp
0x80
highemp
0x01
bold
0x02
edge/outline
0x04
smooth
0x08
speckle
-htcode=n
Halftoning algorithm to use is n.
-htdata=filename
Download binary halftoning array from the file named filename. (Not
currently supported.)
-htid=n
Halftone pattern number to use is n.
-invert=n
Return image with intensity scale inverted (n=1), or normal image (n=0).
28 - ScanShop User’s Guide
Chapter 4:Starting Up ScanShop
-mirror=n
Return horizontal reflection (n=1), or normal image (n=0).
-format=n
Output file format is n, taken from the following list:
Table 5:
=n option
File Format
0
tiff
1
ras
2
epsi
3
x11
15
pal_tif
17
gif
19
jpeg
20
mtiff (multipage)
21
png
22
xwd
23
rgb (Silicon Graphics)
24
rgb-rle (SGI)
28
pdf (Adobe)
-log=filename
ScanShop will append a control/status (text) record for each scan to file
filename. Default is to record no log. (Not currently supported.)
-number= n1:n2:n3
Scan sequential pages to numbered files, starting with page number n1,
stopping with page number n2, and using step size n3. If stop page
number (n2) is 0 or not defined, then scanning will run until the feeder is
empty. If step size (n3) is 0, scan [stop - start + 1] sequential pages
ScanShop User’s Guide - 29
Chapter 4:Starting Up ScanShop
into a single (multi-page TIFF or PDF) file. The exit code of sshop_cli
will be the number of pages scanned.
-start=n1
See above.
-stop=n2
See above.
-step=n3See above.
-ifile=filename
When the GUI version of ScanShop is launched, pre-loads the base
window canvas with image data from file filename.
-ofile=filename
Write resulting scan data to file filename. Default name is “scan.tmp”.
When using page auto-numbering with multiple scans, filename should
contain a “%d” (or similar printf-style format specification) to indicate
where the page number is to be inserted. If any number option
parameters (start, stop, or step) have been assigned, ScanShop will
append “%d” by default.
-fsbfilter=pathname
Sets the path/filter for Motif/OpenLook file selection boxes (not valid for
sshop_cli).
-pdpi=n
Specifies the dpi (dots per inch) of images read from files which do not
denote dpi explicitly. Affects printed size.
-debug=n
Diagnostic trace level set to n.
Examples
To scan an 8” by 11” document to file tmp.rs:
% sshop_cli -bits=1 -length=11i -width=8i -format=ras\
-ofile=tmp.ras -xres=200 -yres=200
Same as above, but using settings file “letter.ss”:
% sshop_cli -ifs=letter.ss
The file letter.ss contains:
format
30 - ScanShop User’s Guide
ras
Chapter 4:Starting Up ScanShop
bits
length
wid
ofile
xres
yres
1
10in
8in
tmp.ras
200
200
To enable automatic document feeding, and scan ten pages to files named
page01, page02, …, page10:
% sshop_cli -ifs=letter.ss -feed=letter -number=1:10 \
-ofile=page%02d
Many users find it handy to have ScanShop come up running with the same
settings they had in their previous session. You can define ScanShop’s command
line to read in the settings it created as it exited in each previous run (C shell
example shown below.) Each time you quit ScanShop it automatically writes out
a .scanshoprc file in the user’s home directory.
% scanshop -ifs=~/.scanshoprc
Another use of the .scanshoprc file is to record all of the settings in effect from
an interactive GUI session of ScanShop for subsequent use in an invocation of
sshop_cli. You can get a complete view of all the settings, edit the settings, and
then save them out under a different name for use with the sshop_cli.
% sshop_cli -ofs=claim_form1.ss
% vi claim_form1.ss
% sshop_cli -ifs=claim_form1.ss
Return Status
When using the CLI, ScanShop will return the number of pages successfully
scanned as its exit status. This is accessible to Bourne and C shells, C programs,
and any other programs that call ScanShop to do batch scanning. Here’s how to
access the return values:
Bourne shell:
$?
C shell:
$status
C programs:
status = system("scanshop…");
ScanShop User’s Guide - 31
Chapter 4:Starting Up ScanShop
File Locking
For back-to-back integration with other programs such as OCR APIs, Databases,
etc., ScanShop applies file-locks to the image files. The locks are released as each
image file is completed. In this way, an application waiting to open image files
that appear in a directory can be automatically awakened by the OS when
ScanShop releases the lock. This feature is somewhat OS-dependent and may not
be supported on any particular platform.
32 - ScanShop User’s Guide
Chapter 5: Using ScanShop
Overview
This section provides full details on the ScanShop main screen, including
scanning and printing images.
The Main Screen
When ScanShop is run with the graphical user interface, the main screen appears.
Figure 5-1.
Figure 5-1 ScanShop Main Screen
ScanShop User’s Guide - 33
Chapter 5:Using ScanShop
Following is a brief summary of the main components of this screen, described
in order from top to bottom:
Title Bar
Displays the name of the currently displayed file, if the file has been saved.
Menu Bar
Contains all controls for scanning and printing images, as well as controls for
image manipulation and viewing, and file handling. The on-line help system is
also here.
Page Select
For multi-page images, lets you select which image is being displayed. The
desired image can be chosen by using either the slider bar or the forward and
backward page turn arrows.
View Window
Displays the active image. If the image size exceeds the size of the view window,
use the horizontal and vertical scrollbars to display the desired portion of the
image.
Status Bar
Displays status messages and warnings.
34 - ScanShop User’s Guide
Chapter 5:Using ScanShop
The ScanShop Menu Bar
Summary
Figure 5-2 ScanShop Menu Bar
Following are descriptions of the various selections available under each of the
menu headers.
File
Has the options for opening files, saving files (and saving as different file outputs)
and exiting the program.
Edit
Has the edit, undo and crop functions to manipulate image output.
View
Has the fit to window, size controls and zoom functions.
Rotate
Has the functions for rotating images and mirroring across a vertical or
horizontal axis.
Scan
Has the functions for initiating a scan and for the scanner set-up.
Print
Has the functions for initiating a print and for the printer set-up.
Help
Has the on-line help and product information.
ScanShop User’s Guide - 35
Chapter 5:Using ScanShop
File
The FILE menu offers the commands that allow you to read and write
ScanShop’s image files, as well as to exit ScanShop.
Figure 5-3 File Menu
Open
Open will allow you to bring any supported image into ScanShop, automatically
reading in appropriate file format information. If you have been scanning and
editing an image prior to invoking the load command, ScanShop will ask you if
you want to save your image before loading a new one.
Save
Save will save the image over the current file. If there is no current file, Save has
the same effect as Save As…
Save As…
When you choose Save As…, you will get a pop-up dialog that allows you to
enter the directory and filename for your image. From this dialog you may also
choose the desired image format. Which image formats are available depends on
the number of bits/pixel of your image.
36 - ScanShop User’s Guide
Chapter 5:Using ScanShop
Exit
Selecting Exit will cause ScanShop to exit normally. If you have specified the
“ofs” command line option, a ScanShop settings file will be written.
ScanShop User’s Guide - 37
Chapter 5:Using ScanShop
View
The VIEW menu provides controls that change the appearance of the image
ScanShop is displaying.
Figure 5-4 View Menu
Fit to Window
This view option will scale your image to fit in the current window. Additionally,
every time you resize the window or crop your image, your image will be
rescaled accordingly.
Note: Windows cannot be shrunk below a minimum window size.
400%, 200%, 100%, 50%, 25%
These are the built-in zoom options for viewing. 100% is a magnification of 1:1
–– i.e. every pixel in the image is displayed as one pixel on the screen.
38 - ScanShop User’s Guide
Chapter 5:Using ScanShop
Zoom In, Zoom Out
These are the built-in zoom level steps for viewing. For a given viewing zoom,
Zoom In enlarges the image area and Zoom Out shrinks the image.
Important Note: The View options only modify the appearance of the image
on the screen, not the actual size of the image data.
ScanShop User’s Guide - 39
Chapter 5:Using ScanShop
Edit
The EDIT menu allows you to crop an image to desired dimensions and to undo
the most recent image manipulation.
Figure 5-5 Edit Menu
Undo
Undo will undo the most recent rotation, mirror, or crop operation.
Crop
Crop allows you to cut away the outer portions of an image, leaving the image
you wish to save. Use the selection cursor to drag a selection box around the
portion of the image to be saved. Choose Crop and everything outside the box
will be deleted. You can always undo a Crop if you choose Undo immediately
after cropping. The selection box can be adjusted by click-dragging on any of its
“handles,” and you can click-drag the center of the box to change its position.
Figure 5-6 Cropping an Image
40 - ScanShop User’s Guide
Chapter 5:Using ScanShop
Rotate
The ROTATE menu provides commands to rotate and flip the image.
Figure 5-7 Rotate Menu
90, 180, 270
To rotate your image counter-clockwise 90, 180 or 270 degrees, choose the
appropriate menu selection.
Mirror X
Mirror X horizontally mirrors your image across a central vertical axis. You
could say that it “reverses left and right”.
Mirror Y
Mirror Y vertically mirrors your image over a central horizontal axis. You could
say that it “reverses top and bottom”.
ScanShop User’s Guide - 41
Chapter 5:Using ScanShop
Scan
The SCAN menu provides access to the scanner set-up section and allows you to
execute an image scan.
Figure 5-8 Scan Menu
Setup…
Selecting Setup… opens the Scanner Setup Dialog. (More details are in another
section: “Chapter 6: The Scanner Set-up Window” on page 45.)
Scan
Selecting Scan will initiate an image scan, using the current settings and scan
area selection.
42 - ScanShop User’s Guide
Chapter 5:Using ScanShop
Print
The PRINT menu provides access to the printer set-up section and allows you to
print an image.
Figure 5-9 Print Menu
Setup…
Selecting Setup… opens the Print Controls Dialog. (More details are in another
section: “Chapter 7: The Printer Set-up Window” on page 53.)
Print
Selecting Print will print the image, using the current printer settings.
ScanShop User’s Guide - 43
Chapter 5:Using ScanShop
Help
The HELP menu provides access to the on-line help system and to ScanShop
product information.
Figure 5-10 Help Menu
On-line Help
Selecting On-line Help calls up the help library. If the VVNET environment
variable has been set, the application will attempt to use HTML versions of the
on-line documentation under Netscape (version 3.0 or later).
Product Information
Selecting Product Information displays release information for your version of
ScanShop, as well as Vividata contact information.
Manuals
If the VVNET environment variable has been set, selecting Manuals causes the
application to search for local HTML copies of the ScanShop documentation and
open them in a Netscape Browser (version 3.0 or later). If it can’t find them
locally, it attempts to link to them through the Vividata website, using a Netscape
Browser.
44 - ScanShop User’s Guide
Chapter 6: The Scanner Set-up Window
Overview
The Scanner Set-up window appears when you select Setup... from the Scan
pull-down menu.
The Scanner Set-up window contains a set of standard scanner features and a
number of features specific to your particular scanner. ScanShop automatically
determines which features are available for your scanner and displays the
appropriate control elements. Extended image processing features specific to
your scanner are available through the Options... button.
In this chapter, the standard scanner features are described. For specific
information about the supported scanners and screnn shots of their Scanner
Set-up windows and options windows, please see Appendix A, “Scanner and
Printer Specific Features”,.
ScanShop User’s Guide - 45
Chapter 6:The Scanner Set-up Window
The Scanner Set-up Window
Figure 6-1 Scanner Set-up
The Scanner Set-up window is divided into two sections. The left half is the scan
preview area. It contains an area surrounded by a solid line, which represents the
scannable area. Inside this area is a resizable selection box containing the portion
of the image to be scanned. By click-dragging the corners of the selection box,
you can change the size of the region to be scanned. By click-dragging the center
of the box, you can move it to another location on the page.
The right half contains the scanner controls. The standard menus and buttons that
appear on the right side are described in this section.
46 - ScanShop User’s Guide
Chapter 6:The Scanner Set-up Window
Scanner
Click on the Scanner menu button to see all the available scanners. If you have
no supported scanners connected, the first item in the box will say “No Scanners
Available”. The last item will always be “show all devices”.
Figure 6-2 Selecting the Scanner
The “show all devices” option pops up a dialog which gives you a list of all the
SCSI host IDs, the SCSI devices connected to them, and their status. This is a
useful feature for determining which SCSI IDs are available, as well as which
devices are currently connected. Also, if you have a National Instruments GPIB
driver and interface installed, GPIB devices will appear at the end of the list. You
can use the scroll bar on the side of the window to view all of the items listed.
Figure 6-3 Device List
ScanShop User’s Guide - 47
Chapter 6:The Scanner Set-up Window
Dots per Inch
The resolution of the scan is user-definable to the extent that the selected scanner
allows. The choices are listed in this button menu. When you choose “other”, a
pop-up dialog will enable you to set other values and/or separate x and y
resolutions (not supported by all scanners).
Figure 6-4 Selecting Dots Per Inch
Bits per Pixel
A bit is the basic atom of information in the computer. The bit resolution is the
number of bits used to represent each pixel.
Figure 6-5 Selecting Bits Per Pixel
Different selections will be displayed depending on which scanner you have
selected.
48 - ScanShop User’s Guide
Chapter 6:The Scanner Set-up Window
The following table lists the bits per pixel and pixels per byte required for
different types of images:
Table 1:
Image Type
Bits/Pixel
Line Art/B & W Images
1
Grayscale (16 grays)
4
Grayscale (64 grays)
6
Grayscale (256 grays)
8
Color (16.7 million colors)
24
Remember that the more information stored per pixel and the greater your dpi,
the larger your file size will be. An 8.5 x 11 inch image at 120 dpi and 1-bit
resolution will have a file size of 164K, at 4-bits 655K, at 8-bits 1.3 MB, and at
24 bits 4.0 MB. For a description of Bits per Pixel, please refer to “About
Resolution,” in the “Introduction to Imaging and Image Processing” chapter.
(The file sizes for 6 and 8 bits/pixel images are the same because 6 bit pixels are
stored in 8 bit bytes.)
Brightness
The brightness is set with a slider bar, with a higher degree of brightness at the
right end of the scale, and a lower degree of brightness at the left end of the scale.
Figure 6-6 Selecting Brightness
Threshold
The threshold control, available on certain scanners for 1 bit/pixel scans,
determines the balance of black and white pixels in the scanned image. You can
specify a certain intensity as the threshold, and the scanner will convert all the
ScanShop User’s Guide - 49
Chapter 6:The Scanner Set-up Window
pixels that are lighter than the threshold to white and all pixels that are darker
than the threshold to black. The effects of thresholding are most noticeable when
an image with many medium gray shades is scanned.
Figure 6-7 Selecting Threshold
The Threshold option works in 1 bit/pixel mode only. In gray-scale and color
modes, the Threshold option is disabled (i.e. grayed out).
Automatic Document Feeder (ADF)
The Automatic Document Feeder (ADF) (not shown in the scan window
example above) feeds documents for scanning in portrait (vertical) or landscape
(horizontal) orientation. Automatic Document Feeders are standard for some
scanners, and either optional or not available for others.
Figure 6-8 Selecting ADF Usage
Document Size
You can specify the area to be scanned from a predefined list of typical paper
sizes, or define your own area by using the mouse, or by entering the dimensions
numerically through the keyboard. ScanShop dynamically loads information
about standard document sizes supported by your scanner (for example, letter,
legal, A4, etc.). The Document Size menu button will display them and you may
50 - ScanShop User’s Guide
Chapter 6:The Scanner Set-up Window
select any of the presets available in the list. Common document sizes are listed
here.
Table 2:
Document
Name
Inches
Millimeters
letter
8.5x11
216x297
legal
8.5x14
216x356
A3
11.7x16.5
297x420
A4
8.27x11.7
210x297
A5
5.82x8.27
148x210
B4
9.8x13.9
250x353
B5
6.9x9.8
176x250
To select an area to scan within the preview area, drag the rubber-band selection
box around the area you wish to scan. Alternatively, enter the x and y origins as
well as the desired scan width and height in the editable text fields provided for
these values. All dimensions can be entered and displayed in inches, millimeters
or pixels (pels).
Important Note: To enter origins and dimensions from the numeric keypad
on the keyboard, you must enable Number Lock on the keypad.
Image Size
The image size is displayed in bytes at the bottom right-hand corner of the scan
setup window. It changes dynamically as you change the scan area or modify the
dpi or bits-per-pixel resolution.
Preview
This button will initiate a preview scan. To produce the preview image, the
scanner makes a fast scan of the full scanning area at the lowest possible dpi and
ScanShop User’s Guide - 51
Chapter 6:The Scanner Set-up Window
displays it in the preview area. This is a useful, time-saving feature for the
following operations:
Checking Scanning Options
When you modify the scanning options for your image, you can use Scan
Preview to check the results prior to invoking a full-resolution scan. Scan
Preview supports all the scanner options except the Automatic Document Feeder
(ADF), which must be disabled, and horizontal mirroring.
Checking the Scanning Area
If you only need to scan a portion of the image, select that portion by holding
down the selection button and drawing a box around it in the preview area. A
preview scan can be used to verify the enclosed area. When satisfied, click Scan
to commence full dpi scanning.
Scan
Scan will initiate a scan of the selected scan area using the scanner’s current
settings.
Options
Options pops up a dialog which gives you access to the extended imaging
features of your scanner. To activate an option, click on the applicable button box.
For more details, please see “Appendix A: Scanner and Printer Specific Features”
on page 59 for more information about your scanner’s particular features.
52 - ScanShop User’s Guide
Chapter 7: The Printer Set-up Window
Overview
The Printer Set-up window provides controls for the position, orientation,
geometry, and general treatment of the image from ScanShop’s Main Window.
ScanShop must have an image loaded before it can bring up the Printer Set-up
window. Once an image is loaded, select Setup... from the Print pull-down
menu.
The Printer Set-up window contains a set of standard printer features and a
number of features specific to your particular printer. Controls are provided for
printer resolution, brightness, document size, print area, and selection of paper
sources. ScanShop automatically determines which features are available for
your printer and displays the appropriate control elements. Extended image
processing features specific to your printer are available through the Options...
button.
In this chapter, the standard printer features are described. For specific
information about your printer and a picture of its Printer Set-up window, please
refer to another section, “Scanner and Printer Specific Features” on page 59.
ScanShop User’s Guide - 53
Chapter 7:The Printer Set-up Window
The Printer Set-up Window
Figure 7-1 Printer Set-up Window
The Printer Set-up window is divided into two sections. The left half is the print
preview area. It contains an area surrounded by a solid line, which represents the
printable area. Inside this area is a resizable selection box containing the image
to be printed. By click-dragging the corners of the selection box, you can change
the size of the image to be printed. By click-dragging the center of the box, you
can move the image on the page.
Note: Kodak 8600 and 8650 printers will always center images on the page.
The right half of the Printer Set-up window contains the printer controls. The
standard menus and buttons that appear on the right side are described here:
54 - ScanShop User’s Guide
Chapter 7:The Printer Set-up Window
Printer Selection
Available printers fall into three categories:
1. Direct Bus Printers -printers attached locally either via SCSI or GPIB
2. PostShop Printers - supported printers (either local or remote) via any print
queues served by PostShop,
3. Postscript Printers - local or remote Postscript-capable printers
DIRECT BUS PRINTERS
As long as these printers are supported by ScanShop and ScanShop is licensed
for printing, these printers should appear in the list. You can use Show All
Devices in the GUI to check to see if the printer is supported and opened.
POSTSHOP PRINTERS
If the printer is local, it should appear in the list automatically. If the printer is
remote, you will need to insert a line of the form
# vvprint config_file=<configuration file>
into the printer configuration file. The configuration file will be /etc/printcap on
BSD based systems (SunOS 4.x, DEC/OSF1) and the interface file for SVR4
based systems (Solaris 2, SGI, HPUX). The interface file will usually be found
at /usr/spool/lp/interface/<queue name>, though on Solaris it will be at
/etc/lp/interfaces/<queue name> (Note: For remote queues on Solaris, the file
will not exist and needs to be created). Please refer to the PostShop Users
Manual.
POSTSCRIPT PRINTERS
In most cases, the printer should appear in the list automatically. The exception
is the case of a remote printer on an SVR4 system where the interfaces script is
not created automatically (i.e. Solaris). In this case, one can simply create the file
by typing:
touch /etc/lp/interfaces/<queue name>
Click on the Printer menu button to see all your available printers. If you have no
supported printers connected, the first item in the box will say “No Printers
Available”. The last item will always be “show all devices”.
ScanShop User’s Guide - 55
Chapter 7:The Printer Set-up Window
The “show all devices” option in the Printer menu functions identically to that in
the Scanner menu in the Scanner Set-up window. For more, please refer to
another section, “Scanner” on page 47.
Copies
The Copies control allows you to specify the number of copies that will be
printed when you select the Print button.
Orientation
The Orientation Control allows you to specify whether your image will be
printed with Portrait (default) or Landscape orientation. The icons used to
represent Portrait and Landscape are the house standing up and the house turned
90 degrees counterclockwise.
Image Size
The Image Size control is one of the most powerful controls in the ScanShop
printing software. There are four settings available:
•
Original Image Coordinates
Select this to scale your image according to the information about its size
from when it was read from an image file or scanned. Not all image files save
dpi (dots per inch) dimensional information. In such cases, a default of 72
dpi is assumed (unless overridden by the “pdpi=n” command line
parameter).
•
Printer’s Native Resolution
Select this option if you want to guarantee that every pixel in the original
source image will be printed as one pixel in the output. This action will occur
regardless of any differences in the source image’s and printer’s dpi, so the
size of the printed image may not be the same as that of the scanned original.
•
Scale To Fit
This is useful when you want the image to fit exactly within the full printable
area of the selected printer. One result of this process is that images with
different sizes will be printed with different magnification or reduction ratios
to make them fit.
56 - ScanShop User’s Guide
Chapter 7:The Printer Set-up Window
•
Manual
This will be the selection indicated if you manually drag the resize handles
of the image icon on the left side of the Printer Set-up window, or if you enter
values in the numeric fields. The units for entered values can be selected as
Inches or Millimeters.
Lock X & Y Scale
This check box control (on by default) will keep your manual scaling settings
applied equally to the height and width of your image when it is selected. If you
uncheck it, then your manual scalings will not necessarily be symmetric. In other
words, you will be able to print your image in a squashed or stretched fashion.
Use Whole Page
The Use Whole Page Control (off by default) will allow you to position part or
all of your image upon the non-printing border area of the printer’s page.
Normally, these areas are protected, and all of your image will be printed.
However, sometimes you may want to print a full page image that was scanned
at the same dpi as the printer with Printer’s Native Resolution, so clipping will
occur. Almost all printers have some non-printable border area. ScanShop takes
account of these non-printable areas; they are programmed for every printer
supported.
Center X and Center Y
These controls will position the image so that it is perfectly centered on the page
when it is printed. Their effect is just like dragging the entire image selection box
from its center.
Options
Options pops up a dialog which gives you access to the extended imaging
features of your printer. To activate an option, click on the applicable button box.
Please refer to another section, “Scanner and Printer Specific Features” on
page 59 for more information about your printer’s extended features.
ScanShop User’s Guide - 57
Chapter 7:The Printer Set-up Window
58 - ScanShop User’s Guide
Appendix A:
Scanner and Printer Specific Features
Bell & Howell Scanners
SCANNER MODELS SUPPORTED INCLUDE:
•
Copiscan 4000 series
•
Copiscan 3338A, 6338, etc. (all models) with RSC-11 or 21
•
Copiscan 8000 series
•
(500 FB - see Ricoh Aficio IS-01)
•
(1000 FB - see Ricoh IS-420)
•
(1500 FB - see Ricoh IS-430)
SCANNER SETUP
The ScanShop Scanner Setup window provides controls for the scan area,
resolution, and other settings. Many of the controls are available for all scanners,
while others are model-specific. ScanShop automatically enables the controls
which are applicable to your scanner.
ScanShop User’s Guide - 59
Appendix A:Scanner and Printer Specific Features
To operate ScanShop with your Bell & Howell scanner, a remote SCSI controller
is required.
Figure 0-1 Bell & Howell Scanner
Scanner Selection
The Scanner menu shows the scanners that are available. If you don’t have any
scanners available, then this fact will be indicated. The last item on this list is
always “show all devices”.
Dots Per Inch
The following choices of dpi are typically available: 200, 240, 300, and “other...”.
60 - ScanShop User’s Guide
Appendix A:Scanner and Printer Specific Features
Bits Per Pixel
Bell & Howell scanners scan at 1 bit/pixel for black and white. Current
scanner/controller models do not support gray scale or color scanning.
Brightness
The brightness slider bar varies the brightness of the image, ranging from darkest
on the left to lightest on the right.
Threshold
The threshold slider bar allows you to select the level, below which all pixels are
set to black, and above which all pixels are set to white. Moving the slider bar
setting to the right increases this threshold level.
Auto Document Feeder
If you try to scan with the ADF selected but have no paper inserted in the ADF,
an error message will appear at the bottom of your image display window. The
Preview function is disabled when the scanner is in ADF mode.
Certain pre-defined document sizes are supported by the ADF when it is
installed:
•
letter (port and land)
•
legal (port)
•
11” x 17”
•
A5 (port and land)
•
A4 (port and land)
•
A3 (port)
•
B5 (port and land)
•
B4 (port)
“port” is short for portrait mode, which orients the paper with the narrower side
on top. Portrait is the default setting.
“land” is short for landscape mode, which orients the paper with the wider side
on top.
ScanShop User’s Guide - 61
Appendix A:Scanner and Printer Specific Features
Document Size
In selecting the size of the area to be scanned, the following standard document
sizes are typically offered:
•
letter
•
letter (land)
•
legal
•
11” x 17”
•
B5
•
B5 (land)
•
B4
•
A5
•
A5 (land)
•
A4
•
A4 (land)
•
A3
All document sizes are in portrait mode (narrower side on top), unless indicated
by a “land” designation.
X0, Y0, Width, Height
The document size may also be set manually, either by dragging a rectangle in
the preview area or by entering the settings directly into the X0, Y0, Width, and
Height text fields. The setting units may be specified as Inches, Millimeters, or
Pixels (“Pels”).
62 - ScanShop User’s Guide
Appendix A:Scanner and Printer Specific Features
SCANNER SETUP OPTIONS
This window provides access to scanner-specific settings.
Figure 0-2 Bell & Howell Settings
Photo Invert
Selecting this control will let you scan the “negative” of your images.
Horizontal Mirror
This option allows you to do a scan which mirrors the image over a vertical axis
down the center of the image, thus reversing the image left-to-right. Note that in
portrait mode, this axis cuts through the narrower sides, while in landscape
mode, it cuts through the wider sides.
Dithering
Selecting Dithering can help make a black-and-white scan represent gray
images. It does this by varying the size of clusters of black pixels. When viewed
at arm’s length, the dots blur, and the resulting image appears to have gray tones.
ScanShop User’s Guide - 63
Appendix A:Scanner and Printer Specific Features
Compression
When built-in compression hardware is present, this control allows you to select
the type of compression that will be recorded in the image’s Settings file, for use
when scanning directly to a file. Note that images scanned to a displayed window
will not be compressed.
ACE Sensitivity & ACE Function
These controls allow selection of Advanced Contrast Enhancement functions to
improve image contrast. Available choices are: lighten, photo, line art, mixed,
and darken.
Scanner Reports
This is a small text display area that shows information about the scanner you are
using. Information here will include ROM version information and other
information that particular scanner models report about themselves.
64 - ScanShop User’s Guide
Appendix A:Scanner and Printer Specific Features
Canon Scanners
SCANNER MODELS SUPPORTED INCLUDE:
•
CJ-10 with IPU-SS (scan and print)
•
CLC-10 with IPU-SS (scan and print)
SCANNER SETUP
The ScanShop Scanner Setup window provides controls for the scan area,
resolution, and other settings. Many of the controls are available for all scanners,
while others are model-specific. ScanShop automatically enables the controls
which are applicable to your scanner.
ScanShop User’s Guide - 65
Appendix A:Scanner and Printer Specific Features
Figure 0-3 Canon Scanners
Scanner Selection
The Scanner menu shows the scanners that are available. If you don’t have any
scanners available, then this fact will be indicated. The last item on this list is
always “show all devices”.
Dots Per Inch
The following choices of dpi are typically available: 50, 72, 75, 80, 90, 100, 120,
144, 150, 160, 180, 200, 240, 300, 320, 360, 400, and “other...”. (One bit/pixel
has only 400 dpi available.)
66 - ScanShop User’s Guide
Appendix A:Scanner and Printer Specific Features
Bits Per Pixel
Three levels of bits per pixel are offered: 1 bit/pixel for black and white,
8bits/pixel for gray scale, and 24 bits/pixel for color.
Brightness
The brightness slider bar varies the brightness of the image, ranging from darkest
on the left to lightest on the right.
Threshold
The threshold slider bar allows you to select the level, below which all pixels are
set to black, and above which all pixels are set to white. Moving the slider bar
setting to the right increases this threshold level.
Photo Invert
Selecting this control will let you scan the “negative” of your images.
Document Size
In selecting the size of the area to be scanned, the following standard document
sizes are typically offered:
•
letter
•
A5
•
A5 (land)
•
A4
•
B5
All document sizes are in portrait mode (narrower side on top), unless indicated
by a “land” designation.
X0, Y0, Width, Height
The document size may also be set manually, either by dragging a rectangle in
the preview area or by entering the settings directly into the X0, Y0, Width, and
Height text fields. The setting units may be specified as Inches, Millimeters, or
Pixels (“Pels”).
ScanShop User’s Guide - 67
Appendix A:Scanner and Printer Specific Features
Note: No SCANNER SETUP OPTIONS are available with the CJ-10.
CJ-10 PRINT CONTROLS
The ScanShop Print Controls window provides controls for the position,
orientation, geometry, and general treatment of the image from ScanShop’s main
window. ScanShop must have an image loaded before you will be able to bring
up the Print Controls window.
Figure 0-4 Canon Print Controls
Printer Selection
The Printer menu shows the printers that are available. If you don’t have any
printers available, then this fact will be indicated. The last item on this list is
always “show all devices”.
68 - ScanShop User’s Guide
Appendix A:Scanner and Printer Specific Features
Copies
The Copies control allows you to specify the number of copies that will be
printed when you click on the Print button.
Orientation
The Orientation control allows you to specify whether your image will be printed
with portrait (default) or landscape orientation. The icons used to represent these
two orientations are the house standing up (portrait) and the house turned 90
degrees counter-clockwise (landscape).
Image Size
The Image Size control is one of the most powerful controls in the ScanShop
printing software.
•
Original Image Coordinates
Select this to scale your image according to the information about its size
from when it was read from an image file or scanned. Not all image files save
DPI (dots per inch) dimensional information. In such cases, a default of 72
DPI is assumed (unless overridden by the “pdpi=n” command line
parameter).
•
Printer’s Native Resolution
Select this option if you want to guarantee that every pixel in the original
source image will be printed as one pixel in the output. This action will occur
regardless of any differences in the source image’s and printer’s DPI, so the
size of the printed image may not be the same as that of the scanned original.
•
Scale To Fit
This is useful when you want the image to fit exactly within the full printable
area of the selected printer. One result of this process is that images with
different sizes will be printed with different magnification or reduction ratios
to make them fit.
•
Manual
This will be the selection indicated if you manually drag the resize handles
of the image icon on the left side of the Print Controls window, or if you enter
values in the numeric fields. The units for entered values can be selected as
Inches or Millimeters.
ScanShop User’s Guide - 69
Appendix A:Scanner and Printer Specific Features
Lock X & Y Scale
This check box control (on by default) will keep your manual scaling applied
equally to the height and width of your image when it is selected. If you uncheck
it, then your manual scalings will not necessarily be symmetric. In other words,
your printed image may look squashed or stretched.
Use Whole Page
This control (off by default) will allow you to position part or all of your image
upon the non-printing border area of the printer’s page. Normally, these areas are
protected, and no part of the image may be placed within them.
However, sometimes you may want to print a full page image that was scanned
at the same DPI as the printer (for example, with Printer’s Native Resolution
selected for Image Size). Turning on the Use Whole Page option allows you to
position the image over the non-printing border area. Note that clipping will
occur.
Almost all printers have some non-printable border area, and ScanShop takes this
area into account for each printer supported.
X0, Y0, Width, Height
The print size may also be set manually, either by dragging a rectangle in the
print preview area or by entering the settings directly into the X0, Y0, Width, and
Height text fields. The setting units may be specified as Inches or Millimeters.
Center X and Center Y
These controls will position the image so that it is centered on the page, either
horizontally or vertically, when it is printed. Their effect is just like clicking on
the center of the image selection box and dragging it until it has been centered in
the appropriate direction.
70 - ScanShop User’s Guide
Appendix A:Scanner and Printer Specific Features
PRINT CONTROLS OPTIONS
This window provides access to printer-specific settings.
Figure 0-5 Canon Print Options
Sensitometry Table
This menu lets you select a “treatment” of your image as it goes to the output
medium such as CIO Paper, etc. Your printer’s configuration may be
ScanShop User’s Guide - 71
Appendix A:Scanner and Printer Specific Features
automatically sensed, so that the treatment choices available in this menu will
depend on the printer selected and its output media.
Paper Size
Different paper sizes or sources may be selected through this menu. The
following standard sizes are typically offered:
•
letter (paper)
•
letter (transparency)
•
A4 (paper)
•
A4 (transparency)
Gamma
The Gamma control activates image altering functions within the printer that are
provided to compensate for characteristics of certain image sources. The
following source selections are available: scanner, video, and
computer-generated graphic.
Black Text Mode
Enabling this control enhances the printing of text and line art when it is being
printed simultaneously with color images. Characters and lines will appear closer
to black.
Brightness or Color Balance Lock (RGB)
These are general brightness controls for affecting the saturation or tone of an
image. Experiment with these controls and with the Gamma and Sensitometry
controls to attain the best results.
Printer Reports
This is a small text display area that shows information about the printer you are
using. Information here will include ROM version information and other
information that particular printer models report about themselves.
72 - ScanShop User’s Guide
Appendix A:Scanner and Printer Specific Features
Epson Scanners
SCANNER MODELS SUPPORTED INCLUDE:
•
Action scanner II, ES-300C, ES-300GS, ES-600C, ES-800C,
ES-1000C, ES-1200C, ES-8000
•
GT-1000, GT-300, GT-4000, GT-5000, GT-5500, GT-6000, GT-6400,
GT-6500, GT-8000, GT-8500, GT-9000, GT-9500, GT-12000
•
Expression 636, Expression 836XL, Expression 800C
SCANNER SETUP
The ScanShop Scanner Setup window provides controls for the scan area,
resolution, and other settings. Many of the controls are available for all scanners,
while others are model-specific. ScanShop automatically enables the controls
which are applicable to your scanner.
ScanShop User’s Guide - 73
Appendix A:Scanner and Printer Specific Features
Scanner Selection
Figure 0-6 Epson Scanners
The Scanner menu shows the scanners that are available. If you don’t have any
scanners available, then this fact will be indicated. The last item on this list is
always “show all devices”.
Dots Per Inch
The following choices of dpi are typically available: 50, 60, 72, 75, 80, 90, 100,
120, 133, 144, 150, 160, 175, 180, 200, 216, 240, 300, 320, 360, 400, 480, 600,
and 800.
74 - ScanShop User’s Guide
Appendix A:Scanner and Printer Specific Features
Bits Per Pixel
Four levels of bits per pixel are offered: 1 bit/pixel for black and white,
4bits/pixel for gray scale, 8bits/pixel for gray scale, and 24 bits/pixel for color.
Auto Document Feeder
If the ADF is installed, its checkbox will appear “solid.” When available, clicking
on this checkbox alternately enables and disables use of the ADF for scans.
If you try to scan with the ADF selected but have no paper inserted in the ADF,
an error message will appear at the bottom of your image display window. The
Preview function is also disabled when the scanner is in ADF mode.
Transparency Unit
Clicking on this checkbox, if it is available, selects scanning using the
transparency unit. This will allow you to scan from a transparency.
Brightness
The brightness slider bar varies the brightness of the image, ranging from darkest
on the left to lightest on the right.
Zoom X, Zoom Y
Entering percentage values in these controls lets you change the magnification of
the scanned image, while preserving the DPI value. For example, choosing a
value of 200% along a particular direction will cause twice as many pixels to be
used to represent the same length, so that at a constant DPI, that image will be
twice as long in that direction.
The zoom can be set from 50% to 200% in 1% increments.
Document Size
In selecting the size of the area to be scanned, the following standard document
sizes are typically offered:
•
letter
•
A5
•
A5 (land)
ScanShop User’s Guide - 75
Appendix A:Scanner and Printer Specific Features
•
A4
•
B5
All document sizes are in portrait mode (narrower side on top), unless indicated
by a “land” designation.
X0, Y0, Width, Height
The document size may also be set manually, either by dragging a rectangle in
the preview area or by entering the settings directly into the X0, Y0, Width, and
Height text fields. The setting units may be specified as Inches, Millimeters, or
Pixels (“Pels”).
SCANNER SETUP OPTIONS
This window provides access to scanner-specific settings.
Figure 0-7 Epson Scanner Options
76 - ScanShop User’s Guide
Appendix A:Scanner and Printer Specific Features
Sharpness
Five levels of sharpness are available on Epson scanners. Select the desired
degree of sharpness by clicking on the corresponding control.
Halftoning Mode
When scanning in 1 bit/pixel-color and 2 bit/pixel-color data format, continuous
tone images cannot be properly expressed. Halftoning processes the data to
simulate continuous tones. Halftoning is a variation of dithering in which
patterns of dots are used to give the impression of gray. Most dithering methods
use a fixed pattern of dots. The Epson halftoning mode uses a proprietary method
which produces better results.
•
Mode A: Distinct
This is the standard mode which creates a hard, distinct tone.
•
Mode B: Soft
This mode converts the image into a softer tone. It is suited for images that
contain large areas of similar tones.
•
Mode C: Newspaper
This mode represents the image in a way similar to the screening method
commonly used for newspaper photographs. The gradations of tone are
represented by clusters of different numbers of dots.
Gamma Curve
Gamma Curve adjusts the light intensity scale between the original image and
output image so that when the image is reproduced on some devices, the tones in
the reproduced image may be closer to those of the original image.
•
Display A: Linear
The output data is proportional to the original image. This setting is suitable
for most types of computer displays which can display images in the 1
bit/pixel-color format or up to 8 or 16 colors. This mode is also suitable for
images without continuous tones, such as line art.
•
Display B: Non-Linear
This setting is suitable for analog-input CRT displays which can display
images with multiple levels of tones of more than 1 bit/pixel-color.
ScanShop User’s Guide - 77
Appendix A:Scanner and Printer Specific Features
•
Printer A: High Density
This setting is suitable for high density printers, such as 24 dot matrix
printers and page printers. With this function applied, the image is converted
into a light image as it is scanned to compensate for the higher (darker)
density of such printers. The same image will look faint when viewed on a
CRT display.
•
Printer B: Low Density
This setting is suitable for low density printers, such as 8 dot (9 pin) printers,
page printers, and ink jet printers. As it is scanned, the image is converted
into a slightly lighter image to compensate for the lower density of such
printers. This setting is lighter than Printer Output A. The image will look
slightly faint when viewed on a CRT display.
•
Printer C: High Contrast
This setting is suitable for the high contrast printing of images that contain
both photos and text. This setting gives higher contrast and more definition
to the darker areas, like characters and lines, than either Printer Output A or
B, while parts with graphic images are given gamma correction for printing.
Both the darker and lighter parts of the images are accentuated by this
method.
Color Correction
Color Correction processes the color data of the image so that the data is better
suited to the characteristics of the color output device. With the color correction
function, reproduction of the colors of the image data comes closer to the colors
in the original images.
•
CRT Displays
This setting adjusts colors for the characteristics of color CRT displays.
•
Thermal transfer printers
This setting compensates for the characteristics of thermal transfer printers.
•
Impact dot matrix printers
This setting compensates for the characteristics of color impact dot matrix
printers.
•
Ink jet printers
78 - ScanShop User’s Guide
Appendix A:Scanner and Printer Specific Features
This setting compensates for the characteristics of ink jet printers.
Photo Invert
Selecting this control will let you scan the “negative” of your images.
Scanner Reports
This is a small text display area that shows information about the scanner you are
using. Information here will include ROM version information and other
information that particular scanner models report about themselves.
ScanShop User’s Guide - 79
Appendix A:Scanner and Printer Specific Features
Fuji Pictrography 3000 and 4000
PRINT CONTROLS
The ScanShop Print Controls window provides controls for the position,
orientation, geometry, and general treatment of the image from ScanShop's main
window. ScanShop must have an image loaded before you will be able to bring
up the Print Controls window.
Figure 0-8 Pictrography 3000 Print Controls
80 - ScanShop User’s Guide
Appendix A:Scanner and Printer Specific Features
Printer Selection
The Printer menu shows the printers that are available. If you don't have any
printers available, then this fact will be indicated. The last item on this list is
always “show all devices”.
Copies
The Copies control allows you to specify the number of copies that will be
printed when you click on the Print button.
Orientation
The Orientation control allows you to specify whether your image will be printed
with portrait (default) or landscape orientation. The icons used to represent these
two orientations are the house standing up (portrait) and the house turned 90
degrees counter-clockwise (landscape).
Image Size
The Image Size control is one of the most powerful controls in the ScanShop
printing software.
•
Original Image Coordinates
Select this to scale your image according to the information about its size
from when it was read from an image file or scanned. Not all image files save
DPI (dots per inch) dimensional information. In such cases, a default of 72
DPI is assumed (unless overridden by the “pdpi=n” command line
parameter).
•
Printer's Native Resolution
Select this option if you want to guarantee that every pixel in the original
source image will be printed as one pixel in the output. This action will occur
regardless of any differences in the source image's and printer's DPI, so the
size of the printed image may not be the same as that of the scanned original.
•
Scale To Fit
This is useful when you want the image to fit exactly within the full printable
area of the selected printer. One result of this process is that images with
different sizes will be printed with different magnification or reduction ratios
to make them fit.
ScanShop User’s Guide - 81
Appendix A:Scanner and Printer Specific Features
•
Manual
This will be the selection indicated if you manually drag the resize handles
of the image icon on the left side of the Print Controls window, or if you enter
values in the numeric fields. The units for entered values can be selected as
Inches or Millimeters.
Lock X & Y Scale
This check box control (on by default) will keep your manual scaling applied
equally to the height and width of your image when it is selected. If you uncheck
it, then your manual scalings will not necessarily be symmetric. In other words,
your image may look squashed or stretched.
Use Whole Page
This control (off by default) will allow you to position part or all of your image
upon the non-printing border area of the printer's page. Normally, these areas are
protected, and no part of the image may be placed within them.
However, sometimes you may want to print a full page image that was scanned
at the same DPI as the printer (for example, with Printer's Native Resolution
selected for Image Size). Turning on the Use Whole Page option allows you to
position the image over the non-printing border area. Note that clipping will
occur.
Almost all printers have some non-printable border area, and ScanShop takes this
area into account for each printer supported.
Paper Tray
This control allows you to select between different paper sizes available. In
particular, you will be able to select between using a full sheet of paper and a half
sheet of paper.
X0, Y0, Width, Height
The print size may also be set manually, either by dragging a rectangle in the
print preview area or by entering the settings directly into the X0, Y0, Width, and
Height text fields. The setting units may be specified as Inches or Millimeters.
82 - ScanShop User’s Guide
Appendix A:Scanner and Printer Specific Features
Center X and Center Y
These controls will position the image so that it is centered on the page, either
horizontally or vertically, when it is printed. Their effect is just like clicking on
the center of the image selection box and dragging it until it has been centered in
the appropriate direction.
PRINT CONTROLS OPTIONS
This window provides access to printer-specific settings.
Figure 0-9 Pictrography 3000 Print Options
Brightness
The brightness slider bar varies the brightness of the image, ranging from darkest
on the left to lightest on the right.
Contrast
The contrast slider bar varies the contrast of the image. Sliding the slider to the
right increases contrast.
ScanShop User’s Guide - 83
Appendix A:Scanner and Printer Specific Features
Hue
The hue slider bar varies the hue of the image. (PG-3000 only)
Saturation
The saturation slider bar varies the saturation or density of the image. Sliding the
slider to the right increases saturation. (PG-3000 only)
Red, Green, and Blue Balance
The balance slider bars vary the color balance of the image. Each slider allows
you to adjust a specific color channel.
Color Match
This option allows you to use the printer's Color Match function.
Gamma
This option allows you to select one of the printer's Gamma function values
(PG-4000 only).
Fill Black
When checked, this option fills the border regions with black. This option does
not work with all paper sizes (PG-4000 only).
Border
This option allows you to select the width of the image border. This option does
not work with all paper sizes (PG-4000 only).
Mirror
This option allows you to do a scan which mirrors the image over a vertical axis
down the center of the image, thus reversing the image left-to-right. Note that in
portrait mode, this axis cuts through the narrower sides, while in landscape
mode, it cuts through the wider sides.
84 - ScanShop User’s Guide
Appendix A:Scanner and Printer Specific Features
Invert
This option allows you to print the negative of the image.
Printer Reports
This is a small text display area that shows information about the printer you are
using. Information here will include ROM version information and other
information that particular printer models report about themselves.
ScanShop User’s Guide - 85
Appendix A:Scanner and Printer Specific Features
Fujitsu Scanners
SCANNER MODELS SUPPORTED INCLUDE:
•
ScanPartner 10
•
ScanPartner 10C
•
ScanPartner M3096G+/m
•
ScanPartner M3096Gx
•
ScanPartner M3097G (Rev 2 firmware adss grayscale support)
•
ScanPartner M3099G Duplex scanner
SCANNER SETUP
The ScanShop Scanner Setup window provides controls for the scan area,
resolution, and other settings. Many of the controls are available for all scanners,
while others are model-specific. ScanShop automatically enables the controls
which are applicable to your scanner.
86 - ScanShop User’s Guide
Appendix A:Scanner and Printer Specific Features
For operation with ScanShop, your Fujitsu scanner will need to have the memory
option installed.
Figure 0-10 Fujitsu Scanners
Scanner Selection
The Scanner menu shows the scanners that are available. If you don’t have any
scanners available, then this fact will be indicated. The last item on this list is
always “show all devices”.
Dots Per Inch
The following choices of dpi are normally available: 200, 240, 300, and 400.
Additional selections are available if the optional Image Processing Circuit (IPC)
ScanShop User’s Guide - 87
Appendix A:Scanner and Printer Specific Features
Board is installed. For more information, please see the “Image Processing
Circuit Board” section below.
Bits Per Pixel
Three levels of bits per pixel are offered: 1 bit/pixel for black and white and
8bits/pixel for gray scale.
Brightness
The brightness slider bar varies the brightness of the image, ranging from darkest
on the left to lightest on the right.
Contrast
The contrast slider bar allows you to vary the image contrast. Sliding the bar to
the right increases the contrast.
Threshold
The Fujitsu scanner supports two kinds of threshold controls: regular (or static)
threshold and dynamic threshold. Static threshold corresponds to the most
generally used kind of thresholding, where at an established level, all lighter
pixels become white and all darker pixels become black. The slider bar allows
you to select 64 threshold levels.
The Dynamic Thresholding feature is available only when the optional Image
Processing Circuit board is installed. If the board is not installed, the Dynamic
Thresholding checkbox is disabled. (Please see the “Image Processing Circuit
Board” section below.)
Dynamic Thresholding uses a variable threshold level. It is especially useful in
the scanning of signatures which consist of variable line weights. Dynamic
Thresholding automatically adjusts the threshold to extract lightly stroked
handwritten characters. It does this by analyzing the reflected light from the page.
If there is a small variation in the signal, indicating a faint line, the scanner
reduces the threshold setting to a point where it can distinguish between the faint
line and the background.
88 - ScanShop User’s Guide
Appendix A:Scanner and Printer Specific Features
Auto Document Feeder
If you try to scan with the ADF selected but have no paper inserted in the ADF,
an error message will appear at the bottom of your image display window. The
Preview function is disabled when the scanner is in ADF mode.
Certain pre-defined document sizes are supported by the ADF when it is
installed:
•
letter (port and land)
•
legal (port)
•
11” x 17”
•
A5 (port and land)
•
A4 (port and land)
•
A3 (port)
•
B5 (port and land)
•
B4 (port)
“port” is short for portrait mode, which orients the paper with the narrower side
on top. Portrait is the default setting.
“land” is short for landscape mode, which orients the paper with the wider side
on top.
Document Size
In selecting the size of the area to be scanned, the following standard document
sizes are typically offered:
•
letter
•
letter (land)
•
legal
•
11” x 17”
•
B5
•
B5 (land)
•
B4
•
A5
ScanShop User’s Guide - 89
Appendix A:Scanner and Printer Specific Features
•
A5 (land)
•
A4
•
A4 (land)
•
A3
All document sizes are in portrait mode (narrower side on top), unless indicated
by a “land” designation.
X0, Y0, Width, Height
The document size may also be set manually, either by dragging a rectangle in
the preview area or by entering the settings directly into the X0, Y0, Width, and
Height text fields. The setting units may be specified as Inches, Millimeters, or
Pixels (“Pels”).
90 - ScanShop User’s Guide
Appendix A:Scanner and Printer Specific Features
SCANNER SETUP OPTIONS
This window provides access to scanner-specific settings.
Figure 0-11 Fujitsu Scanner Options
Dithering
Dithering can help make a black-and-white scan represent gray images. It does
this by varying the size of clusters of black pixels. When viewed at arm’s length,
the dots blur, and the resulting image appears to have gray tones.
The list of available dither patterns depends on the particular scanner selected.
For this scanner, the following are available:
•
None
•
Photographs 1
•
Photographs 2
•
Characters/Photos 1
ScanShop User’s Guide - 91
Appendix A:Scanner and Printer Specific Features
•
Characters/Photos 2
Gamma
Through the Gamma control, you can adjust the light intensity scale between the
original image and output image so that when the image is reproduced on some
devices, the tones in the reproduced image may be closer to those in the original
image.
Compression
When built-in compression hardware is present, this control allows you to select
the type of compression that will be recorded in the image’s Settings file, for use
when scanning directly to a file. Note that images scanned to a displayed window
will not be compressed.
Image Processing Circuit Board
The optional Image Processing Circuit Board offers a number of image
processing features for the Fujitsu M3096G/H and M3097G scanners. The board
is shipped separately from the scanner and should be installed by a
Fujitsu-authorized and trained service technician.
The IPC board offers the following image enhancement options:
•
Photo Invert
•
Horizontal Mirror
•
Automatic Discrimination
•
Outline Extraction
•
Edge Emphasis
•
Dynamic Thresholding (see “Threshold” above)
If the board is not installed, these options will be disabled.
Photo Invert
Selecting this control will let you scan the “negative” of your images.
92 - ScanShop User’s Guide
Appendix A:Scanner and Printer Specific Features
Horizontal Mirror
This option allows you to do a scan which mirrors the image over a vertical axis
down the center of the image, thus reversing the image left-to-right. Note that in
portrait mode, this axis cuts through the narrower sides, while in landscape
mode, it cuts through the wider sides.
Automatic Discrimination
The automatic discrimination feature is useful when scanning documents
containing both photos and text. This feature allows the scanner to switch
between text and photo mode in one pass. Line mode scanning is binary and
photo mode is dithered halftone. The end result is that line art and photos are both
processed for their best appearance. The automatic discrimination feature
analyzes the reflected light from the page to determine if it is black and white
(very high or low signal) or gray scale (varying signal). When high signal
fluctuations are detected, the scanner switches to line mode for black and white.
When fluctuations are gradual, the scanner switches to halftone mode for
scanning a photograph.
Outline Extraction
The Outline feature saves the outline of a black and white image. The scanner
looks for the boundaries between black and white and connects them to form
outlines of the objects in the image.
Edge Emphasis
The edge emphasis feature enhances the edges of the image to make them appear
sharp and crisp. It can also be set to “smoothing” to help eliminate spot noise and
voids.
Scanner Reports
This is a small text display area that shows information about the scanner you are
using. Information here will include ROM version information and other
information that particular scanner models report about themselves.
ScanShop User’s Guide - 93
Appendix A:Scanner and Printer Specific Features
Hewlett-Packard Scanners
SCANNER MODELS SUPPORTED INCLUDE:
•
ScanJet IIC
•
ScanJet IICX
•
ScanJet 3C
•
ScanJet 4C
•
ScanJet 2P
•
ScanJet 3P
•
ScanJet 4P
•
ScanJet 5P (without “green button” support)
•
ScanJet 6100C
•
ScanJet 6200C
•
ScanJet 6250C
SCANNER SETUP
The ScanShop Scanner Setup window provides controls for the scan area,
resolution, and other settings. Many of the controls are available for all scanners,
while others are model-specific. ScanShop automatically enables the controls
which are applicable to your scanner.
94 - ScanShop User’s Guide
Appendix A:Scanner and Printer Specific Features
Figure 0-12 Hewlett-Packard Scanners
Scanner Selection
The Scanner menu shows the scanners that are available. If you don’t have any
scanners available, then this fact will be indicated. The last item on this list is
always “show all devices”.
Dots Per Inch
The following choices of dpi are typically available: 50, 60, 72, 75, 80, 90, 100,
120, 144, 150, 160, 180, 200, 240, 300, 320, 360, 400, 480, 600, 800, and
“other...”.
ScanShop User’s Guide - 95
Appendix A:Scanner and Printer Specific Features
Bits Per Pixel
Four levels of bits per pixel are offered: 1 bit/pixel for black and white, 4or 8
bits/pixel for gray scale, and 24 bits/pixel for color.
Brightness
The brightness slider bar varies the brightness of the image, ranging from darkest
on the left to lightest on the right.
Contrast
The contrast slider bar allows you to vary the image contrast. Sliding it to the
right increases the contrast.
Auto Background
Auto Background is an image enhancement feature only available on
Hewlett-Packard scanners. This function adjusts the variations in the background
to even out the foreground.
Auto Document Feeder
If the ADF is installed, its checkbox will appear “solid.” When available, clicking
on this checkbox alternately enables and disables use of the ADF for scans.
If you try to scan with the ADF selected but have no paper inserted in the ADF,
an error message will appear at the bottom of your image display window. The
Preview function is disabled when the scanner is in ADF mode.
Zoom X, Zoom Y
Entering percentage values in these controls lets you change the magnification of
the scanned image, while preserving the DPI value. For example, choosing a
value of 200% along a particular direction will cause twice as many pixels to be
used to represent the same length, so that at a constant DPI, that image will be
twice as long in that direction.
Document Size
In selecting the size of the area to be scanned, the following standard document
sizes are typically offered:
•
letter
96 - ScanShop User’s Guide
Appendix A:Scanner and Printer Specific Features
•
legal
•
B5
•
A5
•
A5 (land)
•
A4
All document sizes are in portrait mode (narrower side on top), unless indicated
by a “land” designation.
X0, Y0, Width, Height
The document size may also be set manually, either by dragging a rectangle in
the preview area or by entering the settings directly into the X0, Y0, Width, and
Height text fields. The setting units may be specified as Inches, Millimeters, or
Pixels (“Pels”).
ScanShop User’s Guide - 97
Appendix A:Scanner and Printer Specific Features
SCANNER SETUP OPTIONS
This window provides access to scanner-specific settings.
Figure 0-13 Hewlett-Packard Scanner Options
Photo Invert
Selecting this control will let you scan the “negative” of your images.
Horizontal Mirror
This option allows you to do a scan which mirrors the image over a vertical axis
down the center of the image, thus reversing the image left-to-right. Note that in
portrait mode, this axis cuts through the narrower sides, while in landscape
mode, it cuts through the wider sides.
98 - ScanShop User’s Guide
Appendix A:Scanner and Printer Specific Features
Filtering
Image filtering has the effect of smoothing the image, as local clusters of pixels
are averaged.
Dithering
Dithering can help make a black-and-white scan represent gray images. It does
this by varying the size of clusters of black pixels. When viewed at arm’s length,
the dots blur, and the resulting image appears to have gray tones.
The list of available dither patterns depends on the particular scanner selected.
For this scanner, the following are available:
•
none
•
Coarse Fatting
•
Fine Fatting
•
Bayer Dither
•
Vertical Line
The larger the pattern area, the more gray levels that can be represented, but with
a grainier result. Dither patterns can also be downloaded to achieve special
effects.
Matrix Coefficient
Selection of matrix coefficients lets you slightly alter the colors of scanned
images, so that the colors of the image on the final output device correspond more
closely to those of the original scanned image.
Tone Map
Setting of the tone map is an image enhancement feature of the Hewlett-Packard
scanners.
Scanner Reports
This is a small text display area that shows information about the scanner you are
using. Information here will include ROM version information and other
information that particular scanner models report about themselves.
ScanShop User’s Guide - 99
Appendix A:Scanner and Printer Specific Features
Kodak Printers
SUPPORTED MODELS INCLUDE:
•
XL-7700 (GPIB or SCSI)
•
XLT-7720 (GPIB or SCSI)
•
XLS-8600 (PS, SCSI, ethernet TCP/IP Raster)
•
DS-8650 (PS, SCSI, ethernet TCP/IP Raster)
KODAK PRINT CONTROLS
The ScanShop Print Controls window provides controls for the position,
orientation, geometry, and general treatment of the image from ScanShop’s main
window. ScanShop must have an image loaded before you will be able to bring
up the Print Controls window.
100 - ScanShop User’s Guide
Appendix A:Scanner and Printer Specific Features
For GPIB operation, ScanShop requires that a National Instruments GPIB
adapter be installed with its GPIB drivers.
Figure 0-14 Kodak XL7700 Print Controls
Printer Selection
The Printer menu shows the printers that are available. If you don’t have any
printers available, then this fact will be indicated. The last item on this list is
always “show all devices”.
Copies
The Copies control allows you to specify the number of copies that will be
printed when you click on the Print button.
Orientation
The Orientation control allows you to specify whether your image will be printed
with portrait (default) or landscape orientation. The icons used to represent these
ScanShop User’s Guide - 101
Appendix A:Scanner and Printer Specific Features
two orientations are the house standing up (portrait) and the house turned 90
degrees counter-clockwise (landscape).
Image Size
The Image Size control is one of the most powerful controls in the ScanShop
printing software.
•
Original Image Coordinates
Select this to scale your image according to the information about its size
from when it was read from an image file or scanned. Not all image files save
DPI (dots per inch) dimensional information. In such cases, a default of 72
DPI is assumed (unless overridden by the “pdpi=n” command line
parameter).
•
Printer’s Native Resolution
Select this option if you want to guarantee that every pixel in the original
source image will be printed as one pixel in the output. This action will occur
regardless of any differences in the source image’s and printer’s DPI, so the
size of the printed image may not be the same as that of the scanned original.
•
Scale To Fit
This is useful when you want the image to fit exactly within the full printable
area of the selected printer. One result of this process is that images with
different sizes will be printed with different magnification or reduction ratios
to make them fit.
•
Manual
This will be the selection indicated if you manually drag the resize handles
of the image icon on the left side of the Print Controls window, or if you enter
values in the numeric fields. The units for entered values can be selected as
Inches or Millimeters.
Lock X & Y Scale
This check box control (on by default) will keep your manual scaling applied
equally to the height and width of your image when it is selected. If you uncheck
it, then your manual scalings will not necessarily be symmetric. In other words,
your image may look squashed or stretched.
102 - ScanShop User’s Guide
Appendix A:Scanner and Printer Specific Features
Use Whole Page
This control (off by default) will allow you to position part or all of your image
upon the non-printing border area of the printer’s page. Normally, these areas are
protected, and no part of the image may be placed within them.
However, sometimes you may want to print a full page image that was scanned
at the same DPI as the printer (for example, with Printer’s Native Resolution
selected for Image Size). Turning on the Use Whole Page option allows you to
position the image over the non-printing border area. Note that clipping will
occur.
Almost all printers have some non-printable border area, and ScanShop takes this
area into account for each printer supported.
X0, Y0, Width, Height
The print size may also be set manually, either by dragging a rectangle in the
print preview area or by entering the settings directly into the X0, Y0, Width, and
Height text fields. The setting units may be specified as Inches or Millimeters.
Center X and Center Y
These controls will position the image so that it is centered on the page, either
horizontally or vertically, when it is printed. Their effect is just like clicking on
the center of the image selection box and dragging it until it has been centered in
the appropriate direction.
ScanShop User’s Guide - 103
Appendix A:Scanner and Printer Specific Features
KODAK PRINT OPTIONS
This window provides access to printer-specific settings.
Figure 0-15 Kodak XL-7700 and XL-7720 Print Options
Figure 0-16 Kodak XL 8600 Print Options
104 - ScanShop User’s Guide
Appendix A:Scanner and Printer Specific Features
Sensitometry Table
These radio buttons allow you to choose from the current sensitometry table in
the printer, 1 to 1 (“linear”), CIO paper, or upload a new table to the printer. Your
printer’s configuration will be automatically sensed, so that the treatment choices
available in this menu will depend on the printer selected and its output media.
In the XLS-8600 and 8650 Options GUI, a Kodak TableMaker file, also referred
to as a .TBL or PTF file can be downloaded to the printer. See also the ptf_file
command line option (which applies to the 77XX and the 86XX models).
Brightness
The brightness slider bar varies the brightness of the image, ranging from darkest
on the left to lightest on the right. (77XX models only)
Sharpness
Five levels of sharpness are available in the 77XX models, three levels in the
86XX models. Select the desired degree of sharpness by clicking on the
corresponding control.
Density
This control lets you choose the desired printer output density. (77XX models
only)
Reduction Filter
The reduction filter, when enabled, acts as a low-pass filter, slightly blurring the
image, so that if the image is printed at a lower resolution than it was scanned at,
there is less of a chance that very fine lines will be lost. (77XX models only)
Mirror
This option allows you to do a scan which mirrors the image over a vertical axis
down the center of the image, thus reversing the image left-to-right. Note that in
portrait mode, this axis cuts through the narrower sides, while in landscape
mode, it cuts through the wider sides.
ScanShop User’s Guide - 105
Appendix A:Scanner and Printer Specific Features
Time Stamp
Selecting this control places a time stamp on the image when it is printed.(77XX
models only)
Bell
Selecting this control causes an end-of-print tone to sound at the completion of
printing.(77XX models only)
Annotation
Text in this control will be printed at the border of the image.(77XX models only)
Printer Reports
This is a small text display area that shows information about the printer you are
using. Information here will include ROM version information and other
information that particular printer models report about themselves.
Laminate (86xx models only)
Laminate - If you are using the XtraLife color ribbon, this option will enable
lamination to extend the life of the print.
106 - ScanShop User’s Guide
Appendix A:Scanner and Printer Specific Features
Microtek Scanners
SCANNER MODELS SUPPORTED INCLUDE:
•
ScanMaker 600ZS
•
ScanMaker II
•
ScanMaker IIXe
•
ScanMaker IIHR
•
ScanMaker III
•
ScanMaker E3
•
ScanMaker E6
•
AGFA Arcus II
•
AGFA DuoScan
SCANNER SETUP
The ScanShop Scanner Setup window provides controls for the scan area,
resolution, and other settings. Many of the controls are available for all scanners,
while others are model-specific. ScanShop automatically enables the controls
which are applicable to your scanner.
ScanShop User’s Guide - 107
Appendix A:Scanner and Printer Specific Features
Figure 0-17 Microtek Scanners
Scanner Selection
The Scanner menu shows the scanners that are available. If you don’t have any
scanners available, then this fact will be indicated. The last item on this list is
always “show all devices”.
Dots Per Inch
The following choices of dpi are typically available: 60, 90, 120, 150, 180, 240,
300, 450, 600, 900, 1200, and “other...”.
108 - ScanShop User’s Guide
Appendix A:Scanner and Printer Specific Features
Bits Per Pixel
Three levels of bits per pixel are offered: 1 bit/pixel for black and white, 8
bits/pixel for gray scale, and 24 bits/pixel for color.
Brightness
The brightness slider bar varies the brightness of the image, ranging from darkest
on the left to lightest on the right.
Contrast
The contrast slider bar allows you to vary the image contrast. Sliding it to the
right increases the contrast.
Document Size
In selecting the size of the area to be scanned, the following standard document
sizes are typically offered:
•
B5
•
A5
•
A5 (land)
•
A4
All document sizes are in portrait mode (narrower side on top), unless indicated
by a “land” designation.
X0, Y0, Width, Height
The document size may also be set manually, either by dragging a rectangle in
the preview area or by entering the settings directly into the X0, Y0, Width, and
Height text fields. The setting units may be specified as Inches, Millimeters, or
Pixels (“Pels”).
ScanShop User’s Guide - 109
Appendix A:Scanner and Printer Specific Features
SCANNER SETUP OPTIONS
This window provides access to scanner-specific settings.
Figure 0-18 Microtek Scanners Options
Photo Invert
Selecting this control will let you scan the “negative” of your images.
Dithering
Dithering can help make a black-and-white scan represent gray images. It does
this by varying the size of clusters of black pixels. When viewed at arm’s length,
the dots blur, and the resulting image appears to have gray tones.
The list of available dither patterns depends on the particular scanner selected.
For this scanner, the following are available:
•
none
•
8x8 53 grays
110 - ScanShop User’s Guide
Appendix A:Scanner and Printer Specific Features
•
8x8 65 grays
•
8x8 33 grays
•
6x6 29 grays
•
5x5 26 grays
•
4x4 17 grays
•
3x3 10 grays
•
2x2 5 grays
The larger the pattern area, the more gray levels that can be represented, but with
a grainier result. Dither patterns can also be downloaded to achieve special
effects.
Shadow, Midtone, and Highlight
These sliders can be used to enhance the dynamic range of the images you scan.
If you have an image with lots of midtones that you would like to differentiate,
these controls can help. They allow you to specify the resolution of gray tones at
particular intensity levels, which in turn affects the overall brightness of the
image.
Shadow adjusts the level of the darkest dark for scanning. Below this value, all
pixels will be black.
Accordingly, Highlight allows you to bring down the top end of the range into
the midtones.
Midtone lets you set the intensity level corresponding to medium gray.
Scanner Reports
This is a small text display area that shows information about the scanner you are
using. Information here will include ROM version information and other
information that particular scanner models report about themselves.
ScanShop User’s Guide - 111
Appendix A:Scanner and Printer Specific Features
Panasonic Scanners
SCANNER MODELS SUPPORTED INCLUDE:
•
KVSS-50
•
KVSS-55
SCANNER SETUP
The ScanShop Scanner Setup window provides controls for the scan area,
resolution, and other settings. Many of the controls are available for all scanners,
while others are model-specific. ScanShop automatically enables the controls
which are applicable to your scanner.
Figure 0-19 Panasonic Scanners
112 - ScanShop User’s Guide
Appendix A:Scanner and Printer Specific Features
Scanner Selection
The Scanner menu shows the scanners that are available. If you don’t have any
scanners available, then this fact will be indicated. The last item on this list is
always “show all devices”.
Dots Per Inch
The following choices of dpi are normally available: 200, 240, 300, and 400.
Bits Per Pixel
Three levels of bits per pixel are offered: 1 bit/pixel for black and white and 8
bits/pixel for gray scale.
Brightness
The brightness slider bar varies the brightness of the image, ranging from darkest
on the left to lightest on the right.
Threshold
The threshold slider bar allows you to select the level, below which all pixels are
set to black, and above which all pixels are set to white. Moving the slider bar
setting to the right increases this threshold level.
Auto Document Feeder
If you try to scan with the ADF selected but have no paper inserted in the ADF,
an error message will appear at the bottom of your image display window. The
Preview function is disabled when the scanner is in ADF mode.
Certain pre-defined document sizes are supported by the ADF when it is
installed:
•
letter (port and land)
•
legal (port)
•
11” x 17”
•
A5 (port and land)
•
A4 (port and land)
•
A3 (port)
ScanShop User’s Guide - 113
Appendix A:Scanner and Printer Specific Features
•
B5 (port and land)
•
B4 (port)
“port” is short for portrait mode, which orients the paper with the narrower side
on top. Portrait is the default setting.
“land” is short for landscape mode, which orients the paper with the wider side
on top.
Document Size
In selecting the size of the area to be scanned, the following standard document
sizes are typically offered:
•
letter
•
letter (land)
•
legal
•
11” x 17”
•
B5
•
B5 (land)
•
B4
•
A5
•
A5 (land)
•
A4
•
A4 (land)
•
A3
All document sizes are in portrait mode (narrower side on top), unless indicated
by a “land” designation.
X0, Y0, Width, Height
The document size may also be set manually, either by dragging a rectangle in
the preview area or by entering the settings directly into the X0, Y0, Width, and
Height text fields. The setting units may be specified as Inches, Millimeters, or
Pixels (“Pels”).
114 - ScanShop User’s Guide
Appendix A:Scanner and Printer Specific Features
SCANNER SETUP OPTIONS
This window provides access to scanner-specific settings.
Figure 0-20 Panasonic Scanner Options
Dithering
Dithering can help make a black-and-white scan represent gray images. It does
this by varying the size of clusters of black pixels. When viewed at arm’s length,
the dots blur, and the resulting image appears to have gray tones.
The list of available dither patterns depends on the particular scanner selected.
For this scanner, the following are available:
•
None
•
Photographs 1
•
Photographs 2
•
Characters/Photos 1
•
Characters/Photos 2
ScanShop User’s Guide - 115
Appendix A:Scanner and Printer Specific Features
Gamma
Through the Gamma control, you can adjust the light intensity scale between the
original image and output image so that when the image is reproduced on some
devices, the tones in the reproduced image may be closer to those in the original
image.
Compression
When built-in compression hardware is present, this control allows you to select
the type of compression that will be recorded in the image’s Settings file, for use
when scanning directly to a file. Note that images scanned to a displayed window
will not be compressed.
Photo Invert
Selecting this control will let you scan the “negative” of your images.
Horizontal Mirror
This option allows you to do a scan which mirrors the image over a vertical axis
down the center of the image, thus reversing the image left-to-right. Note that in
portrait mode, this axis cuts through the narrower sides, while in landscape
mode, it cuts through the wider sides.
Edge Emphasis
The edge emphasis feature enhances the edges of the image to make them appear
sharp and crisp. It can also be set to “smoothing” to help eliminate spot noise and
voids.
Scanner Reports
This is a small text display area that shows information about the scanner you are
using. Information here will include ROM version information and other
information that particular scanner models report about themselves.
116 - ScanShop User’s Guide
Appendix A:Scanner and Printer Specific Features
Ricoh Scanners
SCANNER MODELS SUPPORTED INCLUDE:
•
Aficio IS-01
•
FS-2
•
IS-50
•
IS-60
•
IS-410
•
IS-420
•
IS-430
•
Digital Equipment Corp. MD-410
•
IBM 2456
•
Bell & Howell 500 FB, 1000 FB, and 1500 FB
SCANNER SETUP
The ScanShop Scanner Setup window provides controls for the scan area,
resolution, and other settings. Many of the controls are available for all scanners,
while others are model-specific. ScanShop automatically enables the controls
which are applicable to your scanner.
ScanShop User’s Guide - 117
Appendix A:Scanner and Printer Specific Features
Figure 0-21 Ricoh Scanners
Scanner Selection
The Scanner menu shows the scanners that are available. If you have no scanners
available, then this fact will be indicated. The last item on this list is always
“show all devices”.
Dots Per Inch
The following choices of dpi are typically available: 50, 60, 72, 75, 80, 90, 100,
120, 144, 150, 160, 180, 200, 240, 300, 320, 360, 400, 480, 600, 800, 1200, and
“other...”.
118 - ScanShop User’s Guide
Appendix A:Scanner and Printer Specific Features
Bits Per Pixel
Three levels of bits per pixel are offered: 1 bit/pixel for black and white, and 4 or
8bits/pixel for gray scale.
Brightness
The brightness slider bar varies the brightness of the image, ranging from darkest
on the left to lightest on the right.
Contrast
The contrast slider bar allows you to vary the image contrast. Sliding it to the
right increases the contrast.
Threshold
The threshold slider bar allows you to select the level, below which all pixels are
set to black, and above which all pixels are set to white. Moving the slider bar
setting to the right increases this threshold level.
Auto Document Feeder
The Automatic Document Feeder (ADF) is an option on IS50 and IS60 scanners
(part number DF-60) and comes standard on the model IS410. The ADF
checkbox is located under the Threshold slider bar. If your scanner has an ADF,
it will be selectable.
If you try to scan with the ADF selected but do not have paper inserted in the
ADF, an error message will appear at the bottom of your image display window.
The Preview function is disabled when the scanner is in ADF mode.
Document Size
All three Ricoh scanners allow manual input of document size, but the
pre-defined document sizes are different for the IS50/IS60 and the IS410. The
abbreviated menu button for the IS50 and IS60 displays are as follows:
•
letter
•
legal
•
A5
•
A5 (land)
ScanShop User’s Guide - 119
Appendix A:Scanner and Printer Specific Features
•
A4
•
B5
The abbreviated menu button for the IS410 displays:
•
letter
•
letter (land)
•
legal
•
11” x 17”
•
A5
•
A5 (land)
•
A4
•
A4 (land)
•
A3
•
B5
•
B5 (land)
•
B4
All document sizes are in portrait mode (narrower side on top), unless indicated
by a “land” designation.
X0, Y0, Width, Height
The document size may also be set manually, either by dragging a rectangle in
the preview area or by entering the settings directly into the X0, Y0, Width, and
Height text fields. The setting units may be specified as Inches, Millimeters, or
Pixels (“Pels”).
120 - ScanShop User’s Guide
Appendix A:Scanner and Printer Specific Features
SCANNER SETUP OPTIONS
This window provides access to scanner-specific settings.
Figure 0-22 Ricoh Scanner Options
Photo Invert
Selecting this control will let you scan the “negative” of your images.
Horizontal Mirror
This option allows you to do a scan which mirrors the image over a vertical axis
down the center of the image, thus reversing the image left-to-right. Note that in
portrait mode, this axis cuts through the narrower sides, while in landscape
mode, it cuts through the wider sides.
Dithering
Dithering can help make a black-and-white scan represent gray images. It does
this by varying the size of clusters of black pixels. When viewed at arm’s length,
the dots blur, and the resulting image appears to have gray tones.
The larger the pattern area, the more gray levels that can be represented, but with
a grainier result. Dither patterns can also be downloaded to achieve special
effects.
ScanShop User’s Guide - 121
Appendix A:Scanner and Printer Specific Features
Compression
When built-in compression hardware is present, this control allows you to select
the type of compression that will be recorded in the image’s Settings file, for use
when scanning directly to a file. Note that images scanned to a displayed window
will not be compressed.
Line Art Filtering
All of the line art filtering options work only with 1 bit/pixel images (line art,
black and white images).
•
None
No filtering will be done.
•
Bold Lining
This removes single black dots, extracts edges, thickens edges.
•
Edge Detection
This looks for the boundaries between black and white and connects them to
form outlines of the objects in the image.
Smoothing
Smoothing softens the transition between black and white by creating the illusion
of gray.
Speckle Removal
Speckle removal eliminates extraneous dots in the image.
Image Filtering
•
None
This will disable filtering of images.
•
Averaging
Choosing this option averages 2x2 neighborhoods of pixels together to
achieve a “smoothing” effect.
•
MTF
122 - ScanShop User’s Guide
Appendix A:Scanner and Printer Specific Features
This is a filter for boosting fine lines, and thus is effective when black and
white line art is scanned.
Ricoh Gamma Tables
You can download a desired gamma table or you can choose one of the following:
•
Normal
This option gives output closest to the original document.
•
Smooth
This creates an overall loose, soft feeling.
•
Sharp
This option emphasizes the border line between black and white.
•
Linear
With this option, scanned pixel values are passed through the gamma unit
unchanged.
Scanner Reports
This is a small text display area that shows information about the scanner you are
using. Information here will include ROM version information and other
information that particular scanner models report about themselves.
ScanShop User’s Guide - 123
Appendix A:Scanner and Printer Specific Features
Sharp Scanners
SCANNER MODELS SUPPORTED INCLUDE:
•
JX-320s (SCSI)
•
JX-330 (SCSI)
•
JX-600 (GPIB and SCSI)
•
JX-610 (SCSI)
SCANNER SETUP
The ScanShop Scanner Setup window provides controls for the scan area,
resolution, and other settings. Many of the controls are available for all scanners,
while others are model-specific. ScanShop automatically enables the controls
which are applicable to your scanner.
124 - ScanShop User’s Guide
Appendix A:Scanner and Printer Specific Features
For GPIB operation, ScanShop requires that a National Instruments GPIB
adapter be installed with its GPIB drivers.
Figure 0-23 Sharp Scanners
Scanner Selection
The Scanner menu shows the scanners that are available. If you don’t have any
scanners available, then this fact will be indicated. The last item on this list is
always “show all devices”.
Dots Per Inch
The following choices of dpi are typically available: 50, 60, 72, 75, 80, 90, 100,
120, 144, 150, 160, 180, 200, 240, 300, 320, 360, 400, 480, 600, 800, 1200, and
“other...”.
ScanShop User’s Guide - 125
Appendix A:Scanner and Printer Specific Features
Bits Per Pixel
Three levels of bits per pixel are offered: 1 bit/pixel for black and white,
8bits/pixel for gray scale, and 24 bits/pixel for color.
Transparency Illumination Unit
The Sharp JX-600 and JX-610 scanners ship with a transparency illumination
unit. Use of this unit is supported in ScanShop automatically when it is installed
and connected each time when you start ScanShop.
Threshold
The threshold slider bar allows you to select the level, below which all pixels are
set to black, and above which all pixels are set to white. Moving the slider bar
setting to the right increases this threshold level.
Brightness
The brightness slider bar varies the brightness of the image, ranging from darkest
on the left to lightest on the right.
Emphasis
The edge emphasis feature enhances the edges of the image to make them appear
sharp and crisp. Four degrees of emphasis are available: None, Dull, Medium,
and Strong.
Document Size
In selecting the size of the area to be scanned, the following standard document
sizes are typically offered for the JX-600 and JX-610 (the JX-320S and
document sizes are a subset of this list):
•
letter
•
letter (land)
•
legal
•
11” x 17”
•
B5
•
B5 (land)
126 - ScanShop User’s Guide
Appendix A:Scanner and Printer Specific Features
•
B4
•
A5
•
A5 (land)
•
A4
•
A4 (land)
•
A3
All document sizes are in portrait mode (narrower side on top), unless indicated
by a “land” designation.
X0, Y0, Width, Height
The document size may also be set manually, either by dragging a rectangle in
the preview area or by entering the settings directly into the X0, Y0, Width, and
Height text fields. The setting units may be specified as Inches, Millimeters, or
Pixels (“Pels”).
ScanShop User’s Guide - 127
Appendix A:Scanner and Printer Specific Features
SCANNER SETUP OPTIONS
This window provides access to scanner-specific settings.
Figure 0-24 Sharp Scanner Options
Photo Invert
Selecting this control will let you scan the “negative” of your images.
Gamma
Through the Gamma control, you can adjust the light intensity scale between the
original image and output image so that when the image is reproduced on some
devices, the tones in the reproduced image may be closer to those in the original
image.
128 - ScanShop User’s Guide
Appendix A:Scanner and Printer Specific Features
Load Media
Load Media (JX-600 and JX-610) is used to help you position the platen of the
scanner when the overhead transparency unit is installed. Select “Left” to slide
the platen clear of the transparency unit for loading of your image media. Select
“Center” to re-position the platen in the normal position for scanning.
Scanner Reports
This is a small text display area that shows information about the scanner you are
using. Information here will include ROM version information and other
information that particular scanner models report about themselves.
ScanShop User’s Guide - 129
Appendix A:Scanner and Printer Specific Features
UMAX Scanners
SCANNER MODELS SUPPORTED INCLUDE:
•
PowerLook 2000
•
Mirage D-16L
•
MD 1600
•
Vista S-12
•
Super Vista S-12
SCANNER SETUP
The ScanShop Scanner Setup window provides controls for the scan area,
resolution, and other settings. Many of the controls are available for all scanners,
while others are model-specific. ScanShop automatically enables the controls
which are applicable to your scanner.
130 - ScanShop User’s Guide
Appendix A:Scanner and Printer Specific Features
Figure 0-25 UMAX Scanners
Scanner Selection
The Scanner menu shows the scanners that are available. If you don't have any
scanners available, then this fact will be indicated. The last item on this list is
always “show all devices”.
Dots Per Inch
Choices of dpi from 50 to 800 are available from the pull-down menu. You can
select “other” to specify a higher dpi.
ScanShop User’s Guide - 131
Appendix A:Scanner and Printer Specific Features
Bits Per Pixel
Three levels of bits per pixel are offered: 1 bit/pixel for black and white,
8bits/pixel for gray scale, and 24 bits/pixel for color.
Brightness
The brightness slider bar varies the brightness of the image, ranging from darkest
on the left to lightest on the right.
Contrast
The contrast slider bar allows you to vary the image contrast. Sliding the bar to
the right increases the contrast.
Threshold
The threshold slider bar allows you to select the level, below which all pixels are
set to black, and above which all pixels are set to white. Moving the slider bar
setting to the right increases this threshold level.
Transparency Unit
If you have a transparency unit on your scanner, you can toggle the transparency
unit option to turn it on or off.
Document Size
In selecting the size of the area to be scanned, the following standard document
sizes are typically offered:
letter
letter (land)
legal
11" x 17"
B5
B5 (land)
B4
A5
132 - ScanShop User’s Guide
Appendix A:Scanner and Printer Specific Features
A5 (land)
A4
A4 (land)
A3
All document sizes are in portrait mode (narrower side on top), unless indicated
by a “land” designation.
X0, Y0, Width, Height
The document size may also be set manually, either by dragging a rectangle in
the preview area or by entering the settings directly into the X0, Y0, Width, and
Height text fields. The setting units may be specified as Inches, Millimeters, or
Pixels (“Pels”).
ScanShop User’s Guide - 133
Appendix A:Scanner and Printer Specific Features
SCANNER SETUP OPTIONS
This window provides access to scanner-specific settings.
Figure 0-26 UMAX Scanner Options
Photo Invert
Selecting this control will let you scan the “negative” of your images.
Gamma
Through the Gamma control, you can adjust the light intensity scale between the
original image and output image so that when the image is reproduced on some
devices, the tones in the reproduced image may be closer to those in the original
image.
134 - ScanShop User’s Guide
Appendix A:Scanner and Printer Specific Features
Scanner Reports
This is a small text display area that shows information about the scanner you are
using. Information here will include ROM version information and other
information that particular scanner models report about themselves.
ScanShop User’s Guide - 135
Appendix A:Scanner and Printer Specific Features
136 - ScanShop User’s Guide
Appendix B: Troubleshooting
Overview
This chapter offers some troubleshooting hints as well as brief pointers to
maximize ScanShop’s operation efficiency.
Getting Help
Read this section of the manual
This section of the manual contains useful information on common problems and
troubleshooting. If you do not find an answer please go to our website’s support
section.
Getting Help On-line
Vividata now has maintains an on-line knowledge base with Questions and
Answers to many of the most common problems. It can be found at
http://www.vividata.com/SupportShop
Submitting a Question to the Support Department
At our SupportShop Website http://www.vividata.com/SupportShop you will see
a link “Ask the Support Department a Question”. This page will help you to you
supply us some important information that we need to help diagnose your
problem.
Identifying the Problem
There are several status files and options you can set in PostShop to help you
identify the cause of your problem.
ScanShop User’s Guide - 137
Appendix B:Troubleshooting
Step 1: Verify Licensing is Working
Run lmstat to check if the license manager daemon(s) are running:
$VV_HOME/bin/lmstat -t
If you receive a Status UP then licensing is working correctly. If you do not, then
your first step is to verify a key is installed on your system. The file
$VV_HOME/config/license.dat is the file that holds the Vividata license
keys. It should be an ASCII text file with 644 permissions. If it is not there, please
enter your key using the Vividata Installer. If it is there, run
$VV_HOME/bin/./lmutil lmdiag
This will check to see if there is any problems with licensing.
Lastly, try running $VV_HOME/bin/lmgrd directly, this is the license
manager deamon. It should tell you what type of problem it is having. If it can
not find the license file, try setting the LM_LICENSE_FILE environment
variable as described in “LM_LICENSE_FILE environment variable” on
page 146.
Step 2: Verify Connections
Verify that all your cables are connected properly, all equipment is turned on and
working properly. If you have one or more SCSI busses, please check that all of
your connections are plugged in and operating properly.
Step 3: Check Log Files
Vividata software generates various log files that can be useful for determining
the cause of many problems.
vividata.log
When your system reboots, a file called vividata.log is created in the /tmp
directory. This file contains information from the license manager used with our
products. This log is useful in determining if licensing is starting at boot time
correctly.
vvdrv.rc
The vvdrv.rc file located in the /tmp directory will display what SCSI devices our
software found at boot and is able to communicate with. Those devices supported
by our software will be listed as supported. For more information on devices
138 - ScanShop User’s Guide
Appendix B:Troubleshooting
listed as “Not Open” please see problems and solution section on page page 140.
We also include a utility called vvshowdevs that will rescan your SCSI bus for
devices that may not have been ready or available at boot. This utility is run from
the command line and will display its results for you. Another way of forcing a
SCSI rescan is to delete the vvdrc.rc file from the /tmp directory.
SCSI Drivers
ScanShop may have installed Vividata’s SCSI drivers on your system if your
system is not one that provide SCSI drivers in the kernel. The names and
installation requirements of SCSI device ports (i.e. “drivers”) are systemdependent and are described in the following table:
OS/CPU
SCSI Port Names
Installation Requirement
AIX
/dev/scsi*
vv_install
IRIX
/dev/scsi/*
none
HP-UX 9.x
/dev/scsi/*
none
HP-UX 10.x
/dev/scsi/*
vv_install
OSF/1
/dev/cam
none
Solaris 2.x
/dev/vvsc*
automatic by Installer
SunOS 4.x
/dev/vvsc*
vv_install
•
Your SCSI device ports do not have read and write permissions set for all
users. Refer to the “SCSI Drivers” section to determine the name of the SCSI
drivers on you system, and check the permissions on those files. On some
systems, the files are symbolic links; make sure the files they link to also have
sufficient read and write permissions.
•
You do not have SCSI ports and/or a compatible SCSI driver installed on
your system. Refer to the “SCSI Drivers” section to determine the correct
installation procedure for your platform. On OSF/1, HP-UX 9.x, and IRIX,
the SCSI ports should already exist on your system, so no additional drivers
are necessary.
•
You do not have read and write permissions set for /tmp or on /tmp/vvdrv.rc.
Make sure the permissions on these files are sufficient.
ScanShop User’s Guide - 139
Appendix B:Troubleshooting
•
You have an old vvdrv.rc that could not be deleted. Manually delete
/tmp/vvdrv.rc and restart ScanShop.
•
You are running an HP-UX 10.10 or 10.20 system. With certain system
configurations, ScanShop is unable to communicate with the SCSI bus.
Details on particular system configurations that fail are not yet qualified.
•
You have a third party SCSI driver on your system that is incompatible with
our software. You may need to remove the other SCSI drivers.
•
Your scanner (or SCSI printer) has a conflicting SCSI ID with another device
on your system.
•
Your SCSI chain is not properly terminated. Check to make sure that the ends
of the SCSI chain are terminated properly, and the internal termination is set
correctly.
•
Your SCSI chain is too long. Try to keep the chain as short as possible, and
make sure it does not exceed 5 meters.
•
If you are running Solaris 2.x, you may not have reconfigured the /devices
directory with a “reboot -- -r”, “boot -r” from the monitor prompt (“ok”) on
SPARC platforms, or “b -r” from the secondary OS loader on x86 platforms.
•
Your scanner is powered off, not properly connected, or “stuck” in a bad
state. Make sure all connections are okay, and power cycle your scanner. You
need to restart ScanShop after this.
•
You have more than 4 SCSI buses on your system and your scanner is
connected to a bus other than 0, 1, 2, or 3. ScanShop only supports up to 4
SCSI buses. Connect the scanner to bus 0, 1, 2, or 3, or reassign the bus
number.
Symptom:
The “Scanner Setup” window indicates “No scanners available” even though you
have a scanner attached to the system. In the “Show All Devices” window, your
scanner is listed, but marked as “supported, not open”.
Possible causes and solutions:
•
Another application is accessing the scanner (or SCSI printer). Quit any
other applications that may be accessing the scanner. You must restart
ScanShop again.
140 - ScanShop User’s Guide
Appendix B:Troubleshooting
•
Your scanner may be “stuck” in a bad state. Try power cycling the scanner.
You must quit and start ScanShop again.
•
Your scanner may be a supported model, but with ROM ID information that
is different from the one that ScanShop’s scanner driver is looking for. Please
contact Vividata technical support for assistance in finding a possible
workaround.
•
Your scanner is a clone of a supported model (a scanner that claims to be
“compatible with so and so”). It is likely that in such clones, the ROM ID
information is different from that for which ScanShop’s scanner driver was
written. In general, vividata does not support scanners that are clones of
supported models.
Symptom:
ScanShop gives the error message:
“Error opening scanner. Device model is unlicensed.”
or
“Warning: Not licensed for this scanner.”
Possible causes and solutions:
•
You do not have the correct licensing level to use a particular scanner model.
You need to obtain a license key that contains the correct licensing level for
your scanner.
Symptom:
When scanning from the command line, the output image has missing sections.
Possible causes and solutions:
•
Try scanning from the GUI and see if the image is complete. If it is, you may
not have enough free RAM on your system to perform a complete scan from
the command line. Try to free some RAM by exiting unused applications or
rebooting your system.
Symptom:
Your SCSI printer does not show up in the “Print Controls” window.
ScanShop User’s Guide - 141
Appendix B:Troubleshooting
Possible causes and solutions:
•
Please see the symptoms above relating to SCSI scanners for possible
problems and solutions, substituting “scanner” for “printer” when
appropriate.
Symptom:
Some system printers do not show up in the “Print Controls” window, and you
are running Solaris 2.x, HP-UX, or IRIX (System V-style print systems).
Possible causes and solutions:
•
The file $VV_HOME/id/postscript.id does not exist or does not have read
permission set. Make sure you have read permission set on the file and read
and execute permissions set on the $VV_HOME/id directory.
•
ScanShop may not have access to your printer interfaces directory
(/var/spool/lp/interfaces for IRIX and HP-UX 9.x, /usr/spool/lp/interfaces
for HP-UX 10.x, and /etc/lp/interfaces for Solaris 2.x). Make sure the
directory has read and execute access, and that all printers in this directory
that you want users to access have read and write permissions.
•
A printer interface script may not exist for a particular printer. Create a
interface script for each printer you want users to access. Refer to your
printer administration guide for details on how to do this. Note: Remote
printers may not be accessible by this method.
•
PostShop printers will not show up if the interface file references an invalid
ID file.
Symptom:
Some system printers do not show up in the “Print Controls” window, and you
are running OSF/1, SunOS 4.x, or AIX.
Possible causes and solutions:
•
The file $VV_HOME/id/postscript.id does not exist or does not have read
permission set. Make sure you have read permission set on the file and read
and execute permissions set on the $VV_HOME/id directory.
•
ScanShop may not have access to your /etc/printcap file (OSF/1, SunOS) or
/etc/qconfig file (AIX). Make sure the file has read access.
142 - ScanShop User’s Guide
Appendix B:Troubleshooting
•
On OSF/1 and SunOS systems, PostShop printers will not show up if the
/etc/printcap file references an invalid ID file.
•
On AIX systems, PostShop printers will not show up if the /etc/qconfig file
references an interface script (“backend” file) that references an invalid ID
file.
How to Get a License
You must have a valid license before you can print with ScanShop. If you haven’t
yet received a license key from us, you need to get one. You can get one from
either the “Free Demo” section ofVividata’s website, by faxing Vividata a
License Request Form or by sending e-mail to [email protected]. If you need
a form, please download one from www.vividata.com or request one via email,
fax or telephone (see contact information at the front of this manual) and we will
send one to you. If you are certain that you have a valid license, verify that your
licensing is set up correctly (See Appendix C, “License Manager Commands”,
for license manager information.)
Installing the Keys
To enter your license keys, use the Installer. Please see “Using the Installer” on
page 14. Then, try restarting ScanShop.
Patches
It is suggested that the operating system be maintained by installing the most
current patches available from the platform vendor, as certain (possibly known)
bugs can affect the operation of ScanShop. Check Vividata’s release notes and
the support areas of our website for mention of any specific known problems
which can be fixed with certain patches.
ScanShop User’s Guide - 143
Appendix B:Troubleshooting
144 - ScanShop User’s Guide
Appendix C: License
Manager Commands
ScanShop User’s Guide - 145
Appendix C:License Manager Commands
Overview
Publicly distributed versions of Vividata products use FLEXlm as the license
manager. This section will describe the usage of FLEXlm as it pertains to
Vividata products, including determining the lmhostid necessary for license keys
to be issued, diagnosing the license keys and license server, and additional
configuration information.
FLEXlm Utilities
You will find the various FLEXlm utilities discussed below in the
$VV_HOME/bin directory after you have installed a Vividata product containing
the VVlicense package. This set of utilities currently includes lmutil and six links
to this file: lmdiag, lmdown, lmhostid, lmremove, lmreread, and lmstat. The
license daemons, found in the same directory, are lmgrd and vv_d2.
The License Daemon
There are two license daemons required for a FLEXlm server to operate properly.
The first daemon is lmgrd, which is the main FLEXlm daemon. The second is
vv_d2, a vendor daemon for Vividata products. The user will not need to launch
vv_d2; it is launched automatically when lmgrd is launched. When Vividata
products are first installed, lmgrd is automatically started, and appropriate files
in /etc are modified so that lmgrd is launched when the system boots. If for some
reason the license daemon needs to be stopped, the “lmdown” utility (described
below) should be used to stop the program gracefully.
LM_LICENSE_FILE environment variable
The LM_LICENSE_FILE environment variable tells Vividata products where to
look for the FLEXlm license file. The default location searched is
$VV_HOME/config/license.dat, but if for some reason you need to use a
different file, set LM_LICENSE_FILE to the full path of the license file. For
example, in csh:
% setenv LM_LICENSE_FILE <full_path>
146 - ScanShop User’s Guide
Appendix C:License Manager Commands
License File Format
The FLEXlm license file is stored in a user-readable, plain ASCII text format.
The following is an example of such a license file:
SERVER quint 80782d46
VENDOR vv_d2
FEATURE generic vv_d2 3.20 permanent 1 5DFC16E43C9F
ck=107 \
START=1-jan-2000
(Note the backslash ’\’ after the ck=107 indicates a continuation of the third line.)
The three fields most pertinent to Vividata products are SERVER, VENDOR, and
FEATURE. Together, these three fields form a license key. The following is a
description of these fields:
SERVER - contains information about the license server's host name and
lmhostid.
VENDOR - contains the name of the vendor-specific license daemon.
FEATURE - contains information about the features enabled in a particular
license.
Obtaining your lmhostid
If you have the FLEXlm utilities installed on your system, you can simply run
“lmhostid” to determine the lmhostid on your system. If you need the lmhostid
prior to installing the software, or if the “lmhostid” utility does not return a valid
lmhostid, please see the following table to determine your lmhostid manually.
Table 1: lmhostid derivations
Platform
Source
User command
Example
OSF/1
Digital Unix
ethernet
address
netstat -i
080020005532
HP-UX
32-bit hostid
uname -i and convert
to hex or prepend with
#
778DA450 or
#2005771344
ScanShop User’s Guide - 147
Appendix C:License Manager Commands
Table 1: lmhostid derivations
Platform
Source
User command
Example
Linux
ethernet
address
/sbin/ifconfig eth0 and
remove colons from
HWaddr
00400516E525
AIX
32-bit hostid
uname -m then remove
last 2 digits, and use
remaining last 8 digits
02765131
IRIX
32-bit hostid
/etc/sysinfo -s and
convert to hex, or
prepend with #
69064C3C or
#1762020412
SunOS and
Solaris
32-bit hostif
hostid
170a3472
Windows NT
ethernet
address
Programs:Administrative Tools (common):
Windows NT Diagnostics:: Network:
Transports:Address
Programs:Administrative Tools
(common) :
Windows NT
Diagnostics
148 - ScanShop User’s Guide
Appendix C:License Manager Commands
Command Reference
lmdiag
NAME
lmdiag – Checks a license file for problems
SYNOPSIS
lmdiag [-c license file] [feature]
DESCRIPTION
lmdiag checks a license file to see if all features listed in it are valid. This utility
is often helpful in determining the cause of licensing errors that are related to the
license key itself, as opposed license manager problems (see lmstat).
ScanShop User’s Guide - 149
Appendix C:License Manager Commands
lmdown
NAME
lmdown – Shuts down the license daemon
SYNOPSIS
lmdown [-c <license file>] [-v vv_d2]
DESCRIPTION
lmdown shuts down any running lmgrd processes and associated vendor daemons
such as vv_d2. If you are using lmgrd to manage multiple vendor daemons, you
can stop specific vendor daemons by specifying the -vendor option.
150 - ScanShop User’s Guide
Appendix C:License Manager Commands
lmgrd
NAME
lmgrd – Main license manager daemon
SYNOPSIS
lmgrd [-c license file] [-t timeout] [-l logfile] [-s
timestamp_interval] [-v] [-x lmdown] [-x lmremove]
DESCRIPTION
lmgrd is the main FLEXlm daemon responsible for organizing and
communicating with the vendor daemons. When lmgrd is run, it must reference
a license file (via -c, or use the default file, if it exists). The license file contains
information about the vendor daemon and features associated with it. To stop the
daemon, either run “lmdown” or kill the lmgrd process explicitly. The vendor
daemon should not be killed manually.
OPTIONS:
-t
timeout Sets the timeout interval (in seconds) in which redundant daemons need
to connect to each other. Default = 10 seconds.
-l
logfile Specifies the name of the log file.
-s
timestamp_interval Specifies the interval (in minutes) to time stamp the log file.
Default = 360 minutes.
-v
Prints the version number.
-x
lmdown Disallow the lmdown command. To stop the daemon, the process must
be killed.
-x
lmremove Disallow the lmremove command.
ScanShop User’s Guide - 151
Appendix C:License Manager Commands
lmhostid
NAME
lmhostid – Prints the lmhostid of the system
SYNOPSIS
lmhostid [-n]
DESCRIPTION
lmhostid prints the lmhostid of the system, usually used for generating license
keys. The -n option causes program to suppress the header output.
152 - ScanShop User’s Guide
Appendix C:License Manager Commands
lmremove
NAME
lmremove – Revokes a license from a user
SYNOPSIS
lmremove [-c license file] feature user host display
or
lmremove [-c license file] -h feature host port handle
DESCRIPTION
lmremove revokes a license from a user, typically used when the client node
crashes and does not automatically free a license. Information about most of the
options used with lmremove can be obtained via “lmstat -a”.
ScanShop User’s Guide - 153
Appendix C:License Manager Commands
lmreread
NAME
lmreread – Forces the license daemon to reread the license file
SYNOPSIS
lmreread [-c <license_file>] [-vendor vv_d2]
DESCRIPTION
lmreread causes the vendor daemon to reread the license file and update itself on
any new feature licensing information and start any new vendor daemons. You
can stop and restart a single vendor daemon by running “lmdown -vendor
<name>” followed by “lmreread -vendor <name>”.
154 - ScanShop User’s Guide
Appendix C:License Manager Commands
lmstat
NAME
lmstat – Displays the status of licensing activities
SYNOPSIS
lmstat [-a] [-A] [-c license_file] [-f feature] [-S vendor]
[-s hostname]
DESCRIPTION
lmstat shuts down any running lmgrd processes and associated vendor daemons
such as vv_d2. If you are using lmgrd to manage multiple vendor daemons, you
can stop specific vendor daemons by specifying the -vendor option.
OPTIONS:
-t
timeout Sets the timeout interval (in seconds) in which redundant daemons need
to connect to each other. Default = 10 seconds.
-a
Displays all information.
-A
Lists active licenses.
-f feature
Lists activity of feature.
-S vendor
Lists activity of vendor (daemon).
-s hostname
Lists activity of host.
ScanShop User’s Guide - 155
Appendix C:License Manager Commands
lmutil
NAME
lmutil – General collection of tools for handling licensing
SYNOPSIS
lmutil [utility] [options...]
DESCRIPTION
lmutil contains a set of utilities useful for handling licenses and license daemons.
These utilities can be accessed directly if lmutil is renamed to the specific utility
(usually via hard links), or they can be accessed by specifying the utility name as
the first option. Please refer to the sections on each utility for more information
about their operations (lmdiag, lmdown, lmhostid, lmremove, lmreread, lmstat).
156 - ScanShop User’s Guide
Appendix D: Glossary
Glossary term
Term definition
ADF
Automatic document feeder
ASCII
An acronym for American Standard Code for Information Interchange. A code in which the numbers from 0
to 127 stand for text characters. ASCII code is used for
representing text inside a computer and for transmitting
text between computers or between a computer and a
peripheral device.
automatic document
feeder (ADF)
A device that allows you to scan multiple pages without
having to place each page in the scanner. Some ADFs
are built into scanners; others are add-on products.
bit-mapped image
A collection of bits (dots) in memory that represent the
scanned image. The display on the screen is a visible
bit-mapped image.
conversion
filter
A program that translates one file format into another.
For example, the ’mpage’ conversion filter can translate
an ASCII file into a PostScript file.
device driver
A program that manages the transfer of information
between the computer and a peripheral device such as a
scanner.
dithering
A method of representing an image using fewer colors
than the image actually has.
dpi
An abbreviation for dots per inch. This is the number of
dots per linear inch that a printer can print or a scanner
can produce. See also resolution.
ScanShop User’s Guide - 157
Appendix D:Glossary
Glossary term
Term definition
driver
See device driver
monospaced font
Any font in which all characters have the same width.
For example, in Courier New (a monospaced font), the
letter “M” is the same width as the letter “l.” Thus,
“MMMMM” is the same width as “lllll”.
peripheral
At or outside the boundaries of the computer itself,
either physically (as a peripheral device) or logically
(as a peripheral card). Pixel is short for picture element.
A point (dot) on the graphics screen.
point
A typographic unit of measurement equal to 1/72 inch,
measured vertically. Points are used to describe font
size.
proportional font
Any font in which characters differ in width. For example, in the proportional font used here, the letter “M” is
wider than the letter “l”. Thus, “MMMMM” is wider
than “lllll.”
resolution
The fineness with which a scanner, printer, or other
device produces information. It is expressed in dots per
inch (dpi). A higher dpi produces a sharper image.
swap file
An area of the hard disk that is used for temporary data
storage when RAM is low or used up. This is also
known as virtual memory. A swap file lets you run
more programs than you could with actual memory, but
it is slower than using regular memory.
text file
A file containing information in text form; its contents
are interpreted as characters encoded using the ASCII
(or comparable) format.
TIFF
An abbreviation for tagged image file format. This is a
standard graphic file format for grayscale and high-resolution bit-mapped images.
158 - ScanShop User’s Guide
Index
Symbols
/etc/printcap file (SunOS and OSF/1)
command line
interface 23
scripts 23
syntax 23
Contacting Customer Support
Copies
About 56
Crop option
About 40
142
A
Adobe pdf 29
AGFA
Arcus II See Microtek Scanners
DuoScan See Microtek Scanners
AIX 143
/etc/qconfig file 142
Automatic Document Feeder (ADF) 50
D
B
Bell & Howell Scanners 59
1000 FB See Ricoh IS-420.
1500 FB See Ricoh IS-430.
500 FB See Ricoh Aficio IS-01.
Copiscan 4000 series 59
Copiscan 8000 series 59
Copiscan II series (e.g. 3338A, 6338A)
bit resolution 2
bitmap 1
Bits per pixel
About 48
Brightness
About 49
7
59
E
C
Canon Scanners 65
CJ/CLC-10 with IPU-SS (scan and print)
Centering
About 57
clone 141
DEC OSF/1
Removing OCR Shop 18
Demo Mode 18
Digital Equipment Corp.
MD-410 See Ricoh IS-410.
Dithering 3
About 3
document
size 50
Dots per Inch
About 48
double 27
duplex 27
65
Environment Variables
in general 19
Epson Scanners 73
Action Scanner II 73
ES-X000C scanners 73
Expression 636 73
Expression 800C 73
Expression 836XL 73
GT-X000 scanners 73
Exit option
ScanShop User’s Guide - 159
About 37
Extended imaging features
About 57
Removing OCR Shop
troubleshooting 140
18
I
F
IBM 2456 See Ricoh IS-410.
image
size 51
image compression 27
image output
size 6
image processing
extended features 45
Installation 11
Kernel SCSI Driver 17
See Chapter 2 9
IRIX 142
IRIX installation note - libsocket required
file
size 49
File Menu
Using 36
Fit to Window option
About 38
Fujitsu Scanners 86
ScanPartner 10 86
ScanPartner 10C 86
ScanPartner M3096G+/m 86
ScanPartner M3096Gx 86
ScanPartner M3097G 86
ScanPartner M3099G Duplex scanner
Fujix Pictrography 3000 and 4000 80
G
Gamma Tables
About 4
Gamma tables 4
Getting Help 137
GUI
current default settings
K
Kernel SCSI Driver 17
Kodak Printers 100
Kodak TableMaker 105
L
23
H
Hewlett-Packard Scanners
ScanJet 2P 94
ScanJet 3C 94
ScanJet 3P 94
ScanJet 4C 94
ScanJet 4P 94
ScanJet 5P 94
ScanJet 6100C 94
ScanJet 6200C 94
ScanJet 6250C 94
ScanJet IIC 94
ScanJet IICX 94
HP-UX 142
86
94
160 - ScanShop User’s Guide
ld.so.1 13
licensing
level 141
problems 143
lmhostid 14
Lock X & Y Scale
About 57
M
Manuals 44
Microtek Scanners 107
ScanMaker 600ZS 107
ScanMaker E3 107
ScanMaker E6 107
ScanMaker II 107
ScanMaker IIHR 107
12
ScanMaker III 107
ScanMaker IIXe 107
Minimum RAM 6
Mirror X 41
Mirror Y 41
missing sections 141
R
raster 1
Removing OCR Shop 18
resolution 1
Monitor 2
scan 48
value 3
Ricoh Scanners
Aficio IS -01 117
FS-2 117
IS-410 117
IS-420 117
IS-430 117
IS-50 117
IS-60 117
ROM ID 141
rotate 41
Rotate Menu
Using 41
O
On-line Help 44
Open option
About 36
Orientation Control
About 56
OSF/1 143
Output resolution 2
P
Panasonic Scanners 112
KVSS-50 112
KVSS-55 112
patches 143
PATH 23
Pixels 1
Preview scan
About 51
Print Controls Dialog
Center X and Center Y
Copies 56
Image Size 56
Lock X & Y Scale 57
Options 57
Orientation 56
Printer Selection 55
Use Whole Page 57
Print Menu
Using 43
Print option
About 43
Print Setup… option
About 43
Printer selection
About 55
ptf_file 105
S
57
Save As… option
About 36
Save option
About 36
Scan Menu
Using 42
Scan Setup… option
About 42
scanner
controls 46
preview 46
Set-up Window 45, 46
scanners
About 1
standard features 45
ScanShop
the main screen 33
ScanShop Menu Bar
Edit 40
File 36
Overview 35
Print 43
Rotate 41
ScanShop User’s Guide - 161
Scan 42
View 38
SCSI
conflicting ID 140
device ports 139
Show All Devices option 47
termination 140
See Adobe pdf
See Silicon Graphics rgb.
sensor 1
Setup Dialog
Automatic Document Feeder (ADF)
Bits per Pixel 48
Brightness 49
Document Size 50
Dots per Inch 48
Image Size 51
Options 52
Preview 51
Scan 52
Scanner 47
Threshold 49
Sharp Scanners 124
(GPIB/SCSI) 124
JX-320s 124
JX-330 124
JX-600 124
JX-610 124
Silicon Graphics rgb 29
sshop_cli 24
SunOS 143
SunOS 4.1.x
Removing OCR Shop 18
system requirements 5
U
50
T
TableMaker 105
tech support.See Contacting customer support
Threshold
About 49
troubleshooting hints 137
troubleshooting SCSI 139
type conventions 5
162 - ScanShop User’s Guide
UMAX Scanners 130
MD 1600 130
Mirage D-16L 130
PowerLook 2000 130
Super Vista S-12 130
Vista S-12 130
Undo option
About 40
Use Whole Page
About 57
V
View Menu
Using 38
vividata.log 138
vvdrv.rc 138
vvshowdevs 139
X
Xlib
Client is not authorized...
Z
Zoom option
About 39
12
ScanShop User’s Guide - 163
164 - ScanShop User’s Guide