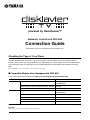
1
powered by RemoteLive™
Disklavier Control Unit DKC-850
Connection Guide
DisklavierTV service is available for U.S. customers only.
Checking the Type of Your Piano
The DKC-850 Disklavier control unit can be connected to several models of Yamaha Disklavier pianos,
however, connections and setup procedures vary depending on the piano model. Check the model number
on the existing control unit and find your piano model following the descriptions below before connecting.
Note:
The model number of the control unit is on the upper part of the display.
■ Compatible Models when Equipped with DKC-850
If you are using the piano listed below, replace the existing control unit with DKC-850.
Models
Upright pianos
Model Number on the Control Unit
Disklavier Mark II XG Series
DKC500R, DKC500RXG, DKC500RW,
DKC500RWXG
Disklavier Mark II XG Series (MX116, MX22, MX500) DKC50R
Grand pianos
Disklavier Mark III Series (DU1A)
DKC55RCD
Disklavier Mark II XG Series
DKC500R, DKC500RXG, DKC500RW,
DKC500RWXG
Disklavier Mark III Series Full-Function Models
DKC55RCD
Disklavier Mark III Series Standard Models
DKC60RCD
Disklavier Mark III Series PRO Models
DKC55RCD
Disklavier Mark III Series Playback Models
DKC55, DKC55CD
For details on connections and setup, see “Replacing the Existing Control Unit with DKC-850” on page 2.
Important:
Please keep your existing control unit for future maintenance.
Replacing the Existing Control Unit with DKC-850
Connect DKC-850 to your piano, replacing with the existing control unit.
8
7
5
Tighten
DKC-850
6
Conversion
cable
(supplied)
AC adaptor (PJP-PS02/PJP-PS04)
(supplied)
Connect monitor
speakers.
See page 4.
Power cable
(supplied)
Control
cable
Your piano
4
3
Tighten
9
Loosen
Cautions
• Use the Yamaha PJP-PS02/PJP-PS04 adaptor, or an equivalent recommended by Yamaha. Use of
other AC adaptors may result in damage, overheating, or fire.
• Do not stretch the cable or bend its ends.
• Do not attempt to use the cable if it is stretched or if the ends of the cable have been bent. Attempting
to do so may cause interruptions to the power supply.
• Always turn off the main unit power before disconnecting the AC adaptor.
• When you wish to move DKC-850, unplug the AC adaptor from the AC wall outlet and disconnect if
from the DC-IN 12V connector on the rear panel of DKC-850 before proceeding.
• Unplug the AC adaptor from the AC wall outlet if you do not intend to use the instrument for an
extended period of time.
2
Important
• Be sure to backup the data on your existing control unit to a floppy disk before connecting.
• Please keep your original control unit for future maintenance.
1
Turn on your piano, and reset settings on your control unit
to its factory default.
For details on setting, refer to your piano’s owner’s manual.
2
Turn off your piano, and disconnect the power cable from
the AC wall outlet.
3
Disconnect the control cable from the TO CONTROL
CABLE FOR PIANO connector on the rear panel of your
control unit.
Note:
The location of the TO CONTROL
CABLE FOR PIANO connector
varies depending on the piano model.
Loosen the two screws attached to the connector using a
screwdriver.
4
Connect the supplied conversion cable to the control cable
disconnected in step 2.
Tighten the two screws attached to the connector using a
screwdriver.
5
Attention:
DKC-850 does not work properly if
the control cable is connected
directly to it. Use the supplied
conversion cable to connect your
piano and DKC-850.
Connect the supplied conversion cable to the TO PIANO
connector on the rear panel of DKC-850.
Tighten the two screws attached to the connector using a
screwdriver.
6
Connect monitor speakers to the OUTPUT jacks on the rear
panel of DKC-850.
7
Connect the supplied AC adaptor to the DC-IN 12V
connector on the rear panel of DKC-850.
8
Connect the supplied power cable to the AC adaptor.
9
Connect the power cable extended from your piano and the
AC adaptor to the AC wall outlet.
See “Connecting Monitor Speakers”
on page 4.
The connection completed.
Turn on DKC-850, and set the piano type.
See “Setting the Type of Your Piano”
on page 5.
3
Connecting Monitor Speakers
To listen to the internal XG tone generator voices, you have to connect
monitor speakers. Connection methods vary depending on whether your
piano is equipped with the Silent Piano™ function or not.
■ For Pianos Equipped with the Silent Piano™
Function
Connect the AUX IN jacks of your piano to the OUTPUT jacks on the rear of
DKC-850 with the supplied audio cable.
For models with the control box
Connect with the supplied audio
cable (pin plugs – stereo mini plug).
Note:
The shape of units or the location of
the AUX IN jacks varies depending
on the piano model.
For models with the amplifier
Connect with the supplied audio
cables (pin plug – phone plug).
To AUX IN jack
(stereo mini plug)
To AUX IN jacks
(phone plug)
Audio cable
(supplied)
Audio cables
(supplied)
DKC-850
DKC-850
■ For Pianos Not Equipped with the Silent Piano™
Function
Connect the input jacks of monitor speakers to the OUTPUT jacks (pin
jacks) on the rear of DKC-850 with audio cables.
(Example: connecting the Yamaha MSP3 monitor speakers)
AC wall outlet
Monitor
speaker (left)
Monitor
speaker (right)
POWER
ON
OFF
POWER
POWER
ON
INPUT
ON
INPUT
LINE 1
(--10dB)
OFF
LINE 1
(--10dB)
OFF
LINE 2
(--4dB)
PARALLEL
Audio cable
(pin plug – pin plug)
(not supplied)
DKC-850
LINE 2
(--4dB)
PARALLEL
Audio cable
(pin plug – pin plug)
(not supplied)
4
Note:
Two audio cables (pin plug – phone
plug) are supplied to connect this unit
to the piano equipped with the Silent
Piano™ function. Prepare suitable
cables for connection of the monitor
speakers.
Setting the Type of Your Piano
[SYSTEM]
“PianoType”
After you have connected DKC-850 to your piano, you must set the type of
your piano.
1
Press [SYSTEM] on the remote control.
The system menu screen appears.
!"#$%{
2
Select “PianoType” with the cursor buttons ([
[ ]), then press [ENTER].
][
][
]
=SYSTEM MENU= _(2/2)
*Language *PianoType
*Display
The piano type setup screen appears.
=PianoType=
>Type=Replace
>Piano=REC
3
Confirm that the piano type is set to “Replace.”
If not, press [+/YES] or [–/NO] to change its setting to
“Replace.”
=PianoType=
>Type=Replace
>Piano=REC
4
-+ENT
-+ENT
Press [ENTER].
If the piano type has been changed, this unit is automatically
rebooted.
=PianoType=
Restarting...
5
Note:
If you select “Replace” and this unit
detects your piano as the playback
model, “[PB]” appears on the right of
the screen.
P.O.Box 1, Hamamatsu, 430-8650 Japan
Copyright © 2013 Yamaha Corporation
Sep-13