1
2. Parts Names
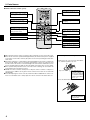
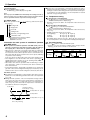
■ Wireless Remote-Controller (option)
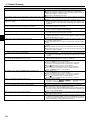
SET TEMPERATURE button
ON/OFF button
SET TEMPERATURE button sets
and any desired room temperature.
CHECK TEST RUN
MODEL SELECT
Pushing button starts operation.
Pushing again stops operation.
NOT AVAILABLE
FAN SPEED button
This button is used to set fan
speed to low, medium or high.
AUTO STOP/AUTO START button
Used for selecting timed starting
or stopping.
FAN AUTO STOP
MODE SELECT button
This button is used to change between auto, cooling, heating and
drying operation modes.
TEMP
ON/OFF
MODE VANE AUTO START
CHECK LOUVER
h
VANE CONTROL button
Used to change the airflow direction.
CHECK button
TEST RUN
min
h button
Used for setting the current time.
TEST RUN button
SET RESET CLOCK
min button
Used for setting the current time.
LOUVER button
Used for adjusting the airflow direction.
■ When using the wireless remote controller, point it towards the receiver on the indoor unit.
■ If the remote controller is operated within approximately two minutes after power is supplied
to the indoor unit, the indoor unit may beep twice as the unit is performing the initial automatic check.
■ The indoor unit beeps to confirm that the signal transmitted from the remote controller has
been received. Signals can be received up to approximately 7 meters in a direct line from
the indoor unit in an area 45° to the left and right of the unit. However, illumination such as
fluorescent lights and strong light can affect the ability of the indoor unit to receive signals.
■ If the operation lamp near the receiver on the indoor unit is flashing, the unit needs to be
inspected. Consult your dealer for service.
■ Handle the remote controller carefully! Do not drop the remote controller or subject it to
strong shocks. In addition, do not get the remote controller wet or leave it in a location with
high humidity.
■ To avoid misplacing the remote controller, install the holder included with the remote controller on a wall and be sure to always place the remote controller in the holder after use.
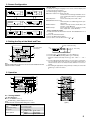
Battery installation/replacement
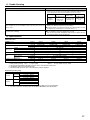
1. Remove the top cover, insert two AAA batteries, and then install the top cover.
1
3
Top cover
2
Two AAA batteries
Insert the negative (–)
end of each battery
first. Install the batteries in the correct directions (+, –)!
2. Press the Reset button.
Press the Reset button
with an object that has
a narrow end.
4