1
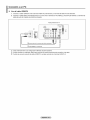
Contact SAMSUNG WORLD-WIDE
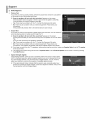
If you have any questions or comments relating to Samsung products, please contact the SAMSUNG customer care center.
Comment contacter Samsung dans le monde
SJvous avez des suggestions ou des questions concernant ies produits Samsung, veuillez contacter ie Service
Consommateurs Samsung.
'_i_i_i_i_i_ii;i;;!;;iii_!'_ii_i_i_ii_i_!_iW_
b_i_Sz!_eii'iS_ii_ii!i!i!i!i!i!i!;i!il
¸I_I
¸i_ii
¸ii_i_il
U.S.A
1-800-SAMSUN G(726-7864)
www.samsung.com/us
CANADA
1-800-SAMSUN G(726-7864)
www.samsung.com/ca
II
BN68-02140A-00
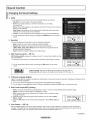
I Important
Warranty
information
Regarding
Television
FormatViewing
Wide screen format PDP Displays (16:9, the aspect ratio of the screen width to height) are primarily designed to view wide
screen format full-motion video. The images displayed on them should primarily be in the wide screen 16:9 ratio format,
or expanded to fill the screen if your model offers this feature and the images are constantly moving. Displaying stationary
graphics and images on screen, such as the dark side-bars on nonexpanded standard format television video and
programming, should be limited to no more than 5% of the total television viewing per week.
Additionally, viewing other stationary images and text such as stock market reports, video game displays, station Iogos,
web sites or computer graphics and patterns, should be limited as described above for all televisions. Displaying stationary
images that exceed the above guidelines can cause uneven aging of PDP Displays that leave subtle, but permanent
burned-in ghost images in the PDP picture. To avoid this, vary the programming and images, and primarily display
full screen moving images, not stationary patterns or dark bars.
On PDP models that offer picture sizing features, use these controls to view different formats as a full screen picture.
Be careful in the selection and duration of television formats used for viewing. Uneven PDP aging as a result of format
selection and use, as well as burned-in images, are not covered by your Samsung limited warranty.
U,S,A Only
The product unit accompanying this user manual is licensed under certain intellectual property rights of certain third parties.
In particular, this product is licensed under the following US patents: 5,991,715, 5,740,317, 4,972,484, 5,214,678, 5,323,396,
5,539,829, 5,606,618, 5,530,655, 5,777,992, 6,289,308, 5,610,985, 5,481,643, 5,544,247, 5,960,037, 6,023,490, 5,878,080, and
under US Published PatentApplication No. 2001-44713-A1.
This license is limited to private non-commercial use by end-user consumers for licensed contents. No rights are granted for
commercial use. The license does not cover any product unit other than this product unit and the license does not extend to any
unlicensed product unit or process conforming to ISO/IEC 11172-3 or ISO/IEC 13818-3 used or sold in combination with this product
unit. The license only covers the use of this product unit to encode and/or decode audio files conforming to the ISO/IEC 11172-3
or ISO/IEC 13818-3. No rights are granted under this license for product features or functions that do not conform to the ISO/IEC
11172-3 or ISO/IEC 13818-3.
Other countries
The product unit accompanying this user manual is licensed under certain intellectual property rights of certain third parties. This
license is limited to private non-commercial use by end-user consumers for licensed contents. No rights are granted for commercial
use. The license does not cover any product unit other than this product unit and the license does not extend to any unlicensed
product unit or process conforming to ISO/IEC 11172-3or ISO/IEC 13618-3 used or sold in combination with this product unit. The
license only covers the use of this product unit to encode and/or decode audio files conforming to the ISO/IEC 11172-3 or ISO/IEC
13618-3. No rights are granted under this license for product features or functions that do not conform to the ISO/IEC 11172-3 or
ISO/IEC 13818-3.
© 2009 Samsung Electronics Co., Ltd. All rights reserved.
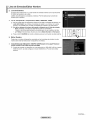
i User instructions
0
Screen image retention
Do not display a still image (such as on a video game) on the plasma display panel for more than several minutes as it can cause
screen image retention. This image retention is also known as "screen burn". To avoid such image retention, refer to page 24 of this
manual to reduce the degree of brightness and contrast of the screen when displaying a still image.
Altitude
The PDP can only operate normally at heights under 6500ft.
Heat on the top of the Plasma TV
The top side of the product may be hot after long periods of use as heat dissipates from the panel through the vent hole in the upper
part of the product.
This is normal and does not indicate any defect or operation failure of the product.
However, children should be prevented from touching the upper part of the product.
The product is making a 'cracking' noise.
A 'cracking' noise may occur when the product contracts or expands due to a change in the surrounding environment such as
temperature or humidity. This is normal and not a defect of the unit.
Col! Defects
The PDP uses a panel consisting of 2,360,000(HD-level) to 6,221,000(FHD-level) pixels which require sophisticated technology to
produce. However, there may be a few bright or dark pixels on the screen. These pixels will have no impact on the performance of the
product.
Avoid operating the TV at temperatures below 41°F (5°0)
@ A still image displayed too long may cause permanent damage to the PDP Panel,
Watching the Plasma TV in 4:3 format for a long period of time may leave traces of borders displayed on
the left, right and center of the screen caused by the difference of light emission on the screen.
Playing a DVD or a game console may cause similar effects to the screen.
Damages caused by the above effect are not covered by the Warranty.
After=images on the Screen.
Displaying still images from Video games for longer than a certain period of time may produce partial after-images.
To prevent this effect, reduce the 'brightness' and 'contrast' when displaying still images for a long time.
Warranty
Warranty does not cover any damage caused by image retention.
Burn-in is not covered by the warranty.
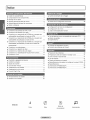
I Contents
,,, List of Features .......................................................................... 5
,,, Changing the Picture Settings ................................................. 22
,,, Checking Parts .......................................................................... 5
,,, Assembling the Cables .............................................................. 5
,,, Viewing the Control Panel ......................................................... 6
,,, Changing the Sound Settings .................................................. 26
,,, Viewing the Connection Panel ................................................... 7
,,, Remote Control ......................................................................... 8
,,, Configuring the Setup Menu .................................................... 27
,,, Connecting VHF and UHF Antennas ......................................... 9
,,, Setting the Time ...................................................................... 31
,,, Source List/Edit Name ........................................................... 32
,,, Connecting Cable TV ................................................................ 9
,,, Connecting a DVD / Blu-Ray Player or Cable Box / Satellite
receiver (Set-Top Box) via HDMI ............................................. 11
,,, Connecting a DVD/Blu-Ray Player or Cable Box / Satellite
,,, Using Your TV as a Computer (PC) Display ............................ 33
,,, Display Modes ......................................................................... 33
receiver (Set-Top Box) via DVl ................................................ 11
,,, Support .................................................................................... 34
,,, Connecting a DVD / Blu-Ray Player or Cable Box / Satellite
receiver (Set-Top Box) via Component cables ........................ 12
,,, Connecting a Camcorder ........................................................ 12
,,, Connecting Anynet + Devices .................................................. 36
,,, Connecting a VCR ................................................................... 13
,,, Troubleshooting for Anynet+ ................................................... 39
,,, Connecting a Digital Audio System ......................................... 14
,,, Connecting an Amplifier / DVD Home Theater ........................ 14
,,, Connecting a PC ..................................................................... 15
,,, Troubleshooting ....................................................................... 40
,,, Preparation before installing the Wall-Mount ........................... 41
,,, How to attach the Stand-Base ................................................. 41
,,, Turning the TV On and Off ...................................................... 16
,,, Using the Stand-Base ............................................................. 41
,,, Changing Channels ................................................................. 16
,,, Securing the TV to the Wall ..................................................... 42
,,, Adjusting the Volume ............................................................... 16
,,, Wall Mount Kit Specifications (VESA) ..................................... 43
,,, Using the TOOLS Button ......................................................... 17
,,, Specifications .......................................................................... 44
,,, Viewing the Display ................................................................. 17
,,, Dimensions (PN50B530S2F) .................................................. 45
,,, Viewing the Menus .................................................................. 18
,,, Dimensions (PN58B530S2F) .................................................. 46
,,, Plug & Play Feature ................................................................ 19
,,, Storing Channels ..................................................................... 20
,,, Managing Channels ................................................................ 20
Symbol
Press
Note
One-Touch Button
TOOLS
i Connecting and Preparing Your TV
i
List of Features
• Adjustable picture settings that can be stored in the TV's memory.
• Automatic timer to turn the TV on and off.
• A special sleep timer.
• V-Chip function.
• Excellent Digital Interface & Networking :
With a built-in HD digital tuner, non-subscription HD broadcasts can be viewed with no Cable Box/Satellite receiver (Set-Top Box)
needed.
• SRS TruSurround HD provides a virtual surround system.
Checking Parts
Please make sure the following items are included with your TV. If any items are missing, contact your dealer,
The items' color and shape may vary depending on the model.
!
_
.....
RemoteControl
(BN59-00856A)/
AAA Batteries
(4301-000103)
Ferrite Core for Power
Cord
(3301-001305)
PowerCord
(3903-000144)
Ferrite Core
for Side-AV
(3301-001201)
PN58B530S2F only
Owner'sInstructions/
Quick Setup Guide
Cover-Bottom /
Screws (2ea)
PN58B530S2F only
Warranty Card /
Safety Guide
Manual
(Not available in
all locations)
Cleaning Cloth
(BN63-01798B)
Holder-Wire
Cable
Cover-Bottom
Holder-Ring (4ea)
PN50B530S2F only (Refer to page 41)
Holder TV /
Screws
(BN96-10788A)
(Refer to page 42)
Screw (4ea)
PN50B530S2F
only
Ferrite Core
The ferrite cores are used to shield the cables from interference.
When connecting a cable, open the ferrite core and clip it around the cable near the plug.
.L
,,
i_,]
::
Audio Cable/
PowerCord i i
VideoCable
....................;;.._._P.N..5.8_.B.5.
?O_S_
.F.
o._!y.
....
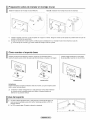
Assembling
the Cables
Enclose the cables in the Holder-Wire Cable so that the cables are not visible through the
transparent stand.
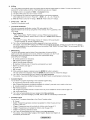
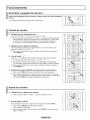
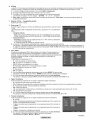
Viewing the Control Panel
The buttons on the lower=right panel control your TV's basic features, including the on-screen menu.
To use the more advanced features, you must use the remote control.
The product color and shape may vary depending on the model.
If you touch the front panel button, the each button will be operated.
............................................................................................................
U
= ...........................................................................................................
=
O SOURCE
[_
Toggles between all the available input sources
(TV, AV, Component1, Conponent2, HDMII, HDMI2/DVI, HDMI3).
In the on-screen menu, use this button as you use the ENTER_ button on the remote control.
O
MENU
Press to see an on-screen menu of your TV's features.
O
+ VOL =
Press to increase or decrease the volume. In the on-screen menu, use the + VOL = buttons as you would use the
and _. buttons on the remote control.
ACHV
Press to change
remote control.
channels.
In the on-screen
menu,
use the A
CH V
buttons
O
POWER INDICATOR
Blinks and turns offwhen the power is on and lights up in stand-by mode.
O
(POWER)
Press to turn the TV on and off.
O
REMOTE CONTROL SENSOR
Aim the remote control towards this spot on the TV.
O
SPEAKERS
as you would
use the A and
T buttons
on the
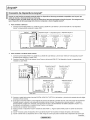
Viewing the Connection Panel
Use the connection panel jacks to connect A/V components that will be connected continuously, such as Biu=Ray DVD Players
or a VCR,
[_
The product color and shape rnay vary depending on the rnodel.
TV Rear Panel
SERVICE
ANT
O
POWER IN
Connects the supplied power cord.
O SERVICE
Used for service only.
AUDIO OUT
Connect to a Digital Audio component.
O
DVl AUDIO IN (AUDIO-R/L)
Connect to the DVI audio output jack of an external device.
O
HDMI IN 1, 2(DVI), 3
Connect to the HDMI jack of a device with an HDMI output.
HDMI 2 can also be used as a DVI connection with
separate analog audio inputs. An optional HDMI/DVI
cable will be necessary to make this connection.
- When using an optional HDMI/DVI adapter, the DVI
analog audio inputs on your TV allow you to receive left
and right audio from your DVI device.
IN i
O
ANT IN
Uses a 750 Coaxial connector for an Air/Cable Network.
O
DIGITAL AUDIO OUT (OPTICAL)
Connects to a Digital Audio component.
o
COMPONENT IN t, 2/AV IN t
Connects Component video / audio. The COMPONENT IN I
jack is also used as the AV IN 1 jack.
@ Connect the video cable to the COMPONENT IN 1
[Y/VIDEO] jack and the audio cable to the COMPONENT
IN I [R-AUDIO-L] jacks.
O
EX-LINK
Used for service only.
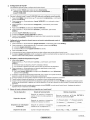
Remote Control
You can use the remote
control
up to a distance
of about 23 feet from the TV.
The product color and shape may vary depending
The performance
on the model.
of the remote control may be affected
POWER
TV
by bright light.
o
POWER
Turns the TV on and off.
o
NUMERIC BUTTONS
Press to change the channel.
_)
TV
Selects the TV mode directly.
o
Press to select additional channels (digital
and analog) being broadcast by the same
station. For example, to select channel
t
J
_)
"54-3", press "54", then press "{--_" and "3".
0
0
[+ _VOL _
Press to increase or decrease the volume.
0
SOURCE
Press to display and select the available
video sources.
@
@
MENU
Displays the on-screen menu.
_)
FAV.CH
Press to switch to your favorite channels.
{_)
RETURN
Returns to the previous menu.
CH LIST
Used to display Channel Lists on the screen. _
Q
i
',V "-1
TOOLS
Use to quickly select frequently used
functions.
EXIT
Press to exit the menu.
_)
RSIZE
Picture size selection.
_)
SRS
Selects SRS TruSurround
Use to select on-screen menu items and
change menu values.
_)
CC
Controls the caption decoder.
_)
INFO
Press to display information on the TV
screen.
@
MTS
Press to choose stereo, mono or Separate
Audio Program (SAP broadcast).
_)
COLOR BUTTONS
Use these buttons in the Channel list.
',,//
UPA / DOWNV / LEFT4
RIGHTI_ / ENTERo_
i*--
PRE-CH
Tunes to the previous channel.
i-_: ] CH i"
Press to change channels,
MUTE
Press to temporarily cut off the sound.
E
Use these buttons in the DMA, Anynet+
modes.(: This remote can be used to
control recording on Samsung recorders
with the Anynet+ feature)
/
e) S.MOOE
J/
Press to select the sound mode,
e
P.MODE
Press to select the picture mode.
_JS_NSUN_
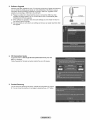
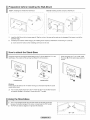
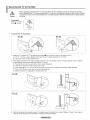
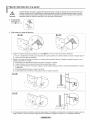
C3 Installing Batteries in the Remote Control
i.
Lift the cover at the back of the remote
2,
Install two AAA size batteries.
3,
Close the cover as shown in the figure.
control upward
as shown
in the figure.
Make sure to match the "+" and "-" ends of the batteries with the diagram
inside the compartment.
Remove the batteries and store them in a cool, dry place if you won't be using the remote control for a
long time. (Assuming typical TV usage, the batteries should last for about one year.)
If the remote control doesn't work, check the following
I.
Is the TV power on?
2. Are the plus and minus ends of the batteries reversed?
3. Are the batteries drained?
4.
Is there a power outage or is the power cord unplugged?
5.
Is there a special
fluorescent
light or neon sign nearby?
HD mode.
i Connections
Connecting
]
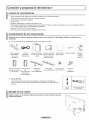
VHF and UHF Antennas
if your antenna has a set of leads that look like this, see "Antennas with 300 {3 Flat Twin
Leads" below.
if your antenna has one lead that looks like this, see "Antennas with 75 {3 Round Leads."
if you have two antennas, see "Separate VHF and UHF Antennas."
[3 Antennas with 300 £_Fiat TwinLeads
if you are using an off-air antenna (such as a roof antenna or rabbit ears) that has 300 {3
twin flat leads, follow the directions below,
1, Place the wires from the twin leads under the screws on a 300-75 _ adapter (not supplied).
Use a screwdriver to tighten the screws.
2, Plug the adaptor into the ANT IN terminal on the back of the TV.
[3 Antennas with 75 £_RoundLeads
Plug the antenna lead into the ANT IN terminal on the back of the TV.
[3 SeparateVHF and UHFAntennas
if you have two separate antennas for your TV (one VHF and one UHF), you must
combine the two antenna signals before connecting the antennas to the TV. This
procedure requires an optional combiner-adaptor (available at most electronics shops),
1, Connect both antenna leads to the combiner.
2, Plug the combiner into the ANT IN terminal on the bottom of the back panel.
Connecting
Cable TV
To connect to a cable TV system, follow the instructions below.
C3 Cablewithout a Cable Box
Plug the incoming cable into the ANT IN terminal on the back of the TV.
Because this TV is cable-ready, you do not need a cable box to view unscrambled cable
channels.
_3 Connecting to a Cable Box that Descrarnbles All Channels
1, Findthe cablethatis connectedto theANT OUTterminalon yourcable box.
@ This terminalmightbe labeled"ANTOUT","VHFOUT"or simply,"OUT".
ANT
iN
ANT OU_
2, Connect the other end of this cable to the ANT IN terminal on the back of the TV.
Continued...
C3 Connectingto a Cable Box that DescramblesSome Channels
if your cable box descrambles only some channels (such as premium channels), follow the instructions below, You
wii! need a two-way splitter, an RF (A/B) switch, and four lengths of Antenna cable. (These items are available at most
electronics stores,)
1. Find and disconnect the cable that is
connected to the ANT IN terminal on your
cable box.
This terminal might be labeled "ANT IN",
"VHF IN" or simply, "IN".
2. Connect this cable to a two-way splitter.
Incoming
cable
3, Connect an Antenna cable between the
.....
OUTPUT terminal on the splitter and the IN
terminal on the cable box.
cable
Splitter
Splitter
_€====
l.......
1
==_
Cable
4. Connect an Antenna cable between the ANT
OUT terminal on the cable box and the B-IN
terminal on the RF(A/B) switch.
o_
Box
out
Incoming
cable
Splitter
Cable
& Connect another cable between the other
OUT terminal on the splitter and the A-IN
terminal on the RF (A/B) switch.
Incoming
IN
Splitter
_
--
I .....
splitt_
Ore"
_,
_
Cable
6, Connect the lastAntenna cable between the
OUT terminal on the RF (A/B) switch and the
ANT IN terminal on the rear of the TV.
RF (A/S)
Switch
Box
*_
L
RF (_/S)
Switch
Box
.,_====
_
====_
TV Rear
RFWSI
Switch
After you have made this connection, set the A/B switch to the "A" position for normal viewing. Set the A/B switch to the "B" position
to view scrambled channels. (When you set the A/B switch to "B", you will need to tune your TV to the cable box's output channel,
which is usually channel 3 or 4.)
Connecting a DVD / Blu-Ray Player or Cable Box / Satellite receiver
(Set-Top Box) via HDMI
This connection can only be made if there is an HDMI Output jack on the external device, This connection wil provide the
highest quality picture,
1.
Connect an HDMI Cable between the HDMI IN (1, 2(DVl), or 3) jack on the TV and the HDMI jack on the DVD / Blu-Ray Player or
Cable Box / Satellite receiver (Set-Top Box).
TV Rear Panel
DVO/Biu-Ray
Player or Cable
Box / Satellite receiver
_HDMI
Cable (Not supplied)
[D Whatis HDMI?
• HDMI, or high-definition multimedia interface, is an interface that enables the transmission of digital audio and video signals using a
single cable.
• The difference between HDMI and DVl is that the HDMI device is smaller in size and has the HDCP (High Bandwidth Digital Copy
Protection) coding feature installed.
[D Each DVD Player or Cable Box I Satellite receiver (Set-Top Box) has a different back panel configuration.
[D The TV may not output sound and pictures may be displayed with abnormal color when DVD / Blu-Ray Player or Cable Box I
Satellite receiver supporting HDMI versions older than 1.3 are connected. When connecting an older HDMI cable and there is no
sound, connect the HDMI cable to the HDMI IN 2(DVI) jack and the audio cables to the DVt AUDIO IN [R-AUDIO-L] jacks on the
back of the TV. If this happens, contact the company that provided the DVD I Blu-Ray Player or Cable Box I Satellite receiver to
confirm the HDMI version, then request an upgrade.
[D
HDMI cables that are not 1.3 may cause annoying flicker or no screen display.
Connecting a DVD/Blu-Ray
(Set-Top Box) via DVI
Player or Cable Box / Satellite receiver
This connection can only be made if there is a DVI Output jack on the external device,
1.
Connect a HDMI/DVl Cable or DVI-HDMI Adapter between the HDMI IN 2(DVl) jack on the TV and the DVl jack on the DVD / BluRay Player or Cable Box/Satellite receiver (Set-Top Box).
2.
Connect Audio Cables between the DVl AUDIO IN JR-AUDIO-L] jack on the TV and the DVD/Blu-Ray Player or Cable Box I Satellite
receiver.
TV Rear Panel
DVO/Biu-Ray
Player or Cable Box /
Satellite receiver
_
Audio Cable (Not supplied)
_
HDMi/DVl Cable (Not supplied)
[D Each DVD / Blu-Ray Player or Cable Box / Satellite receiver (Set-Top Box) has a different back panel configuration.
[D When connecting a DVD Player or Cable Box / Satellite receiver (Set-Top Box), match the color of the connection terminal to the
cable.
[D When using an HDMI I DVl cable connection, you must use the HDMI IN 2(DVl)jack.
Connecting a DVD / Blu-Ray Player or Cable Box / Satellite receiver
(Set-Top Box) via Component cables
The rearpaneljacks on yourTV makeit easyto connecta DVD/Blu=Ray
Playeror CableBox/ Satellitereceiver(Set=TopBox)
to yourTV.
1.
Connect Component Cable between the COMPONENT IN (1 or 2) [Y, PB, PR]jacks on the TV and the COMPONENT [Y, PB, PR]
jacks on the DVD I Blu-Ray Player or Cable Box / Satellite receiver(Set-Top Box).
2.
Connect Audio Cables between the COMPONENT IN (1 or 2) [R-AUDIO-L] jacks on the TV and the AUDIO OUT jacks on the DVD I
Blu-Ray Player or Cable Box I Satellite receiver (Set-Top Box).
TV Rear Panel
DVD / Blu-Ray Player or Cable Box
/ Satellite receiver
[D
_
Audio Cable (Not supplied}
_
Component Cable (Not supplied}
Component video separates the video into Y (Luminance (brightness)), PB (Blue) and PR (Red) for enhanced video quality. Be sure
to match the component video and audio connections. For example, if connecting the video cable to COMPONENT IN 1, connect
the audio cable to COMPONENT IN 1 also.
[D Each DVD I Blu-Ray Player or Cable Box I Satellite receiver (Set-Top Box) has a different back panel configuration.
[D When connecting a DVD / Blu-Ray Player or Cable Box / Satellite receiver (Set-Top Box), match the color of the connection terminal
to the cable.
Connecting a Camcorder
The rear panel jacks on your TV make it easy to connect a camcorder to your TV,
_3 Using a Video I Audio Cable
1. Connect a Video Cable between the AV IN 1 [VIDEO] jack on the TV and the VIDEO OUT jack on the camcorder.
2. Connect Audio Cables between the AV IN 1 [L-AUDIO-R] jacks on the TV and the AUDIO OUT jacks on the Camcorder.
Carncorder
TV rear Panel
®®®
-1
bl
_
Video Cable (Not supplied)
Each Camcorder has a different back panel configuration.
When connecting a Camcorder, match the color of the connection terminal to the cable.
C3 Using an HDMI Cable
1. Connect an HDMI Cable between the HDMI IN (1, 2(DVI), or 3) jack on the TV and the HDMI jack on the camcorder.
TV Rear Panel
Camcorder
HDMI Cable (Not supplied)
Each Camcorder has a different back panel configuration.
Connecting
a VCR
Video Connection
These instructions assume that you have already connected your TV to an antenna or a cable TV system (according to the
instructions on pages 9~10). Skip step 1 if you have not yet connected to an antenna or a cable system.
1. Unplug the cable or antenna from the back of the TV.
2. Connect the cable or antenna to the ANT IN terminal on the back of the VCR.
3. Connect an Antenna Cable between the ANT OUT terminal on the VCR and the ANT IN terminal on the TV.
4. Connect a Video Cable between the AV IN 1 [Y/VIDEO] jack on the TV and the VIDEO OUT jack on the VCR.
6. Connect Audio Cables between the AV IN 1 JR-AUDIO-L] jacks on the TV and the AUDIO OUT jacks on the VCR
TV Rear Panel
VCR Rear Panel
%
If you have a "mono" (non-stereo) VCR, use a Y-connector (not supplied) to connect to the right and left audio input jacks of the
TV. Alternatively, connect the cable to the "R" jack.
If your VCR is stereo, you must connect two cables.
Each VCR has a different back panel configuration.
When connecting a VCR, match the color of the connection terminal to the cable.
When connecting to AV IN 1, the color of the AV IN 1 [YIVlDEO] jack (Green) does not match the color of the video cable (Yellow).
Connecting a Digital Audio System
The rear panel jacks on your TV make it easy to connect a Digital Audio System(Home theater/Receiver) to your TV,
1,
Connect an Optical Cable between the DIGITAL AUDIO OUT (OPTICAL) jacks on the TV and the Digital Audio Input (OPTICAL)
jacks on the Digital Audio System.
When a Digital Audio System is connected to the DIGITAL AUDIO OUT (OPTICAL) jack : Decrease the volume of the TV, and
adjust the volume level with the system's volume control.
TV Rear Panel
Digita! Audio System
[D
[D
5.1CH audio is possible when the TV is connected to an external device supporting 5.1CH.
Each Digital Audio System has a different back panel configuration.
[D When the receiver (home theater) is set to On, you can hear sound output from the TV's Optical jack. When the TV is displaying a
DTV(air) signal, the TV will send out 5.1 channel sound to the Home theater receiver. When the source is a digital component such
as a DVD and is connected to the TV via HDMI, only 2 channel sound will be heard from the Home Theater receiver.
If you want to hear 5.1 channel audio, connect the DIGITAL AUDIO OUT (OPTICAL) jack on the DVD I Blu-Ray player or Cable/
Satellite Box directly to an Amplifier or Home Theater, not the TV.
Connecting
1,
an Amplifier / DVD Home Theater
Connect Audio Cables between the AUDIO OUT [R-AUDIO-L] jacks on the TV and AUDIO IN [L-AUDIO-R] jacks on the Amplifier/
DVD Home Theater.
When an audio amplifier is connected to the AUDIO OUT [R-AUDIO-L] jacks terminals : Decrease the volume of the TV, and adjust
the volume level with the Amplifier's volume control.
TV
Rear
Panel
f
Amplifier
/ DVD Home Theater
(Not supplied}
[D Each Amplifier / DVD Home Theater has a different back panel configuration.
[D When connecting an Amplifier I DVD Home Theater, match the color of the connection terminal to the cable.
Connecting a PC
[_ Using an HDMI/DVICable
1. Connect an HDMI/DVI cable between the HDMI IN 2(OVl) jack on the TV and the PC output jack on your computer.
2. Connect a 3.5 mm Stereo plug to 2RCA cable between the DVl AUDIO IN [R-AUDIO-L] jack on the TV and the Audio Out jack of
the sound card on your computer.
TV Rear Panel
PC
Each PC has a different back panel configuration.
When connecting a PC, match the color of the connection terminal to the cable.
When using an HDMIIDVl cable connection, you must use the HDMI IN 2(DVl) terminal.
j Operation
]
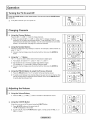
Turning the TV On and Off
Press the POWER button on the remote control. You can also use the POWER button
on the TV.
It may take a while for your TV to power on.
Changing Channels
C) Using the
Channel
Buttons
Press the OH "x ] or OH iv_ button to change channels.
When you press the CH [wi or CH _
button, the TV changes channels in
sequence. You will see all the channels that the TV has memorized. (The TV must
have memorized at least three channels). You will not see channels that were either
erased or not memorized. See page 20 to memorize channels.
C)
i_..Jl
¢..i
Using the Number Buttons
Press the number buttons to go directly to a channel. For example, to select channel "27",
press "2", then "7".
For quick channel change, press the number buttons, then press the ENTER_
button.
C) Using
the "i= _" Button
The "_- "button is used to select stations that broadcast a digital signal.
1. For example, for Channel "7-I", press "7", then '"_-_", then "1".
HD indicates the TV is receiving a Digital High Definition signal.
SD indicates the TV is receiving a Standard Definition signal.
For quick channel change, press the number buttons, then press the ENTER_
button.
C) Using the PRE-CH Button to select the Previous Channel
1. Press the PRE=CHbutton. The TV will switch to the last channel viewed.
To quickly switch between two channels that are far apart, tune to one channel, then
use the number button to select the second channel. Then use the PRE-OH button
to quickly alternate between them.
Adjusting
the Volume
C) Using the Volume Buttons
1, Press the VOL !_
C) Using the
_ MUTE
or VOL _=_ button to increase or decrease the volume.
Button
At any time, you can cut off the sound using the =_ MUTE button.
1. Press =_ MUTE button and the sound cuts off.
The _ will displayed on the screen.
2. To turn mute off, press the _ MUTE button again, or simply press the VOL + or
VOL I=] button.
i
v
i
Using the TOOLS Button
You can use the TOOLS button to select your frequently used functions quickly and easily. The Tools menu changes
2.
Press the A/V button to select a menu, then press the ENTER_
,.
Press the TOOLS button. The Too,s menu wi,, appear,
button.
For a more detailed description of each function, refer to the corresponding page.
- Add to Favorite (or De!ere from Favorite), see page 2!
, Switch to Cable (or Air), see page 20
Viewing the Display
The display identifies the current channel and the status of certain audio=video
settings.
1.
Press the INFO button on the remote control. The TV will display the channel, the type of
sound, and the status of certain picture and sound settings.
Press the INFO button once more or wait approximately 10 seconds and it disappears
automatically.
l/
_'[" ___
..........................
11
Viewing the Menus
Before using the TV, follow the steps below to learn how to navigate the menu in order to select and adjust different functions.
1,
2,
Pressthe MENU button.
The main menu is displayed on the screen. Its left side has the following icons: Picture, Sound, Channel, Setup, input,
Application, Support.
Press the A or V button to select one of the icons.
Press the 4 or _ button to access the icon's sub-menu.
3,
Press the J, or T button to move to items in the menu.
Press the ENTER_ button to enter items in the menu.
4,
Press the A/_r/4/l_ button to change the selected items.
Press the RETURN button to return to the previous menu.
Press the EXIT button to exit from the menu.
&
Using the remote control buttons
EXIT
Exit the on-screen menu.
C3 Example:Settingthe TV's Brightness in the PictureMenu
Adjusting
the Brightness
to 80
1, Press the MENU button to display the menu.
2, Press the ENTER_
button to select Picture.
3, Press the A. or T button to select Brightness.
4, Press the ENTER_
button.
& Press the *,i or _ button until the Brightness changes to 80.
6, Press the ENTER_ button.
Press the EXiT button to exit from the menu.
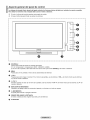
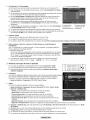
Plug & Play Feature
When the TV is initially powered on, basic settings proceed automatically
and subsequently.
The Screen Saver is activated if there is no remote control key input for longer than 1 minute while Plug & Play is running.
The Screen Saver is activated if there is no operating signal for longer than 15 minutes.
1,
Press the POWER button on the remote control.
The message Menu Language, Store Demo, Channels, and Time will be set. is
displayed.
2,
Press the ENTERI_ button, then Select Language of the OSD, menu is automatically
displayed. Press the ENTER_ button.
Press the A or T button to select language, then press the ENTER_ button.
The message Select 'Home Use' when installing this TV in your home. is displayed.
3,
Press the 4 or _,-button to select Stere Demo or Home Use, then press the ENTER_
button.
We recommend setting the TV to Home Use mode for the best picture in your home
environment.
Store Demo mode is only intended for use in retail environments.
If the unit is accidentally set to Store Demo mode and you want to return to Home
Use (Standard): Press the Volume button on the TV. When the volume OSD is
displayed, press and hold the MENU button on the TV for 5 seconds.
4,
The message Select the Antenna source to memorize, is displayed.
Press the A or T button to memorize the channels of the selected connection.
Press the ENTERI_ button to select Start.
• Air: Air antenna signal.
• Cable: Cable antenna signal.
• Auto: Air and Cable antenna signals.
In Cable mode, you can select the correct signal source among STD, HRC, and
IRC by pressing the A, T, _ or _ button, then press the ENTER_ button. If you
have Digital cable, select the cable system signal source for both Analog and Digital.
Contact your local cable company to identify the type of cable system that exists in
your particular area.
6,
The TV will begin memorizing all of the available channels.
To stop the search before it has finished, press the ENTERI_ button with Step
selected.
After all the available channels are stored, it starts to remove scrambled channels. The Auto program menu then reappears.
Press the ENTERI_ button when channel memorization is complete.
6,
The message Set the Clock Mode. is displayed. Press the ENTERI_ button.
Press the A or T button to select Auto, then Press the ENTER_ button. The message Set to daylight saving time. is displayed.
If you select Manual, Set current date and time is displayed. For detailed descriptions about the Manual, refer to page 31.
7,
Press the A or _r button to select Off, On, or Auto, then press the ENTER_
The image to select time zone in which you live is automatically displayed.
8.
Press the A or T button to select the time zone, then press the ENTERI_ button.
If you have received a digital signal, the time will be set automatically. If not, see page 31 to set the clock.
9.
The brief instruction on How to get the best performance from your new HDTV is displayed.
Press the ENTER _ button.
button.
This menu is available HD connection Guide in the Support menu.
10, Press the ENTERI_ button. The message Enjoy your TV, is displayed. When you have finished, press the ENTER_
if you want to reset this feature...
1,
Press the MENU button to display the menu. Press the A or T button to select Setup,
then press the ENTER_ button.
2,
Press the ENTERI:3_button again to select Plug & Play. For further details on setting
up options, press the ENTERI:_ button again.
The Plug & Play feature is only available in the TV mode.
button.
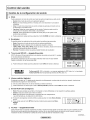
i Channel Control
1
Storing Channels
[3 Antenna _ Air / Cable
Beforeyourtelevisioncan beginmemorizingthe availablechannels,youmustspecifythe
typeof signalsourcethatis connectedto the TV(i.e.an Air or a Cablesystem).
You can also switch the antenna by selecting Tools-_ Switch to Cable (or Air)
[3
Auto
Program
• Air: Air antenna signal.
• Cable: Cable antenna signal.
• Auto: Air and Cable antenna signals
8TD, HRC and IRC identify various types of cable TV systems. Contact your local
cable company to identify the type of cable system that exists in your particular area.
At this point the signal source has been selected.
After all the available channels are stored, it starts to remove scrambled channels.
The Auto program menu then reappears.
If you want to stop Auto Programming, press the ENTER_ button.
The Stop Auto Program? message will be displayed. Select Yes by pressing the
4 or _ button, then press the ENTER_ button.
C) ClearingScrambled Channel(Digital)
The Clear Scrambled Channel function is used to filter out scrambled channels after
Auto Program is completed.
This process may take up to 20~30 minutes.
To stop searching scrambled channels: Press the ENTER_ button to select Stop.
Press the 4 button to select Yes, then press the ENTER_ button.
This function is only available in Cable mode.
C)
Fine Tune
(Analog)
Use fine tuning to manually adjust a particular channel for optimal reception.
If you do not store the fine-tuned channel in memory, adjustments are not saved.
.....will appear next to the name of fine-tuned channels.
To reset the fine tuning setting, press the T button to select Reset, then press the
ENTER_ button.
Managing Channels
[3 ChannelList
Using this menu, you can Add / Delete or set Favorite channels and use the program guide for digital broadcasts.
• All Channels: Shows all currently available channels.
• Favorite: Shows all favorite channels.
•° Programmed:
Added Channels:
Shows
Shows
all current
all added
reserved
channels.
programs.
(_) Press the CH LIST button on the remote control to bring up the channel lists.
Using the Color buttons
I!
with the Channel List
• Green (Zoom): Enlarges or shrinks a channel number.
• Yellow (Select): Selects multiple channel lists.
•
__TOOLS (Tools): Displays the Add (or Delete), Add to Favorite (or Delete from Favorite), Timer Viewing, Channel Name
Edit, Select All, Deselect All, and Auto Program menus (The Options menus may differ depending on the situation.)
@ Channel Status Display Icons
Continued...
C]
Channel
List Tools
Menu (in All Channels/Added
Channels
/ Favorite)
Press the TOOLS button to use the option menu.
Option menu items may differ depending on the channel status.
Add / Delete
You can delete or add a channel to display the channels you want.
All deleted channels will be shown on All Channels menu.
A gray-colored channel indicates the channel has been deleted.
The Add menu only appears for deleted channels.
You can also delete a channel to the Added Channels or Favorite menu in the same
manner.
Add to Favorite / Delete from Favorite
You can set channels you watch frequently as favorites.
Press the TOOLS button to display Tools menu.
You can also set the fav0rite channe! by selecting
Tools _, Add to Favorite (or Delete from Favorite)
The "v" symbol will be displayed and the channel will be set as a favorite.
All favorite channels will be shown on Favorite menu.
/__] To select the favorite channels you have set up, press the FAV,CH button on the
remote control.
Timer Viewing
If you reserve a program you want to watch, the channel is automatically switched to the
reserved channel in the Channel List; even when you are watching another channel.
To reserve a program, set the current time first.
Only memorized channels can be reserved.
You can set the channel, month, day, year, hour and minute directly by pressing the
number buttons on the remote control.
Reserving a program will be shown on Programmed menu.
Digital Program Guide and Viewing Reservation: When a digital channel is
selected, and you press the _ button, the Program Guide for the channel appears.
You can reserve a program according to the procedures described above.
Select All / Deseleet All
•
•
Select At!: You can select all the channels in the channel list.
Deseleet All: You can deselect all the selected channels in the channel list.
You can perform the add / delete, add to Favorite / delete from Favorite function for multiple channels at the same time. Select
the required channels and press the yellow button to set all the selected channels at the same time.
The _ mark appears to the left of the selected channels.
You can only select Deselect All when there is a selected channel.
Channel Name Edit (Analog)
Channels can labeled so that their call letters appear whenever the channel is selected.
The names of digital broadcasting channels are automatically assigned and cannot be labeled.
C]
Channel
List Tools
Menu (in Programmed)
You can view, modify or delete a reservation.
@ Press the TOOLS button to use the option menu.
Change Info
Select to change a viewing reservation.
Cancel Schedules
Select to cancel a viewing reservation.
Information
Select to view a viewing reservation. (You can also change the reservation information.)
Select All / Deselect All
You can select (or deselect) all channels in the channel list.
i Picture Control
Changing
C)
]
the Picture Settings
Mode
You can select the type of picture which best corresponds to your viewing requirements.
• Dynamic: Select a high-definition picture for bright environments.
• Standard: Selects the optimal picture display for normal environments. This
setting is convenient for most situations.
• Movie: Selects a comfortable picture display for dark environments.
/__) You can select these options simply by pressing the P.MODE button on the remote
control.
C) Cell Light / Contrast/ Brightness ! Sharpness / Color / Tint (G/R)
Your television has several setting options that allow you to control the picture quality.
• Cell Light:Adjusts the pixel brightness. 10 is the brightest setting.
• Contrast: Adjusts the contrast level.
• Brightness: Adjusts the brightness level.
• Sharpness:Adjusts the sharpness.
• Color: Adjusts the color saturation of the picture using the bar on the screen.
• Tint (G/R): The closer to Red 100, the more saturated the red color becomes.
When you make changes to Cell Light, Contrast, Brightness, Sharpness, Color or
Tint (G/R), the OSD will be adjusted accordingly.
Settings can be adjusted and stored for each external device you have connected to
an input of the TV.
The energy consumed during use can be significantly reduced if thebrightness level is
lowered, which will reduce the overall running cost.
[3 Advanced Settings
You can adjust the detailed settings for your screen including the color and contrast.
Advanced Settings is available in Standard or Movie mode.
Black Tone
You can select the black level on the screen to adjust the screen depth.
• Off: Turns the Black Adjust function off.
• Dark: Sets the black color depth to dark.
• Darker: Sets the black color depth to darker.
• Darkest: Sets the black color depth to darkest.
Dynamic Contrast
You can adjust the screen contrast so that the optimal contrast is provided.
• Off: Turns the Dynamic Contrast function off.
• Low: Sets Dynamic Contrast to low.
• Medium: Sets Dynamic Contrast to medium.
• High: Sets Dynamic Contrast to high.
Gamma
You can adjust the Primary Color (Red, Green, Blue) Intensity.
Color Space
Color Space is a color matrix composed of red, green and blue colors. Select your Favorite color space to experience the most
natural color.
• Native: Sets the color range wider than that of the input video source.
• Auto: Automatically sets the color range depending on the input video source.
Continued...
White Balance
You can adjust the color temperature for more natural picture colors.
R-Offset: Adjust the low level red intensity.
G-Offset: Adjust the low level green intensity.
B-Offset: Adjust the low level blue intensity.
R-Gain: Adjusts the high level red intensity.
G-Gain: Adjusts the high level green intensity.
B-Gain: Adjusts the high level blue intensity.
Reset: Resets the default white balance.
Changing the adjustment value will refresh the adjusted screen.
Flesh Tone
You can emphasize the pink flesh tone in the picture.
Changing the adjustment value will refresh the adjusted screen.
Edge Enhancement
_ Off / On
You can emphasize object boundaries in the picture.
PictureOptions
Color Tone _ Cool / Normal / Warm1 / Warm2
You can select the most comfortable color tone for viewing.
Warm1 or Warm2 is only activated when the picture mode is Movie.
Settings can be adjusted and stored for each external device you have connected to
an input of the TV.
Size
Occasionally, you may want to change the size of the image on your screen. Your TV
comes with six screen size options, each designed to work best with specific types
of video input. Your satellite receiver may have its own set of screen sizes as well. In
general, though, you should view the TV in 16:9 mode as much as possible.
• 16:9: Sets the picture to the 16:9 aspect ratio.
• Zoom1: Stretches the 16:9 aspect ratio picture vertically.
• Zoom2: Stretches the Zoom I picture vertically.
• Wide Fit: Stretches the picture both horizontally and vertically to display
the optimal picture.
• 4:3: Sets the picture to the 4:3 aspect ratio.
• Screen Fit: Displays the full native HD signal that cannot be viewed
using a normal TV.
[_) Alternately, you can press the P.SIZE button on the remote control repeatedly to
change the picture size.
16:9
Zoom_
Zoom2
II
Wide Fit
4:3
Screen Fit
Continued...
Temporary image retention may occur when viewing a static image on the set for more than two hours.
[_ After selecting Zooral, Zoora2 or Wide Fit:
Press the _ or _. button to select Position, then press the ENTER_ button.
Press the A or T button to move the picture up and down.
Reset: Press the _ or _ button to select Reset, then press the ENTER_ button.
You can initialize the setting.
@ After selecting Screen Fit in HDMI (1O8Oi/1080p)or Component (1O8Oi/1080p)mode, you made need to center the picture:
Press the _ or _. button to select Position, then press the ENTER_ button.
Press the A, V, _1or _-button to move the picture.
Reset: Press the _ or _. button to select Reset, then press the ENTER_ button. The TV will be reset to 16:9.
@ HD (High Definition): 16:9 - 1O80i/108Op(1920x1080), 720p (1280x720)
Settings can be adjusted and stored for each external device you have connected to an input of the TV.
ATV, Video, Component (480i, 480p)
16:9, Zooral, Zoora2, 4:3
Component (72%)
16:9, Wide Fit, 4:3
DTV(1080i), Component (1080i, 1O80p), HDMI (72%, 1080i, 1080p)
16:9, 4:3, Wide Fit, Screen Fit
Digital NR
If the broadcast signal received by your TV is weak, you can activate the Digital Noise Reduction feature to help reduce any static
and ghosting that may appear on the screen.
• Off: Turns the Digital NR function off.
• Low: Sets Digital NR to low.
• Mediura: Sets Digital NR to medium.
• High: Sets Digital NR to high.
• Auto: Sets Digital NR toAuto.
HDMI Black Level
You can directly select the black level on the screen to adjust the screen depth.
•
Normal: The screen gets brighter.
• Low: The screen gets darker.
@ This function is active only when an external device is connected to the TV via HDMI.
HDMI Black Level function may not be compatible with all external devices.
Film Mode
The TV can be set to automatically sense and process film signals from all sources and
adjust the picture for optimum quality.
• Off: Basic video image processing applied and No auto-detection for
film-based programs.
• Auto: Automatically adjusts for the best image quality between film and
video programs.
@ Film mode is supported in TV, Video, Component (480i / 1080i) and HDMI
(1080i).
Screen Burn Protection
Configures the Screen Burn Protection options to prevent and reduce pixel burn.
When an image remains in one position too long, it may cause a permanent burn on the screen.
Preventing Screen Burn=in
To reduce the possibility of screen burn, this unit is equipped with screen burn prevention technology. This technology enables you
to set picture movement up/down (Vertical Line) and side to side (Horizontal Dot).
The Time setting allows you to program the time between movement of the picture in minutes.
•
Pixe! Shift: Using this function, you can minutely move pixels on the PDP in horizontal or vertical direction to prevent afterimages on the screen.
@ Optimum condition for pixel shift;
Horizontal
Vertical
...........
....
....
Time(rain:)
0~4
2
0~4
2
I~4 rain.
2 min.
i
Continued...
Side Gray: When you watch TV with the screen ratio of 4:3, the screen is prevented from any damage by adjusting the white
balance on both extreme left and right sides. To prevent the screen burn from happening, select Dark or Light.
- Dark: When you set the screen ratio to 4:3, it darkens the left and right sides.
- Light: When you set the screen ratio to 4:3, it brightens the left and right sides.
Reducing the Effects of Screen Burn
If screen burn has occurred, you can select scrolling to help remove screen burn artifacts.
• Scrolling: This function removes after-images on the screen by moving all the pixels on the PDP according to a pattern. Use
this function when there are remaining after-images or symbols on the screen, especially when you displayed a still image on
the screen for a long time.
@ The after-image removal function has to be executed for a long time (approximately 1 hour) to effectively remove after-images
on the screen. If the after-image is not removed after performing the function, repeat the function again.
@ Press any key on the remote control to cancel this feature.
C3 Picture Reset_ Reset PictureMode/ Cancel
Resets all picture settings to the default values.
Select a picture mode to be reset. The reset is performed for each picture mode.
i Sound Control
Changing the Sound Settings
[:3 Mode
You can select the sound mode to best suit the programming you're watching.
• Standard: This sound mode is for general purposes.
• Music: Music mode enables you to listen to music as if you are sitting
in a concert hall.
• Movie: Movie mode enables you to experience live and full movie sound as if you are
sitting in a movie theater.
• Clear Voice: Emphasizes voice over other sounds. Select this sound mode when
watching news, soap operas, or documentaries.
• Custom: You can customize the sound settings to suit your personal preferences.
/__) You can select these options simply by pressing the &MODE button on the remote
control.
C) Equalizer
The sound settings can be adjusted to suit your personal preferences.
• Mode: Selects the sound mode among the predefined settings.
• Balance L/R: Adjusts the balance between the right and left speaker.
• 100Hz, 300Hz, lkHz, 3kHz, 10kHz (Bandwidth Adjustment): Adjusts the level of
different bandwidth frequencies.
• Reset: Resets the equalizer settings to the default values.
[3 SR8 TruSurroundHD -_ Off/On
SRS TruSurround HD enables you to enjoy a virtual 5.1 Surround Sound effect over the
TV's two speakers.
This function provides not only rich deep bass also improves high frequency resolution.
/__) You can select these options simply by pressing the SRS button on the remote
control.
$F15(®
D
I
G
I
T
A
TruSurround HD, SRS and the (®) symbol are trademarks of SRS Labs, Inc.
TruSurround HD technology is incorporated under license from SRS Labs, Inc.
L
C3 Preferred Language(Digital)
DigitaI-TV broadcasts are capable of simultaneous transmission of many audio tracks (for example, simultaneous translations of the
program into foreign languages).
You can only select the language from among the actual languages being broadcast.
/__) You can listen in a language other than the Preferred Language by pressing the MTS button on the remote control.
[3 Multi-Track Sound (MTS) (Analog)
o
Mono: Choose for channels that are broadcasting in mono or if you are having difficulty receiving a stereo signal.
• Stereo: Choose for channels that are broadcasting in stereo.
• SAP: Choose to listen to the Separate Audio Program, which is usually a foreignlanguage translation.
Depending on the particular program being broadcast, you can listen to Mono,
Stereo, or SAP.
/__) Press the MTS button on the remote control repeatedly to select Mono, Stereo, or
SAP.
C3 Auto
Volume
_
Off / On
Each broadcasting station has its own signal conditions, and so it is not easy to adjust the volume every time the channel is
changed. This feature lets you automatically adjust the volume of the desired channel by lowering the sound output when the
modulation signal is high or by raising the sound output when the modulation signal is low.
Continued...
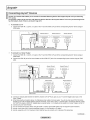
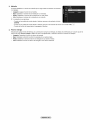
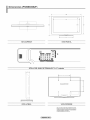
Speaker
Select
When you watch TV with it connecting to a Home theater, turn the TV speakers off so you
can listen to sound from the Home theater's (external) speakers.
• External Speaker: Uses the external speakers(Home Theater) to output sound.
• TV Speaker: Uses the TV speakers to output sound.
If you select External Speaker in the Speaker Select menu, the sound settings will
be limited.
The volume buttons and _ MUTE buttons do not operate when the Speaker Select
is set to External Speaker.
Please set the volume on your Home theater.
°"""'_
.................
-"'" "_"-''"_
.......
....
TV'sinternalSpeakers
w/- '- Av-J
AudioOut (Optical,L/R Out)to SoundSystem
.......................................
w /Av/Compo"enti
.DMI
Sound Output
[_
DOLBY
QIGITAL1
Manufactured under license from Dolby Laboratories.
Dolby and the double-D symbol are trademarks of Dolby Laboratories.
_3 Sound Reset
You can restore the Sound settings to the factory defaults.
• Reset All: All the sound values return to default settings.
• Reset Sound Mode: Current sound values return to default settings.
• Cancel: Select the sound reset options.
l Function Description
j
Configuring the Setup Menu
Language
You can set the menu language.
C3 Game Mode _ Off ! On
When connecting to a game console such as PlayStationTM or XboxTM, you can enjoy a
more realisticgaming experience by selecting the game menu.
When the Game Mode is On
• Picture mode is automatically changed to Standard and cannot be changed.
• Sound mode is automatically changed to Custom and cannot be changed.
Adjust the sound using the equalizer.
• The Reset in the Sound menu is activated. Reset function initializes the Equalizer settings to the factory default setting.
Game Mode is not available in regular TV mode,
If the picture is poor when an external device is connected to the TV, check if Game Mode is On.
If you display the TV menu in Game mode, the screen shakes slightly.
The mark (_) appears on the screen which means that Game Mode is on with the selected source.
This function supports only game function.
Continued...
[_ V-Chip
The V-Chip feature automatically locks out programs that are deemed inappropriate for children. The user must enter a PIN
(personal ID number) before any of the V-Chip restrictions are set up or changed.
V-Ohip function is not available in HDMI, or Component mode.
The default PIN number of a new TV set is '0-0-0-0'.
If you forget the PiN, press the remote-control buttons in the following sequence,
which resets the pin to '0-0-0-0' : Power Off. -_ MUTE _ 8 _ 2 _ 4 _ Power On.
Allow all: Press to unlock all TV ratings. / Block all: Press to lock all TV ratings.
V-Chip Lock -_ Off / On
Turns the V-Chip function on/off.
TV Parental Guidelines
First, set up a personal identification number (PIN) and enable the V-Chip.
Parental restrictions can be set up using either of two methods: The TV guidelines or the
MPAA rating.
• Base Categories
- TV-Y: Young children / TV-Y7: Children 7 and over / TV-G: General audience /
TV-PG: Parental guidance / TVo14:Viewers 14 and over / TV-MA: Mature audience
• Sub-ratings
- All: Lock all TV ratings. / FV: Fantasy violence / V: Violence / S: Sexual situation
/ L: Adult Language / D:Sexually Suggestive Dialog
The V-Chip will automatically block certain categories that are more restrictive.
For example, if you block TV-Y category, then TVoY7will automatically be blocked. Similarly, if you block the TV-G category,
then all the categories in the young adult group will be blocked (TV-G, TVoPG,TV-14 and TVMA). The sub-ratings (D, L, S, V)
work together similarly.
MPAA Rating
The MPAA rating system uses the Motion Picture Association of America (MPAA)
system and its main application is for movies. When the V-Chip lock is on, the TV will
automatically block any programs that are coded with objectionable ratings
either MPAA or TV-Ratings).
G: General audience (no restrictions).
PG: Parental guidance suggested.
PG-t3: Parents strongly cautioned.
R: Restricted. Children under 17 should be accompanied by an adult.
N0-17: No children under age 17.
X: Adults only.
NR: Not rated.
While a particular category is selected, press the ENTER_ button to activate it.
The" _ "symbol will be displayed. Press the ENTER_ button to block or unblock the category.
The V-Chip will automatically block any category that is More restrictive.
For example, if you block the PG-13 category, then R, N0-17 and X will automatically be blocked also.
Canadian
English
You can block TV programs depending on their Canadian English rating.
C: Programming intended for children under age 8.
C8+: Programming generally considered acceptable for children 8 years and over to watch on their own.
G: General programming, suitable for all audiences.
PG: Parental Guidance.
14+: Programming contains themes or content which may not be suitable for viewers under the age of 14.
18+: Adult programming.
The V-Chip will automatically block any category that is More restrictive.
For example, if you block G category, then PG, 14+ and 18+ will automatically be blocked also.
Canadian
French
You can block TV programs depending on their French Canadian rating.
• G: General
• 8 arts+: Programming generally considered acceptable for children 8 years and over
to watch on their own.
• 13 arts+: Programming may not be suitable for children under the age of 13.
• 16 arts+: Programming is not suitable for children under the age of 16.
• 18 arts+: Programming restricted to adults.
The V-Chip will automatically block any category that is More restrictive.
For example, if you block 8 arts+ category, then 13 arts+, IG arts+ and 18 arts+ will
automatically be blocked also.
Continued...
*
title
Downloadable U.8. Rating
Parental restriction information can be used while watching DTV channels
If information is not downloaded from the broadcasting station, the Downloadable U.S,
Rating menu is deactivated.
Parental restriction information is automatically downloaded while watching DTV channels.
It may take several seconds.
The Downloadable U.S. Rating menu is available for use after information is downloaded
from the broadcasting station. However, depending on the information from the
broadcasting station, it may not be available for use.
Parental restriction levels differ depending on the broadcasting station. The default
menu name and Downloadabte U.S. Rating changes depending on the downloaded
information.
The number of
Even if you set the On-screen display to your desired language, the Downloadable U,S,
current rating
Rating menu will appear in English only.
information
The rating will automatically block certain categories that are more restrictive.
The number of all
rating information
The rating titles (For example: Humor Level..etc) and TV ratings
(For example: DH, MH, H..etc) may differ depending on the broadcasting station.
Change PIN
You can change four-digit code to use the V-Chip function.
The default PIN code for a new TV set is '0-0-0-0'.
If you change the PIN code completely, the message PIN is changed successfully,
How to Reset the TV after the V-Chip Blocks a Channel (Emergency
is displayed.
Escape)
If the TV is tuned to a restricted channel, the V-Chip will block it. The screen will go blank and
the following message will appear.
1, Enter your PIN.
To resume normal viewing, tune to a different channel using CH V button. Under certain
conditions (depending on the rating of the local TV programs) the V-Chip might lock out all
the channels. In this case, use the V-Chip function for an "emergency escape":
If you forget the PIN, press the remote-control buttons in the following sequence,
which resets the pin to '0-0-0-0': Power Off. _ _MUTE _ 8 _ 2 _ 4 _ Power On.
C3 Caption
(On-Screen
Text Messages)
@ The Caption feature doesn't work in Component, or HDMI modes.
The availability of captions depends on the program being broadcast.
/__) Press the CO button on the remote control to turn the Caption On or Off.
Analog
The Analog Caption function operates in either analog TV channel mode or when a signal is
supplied from an external device to TV. (Depending on the broadcasting signal, the Analog
Caption function may operate on digital channels.)
• Caption Mode: Default, OO1~OO4, Textl~Text4
Digital
The Digital Captions function operates on digital channels.
• Caption Mode: Default, Servicel~Service6,
0C1~C04, Textl~Text4
• Digital Caption Options
- Size : You can select the caption font size.
- Font Style: You can select the caption font.
- Foreground Color: You can select the color of the captions.
- Background Color: You can select the background color for the captions.
- Foreground Opacity: You can select the opacity of the caption foreground.
- Background Opacity: You can select the opacity of the background for the captions.
- Return to Default: Returns to the default settings of the broadcasting station for the
captions.
Digital Caption Options are available only when Default and Servicel~Service6 can be selected in Caption Mode.
Service1~6 in digital caption mode may not be available depending on the broadcast.
Default means to follow the standard set by the broadcaster.
Foreground and Background cannot be set to have the same color.
Foreground Opacity and Background Opacity cannot be both set to Transparent.
C3 Melody
A melody sound can be set to come on when the TV is powered On or Off.
• Off: Turns off the melody function.
• Low: Sets the melody volume to low.
• Medium: Sets the melody volume to medium.
• High: Sets the melody volume to high.
The Melody does not play.
- When no sound is output from the TV because the _ MUTE button has been
pressed,
- When no sound is output from the TV because the volume has been reduced to
minimum with the VOL _-_ button.
- When the TV is turned off with the Sleep Timer function.
C3 EnergySaving
This feature adjusts the brightness of the TV in order to reduce power consumption. When watching TV at night,
set the Energy Saving mode option to High to reduce eye fatigue as well as power consumption.
• Off: Turns the Energy Saving function off.
• Low: Sets the Energy Saving function to low.
• Medium: Sets the Energy Saving function to medium.
• High: Sets the Energy Saving function to maximum.
Setting the Time
Setting the clock is necessary in order to use the various timer features of the TV. Also, you can check the time while watching
the TV. (Just press the INFO button.)
[3 Time
1, Press the MENU button to display the menu.
2, Press the A or _r button to select Setup, then press the ENTER_
button.
3, Press the A or T button to select Time, then press the ENTER[3_ button.
Clock
• Clock Mode _ Auto / Manual
You can set up the current time manually or autornatically.
• Clock Set
You can set the current time manually.
@ This function is only available when Clock Mode is set to Manual.
@ You can set the Month, Day, Year, Hour, or Minute directly by pressing the
number buttons on the remote control.
• Time Zone
Select your time zone.
@ This function is only available when Clock Mode is set to Auto.
@ Depending on the broadcast station and signal, the auto time may not be set
correctly. If this occurs, set the time manually.
@ The Antenna or cable must be connected in order to set the time automatically.
• DST (Daylight Saving Time) _ Off/On/Auto
Switches the Daylight Saving Time function on or off.
@ This function is only available when Clock Mode is set to Auto.
Sleep Timer
The sleep timer automatically shuts off the TV after a preset time
(30, 60, 90, 120,150 and 180 minutes).
__ press the TOOLS button tOdisplay Tools menu.
You can a!so set the sleep timer by selecting Tools -_ $!eep Timer
Timer 1 / Timer 2 / Timer 3
Use this feature to set the TV to turn on or off at a desired time. 3 different On/Off times
can be set. You must set the clock first.
• On Time: Set the Hour, Minute, am/pm, and Activate/Inactivate.
(To activate timer with the setting you've chosen, set to Activate.)
• Off Time: Set the Hour, Minute, am/pm, and Activate/Inactivate.
(To activate timer with the setting you've chosen, set to Activate.)
• Volume: Set the required volume level.
• Antenna: SelectAir or Cable.
• Channel: Select the desired channel.
• Repeat: Select Once, Everyday, Mon~Fri, Mon~Sat, Sat-Sun, or Manual.
@ When Manual is selected, press the _. button to select the desired day of the
week. Press the ENTER_ button over the desired day and the ,V mark will
appear.
You can set the hour, minute and channel by pressing the number buttons on the remote control.
@ Auto Power Off
When you set the timer On, the television will eventually turn off, if no controls are operated for 3 hours after the TV was turned
on by the timer. This function is only available in timer On mode and prevents overheating, which may occur if a TV is on for too
long time.
Source List / Edit Name
[_ Source List
Use to select TV or other external input sources such as DVD / Blu-Ray players / Cable
Boxes / Satellite / receivers (Set-Top Box) connected to the TV. Use to select the input
source of your choice.
TV, AV, Component1, Component2, HDMI1, HDMI2/DVI, HDMI3.
You can choose only those external devices that are connected to the TV. In the
Source List, connected inputs will be highlighted and sorted to the top. Inputs that
are not connected will be sorted to the bottom.
Using the Color buttons on the remote with the Source list
•
Red (Refresh): Refreshes the connected external devices.
Press this if your Source is on and connected, but does not appear in the list.
__TOOLS (Tools): Displays the Edit Name and Information menus.
/__) Press the SOURCE button on the remote control to view an external signal source.
C) Edit Name
You can name the device connected to the input jacks to make your input source
selection easier.
VCR / DVD / Cable 8TB / Satellite 8TB / PVR 8TB / AV Receiver / Game /
Camcorder / PC / DVI PC / DVI / TV / IPTV / Blu-ray / HD DVD / DMA
When a PC with a resolution of 1920 x 108O@60Hz is connected to the HDMI IN
2(DVl) port, you should set the HDMI2/DVl mode to PC in the Edit Name menu.
i PC Display
]
Using Your TV as a Computer (PC) Display
Setting Up Your PC Software (Based on Windows XP)
The Windows display-settings for a typical computer are shown below. The actual screens on
your PC will probably be different, depending upon your )articular version of Windows and your
particular video card. However, even if your actual screens look different, the same basic set-up
information will apply in almost all cases.
(If not, contact your computer manufacturer or Samsung Dealer.)
1. First, click on Control Panel on the Windows start menu.
2. When the control panel window appears, click on Appearance and Themes and a display
dialog-box will appear.
3. When the control panel window appears, click on Display and a display dialog-box will
appear.
4. Navigate to the Settings tab on the display dialog-box. The correct size setting (resolution)
Optimum: 1920 X 1080 @ 60Hz
If a verticalfrequency option exists on your display settings dialog box, the correct value is 60
or 60 Hz. Otherwise, just click OK and exit the dialog box.
Display Modes
If the signal from the system equals the standard signal mode, the screen is adjusted automatically.
doesn't equal the standard
signal mode, adjust the mode by referring to your videocard
user guide;
For the display modes listed below, the screen image has been optimized during manufacturing.
HDMI/DVI
Mode
If the signal from the system
otherwise there may be no video.
Input
Resolution
Horizontal
Frequency (kHz_T Verticai
Fr;que_'_'n'cy"(Hz)
Pixel
ClockFrequency (MHz)Sync
Polarity
(HIV}
IBM
640 x 350
720 x 400
31.469
31.469
70.086
70.087
25.175
28.322
+/-/ +
MAC
640 x 480
832 x 624
1152 x 870
35.000
49.726
68.681
66.667
74.551
75.062
30.240
57.284
100.000
- /- /-/ +
VESA CVT
720 x 576
1152 x 864
1280 x 720
1280 x 720
1280 x 960
35.910
53.783
44.772
56.456
75.231
59.950
59.959
59.855
74.777
74.857
32.750
81.750
74.500
95.750
130.000
-/
-/
-/
-/
-/
VESA DMT
640 x 480
640 x 480
640 x 480
800 x 600
800 x 600
800 x 600
1024 x 768
1024 x 768
1024 x 768
1152 x 864
1280 x 800
1280 x 800
1280 x 960
1280 x 1024
1280 x 1024
1360 x 768
1440 x 900
1440 x 900
1680 x 1050
31.469
37.861
37.500
37.879
48.077
46.875
48.363
56.476
60.023
67.500
49.702
62.795
60.000
63.981
79.976
47.712
55.935
70.635
65.290
59.940
72.809
75.000
60.317
72.188
75.000
60.004
70.069
75.029
75.000
59.8t0
74.934
60.000
60.020
75.025
60.015
59.887
74.984
59.954
25.175
31.500
31.500
40.000
50.000
49.500
65.000
75.000
78.750
108.000
83.500
106.500
108.000
108.000
135.000
85.500
106.500
136.750
146.250
- /- /- /+/+
+/+
+/+
- /- /+/+
+/+
-/ +
-/ +
+/+
+/+
+/+
+/+
-/ +
-/ +
-/ +
VESA GTF
1280 x 720
1280 x 1024
52.500
74.620
70.000
70.000
89.040
128.943
-/ +
- /-
VESA DMT /
DTV CEA
1920 x 1080p
67.500
60.000
148.500
+/+
@
When using an HDMI/DVI
cable connection,
you must use the HDMI IN 2(DVI) terminal.
+
+
+
+
+
Support
[_ Self Diagnosis
Picture Test
If you think you have a picture problem, perform the picture test. Check the color pattern
on the screen to see if the problem still exists.
Does the problem still exist with this test photo? appears on the screen.
If the test pattern does not appear or there is noise in the test pattern, select Yes
If the test pattern is properly displayed, select No
• Yes: There may be a problem with the TV. Contact the Samsung Call center.
• No: There may be a problem with your external equipment. Please check your
connections.
If the problem still persists, refer to the external device's user manual.
Sound Test
If you think you have a sound problem, please perform the sound test. You can check the
sound by playing a built-in melody sound through the TV.
Does the problem still exist with this sound test? appears on the screen.
If during the sound test you can hear sound only from one speaker or not at all, select
Yes.
If you can hear sound from the speakers, select No.
• Yes: There may be a problem with the TV. Contact the Samsung Call center.
• No: There may be a problem with your external equipment. Please check your
connections. If the problem still persists, refer to the external device's user manual.
If you hear no sound from the TV's speakers, before performing the sound test, make sure Speaker Select is set to TV speaker
in the Sound menu.
The melody will be heard during the test even if Speaker Select is set to External Speaker or the sound is muted by pressing
the _ MUTE button.
Signal Strength
(Digital)
Unlike analog channels, which can vary in reception quality from snowy to clear, digital
(HDTV) channels have either perfect reception quality or you will not receive them at all.
So, unlike analog channels, you cannot fine tune a digital channel. You can, however,
adjust your antenna to improve the reception of available digital channels.
If the signal strength meter indicates that the signal is weak, physically adjust your
antenna to increase the signal strength. Continue to adjust the antenna until you find
the best position with the strongest signal.
Software Upgrade
Samsung may offer upgrades for your TV's firmware in the future. Please visit Samsung.
com or contact the Samsung call center at 1-800-SAMSUNG (726-7864) to receive
information about downloading upgrades and using a USB drive. Upgrades will be
possible by connecting a USB drive to the USB port.
Please be careful not to disconnect the power or remove the USB drive while
upgrades are being applied. The TV will shut off and turn on automatically after
completing the firmware upgrade.
When software is upgraded, video and audio settings you have made will return to
their default (factory) settings.
We recommend you write down your settings so that you can easily reset them after
the upgrade.
C3 HD ConnectionGuide
A brief instruction on How to get the best performance from your new
HDTV. is displayed.
Follow the guide for the best connection method for your HD devices..
Contact Samsung
You can know the Samsung Call center, website and information for product.
You can move the previous or next page by pressing the A or • button.
TV Panel
i Anynet+
Connecting Anynet+ Devices
Anynet+ is a function that enables you to control all connected 8amsung devices that support Anynet+ with your 8amsung
TV's remote.
The Anynet+ system can be used only with $amsung devices that have the Anynet+ feature. To be sure your 8amsung device
has this feature, check if there is an Anynet+ logo on it.
To connect to a TV
1. Connect the HDMI IN (1,2(DVI), or 3)jack on the TV and the HDMI OUT jack of the corresponding Anynet+ device using an
HDMI cable.
::
,o,oe,+Dev,ee,
,°,°et+Dev,ce,
°,oe,+Dev,oe,
®
iiiii_ To connect to a Home Theater
1. Connect the HDMI IN (1,2(DVl), or 3)jack on the TV and the HDMI OUT jack of the corresponding Anynet+ device using an
HDMI cable.
2. Connect the HDMI IN jack of the home theater and the HDMI OUT jack of the corresponding Anynet+ device using an HDMI
cable.
TV
®
Anynet+ Device 1
Anynet+ Device 2
HDMI 1.3 Cablek'_
Home Theater
Anynet+
Device 3
HDMI 1.3 Cable
Optical
Cabte
[_ Connect an Optical cable between the DIGITALAUDIO OUT (OPTICAL) jack on your TV and the Digital Audio Input on the
Home Theater.
[_ When following the connection above, the Optical jack only outputs 2 channel audio. You will only hear sound from the Home
Theater's Front Left and Right speakers and the subwoofer. If you want to hear 5.1 channel audio, connect the DIGITALAUDIO
OUT (OPTICAL) jack on the DVD I Satellite Box (ie Anynet Device 1 or 2) directly to the Amplifier or Home Theater, not the TV.
[_ Connect only one Home Theater.
[_ You can connect an Anynet+ device using the HDMI 1.3 cable. Some HDMI cables may not support Anynet+ functions.
Anynet+ works when the AV device supporting Anynet+ is in the Standby or On status.
[_ Anynet+ supports up to 12 AV devices in total. Note that you can connect up to 3 devices of the same type.
Continued...
C3 Setting Up Anynet+
Thefollowingsettingshelp set theAnynet+functions.
You can also set the Anynet+ by selecting Tools -_ Anynet+ (HDM!-CEC)
To use the Anynet+ Function, Anynet+ (HDMI-CEC) must be set to On
1. Press the MENU button. Press the A or T button to select Application, then press the
ENTER_ button.
2. Press the A or T button to select Anynet+ (HDMI-CEC), then press the ENTER[_
button.
3. Press the A or T to select Setup, then press the ENTER[q_ button.
4. Press the ENTER_
button to select Anynet+ (HDMI=GEC).
5. Press the A or T button to select On, then press the ENTER[_ button.
The Anynet+ (HDM[-CEC) function is enabled.
If you select Off, Anynet+ (HDMI-CEC) is disabled.
When the Anynet+ (HDMI-CEC) function is disabled, all the Anynet+ related operations
are deactivated.
Setting an Anynet+ Device to turn Off Automatically when the TV is Turned Off
1. Press the A or T button to select Auto Turn Off, then press the ENTER_
2. Press the A or T button to select Yes, then press the ENTER_
The Auto Turn Off function is enabled.
button.
button.
If you select No, the Auto Turn Off function is canceled.
3. Press the EXIT button to exit.
@ The active source on the TV remote must be set to TV to use the Anynet+ function.
@ If you set Auto Turn Off to Yes, connected external devices are also turned offwhen the TV is turned off. If an external device is
still recording, it may or may not turn off.
C3 Scanningand Switchingbetween Anynet+ Devices
1. Press the TOOLS button. Press the A or T button to select Device List, then press
the ENTER_ button.
Anynet+ devices connected to the TV are listed.
If you cannot find a device you want, press the red button to scan for devices.
2. Press the A or T button to select to a particular device and press the ENTER_
button. It is switched to the selected device.
Only when you set Anynet+ (HDMI=CEC)to On in the Application menu, the
Device List menu appears.
Switching to the selected devices may take up to 2 minutes. You cannot cancel the
operation during the switching operation.
The time required to scan for devices is determined by the number of connected devices.
When the device scan is complete, the number of devices found are not displayed.
Although the TV automatically scans devices when it is turned on using the POWER button, devices connected when the TV is
already on are not displayed in the device list. In this case, select the Searching Connections menu to search devices.
If you have selected external input mode by pressing the SOURCE button, you cannot use the Anynet+ function. Make sure to
switch to an Anynet+ device by using the TOOLS button.
TV Remote Control Buttons Available
Device Type
in Anynet+
Mode
Available Buttons
Operating Status
After switching to the device wnen tne
menu of the corresponamg aewce s
d_sptayed on the screen
Numeric buttons A/T/_/_-/ENTER[_
Color buttons / EXIT button
buttons
Anynet+ Device
After swltchmg to the devtce.
playtng a file
Device with built=in Tuner
Audio Device
_hJle
_
(Backward search) / _
(Forward search)
(Stop) / [ _ i (Play) / _
(Pause)
After swttcnlng to the oevlce. A/henyou
are watching a TV program
[-ZCH
When Receiver is activated
VOL -+_ / VOL _=_ / _ MUTE button
/_
CH button
Continued...
The Anynet+ function only works when the active source on the TV remote control is set to TV.
The ,¢,-j button works only while in the recordable state.
You cannot control Anynet+ devices using the buttons on the TV. You can control Anynet+ devices only using the TV remote
control.
The TV remote control may not work under certain conditions. In this case, reselect the Anynet+ device.
The Anynet+ functions do not operate with other manufacturers' products.
The _,
_-_-_operations may differ depending on the device.
Anynet+ Menu
The Anynet+ menu changes depending on the type and status of the Anynet+ devices connected to the TV.
View TV
Switches from Anynet+ to TV broadcast mode.
Device List
Displays the Anynet+ device list.
Recording
Starts a recording. (This menu works only for a device supporting recording.)
Shows the menu of the connected device.
Menu
Example: When a DVD Recorder is connected, the DVD Recorder's title menu appears.
INFO
Shows the play control menu of the connected device.
Example: When a DVD Recorder is connected, the play control menu of the DVD Recorder appears.
Timer Recording
Allows reserving a recording. (This menu works only for a device supporting recording reservations.)
Stop Recording
Stops recording.
Receiver
Setup
Sound is output through the receiver (home theater).
You can set the Anynet+ (HDMI-CEC), auto turn off, and searching connections for using Anynet+.
Recording
You can make a recording of a TV program using a Samsung recorder.
1. Press the TOOLS button.
2,
Press the A or T button to select Recording Immediately and press the ENTERI_
button. Recording begins.
When there is more than one recording device
When multiple recording devices are connected, the recording devices are listed.
Press the A. or _ button to select a recording device and press the ENTER_
butt0n. Recording begins.
When the recording device is not diSPlayed
So!oct Device List and press the red button to search devices
3,
Press the EXIT button to exit.
Pressing the _
button will record whatever you are currently watching. If you are watching video from another device, the video
from the device is recorded.
Before recording, check whether the antenna jack is properly connected to the recording device. To properly connect an antenna
to a recording device, refer to the recording device's users manual.
Listeningthrough a Receiver(Home theater)
You can listen to sound through a receiver instead of the TV speaker.
1. Press the TOOLS button. Press the A or T button to select Receiver.
2. Press the _1or _- button to select to On.
Now you can listen to sound through the receiver.
3. Press the EXIT button to exit.
If your receiver supports audio only, it may not appear in the device list.
The receiver will work when you have properly connected the Optical IN jack of the receiver to the Optical Out jack of the TV.
When the receiver (home theater) is set to On, you can hear sound output from the TV's Optical jack. When the TV is
displaying a DTV(air) signal, the TV will send out 5.1 channel sound to the Home theater receiver. When the source is a digital
component such as a DVD and is connected to the TV via HDMI, only 2 channel sound will be heard from the Home Theater
receiver.
When listening through the receiver, there are restrictions for using the audio-related (MTS, Preferred language) menus.
If there is a power interruption to the TV when the Receiver is set to On (by disconnecting the power cord or a power failure),
the Speaker Select may be set to External Speaker when you turn the TV on again.
Troubleshooting for Anynet +
Symptom
Anynet+ does not work.
Solution
......
• Check if the device is an Anynet+ device. The Anynet+ system supports Anynet+ devices
only.
• Connect only one receiver (home theater).
Check if the Anynet+ device power cord is properly connected.
Check the Anynet+ device's Video/Audio/HDMI 1.3 cable connections.
Check whether Anynet+ (HDIVII-CEC)is set to On in the Anynet+ setup menu.
Check whether the TV remote control is in TV mode.
Check whether it is Anynet+ exclusive remote control.
Anynet+ doesn't work in certain situations. (Searching channels, Operating Media Play,
Plug & Play, etc.)
• When connecting or removing the HDMI 1.3 cable, please make sure to search devices
again or turn your TV off and on again.
• Check if the Anynet+ Function of Anynet+ device is set on.
I want to start Anynet+.
• Check if the Anynet+ device is properly connected to the TV and check if the Anynet+
(HDIVII-CEC)is set to On in the Anynet+ Setup menu.
• Press the TV button on the TV remote control to switch to TV. Then press the TOOLS
button to show the Anynet+ menu and select a menu you want.
I want to exit Anynet+.
• Select View TV in the Anynet+ menu.
• Press the SOURCE button on the TV remote control and select a device other than
Anynet+ devices.
• Press OH, OH LIST, PRE-CH, and FAV.CH to change the TV mode.
(Note that the channel button operates only when a tuner-embedded Anynet+ device is not
connected.)
The message Connecting to
Anynet+
device.., appears on the screen.
• You cannot use the remote control when you are configuring Anynet+ or switching to a view
mode.
• Use the remote control when the Anynet+ setting or switching toview mode is complete.
The Anynet+ device does not play. You cannot use the play function when Plug & Play is in progress.
The connected device is not
displayed.
• Check whether or not the device supports Anynet+ functions.
• Check whether or not the HDMI 1.3 cable is properly connected.
• Check whether Anynet+ (HDIVlI-CEC) is set to On in the Anynet+ setup menu.
• Search Anynet+ devices again.
• You can connect an Anynet+ device using the HDMI 1.3 cable only. Some HDMI cables
may not support Anynet+ functions.
• If it is terminated by an abnormal situation such as disconnecting the HDMI cable or power
cord or a power failure, please repeat the device scan.
The TV program cannot be
recorded,
Check whether the antenna jack on the recording device is properly connected.
The TV sound is not output
through the receiver,
Connect the optical cable between TV and the receiver.
i Appendix
j
Troubleshooting
if the TV seems to have a problem, first try this list of possible problems and solutions.
if none of these troubleshooting tips apply, call Samsung customer service at 1-800oSAMSUNG,
Problem
Possible Solution
Poor picture quality.
Try another channel. Adjust the antenna. Check all wire connections.
Poor sound quality.
Try another channel. Adjust the antenna.
No picture or sound.
Try another channe
Press the SOURCE button.
Make sure the TV is plugged in.
Check the antenna connections,
Make sure the _: MUTE button is off.
No sound or sound is too low at
First, check the volume of units connected to your TV (digital broadcasting receiver, DVD,
cable broadcasting receiver, VCR, etc.). Then, adjust the TV volume accordingly.
maximum
volume.
Picture rolls vertically.
Check all connections.
The TV operates erratically.
Unplug the TV for 30 seconds, then try operating it again.
The TV won't turn on.
Make sure the wall outlet is working.
Remote control malfunctions
Replace the remote control batteries.
Clean the upper edge of the remote control (transmission window).
Check the battery terminals.
Press the TV button to put your remote control in the TV mode.
Make sure the remote has batteries.
Check that the "+" and "-" ends of the batteries are inserted correctly.
Digital broadcasting screen
problem.
Please check the digital signal strength and antenna input.
The image is too light or too dark.
Adjust the Brightness and Contrast.
Aajust the Fine tuning.
The image is too large or too smatl.
AQ.ust the Size settings.
The visual qualities ofdigital
channels vary.
The visual qualities of digital channels may vary depending on the original production method
(analog or digital).
If the original production method is digital: High visual quality.
If the original production method is analog: The digital program displayed on the screen is
originally an analog program which has been converted to digital.
The visual quality is of an SD(Standard Definition) grade.
Screen is black and power
indicator light blinks steadily.
On your computer; check the Power and Signal Cable.
The TV is using its power management system,
Move the computer's mouse or press any key on the keyboard.
On your equipment check (STB, DVD, etc) ; Power and Signal Cable.
The TV is using its power management system.
Press the SOURCE button on the panel or remote control.
Turn the TV off and on.
Although the TV caption shows
HD, the visual quality is not
satisfactory.
The HD(High Definition) caption that appears when switching channels or when pressing the
Information button on the remote control means the selected channel is a digital channel. If
the broadcasting station converts an analog signal into digital and transmits the signal, the
visual quality may not be perfect.
A distorted picture appears in the
corner of the screen.
If Screen Fit is selected in some external devices, a distorted picture may appear in the
corner of the screen. This symptom is caused by external devices, not the TV.
A strange sound is heard.
This is caused by minor systems operation and is not a defect.
Pixels are visible on the screen.
There may be few bright or dark pixels on the screen. These pixels will have no impact on the
performance of the product.
The "Resets all settings to the
default values" message appears,
This appears when you press and hold the EXIT button for a while. The product settings are
reset to the factory defaults,
Preparation before installing the Wall-lVlount
Case A. Installing the SAMSUNG Wall-Mount
Case B. Installing another company's Wall-Mount
i
/
1,
Install the Wall Mount with a torque range of 15kgf.cm or less. Use care as the parts can be damaged if the torque is out of the
specified range.
2,
Accessory Kit contains Holder-Ring [,,_2_]
for installing other company's Wall-Mount on Samsung TV. (Case B)
:
i
Screw down the hole ['3_]when installing wall-mount on the wall.
How to attach the Stand-Base
Using the screws for securing the stand base and the TV, firmly attach the TV to the
stand base. (The exterior of the set may be different from the picture.)
PN50B530S2F
PN58B530S2F
Warning
Firmly secure the stand to the TV before moving it, as the stand may fall and could
cause serious injury.
@ Two or more people should carry the TV. Never lay the TV on the floor because
of possible damage to the screen. Always store the TV upright.
Using the Stand-Base
Two or more people should carry the PDR Never lay the PDP on the floor
because of possible damage to the screen. Always keep the PDP upright.
The PDP can rotate 20 degrees in right and left directions.
When mounting your TV on a wall, install
the cover (O) on the stand-base using two
screws.
Securing the TV to the Wall
/'|
pulling, pushing, or climbing on the rv may cause the TV to fall, !n particular, ensure your children do not bang
ever or destabilize the TV; doing so may cause the TV to tip over, causing serious injuries or death. Follow a!! safetY
precautions provided on the included Safety Flyer. For added stability, install the anti-fall device for safety purposes;
as follows.
_k
Caution
Accessaries
Holder-TV (1 item) /
ScrewO (M4X16)
To prevent the TVfrom failing
42", 50"
Attach the TV-Holder to the TV by fastening the screws O (M4"16) into the holes in the center of the TV.
42", 50" : Unscrew a screw attached on the back of your TV before attaching the TV-Holder.
Make sure to only use the supplied screw.
Firmly fasten the screws to the wall or cabinet where the TV is to be installed. Tie the TV-Holder attached to the TV and the
screws fastened on the wall or cabinet so that the TV is fixed.
Purchase the screws to be used on the wall or cabinet separately.
Install the TV close to the wall so that it does not fall.
When attaching the TV to the wall, tie the cord level with the ground or slanted downwards for safety purposes.
Confi rm that the cord or link does not come loose frequently.
Before moving the TV, separate the connected cord first.
42",50"
58",63"
i
3. Verify all connections are properly secured. Periodically check connections for any sign of fatigue or failure. If you have any
doubt about the security of your connections, contact a professional installer.
Wall Mount Kit Specifications (VESA)
Install your wall mount on a solid wall perpendicular to the floor.
When attaching to other building materials, please contact your nearest dealer.
If installed on a ceiling or slanted wall, it may fall and result in severe personal injury.
B
19" ~22"
100 * 100
23"~29''
200 * 100
30"~40`'
200 * 200
46"~55"
400 * 400
57"~70"
800 * 400
80" ~
1400 * 800
42 "~ 50"
400 * 400
58''~ 63"
600 * 400
70" ~
800 * 400
80" ~
1400 * 800
M4
M6
LCD-TV
4
PDP-TV
M8
M8
The standard dimensions for wall mount kits are shown in the table above.
When purchasing our wall mount kit, a detailed installation manual and all parts necessary for assembly are provided.
Do not use screws longer than the standard dimension, as they may cause damage to the inside of the TV set.
For wall mounts that do not comply with the VESA standard screw specifications, the length of the screws may differ depending on
their specifications.
Do not use screws that do not comply with the VESA standard screw specifications.
Do not use fasten the screws too strongly, this may damage the product or cause the product to fall, leading to personal injury.
Samsung is not liable for these kinds of accidents.
Samsung is not liable for product damage or personal injury when a non-VESA or non-specified wall mount is used or the consumer
fails to follow the product installation instructions.
Our 57" and 63" models do not comply with VESA Specifications. Therefore, you should use our dedicated wall mount kit for this
model.
Do not exceed 15 degrees tilt when mounting this TV.
/L
Do not install your Wall Mount Kit while your TV is turned on.
It may result in personal injury due to electric shock.
Specifications
Screen Size (Diagonal)
50 inch (49.9 inches measured diagonally)
58 inch (58.0 inches measured diagonally)
1920 x 1080 @ 60 az
1920 x 1080 @ 60 az
PC ReSetuflon
15Wx2
i
Dimension (W × H x D)
Environmental Considerations
48.4 x 30.3 x 2.8 inches
(1230.3 x 769.8 x 73 mm)
48.4 x 32.3 x 11.4 inches
(1230.3 x 821.5 x 290 mm)
55.4 x 34.2 x 2.8 inches
(1407.7 x 870 x 73 mm)
55.4 x 36.4 x 13.1 inches
(1407.7 x 927 x 335 ram)
72.3 Ibs (32.8 kg)
83.5 Ibs (37.9 kg)
84.8 Ibs (38.5 kg)
I00.3 Ibs (45.5 kg)
50 °F to 104 °F (10 °C to 40 °C)
10% to 80%, non-condensing
-4 °F to 113 °F (-20 °C to 45 °C)
5% to 95%, non-condensing
50 °F to 104 °F (10 °C to 40 °C)
10% to 80%, non-condensing
-4 °F to 113 °F (-20 °C to 45 °C)
5% to 95%, non-condensing
i
operating Temperature
Operating Humidity
Storage Temperature
Storage Humidity
@ This device is a Class B digital apparatus.
@ Design and specifications are subject to change without prior notice.
@ For the power supply and Power Consumption, refer to the label attached to the product.
@ When using an HDMI/DVI cable connection,
you must use the HDMI IN 2(DVI) terminal.
Dimensions (PN50B530S2F)
48.8
t
43,7
32,3
24,8
_,
.................................................................
i:_
:i..................................................................
TOP VIEW
FRONT VIEW
JACK PANEL DETAIL 7.2 X 3
T
lS.7
i i
i
81DEVII=W
., .7_.T;._....
_'_'°"
REAR VIEW
NOTE:
All drawings
dimensions
Refer
any
carpet_try
printed
(c) 2009
not necessarily
are subJect
to dimensions
to change
on each
Not responsible
to scale
without
unit
for typographical
errors
Samsung
Electronics
Some
prior notice
prior to performing
America,
Inc
or
Dimensions (PN58B530S2F)
,
J
:
_
r,
36.6
TOP ViEW
FRONT ViEW
JACK PANEL DETAIL 7;2 x 3:7 inches
<-
2.9.
T
15.7
SIDE VIEW
NOTE:
All drawings
dimensions
Refer
a_y
carpentry
printed
(9 2009
not necessanly
are subject
to dimensions
to change
on each
Not responsible
to scale
without
for typographical
errors
Samsung
Electronics
pnor
Some
notice
unit prior to performing
America,
Inc
or
I Informaci6n
importantesobrelagarantJa
relativaal formatodevisualizaci6n
deltelevisorI
Las pantallas PDP con formato de pantalla panoramica (16:9, la relaci6n de aspecto ancho:alto de la pantalla) estan disei_adas
principalmente para visualizar videos de movimiento de formato panoramico. En estas pantallas debe ver las imageries en el formato 16:9
de pantalla panoramica o ampliadas para Ilenar la pantalla si el modelo tiene esta opci6n, yen movimiento constante. La visualizaci6n de
imagenes y graficos estaticos en la pantalla, como las barras oscuras laterales en programaci6n y videos de televisi6n en formato estandar
no ampliados, debe limitarse a no mas del 5% del tiempo total de visualizaci6n del televisor por semana.
Ademas, la visualizaci6n de otras imagenes estaticas y texto, como los informes de bolsa, pantallas de videojuegos, Iogotipos de
emisoras, sitios Web o graficos y dibujos de ordenador, debera limitarse en todos los televisores como ya se ha descrito. La visualiza¢i6n
de imageries est_ticas que supere los limJtes de las instrucciones anteriores puede producir un envejecimiento desigual de
ias pantatlas PDP, Io que provocara una reproduction superpuesta suti! pero permanente de la imagen, Para evitarlo, varie ia
programacion y las im_genes y, sobre todo, visualice imageries en movimiento a toda pantalla, no graficos estaticos ni barras
osouras,
En modelos de PDP que ofrezcan opciones para el tamaSo de la imagen, utilice estos controles para ver los distintos formatos como
imagen a toda pantalla.
Tenga cuidado en la selecci6n y duraci6n de los formatos de televisi6n utilizados para la visualizaci6n. La garantia limitada de Samsung no
cubre el envejecimiento desigual de la PDP como resultado de la selecci6n y uso de formatos, asi como otras imagenes retenidas.
861o EE.UU.
La unidad del producto que se incluye con este manual del usuario se suministra con licencia bajo derechos de propiedad intelectual
de otras empresas. En concreto, este producto se suministra con licencia bajo las siguientes patentes de EE.UU.: 5,991,715,
5,740,317, 4,972,484, 5,214,678, 5,323,396, 5,539,829, 5,606,618, 5,530,655, 5,777,992, 6,289,308, 5,610,985, 5,481,643,
5,544,247, 5,960,037, 6,023,490, 5,878,080 y bajo el nQmero de aplicaci6n de patentes publicadas de EE.UU. 2001-44713-A1.
Esta licencia esta limitada al uso no comercial privado de consumidores que sean usuarios finales para contenido con licencia. No
se otorga ningt_nderecho para uso comercial. La licencia no cubre ninguna unidad del producto que no sea _sta y la licencia no se
extiende a ninguna unidad del producto o proceso sin licencia en conformidad con el ISO/IEC 11172-3o ISO/IEC 13818-3 utilizada
o vendida en combinaci6n con esta unidad del producto. La licencia s61ocubre el uso de esta unidad para codificar y/o descodificar
archivos de audio en conformidad con el ISO/IEC 11172-3 o ISO/IEC 13818-3. No se otorga ningOn derecho bajo esta licencia para
caracteristicas o funciones del producto que no esten conformes con el ISO/IEC 11172-3 o ISO/IEC 13818-3.
Otros paises
La unidad del producto que se incluye con este manual del usuario se suministra con licencia bajo derechos de propiedad intelectual
de otras empresas. Esta licencia esta limitada al uso no comercial privado de consumidores que sean usuarios finales para
contenido con licencia. No se otorga ningQnderecho para uso comercial. La licencia no cubre ninguna unidad del producto que no
sea _sta y la licencia no se extiende a ninguna unidad del producto o proceso sin licencia en conformidad con el ISO/IEC 11172-3
o ISO/IEC 13818-3 utilizada o vendida en combinaci6n con esta unidad del producto. La licencia s61ocubre el uso de esta unidad
para codificar y/o descodificar archivos de audio en conformidad con el ISO/IEC 11172-3 o ISO/IEC 13816-3. No se otorga ningQn
derecho bajo esta licencia para caracteristicas o funciones del producto que no est_n conformes con el ISO/IEC 11172-3o ISO/IEC
13818-3.
© 2009 Samsung Electronics Co., Ltd. Reservados todos los derechos.
i lnstrucciones
O
para el usuario
Retenei6n de imageries en la pantalla
No deje imageriesfijas visibles (como las de un videojuego) en el panel de la pantalla de plasma durante mucho tiempo,ya que se
podria producir la retenci6n de la imagen en la misma. Este fen6meno de retenci6n de imagenes tambien se denomina "quemadura de
pantalla". Para evitar dicha retenci6n de la imagen, consulte la pagina 23 de este manual para reducir el grado de brillo y contraste de
la pantalla al mostrar una imagen fija.
Altitud
La PDP s61opuede funcionar normalmente hasta altitudes de 2.000 metros.
Calor en la parte superior dei TV de plasma
La parte superior del aparato puede calentarse tras un uso prolongado ya que el calor se disipa desde el panel a trav_s de los orificios
de ventilaci6n de la parte superior.
Esto es normal y no indica ningQn defecto ni fallo de funcionamiento del aparato.
No obstante, debe evitarse que los ni_os toquen la parte superior del aparato.
Ei aparato emite una espeeie de crujido.
El ruido similar a un crujido puede producirse cuando el aparato se contrae o se expande debido a un cambio ambiental de temperatura
o humedad. Este hecho es normal y no se trata de ningQndefecto en la unidad.
Defecto de celda
La PDP utiliza un panel compuesto de 1.230.000 (nivel SD) a 3.150.000 (nivel HD) pixeles que requieren una sofisticada tecnologia
para su producci6n. No obstante, puede que existan unos cuantos pixeles brillantes u oscuros en la pantalla. Estos pixeles no influiran
en el rendimiento del aparato.
Evite que el TV funeione a temperaturas pot debajo de 41 °F (5 °C)
La imagen fija visualJzada durante demasJado tiempo puede causar da_os permanentes en el panel de la PDP,
Ver el TV de plasma en formato 4:3 durante un tiempo prolongado puede dejar rastros de bordes en la
izquierda, derecha o centro de la pantalla causados por la diferencia de emisi6n de luz en la pantalla.
La reproducci6n de un DVD o el uso de una consola de videojuegos pueden provocar un efecto similar en
la pantalla.
Los dar_osprovocados por los efectos mencionados no quedan cubiertos pot la garantia.
Imageries fantasma en la pantalla,
Ver imagenes fijas de videojuegos durante un periodo prolongado puede producir restos de Jmagenesparciales.
Para evitar este efecto, reduzca el 'brillo' y el 'contraste' al mostrar ira&genes fijas durante un tiempo prolongado.
Garantia
La garantJa no cubre nJngQnda_o causado por la retenci6n de Jmagenes.
La garantia no cubre el desgaste de la pantalla.
[ indice
]
,,, Listado de caracteristicas .......................................................... 5
,,, Cambio del tamar_ode la imagen ............................................ 22
,,, Comprobaci6n de los componentes .......................................... 5
,,, Montaje de los cables ................................................................ 5
,,, Aspecto general de] panel de control ........................................ 6
,,, Cambio de la configuraci6n del sonido ................................... 26
,,, Aspecto general del panel de conexiones ................................. 7
,,, Mando a distancia ..................................................................... 8
,,, Configuraci6n del men0 de configuraci6n ............................... 27
,,, Conexi6n de las antenas de VHF y UHF .................................. 9
,,, Configuraci6n de la hora ......................................................... 31
,,, Lista de Entradas/Editar Nombre ............................................ 32
,,, Conexi6n de la televisi6n por cable ........................................... 9
,,, Conexi6n de un reproductor de DVD/Blu-ray o receptor por
cable/sat61ite (decodificador) a traves de HDMI ...................... 11
,,, Uso del televisor como una pantalla de ordenador (PC)......... 33
,,, Conexi6n de un reproductor de DVD/Blu-ray o receptor por
cable/sat61ite (decodificador) a traves de DVl ......................... 11
,,, Modos de pantalla ................................................................... 33
,,, Soporte tecnico ....................................................................... 34
,,, Conexi6n de un reproductor de DVD/Blu-ray o receptor por
cable/sat61ite (decodificador) a traves de los cables de
componentes ........................................................................... 12
,,, Conexi6n a una videocamara .................................................. 12
,,, Conexi6n de dispositivos Anynet +........................................... 36
,,, Soluci6n de problemas de Anynet+ ......................................... 39
,,, Conexi6n de un aparato de video ........................................... 13
,,, Conexi6n de un sistema de audio digital ................................. 14
,,, Conexi6n de un amplificador/DVD para Home Cinema .......... 14
,,, Conexi6n a un PC ................................................................... 15
,,, Resoluci6n de problemas ........................................................ 40
,,, Preparaci6n antes de instalar el montaje mural...................... 41
,,, C6mo montar el soporte base ................................................. 41
,,, Uso del soporte ....................................................................... 41
m Encendido y apagado del televisor ......................................... 16
,,, Cambio de canales .................................................................. 16
= Fijaci6n del televisor a la pared ............................................... 42
,,, Ajuste del volumen .................................................................. 16
,,, Uso del bot6n TOOLS ............................................................. 17
,,, Especificaciones ...................................................................... 44
,,, Visualizaci6n de la pantalla ..................................................... 17
,,, Visualizaci6n de los men0s ..................................................... 18
,,, Dimensiones (PN58B530S2F) ................................................ 46
,,, Especificaciones del equipo de montaje en la pared (VESA).43
,,, Dimensiones (PN50B530S2F) ................................................ 45
,,, Funci6n Plug & Play ................................................................ 19
,,, Almacenamiento de canales .................................................. 20
,,, Gesti6n de los canales ............................................................ 20
A
R
Sirnbolos
Pulse
Nota
Bot6n de
una pulsaci6n
Herramientas
i Conexi6n y preparaci6n del televisor
i
Listado de caracteristicas
• Valores ajustables de la imagen que se pueden almacenar en la memoria del televisor.
• Temporizador automatico para encender o apagar el televisor.
• Temporizador de desconexi6n especial.
• Funci6n V-chip.
• Excelente interfaz digital y capacidad de trabajo en red
El sintonizador digital HD incorporado permite ver las emisiones HD que no exigen una suscripci6n sin que sea necesario disponer
de un receptor de televisi6n por cable/sat_lite (decodificador).
• Conexi6n HDMI/DVI del PC con este televisor.
• SRS TruSurround HD proporciona un sistema surround virtual.
Comprobaci6n
de los componentes
Cornpruebe que los articulos siguientes vengan incluidos con su televisor, Si falta alguno, pongase en contacto con su
distribuidor.
@ El color y la forma de los componentes pueden variar segQnel modelo.
Mando a distancia
(BN59-00852A)/
Pilas AAA
(4301-000103)
Cable de
alimentaci6n
(3903-000144)
NQcteo de ferrita para NQcteo de ferrita
cable de alimentacion
para
(3301-001305)
cable de AV lateral
(3301-001201 )
Solo PN58B530S2F
Manual del usuario/
GuJa de configuraci6n
rapida
Cubierta inferior/
Tamitlos(2)
Solo PN58B530S2F
Tarjeta de garantia/
Manual de seguridad
(No disponible en
todos los l ugares)
PaSode limpieza
(BN63-01798B)
Soporte de cables
Cubierta inferior
Soportes anilla (4)
S61o PN50B530S2F (Consutte la pagina 41)
Tomillos (4)
S6to
PN50B530S2F
....................
N_cleo de ferrita
Soporte TV /
Tornillos
(Cansulteta
pagina 42)
,
TT..............................
ii
JJ
Los nQcleosde ferrita se utilizan para proteger los cables de las interferencias.
Cuando conecte un cable, abra el nOcleo de ferrita y sujetelo con un cable cerca del
enchufe.
Cablede
alimentaci6n
ii
__
....................................................
Montaje de los cables
8ujete los cables con el soporte de cables para que estos no sean visibles a trav6s del
soporte transparente,
Cabledeaudio/cablede video
($610PN58B530S2F)
Aspecto general del panel de control
Los botches de la parte inferior clerechadel panel controlan lasfunciones basicas cleltelevisor, incluidoslos menOsen pantalla.
Pare utilizer las funciones mas avanzaclasclebeusarse el mancloa clistancia.
El color y la forma del producto pueden variar seg_n el modelo.
Si toca el bot6n de] panel frontal, se activan los botones.
............................................................................................................
O
SOURCED
Cambia entre todas las fuentes de entrada disponibles
(TV, AV, Componentel, Componente2, HDMI1, HDMI2/DVI, HDMI3).
En el ment_de la pantalla, utilice este bot6n del mismo modo que el bot6n ENTER_
del mando a distancia.
O
MENU
POlselo para ver en pantalla un ment_de las caracteristicas del televisor.
O
+ VOL=
POlselos para subir o bajar el volumen. En el ment_de la pantalla, use los botones + VOL = del mismo modo que los botones
y _,- del mando a distancia.
ACHV
Permitencambiarde canal.En elmen_ de lapantalla,
uselosbotonesA CH V delmismo modo que losbotonesA y T del
mando a distancia.
INDICADOR DE ENCENDIDO
Parpadea y se apaga cuando se enciende el aparato y se ilumina en el modo en espera.
O
¢ (ENCENDIDO)
Se pulsa para encender o apagar e] televisor.
SENSOR DEL MANDO A DISTANGIA
El mando a distancia debe dirigirse hacia este punto del televisor.
O
ALTAVOCE8
Aspecto general dei panel de conexiones
Use los terminales del panel de conexi6n para conectar componentes de AN que estaran disponibles permanentemente,
como un reproductor de Blu=ray/DVD o un aparato de video.
El color y la forma del producto pueden variar seg_n el modelo.
E&se[_posterior
O
O
O
O
del TV
O
ANT IN
Usa un conector coaxial de 75 _ para antena o red por
cable.
SERVICE
%1o para servicio.
O
DIGITAL AUDIO OUT (OPTICAL)
Se conecta al componente de audio digital.
AUDIO OUT
Conexi6n para un componente de audio digital.
O
COMPONENT IN 1, 2 1AM IN 1
Permite conectar el video/audio de componentes. El terminal
COMPONENT IN 1 tambien se usa como terminal AV IN 1.
POWER IN
Permite conectar el cable de alimentaci6n suministrado.
DVI iN(HDMI 2)(AUDIO-R/L)
Conexi6n para el terminal de salida de audio DVI de un
dispositivo externo.
HDMt IN 1, 2(DVl), 3
Conexi6n para el terminal HDMI de un dispositivo que tenga
salida HDMI.
HDMI 2 se puede utilizar tambien como una conexi6n
DVl con entradas de se_ales de audio anal6gicas
independientes. Para realizar esta conexi6n se requiere
un cable opcional HDMI/DVl.
- Cuando se usa un adaptador HDMI/DVl, las entradas de
se_ales de audio anal6gicas DVl del televisor permiten
recibir se_ales de audio por las entradas derecha e
izquierda desde un dispositivo DVl.
Conecte el cable de video al terminal COMPONENT
IN 1 [Y/VIDEO] y el cable de audio a los terminales
COMPONENT IN 1 [R-AUDIO-L].
O
EX-LINK
$61o para servicio.
Mando a distancia
Puede utilizar e! mando a una distancia
El color y la forma del producto
dei televisor
pueden variar seg_n el modelo.
El exceso de luz puede influir en el rendimiento
io-=@
POWER
Enciende y apaga el televisor.
O
BOTONES NUM!_-RICOS
Permiten cambiar de canal.
i
ie-
I
'
i
_)
Permite seleccionar canales adicionales
(digitaies y analogicos) emitidos por la misma
emisora. Por ejempto, para seleccionar el canal _1
"54-3", pulse "54" y despues pulse "(-]"
y "3".
I
1
l
de] mando a distancia.
O
POWER
:
de hasta 7 metros,
_MUTE
Interrumpe temporalmente
,
i
®
Utilice estos botones en los modos DMA y
Anynet +. (i'_:
Este mando a distancia se
puede usar para controlar ta grabaci6n de
tas grabadoras de Samsung con ta funci6n
Anynet+).
TV
Selecciona directamente
CH_'Permiten cambiar de canal.
el sonido.
0
[ + VOL_='j
Permiten subir o bajar el votumen.
(_)
MENU
Muestra et men_ en la pantalta.
Q
SOURCE
Permite very seleccionar tas fuentes de
_)
FAV.CH
Permite sintonizar tos canaies favoritos.
video disponibtes,
CH LIST
l_)
RETURN
Vuetve al men_ anterior.
@
Q
Q
i@--_)
(1)
Muestra tas tistas de canales en la pantaita.
TOOLS
Permite seieccionar rapidamente las
funciones que se usan con mayor
frecuencia.
ARRIBAAIABAJOTIIZQUIERDA,¢I
DERECHA_/ENTER
Permiten seleccionar los elementos del
menO en pantalla y cambiar los valores del
men_.
INFO
Muestra informaci6n en la pantalla del
televisor.
EXIT
Se pulsa para salir det men_.
_1
RSIZE
Selecci6n deI tamar_o de ta imagen.
SRS
Selecciona et modo Trusurround
CC
Controla et decodificador
_)
MTS
Permite elegir estereo, monoaural o un
programa de audio independiente (emision
SAP).
BOTONES DE COLORES
Use estos botones en la lista de canales.
Permite seteccionar et modo de la sonido.
@
InstalaciSn
P.MODE
Permite seJeccionar eJ modo de la imagen.
i
de las pilas en el mando
a distancia
1
Levante la tapa de la parte posterior del mando a distancia, como se muestra en la ilustraci6n.
2
Instale dos pilas de tamaSo AAA.
AsegQrese de respetar los extremos "+" y "-" de las pilas indicados en el diagrama de] interior del
compartimento.
Cierre la tapa, como se muestra en la ilustraci6n.
Saque las pilas y guardelas en un lugar fresco y seco si no va a utilizar el mando a distancia durante
un periodo de tiempo prolongado. (Suponiendo un uso normal del televisor, las pilas deberian durar
aproximadamente un argo.)
Si el mando a distancia no funciona, haga estas comprobaciones
I. _,Estaencendido el televisor?
2. _,Estanintercambiados los polos positivos y negativos de las pilas?
3. _,Sehan agotado las pilas?
4. _,Hahabido un corte de energia o se ha desenchufado el cable?
5. _,Hay en las proximidades un fluorescente o un ne6n?
SRS HD.
_)
S.MODE
NSUNG
el modo TV.
PRE-CH
Sintoniza el canal anterior.
de subtitulos.
i Conexiones
]
Conexi6n de las antenas de VHF y UHF
8i su antena tiene un juego de cables con este aspecto, consulte "Antenas con cables
pianos dobles de 300 Q" a continuation.
$i la antena tiene un cable con este aspecto, consulte "Antenas con cables coaxiales de 76 _".
8i tiene dos antenas, consulte "Antenas de VHF y UHF separadas",
Antenas
con cables
pianos dobles
__
de 300
si utiliza una antena externa (de azotea o de "cuernos") de cables pianos dobles de
300 Q, siga las indicaciones siguientes.
1, Coloque los hilos del cable doble bajo los tornillos de un adaptador de 300 a 75 D
(no suministrado).
Utilice un destornillador para apretar los tornillos.
2. Enchufe el adaptador en el terminal ANT IN de la parte posterior del televisor.
Antenas con cables coaxialesde 75
Enchufe el cable de la antena en el terminal ANT IN de la parte posterior del televisor.
Antenas
de VHF y UHF separadas
8i dispone de dos antenas separadas para el televisor (una de VHF y otra de UHF),
debera combinar las sehales de ambas antenas antes de conectarlas al televisor. Este
procedimiento requiere un combinador-adaptador optional (disponible en la mayoria de
tiendas de electrbnica).
1, Conecte los dos cables de antena al combinador.
2, Enchufe el combinador en el terminal ANT IN de la parte inferiordel panel posterior.
Conexi6n de la televisi6n
pot cable
Para conectar a un sistema de TV por cable, siga estas instrucciones,
Cablesin decodificador de cable
Enchufe el cable de entrada en el terminal ANT IN de la parte posterior del televisor.
Dado que el televisor tiene previsto el uso de televisi6n por cable, no se necesita un
decodificador para ver canales de cable no codificados.
Conexi6nal decodificadorde cable que decodificatodos los canales
1, Busque el cable conectado al terminal ANT OUT de su decodificador de cable.
@ Este terminal puede estar etiquetado como "ANT OUT", "VHF OUT" o sencillamente
"OUT".
ANT
iN
ANT OU_
2, Enchufe el otro extremo de] cable en el terminal ANT IN de la parte posterior del televisor.
ContinDa...
Conexi6n
al decodificador
de cable
que decodifica
algunos
¢anales
8i su decodificador de cable decodifica _nicamente algunos canales (como, por ejemp!o, canales de suscripci6n), siga las
instrucciones que se incluyen a continuaci6n, Necesitar_ un separador de se_ales de dos vias, un conmutador RF (AIB) y
cuatro extensiones de cable de antena. (Estos articulos estan disponibles en la mayoria de las tiendas de electronica,)
1, Busque y desconecte el cable conectado al
terminal ANT IN de su decodificador de cable.
@ Este terminal puede estar etiquetado como
"ANT IN", "VHF IN" o sencillamente "IN".
•
{ A.T,.
2, Conecte este cable a] separador de seSales
de dos vias.
Cable
Separador
3, Conecte un cable de antena entre el terminal
OUTPUT del separador y el terminal IN del
decodificador de cable.
Cable
de entrada
Separador
_
I
IN
CABLE
Decodificador
OUT 1
de cable
4, Conecte un cable de antena entre el terminal
ANT OUT del decodificador de cable y el
terminal B-IN del conmutador RF(A/B).
Separador
Conmutador
& Conecte otto cable entre el otro terminal
OUT del separador y el terminal A-IN del
conmutador RF (A/B).
deC_d
a
_
_
..........
Decodificador
6, Conecte el Qltimo cable de antena entre el
terminal OUT del conmutador RF (A/B) y
el terminal ANT IN de la parte posterior del
televisor.
"_
de cable
_)
Conmutador
Parte posterior
de] televisor
CABLE
de entrada
Separador
L_
OUT
RF (A/B)
Conmutador
Una vez realizada esta conexi6n, ajuste el conmutador A/B a la posici6n "A" para la visualizaci6n normal. Ajuste el conmutador A/B
en la posici6n "B" para ver los canales codificados. (Cuando ajuste el conmutador A/B en la posici6n "B", necesitara sintonizar el
TV con el canal de salida del receptor de cable, que normalmente es el canal 3 o 4).
Conexi6n de un reproductor de DVD/Blu-ray o receptor pot cablelsat61ite
(decodificador) a trav_s de HDMI
IEsta conexi6n s61o se puede realizar si hay un terminal de salida de HDMI en el dispositivo externo. Esta conexi6n
proporciona una imagen de la mayor calidad,
1.
Conecte un cable HDMI entre el terminal HDMI IN (1, 2(DVI), o 3) del televisor y el terminal HDMI del reproductor de DVD/Blu-ray o
receptor por cable/sat_lite (decodificador).
Reproductor
de DVD/Blu-ray
receptor pot cable/sat_lite
o
_
[D
Cable HDMI (No suministrado}
_,Qu6es HDMI?
• HDMI, o interfaz multimedia de alta definici6n, es una interfaz que permite la transmisi6n de sei_ales digitales de audio y de
video mediante un solo cable.
• La diferencia entre los dispositivos HDMI y DVl es que el HDMI es mas pequefio y tiene instalada la funci6n de codificaci6n
HDCP (protecci6n alta de la copia digital del ancho de banda).
[D Cada reproductor DVD o receptor por cablelsatelite (decodificador) tiene una configuraci6n diferente del panel posterior.
[D
Puede que el televisor no proporcione salida de sonido y muestre imagenes con colores an6malos si se han conectado
reproductores DVD/Blu-ray o receptores por cable/sat_lite que admiten versiones de HDMI anteriores a la versi6n 1.3. Si
se conecta un cable antiguo HDMI y no hay sonido, conecte el cable HDMI al terminal HDMI IN 2 y los cables de audio a
los terminales DVl IN (HDMI2) [R-AUDIO-L] de la parte posterior del televisor. Si ocurriera esto, p6ngase en contacto con la
empresa que suministr6 el reproductor de DVD/Blu-ray o receptor por cablelsat_lite para confirmar la versi6n HDMI y solicite una
actualizaci6n.
[D
Los cables HDMI que no son 1.3 pueden causar un molesto parpadeo o que no se muestre la pantalla.
Cone×i6n de un reproductor de DVD/Blu-ray o receptor pot cable/sat61ite
(decodificador) a trav_s de DVI
IEsta conexibn s61o se puede realizar si hay un terminal de salida de DVI en el dispositivo externo.
1.
Conecte un cable HDMI/DVl o un adaptador de DVI-HDMI entre el terminal HDMI IN 2(DVl) del televisor y el terminal DVl del
reproductor de DVD/Blu-ray o receptor por cablelsatelite (decodificador).
2.
Conecte los cables de audio entre el terminal DVl IN (HDMI 2) [R-AUDIO-L] del televisor y del reproductor de DVDIBlu-ray o
receptor por cable/sat_lite (decodificador).
Reprodoctor
de DVD/Blu-ray
pot cable/sat_lite
o receptor
Panel posterior
_
Cablede
_
Cable HDMItDVI (no suministrado)
del TV
audio (no suministrado)
[D Cada reproductor de DVD/Blu-ray o receptor por cable/satelite (decodificador) tiene una configuraci6n diferente del panel posterior.
[D Cuando conecte un reproductor de DVD o receptor de televisi6n pot cablelsatelite (decodificador), debe hacer coincidir los colores
del terminal de conexi6n y del cable.
[_ Cuando se usa una conexi6n de cable HDMIIDVl, se debe conectar en el terminal HDMI IN 2(DVl).
Conexi6n de un reproductor de DVD/Blu-ray o receptor pot cablelsat61ite
(decodificador) a trav6s de los cables de componentes
Los terminales del panel posterior del televisor facilitan la conexi6n de un reproductor de DVD/Blu=ray o receptor pot cable/
satelite (decodificador) al TV,
1.
Conecte los cables de los componentes entre los terminales COMPONENT IN (1 o 2) [Y, PB, PR]del televisor y los terminales
COMPONENT [Y,PB, PR] del reproductor de DVD/Blu-Ray o receptor por cable/sat61ite (decodificador).
2.
Conecte los cables de audio entre los terminales COMPONENT IN (1 o 2) [R-AUDIO-L] del televisor y los terminales AUDIO OUT
del reproductor de DVD/Blu-Ray o receptor pot cablelsatelite (decodificador).
Reprodoctor
de DVD/Blu-ray
receptor pot cable/sat_lite
o
[D
El video de componentes divide las sefiales de video en Y (Luminancia (brillo)), PB(azul) y PR(rojo) para mejorar la calidad
del video. Las conexiones de audio y de video de componentes deben coincidir. Por ejemplo, si se conecta el cable de video a
COMPONENT IN 1, conecte tambi_n el cable de audio a la misma entrada COMPONENT IN 1.
[D
[D
Cada reproductor de DVD/Blu-ray o receptor por cablelsatelite (decodificador) tiene una configuraci6n diferente del panel posterior.
Cuando conecte un reproductor de DVDIBlu-ray o receptor por cable/sat_lite (decodificador), debe hacer coincidir los colores del
terminal de conexi6n y del cable.
Cone×i6n a una videocamara
Los conectores del panel posterior del TV facilitan la conexi6n a una videocarnara.
IVlediante
el cable de =udio/video
1. Conecte un cable de video entre el terminal AV IN 1 [VIDEO] del televisor y el terminal VIDEO OUT de la videocamara.
2. Conecte cables de audio entre los terminales AV IN 1 [L-AUDIO-R] del televisor y los terminales AUDIO OUT de la
videoc_mara.
Videoc&mara
Panel posterior
_
del TV
Cable de video (no suministrado}
Cada videocamara tiene una configuraci6n diferente del panel posterior.
Cuando conecte una videocamara, debe hacer coincidir los colores del terminal de conexi6n y del cable.
Medianteel c=bleHDMI
1. Conecte un cable HDMI entre el terminal HDMI IN (1, 2(DVl), o 3) del televisor y el terminal HDMI de la videocamara.
Panel posterior
del TV
Videoc&mara
_
Cable HDMI (No suministrado)
Cada videoc_mara tiene una configuraci6n diferente del panel posterior.
Conexi6n de un aparato de video
Conexi6n
de video
En estas instrucciones se asume que ya ha conectado el TV a una antena o a un sistema de TV por cable (de acuerdo con las
instrucciones de las paginas 9 y 10). Ignore el paso 1 si aQn no ha conectado una antena o un sistema de cable.
1. Desenchufe el cable o la antena de la parte posterior del TV.
2. Enchufe el cable o la antena en el terminal ANT IN de la parte posterior del aparato de video.
3. Conecte un cable de antena entre el terminal ANT OUT del aparato de video y el terminal ANT IN del televisor.
4. Conecte un cable de video entre el terminal AV IN 1 [YNIDEO] del televisor y el terminal VIDEO OUT del aparato de video.
6. Conecte cables de audio entre los terminales AV IN 1 [R-AUDIO-L) del televisor y los terminales AUDIO OUT del aparato de
video
Panel posterior
Panel posterior
del TV
del video
D
Si tiene un video "mono" (sin est_reo), use un conector Y (no suministrado) para conectar los terminales de entrada de audio
derecho e izquierdo del TV. Tambien se puede conectar el cable al terminal "R".
Si el video es estereo, tendra que conectar dos cables.
Cada aparato de video tiene una configuraci6n diferente del panel posterior.
Cuando conecte un aparato de video, debe hacer coincidir los colores del terminal de conexi6n y del cable.
Cuando se conecta a AV NI 1, el color (verde) del terminal AV IN 1 [YNIDEO] no coincide con el color (amarillo) del cable de
video.
Cone×i6n de un sistema de audio digital
Los terminales del panel posterior del televisor faclitan la conexi6n de un sistema de audio digital (Home Cinema/Receptor) al
televisor,
1.
Conecte un cable 6ptico entre los terminales DIGITAL AUDIO OUT (OPTICAL) y los terminales de entrada de audio digital
(OPTICAL) del sistema de audio digital.
Cuando un sistema de audio digital se conecta al terminal DIGITAL AUDIO OUT (OPTICAL): Reduzca el volumen del TV y ajuste el
volumen con el control del sistema.
Panel posterior
Sistema
de audio
del TV
digital
[D
El audio de 5.1 canales es posible cuando el televisor esta conectado a un dispositivo externo que admita 5.1 canales.
[D
[D
Cada sistema de audio digital tiene una configuraci6n diferente del panel posterior.
Cuando el receptor (sistema Home Cinema) esta activado, se puede oir la salida de sonido desde el terminal 6ptico del televisor.
Cuando se ve la televisi6n a traves de un DTV (aereo), el televisor envia el sonido de 5.1 canales al receptor del sistema Home
Cinema. Cuando la fuente es un componente digital, como un DVD, y est_ conectada al televisor a trav_s de HDMI, s61ose oye el
sonido de 2 canales del receptor del sistema Home Cinema.
Si desea oir audio de 5.1 canales, conecte el terminal DIGITAL AUDIO OUT (OPTICAL) del reproductor de DVDIBlu-ray o del
decodificador por cablelsat61ite directamente a un amplificador o un sistema de Home Cinema, no al televisor.
Cone×i6n de un amplificadodDVD
1,
para Home Cinema
Conecte los cables de audio entre los terminales AUDIO OUT [R-AUDIO-L] del televisor y los terminales AUDIO IN [L-AUDIO-R]
del amplificador/DVD para Home Cinema.
Cuando conecte un amplificador de audio a los terminales AUDIO OUT JR-AUDIO-L]:Disminuya el volumen del TV y ajuste el nivel
del volumen con el control del volumen del amplificador.
Panel posterior
del TV
Amplificador/DVD
del sistema
Home Cinema
j---_
i° :i
(no suministrado)
[D
Cada amplificador y sistema de DVD para Home Cinema tiene una configuraci6n diferente del panel posterior.
[D
Cuando conecte un amplificador o un sistema de DVD para Home Cinema, debe hacer coincidir los colores del terminal de
conexi6n y del cable.
Cone×i6n a un PC
Uso del cable HDtVlI/DVI
1. Conecte un cable HDMI/DVI entre el terminal HDMI IN 2 del televisor y el terminal de salida PC del ordenador.
2. Conecte un cable est_reo miniclavija/2 RCA de 3,5 mm entre el terminal DVl IN (HDMI2) [L-AUDIO-R] de! televisor y el terminal de
salida de audio de la tarjeta de sonido del ordenador.
Panel posterior
del TV
PC
Conector est_reo de 3,5 mm para el cable 2 RCA(no surninistrado)
_
_
[
Cable HDMItDVl (no suministrado)
Cada ordenador tiene una configuraci6n diferente del panel posterior.
Cuando conecte un ordenador, debe hacer coincidir los colores del terminal de conexi6n y del cable.
Cuando se usa una conexi6n de cable HDMI/DVl, se debe conectar en el terminal HDMI IN 2.
i Funcionamiento
]
Encendido y apagado del televisor
Pu's'"b°t°nPOW
ii1
televisor,
{_
El televisor puede tardar unos segundos en encenderse.
Cambio de canales
Utilizaci6nde los botones de canal
Pulse los botones OH ,',
o CH _
para cambiar de canal.
Cuando se pulsan los botones OH
o CH L_:, el televisor cambia los canales
secuencialmente. Vera todos los canales que ha memorizado el TV. (Debe haber
un minimo de tres canales memorizados.) No vera los canales borrados o no
memorizados. Consulte la pagina 20 para la memorizaci6n de los canales.
Utilizaci6n
de los botones
i_..Jl
¢..i
nurn_ricos
Utilice los botones numericos para ir directamente a un canal. Por ejemplo, para
seleccionar el canal "27", pulse "2" y "7".
Para cambiar rapidamente de canal, pulse los botones numericos y despu_s el
bot6n ENTERS.
Uso del bot6n ": -_"
El bot6n "[ - ;" se utiliza para seleccionar emisoras que emitan con sepal digital.
1. Por ejemplo, para seleccionar el canal "7-1", pulse "7", "i-= )'', "1".
@ HD indica que el televisor esta recibiendo una sepal digital de alta definici6n.
SD indica que el televisor esta recibiendo una sepal digital de definici6n estandar.
@ Para cambiar rapidamente de canal, pulse los botones numericos y despu_s el
bot6n ENTERS.
Utilizaci6ndel bot6n PRE-CHpara seleccionar el canal anterior
1. Pulse el bot6n PRE-CH. El televisor cambiara al _ltimo canal visualizado.
Para cambiar rapidamente de un canal a otro que no es correlativo, sintonice un
canal y utilice el bot6n numerico para seleccionar el segundo canal. A continuaci6n,
utilice el bot6n PRE-CN para alternar rapidamente entre ambos.
Ajuste del volumen
Utilizaci6nde los botones de volumen
1, Pulse los botones VOL + j o VOL _
para subir o bajar el volumen.
Uso del bot6n A MUTE
Puede interrumpir el sonido en cualquier momento pulsando el bot6n _MUTE.
1, Pulse el bot6n _tMUTE y se desconectara el sonido.
_( se mostrara en la pantalla.
2, Para recuperar el sonido, vuelva a pulsar el bot6n _MUTE o pulse los botones
VOL +_ oVOLI=;.
i
v
i
Uso del bot6n TOOLS
Se puede usar e! bot6n TOOLS para seleccionar rapida y facilmente las funciones que se usan con mas frecuencia, El menu
Herramientas cambia seg_n el modo de entrada externo que se esta viendo,
1,
Pulse el bot6n TOOLS. Aparece el ment_Herramientas.
2.
Pulse los botones A/T para seleccionarun menu y,a continuaci6n, pulse el bot6n ENTERS.
3,
Pulse los botones A/V/4/_/ENTER_
para ver, cambiar o usar las opciones
seleccionadas.
Para ver una descripci6n mas detallada de cada funci6n, consulte la pagina
correspondiente.
* ASadir a fav0ritos 0 Borrar de fav0dtos, p&gina 2!
Cambia[ a Cable (o a Aire)i pagina ! 9
Visualizaci6n
de la pantalla
La pantalla identifica el canal actual y e! estado de algunos ajustes de audio-video.
1,
Pulse el bot6n mNFOdel mando a distancia. El televisor mostrara el canal, el tipo de sonido
y el estado de ciertos ajustes de imagen y sonido.
Pulse el bot6n INFO otra vez o espere unos 10 segundos y desaparecera
automaticamente.
Visualizaci6n de los rnen s
Antes de utilizar el televisor, sign los pasos que se expiican a continuacion para aprender a desplazarse por el menu a fin de
seleccionar y ajustar Ins diferentes funciones.
1,
Pulse el bot6n MENU.
El ment_principal se muestra en la pantalla. En el lado izquierdo hay los siguientes iconos: Imagen, $onido, Canal,
Configuration, Entrada, Aplicaciones, 8oporte tecnico.
2,
Pulse los botones A o T para seleccionar uno de los iconos.
Pulse los botones 4 o i_-para acceder al menOsecundario de los iconos.
3,
Pulse los botones ,L o T para desplazarse por las opciones del men&
Pulse el bot6n ENTER_ para acceder a los elementos del men&
4,
Pulse los botones A/T/4/_para cambiar los elementos seleccionados.
Pulse el bot6n RETURN para volver al menO anterior.
6,
Pulse el bot6n EXIT para salir del men&
Uso de los botones del mando a distancia
Bot6n
MENU
RETURN
EXiT
•
Volver al menO anterior.
Salir del men0 en pantalla.
AI T I_11t_1
ENTER_
Funci6n
Ejernplo:Configuraci6ndel brillo del televisor en el rnen_ de irnagen
Ajuste del brillo a 80
1, Pulse el bot6n MENU para ver el men&
2, Pulse el bot6n ENTER_
para seleccionar Imagen,
3, Pulse los botones A o _r para seleccionar Brillo.
4, Pulse el bot6n ENTERS.
6, Pulse los botones 4 o !_ hasta que el brillo cambie a 80.
6, Pulse el bot6n ENTERS.
@ Pulse el bot6n EXiT para salir del men&
v
'
D'*
Mover e cursor, seecconar una o,_con
Seleccionar la opci6n marcada.
Confirmar la conflguraclon.
Funci6n Plug & Play
Cuandoel televisorse enciendeper primeravez, los valoresse iniciancorrelativamentede forma autom_tica.
El salvapantallasseactiva si durantemasde 1 minuteno hay ningunaentradadesdeeltecladodetrnandoa distanciarnientrasPlug & Playesta ell
ejecuci6n.
El salvapantallasseactiva si durantemasde 15minutesno se detectaningunasepalde funcionamiento.
1. Pulseelbot6nPOWERdetmandoa distancia.
Apareceel mensajeMenu Language,8tore Dome,Channelsand Timewill be set.
Pulseelbot6nENTERC#y apareceraautomaticamenteel menuSets the menu language.
Pulseelbot6nENTERC*L
Pulselosbotches J, o T paraseleccionarel idiomay,a continuaci6n,pulseel bot6nENTERC*L
Semuestrael mensajeDefineel idioma del menU..
Pulselosbotches _I o 1,-paraseleccionarDomecomercioo Usedomieiliarioy,a continuaci6n,
pulseel bot6nENTERC_.
Es recomendableconfigurarel televisoren el modeUsedomiciliario paraobtenerla major
imagenen unentomodomestico.
EI modeBernecomercies61oesnecesarioen los entornoscomerciales.
Si accidentalmenteseconfiguralaunidaden el modeDomecomereiey se desea volvera
Use domiciliario(normal):Pulseel bot6ndel volumendettelevisor.Ouandose muestrala
OSD delvolumen,mantengapulsadoel bot6nMENUdel televisordurante5 segundos.
Semuestrael mensaje 8eleecione fuente de antena paraguardar,
Pulselosbotches • o T paramemorizarlos canalesde conexi6nseteccionada.Pulseet bot6n
ENTER_ para seleccionarIniaiar.
• Aire: Serialde antenaaerea.
• Cable: SePalde antenade cable.
• Auto:Se_atesde antenaaerea y per cable.
En elmodeCable puedeseleccionarel origende sepal correctoentre 8TD, HRC e IRC con
los botonesA, T, _1o _,; a continuaci6n,pulseelbot6nENTERS. Si tienecabledigital,
seleccionela fuentede ta seSaldelsistemade cablepara anal6gicay paradigital. P6ngase
en contactocon su proveedorde cablepara averiguaret tipo de sistemade cableexistenteen
SU zona.
El TV empezaraa memorizartodostoscanalesdisponibles.
Paradetenerla bOsquedaantesde quefinatice,pulseel bot6nENTERC#con Detener
seleccionado.
Una vezguardadostodos los canalesdisponibles,se iniciala eliminaci6nde loscanales
codificados.Vuelvea mostrarseel ment_de programaci6nautomatica.
Pulseel bot6nENTER_ cuandosecompletela memorizaci6nde canales.
Apareceautomaticamenteel mensajeConfigure el mode de Reiej. Pulseel bot6nENTERS.
Pulselos botonesA o T paraseleccionarAuto y,a continuaci6n,pulseel bot6nENTERS. Se muestrael mensajeCenfigurar la hera de verano.
Si seleccionaManual, semuestraConfigurar fecha y hera actuales. Para obtenerinformaci6ndetalladasobreManual,consultela pagina31.
7,
Pulsetosbotches _, o T paraseleccionarApagado, Encendidoo Auto y, a continuaci6n,pulseel bot6nENTERC#.
Apareceautomaticamentela imagenparaseleccionarlazona horariaderideusted vive.
8.
Pulselosbotones A o T paraseleccionarlazona horariay, a continuaci6n,pulseel bot6nENTER_.
Si ha recibidouna sei_aldigital,se ajustarala hera automaticamente.
En casenegative,consultelapagina31 para ajustarel reloj.
9.
Semuestrauna breveinstrucci6nsobreHow to getthe best performancefrom your newHDTV.
Pulseelbot6nENTERS#.
Puedeaccedera la Guiade conexi6nHD en el menu8oporte tecnico.
10. Pulseelbot6nENTERC#.Aparecerael mensajeDisfrutede su TV.
Cuandotermine,pulseel bot6nENTERS.
8i desea reiniciar estafunci6n...
1.
Pulseelbot6nMENUparaver el men& Pulselos botchesA o T para seleccionarConfiguraci6n
y,a continuaci6n,pulseel bot6nENTER_.
2.
Pulsede nuevoelbot6nENTERC#paraseleccionarPlug & Play.Paraobtenermasinformaci6n
sobrelasopcionesde configuraci6n,vuelva a pulsarel bot6nENTER_.
La funci6nPlug& Playesta disponibles6toen et modeTV.
i Control de los canales
AImacenamiento
j
de canaJes
Antena _ AirelCable
Antes de empezar a memorizar los canales disponibles, debe indicarel tipo de origen
de la serial conectada al TV (es decir, antena o sistema de cable).
Pulse el bot6n TOOLS para m0strar el men_ Herramientas:
Tambi6n puede cambiar de antena seleccionando H_rramientas _ Cambiar a
Cable(o Aire)
Prog.Auto
• Aire: Serial de antena aire.
• Cable: Sei_alde antena de cable.
• Auto: Sefiales de antena aire y pot cable.
8TD, HRC y IRC identifican los distintos tipos de sistemas de TV pot cable. P6ngase en contacto con su proveedor de cable
para averiguar el tipo de sistema de cable existente en su zona. En este momento ya se ha seleccionado el origen de la serial.
Una vez guardados todos los canales disponibles, se inicia la eliminaci6n de los canales codificados.
Vuelve a mostrarse el menQde programaci6n autom&tica.
Si desea detener la programaci6n automatica, pulse el bot6n ENTERS.
Aparece el mensaje _,Detener programacion automation?. Seleccione 8i con los botones
4 o _. y, a continuaci6n, pulse el bot6n ENTERIC.
Supresi6nde los ¢anales encriptados(digitales)
La funci6n Borrar canal encriptado se usa para filtrar los canales codificados despues
de ejecutar la funci6n Prog. Auto.
Puede tardar de 20 a 30 minutos.
Para detener la bt_squedade canales codificados: Pulse el bot6n ENTER_ para
seleccionar Detener.
Pulse el bot6n _ para seleccionar 81,y, a continuaci6n, pulse el bot6n ENTERIC.
Esta funci6n s61oesta disponible en el modo Cable.
Sintonia
finn
Utilice la sintonia fina para ajustar manualmente un canal concreto para que la recepci6n
sea @tim&
Si no almacena en la memoria el canal que ha ajustado con la sintonJa fin& los
ajustes no se guardan.
El simbolo .....aparecera junto al hombre de los canales cuya sintonizaci6n se haya
ajustado.
Para restablecer la sintonia fina, pulse el bot6n T para seleccionar ReinJciar;a
continuaci6n pulse el bot6n ENTERIC.
Gesti6n de los canales
Lista de canales
Coneste menQpuedeagregary borrarloscanaleso configurarloscomofavoritosy usarlaguia de programasde lasemisoras
digitales.
• Tedos los canales: Muestra todos los canales disponibles actualmente.
• Canales agregados: Muestra todos los canales afiadidos.
• Favorites: Muestra todos los canales favoritos.
• Grabacion con temporizador: Muestra todos los programas actualmente reservados.
Tambien puede pulsar el bot6n OH LIST del mando a distancia para mostrar las listas
de canales.
Uso de los botches
de colores en la iista de canales
• Verde (Zoom): Amplia o disminuye el nt_merodel canal.
• Amarillo (Seleccionar): Selecciona varias listas de canales.
• __TOOLS (Herramientas): Muestra los men_s Agregar o Borrar, Agregar a Favoritos o Borrar de Favoritos, Visualization
con temporizador, Edition de hombre de canal, 8eleccionar todo, Deseleccionar todos, y Prog. Auto (Los ment]s de
opciones pueden variar segQn cada situaci6n.)
Iconos de la pantalla de estado del canal
Unprogramareservado
ContinDa...
Menu de opciones
de la lista de ¢anales
(en Todos
los canales/Canales
agregados/Favoritos)
Pulse el bot6n TOOLS para usar el men_ de opciones.
Los elementos del ment_de opciones pueden variar segOn el estado del canal.
Agregar / Borrar
Puede suprimir o a_adir un canal para que se muestren los canales que desee.
Todos los canales borrados se mostraran en el menO Todos los canales.
Un canal de color gris quiere decir que se ha borrado.
El menOAdd (Agregar) s61oaparece con los canales borrados.
Tambien puede borrar un canal en los ment_s Oanales agregados o Favorites de la
misma manera.
Agregar a Favorites/Berrar de Favorites
Puede configurar come favorites los canales que vea con mas frecuencia.
Pulse el b0t6n TOOLS para m0strar el ment_Herramientas.
Tambi6n puede configurar !os canales favorites selecci0nando Herramientas
Agregar a Favorites (o Borrar de Favorites)
Se mostrara el simbolo "v" y el canal se configurara come favorite.
Todos los canales seleccionados se mostraran en el menQ Favorites.
Si desea seleccionar los canales favorites que ha configurado, pulse el bot6n FAV,OH
en el mando a distancia.
Visual. temper
Si reserva un programa que desea ver, el canal se cambia automaticamente al canal
reservado en la lista de canales aunque est_ viendo otro canal.
Para reservar un canal primero debe configurar la hera actual.
$61ose pueden reservar los canales memorizados.
Puede ajustar el canal, el d[a, el rues, el argo,la hera y el minute directamente
pulsando los botones numericos del mando a distancia.
La reserva de un programa se muestra en el menQ Grabacion con temperizader.
Guia de programas digitales y reserva de visualization: Si se ha seleccionado un
canal digital y se pulsa el bot6n !_ aparece la guia de programas del canal.
Se puede reservar un programa mediante el procedimiento descrito anteriormente.
8eleccionar
rode/Deseiecc[enar
redes
• Seleccionar rode: Puede seleccionar todos los canales de la list&
• Deselecc[onar redes: Puede desmarcar todos los canales seleccionados de la lista de canales.
Puede aplicar la funci6n de agregar/borrar, agregar a favoritos/borrar de favorites a varies canales al mismo tiempo. Seleccione
los canales que desee y pulse el bot6n amarillo para configurar los canales seleccionados al mismo tiempo.
La marca _ aparece a la izquierda de los canales seleccionados.
$61ose puede seleccionar Deseleccienar redes si hay canales seleccionados.
Edition de hombre de canal (anal6gices)
Los canales se pueden etiquetar con el 9rop6sito de que al seleccionar _stos se pueda ver su nombre.
Los nombres de los canales digitales se asignan automaticamente y no se pueden etiquetar.
Men_ de opciones de la lista de canales (en Grabacibn con temporizador)
Se puedever,cambiaro borrarunareserva.
Pulseel bot6nTOOLS parausarel menQde opciones.
Cambiar information
Selecci6nelo para cambiar la reserva de visualizaci6n.
Cancelar programacienes
Selecci6nelo para cancelar la reserva de visualizaci6n.
Infermaci6n
Selecci6nelo para ver una reserva de visualizaci6n. (Tambien puede cambiar la informaci6n de la reserva.)
8ele¢cionar
tode/Deseleceienar
redes
Puede seleccionar (o deseleccionar) todos los canales de la list&
i Control de la imagen
]
Cambio del tama o de la imagen
Modo
Puede seleccionar el tipo de imagen que mejor cumpla sus requisites de visualizaci6n.
• Dinamioo: Selecciona una imagen de alta definici6n para entornos muy
iluminados.
• Normal: Selecciona la mejor visualizaci6n de la imagen para entornos normales.
Esta configuraci6n es lamas conveniente en la mayoria de situaciones.
• Cine: Selecciona una visualizaci6n de imagen confortable en entornos oscuros.
Puede seleccionar estas opciones pulsando el bot6n P.MODE del mando a distancia.
Luz de la celdalContrastelBrillolDefinici6nlColorlTinte
(V/R)
El televisor tiene varias opciones de configuraci6n que permiten controlar la calidad de
la imagen.
Luz de la eelda: Ajusta el brillo de los pixeles. 10 es la configuraci6n mas brillante.
Contraste: Ajusta el nivel de contraste.
Brillo: Ajusta el nivel de brillo.
Definition: Ajusta el nivel de nitidez.
I
I1
Color: Ajusta la saturaci6n del color de la imagen mediante la barra de la pantalla.
Tinte (VlR): Cuanto mas cerca de Rojo 100, mas saturado esta el color rojo.
Cuando se cambian Luz de la celda, Contraste, Brillo, Definition, Color o Tinte
(V/R), la presentaci6n en la pantalla OSD se ajusta consecuentemente.
La configuraci6n de cada dispositivo externo conectado a la entrada del televisor se
puede ajustar y guardar.
La energia consumida durante el use se puede reducir significativamente si se
disminuye el nivel del brillo.
Configuraci6navanzada
Se puede ajustar detalladamente la configuraci6n de la pantalla, incluidos el color y el contraste.
Configuracion avanzada esta disponible en los modes Normal o Cine.
Tone del negro
Se puede seleccionar el nivel de negro en la pantalla para ajustar la profundidad de esta.
• Apagado: Desactiva la funci6n de ajuste del negro.
• Osauro: Establece la profundidad del color negro en un nivel oscuro.
• M_s oscuro: Establece la profundidad del color negro en un nivel mas oscuro.
• El mas oscuro: Establece la profundidad del color negro en el nivel mas oscuro.
Contraste
Dinam.
Se puede ajustar el contraste de la pantalla para conseguir un contraste 6ptimo.
•
•
•
•
Apagado: Desactiva la funci6n de contraste dinamico,
Bajo: Establece el contraste dinamico en un nivel bajo.
Medic: Establece el contraste dinamico en un nivel medic.
Alto: Establece el contraste dinamico en un nivel alto.
Gamma
Se puede ajustar la intensidad de los colores primaries (rojo, verde y azul).
Espaoio de color
El espacio de color es una rnatriz de color compuesta per los colores rojo, verde y azul. Seleccione su gama favorita de color y
disfrute de unos colores aut_nticamente naturales.
• Native: Configura una gama de color mas amplia que la de la fuente del video de entrada.
• Auto: Configura automaticamente la gama de color de acuerdo con la fuente del video de entrada.
ContinDa. ..
Balance de blanco
Se puede ajustar la temperatura del color para conseguir colores mas naturales.
Ba!. Rojo: Ajusta la intensidad del rojo en un nivel bajo.
Ba!. Verde: Ajusta la intensidad del verde en un nivel bajo.
Bal, Azul: Ajusta la intensidad del azul en un nivel bajo.
Gan, Rojo: Ajusta la intensidad del rojo en un nivel alto.
Gan, Verde: Ajusta la intensidad del verde en un nivel alto.
Gan, Azul: Ajusta la intensidad del azul en un nivel alto.
Reiniciar: Restablece el balance de blancos predeterminado.
El cambio del valor de ajuste actualizara la pantalla ajustada.
Tone Piel
Permite acentuar el tone rosa en las imagenes.
El cambio del valor de ajuste actualizara la pantalla ajustada.
Mejora de perfiles -_ Apagado/Encendido
Permite acentuar los bordes de los objetos en Ins imagenes.
Opciones de imagen
Tone Color --_ FriolNormallTibiollTibio2
Puede seleccionar el tone de color que le resulte mas c6modo para la vista.
Tibiol o Tibio2 s61oestan disponibles cuando el mode de imagen es Cine.
La configuraci6n de cada dispositivo externo conectado a la entrada del televisor se
puede ajustar y guardar.
Tamale
Es posible que alguna vez desee cambiar el tamafio de la imagen en la pantalla. El
televisor se suministra con seis opciones de tamafio de la pantalla, cada una disefiada
para que funcione Io mejor posible con tipos especificos de entrada de video. Es posible
que el receptor de satelite tonga tambien su propia gama de tamafios de pantalla. Sin
embargo, en general, debe ver el televisor en el mode 16:9 tanto come sea posible.
16:9: Configura la imagen en una relaci6n de aspecto 16:9.
Zoom1: Alarga verticalmente la relaci6n de aspecto 16:9.
Zoom2: Alarga verticalmente una imagen ampliada con la funci6n Zoom1.
Ajuste ancho: Alarga horizontal y verticalmente una imagen para mostrarla mejor.
4:3: Configura la imagen en una relaci6n de aspecto 4:3.
Ajuste pantalla: Muestra la serial HD nativa completa que no se puede ver en un
televisor normal.
Tambien se puede pulsar varias veces el bot6n P,SIZE del mando a distancia para
cambiar el tamafio de la imagen.
16:9
Aiuste ancho
Zoom1
4:3
Zoom2
_antalla
ContinDa...
Despu_s de seleccionar Zoom1, Zoom2 o Ajuste ancho
Pulse los botones .,qo _ para seleccionar Posiai6n y, a continuaci6n, pulse el bot6n ENTERS.
Pulse los botones A o T para desplazar la imagen hacia arriba o hacia abajo.
Reiniciar: Pulse los botones _ o _. para seleccionar Reinieiar y, a continuaci6n, pulse el bot6n ENTERS. El televisor
recupera la relaci6n 16:9.
Despu_s de seleccionar Ajuste a pantalla en los modos HDMI (1080i/1080p) o Componente (1080i/I080p), quizas deba
centrar la imagen: Pulse los botones _ o _ para seleccionar Posici6n y, a continuaci6n, pulse el bot6n ENTERS.
Pulse los botones A, T, ._ o !_ para mover la imagen.
Reiniciar: Pulse los botones 41o _. para seleccionar Reinieiar y, a continuaci6n, pulse el bot6n ENTERS. El televisor
recupera la relaci6n 16:9.
HD (alta definici6n): 16:9 - 1080i/1060p (1920x1080), 720p (1280x720)
La configuraci6n de cada dispositivo externo conectado a la entrada del televisor se puede ajustar y guardar.
ATV, Video, Componente (4801,480p)
16:9, Zoom1, Zoom2, 4:3
Componente (720p)
16:9, Ajuste aneho, 4:3
DTV(1080i), Componente (1080i, 108%), HDMI (720p, I080i, I080P)
16:9, 4:3, Ajuste ancho, Ajuste a pantalla
Digital NR
Si la serial de emisi6n que recibe el TV es debil, puede activarse la funci6n Digital NR
(Reducci6n digital del ruido) para reducir la estatica y las imagenes superpuestas que
pueden aparecer en la pantalla.
•
•
•
•
•
Apagado: Desactiva la funci6n de reducci6n de ruido digital.
Bajo: Configura la reducci6n de ruido digital en el nivel bajo.
Medio: Configura la reducci6n de ruido digital en el nivel medio.
Alto: Configura la reducci6n de ruido digital en el nivel alto.
Auto: Configura la reducci6n de ruido digital en Automatico.
N.neg HDMI
Se puede seleccionar directamente el nivel de negro en la pantalla para ajustar la
profundidad de esta.
• Normal: La pantalla seve mas brillante.
• Bajo: La pantalla seve mas oscura.
Esta funciSn s61oesta activa cuando un dispositivo extemo esta conectado al
televisor a traves de HDMI. La funciSn
N.neg HDMI puede qua no sea compatible con todos los dispositivos externos.
Modo pelicula
El televisor se puede configurar para que perciba y procese automaticamente las set, ales
de pelicula de todas las fuentes y ajuste la major calidad de imagen.
• Apagado: Aplicado procesamiento basico de imagenes de video y no detecci6n
automatica para programas de peliculas.
• Auto: Ajusta automaticamente para obtener la major calidad de imagen entre programas de peliculas y video.
Modo pelicula es compatible con TV, Video, Componente (480i/1080i) y HDMI (1080i).
Protecci6n de pantaila
Configura las opciones de Protecci6n de pantalla para evitar y reducir el quemado de pixeles.
Cuando una imagen permanece en una posiciSn por mucho tiempo, puede ocasionar un quemado permanente en la pantalla.
Prevenci6n del desgaste de la pantalla
Esta pantalla esta equipada con tecnologia de prevenci6n para reducir la posibilidad de que se queme. Esta
tecnologia permite definir el movimiento de la imagen arriba o abajo (linea vertical) y de lado a lado (punto horizontal).
El ajuste del tiempo permite programar intervalos temporales entre los movimientos de la imagen en minutos.
• Cambio de pixel: Con esta funci6n podra mover pixeles de forma detallada en el PDP, en sentido horizontal o vertical, para
evitar restos de imagenes en la pantalla.
Condici6n 6ptima para cambio de pixel:
Horizontal
0~4
2
0:4
2
i:4 minl
2 min.
Continba. ..
• Lateral gris: Cuando se ve la televisi6n con una relaci6n de pantalla de 4:3, _sta se puede proteger de un posible dafio si se
ajusta el balance de blanco en ambos extremos, el izquierdo y el derecho. Para prevenir que la pantalla se queme, seleccione
Oscuro o Claro.
- Oscuro: Cuando se establece una relaci6n de pantalla de 4:3, con esta opci6n se oscurecen ambos extremos, el izquierdo y
el derecho.
- Olaro: Cuando se establece una relaci6n de pantalla de 4:3, con esta opci6n se aclaran ambos extremos, el izquierdo y el
derecho.
Reduceion de los efeetos de una pantalla quemada
Si la pantalla se ha quemado, puede seleccionar desplazamiento o lateral gris para que le ayude a retirar los elementos quemados.
Desplazamiento: Esta funci6n suprime los restos de imagenes en la pantalla moviendo todos los pixeles del PDP de acuerdo
con un patr6n. Utilice esta funci6n si hay restos de imagenes o simbolos en ]a pantalla, especialmente
despues de haber mostrado una imagen fija en la pantalla durante un largo tiempo.
La funci6n de supresi6n de restos de imagenes debe aplicarse durante largo tiempo (aproximadamente 1 hora) para que
sea efectiva. Si los restos de imagenes no desaparecen despues de ejecutar la funci6n, repita el proceso.
Pulse cualquier tecla del mando a distancia para cancelar esta funci6n.
Reinicio de la irnagen--, Reinic.rnodoirnagen/Cancelar
Restablece todos los ajustes predeterminados.
Seleccione un modo de imagen que desee restaurar. La restauraci6n se realiza en
cada modo de imagen.
i Control del sonido
Cambio de la configuraci6n dei sonido
Modo
Puede seleccionar el modo de sonido que mejor se ajuste al programa que esta viendo.
• Normal: Este modo de sonido es de aplicaci6n general.
• M_3sica: El modo M@sicapermite oir mt_sica como si se estuviera en una sala de
conciertos.
• Cine: El modo Cine proporciona un sonido completo de pelicula en directo como si
se estuviera en una sala de cine.
• Voz clara: Realza las voces respecto de los sonidos. Seleccione este modo de
sonido para ver noticiarios, telenovelas o documentales.
• Favorito: Puede personalizar los ajustes de sonido para que se ajusten a sus
preferencias personales.
Puede seleccionar estas opciones pulsando el bot6n 8.1VIODEdel mando a distancia.
Ecualizador
Es posible ajustar los parametros del sonido segt_n las preferencias personales.
• Modo: Selecciona el modo de sonido entre los valores predefinidos.
• Balance liD: Ajusta el balance entre los altavoces izquierdo y derecho.
• 100Hz, 300Hz, lkHz, 3kHz, 10kHz (Ajuste del ancho de banda): Ajusta el nivel de las
diferentes frecuencias de ancho de banda.
• Reiniciar: Restablece todos los ajustes predeterminados del ecualizador.
[_ Trusurround8RS HD _ Apagado/Encendido
SRS TruSurround HD permite disfrutar de los efectos de sonido surround de 5.1 canales
en los dos altavoces del televisor.
Esta funci6n proporciona no s61o unos bajos profundos mas ricos sino que tambien
mejora la resoluci6n de las frecuencias altas.
Puede seleccionar estas opciones pulsando el bot6n SR8 del mando a distancia.
r_
i
_
i
TAt.
I
@
Tru$urround HD, SRS y el simbolo son marcas registradas de SRS Labs, Inc. La tecnologia
TruSurround HD esta incorporada bajo licencia de SRS Labs, Inc.
C] Idioma preferido(digitales)
El sistema de emisi6n de TV digital permite transmitir simultaneamente muchas pistas de audio (por ejemplo, traducciones
simultaneas del programa en otros idiomas).
S61ose puede seleccionar uno de los idiomas que ofrece la emisora.
Puede seleccionar un idioma que no sea el Idioma preferido pulsando el bot6n MT8 del mando a distancia.
C] 8onido Multi-track(anal6gicos)
• Mono: Elija para canales que emiten en monoaural o si tiene dificultades con la recepci6n de se_ales est6reo.
• Estereo: Elija para canales que emiten en est_reo.
• SAP: Elija esta opci6n para escuchar el programa de audio independiente,
que normalmente es una traducci6n de otro idioma.
En funci6n del programa concreto emitido, puede escuchar en modo Mono, Est6reo
o SAP.
Pulse varias veces el bot6n MT8 del mando a distancia para seleccionar Mono,
Estereo
o SAP.
[_ VoI.Auto _Apagado/Encendido
Cada emisora tiene sus propias condiciones de sei_al y resulta inc6modo ajustar el volumen cada vez que se cambia de canal.
Esta funci6n permite ajustar automaticamente el volumen de un canal disminuyendo la salida de sonido cuando la sepal de
modulaci6n es alta o aumentando la salida de sonido cuando la serial de modulaci6n es baja.
ContinUa...
Seleccionar
altavoz
Cuando se ve el televisor conectado a un sistema Home Cinema, se debe apagar el
altavoz del televisor para que la salida de audio del televisor utilice los altavoces del
Home Cinema (externos).
• Altavoz externo: Utiliza los altavoces externos (Home Cinema) para la salida de
sonido.
• AItavoz de TV: Utiliza los altavoces del TV para la salida de sonido.
Si se selecciona AItavoz externo en el men_ 8eleccionar altavoz, se limita la
configuraci6n del sonido.
Los botones de volumen y _tMUTE no funcionan si 8eJeccionar altavoz esta
establecido en Altavoz externo.
Configure el volumen del sistema Home Cinema.
Salida de sonido
Silencio
Silencio
DIGITAL
r'JLq DOLBY
C)
Reinicio
I
Fabricado bajo licencia de Dolby Laboratories.
Dolby y el simbolo de la doble D son marcas comerciales de Dolby Laboratories.
del sonido
Puede restaurar la configuraci6n del sonido con los valores predeterminados de fabrica.
• Reiniciar rode: Todos los valores del sonido vuelven a la configuraci6n predeterminada.
• Reini¢. mode sonido: Los valores actuales del sonido vuelven a la configuraci6n predeterminada.
• Cancelar: Seleccione las opciones de reinicio de sonido.
Descripci6n de las funciones
Configuraci6n
del men
]
de configuraci6n
[3 Idioma
Se puede configurar el idioma de los rnen_s.
C)
Modo Juego _
Apagado/Encendido
Si se conecta a una consola de videojuegos come PlayStationTM o XboxTM, podra
obtener sensaciones mas realistas seleccionando el ment_de juegos.
8i el mode Juego esta encendido
• El mode Imagen cambia automaticamente a Normal y no se puede cambiar.
• El mode Sonido cambia automaticamente a Favorite y no se puede cambiar. Ajuste el
sonido con el ecualizador.
• La funci6n Reiniciar se activa en el menO Sonido. La funci6n Reiniciar inicializa la configuraci6n del Ecualizador con los
parametros de fabrica.
Mode Juego no esta disponible en el mode normal de TV o Mode Juego esta establecido come Apagado.
Si la calidad de la imagenes deficiente cuando un dispositivo externo esta conectado al televisor, compruebe si la opci6n Mode
Juego esta establecida come Encendido.
Cuando se muestra el ment_de TV en el Mode Juego, la pantalla tiembla ligeramente.
La marca (d_) que aparece en la pantalla indica que la opci6n Mode Juego esta activa con la fuente seleccionada.
Esta funci6n s61oadmite la funci6n de juegos.
ContinDa. ..
[_ V-Chip
La opci6n V-Chip bloquea automaticamente los programas que no se consideran apropiados para los menores. El usuario debe
introducir primero un c6digo PiN (n0mero de identificaci6n personal) para configurar o cambiar las restricciones de V-Chip.
La funci6n V-Chip no esta disponible en los modes HDMI o Cempenente.
El c6digo PIN predeterminado para un televisor nuevo es '0-0-0-0'.
Si olvida el PIN, pulse los botches del mando a distancia en la siguiente secuencia
para reiniciar el c6digo a '0-0-0-0': Apagar _ _ MUTE _ 8 _ 2 _ 4 -_ Encender.
Perm. rode: Se pulsa para desbloquear todos los programas de televisi6n. / Bloq. rode: Se pulsa para bloquear todos los
programas de televisi6n.
Bloqueo V-Chip -, Apagado/Eneertdido
Desactiva la funci6n V-Chip.
Guias pater. TV
En primer lugar, configure un n0mero de identificaci6n personal (PIN) y active la funci6n
V-Chip.
Las limitaciones pueden configurarse de dos formas: Las guias de TV o la clasificaci6n
MPAA.
• Categorias basicas
- TVoY:Ni_os peque_os/TV-Y7: Ni_os de mas de 7 a_os/TV-G: Todos los pt_blicos/
TV-PG: Supervisi6n paterna/TV-14: Mayores de 14 a_os/TV-MA: Audiencia adulta
• Subclasificaciones
- All (Todos): Bloquea todas las clasificaciones de TV. / FV: Violencia y fantasia/V:
Violencia/S: Contenido sexual
/L: Lenguaje grosero/D: Dialogo de contenido sexual
La funci6n V-Chip bloqueara automaticamente cualquier categoria que sea mas restrictiva.
Per ejemplo, si bloquea la categoria TV-Y, automaticamente se bloqueara TV-Y7. De forma similar, si bloquea la categoria TVG, todas las categorias del grupo adultos j6venes se bloquearan (TV-G, TVoPG,TV-14-14 y V-MA}. Las subclasificaciones (D,
L, S, V) funcionan de manera similar.
Clas. MPAA
El sistema de clasificaci6n MPAA utiliza el sistema de la Motion Picture Association of
America (Asociaci6n americana de cinematografia) y se aplica principalmente en las
_eliculas. Cuando el bloqueo V-Chip esta activado, el televisor bloquea automaticamente
cualquier programa que tenga una determinada clasificaci6n (ya sea segt_n la
clasificaci6n MPAA
o segQnla guia de programas de TV).
G: Todos los pt_blicos(sin restricciones).
PG: Se sugiere la compa_ia de un adulto.
PG-13: Menores acompa_ados de un adulto.
R: Restringido. Menores de 17 acompar_ados per un adulto.
NC-17: Prohibido a menores de 17 a_os.
X: $61oadultos.
NR: Sin clasificar.
Con una determinada categoria seleccionada, pulse el bot6n ENTER_ para activarla.
Aparecera el simbolo "_". Pulse el bot6n ENTER_ para bloquear o desbloquear la categoria.
El V-Chip bloqueara automaticamente cualquier categoria que sea m_s restrictiva,
Per ejemplo, si bloquea la categoria PG-13, tambi_n se bloquearan automaticamente R, NC-17 y X.
Ingl6s Canadiense
Puede bloquear los programas de TV segOn la clasificaci6n Ingles Canadiense.
C: Programaci6n para ni_os menores de 8 ai_os.
C8+: Programaci6n generalmente considerada aceptable para ni_os mayores de 8 a_os sin acompa_amiento de adultos.
G: Programaci6n general, ideal para todas las audiencias.
PG: Supervisi6n paterna.
14+: La programaci6n contiene temas y contenidos que puede que no sean adecuados para menores de 14 a_os.
18+: Programaci6n para adultos.
El V-Chip bloqueara automaticamente cualquier categoria que sea robs restrietiva,
Per ejemplo, si bloquea la categoria G, automaticamente tambi_n se bloqueara PG, 14+ y 18+.
Franc6s Canadiense
Puede bloquear los programas de TV seg0n la clasificaci6n Franc_s Canadiense.
• G: General
• 8 arts+: Programaci6n generalmente considerada aceptable para ni_os mayores de
8 a_os sin acompar_amiento de adultos.
• 13 arts+: Es posible que la programaci6n no sea adecuada para ni_os menores de
13 a_os.
• 16 arts+: Es posible que la programaci6n no sea adecuada para ni_os menores de
16 a_os.
• 18 arts+: Programaci6n restringida para adultos.
El V-Chip bloqueara automaticamente cualquier categoria que sea m_s restrietiva,
Per ejemplo, si bloquea la categoria 8 arts+, tambien se bloquearan
automaticamente 13 arts+, 16 arts+ y 18 arts+.
ContinDa. ..
ClasJficaci6n
U.8. Descargable
La informaci6n de la restricci6n paterna se puede usar mientras se yen los canales DTV.
Si la informaci6n no se descarga desde la emisora, el men0 Dewnleadable U.8. Rating
esta desactivado.
La informaci6n de la restricci6n de bloqueo se puede descargar automaticamente mientras
se yen los canales DTV. Esto puede tardar algunos segundos.
El men0 Downleadable U.8. Rating esta disponible despu_s de que la informaci6n se
haya descargado desde la emisora. Sin embargo, seg0n el tipo de informaci6n de la
emisora, el men0 podria no estar disponible para su use.
Los niveles de restricci6n paterna difieren seg0n la emisora. El hombre de menO
predeterminado y la Clasificaci6n U.8. Descargable cambian seg0n la informaci6n
descargada.
Aunque configure la visualizaci6n en pantalla en su propio idioma, el men0 Clasificacion
U.$. Descargable siempre Io vera en ingles.
El nOmero de la
informaci6n de
clasificaci6n actual
La clasificaci6n bloqueara automaticamente cualquier categoria que sea mas restrictiva.
Los titulos de clasificaci6n (per ejemplo, nivel de humor, etc) y las clasificaciones de televisi6n
(per ejemplo, DH, MH, H, etc.) pueden variar de acuerdo con la emisora.
El n0mero de toda
la informaci6n de
clasificaci6n
CambJar C6dJge
Puede cambiar el c6digo de cuatro digitos para usar la funci6n V-Chip.
El c6digo PIN predeterminado para un televisor nuevo es '0-0-0-0k
Si cambia el c6digo PIN completamente, se muestra el mensaje PIN is changed successfully. (Codige cambiado correctamente).
C6mo reinicJar eJ televisor ¢uande el V-Chip bJoClueaun canal (Escape de
emergencJa)
Si el TV se sintoniza en un canal restringido, V-Chip Io bloquear& La pantalla quedara en
blanco y aparecera el mensaje siguiente:
1. Escriba su c6digo PIN.
Para volver al mode de visualizaci6n normal, sintonice un canal diferente con los botones
CH V. En determinadas condiciones (on funci6n de la clasificaci6n de los programas
de TV locales), V-Chip puede bloquear todos los canales. En este case, utilice la funci6n
V-Chip come "salida de emergencia":
Si olvida el PIN, pulse los botones del mando a distancia en la siguiente secuencia
para reiniciar el c6digo a '0-0-0-0': Apagar _ _MUTE _ 8 _ 2 _ 4 _ Encender.
C3 Subtitulo
(mensajes
de texto en pantalla)
@ La funci6n de subtitulos no esta disponible en los modes Componente o HDMI.
@ La disponibilidad de los subtitulos depende del programa que se est_ emitiendo.
Pulse el bot6n CO del mando a distancia para seleccionar 8ubtitule (Encendido) o
Subtitule (Apagade).
Anal6gicos
La funci6n de subtitulos anal6gicos funciona tanto en el mode de canal de televisi6n anal6gica
come cuando la seSal proviene de un dispositivo externo. (Dependiendo de la serial de
transmisi6n, la funci6n de subtitulos anal6gicos puede funcionar en canales digitales.)
• Mode de 8ubtitule
: Programatic, 0C1~C04, Textel~Texte4
Digital
La funci6n de subtitulos digitales funciona en canales digitales.
• Mode de 8ubtituto:
Programatic, 8erviciof~Servicio6,
• Opciones - 8ubtitulos
001~C04, Textel~Texte4
Dig.
- Tamafio: Se puede seleccionar el tamafio de la fuente del subtitulo.
- Estilo fuente: Se puede seleccionar la fuente del subtitulo.
- Color de primer piano: Se puede seleccionar el color de los subtitulos.
- Color de rondo: Se puede seleccionar el color del rondo de los subtitulos.
- Opacidad de primer plane: Se puede cambiar la opacidad del primer piano de los
subtitulos.
- Opacidad de rondo: Se puede seleccionar la opacidad del rondo de los subtJtulos.
- Regresar al Predeterminade: Restaura la configuraci6n predeterminada de la estaci6n emisora de los subtitulos.
Opcienes - 8ubtitulos
de 8ubtitulo.
8ervicief~6
Dig. s61oestan disponibles cuando Pregramado y 8erviciel~$ervicie6
se han seleccionado en el Mode
en el mode de subtitulos digital pueden no estar disponibles seg0n el tipo de emisi6n.
Programatic significa que se sigue el estandar establecido per el emisor.
Las opciones de color de primer piano y color de rondo no se pueden ajustar con el mismo color.
Las opciones de opacidad de primer piano y de fondo no pueden ajustarse a la vez en transparente.
C)
Melodia
Se puede establecer un sonido de melodia que se oiga cuando el televisor se encienda
o se apague.
• Apagado: Apaga la funci6n de la melodia.
• Bajo: Establece el volumen de la melodia en un nivel bajo.
• Medio: Establece el volumen de la melodia en un nivel medio.
• Alto: Establece el volumen de la melodia en un nivel alto.
La melodia no se reproduce.
- Cuando no hay salida de sonido desde el televisor porque se ha activado el bot6n
_MUTE.
- Cuando no hay salida de sonido desde el televisor porque se ha reducido al minimo con el bot6n VOL _.
- Cuando la funci6n de temporizador ha apagado el televisor.
[3 Ahorro
energia
Esta funci6n ajusta el brillo del televisor, Io cual reduce el consumo de energia. Si desea ver ]a televisi6n por la noche, ajuste la
opci6n del modo Ahorro ertergia en Alto; sus ojos se Io agradeceran y, ademas, reducira el consumo de energia.
• Apagado: Desactiva la funci6n de ahorro de energia.
• Bajo: Establece la funci6n de ahorro de energia en sus valores bajos.
• Medio: Establece la funci6n de ahorro de energia en sus valores medios.
• Alto: Establece la funci6n de ahorro de energia en sus valores maximos.
Configuraci6n de la hora
Para usar Ins diferentes rune!ones de! temporizador de! televisor es necesario configurar el reloj. Asimisrno, se puede
comprobar ia horn mientras se ve la television. (Pulse el boron INFO.)
[3 Tiempo
1. Pulse el bot6n MENU para ver el men&
2. Pulse los botones A o T para seleccionar Conflguracion y, a continuaci6n,
pulse el bot6n ENTERS.
3. Pulse los botones A o T para seleccionar Tiempo y, a continuaci6n, pulse el bot6n
ENTERIC,.
Reloj
• Mode Reloj _ Auto/Manual
Puede configurar la hera actual en forma manual o automat!ca.
• Config, Reloj
Puede ajustar la hera actual manualmente.
[_ Esta funci6n s61oesta disponible si Mode Reloj esta configurado come Manual.
[_ Puede ajustar Mes, Din, A_o, Hera o Minute directamente pulsando los botones
num6ricos del mando a distancia.
• Zona Tiempo
Seleccione su zona horaria.
Esta funci6n s61oesta disponible si Mode Reloj esta configurado come Auto.
SegOn la emisora y la serial, la hera automat!ca no se puede ajustar correctamente. En tal case, debe hacerlo manualmente.
La antena o el cable deben estar conectados para ajustar la hera automaticamente.
• DST (horario de verano) --, Apagado/Encendido/Auto
Activa o desactiva la funci6n de horario de verano.
@ Esta funci6n s61oesta disponible si Mode Reloj esta configurado come Auto.
Tempor[zador
El temporizador de desconexi6n apaga automaticamente el televisor despues de un
periodo prefijado (30, 60, 90,120,150 y 180 minutes).
Tambien puede configurar el temporizador seleccionando Herramientas -_
Temporizador:
Tempor[zador l/Tempor[zador
2/Tempor[zador 3
Utilice esta funci6n para que el televisor se encienda o apague a una hera concreta.
Se pueden activar/desactivar 3 horas distintas. Debe ajustar el reloj en primer lugar.
• Hera de eneendido: Ajuste la hera, los minutes, am/pm y activar/inactivo.
(Para activar el temporizador con la configuraci6n elegida, establezcalo en Aetivar.)
• Hera de apagado: Ajuste la hera, los minutes, am/pm y activar/inactivo.
(Para activar el temporizador con la configuraci6n elegida, establezcalo en Aetivar.)
• Volumen: Configure el nivel de volumen deseado.
• Antena: Seleccione aerea o de cable.
• Canal: Permite seleccionar el canal deseado.
• Repot!r: Seleccione Una vez, Carla din, Lun~Vie, Lun~$ab, 8ab~Dom o Manual.
@ Con Manual seleccionado, pulse el bot6n _. para seleccionar el dia de la semana.
Pulse el bot6n ENTER_ sobre el d[a deseado y aparecera la marca ,_.
Puede ajustar la hera, los minutes y el canal pulsando los botones numericos del mando a distancia.
Apagado automat!co
Si activa el temporizador, el televisor se apagara si no se pulsa ningOn bot6n durante 3 horas, despues de que el temporizador
Io haya puesto en march& Esta funci6n s61oesta disponible con el temporizador activado y evita el recalentamiento que se
puede producir si el televisor esta encendido durante demasiado tiempo.
Lista de Entradas/Editar Nombre
[_ Lista de Entradas
Se utiliza para seleccionar TV u otras fuentes de entrada externas como reproductores
DVD/Blu-ray/receptores por cable/
satelite (decodificadores) conectados al televisor. Permite seleccionar la fuente de
entrada que se prefiera.
TV, AV, Componentel,
Componente2, HDMII, HDMI2/DVI, HDMI3.
$61ose puede elegir los dispositivos externos que est_n conectados al televisor. En
Lista de Entradas, las entradas conectadas se resaltan y se ordenan en la parte
superior. Las entradas que no estan conectadas se ordenan en la parte inferior.
Uso de los botones de colores del mando a distancia con la lista de entradas
• Rojo (actualizar): Actualiza los dispositivos externos conectados.
PL_lselosi la entrada esta activada y conectada pero no se muestra en la lista.
__ TOOLS (Herramientas): Muestra los ment_s Editar Nornbre e Information.
Pulse el bot6n 8OURCE del mando a distancia para ver una fuente de sei_al externa.
Editar Nornbre
Puede dar un nombre al dispositivo conectado en los terminales de entrada; de esta
manera sera mas facil seleccionar el dispositivo de entrada.
VideolDVDICable
8TB/Sat_lite 8TB/PVR 8TB/Receptor AVIJuegolFilrnadoral
PC/DVI PC/DVI/TV/IPTV/Blu.ray/HD
DVD/DMA
Cuando se conecta un ordenador con una resoluci6n de 1920x1080 a 60 Hz al puerto
HDMI IN 2(DVl), se debe configurar el modo HDMI2/DVl en PC del ment_Editar
Nombre.
ContinDa. ..
i Pantalla de PC
Uso del televisor
}
como una pantalla de ordenador (PC)
Configura¢i6n del software del PC (basado en Windows
XP)
A continuaci6n se muestra la configuraci6n de pantalla de Windows para un ordenador tipico.
Probablemente la pantalla real de su PC sea distinta, segOn la versi6n concreta de Windows y
de la tarjeta de video que tenga. Aunque las pantallas reales sean diferentes, la informaci6n de
configuraci6n basica que se aplica en casi todos los casos es la misma.
(En caso contrario, p6ngase en contacto con el fabricante del ordenador o con el distribuidor de
Samsung.)
'_
Therr_
De_#°
Scr_r'_av_
A_;ar_
_%_
_:'_
1. Primero, haga clic en Panel de control en el menO de inicio de Windows.
2. Cuando aparezca la ventana del panel de control, haga clic en Apariencia y temas y
aparecera un cuadro de dialogo.
3, Cuando aparezca la ventana de] panel de control, haga clic en Pantalla y aparecera un
I_ll_
cuadro de dialogo ...............................................
4. Vaya a la pestaSa Configuraci6n en el cuadro de di&logo. Configuraci6n correcta del
tamaSo (resoluci6n) 6ptima: 1920 x 1080 @ 60 Hz Si existe una opci6n de frecuencia vertical
en el cuadro de dialogo de configuraci6n de la pantalla, el valor correcto es de 60 o 60 Hz. Si no, haga clic en Aceptar y salga
del cuadro de di&logo.
Modos de pantaila
Si la serial del sistema es igual al modo de se5al estandar, la pantalla se ajusta automaticamente. Si la seifial del sistema no es igual
al modo de seiSalestandar, ajuste el modo consultando la guia del usuario de la tarjeta de video; de Io contrario, puede no haber sei_al
de video. La imagen de pantalla se ha optimizado durante la fabricaci6n para los siguientes modos de visualizaci6n.
_
Entradas HDMI/DVI
Modo
Reso!ucibn
Frecuenciahorizontal
(kHz)
FrecuenciaVertical(Hz)Frecuencia
....
18M
dereloj de p!xeles
(MHz)
Polaridadsincr.
(H/V)
640 x 350
31.469
70.086
25.175
+/ -
720x400
31.469
70.087
28.322
- /+
640 x 480
35.000
66.667
30.240
- /-
832x624
1152x 870
720x 576
1152x 864
1280x 720
1280x 720
1280x 960
49.726
68.681
35.910
53.783
44.772
56.456
75.231
74.55t
75.062
59.950
59.959
59.855
74.777
74.857
57.284
100.000
32.750
81.750
74.500
95.750
130.000
- /- /+
- /+
- /+
- /+
- /+
- /+
VESA DMT
640 x 480
640 x 480
640 x 480
800 x 600
801 x 600
802 x 600
1024 x 768
1024 x 768
1024 x 768
1152x 864
1280 x 800
1280 x 800
1280 x 960
1280 x 1024
1280 x 1024
1360 x 768
1440 x 900
1440 x 900
1680 x 1050
31.469
37.861
37.500
37.879
48.077
46.875
48.363
56.476
60.023
67.500
49.702
62.795
60.000
63.981
79.976
47.712
55.935
70.635
65.290
59.940
72.809
75.000
60.317
72.188
75.000
60.004
70.069
75.029
75.000
59.810
74.934
60.000
60.020
75.025
60.015
59.887
74.984
59.954
25.175
31.500
31.500
40.000
50.000
49.500
65.000
75.000
78.750
108.000
83.500
106.500
108.000
108.000
135.000
85.500
106.500
136.750
146.250
- /- /- /+/+
+/+
+/+
- /- /+/+
+/+
- /+
- /+
+/+
+/+
+/+
+/+
- /+
- /+
- /+
VESA GTF
1280x 720
1280x 1024
52.500
74.620
70.000
70.000
89.040
128.943
- /+
- /-
VESADMT/
DTVCEA
1920x 1080p
67.500
60.000
148.500
+/+
MAC
VESA CVT
Cuando se usa una conexi6n de cable HDMI/DVl, se debe conectar en el terminal HDMI IN 2(DVl).
Soporte t6cnico
Autodiagn6stico
Prueba de irnagen
Si cree que tiene un problema con la imagen, efectOela prueba de imagen. Compruebe
el patr6n del color en la pantalla para ver si persiste el problema.
_,Contin_a e! problema con esta prueba? se muestra en la pantalla.
Si el patr6n de prueba no aparece o si en 81se produce ruido, seleccione 8i.
Si el patr6n de prueba se muestra correctamente, seleccione No.
• 8i: Puede haber un problema en el televisor. P6ngase en contacto con el Centro de
Ilamadas de Samsung.
• No: Puede haber un problema en el equipo externo. Compruebe las conexiones. Si
persiste el problem& consulte el manual del usuario del dispositivo externo.
Prueba de sonido
Si cree que tiene un problema con el sonido, efectt_e la prueba de sonido. Compruebe el
sonido reproduciendo una melodia en el televisor.
_,Contin_a el problema con esta prueba? se muestra en la pantalla.
Si durante la prueba de sonido s61ose oye sonido de un altavoz o no se oye de
ninguno, seleccione 8i.
Si oye sonido de los altavoces, seleccione No.
• 8i: Puede haber un problema en el televisor. P6ngase en contacto con el Centro de
Ilamadas de Samsung.
• No: Puede haber un problema en el equipo externo. Compruebe las conexiones. Si
persiste el problema, consulte el manual del usuario del dispositivo externo.
Si no oye sonido en los altavoces del televisor, antes de realizar la prueba de sonido, asegQrese de que 8eleccionar altavoz
este configurado como Altavoz de TV en el men_ de sonido.
La melodia se oira durante la prueba aunque 8eleecionar altavoz este establecido como Altavoz externo o se haya
silenciado el sonido con el bot6n AMUTE
Intensidad sepal (Digital)
AA diferencia de los canales anal6gicos, cuya calidad de recepci6n puede variar desde
con nieve hasta nitida, los canales digitales (HDTV) tienen una calidad de recepci6n
nitida o no hay recepci6n. Por ello, a diferencia de los canales anal6gicos, no se puede
realizar una sintonizaci6n fina de un canal digital. Se puede, no obstante, ajustar la
antena para mejorar la recepci6n de los canales digitales disponibles.
Si el medidor de la intensidad de la sei_al indica que _sta es debil, mueva la antena
para aumentar la intensidad de la sei_al. Siga ajustando la antena hasta que
encuentre la mejor posici6n para recibir la sei_al mas fuerte.
Actualizaci6n del software
Samsung puede ofrecer actualizaciones del firmware del televisor en el futuro. Consulte
Samsung.com o p6ngase en contacto con el centro de Ilamadas de Samsung en
1-800-SAMSUNG (726-7864) para recibir informaci6n acerca de la descarga de las
actualizaciones y del uso de un controlador USB. Las actualizaciones se pueden realizar
conectando una unidad USB al puerto USB.
No desconecte la alimentaci6n ni retire la unidad USB mientras se aplican las
actualizaciones. El televisor se apagara y se encendera automaticamente despu_s de
completar la actualizaci6n del firmware.
Cuando se actualiza el software, la configuraci6n del video y audio que se haya
efectuado vuelve a la configuraci6n predeterminada (de fabrica).
Es aconsejable anotar la configuraci6n para que despu6s sea m_s facil restaurarla
tras la actualizaci6n en el modo de suspensi6n.
Guia de cone×ibn HD
Se muestra una breve explicaci6n en Cbmo conseguir el meier
rendimiento del nuevo HDTV,
Siga las instrucciones para obtener el mejor metodo de conexi6n de los
dispositivos de alta definici6n.
C) Contactocon 8amsung
Puede conocer los datos del centro de Ilamadas, la pagina web y obtener
informaci6n de los productos de Samsung.
Puede desplazarse a la pagina anterior o siguiente con los botones
Ao_'.
Unidad
USB
Panel lateral
del TV
SERVICE
,/,i,,
_?,
/_21
i Anynet+
Conexi6n de dispositivos Anynet+
Anynet+ es una funei6n que permite ¢entreiar redes los dispesitives $amsung coneetados compatibles con Anynet+ per
medio del mande a distaneia del televisor $amsung,
El sistema Anynet+ se puede utilizar sblo con los dispesitives Samsung que tengan la funcibn Anynet+. Para asegurarse de
que el dispositive de Samsung tenga dieha funci6n, eempruebe si lleva el legotipo Anynet +,
Para conectar ai televisor
1. Conecte los terminales [HDMI IN 1], [HDMI IN 2(DVl)] o [HDMI IN 3] del televisor y el terminal HDMI OUT del dispositivo
Anynet+ correspondiente mediante un cable HDMI.
Para conectar ai sistema Home Cinema
1. Conecte los terminales [HDMI IN 1], [HDMI IN 2] o [HDMI IN 3] del televisor y el terminal HDMI OUT del dispositivo Anynet+
correspondiente mediante un cable HDMI.
2. Conecte el terminal HDMI IN del sistema Home Cinema y el terminal HDMI OUT del dispositivo Anynet + correspondiente
mediante un cable HDMI.
Televisor
_:
Dispositivo
Anynet+ I
Sistema
H[)f_l OUT
CableHDMI1._
Home Cinema
Dispositivo
Anynet+ 2
Oispositivo
Anynet + 3
DBrr,_A_31OIN HDMI IN
CableHDMI1.3
Cable optico
Conecte un cable 6ptico entre el terminal DIGITALAUDIO OUT (OPTICAL) del televisor y el terminal de entrada de audio digital
del sistema Home Cinema.
Si se sigue la conexi6n anterior, la toma Optical s61oproduce la salida de 2 canales de audio. S61ooira sonido de los altavoces
frontales izquierdo y derecho y del subwoofer del sistema Home Cinema. Para escuchar el canal de audio 5.1, conecte el
terminal DIGITAL AUDIO OUT (OPTICAL) del reproductor de DVD o del decodificador de satelite (dispositivo Anynet 1 o 2)
directamente al amplificador o al sistema Home Cinema, no al televisor.
Conecte s61oun sistema Home Cinema.
Puede conectar un dispositivo Anynet+ mediante el cable HDMI 1.3. Algunos cables HDMI pueden no admitir las funciones
Anynet+.
Anynet+ funciona cuando el dispositivo de AV que admite Anynet + se encuentra en estado de espera o de encendido.
Anynet+ admite hasta 12 dispositivos de AV en total. Tenga en cuenta que puede conectar hasta 3 dispositivos del mismo tipo.
Contin(Ja.. .
Configuraci6n
deAnynet+
Los parametrossiguientesayudana configurarlas funcionesAnynet+.
PUlse eibe_6n TOOL8 Para mostrar el rnen_tNerrarn!entaS:
Tambi6n
puede configurarAnynet + seleccionando Herramientas -_
(HD[v_=CEC}
Para usar la funeionAnynet+,Anynet+(HDMI-CEC)debeestareonfiguradocoma Encendido.
1. Putseel bot6nMENU.Pulselos botonesA o T para seteccionarAplieaeionesy,a continuaci6n,
putseel bot6nENTERS.
2. Putselos botonesA o T para seleccionarAnynet+ (HDMI-CEC),y,a continuaci6n,putseel
bot6nENTERS.
&
Pulselos botonesJ, o T para seleccionarConfiguraeion y,a continuaci6n,pulseel bot6n
ENTER_*L
4. Putseel bot6nENTER_ paraseleccionarAnynet+ (HDMI-CEC).
&
Pulselos botonesJ, o T para seleccionarEncendido y, a continuaci6n,pulseelbot6n
ENTERC,
a.
@ Lafunci6nAnynet+ (HDMI-CEC)esta activada.
@ Si seleccionaApagado, Anynet+ (HDMI-CEC)sedesactiva.
@ Cuandolafunci6nAnynet+ (HDMI.CEC)esta desactivada,todaslas operacionesrelacionadas
con Anynet+ sedesactivan.
Configuracionde urtdispositivoAnynet+ paraque se desaetiveautomatiearnentecuandoel
televisorse apaga
1. Pulselos botonesA o T para seleccionarApagado Automatico, a continuaci6npulseel bot6nENTERC#.
2. Pulselos botonesA o T para seleccionar8i y,a continuaci6n,pulseel bot6nENTER_.
Lafunci6nApagadoAutom_ticose activa.
@ Si seleccionaNo, lafunci6nApagado Autom_tico se cancel&
&
Pulseel bot6nEXITparasalir.
@ Lafuenteactivadel mandoa distanciadel televisorse debeconfigurarpara queeste utiliceta funci6nAnynet+
@ Si estableceApagado Autornatieo comaSi, los dispositivosextemosconectadostambiense desactivancuandoseapagaet televisor.Si un
dispositivoexternotodaviaesta grabando,puedeapagarseo no.
B_squeday cambiodedispositivos
Anynet+
1. Pulseel bot6nTOOLS.
Pulselos botonesJ, o T para seleccionarListaDisp. y,a continuaci6n,pulseel bot6n
ENTERC#.
Se muestrantodoslos dispositivosAnynet+ conectadosaltelevisor.
Si no encuentrael dispositivoquedesea,pulseel bot6nrojopara buscarlos dispositivos.
2. Pulselos botonesA o T para seleccionarun dispositivodeterminadoy pulseel bot6n
ENTERC*J.Se cambiaal dispositivoseleccionado.
$61ocuandoAnynet+ (HDMI-CEC)se configuracoma Encendidoen et menuAplicaeiones,
apareceelmenuListaDisp.
@ El cambioa los dispositivosseleccionadospuedetardar unos2 minutos.No sepuedecancelarla
operaci6nde cambiodedispositivomientrasestase esta efectuando.
@ El tiemponecesariopara la bt_squedadedispositivosdependede la cantidadde dispositivosconectados.
@ Cuandofinalizala bOsquedade dispositivos,nose muestrael nOmerode dispositivosencontrados.
@ Aunqueel televisorexploraautomaticamentelos dispositivoscuandoseenciendecon el bot6nPOWER,losdispositivosconectadoscuando
el televisoryaesta encendidonoaparecenen la listadedispositivos.En talcaso,seleccioneel menuBuscandoConexionesparabuscar los
dispositivos.
@ Si ha seleccionadoel modode entradaexternaputsandoel bot6nSOURCE,no podrausar lafunci6nAnynet+. AsegOresede cambiaral
dispositivoAnynet+ medianteel bot6nTOOLS.
Botones del manda a distanciadel televisordispanibles an el modo Anynet+
Tipo de dispositivo
Dispositivo Anynet+
Despu_s de oamlalar al dlSOOSltlVO.
cuando el menu ae este aparece en
la pantalla.
Despu_s
mlentras
Dispositivo con sintonizador
incorporado
Dispositivo de audio
Botones disponibies
Estado de funoionamiento
de oamDlar al dlSOOSltlVO.
se reloroduoe un aronlvo
Botones numericos
A/T/_I/_"
botones de colores/bot6n EXIT
L_
(BOsquedaarras) / _
L,,_ (Detener)/_
(BOsquedaadetante
(Reproducir)/_
Despu6s ae camDlar al alsoosltwo.
mlentras seve un programa de TV.
L" Botones OH/[ -,'_OH
Cuando e receptor esta act_vado
Botones VOL '+
ENTER_
(Pausa)
IVOL ,-_ I_tMUTE
ContinOa...
Lafunci6nAnynet+ s61ofuncionacuandola fuenteactiva delmandoa distanciadettelevisoresta ajustadaenTV.
Etbot6nE-_-_funcionas61ocuandola grabaci6nes posible.
LosdispositivosAnynet+ nose puedencontrolarcon los botonesdel TV. LosdispositivosAnynet+ s61ose puedencontrolarmedianteelmandoa
distanciadel televisor.
Etmandoa distanciadet televisorpuedeno funcionaren determinadascircunstancias.Enese caso,vuetvaa seleccionaret dispositivoAnynet+.
LosfuncionesAnynet+no funcionancon los productosde otrosfabricantes.
Losfunciones_,
_
puedenvariarsegOnel dispositivo.
@
Men_Anynet+
El menQAnynet+ cambiasegOnel tipo y el estadode los dispositivosAnynet+ conectadosal televisor.
Menu Anynet÷
VerTV
Descripclbn
Cambia de Anynet ÷ al modo de emisi6n de TV.
Lista Disp,
Muestra a lista de dlsDositivos de Anyne_".
Grabando
Comienza una grabaci6n. Este menO s61ofunciona con disuosltlvos que admiten grabaci6n.)
Muestra el menL]del disposluvo conec_aao.
Menu
Ejemplo: Cuando hay un grabador de DVD conectado aparece el ment_ de titulos del grabador de
DVD.
Muestra el menL]de control oe reproducci6n del dlSDOSltlvoconectado.
INFO
Grabacibn con
temporizador
Detener grabaci6n
Receptor
Configuraei6n
Ejemplo: Cuando hay un grauaaor oe DVD conec_aao aDarece e ment_de control de reproducci6n
del grabador de DVD.
Permite reservar una grabaci6n. Este menO s61o funciona en un dispositivo que admita reservas de
grabaci6n.
Detiene la grabaci6n.
La salida de sonido se efectOaa traves del receptor (sistema Home Cinema).
Se pueoe configurar que Anynet + (HDMI-CECt se apague automaticamente asJ como la bt_squeda
de las conexiones para usar Anynet ÷.
Grabando
La grabadorade Samsungpermiteefectuarunagrabaci6nde un programade televisi6n.
1. Pulseel bot6nTOOLS.
2. Pulselos botchesA o T para seieccionarGrabandoinmediatamentey pulseel bot6n
ENTERC#.Comienzala grabaci6n.
Cuando hay m_,sde un dJspositivo de grabaci6n
Cuando hay ratios dispositivos de grabaci6n €onectados, 6stos se muestran en
una lista. Pulse los botones ,i. o _' para seleccionar el dispositivo de grabaci6n
que desee y pulse et bot6n ENTEREd, Comienza !a grabaci6n.
Cuando no se muestra e! dispositivo de grabaci6n
Se!eccione Lista DJSp.y Pulse el bot6n rojo para buscar los dJspositivos
3. Pulseel bot6nEXITparasalir.
Si putsael bot6n.L-'_ segrabaraIo queesta viendoen ese momento.Siesta viendoun videodesde otrodispositivo,segraba elvideo de este.
Antesde grabar,compruebesila tomade antenaesta conectadacorrectamenteal dispositivodegrabaci6n.Paraconectarcorrectamenteuna
antenaa un dispositivode grabaci6n,consulteet manualdel usuariodel dispositivode grabaci6n.
Escucha a trav6s de un receptor (Home Cinema)
Se puedeescucharsonidoa tra%s de un receptoren lugarde hacerlomedianteel altavozdelTV.
1. Pulseel bot6nTOOLS.Pulselos botchesA o T para seleccionarReceptor.
2. Pulselos botches_ o _ para seieccionarEncendJdc.
Ahorapodraescucharel sonidoa trovesdel receptor.
3. Pulseel bot6nEXITparasalir.
Si el receptors61oadmiteaudio,quizasno se muestrelalistade dispositivos.
El receptornofuncionarasi no se ha conectadocorrectamenteelterminalOpticalIN delreceptorcon elterminalOpticalOUTdeltelevisor.
Cuandoel receptor(sistemaHomeCinema)esta activado,se puedeoir la salida desonidodesdeel terminal6pticodel televisor.Cuando
seve latelevisi6na tra%s de un DTV(aereo),el televisorenviael sonidode 5.1 canalesal receptordeisistemaHomeCinema.Cuando
lafuentees un componentedigital, comoun DVD,y esta conectadaal televisora trovesde HDMI,s61oseoye el sonidode 2 canalesdot
receptordelsistemaHomeCinema.
Cuandose escuchaa troves delreceptor,hay restriccionespara el uso de los menOsrelativosal audio (MTS,idiomaspreferidos).
Si hay una interrupci6nen la alimentaci6ndel televisorcon la opci6nReceptorconfiguradaenEncendido(pordesconectarelcablede
alimentaci6no por un foliode corriente),puedeque 8eleccJonarAltavoz este establecidocomoAltavoz externo alvolvera encenderel
televisor.
Soiuci6n de probiemas de Anynet +
8intoma
8oluci6n
Anynet + no funciona,
• Compruebe si el dispositivo es un dispositivo Anynet +. El sistema Anynet + s61oadmite
dispositivos Anynet+.
• Conecte s61oun receptor (sistema Home Cinema).
• Compruebe si el cable de alimentaci6n de Anynet+ esta debidamente conectado.
• Compruebe las conexiones de los cables de Video/Audio/HDMI 1.3 del dispositivo
Anynet +,
• Compruebe si Anynet + (HDMI=CEC)esta establecido como Encendido en el ment_de
configuraci6n de Anynet +.
• Compruebe si el mando a distancia del televisor esta en modo TV.
• Compruebe si es un mando a distancia exclusivo para Anynet +.
• Anynet + no funciona en algunas situaciones. (Bt_squeda de canales, funcionamiento de
Plug & Play, etc.)
• Cuando se conecta o se desconecta el cable HDMI 1.3, se hart de buscar de nuevo los
dispositivos o volver a apagar y encender el televisor.
• Compruebe si la funci6n Anynet + del dispositivo Anynet+ est& activada.
Deseo iniciar Anynet+,
• Compruebe si el dispositivo Anynet+ esta debidamente conectado al TV y si la opci6n
Anynet + (HDMI=CEC)del ment_de configuraci6n esta establecida en Encendido.
• Pulse el bot6n TV del mando a distancia del televisor para cambiar a TV. A continuaci6n
pulse el bot6n TOOLS para visualizar el men0 Anynet + y seleccionar el ment_que desee.
Deseo salir de Anynet+.
• Seleccione Ver TV en el ment_de Anynet +.
• Pulse el bot6n SOURCE del mando a distancia del televisor y seleccione un dispositivo
que no sea Anynet +.
• Pulse OH, OH LIST, PRE-CH y FAV.CH para cambiar al modo TV.
(Tenga en cuenta que el bot6n de canal s61ofunciona cuando no hay ningt_n dispositivo
Anynet + con sintonizador incorporado conectado.)
En la pantalla aparece el mensaje
Conectando al clispositivo
Anynet+ ....
• El mando a distancia no se puede utilizar cuando se esta configurando Anynet + o
cambiando a un modo de visualizaci6n.
Utilice el mando a distancia cuando haya terminado la configuraci6n de Anynet + o el
cambio al modo de visualizaci6n.
El dispositivo Anynet+ no
funciona,
El dispositivo
se visualiza.
conectado no
No se puede usar la funci6n de reproducci6n mientras se efect_a una conexi6n Plug & Play.
• Compruebe si el dispositivo admite las funciones Anynet +.
• Compruebe si el cable HDMI 1.3 esta debidamente conectado.
• Compruebe si Anynet+ (HDMm=CEC)esta establecido como Encendklo en el ment_de
configuraci6n de Anynet +.
• Vuelva a efectuar una b0squeda de dispositivos Anynet +.
• $61o puede conectar un dispositivo Anynet + mediante el cable HDMI 1.3. Algunos cables
HDMI pueden no admitir las funciones Anynet+.
• Si se ha interrumpido por una situaci6n anormal como la desconexi6n del cable HDMI o
el de alimentaci6n o pot un fallo en la corriente el_ctrica, debera repetir la bt_squedadel
dispositivo.
El programa de televisi6n no se
puede grabar.
Compruebe la conexi6n de la toma de antena del dispositivo de grabaci6n.
E! sonido del televisor no sale a
traves del receptor,
Conecte el cable 6ptico entre el televisor y el receptor.
[ Ap ndice
Resoluci6n
]
de problemas
Si cree que el televisor tiene un problema, compruebe primero esta lista de posibles probtemas y soluciones.
8i ninguno de los consejos funciona, pongase en contacto con el centro de atencion al cliente de 8amsung o ilame al
1-800-SAMSUNG,
Problema
Posible solucibn
Mala ¢alidad de imagen.
Intente sintonizar otro canal.
Ajuste la antena.
Compruebe todas las conexiones de cable.
Intente sintonizar otro canal.
Ajuste la antena.
Calidad de sonido deficiente.
No hay imagen ni sonido.
Intente sintonizar otro canal.
Pulse el baton SOURCE.
Compruebe que el televisor este enchufado.
Com_)ruebe las conexiones de la antena.
Compruebe que el bot6n _MUTE est_ desactivado.
No se percibe ning_n sonido,
o muy bajo, con el volumen al
Primero, compruebe el volumen de los aparatos conectados al TV (por ejemplo, un receptor
algital, DVD, receptor de cable, reproductor de video, etc.). A continuaci6n, ajuste el volumen
del TV segt_nsea mas conveniente.
maxImo,
Las imagenes de desplazan
verticatmente.
Compruebe todas las conexiones.
El TV funciona de forma irregular.
El televisor no se enciende
Desenchufe el TV durante 30 segundos e intentelo de nuevo.
El mando a dJstancia funciona real
Sustituya las pilas del mando a distancia.
Limpie el borde superior del mando a distancia (ventana de transmisi6n).
Compruebe los terminales de las pilas.
Pulse el bot6n TV del mando a distancia para ponerlo en el modo TV.
AsegQrese de que el mando a distancia tonga pilas.
Compruebe que los polos "+"y "-" de las pilas esten correctamente colocados.
Probtema en pantalla con la
emisi6n digital.
Compruebe la potencia de la sepal digital y la antena de entrada.
La imagenes demasiado clara o
dernasiado oscura.
Ajuste e brillo y el contraste.
Realice una sintonizaci6n fin&
La imagen es demasiado grande o
demasiado peque_a.
La catidad visual de los canales
digitales puede variar.
Ajuste los parametros de tama_o.
La pantalta est_ en blanco y e!
indicador de
encendido parpadea
constantemente.
En el ordenador, compruebe los cables de serial y de alimentaci6n.
El televisor esta usando su sistema de gesti6n de energia.
Mueva el rat6n del ordenador o pulse cualquier tecla.
Aunque el subtitulo del televisor
muestre HD (Alta definition), la
catidad visual no es satisfactoria,
El subtitulo HD (Alta definici6n) que aparece al cambiar de canal o al pulsar el bot6n INFO
ael mando a distancia significa que el canal seleccionado es un canal digital. Si la emisora
convierte una serial anal6gica en digital y la transmite, es posible que la calidad visual no sea
perfect&
Aparece una imagen distorsionada
en la esquina de la pantalla.
Si la funci6n Ajustar a pantalla esta seleccionada en varios dispositivos externos, puede
a_)arecer una imagen distorsionada en la esquina de la pantalla. Este sintoma se origina en
los dispositivos externos, no en el televisor.
Se oye un ruido extraSo.
La causa es un menor funcionamiento del sistema y no se trata de ningt_n defecto.
Hay pixeles visibles en la pantalla.
Puede que existan unos cuantos pixeles brillantes u oscuros en la pantalla. Estos pixeles no
influiran en el rendimiento del aparato.
Se muestra et mensaje "Resets
all settings to the default values"
("Restabiece todos los valores
predeterminados"),
Aparece cuando el bot6n EXIT se mantiene pulsado durante unos momentos. La
configuraci6n del producto se reinicia con los valores predeterminados.
Compruebe si la toma de pared funciona.
La calidad visual de los canales digitales puede variar segQnel m6todo original de producci6n
(anal6gico o digital).
Si el metodo de producci6n original es digital: Calidad visual alta.
Si el metodo de producci6n original es anal6gico: El programa digital mostrado en la
pantalla es originalmente un programa anal6gico que se ha convertido a digital.
La calidad visual es de grado SD (definici6n estandar).
En el equipo, compruebe (STB, DVD, etc.); el cable de serial y el de alimentaci6n.
El televisor esta usando su sistema de gesti6n de energia.
Pulse el bot6n SOURCE del mando a distancia o del panel.
Encienda y apague el televisor.
Preparaci6n antes de instalar el montaje mural.
Caso A, Instalaci6n del montaje mural SAMSUNG
1,
2,
Caso B, Instalaci6n del montaje mural de otra empresa
Instale el montaje mural con un par de apriete de 15 kgf cm o menos. Tenga en cuenta que las piezas se pueden dar_ar si el par de
apriete es diferente del especificado.
El juego de accesorios incluye soporte y anilla [®] para la instalaci6n en un montaje mural de otra empresa. (Caso B)
Se ha de fijar en el orificio [{1_]cuando instale el montaje mural en la pared•
C6mo montar el soporte base
Utilizandolos tornillos para asegurarel soportey el televisor,fije firmementeeste al
soporte.(Esposible queel exteriordel equiposea diferente delque se muestraen laimagen.)
PN50B530S2F
PN58B530S2F
Advertencia
Sujete firmemente el soporte al televisor antes de moverlo, ya que el soporte puede
caer y causar lesiones graves.
El televisor Io deben transportar dos o mas personas. Nunca deje el televisor
en el suelo ya que la pantalla puede sufrir dafios. Almacene siempre el
televisor en su posici6n vertical•
Uso del soporte
La PDP la deben transportar dos o mas personas. Nunca deje la PDP en el
suelo ya que la pantalla puede sufrir da_os. Mantenga siempre la PDP en
posici6n vertical.
La PDP se puede girar 20 grados a derecha e izquierda.
Cuando instale el televisor en una pared,
fije la tapa (O) al soporte con dos tornillos.
Fijaci6n del televisor
f|_
la
Precauci6n
a la pared
Tirar del televisor, empujar!o o c01garsede 61puede pr0vocar SUcaidal En especial, Procure que tos niSos no Se
cuelguen del televisor ni Io desestabilicen; 6ste podria caerse sobre ellos y causa[tes !esiones graves o incluso
muerte. Siga !as precauciones de seguridad de! folleto de seguridad incluid0 con el p[oducto, Para meJora[ !a
estabilidad instale un dispositivo antivuelco, como se explica a continuaci6n.
Soporte del TV /
TornilloO (M4X16)
;#
Componentes
I
_
Para prevenir la caida del televisor
Asegure el soporte del televisor apretando los tomillos O (M4X 16) en los orifi cios del centro del televisor.
42", 50": Desatomillar el tornillo que se encuentra en la parte posterior de su televisor antes de colocar el Soporte para TV.
Utilice solo los tornillos suministrados.
Apriete fi rmemente los tornillos en la pared o el mueble donde se instala el televisor. Asegure el soporte al televisor y a los
tornillos de la pared o el mueble.
Debe adquirir por separado los tornillos que usara en la pared o el mueble.
Instale el televisor cerca de la pared para evitar que caiga hacia a atras.
Cuando instale el televisor en la pared, asegure el cable nivelado respecto al suelo o inclinado hacia adelante por motivos
de seguridad.
Compruebe regularmente que el cable no se aft oje.
Cuando desee mover el televisor, debe quitar, primero, el cable de conexi6n.
3. Compruebe que todas las conexiones est_n bien aseguradas. Compruebelas peri6dicamente para detectar cualquier signo de
fatiga o de fallo. Si tiene dudas sobre la seguridad de la instalaci6n, p6ngase en contacto con un instalador profesional.
Especificaciones del equipo de montaje en la pared (VESA)
Instale el montaje mural en una pared s61ida,perpendicular al suelo.
Para colocarlo en otros materiales de construcci6n, p6ngase en contacto con el distribuidor mas cercano.
Si se instala en el techo o en una pared inclinada, puede caerse y causar graves lesiones personales.
B
Faml!!a de producto
Pulgadas
(A'B)
T°rm!lO estandar
19" ~22"
100 * 100
23"~29"
200 * 100
30"~40`'
200 * 200
46"~55 ''
400 * 400
57"~70"
800 * 400
80" ~
1400 * 800
42"~ 50"
400 * 400
58''~ 63"
600 * 400
Cant=dad
M4
M6
LCD-TV
4
PDP-TV
M8
M8
70" ~
800 * 400
80" ~
1400 * 800
Las dimensiones estandar de los equipos de montaje mural se muestran en la tabla.
AI adquirir el equipo de montaje mural, se proporciona un manual de instalaci6n detallado y todas las piezas necesarias para el
montaje.
No use tornillos con un tamai_o superior al estandar, ya que pueden causar da_os en el interior del televisor.
Para montajes murales que no cumplen las especificaciones de tornillos estandar VESA, la Iongitud de _stos puede variar
dependiendo de las especificaciones.
No use tornillos que no cumplan las especificaciones de tornillos estandar VESA.
No apriete excesivamente los tornillos, ya que podria da_ar el producto o provocar la caida de _ste con riesgo de causar lesiones
personales. Samsung no se hace responsable de este tipo de accidentes.
Samsung no se hace responsable de da_os o lesiones personales cuando se usa un montaje mural que no es VESA o que no
cumple las especificaciones, o si el cliente no sigue las instrucciones de instalaci6n de] producto.
Nuestros modelos de 57" y 63" no son compatibles con las especificaciones VESA. Por ello, debe usar un equipo de montaje mural
exclusivo para este modelo.
No supere los 15 grados de inclinaci6n cuando monte este televisor.
I
No podria
instale producir
el equipouna
de descarga
montaje mural
mientras
el televisor
esta encendido.
Se
el_ctrica
con riesgo
de causar
lesiones personales.
Especificaciones
TamaSo de panta!!a (diagonal)
50 pulgadas (49.9 pulgadas medidas
diagonalmente)
ReS0iuci6n
dePC
1920
x1080
¢ 80Hz
58 pulgadas (58,0 pulgadas medidas
diagonalmente)
1920
x1080
¢ 80.z
i
$onido (satida)
10Wx2
15Wx2
Con el soP0rte
48.4 x 30.3 x 2,8 pulgadas
(1230,3 x 789,8 x 73 ram)
48.4 x 32.3 x 11.4 pulgadas
(1230.3 x 821.5 x 290 mm)
55.4 x 34.2 x 2.8 pulgadas
(1407,7 x 870 x 73 mm)
55,4 x 36,4 x 13,1 pulgadas
(1407,7 x 927 x 335 mm)
Cuerpo Principal
Con el soporte
72.3 Ibs ( 32.8 kg)
83.5 Ibs (37.9 kg)
84.8 Ibs (38.5 kg)
100.3 Ibs (45.5 kg)
50 °F to 104 °F (10 °C to 40 °C)
10% to 80%, sin condensaci6n
-4 °F to 113 °F (-20 °C to 45 °C)
5% to 95%, sin condensaci6n
50 °F to 104 °F (10 °C to 40 °C)
10% to 80%, sin condensaci6n
-4 °F to 113 °F (-20 °C to 45 °C)
5% to 95%, sin condensaci6n
oimensiones
(An:x A!:X Pr.)
Cuerpo principaI
rnedioarnbientales
Temperatura de funcionamient0
Humedad de funcionamiento
Temperatura de atmacenamiento
Humedad de almacenamiento
@ Este dispositivo es un aparato digital de la Clase B.
@ El dise_o y las especificaciones pueden cambiar sin previo aviso.
@ Para conocer la fuente de alimentaci6n y el consumo de energia, consulte la etiqueta adherida al producto.
@ Cuando se usa una conexi6n de cable HDMI/DVI, se debe conectar en el terminal HDMI IN 2(DVI).
Dimensiones (PNSOB530S2F)
48.8
48,7
32,3
24,8
Y
_,
.................................................................
i:_
:i..................................................................
VtSTASUPERIOR
VISTAFRONTAL
[® @lei@ @
@
DETALLE DEL PANEL DE TERMINALES 7:2X &7 pulgadas
T
lS.7
VISTA LATERAL
NOTA:
No todos
Algunas
mueble
las
estan
dimensiones
para el televisor
los errores
@ 2009
los dibujos
dimensiones
Consulte
tipograficos
Samsu_g
estan
necesadamente
sujetas
de cada
a cambio
unidad
La empresa
Amenca,
a escala
previo
Jnc
avlso
de adaptar
no se responsabiliza
o de impresi6n
Electronics
sin
antes
el
de
Dimensiones (PN58B530S2F)
,
J
:
_
3,
36.6
VISTA SUPERIOR
VISTA FRONTAL
b
DETALLE DEL PANEL DE TERMINALE8 7,2 X3,7 puigadas
<-
2.9.
T
IS.7
f
VISTA LATERAL
!
VISTA POSTERIOR
NOTA:
No todos
Algunas
mueble
1as dime_siones
para eJ televisor
los errores
@ 2009
los dibujos
dime_siol_es
ConsuIte
tipograficos
Samsung
estan
estan
sujetas
de cada
necesadamente
a cambio
unidad
La empresa
America,
Inc
aviso
de adaptar
no se responsabiliza
o de impresi6n
Electronics
a escaEa
sin prevlo
antes
el
de