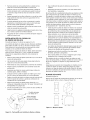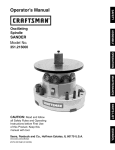
1
Operator's
Manual
CRRFT$14RN
13"
PLANER/MOLDER
Model No.
351.21 7330
CAUTION: Read and follow
all Safety Rules and Operating
Instructions before First Use
of this Product.
Sears, Roebuck and Co., Hoffman
www.sears.com/craftsman
17509.02 Draft (08/31/01 )
Estates, IL 60179 U.S.A.
PREPARE
Warranty
....................................
SafetyRules...............................
Unpacking..................................
Assembly.................................
Installation
.................................
Operation................................
Maintenance
.............................
Troubleshooting
.............................
PartsIllustration
andList ...................
Espa_ol.................................
2
2-3
3
3-4
4-5
5-13
13-14
15
16-21
23-36
Keep work area clean. Cluttered work areas invite
accidents.
•
Do not use power tools in dangerous environments.
Do not use power tools in damp or wet locations. Do
not expose power tools to rain.
•
Work area should be properly lighted.
•
Proper electrical receptacle should be available for
tool. Three prong plug should be plugged directly
into properly grounded, three-prong receptacle.
•
Extension cords should have a grounding prong and
the three wires of the extension cord should be of
the correct gauge.
•
Keep visitors at a safe distance from work area.
•
Keep children out of workplace. Make workshop childproof. Use padlocks, master switches or remove switch
keys to prevent any unintentional use of power tools.
TOOL SHOULD
If this product is used for commercial or rental purposes,
this warranty will apply for 90 days from the date of
purchase.
This warranty applies only while this product is used in
the United States.
This warranty gives you specific legal rights and you may
also have other rights which vary from state to state.
Sears, Roebuck and Co., Dept. 817WA, Hoffman
Estates, IL 60179
BE MAINTAINED
•
Always unplug tool prior to inspection.
•
Consult manual for specific maintaining and adjusting procedures.
•
Keep tool lubricated and clean for safest operation.
•
Remove adjusting tools. Form habit of checking to
see that adjusting tools are removed before switching machine on.
•
Keep all parts in working order. Check to determine
that the guard or other parts will operate properly
and perform their intended function.
•
Check for damaged parts. Check for alignment of
moving parts, binding, breakage, mounting and any
other condition that may affect a tool's operation.
•
A guard or other part that is damaged should be
properly repaired or replaced. Do not perform
makeshift repairs. (Use parts list provided to order
replacement parts.)
WARNING:
For your own safety, read all of the
instructions and precautions before operating tool.
KNOW HOW TO USE TOOL
CAUTION: Always follow proper operating procedures
as defined in this manual even if you are familiar with
use of this or similar tools. Remember that being careless for even a fraction of a second can result in severe
personal injury.
BE PREPARED
AREA FOR JOB
•
FULL ONE YEAR WARRANTY
If this product fails due to a defect in material or workmanship within one year from the date of purchase,
Sears will at its option repair or replace it free of
charge. Contact your nearest Sears Service Center
(1-800-4-MY-HOME) to arrange for product repair, or
return this product to place of purchase for replacement.
WORK
•
Use right tool for job. Do not force tool or attachment
to do a job for which it was not designed.
•
Disconnect tool when changing blades.
•
Avoid accidental start-up. Make sure that the switch
is in the "off" position before plugging in.
•
Do not force tool. It will work most efficiently at the
rate for which it was designed.
•
Keep hands away from moving parts and cutting
surfaces.
FOR JOB
•
Wear proper apparel. Do not wear loose clothing,
gloves, neckties, rings, bracelets or other jewelry
which may get caught in moving parts of machine.
•
Wear protective hair covering to contain long hair.
•
Wear safety shoes with non-slip soles.
•
•
Wear safety glasses complying with United States
ANSI Z87.1. Everyday glasses have only impact
resistant lenses. They are NOT safety glasses.
Never leave tool running unattended. Turn the power
off and do not leave tool until it comes to a complete
stop.
•
Do not overreach. Keep proper footing and balance.
•
Wear face mask or dust mask if operation is dusty.
•
•
Be alert and think clearly. Never operate power tools
when tired, intoxicated or when taking medications
that cause drowsiness.
Never stand on tool. Serious injury could occur if tool is
tipped or if blade is unintentionally contacted.
•
Know your tool. Learn the tool's operation, application and specific limitations.
© Sears, Roebuck and Co.
2
•
Use recommended accessories (refer to page 21).
Use of improper accessories may cause risk of
injury to persons.
REMOVE
CAPS
The planer/molder is shipped with caps on the threaded
shafts to avoid damage to shafts during shipping and
handling.
•
Handle workpiece correctly. Protect hands from possible injury.
•
Unscrew and remove caps before turning the tool on.
•
Turn machine off if it jams. Blade or bit jams when it
digs too deeply into workpiece. (Motor force keeps it
stuck in the work.)
•
Save caps for future use.
Always keep drive, cutterhead and blade guards in
place and in proper operating condition.
•
•
•
INSTALL
HANDWHEEL
ASSEMBLY
Slide handwheel onto crank lead screw so that the
spring pin on the crank lead screw is positioned
between the groove in the handwheel.
Feed work into blade or cutter against direction of
rotation.
Handle Assembly............._
CAUTION: Think safety! Safety is a combination of
operator common sense and alertness at all times
when tool is being used.
OapQ
WARNING:
Do not attempt to operate tool until it is
completely assembled according to the instructions.
Refer to Figure 1.
Check for shipping damage. If damage has occurred, a
claim must be filed with carrier. Check for completeness. Immediately report missing parts to dealer.
The planer/molder comes assembled as one unit.
Additional parts which need to be fastened to planer
should be located and accounted for before assembling
or operating planer/molder.
A. Handwheel Assembly
B. Bit Setting Gauge
C. Blade Height Gauge
D. T-wrench
E. Brass Punch
E Open End Wrench
G. Allen Wrench
F
Reset
Figure 2 - Assembly
MOUNT
Lifting Bars
PLANER TO WORK
Refer to Figures 2 and 3.
•
__A
Planer is designed to be portable so it can be moved
to job site, but should be mountable to stable, level
bench or table. See Recommended Accessories,
page 21.
MOUNTING INSTRUCTIONS
OPTIONAL
G
E _"
%_
/
SURFACE
FOR
TOOL STAND 222240
The Craftsman Planer/Molder Model 217330 can be
mounted directly on to Craftsman Multi-purpose Tool
Stand Model 222240. To mount Planer/Molder to stand:
•
Place the Planer/Molder on stand top.
CAUTION: Planer/Molder weighs approximately 140
Ibs. Two people may be required to lift Planer/Molder.
Use lifting bars (see Figure 2).
•
Figure 1 - Unpacking
[3
Refer to Figure 2.
The planer/molder is shipped assembled except for the
handwheel assembly.
Position the Planer/Molder on stand top as shown in
Figure 3. Make sure that the four threaded holes on
the Planer/Molder base casting are aligned with four
slots as shown in Figure 3, page 4.
Properly Grounded Outlet
Grounding Prong
3-Prong
Figure 4 - 3-Prong Receptacle
•
Do not remove or alter grounding prong in any manner. In the event of a malfunction or breakdown,
grounding provides a path of least resistance for
electrical shock.
WARNING:
Do not permit fingers to touch the terminals of plug when installing or removing from outlet.
•
Plug must be plugged into matching outlet that is
properly installed and grounded in accordance with
all local codes and ordinances. Do not modify plug
provided. If it will not fit in outlet, have proper outlet
installed by a qualified electrician.
•
Inspect tool cords periodically, and if damaged, have
repaired by an authorized service facility.
•
Green (or green and yellow) conductor in cord is the
grounding wire. If repair or replacement of the electric cord or plug is necessary, do not connect the
green (or green and yellow) wire to a live terminal.
•
Where a 2-prong wall receptacle is encountered, it
must be replaced with a properly grounded 3-prong
receptacle installed in accordance with National
Electric Code and local codes and ordinances.
Figure 3 - Mount Planer/Molder to Optional Multi-Purpose
Tool Stand Model No. 222240
•
•
Planer/Molder is supplied with four 8-1.25 x 25mm
bolts with washers for mounting to stand. Fasten the
four bolts with washers from underneath the stand
top into the Planer/Molder base casting.
Tighten all four bolts and make sure Planer/Molder is
securely mounted to stand.
POWER
SOURCE
WARNING:
Do not connect planer/molder to the power
source until all assembly steps have been completed.
WARNING: This work should be performed by a qualified electrician.
The motor is designed for operation on the voltage and
frequency specified. Normal loads will be handled safely on voltages not more than 10% above or below specified voltage. Running the unit on voltages which are not
within range may cause overheating and motor burnout. Heavy loads require that voltage at motor terminals
be no less than the voltage specified on nameplate.
•
A temporary 3-prong to 2-prong grounding adapter (see
Figure 5) is available for connecting plugs to a two pole
outlet if it is properly grounded.
Make Sure
Grounding Lug_
_
This Is
Adapter _"_._
Power supply to the motor is controlled by a rocker
switch. Removing the rocker switch key will lock the
unit and prevent unauthorized use.
GROUNDING
3-Pron
INSTRUCTIONS
Check with a qualified electrician if grounding
instructions are not understood or if in doubt as to
whether the tool is properly grounded.
•
This tool is equipped with an approved cord rated at
150V and a 3-prong grounding type plug (see Figure
4) for your protection against shock hazards.
•
Grounding plug should be plugged directly into a
properly installed and grounded 3-prong groundingtype receptacle, as shown (see Figure 4).
.
.
TOGroundA
Known
2-Prong Receptacle
WARNING:
Improper connection of equipment
grounding conductor can result in the risk of electrical
shock. Equipment should be grounded while in use to
protect operator from electrical shock.
•
Connected
Figure 5 - 2-Prong Receptacle with Adapter
•
Do not use a 3-prong to 2-prong grounding adapter
unless permitted by local and national codes and
ordinances. (A 3-prong to 2-prong grounding adapter
is not permitted in Canada.)
Where a 3-prong to 2-prong grounding adapter is permitted, the rigid green tab or terminal on the side of the
adapter must be securely connected to a permanent
electrical ground such as a properly grounded water
pipe, a properly grounded outlet box or a properly
grounded wire system.
4
•
Many cover plate screws, water pipes and outlet
boxes are not properly grounded. To ensure proper
ground, grounding means must be tested by a qualified electrician.
EXTENSION
CORDS
Refer to Figures 7 - 25.
•
The use of any extension cord will cause some drop
in voltage and loss of power.
•
Wires of the extension cord must be of sufficient size
to carry the current and maintain adequate voltage.
The minimum extension cord wire size is A.W.G.14.
Do not use extension cords over 25 ft. long.
•
•
Use only 3-wire extension cords having 3-prong
grounding type plugs and 3-pole receptacles which
accept the tool plug.
•
If the extension cord is worn, cut or damaged in any
way, replace it immediately.
MOTOR
The 13" planer/molder is supplied with a 2Y2 HP motor
and wiring installed.
The 110 Volt AC universal motor has the following
specifications:
Horsepower (Maximum Developed) .............
2Y2
Voltage ...................................
110
Amperes ...................................
Hertz .....................................
Phase ..................................
RPM ....................................
ELECTRICAL
If the breaker is tripped, turn the planer/molder "off" and
reset the circuit by pressing the button.
15
60
Single
5000
CONNECTIONS
DESCRIPTION
Sears 13" planer/molder finishes rough-cut lumber to
size and planes soft and hardwoods up to 6" thick and
13" wide. Produces decorative designs including furniture moldings, baseboards, casings, picture frames,
tongue and groove, glue joints, rabetting and much
more. Wood feeds into three-blade cutterhead by
adjustable rubber in-feed/out-feed rollers. Large 13"x
19" cast iron table has precision ground steel columns
for smooth feeding of the workpiece and reducing vibration. Motor has overload protection and is enclosed in
the base of the machine, away from wood chips and
dust. The gearbox offers two speeds: 20 ft/min, for fast
planing, and 10 ft/min for smooth finish molding. The
tool comes with anti-kickback mechanism for added
safety, and built-in carrying handles.
OPERATION
SAFETY
RULES
WARNING:
Operation of any power tool can result in
foreign objects being thrown into eyes which can result
in severe eye damage. Always wear safety goggles
complying with United States ANSI Z87.1 (shown on
package) before commencing power tool operation.
CAUTION:
cautions:
Always observe the following safety pre-
•
Know general power tool safety. Make sure all precautions are understood (see pages 2, 3 and 5).
•
Whenever adjusting or replacing any parts on
planer/molder, turn switch off and remove plug from
power source.
The motor is assembled with an approved three conductor cord to be used on 110 volts as indicated. The
•
power supply to the motor is controlled by a double
pole locking rocker switch.
Make sure all guards are properly attached and
securely fastened.
•
Make sure all moving parts are free from interference.
•
Always wear eye protection or face shield.
•
Make sure blades are aligned and properly attached
to cutterhead.
•
Do not plug in planer/molder unless switch is in "off"
position. After turning switch on, allow planer/molder
to come to full speed before operating.
•
Do not attempt to perform an abnormal or little used
operation without study and the use of adequate jigs,
fixtures and the like.
•
Keep hands clear of all moving parts.
•
Do not force cut. Slowing or stalling will overheat
motor. Allow automatic feed to function properly.
•
Use quality lumber. Blades last longer and cuts are
smoother with good quality wood.
•
Do not plane material shorter than 15", narrower
than 3A", wider than 13" or thinner than 1/2".
•
Never make planing cut deeper than %2".
WARNING:
Make sure unit is off and disconnected
from power source before inspecting any wiring.
The motor is installed and wiring connected as illustrated in the wiring schematic (see Figure 6).
The power lines are inserted directly onto the switch.
The green ground line must remain securely fastened
to the frame to properly protect against electrical shock.
Switch
Circuit_Breaker --__
To Motor
E
Figure 6 - Wiring Schematic
•
Removing the rocker switch key will lock the unit and
prevent unauthorized use.
A manual reset overload protector is installed in line
with the power supply to the motor. If the planer/molder
is overloaded, the protector will break the circuit.
• Maintaintheproperrelationships
ofinfeedandoutfeedtablesurfacesandcutterhead
bladepath.
• Donotbacktheworktowardtheinfeedtable.
• Takeprecautions
againstkickback.
Donotpermit
anyoneto standor crossin lineofcutterhead's
rotation.Kickback
or throwndebriswilltravelin this
direction.
• Turnswitchoffanddisconnect
powerwhenever
planer/molder
is notin use.
• Replaceor sharpenbladesas theybecomedamagedor dull.
• Keepplaner/molder
maintained.
Followmaintenance
instructions
(seepage13).
Make a test cut on a piece of wood and measure the
thickness produced.
_,.-Up
Down_
Scale
DEPTH OF CUT
•
•
•
•
•
Thickness planing refers to the sizing of lumber to a
desired thickness while creating a level surface parallel to the opposite side of the board.
Figure 7 - Adjusting the Depth of Cut
Quality of thickness planing depends on the operator's judgement about the depth of cut. Depth of cut
depends on the width, hardness, dampness, grain
direction and grain structure of the wood.
Maximum thickness of wood which can be removed
in one pass is %2"for planing operations. For optimum planing performance, the depth of cut should
be less than V,6".During molding operation, do not
exceed '/4" total depth of cut.
Check measurement of test workpiece against measurements on each scale. If measurements are not the same,
then loosen the pan head screw and set the indicator to
show the thickness produced. Make sure that both indicators are positioned correctly.
FEED RATE ADJUSTMENT
Refer to Figures 8 and 9.
•
The planer/molder has a 2-speed gearbox that feeds
the workpiece at 20 feet per minute (standard planing) and at 10 feet per minute (for molding or slow
planing).
Board should be planed with shallow cuts until the
work has a level side. Once level surface has been
created, flip the lumber and create parallel sides.
Plane alternate sides until the desired thickness is
obtained.
Slow planing a workpiece results in a better surface
finish than that obtained by planing at the higher
speed.
When half of total depth of cut is taken from each
side, the board will have a uniform moisture content
and additional drying will not cause it to warp.
•
Depth of cut should be shallower when work is wider.
•
When planing hardwood, take light cuts or plane the
wood in thin widths.
•
Make test cut when working with a new type of
board or different kind of operation.
•
Check accuracy of test cut prior to working on finished product.
•
The handle for adjusting the feed rate is located on
the left side of the planer/molder (see Figure 8).
/
ADJUSTING THE DEPTH OF CUT
Refer to Figure 7.
Board thickness which the planer/molder will produce is
indicated by either scale on the side.
Thickness is adjusted by rotating the handwheel clockwise to raise the table.
To lower the table height, rotate the handwheel counterclockwise.
•
Do not set blade below %2". Do not plane a board
which is less than W' thick.
•
Table height will be moved '_6" with every complete
revolution of the handwheel.
Figure 8 - Adjusting the Feed Rate
NOTE: Only change feed rate while the machine is
running.
•
6
There are three positions that the feed rate can be
set: 20 feet/minute, 0 feet/minute (neutral) and
10 feet/minute (see Figure 9).
10 FPM
0 FPM
20 FPM
•
Do not grasp any portion of board which has not
gone past out-feed roller.
•
Repeat this operation on all boards which need to be
same thickness.
AVOIDING
Surface that the planer/molder will produce will be
smoother if shallower depth of cut is used. Snipe refers
to a depression at either end of board caused by an
uneven force on cutterhead when work is entering or
leaving planer. Snipe will occur when boards are not
supported properly or when only one feed roller is in
contact with work at beginning or end of cut. To avoid
snipe:
•
Gently push the board up while feeding the work
until the outfeed roller starts advancing it.
•
Move to the rear and receive planed board by gently
pushing it up when the infeed roller loses contact
with the board.
•
When planing more than one board of the same
thickness, butt boards together to avoid snipe.
Figure 9 - Feedrate Positions
WOOD GRAIN
For an improved surface finish with minimal tear out,
always plane or mold the workpiece with the grain. The
workpiece should be fed into the planer/molder so that
the blades or bits are traveling with the grain as the cutters finish the cut. The grain should be angled up
toward the rear of the workpiece as it is fed into the
planer/molder.
PLANING
WARNING:
Always turn the planer/molder off and
disconnect it from the power source whenever blade
cover is removed. Never operate planer/molder without
the blade cover properly secured.
The planer/molder is supplied with planing blades mounted in the cutterhead and the infeed and outfeed rollers
adjusted to the correct height. The planer/molder is capable of working at two different feed rates. Feed rate refers
to rate at which lumber travels through planer/molder.
Planing can be done at 10 FPM for an improved surface
finish or 20 FPM for faster planing (see Feed Rate
Adjustment).
•
Adjust the table height to produce the depth of cut
desired.
•
Stand to side which the handwheel is attached.
•
Lift edge to infeed side of the table by grasping
edges of board at approximately middle of length.
•
Boards longer than 24" should have additional support from free standing material stands.
•
Position the workpiece with the face to be planed on
top.
•
Gently slide the workpiece into the infeed side of the
planer/molder until the infeed roller begins to
advance the workpiece.
•
Let go of the workpiece and allow automatic feed to
advance the workpiece.
•
Do not push/pull on workpiece.
•
Move to the rear and receive planed lumber by
grasping it in same manner as it was fed.
CAUTION: Do not stand directly in line with front or
rear of planer/molder.
SNIPE
BLADE
HEIGHT
ADJUSTMENT
Refer to Figures 10-14 and 28, pages 7, 8 and 18.
WARNING:
Disconnect planer/molder from the power
source and turn the planer/molder OFF before attempting to adjust or replace the cutting bits or blades, or performing any adjustment or maintenance to the
planer/molder.
A blade height gauge is provided for use when replacing or adjusting the planing blades (Key No. 2).
•
Unplug the planer/molder and turn it OFE
•
Remove the blade cover (Key No. 8)
•
Loosen all the set screws (Key No. 41) on all of the
gibs (Key Nos. 40 and 42) in all 3 cutterhead slots.
Figure 10 - Loosen all Gib Set Screws
•
Using the brass punch, tap all the gibs down into the
cutterhead slot.
•
Make sure the gibs are loose and can be moved.
Adjust both ends of all three blades in a similar manner until all of the blades are at the same height.
Tighten the gibs slowly, moving from one cutterhead
slot to the next, until all three blades and all gibs are
tight and secure.
Figure 11 - Loosen all Gibs using Brass Punch
•
Remove the old blades, all gibs and spacers (Key
No. 43).
•
Make sure the cutterhead slots and gibs are clean.
•
Install the new planer blades and replace gibs and
spacers.
•
Tighten the gib set screws only enough to hold the
gibs and blades in position.
NOTE: The blades may creep up as the gibs are tightened. Lightly tap on blades with a piece of hardwood to
position blades against jack screws if needed.
•
Make sure there is no gap between the gibs, and the
spacers are in place.
POSITION
Figure 14 - Raising the Blade byTurning the Jack Screws
THE CHIP BREAKER
Refer to Figure 15 and 28, pages 8 and 18.
The chip breaker (Key No. 19) is used to help remove
wood chips from the cutter bits and blades while planing or molding. Adjust the chip breaker every time the
cutting tools are changed or adjusted.
The chip breaker should be positioned as close to the
cutterhead as possible without contacting the cutter bits
or blades. Remove the blade cover. Loosen the three
Figure 12 - Using the gaugq
socket head bolts that hold the chip breaker and position
it as close to the cutterhead as possible, rotate the cutterhead by hand to ensure that there is no interference
with the chip breaker. Secure the chip breaker by tightening the three socket head bolts. Replace and secure
blade cover.
©
height
Blade Cover
Wing Nut
Blade Height Gauge
Chip
Breaker
Jack Screw
Blade
Le(
Chip
Deflector
Plate
Gib
Set Screw
Figure 13 - Blade Height Gauge
Place the blade height gauge on one end of the
blade and adjust the jack screw until the blade just
contacts the tab in the middle of the gauge (see
Figures 12 and 13).
Figure 15 - Positioning the Chip Breaker
8
Socket
Head
Bolts
MOLDING
Bit Setting Gauge
Molding, also known as millwork or trim, can be defined
as a strip of wood milled with a plain or decorative surface which is continuous throughout its length.
•
To get superior molding finish, workpiece must be
planed and presized prior to molding. Always presize
the workpiece to within '_6" of the final thickness
prior to molding.
•
During molding operation, do not exceed 1/4"total
depth of cut.
Bolt
Spacers
Certain molding profiles require outer edge clean-up.
When using such profiles the workpiece must be presized to 1/8"larger than the final width. This will allow 1_6,,
for clean-up on either side.
Certain molding profiles cut only the edge of the workpiece. When using such profiles workpiece must be
presized to the same width as the final width.
INSTALLING
CUTTER
BITS
Refer to Figures 15, 16, 17 and 28, pages 8, 9 and 18.
NOTE: The cutter bits are mounted in the center of the
cutterhead (Key No. 47) using the 2" bit gibs (Key No.
42) provided. The cutter bits and the planing blades
(Key No. 44) are mounted in the cutterhead at the same
time so that planing and molding operations can be
done with the same set-up.
The bit setting gauge (see Figure 16) is used when
mounting three piece molding bits in the planer/molder
cutterhead. The gauge aligns the bits in the cutterhead
so that all three bits cut the workpiece in the same position providing precise cuts and improved surface finish.
•
Turn the planer/molder off and unplug the
planer/molder from the power source.
•
Remove the blade cover and chip deflector (Key
Nos. 8 and 15).
•
Using the 5mm socket head bolt (Key No. 9) used to
mount the blade cover, mount the bit setting gauge
to the top of the planer/molder as shown in Figure 16.
•
Position the bit setting gauge so that the molding bits
are positioned in cutterhead as required. Tighten the
5mm socket head bolt.
•
Loosen two set screws (Key No. 41) on the 2" bit gib
(Key No. 42) located in the center of the cutterhead.
•
Tap until the gib is loose and can be moved.
•
Remove the 1" spacers (Key No. 43) as needed.
•
Be sure the cutterhead slot and gibs are clean and
free of any dirt, grease, chips or burrs.
•
Place the cutter bits in the cutterhead slot in place of
the spacers.
Insert the first cutter bit to be mounted between the
bit gib and planer blade.
•
Slide the cutter bit against edge of the cutter bit
setting gauge and tighten the cutter bit/bit gib
combination in the cutterhead.
,_
Figure 16 - Using the Bit Setting Gauge to Install Cutter Bits
•
To mount more than one cutter bit in each cutterhead slot, for example, tongue and groove cutter bits
(23302), additional set of three bit gibs is required.
Use replacement parts list, page 19, Key No. 42 to
order.
•
Remove one or both cutterhead gibs (Key No. 40) as
needed after loosening the set screws (Key No. 41)
and tapping gibs down.
•
Place the bit gib in the cutterhead slot at the desired
position.
•
Insert the cutter bit between the bit gib and planer
blade, and tighten cutter bit/bit gib combination.
•
Rotate the cutterhead and mount the remaining cutter bits using the bit setting gauge to align bits.
•
Be sure all bits and gibs are tight and secure.
•
Remove the bit setting gauge and replace the blade
cover and chip deflector. Check that chip deflector
plate does not interfere with bits (see Figure 15). If
necessary, adjust plate using wing nuts.
WARNING:
Never operate planer/molder without blade
cover and chip deflector properly mounted.
CAUTION: In order to prevent damage to cutterhead,
caution must be exercised when mounting gibs in the
cutterhead slots.
13" Planing Blade
Use the brass punch provided to gently tap the gib
down into the cutterhead slot.
•
•
Cutter Bit
_-_
Cutter Bit
Gib
Figure 17 - Cutterhead with Cutting Bits
•
Always tighten the gibs gradually and tighten the
three gibs in the cutterhead slot at the same time.
• Mountthegibin onecutterhead
slotandtightenthe
setscrewsonlyenoughto holdthegibin position,
thenmounttheothertwogibsin thesamemanner.
• Tightenthesetscrewson onegibslightly,thentightentheothertwogibswithequalpressureontheset
screws.
• Continue
totightenthethreegibswithsmallamounts
ofaddedpressure,
movingfromonegibtothenext,
untilallthreegibsaretightandsecure.
• Repeatthesameprocedure
formountingthegibsin
theothertwocutterhead
slots.
• Operatetheplaner/molder
forfiveminutesand
retightenallsetscrews.
• Makesureto recheckthesetscrewsaftereverytwo
hoursofuse.
•
Use the bit setting gauge to align knives.
•
Be sure all knives and gibs are aligned, tight and
secure.
•
Install the first pattern knife in the cutterhead slot
with the proper gib and tighten the knife/gib combination. Rotate cutterhead. Use bit setting gauge and
install the two remaining pattern knives, one in each
cutterhead slot.
INSTALLING
•
Install the first back relief knife in the cutterhead slot
with the bit gib and 1" spacers. Tighten the knife/bit
gib combination. Rotate cutterhead. Use bit setting
gauge and install the two remaining back relief
knives, one in each cutterhead slot.
The feed rollers must be lowered after the back relief
THE PATTERN
KNIVES
The planer/molder cutterhead will accept multiple pattern knife set-ups at one time. For example, a pattern
knife and its relief knives can be mounted at the same
time so that the relief and the molding can be done with
one gib set-up. To mount pattern knife, the gib supplied
with the pattern knife must be used. To mount back
relief knife, the bit gib and 1" spacers (Key Nos. 42 and
43) must be used.
Refer to Figures 18 and 28, pages 10 and 18.
The steel pattern knives, Sears Model Numbers 23331
through 23341, are 1A"thick, and are supplied with gibs.
Use only gibs supplied with pattern knives for mounting
on the cutterhead.
•
cut for molding operation. See "Feed Roller Adjustment" below.
To install pattern knives, all gibs (Key Nos. 40 and 42),
planing blades (Key No. 44), spacers (Key No. 43) and
cutter bits, must be removed.
•
•
Loosen all six set screws (Key No. 41) in one cutterhead slot.
Use the brass punch to tap all the gibs down into the
cutterhead slot.
•
Remove all gibs, spacers and cutter bits.
•
Repeat the same procedure with the other cutterhead slots.
•
Be sure all slots are clean and free of any dirt,
grease, chips or burrs.
•
Position the first pattern knife to be mounted in the
cutterhead slot with the proper gib.
•
Slide the pattern knife against edge of the bit setting
gauge and tighten the knife/gib combination in the
cutterhead.
•
Loosen three socket head bolts (Key No. 17) and
position chip breaker (Key No. 19) (see "Position The
Chip breaker", page 8).
•
Rotate the cutterhead by hand and mount the two
remaining pattern knives.
¼" Pattern Knife
•
Make sure all knives and gibs are aligned, tight and
secure.
•
Turn the cutterhead by hand and make sure there is
no interference with the knife path.
To install more than one pattern knife in each cutterhead slot, for example, crown and bed knives or tongue
and groove knives, an additional set of three gibs is
required.
Make sure the chip breaker position does not interfere
with any pattern knives. Be sure to replace the blade
cover (Key No. 8) properly after removing the bit setting
gauge. Replace the chip deflector (Key No. 15).
ADJUSTMENT
BLOCK
Refer to Figure 19.
Some of the maintenance adjustments require the use
of handmade adjustment blocks (See Figure 19).
_A"
Gibs Supplied with
Pattern Knives
_-
_1' /2",,_
Figure 19- Adjustment Block
Make blocks out of hard wood scrap with the
dimensions shown. Exact dimensions are not critical but
Figure 18 - Cutterhead with Pattern Knives
10
a very smooth, level finish across the top is required.
Three sets of two blocks each are required, with height
H=3", 211/,6
'' and 213/,6
''.
FEED ROLLER
Fiber Hex Nut
(De Not Adjust)
ADJUSTMENT
Refer to Figures 20, 21, and 28, pages 11 and 18.
The planer/molder feed rollers can be raised or lowered
as needed. The infeed and outfeed rollers are set _6"
below the cutterhead (not the blades) at the factory for
planing operation. The infeed and outfeed rollers have
to be set %6"below the cutterhead for molding operation using the pattern knives. Feed rollers must be
adjusted properly for smooth feeding of the workpiece.
NOTE: Never lower infeed and outfeed rollers beyond
%6"lower than the cutterhead. This will cause severe
Threaded
Bushing
(_
/
stress on the gearbox and roller system.
Figure 21 - Adjusting Height of the Feed Roller
To adjust feed roller height for molding:
• Make two 3 x 11/2x 3W' blocks and mark them as
cutterhead blocks.
•
Tighten large hex nut and repeat this process with
the other side of the infeed roller.
•
Make two 21_6 x 11/2x 3W' blocks and mark them as
molding blocks.
Make sure the blocks are made to the mentioned
size.
•
Move molding blocks beneath the outfeed roller and
repeat the process.
•
Make sure that the large hex nuts are tightened after
adjustment.
Turn handwheel and lower the table to allow cutterhead blocks to slide freely between the table and the
cutterhead. Cutterhead may have to be turned by
hand to rotate blade out of the way.
•
Remove the cutterhead blocks and molding blocks
and retain them for future use.
•
•
•
The feed rollers should be raised to their original position when the molding operation is done and at all
times when planing.
Place the 3" portion of cutterhead blocks beneath
the cutterhead, one on each side. Adjust table height
so the cutterhead block just makes contact with the
cutterhead.
To raise rollers to original position:
• Make two 2_ '' x 11/2"x 31/2" blocks and mark them
as planing blocks.
•
Do not raise or lower the table from now on until all
other adjustments are made.
•
Adjust the feed rollers height in the same manner as
for the molding using 21%_'' portion of the blocks.
•
Place the 21_16
'' portion of molding blocks beneath
the infeed roller, one on each side.
•
Retain the blocks after adjustment for future use.
•
Loosen the large hex nuts ( See Figure 20 and
Figure 28, Key No. 25) on both sides of the infeed
roller using the wrench provided.
©
AUXILIARY
TABLE
Some of the cutting bits and pattern knives are designed
to cut all of the way through the workpiece and 'A_"
beyond the workpiece.
This produces a smooth edge and final sioing of the
workpiece. When using these bits or knives, an auxiliary
wood table must be mounted on the cast iron table to
prevent damage to the table and the bits or knives. The
cast iron table is provided with holes to accommodate
an auxiliary table.
L_
Hex Nut
The auxiliary table should be made from smooth 3_,,
particle board (12%" wide and 31 W' long) to provide a
smooth surface for the workpiece to slide on.
NOTE: Auxiliary table is 12" longer than the cast iron
table to allow 6" overhang in the front and rear for long
workpieces.
The particle board must be mounted on the cast iron
table with four 3/8x 1" flat head screws, washers and
nuts (not included). Be sure to countersink the mounting holes on the auxiliary table for the flat head screws.
The screws must be positioned below the surface of the
auxiliary table to prevent damage to the workpiece.
Figure 20 - Loosening the Feed Roller
•
Using the same wrench, turn threaded bushing
(Figure 28, Key No. 27) clockwise until the infeed
roller just makes contact with the block.
11
GUIDE
FENCES
SETTING
When molding, the workpiece must be guided into the
molding cutter bits or knives properly in order to produce the desired shape and size molding. Using properly adjusted guide fences assures the workpiece passes the molding cutters/knives in the same position
using multiple passes.
Guide fences should be made from smooth, straight
hardwood. Guide fences should be the same length as
auxiliary table (311/4") and 2" wide. Cut the guide fences
1/4"lower than the maximum thickness of the final workpiece profile. The guide fences must be notched to
clear the infeed/outfeed rollers and anti-kickback pawls.
See Figure 22 on below for dimension.
To mount guide fences to table/auxiliary table:
•
Install molding cutter bits/knives in the cutterhead.
See "Installing Cutter Bits" and "Installing the Pattern
Knives".
•
Lower the table and carefully turn cutterhead by
hand so that one cutter bit/knife is at the lowest point
of the cutting edge.
•
Position the workpiece beneath the cutter bit/knife.
•
Slide in first guide fence and position inside edge of
guide rail to outside edge of workpiece.
•
Clamp the guide fence to table/auxiliary table using
"C" clamps on both ends.
•
Position second guide fence on the other side of the
workpiece and clamp it to table/auxiliary table.
•
Make sure workpiece slides between guide fences
smoothly and without binding.
91/z
''
_
12W' _._
UP FOR MOLDING
•
Mount auxiliary table onto cast iron table.
•
Install the required molding cutter bits/knives in the
cutterhead.
•
Lower the table and insert the workpiece relative to
the position of cutter bits/knives.
•
Install the guide fences relative to the position of the
workpiece.
•
Raise the table until the workpiece just contacts the
infeed roller.
•
Record the height of the table as indicated on the
scale.
•
•
Lower the table and remove workpiece.
Raise the table back to the recorded measurement.
Continue to raise the table one full turn of the handwheel. Record the measurement -- this is the first
pass measurement.
•
Switch on the planer/molder and insert the workpiece until the feed roller begins to advance the
workpiece.
NOTE: When using certain cutter bits/knives, the
workpiece may feed in a jerky motion. If this happens, turn the handwheel and raise the table until
the workpiece advances smoothly. Revise the first
pass measurement with the current reading.
9W'
•
During molding operation, do not exceed 1/4"total
depth of cut.
•
If your molding requires several passes, make sure
you run all your stock before changing the set-up for
each pass. This will assure conformity of shape
between workpieces.
FACE MOLDING
Refer to Figure 23 below.
NOTE: Always cut the relief first before molding the
workpiece.
I s/8 (Minirnum)_///'/_j///
//,/"_7"/_/_
•
Mount the required cutter bits or pattern knives in
the planer/molder cutterhead. (See "Installing Cutter
Bits or Installing the Pattern Knives", pages 9 and 10.)
•
Position the guide fences on each side of the bits or
knife in the desired position. (See "Guide Fences").
t
"A"will change depending upon thickness of finished workpiece.
Dimension 'W'=Maximum Thickness of Final Workpiece - W'
Figure 22 - Guide Fence (Side View)
RELIEF
KNIVES
Many of the 1/4"pattern knives are supplied with relief
knives. The relief knives are used to cut a relief on the
back side of the molding so that the molding will better
fit irregular surfaces such as plastered walls.
Always cut the relief first before molding the workpiece,
so that there is a flat surface for the workpiece to slide
on during the molding operation. If the molding is done
first, the workpiece will not lie flat on the feed table and
therefore the relief cannot be cut.
Figure 23 - Face Molding
12
EDGE MOLDING
Refer to Figure 24 below.
The workpiece edges can be molded by feeding the
workpiece on edge into the planer/molder.
Guide fences that are %" shorter than the workpiece
must be positioned on the sides of the workpiece. Be
sure the workpiece is supported rigidly on both sides by
the guide fences directly under the cutter bits or knives.
J J
Dust
Chute
l
"
Figure 25 - Dust Collector Chip Chute
OVERLOAD
Refer to Figure 2, page 3.
Figure 24 - Edge Molding
ANTI-KICKBACK
The planer/molder is supplied with an overload protection
circuit breaker to prevent damage to the planer/molder
motor.
PAWLS
The planer/molder is supplied with anti-kickback pawls
that help prevent the cutterhead from kicking back the
workpiece.
CAUTION: Never stand in front of infeed or outfeed
side of planer/molder. Always stand to one side of planer/molder to avoid injury if a kickback of the workpiece
should occur.
DUST COLLECTOR
If the planer/molder stops working during a planing or
molding operation, unplug the planer/molder and turn
the switch OFE Press the reset button next to the
switch to enable the planer/molder to be restarted.
LIFTING
Four lifting bars are provided to make relocation of the
planer/molder easy.
Slide the four handles out of the infeed and outfeed
A dust collector chip chute (not shown) is available as
an optional accessory.
ends of the table and use them to carry the
planer/molder to the desired location.
The dust collector chip chute is mounted to the planer/molder in place of the chip deflector. To mount dust
collector chip chute:
•
Switch off and unplug the planer/molder.
•
Unscrew and remove three pan head screws and
washers (Key Nos. 13 and 14).
•
Remove chip deflector (Key No. 15).
•
Slide dust collector chip chute along the
blade cover (Key No. 8) so that the slots
blade cover are aligned above the holes
collector chute and the slots on the dust
CAUTION: The planer/molder is top-heavy and will
tend to tip when moved. Exercise caution whenever
moving the planer/molder.
Refer to Figure 29, page 20.
edges of
on the
on the dust
collector
WARNING:
Be sure planer/molder is unplugged from
any power source and turned off before attempting any
maintenance.
chute align with the holes on the rear side of roller
case (Key No. 21).
•
BARS
Refer to Figure 2, page 3.
CHIP CHUTE
Refer to Figure 25 and 28, pages 13 and 18.
•
RESET
Reuse three pan head screws and washers (Key
Nos. 13 and 14) to fasten dust chute with blade
cover.
Use three 6-1.0 x 8mm socket head bolts and three
6mm flat washers (supplied with dust chute) to fasten dust chute with roller case.
The dust chute accommodates a 4" diameter hose. A 4
to 21/2"adapter is included with the chute. Attach appropriate hose to the chute and be sure to turn the vacuum
on before operating the planer/molder.
13
•
Keep planer/molder clean of any wood chips, dust,
dirt or debris.
•
Clean the four steel columns (Key No. 19) to prevent
the table from binding when raised and lowered.
•
Keep lead screws (Key Nos. 20 and 26) clean and
properly lubricated with grease.
•
Keep the anti-kickback pawls clean and operating
smoothly to prevent injury due to kickback.
•
After each ten hours of operation, clean the
chain/gear drive mechanism.
ADJUSTING
TABLE POSITION
Refer to Figures 19 and 29, pages 10 and 20.
The table is positioned parallel to the cutterhead at the
factory and should need no further adjustment. If the
planer is cutting one side of the workpiece deeper than
the other producing a tapered cut, then the table may
need to be adjusted. Check to see that the blades are
adjusted properly, see "Adjusting Blade Height" page 7.
•
Disconnect planer from power source.
•
Place cutterhead adjustment block (See Figure 19)
on table at outside edge of cutterhead. Raise table
until block just contacts cutterhead. Do not move
table position until both sides of the cutterhead have
been checked.
•
Slide block to other side of cutterhead. Check to see
\
Figure 26 - Detail of Chain/Gear Drive Mechanism
•
Using a clean, dry cloth, clean all of the chains and
gears of wood chips, dust, and old grease.
•
Use common automotive bearing grease to lubricate
all chains and gears. Be sure all chains and gears
have plenty of grease.
that the block just contacts the cutterhead.
LUBRICATION
The table surface can be
as furniture wax, to make
Be sure that the lubricant
ty to finish the workpiece
coated with a lubricant, such
the workpiece feed smoother.
used does not affect the abiliwith varnish, sealer, etc.
•
If both sides of cutterhead are at the same height,
then roller case and cutterhead are parallel to the
table.
•
If roller case is not parallel to the table, then the
table must be adjusted. Loosen the bolt holding the
tension bracket assembly (Key No. 38).
For example, do not use any silicone base lubricants
because they will ruin any attempt to finish the wood.
The table height is adjusted by removing the chain from
the corner sprockets and rotating the sprockets.
Determine which side needs adjustment and remove
the chain from that sprocket. Rotate the sprocket by
hand to adjust the table height (be sure to leave the
other sprocket untouched).
Replace feed rollers if damaged. Replace blades, cutter
bits and pattern knives if worn or damaged.
NOTE: Be careful not to rotate each sprocket more
than 1 or 2 teeth.
Rotate sprocket until table is parallel to roller case.
Assemble chain tension sprocket carefully and tension
chain properly.
V-BELT ADJUSTMENT
Refer to Figures 27 and 29, pages 16 and 20.
Inadequate tension in the V-Belt (Figure 29, Key No. 31 )
will cause the belt to slip from the motor pulley or drive
pulley. To adjust V-Belt tension:
•
•
Loosen and remove four pan head screws (Figure
27, Key No. 2) on right cover (Figure 27, Key No. 9)
Remove cover.
•
Loosen two socket head bolts (Figure 29, Key No. 27)
that go through the motor assembly (Figure 29, Key No.
32).
•
Loosen hex nuts (Figure 29, Key No. 16) and tighten
two socket head bolts (Figure 29, Key No. 27) that go
into the indent on motor assembly to tension belt.
Belt is tensioned properly when moderate finger
pressure applied to the midpoint of belt produces 1A"
deflection. Tighten hex nuts to lock socket head bolts.
•
Tighten two socket head bolts (Figure 29, Key No. 27)
that go through motor assembly.
•
Replace cover and tighten four screws (Figure 27,
Key Nos. 2 and 9).
14
SYMPTOM
POSSIBLE
Excessive snipe
(gouging at ends of board)
1. Dull blades
1. Replace blades per instructions, see
"Operation"
2. Inadequate support of long boards
2. Support long boards
3. Uneven feed roller pressure
4. Table not aligned
5. Lumber not butted properly
3. Check feed roller operation
4. Check position on elevation screws
5. Butt end to end each piece of stock as
boards pass through planer/molder
6. Support rollers misaligned
6. Adjust support rollers
Fuzzy grain
Planing wood with a high moisture
content
Remove high moisture content from wood by
drying
Torn grain
1. Too heavy a cut
1. Review "Depth of Cut"
2. Blades cutting against grain
3. Dull blades
2. Review "Wood Grain"
3. Replace blades per instructions,
see "Blade Height Adjustment"
1. Dull blades
1. Replace blades per instructions,
see "Blade Height Adjustment"
2. Too heavy a cut
3. Moisture content too high
2. Review "Depth of Cut"
3. Dry the wood or use dried wood
Difficult to raise/lower table
Cutterhead not parallel with table
Adjust elevation screws, see "Adjusting Depth
of Cut"
Uneven depth of cut
(tapered cut)
Cutterhead not parallel with table
Adjust elevation screws, see "Adjusting Depth
of Cut"
Belt slipping
Loose belt
Tension or replace belt, see "V-Belt
Adjustment"
Planer/Molder will not operate
1. No power to planer/molder
2. Motor overload protection tripped
1. Check power source by qualified electrician
2. Reset motor overload protection,
see "Overload Reset"
3. Defective or loose switch or wiring
3. Check switch and wiring by qualified
electrician
Board slips, will not feed
Feed rollers too high
Lower feed rollers, see "Feed Roller Adjustment"
Board feeds, but does not cut
Feed rollers too low
Raise feed rollers, see "Feed Roller Adjustment"
Board feeds inside, but stops
moving past the outfeed roller
1. Outfeed rollers too high
1. Lower outfeed rollers in level with infeed
rollers, see "Feed Roller Adjustment"
2. Outfeed rollers cannot rotate due
to clogging of chips
2. Clear the clogging, use dust collector chip
chute, see "Recommended Accessories",
page 21
Gibs not loose
Loosen set screws on gibs and tap down all the
gibs
Rough raised grain
Planing blade/pattern knife
cannot be removed
CAUSE(S)
15
CORRECTIVE
ACTION
Model 351.217330
1\
3
44
4
28
\
15
14
15
31
32
22
12
<.\ \
11
41
45
42
Figure 27 - Replacement
Parts Illustration
for Gearbox and Table
16
15
KEY
NO.
PART NO.
DESCRIPTION
1
2
17110.00
17221.00
Left Cover
5-0.8 x lOmm Pan Head Screw
1
8
3
4
5
07365.00
06821.00
03812.00
Lifting Bar
3CM1-12 Retaining Ring
6-1.0 x lOmm Pan Head Screw
4
4
6
6
7
8
17112.00
17113.00
17114.00
Guide Plate
Table
Indicator
2
1
1
9
10
11
17115.00
17116.00
STD315225
Right Cover
Gearbox
6202zz Bearing*
1
1
1
12
13
07370.00
17117.00
3BMI-35 Retaining Ring
lOT Gear Shaft
1
1
14
15
16
16155.00
17118.00
17119.00
4x4x7mmKey
Bushing
24T/16T Double Gear Shaft
2
5
1
17
18
19
17120.00
STD851010
17121.00
72T Spur Gear
lOmm Flat Washer*
2O
21
22
17122.00
17123.00
01505.00
50T Spur Gear
12T Gear Shaft
Gearbox Cover
6-1.0 x 12mm Socket Head Bolt
1
1
1
1
1
4
23
24
25
17085.00
STD851008
06410.00
Tension Bracket Assembly
8mm Flat Washer*
8-1.25 x 16mm Socket Head Bolt
1
1
1
26
27
28
03853.00
00533.00
17124.00
Sprocket
1
1
1
29
30
31
17125.00
17126.00
02970.00
Shoulder Bolt
Sprocket
Knob
1
1
1
32
33
34
17127.00
08511.00
17128.00
Handle
Pin
Clutch
1
2
1
35
36
17129.00
17310.00
Gear Shaft
1
1
37
38
39
17311.00
17312.00
17313.00
40
41
42
STD851012
00519.00
17314.00
43
44
45
A
*
a,
QTY.
3AM1-15 Retaining Ring
Chain
4x4x4OmmKey
5/161'
Steel Ball
1
1
1
Spring
Spacer
12mm Flat Washer*
3AM1-12 Retaining Ring
72T/80T Double Gear
1
1
1
STD851005
17212.00
03806.00
5mm Flat Washer
Left Hand Indicator
6-1.0 x lOmm Socket Head Bolt
8
1
1
17509.02
Operator's Manual
1
Standard hardware item available locally
Not Shown
17
Model 351.217330
6
2
4
5
39
/
1
20
40 41
42
27
/'
32
3O
31
32
49
34
37
38
32
Figure 28 - Replacement
Parts Illustration for Rollercase
18
!
50
KEY
NO.
1
2
3
4
5
6
7
8
9
10
11
12
13
14
15
16
17
18
19
20
21
22
23
24
25
26
27
28
29
30
31
32
33
34
35
36
37
38
39
40
41
42
43
44
45
46
47
48
49
50
51
52
*
PART NO.
DESCRIPTION
17087,00
08581,00
08760,01
09575,00
16114,00
17088,00
17089.00
17090.00
03855,00
03888,00
08566,00
17091.00
05265,00
STD851004
17092.00
17208,00
05331.00
STD851005
17094.00
01822,00
17095.00
00179.00
17096,00
08517.00
08514.00
08516,00
17097.00
08518,00
17098.00
00533,00
03853,00
08519.00
17099,00
17100.00
17101,00
17102.00
03855,00
17103,00
17104,00
17105,00
08560,00
08539.00
08540.00
17106,00
08541,00
03839.00
17107.00
STD315235
17108.00
17109.00
17209,00
17207,00
Tool Tray
Blade Height Gauge
Wrench
Brass Punch
Wrench
QTY.
Bit Setting Gauge
Chip Deflector Plate
Blade Cover
5-0,8 x 10ram Socket Head Bolt
4mm Flat Washer
Handwheel
4ram Wing Nut
4-0,7 x 8ram Pan Head Screw
4mm Flat Washer*
Chip Deflector
Knob Housing
5-0,8 x 12ram Socket Head Bolt
5mm Flat Washer*
Chip Breaker
8-1,25 x 20ram Socket Head Bolt
Rollercase
6-1,0 x 20ram Socket Head Bolt
Bushing
Cap
22-1,5ram Hex Nut
10-1.5 Fiber Hex Nut
Threaded Bushing
Spring
Threaded Shaft
3AM1-15 Retaining Ring
Sprocket
Retaining Bracket
Roller
Spacer
Anti-Kickback Pawl
Bracket
5-0,8 x 10ram Socket Head Bolt
Shaft
Handle Assembly (Key Nos, 11, 16, 51 and 52)
Cutterhead Gib
8-1,25 x 16ram Set Screw
Bit Gib
Spacer
Blade (Set of 3)
Jack Screw
5 x 5 x 10ram Key
Cutterhead
6203zz Bearing*
Drive Pulley
Nut
Screw
Knob
Standard hardware item available locally
19
1
1
1
1
1
1
1
1
3
3
1
3
3
3
1
1
3
6
1
4
1
3
2
4
4
4
4
4
4
2
2
4
2
38
35
2
4
1
1
6
18
3
6
1
6
1
1
1
1
1
1
1
Model 351.21 7330
29
21
24
1
V
18
\
_/12
30
/
40
r,o
o
31
32
37
lO
36
11
Figure 29 - Replacement
Parts Illustration for Base
35
KEY
NO.
1
_
*
A
KEY
PART NO.
DESCRIPTION
16080.00
Switch
QTY.
NO.
PART NO.
DESCRIPTION
QTY.
1
21
01505.00
6-1.0 x 12mm Socket Head Bolt
4
2
04287.00
Circuit Breaker
1
22
STD852006
6mm Lock Washer*
6
3
00997.01
8mm Flat Washer
4
23
09656.00
Set Plate
2
4
17070.00
Switch Plate
1
24
16136.00
Cord Wrap
2
5
STD851005
5mm Flat Washer*
6
25
02817.00
1
6
01474.00
5mm Serrated Washer
1
26
17078.00
4 x 20mm Spring Pin
Crank Lead Screw
7
03855.00
5-0.8 x 10mm Socket Head Bolt
4
27
01775.00
6-1.0 x 25mm Socket Head Bolt
4
8
17071.00
Switch Box
1
28
STD851006
6mm Flat Washer*
2
9
16087.00
Strain Relief
3
29
16083.00
Line Cord
1
10
17072.00
Switch Wire
1
30
17079.00
Belt Cover
1
11
01784.00
5-0.8 x 10mm Pan Head Screw
14
31
17080.00
V-Belt 330-J6
1
12
03891.00
32
17081.00
17073.00
2
33
STD852005
Motor Assembly
5mm Lock Washer*
1
13
Clamp
5-0.8 x 16mm Pan Head Screw
3
4
14
15
01553.00
34
17082.00
Bracket
2
01822.00
Cord Clamp
8-1.25 x 20mm Socket Head Bolt
1
4
35
00964.00
6-1.0 x 6mm Set Screw
4
16
00961.00
6-1.0mm Hex Nut
2
36
17083.00
2
17
STD851008
8mm Flat Washer*
1
37
17084.00
Sprocket
Chain
18
17075.00
Base
1
38
17085.00
1
19
17076.00
Column
4
39
06410.00
Tension Bracket Assembly
8-1.25 x 16mm Socket Head Bolt
2O
17077.00
Lead Screw
1
4O
17086.00
Switch Cord
1
1
1
Standard hardware item available locally
Not Shown
Recommended
Accessories
A
Multi-Purpose
Stand
A
Horizontal Roller Stand
9 21417
A
Dust Collection Chip Chute
9 23319
A
Planer Blade (set of 3)
9 23211
9 22224
1
23
Model 351.217330
22
21
19
1\
16
6
10
12
Figure 30 - Replacement
Parts Illustration
for Motor
KEY
NO.
PART NO.
DESCRIPTION
1
2
3
4
5
6
7
8
9
10
11
12
13
14
15
16
17
18
19
20
21
22
23
24
17081.00
17211.00
17210.00
17214.00
00361.00
01474.00
01775.00
17216.00
STD852006
17213.00
03868.00
03867.00
03866.00
17215.00
16366.00
16093.00
17217.00
16092.00
STD315215
16091.00
16090.00
STD615205
16089.00
16088.00
Motor Assembly (Key Nos. 2-25)
Hinge Shaft
Motor Bracket
Grommet
5-0.8 x 8mm Pan Head Screw
5mm Serrated Washer
6-1.0 x 25mm Socket Head Bolt
QTY.
#14-10 x s/4"Thread Forming Screw
6mm Lock Washer
Spacer
Brush Cap
Carbon Brush
Brush Holder
6V Pulley
6.3-1.80 x 16mm Thread Forming Screw
Housing
Stator
Fan Casing
6201 Ball Bearing
4.8-1.60 x 70mm Thread Forming Screw
Armatu re
6200 Ball Bearing
Cap
4.8-1.60 x 20mm Thread Forming Screw
22
1
1
1
1
3
3
1
1
1
1
2
2
2
1
2
1
1
1
1
2
1
1
1
4
NOTES
23
CE PI L LADO RA/M OL D URADORA
DE 13"
•
Modelo No.
351.21 7330
........................................
Garanfia
Reglas
Use zapatos
Use gafas de seguridad que cumplan con la norma ANSI
Z87.1 de los Estados Unidos. Los anteojos comunes tienen
de Seguridad
..............................
Instalaci6n
......................................
26-27
Operaci6n
.......................................
27-35
...................................
de Problemas
GARANTIA
con suelas antideslizantes.
COMPLETA
se produce
mucho polvo.
Este alerta y piense claramente. Nunca opere herramientas
mecanicas cuando este cansado, intoxicado o bajo la influenque produzca
EL AREA
LA TAREA
A REALIZAR
somnolencia.
DE TRABAJO
PARA
•
Mantenga el Area de trabajo limpia. Las Areas de trabajo desordenadas atraen accidentes.
•
No use herramientas
mecAnicas
en ambientes
peligrosos.
No
en lugares ht_medos o mojados.
mecanicas a la Iluvia.
•
El Area de trabajo debe estar iluminada
•
Debe haber disponible
adecuadamente.
una toma de corriente
adecuada
para
la herramienta. El enchufe de tres puntas debe enchufarse
directamente
a un receptaculo para tres puntas puesto a tierra
correctamente.
35-36
...........................
al impacto. NO son anteojos
para la cara o una m_.scara contra el polvo,
use herramientas mecAnicas
No exponga las herramientas
25
25-26
Use una mascara
PREPARE
24-25
Montaje .........................................
Identificaci6n
de seguridad
cia de medicaci6n
24
.......................................
Mantenimiento
•
16-22
...........................................
para sujetar el
•
si al utilizar la herramienta
2-22
y Lista de Partes .........................
Desempaque
para el cabello,
•
•
Ilustraci6n
protectora
largo.
lentes que s61o son resistentes
de seguridad.
PRECAUCION:
Lea y siga todas las Reglas
de Seguridad y las Instrucciones de Operaci6n
antes de usar este producto por primera vez.
Ingles
Use una cubierta
cabello
37
DE UN ANO
•
Los cordones de extensi6n deben tener una punta de conexi6n a tierra y los tres alambres del cord6n de extensi6n
deben ser del calibre correcto.
•
Mantenga
trabajo.
a los visitantes
Mantenga
a los niffos fuera del lugar de trabajo. Haga que su
•
a una distancia
prudente
del Area de
Si fallara este producto por causa de defectos en el material
en la mano de obra en un lapso de un aho a partir de la
taller sea a prueba de niffos. Use candados, interruptores
maestros y remueva las Ilaves del arrancador para impedir
fecha de compra, Sears Io reparara o reemplazar&
a su
elecci6n, sin costo adicional. Solicite al Centro de servicio
cualquier
Sears (1-800-4-MY-HOME)
mAs cercano
producto o devuelvalo al establecimiento
Si este producto
esta garanfia
SE
la reparaci6n del
donde Io adquiri6.
se usa para fines comerciales
o de alquiler,
cuando
el producto
se utiliza
DAR
MANTENIMIENTO
Desenchufe
•
Consulte el manual para informarse sobre los procedimientos
de mantenimiento
y ajuste especfficos.
•
Esta garanfia le otorga derechos legales especfficos y
tambien puede usted tener otros derechos que vaffen de
estado a estado.
•
Sears, Roebuck
IL 60179
•
Hoffman
Mantenga
siempre
la herramienta
la herramienta
lubricada
antes de inspeccionarla.
y limpia de modo que fun-
mas segura.
Retire las herramientas de ajuste. Desarrolle el habito de verificar que hayan sido retiradas las herramientas de ajuste antes
de encender
Estates,
mecanicas.
HERRAMIENTA
clone de la manera
and Co., Dept. 817WA,
de las herramientas
•
compra.
Esta garantia aplica Qnicamente
en los Estados Unidos.
DEBE
A LA
es valida por 90 dfas a partir de la fecha de
uso involuntario
la maquina.
Mantenga todas las partes listas para funcionar. Revise el protector u otras piezas para determinar si funcionan correctamente y hacen el trabajo que deben hacer.
•
cualquier otra condici6n
de la herramienta.
ADVERTENClA:
Para su propia seguridad, lea todas las
instrucciones
y las precauciones
antes de operar la herramienta.
PREOAUClON:
Siempre
siga los procedimientos
Revise que no haya partes daffadas.Verifique
el alineamiento
de las partes m6viles, si hay atascamiento,
roturas y montaje
•
de operaci6n
Si hay una protecci6n
correctos, tal como se definen en este manual, aun cuando este
familiarizado
con el uso de esta o de otras herramientas
simi-
deberan repararse
haga reparaciones
lares. Recuerde que descuidarse aunque s61o sea por una fracci6n de segundo puede ocasionarle
graves lesiones.
incluida
EL OPERADOR
DEBE
PARA EL TRABAJO
•
ESTAR
que pudiera afectar el funcionamiento
o cualquier
correctamente
provisionales
para solicitar
•
Use ropa apropiada. No use ropa holgada, guantes, corbatas,
anillos, pulseras ni otras joyas que puedan atascarse en las
piezas m6viles de la maquina.
•
24
o ser reemplazadas.
No
(valgase de la lista de piezas
piezas de reemplazo).
EL OPERADOR
DEBE SABER
LA HERRAMIENTA
PREPARADO
otra parte daBada, estas
COMO
USAR
Use la herramienta correcta para cada trabajo. No fuerce la
herramienta o el accesorio ni los use para una tarea para la
que no fueron disehados.
Cuando cambie las cuchillas, desconecte la herramienta.
o
•
Evite que la herramienta
Cerci6rese
(apagado)
•
se encienda
No fuerce la herramienta.
ciente a la velocidad
Funcionara
OFF
F
en la forma mas eftG
para la cual se diseff6.
•
Mantenga las manos alejadas
superficies cortadoras.
•
Nunca deje desatendida
No trate de alcanzar
de las partes movibles
una herramienta
Desconectela
y no abandone
detenido por completo.
•
por accidente.
de que el interruptor este en la posici6n
antes de enchufar la herramienta.
\
y de las
en funcionamiento.
el lugar hasta que se haya
demasiado
lejos. Mantengase
firme y
equilibrado.
•
Nunca se pare sobre la herramienta. Se pueden producir
lesiones graves si la herramienta se vueica o hace contacto
con la cuchilla sin intenci6n.
•
Conozca su herramienta. Aprenda a manejar
su aplicaci6n y iimitaciones especfficas.
•
Use los accesorios
recomendados
se usan accesorios
nar a alguien.
incorrectos,
•
Maneje
•
o lesio-
en forma
correcta. Protejase
las
conjunto
Apague la maquina si se atasca. La cuchilla o la barrena se
atasca si se introduce muy profundamente
en la pieza de tra-
Siempre
mantenga
los protectores
trabada
REMOCION
en la pieza de
se envfa montada,
de ia transmisi6n,
DE
LAS
La cepilladora/molduradora
en su lugar y en adecuadas
el por-
o cortadora
se envfa con tapas en los ejes rosca-
la Figura 1.
Guarde las tapas para uso futuro.
•
ADVERTENCIA:
No trate de operar la herramienta
hasta que
haya sido completamente
armada segOn las instrucciones.
que no hayan ocurrido dahos durante
•
INSTALACION
al usar la herramienta.
Verifique
Desenrosque
herramienta.
el envfo y el manejo.
y retire las tapas antes de encender
la
en
PRECAUCION:
iPiense en la seguridad! La seguridad es una
combinaci6n
del sentido comOn del operador y un estado de
Consuite
del
TAPAS
•
condiciones
a excepci6n
del volante.
dos para evitar da_ar los ejes durante
Introduzca la pieza de trabajo en la cuchilla
sentido contrario al de rotaci6n.
alerta permanente
ia Figura 2.
La cepiiladora/molduradora
lesiones.
tacuchilla y la cuchilia
de funcionamiento.
•
la p_tgina 21). Si
puede sufrir lesiones
bajo (la fuerza del motor la mantiene
trabajo).
•
D
Figura 1 - Desempaque
la herramienta,
Consulte
la pieza de trabajo
manos de posibles
(consulte
\
DEL CONJUNTO
DEL VOLANTE
Deslice el volante en el tornillo de avance de la manivela de
manera que el pasador de resorte en el tornillo de avance de
la maniveia quede colocado entre la ranura en el volante.
Conjunto
del volante
el envfo. Si hay
daffos, se debera presentar un reciamo a la compafffa de transporte. Verifique que este completa. Avise inmediatamente
al distribuidor si faltan partes.
La cepilladora/molduradora
viene armada como una unidad. Es
necesario Iocalizar y tomar en cuenta las piezas adicionales que
deben asegurarse a ia herramienta
cepilladora/molduradora.
antes de armarla
A.
Conjunto
B.
Calibrador
de ajuste de barrenas
C.
Calibrador
de la altura de la cuchilia
D.
Llave enT
E.
Punz6n de lat6n
R
Uave de extremo
G.
Llave Alien
u operar ia
del volante
Reajuste de
sobrecarga
abierto
Figura 2 - Conjunto
25
Barras
elevadoras
MONTAJE DE LA CEPILLADORA
LA SUPERFICIE
DE TRABAJO
EN
El motor ha sido dise_ado
Consulte las Figuras 2 y 3.
•
DE
LA
PLATAFORMA
OPCIONAL
LA
HERRAMIENTA
MONTAJE
exigen que el voltaje en los terminales
especificado.
•
Craftsman
PARA
DE
INSTRUCCIONES
Modelo 217330
puede
montarse directamente
en una Plataforma para Herramienta
usos Modelo 222240. Para montar la Cepilladora/Molduradora
Multien
Coloque la Cepilladora/Molduradora
plataforma.
PRECAUClON:
en la parte superior
La Cepilladora/Molduradora
de la
PARA
LA CONEXION
ADVERTENCIA:
Si no se conecta
a tierra del equipo,
se corre
•
pesa aproximada-
mediante
un
A TIERRA
correctamente
•
el conductor
el riesgo de un electrochoque.
El
se usa para prote-
Si no comprende las instrucciones de conexi6n a tierra o tiene
dudas en cuanto a si la herramienta esta correctamente
conectada
mente 140 Ibs. Se requeriran dos personas para levantar la
Cepilladora/Molduradora.
Use las barras elevadoras (vease la
a tierra, consulte
Esta herramienta
a un electricista
viene equipada
calificado.
con un cable especificado
para 150V y un enchufe de 3 puntas para conexi6n a tierra
(vease la Figura 4) que Io protegen a usted de un electro-
Figura 2, pagina 24).
•
del motor se controla
equipo debe estar conectado a tierra mientras
ger al operador de un electrochoque.
la plataforma:
•
La fuente de alimentaci6n
del motor no sea inferior al
interruptor basculante. Si se extrae la Ilave del interruptor basculante, se bloquea la unidad e impide el uso no autorizado.
222240
La Cepilladora/Molduradora
al voltaje y frecuencia
do. Si se hace funcionar la unidad a un voltaje fuera de este intervalo, se puede recalentar y quemar el motor. Las cargas pesadas
La cepilladora ha sido dise_ada para ser portb.til de modo que
pueda Ilevarse al lugar de trabajo, pero se debe montar en
un banco o mesa estable y nivelada. Vease Accesorios
Recomendados en la pagina 21.
INSTRUCCIONES
para funcionar
especificados.
Las cargas normales se pueden manejar sin riesgos dentro de un intervalo del 10% respecto al voltaje especifica-
Coloque la Cepilladora/Molduradora
en la parte superior de la
plataforma tal como se muestra en la Figura 3. AsegQrese que
choque.
•
los cuatro agujeros roscados en la pieza fundida de la base de
la Cepilladora/Molduradora
esten alineados con las ranuras tal
El enchufe
de conexi6n
a tierra deberdt conectarse
mente a un receptaculo
debidamente
como se muestra en la Figura 3.
para 3 puntas instalado
a tierra, tal como se muestra
(vease la Figura 4).
Tomacorriente
puesto a
tierra adecuadamente
Punta de conexi6n
Enchufe
@
a tierra
de 3 puntas
directa-
y conectado
_
;
Figura 4 - Recept&culo
•
para 3 Puntas
No retire ni modifique en forma alguna la punta de conexi6n a
tierra. En caso de un mal funcionamiento
o una descompostura, la conexi6n a tierra proporciona una ruta de menor
resistencia para la descarga electrica.
ADVERTENClA:
L
\.......
no permita
•
debe conectarse
La Cepilladora/Molduradora
25 mm y cuatro arandelas
incluye cuatro
para el montaje
pemos de 8-1.25 x
en la plataforma.
•
del
los terminales
en el tomacorriente
correspon-
Revise peri6dicamente
los cordones de la herramienta,
si
estan da5ados, Ilevelos a un centro de servicio autorizado
para que los reparen.
de la Cepilladora/Molduradora.
•
Apriete los cuatro pemos y asegQrese que la Cepilladora/
Molduradora quede montada firmemente en la plataforma.
El conductor
de conexi6n
verde (o verde y amarillo) del cord6n es el cable
a tierra. Si es necesario reparar o reemplazar el
cord6n electrico o el enchufe, no conecte
verde y amarillo) a un terminal cargado.
•
FUENTE
el enchufe
locales. No modifique el enchufe que se incluye. Si no cabe en
el tomacorriente,
solicite a un electricista calificado que instale
un tomacorriente
adecuado.
Sujete los cuatro pernos con las arandelas por debajo de la
parte superior de la plataforma en la pieza fundida de la base
•
El enchufe
o desconectar
que los dedos toquen
diente que haya sido instalado y conectado a tierra debidamente, de acuerdo con todos los c6digos y regulaciones
Figura 3 - Monte la Cepilladora/Molduradora
en la Plataforma
Multiusos Opcional Modelo No. 222240
•
AI conectar
tomacorriente,
o el enchufe.
Si se cuenta Onicamente
el cable verde (o
con un tomacorriente
de dos puntas,
este debera ser reemplazado
con un tomacorriente
puntas debidamente
conectado a tierra e instalado
DE ALIMENTACION
con las Normas para Instalaciones
Code) y los c6digos y regulaciones
ADVERTENCIA:
No conecte la cepilladora/molduradora a la
fuente de alimentaci6n hasta haber cumplido todos los pasos del
ensambiaje.
ADVERTENCIA:
tricista calificado.
26
Esta tarea debera
Electricas
locales.
de tres
de acuerdo
(National
ser realizada
Electric
por un elec-
Se puede usar temporalmente
un adaptador
de 3 puntas a 2
El motor se ensambla
con un cable de tres conductores,
aproba-
puntas con conexi6n a tierra (v@ase la Figura 5) para conectar
los enchufes a un tomacorriente
bipolar que est@ correctamente
do para usarse con 110 voltios como se indica. La fuente de alimentaci6n del motor estdt controlada por un interruptor basculante
puesto a tierra.
enclavador
Adaptador
Enchufe
bipolar.
Las lineas de energia el@ctrica se insertan directamente
en el
interruptor. La linea de conexi6n a tierra verde debe permanecer
Tal6n de tierra
,.___,,_
que est@
AsegL_rese
conectado
a una tierra
conocida
._
de 3 puntas
_
Recept&culo
Figura 5 - Receptbculo con Adaptador
firmemente sujeta al bastidor
contra un electrochoque.
para ofrecer
la adecuada
protecci6n
Interruptor
Interruptor
para 2 puntas
de circuito
AI motor
para Enchufe de 2 Puntas
F
•
No utilice este tipo de adaptadores a menos que est@ permitido
por los c6digos y regulaciones nacionales y locales. (En Canada
no se permite usar adaptadores
a 2 puntas.)
de conexi6n a tierra de 3 puntas
Figura 6 - Diagrama del Cableado
Si se permite el uso de un adaptador de 3 a 2 puntas con conexi6n
a tierra, se debe conectar firmemente la lengQeta verde o terminal
•
Si se extrae la Ilave del interruptor
ffgido en un lade del adaptador
Est& instalado
basculante,
se bloquea
la
unidad e impide el uso no autorizado.
manual
en
por ejemplo, una tubeffa de agua puesta a tierra, una caja de tomacorriente puesta a tierra o un sistema de cables puesto a tierra.
linea con la fuente de alimentaci6n
del motor. Si se sobrecarga
cepilladoraJmolduradora,
el protector interrumpe el circuito.
la
•
Si el interruptor
a una toma de tierra permanente,
Muchos de los tornillos de la plancha de cubierta, las tubeffas
de agua y las cajas de tomacorriente
no est&n debidamente
restaure
un protector
se dispara,
de sobrecarga
apague
el circuito presionando
de reajuste
la cepilladora/molduradora
y
el bot6n.
conectados a tierra. Para garantizar que la conexi6n a tierra es
efectiva, un electricista calificado debe verificar los medios de
conexi6n a tierra.
CORDONES
•
DE
El uso de cualquier
una caida
•
tipo de cord6n
de extensi6n
Los cables del cord6n
de extensi6n
El tamaffo minimo
la corriente
Utilice 0nicamente
y mantener
de los hilos del cable de extensi6n
14 A.W.G. No use cables de extensi6n
mayor de 7.6 m.
•
La cepilladora/molduradora
deben tener el tamaho
adecuada
cordones
cuya Iongitud
de extensi6n
Si el cord6n de extensi6n
el
marcos para retratos, ranura y lengQeta, juntas encoladas, rebajos
y mucho mas. La madera avanza en el portacuchilla de tres
cuchillas a trav@s de rodillos de alimentaci6n
de entrada y salida.
es
sea
La mesa grande de hierro fundido de 13" x 19" contiene columnas de acero esmerilado a precisi6n para permitir el avance uni-
de tres cables
cualquier
forma,
est6. desgastado,
reempl6.celo
forme de la pieza de trabajo y reducir la vibraci6n. El motor tiene
protecci6n contra sobrecarga y se encuentra dentro de la base de
la maquina, alejado de las astillas de madera y del polvo. La caja
de engranajes ofrece dos velocidades: 20 pies/minuto para cepillado rapido, y 10 pies/minuto para moldeado de acabado uni-
roto o daffado en
inmediatamente.
forme. La herramienta
para mayor seguridad,
MOTOR
La cepilladora/molduradora de 13" incluye un motor de 2_/2HP y
cableado instalado.
REGLAS
mecanicas
....................
110
Amperaje .......................................
15
Frecuencia (Hz) ..................................
Fase ....................................
60
Monofasico
RPM .........................................
CONEXIONES
desconectada
el cableado.
Cerci6rese
del diagrama
de cableado
a los ojos cuerpos
Tenga siempre
en cuenta las siguientes
precauciones:
5000
•
Aprenda
las reglas de seguridad
generales
para el uso de
herramientas mecanicas. AsegOrese de comprender todas
las precauciones
(v@anse las pdtginas 24, 25, 27 y 28).
de que la unidad est@ apagada
de la fuente de alimentaci6n
Se instala el motor y se conecta
de todas las herramientas
puede hacer que sean lanzados
PREOAUClON:
ELECTRICAS
ADVERTENCIA:
DE OPERACION
El funcionamiento
extrahos, Io cual puede lesionarlos gravemente. Siempre use
gafas de seguridad que cumplan con los requisitos de la norma
estadounidense
ANSI Z87.1 (se indica en el paquete) antes de
comenzar a usar la herramienta
mecdtnica.
21/z
Voltaje ........................................
incluye un mecanismo anticontragolpes
y mangos incorporados
para el transporte.
DE SEGURIDAD
ADVERTENCIA:
El motor universal de CA de 110 voltios tiene las siguientes
especificaciones:
Caballaje (maximo desarrollado)
de 13" de Sears acaba la madera
tosca y la deja del tamaffo correcto y cepilla las maderas duras de
hasta 6" de grosor y 13" de ancho. Produce disehos decorativos
incluyendo molduras para muebles, frisos inferiores, cubiertas,
que cuenten con enchufes tipo conexi6n a tierra de tres
puntas y receptdtculos tripolares que acepten el enchufe de
la herramienta.
•
las Figuras 7-25.
DESCRIPCION
ocasionara
en el voltaje y una p@rdida de potencia.
suficiente para conducir
voltaje correcto.
•
Consulte
EXTENSION
el cableado
y
•
antes de inspeccionar
Cuando
ajuste o reemplace
cualquier
molduradora, abra el interruptor
de alimentaci6n.
segOn la ilustraci6n
•
(v@ase la Figura 6).
AsegOrese
acoplados
27
que todos los protectores
y firmemente
sujetos.
parte de la cepilladora/
y retire el enchufe
de la fuente
est@n correctamente
•
AsegOrese
•
Siempre
que nada obstaculice
•
AsegQrese que las cuchillas
acopladas al portacuchilla.
•
No enchufe la cepilladora/molduradora
a menos que el interruptor este en la posici6n OFF (apagado). Despues de encen-
use protecci6n
ninguna
parte movible.
AJUSTANDO
para los ojos o para la cara.
esten alineadas
Consulte
y correctamente
manecillas
•
•
No fuerce el corte. Si disminuye la velocidad o se queda
atascado, se recalienta el motor. Permita que la alimentaci6n
automatica funcione correctamente.
de las
No ajuste la cuchilla
en el sentido con-
por debajo de _%2". No cepille una tabla
de menos de W' de grosor.
•
Mantenga
•
el volante en el sentido
se
del reloj para elevar la mesa.
Para bajar la altura de la mesa, gire el volante
trario alas manecillas del reloj.
•
•
CORTE
la Figura 7.
El grosor se ajusta girando
No intente realizar una operaci6n extraha o poco comt_n sin
estudiarla o sin usar plantillas, aparatos u otros accesorios
similares.
las manos alejadas
DEL
El grosor de la tabla que producirb, la cepilladora/molduradora
indica en cualquiera de las escalas en los lados.
der el interruptor, permita que la cepilladora/molduradora
alcance toda la velocidad antes de usar.
•
LA PROFUNDIDAD
de las partes movibles.
La altura de la mesa se movera %6" con cada revoluci6n
completa
del volante.
Haga un corte de prueba
en un pedazo de madera y mida el
grosor producido.
Use madera de calidad. Las cuchillas duran m_.s y los cortes
resultan mas uniformes si la madera es de buena calidad.
f_,_Arriba
Abajo_l¢"
No cepille material que tenga menos de 15" de Iongitud,
menos de 3A" de ancho, m_.s de 13" de ancho o menos de V2"
de grosor.
•
Nunca haga un corte de cepillado
•
Mantenga la proporci6n adecuada entre las superficies de alimentaci6n de entrada y salida de la mesa y la trayectoria de la
cuchilla del portacuchilla.
mayor de %2" de profundidad.
•
No haga retroceder la pieza hacia la superficie
ci6n de entrada de la mesa.
•
Tome las precauciones
necesarias en caso de contragolpes.
No permita que nadie cruce ni este de pie en la trayectoria de
rotaci6n del portacuchilla.
Los contragolpes
arrojados ir,_n en esta direcci6n.
•
Abra el interruptor
usando
y desconecte
de alimenta-
o los residuos
Figura 7 - Ajustando la Profundidad
la alimentaci6n
Compare
la cepilladora/molduradora.
o afile las cuchillas
Reemplace
•
Dele mantenimiento
a la cepilladora/molduradora.
Siga las
instrucciones
de mantenimiento
(vease la pagina 35).
•
si se da_an o desafilan.
DEL CORTE
nivelada,
paralela
al lado opuesto
Consulte
•
de la tabla.
La calidad del cepillado de grosor depende del juicio del operador en cuanto a la profundidad del corte. La profundidad del
El grosor mdtximo de la madera
que ambos indicadores
que se puede eliminar
El cepillado
en una
•
y a 10 pies por minuto (para
lento de una pieza de trabajo
acabado de la superficie
velocidad mas alta.
corte debe ser menor de V_6". Durante la operaci6n de moldeado, no exceda ¼" de la profundidad total del corte.
La tabla se debe cepillar con cortes poco profundos
las Figuras 8 y 9.
La cepilladora/molduradora
incluye una caja de engranajes de
2 velocidades que hace avanzar la pieza de trabajo a 20 pies
por minuto (cepillado estandar)
moldeado o cepillado lento).
pasada es %2" para operaciones de cepillado. Si desea obtener el mejor desempeho de la cepilladora, la profundidad del
•
de prueba con las
AJUSTE DE LA VELOCIDAD DE ALIMENTACION
corte depende del ancho, la dureza, la humedad, la direcci6n
de la veta y la estructura de la veta de la madera.
•
de la pieza de trabajo
mostrar el grosor producido. AsegOrese
esten situados correctamente.
El cepillado de grosor se refiere a reducir el tamaho de la
madera al grosor deseado al mismo tiempo que se crea una
superficie
•
la medida
medidas en cada escala. Si las medidas no son iguales, entonces
afloje el tornillo de cabeza de placa y ajuste el indicador para
•
PROFUNDIDAD
del Corte
si no se esta
brinda un mejor
que el que se obtiene cepillando
El mango para ajustar la velocidad de alimentaci6n
tra en el lado izquierdo de la cepilladora/molduradora
Figura 8).
hasta que
la pieza tenga un lado nivelado. Una vez Iograda una superficie nivelada, de vuelta a la madera y haga lados paralelos.
Cepille los lados alternos
•
hasta Iograr el grosor deseado.
Cuando se haya alcanzado la mitad de la profundidad total del
corte por cada lado, la tabla tendra un contenido de humedad
uniforme
y no se combara
•
La profundidad
ancha.
•
Cuando
cepille madera
en extensiones
al secarse
mas.
del corte debe ser menor si la pieza es m_.s
dura, haga cortes pequehos
o cepillela
angostas.
•
Haga un corte de prueba cuando trabaje con un nuevo tipo de
tabla o una clase diferente de operaci6n.
•
Revise la precisi6n de la prueba
el producto terminado.
de corte antes de trabajar
en
Figura 8 - Ajustando
28
la Velocidad de Alimentaci6n
a la
se encuen(vease la
AVISO:
maquina
•
Cambie
la velocidad
de alimentaci6n
s61o mientras
la
este funcionando.
La velocidad de alimentaci6n se puede ajustar en tres posiclones: 20 pies/minuto, 0 pies/minuto (neutro) y 10 pies/minuto
•
No empuje
•
Muevase
ni tire de la pieza de trabajo.
a la parte posterior
agarrdindola
de la misma
PRECAUCION:
frontal o posterior
(vease la Figura 9).
No se pare directamente
en Ifnea con la parte
de la cepilladora/molduradora.
•
No agarre ninguna parte de la tabla que no haya pasado
el rodillo de salida.
•
Repita esta operaci6n
mismo grosor.
EVITAR
10 PPM
y reciba la tabla cepillada
manera en que la hizo avanzar.
por
con todas las tablas que deban tener el
REDONDEO
La superficie que produce la cepilladoraJmolduradora
es mas lisa
si se usa una profundidad de corte menor. El redondeo se refiere
0 PPM
a la depresi6n en cualquier extremo de la tabla producido por una
fuerza dispareja en el portacuchilla
cuando la pieza entra o sale
20 PPM
de la cepilladora. El redondeo se produce cuando las tablas no
estan correctamente
apoyadas o cuando solamente un rodillo de
alimentaci6n hace contacto con la pieza al comienzo
corte. Para evitar el redondeo:
•
Empuje
alimenta
Figura 9 - Posiciones
VETA
DE
de Velocidades
•
de Alimentaci6n
suavemente
•
Para Iograr el acabado 6ptimo de la superficie con un mfnimo de
rasgado, cepille o moldee siempre la pieza de trabajo en direcci6n
de la veta. La pieza de trabajo debe hacerse avanzar en la cepilladora/molduradora
de manera que las cuchillas o las barrenas se
desplacen en direcci6n de la veta mientras
zan el corte. La veta debe quedar inclinada
Muevase a la parte posterior y reciba la tabla cepillada
empujandola suavemente hacia arriba cuando el rodillo de
de entrada
deje de hacer contacto
con la tabla.
Cuando cepille mas de una tabla del mismo grosor haga
que las tablas se topen entre sf para evitar el redondeo.
AJUSTE
las cortadoras finalihacia la parte poste-
la tabla hacia arriba al tiempo que la
hasta que el rodillo de salida la haga avanzar.
alimentaci6n
LA MADERA
o final del
Consulte
DE
LA ALTURA
las Figuras
DE
LA CUCHILLA
10-14 y 28 en las pdiginas 29, 30 y 18.
ABVERTENClA:
Desconecte la cepilladora/molduradora
de la
fuente de alimentaci6n
y apaguela antes de intentar ajustar o
rior de la pieza de trabajo a la vez que esta avanza en la cepilladora/molduradora.
reemplazar las barrenas o cuchillas de corte, o de realizar
cualquier ajuste o mantenimiento
a la cepilladora/molduradora.
CEPILLADO
Se incluye un calibrador
de la altura de la cuchilla para utilizarlo
ADVERTENCIA:
Siempre apague la cepilladora/molduradora
y
desconectela
de la fuente de alimentaci6n
cuando se vaya a reti-
cuando se reemplacen
rar la cubierta
ra/molduradora
•
Retire la cubierta
•
Afloje todos los tornillos de fijaci6n (Clave No. 41) y todas las
cuSas (Claves No. 40 y 42) en las tres ranuras del portacuchilla.
•
de la cuchilla. Nunca haga funcionar la cepilladosin la cubierta de la cuchilla bien afianzada.
La cepilladora/molduradora
viene con las cuchillas
de cepillado
montadas en el portacuchilla
y con los rodillos de alimentaci6n
entrada y salida ajustados a la altura correcta. La cepilladora/
de
molduradora
puede funcionar a dos velocidades de alimentaci6n
diferentes. La velocidad de alimentaci6n
se refiere a la velocidad
Desenchufe
o ajusten cuchillas de cepillado (Clave No. 2).
la cepilladora/molduradora
de la cuchilla
y apdiguela.
(Clave No. 8)
a
la que avanza la madera a traves de la cepilladora/molduradora.
El cepillado se puede realizar a 10 PPM para Iograr el acabado
6ptimo de la superficie o a 20 PPM para un cepillado
(vease Ajuste de la Velocidad de Alimentaci6n).
•
Ajuste la altura de la mesa para producir
corte deseada.
•
Parese en el lado donde se encuentra
•
Levante
la profundidad
de
el volante.
el borde del lado de alimentaci6n
mesa agarrando
mb.s rapido
de entrada de la
los bordes de la tabla a aproximadamente
la
mitad de la Iongitud.
•
Las tablas con una Iongitud mayor de 24" deben tener mayor
apoyo mediante pedestales de material independientes.
•
Coloque
Figura 10 -Afloje
la pieza de trabajo con la cara que se va a cepillar en
Todos los Tornillos de Fijaci6n de las Cu_as
la parte superior.
•
Suavemente, deslice
lado de alimentaci6n
el rodillo de alimentaci6n
•
•
la pieza de trabajo hacia el interior del
de la cepilladoraJmolduradora
hasta que
de entrada
Suelte la pieza de trabajo y permita
automb.tica la haga avanzar.
haga avanzar
Con un punz6n
de lat6n, golpee hacia abajo todas las cuBas
en la ranura del portacuchilla.
•
la pieza.
que la alimentaci6n
29
AsegQrese
que las cuSas esten flojas y puedan
moverse.
Ajuste
los dos extremes
de las tres cuchillas
hasta que todas las cuchillas
queden
de manera
similar
a la misma altura.
Apriete las cuBas de manera lenta, moviendose de una ranura
del portacuchilla a la otra, hasta que las tres cuchillas y todas
las cuhas queden
apretadas
y aseguradas.
Y
Figura 11 - Afloje Todas las Cu_as Mediante el Punz6n de Lat6n
•
Retire las cuchillas viejas,
dores (Clave No. 43).
•
Aseg0rese
y todas las cuhas y los espacia-
que las ranuras del portacuchilla
y las cuhas esten
Figura 14-
limpias.
•
Instale las nuevas cuchillas
cuSas y los espaciadores.
de cepillado,
y vuelva a colocar
•
Apriete los tornillos de fijaci6n de las cuhas s61o Io suficiente
para sostener las cuhas y las cuchillas en su posici6n.
•
Aseg0rese
que no quede espacio
los espaciadores
las
Levantando la Cuchilla al Girar los Tornillos
Niveladores
AVISO: Las cuchillas
se levantan
gradualmente
mientras
se
aprietan las cuhas. Golpee suavemente
las cuchillas con un
pedazo de madera dura para colocar las cuchillas contra los
tornillos niveladores de ser necesario.
libre entre las cuhas, y que
esten en su posici6n.
COLOCACION
t
Consulte
DEL
las Figuras
El rompeastillas
ROMPEASTILLAS
15 y 28 en las p_tginas 30 y 18.
(Clave No. 19) se utiliza para ayudar a remover
astillas de madera de las barrenas de la cortadora y de las
cuchillas mientras se realiza el cepillado o moldeado. Ajuste el
rompeastillas
tas de corte.
cada vez que se cambien
o ajusten las herramien-
El rompeastillas
debe colocarse Io mas cerca posible del portacuchilla sin hacer contacto con las barrenas de la cortadora o
las cuchillas.
Retire la cubierta
de la cuchilla. Afloje los tres pernos
de cabeza hueca que sostienen el rompeastillas
y col6quelo Io
mas cerca posible del portacuchilla,
gire este con la mano para
asegurar que no haya ninguna interferencia con el rompeastillas.
Asegure el rompeastillas
apretando los tres pernos de cabeza
hueca. Vuelva a colocar
Figura 12 - Usando el Calibre para Verificar la Altura de la Cuchilla
Cubierta
Calibrador
de la altura de la cuchilla
y asegurar
la cubierta
de la cuchilla.
de
la cuchilla
Tuerca de mariposa
Pata
Tornillo
Leng0eta
--
Rompeastillas
nivelador
Pernos de
cabeza
hueca
Cuchilla
Cuba
Placa del
desviador
de astillas
Tornillo de fijaci6n
"\
Figura 13 - Calibrador de la Altura de la Cuchilla
Coloque
el calibrador
de la altura de la cuchilla
en un extremo
de la cuchilla y ajuste el tornillo nivelador hasta que la cuchilla
haga contacto 0nicamente con la leng0eta en el centro del
calibrador
(veanse
las Figuras
Figura 15 - Colocando
12 y 13).
3O
el Rompeastillas
MOLDEADO
Calibrador
El moldeado, conocido tambien como carpinterfa prefabricada o
desbastado, puede definirse como una tira de madera fresada con
un cepillo o superficie
Iongitud.
•
Para obtener
decorativa
un acabado
que es continua
de moldeado
de ajuste
de barrenas
Perno
Espaciadores
a traves de su
6ptimo,
la pieza de tra-
bajo debe cepillarse y reducirse a su tamaSo antes de moldearse. Siempre reduzca el tamaSo de la pieza de trabajo
dentro de _/_" del grosor final antes de moldear.
•
Durante la operaci6n
didad total del corte.
Ciertos
de moldeado,
perfiles de moldeado
requieren
no exceda
¼" de la profun-
la limpieza
del borde exte-
rior. Cuando use dichos perfiles, debe reducirse el tamaSo de la
pieza de trabajo %" por encima del ancho final. Esto permitir& %6"
para la limpieza
en el otro lado.
Barrena
AIgunos perfiles de moldeado cortan Linicamente el borde de la
pieza de trabajo. Cuando use dichos perfiles, debe reducirse el
tamaho de la pieza de trabajo al mismo
INSTALACION
DE
LAS
AVlSO:
las Figuras
Las barrenas
portacuchilla
BARRENAS
•
de la cortadora
se montan
en el centro del
(Clave No. 42) incluidas. Las barrenas de la cortadora y las
cuchillas de cepillado (Clave No. 44) se montan en el portacuchilla
El calibrador
de ajuste de barrenas
•
y
•
de tres piezas en el
El calibrador alinea
•
Apague la cepilladora/molduradora
fuente de alimentaci6n.
•
Retire la cubierta
(Claves
•
de la cuchilla
y desenchLifela
y el desviador
de astillas
de ajuste de barrenas
en
Inserte la barrena
de la cortadora
entre la cuba de barrena
y apriete la combinaci6n
de barrena.
de
•
AsegQrese
•
que todas las barrenas
Retire el calibrador
y cuhas esten apretadas
de ajuste de barrenas
cubierta de la cuchilla
la placa del desviador
y
de manera que
ADVERTENCIA:
Nunca haga funcionar
radora sin la cubierta para la cuchilla
montados correctamente.
PREOAUCION:
Afloje dos tornillos de fijaci6n (Clave No. 41) en la cuba de
barrena de 2" (Clave No. 42) ubicada en el centro del
tener cuidado
cuchilla.
y vuelva a colocar
la
y el desviador de astillas. Verifique que
de astillas no interfiera con las barrenas
(vease la Figura 15). De ser necesario,
mediante las tuercas de mariposa.
las barrenas de moldeado queden colocadas en el portacuchilla segOn sea necesario. Apriete el perno de cabeza
hueca de 5 mm.
•
en la ranura del portacuchilla
deseada.
Gire el portacuchilla y monte las dem_.s barrenas de la cortadora mediante el calibrador de ajuste de barrenas para alinear
las cuchillas.
No. 8 y 15).
el calibrador
la cuba de barrena
aseguradas.
Con el perno de cabeza hueca de 5 mm (Clave No. 9) empleado para montar la cubierta de la cuchilla, monte el calibrador
Coloque
(Clave No. 40)
•
de la
de ajuste de barrenas en la parte superior de la cepilladora/molduradora
tal como se muestra en la Figura 16.
•
Coloque
y la cuchilla de la cepilladora,
barrena de la cortadora/cuRa
de la superficie.
•
Retire una o ambas cuhas de portacuchilla
la posici6n
las barrenas en el portacuchilla
de manera que las tres barrenas
corten la pieza de trabajo en la misma posici6n, brindando cortes
precisos y un mayor acabado
en cada ranura
segLJn sea necesario luego de aflojar los tornillos de fijaci6n
(Clave No. 41) y golpear las cuhas hacia abajo.
(vease la Figura 16) se usa
cuando se montan barrenas de moldeado
portacuchilla
de la cepilladora/molduradora.
mas de una barrena de cortadora
tres cu_as de barrena. Para hacer un pedido, use la lista de
partes de reemplazo, pagina 19, Clave No. 42.
las cuSas de barrena de 2"
a la misma vez de manera que las operaciones de cepillado
moldeado puedan realizarse con el mismo ajuste.
Para montar
del portacuchilla,
por ejemplo, barrenas de cortadora para
ranura y lengOeta (23302), se necesita un juego adicional de
15, 16, 17 y 28 en las paginas 30, 31 y 18.
(Clave No. 47) mediante
_
Figura 16 - Usando el Calibrador de Ajuste de Barrenas para
Instalar las Barrenas de la Cortadora
ancho que el ancho final.
DE LA CORTADORA
Consulte
de
la cortadora
ajuste la placa
la cepilladora/moldu-
y el desviador
de astillas
Para evitar da_os al portacuchilla,
al montar las cu_as en las ranuras
se debe
del porta-
portacuchilla.
•
Use el punz6n de lat6n incluido para golpear suavemente
hacia abajo la cuba en la ranura del portacuchilla.
•
Golpee
•
Retire los espaciadores
necesario.
•
Aseg0rese
Coloque
tacuchilla
•
que la ranura del portacuchilla
las barrenas
y las cuSas esten
en la ranura del por-
en lugar de los espaciadores.
Inserte la primera
Deslice
Cuba
grasa, astillas o rebabas.
de la cortadora
barrena de la cortadora
la barrena de la cortadora
de 13"
Barrena de
la cortadora
de 1" (Clave No. 43) seg0n sea
entre la cuSa de barrena y la cuchilla
•
de cepillado
hasta que la cuba se suelte y pueda moverse.
limpias y libres de suciedad,
•
Cuchilla
que se montara
de la cepilladora.
contra el borde del calf
brador de ajuste de barrenas de la cortadora y apriete la combinaci6n de barrena de la cortadora/cuha
de barrena en el
Figura 17 - Portacuchilla
portacuchilla.
31
con Barrenas de Corte
•
Siempre
apriete las cu_as gradualmente
•
Use el calibrador
cuchillos.
Monte la cuba en una ranura del portacuchilla
y apriete los
tornillos de fijaci6n s61o Io suficiente para sujetar la cuba en
•
AsegOrese que todos los cuchillos
das, apretadas y aseguradas.
su posici6n,
manera.
El portacuchilla
cu_as en la ranura del portacuchilla
•
•
Apriete
y apriete las tres
a la misma vez.
luego monte las otras dos cu_as de la misma
levemente
los tornillos
de fijaci6n
•
ContinQe apretando
las tres cu_as, aumentando
Repita el mismo procedimiento
otras dos ranuras
para montar las cu_as
Consulte
DE
las Figuras
Los cuchillos
cuchillo de relieve posterior, deben usarse la cuba de barrena y
los espaciadores de 1" (Claves No. 42 y 43).
en las
•
del portacuchilla.
AsegQrese de volver a revisar
cada dos horas de uso.
EN
LOS
luego de
ajuste de barrenas e instale los dos cuchillos de dise_o en
relieve restantes, uno en cada ranura del portacuchilla.
los tornillos de fijaci6n
•
de Modelo
son de ¼" de ancho e incluyen
(Clave No. 41) en una de las
Retire todas las cuhas, espaciadores
•
Repita el mismo procedimiento
portacuchilla.
•
AsegQrese
y barrenas
de cortadora.
•
Coloque el primer cuchillo de dise_o en relieve que se montara en la ranura del portacuchilla
con la cuba adecuada.
•
Deslice
con la mano y asegOrese
con la trayectoria
de dise_o en relieve en cada
por ejemplo,
del rompeastillas
Consulte
de tres
no interfiera con los
Vuelva a colocar el
la Figura 19.
de
hueca (Clave No. 17) y
Gire el portacuchilla
con la mano y monte los dos cuchillos
diseho en relieve restantes.
de
Cuchillo de diseho
en relieve de ¼"
_/_"
_-
Cu_as incluidas
_'rJcon
los cuchillos
de diseBo en relieve
L
L,,I'/_" _
Figura 19 - Bloque de Ajuste
con Cuchillos
de corona o fijos, o
AIgunos de los ajustes de mantenimiento
requieren el uso de bloques de ajuste hechos a mano. (Vease la Figura 19.)
del
18 - Portacuchilla
cuchillos
un juego adicional
BLOQUE DE AJUSTE
coloque el rompeastillas
(Clave No. 19) (vease "Colocaci6n
Rompeastillas
en la pagina 29).
Figura
que no haya
del cuchillo.
de retirar el calibrador de ajuste de barrenas.
desviador de astillas (Clave No. 15).
en relieve contra el borde del cali-
brador de ajuste de barrenas y apriete la combinaci6n
cuchillo/cuBa en el portacuchilla.
•
Gire el portacuchilla
abajo.
cuchillos de dise_o en relieve. AsegL_rese ademas de volver a
colocar en su lugar la cubierta de la cuchilla (Clave No. 8) luego
que todas las ranuras esten limpias y libres de
de cabeza
•
AsegLirese que la posici6n
con las demdts ranuras del
bajarse luego del corte
de moldeado. Vease
de Alimentaci6n"
de ranura y lengOeta, se requiere
cuhas.
grasa, astillas o rebabas.
Afloje los tres pernos
AsegL_rese que todos los cuchillos y las cu_as esten
alineadas, apretadas y aseguradas.
ranura del portacuchilla,
•
•
•
Para instalar m,_s de un cuchillo
cu_as en la ranura del portacuchilla.
el cuchillo de diseho
Los rodillos de alimentaci6n
deberan
en relieve posterior para la operaci6n
interferencia
Use el punz6n de lat6n para golpear hacia abajo todas las
suciedad,
•
"Ajuste de los Rodillos
removerse
todas las cuBas (Claves No. 41 y 42), cuchilllas de cepillado
(Clave No. 44), espaciadores
(Clave No. 43) y barrenas de
cortadora.
•
en la ranura del
ranura del portacuchilla.
cuhas.
las cu_as
en relieve, deben
Afloje los seis tornillos de fijaci6n
ranuras del portacuchilla.
de relieve posterior
portacuchilla.
Use el calibrador de ajuste de barrenas e instale
los dos cuchillos de relieve posterior restantes, uno en cada
de diseho en relieve de acero, NLimeros
Para montarlos en el portacuchilla
use Onicamente
incluidas con los cuchillos de diseho en relieve.
•
Instale el primer cuchillo
portacuchilla
con la cuba de barrena y los espaciadores de 1".
Apriete la combinaci6n
de cuchillo/cuha
de barrena. Gire el
CUCHILLOS
de dise_o
de dise_o en relieve en la ranura del
cinco minu-
18 y 28 en las pb.ginas 32 y 18.
Para instalar los cuchillos
Instale el primer cuchillo
portacuchilla
con la cuba apropiada y apriete la combinaci6n
de cuchillo/cu_a.
Gire el portacuchilla.
Use el calibrador de
RELIEVE
Sears 23331 al 23341,
a mOlti-
cuRa. Para montar el cuchillo de diseBo en relieve, debe usarse la
cuba incluida con el cuchillo de diseho en relieve. Para montar el
•
DISEI_IO
se adaptara
la presi6n
Haga funcionar la cepilladora/molduradora
durante
tos y vuelva a apretar los tornillos de fijaci6n.
DE
de la cepilladora/molduradora
relieve pueden montarse a la misma vez de manera que el relieve
y el moldeado puedan realizarse con una misma configuraci6n
de
•
INSTALACION
y las cu_as esten alinea-
en los
ligeramente y moviendose de una cuba a la otra hasta que
las tres cu_as queden apretadas y aseguradas.
•
para alinear los
pies configuraciones
de cuchillos de diseho en relieve a la vez.
Por ejemplo, un cuchillo de dise_o en relieve y sus cuchillos de
en una de las cu_as,
luego apriete las otras dos cuBas con igual presi6n
tornillos de fijaci6n.
de ajuste de barrenas
de DiseSo en Relieve
32
Haga los bloques
de madera
de desecho
dura con las dimen-
Tuerca hexagonal de
fibra (no la ajuste)
siones que se muestran. Las medidas exactas no son cruciales
pero se requiere un acabado nivelado y uniforme a traves de la
parte superior. Se necesitan tres juegos de dos bloques cada uno,
con una altura de 3", 2"/_6" y 2_3/_6
".
AJUSTE
DEL
Consulte
RODILLO
DE ALIMENTACION
las Figuras 20, 21 y 28 en las pAginas 33 y 18.
Los rodillos de alimentaci6n de la cepilladora/moldeadora
pueden
subirse o bajarse segL_n sea necesario. Los rodillos de alimentaci6n de entrada y salida vienen ajustados de fAbrica a 3/_6"por
debajo del portacuchilla
(no de las cuchillas) para la operaci6n de
cepillado. Los rodillos de alimentaci6n
de entrada y salida deben
ajustarse a _/_6" por debajo del portacuchilla
para una operaci6n
de moldeado con cuchillos de dise_o en relieve. Los rodillos de
alimentaci6n
avanzar
deben ajustarse
la pieza de trabajo
correctamente
de manera
Buje roscado
para poder hacer
/
uniforme.
AVlSO: Nunca baje los rodillos de alimentaci6n de entrada y salida
mAs de %6" por debajo del portacuchilla. Esto ocasionara un exce-
Figura 21 - Ajustando
so de tensi6n en la caja de engranajes
•
Apriete la tuerca hexagonal grande y repita este proceso con
el otro lado del rodillo de alimentaci6n de entrada.
•
Coloque los bloques de moldeado debajo del rodillo de alimentaci6n de salida y repita el proceso.
•
Aseg0rese
y el sistema de rodillos.
Para ajustar la altura del rodillo de alimentaci6n
operaci6n de moldeado:
•
para una
Haga dos bloques de 3 x 1 _/2x 3V2" y mArquelos
como blo-
ques del portacuchilla.
la Altura del Rodillo de Alimentacidn
que las tuercas
hexagonales
Haga dos bloques de 2"/_6 x 1 _/2x 3W' y marquelos
ques de moldeado.
•
Aseg0rese
•
Gire el volante y baje la mesa para permitir que los bloques
Los rodillos de alimentaci6n
del portacuchilla
se deslicen libremente entre la mesa y el
portacuchilla.
Quizas sea necesario tornear el portacuchilla
nal cuando se realice la operaci6n
Ileve a cabo el cepillado.
manualmente
Para devolver
•
que los bloques
se hagan del tamaho
•
como blo•
indicado.
para girar la cuchilla fuera de en medio.
Coloque la porci6n de 3" de los bloques del portacuchilla
debajo del portacuchilla,
uno a cada lado. Ajuste la altura de la
mesa de manera que el bloque del portacuchilla
t_nicamente con el portacuchilla.
No suba o baje la mesa a partir de este momento
•
•
hasta que
•
•
Afloje las tuercas
hexagonales
grandes
(veanse
y los bloques de moldea-
deben devolverse
a su posici6n
origi-
y siempre
que se
de moldeado
los rodillos a su posici6n
original:
Haga dos bloques de 2W_6" x 1 V2" x 3V2" y mArquelos
como
Ajuste la altura de los rodillos de alimentaci6n
manera que Io hizo para el moldeado usando
de la misma
la porci6n de
2_3/_" de los bloques.
no se Ileven a cabo todos los demas ajustes.
Coloque la porci6n de 2"/_6" de los bloques de moldeado
debajo del rodillo de alimentaci6n
de entrada, uno a cada lado.
Retire los bloques del portacuchilla
do, conservelos
para uso futuro.
bloques de cepillado.
haga contacto
•
grandes esten apre-
tadas luego del ajuste.
•
Luego del ajuste, conserve
los bloques
para uso futuro.
MESA AUXILIAR
las Figuras 20
AIgunas barrenas de corte y cuchillos
disehados para cortar completamente
y 28, Clave No. 25) a ambos lados del rodillo de alimentaci6n
de entrada con la Ilave incluida.
de disefio en relieve estAn
a traves de la pieza de tra-
bajo y _/_6"mas alia de la misma.
Esta acci6n produce
o
un borde uniforme
y la reducci6n
de tama_o
final de la pieza de trabajo. Cuando use estas barrenas 0 cuchillos, debera montarse una mesa de madera auxiliar en la
mesa de hierro fundido para evitar da_os a la mesa y alas
nas 0 cuchillos. La mesa de hierro fundido incluye agujeros
acomodar la mesa auxiliar.
,rca
ional
barrepara
La mesa auxiliar debe hacerse de una tabla de parficulas lisa de
3A" (123/8" de ancho y 31 ¼" de largo) a modo de brindar una
superficie uniforme sobre la cual se pueda deslizar la pieza de
trabajo.
AVlSO:
La mesa auxiliar es 12" mas larga que la mesa de hierro
fundido para proveer 6" de proyecci6n
terior de piezas de trabajo largas.
o
La tabla de parficulas debe montarse sobre la mesa de hierro fundido con cuatro tornillos de cabeza plana de 3/8x 1 ", arandelas y
tuercas (no incluidos). AsegLirese de avellanar los agujeros de
Figura 20 - Aflojando el Rodillo de Alimentaci6n
Con la misma Ilave, gire el buje roscado
en las partes frontal y pos-
montaje en la mesa auxiliar para los tornillos de cabeza plana.
Los tornillos deben colocarse debajo de la superficie de la mesa
auxiliar para evitar dahos a la pieza de trabajo.
(Figura 28, Clave No.
27) en el sentido de las manecillas del reloj hasta que el rodillo
de alimentaci6n
de entrada haga contacto 0nicamente con el
bloque.
33
REBORDES
PREPARACION
GUIA
Cuando realice el moldeado, la pieza de trabajo deber& guiarse
correctamente
en las barrenas de cortadora de moldeado o los
cuchillos a fin de producir el moldeado de forma y tamaffos
deseados. El uso de rebordes gufa ajustados de manera correcta
PARA EL MOLDEADO
•
Monte la mesa auxiliar sobre la mesa de hierro fundido.
•
Instale las barrenas
de cortadoraicuchillos
de moldeado
nece-
sarios en el portacuchilla.
•
asegura que la pieza de trabajo pase por las cortadoras/cuchillos
de moldeado en la misma posici6n mediante mQItiples pasadas.
Baje la mesa e inserte la pieza de trabajo en relaci6n a la
posici6n
de las barrenas
de cortadoraicuchillos.
•
Los rebordes guia deben ser del mismo largo que la mesa auxiliar
(31 ¼") y 2" de ancho. Corte los rebordes guia ¼" menos que el
Instale los rebordes
de trabajo.
•
grosor m_.ximo del perfil de la pieza de trabajo final. Los rebordes
guia deben ser enmuescados
para despejar los rodillos de ali-
Eleve la mesa hasta que la pieza de trabajo
t_nicamente con el rodillo de alimentaci6n.
•
Registre
•
Baje la mesa y retire la pieza de trabajo.
•
Eleve de nuevo la mesa a la medida registrada. ContinQe elevando la mesa un giro completo del volante. Registre la medi-
Los rebordes
guia deben hacerse
de madera
dura recta y lisa.
mentaci6n de entrada y salida y los retenes anticontragolpes.
Vease la Figura 22 abajo para informaci6n sobre las dimensiones.
Para montar
•
los rebordes
Instale las barrenas
gufa a la mesa/mesa
de cortadoraicuchillos
auxiliar:
de moldeado
•
de la pasada.
pieza de trabajo.
mente. Si esto ocurre, gire el volante y eleve la mesa hasta
que la pieza de trabajo avance de manera suave. Compare la
el primer
reborde guia y coloque
Coloque
el segundo
de la corta-
medida
el borde interior del
auxiliar en ambos
Durante la operaci6n
didad total del corte.
•
Si el moldeado
MOLDEADO
Consulte
AVlSO:
_
12W'
_,_
con la lectura actual.
de moldeado,
requiere varias
no exceda
pasadas,
¼" de la profun-
asegLirese
de hacer
de trabajo sea semejante.
auxiliar.
AsegQrese que la pieza de trabajo se deslice entre los rebordes guia de manera uniforme y sin atascarse.
91/2"
pasada
avanzar todo el material antes de cambiar la configuraci6n
para cada pasada. Esto asegurarb, que la forma de las piezas
reborde gufa en el otro lado de la pieza
de trabajo y sujetelo a la mesa/mesa
de la primera
•
de la pieza de trabajo.
Sujete el reborde gufa a la mesa/mesa
extremos con abrazaderas en C.
•
medida
Encienda la cepilladoraimolduradora
e inserte la pieza de trabajo hasta que el rodillo de alimentaci6n
haga avanzar la
quede en el punto mas bajo del borde de corte.
riel de gufa hacia el borde exterior
•
haga contacto
AVlSO: Cuando use ciertos tipos de barrenas de cortadoraicuchillos,
la pieza de trabajo podffa avanzar brusca-
Deslice
•
de la pieza
Baje la mesa y cuidadosamente
gire el portacuchilla
con la
mano de manera que una barrena de la cortadoraicuchillo
Coloque la pieza de trabajo debajo de la barrena
doraicuchillo.
•
•
a la posici6n
la altura de la mesa segOn se indica en la escala.
da - esta es la primera
en el portacuchilla. Vease "lnstalaci6n de las Barrenas de
la Cortadora" e "lnstalaci6n de los Cuchillos de Diseho en
Relieve".
•
gufa en relaci6n
DE CARAS
la Figura 23 abajo.
Siempre corte primero
el relieve antes de moldear
la
pieza de trabajo.
91/2''
•
Monte las barrenas
de cortadora
relieve en el portacuchilla
o cuchillos
de diseffo en
de la cepilladoraimolduradora.
(Veanse "lnstalaci6n de las Barrenas de la Cortadora" o
"lnstalaci6n de los Cuchillos de Diseho en Relieve" en
las paginas
t
////
•
t
Dimensi6n
dependiendo
"A"=Grosor
DE
Gufa".)
del grosor de la pieza de trabajo
mdtximo de la pieza de trabajo
Figura 22 - Reborde Guia (Vista
CUCHILLOS
Coloque los rebordes guia en cada uno de los lados de las
barrenas o el cuchillo en la posici6n deseada. (Vease
"Rebordes
"A" cambiarb,
acabada.
31 y 32.)
final - ¼"
Lateral)
r °
r
RELIEVE
Muchos cuchillos de diseflo en relieve de ¼" incluyen cuchillos de
relieve. Los cuchillos de relieve se usan para cortar un relieve en la
parte posterior del moldeado de manera que el moldeado se adapte
mejor a superficies
irregulares tales como paredes enlucidas.
Siempre corte el relieve primero antes de moldear la pieza de trabajo, de manem que se produzca una superficie plana por la cual
se pueda deslizar la pieza de trabajo durante
moldeado. Si se realiza primero el moldeado,
Figura 23 - Moldeado de Caras
la operaci6n de
la pieza de trabajo
no descansara plana sobre la mesa de alimentaci6n
no podra cortarse.
y el relieve
34
MOLDEADO
Consulte
DE
BORDES
la Figura 24 abajo.
Los hordes de la pieza de trabajo pueden moldearse haciendo
avanzar la pieza de trabajo en el borde en la cepilladora/
molduradora.
Los rebordes gufa con una Iongitud de 3A" menor que la pieza de
trabajo deben colocarse en los lados de la pieza de trabajo.
AsegLirese que la pieza de trabajo quede apoyada rfgidamente en
ambos lados por los rebordes gufa directamente
debajo de las
barrenas de la cortadora o los cuchillos.
Adapta'a_dor
l
Canal
para
polvo
l
Figura 24 - Moldeado
RETENES
Figura 25 - Canal de Astillas del Colector de Polvo
REAJUSTE
Consulte
de Bordes
DE SOBRECARGA
la Figura 2 en la pagina 25.
La cepilladora/molduradora
viene equipada con un interruptor de
circuito de protecci6n contra sobrecarga que protege al motor de
ANTICONTRAGOLPES
la cepilladora/molduradora
La cepilladora/molduradora
viene equipada
con retenes anticon-
tragolpes para ayudar a evitar que el portacuchilla
de trabajo.
PRECAUCION:
Nunca se pare de frente
o salida de la cepilladora/molduradora.
los lados de la cepilladora/molduradora
ocurriera
CANAL
Consulte
el contragolpe
DEL
a los lados de entrada
Parese siempre a uno de
para evitar una lesi6n si
volver a encender
BARRAS
COLECTOR
DE
como accesorio
optativo
Consulte
POLVO
•
Retire el desviador
•
Deslice
la cepilladora/molduradora.
y
al lugar deseado.
La parte superior
de la cepilladora/molduradora
de cabeza
de placa y las
de astillas (Clave No. 15).
la canal de astillas
del colector
de polvo a Io largo de
Consulte
alineadas con los agujeros
de rodillos (Clave No. 21).
en el lado posterior
Vuelva a usar dos tornillos
de cabeza
(Claves No. 13 y 14) para asegurar
cubierta de la cuchilla.
Use tres pemos de cabeza
de la caja
de placa y arandelas
•
Mantenga la cepilladora/molduradora
polvo, suciedad y residuos.
•
Limpie las cuatro columnas
que la mesa se atasque
la canal para polvo a la
Mantenga los tornillos de avance
y bien lubricados con grasa.
•
Mantenga
•
de 4" de
antes de hacer funcionar
la cepilladora/
35
de madera,
se suba o se baje.
(Claves
los retenes anticontragolpes
apropiadamente
diametro. Con la canal se incluye un adaptador de 4 a 2W'.
Inserte la manguera adecuada a la canal y asegL_rese de en-
sin astillas
de acero (Clave No. 19) para evitar
cuando
•
hueca de 6-1.0 x 8 mm y tres
arandelas planas de 6 mm (incluidas con la canal para polvo)
para asegurar la canal para polvo a la caja de rodillos.
La canal para polvo tiene espacio para una manguera
la Figura 29 en la pdtgina 20.
ADVERTENCIA:
AsegQrese que la cepillada/molduradora
haya
sido desconectada
de cualquier fuente de alimentaci6n
y apagada antes de intentar realizar el mantenimiento.
den alineadas sobre los agujeros en la canal del colector
de polvo y las ranuras en el colector de polvo queden
cender el aspirador
molduradora.
para facilitar la reubicaci6n
es pesada y tiende a inclinarse cuando se mueve. Tenga cuidado
cada vez que mueva la cepilladora/molduradora.
los bordes de la cubierta de la cuchilla (Clave No. 8) de
manera que las ranuras en la cubierta de la cuchilla que-
•
cuatro barras elevadoras
PRECAUCION:
Desenrosque y retire los tres tornillos
arandelas (Claves No. 13 y 14).
•
ELEVADORAS
molduradora
de polvo:
Apague y desenchufe
la cepilladora/molduradora.
Deslice los cuatro mangos fuera de los extremos de entrada
salida de la mesa y tJselos para transportar la cepilladora/
La canal de astillas del colector de polvo se monta en la cepilladora/molduradora
en vez del desviador de astillas. Para montar la
•
una
de la cepilladora/molduradora.
una canal de astillas para
•
durante
la Figura 2 en la p_tgina 24.
Se incluyen
de polvo (no se muestra).
canal de astillas del colector
dahos.
deja de funcionar
operaci6n de cepillado o moldeado, desenchQfela y Ileve el interruptor a la posici6n OFF (apagado). Optima el bot6n de
reajuste al lado del interruptor para permitir que se pueda
las Figuras 25 y 28 en las p_tginas 35 y 18.
Esta disponible
el colector
golpee la pieza
de la pieza.
DE ASTILLAS
contra posibles
Si la cepilladora/molduradora
para evitar lesiones
No. 20 y 26) limpios
limpios y funcionando
debido al golpe.
Luego de cada diez horas de funcionamiento,
nismo de impulsi6n de cadena/engranaje.
limpie el meca-
AJUSTE
Consulte
DE
LA POSICION
las Figuras
DE
LA MESA
19 y 29 en las p&ginas 32 y 20.
La mesa viene colocada de fb.brica paralela al portacuchilla y no
necesitarb, ning0n otro ajuste. Si la cepilladora corta un lade de la
pieza de trabajo de forma m&s profunda que el otro, produciendo
asi un corte ahusado, entonces la mesa debera ajustarse.
Verifique que las cuchillas esten ajustadas correctamente,
"Ajuste de la Altura de la Cuchilla" en la pb.gina 28.
•
Desenchufe
•
Coloque el bloque de ajuste del portacuchilla
la cepilladora
de la fuente
vease
de alimentacion.
(vease la Figura
19) sobre la mesa en el borde exterior del portacuchilla.
Levante la mesa hasta que el bloque haga contacto tJnica-
o?_
mente con el portacuchilla.
No mueva la posici6n de la mesa
hasta que se hayan revisado ambos lados del portacuchilla.
\
•
Deslice
el bloque al otro lade del portacuchilla.
bloque haga contacto
Figura 26 - Detalle del Mecanismo
de Cadena/Engranaje
de Impulsi6n
•
•
Use un paso limpio y seco para limpiar las astillas de madera,
polvo, suciedad y grasa vieja de las cadenas y engranajes.
•
Use grasa de rodamientos
automotrices
•
cadenas y engranajes. AsegtJrese que todas las cadenas
engranajes tengan suficiente grasa.
afecte la capacidad
sellador, etc.
que el lubricante
de acabar la pieza de trabajo
altura de la mesa (asegtJrese
con barniz,
Gire la rueda dentada
los rodillos de alimentaci6n
da5ados.
cuchillas, barrenas de cortadora
dahados o desgastados.
y cuchillos
AJUSTE
V
Consuite
DE
LA
CORREA
Reemplace
las
de diseSo en relieve
La tensi6n inadecuada en la Correa V (Figura 29, Clave No. 31)
causar_, que la correa se deslice de la polea del motor o de la
Para ajustar la tensi6n
de la Correa V:
•
Afloje y retire los cuatro tomillos de cabeza de placa (Figura 27,
Clave No. 2) en la cubierta derecha (Figura 27, Clave No. 9).
•
Retire la cubierta.
•
Afloje los dos pernos de cabeza
hueca (Figura 29, Clave No.
27) que van a traves del conjunto
No. 32).
•
del motor (Figura 29, Clave
Afloje las tuercas hexagonales (Figura 29, Clave No. 16) y
apriete los dos pernos de cabeza hueca (Figura 29, Clave No.
27) que van en la muesca del conjunto del motor para tensionar la correa. La correa se tensiona de rnanera correcta
cuando
se produce una desviaci6n
de ¼" al aplicar presi6n
moderada con los dedos al punto central de la correa. Apriete
las tuercas hexagonales para asegurar los pernos de cabeza
hueca.
•
Apriete los dos pernos de cabeza hueca (Figura 29, Clave No.
27) que van a traves del conjunto del motor.
•
Vuelva a colocar
la cubierta
(Clave No. 38).
de no tocar la otra rueda dentada).
mas de 1 6 2
hasta que la mesa quede paralela
a la caja
de rodillos. Monte la rueda dentada de la presi6n de la cadena
cuidadosamente
y tensione la cadena de manera adecuada.
las Figuras 27 y 29 en las p_.ginas 16 y 20.
polea impuisora.
de tensi6n
AVISO: Cuide de no girar las ruedas dentadas
dientes.
usado no
Por ejemplo, no use lubricantes a base de silicio porque los mismos arruinar&n cualquier intento de acabar la madera.
Reemplace
de la abrazadera
Determine el lado que necesita ajuste y retire la cadena de dicha
rueda dentada. Gire la rueda dentada con la mano para ajustar la
La superficie de la mesa se puede recubrir con un lubricante, por
ejemplo, cera para muebles, para hacer que la pieza de trabajo
AsegQrese
a la mesa.
La altura de la mesa se puede ajustar retirando la cadena de las
ruedas dentadas de las esquinas y girando las ruedas dentadas.
LUBRICAClON
avance uniformemente.
que el
Si la caja de rodillos no se encuentra paralela a la mesa,
entonces deberb, ajustarse la mesa. Suelte el perno que sujeta
el conjunto
y
Verifique
con el portacuchilla.
Si ambos lades del portacuchilla
se encuentran a la misma
altura, entonces la caja de rodillos y el portacuchilla
estan
paralelos
para lubricar todas las
Qnicamente
y apriete los cuatro tornillos
(Figura 27, Claves No. 2 y 9).
36
SINTOMA
CAUSAS(S) POSIBLE(S)
MEDIDA
CORRECTIVA
Redondeo excesivo
(depresiones en los
extremes de la tabla)
1. Cuchillas desafiladas
1. Reemplace las cuchillas segun las instrucciones,
vease "Operacion"
2. Soporte inadecuado de las tablas
largas
3. Presi6n del rodillo de alimentacion
dispareja
4. Mesa desalineada
2. Soporte las tablas largas
3. Verifique el funcionamiento
de alimentacidn
del rodillo
5. La madera no esta topando
correctamente
4. Verifique la posicidn en los tornillos de elevacidn
5. Haga que los extremos de las piezas de material
se topen entre si a medida que las tablas pasan
por la cepilladora/molduradora
6. Rodillos de soporte desalineados
6. Ajuste los rodillos de soporte
Veta fibrosa
Cepillado de madera con un alto
contenido de humedad
Seque la madera para eliminar su alto contenido de
humedad
Veta desgarrada
1. Corte muy pesado
2. Las cuchillas estan cortando en
contra de la veta
1. Revise "Profundidad del Corte"
2. Revise "Veta de la Madera"
3. Cuchillas desafiladas
3. Reemplace las cuchillas segQn las instrucciones,
vease "Ajuste de la Altura de la Cuchilla"
1. Cuchillas desafiladas
1. Reemplace las cuchillas segun las instrucciones,
vease "Ajuste de la Altura de la Cuchilla"
2. Revise "Profundidad del Corte"
Veta aspera, elevada
2. Corte muy pesado
3. Contenido de humedad
demasiado alto
3. Sequela
madera o use madera seca
Dificultad para levantar/bajar
la mesa
Portacuchilla desnivelado
a la mesa
respecto
Ajuste los tornillos de elevacion, vease "Ajuste de la
Profundidad del Corte"
Profundidad del corte dispareja
(corte ahusado)
Portacuchilla desnivelado
a la mesa
respecto
Ajuste los tornillos de elevacion, vease "Ajuste de la
Profundidad del Corte"
Deslizamiento
Correa suelta
de la correa
La cepilladora/molduradora
no funciona
1. Alimentaci6n
Aplique tensi6n o reemplace la correa, vease
"Ajuste de la Correa V"
no conectada
a la
cepilladora/moldu radora
2. Se disparo la proteccidn contra
la sobrecarga del motor
3. Interrupter o cableado defectuosos
o sueltos
1. Un electricista calificado debe revisar la fuente
de alimentacion
2. Reajuste la protecci6n contra la sobrecarga del
motor, vease "Reajuste de Sobrecarga"
3. Un electricista calificado debe revisar el
interruptor y el cableado
La tabla se desliza, no avanza
Rodillos de alimentaci6n
demasiado altos Baje los rodillos de alimentaci6n, vease "Ajuste de
los Rodillos de Alimentacion"
La tabla avanza pero no corta
Rodillos de alimentaci6n
bajos
demasiado
La tabla entra pero deja de
moverse despues del rodillo de
alimentaci6n de salida
1. Rodillos de salida demasiado altos
1. Baje los rodillos de alimentaci6n de salida a
nivel con los rodillos de entrada, vease "Ajuste
de los Rodillos de Alimentacion"
2. Los rodillos de salida no pueden
girar debido a que estan atascados
con astillas
2. Despeje el atascamiento, use la canal de
astillas del colector de polvo, vease
"Accesorios Recomendados", pagina 21
Las cu_as no estan sueltas
Afloje los tornillos de fijaci6n en las cuSas y golpee
todas las cuSas hacia abajo
No puede removerse la
cuchilla de cepillado/cuchillo
de dise_o en relieve
37
Suba los rodillos de alimentacion, vease "Ajuste de
los Rodillos de Alimentacion"
NOTAS
38
NOTAS
39
Your Home
For repair-in
your home-of all major brand appliances,
lawn and garden equipment, or heating and cooling systems,
no matter who made it, no matter who sold it!
For the replacement parts, accessories and
owner's manuals that you need to do-it-yourself.
For Sears professional installation of home appliances
and items like garage door openers and water heaters.
1-800-4-MY-HOME
Call anytime,
® (1-800-469-4663)
day or night (U.S.A. and Canada)
www.sears.com
www.sears.ca
Our Home
For repair of carry-in items like vacuums, lawn equipment,
and electronics, call or go on-line for the location of your nearest
Sears Parts & Repair Center.
1-800-488-1222
Call anytime,
day or night (U.S.A. only)
www.sears.com
To purchase a protection
1-800-827-6655
agreement
on a product serviced by Sears:
(U.S.A.)
Para pedir servicio de reparaci6n
a domicilio, y para ordenar piezas:
1-888-SU-HOGAR
1-800-361-6665
(Canada)
Au Canada pour service en fran£ais:
1-800-LE-FOYER
sM
Mc
(1-800-533-6937)
www.sears.ca
(1-888-784-6427)
SEARS
TM
SM
® Registered Trademark /
Trademark /
Service Mark of Sears, Roebuck and Co.
® Marca Registrada / TM Marca de Fabrica / SM Marca de Servicio de Sears, Roebuck and Co.
MC Marque
de commerce
/ MD Marque
deposee
de Sears,
Roebuck
and Co.
® Sears, Roebuck and Co.