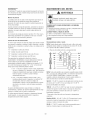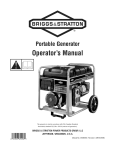
1
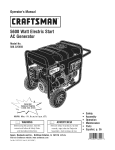
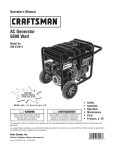
Operator's Manual
®
HOURS: Man. =Fri. 8 a.m. to 5 p.m. (CT)
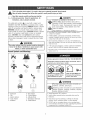
WARNING
ADVERTENCIA
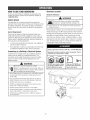
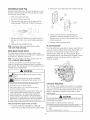
Before using this product, read this
Antes de utiiizar et producto, iea este
manual and foiiow ali Safety Rules
manual y siga todas las Reglas de
and Operating instructions.
Seguridad e Instrucciones de Uso.
Sears, Roebuck and Co., Hoffman Estates, JL 68179 U.S.A.
Visit our Craftsman website: www.craftsman.cem
Part No. 198451GS Draft F (04/09/2007)
®
,,
,,
,,
®
Safety
Assembly
Operation
Maintenance
Parts
® Espa_oi, p. 36
WARRANTY....................................
SAFETYRULES ...............................
FEATURESAND CONTROLS .......................
ASSEMBLY...................................
OPERATION................................
SPECIFICATIONS...............................
2
3-5
6
/-9
1O-f3
14
MAINTENANCE..............................
15-18
STORAGE ....................................
19
TROUBLESHOOTING............................
NOTES ..................................
20
21 & 33
SCHEMATIC/WIRiNGDIAGRAM ................
22-23
REPLACEMENTPARTS .......................
24°32
EMISSIONSSYSTEMWARRANTY...............
34-35
ESPANOL..................................
36°59
HOW TO ORDERPARTS .................
BACKPAGE
One-Year FuMM
Warranty on Craftsman Generator
If this generator fails due to a defect in materiai or workmanship within one year from the date of purchase, return it to any
Sears store, other Craftsman outlet, or Sears Parts & Repair Center in the United States for free repair (or replacement if
repair proves impossible).
Additional One-Year LimitedWarranty on Craftsman Generator
For the second year from the date of purchase, if any part of this generator faiis due to a defect in material or workmanship, a
new part wiii be supplied free of charge. You must pay the labor cost if you wish to have it installed.
Ati warranty coverage appiies for only 90 days from date of purchase if this generator is used for commercial or rental
purposes. Oncea generator has experienced commercial or rental use, it shall thereafter be considered a commercial or rental
generator for the purpose of this warranty.
This warranty gives you specific legal rights, and you may atso have other rights which vary from state to state.
Sears, Roebuck and Ca., D/817WA, Haffman Estates, _L60179 U.S.A.
© Sears Brands, LLC
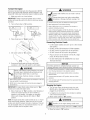
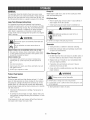
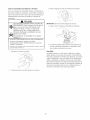
This is the safety alert symbol, tt is used to alert you to potential personalinjuryhazards.
Obey all safety messages that fallow this symbamto avoid passible injury or death.
ii_!-j_j Read
this generator.
manual carefui(y
andapplications,
become familiar
with your
}(now its
its
(imitations, and any hazards involved.
The safety alert symbol (_) is used with a signal word
(DANGER,CAUTIOr/,WARNIr/G), a pictorial and/or a safety
messageto alert you to hazards. BANGERindicates a hazard
which, if not avoided, wi/f result in death or serious injury.
WARNINGindicates a hazardwhich, if not avoided, could
result in death or serious injury. CAUTIONindicates a hazard
which, if not avoided, might resuIt in minor or moderate
injury. CAUTION,when used without the alert symbol,
indicates a situation that could result in equipment damage.
Foiiow safety messagesto avoid or reduce the risk of injury
or death.
WARNING
The engine exhaust from this productcontains chemicals
known to the State of California to cause cancer, birth
defects, or other reproductive harm.
Hazard Symheis and Nteanings
DANGFR
Contents are HARMFULOR FATAL iF
SWALLOWED.Avoid contact to eyes, skin or
clothing. DOriOT take internaIiy. Avoid breathing
the mist or vapor. Overexposureto eyes or skin
can cause irritation. Keepstabiiizer out of the
reach of children.
®
Fuelstabilizer is a hazardous chemical/*
FreshStartTM fuel capis designedto holda cartridgewhich
containsfuelstabilizer.
• If SWALLOWED
callphysicianimmediately.DONOTinduce
vomiting.If inhaled removeto freshair. Incaseof eyeor skin
contacLflush with waterfor 15 minutes.
o Storeunopenedcartridgesin a cool,d% wellventilatedarea.
Keepopenca!tridgein fuel cap,andfuel capclosedon fueltank
whennotin use.
o Inthe caseof an emergency,contacta physicianimmediately
andcall 1-800-424-9300for rnateria!safetyinformation.
• * Fuel stabilizer contains: 2,6-di-tret-butylphenol (128=39-2) and aliphatic petroleum
distillate (64742-47-8).
Using
a generator
indoors
Generator
exhaust
a poison
you cannot
NEVER
CAN
contains
KiLL YOU iN MINUTES,
carbon
monoxide,
This is
see or smemmo
use inside a home
or garage, EVEN mF doors
and wiedows
are open,
Only use OUTSIDE and
far away from windows,
doors, and vents,
WARNSNG
Running engine gives off carbon monoxide, an
odorless, colorless, poison gas.
Breathing carbon monoxide can cause headache,
fatigue, dizziness,vomiting, confusion, seizures,
nausea,fainting or death.
A =Explosion
B =Fire
C =Electric Shock
D = Toxic Fumes
E =Kickback
F =Hot Surface
G =Flying Objects
H =Moving Parts
J =HazardousChemical
K =ReadManual
o OperategeneratorONLYoutdoors.
• Installa batteryoperatedcarbonrnonoxideahrrn nearthe
bedroorns.
• Keepexhaustgasfrom enteringa confinedareathrough
windows_doors,ventilationintakes,or otheropenings.
• DONOTstartor runengineindoorsor in an enclosedarea,
(evenif windowsanddoorsareopen) includingthe generator
compa!tmentof a recreationalvehicle(RV).
WARNING
WARNING
3enerator produces hazardous voltage.
Faiiure to isoiate generator from power utiiity can
result in death or injury to etectric utiiity workers
due to backfeed of electrical energy.
_<
Starter cord kickback (rapid retraction) can result
in bodiiy injury. Kickback wiii puff hand and arm
toward engine faster than you can bt go.
Broken bones, fractures, bruises, or sprains
could result.
• Wben using generator for backup power_notify utility company.
Use approvedtransfer equipment to isolate generator frorn
electric utility.
• When starting engine, pull cord slowly until resistanceis felt and
then pull rapidly' to avoid kickback.
• Use a ground fault circuit interrupter (GFCI)in any damp or
bigbly conductive area, such as metal decking or steel work.
• NEVERstart or stop engine with electrica! devices plugged in
and turned on.
• DO NOTtouch bare wires or receptacles.
o DO NOTuse generator with ebctrical cords which are worn,
frayed, bare or otherwise damaged.
• DO NOToperate generator in the rain or wet weather.
• DO NOTbandle generator or ebctrica! cords while standing in
water, while barefoot, or wbile hands or feet are wet.
• DO NOTallow unqualified persons or children to operate or
service generator.
WARNING
Fuel and its vapors are extremely flammable and
explosive.
death.
Fire or explosion can cause severe burns or
WNENADDING OR DRA_NINGFUEL
WARNING
Contact with muffler area can result in serious
burns.
Exhaust heat/gases can ignite combustibles,
structures or damagefuel tank causing a fire.
DO NOT touch hot parts and AVOID bot exhaust gases.
• Allow equipment to cool before touching.
• Keep at least 5 feet (1.5 m) of clearance on all sides of
generator including overhead.
• Code of FederalRegulation (CFR) Title 36 Parks, Forests, and
Public Property require equipment powered by an internal
combustion engine to have a spark arrester, rnaintainedin
effective working order, complying to USDAForest seP,dce
standard 5100-10 or later revision. In the State of California a
spark arrester is required under section 4442 of the California
Public resources code. Other states may havesimilar laws.
WARNING
Starter and other rotating parts can entangie
hands, hair, ciothing, or accessories.
• NEVERoperate generator without protective housing or covers.
o DO NOTwear loose c!othing, jewelry'or anything that may'be
caught in the starter or other rotating parts.
o Tie up long hair and remove jewelry'.
o Turn generator OFFand let it cool at least 2 rninutes before
removing fuel cap. Loosen cap slowly to re%ve pressure in
tank.
• Fill or drain fuel tank outdoors.
o DO NOT overfill tank. Allow space for fuel expansion.
• If fue! spills, wait until it evaporates before starting engine.
o Keep rue! away from sparks_open flames, pilot lights, beat, and
other ignition sources.
o DO NOT light a cigarette or smoke.
WHENSTARTBNGEQUIPMENT
• Ensure spark plug_muffler, fue! cap, and air charier are in place.
o DO NOT crank engine with spark plug removed.
WNEN OPERATmNG
EQUmPLNIENT
• DO NOT tip engine or equipment at angle wbich causesfuel to
spill.
o This generator is not for use in rnobile equipment or rnarine
applications.
WNENTRANSPORTINGOR REPAIRmNGEQUmPI_IENT
• Transport/repair witb fuel tank EMPTYor with fuel shutoff valve
OFF.
• Disconnect spark plug wire.
WNEN STORmNGFUELOR EQUmPIVlENT
WITH FUEL iN TANK
o Store away'from furnaces, stoves,water heaters, clothes dryers,
or other appliances that bavepilot light or other ignition source
becausethey can ignite fuel vapors.
WARNING
This generator does not rneetU. S. Coast Guard Regulation
33CFR-183and should not be used on rnarine applications.
Failure to use the appropriate U. S. Coast Guard approved
generator could result in death or serious iniury and/or
property damage.
WARNING
Unintentionai sparking can result in fire or
electric shock.
NOTICE
Exceeding generators wattage/amperage capacity can
damage generator and/or eiectricai devices connected to it.
DO NOT exceedthe generator's wattage/amperage capacity, See
Don't OverloadGenerator in the Operationsection.
Stat generator and let engine stabilize before connecting
ebctrical loads,
WHENADJUSTING
OR[VIAKINO
REPAIRS
TOYOURGENERATOR
, Disconnectthe sparkplugwirefrom the sparkplugand place
thewirewhereit camot contactsparkplug.
WHEN TESTINGFOR ENGINESPARK
• Useapprovedsparkplugtester.
o DONOTcheckfor sparkwith sparkplug removed.
CAUTION
Excessively high operating speeds increase risk of injury
and damage to generator.
Excessively low speeds impose a heavy load.
DO NOTtamper with governed speed. Generator supplies
correct rated frequency and voltage when running at governed
speed.
DO NOTmodify generator in any way.
Connect ebctrical loads in OFFposition, then turn ON for
operation.
Turn electrical loads OFFand disconnect from generator before
stopping generator.
NOTICE
Improper treatment of generator can damage it and
shorten its iife.
Use generator only for intended uses,
If you havequestions about intended use, ask dealeror contact
local service center.
Operate generator only on level surfaces.
DO NOT expose generator to excessive moisture, dust, dirt, or
conosive vapors.
DO NOT insert any obiects through cooling slots.
If connected devices overheat_turn them off and disconnect
them from generator.
Shut off generator if:
-electrical output is lost;
-equipment sparks, smokes, or emits flames;
-unit vibrates excessively.
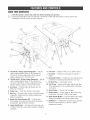
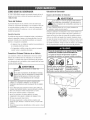
KNOWYOURGENERATOR
_Read Compare
the the
operator's
manaamand
rulestobefore
operatingyour
generator,
illustrations
with yoursafety
generator
familiarize
yourself with
the locations of various controls and
adjustments. Savethis manual for future reference.
H =Fuel Tank -- Capacity of five (5) U.S. gallons (18.9 L).
A =120 VoltAC,20 Amp, DuplexReceptacles
-- May be
used to supply electricaI power for the operation of
120 Voit AC, 20 Amp, single phase, 60 Hz eiectricat,
lighting, appliance, tooi, and motor loads.
J - Fael VaNe -- Used to turn fuel supply on and off to
engine.
B =120/240VoltAC, 30 Amp LockingReceptacle
-- May be
used to supply electricai power for the operation of
120 and/or 240 Voit AC, 30 Amp, single phase, 60 Hz
electrical, lighting, appliance, toot and motor ioads=
L - Oil Drain Plag -- Drain engine oii here.
C - Air Cleaner -- Protects engine by filtering dust and
debris out of intake air.
D - Choke Lever -- Used when starting a cold engine.
E - Data Tag -- Provides model, revision, and serial number
of generator. Pleasehavethese readily available when
calling for assistance.
F= DoablePoleCircuit Breaker(AC)-- A doublepole
circuit breaker is provided to protect ali the receptacies
and generator against electrical overload.
G - Engine Identification -- Provides model, type and code
of engine. Pleasehave these readily availableif calling for
assistance.
K =Groanding Fastener -- Consuit your iocai agency having
jurisdiction for grounding requirements in your area.
Ni - Oil Fill Cap -- Checkand fiii engine with oii here. See
Offin Maintenancefor oil recommendations and filling
instructions.
N =ReooiJ Starter -- Used to start the engine.
P - Rocker Switch -- Set this switch to "On" before using
recoii starter. Set switch to "Off" to stop engine.
R =Spark Arrestor I_]affier -- Exhaust muffler lowers engine
noise and is equipped with a spark arrestor screen,
S - StatBtationTM -- Dispiays the nominat load on generator
based on output frequency. It also has a built in
maintenance reminder.
YourCraftsman
generator
requires
someassembly
andis
ready
foruseonlyafterit hasbeenproperly
servbed
withthe
recommended
oilandfuel.
tf youhaveanyprobbmswiththeassemMy
ofyour
generator,
please call the generater heb]ine at
1-80e-222-3136.
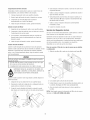
Unpacking the Generater
1. Set the carton on a rigid fiat surface.
2. Removeeverything from carton except generator.
3. Open carton completely by cutting each corner from top
to bottom.
4. Leavegenerator on carton to install wheel kit.
Carten Centents
Check alI contents against those listed below:
o Main unit
o Engineoii
o Operator's manuai
Wheel kit
4. Mace a washer (C) on axie and then place an e-ring (g)
in axle groove.
o Adapter cord set
5. InstalI e-ring with pliers, squeezing from top of e-ring to
bottom of axle.
If any parts are missing or damaged, call the generator
helpline at 1=800=222=3136.
nstall Wheel Kit
NOTE:Wheel kit is not intended for over-the-road use. DO
NOTtow this unit with a motorized vehicte.
You wiii need the following tools to install these
components:
o 13ram wrench
o Socket wrench with a 13ram socket
o Pliers
o Safety gtasses
Install the Wheel }(it as Folbws:
1. Tip generator so that engine end is up.
2. Slide axle (A) through both mounting brackets.
3. Placea wheel (B) on each side as shown.
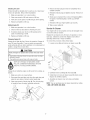
CAUTION
E-rings can cause eye injury.
E-rings can spring back and become airborne
when installing or removing.
• Alwaysweareyeprotectionwheninstalling/removing
e-rings
6. Repeatsteps 4 and 5 to secure second wheei.
7. Tip generator so that engine side is down.
8. Line up holes in support leg (E) with holes in generator
frame.
9. Attach support ieg using two short capscrews (MS x
16 ram) (F) and two iocking hex nuts (G). Tighten with
a 13 mm socket and wrench.
10. Return generator to normat operating position (resting
on wheels and support leg).
BEFORESTARTINGTHE GENERATOR
WARNING
Add Engine Oil
1. Place generator on a level surface.
2. Cleanarea around oii fiii and remove yellow oii fiii cap.
NOTE:See the section Oi/to review oii recommendations.
Verify provided oii bottie is correct viscosity for current
ambient temperature.
3. Using oil funne! (optional), slowly pour entire contents
of provided oil bottle (26 oz.) into oil fill opening.
NOTICE
improper treatment of generator can damage it and
shorten its iife.
DONOTattemptto crankor startthe enginebeforeit hasbeen
properlyservicedwith the recommended
oil.This mayresultin
an enginefailure.
4. Replace oil fill cap and fuIly tighten.
AddFuel
Fuel must meet these requirements:
o Clean, fresh, unleaded gasoline.
° A minimum of 87 octane/87 AKi (91 RON). High altitude
use, see High-A/titude.
° Gasoiine with up to 10% ethanol (gasohoi) or up to
15% MTBE(methyl tertiary butyl ether) is acceptable.
NOTICE
Fueland its vapors are extremely flammable and
explosive.
Fireor explosion can cause severe burns or
death.
WHENADDINGFUEL
o TurngeneratorOFFandlet it cool at least2 rninutesbefore
removingfuel cap.Loosencapslowlyto relievepressurein
tank.
* Fillfue!tank outdoors.
o DONOToverfilltank.Allowspacefor fuel expansion.
* If fue! spills,wait until it evaporatesbeforestartingengine.
o Keepfuelawayfrom sparks_
openflames,pilot lights,heat,and
otherignitionsources.
o DONOTlight a cigaretteor smoke.
To protect the fuei system from gum formation, mix in a fuel
stabiiizer when adding fuel. See Storage. AJifuel is not the
same. if you experience starting or performance probiems
after using fuel, switch to a different fuei provider or change
brands. This engine is certified to operate on gasoline. The
emission controi system for this engine is EM (Engine
Modifications).
1. Cleanarea around fuei fiii cap, remove cap.
2. Slowly add unieaded gasoline (A) to fuei tank (B). Be
careful not to overfill. Allow about 1.5" (4 cm) of tank
space (C) for fuel expansion.
Avoid generator damage.
Faiiureto foilow Operator's Manuai for fuel
recommendations voids warranty.
DONOTuseunapprovedgasolinesuch asE85.
DONOTmix oil in gasoline.
DONOTrnodifyengineto run on alternatefuels.
3. Instali fuei cap and let any spifled fuel evaporate before
starting engine.
CAUTISN! Alcohol-blended fuels (called gasohoI, ethanol or
methanol) can attract moisture, which ieads to separation and
formation of acids during storage, Acidic gas can damagethe
fuei system of an engine whiie in storage,
To avoid engine problems, the fuel system should be treated
with a fuel preserver or emptied beforestorage of 30 days or
longer, if adding a fuel preserver, fiii the fuel tank with fresh
fuel. if only partialiy tiffed, air in the tank wiii promote fuel
deterioration during storage, if fuei preserver is not used,
drain the fuel tank, start the engine and let it run untii the fuel
lines and carburetor are empty. Use fresh fuel next season.See
Storagefor additionai information.
3. Removetab to expose membrane.
)
IMPORTANT:DONOT remove the silver foil seal on the
opposite side.
4. Reinstall fuei cap on fuel tank.
NEVERuse engine or carburetor cleaner products in the fuel
tank as permanent damage may occur.
Fresh Starl TM Fuel Cap
Adding fuel preserver helps keepfuei fresh and carburetors
ciean for easier starting, ali season iong. This new fuel cap
automatically drips concentrated fuel preserver into your fuel
tank.
_/////i_
V/b;
contact to eyes, skin or c!othing. DONOTtake
internaiiy. Avoid breathing the mist or vapor.
Overexposureto eyes or skin can cause irritation.
Keep stabilizer out of the reach of chiidren.
5. Periodicaliy check the cartridge to ensure there is stiil
fuel preserver inside. If it is empty, remove cartridge
and replace.
Fuei stabiiizer is a hazardous chemical.**
If SWALLOWED,
callphysicianimmediately.
h_the caseof an emergency,contacta physicianimmediately
and call1-800-424-9300for materialsafetyinformation.
*Fuel stabilizer contains: 2.6-di-tret-butylphenol (128-39-2) and aliphatic petroleum
distillate (64742-47-8),
1. Place cartridge into fuel cap.
2. Push to "snap" cartridge into place.
At altitudes over 5,000 feet (1524 meters), a minimum
85 octane / 85 AKI (89 RON) gasoline is acceptable. To
remain emissions compiiant, high aititude adjustment is
required. Operationwithout this adjustment wiii cause
decreasedperformance, increased fuel consumption, and
increased emissions. See a qualified Sears dealer for high
altitude adjustment information. Operation of the engine at
altitudes below 2,500 feet (762 meters) with the high altitude
kit is not recommended.
HOWTO USEYOUR GENERATOR
Generater Lecatien
If you haveany problems operating your generator after
reading the manual, please call the generator helpiine at
1o800o222o3136.
Generater Clearance
WARNING
System Ground
_,_5
The generator has a system ground that connects the
generator frame components to the ground terminals on the
AC output receptacbs. The system ground is connected to
the AC neutral wire (the neutral is bonded to the generator
frame),
structures or damage fuel tank causing a fire.
Keepat least5 ft. (1.5 rn)clearanceon all sidesof generator
includingoverhead.
Mace generator outdoors in an area ttsat wiii not accumuiate
deadiy exhaust gas. DO NOTpiace generator where exhaust
gas (A) couid accumulate and enter inside or be drawn into a
potentialiy occupied buiiding. Ensure exhaust gas is kept
away from any windows, doors, ventiiation intakes, or other
openings that can ailow exhaust gas to coiiect in a confined
area. Prevaiiing winds and air currents shouid be taken into
consideration when positioning generator.
Special Requirements
There may be Federator State Occupational Safety and
Health Administration (OSHA)regulations, local codes, or
ordinances that appiy to the intended use of the generator.
Pieaseconsult a quaiifbd eiectrician, electrical inspector, or
the local agency having jurisdiction.
,
In some areas, generators are required to be registered
with iocai utiiity companies.
o
If the generator is used at a construction site, there may
be additional regulations which must be observed.
Using
Cennecting te a Building's
Exhaustheat/gases can ignite combustibles,
Electrical System
Connections for standby power to a buiiding's electrical
system must be made by a quaiified electrician. The
connection must isoiate the generator power from utiiity
power, and must comply with alI appficabb laws and
electrbaI codes.
WARNING
a generator
indoors
Generator
exhaust
a poison
you cannot
contains
CAN
KiLL YOU mN MINUTES,
carbon
monoxide,
This is
see or smell,
Only use OUTSIDE and
far away from windows,
doors, and vents,
3enerator produces hazardous voltage.
_¢
aiiure into death
isoiateor generator
from power
can
result
injury to electric
utility utiiity
workers
due to backfeed of electricai energy.
• Wher_using generator for backup power, notify utility company
Use approvedtralssfer equipment to isolate generator frorn
electric utility
• Use a ground fault circuit interrLipter(GFCI)in any damp or
highly conductive area, such as metal decking or steel work.
• DO NOTtouch bare wires or receptacles
o DO NOTuse generator with ebetrical cords which are worn,
frayed bare or otherwise damaged.
• DO NOToperate generator in the rain or wet weather
• DO NOThandle generator or ebctrica! cords while standing in
water, while barefoot, or while hands or feet are wet
• DO NOTallow Lmqualifiedpersons or children to operate or
service generator.
10
To Start The Engine
WARNING
DisconnectatI ebctricai loads from the generator. NEVER
start or stop engine with electricai devices piugged in and
turned ON. Foilow start instruction steps in numerical order:
Contact with muffler area can result in serious
burns.
1. Make sure unit is on a ievei surface.
_
iMPORTANT: Failureto start and operate unit on a level
surface wiii cause the unit not to start or shut down during
operation.
o
2. Turn red fuei vaive to "On" position.
®
o
3. Place choke lever in "Choke" position.
Exhaust heat/gases can ignite combustibies,
structures or damage fue! tank causing a fire.
DONOTtouch hotpartsandAVOIDhot exhaustgases.
Allowequipmentto coolbeforetouching.
Keepat least5 feet (1.5m) of clearanceon all sidesof
generatorincludingoverhead.
Codeof FederalRegulation(CFR)Title 36 Parks,Forests,and
PublicPropertyrequireequipmentpoweredby an internal
combustionengineto havea sparkanester,maintainedin
effectiveworkingorder,complyingto USDAForestservice
standard5100-1Cor laterrevision.Inthe Stateof Californiaa
sparkarresteris requiredundersection4442 ofthe CaBornia
Publicresourcescode.Otherstatesrnayhavesimilarlaws.
Connecting Electrical Loads
* Let the engine stabiiize and warm up for a few minutes
after starting.
o DONOTconnect240Volt loadsto 120Voit receptacbs.
* DO NOTconnect 3-phase ioads to the generator.
o DO NOTconnect 50 Hz ioads to the generator.
4. Set rocker switch to "Off' position.
o Mug in and turn on the desired 120 Volt AC, singie
phase, 60 Hertz eiectricai ioads.
o DO NOT OVERLOADTHE GENERATOR.See Don't
Overload Generator.
5. Grasp recoil handle and pulI slowly until slight
resistance is felt. Then pull rapidty to start engine.
NOTICE
Exceedinggenerators wattage/amperagecapacity can
damagegenerator and/or ebctricaI devicesconnected to it.
DONOTexceedthe generator'swattage/amperage
capacity.See
Don?OverloadGeneratorin the Operation
section.
Startgeneratorand letenginestabilizebeforeconnecting
electricalloads.
WARNING
Starter cord kickback (rapid retraction) can result
n bodiiy injury. Kickback wiii puli hand and arm
toward engine faster than you can bt go.
Broken bones, fractures, bruises, or sprains
sould result.
• Whenstartingengine,pul!cordslowlyuntil resistanceisfelt and
then pull rapidlyto avoidkickback.
o NEVERstart or stop enginewith ebctricaldevicespluggedin
andturnedon.
Connectebctricalloadsin OFFposition,thenturn ONfor
operation.
TurnelectricalloadsOFFanddisconnectfrom generatorbefore
stoppinggenerator.
Stopping the Engine
t_IPORTANT:If engine floods, place choke lever in "Rue"
position and crank untii engine starts.
1. Turn off and unpiug ati eiectricai ioads from unit.
NEVERstart or stop engine with ebctricat devices
ptugged in and turned on.
6. Move choke iever to "Rue" position a short distance at
a time over severai seconds in warm weather or
minutes in cold weather. Let engine run smoothly
before each change. Operatewith choke in "Rue"
position.
2. Let engine run at nooioad for two minutes to stabilize
unit's internal temperatures.
3. Move rocker switch to "Off" position.
i
NOTE:if engine starts after 3 pulls but faiis to run, or if unit
shuts down during operation, make sure unit is on a level
surface and check for proper oii ieveI in crankcase. This unit
may be equipped with a iow oii protection device. If so, oil
must be at proper level for engine to start.
wAR. .G
Backf re, fire or engine damagecould occur.
Io DONOTstop enginebymovingchokeleverto "Choke"position.
4. Move fuel valve to "Off" position.
11
CSBDSETSAND RECEPTACLES
128 Volt AC, 28 Amp, #uplex Receptacles
Use onty high quality, welPinsulated, grounded extension
cords with the generator's 120 Volt electrical receptacles.
Inspect extension cords before each use.
Eachduplex receptacle is protected against overload by a
double pole rocker switch circuit breaker.
Checkthe ratings of aii extension cords before you use them.
Extensioncord sets used should be rated for 125 Voit AC
loads at 20 Amps or greater for most electrical devices.
Some devices, however, may not require this type of
extension cord. Checkthe operator's manuals of those
devices for the manufacturer's recommendations.
Keepextension cords as short as possible, preferably Iess
than 15 feet iong, to prevent voltage drop and possible
overheating of wires.
WARNING
Overloadedelectrical cords can overheat, arc,
and burn resulting in death, bodily injury, and/or
property damage.
* ONLYusecords ratedfor your loads.
o Followall safetieson ebctricalcords.
Use each receptacieto operate 120 Volt AC, singb-phase, 60
Hz electrical loads requiring up to 2,400 watts (2.4 kW) at 20
Amps of current. Use cord sets that are rated for 125 Volt AC
loads at 20 Amps (or greater).
128/248 VeJt AC, 38 Amp, Locking Receptacle
Use a NEMA L14-30 piug with this receptacle. Connecta
4-wire cord set rated for 250 Voit AC ioads at 30 Amps (or
greater). You can usethe same 4-wire cord if you plan to
run a 120 Volt load.
BENERAT{)RADAPTER CORD SET
The generator comes with a 25' generator adapter cord set
designedto provide two sets of 120 Voit, 20 Amp outiets
from one 120 Volt, 20 Amp dupiex receptacle.
4-WheCordSet
J
(Neutral)
Y (Hot)
NEMA L14-30
|
X (Hot)
/-7L7 Ground(Green)
The maximum load on each outtet is 20 Amps. The maximum
totai ioad on both biack wire outiets or white stripe wire
outiets is 20 Amps.
This receptaclepowers 120/240 Volt AC, 60 Hz, single phase
loads requiring up to 5,600 watts of power (5.6 kW) at
23.3 Amps for 240 Volts or two independent 120 Voit ioads
at 23.3 Amps each. The outbt is protected by a double pole
rocker switch circuit breaker.
NOTE:Foliow aii safety precautions when connecting any
extension cord or device to the generator.
NOTICE
Receptaclesmay be marked with rating vaiue greater than
generator output capacity.
NEVERattemptto powera devicerequiringrnoreamperage
than generatoror receptacle
cansupply,
DONOToverloadthe generator,SeeDon't OverloadGenerato,_
12
DON'TOVERLOADGENERATOR
4. Hug in and turn on the next ioad.
5. Again, permit the generator to stabiiize.
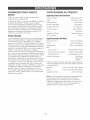
Capacity
6. Repeatsteps 4 and 5 for each additional load.
You must make sure your generator can supply enough rated
(running) and surge (starting) watts for the items you will
power at the same time. Foliow these simple steps:
NEVERadd more loads than the generator capacity. Take
speciai care to consider surge loads in generator capacity, as
described above.
1. Select the items you wiii power at the same time.
Rated*
2. Total the rated (running) watts of these items. This is
the amount of power your generator must produce to
keep your items running.
Tool or Appliance
L_ht
Bulb - 75 watt
Freezer
Sump Pump
Refrigerator/Freezer- 18 Cu. Ft.
Water Well Pump- 1/3 HP
Heating/Cooling
Window AC - 10,000 BTU
Window Fan
Furnace Fan Blower- 1/2 HP
Kitchen
Microwave Oven - 1000 Watt
Coffee Maker
Electric Stove - Sinqle Element
Hot Plate
Family Room
Deep
Example:
Window Air
Conditioner
Refrigerator
Deep Freezer
Television
U,ht _75 Watts'
Rated
(Running) Watts
1200
Additional Surge
(Starting) Watts
1800
8OO
5O0
50O
75
3075 Total
Running Watts
1600
5OO
DVD/CD
Total Rated (Running) Watts
HighestAdditional Surge Watts
1800 Highest
Surge Watts
= 3075
= 1800
Total Generator Output Required
= 4875
Watts
Surge
(Starting)
75
500
800
800
1000
500
1200
1600
2000
1200
300
800
1800
600
1300
Watts
Essentials
3. Estimate how many surge (starting) watts you wiii need.
Surge wattage is the short burst of power needed to
start electric motor-driven toois or appliances such as a
circular saw or refrigerator. Because not aii motors start
at the same time, totai surge watts can be estimated by
adding only the item(s) with the higilest additional
surge watts to the total rated watts from step 2.
Tool or Appliance
(Running)
Additional
Player
VCR
Stereo Receiver
Color Television - 27"
Personal Computer w/17"
monitor
Other
Security Svstem
AM/FM Clock Radio
Garage Door Opener - 1/2 HP
Electric Water Heater - 40
Gallon
DIY/Job Site
Quartz Haloqen Work Light
Airless Sprayer- 1/3 HP
Reciprocating Saw
Electric Drill- 1/2 HP
Circular Saw - 7 1/4"
Miter Saw - 10"
Table Planer - 6"
Table Saw/RadialArm Saw - 10"
Air Compressor - 1-1/2 HP
NOTE:The rated (running) watts cannot exceed 5600. Also,
given the 5600 watt rated iimit, additional surge (starting)
watts cannot exceed 8600.
Pewer Management
To prolong the iife of your generator and attached devices, it
is important to take care when adding electrical loads to your
generator. There shouid be nothing connected to the
generator outlets before starting it's engine. The correct and
safe way to managegenerator power is to sequentially add
loads as follows:
1. With nothing connected to the generator, start the
engine as described in this manual.
2. Hug in and turn on the first ioad, preferably the largest
load you have.
1000
1500
1500
2500
100
100
45O
50O
8O0
180
30O
480
4000
1000
600
960
1000
1500
1800
1800
2000
2500
520
1200
960
1000
1500
1800
1800
2000
2500
*Wattages listed are approximate 0nly, Checktool or
appliance for actual wattage.
3. Permit the generator output to stabiiize (engine runs
smoothly and attached device operates properly).
13
ENGINETECHNICALiNFORMATiON
PRODUCT
SPECiFiCATiONS
This is a single cylinder, overhead valve(OH\/), air cooled
engine, it is a iow emissions engine.
Generator $pe¢ificatiens
In the State of Caiifornia, Model 200000 engines are certified
by the California Air Resources Board to meet emissions
standards for 250 hours. Such certification does not grant
the purchaser, owner or operator of this engine any
additiona] warranties with respectto the performance or
operational iife of this engine. The engine is warranted solety
according to the product and emissions warranties stated
elsewhere in this manual.
Starting Wattage .................
8600 Watts (8.6 kW)
Wattage ........................
5600 Watts (5.6 kW)
AC Voltage ...........................
AC Current
at 240 Volts ...........................
120/240 Volts
at 120 Volts ...........................
46.6 Amps
Frequency ........................
23.3 Amps
60 Hz at 3600 rpm
Power Ratings
Phase ................................
The gross power rating for individuai gas engine models is
labeled in accordance with SAE (Society of Automotive
Engineers)code J1940 (Small Engine Power & Torque
Rating Procedure), and rating performance has been
obtained and corrected in accordancewith SAEJ1995
(Revision 2002=05). Torque values are derived at 3060 RPM;
horsepower values are derived at 3600 RPM. Actuai gross
engine power wiii be lower and is affected by, among other
things, ambient operating conditions and engine-to-engine
variability. Given both the wide array of products on which
engines are piaced and the variety of environmentai issues
appiicabte to operating the equipment, the gas engine wiii not
develop the rated gross power when used in a given piece of
power equipment (actual "on-site" or net power). This
difference is due to a variety of factors including, but not
limited to, accessories (air cleaner, exhaust, charging,
cooling, carburetor, fuel pump, etc.), appiication iimitations,
ambient operating conditions (temperature, humidity,
altitude), and engine-to-engine variabiiity. Due to
manufacturing and capacity iimitations, Briggs & Stratton
may substitute an engine of higher rated power for this
Series engine.
FuelCapacity .........................
Single Phase
Unit Weight ...............................
5 U.S. gailons
170 Ibs.
EngineSpecifications
Sore ..............................
3.12 in. (79mm)
Stroke .............................
2.44 in. (62mm)
Displacement ......................
18.64 in. (305 cc)
SparkPlug
ResistorType: .............
Long Life Piatinum: ..........
Set Gap To: ...................
Armature Air Gap: ........
Briggs & Stratton 491055S
Briggs & Stratton 5066D
O.030inch (0.76ram)
0.008-0.012 in. (O.20-O.30mm)
Valve clearance with valve springs installed and piston 1/4 in.
(6 ram) past top dead center (check when engine is cold).
Intake .................
0.004-0.006 in. (0.10=0.15mm)
Exhaust ...............
0.004-0.006 in. (0.10=0.15mm)
OiI Capacity ....................
28 Ounces (0.8 Liters)
NOTE:For practical operation, the generator load should not
exceed 85% of rated wattage. Engine gross horsepower wiii
decrease3-I/2% for each 1,000 feet (300 meters) above sea
level and 1% for each 10° F (5.6° C) above 77° F (25° C). It
shouid operate satisfactorily at an angie up to 15°,
14
MAINTENANCESCHEDULE
Foiiow the hourly or calendar intervals, whichever occurs first=
More frequent service is required when operating in adverse conditions noted beiow.
MAINTENANCESgNEDULE
FILL IN DATESAS YOU COMPLETE
SERVICEDATES
REGULARSERVICE
MAINTENANCETASK
SERVICEDATES
Before
j Every 25 Hours
Each Use J
Check oil level
×
Clean debris
X
Every 50 Hours
Every 100 Hours
or Yearly
or Yearly
or Yearly
X1
Change engine oil
X2
Service air cleaner
Service spark plug
X
Service spark arrester
X
Clean cooling system
X2
Prepare for storage
1
If unit is to remain idle for longer than 30 days.
Change oil after the first (5) operating hours and every 50 hours or every year, whichever occurs first, thereafter,
Change sooner when operating under dirty or dusty conditions,
2
Replace more often under dirty or dusty conditions,
GENERALBECOMMENDATIONS
NOTE:DO NOT use a garden hose to clean generator. Water
can enter the engine fuel system and cause problems, in
addition, if water enters the generator through cooiing air
slots, some of the water wiii be retained in voids and cracks
of the rotor and stator winding insulation. Water and dirt
buiidup on the generator internai windings wiii eventually
decrease the insuiation resistance of these windings.
Regular maintenancewill improve the performance and
extend the iife of the generator. See any Sears or other
qualified dealer for service.
The generator's warranty does not cover items that have
been subjected to operator abuse or negligence. To receive
fuiI vaiue from the warranty, the operator must maintain
generator as instructed in this manual
Generater Cleaning
Some adjustments wili need to be made periodically to
properly maintain your generator.
Daiiy or before use, ctean accumuiated debris from
generator. Keep iinkage, spring and controts clean. Keeparea
around and behind muffler free from any combustibie debris=
Inspect cooiing air siots and openings on the generator=
These openings must be kept ctean and unobstructed.
AtI service and adjustments should be made at least once
each season. Follow the requirements in the Maintenance
Schedulechart above.
Generator parts shouid be kept clean to reducethe risk of
overheating and ignition of accumulated debris.
NOTE:Oncea year you should clean or replace the spark
ptug and repiace the air filter. A new spark plug and clean air
fiiter assure proper fuel-air mixture and help your engine run
better and last longer.
o
Use a damp cloth to wipe exterior surfaces clean.
NOTICE
EMISSIONSCONTBOL
Improper treatment of generator can damage it and
shorten its iife.
DONOTexposegeneratorto excessivemoisture,dust,dirt, or
corrosivevapors.
DONOTinsertanyobjectsthroughcoolingslots.
Maintenance, replacementor repair of the emissions control
devices and systems may be performed by any non-road
engine repair establishment or individual.
BENEBATOBMAINTENANCE
Generatormaintenanceconsists of keepingthe unit ctean and
dry. Operateand store the unit in a clean dry environment
where it wiii not be exposed to excessive dust, dirt, moisture
or any corrosive vapors. Cooiing air slots in the generator
must not become clogged with snow, leaves,or any other
foreign material.
Checkthe cleanliness of the generator frequently and ctean
when dust, dirt, oii, moisture or other foreign substances are
visible on its exterior surface.
15
,
Use a soft bristle brush to loosen caked on dirt, oil, etc.
,
Usea vacuumcleanerto pick up loose dirt and debris.
ENGINEMAINTENANCE
TheStatStation
TM displays the nominai ioad on generator
WARNING
based on output frequency. It also has a built in maintenance
reminder.
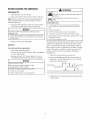
Wattage Monitor Operatian
Unintentionai sparking can result in fire or
electric shock.
The dispiay is two seven-segment LEDs that provide an easyto-read indication of the amount of power being suppiied by
the generator. The ioad monitor displays the generator's
output as a percentage.
WHEN ADJUSTINGOR _IAKBNO
REPAIRSTO YOUR GENERATOR
,', Disconnectthe sparkplugwhefrom the sparkplugand place
thewirewhereit cannotcontactsparkplug.
WHENTESTINGFORENGINE
SPARK
As generator ioad increases, the dispiay vaiues wiii increase.
When the dispiayed values begin flashing, the user should
stop adding electricaI ioads to the generator.
, Useapprovedsparkplugtester.
• DONOTcheckfor sparkwith sparkplug removed.
If the power usage becomestoo hi@l, the ietters "OL" (for
Over Load) will flash on the display. The user should reduce
the amount of load attached to the generator.
8il
_laintenanee Reminder
oimBecemmendatiens
The LEDwill display certain codes to aiert you to check oii,
change off, check or replaceair fiiter and check or replace
spark piug. The foliowing codes wiii display:
"C1" Check oii at 8 hour increments
NOTE:When adding oiI to the engine crankcase, use only
high quality detergent oii classified "For Service SF, SG, SH,
SJ" or higiler. DO NOT use speciai additives.
1. Choosea viscosity according to the foiiowing table:
"C2" Changeoil at 50 hour increments
40 C
"C3" Check or repiace air fiiter at 25 hour increments
"C4" Check or repiace spark piug at 100 hour increments
86
To take advantage of the StatStation "maintenance reminder"
capabilities, tile user must press tile reset button after
compieting the maintenancecatied for in the dispiayed code
(Cl, C2, C3, or C4). This results in a display of "Co" or "CA",
depending on how iong the button is pressed:
68
50
32 F_
104
14
1) "Co" = Pressing the reset button once quickiy wiii
display "Co" (clearing to zero). This wilI clear any
maintenancecodes that haveelapsed up to that point
and they wiii begin timing again from zero.
30
10
0
-10
4
-20
-22
-30
NOTE:Synthetic oii meeting iLSAC GF=2,API certification
mark and APi service symboi with "SJ/CFENERGY
CONSERVING"or higiler, is an acceptabieoii at aii
temperatures. Use of synthetic oil does not alter required oil
change intervals.
2) "CA" - Pressing and hoiding the reset button for
2 seconds wilI display "CA"(clearing all). This clears alI
maintenancecodes, even if they have not yet reached
their service point, and they will begin timing again
from zero.
$AE 30:40 °F and h@her(5 °C and h,{qher)is good for ati
purpose use above 40°F, use below 40°F will cause hard
starting.
If nominal Ioad and maintenancecodes appear
simuItaneously, the LEDshall display, alternately, the
nominal Ioad and code as follows:
10W-30:0 to 100 °F (=18 to 38 °C) is better for varying
temperature conditions. This grade of oii improves coid
weather starting, but may increase oil consumption at 80°F
(27°C) or higher.
*Check oii ievei frequently at higher temperatures.
The code wilI display for 3 seconds, then 1/2 second off. The
load will display for 6 seconds and then 1/2 second off.
Synthetic 5W-30:=20 to 120 °F (=30to 40 °5')provides the
best protection at all temperatures as weii as improved
starting with iess oii consumption.
5W-31}: 40 °F and be_;ow(5 °C and be/ow) is recommended
for winter use, and works best in cold conditions.
16
Checking Oil Level
4. Remove oil drain plug and drain oil completely into a
suitabie container.
Oii level should be checked prior to each use or at least every
5 hours of operation=Keep oii ievet maintained.
5. Reinstail oil drain plug and tighten securely. Removeoil
fill cap.
1. Make sure generator is on a ieve! surface=
6. Slowiy pour oil (about 28 oz.) into oil fill opening (B) to
the point of overflowing (C) at oil fill cap. DO NOT
overfill.
2. Cleanarea around oii fiii and remove oii fiii cap=
3. Verify oii is at the point of overflowing at oil fill opening.
4. Replace and tighten oil fill cap=
7. Reinstati oii fiii cap. Fingertigilten cap securely.
Adding Engine Oil
8. Wipe up any spiiied oil.
1. Make sure generator is on a level surface.
Service Air Cleaner
2. Check oii ievei as described in Checking OffLevel
Your engine wiil not run properiy and may be damaged if you
run it with a dirty air cleaner.
3. If needed, siowiy pour oii into oil fill opening to the
point of overflowing at oil %.
Repiacethe air cieaner every 25 hours of operation or once
each year, whichever comes first. Repiace more often if
operating under dirty or dusty conditions.
4. Replace and tighten oil fill cap.
Changing Engine Oil
To service the air cteaner, foiiow these steps:
Changethe oil after the first 5 hours of operation. Changeoil
every 50 hours thereafter, if you are using your generator
under extremely dirty or dusty conditions, or in extremely hot
weather, change the oil more often.
1. Loosen screws (A) and remove air cleaner cover (B).
CAUTION
or rep_
oil.
Usedmotor oil hasbeenshownto causeskin cancelin certain
laboratoryanimaB
Thoroughlywashexposedareaswith soapandwater
KEEPOUT OFREACHOFCHILDREN.DON'T
POLLUTE.CONSERVERESOURCES.RETURN
USEDOiL TO COLLECTIONCENTERS.
Changethe oil while the engine is still warm from running, as
foflows:
2. Carefully remove cartridge (C) from base (O),
1. Make sure unit is on a level surface.
3. Instaii ctean (or new) air cieaner assembly inside cover.
Dispose of old fiiter properly.
2. Disconnect the spark piug wire from the spark piug and
place the wire where it cannot contact spark plug.
4. Assembte air cleaner cover onto base and tighten
screws.
3. Cban area around oil drain ptug (A). The oii drain plug
is located at base of engine, opposite carburetor.
NOTE:You can purchase new air cleaner elements by calling
l=800=4=MY=NOME
(46go4663),
17
2. Removefour screws that attachspark arrestor screen (C).
CJean_epJace Spark PJu9
Changethe spark piug every 100 hours of operation or once
each year, whichever comes first. This wifl help your engine
to start easier and run better.
1. Cleanarea around spark piug.
2. Remove and inspect spark piug.
3. Checkelectrode gap with wire feeler gauge and set
spark plug gap to 0.030 inch (0.76ram) if necessary.
3. Inspect screen and obtain a repiacement if torn,
perforated or otherwise damaged. DO NOT use a
defective screen, if screen is not damaged, clean it with
commercial soivent.
4. Replace spark plug if electrodes are pitted, burned or
porcelain is cracked. Use a recommended replacement
plug.
4. Reattach screen and muffler guard.
5. Install spark plug and tighten firmly.
Air Cooling System
NOTE:You can purchase a new spark plug by calling
l=800-4=MY=NONiE(469=4663),
Overtime debris may accumulate in cyiinder cooiing fins and
cannot be observed without partial engine disassembly. For
this reason, we recommend you have a Sears or other
quaiified service deaier clean the cooiing system (A) per
recommended intervais (see Maintenance Schedub). Equally
important is to keeptop of engine free from debris=See
Generator C/eaning.
Ctean Spark Attester Screen
The engine exhaust muffler has a spark arrestor screen.
Inspect and clean the screen every 100 hours of operation or
once eachyear, whichever comes first.
NOTE:You can purchase a new spark arrester screen by
calling 1-800-4-MY-HOME (469-4663).
If you useyour generator on any forest-covered, brushcovered, or grass-covered unimproved iand, it must have a
spark arrestor. The spark arrestor must be maintained in good
condition by the owner/operator.
WARNING
_,_
Contact
burns. with muffler area can result in serious
Exhaust heat/gases can ignite combustibles,
structures or damagefuel tank causing a fire.
CarburetorAdjustment
* DONOTtouchhot partsandAVODhot exhaustgases.
, Allowequipmentto coolbeforetouching.
o Keepat least5 feet (1.5m) of clearanceon all sidesof
generatorincludingoverhead.
o Codeof Federa!Regulation(CFR)Title36 Parks,Forests,and
PublicPropertyrequireequipmentpoweredbyan internal
combustionengineto havea sparkattester,maintainedin
effectiveworkingorder,complyingto USDAForestservice
standard5100-1Cor laterrevision.Inthe Stateof Californiaa
sparkarresteris requiredundersection4442 of theCalifornia
Publicresourcescode.Otherstatesmayhavesimilar laws.
The carburetor on this engine is iow emission, it is equipped
with a non-adjustable idle mixture valve and governed idJe,if
equipped. Governedidie and top speed have been set at the
factory, if adjustment is required, see any Sears or other
ualified dealer.
CAUTION
Excessively high operating speeds increase risk of injury
and damageto generator.
Excessively iow speeds impose a heavy ioad.
Clean and inspect the spark arrestor as fellows:
DONOTtamperwith governedspeed.Generatorsupplies
correctratedfrequency'andvoltagewhenrunningat governed
speed.
DONOTmodify'generatorin anyway'.
1. To remove muffler heat shield (A) from muffler (B),
remove four screws that connectguard to muffler bracket.
18
Change eil
While engine is still warm, drain oil from crankcase. Refill
with recommended grade.
The generator should be started at least once every seven
days and aliowed to run at ieast 30 minutes, if this cannot be
done and you must store the unit for more than 30 days, use
the following information as a guide to prepare it for storage.
elmCyminder
Bere
* Removespark plug and pour about 1 ounce (30mi) of
clean engine oil into the cyiinder.
Leng Term Sterage [nstructiens
It is important to prevent gum deposits from forming in
essential fuel system parts, such as the carburetor, fuei fiiter,
fueI hose or tank during storage. Also, aicohoi-blended fueis
(called gasohoI, ethanol or methanol) can attract moisture,
which ieads to separation and formation of acids during
storage. Acidic fuel can damagethe fuel system of an engine
while in storage.
* Install spark plug and crank slowly to distribute oil.
WARNING
-_
WARNING
_¢
electric shock.
o NEVERcrankenginewith sparkplug removed.
Fue!and its vapors are extremely flammable and
explosive.
Generater
Fire or explosion can cause severe burns or
death.
1. Cieangenerator as outtined in Generator C/eaning.
2. Checkthat cooiing air slots and openings on generator
are open and unobstructed.
WHEN STORING FUEL OR EQUIP_IENTWiTH FUEL mNTANK
. Store away from furnaces, stoves water heaters, clothes dryers
or other appliancesthat have pilot light or other ignition source
becausethey can ignite fuel vapors.
WHEN DRAmNINGFUEL
Other Storage Tips
1. DO NOTstore fuei from one season to another unless it
has been treated as described in Protect Fuel System.
o Turn generator OFFand let it cool at least 2 minutes before
rernoving fuel cap. Loosen cap slowly to relieve pressure in
tank.
2. Replacefuel can if it starts to rust. Contaminated fuel
will cause engine probiems.
• Drain fuel tank outdoors.
.
o Keepfuel away from sparks, open flarnes, pilot lights, heat, and
other ignition sources.
.
o DO NOT light a cigarette or smoke.
If possible, store unit indoors and cover it to give
protection from dust and dirt.
Cover unit with a suitable protective cover that does not
retain moisture.
WARNING
Pretect Fuel System
covers can be flammable.
FuemPreserver:
FilIthe fuet tank with fresh fuet allowing at ieast 1.5" of tank
space for fue! expansion as shown on page 8, when using a
fuei preserver cartridge with the fresh start fuei cap. if only
partialiy fiiled, air in the tank wiii promote rue! deterioration
during storage. Engine and fuel can be stored up to 6 months
with fuei preserver.
DONOTplacea storagecoverovera hotgenerator.
Letequipmentcoo!for a sufficienttime beforeplacingthecover
on the equipment.
5. Store generator in clean, dry area.
o Check level of fuet preserver cartridge. Fuelpreserver is
dark in color.
,
Unintentional sparking can result in fire or
If cartridge is almost empty or empty, repiace with a new
fuei preserver cartridge foliowing the instructions in Fresh
StarY Fuel Cap.
If fuei preserver is not used, remove aii fuel from tank and
run engine until it stops from lack of fuel.
19
Probmem
Engine is running, but no AC output is
available.
Cause
Cerreetien
1. One of the circuit breakers is open.
1. Resetcircuit breaker.
2. Fault in generator.
2. Contact Sears or other qualified
service dealer.
3. Poor connection or defective cord
set.
3. Checkand repair.
.
Connected device is bad.
4. Connectanother device that is in
good condition.
Engine runs good at no=load but "bogs
down" when loads are connected.
Engine will not start; or starts and runs
rough.
Engine shuts down when running.
Engine lacks power.
Engine "hunts" (speed constantly
fluctuates) or falters.
1. Short circuit in a connected load.
1. Disconnect shorted eiectricai ioad.
2. Engine speed is too slow.
2. Contact Sears or other qualified
service dealer.
3. Generator is overloaded.
3. See Don't Over/'oadGenerator,
4. Shorted generator circuit.
4. Contact Sears or other quatified
service dealer.
1. Rocker Switch set to "Off".
1. Set switch to "On".
2. FueiValve is in "Off" position.
2. Turn fuei valve to "Open"position.
3. Dirty air cleaner,
3. Cleanor repiaceair cleaner.
4. Out of fuel,
4. Fill fuet tank,
5. Stale fuel.
5. Drain fuei tank and carburetor; fill
with fresh fue!.
6. Spark piug wire not connectedto
spark plug.
6. Connectwire to spark plug.
.
Bad spark plug.
7. Replacespark plug.
8. Water in fuel.
8. Drain fuei tank and carburetor; fill
with fresh fuel.
9. Flooded.
9. Wait 5 minutes and re=crank
engine.
10. Excessivelyrich fuel mixture.
10. Contact Sears or other qualified
service dealer.
11. Intake valve stuck open or closed.
11. Contact Sears or other qualified
service dealer.
12. Engine has iost compression.
12. Contact Sears or other qualified
service dealer.
Out of fuel.
Fill fuel tank.
1. Load is too high.
1. See Don't Oveh"oadGenerator.
2. DirtS,air filter.
2. Replaceair filter.
Carburetor is running too rich or too
lean.
2O
Contact Sears or other quatified service
dealer.
21
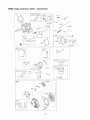
CRAFTSMAN5600 Watt AC Generator 580_325610
EXCllA_IaN
_IELB
it
POWER
PDWER
PI3
O
LDAD
CBI
PI-4
B2
MDNITDR
2
28AMP
2P
LED
44A
44A
DP2
44A
_dlIITE
[L
44A
30AMP
B-BRASS
SILVER
GR GREEN
22
SCREW
SCREW
SCREW
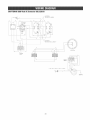
CRAFTSMAN5600 Watt AC Generator 580_S25610
v/ARNING!
na
8;
i
c_J '
'
I
[Js 1I_r__
23
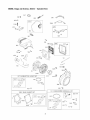
CRAFTSMAN5600 Watt AC Generator 580,325610
Main Unit _
ExpJodedView
52
5!
45
4O
5O
41
900
\
6
\
4
24-
to
12
57
15
11
54
26
t8
25
22
16
24
CRAFTSMAN5600 Watt AC Generater 580,325610
Main Unit _
Parts List
item
I
2
3
4
5
6
7
8
9
10
11
12
13
14
15
16
17
18
19
20
21
22
23
24
25
26
31
34
35
37
40
Part #
201874GS
194150GS
67989GS
190220GS
NSP
*
195398GS
96796GS
*
*
47480GS
*
198763GS
189009GS
695398
*
189008GS
*
83083GS
B4986GS
194153GS
86494GS
195094GS
197424GS
191190GS
74908GS
196830GS
195422GS
791745
56893GS
199433GS
199284GS
41 192980GS
44 193668GS
45 198912GS
48 195373GS
50 188333GS
51 194799GS
52 189235GS
53 203579GS
54 196908GS
55 197798GS
58 197641GS
59 *
900 NSP
Parts Not illustrated
198451GS
AB3061GS
5097D
202180GS
197474GS
198818GS
Description
ASSY, Cradle
KiT, Vibration, Mount, 45 °
NUT, M8 FiangeSerrated
HOUSING,Engine Adapter
ASSY,Alternator (see page 27)
NUT, Hex M8 =I=25
TPHMS, M8 =1=25x 35
WASHER,M8 Fiat
WASHER,Lock 5/16 - M8
SBHCS,3/8-16 x 1 =0Lg=
HHCS,5/16=24 x 7
HHCS,M8 - 1=25x 25
KIT, Handle
BRACKET,Muffler
GASKET,Exhaust
HHCS,M6= 1=0x 12 w/LW
MUFFLER
SHCS,5/16 - 18 x 7/8"
SCREEN,Spark Arrest
DECAL,Ground, Green
KIT,Vibration Mount
SCREW,Wing M6 =1.0 x 16
SCREW,I0- 16 x =68,Self Drill
SHIELD, Heat
CAP
SCREW,M5-0.8 x 10, Taptite
DECAL,ExhaustWarning
COVER,RBC,Piastic with Cap
KiT, FuelHose (Cut to fit)
CRIMPTITE,10-24 x 1/2
KiT, FuelTank Hrdwr w/U-Ctips
U-CLiPS,(Optional Accessory)
KIT,Valve, FuelTank
ASSY,Tank, Fuei(includes Items 41,50, 51,52 & 55)
FUELCAP, Fresh StartTM
WIRE, Ground
DECAL,GasFiii
DECAL,Danger
DECAL,Start instructions
DECAL,Warning, CO
LOADMONITOR
DECAL,Shut-Off, Fuei
ASSY, Control Panel (see page 26)
NUT, Painut, 3/16"
ENGINE(204412=0163-EI)
MANUAL,Operator's
BOTTLE,Oil
CARTRIDGE,Fresh Fuel
DECAL,Family, CA EVP
CORDSET,Storm
KiT, Decals
* =Items without part numbers are common fasteners and are availableat local hardware stores.
25
CRAFTSMAN
5600 Watt AC Generator 580.325610
ControlPanel -- ExplodedView and Parts List
d
4
4
\\
\
\
\
\
12
1
\
\
\
2
\
\
\
\
\
\
\
\
\
g
\\
6
item Part #
I
2
3
4
5
6
7
B
197471GS
197472GS
188890GS
197731GS
189165GS
197729GS
197958GS
202030GS
191481GS
9 43437GS
10 22694GS
11 82308GS
12 192241GS
Description
PANEL,Control
COVER,Outlet Flip
COVER,Back Panel
OUTLET,120V, 15/2BA Dplx
NUT,5/32 Pal
MODULE,Led
SCREW,3 x 6, Tapping
BREAKER,Circuit, 20A
BOOT,BreakerCircuit (not shown)
OUTLET,120/240V, 30A
HOUSING,Rcptci, 6 Pin
SCREW,3 x 18, Tapping
SCREW,3,5 x 14, Tapping
26
CRAFTSMAN5600 Watt AC Generator 580.325610
Alternator -- Exploded View & Parts List
9
\
\
\
\
\
\
\
1
5
\
\
\
\
\
6
12
7
\
\
\
\
\
11
186059GS
191043GS
191042AGS
186060GS
86308CGS
91825GS
66849GS
22694GS
81917GS
193428AGS
198779GS
65791GS
Descripfien
ADAPTER,Mounting, Alternator
ASSY, Rotor (Includes Item 12)
STATOR
RBC,with O-Ring (p/n 189197GS)
HHCS, M6-1.0x 130 SEMS
ASSY, Hotder, Rectifier/Brush
TAPTITE,M5 =0=8x 16
RECEPTACLE,
6 pin
PiN, Roll, 4mm x 10
ASSY,Wire, Ground
HARNESS,Wire, Power
BEARING
27
CRAFTSMAN5600 Watt AC Generator 580,325610
WheeJ [it _
ExpJodedView and Parts List
/
7
/
3
/
/
5
item
I
2
3
4
5
6
7
Part #
196517GS
B1764GS
191267HGS
*
191265GS
67989GS
*
Description
WHEEL
SUPPORT,Wheel Kit
AXLE
WASHER,5/8"
EoRING
NUT, M8 o FlangeSerrated
HHCS,M8o 1.25 x 16
* o items without part numbers are common fasteners and are
available at local hardware stores.
28
/
ENGINE, Briggs and $tratten,
204412 - Exploded View
718A
12
@
529
$52 _
22
718
15 _
306
742 _,,_
615 @
k
\
746
\
\
616
307 _
24 _
i
741
146
27
358 ENGINE GASKET SET
29
ENIINE, lri!£s
and $tratton,
204412 - Expletet View
1171
13
798
1100C_
914
i
633 0
633 0
108
127 O
130
137
95
_J 51A_D>
lo58
117
L s1_3_'
369
1127_
459
12
121_
592¢_
3O
ENGINE, Brig[is and Straiten,
188 _
347
204412 - Exploded View
_
209
3s6
f
1404 @
1230
222_
@
5o5
%
334
883__
604
161
622
728 _ _
1275
425_
445
564_
725A
163
725
I°7°_
1005
455
977 CARBURETOR GASKET SET
332(_
)
137
163 %
304
3os %
633 @
1095
121 CARBURE©R OVERHAUL KIT
VALVE GASKET
SET
_
633
137
51A,
<
©51A_
105
104c_
163
868
127 (_
117 ®
31
_
@
ENGJHE,Briggs and $tratten,
item
1
2
3
5
7
11
12
13
15
16
18
19
20
21
22
23
24
25
26
27
28
29
30
32
33
34
35
36
42
45
46
51
51A
53
55
58
59
60
65
95
97
98
1(}4
105
108
109
117
118
121
122
125
127
130
133
135
137
146
161
163
185
188
192
209
219
220
222
227
304
305
Part #
695464
698340
391086
697233
694872
696796
694953
690360
691686
694678
696914
698340
391086
281658
695174
694954
222698
792117
792144
792026
792073
690975
696581
694691
694692
690976
499596
697464
694865
694865
499586
690977
790958
694874
694875
694869
695288
693389
805957
715257
690837
690718
696387
695408
694918
696136
696143
696735
696134
696135
696146
694876
699966
690727
696139
694914
696142
695426
690979
699960
692277
690958
690877
690083
694867
693578
691724
791753
694864
697250
691108
284412 - Parts List
mtem
305A
306
307
332
333
334
337
347
356
356A
358
369
4!5
425
445
455
456
459
505
552
562
564
592
597
604
608
615
616
622
632
633
635
689
718
718A
725
725A
728
741
742
746
798
851
868
883
914
951
968
975
977
1005
1022
1023
1026
1029
1070
1095
1100
1127
1171
1210
1211
1230
1275
1404
Bescriptien
Cylinder Assembly
Kit-Bushing/Seal (Magneto Side)
£ SeaFOfl(Magneto Side)
Head-Cylinder
£ t Gasket-Cylinder Head
Tube-Breather
£ Gasket-Crankcase
Screw (Cylinder Head)
Plug-Oil Drain
Crankshaft
Cover-Crankcase
Kit-Bushing/Sea! (PTO Side)
£ SeaFOfl(PTO Side)
Cap-Oil FiI[
Screw (Engine Sump)
Flywheel
Key-Flywheel
Piston Assembly (Standard)
Piston Assembly (.020" Oversize)
Ring Set Standard)
Ring Set (.020 Oversize)
Lock-Piston Pin
PimPlston
Rod-Connecting
Dipper-Connecting Rod
Screw (Connecting Rod)
VaWe-Exhaust
Vaiveqntake
Spring-Valve (Intake)
Spring-Valve (Exhaust)
Keeper-Valve
Tappet-Valve
Camshaft
¥ £ 1.$ Gasketqntake
Y £ 1.$ Gasket-intake
Stud (Carburetor)
Housing-Rewind Starter
Rope-Starter (Cut to Required Length}
Grip-Insert
Grip-Starter Rope
Screw (Rewind Starter)
Screw (Throttle Valve)
Shaft-Throttle
¥ Kitqd]e Speed
Y PimEIoat Hinge
¥ Valve-Float Needle
Valve-Choke
Shaft-Choke
V Jet-Main (Standard)
Jet-Main (High Altitude)
Kit-Carburetor Overhaul
¥ t $ Spacer-Carburetor
Carburetor
¥ Pklg-Welch
Valve-Throttle
F!oat-Carburetor
Tube-FuelTransfer
¥ $ Gasket-Float Bowl
Key-Timing
Base-Air Cleaner
¥ £ $ Gasket-Air Cleaner
[',Jut(Air Cleaner Base)
Screw (Control Bracket)
Bali-Rocker Arm
Spring-Governor
Gear-Governor
Washer (Goven_or Gear)
Bracket-Control
Lever-Governor Control
Housing-Blower
Screw (Blower Housing}
£
¥
t
32
Part #
691125
697204
691660
694685
495859
691061
491055
698338
696482
692603
695438
695422
691363
694515
491588
694683
692299
281505
691251
694674
92613
692577
699800
691696
791752
695287
694676
694675
698839
695917
690998
691909
691855
690959
695178
698836
698837
691108
691288
692564
694679
697892
692424
690968
697255
693732
699961
692321
696138
696147
694684
690971
697691
695177
690972
691058
695440
791959
695407
696754
498144
498144
791754
696757
696757
Descriptian
Screw (Blower Housing)
Shield-Cylinder
Screw (Cylinder Shield)
Nut (Flywheel)
Armature-Magneto
Screw (Magneto Armature)
Plug-Spark
Switch-Rocker
Wife-Stop
Wire-Stop
GasketSet-Engine
Spring-Float Bowl
Hug
Screw (Air Cleaner Cover)
Filter-Air Cleaner Cartridge
Cup-Flywheel
Plate-Paw[ Friction
Pawl-Ratchet
Nut (Governor Control Lever)
Bushing-Governor Crank
Bolt (Governor Control Lever)
Screw (Control Cover)
Nut (Rewind Starter)
Screw (Paw[ Friction Plate)
Cover-Control
Starter-Rewind
Retainer-Governor Shaft
Crank-Governor
Washer (Heat Shield)
Spring/Link-Mechanica! Governor
Y _ SeaI-ChokefThrottle Shalt
Boot-Spark Plug
Spring-Friction
Pin-Locating
Pin-Locating
Shield-Heat
Shield-Heat
Screw (Heat Shield}
Gear-Timing
Retainer-E Ring
Gear-Idler
Screw (Rocker Arm)
Terminal-Spark Plug
£ 1- Seal-Valve
£ Gasket-Exhaust
Screw (Rocker Cover)
Shaft-Choke
Cover-Air Cleaner
Bow!-EIoat
Gasket Set-Carburetor
Fan-Flywbeel
£ 1 Gasket-RockerCover
Cover-Rocker
Rod-Push
Rocker Arm
Screw (Flywheel Fan)
Valve Gasket Set
Pivot-Rocker Arm
Screw (Float Bowl)
Stud (Rocker Cover)
Pufley/Spring Assembly (Pulley)
Pulley/Spring Assembly (Spring)
Stud (Control Bracket)
Nut (Heat Shield)
Nut (Control Cover)
_ncludedin Engine GasketSet, Item 358
Included in Carburetor Overhaul Kit, Item !21
Included in Carburetor GasketSet Item 977
Included hr Valve GasketSet, Item 1095
33
The California Air Resources Board (CARB), U.S. EPA and Sears are
pleased to explain the Ernissions Centre[ System Warranty on your
srnaI[ offroad engine (SORE).In California, new small offroad
engines rnodel year 2006 and later must be designed, built and
equipped to meet the State's stringent anti-smog standards.
Elsewherein the United States, new non-road,spark-ignition engines
certified for mode[year 1997 and later must meet similar standardsset
forth bythe U.S. EPA.Sears must warrant the emissions control
systern on your engine for the periodsof time listed below, provided
there has beenno abuse, neglector improper maintenanceof your
small off-road engine.
Your emissions centre[ system includes parts such as the
carburetor, air cleaner, ignition system, fuel line, muffler and
catalytic converter. Also included rnay be connectors and other
emissions related assernblies.
*
*
*
,
,
Carburetor and internalparts
Fuel Pump
Fuel line, fuel line fittings, clamps
Fun[tank, cap and tether
Carbon canister
b.
*
,
,
c
,
,
d.
*
,
,
e.
,
Air Induction System
Air cbaner
Intake rnanlfold
Purge and vent line
Ignition System
Spark plug(s)
Magneto ignition system
Catalyst System
Catalytic converter
Exhaust manifold
Air iniection system, Pulse valve
Miscellaneous Items
Vacuum, temperature, position, tirne sensitive valves and
switches
o Connectors and assernblbs
2. Length of Coverage
Sears warrants to the initial owner and eachsubsequent
purchaser that the Warranted Parts shall be free from defects in
rnaterials and workmanship which caused the failure of the
Warranted Parts for a period of two years from the date the
engine is deliveredto a retail purchaser.
3. No Charge
Repair or replacement of any Warranted Part will be performed
at no charge to the owner, includingdiagnostic labor which
leads to the @termination that a Warranted Part is defective if
the diagnostic work ls performed at an Authorized Sears
Service Dealer.
4. CJaims and Coverage Exclusions
Warranty claims shall be filed in accordance with the provls_ons
of the Sears Engine Warranty Policy. Warranty coverage shall
be excluded for failures ofWarranted Parts which are not
original Sears parts or becauseof abuse, neglect or improper
rnaintenanceas set forth in the Sears Engine Warranty Policy.
Sears is not liable to cover failures of Warranted Parts caused
by the use of add-on, non-original, or rnodified parts.
5. _daintenanee
Any Warranted Part which is not schedubd for rephcement as
required rnaintenanceor which is scheduled only for regular
inspection to the effect of "repair or replaceas necessary"shall
be warranted asto defects for the warranty period. Any
Warranted Part which is scheduledfor replacementas required
rnaintenanceshall be warranted as to defects only for the period
of time up to the first scheduled replacernentfor that part. Any
replacement part that is equivalent in performance and
durabilityrnay be used in the perforrnanceof any rnaintenanceor
repairs. The owner is responsible for the performance of all
required maintenance,as defined in the Sears Operating and
Maintenance Instructions.
6. Consequential Coverage
Coverage hereunder shall extend to the failure of any engine
components caused by the failure of any Warranted Part still
under warranty.
Where a warrantabb condition exists, Sears will repair your small
off-road engine at no cost to you including diagnosis, parts and
labor.
Sears, Roehnck and Cn, Emisebns Cnntrni l_efects Warranty
Cnvera_le
Srna[[off-road engines are warranted relative to ernbsions control
parts defects for a period of two years, subiect to provisions set
forth below, if any covered part on your engine is defective,the part
will be repaired or replaced by Sears.
Owner's Warranty Respnnsihiiities
As the small off-road engine owner, you are responsible for the
performance of the required rnaintenancelisted h_your Operating
and Maintenance Instructions. Sears recommends that you retain all
your receipts covering maintenance on your smaIt off-road engine,
but Sears cannot deny warranty solely for the lack of receipts or for
your failure to ensurethe performance of all scheduled rnaintenance.
As the small off-road engine owner, you should however be aware
that Sears may deny'you warranty coverage if your small off-road
engine or a part has failed due to abuse, neglect, improper
rnaintenanceor unapproved modifications.
You are responsible for presenting your small off-road engine to an
Authorized Sears Service Dealeras soon as a problem exists.
The undisputed warranty repairs should be completed in a
reasonable amount of time, not to exceed30 days.
If you have any questbns regarding your warranty rights and
responsibilities, you should contact a Sears Service Representative
at 1-800-469-4663.
The emissions warranty is a defects warranty. Defects are iudged
on normal engine performance. The warranty is not related to an inuse emissions test.
Sears, Rnebnck and Co. [missinns Cnntrni Befente Warranty
Prneisinns
The following are specific provisions rebtive to your Emissions
Control Defects Warranty Coverage.It is in addition to the Sears
engine warranty for non-regulated engines found in the Operating and
Maintenance Instructions.
1. Warranted Parts
Coverageunder this warranty extends only to the parts listed
below (the emissions control systerns parts) to the extent these
parts were present on the engine purchased.
a. Fue! Metering System
o Cold start enrichment systern
In the USAandCanada,a 24-hour hot!inn,1-800-469-4663,hasa rnenuof pro-recordedrnessages
offeringyou productmaintenance
lnforrnation.
34
EmJ_ion information
Certain engines wiii be certified to meet the United States
Environmental Protection Agency (USEPA)Phase 2 emission
standards. For phase 2 certified engines, the Emissions
Compiiance Period referred to on the Emissions Compliance
label indicates the number of operating hours for which the
engine has been shown to meet Federalemission
requirements.
Enginesthat are certified to meet the California Air Resources
Board (CARB) Tier 2 Emission Standards must display
information regarding the Emissions Durabiiity Period and Air
Index. The engine manufacturer makesthis information
avaiiabteto the consumer on emission iabeis, The engine
emission iabet wili indicate certification information,
For engines iess than 225 cc displacement:
CategoryC = 125 hours
Category B = 250 hours
CategoryA = 500 hours.
The Emissions Durability Period describes the number of
hours of actual running time for which the engine is certified
to be emissions compliant, assuming proper maintenancein
accordancewith the Operating & Maintenance Instructions.
The following categories are used:
For engines of 225 cc or more displacement:
CategoryC = 250 hours
Category B = 500 hours
CategoryA = 1000 hours.
Moderate: Engine is certified to be emission compliant for
125 hours of actual engine running time.
Intermediate: Engine is certified to be emission compliant
for 250 hours of actual engine running time.
Extended: Engine is certified to be emission compiiant for
500 hours of actual engine running time.
Forexample, a typical walk-behind lawn mower is used 20 to
25 hours per year. Therefore, the Emissions Durability
Period of an engine with an intermediate rating would
equateto 10 to 12 years.
35
GARANTIA ....................................
REGLASDESEGURIDAD ......................
60NOZCA SU GENERADOR........................
MONTAJE ..................................
FUNCIONAMIENTO...........................
ESPECIFICACIONES.............................
MANTENIMIENTO............................
36
37-39
40
41-43
44-47
48
49-52
ALMACENAMiENTO .............................
53
REPARACIONDEAVERIAS .......................
54
NOTAS .....................................
55-57
GARANTIADEL SISTEMADECONTROL
DE EMISIONES ..............................
58-59
COMOORDENARPARTES.............
ULTIMA PAGINA
GARANTJAOO_dPLETADE UN ANO DEL GENERADORCRAFTS_dAN
Si el generador fa!la debido a defectos de materiales o mano de obra en el plazo de un a_o a partir de la fecha de cornpra, devuav@ a
cualquier ahnac@ Sears, punto de venta de Craftsman o centro de reparaci@ y repuestos de Seas de los Estados Unidos para su
reparaci6n gratuita o, en caso de que 6sta no sea posible, para su sustituci6n.
Garantia Hmitada de un a_e adidenai
del generader Craftsman
Durante el segundo a_o a partir de lafecha de cornpra, si cualquier pbza de! generador falla debido a defectos de materiales o rnano de
obra, se suministrar_ gratuitamente una nueva pieza.Si @sea que se instale la pieza,deber_ pagar la mano de obra.
El periodo de garantia se reducir_ a 90 dias desde la fecha de compra si e! generador se utiliza con fines comerciales o de alquiler. Unavez
que e! generador se haya usa@ con fines comerciabs o de alquiler, se considerai como equipo de uso cornercial o alquibr a efectos de
esta garantia.
Esta garantia b otorga determinados derechos bgales yes posibb que tenga otros derechos que pueden variar de un pals o estado a otto.
Sears, Reehack and Co,, #/817WA, Hoffaaa Estates, JL68179 8,S,a,
36
Este es emsimboRode amertade segufidad, Esusado para indicafle situaciones con peHgrospotenciames
de mesionpara e_
personal Siga masinstrucciones de todos ruesmensajes de segufidad que aparecen despues de este simbemepara evitar pesibmes
mssi0ns$
0 mfferte,
..... • Lea eats maeuamde maeera cuidadssay famiHadceee can
__ su gsesradsr, Csnezcasue uses, sue Hmitecieese y
cuelqsier peligrs relecisnede csnel raisins,
PELIGRO
/////x'_dWtf/7_
E[ simbo[o de a[erta de seguddad (,_k) es usado con una pa[abra
(PELIGRO,ADVERTENCIA,PRECAUCION),un mensaje per escrito o
una iIustraciOe, pare aIerterlo acerca de cualquier situaciGnde
peligro que puedaexistir. PELtGROindica un riesgo el cual, si no se
evita, causardla muerte o una herida grave. ADVERTENCBA
indica
un riesgo el cual, si no se evita, pueds causar la muerte o una
heride grave. PRECAUOIONindica un riesgo, el cual, si no se evita,
pueds causar heridas meeores o rnoderadas. AVmSOindica una
situaciGeque podria resultar en el da_o del eqLfipo.Siga los
mensajes de seguridad para evitar o reducir los riesgos de heridas e
inclusive la rnuerte.
SERiNGERtDO.Evite ei contacto con ios ojos, la
piel o ia ropa=No tomar internamente. Evite
respirar Ia niebta o el vapor• La exposiciOn
excesiva de ios ojos o la piei puede causar
irritaciGn=Mantenga ei estabiiizador fuera del
alcance de ios nifios=
EI estabiiizador de combustible es un qdmico
peligroso.**
La tapa de combustible FreshStartTM est_ disefiada para sosteeer
un cartucho el cua] contiene el estabilizadorde combustible.
EN CASODE SER INGERIDO,Ilame un medico inmediatamente.
No induzcael vOmito. En case de inhaIaciOnsalir al aire libre. Es
case de contacto con los ojos o con la piel, lavar
abundantemente con agua durante 15 minutes.
Almacene los cartuchos sin abrir en un _rea fresca, seca y b[en
veetilada. Manteega el cartucho abierto elf la tapa de
combustible, y la tapa de combustible cerrada en el talrque de
combustible cuaedo no est_ es use.
En case de la ernergencia,contacte a un rn_dico
inmediatamente y llama 1-800-424-9300 para la inforrnaciOn
material de la seguridad.
*El estabilizador de combustible contiene 2,6-di-tert-butilfenol (128-39-2) y destilado
de petrGleo alif_tico (64742-47-8).
El use de un generador en un espacio interior PUEDE
PROVOCAR LA MUERTE EN Paces MINUTES.
Los gases de escape dei generador contienen
martS×ida de carbono, un veneno invisible e inodoro.
A
[]
NUNCA uti|ice un generador
en el interior de una casa o
un garaje, AUNQUE haya
ventanas y puertas abiertaso
A =Exp,,'osiGn
B = Fuego
C = Descarga E_ctHca
D = Gases TGxicos
E = Retmceso
F =Supefficie Cafiente
G =Objets volant
H =Partes en Movimiento
J =Qufmico Pefigmso
K =Manual del Operario
37
uumicemo
some
EXTERIOR, alejado de
ventanas, puertas y
aberturaa de ventilaciGn.
ADVEBTENCIA
ADVEBTENCIA
AI motor funcionar, se produce mon6xido de
sarbono, un gas inodoro y venenoso.
La combustible y sus vapores son
extremadamente infiamables y expiosivos.
Respirar mon6xido de carbono puede provocar
dolor de cabeza,fatiga, mareos, vOmitos,
sonfusiOn, ataques, n_iuseas,desmayos o inciuso
a muerte.
o Opereel generadorSOLAMENTE
al airelibre.
o Instaleunaalarmade monOxidodecarbor_o
con bater{acerca
de los dormitorios.
quemaduras
severas
e inclusive
muerte.
Et fuego o una
explosi6n
pueden lacausar
CUANDO ANADA CO_IBUST_BLE0 VACiE EL DEP{}SITO:
o Apague el generador (posici6n OFF)y d_ielo enfriar al menos
por 2 rninutos antes de rernover la tapa de la combustible.
Afloje la tapa bntamente para dejar que la presiOnsalga de!
tanque.
o AsegOrese
de quelos gasesdeescapeno puedanentrarpor
ventanas,puertas,tomasdeaire deventilaci6nu otrasaberturas
en un espaciocerradoen el quepuedanacumularse.
• NOarranqueni dejefuncionare! motoren interioresni en zonas
cerradas_
(aunquehayaventanasy puertasabiertas),incByendo
el compartirnientodel generadoren un vehiculorecreativoo RV.
• Lbne o vacie el dep6sito de combustible a la internperie.
o NO !lene dernasiado eltanque. Permita al menos espacio para B
expansion de! combustible.
o Si se ha derramado combustible, esperea que se evapore antes
de arrancar el motor.
o Mantenga la combustible alejadade chispas, llamas abiertas_
pilotos_calory otras fuentes de ignici6n.
ADVEBTENCIA
o NO encienda un cigarrillo o furne.
CUANDO PONGA EN FUNCmONA_VImENTO
EL EQUmPO:
Et retroceso (repliegue r@ido) del cable det
arrancador puede producir iesiones. Et retroceso
impedir_ique el usuano suelte et cabie a tiempo y
tirar_ de su mano y brazo hacia el motor.
o Cornpruebeque la buiia, el silenciador, el tap@ del dep6sito de
combustible y el filtro de aire est_n instalados.
o NO arranque el motor sin la buiia instalada.
CUANDO OPERE EL EQUmPO:
Como resultado, podr[an producirse fracturas,
contusiones o esguinces.
• Cuandoarranqueel rnotor tire lentamentedelcablehastasentir
una resistenciay a continuaci6n,tire r@idarnente
de 61para
evitarsu retroceso.
o NO incline el motor o el eqLdpo,de tal manera que B
combustible se puedaderramar.
o Este generador no es apto para el uso en equipos rn@ibs ni en
aplicaciones marinas.
CUANDO TRANSPORTE 0 REPARE EL EQUIPO:
o ItUNCAarranqueo pareetmotor cuandohayaaparatos
el6ctricosconectadosyen fundonamiento.
o Transpo_teo repare el equipo con el tanque de combustible
vacio, o con la v_lvula para apagar el combustibb_ apagada
(posiciOn OFF).
ADVEBTENCIA
_¢
Los generadores producen un voltaje muy
_oderoso.
• Desconecteel cable de la bujia.
CUANDO ALIViACENE
0 GUARDE EL EQUIPO CON CO_IBUSTIBLE
EN EL TANQUE:
)uede
hacerel que
los trabajadores
de electdcidad
Si
no aisla
generador
de utilidades
de energia,
sufran heridas graves e inclusive Ia muerte,
debido a Ia retroalimentaci6n de Ia energia
ai@trba.
o Almacene alejado de calderas,estufas, calentadores de agua,
secadoras de ropa u otros aparatos electrodorn6sticos que
posean pilotos u otras fuentes de ignici6n, porque ellos pueden
encender los vapores de B combustible.
• Cuando use un generador como poder de energia auxiliar_
notifique a B compariia de utilidades. Usee! equipo de
transferencia aprobado para aislar el generador de otra utilidad
el6ctrica.
ADVEBTENCIA
Este generador no curnple la norma 336FR-183 del cuerpo de
guardacostas de EE.UU.y no debe utilizarse en aplicaciones
marinas.
• Use un interruptor para la falla de! circuito de tierra (GFC!)en
cualquier area bastante hOrnedao que sea altamente conductiva,
tales corno terrazas de metal o trabajo hecho con acero.
El uso de un generador no homologado por cuerpo de
guardacostas de EE.UU.puede provocar lesiones y dafios
materiales.
• 1/Otoque los alambres pelados o recept_culos.
o 1/O use un generador con cables el_ctricos que est@
malgastados_rotos, pelados o dai_adosde cualquierforrna.
• 1/Oopere el generador bajo la IBvia.
• 1/O maneieel generador o cables e!_ctricos mientras est6
parado en agua_descalzoo cuando las rnanosy los pies est@
mojados.
o 1/O perrnita que personas descalificadaso ni_os operen o sirvan
al generador.
38
ADVERTENCIA
PRECAUCION
Las velocidades de operaci6n en exceso, aumentan ios
riesgos de heridas y da_os ai generador.
producir quemaduras graves.
El contacto con la zona deI silenciador puede
Los gases y el cator de escape pueden inflamar
los materiates combustibles y ias estructuras o
dafiar el dep6sito de combustible y provocar un
incendio.
• NO toque las superficies calieotes y evite los gases del escape a
alta temperatura.
Las veiocidades bajan en exceso, imponen una carga muy
)esada.
NO cambie ninguna velocidad determinada. El generador
suministra unafrecuencia y un voltaie calificado cuando
funciona a una velocidad determinada.
NO modifique a! generador en ninguna forrna.
• Permita que el equipo se enfrie antes de tocarlo.
o Deje un espado minimo de 1.5 rn (5 pies) alrededor de!
generador [ncluida la parte superior.
AVISO
Ei sobrepasar ia capacidad dei amperaje y vataje del
lenerador, puede da_ar al generador y los aparatos
eidctricos conectados ai mismo.
o E! C6digo de Normativa Federal(CFR T[tulo 36: Parques,
Bosques y Propiedad POblica)obliga a instalar una pantalla
apagachispasen los equipos con rnotor de combustion interno
y a mantenerla en buenas condiciones de funcionamiento
conforrne a la norma 5100-10 (o posterior) dd Servicio Forestal
de la USDA. En el Estadode California la ley exige el uso de una
pantalla apagachispas (Secci6n 4442 del O6digo de Recursos
POblicos de California). En otros estados puede haber leyes
similares en vigor.
Vea No sobmcargue generafiol:
Enciendasu generadory deje que el motor se estabiliceantes
de conectar las cargas el_ctricas.
Conecte las cargas el_ctricas en la posiciOn de apagado (OFF),
luego encienda (ON) para su operaciOn.
Apague (OFF)las cargas e!_ctricasy descon6ctelas del
generador antes de parar el generador.
ADVERTENCIA
_o
AViSO
l arrancador
y otraset piezas
rotan
pueden
enredar
ias manos,
pelo, laque
ropa,
o los
•
Et tratamiento inadecuado dei generador puede da_ario y
acortar su vida productiva.
Use el generador solarnente con la finalidad para el cual fue
diseiiado.
accesorios.
• NUNCAutilice la geoerador sin sus carcasas o tapas de
protecci6n.
o NO use ropa suelta, joyas o elementos que puedan quedar
atrapados en el arranque o en otras partes rotatorias.
En caso de dudas sobre su uso, diriiase al distribuidor.
Opereel generador solamente en superficies niveladas.
o Ate para arriba el pelo largo y quite la joyeria.
NO exponga al generador a una hurnedad excesiva,polvo,
suciedad o vapores corrosivos.
ADVERTENCtA
NO inserte cualquier objeto a trav6s de las ranuras de
eofriarniento.
Si los aparatos conectados se sobrecalientan, ap_guelosy
descon_cte!osdel generador.
Chispear invotuntario puede tenet como
¢
Apague el generador si:
-Se pierde la salida el6ctrica;
-El equipo produce chispas humo o ernite llamas;
-La unidad vibra de una manera excesiva.
resultado el fuego o et golpe el6ctrico.
CUANDOAJUSTE0 HAGAREPARACIONESA SY MAQU_NA
GENERADOR
o Siempre desconecteel alambre de la bujia y col6quelo donde no
pueda entrar en contacto con la buiia.
CUANDOPRUEBELA BUJiA DELIVlOTOR
• Utilice un comprobador de bujias homologado.
o NO comprueba la chispa sin la bujia instalada.
39
CONOZCASU GENERADOR
_Lea
este mafluamdel
operario
y las
regJasde
seguridad
antescon
de operar
su generador.
.......Compare
Ias ilustraciones
con su
generador
para
familiarizarse
la ubicaciCnde
Ios diferentes controJesy ajustes.
Conserveeste manuat para referenciasfuturas.
A = Toma¢orriente DobJes de 120 VoRtiosAC, 20 Amp -- Pueden
ser LdiIizadospara suministrar aIirnentaciCn eI_ctrica para e[
funcionamiento de cargas de! motor, herrarnientas aparatos
especiaIese iIuminaciOn el_ctrica de 120 Voltios AO a
20 Amperios, monofasica de 60 Hz.
H = TanquedeJ Combustible -- E[talsquet[ene una capacidad de
18.9 L (5 galones arnericanos) de gasolina sin contenido de
plomo.
J =V_lvula de Combustible -- Permite abr[r y cerrar la
alimentaciCn de combustible al rnotor.
[} = Tomacorriente cen Dispositivo de Seguridad de
120/24g Voltios, 3g Amp -- Puede ser utilizado para
suministrar alimentaciCnel_ctrica para e[ funcio!_amiento de
cargas del motor, herramientas aparatos especiales e
[luminaciCn el_ctrica de 120 y/o 240 Voltios AC a 30 Amperios,
rnonof_sica de 60 Hz.
K =Conecter de Tierra -- Consulte con el organismo responsable
de la normativa vigente de conexiCna tierra.
L =TapCn de Vaciado de Aceite -- Perrnite vaciar e[ aceite del
motor. Yea Aceiteen Mantenimiento para las recomendaciones
del aceite.
[vl =Tapa deJ DepCsite deJ Aceite -- Llene el rnotor con aceite
aqui.
C = Bepurador de Aire -- Filtra el aire de er_tradaa rned[da que
penetra en e! rnotor.
N = C[dataze e_Prineipin -- Us6 para cornenzar motor.
B =PaJanca r:stranguJadera -- Usada cuando se est_ dando
arranque a un rnotor fr[o.
P= InterruptorBamancin-- Deber_estar en la posiciCn "On" (En)
para darle arranque al motor. ColCque[oen la posiciCis"Off"
(Apagado) para detelserun rnotor en fulscionamiento.
_:= _:tiqueta de Bates -- Proporciona e[ modelo revision y el
nOmerode serie de generador. Tenga por favor estos
prontamente disponible cu_ndo Ilamar para la ayuda.
F = DisyunterBascuJante - Un disyuntor basculante que protege el
generador contra sobrecargas el_ctricas.
6_=mdentifica¢iCndel Motor -- Indica el mode!o, tipo y cOdigo del
rnotor. Tenga por favor estos prontarnente disponible cudndo
Ilamar para la ayuda.
R = Silenciador Apagaehispas -- E]silenciador disminuye el ru[do
de! motor y est_ equipado con una pantalla apagachispas.
S =StatStation TM - Muestra la carga nominal del generador en
fur_ciCnde la frecuer_ciade salida. TarnbiCn[ncluye una funciOn
de aviso de mantenimiento [ntegrada.
4O
Su generadorrequierede ciertos procedimientosde montajey solo
estasdlisto para ser utilizadodespuOsde habedesuministradoservicio
con el combustibley aceiterecornendados.
Si usted tiene psoMemasconemmontaje de su genesades, pos
favor Hamo a RaIJnoa do ayuda para gonoradoros am
1=800=222=3136.
Desembalaje del Generader
1. Coloquela cajade cartonen unasuperficierigiday plana.
2. Saquetodo el contenidode la cajade carton,a excepciOn
de[
generados.
3. Abracompletarnente
la cajade cartoncortandocadaunade
sus esquinasde arribaabaio.
4. Mantengael generadorsobreel cartonparainstalarel juego
de ruedas.
Centenido de la Caja
Revisetodoel contenidocomparAndoloconla lista a continuaciOn:
o UnidadPrincipal
o Aceitedel Motor
4. Introduzca una arandela (C) por e! eje y coloque una anilla en
"e" (D) en la ranura dot eje.
5. Para e!lo, apriete con unos alicates desde la parte superior de
la anilla en "e" hacia la parte inferior dot eje.
o Manualde!Operario
, Juegode Ruedas
, Juegode Cablesdel Adaptados
PRECAUCi6N
Las aniiias en "e" pueden provocar lesiones
Si cualquierpastefaltao est_daiiada,Ilarnea la Lineade Ayudadel
Generadoral 1=800=222=3136.
oculares,
Las aniiias en "e" pueden salir disparadas
durante el montaje o el desmontaje.
o UtilicesiempreprotecciOn
ocularparamontaro desmontas
anillasen"e'.
"
Instale el Juege de Ruedas
NOTA:Eljuegode ruedasno est_disdiado parausoen carretera.
NOremolquela urfidadcon un vehicu!ocontracciOnrnec_nica.
6. Repitalos pasosdel 3 al 5 paraasegurarla segundarueda.
Necesitar_lassiguientesherramientas
parainstalarestos
cosnponentes:
, Llavede 13 mm
7. Delela vudta al generadorde forma queel ladodel rnotor
quedeabajo.
o Llavede cubode 13 msn
8. Hagacoiocidirlos orificiosde la patade apoyo(E) conlos del
bastidordel generador.
, Alicates
9. Montela patade apoyocon dostornillos de cabezacortos
(M8x 16 snsn)(F) y dostuercashexagonales
(G).Aprietecon
unaIlavede cubo de 13 snm.
, Gafasde seguridad
InotaleeJjuegode suedasuonfesme
a JasinstsLicoiones
sigu=
iontos:
10. Vuelvaa colocarel generados
en la posiciOnnormalde
funcionamiento(apoyadoen lasruedasy la patadeapoyo).
1. Delela vueltaal generadordeforma que el motor quede
arriba.
2. Introduzcael eie (A) a travasde los dossoportesde montaje.
3. Coloqueunarueda(B) en cadaextremo,cuandomostrado.
41
ANTES DE DARLE ARRANQUEAL
GENEBADOB
ADVEBTENCIA
La combustible y sus vapores son
extremadamente infiamabIes y expiosivos.
Agregar Aceite al Metor
1. Coloque la generador en una superficie plana y nivelada.
Etfuego o una expiosi6n pueden causar
quemaduras severas e inclusive la muerte.
2. Limpie la zona de alrededor del orificio de Ilenado de aceitey
quite el tapOn amarillo.
CUANDO ANADA CO_BUSTmBLE
NOTA:ConsuIte la secci6n Aceite para ver las recornendaciones
reIativas al aceite. Compruebe que la botella de aceite suministrada
tiene la viscosidad adecuada para la temperatura ambiente actual.
• Apague el generador (posici6n OFF)y d_ie[o enfriar al rnenos
por 2 rninutos antes de remover la tapa de la combustible.
Afloje la tapa lentamente para dejar que la presi6n salga de!
tanque.
3. Con la ayuda de un embudo (opcional) vierta lentarnente todo
el contenido de la boteIIade aceite (0,77 I - 26 onzas) por el
orificio de Ilenado de aceite.
o Llene o vacie el depOsitode combustible a la intemperie.
• NO !lene demasiado eltanque. Permita al menos espacio para la
expansion de! combustible.
AVISO
• Si se ha derramado combustible, esperea que se evapore antes
de arranoarel motor.
Et tratamiento inadecuado det generador puede dafiado y
acortar su vida productiva.
I,,_Oprocure acodar ni empezar e[ rnotor antes ha sido aendido a
apropiadarnentecon e[ aceite recornendado. Esto puede tener
como resultado unaaveria de! motor.
• Mantenga [a combustible alejadade chispas, llamas abiertas,
pilotos, caIory otras fuentes de igniciOn.
• NO encienda un cigarrillo o furne.
1. Lhnpie el b_reaalrededor de la tapa de Ilenado del combustible,
retire la tapa.
4. Vuelva a colocar e! tap6n y apri6telo firrnemente.
2. Afiada lentamente gasolina sin pIomo (A) al depOsito de
cornbustibIe (B). 1/0 a_adacombustible en exceso. Deje
aproximadamente 4 cm (1,5") de espacio en el depOsito (C)
para permitir la expansion del combustible, como se muestra.
Agregue combustible
EJ¢ombustibJedebe reunir Jossiguientes requisites:
, Gasolina sin ptorno limpia y nueva.
o Un minimo de 87 octanos/87 AK! (91 RON). Para uso a gran
altitud, consulte 6ran altitud.
o EI motor admite gasolina con hasta un 10% de etanol
(gasohol) o basta un 15% de MTBE(rter rnetil terbutilico).
AVlSO
Evite e! dafio dei generador.
3. Instale latapa del tanque de combustible y la espera para
algOn combustible rociado para evaporar.
El fracaso para seguir Manual de Operario para el
combustible reccomendations garant[a de vados.
I/0 utilice gasoIina no autorizada; por ejemplo, E85.
iPRESAgCm6N!
Loscombustiblesconmezdadealcohol(gasohol,
etanolo metanol)puedenatraerla humedady provocarla
separaci6ny formaciOndeacidosduranteel almacenamiento.
Los
gasesacidospuedendaiiarel circuitode combustibley el motor
duranteel aimacenamiento.
NO mezde aceite con gasolina.
NO modifique el motor para hacerlofuncionar con otros
combustibles.
Para evitar la formaci6n de carbonilla en el circuito de combustible,
siempre que afiada combustible, mazclelo con un estabilizador.
Para evitar este tipo de problemas vacie e[ circuito de combustible
cuando vaya a ahnacenar la unidad durante 30 dias o rn_s. Vacie e!
dep6sito de combustible, arranque el rnotor y d_jelo funcionar basta
que los conductos de combustible y el carburador queden vacios.
Utilice combustible nuevo la prOximatemporada. Para obtener m_s
informaci6na! respecto, consulte Almacenamiento.
Consulte Almacenamiente. !/o todos los combustibles son iguales.
Si detecta problemas de arranque o de rendimiento despu_s de
utilizar un combustible, pruebe a cambiar de proveedor o de marca.
Este rnotor est_ certificado para funcionar con gasolina. Su sistema
de control de emisiones es EM (Modificaciones del motor).
NUNCAutilice productos lirnpiadores para motores o carburadores
en e! depOsito de combustible, ya que podrian provocar dafios
permanentes.
42
Tap6n de Combustiblepara Mejorar el Arranque
3. Retire la lengLietapara dejar la membrana al descubierto.
El usode conservantede cornbustiblerna!]tieoeel combustibleer_
boenestadoy limpialoscarburadoresIo quefacJlitael arranqueen
todaslasestacionesdel ario,El nuevotapOnde combustiblegotea
autom_ticarnente
conserva!]teconcentradoen el depOsitode
combustible.
PELIGRO
IMPORTANTE:rio retire el cierre ptateado del otro lado.
SERINGERIDO.Evite el contacto con los ojos, la
4. Vuelva a colocar el tapOnde combustible er_el depOsito.
Jpieto Ia ropa. [/o tornar internamente. Evite
'respirar ia niebJa o ei vapor. La exposici6n
excesiva de los ojos o la pieJ puede causar
irritaci6n. Mantenga el estabiiizador fuera del
_
jalcance
de los ni_os.
let estabiiizador
de combustible
es un quimico
peligroso.**
EN CASODE SERINGERIDO,Ilame un medico inmediatamente.
En caso de la ernerger_cia,contacte a un m_dico
inmediatamente y llama 1-800-424-9300 para la informaci6n
material de la seguridad.
5. Comproebe periOdicamenteel cartucbo para asegurarse de
que siga conteniendo estabilizador de combustible. Si est4
vacio, carnbie el cartucho por uno nuevo.
*El estabiJizador de combustible contiene 2,6-di-tert-butHfenoJ (128-39-2) y destiJado
de petr61eoalif4tico (64742-47-8),
Gran altitud
1. Introduzca el cartucho en e! tap6n.
En altitudes soperiores a 1.524 metros (5.000 pies)_se deber_
utilizar gasolina con un minirno de 85 octanos / 85 AKI (89 ROIt).
Para seguir cumplielsdo la normatJvasobre emisiones_es necesario
aiustar la unidad para su uso a gran altitud. De no realizarseeste
ajuste_el rendirniento se reducir_ y el consumo de combustible y
las emisiones aumentar4n. Para obtener m_s inforrnaci6n sobre el
ajuste para gran altitu¢ consulte con un distribuidor cualificado de
Sears. No se recornieoda utilizar el motor a altitudes inferiores a
762 met!os (2.500 pies) con el juego de gran altitud.
/
2. Presione hasta que el cartucho encaje en su posici6n.
43
COMO USAR SU GENERADOR
Ubicad6ndemGenerador
SI TIENEPROBLEMASoperando su generador despu_s de leer el
manual por favor !lame a la linea de ayuda para generadores al
1=888=222=3136.
Es_ado LibreAIrededordd Geeemdor
ADVERTENCIA
Tierra dei Sistema
Los gases y et cator de e_ape pueden inflamar
El generador dispone de una conexiOn a tierra dd sistema que
conecta los cornponentes dd bastidor a los terminales de tierra de
los enchufes hembra de salida de CA=La tierra del sistema est_
ios materiates
combustibies
y ias yestructuras
o
dafiar
e! dep6sito
de combustible
provocar un
incendio=
• Deje un espacio minimo de 1.5 m (5 pies) alrededor dd
generador, inchida la parte superior.
conectada al cable de CA neutro que, a su vez, est_ conectado al
bastidor dd generador.
Coloque la generador a la internperie en una zona en donde no se
acurnuIen gases de escape mortales. NO instaIe el generador en
hgares en los que los gases de escape (A) se puedan acurnular o
entrar en un edificio que pueda estar ocupado. Aseg8resede que
los gasesde escape no puedan entrar por ventanas, puertas, tomas
de aire de ventilaci6n u otras aberturas en un espacio cerrado en el
que puedan acumularse. Tenga en cuenta los vientos y las corriente
de aire preponderantes cuando elija la ubicaciOndd generador.
Requisites Espedames
Es posible que haya norrnas u ordenanzaslocales y nacionalesen
materia de seguridad e higiene en el trabajo apIicables a! uso dd
generador. Consulte con un dectricista cualificado, un inspector
d_ctrico o el organismo competente.
En algunas zonas, es obligatorio registrar los generadores en
las compai_ias e!6ctricas locales.
o Si el generador se utiliza en una obra puede ser necesario
cumplir normas y requisitos adicionales.
El uso de un generador
en un espacio interior
PUEDE
PROVOCAR
LA MUERTE EN POCOS MINUTOS,
Conexi6n amSistema Ei6drico de un Edifido
Los gases
mon6xido
Las conexiones a efectos de alimentaci6n de reserva al sistema
de escape dei generador
contienen
de carbono,
un veneno invidbme e inodoro,
el6ctrico de un edificio deben ser realizadaspor un dectricista
cualificado. La conexi6n debe aislar la alimentaci6n dd generador
de la alimentaciOn de la red pOblica y debe cumplir todas las leyes y
norrnas e!6ctricasvigentes.
ADVERTENCIA
NUNCA uti|ice un generador
en eminterior de una casa o
an garaje, AUNQUE haya
ventanas y puertas abiertas.
Los generadores producen un voltaje muy
)oderoso.
Util{celo
solo
en el
EXTERIOR,
ame]ado de
ventanas,
puerta$ y
aberturas
de ventimaci6m
i
_uede
hacer
los trabajadores
de electricidad
_¢
Si
no a[sla
et que
generador
de utilidades
de energia,
sufran heridas graves e inclusive ia muerte,
debido a Ia retroatimentaci6n de Ia energia
sI6ctrica.
o Cuandouseun generadorcornopoderde energiaauxiliar,
notifiquea la cornpa_iade utiIidades.Useel equipode
transferenciaaprobadoparaaislarel generadordeotra utilidad
d6ctrica.
o Useun interruptorparala falladel circuitode tierra(GFCI)en
cuaIquier_reabastantehOmeda
o queseaaItarnenteconductiva,
tales cornoterrazasde metalo trabajohechoconacero.
• NOtoquelosalarnbrespdadoso recept_culos.
• NOuseungeneradorconcablesel_ctricosqueest6n
rnalgastadosrotos,peladoso dafiadosde cualquierforma.
• NOopereel generadorbajola Ihvia.
o NOmane]eel generadoro cableselactricosmientrasest6
paradoenagua,descalzoo cuandolasrnanosy los piesest6n
rnojados.
• 1/0 perl-nitaquepersonasdescalificadas
o ni_osopereno sirvan
al generador.
T[pica Generador Mostrada
44
Encienda eJ Motor
ADVERTENCIA
Descoeectetodas las cargas eI_ctricas del generador NUNCA
arraeque o pare el motor cuaedo hayaaparatos ei_ctricos
conectados y ee funcionarniento. Siga las [estrucciones de puesta
en marcha ee orden nurnSrico.
Ei contacto con la zone deI silenciador puede
producir quemaduras graves,
1. AsegOresede que B unidad estAen una superficiepBea.
IMPORTANTE:Si la unidad no se arranca y utiIiza en una superficie
plana se pueden producir probbmas de arraeque y de parada
duraete e! funcionamiento.
®
2. Gire la %lvuIa del cornbustible ala posiciOn "OnL
o
®
®
3. Coloque la palanca de choke en la posici6n "Choke".
Los gases y ei calor de escape pueden infiamar
ios materiabs combustibles y ias estructuras o
dafiar ei dep6sito de combustible y provocar un
incendio.
NOtoquelassuperficiescalientesy evitelosgasesde!escapea
altatemperatura.
Permitaqueel equipose enfrieantesdetocar!o.
Dejeun espaciominimode 1.5 rn (5 pies)alrededordel
generador,ieduida la partesuperior.
El C6digode NormativaFederal(CFRTitulo 36: Parques,
Bosquesy PropiedadP@lica)obligaa instalaruna pantalla
apagachispas
en losequiposcon rnotordecombusti6ninterno
y a mantenerlaen bueeascondicionesde funcionamiento,
conformeala norrna5100-1C(o posterior)del ServicioForestal
de la USDA.Ene!Estadode Californiala ley exigeel usode una
pantallaapagachispas
(Secci6n4442 delC6digode Recursos
POblicosdeCalifornia).Enotros estadospuedehaberbyes
simiBreseevigor.
Conexion de Cargas Eieerieas
o Deie que el motor se estabilice y se calieete por unos minutos
despuSs del arranque.
4. Coloque el interruptor balaecin ala posici6n "On".
* Enchufe y encieeda las cargas eISctricas AC de 120 Voltios,
monof_sicas de 60 Hertzios deseadas.
* NO coeecte cargas de 240 Voltios a los tomacorrientes de
120 Voltios.
* NO coeecte cargas trif_sicas a los tornacorrieetes.
5. Agarre la rnaeilla de retroceso y hale lentamente hasta que
puede sentir un poco de resistencia. Luego hale r@idamente
para enceeder el motor.
o NO conecte cargas de 50 Hertzios al generador.
. NO SOBRECARGUEGENERADOR.Vea No Sobmcardue
6enerador.
ADVERTENCIA
AVISO
El retroceso (reptbgue r@ido) det cable del
arrancador puede producir Iesiones. El retroceso
'_
Ei sobrepasar ia capacidad dei amperaje y vataje del
lenerador, puede da_ar al generador y los aparatos
el@trbos conectados al mismo.
impedir_ que el usuario suelte el cable a tbmpo y
tirar_ de su mano Y brazo hacia e! motor.
Como resultado, podrian producirse fracturas,
contusiones o esguinces.
* Cuando arranque el motor tire lentamente del cable hasta sentir
una resistenciay, a coetinuaci6n, tire r@idarnente de 81pare
evitar su retroceso.
Vea No sobmcargue generador.
Enciendasu generadory deje que el motor se estabiliceantes
de coeectar las cargas el@trices.
Conecte las cagas eI_ctricas en la posici6n de @@ado (OFF),
luego encienda (ON) para su operaci6e.
. NUNCAarranque o pare el motor cuando haya aparatos
elSctricos coeectados yen funcionamiento.
Apague (OFF)las cargas e!Sctricasy desconSctelasdel
generador antes de parer el generador.
IMPORTANTE:
Si el motorse desborda,co[oque[a paIanca
estranguladoraenla posiciOn"Run"e ietentearrancarlohasta
coeseguido.
6. Muevala palancade chokeala posiciOn"Rue"unadistancia
cortaala vezpor aIgunossegundosen un dirna cdlido o
algunosrninutosen un cIimafrio. Dejequeel motorcorra
suavementeantesde cadacambio.Opereconel chokeen la
posiciOe"Run",
NOTA:Si el motorarrancadespuSsde tirar tres vecesdel
arraecadorpero no siguefuncionando,o si la unidadse paraen
funcionamientoasegL'lrese
de que la unidadestAell unasuperficie
planay compruebeque e! nivelde aceitedel cigiJe_ales correcto.
La unidadpuedeequiparsecon un dispositivode protecci6nde bajo
nivelde aceite.Encasoafirmativo,el niveldel aceitedebeser
adecuadoparequeel motorarranque.
Detener eJ Meter
1. Desconectetodas [as cargas eISctricas de [a unidad. NUNCA
arraeque o deteega el motor con dispositivos elSctricos
coeectados a 81y encendidos.
2. Permita que e! motor funcione sin carga durante dos mieutos
para estabflizar Bs temperaturas internes de la unidad.
45
3. Mueva
elinterruptordel motor a la posiciOn "Off"
(Apagado).
Este receptAculole provee poder a cargas de 120/240 Voltios AC de
60 Hz, fase sencilla, que requieren hasta 2,800 Voltios de energia a
23.3 Amperios, para 120 Voltios; 5,600 Voltios de energia (5.6 kW)
a 23.3 Arnperios para 240 Voltios. El enchufe est_ protegido por un
disyuntor basculante.
ADVERTENCIA
El motor podr[a petardear, incendiarseo dafiarse=
AVISO
• NO coloque la palanca estranguladora en la posiciOn "Cheke"
para parar el motor.
Las tomas elOctricas pueden marcar un vaior nominal
rr_ad
de saIida det qenerador.
NUNCAintente conectar Lmdispositivo que requieramAs
amperaje del que el generador o la toma el_ctrica pueden
suministrar.
4. Gire la v_lvula a la posiciOn "Off" (Apagado).
JUEGOSDE CGRDONESY ENCHUFES
CONECTORES
NO sobrecargar el generador. V_ase No sebrecargar d
generado,_
Use t]nicarnente cordones de extension de alta calidad y bien
aislados con los tomacorrientes elOctricosdoNes de 120 Voltios del
generador.
128 VoJt AC, 28 Amp, Recept_culos DohJes
Cada recept_culo estA protegido en contra de sobrecargas por un
disyuntor basculante.
Revise las capacidadesde todos las cordones de extension antes de
usarlos. Los juegos de cordones de extension utilizados deberAn
tener una capacidad de 125 Voltios AC a 20 Amperios o rnayor para
la rnayoria de los dispositivos e!Octricos.Sin embargo algunos
dispositivos podrian no requerir este %o de cordon de extension.
Revise e! manual del operario de esos dispositivos para ver las
recomendaciones del fabricante.
Mantenga los cordones de extension Io mAs corto posible,
preferiblemente menos de 15 pies de largo para evitar la caida de
voltaie y posiNe recalentamiento de los alarnbres.
,_
ADVERTENCIA
Usecadarecept_.culo
paraoperar120VoltiosAC,de fasesencilla,
de cargasde 60Hzque requierenhasta2,400vatios(2.4 kW) a
corrientesde 20 Amps.Uselos juegosde cablesque son
calificadosparacargasde 125VoltiosAC,a 20 Arnps(o rnayores).
Los canes elOctricos sobrecargados pueden
._
recalentarse,
arco o quemarse,
3rovocando laformar
muerte,unlesiones
y/o da_os
materiales.
JUEGO DE CABLES DEL ADAPTADOR DEL
GENERADOR
• Utilice exdusivamente cables regulados para las cargas
aplicadas.
o Respetetodas las medidas de seguridad de los cables
elOctricos.
El generador est_ equipado con un Juego de Cables del Adaptador
del Generadorde 25 pies, diseSadopara un circuito neutro a tierra
de 120 voltios, 20 Amperios.
128/248 Voltios AC, 38 Amp, Recept_cule de
Seguridad
Use un tapOn NEMA L14-30 con este receptAculo.Conecte un juego
de cable de 4 alambres clasificado corno 250 Voltios AC a 30 Amps
(o mayor). Usted puede usar el mismo cable de 4-alambres si
planea trabaiar con una carga de 120 Voltios.
go de Cablede 4 Alarnbres
(Neutro)
La carga maxima en cadatomacorriente es de 20 Amperios. La
carga rn_xirna total tanto en el tornacorriente de cable amarillo
corno el tomacorriente de cane negro, es de 20 Amperios.
NOTA:Siga todas las instrucciones de seguridad cuando conecte
cualquier cable de extension o aparato al generador.
Y (Cargado)
NEMA L14-30
FTL7
x (Cargado)
Tierra (Verde)
46
NO SOBRECARGUEGENERADOR
4. 6onecte y encienda la prOximacarga.
5. De nuevo, permita que el geeerador se estabilice.
Capacidad
Usted debe asegurarse que su geeerador
suficiente vataje calificado (cuando est_ funcioeando)
encender)para
los
aparatosa
mismo tiempo.
Siga estos pasos:
6. Repita los pasos 4 y 5 para cada carga adicioeal que usted
tenga.
puede proveer el
y de carga (a]
los cuabs va a proveer la
NUNCAaiiada rn_s cargas sobre la capacidad del generador. Tome
una ateecJ6nespecialen coesiderar las cargas de corriente segOnla
capacidaddel generador, como se describe arriba.
energia,al
1. Seleccione los aparatos que recibirAn la energia, al mismo
Vatios
Calificados*
tiempo.
2. TotaIice los vatios calificados
(cuandoest_funcioeando)de
Herramienta
o Aparato EI6ctrico
estos aparatos. Esta es la cantidad de eeergia que su
generadordebeproducirpara
funcionando
manteeer eso
aparatos
o)
adecuadamente.
3. Calcub la cantidad de vatios de carga
(al encender)que
Esenciales
Bombilla _75 vatios
usted
Congelador industrial
Bomba de aguas negras
Refrigerador / congelador - 18 pies
cObicos
El vatajede carga es la cantidad minima de
necesitar&
electricidad,necesaria para encender herramientas o aparatos
con rnotores eI_ctricos,tabs como, sierras circulares o
refrigeradores.
Debido a que no todos los motores se
encienden al mismo rnomento,
puedeestirnar
el
al afiadir soWneete
Bomba de agua - 1/3 HP
Calefacci6n / enfriamiento
Aire Acond. de ventana - 10.000
BTU
Ventilador de ventana
Calefactor de caldera - 1/2 HP
Cocina
Horno de microondas - 1.000
Vatios
Cafetera
vatajetotal de carga se
e!(Ios)aparato(s)con el
vataje adicioeal m_.s alto, al total del vataje calificado,
obtenido en el paso 2.
Ejemple:
Herramienta o
Aparato ElSctrico
Vatios Calificados
Refrigerador
Congelador
industrial
Televisi6n
Luz (75 Vatios)
Vatios Adicionales
(cuando este
funcionando)
de Carga (a!
encender)
1200
1800
8OO
1600
5O0
50O
Cocina el6ctrica - Elemento simple
Calientaplatos
Habitaci6n Familiar
Tocador de DVD/CD
VCR
1800 (Vatios de
Carga mas alto)
Televisor a color - 27 pulg.
Computadora personal con monitor
de 17 pulg.
Otros
Aire Acondicionado
de Ventana
Receptor est@eo
50O
75
Total = 3075
Vatios para
funcionar
VatajeTotalCalificado(cuaedoest_fuedonando = 3075
Vatajede CargaAdicioealrn_salto
SalidaTotalRequeridadel Generador
= 1800
= 4875
NOTA:El nivelnominalde vatios(enfuecionamiento)no puedeser
superiora 5.600. Dadaestalimitaci6n el niveladicionaldevatios
(arranque)no puedeser superiora 8.600.
ControJde la Ener_[a
Para prolongar
conectados
a!
rnuy
irnportantecuidarlo
cuando se b
afiaden cargas el6ctricas. Nada deberia estar coeectado a los
tomacorrientes
del generador antes de que su motor sea encendido.
La forma correcta y m_s segura para coetrolar
la energia del
geeerador es la de afiadir en secuencias las cargas, corno se
describe a coetinuaciOe:
1. Sin tenet nada coeectado a! generador,
5OO
1200
1600
1000
2000
1200
1800
300
800
600
1300
1000
1500
1500
2500
100
100
45O
5OO
8OO
180
300
48O
4000
Luz de hal6geno para trabajar
Rociador sin aire _ 1/3 HP
Sierra intercambiable
Taladro el6ctrico _ 1/2 HP
1000
6OO
960
1000
1500
1800
1800
2000
1200
96O
1000
1500
1800
1800
2000
2500
2500
520
*El vatajequeapareceee [a lista essolameeteunacantidad
aproxirnada.Verifiquela herramientao aparatoel@tricopara
obtenerel vatajeverdadero.
encienda el rnotor de
la rnaeera descrita ee este rnaeual
2. Conecte y encienda la primera carga, preferibbrnente
75
5OO
8OO
8OO
Sistema de seguridad
Radio_Reloj AM/FM
Abridor de garaje _ 1/2 HP
Calentador el6ctrico de agua - 40
galones
Tal_er
Sierra circular _ 7 % pulg.
Sierra inglete_ 10 pulg.
Mesa de planificaci6n - 6 pulg.
Sierra de mesa / sierra de brazo
radial- 10 pulg.
Compresor de aire - 1-1/2 HP HP =
Caballo de fuerza.
la vlda de su geeerador y !os aparatos que est@
mismo,es
(cuando
est6
funcionand
Vatios
Adicionales
de Carga
(al
encender)
la mayor
que usted tenga.
3. Permita que la salida de! geeerador se estabilice (el motor
funciona suavemente y el aparato conectado al rnismo trabaja
adecuadameete)
47
JNFORMACJ6NTF:CNJCASOBREEL
MOTOR
ESPECIHCACIONES[}EL PRODUCTO
El motor es de m_ocilindros, de v_lvulas en cabeza (OHV),
refrigerado por aire y de baja emisiOn.
Vataje que empieza ....................
8,600 Vatios (8.6 kW)
Vataie ...............................
5,600 vatios (5.6 kW)
Especificaciones de_ Generader
En el Estado de California, los motores de la 200000 han obtenido la
certificaciOn del California Air Resources Board (Conseio de
recursos de aire de California) de cumplimiento de la normativa
sobre emisiones durante 250 horas. Esta certificaciOn no supone
para e! cornprador, el propietario o e! usuario ninguna garantia
adicional en Io relativo al rendimiento y a la vida Otil del motor. Las
garantfas del motor atafien exclusivamente al producto y alas
emisiones que se declaran en este manual.
Voltaje Nominal AC .........................
Corriente a 240 Voltios .......................
Corriente a 120 Voltios .......................
Frecuencia Nominal .......................
Fase ........................................
Capacidad de Gasolina ..................
Peten¢ia Neminal
Peso que Embarca ................................
El valor de potencia bruta de cada modelo de rnotor de gasolina se
indica en la etiqueta conforrne a los requisitos del cOdigoJ1940
(Procedimiento de valoraciOnde potencia y par de pequeiios
motores) de la SAE (Society o1Automotive Engineers, Sociedad de
ingenieros de automociOn). Los valores norninales se hart obtenido
y corregido conforme al cOdigoSAE J!995 (RevisiOn2002-05). Los
valores de par se obtienen a 3060 rpm, y los valores de potencia, a
3600 rpm. La potencia bruta real del motor serAinferior y
dependerA,entre otros factores, de las condiciones ambientales de
uso y de las variaciones entre distintos rnotores del misrno modelo.
Dada la amplia vafiedad de productos que utilizan nuestros motores
y la multitud de factores arnbientales que pueden afectar a su
fundonamiento es posible que el motor de gasolina no desarrolle
toda su potencia bruta nominal en determinados equipos (potencia
"en la aplicaciOn" o neta real). Esta diferencia se debe, entre otros, a
los siguientes factores: accesodos (filtro de aire, escape, carga
refrigeraciOn, carburador, bomba de combustible etc.), limitaciones
de la aplicaciOn, condiciones ambientales de uso (temperatura,
humedad, altitud) y variaciones entre distintos rnotores de un
mismo rnodelo. Briggs & Stratton podr_ sustituir e! rnotor de esta
serie pot otro de mayor potencia norninal en caso de lirnitaciones
de fabricaciOno capacidad.
Especificacienes de_ _aeter
Dib_metrode carnisa ..................
Carrera ............................
120/240 Voltios
23.3 Amperios
46.6 Amperios
60Hz a 3600 rpm
Monof_sica
5 ga!onesarnericanos
170 Ibs.
79 rnm (312 pulgadas)
62 mm (2,44 pulgadas)
Desplazarniento .....................
305 cc (18,64 pulgadas)
Bujia
Tipo de reOstato:.................
Tipo de larga de vida de platino: .......
Calibrar SeparaciOna: .............
Entrehierro del inducido: .......................
Briggs & Stratton 491055S
Briggs & Stratton 5066D
0.030 pulgadas (0.76 ram)
0,20-0,30 rnrn
(0,008-0,012
putgadas)
Holgura de la vAIvulacon muelles de vAIvula instalados y piston de
6 mm (0,25 pulgadas) pasado el punto rnuerto superior (cornprobar
con el rnotor en ifio)
AdmisiOn ...............
0,10-0,15 rnm (0,004-0,006 pulgadas)
Escape.................
0,10-0,15 rnrn (0,004-0,006 pulgadas)
Capacidad de Aceite ......................
0.8 litros (28 onzas)
NOTA:Paraqueel rendimientoseaOptimo,la cargadel generador
no debesuperarel 85% de la potencianominalen vatios.La
potenciabrutadel motor se reducir_un 3,5% por cada300 rn
(1.000pies)de aititud sobreel niveldel mary un 1% por cada5,6
°C (10 °F)por encirnade 25 °C (77 °F).ElfuncionamientoserA
satisfactoriohastaun _ngulode inclinaciOnde 15°.
48
PROGRAMADE MANTENJMIENTO
Siga los intervalos horarios o de caIendario, !o que ocurra primero. Se requiere de servicio con mayor frecuencia cuando opere la unidad en
las condiciones adversas descfitas a continuaci6n.
CALENDARIO DE i'dANTENUMIENTO
ANOTE LAS FECHAS CONFORMECUMPLA
INTERVALO DE OPERACUONPOR HORA
CON EL SERVICIO NORMAL
FECNA$ DE SERVICiO
Antes de Cada Cada 25 Horas o
TAREADE MANTENIMUENTO
Uso
Verincar el nivel de ace!to
X
Limpie los residuos
X
Cambiar
Cada 50 Horas o
Cada 100 Horas
a A[io
o al Ai_o
al A_o
el ace!to del motor
X1
Servicio al filtro de aire
X2
Servicio a [a bujia
X
Servicio al sistema de la bujia
X
Limpie el sistema de refrigeraci6n
Prepar aJmaeenamiento
1
2
X2
Si Ja unidad permanecer4 sin uso por m4s de 30 dias,
Cambiarel ace!todespuCsde lasprimeras(5) horasy despuCscada50 horas.
Hacerel cambiode ace!tocon mayorfrecuenciacuandotrabajeen condicionesde muchasuciedado polvo.
Remplazarm4s a menudobajocondicionesde suciedado polvo.
RECOIVIENDACIONES
GENERALES
NOTA:NO recomendamosel uso de manguerasde jardin paralimpiar el
generador.El agua podriaintroducirseen el sisternade combustible dot
motor y causar probIernas.Adorers, si elagua se introduceal generador
a travCsde las ranuraspara aire de enfriarniento,algo del agua quedard
retenidaen los espaciosvaciosy grietasdel aislamientodel devanado
del estatory rotor. La acumutaciOnde aguay suciedaden losdevanados
internosdel generadordisminuir_ eventualmentela resistenciadd
aislamientode estos devanados.
El mantenirnientoperiOdicomejorar_el rendimientoy prolongardlavida
Qtildel generador.Si necesitaasistencia,consultecon UNdistribuidor de
Searso con otro distribuidor cualificado.
La garantia del generador no cubre los eIementos que hayan sido
sujetos al abuso o negIigencia del operador. Para recibir e! valor
completo de la garar_tia el operador deberA mantener e! generador
de la forma descrita en este manual.
Se deber_n Ilevar a cabo aIgunos ajustes periOdicarnentepara
mantener correctamente su generador.
Limpieza del Generader
Limpie a diar[o o antes de cadauso, los residuosacumulados en el
generador.Mantengalimpias [as conexiones los rnue!lesy los
rnandos. Limpie todo resto de combustible de la zona que rodeaa[
silenciadory de detr_sde] mismo. Inspeccione las ranuras para aire
de enfriamiento y la apertura del generador. Estasaperturas deber4n
rnantenerseIimpiasy despejadas.
Todos los ajustes de la secci6n Servicio y Ajustes de este manual
deberAnser hechos por Io menos unavez en cada estaciOn.CumpIa
con los requisitos de la taNa Programa de Mantenimiento descrita
anteriormente.
NOTA: Unavez a! ai_o deberAlimp!at o reemplazar la bujia y
reemplazar e! filtro de aire. Una buiia nueva y un filtro de aire lirnpio
garantizan una mezclade combustible-aire adecuada y ayuda a que
su motor funcione mejor y tonga una vida Qtil rnds pro!ongada.
Mantenga limpios los componentes del generador para reducir el
riesgo de sobrecalentamiento e [gnici6n de los residuos
acurnulados.
CONTROLDE EIVlISiONES
o Utiliceun trapo ht]medoparalimpiarlassuperficies
exteriores.
Cualquier establecimiento o individuo especializadoen la reparaciOn
de motores que no sean de autornoci6n puedeencargarse del
mantenimiento, la sustituci6n y la reparaciOnde los dispositivos y
sistemas de control de emisiones.
Mantenimieate
AVISO
Et tratamJento inadecuado del generador puede da_arlo y
acortar su vida productiva.
NO exponga al generador a una humedad excesiva,polvo,
suciedad o vapores corrosivos.
NO inserte cualquier obieto a trav_s de las ranuras de
enfr[amiento.
del Generader
El mantenimiento del generador consiste en conservar la unidad
limpia y seca. Operey aIrnacenela unidad en un ambiente lirnpio y
seco donde no serAexpuesta al polvo suciedad, hurnedad o
vapores corrosivos. Las ranuras de! aire de enfriamiento del
generador no deben estar tapadas con nieve, hojas, o cualquier otro
material extrdios.
• Puedeusarun cepillode cerdassuavespararetirarla
suciedadendurecida,aceite etc.
• Puedeusaruna mAquinaaspiradoraparadirninar suciedady
residuossueltos.
Revise frecuentemente la limpieza del generador y limpielo cuando
est_ con polvo, sucio, con aceite, humedad, o cuando otras
substancias extra,as sean visibles en su superficie exterior.
49
ANTENI IENTO DEL OTOR
El StatStationTM rnuestra la carga nominal del generador en funci6n
de la frecuencia de salida. Tambi_n incluye una funci6n de aviso de
mantenimiento integrada.
ADVERTENCIA
[v1onitorde potencia
Chispear involuntario puede tener como
La pantalla consta de dos LEDde siete segmentos que indican de
forrna f_.cil de leer la cantidad de energfa que suministra el
generador. El monitor de carga rnuestra la salida dd generador en
forrna de porcentaje.
_
CUANDO AJUSTE0 HAGA REPARACIONES
A SU [vIAQUINA
GENERADOR
Cuando aumenta la energia del generador_aumentan los valores de
la pantalla. Cuando los valores que muestra la palltalla empiezan a
parpadear, el usuario debe dejar de aiiadir cargas el_ctricas al
generador.
Si et consumo de energia es excesivo, las letras "OL" (Over Load =
Sobrecarga) parpadearAnen la panta!la. Eli este caso_el usuario
debe reducir la carga conectada al genetador.
resultado eI fuego o eI gotpe et_ctrico.
• Siempredesconecteel alambrede la buj{ay colOquelodondeno
puedaentraren contactocon la buiia.
CUANDO PRUEBELABUJiADELMOTOR
• Utiliceun comprobadorde bui{ashomologado.
• NOcompruebala chispasin la bujiainstalada.
Aceite
Funei{}n de aviso de mantenhniento
Reeomendaciones sobre emaeeite
El visor de LED mostrar_ una serie de cOdigos para avisarle cuando
sea necesario comprnbar o cambiar el aceite_comprobar o cambiar
el filtro de aire y comprobar o cambiar la bujia. Los c6digos son los
siguientes:
NOTA:Cuando a_ada aceite al c_rter del motor_ utilice solo aceite
detergentede alta calidad con clasificaciOn de servicio SF, SG, SH,
SJ o superior. NO utilice aditivos especiales.
"C1" Comprobar el aceite cada 8 horas
"C2" Cambiar el aceite cada 50 horas
1. Bija una viscosidad conforme a la siguiente tabla:
"C3" Comprobar o cambiar el filtro de aire cada 25 horas
86
68
"C4" Comprobar o carnbiar la bujia cada 100 horas
Para aprovechar las ventajas de lafunciOn de "aviso de
mantenirniento" de StatStation el usuario debe pulsar el botOnde
rearrne (reset) una vez que hayacompletado las tareas de
mantenirniento solicitadas segOnel cOdigoque se rnuestra (C!, C2,
C3, o C4). Esto har_ quese rnuestre"Co" o "CA" en funciOn del
tiernpo que se hayamantenido pulsado e! botOn:
1) "Co" - Si se pulsa el bot6n de rearme (reset) r_pidamente
una vez, se mostrar_ "Co" (borrado a cero). Esto borrar_i los
cOdigosde mantenimiento que hayan cumplido su tiempo
hasta ese punto y se volverd a contar el tiernpo
nuevamente desde cero.
2) "CA" - Si se pulsa el botOn de rearme (reset) y se Io
mar_tienepulsado durante 2 segundos, se mostrar_ "CA"
(borrado total). Esto borra todos los cOdigos de
mar_tenimiento_incluso si no har_alcanzadoa_n su punto
de servicio y se volverA a contar el tiempo nuevamente
desde cero.
Si aparece simult_neamente la carga nominal y un c6digo de
mantenimiento la pantalla LED rnostrar_ alternativamente la carga
nominal y el cOdigocorno se indica a continuaciOn:
El cOdigoaparecer_ durante 3 segundos y desaparecer_ durante
medio segundo. La carga aparecer_ durante 6 segu_ldosy
desaparecerddurante medio segundo.
50
_
30
20
;
10
)
32
°_
;
0
14
-10
4
-20
-22
-30
NOTA:Todo aceite sint_tico que cumpla las especificaciones ILSAC
GF-2,con marca de certificaci6n API y con simbolo de servicio API
con "SJ/CF ENERGYCONSERVING"o superior es un aceite
aceptable a todas las temperaturas. El uso de aceite sint_tico no
altera los intervalos de carnbio de aceite indicados.
SAE30:5
°C (40 °F)y superior es adecuado para todo tipo de usos
pot encima de 5 °C (40 °F). El uso por debajo de 5 °C (40 °F)
provocarAdificultades de arranque.
10W=30:-18 a 38 °C (0 a t00 %_es meior en caso de ternperatura
variable. Este grado de aceite mejora el arranque en climas frios,
pero puede aumentar el consurno de aceite a 27 °C (80 °F) o
temperaturas superiores.
*Compruebe el nivel de aceite con frecuencia a ternperaturas
superiores.
Sint6tice 5W=30:-30 a 40 °C (-20 a 120 °F) proporciorla la meior
protecciOna todas las ternperaturas al tiernpo que rnejora el
arranque y reduce el consurno de aceite.
5W=30:5 °C (40 °F) e inferiores el aceite recomerldado para el
invierno y funciona rnejor en condiciones de frio.
5O
Comprobaci6n del Nivel de Aceite
4. Quite el tapOn de Ilenadode aceite y vacie todo el aceite en un
recipiente adecuado.
Compruebe el nivel de aceiteantes de cada usa o cada 5 horas de
fancionarniento, coma minima. Rellenesi es necesario.
5. Vuelva a colocar el tap6n de vaciado y apriatelo bien. Quite el
tapOn de Ilenado de aceite.
1. Co!oquee! generador sabre una superficie nivelada.
6. Vierta lentamente unos Q6 litros (20 onzas) de aceite par el
orificio de Ilenado (B) hasta el punto de desbordamiento (C).
NO a_adaaceite en exceso.
2. Quite el tapOn de Ilenado de aceitey limpie!o con un trapo.
3. Compruebe que el aceite Ilega hasta el punto de
desbordarniento en el orificio de Ilenado.
7. Vuelva a colocar el tap6n de Ilenadode aceite Apri6telo
firmernente a mano.
4. Instale el tapOn de Ilenado de aceite, apriete firmernente.
Adici6n de Aceite del I_latar
8. Lirnpie los residuos de aceite.
1. Asegt_resede que la generador est6 en una superficie plana.
Servicio dei Depurador de Aire
2. Compruebe el nivel de aceite tal coma se indica en la secci6n
Compmbacidn de/n/vet de ace/re.
Su motor no funcionar_ adecuadamentey puede da_arse si usted Io
hacefuncionar con un depurador de aire sucio.
3. Si es necesario, vierta lentarnente aceite par el orificio de
Ilenado hasta el punto de desbordamiento en el tap6n de
Ilenado de aceite.
Cambia de Aceite dem_,letar
Saministre servicio al depurador de aire unavez cada 25 horas de
operaci6n o una vez par a_o Io que suceda primero. Suministre
servicio m_s frecaenternente si la unidad funciona bajo condiciones
de macha suciedad o polvo. Los repuestos se encuentran
disponibles en sa centro de servicio local Sears.
Cambie el aceite despu_s de las primeras 5 horas de operaciOn.
Cambie el aceite cada 50 horas de ese rnomento en adelante. SiestA
Para dar servieia amfimtrade aire, aiga ruespasaa qua ae detaHan
a uantinuaci6n:
4. Instale el tapOn de Ilenado de aceite, apriete firmernente.
utilizando su generador bajo condiciones de extrerna suciedad o
polvo, o en un clima demasiado caliente, haga el carnbio de aceite
mAs frecuentemente.
1. Afio]e los tornillos (a) y quite aire la cubierta rn_s limpia (B).
AVISO
Evite et contacto proiongado o repetido de piel con aceite
usado de motor.
El aceite usado del rnotor ha sido mostrado al cancer de la pie!
de la causa en ciertos animales de! laboratorio.
Completarnentelavado expuso dreas con el jab6n y el agua.
MANTENERFUERADELALCANCEDE LOS !',Ill'lOS.NO
COr,ITAMINE. CONSERVELOS RECURSOS.DEPOSITEEL
ACEITEUSADOEN UN PUNTO DE RECOGIDA.
Cambieel aceitecuandoel motorsigaestandocalientedespu_sde
haberfuncionado:
2. Con cuidado quite cartucho (C) de base (D).
1. Asegt]resede quela unidadest_en unasuperficieplana.
3. Instale limpie (o nuevo) aire la asarnblea rn_s limpia dentro de
la cubierta. Desb_gasedel filtro viejo apropiadamente.
2. Desconecte
el cablede la bujiade estay colOquelodondeno
puedaentraren contactocon la bujia.
4. Arme la cubierta rn_s limpia a_reaen la basey apriete los
tornillos.
3. Lirnpiela zonade alrededordeltapOnde vaciadodeaceite
(A), situadoen la basedetmotor,al otro lado del carburador.
NOTA:Usted puede comprar los elementos del filtro de aire nuevos
Ilamando al 1=888=4=MY=HOME
(469=4663).
51
LJmpJe/ReempJacela Buj[a
Cambie[a buiiacada100 horasde funcionarnientoo unavezal a_o,
Io quesucedaantes.Estoayudar_a su motora arrancarm_s
f_ciknentey funcionarrnejor.
1. Limpiela zonade alrededorde la bujia.
2. Retiree inspeccionela buiia.
3. Revisela separaci6ndel eIectrodocon un calibradorde
alarnbrey ajusteB separaciOn
a 0.030pulgadas(0.76mm)si
es necesario.
i,
2. Retirelos cuatrotornillos que sostienenlapantalla
apagachispas
(C).
3. Inspeccione
la pantaIla
y reempl_cda
si est_rota perforada
o
da_ada.NOusepanta!las
defectuosas.
Si lapantallanoest_
dafiadalimpidaconundisolvente
comerciaL
4. CarnbieB bujiasi loselectrodosest_npicadoso quemadoso si
la porcelanaest_agrietada.UtiIicela buiiade repuesto
recomendada.
ConsulteEspecificaciones.
4. Vuelvaa [nstalarla pantallay B protecci6ndel silenciador.
5. Instabla bujiay aprietefirrnemente.
NOTA:Puedeadquirirnuevosbujiaal n0merotetef6nico
1-8()G4=_IY=HO_IE
(469-4663).
$istema de Refrigeraci6n
de Aire
Conel tiempo,sepuedenacurnularresiduosen lasaIetasde
refrigeraci6n
del ciIindroy pasarinadvertidos
rnbntrasnosedesmonte
pamialmente
e!motor.Recornendamos
queencarguela limpiezadel
Limpie ia Pantalla Apagachispas
sisternade refrigerad6n(A)a undistribuidorde servicioSears
El silenciadorde!escapedel motorposeeunapanta!laapagachispas. siguiendolosintervalosrecornendados
(consultela secci6nPlande
Inspeccione
y limpiela pantallacada100 horasde operaci@o una
manten/m/ento).
Esiguaimente
importantequeno seacurnubn
vezal afio, Io quesucedaprimero.
residuoseoel motor.Consultela secciOn
Limpiezadetgenerador.
NOTA:Ustedpuedecomprarlos apagachispas
a trav_snuevos
Ilamandoal 1-80G4-_IY_HOff]E
(46G4663}.
EIgeneradortendr_quetener un apagachispas
si Io usaenterrenos
no tratadoscubiertosde monte,rnalezao pasto.El apagachispas
deber_ser rnantenidoen buenascondicionespor pa!te del
propietario/operador.
ADVERTENCIA
producir
quemaduras
graves.
t contacto
con ia zona
dei siienciador puede
Los gases y ei caior de escape pueden infiamar
los materiaies combustibles y ias estructuras o
da_ar e! dep6sito de combustible y provocar un
incendio.
NOtoquelassuperficiescalientesy evitelos gasesdelescapea
a[tatemperatura.
Permitaqueel equiposeenfrieantesdetocarlo.
Dejeun espaciominimode 1.5m (5 pies)alrededorde!
generadorincluidala partesuperior.
E!C6digode NormativaFederal(CFRTitulo36: Parques,
Bosquesy PropbdadPOblica)obIigaa instaIarunapantaIla
apagachispas
en losequiposconrnotorde combusti6ninterno
y a mantenerlaen buenascondicionesde funcionamiento,
conforrnea la norma5100-10(o posterior)dd ServicioForestal
de la USDA.Enel Estadode Californiala ley exigeel usode una
pantaIIaapagachispas
(Secci6n4442 delC6digode Recursos
POblicosdeCalifornia).Enotros estadospuedehaberbyes
similaresenvigor.
_
*
*
o
,
Ajuste del Carhurader
Elcarburadordeestemotoresde baiaemisi6n.Est_equipadocon
unavAIvuBde mezclade ralentino ajustabley, en algunoscasoscon
ralentiregulado.Losnivebsde ralentireguladoy velocidadmaxima
seajustanen B fdbrica.Si esnecesariornodificar!os,
acudaa un
distribuidordeservicioSears.
PRECAUCiON
Las vetocidades de operaci6n en exceso, aumentan ios
rbsgos de heridas y da_os ai generador.
Las veiocidades bajan en exceso, imponen una carga muy
)esada.
NOcarnbieningunaveIocidaddeterminada.
El generador
suministraunafrecuenciay Lmvottaiecalificadocuando
funcionaa unavdocidaddeterminada.
Limpiee inspeecbneelapagachispas
de la siguientemanera:
1. Pararetirarla protecciOndel silenciador(A) de silenciador(B),
retirelos cuatrotorniIIosque conectanla protecci6na la
m@suladel sibnciador.
NOmodifiqueal generadoren ningunaforma.
52
GENERALIDADE$
Camhie de Aeeite
E! generador deber_ set encendido al menos una vez cada siete alas
y deber_ deiar!o funcionar al rnenos durante 30 minutes. Si no
puede hacer esto y debe almacenar la unidad per mAs de 30 alas,
use la siguiente informaci6n come gala para preparar su unidad
para ah_nacenamiento.
Con el rnotor todavia caliente, drene el aceite de la caia de] cigOefiah
Jnstruccienes
de AImacenamiente
Prelengades
Vuelva a Ilenarla con el grade de aceite recomendado.
Aceite el #i_metro Jaterier de! Ciiiadre
, Quite la buiia y vierta aproximadamente 30 ml (1 onza) de
aceite de rnotor limp[o en el interior del cilindro.
para Per_edes
o Coloque la bujia y arranqoe lentamente para distfiboir e!
aceite.
Esimpo!tante evitar quese formen dep6sitosde goma en las partes
esencialesde! sistema de combustible come el carburador, fiitro de
combustible rnanguerao tanque de combustible, durmstee!
aImacenamiento.Tambian,la experienciaindica qoe los combustibles
con mezclasde alcoho! (llamados gasohoLetalso!o metanol) pueden
atraer humedad la cual !levaa la separaci6ny forrnaci6n de _cidos
durante el alrnacenamiento.El gas _cido puededai_arel sistema de
combustible de un rnotor durante su almacenarniento.
ADVERTENCIA
Chispear invoiuntario
¢
puede tenet come
resuItado eI fuego oeI gotpe et_ctrico.
• NUNCAarral_queel motor sin la bujias instalada.
ADVERTENCIA
Generader
La combustibie y sus vapores son
extremadamente infiamabies y expiosivos.
, Limpie el generador come est_ descrito en Limpieza de/
6enerado_
EIfuego
o una
explosi6n
puedenlacausar
quemaduras
severas
e inclusive
muerte.
Revise que las ranuras para el aire de enfriamiento y las
aperturas det generador se encuentren abiertas y despeiadas.
CUANDO AL_vIACENE
0 GUARDE EL EQUmPO CON CO_IBUSTmBLE
EN EL TANQUE
Otras $ugereneias para el Almaeeuamiente
o AlrnaceneaIejado de caIderas,estufas calentadores de agua,
secadoras de ropa u otros aparatos electrodom@sticosque
posean pilotos u otras fuentes de ignici6n, porque ellos pueden
encender los vapores de la combustible.
CUANDOVACiE EL DEPOSITO
1. NO guarde combustible de una temporada a otra a menos que
Io hayatratado come se [ndica en la secci6n Pretecci6n de/
Sistema de Combustible.
2. Reemplace[a caneca de gasoIina si comienza a oxidarse. E[
6xido y/o la suciedad en la gasolina le causar_ problemas.
o Apague e! generador (posic!6n OFF)y d6jelo enfriar al menos
per 2 minutes antes de remover la tapa de la combustible.
Afloje la tapa lentamente para dejar que la presi6n salga de]
tanque.
* Vacie e! dep6sito de combustible a la {ntemperie.
, Mantenga la combustible aIejadade chispas, llamas abie!tas,
pilotos, calory otras fuentes de ignici6n.
o NO endenda un cigarrillo o fume.
3. Si es posibIe, airnacene su unidad en un recinto encerrado y
c_brala para protegerla del polvo y la suciedad.
4. Cubra su unidad con una cobierta de protecciOn adecuada qoe
no retenga hurnedad.
ADVERTENCIA
Pretee¢i_n del $istema de Cembestible
Las cubiertas para aImacenamiento pueden set
infiamables,
Aditivo para CombustibJe:
NO co[oque una cubierta encirna de un generador caliente.
L]ene el dep6sito con combustible nuevo y deje aproxirnadamente
4 cm (1 5") de espacio para permitir la expansi6n del combustible,
come se muestra en la pdgina 42, cu_ndo utiliza un cartucho de
aditivo para el combustible con el tap6n FreshStartTM. Si s61ose
Ilena parcialrnente el aire contenido el_el depOsito favorecerd el
deterioro del combustible durante el almacenamiento. EI motor y el
combustible se pueden alrnacenar hasta 6 meses con aditivo.
Deje que la unidad se enffie Io suficientemente antes de que le
coloque la cubierta.
5. Almacene la unidad en un area limpia y seca.
• Compruebe el nivel del cartucho de aditivo para el
combustible. E!aditivo es de color oscuro.
• Si el cartucho est,. vacio o casi vacio, cdmbielo por otro
nuevo conforme alas instrucciones de la secci6n Tapdn de
combustible Fresh Start TM.
Si no usa aditivo para combustible, retire todo el combustible del
tanque y hagafuncionar el rnotor hasta que se detenga per falta de
combustible.
53
Problema
El meierest_funcienandeporene existe
saHdade ACdispeniNe.
Soluci6n
Cause
1 Uno de los cotacircuitos est_ abierto.
1. Reajusteel certacircuite.
2. Fallaen el generador.
2. P6ngaseen contactecenla Plantade
Serviciode Sears.
3. Mala conexiOne juego de cordenes
3. Revisey repare.
defectueso,
4. E!dispesitive conectade est_ en real
estado.
El motorfeneienabion sin eargaspore
"feneienamap ouandelas eargassen
cenectadas.
1. Co!te circuito en la carga conectada.
1. Descenectela carga el6ctrica en corto.
2. La ve!ocidad del rnetor es muy lenta.
2. P6ngase en contacto con la Planta de
Servicio de Sears.
3. E!generador estb_sobrecargade.
4. Circuito del generador en corte.
3. Vea No Sobrecargue Generador.
1. Interrupter balancin en "Off".
1. Co!oqueel interrupter en "On"(En).
2. V_lvula det combustible ala pesici6n
2. Gire la v_lvula de! cembustible a la
"Off".
El motor se epaga on plene
funeienamionte.
AI meier le heee felta peteneia.
posici6n "On".
3. Limpie e reemptace el depurador de
aire.
4. Sin cernbustible.
4. Llene el tanque de cembustible,
5. Cernbustiblevieia.
5. Drene el tanque de combustible; 116nelo
con combustible fresco.
E!alambre de la bujia no est_
conectado.
6. Conecte e! alambre ala bujia.
7. Bujia en mal estade.
7. Reemplacela bujia.
8. Agua en la combustible.
8. Drene el tanque de combustible; 116nelo
cen combustible fresco,
9. Excesode cebade.
9. Espere5 minutes y haga girar el rnetor.
10. Mezclade combustible excesivamente
rica.
10. P6ngase en contacte con la Planta de
Servicio de Sears.
11. VAIvulade toma atascada en la posici6n
abierta o cerrada.
11. P6ngase en contacte con la Planta de
Servicio de Sears.
12. E! rnotor Ira perdido compresi6n.
12, P6ngase en contacte con la Planta de
Servicio de Sears.
Sin combustible.
Llene el tanque de! cembustible.
1. La carga es muy alta.
2. Filtro de aire suc[o.
El meier "no funciene centinuamento"e se
detiene.
4. P6ngase en contacto con la Planta de
Servicio de Sears.
3. Depurador de aire sucio.
G.
ERmeier no arranea; e arrenea y funeiena
reel
4. Conecte etro dispesitivo que est_ en
buenas condicienes.
Carburador con rnezclade aire-combustible
rnuy rica o rnuy pobre.
54
1. Yea No Sobrecardue Generado,_
2. Reernplaceel filtro de aire.
P6ngase en contacto con la Planta de
Servic[o de Sears.
55
56
57
California Air Resources Board (CARB) U.S. EPAy Sears le explican a continuaci6n
la garantia del sistema de control de emisiones de su pequ@o motor para mdquinas
de servicio (SORE, Small Offroad Engine). En California, los modelos de peque_os
motores para m_quinas de servicio a partir del a_o 2006 @ben estar dise_ados,
fabricados y equipados conforme a los exigentes est_ndares de lucha centre la
contaminaci6n del Estado.
Carburador y partes internas
Bomba de combustible
Tube de combustible,
abrazaderas
Dep6sito de combustible,
b
Linea de purga y ventilaci6n
c.
Sistema de ignici6n
BujBs
Sistema de ignici6n per magneto
d,
Sbtema catalizador
Convertidor cataBtico
Colector de escape
diagnCstico, las partes de repuesto y la mane de obra
e.
gobertura de la garantia de Sears, Ree_u_k and ge. centre ddectes en el
central de emisienee
Sistema de inyecciCn de aire o v_lvula per impulses
Distintos elementos utilizados en los sistemas antedores
V_lvulas e interruptores
detecci6n de tiempo
de vado temperature
posici6n y de
Conectores y conjuntos
Los pequ@os motores para m_quinas de sep,4cio estdn garantizados centre defectos
de las piezas de control de emisiones durante un per[ode de dos aSos, conforme alas
siguientes disposiciones, Si cualquier plaza del motor con cobertura es defectuosa,
ser_ reparada o sustituida per Sears.
2.
Vigencia de ia _ebertnra
Sears garantiza al propietario inicial y a cada comprador subsiguiente qua
las partes garantizadas estar_n libres de defectos en material yen mane de
obra, qua ocasionen fallas de las partes garantizadas durante un periodo de
dos aSos a partir de la fecha en qua el motor sea entregado al comprador
minorista,
del prepietarin pare la garantia
Come propietario del motor peque_o para exteriores, usted es responsable de
realizar las actividades de mantenimiento requeridas qua se indican en
Instrucciones de use y mantenimiento Sears recomienda qua conserve todos los
recibos qua cubran el mantenimiento de su motor peque_o para exteriores, pare
Sears no puede negar la garant[a solamente per la falta de recibos ni per su
imposibilidad de garantizar la realizaciCn de todas las actividades de
mantenimbnto programadas.
3.
Ne habr_ cargee
La reparaciCn o reemplazo de cualquier parte garantizada se realizard sin
cargo alguno pare el propietario, incluyendo la mane de obra de diagnCstico
qua derive en la determinaciCn de qua una parte garantizada est_ defectuosa,
si la labor de diagnCstico se realiza en un Centre de servicio Sears aprobado.
Come propietario del motor peque_o para exteriores, usted siempre debe tener
en cuenta qua Sears podr_ negar la cobertura de la garant[a si su motor peque_o
para exteriores o una parte del misrno presenta fallas debido a abuse, descuido,
mantenimiento incorrecto o modificaciones no aprobadas
4.
Reclamne y exelesienes
de cebertnra
Los reclamos vinculados con la garant[a se presentanJn conforme a las
disposiciones de la PCliza de garant[a de Sears. La cobertura de la garanth
se excluir_ para aquellas fallas de partes garantizadas qua no sean partes
originabs de Sears o debido a abuse, descuido o mantenimiento incorrecto,
sag@ se estabbce en la PCliza de garanth de motores de Sears. Sears no
es responsabb per la cobertura de fallas de partes garantizadas ocasionadas
per el use de partes adicionales, no originabs o modificadas.
Usted es responsabb de presentar su motor pequeiio para exteriores a un
distribuidor autorizado de servicio de Sears aprobado tan pronto come se
presente el probbma,
Las reparaciones cubiertas per la garanth se Ilevar_n a cabo en un plazo
razonable, no superior a 30 dias en ning0n case.
Si tiene alguna pregunta con respecto a sus derechos y responsabilidades para la
garant[a, pCngase en contacto con un representante de servicio Sears al 1-800469-4663
5.
Ntantenirainnte
Cualquier parte garantizada cuyo reemplazo no est6 programado come
mantenimiento requerido o qua est_ programada 0nicamente para
inspecciCn frecuente con el fin de "reparar o reemplazar conforme sea
necesario", estard garantizada en cuanto a defectos per el per[ode de la
garant[a. Cualquier parte garantizada cuyo reemplazo est6 programado
come mantenimiento requerido tendr_ solamente una garanth centre
defectos _nicamente per el per[ode hasta el primer reemplazo programado
para esa parte Se podr_ utilizar cualquier parte de repuesto qua tenga un
rendimiento y durabilidad equivabntes, al realizar cualquier actividad de
mantenimiento o reparaciCn El propietario es responsable de realizar todo
el mantenimiento requerido, segSn se define en Instrucciones de use y
mantenimiento de Sears,
La garant[a de emisiones es una garantia contra defectos, Los defectos se iuzgan
en funciCn del rendimiento normal del motor. La garantia no depender_ de
ninguna prueba de emisiones en funcionamiento.
I}iepnsicienee de la garantia de Seers, Ree_eck and Ca. _entra defectes en el
ennlrel de ernisienee
Las siguientes son disposiciones espedficas relacionadas con la cobertura de la
garanfia contra defectos en el control de emisiones. Se a_ade ala garanfia de
motores de Sears para motores no regulados, qua figura en las Instrucciones de
use y mantenimiento,
Partes garantizadas
La cobertura bqo esta garant[a incluye solamente aquellas partes qua se
enumeran a continuaci6n (las partes del sistema de control de emisiones)
en la medida qua dichas partes hayan estado presentes en el motor
adquirido.
6.
Cnbertera _ensignienle
La cobertura bajo [a presente se ampliar_ a [a falla de cualqubr componente
de[ motor provocada per un desperfecto en cualquier parte garantizada qua
siga gozando de la cobertura de [a garant[a.
Sistema de medici6n de combustible
Sistema de enriquecimiento
Sistema de inducci6n de aire
Colector de entrada
Cuando exista una condici6n qua pueda ser cubierta per la garantia, Sears
reparar_ el motor peque_o para exteriores sin costo alguno, incluyendo el
a.
tap6n y cadena
Filtro de aire
Su sistema de control de emisiones incluye plazas come el carburador, el filtro de
aire, el sistema de arranque, el tube de combustible el silenciador y el convertidor
catal[tico, Tambi@ puede incluir conectores y otros coquntos relacionados con las
emisiones,
1
del tube de combustible,
Beta de carbono
En otras regiones de Estados Unidos, los nuevos motores para interiores de
ignici6n per chispa certificados para modelos a_o !997 y posteriores deben
cumplir con normas similares establecidas per la EPA de EE.UU. Sears debe
garantizar el sistema de control de emisiones de su motor para los per[odes
indicados a continuaci6n, siempre y cuando no se haya abusado, descuidado o
dado mantenimiento incorrecto al motor peque_o para exteriores
Respensabilidadns
acoplamientos
pare arranque en fr[o
En EE,UU. y Canadd contamos con una Bnea de emergencia las 24 horas (1-800-469-4663),
mantenimiento de productos,
58
qua ofrece un men8 de mensajes pregrabados con informaciCn sobre
[nfermac[6n sehre emisiones
Algunos rnotores cuentan con la certificaciOn de curnplimiento de la
fase 2 de las normas sobre emisioees de la United States
Los motores con certificacl6n de cumplhnieeto de la normativa
sobre emisioees de nivel 2 del California Air Resources Board
(CARB) debee mostrar informaciOe sobre el periodo de durabilidad
de las emisiones y e! hsdicede aire. El fabricante del motor ofrece
esta informaciOn al consumidor rnedianteetiquetas de emisiones.
La etiqueta de emisiones de] rnotor contieee la informaciOn de
certificaci6e.
Environmental Protection Agency (USEPA Ageecia estadourfideese
de protecciOndel medioambiente ). En el case de los motores con
certificaciOn de fase 2, el periodo de cumplimiento de la normativa
sobre emisiones que figura en la etiqueta de cumplimiento de
emisiones indica el n8mero de betas de funcionamiento durante las
cuaIesel rnotor ha demostrado cumplir los requisites federales
sobre emisiones.
E[ Periede de Durabilidad de lee Emisieees [ndicael mirnero de
horas duraete las cuales e! motor peedefencionar cempliendo [as
normas sobre emisiones siernpre que se realicen las operaciones
de maeteeimiento que se detaIIae en las instrucciones de use y
manteeimiento. Se uti[[zan [ass[guientes categorias:
Pararnotoresde rneeosde225 cc:
CategoriaC = 125 horas
CategoriaB = 250 horas
CategoriaA = 500 horas.
Pararnotoresde 225 cc o rn_s:
Categoria6 = 250 horas
CategoriaB = 500 horas
CategoriaA = 1000 horas.
Mederade: EI motor est_ certificado para cumpIir la norrnativa
sobre emisioees durante 125 horas de funcioeamieeto real.
Intermedie: El motor est_ certificado para cumplir la normativa
sobre emisioees durante 250 horas de funcioeamieeto real.
Preleegade: El rnotor est_ certificado para cumplir la normativa
sobre emisioees durante 500 horas de funcioeamiento real.
Per ejemplo un cortac_sped con operario a pie se suele utilizar
entre 20 y 25 horas al a[io. Per taeto, el Periede de Burabilidad de
las Emisieees de un motor con cias[ficaciOeietermedia equivaldria
a 10-12 a_os.
59
iiiiiiiiiiiiiiiii!!
Voor
Home
:::::::::::
For repair-in
your home -of all major brand appliances,
lawn and garden equipment,
or heating and cooling systems,
no matter who made it, no matter who sold it!
For the replacement
owner's
For Sears
manuals
parts, accessories
...............
and
that you need to do-it-yourself.
professional
and items like garage
installation
of home appliances
door openers
1-800-4-MY-HOME
wwwmears,com
®
...............
and water
heaters.
...............
(1-8oo-469-4663)
www.sears.ca
wwwmea rs,com
To purchase
or maintenance
a protection
agreement
1-800-827-6655
agreement
(Canada)on
(U.S.A.)
Parapedirse_,icio
dereparaci6o
a product
Trademark
/ TM Trademark
(Canada)
1-800-LE-FOYER
®
/ SMService
by Sears:
AuCanada
pourse_iceenfran_ais:
Me
(1-800.533.6937)
(1-888 o784-6427)
® Registered
serviced
1-800-361-6665
a domicilie, y para ordenar piezas:
1-888-SU-HOGAR
(U.S.A.)
www.sears.ca
Mark of Sears Brands,
LLC
® Marca Registrada / TMMama de Fabrica / SM Mama de Servicio de Sears Brands,
MC Marque de commerce / MD Marque d6pos6e de Sears Brands, LLC
LLC
® Sears Brands,
LLC