1
Barrett 960 HF Telephone Interconnect
Operation Manual
© BARRETT COMMUNICATIONS
BCM96001/2
Head office:
European office:
Barrett Communications Pty Ltd
10 Port Kembla Drive, Bibra Lake WA 6163
P O Box 1214, Bibra Lake WA 6965
AUSTRALIA
Toll Free Tel: 1800 999 580
Tel: (61-8) 9 434 1700
Fax: (61-8) 9 418 6757
Barrett Europe Limited
19 Lenten Street
Alton, Hampshire
GU34 1HG
UNITED KINGDOM
Tel:
(44) 1420 542254
Fax:
(44) 1420 543373
1
Introduction
....................................................................... 7
System Overview
Operation
................................................................. 7
......................................................................... 7
Automatic mode overview . . . . . . . . . . . . . . . . . . . . . . . . . . . . . . . . . . . . . . . . . . . . . . . . . . . . . . . . . . . . . . . . . . . 7
Facilities available to the telephone user . . . . . . . . . . . . . . . . . . . . . . . . . . . . . . . . . . . . . . . . . 8
Selecting a channel . . . . . . . . . . . . . . . . . . . . . . . . . . . . . . . . . . . . . . . . . . . . . . . . . . . 8
Sending a Beacon Request . . . . . . . . . . . . . . . . . . . . . . . . . . . . . . . . . . . . . . . . . . . . . 8
Sending a Selcall . . . . . . . . . . . . . . . . . . . . . . . . . . . . . . . . . . . . . . . . . . . . . . . . . . . . . 8
Sending a Telcall . . . . . . . . . . . . . . . . . . . . . . . . . . . . . . . . . . . . . . . . . . . . . . . . . . . . . 9
Requesting current channel information . . . . . . . . . . . . . . . . . . . . . . . . . . . . . . . . . . . . 9
Completing a call - "Hanging up" . . . . . . . . . . . . . . . . . . . . . . . . . . . . . . . . . . . . . . . . 10
Sending an ALE call . . . . . . . . . . . . . . . . . . . . . . . . . . . . . . . . . . . . . . . . . . . . . . . . . . 10
Facilities available to the HF station . . . . . . . . . . . . . . . . . . . . . . . . . . . . . . . . . . . . . . . . . . . . 10
Sending a beacon Request . . . . . . . . . . . . . . . . . . . . . . . . . . . . . . . . . . . . . . . . . . . . 10
Sending a Selcall - dialling a preset phone number . . . . . . . . . . . . . . . . . . . . . . . . . . 10
Sending a Telcall - dialling a telephone number . . . . . . . . . . . . . . . . . . . . . . . . . . . . . 10
Terminating a call . . . . . . . . . . . . . . . . . . . . . . . . . . . . . . . . . . . . . . . . . . . . . . . . . . . . 10
Sending an ALE call . . . . . . . . . . . . . . . . . . . . . . . . . . . . . . . . . . . . . . . . . . . . . . . . . . 11
Manual mode overview . . . . . . . . . . . . . . . . . . . . . . . . . . . . . . . . . . . . . . . . . . . . . . . . . . . . . . . . . . . . . . . . . . . . . 11
Receiving a Selcall from a HF station . . . . . . . . . . . . . . . . . . . . . . . . . . . . . . . . . . . . . . . . . .
To on-forward the call . . . . . . . . . . . . . . . . . . . . . . . . . . . . . . . . . . . . . . . . . . . . . . . . .
To communicate by voice with the calling HF user . . . . . . . . . . . . . . . . . . . . . . . . . . .
Receiving a Telcall from a HF station . . . . . . . . . . . . . . . . . . . . . . . . . . . . . . . . . . . . . . . . . . .
To on-forward the call . . . . . . . . . . . . . . . . . . . . . . . . . . . . . . . . . . . . . . . . . . . . . . . . .
To communicate by voice with the calling HF user . . . . . . . . . . . . . . . . . . . . . . . . . . .
Incoming phone calls . . . . . . . . . . . . . . . . . . . . . . . . . . . . . . . . . . . . . . . . . . . . . . . . . . . . . . .
Completing the call - "Hanging up" . . . . . . . . . . . . . . . . . . . . . . . . . . . . . . . . . . . . . . .
Sending a Selcall to a HF station . . . . . . . . . . . . . . . . . . . . . . . . . . . . . . . . . . . . . . . . . . . . . .
Sending a Telcall to a HF station . . . . . . . . . . . . . . . . . . . . . . . . . . . . . . . . . . . . . . . . . . . . . .
Making a telephone call . . . . . . . . . . . . . . . . . . . . . . . . . . . . . . . . . . . . . . . . . . . . . . . . . . . . .
Completing a telephone call . . . . . . . . . . . . . . . . . . . . . . . . . . . . . . . . . . . . . . . . . . . .
Sending a Beacon request to a HF station . . . . . . . . . . . . . . . . . . . . . . . . . . . . . . . . . . . . . . .
Sending an ALE Request/End . . . . . . . . . . . . . . . . . . . . . . . . . . . . . . . . . . . . . . . . . . . . . . . .
System Setup
11
11
11
11
11
11
11
12
12
13
13
14
14
14
. . . . . . . . . . . . . . . . . . . . . . . . . . . . . . . . . . . . . . . . . . . . . . . . . . . . . . . . . . . . . . . . . . . . 15
Hardware . . . . . . . . . . . . . . . . . . . . . . . . . . . . . . . . . . . . . . . . . . . . . . . . . . . . . . . . . . . . . . . . . . . . . . . . . . . . . . . . 15
Front Panel . . . . . . . . . . . . . . . . . . . . . . . . . . . . . . . . . . . . . . . . . . . . . . . . . . . . . . . . . . . . . . 15
Rear Panel . . . . . . . . . . . . . . . . . . . . . . . . . . . . . . . . . . . . . . . . . . . . . . . . . . . . . . . . . . . . . . . 15
System interconnection . . . . . . . . . . . . . . . . . . . . . . . . . . . . . . . . . . . . . . . . . . . . . . . . . . . . . . . . . . . . . . . . . . . . 16
Option levels . . . . . . . . . . . . . . . . . . . . . . . . . . . . . . . . . . . . . . . . . . . . . . . . . . . . . . . . . . . . . . . . . . . . . . . . . . . . . 17
Level 1
Level 2
Level 3
Preset telephone numbers only . . . . . . . . . . . . . . . . . . . . . . . . . . . . . . . . . . . 17
Standard configuration . . . . . . . . . . . . . . . . . . . . . . . . . . . . . . . . . . . . . . . . . . 17
Full logging commercial option . . . . . . . . . . . . . . . . . . . . . . . . . . . . . . . . . . . . 17
Primary screen functions . . . . . . . . . . . . . . . . . . . . . . . . . . . . . . . . . . . . . . . . . . . . . . . . . . . . . . . . . . . . . . . . . . . 18
Setting parameters . . . . . . . . . . . . . . . . . . . . . . . . . . . . . . . . . . . . . . . . . . . . . . . . . . . . . . . . . . . . . . . . . . . . . . . . 19
Navigating the menus . . . . . . . . . . . . . . . . . . . . . . . . . . . . . . . . . . . . . . . . . . . . . . . . . . . . . .
Channels - setting . . . . . . . . . . . . . . . . . . . . . . . . . . . . . . . . . . . . . . . . . . . . . . . . . . . . . . . . .
Adding / editing a Channel . . . . . . . . . . . . . . . . . . . . . . . . . . . . . . . . . . . . . . . . . . . . .
Deleting a channel . . . . . . . . . . . . . . . . . . . . . . . . . . . . . . . . . . . . . . . . . . . . . . . . . . .
960 interface parameters . . . . . . . . . . . . . . . . . . . . . . . . . . . . . . . . . . . . . . . . . . . . . . . . . . . .
Selecting receiver audio source . . . . . . . . . . . . . . . . . . . . . . . . . . . . . . . . . . . . . . . . .
Selecting 960 interface . . . . . . . . . . . . . . . . . . . . . . . . . . . . . . . . . . . . . . . . . . . . . . . .
Selecting Duplex Mode . . . . . . . . . . . . . . . . . . . . . . . . . . . . . . . . . . . . . . . . . . . . . . . .
Phone dialling configuration . . . . . . . . . . . . . . . . . . . . . . . . . . . . . . . . . . . . . . . . . . . . . . . . . .
Preset phone numbers . . . . . . . . . . . . . . . . . . . . . . . . . . . . . . . . . . . . . . . . . . . . . . . .
Adding / editing a preset phone number . . . . . . . . . . . . . . . . . . . . . . . . . . . . . . . . . . .
Deleting a preset phone number . . . . . . . . . . . . . . . . . . . . . . . . . . . . . . . . . . . . . . . .
2
19
19
19
20
21
21
21
22
23
23
23
23
Selecting DTMF or pulse (Decadic) dialling . . . . . . . . . . . . . . . . . . . . . . . . . . . . . . . .
Enabling dial tone checking . . . . . . . . . . . . . . . . . . . . . . . . . . . . . . . . . . . . . . . . . . . .
Setting DTMF tone duration . . . . . . . . . . . . . . . . . . . . . . . . . . . . . . . . . . . . . . . . . . . .
Setting time to wait for someone to answer the phone . . . . . . . . . . . . . . . . . . . . . . . .
Setting time to wait for first ring . . . . . . . . . . . . . . . . . . . . . . . . . . . . . . . . . . . . . . . . .
Enabling line reversal off hook / on hook detection . . . . . . . . . . . . . . . . . . . . . . . . . .
Setting the number of rings before the 960 will auto-answer . . . . . . . . . . . . . . . . . . .
Setting the number of rings to determine "no one is home" . . . . . . . . . . . . . . . . . . . .
Setting the maximum call length . . . . . . . . . . . . . . . . . . . . . . . . . . . . . . . . . . . . . . . . .
Dialling a prefix to obtain an external line . . . . . . . . . . . . . . . . . . . . . . . . . . . . . . . . . .
Setting PABX prefix number . . . . . . . . . . . . . . . . . . . . . . . . . . . . . . . . . . . . . . . . . . . .
Learning non-standard ring / busy / disconnect cadences . . . . . . . . . . . . . . . . . . . . .
Access levels . . . . . . . . . . . . . . . . . . . . . . . . . . . . . . . . . . . . . . . . . . . . . . . . . . . . . . . . . . . . .
Setting Access from Transceiver to Phone . . . . . . . . . . . . . . . . . . . . . . . . . . . . . . . . .
24
24
25
25
25
26
26
26
27
27
27
28
30
30
Preset . . . . . . . . . . . . . . . . . . . . . . . . . . . . . . . . . . . . . . . . . . . . . . . . . . . . . . . . . . . . . . .
Preset/Local . . . . . . . . . . . . . . . . . . . . . . . . . . . . . . . . . . . . . . . . . . . . . . . . . . . . . . . . . .
Preset/Local/STD . . . . . . . . . . . . . . . . . . . . . . . . . . . . . . . . . . . . . . . . . . . . . . . . . . . . . .
All Phone Calls . . . . . . . . . . . . . . . . . . . . . . . . . . . . . . . . . . . . . . . . . . . . . . . . . . . . . . .
Barred . . . . . . . . . . . . . . . . . . . . . . . . . . . . . . . . . . . . . . . . . . . . . . . . . . . . . . . . . . . . . .
30
30
30
30
30
Setting Access from Phone to Transceiver . . . . . . . . . . . . . . . . . . . . . . . . . . . . . . . . . 31
Selcalls Only . . . . . . . . . . . . . . . . . . . . . . . . . . . . . . . . . . . . . . . . . . . . . . . . . . . . . . . . . 31
Selcalls and Telcalls . . . . . . . . . . . . . . . . . . . . . . . . . . . . . . . . . . . . . . . . . . . . . . . . . . . 31
Barred . . . . . . . . . . . . . . . . . . . . . . . . . . . . . . . . . . . . . . . . . . . . . . . . . . . . . . . . . . . . . . 31
Viewing Access Level . . . . . . . . . . . . . . . . . . . . . . . . . . . . . . . . . . . . . . . . . . . . . . . . . 31
Telcall access parameters . . . . . . . . . . . . . . . . . . . . . . . . . . . . . . . . . . . . . . . . . . . . . 32
Barred Prefix . . . . . . . . . . . . . . . . . . . . . . . . . . . . . . . . . . . . . . . . . . . . . . . . . . . . . . . . .
Local Number Length . . . . . . . . . . . . . . . . . . . . . . . . . . . . . . . . . . . . . . . . . . . . . . . . . .
TollFree Prefixes . . . . . . . . . . . . . . . . . . . . . . . . . . . . . . . . . . . . . . . . . . . . . . . . . . . . . .
STD Prefixes . . . . . . . . . . . . . . . . . . . . . . . . . . . . . . . . . . . . . . . . . . . . . . . . . . . . . . . . .
32
32
33
33
Pre-recorded messages . . . . . . . . . . . . . . . . . . . . . . . . . . . . . . . . . . . . . . . . . . . . . . . . . . . . .
Playing a Pre-Recorded Message . . . . . . . . . . . . . . . . . . . . . . . . . . . . . . . . . . . . . . .
Recording a Message . . . . . . . . . . . . . . . . . . . . . . . . . . . . . . . . . . . . . . . . . . . . . . . . .
Erasing a Message . . . . . . . . . . . . . . . . . . . . . . . . . . . . . . . . . . . . . . . . . . . . . . . . . . .
Operational parameters . . . . . . . . . . . . . . . . . . . . . . . . . . . . . . . . . . . . . . . . . . . . . . . . . . . . .
Selecting Channel Scan on Power-up . . . . . . . . . . . . . . . . . . . . . . . . . . . . . . . . . . . .
Selecting Automatic Mode on Power-up . . . . . . . . . . . . . . . . . . . . . . . . . . . . . . . . . . .
Enabling Automatic VOX . . . . . . . . . . . . . . . . . . . . . . . . . . . . . . . . . . . . . . . . . . . . . .
Setting VOX Hang-up Timeout Period . . . . . . . . . . . . . . . . . . . . . . . . . . . . . . . . . . . .
Setting Number of Busy Tones before Hangup . . . . . . . . . . . . . . . . . . . . . . . . . . . . .
Setting VOX Hang-time . . . . . . . . . . . . . . . . . . . . . . . . . . . . . . . . . . . . . . . . . . . . . . .
Setting VOX Threshold . . . . . . . . . . . . . . . . . . . . . . . . . . . . . . . . . . . . . . . . . . . . . . . .
Setting Selcall Self ID . . . . . . . . . . . . . . . . . . . . . . . . . . . . . . . . . . . . . . . . . . . . . . . . .
Enabling Periodic Beacon . . . . . . . . . . . . . . . . . . . . . . . . . . . . . . . . . . . . . . . . . . . . .
Selecting the Charging Method . . . . . . . . . . . . . . . . . . . . . . . . . . . . . . . . . . . . . . . . .
Enabling the Printer . . . . . . . . . . . . . . . . . . . . . . . . . . . . . . . . . . . . . . . . . . . . . . . . . .
Setting the Real Time Clock (RTC) . . . . . . . . . . . . . . . . . . . . . . . . . . . . . . . . . . . . . .
Setting the Custom Start-up Message . . . . . . . . . . . . . . . . . . . . . . . . . . . . . . . . . . . .
Enabling the Scrambler . . . . . . . . . . . . . . . . . . . . . . . . . . . . . . . . . . . . . . . . . . . . . . .
Setting Scrambler ID for each User's Self Selcall ID . . . . . . . . . . . . . . . . . . . . . . . . .
Setting RX Level when in PTT . . . . . . . . . . . . . . . . . . . . . . . . . . . . . . . . . . . . . . . . . .
Enabling Mute during Scanning . . . . . . . . . . . . . . . . . . . . . . . . . . . . . . . . . . . . . . . . .
Factory options . . . . . . . . . . . . . . . . . . . . . . . . . . . . . . . . . . . . . . . . . . . . . . . . . . . . . . . . . . .
Reset all to defaults . . . . . . . . . . . . . . . . . . . . . . . . . . . . . . . . . . . . . . . . . . . . . . . . . .
Reset operational only to defaults . . . . . . . . . . . . . . . . . . . . . . . . . . . . . . . . . . . . . . .
Reset Selcall access levels only to default . . . . . . . . . . . . . . . . . . . . . . . . . . . . . . . . .
Reset Call Progress Cadences to default . . . . . . . . . . . . . . . . . . . . . . . . . . . . . . . . .
Erase all channels . . . . . . . . . . . . . . . . . . . . . . . . . . . . . . . . . . . . . . . . . . . . . . . . . . .
Erase all preset phone numbers . . . . . . . . . . . . . . . . . . . . . . . . . . . . . . . . . . . . . . . . .
Erase internal DataLog . . . . . . . . . . . . . . . . . . . . . . . . . . . . . . . . . . . . . . . . . . . . . . . .
Getting DataLog % Full . . . . . . . . . . . . . . . . . . . . . . . . . . . . . . . . . . . . . . . . . . . . . . .
Enable configuration through PC serial port . . . . . . . . . . . . . . . . . . . . . . . . . . . . . . . .
34
34
34
35
36
36
36
36
37
37
37
38
38
39
39
39
40
40
41
41
42
42
43
43
43
43
44
44
44
44
45
45
3
ALE Configuration . . . . . . . . . . . . . . . . . . . . . . . . . . . . . . . . . . . . . . . . . . . . . . . . . . . . . . . . .
Enabling/Disabling the ALE . . . . . . . . . . . . . . . . . . . . . . . . . . . . . . . . . . . . . . . . . . . .
ALE Fill Mode . . . . . . . . . . . . . . . . . . . . . . . . . . . . . . . . . . . . . . . . . . . . . . . . . . . . . . .
Preset ALE Phone Numbers . . . . . . . . . . . . . . . . . . . . . . . . . . . . . . . . . . . . . . . . . . .
ALE Self ID . . . . . . . . . . . . . . . . . . . . . . . . . . . . . . . . . . . . . . . . . . . . . . . . . . . . . . . . .
4
46
46
46
46
46
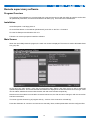
Remote supervisory software . . . . . . . . . . . . . . . . . . . . . . . . . . . . . . . . . . . . . . . . . . . . . . . . . . . .
47
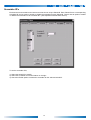
Program Overview . . . . . . . . . . . . . . . . . . . . . . . . . . . . . . . . . . . . . . . . . . . . . . . . . . . . . . . . . . . . . . . . . . . . . . . . 47
Installation . . . . . . . . . . . . . . . . . . . . . . . . . . . . . . . . . . . . . . . . . . . . . . . . . . . . . . . . . . . . . . . . . . . . . . . . . . . . . . . 47
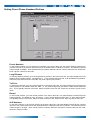
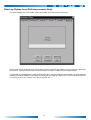
Main Screen . . . . . . . . . . . . . . . . . . . . . . . . . . . . . . . . . . . . . . . . . . . . . . . . . . . . . . . . . . . . . . . . . . . . . . . . . . . . . 47
Menu Options . . . . . . . . . . . . . . . . . . . . . . . . . . . . . . . . . . . . . . . . . . . . . . . . . . . . . . . . . . . .
Creating a New Group File . . . . . . . . . . . . . . . . . . . . . . . . . . . . . . . . . . . . . . . . . . . . .
Opening an Existing Group... . . . . . . . . . . . . . . . . . . . . . . . . . . . . . . . . . . . . . . . . . . .
Copying a Group File’s Parameters . . . . . . . . . . . . . . . . . . . . . . . . . . . . . . . . . . . . . .
Setting Configuration Options . . . . . . . . . . . . . . . . . . . . . . . . . . . . . . . . . . . . . . . . . . .
Exit Program . . . . . . . . . . . . . . . . . . . . . . . . . . . . . . . . . . . . . . . . . . . . . . . . . . . . . . .
Downloading All Interconnect Parameters . . . . . . . . . . . . . . . . . . . . . . . . . . . . . . . . .
Uploading All Interconnect Parameters . . . . . . . . . . . . . . . . . . . . . . . . . . . . . . . . . . .
Charging Setup . . . . . . . . . . . . . . . . . . . . . . . . . . . . . . . . . . . . . . . . . . . . . . . . . . . . .
Client Administrator . . . . . . . . . . . . . . . . . . . . . . . . . . . . . . . . . . . . . . . . . . . . . . . . . .
48
48
48
48
48
48
48
48
48
48
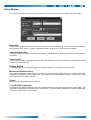
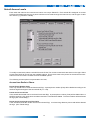
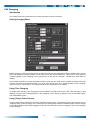
Setup Window . . . . . . . . . . . . . . . . . . . . . . . . . . . . . . . . . . . . . . . . . . . . . . . . . . . . . . . . . . . . . . . . . . . . . . . . . . . . 49
Baud Rate . . . . . . . . . . . . . . . . . . . . . . . . . . . . . . . . . . . . . . . . . . . . . . . . . . . . . . . . . . . . . . .
Communication Port . . . . . . . . . . . . . . . . . . . . . . . . . . . . . . . . . . . . . . . . . . . . . . . . . . . . . . .
Flow Control . . . . . . . . . . . . . . . . . . . . . . . . . . . . . . . . . . . . . . . . . . . . . . . . . . . . . . . . . . . . . .
Dialling Method . . . . . . . . . . . . . . . . . . . . . . . . . . . . . . . . . . . . . . . . . . . . . . . . . . . . . . . . . . .
Modem Initialisation String . . . . . . . . . . . . . . . . . . . . . . . . . . . . . . . . . . . . . . . . . . . . . . . . . . .
Printer . . . . . . . . . . . . . . . . . . . . . . . . . . . . . . . . . . . . . . . . . . . . . . . . . . . . . . . . . . . . . . . . . .
Local RS-232 Connection . . . . . . . . . . . . . . . . . . . . . . . . . . . . . . . . . . . . . . . . . . . . . . . . . . .
49
49
49
49
49
49
49
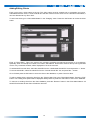
Adding Interconnect Sites . . . . . . . . . . . . . . . . . . . . . . . . . . . . . . . . . . . . . . . . . . . . . . . . . . . . . . . . . . . . . . . . . . . 50
Site Name . . . . . . . . . . . . . . . . . . . . . . . . . . . . . . . . . . . . . . . . . . . . . . . . . . . . . . . . . . . . . . .
Phone Number . . . . . . . . . . . . . . . . . . . . . . . . . . . . . . . . . . . . . . . . . . . . . . . . . . . . . . . . . . . .
Pin Number . . . . . . . . . . . . . . . . . . . . . . . . . . . . . . . . . . . . . . . . . . . . . . . . . . . . . . . . . . . . . .
Default Packs . . . . . . . . . . . . . . . . . . . . . . . . . . . . . . . . . . . . . . . . . . . . . . . . . . . . . . . . . . . . .
Upload Operational Parameters . . . . . . . . . . . . . . . . . . . . . . . . . . . . . . . . . . . . . . . . . . . . . . .
Upload Channels . . . . . . . . . . . . . . . . . . . . . . . . . . . . . . . . . . . . . . . . . . . . . . . . . . . . . . . . . .
Upload Phone Numbers . . . . . . . . . . . . . . . . . . . . . . . . . . . . . . . . . . . . . . . . . . . . . . . . . . . . .
Upload Selcall Access Levels . . . . . . . . . . . . . . . . . . . . . . . . . . . . . . . . . . . . . . . . . . . . . . . .
Download and Erase Call History . . . . . . . . . . . . . . . . . . . . . . . . . . . . . . . . . . . . . . . . . . . . . .
Hang-up on Completion . . . . . . . . . . . . . . . . . . . . . . . . . . . . . . . . . . . . . . . . . . . . . . . . . . . . .
50
50
50
50
51
51
51
51
51
51
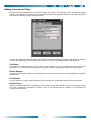
Dialling . . . . . . . . . . . . . . . . . . . . . . . . . . . . . . . . . . . . . . . . . . . . . . . . . . . . . . . . . . . . . . . . . . . . . . . . . . . . . . . . . 52
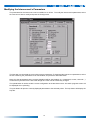
Modifying the Interconnect’s Parameters . . . . . . . . . . . . . . . . . . . . . . . . . . . . . . . . . . . . . . . . . . . . . . . . . . . . . . . 53
Operational Parameters . . . . . . . . . . . . . . . . . . . . . . . . . . . . . . . . . . . . . . . . . . . . . . . . . . . . . . . . . . . . . . . . . . . . 54
Operational Settings . . . . . . . . . . . . . . . . . . . . . . . . . . . . . . . . . . . . . . . . . . . . . . . . . . . . . . .
Version (Read Only) . . . . . . . . . . . . . . . . . . . . . . . . . . . . . . . . . . . . . . . . . . . . . . . . . .
Scan on Powerup . . . . . . . . . . . . . . . . . . . . . . . . . . . . . . . . . . . . . . . . . . . . . . . . . . . .
Auto Mode on Powerup . . . . . . . . . . . . . . . . . . . . . . . . . . . . . . . . . . . . . . . . . . . . . . .
Printer Enabled . . . . . . . . . . . . . . . . . . . . . . . . . . . . . . . . . . . . . . . . . . . . . . . . . . . . . .
Automatic VOX . . . . . . . . . . . . . . . . . . . . . . . . . . . . . . . . . . . . . . . . . . . . . . . . . . . . . .
Scrambler Enabled . . . . . . . . . . . . . . . . . . . . . . . . . . . . . . . . . . . . . . . . . . . . . . . . . . .
Scan Mute on Powerup . . . . . . . . . . . . . . . . . . . . . . . . . . . . . . . . . . . . . . . . . . . . . . .
Periodic Beacon Period . . . . . . . . . . . . . . . . . . . . . . . . . . . . . . . . . . . . . . . . . . . . . . .
Selcall Self ID . . . . . . . . . . . . . . . . . . . . . . . . . . . . . . . . . . . . . . . . . . . . . . . . . . . . . . .
ALE Self ID . . . . . . . . . . . . . . . . . . . . . . . . . . . . . . . . . . . . . . . . . . . . . . . . . . . . . . . . .
VOX Inactivity Timeout . . . . . . . . . . . . . . . . . . . . . . . . . . . . . . . . . . . . . . . . . . . . . . . .
Hangup Count . . . . . . . . . . . . . . . . . . . . . . . . . . . . . . . . . . . . . . . . . . . . . . . . . . . . . .
VOX Threshold . . . . . . . . . . . . . . . . . . . . . . . . . . . . . . . . . . . . . . . . . . . . . . . . . . . . . .
VOX Hangtime . . . . . . . . . . . . . . . . . . . . . . . . . . . . . . . . . . . . . . . . . . . . . . . . . . . . . .
Duplex Mode . . . . . . . . . . . . . . . . . . . . . . . . . . . . . . . . . . . . . . . . . . . . . . . . . . . . . . .
PTT Rx Level Low . . . . . . . . . . . . . . . . . . . . . . . . . . . . . . . . . . . . . . . . . . . . . . . . . . .
ALE Enabled . . . . . . . . . . . . . . . . . . . . . . . . . . . . . . . . . . . . . . . . . . . . . . . . . . . . . . .
AUX Rx Audio . . . . . . . . . . . . . . . . . . . . . . . . . . . . . . . . . . . . . . . . . . . . . . . . . . . . . .
AUX BCD . . . . . . . . . . . . . . . . . . . . . . . . . . . . . . . . . . . . . . . . . . . . . . . . . . . . . . . . . .
Dial Settings . . . . . . . . . . . . . . . . . . . . . . . . . . . . . . . . . . . . . . . . . . . . . . . . . . . . . . . . . . . . . .
Tone Dialling . . . . . . . . . . . . . . . . . . . . . . . . . . . . . . . . . . . . . . . . . . . . . . . . . . . . . . .
Dial Tone Wait . . . . . . . . . . . . . . . . . . . . . . . . . . . . . . . . . . . . . . . . . . . . . . . . . . . . . .
DTMF Tone Length . . . . . . . . . . . . . . . . . . . . . . . . . . . . . . . . . . . . . . . . . . . . . . . . . .
5
54
54
54
54
54
54
55
55
55
55
55
55
55
55
55
55
55
55
55
55
56
56
56
56
PABX Prefix . . . . . . . . . . . . . . . . . . . . . . . . . . . . . . . . . . . . . . . . . . . . . . . . . . . . . . . .
Line Reversal Detection . . . . . . . . . . . . . . . . . . . . . . . . . . . . . . . . . . . . . . . . . . . . . . .
Wait for Ring . . . . . . . . . . . . . . . . . . . . . . . . . . . . . . . . . . . . . . . . . . . . . . . . . . . . . . .
Wait for Answer . . . . . . . . . . . . . . . . . . . . . . . . . . . . . . . . . . . . . . . . . . . . . . . . . . . . .
Rings Till Answer . . . . . . . . . . . . . . . . . . . . . . . . . . . . . . . . . . . . . . . . . . . . . . . . . . . .
Rings Till Hang-up . . . . . . . . . . . . . . . . . . . . . . . . . . . . . . . . . . . . . . . . . . . . . . . . . . .
Call Length . . . . . . . . . . . . . . . . . . . . . . . . . . . . . . . . . . . . . . . . . . . . . . . . . . . . . . . . .
Call Charging . . . . . . . . . . . . . . . . . . . . . . . . . . . . . . . . . . . . . . . . . . . . . . . . . . . . . . .
Operational - Date/Time . . . . . . . . . . . . . . . . . . . . . . . . . . . . . . . . . . . . . . . . . . . . . . . . . . . . .
Date/Time . . . . . . . . . . . . . . . . . . . . . . . . . . . . . . . . . . . . . . . . . . . . . . . . . . . . . . . . . .
Startup Message . . . . . . . . . . . . . . . . . . . . . . . . . . . . . . . . . . . . . . . . . . . . . . . . . . . .
56
56
56
56
56
56
56
56
57
57
57
Setting Preset Phone Numbers/Prefixes . . . . . . . . . . . . . . . . . . . . . . . . . . . . . . . . . . . . . . . . . . . . . . . . . . . . . . . 58
Preset Numbers . . . . . . . . . . . . . . . . . . . . . . . . . . . . . . . . . . . . . . . . . . . . . . . . . . . . . . . . . . .
Long Distance . . . . . . . . . . . . . . . . . . . . . . . . . . . . . . . . . . . . . . . . . . . . . . . . . . . . . . . . . . . .
Toll Free . . . . . . . . . . . . . . . . . . . . . . . . . . . . . . . . . . . . . . . . . . . . . . . . . . . . . . . . . . . . . . . .
Barred . . . . . . . . . . . . . . . . . . . . . . . . . . . . . . . . . . . . . . . . . . . . . . . . . . . . . . . . . . . . . . . . . .
ALE Numbers . . . . . . . . . . . . . . . . . . . . . . . . . . . . . . . . . . . . . . . . . . . . . . . . . . . . . . . . . . . .
58
58
58
58
58
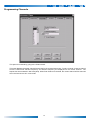
Programming Channels . . . . . . . . . . . . . . . . . . . . . . . . . . . . . . . . . . . . . . . . . . . . . . . . . . . . . . . . . . . . . . . . . . . . 59
Selcall Access Levels . . . . . . . . . . . . . . . . . . . . . . . . . . . . . . . . . . . . . . . . . . . . . . . . . . . . . . . . . . . . . . . . . . . . . . 60
Access from Radio to Phone . . . . . . . . . . . . . . . . . . . . . . . . . . . . . . . . . . . . . . . . . . . . . . . . .
Preset Phone Number Calls . . . . . . . . . . . . . . . . . . . . . . . . . . . . . . . . . . . . . . . . . . . .
Preset and all Local Calls . . . . . . . . . . . . . . . . . . . . . . . . . . . . . . . . . . . . . . . . . . . . . .
Preset and all Local and Long Dist. Calls . . . . . . . . . . . . . . . . . . . . . . . . . . . . . . . . . .
All Phone Calls (Except Barred Numbers) . . . . . . . . . . . . . . . . . . . . . . . . . . . . . . . . .
Barred from receiving Selcalls and Telcalls . . . . . . . . . . . . . . . . . . . . . . . . . . . . . . . .
Access from Phone to Radio . . . . . . . . . . . . . . . . . . . . . . . . . . . . . . . . . . . . . . . . . . . . . . . . .
Selcalls Only . . . . . . . . . . . . . . . . . . . . . . . . . . . . . . . . . . . . . . . . . . . . . . . . . . . . . . . .
All Selcalls and Telcalls . . . . . . . . . . . . . . . . . . . . . . . . . . . . . . . . . . . . . . . . . . . . . . .
Barred from receiving Selcalls and Telcalls . . . . . . . . . . . . . . . . . . . . . . . . . . . . . . . .
60
60
60
60
61
61
61
61
61
61
Scrambler ID's . . . . . . . . . . . . . . . . . . . . . . . . . . . . . . . . . . . . . . . . . . . . . . . . . . . . . . . . . . . . . . . . . . . . . . . . . . . . 62
Data Log . . . . . . . . . . . . . . . . . . . . . . . . . . . . . . . . . . . . . . . . . . . . . . . . . . . . . . . . . . . . . . . . . . . . . . . . . . . . . . . . 63
Call Charging . . . . . . . . . . . . . . . . . . . . . . . . . . . . . . . . . . . . . . . . . . . . . . . . . . . . . . . . . . . . . . . . . . . . . . . . . . . . 64
Introduction . . . . . . . . . . . . . . . . . . . . . . . . . . . . . . . . . . . . . . . . . . . . . . . . . . . . . . . . . . . . . .
Setting Charging Rates . . . . . . . . . . . . . . . . . . . . . . . . . . . . . . . . . . . . . . . . . . . . . . . . . . . . .
Using Time Charging . . . . . . . . . . . . . . . . . . . . . . . . . . . . . . . . . . . . . . . . . . . . . . . . . . . . . . .
Using Charge Pulse Scheme . . . . . . . . . . . . . . . . . . . . . . . . . . . . . . . . . . . . . . . . . . . . . . . . .
Invoice Options . . . . . . . . . . . . . . . . . . . . . . . . . . . . . . . . . . . . . . . . . . . . . . . . . . . . . . . . . . .
Adding/Editing Clients . . . . . . . . . . . . . . . . . . . . . . . . . . . . . . . . . . . . . . . . . . . . . . . . . . . . . .
Building Invoices . . . . . . . . . . . . . . . . . . . . . . . . . . . . . . . . . . . . . . . . . . . . . . . . . . . . . . . . . .
Choosing a Client . . . . . . . . . . . . . . . . . . . . . . . . . . . . . . . . . . . . . . . . . . . . . . . . . . . .
Choosing a Selcall ID . . . . . . . . . . . . . . . . . . . . . . . . . . . . . . . . . . . . . . . . . . . . . . . . .
Month/Year Field . . . . . . . . . . . . . . . . . . . . . . . . . . . . . . . . . . . . . . . . . . . . . . . . . . . .
Build Invoice Button . . . . . . . . . . . . . . . . . . . . . . . . . . . . . . . . . . . . . . . . . . . . . . . . . .
APPENDIX - A
64
64
64
64
65
66
67
67
67
67
67
. . . . . . . . . . . . . . . . . . . . . . . . . . . . . . . . . . . . . . . . . . . . . . . . . . . . . . . . . . . . . . . . . . . . 68
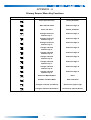
Primary Screen/ Menu Key Functions . . . . . . . . . . . . . . . . . . . . . . . . . . . . . . . . . . . . . . . . . . . . . . . . . . . . . . . . . 68
6
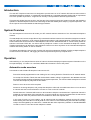
Introduction
The 960 HF Telephone interconnect is designed to provide users on a HF network full interconnection with the
international telephone network. It is designed to be operated as a completely automatic facility with no requirement
for human operator supervision. A high level of security is incorporated to eliminate system abuse.
This manual is divided into two sections, the first part of the manual gives a brief system overview and details the
operation of the 960 telephone interconnect assuming the 960 has already been setup by a system supervisor. The
second part of the manual details the 960 setup procedures.
System Overview
The 960 telephone interconnect will make your HF network stations extensions of the international telephone
network.
The 960 telephone interconnect provides a fully automated interface between the international telephone network
and a HF network. Stations in a HF network equipped with selective call systems based on CCIR 493 can call up
to 98 numbers that can be stored in the 960 telephone interconnect. Stations fitted with a “Telcall” facility, based on
selective call format CCIR 493, can direct dial any telephone number on the international telephone network.
Telephone subscribers can dial into the 960 telephone interconnect from anywhere on the international telephone
network and call any station on the HF network.
The Barrett 960 telephone interconnect provides full network management facilities including multiple telephone
access levels for HF stations, call logging and remote supervision by dial up computer links
Operation
After switching on, the 960 performs a series of internal checks and displays important system information on the
front panel display. If Levels 2 or 3 are fitted, additional information is sent to the printer.
Automatic mode overview
In automatic mode the 960 HF telephone interconnect will:Scan all channels programmed for scan looking for an incoming Selcall or Telcall from a HF network station.
On receipt of a Selcall or Telcall, the 960 checks that the station calling is registered in the database and has
the required access privilege programmed by the system supervisor, if so it then initiates a telephone call and
connects the telephone party with the HF station.
Return to scan when the call is complete.
Answer an incoming telephone call, prompt the telephone caller with recorded instructions on how to select
a channel and how to send a Selcall to connect to a user on the HF network.
Periodic beacons if selected, will be sent on all channels to help the user determine if a particular channel is
suitable for communication at the required time. A beacon signal can also be requested from the transceiver
being called to check if a particular channel is suitable for use at the required time.
In the case of Level 2 or Level 3 960's - log all calls from both the telephone network and the HF network,
either sending the information to a local printer or in the case of a Level 3 960 storing the information internally,
ready to be interrogated by an external PC, loaded with 960 online supervisory software. A standard MODEM
is used to connect to the 960 via the telephone network.
7
Facilities available to the telephone user
A telephone subscriber using a DTMF telephone can access the following facilities provided by the 960 telephone
interconnect. These facilities are available after the 960 has answered the call and played its recorded instruction
messages. To make a call to a station on the HF network a channel must be selected and the Selcall number of the
station required must be entered, after which the 960 will send the selcall and if successful an audible reply will be
heard from the station being called. If this audible reply (revertive call) is not heard another channel should be
selected and the call repeated.
Selecting a channel
The 960 can store up to 50 channels. These are selected as follows:Press the two digits, representing the channel number required, on the DTMF key pad of the phone being
used. Valid channel numbers are from 01 to 50. Alternatively for channels 1 to 9 can be selected by pressing
a single digit followed by the '#' key. i.e. 1# selects channel one. Once the second number is pressed, the
request is processed and a stored voice will repeat back the channel number.
The second option is especially useful for telephone systems which have STD-bar limits placed upon them.
These telephones usually have a system fitted which prohibits the first digit pressed from being a zero.
Note:- channel numbers must be two digits in length. e.g. Enter 03 or 3# instead of 3.
Note:- once channel entry commences HF receiver noise will disappear until the DTMF function being entered is
complete. This lack of HF receiver noise identifies that you are still in the DTMF request sequence.
Sending a Beacon Request
A beacon request is used to test to see if a channel is "open" to a HF station you may wish to call later with a
Selcall. A beacon request does not alert the HF station being called. After the beacon request is sent a confirmation
tone (revertive call) will be heard from the HF station, the strength of this confirmation tone (revertive call) indicates
the quality of the channel for communication. If no confirmation tone (revertive call) is heard try another channel.
A beacon request can be sent to any HF station that has an access level that allows it to receive Selcalls (access
levels are set in the 960 by the system supervisor and are described in the setup section within this manual).
To send a beacon request, press the '*'(star) key on the telephone key pad.
If the '*' key is recognised the receiver noise will disappear. Some DTMF telephones do not send the '*' and '#'
tones. This should be tested before the system is first used.
Then enter the 4 digit selcall ID of the transceiver you wish to contact using the telephone key pad. Press the '*'
button to send the beacon request. The tones of the beacon request selcall being sent will now be heard.
To re-send the last sent beacon request, press ‘**’(star twice) on the telephone key pad.
Sending a Selcall
A selcall is used to call a HF station and alert the operator that you wish to commence communication with that
station. After the selcall is sent a confirmation tone (revertive call) will be heard from the HF station indicating the
station has received the call. If no confirmation tone (revertive call) is heard try another channel.
A selcall can be sent to any HF station that has an access level that allows it to receive Selcalls (access levels are
set in the 960 by the system supervisor and are described in the setup section within this manual).
To send a Selcall, press the '*' key on the telephone key pad.
8
If the '*' key is recognised the receiver noise will disappear. Some DTMF telephones do not send the '*' and '#'
tones. This should be tested before the system is first used.
Then enter the 4 digit Selcall of the transceiver you wish to contact followed by two '#' key presses (only one '#' press
is necessary on Level 1 Interconnects). The tones of the selcall being sent will now be heard. Note: ID's 9900 to
9999 are reserved for ALE calls. See "Sending an ALE call".
If the entered ID does not have the access level to receive Selcalls then the ‘Access Denied’ pre-recorded message
will be played and the Selcall not sent.
After the Selcall has been sent, if the transceiver with that Selcall ID is on channel, a confirmation tone (revertive
tone) will be heard. The telephone user should then wait for the transceiver operator to make voice contact. If no
voice contact is made, a telephone number to call back on can be sent to the HF station using the 'Sending a Telcall'
procedure.
If no audible acknowledgment tones are heard, the transceiver may be on another channel, or switched off. To try
to make contact on another channel, follow the 'Selecting a Channel' procedure, then repeat the 'Making a Selcall'
procedure.
If you wish to send the same Selcall number again, press ‘**’.
Sending a Telcall
In the event that a transceiver responds to a Selcall, but no voice contact is established, indicating the operator is
not available, a ring back telephone number can be sent to the HF station transceiver and stored in its memory. On
the HF station operators return he can return the call. This facility is not available on Level 1 Interconnects
A Telcall can only be made to a HF station that has an access level required for direct dialling on the PSTN.
To send a Telcall:Press '*' followed by the 4 digit Selcall number, then press '#'.
Enter the desired telephone number (up to 16 digits long) and then press '#' again.
The Telcall will then be sent and the telephone number will be stored in the HF station transceivers "Selcall
history".
An audible acknowledgment will be heard if the call was successful.
If the HF station does not have the access level required for this operation the ‘Access Denied’ pre-recorded
message will be heard and no action will be taken.
Using the Voice Operated Switch (VOX)
The transceiver being operated by the Barrett 960 telephone interconnect is usually switched between transmit and
receive using the telephone subscribers voice to derive the switching signal. This is achieved using a specialised
VOX (voice operated switch). If however the telephone is of bad quality then a manual method to switch between
transmit and receive is available. To switch to the manual method press "88" on the telephone key pad. The internal
synthesised voice will annunciate "OFF" indicating automatic VOX is off and you are now in a "manual VOX mode".
In the manual mode to key the transceiver into transmit press the "#" key on the telephone keypad. When you finish
talking again press the "#" key, the transceiver will now be in receive mode. i.e. using the "#" key on the telephone
keypad is the similar to the microphone Press To Talk (PTT) button, except it only has to be pressed momentarily
to switch between transmit and receive and visa versa.
To return to "automatic VOX mode" press "88" again on the telephone keypad, the internal synthesised voice will
annunciate "ON" indicating automatic VOX is on again.
Requesting current channel information
The telephone subscriber can request the 960 to annunciate the current channel's number and frequency
information using its internal synthesised voice by entering 77 on their telephone keypad.
9
Completing a call - "Hanging up"
There are two methods to complete a call or "Hang up":-.
The fastest and most efficient method is to enter "99" on the telephone keypad. This causes the 960
interconnect to instantly hang up. The telephone user then replaces the handset on his telephone. The 960
interconnect is now immediately ready for the next caller.
The second method is to simply hang up the telephone handset. The 960 cannot sometimes detect the
telephone subscriber has "hung up" due to the way different telephone systems operate in different countries.
The 960 in this case will either respond to a "BUSY" signal from the telephone system and then hang up or
will time out due to lack of activity. Which ever is the case whilst the 960 is waiting to hang up, the system is
not available for use and the last caller will be charged extra time on his call. Thus the first method is always
preferable.
Sending an ALE call
If the optional ALE board is fitted, then an ALE call can be made to a HF transceiver also fitted with the optional ALE
board.
To transmit an ALE call, press '*' (STAR) on the telephone keypad. If the '*' key is recognised the receiver noise
will disappear. Enter the Destination ID number (up to 4 digits), followed by two '#' key presses.
Source and Destination ID's are allocated by the Interconnect operator.
Note: ID's 9900 and above are reserved for ALE calls.
Facilities available to the HF station
For more detailed information on how to call the interconnect using Barrett 530,550,930 and 950 transceivers refer
to the relevant transceiver operation manuals.
Sending a beacon Request
To receive a beacon revertive from the 960 interconnect, send a Selcall to the ID xx99, where xx is the self ID of
the interconnect. For example, Selcall 4599 will receive a beacon revertive from the interconnect with self ID of 45.
Sending a Selcall - dialling a preset phone number
To dial one of the interconnect preset phone numbers (0-98), send a Selcall to the interconnect with the preset
number to dial. For example, Selcall 4501 will dial preset number 1, Selcall 4587 will dial preset number 87 etc, on
a 960 interconnect with Self ID of 45.
The HF station sending the Selcall must have a relevant access level assigned to their selcall number to permit
dialling to a preset phone number.
Sending a Telcall - dialling a telephone number
A 950 transceiver must be fitted with the telcall option to enable it to dial any desired telephone number via the 960.
To make a telephone call, enter the self ID of the 960 to be used via the numeric key pad.
The SEL/TEL key is then pressed and then the wanted telephone number is entered. Finally, press the CHAN/SEND
key. All of the information needed by the 960 to connect the transceiver to the required telephone number is sent
to the 960 along with the selcall information.
Terminating a call
When a call has been completed, the caller must hang up by sending a "hang up" code to the 960.
To do this, press the SEL/TEL key followed by the PROG/END key.
10
Sending an ALE call
ALE calls may be sent to Interconnects fitted with the ALE option. The transceiver must also be fitted with an ALE
board.
Preset numbers are allocated by the Interconnect operator. Preset numbers are allocated according to which
destination address is used.
Manual mode overview
In manual mode the 960 interconnect will act as a HF base station and :Enable the operator to send Selcalls to stations on the HF network.
Enable the operator to send Telcalls to stations on the HF network.
Receive incoming Selcalls from the HF network and manually forward the call to the pre-set telephone
number within the 960 that is associated with selcall number received.
Receive incoming Telcalls from the HF network and forward these manually to the telephone network.
Note:- To operate the 960 in manual mode, the option ‘Auto on Power up’ should be set to 'Manual', in the
‘Operational Menu’ - refer to the setup section later in this manual.
Receiving a Selcall from a HF station
On receipt of a Selcall directed to your 960 , it will be displayed on the front panel and an alarm will sound.
To on-forward the call
To on-forward the call to the pre-set telephone, stored in your 960 and associated with the received selcall number,
press the 'LEFT' key. The 960 will process the request, the telephone number will be dialled and the HF user will
be connected to the telephone party.
To communicate by voice with the calling HF user
Press the 'RIGHT' key. This will cancel the audible alarm and allow conversation with the HF user to commence.
Receiving a Telcall from a HF station
On receipt of a Telcall directed to your 960 , it will be displayed on the front panel and an alarm will sound.
To on-forward the call
To on-forward the call to the telephone number, sent within Telcall by the HF station, press the 'LEFT' key. The 960
will process the request, the telephone number will be dialled and the HF user will be connected to the telephone
party.
To communicate by voice with the calling HF user
Press the 'RIGHT' key. This will cancel the audible alarm and allow conversation with the HF user to commence.
Incoming phone calls
When the 960 is in 'Manual' mode, all incoming telephone calls are ignored. They are recognised but not answered.
A standard telephone should be connected in parallel to the 960, the call can then be manually answered by the
operator. The operator can then Selcall the required HF station using the manual operator's control menu. Once
contact is established, the telephone caller is connected to the HF station by selecting 'Place On Line' from the
manual operator's control menu.
11
Completing the call - "Hanging up"
The HF user can send a "Hangup Request" for his transceiver (see the transceiver operation manual for
details). When received by the 960 this will be displayed on the front panel, and pressing the 'LEFT' key
will complete the hang up action by the 960. Any other key will abort this action.
From the telephone:The telephone user can request a "Hangup" by entering '99' on their DTMF telephone handsets.
This will cause immediate call completion.
The telephone user can simply replace the phone to complete the call, the subsequent service
tones from the telephone network will result in call completion. Note:- the service tones do not
commence immediately the telephone receiver is replaced so extra time will be logged against the
call using this method.
The 960 operator can select 'Place Off Line' from the manual operator's control menu.
Once a telephone call is complete, the Barrett 960 will revert to scan if scanning is selected as the system default.
Sending a Selcall to a HF station
Enter manual mode by pressing '0'. Enter the manual operator’s control menu by pressing the ‘LEFT’ key while in
‘Manual’ mode. When making a Selcall, use the UP/DOWN keys to select 'Send Selcall'. Press the RIGHT key.
When making a Selcall, the most recent Selcall number becomes the default. If the same Selcall number is required,
press the ‘END’ key. If a different Selcall number is required, directly enter it using the number keys.
When the Selcall number displayed is correct, press 'END' to send the call. Press ‘CANCEL’ at any time to exit
without making the call.
12
Sending a Telcall to a HF station
Enter manual mode by pressing '0'. Enter the Manual Operator’s Control Menu by pressing the ‘LEFT’ key while in
‘Manual’ mode. When making a Telcall, use the UP/DOWN keys to select 'Send Telcall'. Press the RIGHT key.
Enter the telephone number required by using the numeric keypad. To delete the previous phone number,
repeatedly press the 'CANCEL' button, until there is no phone number. If a mistake is made press 'CANCEL' and
try again. If a 16 digit number is entered, the number is dialled immediately after the 16th digit is entered. When the
telephone number displayed is correct press ‘END’ to dial the number.
13
Making a telephone call
Enter the Manual Operator’s Control Menu, as before. When making a telephone call, use the UP/DOWN keys to
select 'Make Phonecall'. Press the RIGHT key.
When the telephone number displayed is correct press ‘END’ to dial the number. When the telephone is answered,
use the front panel microphone to talk and the speaker to listen.
If a 16 digit number is entered, the number is dialled immediately after the 16th digit is entered. Press CANCEL at
any time to exit without making the call.
Completing a telephone call
When placing the 960 On Line and Off Line, the current line status is always shown by the front panel LED's. The
centre LED is the On Line indicator.
To go offline manually, enter the Manual Operator’s Control Menu, as before. Use the UP/DOWN keys to select
'Place Off-Line'. Press the RIGHT key
14
Sending a Beacon request to a HF station
Enter manual mode by pressing '0'. Enter the Manual Operator’s Control Menu by pressing the ‘LEFT’ key while in
‘Manual’ mode. Use the UP/DOWN keys to select 'Send Beacon Rqst'. Press the RIGHT key.
When sending a Beacon, the most recent destination ID becomes the default. If the same destination ID is required,
press the ‘END’ key. If a different destination ID is required, directly enter it using the number keys.
When the destination ID displayed is correct, press 'END' to send the call. Press ‘CANCEL’ at any time to exit
without making the call.
15
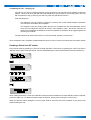
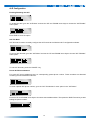
Sending an ALE Request/End
To send an ALE call or end call requires the optional ALE board. Enter the Manual Operator’s Control Menu by
pressing the ‘LEFT’ key while in ‘Manual’ mode. Use the UP/DOWN keys to select ‘Send ALE Rqst’ or ‘Send ALE
End’. Press the RIGHT key.
or
or
When sending an ALE request, select the destination address by pressing the ‘UP’ or ‘DOWN’ keys. The most
recent destination address becomes the default. Destination addresses must be set in the MS-Windows ALE
software, and downloaded to the ALE board on the 960 interconnect. (See ALE Configuration section of this
manual.)
Press the LEFT/RIGHT arrow keys to move onto the source address field. The most recent source address becomes
the default. Select the source address by pressing the ‘UP’ or ‘DOWN’ keys. To make a call press the ‘END’ key.
To abort a call press the ‘CANCEL’ key.
To send an ALE end call, select the ‘Send ALE End’ menu option. The ALE must be already linked to send an ALE
end call.
16
System Setup
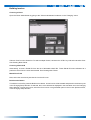
Hardware
Front Panel
32 character (16 x 2 lines) backlit, liquid crystal display.
16 control keys for full operation and editing.
5 status LED's giving POWER, ALE, ON LINE, PTT and VOX indications.
Speaker giving full audio response and output power.
Volume control knob with POWER ON/OFF control.
International standard 8-pin microphone connector.
Handles, for easy removal from racking installations.
Rear Panel
Transceiver port for connection to a 950 transceiver. (25 pin 'D' female connector).
Auxiliary port 2 for connection to remote site systems etc. i.e. Barrett 974 system(25 pin “D” female connector)
Auxiliary serial port for configuring (filling) the optional ALE board (9 pin ‘D’ connector). Can also be used for logging
/ monitoring and direct programming.
Parallel printer port for connection to a tractor-feed dot matrix printer - for real time hard copy print out.
Power lead - suits 922 Power Supply
.
Telecom line socket (RJ12 type, 6P4C)
.
Ground Bonding Strap
17
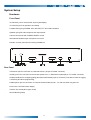
System interconnection
Ensure that all components to be connected into the system are switched off:On the 960 interconnect ensure the ON/OFF Volume control is fully counter-clockwise.
On the 922 Power supply remove the IEC mains connector lead.
Connect the 25 way interface cable (cable Barrett connector P/N BCA90021) from the 950M transceiver 25 pin
auxiliary connector to the 960 25 pin 950 transceiver connector.
Connect the 960's ground bonding strap to the transceiver and the 950 transceiver's ground bonding strap to the
922 power supply. It is very important that these bonding straps are correctly fitted or transmitter instability may
occur.
Connect the supplied telephone cable to the 'Telephone' socket of the 960 and to the PSTN socket.
Connect the power leads to the 950M transceiver, and 960 interconnect from the 922 power supply. The 922 power
supply has two outputs. Transceiver output and Aux output. Connect the Transceiver output to the 950 and the Aux
output to the 960.
If a power supply other than the 922 is to be used, it must be capable of providing the 960 interconnect with +13.8V
@ 2A and the 950M transceiver with +13.8V @ 20A.
Connect a suitable antenna to the 950 transceiver module.
Switch the 960 on by turning the volume control knob clockwise. A click will result and the 960 interconnect and
950M transceiver units will both be powered up. Further turning of this knob adjusts the volume of the front panel
speaker.
18
Option levels
There are 3 different option levels of 960 Telephone interconnect available. These are only available factory fitted.
These options can be upgraded, however this can only be done by returning the 960 to the Barrett factory. It is NOT
possible for dealers to perform this upgrade.
The 3 option levels are:
Level 1
Preset telephone numbers only
This level gives no facility for direct dialling of telephone numbers. Only the 98 internal preset numbers can be
used. No system activity information is available.
Level 2
Standard configuration
Full direct dialling facilities as well as preset telephone numbers are available. A complete log of system activity
is available from the printer port.
Level 3
Full logging commercial option
Full direct dialling facilities as well as preset telephone numbers are available. A complete log of system activity
is available from the printer port. Full reprogramming facilities from an external computer/terminal are available
through the RS-232 port. Logging to a remote computer is available for complete remote site system management.
19
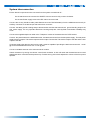
Primary screen functions
The primary screen is the normal operational screen of the 960 interconnect.
From the primary screen, the user can do several operations by using the front panel key pad. These are shown
individually below, but are not intended to be a sequence of key presses.
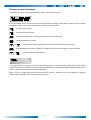
... to enter the main menu
... to enter/exit manual mode.
... to enter the manual menu, while the interconnect is in manual mode.
... to enable/disable scan mode.
or
... to scroll up and down through the channels. Interconnect must be out of scan.
... to enable/disable scan mute. Speaker is muted until the interconnect begins to detect a Selcall.
to
... to change channels. (See below)
To change channels, press any one of the number keys except 0. The interconnect prompts the user to enter a
2 digit channel number, as above. Press the 'UP' and 'DOWN' keys to scroll up and down through the channels, or
enter a 2 digit channel number using the number keys.
Note:- to enter a single digit channel number, press the zero key, followed by one of the digit keys, while the
interconnect is prompting for a channel number, as above.
20
Setting parameters
Navigating the menus
The configuration of the interconnect is broken down into menus and sub-menus.
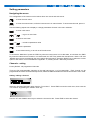
... to enter the main menu
... to enter the manual menu, while the interconnect is in manual mode. To enter manual mode, press '0'.
Use the following sequences to display or change parameters of items in the menu selection.
... to enter a sub-menu
or
... to go to a menu item
... to select a menu item
or
... to select a parameter value
... to save the parameter
... to exit without saving, or to exit out of the sub-menu
To access the “Main Menu” press the ‘END’ key when the interconnect is in it’s idle state, or hold down the ‘END’
key when the interconnect is turned on. In manual mode, the 'LEFT' key selects the manual menu. Use the ‘UP’ and
‘DOWN’ arrow keys to scroll through the menu options and sub-menus. Press the ‘RIGHT’ key to select the current
option or sub-menu. For more details see "Appendix - A, Primary Screen / Menu Key Functions".
Channels - setting
Factory Default: No programmed channels.
There are fifty programmable channels on the 960 interconnect, 1 to 50 respectively. Each channel can be
programmed for receive and transmit frequencies, USB and LSB and whether the channel is scanned in scan mode.
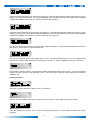
Adding / editing a Channel
Select the “Program Channels” option from the “Txcvr Menu”. Press 'END' to enter the main menu, then enter the
"Txcvr Menu" by pressing the 'RIGHT' arrow key.
Use the ‘UP’ and ‘DOWN’ arrow keys to select the channel to edit. Press ‘END’ to select the channel.
21
Using the number pad enter in the receive (Rx) frequency. If the first digit entered is greater than three (‘3’) then a
leading zero (‘0’) will be inserted. For example 06850kHz. This is because RX and TX frequencies are between
1600kHz and 30MHz. Press ‘END’ to confirm the receive (Rx) frequency.
Using the number pad enter in the transmit (Tx) frequency. If the first digit entered is greater than three (‘3’) then
a leading zero (‘0’) will be inserted. For example 06850kHz. This is because RX and TX frequencies are between
1600kHz and 30MHz. Press ‘END’ to confirm the transmit (Tx) frequency.
Use ‘LEFT’ and ‘RIGHT’ arrow keys to select “USB” (upper side band) or “LSB” (lower side band) will be used for
this channel. Press ‘END’ to confirm the selection.
Use ‘LEFT’ and ‘RIGHT’ arrow keys to select “Scan” or “Off”. This channel will be scanned if “Scan” is selected and
scan mode is enabled (See ‘Selecting Channel Scan on Power-up’, ‘Enable / Disable Scanning of Channels’)
Press ‘END’ to save the channel. The transceiver will be programmed with the new channel. The next successive
channel as shown above be will prompted to edit. If no more further channels require editing then press the
‘CANCEL’ key.
Deleting a channel
Select the “Program Channels” option from the “Txcvr Menu”.
Use the ‘UP’ and ‘DOWN’ arrow keys to select the channel to edit. Press ‘END’ to select the channel.
Using the number pad, enter in zero (‘0’) for the receive (Rx) frequency. Press ‘END’ to confirm the receive
frequency.
22
Press enter to accept zero (‘0’) as the transmit (Tx) frequency. Press ‘END’ to confirm the transmit (Tx)
frequency.
Select either “USB” or “LSB”. Does not matter since this channel will not be used. Press ‘END’ to confirm.
Select either “Scan” or “Off”. Does not matter since this channel will not be used. Press ‘END’ to save empty
channel. The transceiver will also be programmed with the empty channel.
The next successive channel will be prompted to edit. If no more further channels require editing then press the
‘CANCEL’ key.
960 interface parameters
The 960 can control either a 950 transceiver or an ancillary device on the auxiliary interface connector.
When controlling a 950 transceiver, the receive audio source the 960 uses can either be from the 950 transceiver
or from a remote source, via the auxiliary connector, such as a remote receive site.
Selecting receiver audio source
Factory Default: 950
Selects the receiver audio source used within the 960 either from the 950 transceiver connected to the 950 port or
from a remote source via the auxiliary connector i.e. when a remote receive site is being used.
Select the “Txcvr Rx Audio” option from the “Txcvr Menu”.
Use the ‘LEFT’ and ‘RIGHT’ arrow keys to select “950” or “Aux”. Press ‘END’ to confirm selection.
Selecting 960 interface
Factory Default: 950
Selects which 960 interface is in use. The interconnect can communicate with a 950 transceiver or an ancillary
device connected to the ancillary port such as a Barrett 974 integration system.
23
Select the “Txcvr Type” option from the “Txcvr Menu”.
Use ‘LEFT’ and ‘RIGHT’ arrow keys to select “950” or “Aux”. Press ‘END’ to confirm selection.
Selecting Duplex Mode
Factory Default: Off
Selects duplex mode. This allows the transceiver user to talk and listen at the same time. Duplex mode requires two
950 transceivers, one for receive and one for transmit. The receiving transceiver is connected to the auxiliary port
on the rear of the interconnect. The remote user also requires two transceivers, transmitting and receiving on
different frequencies.
Select “Duplex Mode” option from the “Txcvr Menu”.
Use ‘LEFT’ and ‘RIGHT’ arrow keys to select “On” or “Off. Press ‘END’ to confirm selection.
24
Phone dialling configuration
Preset phone numbers
Factory Default: No preset phone numbers.
The interconnect has the ability to store 98 preset phone numbers internally. These are dialled when a Selcall is
received by the interconnect. For example, the interconnect has a self ID of 45, and a Selcall is sent from a mobile
transceiver ID 1234 to the ID 4550. The interconnect will respond because 45 is its self ID and will dial the preset
phone number 50 (xx50). Note the mobile ID 1234 must have appropriate access level to be able to dial out. (See
‘Selcall Access Levels’).
Adding / editing a preset phone number
Select the “Preset Numbers” option from the “Dialling Menu”.
Select the preset phone number to modify by using the ‘UP’ and ‘DOWN’ arrow keys to scroll between 0 and 98.
Press ‘END’ to confirm which phone number to modify.
If the phone number already exists it will be displayed upon the bottom line otherwise the LCD cursor will be
positioned at the first number. The ‘CANCEL’ button will delete the last entered character, or cancel the operation
all together if the phone number is blank. Press ‘END’ to save the phone number.
Select the next preset number to modify and repeat the above. Press 'CANCEL' to finish changing preset numbers.
Deleting a preset phone number
Select the “Preset Numbers” option from the “Dialling Menu”.
Select the preset phone number to delete by using the ‘UP’ and ‘DOWN’ arrow keys to scroll between 0 and 98.
Press ‘END’ to confirm which number to delete.
25
If the phone number exists it will be displayed upon the bottom line. Use the ‘CANCEL’ button to delete each digit
in the phone number. Once all the digits have been deleted press the ‘END’ key to save the empty phone number.
Selecting DTMF or pulse (Decadic) dialling
Factory Default: DTMF
is
This will set how all phone numbers are dialled to the phone exchange. Most new exchanges use DTMF since it
quicker. Decadic dialling should be used as a last resort.
Select “Dialling Method” from the “Dialling Menu”.
Use the ‘LEFT’ and ‘RIGHT’ arrow keys to select “DTMF” or “Pulse”. Press ‘END’ to confirm selection.
Enabling dial tone checking
Factory Default: Enabled, 3 seconds.
Dial tone checking looks for the absence of a valid free phone line before making a phone call. For example,
someone may be using a normal telephone in parallel on the same line, therefore the interconnect is unable to use
it.
Note: In some telephone exchanges, particularly older ones, the dial tone on the telephone line before
dialling is different to the newer standards now used. In these cases dial tone checking has to be disabled.
Select “Dial Tone Wait” option from the “Dialling Menu”.
Use the ‘UP’ and ‘DOWN’ arrow keys to select the time in seconds to wait for a dial tone. To disable dial tone
checking select “00 Second(s)”. The maximum time to wait for a dial tone is ten seconds. Press ‘END’ to save.
26
Setting DTMF tone duration
Factory Default: 70ms.
Select “DTMF Tone Length” option from the “Dialling Menu”.
Use the ‘UP’ and ‘DOWN’ arrow keys to select the time in milli -seconds (ms) a DTMF tone will be on for. Press
‘END’ to save.
Setting time to wait for someone to answer the phone
Factory Default: 50 seconds.
Sets the maximum time to wait for someone to answer the phone when dialling out, after receiving the first ring.
Select "Wait for Answer" option from the "Dialling Menu".
Use the 'UP' and 'DOWN' arrow keys to increase/decrease the value. Press 'END' to save.
Setting time to wait for first ring
Factory Default: 50 seconds.
Sets the maximum time to wait for a ring, after the interconnect dials out to the phone.
Select "Wait for Ring" option from the "Dialling Menu".
Use the 'UP' and 'DOWN' arrow keys to increase/decrease the value. Press 'END' to save.
27
Enabling line reversal off hook / on hook detection
Line reversal detection is a means of detecting when the phone is answered when an outgoing phone call from the
960 is made. To use "line reversal detection" the phone line the 960 is connected to must have this facility fitted.
You should request this facility from your local Telecom company.
If line reversal is not available from your local Telecom company, then the 960 must be trained to recognise the 'ring'
cadence. ( See "Learning non-standard ring / busy / disconnect cadences" ).
Select “Line Reversal” option from the “Dialling Menu”.
Use the ‘LEFT’ and ‘RIGHT’ arrow keys to select “Yes” or “No”. Press ‘END’ to save.
Setting the number of rings before the 960 will auto-answer
Factory Default: 2 rings
In normal automatic operation the interconnect will answer the phone automatically. This option sets the number
of phone rings before the phone is answered.
Select “Ring Till Answer” option from the “Dialling Menu”.
Use the ‘UP’ and ‘DOWN’ arrow keys to select the number of rings before the interconnect will answer the phone.
The minimum is one ring, the maximum is ten rings. Press ‘END’ to save.
Setting the number of rings to determine "no one is home"
Factory Default: 10 rings
This option sets the number of rings the 960 will wait before determining the number the 960 has dialled is not going
to answer.
Select “Ring Till Hangup” option from the “Dialling Menu”.
28
Use the ‘UP’ and ‘DOWN’ arrow keys to select the number of rings before the interconnect will hang-up the phone.
The minimum is two rings, the maximum is fifteen rings. Press ‘END’ to save.
Setting the maximum call length
Factory Default: 30 minutes
The interconnect can restrict the length of phone calls so as to allow other people the use of the interconnect.
Select “Call Length” option from the “Dialling Menu”.
Use the ‘UP’ and ‘DOWN’ arrow keys to select the longest possible call one can make in minutes. The minimum
call length is one minute, the maximum call length is sixty minutes. To disable call length monitoring, set the call
length to “00 Minute(s)”. This allows unlimited call length. Press ‘END’ to save.
Dialling a prefix to obtain an external line
Factory Default: Off
This option dials a prefix before dialling an out-going phone number. This is used by some PABX systems to obtain
an external line.
To enable, go to "PABX Prefix" in the "Dialling Menu".
Press 'RIGHT' arrow key to select the option. Press 'LEFT' or 'RIGHT' arrow keys to select "On" or "Off". Press 'END'
to save the setting, or press 'CANCEL' to abort without saving.
Setting PABX prefix number
Factory Default: "0"
This option set the prefix number to dial to obtain an external line in a PABX telephone network.
Go to "PABX Prefix No" in the "Dialling Menu".
29
Press 'RIGHT' arrow key to select the option. Press 'CANCEL' to delete the current PABX prefix. Enter a new prefix
using the number keys. Press 'END' to save the setting, or continually press 'CANCEL' to abort without saving.
Learning non-standard ring / busy / disconnect cadences
This feature allows the 960 interconnect to adapt to the different cadences available on different telephone networks.
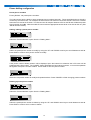
Select “Learn Cadences” option from the “Dialling Menu”.
Select either “Learn Ring Tone”, “Learn Busy Tone” or “Learn Disc. Tone” option.
Select a cadence. Press the 'UP' and 'DOWN' arrow keys to scroll through the numbers, or type in a number using
the number keys. Up to 3 different cadences can be learned for each tone. Each cadence is allocated to a different
cadence number. Press 'END' to accept.
Using the number pad enter in the phone number to be dialled to generate the appropriate cadence. Press ‘END’
to dial the phone number.
Once the correct cadence is heard through the front panel speaker, press any key to activate the learning
process.
Once an adequate number of cadences have been heard. ( 2 - 16 cadences ), press any key to end the learning
process. The learning process will automatically finish after 16 cadences, if no key is pressed.
Note; 'CANCEL' key can be used at any time to cancel the learning process.
Repeat for other cadence tones.
30
Alternatively, the user may enter the cadence manually. This procedure sets the various tone ON and OFF time.
These must be known by the user to be entered into the 960.
Enter the “Manual Set Tones” submenu in the “Learn Cadences” submenu.
Select “Ring Tone”, “Busy Tone” or “Disc. Tone” by pressing the ‘UP’ and ‘DOWN’ arrow keys.
Select a cadence, by pressing the 'UP' and 'DOWN' keys, or type in a value using the number keys. 'Maximum
Cadence on Time’ will be displayed.
Press 'CANCEL' to delete a digit. Enter a new value using the number keys. Press the ‘END’ key to accept, or the
‘CANCEL’ key repeatedly to abort. When the ‘END’ key is pressed, the ‘Minimum Cadence on Time’ is displayed.
Press 'CANCEL' to delete a digit. Enter a new value using the number keys. Press the ‘END’ key to accept, or the
‘CANCEL’ key repeatedly to abort. When the ‘END’ key is pressed, the ‘Maximum Cadence off Time’ is displayed.
This is the maximum time it waits for a new cadence.
Press 'CANCEL' to delete a digit. Enter a new value in seconds. Press the ‘END’ key to accept, or the ‘CANCEL’
key repeatedly to abort.
31
Access levels
Each transceiver that calls into the interconnect has its own unique Selcall ID. Each Selcall ID is assigned an access
privilege internally to the interconnect that determines the type of phone call that can be made through the
interconnect, and the type of call it can receive (eg. Selcall or Telcall).
Setting Access from Transceiver to Phone
Access levels that exist from the transceiver to the phone are;
Preset
If set, only Selcalls can be received from these ID(s). A preset phone number (if set) will be dialled according to the
least two significant values of the sent Selcall ID (ie. 1-98).
Preset/Local
If set, Selcalls and Telcalls can be received from these ID(s). A preset phone number (if set) will be dialled when
a Selcall is received. Only local phone numbers received in a Telcall will be dialled. Toll free numbers will be
allowed through. These are phone numbers with a prefix of 1800 or 008.
Preset/Local/STD
If set, Selcalls and Telcalls can be received from these ID(s). Local and long distance phone calls will be allowed
through.
All Phone Calls
If set, Selcalls and Telcalls can be received from these ID(s). Every call received will be dialled.
Barred
If set, this selcall ID will not be able to make any phone calls through this system.
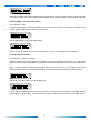
Select “Set Phone Access” option from the “Access Menu”.
Use the number pad to enter in the Start ID to modify.
Use the number pad to enter in the End ID. To edit one Selcall ID, set Start ID and End ID the same.
Use the ‘UP’ and ‘DOWN’ arrow keys to select the required access level. Press ‘END’ key to save. Available access
levels will depend on the Option Level of the interconnect purchased (See System Option Levels).
32
Setting Access from Phone to Transceiver
Access levels that exist from the phone to the transceiver are;
Selcalls Only
If set, this Selcall ID can receive Selcalls only from the interconnect.
Selcalls and Telcalls
If set, this Selcall ID cannot receive all Selcalls and Telcalls.
Barred
If set, this Selcall ID will not be able to receive any Selcalls or Telcalls from the interconnect.
Select “Set Txcvr Access” option from the “Access Menu”.
Use the number pad to enter in the Start ID to modify.
Use the number pad to enter in the End ID. To edit one Selcall ID, set Start ID and End ID the same.
Use the ‘UP’ and ‘DOWN’ arrow keys to select the required access level. Press 'END’ key to save.
Viewing Access Level
Select “Get Access Level” option from the “Access Menu”.
Use the number pad to enter in the Selcall ID to modify. Press ‘END’ to select.
33
The access level from transceiver to phone will be displayed for 2 seconds on the top line of the LCD and the access
from phone to transceiver will be displayed on the bottom line.
Telcall access parameters
Barred Prefix
This facilitates the ability to block certain phone number prefixes from being called via a Telcall.
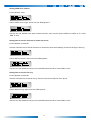
Select “Barred Prefixes” option from the “Telcall Setup” menu. This is located in the “Access Menu”.
Select the barred prefix to modify by using the ‘UP’ and ‘DOWN’ arrow keys to scroll between 0 and 9. Press ‘END’
to confirm which barred prefix to modify.
If the barred prefix already exists it will be displayed upon the bottom line otherwise the LCD cursor will be
positioned at the first number. The ‘CANCEL’ button will delete the last entered character, or cancel the operation
all together if the barred phone number is blank. Press ‘END’ to save the barred phone number.
Select another barred prefix to modify by using the 'UP' and 'DOWN' arrow keys. Press 'END' to confirm which
barred prefix to modify, or press 'CANCEL' to exit.
Local Number Length
If the received Telcall phone number is this length, then it is assumed to be a local phone number.
Select “Local Num Length ” option from the “Telcall Setup” menu. This is located in the “Access Menu”.
Select the local number length by using the ‘UP’ and ‘DOWN’ arrow keys to scroll between 6 and 10. Press ‘END’
to save.
34
TollFree Prefixes
This sets prefixes that are recognised as TollFree phone number prefixes during a Telcall.
Select “TollFree Prefixs” option from the “Telcall Setup” menu. This is located in the “Access Menu”.
Select the TollFree prefix to modify by using the ‘UP’ and ‘DOWN’ arrow keys to scroll between 0 and 4. Press
‘END’ to confirm which TollFree prefix to modify.
If the TollFree prefix already exists it will be displayed upon the bottom line otherwise the LCD cursor will be
positioned at the first number. The ‘CANCEL’ button will delete the last entered character, or cancel the operation
all together if the barred phone number is blank. Press ‘END’ to save the toll free prefix.
STD Prefixes
This sets which prefixes are recognised as STD phone number prefixes during a Telcall.
Select “STD Prefixes ” option from the “Telcall Setup” menu. This is located in the “Access Menu”.
Select the STD prefix to modify by using the ‘UP’ and ‘DOWN’ arrow keys to scroll between 0 and 9. Press ‘END’
to confirm which STD prefix to modify.
If the STD prefix already exists it will be displayed upon the bottom line otherwise the LCD cursor will be positioned
at the first number. The ‘CANCEL’ button will delete the last entered character, or cancel the operation all together
if the barred phone number is blank. Press ‘END’ to save the STD prefix.
35
Pre-recorded messages
Three pre-recorded messages can stored internally to the interconnect. They are used to provide information to the
users of the interconnect and can be up to 15 seconds long. The three messages are respectively;
“Welcome”. When someone calls into the interconnect from a phone line this message is played to the
phone line. This also can be used to provide instructions on the use of the interconnect.
“No Dial Tone”. When a phone call is made by the interconnect, the presence of a dial tone is checked first
(See Enabling Dial Tone Checking). If no dial tone is found then this message is transmitted to the
transceiver.
“Access Denied”. When a user of the interconnect attempts to use a feature that they have not paid for, this
message will be played.
Playing a Pre-Recorded Message
Select “Play Message” from the “Voice Msg’s Menu”.
Select the message to play.
The message will now be played to the interconnect’s front speaker.
Recording a Message
Select “Record Message” from the “Voice Msg’s Menu”.
Select the message to record.
Using a microphone plugged into the front panel, press the PTT button to start recording the message.
36
An indicator of the time left in the message will be displayed on the LCD. Release the PTT button when the message
is completed.
The message is not required to use the maximum length possible. Play back the message as explained above.
Erasing a Message
Select “Erase Message” from the “Voice Msg’s Menu”.
Select the message to erase.
The message is now erased.
37
Operational parameters
Selecting Channel Scan on Power-up
Factory Default: On
The normal operation of the interconnect requires that a number of channel frequencies be scanned for incoming
calls. The channels only programmed as “Scan” will be scanned (See ‘Adding / Editing a Channel’). Enabling scan
mode here will place the interconnect into scan mode and will also save this option.
Select “Scan on Powerup” from the “Operational Menu”.
Use the ‘LEFT’ and ‘RIGHT’ arrow keys to select “On” or “Off”. Press ‘END’ to confirm selection.
Selecting Automatic Mode on Power-up
Factory Default: Auto
The normal automatic operation of the interconnect means that any incoming phone calls will be automatically
answered and any received Selcalls, Telcalls or beacons will be automatically processed.
Select “Auto on Powerup” from the “Operational Menu”.
Use ‘LEFT’ and ‘RIGHT’ arrow keys to select “Auto” or “Manual”. Press ‘END’ to confirm selection.
Enabling Automatic VOX
Factory Default: Auto
'Automatic' VOX control removes the need for the telephone user to have to think about what is happening.
Whenever they say something, the transceiver is automatically switched to transmit. Whenever they stop or pause
for a while, it switches back to receive.
Select “Automatic VOX” from the “Operational Menu”.
38
Use the ‘LEFT’ and ‘RIGHT’ arrow keys to select “Auto” or “Manual”. Press ‘END’ to confirm selection.
Setting VOX Hang-up Timeout Period
Factory Default: 4 minutes
This option will terminate a phone call if the person on the phone line has not spoken within this period. This is to
assist with phone exchanges that do not generate a call progress tone when the phone is placed on-hook.
Select “VOX Timeout” from the “Operational Menu”.
Use the ‘UP’ and ‘DOWN’ arrow keys to select the maximum time in minutes to wait for someone on the phone to
speak. To disable the VOX timeout select “00 Minute(s)”. The maximum time out is sixty minutes, the minimum is
one minute. Press ‘END’ to confirm selection.
Setting Number of Busy Tones before Hangup
Factory Default: 5
This option will set the maximum number of busy cadences before the interconnect hangs up.
Select “Hangup Counts” from the “Operational Menu”.
Use the ‘UP’ and ‘DOWN’ arrow keys to select the maximum number of busy cadences. The maximum is ten, the
minimum is one. Press ‘END’ to confirm selection.
Setting VOX Hang-time
Factory Default: 0.5 seconds
This option determines how long to leave VOX enabled after the person on the phone line has finished speaking.
This helps to maintain a reliable PTT in between words or syllables.
39
Select “VOX Hangtime” from the “Operational Menu”.
Use the ‘UP’ and ‘DOWN’ arrow keys to select how long to leave VOX enabled after the person on the phone line
has finished speaking. Press ‘RIGHT’ arrow to confirm selection.
Setting VOX Threshold
Factory Default: Sensitive
This option determines the minimum threshold level for automatic VOX, when a person speaks on the phone line.
When this level is reached, then VOX is enabled.
Select “VOX Threshold” from the “Operational Menu”.
Use the ‘UP’ and ‘DOWN’ arrow keys to select the minimum threshold for automatic VOX. Choices are; Sensitive,
Normal, -3dB, and -6dB. Press ‘END’ key to confirm selection.
Setting Selcall Self ID
Factory Default: 45xx
This is the group Selcall ID owned by this unit. For example, the ID 45xx means that any Selcalls, Telcalls or
beacons sent in the range 4500 to 4599 will be acknowledged by this interconnect.
Select “Selcall Self ID” from the “Operational Menu”.
Use the ‘UP’ and ‘DOWN’ arrow keys to select the ID. Press ‘END’ to confirm selection.
40
Enabling Periodic Beacon
Factory Default: 10 minutes
This option generates a beacon that will be sent on every programmed channel. The interval in minutes determines
how often the beacon(s) will be sent.
Select “Periodic Beacon” from the “Operational Menu”.
Use the ‘UP’ and ‘DOWN’ arrow keys to select the interval in minutes that the beacons will be sent. To disable the
periodic beacon select “00 Minute(s)”. The maximum beacon interval is sixty minutes, the minimum is one minute.
Press ‘END’ to confirm selection.
Selecting the Charging Method
Factory Default: Time Charging
In addition to charging the client for the length of time on-line, a charge pulse can be setup to be sent from the
Telephone exchange at a unit time interval as determined by the telephone exchange charging rates. A unit interval
for example may be every 30 seconds for a long distant phone call. This is available to out going calls only.
The available pulse detection types are 50Hz, 12kHz and 16kHz. These may not be available in some countries.
A combination is not possible.
Select “Charging Method” from the “Operational Menu”.
Use the ‘UP’ and ‘DOWN’ arrow keys to select the charging type. Press ‘END’ to confirm selection.
Enabling the Printer
Factory Default: Yes, Enabled
Enabling this will generate printed information out of the printer port.
Select “Printer Enable” from the “Operational Menu”.
41
Use ‘LEFT’ and ‘RIGHT’ arrow keys to select “Yes” or “No”. Press ‘END’ to confirm selection.
Setting the Real Time Clock (RTC)
Select “Set Clock” from the “Operational Menu”.
Use the ‘UP’ and ‘DOWN’ arrow keys to select the day of the month. Optionally use the number keys to type in the
day of the month. Press ‘END’ to move onto the next field.
Use the ‘UP’ and ‘DOWN’ arrow keys to select the month. Press ‘END’ to move onto the next field.
Use the ‘UP’ and ‘DOWN’ arrow keys to select the year, or use the number keys to type in the year. Single digit
years(e.g. 01) must start with a zero. Press ‘END’ to move onto the next field.
Use the ‘UP’ and ‘DOWN’ arrow keys to select the hour of day (24 hour format). Press ‘END’ to move onto the next
field.
Use the ‘UP’ and ‘DOWN’ arrow keys to select the minute of the hour. Press ‘END’ to save new date and time.
(Seconds are set to zero).
Setting the Custom Start-up Message
A custom user start-up message can be displayed on power-up following the Barrett start-up message.
To modify the startup message, select “Startup Message” from the “Operational Menu”.
Use the ‘UP’ and ‘DOWN’ arrow keys to scroll through the possible characters. Press ‘END’ to move onto the next
character.
Repeat until both lines on LCD are done.
The final press of the ‘END’ key will save both lines to EEPROM. Pressing ‘CANCEL’ at any point will abort
changes.
42
Enabling the Scrambler
Factory Default: No, Disabled
This option is used to enable/disable all scrambler ID's that are enabled in the "Set Scrambler ID" menu option. (See
"Setting Scrambler ID for each User's Self Selcall ID").
Select “Scrambler Enable” from the “Operational Menu”.
Use the ‘LEFT’ and ‘RIGHT’ arrow keys to select “Yes” or “No”. Press ‘END’ to confirm selection.
Setting Scrambler ID for each User's Self Selcall ID
Sets the scrambler ID, for each individual user Selcall ID. Also enables / disables scramber for each Selcall ID.
Select “Set Scrambler ID” from the “Operational Menu”.
Enter a interconnect user's transceiver self Selcall ID using the number keys.
Press the ‘LEFT’ and ‘RIGHT’ arrow keys to enable / disable scrambler for the current Selcall ID. Press ‘END’ to
confirm selection.
Press the 'UP' and 'DOWN' arrow keys to select a Scramber ID for the current Selcall ID. Press 'END' to accept and
press 'CANCEL' to abort.
43
Setting RX Level when in PTT
Factory Default: Low
Sets the RX Level when the interconnect detects VOX, in duplex mode. Options are “High” and “Low”. When “Low”
is selected, RX Level is reduced by 20dB. When “High” is selected, audio is received at full power.
Select “PTT RX Level” from the “Operational Menu”.
Use the ‘LEFT’ and ‘RIGHT’ arrow keys to select “Low” or “High”. Press ‘END’ to confirm selection.
Enabling Mute during Scanning
Factory Default: Off
Enables mute while scanning.
Note; Speaker will be unmuted while receiving Selcalls and while online.
Select “Scan Mute” from the “Operational Menu”.
Use the ‘LEFT’ and ‘RIGHT’ arrow keys to select “On” or “Off”. Press ‘END’ to confirm selection.
44
Factory options
The “Factory Menu” is located in the ‘Operational Menu”, and it is used to reset various parameters to their factory
defaults.
Reset all to defaults
Select “Factory Rst All” from the “Factory Menu”.
Use the ‘LEFT’ and ‘RIGHT’ arrow keys to select “Yes” or “No”. Press 'END’ to confirm selection.
Reset operational only to defaults
Resets all operational parameters.
Select “Rst Operational” from the “Factory Menu”.
Use ‘LEFT’ and ‘RIGHT’ arrow keys to select “Yes” or “No”. Press ‘END’ to confirm selection.
Reset Selcall access levels only to default
Sets all access privileges to the defaults. e.g. access barred.
Select “Rst Access Level” from the “Factory Menu”.
Use ‘LEFT’ and ‘RIGHT’ arrow keys to select “Yes” or “No”. Press END to confirm selection.
45
Reset Call Progress Cadences to default
Resets cadences to defaults (e.g. Busy, Ring and Disconnect), which are Australian.
Select “Rst Cadences” from the “Factory Menu”.
Use ‘LEFT’ and ‘RIGHT’ arrow keys to select “Yes” or “No”. Press END to confirm selection.
Erase all channels
Select “Erase Channels” from the “Factory Menu”.
Use ‘LEFT’ and ‘RIGHT’ arrow keys to select “Yes” or “No”. Press ‘END’ to confirm selection.
Erase all preset phone numbers
Select “Erase Phone Num.” from the “Factory Menu”.
Use ‘LEFT’ and ‘RIGHT’ arrow keys to select “Yes” or “No”. Press ‘END’ to confirm selection.
Erase internal DataLog
Select “Erase Data Log” from the “Factory Menu”.
Use ‘LEFT’ and ‘RIGHT’ arrow keys to select “Yes” or “No”. Press ‘END’ to confirm selection.
46
Getting DataLog % Full
This will display how full the internal DataLog is.
Select “% Data Log Full” from the “Factory Menu”.
DataLog size is displayed as a percentage of total memory usage.
Enable configuration through PC serial port
This will enable using the Option Level 3 PC software through a NULL modem serial cable to configure the
interconnect.
Select “(RS-232) Program” from the “Factory Menu”.
The interconnect will now be placed in permanent computer control. Use the Option Level 3 software to talk to the
interconnect. To restart the interconnect turn the unit off and on.
47
ALE Configuration
Enabling/Disabling the ALE
To enable the ALE go to the "ALE Menu" and use the 'UP' and 'DOWN' arrow keys to choose the "ALE Enable"
menu option.
Press 'END' to save the option.
ALE Fill Mode
ALE fill mode is used to remotely configure the ALE board via the Windows ALE configuration software.
To go into ALE fill mode, go to the "ALE Menu" and use the 'UP' and 'DOWN' arrow keys to choose "ALE Fill Mode"
menu option.
To exit ALE fill mode, press the 'CANCEL' key.
Preset ALE Phone Numbers
For each ALE source address there is a corresponding preset phone number. These numbers are allocated
according to source address index ID's.
To enter a preset ALE phone number, go to the "ALE Ph Numbers" menu option in the "ALE Menu".
Press the 'UP' and 'DOWN' arrow keys to choose a source address index. Then press the 'RIGHT' arrow key to start
editing the phone number.
48
Enter the phone number through the key pad. When finished, press 'END' to save the current phone number and
to go onto the next index.
Press 'CANCEL' to exit out of the ALE phone number editor, or 'RIGHT' arrow key to edit the next ALE phone
number.
ALE Self ID
Factory Default: 0
This is the index of the 'Self ID' memory in which the desired 'FROM' address resides. This is used for transmitting
an ALE call from the telephone keypad, using the '*<dest ID>##' format, while online. <dest ID> is the index of the
'Other ID' memory in which the desired 'TO' address resides. See the "Embedded FED-STD-1045 ALE Card User's
Manual" for details.
To set the ALE Self ID, go to the "ALE Self ID" menu option in the "ALE Menu".
Press the 'UP' and 'DOWN' arrow keys to choose a source address index. Press the 'END' key to save the option.
Press 'CANCEL' to exit without saving.
49
Remote supervisory software
Program Overview
The purpose of this software is to communicate with a remote interconnect with the ability to examine and/or alter
its operational parameters, as well as download its call history log. See Interconnect Parameters.
Installation
Insert Setup disk 1 into floppy drive A:
Go to the Start button on the task bar (Windows 95), and click on the Run.. Command.
Find the file Setup.exe and double click on it.
Follow the on-screen prompts to install the software.
Main Screen
When the user initially starts the program, the main user screen is displayed. The screen is used to allocated clients
to a group file.
At the left of the main screen, is the list of interconnect sites. Select a site from the list to edit or download
operational parameters. The current selected site’s details are displayed in the site information box to the right. Sites
can be added, edited and removed with the add, edit and remove button respectively.
Note that once the modem is connected to a remote interconnect, the site cannot be changed, until the connection
has been terminated.
The lower right list shows a log of program activity. A mirror of this is saved to “win960.log”.
Press the dial button to connect to an interconnect remotely. Note; modem parameters must be configured first.
50
The config button allows configuration of interconnect parameters on or off-line. Any of the interconnect parameters
can be printed, uploaded or downloaded from here.
Whilst connected the dial button changes to a hangup button. Pressing the hangup button terminates the current
connection.
Menu Options
Creating a New Group File
Opens a new group file. A group file contains all the sites, and a shared interconnect configuration. All the sites in
the current group file share the same configuration parameters. To create a new interconnect configuration, create
a new group file. To create a new group file, go to the “New Group” option in the “File” menu.
Opening an Existing Group...
To open an existing group file, go to the “Open Group...” option in the “File” menu. A standard file dialog box will be
displayed. Enter a file name, and press OK. The new group file is opened for editing.
Copying a Group File’s Parameters
To Copy the 960 configuration parameters between the current group file, and a new group file, or existing group
file, go to the “File” menu and choose the “Copy Group” menu option. The new file dialog box is displayed. Enter
a file name, and press OK. The new group file is opened immediately after creation.
Setting Configuration Options
Sets the current serial port, modem parameters, and printer. These options are shared across all the site group files.
To access configuration options, go to the “Setup Port” option in the “File” menu.
Exit Program
All current options will be saved to disk. Go to the “File” menu and choose the “Exit” menu option.
Downloading All Interconnect Parameters
Open the appropriate Group File using the "Open Group..." option in the "File" menu. Select a Site from the sites
list. Connect to the Site using the Dial button. To download all the parameters, go to the "Site" menu and select the
"Download" menu option. A status bar will be displayed showing progress, and it will indicate which group of
parameters are being downloaded. Once it is finished, press Config to edit the parameters.
Uploading All Interconnect Parameters
To upload the current interconnect parameters, select the current site in the current group file. Go to the "Site" menu
and select the "Upload" menu option. A status bar will be displayed, and it will indicate which group of parameters
are being uploaded.
Charging Setup
Sets the charging rates for both local calls and long distance calls. ($/minute or $/call). These are used for creating
invoices for customers. Also, sets extra options for creating invoices. e.g. The text viewer used to view the invoice
file, and the invoice directory. To access charging options, go to the “Charging Setup” option in the “Charging” menu.
See the "Charging Setup" section.
Client Administrator
Used to generate invoices for customers. Allows the user to add new clients to the client database and allocate
certain selcall ID's to a client. To run the client administrator, go to the “Client Administrator” option in the “Charging”
menu. See the "Client Administrator" section.
51
Setup Window
The setup port window is accessed by going to the “File” menu and choosing the “Setup Port” menu option.
Baud Rate
This is the rate at which data is sent and received from the communications port. For newer high speed modems,
this should be set to 19200. For older 1200/2400 modems, this has to be set at the connect speed.
Communication Port
This is the serial port where the modem is connected to. Usually COM1 or COM2, depending on where mouse is
connected.
Flow Control
When communicating to modems at speeds greater than 9600 bps, it is recommended that hardware flow control
be used to prevent data loss.
Dialling Method
Tone/Pulse depends on what your telephone exchange supports. Tone dialling is much quicker.
Modem Initialisation String
The modem initialisation string is used to configure the modem, before dialling out. For a normal modem ("AT"
compatible command set) this is usually "ATZ". This will fetch the last saved modem settings. Consult your modem
reference manual for modem settings.
Printer
Selects the windows printer device to print to.
Local RS-232 Connection
Checking this box will allow the interconnect to communicate directly with a PC through a NULL modem cable. This
allows quick configuration of the interconnect “on the bench”. Communications will be set to a default of 9600 baud,
8 data bits, 1 stop bit and no flow control.
52
Adding Interconnect Sites
Each site has associated with it a name, phone number, pin number, and a number of user selectable automatic
events. The automatic events allows one to automatically upload any parameter settings of the interconnect and
download the call history without user intervention.
To add a site, press the Add button on the main window. To edit an existing site, press the Edit button on the main
window, after selecting a client to edit from the client list on the left. The following options are displayed;
Site Name
The name of the interconnect site in the current group. All sites in a group file share the same interconnect
parameters. To create a different configuration, go to the File menu and select the New Group menu option.
Phone Number
The phone number used to dial to a remote interconnect. Local RS-232 Connection must be disabled in the Setup
Port Window.
Pin Number
The pin number is a unique number assigned to each interconnect which allows remote access via modem.
Default Packs
Selects a standard interconnect configuration for this group of sites. Note; All sites in the current group file share
the same configuration parameters. Therefore, when a new default pack is selected, it will overwrite the
configuration for all sites.
53
Upload Operational Parameters
The interconnect operational parameters contained within the file will be uploaded as soon as a connection is seen.
Upload Channels
The interconnect channels contained within the file will be uploaded as soon as a connection is seen.
Upload Phone Numbers
The interconnect preset phone numbers contained within the file will be uploaded as soon as a connection is seen.
Upload Selcall Access Levels
If the site image file is valid, the interconnect selcall access levels contained within the file will be uploaded as soon
as a connection is seen.
Download and Erase Call History
The interconnect call history will be downloaded, processed and placed in the database as soon as a connection
is seen.
Hang-up on Completion
On completion of all the above auto events, if this is enabled, the modem will hang-up.
54
Dialling
Once a site has been selected from the sites list, hit the dial button. This will invoke a form that will initialise the
modem and then start dialling the site’s phone number. Any dialling errors like ‘no dial tone’ or ‘modem not
responding’ will be reported.
Once the interconnect has answered the phone call, it will start playing its custom voice message. Once this
message is complete, hit the connect button which will switch both modems into data mode. Alternatively this will
automatically be done after 30 seconds, removing any need for user intervention.
When a modem carrier is detected the dialling form will be closed, and any automatic events will be initiated. The
status of these auto events will be displayed in the program log. If ‘hang-up’ on auto completion is selected then
the modem will hang-up, otherwise the software will be left in an interactive (on-line) state, allowing the user to do
whatever they wish on-line.
55
Modifying the Interconnect’s Parameters
The parameters for the interconnect can be modified on or off-line. To modify the interconnect’s parameters, select
the interconnect site to modify and press the Config button.
The first step is to download the current interconnect parameters. To download the interconnect parameters, select
the tab containing the parameters to be downloaded, and press the download button.
Note; Only the parameters that are currently displayed will be downloaded. (e.g. operational, access, channels...).
These will only be saved to the site’s disk image file. Press cancel to abort any changes
The upload button is used to send the current configuration to the 960 interconnect. A transfer progress screen will
be displayed when uploading.
The print button will print the currently displayed parameters to the selected printer. The help button will display the
help file.
56
Operational Parameters
This panel displays the operational parameters of the remote interconnect. These are general settings that affect
the operational state of the interconnect.
Operational Settings
To access the operational settings, press the Config button on the main window. Go to the operational tab and select
operational parameters.
Version (Read Only)
This displays the software version of the remote interconnect.
Scan on Powerup
When checked, the interconnect will jump into scan mode when started, allowing multiple frequencies to be
monitored.
Auto Mode on Powerup
When checked, the interconnect will jump into automatic response mode to received selcalls, telcalls and phone
calls.
Printer Enabled
When checked, the printer (if connected) on the remote interconnect will print out event information. Eg. phone call
received, phone call made etc...
Automatic VOX
The VOX allows automatic detection of when the person on the phone is speaking. This in turn is used to activate
PTT (Press to Transmit) on the connected transceiver, hence allowing the voice from the phone to be transmitted
to air. When checked, this allows automatic detection of voice and activation of PTT.
57
Scrambler Enabled
When checked, the scrambler is enabled on the remote interconnect.
Scan Mute on Powerup
This option enables Scan Mute, which disables the speaker during scan. The speaker is re-enabled during receiving
Selcalls, and while the interconnect is online.
Periodic Beacon Period
The remote interconnect when off-line has the ability to send out a beacon on all available scannable channels to
indicate that there is an interconnect out there. The time is measured in minutes. A zero in this field disables the
periodic beacon.
Selcall Self ID
This is the self ID of the interconnect. The ID is the two most significant digits of a normal selcall ID. (e.g. 45xx)
All selcalls, telcalls (e.g. 4512) and beacon calls (e.g. 4599) on air with this ID will be acknowledged by the
interconnect.
ALE Self ID
Index to 'FROM' Address, used when sending ALE calls from the phone line.
VOX Inactivity Timeout
This is the maximum time that the remote interconnect will wait for the person on the phone to speak before the call
is terminated. The time is measured in minutes. A zero in this field disables the VOX inactivity timeout.
Hangup Count
This sets the number of busy tones before hangup, while the interconnect is online. The hangup count may need
to be varied for some countries, which have longer busy tones. (e.g 4 to 5 seconds, instead of 0.5 to 1 second
between busy tones. )
VOX Threshold
This option determines the minimum threshold level for automatic VOX, when a person speaks on the phone line.
The options are Sensitive, Normal, -3dB, and -6dB.
VOX Hangtime
This option determines how long to leave VOX enabled after the person on the phone line has finished speaking.
The time is measured in seconds.
Duplex Mode
When checked, the duplex mode is enabled on the remote interconnect.
PTT Rx Level Low
Selects Low level for RX when interconnect detects VOX, in duplex mode. When unchecked, transceiver RX is
received at full power.
ALE Enabled
When checked, the ALE is enabled on the remote interconnect.
AUX Rx Audio
When checked, the Auxiliary input is selected as the current transceiver source. Deselect this option to select the
950 input as the current transceiver source.
AUX BCD
When checked, the 974 (Aux) transceiver is selected as the source transceiver type. Deselect this option to select
the 950 transceiver as the source transceiver type.
58
Dial Settings
To access the Dial Settings, go to the Operational tab and select Dial Settings.
Tone Dialling
When checked, tone dialling will be used for outgoing phone calls, otherwise pulse dialling will be used.
Dial Tone Wait
This is the period to wait for before determining if a dial tone is present. The time is measured in seconds. A zero
in this field disables dial tone checking.
DTMF Tone Length
This is the length of one DTMF tone. This is only effective when tone dialling is selected. The time is measured in
milli-seconds.
PABX Prefix
When this is selected, a set prefix is inserted before all outgoing calls. This may be used in some PABX phone
systems to obtain an outside line. This prefix may be set in the text box following the PABX prefix option.
Line Reversal Detection
When checked, line reversal detection is enabled. Line reversal detection is a means of detecting when someone
answered the phone when an outgoing phone call is made.
Wait for Ring
This sets the amount of time to wait for the first ring, when dialling out. Time is in seconds.
Wait for Answer
This sets the maximum amount of time to wait the user to answer the phone, when dialling out. Time is in seconds.
Rings Till Answer
This sets the number of rings required before the interconnect will answer the phone. A zero in this field disables
the interconnect from answering the phone.
Rings Till Hang-up
This sets the number of rings to wait for when making a phone call before deciding that no one has answered.
Call Length
This is the maximum time online before the interconnect hangs up the phone.
Call Charging
This utilises a new method of monitoring the cost of the call in progress. If your exchange has enabled either the
50Hz, 12kHz or 16kHz subscriber charge pulses on your phone line then charging can additionally be made
according to the number of charge units received. Selecting the corresponding field will enable monitoring for it.
'Time' will select time charging. See the main section "Call Charging" in this manual.
59
Operational - Date/Time
To access the Date/Time parameters, go to Date/Time in the Operational tab.
Date/Time
Allows changing the date and time of the remote interconnect when 'Change Data/Time' check box is checked.
Startup Message
This displays the LCD (Liquid Crystal Display) user defined startup message when the interconnect is turned on.
60
Setting Preset Phone Numbers/Prefixes
Preset Numbers
To set preset numbers, go to Preset phone numbers in the Phone No’s tab. This panel displays preset phone
numbers internal to the remote interconnect that are dialled when a Selcall is received. The maximum phone
number length is 16 digits. There 98 preset phone numbers. Select the phone number index from the "Preset" list.
Enter a phone number for this index.
Long Distance
To set long distance prefixes, go to the long distance prefixes in the Phone No’s tab. This panel displays the long
distance phone number prefixes. The default is ‘0’. i.e. Any number beginning with ‘0’ will be classed long distance.
Select the prefix index from the "Prefix No" list. Enter a prefix for this index.
Toll Free
To set toll free prefixes, go to the toll free prefixes in the Phone No’s tab. This panel displays the toll free phone
number prefixes. The default is ‘008’ and ‘1800’. i.e. Any number beginning with ‘008’ or ‘1800’ will be classed as
free. This is globally effective to all users. Select the prefix index from the "Prefix No" list. Enter a prefix for this
index.
Barred
To set barred prefixes, go to the barred prefixes in the Phone No’s tab. This panel display’s the barred phone
number prefixes. The default is ‘0011’ and ‘0015’. i.e. Any number beginning with ‘0011’ or ‘0015’ will be barred.
This globally effective to all users. Select the prefix index from the "Prefix No" list. Enter a prefix for this index.
ALE Numbers
To set ALE numbers, go to the ALE numbers in the Phone No’s tab. This panel display's preset phone numbers
internal to the remote interconnect that are dialled when a standard ALE call is received. The maximum phone
number length is 16 digits. There 100 ALE phone numbers. Select the ALE phone number index from the "ALE"
list. Enter a phone number.
61
Programming Channels
This panel is accessed by going to the Channels tab.
This panel displays the preset channel frequencies for the remote interconnect. To set a channel, choose a channel
from the channel list. Receive frequency and transmit frequency are displayed for the current channel. The
frequencies are measured in kilo Hertz (kHz). When Scan Channel is checked, the current channel will be scanned
when the interconnect is in scan mode.
62
Selcall Access Levels
Each radio that calls into the interconnect has its own unique Selcall ID. Each selcall ID is assigned an access
privilege that determines the type of phone call that can be made through the interconnect, and the type of call it
can receive (e.g. Selcall or Telcall).
To modify access levels, select a selcall ID from the ID list. The current access levels are shown on the right. Select
Access from Radio to Phone from the available options. This is the access to the phone for the transceiver user.
Select Access from Phone to Radio from the available options.
The following access options are presented to the user;
Access from Radio to Phone
Preset Phone Number Calls
If set, only selcalls can be received from these ID(s). A preset phone number (if set) will be dialled according to the
least two significant digits of the sent selcall ID (i.e. 1-98).
Preset and all Local Calls
If set, selcalls and telcalls can be received from these ID(s). A preset phone number (if set) will be dialled when a
selcall is received. Only local phone numbers received in a telcall will be dialled. Toll free numbers will be allowed
through (See Telcall Setup).
Preset and all Local and Long Dist. Calls
If set, selcalls and telcalls can be received from these ID(s). Local and long distance phone calls will be allowed
through. (See Telcall Setup)
63
All Phone Calls (Except Barred Numbers)
If set, selcalls and telcalls can be received from these ID(s). Every call received will be dialled, except barred
numbers.
Barred from receiving Selcalls and Telcalls
If set, this selcall ID will not be able to make any phone calls through this system.
Access from Phone to Radio
Selcalls Only
If set, this selcall ID can receive selcalls only from the interconnect.
All Selcalls and Telcalls
If set, this selcall ID can receive all selcalls and telcalls.
Barred from receiving Selcalls and Telcalls
If set, this selcall ID will not be able to receive any selcalls or telcalls from the interconnect.
64
Scrambler ID's
Each transceiver that calls into the interconnect has its own unique Selcall ID. Each Selcall ID has a corresponding
scrambler ID, and an option to enable or disable the scrambler for each Selcall ID. There is also an option to enable
or disable the scrambler for all scrambler ID’s. (See Operational Parameters section).
To set the scrambler ID’s;
1) Select the selcall ID to modify.
2) Select the scrambler ID from the listbox on the right.
3) Check the Enable option to enable the scrambler for the selected selcall ID.
65
Data Log (Option Level 2&3 Interconnects Only)
This panel displays the current state of the internal data log of the remote interconnect.
Shown at the top of the screen is the percentage of memory used by the datalog in the interconnect. When this
becomes full, press the Erase button. Press the Refresh % button to update the percentage display.
To download the internal data log, press the download button. After the datalog is downloaded, it is processed and
added to the datalog database. The datalog is used by the call charging component as a record of all transactions
on the interconnect. (e.g. connect time, disconnect time, etc. )
66
Call Charging
Introduction
The remote supervisory software may be used to produce a bill for customers.
Setting Charging Rates
Before producing a bill, the charging rates must be set. Calls can be charged according to whether the incoming
phone call produced a Selcall, Telcall, or ALE Call to link to the remote transceiver. These can be set by going to
“Charging Setup” in the “Charging” menu and typing in a new rate for "Selcalls", "Telcalls" and "ALE Calls" (in
dollars).
If the call was invoked by an incoming Selcall, Telcall, or ALE call, then calls can be charged according to the type
of phone call made by the transceiver user. (e.g. local, STD, toll free, etc). Go to “Charging Setup” in the “Charging”
menu and type in a new rate for “Local Phone Calls” and “Long Distance” (in dollars).
Using Time Charging
To enable time charging, time charging must be enabled on the 960 interconnect. See "Call Charging" in "Dial
Settings". Then go to the "Charging Setup" in the "Charging" menu. Select "$ / Minute" in the "Phone Rate" option
and "Selcall Rate" option.
Using Charge Pulse Scheme
In some areas charge pulses can be used to calculate charging rates. To enable the charge pulse scheme, go to
“Charging Setup” in the “Charging” menu. Select the “Use charge pulse scheme if available” option. Set the “Charge
Pulse” rate (in dollars). Also pulse charging must be set in the 960 interconnect configuration. See "Call Charging"
in "Dial Settings".
67
Invoice Options
Invoice options are used to determine how the bill will be produced.
Optionally, the produced invoice can be viewed by a Windows text editor. The default editor is notepad. To modify,
go to “Charging Setup” in the “Charging” menu. Select the “View invoice with” check box. Enter a name for the
executable of the program used to open the invoice file.
Even though it is possible to use notepad to print the invoice file, it is better to use the built in printer option to print
the invoice. Select “Print invoice once generated” to send the invoice to the default printer, which is selected by
going to the printer option in the “Port Setup” window.
Once the invoice is produced, it is stored in a text file in the directory of your choice. To modify, go to “Charging
Setup” in the “Charging” menu. Go to the “Invoice Directory” option. Enter a new directory.
68
Adding/Editing Clients
Each invoice has a client name at the top. This client name must be entered prior to generating an invoice.
Associated with each client, is a list of selcall ID’s that are reserved for this client. Once a selcall ID is allocated, it
can’t be allocated to any other client.
To add a new client, go to “Client Administrator” in the “Charging” menu. Press the “Add” button to invoke the client
editor.
Enter a “Client Name”. This is the name of the company providing the interconnect service to it’s customers.
Optionally, enter a contact phone number, fax number, and address. These will be shown at the top of the generated
invoice. Any comments entered, will be displayed on the invoice as well.
To add selcall ID’s to this client, select the selcall ID from the “Unallocated Selcall ID’s” list, and press the “+” button.
To remote selcall ID’s, select the selcall ID from the “Owned Selcall ID’s” list, and press the “-” button.
Once finished press the OK button to save the client to the database, or press Cancel to abort.
To edit an existing client, select the client from the “Client’s Name” list in the Client Administrator. Press the “Edit”
button. The existing client options will be displayed. Modify and then press the “OK” button to save to the database.
To remove an existing client from the client database, press the “Remove” button in the Client Administrator. All
selcall ID’s allocated to that client will also be removed.
69
Building Invoices
Choosing a Client
Open the Client Administrator by going to the "Client Administrator" submenu in the "Charging" menu.
Select a client from the clients list. To select multiple clients, hold down the 'CTRL' key and select another client.
See Creating New Clients.
Choosing a Selcall ID
Alternatively, choose a Selcall ID from the list of allocated selcall ID’s. These Selcall ID’s were allocated to a
particular client when the client was created. See Creating New Clients
Month/Year Field
Next, select the month and year that the invoice will cover
Build Invoice Button
To build the invoice file, press the Build Invoice button. A new invoice will be created and placed in the directory set
in the Charging Setup Window. If selected, the invoice will also be displayed in the text editor set in the Charging
Setup Window. To print the invoice, select the Print invoice once generated option in the Invoice Options section,
in the Charging Setup Window.
70
APPENDIX - A
Primary Screen/ Menu Key Functions
Key
Primary Screen Function
Menu Function
Enter the main menu
Saves parameter
Auto / Manual mode
Enters the digit '0'
Scan / No Scan
Aborts parameter
Changes channels
Numeric key '1'
Enters the digit '1'
Changes channels
Numeric key '2'
Enters the digit '2'
Changes channels
Numeric key '3'
Enters the digit '3'
Change channels
Numeric key '4'
Enters the digit '4'
Change channels
Numeric key '5'
Enters the digit '5'
Change channels
Numeric key '6'
Enters the digit '6'
Change channels
Numeric key '7'
Enters the digit '7'
Change channels
Numeric key '8'
Enters the digit '8'
Change channels
Numeric key '9'
Enters the digit '9'
Enters the Manual Menu
None
Enables / Disables Mute
Enter sub-menu
Changes channels (increment)
Scroll menu options (Up)
Changes channels (decrement)
Scroll menu options (Down)
71