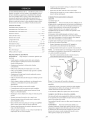
1
Operator's
//
//
//
Manual
tl °
10"
BAND SAW
Model No.
124.214000
CAUTION:
Read and follow
all Safety Rules and Operating
Instructions
before First Use
of this Product.
Sears Brands
www.craftsma
n.com
Management
Corporation
Hoffman
Estates,
IL 60179
//
//
BE PREPARED FOR JOB
Warranty .................................................
2
Safety Rules ............................................
Unpacking
Wear proper apparel. Do not wear loose clothing,
gloves, neckties, rings, bracelets or other jewelry
which may get caught in moving parts of machine.
2-3
..............................................
Wear protective
3
Assembly .............................................
Installation .............................................
3-4
5-6
Operation ...........................................
Maintenance ...........................................
Wear safety glasses complying with United States
ANSI Z87.1. Everyday glasses have only impact
resistant lenses.They are NOT safety glasses.
6-10
10
Troubleshooting
.......................................
Parts Illustrations and Lists ...........................
11
12-13
Espa_ol .............................................
16-25
hair covering to contain long hair.
Wear safety shoes with non-slip soles.
Wear face mask or dust mask if operation
is dusty.
Be alert and think clearly. Never operate power tools
when tired, intoxicated or when taking medications
that cause drowsiness.
PREPAREWORK AREA FOR JOB
Keep work area clean. Cluttered work areas invite
accidents.
CRAFTSMAN ONE YEAR FULL WARRANTY
Do not use power tools in dangerous environments.
Do not use power tools in damp or wet locations. Do
not expose power tools to rain.
FOR ONE YEAR from the date of purchase, this product is
warranted against any defects in material or workmanship. A
defective product will receive free repair or replacement if the
repair is unavailable.
For warranty coverage details to obtain free repair or replacement, visit the website: www.craftsman.com
Work area should be properly lighted.
Proper electrical receptacle should be available for
tool.Three-prong
plug should be plugged directly
into properly grounded, three-prong receptacle.
Extension cords should have a grounding prong and
the three wires of the extension cord should be of
This warranty does not cover the blade, which is an expendable part that can wear out from normal use within the
warranty period.
This warranty is void if this product is ever used while providing commercial services or if rented to another person.
the correct gauge.
Keep visitors at a safe distance from work area.
Keep children out of workplace. Make workshop
childproof. Use padlocks, master switches or remove
switch keys to prevent any unintentional use of
power tools.
This warranty gives you specific legal rights, and you may
also have other rights, which vary, from state to state.
Sears Brands Management
Corp., Hoffman Estates, IL. 60179
TOOL SHOULD BE MAINTAINED
Always unplug tool prior to
PROPOSITION
65 WARNING:
Some dust created
by power sanding, sawing, grinding, drilling and other
construction activities contains chemicals known to the
Keep tool lubricated
state of California to cause cancer, birth defects or
other reproductive harm.
and clean for safest operation.
Keep all parts in working order. Check to determine
that the guard or other parts will operate properly
and perform their intended function.
. Lead from lead-based paints.
. Crystalline silica from bricks and cement and other
masonry products.
Check for damaged parts. Check for alignment of
moving parts, binding, breakage, mounting and any
other condition that may affect a tool's operation.
lumber.
Your risk from these exposures vary, depending on how
often you do this type of work.To reduce your exposure
to these chemicals:work
in a well ventilated area and
A guard or other part that is damaged should be
properly repaired or replaced. Do not perform
makeshift repairs. (Use parts list provided to order
replacement parts.)
work with approved safety equipment. Always wear
OSHA/NIOSH
approved, properly fitting face mask or
respirator when using such tools.
WARNING:
instructions
and adjust-
Remove adjusting tools. Form habit of checking to
see that adjusting tools are removed before switching machine on.
Some examples of these chemicals are:
. Arsenic and chromium from chemically-treated
inspection.
Consult manual for specific maintaining
ing procedures.
KNOW HOWTO USETOOL
For your own safety, read all of the
and precautions before operating tool.
Use right tool for job. Do not force tool or attachment
to do a job for which it was not designed.
CAUTION:
Always follow proper operating procedures
as defined in this manual -- even if you are familiar
with use of this or similar tools, Remember that being
careless for even a fraction of a second can result in
severe personal injury,
Disconnect tool when changing
blade.
Avoid accidental start-up. Make sure that the tool is
in the "off" position before plugging in.
2
Do not force tool. It will work most efficiently at the
rate for which it was designed.
Keep hands away from moving parts and cutting
surfaces.
Never leave tool running unattended.Turn the power
off and do not leave tool until it comes to a complete
stop.
Do not overreach. Keep proper
footing and balance.
Never stand on tool. Serious injury could occur if tool
is tipped or if blade is unintentionally
contacted.
Know your tool. Learn the tool's operation,
tion and specific limitations.
applica-
D
A
Use recommended accessories. Use of improper
accessories may cause risk of injury to persons.
Handle workpiece correctly. Protect hands from possible injury.
Turn machine off if it jams. Blade jams when it digs
too deeply into workpiece. (Motor force keeps it
stuck in the work.) Do not remove jammed or cut off
pieces until the saw is turned off, unplugged and the
blade has stopped.
Maintain proper adjustment
guides and thrust bearings.
of blade tension, blade
Adjust upper guide to just clear workpiece.
Hold workpiece firmly against table.
DIRECTION OF FEED:Feed work into a blade or
cutter against the direction of rotation of the blade or
cutter only.
WARNING:
The operation of any power tool can result
in foreign objects being thrown into the eyes, which can
result in severe eye damage. Always wear safety goggles
complying with United States ANSI Z87.1 (shown on
package) before commencing power tool operation.
Safety goggles are available at SearsStores or Craftsman Outlets
Check for shipping damage and missing parts. If item is
damaged or parts missing, call 1-800-469-4663.
Model 124.214000 10" band saw is shipped complete
in one box.The band saw comes assembled as one
unit. Additional parts which need to be fastened to the
saw should be located and accounted for before
assembling (see Figure 1).
A Main Machine (1)
B Fence Assembly (1)
C Table (1)
D Guide Rail (1)
G
E
Figure 1 - Unpacking Band Saw
IMPORTANT: Table is coated with a protectant.To
ensure proper fit and operation, remove coating.
Coating is easily removed with mild solvents, such as
mineral spirits, and a soft cloth. Avoid getting solution
on paint or any of the rubber or plastic parts. Solvents
may deteriorate these finishes. Use soap and water on
paint, plastic or rubber components. After cleaning,
cover all exposed metal surfaces with a light coating of
oil. Paste wax is recommended for table top.
WARNING:
Never use highly volatile solvents. Non
flammable solvents are recommended to avoid possible
fire hazard.
CAUTION:
Do not attempt assembly if parts are missing. Use this manual to order replacement parts.
The machine is supplied partly assembled. Prior to use,
the following items have to be installed:Table, blade
tension knob and rip fence.
WARNING:
To avoid injury, do not attempt to run or
use this machine until all parts are assembled and
working properly.
ASSEMBLE TABLE TRUN NION
Assemble the upper table trunnion to the lower table
trunnion with carriage bolt, glide piece, washer and
wing nut. Place the table on to the upper table trunnion, taking care when passing the saw blade
through the slot of the table (see Figure 2).
E Owner's Manual (1)
F UpperTableTrunnion
Assembly (1)
G Bag of Loose Parts (1)
Parts bag includes: Blade Tension Knob (1), Miter Gauge
(1), Hex Socket Head Cap Screw M6x30 (1), Washer
M6 (1), Wing Nut M6 (1), Hex Bolt M6xl 2 (4), Lock
Washer M6 (4), Star Knob Screw (2), Washer M6 (2),
M3 Hex "L_'Wrench (1), M5 Hex "L_'Wrench (1).
Figure 2 - AssembleTrunnion
Table
Locate four hex bolts and four lock washers from the
bag of loose parts. Mount the table to the upper table
trunnion and install a bolt with washer in each hole, and
then tighten with adjustable wrench.
CENTERINGTHE TABLE
Loosen the four hex bolts mounting
upper table trunnion
the table to the
(see Figure 3).
Figure 5 - Set Indicator to Zero
FASTENGUIDE RAIL
aex
Fasten the guide rail with two each star knob screw
and washer to the table. Use the hex socket head
Bolt
Hex Bolt
cap screw, washer and wing
working
table flatness
nut for correcting
the
(see Figure 6).
Figure 3 - Hex Bolts forTrunnion
Move the table sideways as required, until the saw
blade runs through the center of the table insert.
If moving the upper table trunnion is not enough to
center the table, loosen the four flange nuts holding
the lower table trunnion and move the table sideways to place the table in the center.
Re-tighten hex bolts for trunnion and flange nuts,
recheck the saw blade position.
Figure 6 - Fasten Guide Rail
INSTALL RIP FENCE
SE'FFINGTABLE SQUARETO SAW BLADE
Lay the rip fence onto the guide rail. Adjust the rip
fence parallel to the saw blade.Tighten
rip fence
Refer to Figures 4 and 5.
Loosen the knob on the lower table trunnion
a suitably
sized square against
table requires
adjustment,
Using a wrench,
and place
handle
by pressing
downward
(see Figure 7).
the saw blade. If the
proceed
as follows:
release the hex nut on the frame
(see Figure 4).
ii
.....
uare
===
Hex Bolt
Figure 7 - Install Rip Fence
INSTALL BLADETENSION KNOB
Place the blade tension
Figure 4 - SquareTable to Saw Blade
tensioner
knob on to the blade
(see Figure 8).
Place the wrench on the hex bolt and adjust until the
table is square to the saw blade (see Figure 12).
Blade
Tension
Tighten the hex nut and recheck the saw blade and
the table for squareness.
Knob
Lock the table into position and check that the indicator reads zero degree on the side of lower table
trunnion. Loosen the screw securing the indicator
and reset if necessary to give zero degree reading
(see Figure 5).
Figure 8 - Install BladeTension Knob
4
STABILIZE MACHINE
To ensure sufficient upright stability of the machine it
should be bolted to floor, bench or worktable. For
this purpose 6mm holes are provided in the
machine's base. Mounting hardware not provided.
(see Figure 9).
MOTOR
The band saw is supplied with a 1/3 HP Motor.
The 120 Volt AC motor has the following
Horsepower
specifications:
...........................................
1/3
Voltage ...............................................
120
Amperes ..............................................
3.5
Hertz ..................................................
60
Phase ..............................................
Single
RPM .................................................
WARNING:
performed
Figure 9 - Stabilize Machine
must be
by a qualified electrician.
ELECTRICAL CONNECTIONS
USE SUITABLE DUST COLLECTOR
The band saw has a 2
Figure 10).
1720
All electrical connections
_" dust port included
WARNING:
(see
Make sure unit is off and disconnected
from power source any time wiring is inspected.
It is recommended that when in use, the band saw is
connected to a suitable dust collector.
POWER SOURCE
Band Saw is prewired for 120 volt, 60 HZ power source.
The motor is designed for operation on the voltage and
frequency specified. Normal loads will be handled safely on voltages not more than 10% above or below the
specified voltage.
Running the unit on voltages which are not within the
range may cause overheating and motor burn-out.
Heavy loads require that the voltage at motor terminals
be no less than the voltage specified. Power supply to
the motor is controlled by a single pole toggle switch.
Figure 10- Dust Port
Blade Tension Knob
Locking Knob
Guide
ge
GROUNDING
INSTRUCTIONS
WARNING:
Improper connection of equipment
grounding conductor can result in the risk of electrical
shock. Equipment should be grounded while in use to
protect operator from electrical shock.
Check with a qualified electrician if grounding
instructions are not understood or if in doubt as to
whether the tool is properly grounded.
Lock Switch
Rail
Blade
This tool is equipped with an approved 3-conductor
cord rated at 150V and a three prong grounding type
plug or your protection against shock hazards.
Grounding plug should be plugged directly into a
properly installed and grounded 3- prong groundingtype receptacle, as shown (Figure 12).
Knob
Guide Post
Grounding
Prong
Adjusting
3-Prong Plug
Grounded Outlet
Properly
__
_'_-'____-
Upper Table Trunnion
Lower Table Trunnion
Dust Port
Figure 11 - KnowYour Band Saw
Figure 12 - 3-Prong Receptacle
Do not remove or alter grounding prong in any
manner. In the event of a malfunction or breakdown,
grounding provides a path of least resistance for
electrical shock.
WARNING:
Do not permit
nals of plug when
installing
Plug must be plugged
properly
installed
fingers
to touch
or removing
into matching
and grounded
EXTENSION
the termi-
from
outlet.
outlet
that
in accordance
Wire
is
by a qualified
with
electrician.
Inspect tool cords periodically,
and if damaged,
have
repaired by a Sears or other qualified
service dealer.
Green (or green and yellow) conductor
grounding
wire. If repair or replacement
tric cord or plug is necessary,
green
Where
must
(or green
a 2-prong
be replaced
with
a properly
WARNING:
This work
fied electrician.
A temporary
Figure
3-prong
or fire, any repairs
be done
grounded
3-prong
National
surface
Electric
adapter
plugs
(see
It is designed
Depth
quick
many different
tensioning
makes blade
a rip fence
and comprehensive
changing
of throat
at 90 °. ................................
depth
of cut at 45 °. .........................
Connected
To A Known
Ground
This Is
Table tilt
diameter
Blade
length
Use the table to determine
(A.W.G.) extension
.......................................
W'- V/'
Blade
....................................
speed
dimensions
grounding
plugs
accept
type
cords
and 3-pole
having
weight
Dust collection
WARNING:
cautions.
If the extension
cord
immediately.
it
is worn,
port
73 Ibs
..................................
Always
observe
Use the appropriate
being cut.
which
size
2'//'
the following
safety
blade. Replace
are missing
are positioned
blade for the workpiece
pre-
dull blades
correctly.
that
or blades
is tensioned
properly
and going
blade speed for the work.
For optimum
performance,
do not stall the motor
reduce the speed. Use the proper feed pressure.
3-prong
which
in any
Secure the workpiece
in a stable
Check
are attached.
that all guards
After turning
speed.
6
is
teeth.
Make sure the blade
in the right direction.
wire size
cut, or damaged
66 Ibs
....................................
Whenever
adjusting
or replacing
any parts on the
band saw turn, switch off and remove plug from
power source.
the tool plug.
way, replace
21 x 14 x 34"
SAFETY PRECAUTIONS
voltage.
receptacles
2780 FPM
...........................
.............................................
Use the proper
extension
10"
Blade width
Shipping
cord.
Use only 3-wire
0 ° to 45 °
......................................
70V/'
Use a sharp
the minimum
23A"
121/2 x 13 34"
.........................................
Weight
and loss of power.
adequate
4_"
.........................................
Wheel
Overall
cord will cause some drop
and maintain
9_"
Maximum
Make sure the blade guides
to carry the current
A con-
tracking
port.
Table size ....................................
be of sufficient
a miter
and easy. Saw
of cut at 90 ° . .........................
EXTENSION CORDS
cord must
quick
and dust collection
depth
Many cover plate screws, water pipes and outlet boxes
are not properly grounded.To ensure proper ground,
grounding means must be tested by a qualified electrician.
of the extension
with
operations.
Maximum
Do not use a 3-prong to 2-prong grounding adapter
unless permitted by local and national codes and
ordinances. (A 3-prong to 2-prong grounding adapter
is not permitted in Canada.) Where permitted, the
rigid green tab or terminal on the side of the adapter
must be securely connected to a
permanent electrical ground such as a properly grounded water pipe,
a properly grounded outlet box or a properly grounded wire system.
in voltage
using
for cutting
saw is equipped
Make Sure
2-Prong Receptacle
Wires
electrician,
SPECIFICATIONS
Figure 13 - 2-Prong Receptacle with Adapter
The use of any extension
avoid
system
10 inch Bench Top Band Saw features weldconstruction
and a solid cast iron table
for performing
also features
to a two
Lug
Adapte_
be grounded.To
to electrical
parts.
to insure durability.
venient
by a quali-
grounded.
3-Prong
must
by a qualified
hard and soft woods.The
gauge
grounding
for connecting
only
replacement
mechanism
if it is properly
Grounding
This machine
electrocution
The Craftsman
ed steel frame
it
be performed
to 2-prong
13) is available
3ole outlet
should
WARNING:
genuine
cords over 25 ft. long is not
the
is encountered,
receptacle
installed in accordance
with
Code and local codes and
ordinances.
extension
should
wire to a live terminal.
wall receptacle
NOTE:
Using
recommended.
18
in cord is the
of the elec-
do not connect
and yellow)
A.W.G.
Up to 25 ft ..............................................
all local codes and ordinances.
Do not modify plug
provided.
If it will not fit in outlet, have proper outlet
installed
CORD LENGTH
Size
the switch
or
position.
on, let the blade come
to full
CORRECT
HANDPLACEMENT
Slowly
feedtheworkpiece
towards
thesawblade
putting
0nlylightpressure
onit.Withbothhands,
firmlyh01d
theworkpiece
downonthetable,
and
feedittowards
thesawblade
slowly.
3effect
Thesawblade
cutsonacontinuous
downstroke.
To
avoidinjurywhenhands
areunavoidably
nearthe
sawblade,
place
themoneither
side0ftheblade
(See
FIG.
13B),
notinlinewithit(SeeFIG.
13C).
13C
Blade
Useapushstick
whenever
possible
whenworking
in
close
proximity
tothesawblade.
FURTHER
SAFETY
PRECAUTIONS
Keep
hands
away
Always
wear
Always
stop
from
Never
attempt
turn
backed
out
Make
ON/OFF
Refer
moving
parts.
off
removing
that
does
support
firmly
the
that
not
have
a flat
and
feed
it
machine
if the
blade
into
the
blade
material
is to
be
cut.
tension
blade
cuts
before
tension
cutting
when
period
long
the
curves.
saw
will
not
be
Figure
saw
aged
or
starting
is missing,
broken,
operation
the
band
part
is properly
The
ON/OFF
saw
column.To
as the
motor
a safety
saw
off
has
been
or
saw
saw
ing
saw
To
change
cord,
the
particular
on
the
left
pull
the
switch
push
the
front
be
followed:
switch
to
the
the
can
the
be
locked
switch.To
Turn
the
from
power
the
key
key
removed.
be
turned
OFF
out.The
Should
ON
the
to
the
position,
on
replace
unauthorized
use
by
adjustments
before
cord
hands
when
from
with
saw
avoid
blade
the
from
saw
blade
the
band
handling
delivery.
must
unexpected
or
saw
saw
to
procedure
starting,
carrying
off
outlet.To
the
prior
following
injury
main
a general-purpose
is set
the
the
SAW
and
remove
avoid
blade,
out
the
injury
wear
to
gloves
necessary.
the
rip
screw
from
the
upper
fence,
the
the
guide
rail,
the
wing
nut
table.
and
lower
doors
by turning
the
door
knobs.
sion
the
knob
blade
on
the
counterclockwise
tension
top
until
from
by
of the
the
above).
See
turning
the
upper
blade
wheel
saw
blade
Figure
15.
ten-
housing
has
slackened
lock-
switch:
position
switch
key
the
be
switch
and
cannot
removed
can
disconnect
saw
be
turned
from
be
turned
the
slot
on
the
switch
off
but
with
at
cannot
again.
key,
slide
key
into
Switch
\
Switch
on
switch
until
Figure
it snaps.
Key
15-
Remove
wheels.
BladeTension
the saw
Switch
blade
the new
blade tracking
The saw blade
saw wheels.
14 - ON/OFF
Knob
from
the
upper
and lower
When fitting
the new saw blade ensure the blade
teeth are pointing
downwards
and towards
you at the
position
where
the saw blade passes through
the
table.
Re-tension
Figure
been
adjustments
transit.
these
blade,
switch
power
Loosen
clown
have
the
source.
Pull
the
lock
switch
the
NOTE:
from
saw
To
locking
up
the
changing
Open
of the
to
is in
verify
guides
However,
ADJUSTINGTHE
blade;
the
and
power
it until
blade
is factory-equipped
cutting
(viewed
saw
To
AND
Remove
replaced.
ON,
OFF,
damother
position.
The
band
whenever
of your
or
or the
unplug
is located
turn
turn
part
switch,
device
and
repaired
switch
position.To
if any
malfunctioning,
such
control,
turn
check
saw
to
CHANGING
BLADE
whenever
14.
the
and
factory.
saw.
adjustments,
Before
band
while
WARNING:
of time.
SWITCH
to
change
wood
tracking
tension
at the
It is recommended
This
and
tracking,
adjusted
operating
adjusted.
WARNING:
blade
properly
scrap
is used.
uncompleted
the
a long
ADJUSTMENTS
The
speed.
blade
for
stock
material
"relief"
used
all
shield.
before
a suitable
properly
Release
saw
saw
of an
sure
Make
and
or face
may
to
hold
Always
blade
table.
at a moderate
are
band
unless
Always
the
protection
the
pieces
surface,
from
eye
saw blade
and check
the
saw
by turning
the upper wheel
by hand.
should
run in the center
of the band
If need adjust the tracking
procedures
for TRACKING
of the saw blade,
THE SAW BLADE.
Replace the rip fence, the
and screw to the table.
guide
Close the upper and
locking
knobs before
lower doors
reconnecting
rail, the
wing
follow
nut
by turning
the door
the power
supply.
!/
TRACKINGTHE SAW BLADE
Set the tracking
Adjust
of the saw blade before
setting
the guide adjust-
ing screw (B).
blade guides.
Once the saw blade is installed
and tensioned,
track the
saw blade by adjusting the tracking knob by hand (see
Figure 16).The saw blade should run in the center of
the band saw wheels.When
achieved
the rear roller guide to be just clear of the
back of the saw blade by unlocking
the
lock the tracking
the correct adjustment
knob with the locking
When the correct
adjustment
rear roller guide in position
is reached,
lock the
with the guide adjusting
screw (B).
Blade Gullet
is
knob.
Guide Adjusting
Screw (B)
1/16"
her Handle
Guide
Guide Adjusting
(A)
Carrier
Figure 18 - Adjusting Blade Guides
Tracking Knob
LOWERBLADE GUIDE
Figure
16 - SetTracking
Refer to Figure
of Saw Blade
To adjust
right and left roller guides relative
SETTINGTHE CUTI-ING HEIGHT
The upper
practical
blade guide should
slackening
be set as close as
against the workpiece.
To adjust this height,
housing
knob at the
(see Figure 17).
the
to the blade by
the lock nut and moving
the guide carrier
tJ
until both roller guides are approximately
the gullets
loosen the locking
side of the upper wheel
19.
the lower blade guides, first position
of the saw blade. (See Figure
_A6 behind
18)
Set both roller guides to within
]/32" of the saw blade
by releasing
screw (C) on each
the guide adjusting
side of the saw blade. Do not set the roller guides
Guide Post
Knob
too close as this will adversely
saw blade.
Adjust
affect the life of the
the rear roller guide to be just clear of the
back of the saw blade by unlocking
the guide adjust-
ing screw (D).
When the correct
Locking Knob
adjustment
rear roller guide in position
is reached,
lock the
with the guide adjusting
screw (D).
Guide Carrier
Figure
17 - Setting
Cutting
Set the blade guide to the required
the guide post adjusting
Tighten
locking
Guide Adjusting
Screw (C)
Depth
height
by turning
knob.
knob after setting.
ADJUSTINGTHE BLADE GUIDES
Guide Adjusting
UPPER BLADE GUIDE
Figure 19- Adjusting Blade Guides
See Figure 18.
To adjust the upper blade guides, first position
right and left roller guides
slackening
the ratchet
the
relative to the blade by
handle (Figure18)
the guide carrier until both
mately
Screw (D)
and moving
roller guides are approxi-
1A6" behind the gullets
of the saw blade.
Set both roller guides to within
]/32" of the saw blade
by releasing
screw (A) on each
the guide adjusting
side of the saw blade. Do not set the roller guides
too close as this will adversely
saw blade.
affect the life of the
TILTING THETABLE
For bevel cuts, the table tilts 0 through
45 degrees.
To tilt the table, loosen the knob on the table trunnion, set the table to the required
angle and tighten
the knob again (see Figure 20, page 9).
It is recommended
to verify the correct angle setting
using an angle guide, or by making
wood. Adjust
the indicator
Phillips head screwdriver.
trial cuts in scrap
accordingly
by using a
BLADETHICKNESS
Blade thickness
describes
sides of blade. A thicker
the distance
between
blade has more
rigidity
and
stronger
teeth.
A narrow
thick blade is used to cut curves while
wide thin
blade is used to make long, straight
a
cuts.
BLADE PITCH
Pitch describes
Knob
Figure
20 -Tilting
theTable
The locking pressure of the rip fence has been factoryset; if adjustment
is required proceed as follows:
Raise the fence handle to horizontal
position.
Turn the fence handle clockwise to increase clamping pressure, counterclockwise
to decrease clamping
pressure (see Figure 21 ).
After counterclockwise
turning
ing the rip fence to the desired
rail (see Figure 21).
the fence handle,
position
slid-
on the guide
position.
a
may lead to deformation
of the end clamp at the rear of
the rip fence. Set the fence handle to apply just enough
during
blade has between
of
6
When cutting hard materials, where shocking is more
detrimental,
use a blade with 8 to 12 teeth per inch.
There should
tact with
always be at least three
cut to avoid shocking
teeth
in con-
blade.
Blade shocking occurs when pitch is too large and
blade tooth encounters
too much material.This
can
from blade.
Blade manufacturers
tion about
are prepared
blades for specific
to supply
informa-
applications.
TYPE OF CUT
NOTE:
Do not adjust the fence handle such that
excessive pressure is exerted during operation
- this
to secure fence position
per inch or tooth
per inch produces
For soft materials, the proper
to 8 teeth per inch.
strip teeth
The fence handle has a cam action, press down the
handle to clamp tightly to the table after setting rip
pressure
of teeth
more teeth
The type of material being cut determines
number
teeth which should be in contact with work.
ADJUSTINGTHE RIP FENCE
fence to desired
number
size. A blade with
smoother cut.
cutting
Contour cutting is done by guiding
handed to produce curved shapes.
Beveled cutting is done by tilting
proper work guide method.
Regardless
of which
work
free-
saw table and using
guiding
workpiece which overhangs
needs proper support.
workpiece
method
is used, a
table by more than
5"
CONTOUR SAWING
When contour sawing, use both hands to keep workpiece fiat against table and guided along desired
path.
WARNING: Avoid
Figure 21 - Adjusting
the Rip Fence
Blades vary depending
on type of material, size of
workpiece and type of cut that is being performed.
width,
thickness
which
make blades different
are
Cut small corners
remove
scrap until
Refer to Figure
Width of blade describes
to back of blade.
of blade affects
wanders
Width
distance
rigidity
less and produces
of blade also limits
can be cut. A
radius.
blade.
blade.
from tip of a tooth
of blade. A wider
a straighter
the smallest
blade
cut.
desired
Perform
degree.
a
around
them.
Saw to
shape is obtained.
23.
bevel cutting
1A"
by tilting
table to desired
Unlock table by loosening
locking handle
the backside of the unit (Key No. 68).
Tilt table to desired
radius which
1/4" wide blade can cut about
by sawing
BEVEL CUTTING
and pitch.
BLADE WIDTH
Width
hands in line with
contact
Try to stand to front of the saw and use hands over
the portion of table which is to right of blade and
before cut.
BLADE SELECTION
Characteristics
positioning
If hands slip, they could
Lock table in position
located
position.
by tightening
locking
handle.
on
MITER GAUGE
WARNING:
Any attempt to repair the motor may create a hazard unless repair is done by qualified service
technician.
Use miter gauge for securing and holding workpiece
at desired angle to produce angled cuts. Use scale
to adjust gauge to desired angle.
Repairs are available at a Sears Parts and Repair Service Center.
WARNING:
Never use miter gauge and rip fence at
the same time.The blade might bind in the workpiece.
CHANGINGTHE
DRIVE BELT
Release the saw blade tension by turning the blade
tension knob on the top of band saw counterclockwise.
Operator could be injured and/or workpiece could be
damaged.
BLADE CLEANING BRUSH
Using a M6 hex "1" wrench (not provided) to release
the hex socket head cap screw on motor mounting
flange (see Figure 22).
Refer to Figure 23.
Make sure that brush (Key No. 150) is in contact with
blade to properly remove foreign particles from drive
wheel.
Hex socket
head cap screw
Refer to Figure 23, page 12.
Steps required to keep the saw in optimum operating
condition have been described under "Operating
Instructions"The
Safety Precautions should be performed before operation.
Figure 22 - Changing
the Belt Drive
For proper maintenance:
Keep saw clean and dry. Sweep off spots where
chips have collected.
Using a clip pliers (not provided) remove the retaining ring from the center of the lower wheel.
Lubricate the unpainted surfaces with a light application of medium consistency machine oil to prevent
corrosion after cleaning.
Carefully slide the lower wheel forward and at the
same time release the saw blade from this wheel.
Replace dull blades and blades from which teeth
have been stripped. A clean saw with a sharp blade
will yield the best cut.
(Ensure ribs in drive belt are seated correctly before
reassembling and tensioning the drive belt)
Remove the old drive belt and fit the new belt.
Follow procedures for CHANGING AND ADJUSTING THE SAW BLADE & TRACKING THE SAW
Internal parts of the band saw have been completely
lubricated at the factory and do not need to be relubricated.
WARNING:
BLADE, before restoring power to the band saw and
setting up for use.
Make certain that the saw is disconnected
from the power source before attempting
remove any component.
to service or
10
SYMPTOM
CORRECTIVE ACTION
POSSIBLE CAUSE(S)
The machine does not
work when switched
1. No power supply.
2. Defective switch.
1. Check the cable for breakage.
on.
3. Defective motor.
3. Replace the motor.
The saw blade does
not move with the
1. The blade tension knob has not
1. Switch off the motor, tighten the blade tension
knob.
motor running.
The saw blade does
not cut in a straight
line.
2. Replace the lock switch.
been tightened.
2. The blade has come off one of the
wheels.
3. The saw blade has broken.
3. Replace the blade.
4. The drive belt has snapped.
4. Replace the belt.
1. Rip fence for cutting
2. Feed rate too fast.
1. Use a rip fence.
not used.
2. Put light pressure on the workpiece. Make sure
the saw blade does not bend.
3. The blade teeth are dull or damaged.
The saw blade does
not cut, or cuts very
slowly.
2. Open the doors and check
3. Try a new saw blade.
4. Blade guides not suitably adjusted.
4. Adjust the blade guides (see OPERATION
instructions).
1. The teeth are dull, caused by cutting hard material or long use.
1. Replace the saw blade, use a 6 TRI. saw blade
for wood and soft material. Use a 14T_RI.saw
blade for harder materials.A 14T.RI. saw blade
always cuts slower due to the finer teeth and
the slower cutting performance.
2. The saw blade was fitted the wrong
way on the band saw.
2. Fit the saw blade correctly.
Sawdust builds up
inside the machine.
This is normal
Clean the machine regularly.Open the doors and
remove the sawdust with a vacuum cleaner.
Sawdust inside the
This is normal
Clean the ventilating slots of the motor with a vacuum cleaner. From time to time remove the sawdust
motor housing.
to prevent it from being drawn into the housing.
The machine does not
cut at 45 or 90
1. The table is not at right angles to
the blade.
1. Adjust the table.
degrees.
2. The saw blade is dull or too much
2. Replace the saw blade or put less pressure on
the workpiece.
pressure was put on the workpiece.
The saw blade cannot
be properly positioned
on the wheels.
1. The wheels are not in alignment
defective bearing.
or
2. The blade tracking knob hasn't
been properly adjusted.
3. Inferior saw blade.
1. Replace bearing.
2. Adjust the blade tracking knob (See OPERATION instructions).
3. Replace the saw blade.
11
Model124.214000
Figure 23 - Replacement Parts Illustration
b_
PART
DESCRIPTION
NO.
1-JL200611O1-081S
1-M6X45GB5781Z
Knurled Knob Cap
Hex. Screw M6X45
1-JL20061102-081S
Knurled Knob Body
1-M6GB6172Z
Hex. Nut M6
1-JL2001001OF
Slotted Insert
1-JL20010014
Spring Washer
1-JL20010011AO01S Lock Housing
1-JL22012000DO01Z Upper Door
1-RVT4X8GB12618A Rivet
1d L22010008
ldL20010012
Leaf Spring
Hex. Nut
ldL20010009
Tongue Lock
1-WSH6GB93Z
Spring Washer
1-M6GB889ZF
Lock Nut M6
I-JL22024002-001 S
Blade Tension Knob Cap
I-JL22024001-001S
Blade Tension Knob Body
1dL22021003
Blade Tensioner
I-WSH8GB97DIZ
Washer
-M6GB6177Z
Flange Nut M6
-M8X5OGB14Z
Carriage Bolt M8X50
Washer
1JL2OOIOOO1A
ldL22010001A-O01S Top Plug
1alL220110001081Z Frame Bandsaw
1-M6XI 2GB5781B
Hex. Screw M6X12
1-M6GB889ZF
Lock Nut M6
1-WSH6GB97D1Z
Washer
1dL22040001
Gear
1-JL22040003
Spring Washer
Tube
1dL22040002A
1-JL22040007
Nut
1-JL22044001-001S
Adjusting Knob Body
1dL20024001-001S
Adjusting Knob Cap
PART
DESClPTION
NO.
ldL20061101-001S Blade Tracking Knob Cap
ldL20061102-001S Blade Tracking Knob Body
1-M6X60GB5781Z Hex. Bolt M6X60
1-M6GB6172Z
Hex. Nut M6
1-JL22020002-001SWing Nut
1-WSH6GB96Z
Washer
1-ST3D5X13GB846Z
Tapping Screw 3.5X9.5
ldL22041006
Rack
ldL22041009
1-M8X20GB14Z
KEY PART
NO. NO.
1-M6X12GB5781Z
Hex.Bolt M6XI 2
66
1-JL22030001
Table Trunnion Lower
67
1-M6X16GB14Z
Carriage Bolt M6XI 6
68
1-JL22020002-001S
1-WSH6GB96Z
Wing Nut
Washer
1-M6GB6177Z
Flange Nut M6
70
71
Slide
Carriage Bolt M8X20
Bolt Guide
-1506003-01016S
Indicator
-ST3D5X9D5GB845Z
Tapping Screw 3.5X9.5
Table
1dL22031001F001G
74
-JL22031002A001S
75
1-JL20041004
1-JL20010016-001S Wing Nut
76
1d L22041001D
SawBlade Guide Assembly 77
T-Nut
78
ldL22041008
79
1-M6X10GB5781B Hex. Bolt M6XlO
1-JL22041008A
T-Nut
8O
-M6X30GB70Z
Washer
81
1-WSH6GB96Z
Hex.SocketSetScrewM6X2._
82
1-M6X25GB80B
83
1d L46084000-001
S Locking Lever
84
1-JL22042005
Guide Adjust Screw
85
1-BRG626-2ZGB276Bearing 80026
86
1-WSH6GB97D1Z Washer
1-JL22042004
Bearing Mount Cylinder
Hex. Socket Screw M6X10
1-M6XI0GB80B
ldL22041003
Upper Guide Mount
Guide Shaft
1-JL22042002
1-JL22042003
BearingMountCylinderiCa
3-Roller Guide Block
1-JL22042001
1-M6X35GB12Z
Carriage Bolt M6X30
1-JL22030002-001S Glide Piece
1dL22032001B
Table Trunnion Upper
1-WSH6GB862D2Z LockWasher
DESCRIPTION
87
Insert
tex.SocketScrewM6X30
-WSH6GB97D1Z
Washer
dL22020002A-001S
Wing Nut
-JL22061006A
Fence Clamper
-JL22061009
Threaded Rod
-0802004
-JL22061005A
Spring
Guide Rod
d L22061001D
Fence
-M6X10GB819Z
Sunk Head Screw
dL22061005A
Guide Rod
!-SR22033000
Guide Rail Assembly
1-JL22061002A
Fence Clamp
1-JL22061003
88
-WSH10GB97D1Z
Special Screw
Washer
89
-JL22061004
Fence Handle
90
-PIN3X18GB879B
Roll Pin
91
-JL60020023A
Knob
92
1-WSH6GB97D1Z
Washer
93
ldL60040002
Aluminium Bar
94
1d L60040001-001 S
95
-1506003-01016S
Miter Gauge Base
Indicator
96
1-M5X6GB818B
Pan Head Screw M5X6
PART
NO.
DESCRIPTION
KEY PART
DESCIPTION
PART
NO.
I -JL60040003-001S
I-JL22042004
Knob
NO.
1-M6G B6172Z
KEY
NO.
DESCRIPTION
NO.
121
Hex. Nut M6
1-J L20061102-081S
1-M6X40GB5781Z
1-J L20061101-081S
145
146
147
1-M14GB6171Z
1-JL22021004
1-JL22021002
Hex. Nut M14
122
123
124
1-M8X30GBTOB
1-WSH8GB93Z
148
149
150
1-JL22021001-081Z
1-M8X70GB14B
Blade Tensioner
125
126
127
I-M6XIOGB80B
I-JL22043001
I -JL22043002
I -JL22043003
1-M6GB889Z
1-WSH6GB97D1Z
1-WSH6GB96Z
1-M6X20GB5783Z
1-JL22042005
1-BRG626-2ZGB276
1-J L22040004
1WSH6GB97D1Z
1-M6GB889ZF
1-WSH6BG93Z
1-J L20010009
4_
1-J L20010012
1-J L22013000A001Z
1-JL22010008
1-RVT4X8GB 12618A
1-J L2001001
IS
_
A
Adjusting Shaft
HexSocketSetScrewM6X1
Lower Guide Body
Lower Guide Shaft
Lower Guide Mount
Lock Nut M6
Washer
Washer
Hex. Bolt M6X20
Guide Adjust Screw
Bearing 80026
Pin Guide Seat
Washer
Lock Nut M6
Spring Washer
Tongue Lock
Hex. Nut
Lower Door
Leaf Spring
Rivet
Lock Housing
Standard hardware item available locally.
Not shown.
128
129
130
131
132
133
134
135
136
137
138
139
140
141
142
Knurled Knob Cap
Hex. Socket Screw M8X30
Spring Washer
Washer
Motor
1-WSH8GB97D1Z
1-G7412634B
1-M6X20GB5783Z
Hex. Bolt M6X20
Hex. Nut M6
1-M6GB6170Z
1-JL22020004
Lower Bearing Bolt
Hex. Nut M14
1-M14GB6171Z
1-JL22071001A
1-M6X10GB80B
Motor Pulley
HexSocketSetScrewM6X
1-JL22020003
1-BRG6001-2ZGB27_
1-CLP28GB893 D 1B
1-JL22023001
1dL22022002
1-CLP12GB894D
1-JL22020001A
1-JL22022001
Knurled Knob Body
Hex. Screw M6X45
1B
Poly-V-Belt
Bearing 80101
Retaining Ring
Lower Wheel
Tire
Retaining
Blade
Ring
Upper Wheel
151
152
153
154
155
156
157
10 158
159
1-JL22020006
1-M8GB6177D1B
1-M6X35BG5781Z
1-M6G B6170Z
1-U23182300-471
1-WSH4GB862D2Z
1-WSH4GB97D1Z
1-M4X8GB818Z
1-JL20070002A
1-HY18-32B
160
161
162
1-M4X12G B823Z
1-JL22021100-081Z
1-JL20072003
163
A
1-WSH8GB96Z
2-JL22061000D
A
A
2-J L22000010El 5
1-S R22080001 B
Recommended
Star Lock Cap
Shaft Mount
Carriage Bolt M8X65
Brush Strip
Flange Nut M8
Hex. Bolt M6X35
Hex. Nut M6
Cable w/Plug
LockWasher
Washer
Pan Head Screw M4X8
Switch Cover Plate
Lock Switch
Pan Head Screw M4X12
Tension Angle
RubberTube
Washer
Rip Fence Assembly
Hardware Kit
Owners Manual
Accessories
&
701A x %" x 14TPI Flex Back Blade
9-29556
A
70_A x 3/_" x 10 TPI Flex Back Blade
9-29557
&
70_A x W' x 6 TPI Skip Tooth Flex Back
9-29558
&
70_A x %" x 4 TPI Skip Tooth Flex Back
9-29559
NOTES
15
SIERRA DE BANDA
en un _rea bien ventilada y utilice equipo de seguridad aprobado.
Cuando trabaje con este tipo de herramientas, utilice siempre
una m_scara para la cara o respirador adecuadamente ajusta-
DE 10"
Modelo No.
124.214000
dos, aprobados por
OSHA/NIOSH
ADVERTENClA:
Por su propia seguridad, lea todas las
instrucciones
PRECAUCION:
y precauciones antes de manejar la herramienta.
PRECAUClON:
Siempre siga los procedimientos de operaci6n
correctos, tal como se definen en este manual, aun cuando
est_ familiarizado con el uso de _sta o de otras herramientas
Lea y siga todas las
similares. Recuerde que descuidarse aunque s61o sea pot
una fracci6n de segundo puede ocasionarle graves lesiones.
Reglas de Seguridad e Instrucciones de
Operacidn
antes de utilizar este producto
EL OPERADOR DEBE ESTARPREPARADO PARA
ELTRABAJO
por primera vez.
Use ropa apropiada.
anillos,
Ingl6s
......................................................
Ilustraci6n
Garantia
y Lista
de Partes
piezas m6viles
2-10
.................................
cabello
de Segu ridad
No use ropa holgada,
Montaje
protectora
17
................................................
.................................................
Ma ntenimiento
de seguridad
de Problemas
para sujetar
el
con suelas antideslizantes.
Z87.1 de los Estados
que cumplan
Unidos.
lentes que s61o son resistentes
19-20
de seguridad.
Use una m_scara
21-24
si al utilizar
24
..................................
25
con la norma
Los anteojos
18-19
...............................................
Identificad6n
para el cabello,
largo.
16-17
...................................................
Operaci6n
en las
16
.......................................
.................................................
Instalaci6n
corbatas,
atascarse
de la m_quina.
Use galas de seguridad
Desempaque
guantes,
ni otras joyas que puedan
Use una cubierta
12-14
.......................................................
pulseras
Use zapatos
Reglas
.
al impacto.
Est_ alerta
y piense
mec_nicas
cuando
se produce
claramente.
cia de medicaci6n
el polvo,
polvo.
opere
intoxicado
que produzca
son anteojos
contra
mucho
Nunca
est_ cansado,
tienen
NO
para la cara o una m_scara
la herramienta
ANSI
comunes
herramientas
o bajo la influen-
somnolencia.
PREPAREEL AREA DETRABAJO PARA LATAREA
A REALIZAR
GARANTIA COMPLETA DE UN ANO PARA
HERRAMIENTA CRAFTSMAN
Siesta
herramienta
el material
Craftsman
fallara
Mantenga
el _rea de trabajo limpia.
desordenadas
atraen accidentes.
por causa de defectos
de la fecha de compra,
LLAME al 1-800-4-MY-HOME
SOLICITAR LA REPARACION GRATUITA DEL PRODUCTO
(o su reemplazo
si no se puede
no incluye partes fungibles,
barrenas o cuchillas.
Siesta
en
No use herramientas
o en la mano de obra en un lapso de un afro a partir
herramienta
de alquiler,
reparar
se usa alguna
esta garantia
la unidad).
tales como
es v_lida
Onicamente
_' PARA
No exponga
comerciales
puede
usted
le otorga
tener
Sears, Roebuck
derechos
and Co., Hoffman
Estates,
a la Iluvia.
de corriente
adecuada
debe
para
enchufarse
para tres puntas
puesto
a
por 90 dias a par-
legales especificos
que varien
No
o mojados.
adecuadamente.
de tres puntas
directamente
a un recept_culo
tierra correctamente.
o
Los cordones
otros derechos
una toma
El enchufe
peligrosos.
humedos
mec_nicas
estar iluminada
disponible
la herramienta.
tir de la fecha de compra.
Esta garantia
debe
en ambientes
en lugares
las herramientas
Debe haber
baterias,
mec_nicas
mec_nicas
El _rea de trabajo
Esta garantia
I_mparas,
vez para fines
use herramientas
Las Meas de trabajo
y tambi_n
de estado
de extensi6n
deben
xi6n a tierra y los tres alambres
deben set del calibre correcto.
a estado.
Mantenga
IL 60179
a los visitantes
tenet
una punta
del cord6n
a una distancia
de cone-
de extensi6n
prudente
del _rea
de trabajo.
Mantenga
ADVERTENCIA DE LA PROPOSICION 65:
Parte del polvo
produddo por las operaciones de lijado, serrado, esmedlado y
a los nifos
fuera
su taller
sea a prueba
maestros
y remueva
cualquier
uso involuntario
del lugar de trabajo.
de nifos.
Use candados,
las Ilaves del arrancador
Haga que
interruptores
para impedir
de las herramientas
mec_nicas.
SE DEBE DAR MANTENIMIENTO A
LA HERRAMIENTA
taladrado realizadas con herramientas el6ctdcas y otras actividades de construcci6n contiene sustancias quimicas que el estado de California reconoce como causantes de c_ncer, malformaciones cong6nitas u otros daffos reproductivos.
Desenchufe
Consulte
Algunos ejemplos de estas sustancias quimicas son:
siempre
el manual
de mantenimiento
Plomo proveniente de pinturas con base de plomo.
Mantenga
Silice cristalino proveniente
rial de mamposteria.
funcione
de ladrillos, cemento y otro mate-
la herramienta
antes
de inspeccionarla.
para informarse
sobre
los procedimientos
y ajuste
la herramienta
de la manera
Retire las herramientas
verificar
Ars_nico y cromo proveniente de madera quimicamente tratada.
16
lubricada
y limpia
de modo
que
el h_bito
de
m_s segura.
de ajuste.
que hayan sido retiradas
antes de encender
El riesgo debido a la exposici6n de estas sustancias quimicas
depende de la frecuencia con la cual realice este tipo de trabajo.
Para reducir la exposici6n a estas sustancias quimicas: trabaje
especificos.
la m_quina.
Desarrolle
las herramientas
de ajuste
Mantenga
todas
protector
las partes
u otras piezas
tamente
y hacen
listas para funcionar.
para determinar
el trabajo
que deben
Revise que no haya partes
de las partes
m6viles,
o cualquier
cionamiento
deber_n
o cualquier
incluida
provisionales
para solicitar
dafios,
y montaje
que no hayan ocurrido
se deber_
tribuidor
parte
daffada,
_stas
No
(v_lgase
presentar
porte.Verifque
el fun-
o ser reemplazadas.
partes
Verifque
el alineamiento
roturas
afectar
otra
correctamente
haga reparaciones
partes
daffadas.Verifque
otra condici6n
que pudiera
de la herramienta.
repararse
correc-
hacer.
si hay atascamiento,
Si hay una protecci6n
Revise el
si funcionan
que est_ completo.
si faltan
La Sierra de banda
unidad.
EL OPERADOR DEBE SABER COMO USAR
LA HERRAMIENTA
correcta
para cada trabajo.
herramienta
ni el accesorio
cual no han sido diseffados.
Cuando
cambie
para realizar
la hoja, desconecte
Evite que la herramienta
de que la herramienta
(apagado)
antes de enchufarla.
No fuerce
la herramienta.
caz a la velocidad
para la
accidentalmente.
est_ en la posici6n
Funcionar_
en la forma
las manos
alejadas
superficies
corta ntes.
M_quina
B
Conjuntode
C
Mesa (1)
m_s ef _
m6viles
una herramienta
y no la abandone
124.214000,
viene
se envia com-
armada
como
y ver que no falten
montarse
principal
una
las partes
en la sierra, antes
de instalarlas
(1)
la guia (1)
D
Riel de guia
E
Manual
F
Conjunto
del muff6n
de la mesa (1)
G
Bolsa de partes
sueltas
La bolsa de partes
incluye:
hexagonal
y de las
(1)
del propietario
(1)
(soporte
giratorio)
superior
en funcionamiento.
M6x30
Manilla
de tensi6n
de casquete
(1), Arandela
de manilla
hexagonal
(1)
(1), Tornillo
(1), Perno hexagonal
Tornillo
Nunca deje desatendida
al dis-
1).
Guia de ingletes
de las partes
Iocalizar
que deben
A
de trans-
"off"
para la cual se dise_6.
Mantenga
Descon_ctela
una tarea
la
la herramienta.
se encienda
Cerci6rese
No fuerce
de 10" Modelo
Ser_ necesario
adicionales
de repuesto).
el envio. Si hay
a la compa_ia
Avise inmediatamente
pleta en una caja. La sierra de banda
de la lista de
durante
partes.
(v_ase la Figura
Use la herramienta
daffos
un reclamo
M6x12
en estrella
de la hoja (1),
de cabeza
hueca
M6 (1), Tuerca de mariposa
(4), Arandela
de seguridad
(2), Arandela
M3 (1), Llave "1" hexagonal
M6
M6 (4),
M6 (2), Llave "1_'
M5 (1).
basra que se haya detenido
por completo.
No trate de alcanzar
demasiado
lejos. Mant_ngase
firme
y
equilibrado.
Nunca
se coloque
producir
de pie sobre
lesiones
hace contacto
Conozca
con
la hoja en forma
su herramienta.
su aplicaci6n
Use los accesorios
Maneje
sufrir
Apague
la m_quina
duce muy
a manejar
la herramienta,
Si se usan accesorios
lesiones
o lesionar
en forma
a alguien.
correcta.
Prot_jase
las
D
lesiones.
si se atasca. La hoja se atasca
profundamente
la mantiene
si se intro-
en la pieza de trabajo
trabada
las piezas atascadas
y desconectado
o se
especificas.
la pieza de trabajo
de posibles
Se pueden
se vuelca
accidental.
recomendados.
puede
manos
motor
Aprenda
y limitaciones
incorrectos,
la herramienta.
graves si la herramienta
en la pieza de trabajo).
o cortadas
la sierra
(la fuerza
del
No quite
hasta que se haya apagado
y la hoja se haya detenido.
E
Mantenga
bien ajustados
los siguientes:
las guias de la hoja y los cojinetes
Ajuste
la guia superior
la tensi6n
Figura
de empuje.
para que apenas
quede
separada
de
1 - Desempaque
IMPORTANTE:
la pieza de trabajo.
garantizar
Sujete
firmemente
DIRECCION
trabajo
La operaci6n
hacer que salgan
ojos y les causen
dad que cumplan
arrojados
graves heridas.
s61o contra
la direcci6n
en el paquete)
mec_nica.
de toda
herramienta
objetos
extraffos
antes
Puede obtener
de pl_stico
ficies
a usar
a
o pl_stico.
recomienda
incendios.
17
Despu_s
f_cilmente
minerales,
pueden
usando
Nunca
suave.
parte
deteriorar
yen
de limpiar,
cubra
estos
los componentes
todas
para la parte
use solventes
las superSe
superior
muy vol_tiles.
no inflamables
sol-
o en cualquier
con una capa fina de aceite.
solventes
Para
retire dicho
y un paffo
en la pintura
el uso de cera en pasta
utilizar
con un protector.
correctos,
en la pintura
Los solventes
expuestas
ADVERTENCIA:
de su cat, logo de Sears.
eliminar
esencias
Use agua y jab6n
o goma.
revestida
y un funcionamiento
Este se puede
met_licas
recomienda
la mesa.
estadounidense
galas de seguridad
La mesa viene
suaves, tales como
acabados.
mec_nica
hacia los
de comenzar
de la Sierra de Banda
Evite dejar caer esta soluci6n
use galas de seguri-
de la norma
un ajuste
revestimiento.
ventes
de goma
Siempre
con los requisitos
ANSI Z87.1 (se indica
la herramienta
la mesa.
la pieza de
de la hoja o cortadora.
ADVERTENCIA:
trav_s
contra
Alimente
en la hoja o en la cortadora,
de rotaci6n
puede
la pieza de trabajo
DE LA ALIMENTACION:
F
de la hoja,
para evitar
de
Se
posibles
AJUSTE DE LA MESA PARA PONERLA A
ESCUADRA CON LA HOJA DE LA SIERRA
Consulte
PRECAUCION:
Nointente
hacer
elmontaje
sihaypartes
que
faltan.V_lgase
deestemanual
para
solidtar
partes
derepuesto.
Lam_quina
sesuministra
pardalmente
armada.
Antes
deusarla,
deben
instalarse
lossiguientes
elementos:
lamesa,
lamanilla
de
tensi6n
delahojayelreborde
para
aserrar
aIolargo.
ADVERTENCIA:
funcionar
Para evitar
set lesionado,
o usar esta m_quina
montadas
y fundonen
no intente
basra que todas
Afloje
escuadra
en el mu_6n
de tama_o
necesafio
manera:
hacerle
inferior
adecuado
un ajuste
Con una Ilave, afloje
hacer
sus partes
las Figuras 4 y 5.
la manilla
de la mesa y ponga
contra
a la mesa, proceda
la tuerca
una
la hoja de la sierra. Si es
hexagonal
de la siguiente
en el bastidor
(v6ase la Figura 4).
est6n
correctamente.
INSTALACION DEL MUIqlON DE LA MESA
Monte
el mufi6n
superior
mesa con el perno
delay
tuerca
superior
de la mesa en el mufi6n
de carruaje,
de mariposa.
Coloque
de la mesa, teniendo
de la
aran-
la mesa en el mu_6n
cuidado
la sierra a trav6s de la ranura
inferior
pieza de deslizamiento,
cuando
pase la hoja de
de la mesa (v6ase la Figura 2).
Figura 4 - Ponga la Mesa a Escuadra con la Hoja
de la Sierra
Ponga la Ilave en el perno
hexagonal
mesa est6 a escuadra
la hoja de la sierra
Figura
Apriete
Figura 2 - Monte
la Mesa de Soporte
probar
Giratofio
cuatro
segufidad
mu_6n
pernos
hexagonales
de la bolsa de partes
superior
cada agujero,
y cuatro
sueltas.
de la mesa e instale
luego
apri6telos
arandelas
Monte
un perno
de
la mesa en el
con arandela
en
y ajustelo
hasta que la
(v6ase la
12).
la tuerca
hexagonal
si la hoja de la sierra
Fije la mesa en posici6n
Obtenga
con
y revise nuevamente
para com-
y la mesa ya est_n a escuadra.
y compruebe
que el indicador
cero grados
en uno de los lados del mu_6n
mesa. Afloje
el tornillo
es necesafio
para que indique
inferior
que sujeta el indicador
cero grados
lea
de la
y reajuste
6ste si
(v6ase la Figura 5).
con una Ilave ajustable.
CENTRADO DE LA MESA
Afloje
mufi6n
los cuatro
pernos
superior
hexagonales
de la misma
que fijan
la mesa en el
(v6ase la Figura 3).
Perno
Perno hexagonal
Figura 5 - Ajuste el Indicador a Cero
hexagonal
INSTALACION DEL RIEL DE GUIA
Monte
manilla
Figura 3 - Pernos
Hexagonales
para el Mu_6n
y sujete
el riel de guia en la mesa con dos tornillos
en estrella
de cabeza
hueca
posa para corregir
Mueva
lateralmente
la mesa
segun
la hoja pase a trav6s del centro
Si el movimiento
ciente
del mu_6n
para centrar
que sujetan
inferior
mente
la mesa para ponerla
Vuelva
a apretar
tuercas
de brida,
del inserto
superior
la mesa, afloje
el mu_6n
los pernos
luego
sea necesafio,
hasta que
Figura
y arandelas.
hexagonal,
la planitud
6).
de la mesa.
de la mesa
las cuatro
no es sufi-
tuercas
de la mesa y mueva
de brida
lateral-
en el centro.
hexagonales
revise nuevamente
para el mufi6n
la posici6n
y las
de la
hoja de la sierra.
Figura
18
6 - Instale
el Riel de Guia
Utilice
la arandela
el tornillo
de
de casquete
y la tuerca
de la mesa de trabajo
de marl(v6ase
la
INSTALACION DEL REBORDEPARA ASERRAR A
LO LARGO
Coloque
el reborde
guia. Ajuste
est6 paralelo
manivela
para aserrar a Io largo
el reborde
sobre el riel de
para aserrar a Io largo, a fin de que
con la hoja de la sierra. Presione
del reborde
para aserrar
hacia abajo
la
a Io largo, para apretarla
(v_ase la Figura 7).
Orificio
Figura
de salida del polvo
10 - Orificio
de Salida del Polvo
Manilla de tensi6n
de la hoja
de fijaci6n
de la puerta
Guia de la hoja
ingletes
ura 7 - Instale
el Reborde
para Aserrar
a Io Largo
Interruptor
bloqueable
INSTALAClON DE LA MANILLA DETENSION DE
LA HOJA
Coloque
la manilla
de tensi6n
de la hoja en el tensor
juia
de la
hoja (v_ase la Figura 8).
Manilla de
_r---
Manilla de
tensi6n de
de la hoja
la hoja
Manilla de ajuste
del poste de guia
Reborde
guia
Mufi6n
superior
de la mesa
inferior
de la mesa
Figura 8 - Instale la Manilla deTensi6n de la Hoja
Mufi6n
ESTABILIZAClON DE LA MAQUINA
Para garantizar
una suficiente
m_quina,
anclarse
debe
de trabajo
estabilidad
@sta con pernos
o una mesa de trabajo.
incluyen
agujeros
incluye
los herrajes
vertical
Orificio
de la
Para este prop6sito,
se
de 6 mm en la base de la m_quina.
No
de montaje
de salida del polvo
en el piso, un banco
Figura
11 - Conozca
su Sierra de Banda
(v@ase la Figura 9).
MOTOR
La sierra de banda
El motor
se suministra
de CA de 120 voltios
con
un motor
de _/_ HR
tiene las siguientes
especificaciones:
Caballos
Voltaje
de fuerza
Amperaje
Figura 9 - Estabilice
la M_quina
Hertzios
de banda
incluye
21/2" (v6ase la Figura
Se recomienda
conectada
de salida
de polvo
...........................................
ADVERTENCIA:
se use la sierra de banda,
de polvo
3.5
.............................................
60
Monof_sico
R PM ...............................................
de
10).
que cuando
a un colector
un orificio
1/_
120
Fase .........................................
UTILICE UN COLECTOR DE POLVO ADECUADO
La sierra
..................................
.............................................
conexiones
_sta est_
1720
Un electricista
calificado
debe hacer todas
las
el_ctricas.
adecuado.
CONEXIONES ELECTRICAS
ADVERTENCIA:
desconectada
inspeccione
19
Cerci6rese
de la fuente
el cableado.
de que la unidad
de alimentaci6n
est6 apagada
siempre
que se
y
FUENTE DE ALIMENTACION
La sierra
de banda
viene
de alimentaci6n
de ] 20 voltios,
El motor
disehado
ha sido
especificados.
seguridad
debajo
voltajes
del voltaje
El hacer
cado
Las cargas
con
nales
pesadas
se pueden
de ]0%
las Normas
y frecuencia
manejar
con
por encima
con voltajes
fuera
la herramienta
es necesario
del motor
que el voltaje
al voltaje
est_
controlada
enchufes
por
puesto
La fuente
un interruptor
del equipo,
El equipo
debe
proteger
se corre
estar
Si no entiende
dudas
contra
a tierra,
aprobado
puntas
consulte
contra
est_ equipada
y clasificado
del tipo
con
a un receptSculo
mente
a tierra,
debe
Punta
de conexi6n
a tierra
Figura
califlcado.
esta
herra-
un enchufe
do por
de tres
conectarse
directamente
y conectado
en la Figura
lizar
debida-
este tipo
cables
de menor
para la descarga
una ruta
no permita
clebe
que
conectarse
haya sido
de acuerdo
No modifique
o desconectar
los dedos
con
toquen
todos
y conectado
peri6dicamente
para que
cord6n
(o verde
uti-
de color
deberSn
como
estar
seria una
conectado
a tierra.
de la placa
de cubierta,
no estSn
las tuberias
debidamente
de
conec-
que la conexi6n
a tierra
debe veriflcar
los medios
sea efectide cone-
a tierra.
de cualquier
suficiente
los cordones
o
del cord6n
de extensi6n
ocasionar5
de potencia.
de extensi6n
deben
la corriente
tener
adecuada
el tamaho
y mantener
correcto.
la tabla
para
(seg0n
la norma
Utilice
0nicamente
con
receptSculos
herramienta.
determinar
AWG)
cordones
enchufes
tripolares
el tama_o
del cord6n
tipo
minimo
del alambre
de extensi6n.
de extensi6n
conexi6n
trifilares
a tierra
que funcionen
con
que
de tres
puntas
el enchufe
y
de la
Si no cabe
calificado
Si el cord6n
que
cualquier
de servicio
de cord6n
y una p_rdida
para transportar
cuenten
debida-
de la herramienta,
Ile_velos a un centro
Utilice
y regulaciones
que se incluye.
tipo
en el voltaje
si
LONGITUD
autorizado
Tamaho
de extensi6n
forma,
DEL CORDON
del cable
est_ desgastado,
reemplScelo
Norma
roto
o da_ado
en
inmediatamente.
DE EXTENSION
AWG
los reparen.
El conductor
conexi6n
permitido
rigida
del adaptador
y las cajas de tomacorriente
Los alambres
correspona tierra
los c6digos
el enchufe
est_
permanente,
(En
de 3 puntas
del
las terminales
en el tomacorriente,
solicite
a un electricista
instale
un tomacorriente
adecuado.
dahados,
en el lado
debidamente
una caida
resistencia
el enchufe
en el tomacorriente
instalado
Cuando
la leng0eta
a una tierra
de los tornillos
el voltaje
AI conectar
locales.
estSn
a
ele_ctrica.
mente,
Revise
a tierra.)
permiti-
CORDONES DE EXTENSION
para 3 Puntas
conexi6n
ADVERTENCIA:
est_
y locales.
el uso de los adaptadores
conexi6n
o el terminal
que
nacionales
de adaptadores,
conectados
El uso
que
con
tipo
a menos
y regulaciones
tuberia
de agua debidamente
conectada
a tierra, un tomacorriente
debidamente
conectado
a tierra o un sistema
de
a
Muchos
proporciona
para 2 puntas
con Adaptador
de adaptadores
no se permite
este
bien
la punta de conexi6n
o una averia, la
diente
para 2 Puntas
tados a tierra. Para garantizar
va, un electricista
califlcado
a tierra
que
conodda
los c6digos
verde
12.
No retire ni modifique
en forma alguna
tierra. En caso de un mal funcionamiento
El enchufe
Aseg0rese
a una tierra
13 - Recept_culo
No utilice
a tierra
ReceptSculo
tomacorriente,
el enchufe.
de tierra
ReceptSculo
de 3 puntas
12-
los
que est,% correctamente
o tiene
xi6n
Figura
bipolar
est_ conectado
agua
Enchufe
a 2 puntas
ele_ctrica.
conductores,
instalaclo
se muestra
Tomacorriente
puesto
tierra adecuadamente
un elec-
] 3) para conectar
de 3 pu
Canad5
para 3 puntas
tal como
de 3 puntas
la Figura
Adaptador
Enchufe
a tierra.
a tierra
temporal
(v_ase
se usa para
el_ctrica,
de tres
para 150 V, y con
de conexi6n
por
a tierra.
a 2 puntas
El enchufe
ser realizada
Code)
ele_ctrica.
un electricista
un cord6n
de conexi6n
Electric
est5 correctamente
una descarga
con
mientras
de conexi6n
a si la herramienta
A fin de protegerlo
mienta
a tierra
una descarga
(National
bas-
el conductor
de una descarga
las instrucciones
en cuanto
conectada
el riesgo
conectado
al operador
correctamente
deber5
un adaptador
Orejeta
Si no se conecta
Ele_ctricas
puntas,
para tres punde acuerdo
con
locales.
a un tomacorriente
INSTRUCCIONES PARA LA CONEXION ATIERRA
a tierra
Instalaciones
a tierra
unipolar.
ADVERTENCIA:
para dos
con un recept_culo
a tierra e instalado
Esta tarea
con conexi6n
en las termi-
un receptSculo
calificado.
Hay disponible
especifi-
el motor.
espedficado.
con
y regulaciones
ADVERTENCIA:
o por
del rango
y quemar
para
y los cddigos
tricista
no sea inferior
de alimentaci6n
culante
normales
al voltaje
0nicamente
e_ste deber5
ser reemplazado
tas debidamente
conectado
una fuente
60 Hz.
no mayores
la unidad
del motor
uso con
para funcionar
sobrecalentar
Para cargas
para
especificado.
funcionar
puede
Si se cuenta
precableada
verde
a tierra.
ele_ctrico
y amarillo)
(o verde
y amarillo)
Si es necesario
o el enchufe,
del cable
reparar
no conecte
a un terminal
o reemplazar
el cable
Hasta
es para
25 pies
AVlSO:
el
......................................
No se recomienda
utilizar
18
cordones
de extensi6n
de
mSs de 25 pies de largo.
verde
ADVERTENCIA:
energizado.
debe
ser puesta
a tierra.
Para
reparaci6n
del
toda
por
de repuesto
un electricista
genuinas.
2O
Esta mSquina
evitar el riesgo de electrocuci6n
o incendio,
sistema
el_ctrico
debe ser realizada
s61o
catificado,
usando
partes
Asegurese
est6n
que la tensi6n
debidamente
Haga cortes
La Sierra de Banda
bastidor
de Banco de 10
construido
con acero
fundido
para garantizar
de hierro
para cortar
maderas
soldado
para realizar
pr_ctico
de tensi6n
mecanismo
el cambio
y una superficie
La sierra
diferentes
r_pida
y un orificio
con un
Destense
de mesa
de "alivio"
operaciones.
y alineaci6n
total
aligera
incluye
de recolecci6n
con
Consulte
la Figura
14.
ADVERTENCIA:
de polvo.
est6n
partes
Antes de encender
ni tenga
da_adas
9%"
control
de funcionamiento,
de corte
m_xima
a 90 ° . ............................
45/8"
cord6n
de alimentaci6n.
Profundidad
de corte
m_xima
a 45 ° . ............................
23/4"
a 90 ° . ...............................
......................................
enchufela
de la rueda ............................................
Longitud
de la hoja ............................................
delantera
10"
de la hoja
Veloddad
1/8 - 1/2"
.......................................
generales
2780
.................................
PPM
66 Ib
Peso de embarque
73 Ib
colector
............................................
de polvo ........................................
Tenga siempre
o el
la sierra y dessea reparada
de la sierra.
o reem-
Para encender
sierra,
Ileve el interruptor
a la posici6n
superior.
sierra,
Ileve el interruptor
a la posici6n
inferior.
trabar
Ponga
Extraiga
Para apagar
la
la
AVISO:
en la posici6n
la sierra
de la fuente
Si se extrae
pre-
ranura
el uso no autorizado
OFF (apagado)
no se puede
cerrar
la Ilave con el interruptor
a insertar
la Ilave, deslice
del interruptor
y
de alimentaci6n.
(encendido),
se puede Ilevar a la posici6n
no a la de encendido
nuevamente.
21/2"
las siguientes
para impedir
el interruptor:
la Ilave. El interruptor
Para volver
en cuenta
el interruptor
el interruptor
desconecte
PRECAUClONES DE SEGURIDAD
ADVERTENCIA:
de seguridad
o
u otro
se halla en la parte
de la columna
de la sierra. Para trabar
21 x 14 x 34"
Peso ...........................................................
Orifido
del motor
701/2 "
............................................
de la hoja
Dimensiones
un dispositivo
de Encendido!Apagado
izquierda
Se puede
Ancho
el interruptor
Si es asi, apague
que no
correctamente
correctamente.
El interruptor
0 ° a 45 °
la sierra, verifique
que no fundonen
hasta que la pieza en cuesti6n
plazada
121/2 x 133/4"
.......................................
partes
o rotas, tales como
de la garganta
Di_metro
por un
y
un rebor-
Profundidad
de la mesa
largas.
la sierra
prolongado.
Profundidad
de la mesa
curvas
no se vaya a utilizar
INTERRUPTOR DE ENCENDIDO/APAGADO
(ON/OFF)
Su
ESPEClFICAClONES
Inclinaci6n
antes de cortar
la hoja cuando
lapso de tiempo
le falten
Tama_o
de la hoja
Est_ dise_ada
est_ equipada
de las hojas. La sierra tambi6n
de para aserrar a Io largo
cuenta
su durabilidad.
duras y suaves.
una guia de ingletes
facilita
_ Craftsman
de la hoja y la alineaci6n
ajustadas.
sin la Ilave.
en la posici6n
OFF (apagado)
e inserte
ON
pero
6sta en la
basra que enganche.
cauciones.
Cuando
ajuste
o reemplace
siempre apague la unidad
fuente de alimentaci6n.
Asegurese
partes
de la sierra
y desconecte
el enchufe
que las guias de la hoja est6n
Interruptor
de banda,
\
de la
situadas
Llave del interruptor
correctamente.
Utilice
la hoja adecuada
Utilice
una hoja afilada.Cambie
que les falten
Asegurese
para la pieza que se va a cortar.
que la hoja tenga
en la direcci6n
A fin de Iograr
un 6primo
Fije la pieza de trabajo
Ilegue
que todos
de encender
a su velocidad
Mantenga
m6viles.
la tensi6n
adecuada
adecuada
y avance
las manos
de hoja para el trabajo
rendimiento,
ni reduzca su veloddad.
alimentad6n.
Despu6s
o aquellas
correcta.
Utilice la velocidad
realizando.
Compruebe
las hojas gastadas
dientes.
no detenga
Use la presi6n
adecuada
que est6
el motor
Figura
14 - Interruptor
use protecci6n
Siempre
detenga
en una posici6n
los protectores
la unidad,
La alineaci6n, tensi6n y las guias de la hoja han sido ajustadas
correctamente en la f_brica. Sin embargo, los ajustes podrian
estable.
est6n
espere
instalados.
cambiar durante el transporte
hasta que la hoja
de la hoja y de todas
las partes
CAMBIOY AJUSTE DE LA HOJA DE LA SIERRA
para los ojos o para la cara.
la sierra
de la mesa.
Nunca
aserrar
plana, a menos
Siempre
hoja a veloddad
Siempre
apague
hoja despu6s
de banda
antes de retirar
una pieza que no tenga
que se utilice
sujete firmemente
un soporte
el material
toda
antes
equipada
madera;
6ste en la
arranque
la m_quina
de alimentaci6n
el material
de la
lesiones
incompleto.
utilice
21
Para evitar
inesperado,
haga ajustes,
apague
siempre
siempre
se debe
sufrir
lesiones
la sierra de banda
cuando
seguir
que cambie
del tomacorriente
en las manos
guantes
de la f_brica
con una hoja
la hoja de la sierra se instala
de la unidad.
la hoja de la sierra,
ADVERTENCIA:
adecuado.
si se va a retirar
viene
para cortar
de la entrega
Para cambiar
cedimiento:
una superficie
y alimente
de banda
de uso general
moderada.
de un corte
de la unidad.
Se recomienda verificar estos ajustes antes de usar la sierra.
m_xima.
alejadas
pieza residual
intente
y Apagado
AJUSTES
Esta sierra
Siempre
de Encendido
de
el siguiente
debido
y desconecte
que sea necesario.
a un
la hoja de la sierra o
principal.
manipule
pro-
el cord6n
Para evitar
sufrir
la hoja de la sierra,
Retire
guia,
de la mesa
la tuerca
Gire las manillas
para abrir
el reborde
para aserrar
de mariposa
a Io largo,
el riel
AJUSTE
y el tornillo.
de fijaci6n
DE LA ALTURA
La guia
de las puertas
superior
e inferior
ble contra
las puertas.
Gire hacia la izquierda
la manilla
de tensi6n
parte superior
del alojamiento
de la rueda
DE CORTE
de la hoja
la pieza
Para ajustar
alojamiento
de la hoja en la
superior
para aflo-
jar la tensi6n
de la hoja hasta que la hoja de la sierra
destensado
(visto desde arriba).V&ase
la Figura 15.
superior
debe
colocarse
Io m_s cerca
esta altura, afloje la manilla de fijaci6n
de la rueda superior
(v&ase la Figura
Manilla
Figura
15 - Manilla
Desmonte
Cuando
dientes
deTensi6n
la hoja
en la posici6n
mesa.
Vuelva
donde
a tensar
de la Hoja
de la sierra
monte
la nueva
de la hoja est_n
la nueva
superior
e inferior.
Apriete
hoja de la sierra, asegOrese
que los
orientados
hacia abajo y hacia usted
la hoja
hoja
17 - Ajuste
de la Profundidad
de la sierra
pasa a trav_s
de la sierra
y revise
la manilla
de fijaci6n
despu6s
la alinea-
la Figura
quete y el movimiento
del portaguias
de rodillo est_n a aproximadamente
Vuelva
largo,
a instalar
de la hoja
el reborde
la tuerca
de mariposa
el riel guia,
para aserrar
DE LA HOJA
de la hoja
Despu&s
y tensar
de instalar
superior
e inferior
la fuente
de ali-
rodillo
de la sierra
antes
de ajustar
demasiado
de la sierra,
ajuste
de hacer
la
el ajuste.
de la hoja,
de la hoja
primero
situe
las
con respecto
a la hoja
de la manivela
de trinbasra que ambas guias
1/16[_detr_s de los espa-
de la sierra.
cerca,
porque
eso afectar_
adversamente
de la sierra.
Desbloquee
el tornillo
de ajuste de la guia (B) para ajustar la
guia del rodillo trasero
para que quede
apenas separada
de
la parte posterior
de la hoja de la sierra.
las
Cuando
la hoja
superiores
los dientes
la vida Otil de la hoja
DE LA SIERRA
Ajuste
la alineaci6n
guias de la hoja.
para ajustar
Afloje el tornillo
de ajuste de la guia (A) en cada lado de la
hoja de la sierra para ajustar las dos guias de rodillo a no
m_s de 1/32" de la hoja de la sierra. No coloque
las gufas de
a Io
y el tornillo.
Gire las manillas
de fijad6n
de las puertas
para cerrar las puertas
antes de reconectar
mentaci6n.
ALINEACION
DE LA
cios entre
en la mesa
las guias
guias derecha
e izquierda
de rodillo
(Figura
18) mediante
el aflojamiento
de la sierra;
de ALINEACION
de fijaci6n
18.
Si es necesario,
la alineaci6n
del
GUIA SUPERIOR DE LA HOJA
V_ase
Para ajustar
ajuste
de ajuste
juia
AJUSTE DE LAS GUIAS DE LA HOJA
de la
ci6n de la hoja, girando
manualmente
la rueda superior.
La
hoja de la sierra deber_
avanzar montada
en el centro
de las
ruedas de la sierra de banda.
para esto, siga los procedimientos
HOJA DE LA SIERRA.
del
de Corte
Gire la manilla
de ajuste del poste de guia
guia de la hoja a la altura necesaria.
de las ruedas
al lado
17).
se haya
Manilla
Figura
posi-
de trabajo.
Iogre
en posici6n
manual-
el ajuste
correcto,
con el tornillo
fije la guia
de ajuste
del rodillo
de la guia
trasero
(B).
Blade
Gullet
mente
la manilla de alineaci6n
para alinear
la hoja de la sierra
(v&ase la Figura 16). La hoja de la sierra deber_
avanzar montada en el centro
de las ruedas de la sierra de banda. Cuando
Iogre el ajuste
de fijaci6n.
correcto,
fije
la manilla
de alineaci6n
con
la manilla
Tornillo de ajuste
la guia (B)
de
.1/16"
Manivela
Portaguias
Figura
de trinquete
Tornillo de ajuste
Je la guia (A)
18-
Ajuste
de las Guias
de la Hoja
GUIA INFERIOR DE LA HOJA
Consulte
la Figura
19, en la p_gina
Para ajustar las guias inferiores
las guias derecha
e izquierda
Figura
16 -Ajuste
la Alineaci6n
de la Hoja
de la Sierra
23.
de la hoja, primero
sitOe
de rodillo
con respecto
a la
hoja, mediante
el aflojamiento
de la tuerca
de fijad6n
y el
movimiento
del portaguias
basra que ambas guias de roclillo
est_n a aproximadamente
1/16" detr_s de los espacios
entre
los dientes
22
de la hoja
de la sierra.
Afloje
el tornillo
hoja
de la sierra
m_sde
de ajuste
de la guia
ajustar
(C) en cada
las dos
guias
I/_2[]delahojadelasierra.
rodillo
demasiado
la vida
0til
cerca,
de la hoja
Desbloquee
guia
para
del rodillo
posterior
Cuando
Iogre
en posici6n
para
el ajuste
ejerza
que
quede
fije
la guia
de ajuste
Portag
apenas
ajustar
reborde
de manera
la operaci6n;
del extremo
posterior
Ajuste
s61o la presi6n
durante
la
separada
a Io largo.
del
durante
la manivela
necesaria
las operaciones
esto
fijar
se
del reborde
del reborde
para
que
podrfa
para
para que
la posici6n
del
6sta
reborde
de torte.
de
de la sierra.
correcto,
el tornillo
(D) para
la manivela
presi6n
la abrazadera
aserrar
ejerza
de la guia
No ajuste
demasiada
deformar
adversamente
la sierra.
de la hoja
con
eso afectar_
de ajuste
trasero
la parte
AVISO:
de la
a no
Nocoloquelasguiasde
porque
de
el tornillo
lado
de rodillo
del rodillo
de la guia
trasero
(D).
uias
Tornillo
ajuste
de
la guiade (C)
Tuerca
de fijaci6n
Figura
Tornillo
de ajuste
de la
21 - Ajuste
19-
Ajuste
INCLINACION
La mesa
de las Guias
de
de 0 a 45 grados
la mesa,
afloje
mesa,
la mesa
al _ngulo
ajuste
la manilla
Se recomienda
(v6ase
guia
de desecho.
usando
un destornillador
hacer
biselados.
a Io Largo
el tipo
y tipo
de torte
Las caracteristicas
que
ANCHO
y apriete
el indicador
de cabeza
segOn
diferencian
tama_o
se vaya
alas
de la
a realizan
hojas
son
el ancho,
y el paso.
El ancho
nueva-
correcto
de prueba
que
DE LA HOJA
hasta
de _ngulo
de material,
de la
20).
cortes
Ajuste
cortes
en el mu_6n
necesario
el ajuste
o haciendo
madera
para
la manilla
la Figura
verificar
de _ngulos,
segOn
el espesor
Para inclinar
mente
varian
de trabajo
pieza
la Hoja
DE LA MESA
se inclina
para Aserrar
SELECCION DE LA HOJA
luia (D)
Las hojas
Figura
del Reborde
con
en piezas
de la hoja
la parte
El ancho
una
de la hoja
desvia
de
menos
El ancho
corresponda
desde
la punta
del diente
de la hoja.
afecta
su rigidez.
y produce
de la hoja
se puede
alrededor
Phillips.
es la distancia
posterior
un corte
tambi6n
Una hoja
m_s
limita
el radio
cortan
Una hoja de 1/4
de 1/2 [] de radio.
m_s ancha
se
pequeffo
que
recto.
m&s
[] de ancho
puede
cortar
ESPESOR DE LA HOJA
El espesor
de la hoja
es la distancia
mayor
es su espesor,
dientes.
Una hoja
curvas
angosta
que
hater
una
cortes
entre
sus lados.
es su rigidez
y de mayor
mientras
se usa para
mayor
espesor
hoja
se usa para
ancha
largos
Mientras
y m_s fuertes
y de menor
sus
cortar
espesor
y rectos.
PASO DE LA HOJA
El paso
ura 20-
Inclinaci6n
es el n0mero
de dientes
diente.
Una hoja con
corte m_s uniforme.
de la Mesa
El tipo
AJUSTE DEL REBORDE PARA ASERRAR A
LO LARGO
de material
de dientes
que
pot
m&s dientes
que
tienen
se est_
que
pulgada
pot
cortando
estar
o el tamaffo
pulgada
determina
en contacto
del
produce
un
el n0mero
con
la pieza
de
trabajo.
La presi6n
de fijaci6n
dispuesto
del reborde
en la f_brica;
de la siguiente
Levante
para aserrar
si es necesario
hater
a Io largo
un ajuste,
se ha
En el caso
proceda
tener
manera:
la manivela
del reborde
a la posici6n
Cuando
horizontal.
son
Gire
la manivela
la presi6n
(v6ase
del reborde
de sujeci6n,
la Figura
hacia
y hacia
la derecha
la izquierda
para
aumentar
deslice
dientes
deseada
la manivela
del reborde
para aserrar
en el riel de guia
hacia
a Io largo
(v6ase
pot
materiales
la hoja
adecuada
debe
pulgada.
m_s duros,
se recomienda
usar
donde
una hoja
los golpes
de 8 a 12
pulgada.
debe
para
haber
evitar
al menos
golpear
tres
dientes
en contacto
con
La hoja
se golpea
encuentra
21).
cuando
demasiado
el paso
material.
es muy
Esto puede
grande
y el diente
romper
los dientes
de la hoja.
La manivela
manivela
aserrar
del reborde
hacia
a Io largo
abajo
tiene
para fijar
despu6s
una acci6n
firmemente
de ajustarlo
el
la hoja.
la izquierda,
a la posici6n
la Figura
nocivos,
pot
Siempre
21).
de girar
el reborde
se corten
m_s
blandos,
6 y 8 dientes
para reducirla
torte
Despu6s
de materiales
entre
de leva,
empuje
el reborde
a la posici6n
la
Los fabricantes
para
ci6n
deseada.
23
sobre
de hojas
las hojas
tienen
y pueden
para aplicaciones
suministrar
especificas.
informa-
TIPO DE CORTE
El corte
mano
Para un mantenimiento
de contorno
se hace guiando
libre para producir
El corte
biselado
aplicando
formas
adecuada
Independientemente
usar un soporte
las superficies
corrosi6n
adecuado
posterior
Reemplace
de la mesa pot m_s de 5".
dientes.
mejor
CORTE DE CONTORNO
realice
mantener
guiarla
cortes
de contorno,
la pieza de trabajo
por la trayectoria
Evite poner
pueden
horizontal
manos
sobre
para
la mesa y
sobre la parte
las esquinas
vicio
delantera
de la sierra y ponga
de la mesa que est_ a la derecha
la
limpia
y las que hayan perdido
con una hoja afilada
producir_
el
internas
de la sierra de banda
aceitadas
vienen
y no requieren
de la f_-
ser lubricadas
Asegurese
que la sierra est_ desconectada
de alimentaci6n
el_ctrica antes de tratar de dar ser-
o retirar
cualquier
componente.
ADVERTENCIA:
Cualquier
constituir
a menos
un peligro
intento
de reparar
que sea realizado
el motor
puede
pot un t_cnico
profesional.
pequeRas
con la sierra para eliminar
la forma deseada.
ligera
para evitar
corte.
de la fuente
de la hoja y antes del corte.
Corte
con una aplicaci6n
viscosidad
nuevamente.
con la hoja.
hacia la parte
se hayan
ADVERTENCIA:
las manos en linea con la hoja. Si se le resbalan,
]-rate de pararse
no pintadas
de mediana
las hojas gastadas
brica totalmente
deseada.
hacer contacto
las manos
use ambas
donde
a la limpieza.
Una sierra
Las partes
Cuando
y seca. Limpie
o aserrin.
de aceite de m_quina
de guia de la pieza de tra-
se debe
pieza que sobresalga
la pieza de trabajo.
limpia
virutas
Lubrique
la mesa de la sierra y
adecuado:
la sierra
acumulado
para guiar
de la t_cnica
bajo que se est_ usando,
Mantenga
a
curvas.
se hace inclinando
la t_cnica
para toda
la pieza de trabajo
aserrando
el material
a su alrededor.
residual
Corte
Puede obtener
hasta que Iogre
servicio
de reparaci6n
en el centro
Sears m_s
cercano.
CAMBIO DE LA CORREA DE PROPULSION
CORTE BISELADO
Gire hacia la izquierda
Consulte
la Figura 23.
parte
Realice el corte biselado
Desbloquee
ubicada
Incline
inclinando
la mesa, aflojando
en la parte
posterior
la mesa a la posici6n
Fije la mesa en posici6n
la mesa al grado
la manilla
de fijaci6n
de la unidad
deseado.
Suelte el tornillo
que est_
la pesta_a
(Ref. No.68).
apretando
la manilla
para fijar y sujetar
deseado
de cabeza
del motor
de la hoja en la
para destensar
hueca
usando
la hoja.
hexagonal
en
una Ilave "12 hexago-
la Figura 22.
de fijaci6n.
y producir
la pieza de trabajo
asi cortes
la guia en el _ngulo
en _ngulo.
hexagonal
Use la
deseado.
Nunca use simult_neamente
ingletes
para serrar a Io largo. La hoja se puede
atascar
de casquete
de montaje
nal M6 (no suministrada).V_ase
ADVERTENCIA:
y el reborde
de tensi6n
Tornillo de casquete
de cabeza hueca
Use la guia de ingletes
escala para ajustar
la manilla
de la sierra de banda
deseada.
GUIA DE INGLETES
en el _ngulo
superior
la guia de
en la pieza de trabajo.
El operador
daffar.
puede
lesionarse
y/o la pieza de trabajo
se puede
Figura 22 - Cambio
de la Correa
de Propulsi6n
ESCOBILLA PARA LIMPIAR LA HOJA
Consulte
Con aiicates para anillas (C-clip) (no suministrado),
anillo de retenci6n del centro de la rueda inferior.
la Figura 23.
Asegurese
que la escobilla
(Clave No. 150) haga contacto
la hoja para eliminar
adecuadamente
extra,as
impulsora.
de la rueda
todas
con
retire el
Deslice cuidadosamente la rueda inferior hacia delante y a la
vez retire la hoja de la sierra de esta rueda.
las partkulas
Retire la correa de propulsi6n vieja e instale la correa nueva
(asegOrese que las costillas de la correa de propulsi6n est_n
asentadas correctamente antes de volver a instalar y tensar la
correa de propulsi6n).
Consulte
la Figura 23 en la p_gina
Los pasos necesarios
6ptimas
de funcionamiento
Instrucciones
cauciones
para mantener
Ser_ necesario
antes
Siga los procedimientos
la sierra en condiciones
se describen
de Operaci6n.
de seguridad
12.
de trabajar
en la secci6n
tomar
de CAMBIOY AJUSTE DE LA HOJA
DE LA SIERRAy de ALINEACION DE LA HOJA DE LA
SIERRA,antes de restablecer la alimentaci6n el_ctrica para
la sierra de banda y conflgurar la sierra para usarla.
las pre-
con la sierra.
24
SINTOMA
La m_quina
cuando
MEDIDA
CAUSAS(S) POSIBLE(S)
no funciona
se enciende.
1. No hay suministro
2. Interruptor
3. Motor
el_ctrico.
1. Revise el cable para ver si estg roto.
defectuoso.
2. Reemplace el interruptor
defectuoso.
No se ha apretado
CORRECTIVA
la manilla de
1. Apague el motor y apriete
La hoja de la sierra no se
mueve cuando el motor
1.
est_ funcionando.
2. La hoja se ha salido de una de las
ruedas.
2. Abra las puertas y revise.
3. La hoja de la sierra se ha roto.
3. Reemplace la hoja.
4. La correa de propulsi6n
4. Reemplace la correa.
La hoja de la sierra no
corta en linea recta.
tensi6n de la hoja.
I.
No se est_ utilizando
aserrar a Io largo.
se ha roto.
un reborde para
es
una presi6n
ligera en la pieza de trabajo.
Asegurese que la hoja de la sierra no se doble.
3. Los dientes de la hoja estgn
desgastados o da_ados.
3. Utilice una hoja de sierra nueva.
4. Las guias de la hoja no est_n
4. Ajuste las guias de la hoja (v6ase las instrucciones
en la secci6n OPERACION).
I.
de
1. Utilice un reborde para aserrar a Io largo.
2. Aplique
ajustadas adecuadamente.
corta, o corta muy
lenta mente.
la manilla detensi6n
la hoja.
2. La velocidad de alimentaci6n
demasiado alta.
La hoja de la sierra no
bloqueable.
3. Reemplace el motor.
Los dientes est_n desgastados,
al corte de materiales
uso de la hoja.
debido
duros o el largo
1. Reemplace la hoja de la sierra; utilice una hoja de
sierra de 6 DPP (dientes por pulgada) para cortar
madera y materiales suaves. Utilice una hoja de
sierra de 14 DPP (dientes por pulgada) para cortar
materiales
m_s duros. La hoja de sierra de 14 DPP
(dientes por pulgada) siempre corta m_s lentamente
debido a los dientes m_s finos y al rendimiento de
corte m_s lento.
2. Se instal6 incorrectamente
la hoja de
la sierra en la sierra de banda.
El aserrin se acumula en
Esto es normal.
la hoja de la sierra.
Limpie regularmente
la m_quina. Abra las puertas y
extraiga el aserrin con una aspiradora.
el interior de la m_quina.
Hay aserrin en el interior
del alojamiento del motor.
2. Instale correctamente
Esto es normal.
Limpie las ranuras de ventilaci6n
del motor
con una
aspiradora. De vez en cuando limpie el aserrin para
evitar que sea aspirado y se acumule en el interior
del alojamiento.
La m_quina
no corta a
45 6 90 grados.
1. La mesa no est_ a 90 grados con la
hoja.
2. La hoja de la sierra est_ desgastada
se aplic6 demasiada
1. Ajuste la mesa.
o
presi6n en la
2. Reemplace la hoja de la sierra o aplique
menos
presi6n en la pieza de trabajo.
pieza de trabajo.
No se puede situar
correctamente
la hoja
de la sierra en las ruedas.
1. Las ruedas no est_n alineadas
o hay
1. Reemplace el cojinete.
un cojinete defectuoso.
2. No se ha ajustado correctamente
manilla de alineaci6n
la
de la hoja.
2. Ajuste la manilla de alineaci6n
instrucciones
3. La hoja de la sierra es inferior.
3. Reemplace la hoja de la sierra.
25
de la hoja (v_ase las
en la secci6n OPERACION).
NOTAS
26
NOTAS
27
Your Home
For troubleshooting,
product manuals and expert advice:
managemylife
www.managemylife.com
For repair - in your home - of all major brand appliances,
lawn and garden equipment, or heating and cooling systems,
no matter who made it, no matter who sold it!
For the replacement parts, accessories and
owner's manuals that you need to do-it-yourself.
For Sears professional installation of home appliances
and items like garage door openers and water heaters.
1-800-4-MY-HOME ®
Call anytime,
(1-800-469-4663)
day or night (U.S.A.
www.sears.com
and Canada)
www.sears.ca
Our Home
For repair of carry-in items like vacuums, lawn equipment,
and electronics, call anytime for the location of your nearest
Sears Parts & Repair Service
1-800-488-1222
(U.S.A.)
Center
1-800-469-4663
www.sears.com
(Canada)
www.sears.ca
To purchase a protection agreement on a product serviced by Sears:
1-800-827-6655
(U.S.A.)
Para pedir servicio de reparaci6n
a domicilio, y para ordenar piezas:
1-888-SU-HOGAR
1-800-361-6665
Au Canada
®
Trademark
® Marca Registrada
/ TMTrademark
/
MD
1-800-LE-FOYER
Mc
www.sears.ca
of KCD IP, LLC in the United States, or Sears Brands,
/ TMMarca de Fabrica de KCD IP, LLC en Estados
ac Marque de commerce
en frangais:
(1-800-533-6937)
(1-888-784-6427)
www.sears.com
® Registered
pour service
(Canada)
Marque deposee
de Sears Brands, LLC
LLC in other countries
Unidos, o Sears Brands, LLC in otros paises