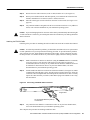
1
Doc. No. 78-3335-03
Second-Generation Channel Interface
Processor (CIP2) Installation and Configuration
Product Numbers: CX-CIP2-ECA1(=), CX-CIP2-ECA2(=), CX-CIP2-ECAP1(=),
CX-CIP2-PCA1(=), CX-CIP2-PCA2(=), CX-CIP2-U-ECA1(=), CX-CIP2-U-ECA2(=),
CX-CIP2-U-ECAP1(=), CX-CIP2-U-PCA1(=), CX-CIP2-U-PCA2(=), CAB-PCA-Y=,
CAB-PCA-VA=, CAB-PCA-VB=
This document contains instructions for installing (or replacing) the second-generation Channel
Interface Processor (CIP2) in the Cisco 7000 series routers and the Cisco 7500 series routers.
Important Note The following Cisco IOS releases support the CIP2: Cisco IOS Release 10.2(13),
or later, Release 10.3(13), or later, Release 11.0(10), or later, or Release 11.1(5) or later. Prior to
these Cisco IOS releases being available, CIP2 is supported with a special microcode image.
This microcode image is available through download from Cisco Connection Online (CCO), on
diskettes shipped with the CIP2 when shipped separately from a system (as a spare), or is already in
Flash memory on a preconfigured system. (For instructions on placing CIP2 microcode in Flash
memory, see the section “CIP2 Microcode Guidelines” on page 42.)
We recommend that you load and use the version of CIP2 microcode that is bundled with your Cisco
IOS software. If you choose not to, you must then copy a CIP2 microcode image into Flash memory
and use a specified configuration command to instruct the Cisco IOS to use this microcode image
instead of the microcode image bundled with your version of the Cisco IOS; however, this is
unnecessary if you load the bundled, recommended CIP2 microcode version.
(For general information on CIP2 microcode, refer to the section “CIP2 Microcode Overview” on
page 6. For specific instructions on configuring the Cisco IOS to use a CIP2 microcode image from
Flash memory, refer to the section “CIP2 Microcode Upgrade Overview” on page 43.)
Corporate Headquarters
Cisco Systems, Inc.
170 West Tasman Drive
San Jose, CA 95134-1706
USA
Copyright © 1996–1997
Cisco Systems, Inc.
All rights reserved.
1
Document Contents
Note For additional specific CIP2 software and hardware requirements, refer to the section “CIP2
Software, Hardware, and Microcode Prerequisites” on page 4.
Your CIP2 might contain a new revision of the ESCON channel adapter (ECA). For additional
specific software, hardware, and microcode requirements for the next-generation ESCON Channel
Adapter, refer to the section “ESCON Channel Adapter Software, Hardware, and Microcode
Prerequisites” on page 7.
For complete and detailed descriptions of CIP2-related interface and configuration commands,
configuration options, and requirements, refer to the appropriate configuration and command
reference publications listed in the section “If You Need More Information.”
Document Contents
This document includes the following sections:
•
•
If You Need More Information
CIP2 Installation Prerequisites, page 4
This section contains important information that must be observed to ensure a successful CIP2
installation.
•
•
•
•
•
•
•
What Is the CIP2, page 21
CIP2 Hardware Installation, page 30
Checking the CIP2 Installation, page 40
CIP2 Microcode Guidelines, page 42
Using Flash Memory, page 46
Running CIP2 Diagnostic Tests, page 49
Cisco Connection Online, page 51
If You Need More Information
The Cisco IOS software running your router contains extensive features and functionality. The
effective use of many of many of these features is easier if you have more information at hand. For
additional information on configuring and maintaining the Cisco 7000 series and Cisco 7500 series
routers and CIP2, the following documentation resources are available to you:
•
Cisco documentation and additional literature are available in a CD-ROM package, which ships
with your product. The Documentation CD-ROM, a member of the Cisco Connection Family, is
updated monthly. Therefore, it might be more up to date than printed documentation. To order
additional copies of the Documentation CD-ROM, contact your local sales representative or call
customer service. The CD-ROM package is available as a single package or as an annual
subscription. You can also access Cisco documentation on the World Wide Web at
http://www.cisco.com, http://www-china.cisco.com, or http://www-europe.cisco.com.
2 Second-Generation Channel Interface Processor (CIP2) Installation and Configuration
If You Need More Information
•
Refer to the following modular configuration, modular command reference, and support
publications, as appropriate for your configuration:
— Configuration Fundamentals Configuration Guide
— Configuration Fundamentals Command Reference
— Security Configuration Guide
— Security Command Reference
— Wide-Area Networking Configuration Guide
— Wide-Area Networking Command Reference
— Network Protocols Configuration Guide, Part 1, 2, and 3 (three separate volumes)
— Network Protocols Command Reference, Part 1, 2, and 3 (three separate volumes)
— Bridging and IBM Networking Configuration Guide
— Bridging and IBM Networking Command Reference
— Configuration Builder Getting Started Guide
— Troubleshooting Internetworking Systems
— Debug Command Reference
— System Error Messages
— Cisco IOS Software Command Summary
— Cisco Management Information Base (MIB) User Quick Reference
•
Refer to the hardware installation and configuration guide that shipped with your Cisco 7000
series or Cisco 7500 series router
•
To view Cisco documentation or obtain general information about documentation, refer to the
Documentation CD-ROM, to the section “Cisco Connection Online,” on page 51, or call
Customer Service at 800 553-6387 or 408 526-7208. Customer Service hours are 5:00 a.m. to
6:00 p.m. Pacific time, Monday through Friday (excluding company holidays). You can also send
e-mail to [email protected]. You can also refer to the Cisco Information Packet that shipped with
your router.
Second-Generation Channel Interface Processor (CIP2) Installation and Configuration
3
CIP2 Installation Prerequisites
CIP2 Installation Prerequisites
Before you install the CIP2, review the safety and electrostatic discharge (ESD)-prevention
guidelines in this section to avoid injuring yourself or damaging the equipment. This section also
provides a list of parts and tools you will need to perform the installation, and lists the software and
microcode requirements.
Following is the specific information included in this section:
•
•
•
•
•
•
•
•
•
CIP2 Software, Hardware, and Microcode Prerequisites
CIP2 Microcode Overview, page 6
ESCON Channel Adapter Software, Hardware, and Microcode Prerequisites, page 7
Safety Guidelines, page 10
Preventing Electrostatic Discharge Damage, page 12
Guidelines for Interface Processor Removal and Installation, page 13
Tools and Parts Required, page 14
What Is the Cisco 7000 Series?, page 14
What Is the Cisco 7500 Series?, page 18
CIP2 Software, Hardware, and Microcode Prerequisites
This section provides important prerequisites you should observe regarding CIP2 software,
hardware, and microcode.
Following are important software and hardware prerequisites concerning the CIP2:
•
To operate with the CIP2, the Cisco 7000 series systems require Cisco IOS Release 10.2(13), or
later, Release 10.3(13), or later, Release 11.0(10) or later, Release 11.0(10)BT or later, Release
11.1(5) or later, or Release 11.2(1) or later.
•
To operate with the CIP2, the Cisco 7500 series systems require Cisco IOS Release 10.3(13), or
later, Release 11.0(10) or later, Release 11.0(10)BT or later, Release 11.1(5) or later, or
Release 11.2(1) or later.
Refer to Table 1, on page 5, for the specific Cisco IOS image names.
•
The CIP2 operates with the CxBus in the Cisco 7000 series routers with either of the following
processor types:
— Route Processor (RP) and Switch Processor (SP) (or Silicon Switch Processor [SSP])
combination.
— 7000 Series Route Processor (RSP7000) and 7000 Series Chassis Interface (RSP7000CI)
combination.
•
The CIP2 operates with the CyBus in the Cisco 7500 series routers, which use the Route Switch
Processor (RSP).
Caution To prevent system problems in Cisco 7000 series and Cisco 7500 series systems, running
Cisco IOS images earlier than Cisco IOS Release 11.1(5), CIP2 (second-generation) cards must not
be installed in the same chassis system with CIP (first-generation) cards.
4 Second-Generation Channel Interface Processor (CIP2) Installation and Configuration
CIP2 Installation Prerequisites
Table 1 lists the specific Cisco IOS software release images that are compatible with the CIP2.
Table 1
Cisco IOS Release Image Names
Cisco IOS Release
gs7-k2-mz, gs7-p2-mz
1
gs7-k2-mz, gs7-p2-mz
rsp-k2-mz, rsp-p2-mz
Release 10.2
Release 10.3
Image Names
1
Release 11.01
gs7-k2-mz, gs7-p2-mz, gs7-ak2-mz
rsp-k2-mz, rsp-p2-mz, rsp-ak2-mz
Release 11.0(10)BT
gs7-k2-mz and rsp-k2-mz
Release 11.12
gs7-aj-mz, gs7-ajv-mz, gs7-j-mz, gs7-jv-mz, gs7-p-mz, gs7-pv-mz
rsp-aj-mz, rsp-ajv-mz, rsp-j-mz, rsp-jv-mz, rsp-p-mz, rsp-pv-mz
Release 11.22
c7000-ajs-mz, c7000-ajsv-mz, c7000-js-mz, c7000-jsv-mz, c7000-p-mz,
c7000-pv-mz
rsp-adsv-mz, rsp-ajsv-mz, rsp-ajsv40-mz, rsp-ajsv56-mz, rsp-dsv-mz,
rsp-dsv40-mz, rsp-dsv56-mz, rsp-isv-mz, rsp-isv40-mz, rsp-isv56-mz, rsp-jsv-mz,
rsp-jsv40-mz, rsp-jsv56-mz, rsp-p-mz, rsp-pv-mz
1. The Cisco IOS Release 10.2, Release 10.3, and Release 11.0 image names that specifically contain a “2” are compatible with the
CIP2.
2. All Cisco IOS Release 11.1 and Release 11.2 images are compatible with the CIP2.
Note Cisco IOS Releases 10.2 and Release 10.3 do not support the latest ESON Channel Adapter
(ECA). This new ECA has specific Cisco IOS release requirements; refer to the section “ESCON
Channel Adapter Software, Hardware, and Microcode Prerequisites” on page 7.
Table 2 specifies the name of the recommended minimum level of CIP2 microcode for a
corresponding Cisco IOS release, which should be used if you are using a Cisco IOS release earlier
than the Cisco IOS releases listed in the section “CIP2 Software, Hardware, and Microcode
Prerequisites,” on page 4, or in the Notes on page 1 or page 42.
Table 2
Cisco IOS Releases and CIP2 Microcode Images
Cisco IOS Release
CIP2 Microcode Image1
Minimum CIP2 Microcode Image
Required for Latest ECA
10.2
cipp20-8 or later
Not supported
10.3
cipp20-8 or later
Not supported
11.0
cipp21-8 or later
cipp21-14 or later, or cipp-k-22-152 or later
11.1
cip22-6 or later
cip22-15 or later
11.2
cip22-6 or later
cip22-15 or later
1. In general, CIP2 microcode image names that have the prefix “cipp” are compatible with the CIP2.
2. Specifically for Cisco IOS Release 11.0(10)BT or later.
Second-Generation Channel Interface Processor (CIP2) Installation and Configuration
5
CIP2 Installation Prerequisites
The show version and show hardware commands display the current hardware configuration of the
router, including the system software version that is currently loaded and running. The
show microcode command lists the bundled microcode (target hardware) version for each processor
type. The CIP (and now CIP2) microcode is no longer bundled in Cisco IOS 11.1 and later, so the
show microcode command lists the default microcode which should be used with this Cisco IOS
version. The show controller cbus command shows the microcode version you are running. (For
additional descriptions of configuration commands, refer to the publications listed in the section “If
You Need More Information” on page 2.)
You can determine the current version of software or microcode stored in Flash memory either by
removing the processor module and checking the Flash device label or by using the show controller
cbus command and checking the EPROM version number in the output. (Refer to the section “CIP2
Microcode Guidelines,” on page 42, for basic configuration information, and to the appropriate
software documentation for complete configuration instructions and examples, listed in the section
“If You Need More Information” on page 2.)
If the displays indicate that the required system software and microcode is not available in your
system, refer to the section “Cisco Connection Online,” on page 51, or contact a service
representative for upgrade information.
CIP2 Microcode Overview
Microcode, also known as firmware, is a set of processor-specific software instructions that enables
and manages the features and functions of a specific processor type. At system startup or reload, the
system loads the microcode for each processor type present in the system.
The CIP2 microcode boot image resides in a Flash memory device on the CIP2 motherboard. The
entire CIP2 microcode image is delivered on a Flash memory card, on floppy diskettes, or is
available via download from CCO.
New microcode is released to enable new features, improve performance, or fix bugs in earlier
versions. The Cisco 7000 series and Cisco 7500 series routers feature downloadable software and
microcode for most upgrades. These features enable you to download new (upgraded) images
remotely, store the images in router memory, and load the new images at system startup without
having to physically access the router. You can store multiple versions for a specific processor type
in Flash memory, and use configuration commands to specify which version the system should load
at startup. All interfaces of the same type (for example, all CIP2s) use the same microcode image.
To ensure proper operation of the CIP2, and to preclude system problems, you should use
only the CIP2 microcode image that is recommended for the version of Cisco IOS you are running.
(See Table 2 on page 5.)
Caution
By default, the CIP2 microcode is loaded from either onboard Flash memory (if you have a Cisco
7000 or Cisco 7010 with an RP) or the Flash memory card in slot0 for the Cisco 7500 series routers.
The default CIP2 microcode version can be found by entering the show microcode command.
6 Second-Generation Channel Interface Processor (CIP2) Installation and Configuration
CIP2 Installation Prerequisites
Following is a partial-display example of the show microcode command output:
Router# show microcode
Microcode bundled in system
Card
Microcode
Type
Version
device:filename
-----------------------------(additional display text omitted from this example)
CIP2
22-15
slot0:cip22-15
(additional display text omitted from this example)
Microcode flash default images
Note For all Cisco IOS releases earlier than Cisco IOS Release 11.1, the filenames of all CIP2
microcode images use the following nomenclature: cippnn-nn, where nn-nn is the specific
microcode version. As of Cisco IOS Release 11.1 or later, the filenames of all CIP2 (and CIP)
microcode images use the nomenclature cipnn-nn.
ESCON Channel Adapter Software, Hardware, and Microcode Prerequisites
The second-generation ESCON channel adapter is the latest Enterprise Systems Connection
Channel Adapter (ECA) available from Cisco Systems. Both ECA models can be used in all
Cisco 7000 series and Cisco 7500 series routers, and both ECAs are compatible with each other, and
with the CIP2.
The ECA/CIP2-motherboard assemblies ship as follows:
•
•
•
Combination PCA and ECA—CX-CIP2-ECAP1(=)
One ECA on a dual carrier—CX-CIP2-ECA1(=)
Two ECAs on a dual carrier—CX-CIP2-ECA2(=)
(Add an equal sign (=) to the product number when you order interface processors as spares.)
Note The latest ECA has specific restrictions regarding the Cisco IOS release your host Cisco 7000
series or Cisco 7500 series router is running, and the CIP2 microcode images to use that are
compatible with the latest ECA and the Cisco IOS software images it requires.
Following are the specific Cisco IOS software and CIP2 microcode requirements that we
recommend you carefully observe, before you can use the latest ECA installed on your CIP2 card:
•
CIP2 Microcode Release cipp21-14 or later, for Cisco 7000 series and Cisco 7500 series routers
running Cisco IOS Release 11.0(14) or later
•
CIP2 Microcode Release cipp-k-22-15 or later, for Cisco 7000 series and Cisco 7500 series
routers running Cisco IOS Release 11.0(14)BT or later
•
CIP2 Microcode Release cip22-15 or later, for Cisco IOS Release 11.1(10) or later, or Release
11.2(5) or later
The appropriate CIP2 microcode images are bundled with the Cisco IOS software.
Second-Generation Channel Interface Processor (CIP2) Installation and Configuration
7
CIP2 Installation Prerequisites
Verifying ECA Models by Examining ECA Hardware
Verify which type of ECA you have on your CIP2; it should be one of the following:
•
•
The latest ECA model (see Figure 1 on page 8)
The earlier ECA model (see Figure 2 on page 8)
Note Because ECAs ship under identical product numbers, you must refer to the different part
numbers (73-xxxx-xx) and component layouts of the two ESCON channel adapter cards, which are
shown in Figure 1 and Figure 2, then make the appropriate comparisons to the CIP2/ECA assembly
shipped to you.
The latest ECA model is Part Number 73-2185-02 or later (see Figure 1); the earlier ECA model is
Part Number 73-1201-02 or earlier (see Figure 2).
If you determine that you have the latest ECA (see Figure 1), you must observe and comply with the
preceding ESCON channel adapter software and microcode prerequisites.
If you determine that you have the earlier ECA (see Figure 2), no further action is required.
Figure 1
Latest ECA Installed on CIP2 (Overhead View)
H9770
Part Number
73-2185-02
(or greater)
CIP2 with latest ECA installed
8 Second-Generation Channel Interface Processor (CIP2) Installation and Configuration
CIP2 Installation Prerequisites
Figure 2
Earlier ECA Installed on CIP2 (Overhead View)
H9774
Part Number
73-1201-02
CIP2 with earlier ECA installed
Verifying ECA Hardware Versions Using the show controllers cbus Command
This section provide an alternative method for verifying your ECA’s hardware version.
Note If you have Cisco IOS software and CIP2 microcode images loaded and running that support
the latest ECA (see Table 2 and the section “ESCON Channel Adapter Software, Hardware, and
Microcode Prerequisites”), then you can also verify which ECA model you have installed by using
the show controllers cbus command to view the ECA’s hardware version.
Refer to the arrow in the following partial-display example of the show controllers cbus command;
the latest ECA model is indicated by hw version 02:
Router# show controllers cbus
(additional text omitted from this example)
slot0: CIP2, hw 5.0, sw 206.172, ccb 5800FF20, cmdq 48000080, vps 8192
software loaded from flash slot0:biff/cip206-172.cbus_kernel_hw5
Loaded:seg_eca
Rev. 0
Compiled by biff on Mon 10-Feb-97 09:28
—>
EPROM version 2.1, VPLD version 5.8
ECA0: hw version 02, microcode version C50602C3
Load metrics:
Memory
dram 29763656/32M
CPU
1m n/a, 5m n/a, 60m n/a
DMA
1m n/a, 5m n/a, 60m n/a
ECA0
1m n/a, 5m n/a, 60m n/a
Second-Generation Channel Interface Processor (CIP2) Installation and Configuration
9
CIP2 Installation Prerequisites
If the installed ECA is the earlier ECA, then hw
shown following:
version 01
(or hw
version 00)
is displayed, as
(additional text omitted from this example)
—>
ECA0: hw version 01, microcode version C50602C3
Note If you determine that you have the latest ECA (and hw version 02 is displayed), you must
observe and comply with the ESCON channel adapter software and microcode prerequisites; refer
Table 2 and the section “ESCON Channel Adapter Software, Hardware, and Microcode
Prerequisites.”
If you determine that you have the earlier ECA (hw
further action is required.
version 00 or hw version 01 is displayed), no
If you see the following error messages displayed, this indicates that you must upgrade the
Cisco IOS software and CIP2 microcode by observing and complying with the ESCON channel
adapter Cisco IOS software and microcode prerequisites; refer to Table 2 and the section “ESCON
Channel Adapter Software, Hardware, and Microcode Prerequisites.”
%CIP2-0-MSG: %ADAPTER-0-DIAGFAIL: Port 0 failed the I/O chip tests diagnostic
%CIP2-0-MSG: %ADAPTER-0-DIAGDATA: Module Call: 123 Error ID: FF85
If you see the following error messages, your Cisco IOS software and CIP2 microcode support the
latest ECA installed in your system:
%CIP2-0-MSG: %ADAPTER-0-DIAGFAIL: Port 0 failed the Electrical wrap diagnostic
%CIP2-0-MSG: %ADAPTER-0-DIAGDATA: Module Call: 1221 Error ID: FE14
Note Running CIP2 microcode versions earlier than cip21-11 and cip22-12 with the latest ECA,
will always result in error messages. Running CIP2 microcode versions earlier than cip21-14 and
cip22-15 with the latest ECA, might result in error messages.
Safety Guidelines
This section lists safety guidelines you should follow when working with any equipment that
connects to electrical power or telephone wiring.
Safety Warnings
Safety warnings appear throughout this publication in procedures that, if performed incorrectly, may
harm you. A warning symbol precedes each warning statement.
Warning Means danger. You are in a situation that could cause bodily injury. Before you work on
any equipment, be aware of the hazards involved with electrical circuitry and be familiar with
standard practices for preventing accidents. To see translations of the warnings that appear in this
publication, refer to the Regulatory Compliance and Safety Information document that accompanied
this device.
10 Second-Generation Channel Interface Processor (CIP2) Installation and Configuration
CIP2 Installation Prerequisites
Waarschuwing Dit waarschuwingssymbool betekent gevaar. U verkeert in een situatie die
lichamelijk letsel kan veroorzaken. Voordat u aan enige apparatuur gaat werken, dient u zich bewust
te zijn van de bij elektrische schakelingen betrokken risico's en dient u op de hoogte te zijn van
standaard maatregelen om ongelukken te voorkomen. Voor vertalingen van de waarschuwingen die
in deze publicatie verschijnen, kunt u het document Regulatory Compliance and Safety Information
(Informatie over naleving van veiligheids- en andere voorschriften) raadplegen dat bij dit toestel is
ingesloten.
Varoitus Tämä varoitusmerkki merkitsee vaaraa. Olet tilanteessa, joka voi johtaa ruumiinvammaan.
Ennen kuin työskentelet minkään laitteiston parissa, ota selvää sähkökytkentöihin liittyvistä
vaaroista ja tavanomaisista onnettomuuksien ehkäisykeinoista. Tässä julkaisussa esiintyvien
varoitusten käännökset löydät laitteen mukana olevasta Regulatory Compliance and Safety
Information -kirjasesta (määräysten noudattaminen ja tietoa turvallisuudesta).
Attention Ce symbole d'avertissement indique un danger. Vous vous trouvez dans une situation
pouvant causer des blessures ou des dommages corporels. Avant de travailler sur un équipement,
soyez conscient des dangers posés par les circuits électriques et familiarisez-vous avec les
procédures couramment utilisées pour éviter les accidents. Pour prendre connaissance des
traductions d’avertissements figurant dans cette publication, consultez le document Regulatory
Compliance and Safety Information (Conformité aux règlements et consignes de sécurité) qui
accompagne cet appareil.
Warnung Dieses Warnsymbol bedeutet Gefahr. Sie befinden sich in einer Situation, die zu einer
Körperverletzung führen könnte. Bevor Sie mit der Arbeit an irgendeinem Gerät beginnen, seien Sie
sich der mit elektrischen Stromkreisen verbundenen Gefahren und der Standardpraktiken zur
Vermeidung von Unfällen bewußt. Übersetzungen der in dieser Veröffentlichung enthaltenen
Warnhinweise finden Sie im Dokument Regulatory Compliance and Safety Information
(Informationen zu behördlichen Vorschriften und Sicherheit), das zusammen mit diesem Gerät
geliefert wurde.
Avvertenza Questo simbolo di avvertenza indica un pericolo. La situazione potrebbe causare
infortuni alle persone. Prima di lavorare su qualsiasi apparecchiatura, occorre conoscere i pericoli
relativi ai circuiti elettrici ed essere al corrente delle pratiche standard per la prevenzione di incidenti.
La traduzione delle avvertenze riportate in questa pubblicazione si trova nel documento Regulatory
Compliance and Safety Information (Conformità alle norme e informazioni sulla sicurezza) che
accompagna questo dispositivo.
Advarsel Dette varselsymbolet betyr fare. Du befinner deg i en situasjon som kan føre til
personskade. Før du utfører arbeid på utstyr, må du vare oppmerksom på de faremomentene som
elektriske kretser innebærer, samt gjøre deg kjent med vanlig praksis når det gjelder å unngå ulykker.
Hvis du vil se oversettelser av de advarslene som finnes i denne publikasjonen, kan du se i
dokumentet Regulatory Compliance and Safety Information (Overholdelse av forskrifter og
sikkerhetsinformasjon) som ble levert med denne enheten.
Aviso Este símbolo de aviso indica perigo. Encontra-se numa situação que lhe poderá causar danos
físicos. Antes de começar a trabalhar com qualquer equipamento, familiarize-se com os perigos
relacionados com circuitos eléctricos, e com quaisquer práticas comuns que possam prevenir
possíveis acidentes. Para ver as traduções dos avisos que constam desta publicação, consulte o
documento Regulatory Compliance and Safety Information (Informação de Segurança e
Disposições Reguladoras) que acompanha este dispositivo.
¡Advertencia! Este símbolo de aviso significa peligro. Existe riesgo para su integridad física.
Antes de manipular cualquier equipo, considerar los riesgos que entraña la corriente eléctrica y
familiarizarse con los procedimientos estándar de prevención de accidentes. Para ver una traducción
de las advertencias que aparecen en esta publicación, consultar el documento titulado Regulatory
Compliance and Safety Information (Información sobre seguridad y conformidad con las
disposiciones reglamentarias) que se acompaña con este dispositivo.
Second-Generation Channel Interface Processor (CIP2) Installation and Configuration
11
CIP2 Installation Prerequisites
Varning! Denna varningssymbol signalerar fara. Du befinner dig i en situation som kan leda till
personskada. Innan du utför arbete på någon utrustning måste du vara medveten om farorna med
elkretsar och känna till vanligt förfarande för att förebygga skador. Se förklaringar av de varningar
som förkommer i denna publikation i dokumentet Regulatory Compliance and Safety Information
(Efterrättelse av föreskrifter och säkerhetsinformation), vilket medföljer denna anordning.
Electrical Equipment
Follow these basic guidelines when working with any electrical equipment:
•
Before beginning any procedures requiring access to the chassis interior, locate the emergency
power-off switch for the room in which you are working.
•
•
•
•
•
Disconnect all power and external cables before moving a chassis.
Do not work alone when potentially hazardous conditions exist.
Never assume that power has been disconnected from a circuit; always check.
Do not perform any action that creates a potential hazard to people or makes equipment unsafe.
Carefully examine your work area for possible hazards such as moist floors, ungrounded power
extension cables, and missing safety grounds.
Telephone Wiring
Use the following guidelines when working with any equipment that is connected to telephone
wiring or to other network cabling:
•
•
Never install telephone wiring during a lightning storm.
•
Never touch uninsulated telephone wires or terminals unless the telephone line has been
disconnected at the network interface.
•
Use caution when installing or modifying telephone lines.
Never install telephone jacks in wet locations unless the jack is specifically designed for wet
locations.
Preventing Electrostatic Discharge Damage
ESD damage, which can occur when electronic cards or components are improperly handled, results
in complete or intermittent failures.
Following are guidelines for preventing ESD damage:
•
•
Always use an ESD-preventive wrist or ankle strap and ensure that it makes good skin contact.
•
When you install a processor module, use the ejector levers to properly seat the bus connectors
in the backplane, then tighten both captive installation screws.
•
Handle processor modules by the carrier handles and carrier edges only; never touch the board
or any connector pins.
When you work at the interface processor end of the chassis, connect the equipment end of the
strap to a captive installation screw on an installed interface processor, or to any unpainted
chassis surface.
12 Second-Generation Channel Interface Processor (CIP2) Installation and Configuration
CIP2 Installation Prerequisites
•
When you remove a processor module, place it card side up on an antistatic surface or in a static
shielding bag. Immediately place the module in a static shielding bag if you need to return it to
Cisco Systems.
•
Avoid contact between electronic equipment and clothing. Antistatic straps only protect the
equipment from ESD voltages on the body; ESD voltages on clothing can still cause damage.
For safety, periodically check the resistance value of the antistatic strap. The
measurement should be between 1 and 10 megohms.
Caution
Guidelines for Interface Processor Removal and Installation
This section describes mechanical functions of system components, emphasizes the importance of
following correct procedures to avoid unnecessary board failures, and is for background only;
specific procedures follow in the section “CIP2 Hardware Installation” on page 30.
You can remove and replace interface processors while the system is operating; you do not need to
notify the software or reset the system power. This functionality enables you to add, remove, or
replace interface processors with the system online, which provides a method that is seamless to end
users on the network, maintains all routing information, and ensures session preservation.
After an interface processor is reinstalled, the system brings on line only interfaces that match the
current configuration and were previously configured as up; all others require that you configure
them with the configure command.
Caution The system can indicate a hardware failure if you do not follow proper procedures.
Remove or insert only one interface processor at a time. Allow at least 15 seconds for the system to
complete the preceding tasks before removing or inserting another interface processor. Disrupting
the sequence before the system completes its verification can cause the system to interpret hardware
failures.
All interface processors have ejector levers that allow you to firmly seat an interface processor in the
interface processor slot. The function of the ejector levers is to align and seat the card connectors in
the backplane.
Caution Always use the ejector levers to remove or install the CIP2. The ejectors help ensure that
backplane connectors on the card are fully seated in, or fully ejected from, the backplane. Failure to
use the ejector levers could result in a partial backplane connection, which can hang the system.
The captive installation screws on the ends of the CIP2 faceplate, when tightened, provide EMI
shielding and also help ensure proper seating in the backplane. After using the ejector levers to
install a CIP2, tighten the captive installation screws to prevent the CIP2 from becoming partially
dislodged from the backplane. These screws must be tightened to meet EMI specifications.
Second-Generation Channel Interface Processor (CIP2) Installation and Configuration
13
CIP2 Installation Prerequisites
Tools and Parts Required
You need the following tools and parts to install or replace a CIP2. If you need additional equipment,
contact a customer service representative for ordering information.
•
Number 2 Phillips or one-quarter-inch flat-blade screwdriver for the captive installation screws
on the CIP2. (Although most interface processors use slotted screws, some interface processor
carriers use Phillips screws.)
•
A new CIP2 shipped as one of the product numbers listed on page 1 or in the section “CIP2
Model Numbers” on page 23.
•
The appropriate cables for your CIP2 type: bus and tag for a PCA (with terminal blocks or 78-pin
connectors) and/or ESCON fiber with duplex connectors for an ECA.
•
•
ESD-preventive wrist strap or other device for preventing ESD damage.
Interface processor filler (MAS7K-BLANK) if you are removing a CIP2 and not installing a new
CIP2 or other interface processor in the empty slot.
What Is the Cisco 7000 Series?
This section provides an overview of the CIsco 7000 series routers. The Cisco 7000 series consists
of the Cisco 7000 and Cisco 7010 routers. The CIP2 will operate in the Cisco 7000 series routers.
The CIP2 will operate in the Cisco 7000 series routers.
For specific software and hardware requirements for the Cisco 7000 series systems, refer to the
section “CIP2 Software, Hardware, and Microcode Prerequisites” on page 4.
In the Cisco 7000, slot 5 is reserved for the RSP7000 (7000 RSP slot shown in Figure 3), which
contains the system processor and performs packet switching functions; slot 6 is reserved for the
RSP7000CI (7000 CI slot shown in Figure 3), which contains all of the environmental monitoring
functions for the Cisco 7000. The Cisco 7000 can also be used with the Route Processor (RP) and
Switch Processor (SP) (or SSP) combination.
The remaining five slots (slots 0 through 4) are for interface processors, including the CIP2.
14 Second-Generation Channel Interface Processor (CIP2) Installation and Configuration
CIP2 Installation Prerequisites
Figure 3
Cisco 7000 with RSP7000 and RSP7000CI Installed (Interface Processor End)
Captive
installation screw
DC
AC
FA
IL
PO
WE
EN
R
AB
LE
NO
RM
AL
Upper
power supply
EJ
EC
T
I
SL SLO
OT T
0 1
O
Captive
installation screw
CP
U
EN
AB
HA
LT
LE
RE
SE
T
DC
AC
FA
IL
PO
WE
R
Lower
power supply
AU
NS
OL
E
I
ROUTE SWITCH PROCESSOR
CO
H5288
X.
O
Interface processor slots
0
1
2
3
4
RSP RSP
7000 7000CI
slot 5 slot 6
Second-Generation Channel Interface Processor (CIP2) Installation and Configuration
15
CIP2 Installation Prerequisites
Figure 4 shows the interface processor end of the Cisco 7000, which provides access to the seven
processor slots and the removable power supplies. When facing the interface processor end of the
chassis, the SP (or SSP) and RP slots are on the far right. The five interface processor slots are
numbered 0 to 4 from left to right and are reserved for interface processors, including the CIP2.
Figure 4
Cisco 7000 with RP and SP (or SSP) Installed (Interface Processor End)
Captive
installation screw
DC
AC
FA
IL
PO
WE
R
Upper
power supply
I
O
Captive
installation screw
DC
AC
FA
IL
PO
WE
H2358
R
Lower
power supply
I
O
Slot 0
1
2
3
4
16 Second-Generation Channel Interface Processor (CIP2) Installation and Configuration
SP RP
or
slot
SSP
CIP2 Installation Prerequisites
In the Cisco 7010, slot 3 is reserved for the RSP7000 (7000 RSP slot shown in Figure 5), which
contains the system processor and performs packet switching functions; slot 4 is reserved for the
RSP7000CI (7000 CI slot shown in Figure 5), which contains all of the environmental monitoring
functions for the Cisco 7010. The remaining three slots (slots 0 through 2) are for interface
processors, including the CIP2.
Figure 5
Cisco 7010 with RSP7000 and RSP7000CI Installed (Interface Processor End)
RSP7000CI slot 4
RSP7000 slot 3
NS
CO
AU
X.
OL
E
T
HA
SE
U
RE
CP
EC
Interface processor slot 2
EN
AB
EN
LE
AB
LE
EJ
RM
AL
NO
SL SLO
OT T
0 1
T
LT
ROUTE SWITCH PROCESSOR
Interface processor slot 1
Interface processor slot 0
Power switch
H5874
DC OK LED
Chassis ground
screw
Power receptacle
AC-input power supply
Figure 6 shows the interface processor end of the Cisco 7010, which provides access to the five
processor slots. When facing the interface processor end of the chassis, the RP and SP (or SSP) slots
are at the top. The three interface processor slots are numbered from the bottom up beginning with
slot 0 (the bottom slot) through 2 (the center slot) and are reserved for interface processors, including
the CIP2.
Figure 6
Cisco 7010 with RP and SP (or SSP) Installed (Interface Processor End)
RP slot
SP or SSP slot
Interface processor slot 2
Interface processor slot 1
Interface processor slot 0
H2359
Power switch
Chassis ground
screw
Power receptacle
DC OK LED
AC-input power supply
Second-Generation Channel Interface Processor (CIP2) Installation and Configuration
17
CIP2 Installation Prerequisites
What Is the Cisco 7500 Series?
This section provides an overview of the CIsco 7000 series and Cisco 7500 routers. The Cisco 7500
series consists of the Cisco 7505, Cisco 7507, and Cisco 7513 routers. The CIP2 will operate in the
Cisco 7500 series routers.
For specific software and hardware requirements for the Cisco 7500 series systems, refer to the
section “CIP2 Software, Hardware, and Microcode Prerequisites” on page 4.
Network interfaces reside on modular interface processors, including the CIP2, which are inserted
into interface processor slots and provide a direct connection between external networks and the
high-speed CyBus in the Cisco 7500 series. Figure 7, Figure 8, and Figure 9 show the rear of the
Cisco 7500 series routers: the five-slot Cisco 7505, the seven-slot Cisco 7507, and the thirteen-slot
Cisco 7513, respectively.
In the Cisco 7505 (see Figure 7), slot 4 is reserved for the Route Switch Processor (RSP1 or RSP4),
which contains the system processor and performs packet switching functions. Slots 0 through 3 are
for interface processors, including the CIP2.
Cisco 7505 (Interface Processor End)
T
NS
CO
AU
X.
OL
E
SE
HA
CP
RE
U
T
EC
Interface processor slot 3
EN
AB
EN
LE
AB
LE
EJ
SL SLO
OT T
0 1
AL
RM
NO
RSP slot
ROUTE SWITCH PROCESSOR
LT
Figure 7
Interface processor slot 2
Interface processor slot 1
Interface processor slot 0
H2761
ower switch
Chassis
grounding
receptacles
Power receptacle
AC-input power supply
18 Second-Generation Channel Interface Processor (CIP2) Installation and Configuration
DC OK LED
CIP2 Installation Prerequisites
Figure 8 shows the rear of the Cisco 7507 router. In the Cisco 7507, up to two slots (2 and 3) are
reserved for the Route Switch Processor (RSP2 and/or RSP4), which contains the system processor
and performs packet switching functions. Slots 0 and 1 and 4 through 6 are for interface processors,
including the CIP2.
Figure 8
Cisco 7507 (Interface Processor End)
aptive
stallation screw
DC
AC
FA
IL
PO
WE
R
EN
NO
AB
RM
LE
AL
pper
ower supply
hassis
rounding
eceptacles
EJ
EC
T
SL SLO
OT T
0 1
I
SL MAS
AV T
E ER
O
SL
AV
E/M
AS
TE
R
aptive
stallation screw
CP
U
HA
LT
EN
AB
RE
LE
SE
T
DC
AC
FA
IL
PO
WE
H3888
R
ower
ower supply
AU
X.
NS
OL
E
I
ROUTE SWITCH PROCESSOR 2
CO
O
Slot 0
1
2
3
4
5
6
RSP slots
Second-Generation Channel Interface Processor (CIP2) Installation and Configuration
19
CIP2 Installation Prerequisites
Figure 9 shows the rear of the Cisco 7513. Two slots (6 and 7) are reserved for the second generation
Route Switch Processor (RSP2 and/or RSP4), which contains the system processor and performs
packet switching functions. Slots 0 through 5 and 8 through 12 are for interface processors, including
the CIP2.
Figure 9
Cisco 7513 (Interface Processor End)
Blower module
Cable-management
bracket
NO
RM
AL
EN
AB
LE
EJE
CT
SLO SLO
T0 T1
SLA MAS
VE TE
R
Card cage and
processor modules
SLA
VE
/M
AS
TE
R
CP
U
HA
LT
RE
SE
EN
T
AB
LE
AU
X.
ROUTE SWITCH PROCESSOR 2
CO
NS
OLE
Air intake vent
AC
OK
FAN
OK
OUTPUT
FAIL
AC
OK
OUTPUT
FAIL
POWER
A
POWER
B
Chassis grounding
receptacles
I
I
0
0
20 Second-Generation Channel Interface Processor (CIP2) Installation and Configuration
H5268
Power supplies
FAN
OK
What Is the CIP2
What Is the CIP2
This section discusses channel attachment and the CIP2, its LED functions, and its memory and
cable requirements.
The following information is included:
•
•
•
Channel Attachment Overview
CIP2 Overview
CIP2 Description, page 22
— CIP2 Model Numbers, page 23
— CIP2 DRAM Configurations, page 24
— CIP2 LED Indicators and Sequences, page 24
— ESCON and Bus and Tag Specifications, page 26
— ESCON Cable, page 26
— Bus and Tag Cables, page 27
Channel Attachment Overview
A mainframe channel (referred to as a channel) is an intelligent processor that manages the protocol
on the communications media and controls the data transfer to and from the main central processing
unit (CPU) storage. Devices called input/output processors (IOPs) communicate between the host
CPU and the channel. One IOP controls multiple channels, and there is no relationship between the
number of CPUs and the number of IOPs.
The channel relieves the mainframe CPU of direct communication with input/output (I/O) devices,
which saves processing cycles and allows data processing and communications tasks to run
concurrently. Channels use one or more channel paths as the links between mainframes and I/O
devices. I/O devices are connected directly to control units, which provide the logical capabilities
required to operate and control the I/O devices.
CIP2 Overview
The CIP2 provides up to two channel interfaces for Cisco 7000 series and Cisco 7500 series routers;
in some situations, this can eliminate the need for a separate front-end processor (FEP). The CIP2
contains combinations of a bus and tag (also called an original equipment manufacturer’s interface
[OEMI] and a parallel I/O interface) adapter and an Enterprise Systems Connection (ESCON)
adapter. The bus and tag adapter is called the Parallel Channel Adapter (PCA), and the ESCON
adapter is called the ESCON Channel Adapter (ECA). (For information on the latest ECA model
refer to the section “ESCON Channel Adapter Software, Hardware, and Microcode Prerequisites”
on page 7.) The PCA and ECA connect directly to the CIP2, and all combinations of the two adapters
are available.
Note The ECAs and PCAs must be upgraded or replaced (in the field) by a Cisco-certified
maintenance provider only. The CIP2 supports online insertion and removal, which allows you to
install or remove a CIP2 while the system is operating, without shutting down system power.
Second-Generation Channel Interface Processor (CIP2) Installation and Configuration
21
What Is the CIP2
Caution To prevent system problems in Cisco 7000 series and Cisco 7500 series systems running
Cisco IOS images earlier than Cisco IOS Release 11.1(5), CIP2 (second-generation) cards must not
be installed in the same chassis system with CIP (first-generation) cards.
CIP2 Description
The CIP2 (see Figure 10) consists of a motherboard that is mounted on a metal carrier and one or
two ECA and/or PCA interfaces. (The CIP2’s front-panel label reads Channel Interface
Processor 2.) The ECA and PCA interfaces attach to the motherboard by means of a multipin
connector located at the rear edge of the adapter. The ECA and PCA provide the channel attachment
interfaces to connect your CIP2 to your channel.
The CIP2 has two DRAM SIMMs (see Figure 10) and comes configured with 32 MB of DRAM as
the minimum standard (default) memory configuration. The CIP2 also has a Flash memory device
for storing the CIP2 microcode boot image. (See Figure 10.)
Figure 10
CIP2, Horizontal Orientation
Flash memory
H6671
U2
U1
0
1
DRAM
SIMMs
ECA
NL L
IN
E
O
T
ED
NA
G
EN
AD
LO
ES
PR
SI
EN
PO
RT
AB
0
LE
PO
D
RT
1
PCA
Note The ECA and PCA adapters can be upgraded or replaced (in the field) by a Cisco-certified
maintenance provider only.
Caution To prevent damage, and to prevent insertion problems caused by misalignment of the
adapters and motherboard, do not attempt to remove the adapters or motherboard from the carrier.
22 Second-Generation Channel Interface Processor (CIP2) Installation and Configuration
What Is the CIP2
CIP2 Model Numbers
There are three CIP2 carrier types, which offer the following five interface adapter combinations:
•
•
•
•
•
One PCA on a PCA/ECA carrier—CX-CIP2-PCA1(=)
Combination PCA and ECA—CX-CIP2-ECAP1(=)
One ECA on a dual carrier—CX-CIP2-ECA1(=)
Two ECAs on a dual carrier—CX-CIP2-ECA2(=)
Two PCAs on a dual carrier—CX-CIP2-PCA2(=)
Add an equal sign (=) to the product number when you order interface processors as spares.
The ECA has a female, duplex connector, and the PCA has a female, DB-78 connector. Figure 11
shows the ECA and PCA interface combinations that are available.
1
Single PCA
1
PCA and ECA
1
Single ECA
1
CIP2 Interface Channel Adapter Combinations
Dual ECA
1
0
Dual PCA
H7108
0
0
0
0
Figure 11
Caution The latest ECA model has specific software, hardware, and microcode requirements that
must be observed to ensure proper system operation. To determine if you have the earlier ECA, or
the latest ECA, on your CIP2, refer to the section “ESCON Channel Adapter Software, Hardware,
and Microcode Prerequisites” on page 7.
Second-Generation Channel Interface Processor (CIP2) Installation and Configuration
23
What Is the CIP2
CIP2 DRAM Configurations
Each CIP2 model is available in the following configurations of dynamic random-access memory
(DRAM) single in-line memory modules (SIMMs):
•
•
•
•
32-MB DRAM—MEM-CIP-32M
32-MB DRAM—MEM-CIP-32M=
64-MB DRAM—MEM-CIP-64M(=)
128-MB DRAM—MEM-CIP-128M(=)
Note MEM-CIP-32M is the default memory configuration that ships on the CIP2.
MEM-CIP-32M= is a spare memory option, which is intended for CIP2 cards ordered without
DRAM.
All CIP2 DRAM upgrade products ship with the configuration note Upgrading DRAM on the CIP2
(Document Number 78-3915-xx, where xx is the latest version of the document). This configuration
note is also available on the Documentation CD-ROM.
CIP2 DRAM can be upgraded in the field by Cisco-certified service personnel only.
CIP2 LED Indicators and Sequences
Following are the functions of the CIP2 LEDs. (See Figure 12.)
CIP2 LED Indicators
L
H2433
E
A
N
N
LI
G
N
SI
O
ED
D
A
LO
PR
ES
EN
T
EN
PO
R
T
AB
0
LE
PO
R
D
T
1
Figure 12
•
•
•
•
Enabled—Indicates that the CIP2 has been enabled for operation by the system.
•
Online—For the ECA, this LED indicates that an establish-logical-path request has been
received from the channel. For the PCA, this LED indicates that the PCA is ready to establish
connection to the host channel.
Present—Indicates that the ECA or PCA adapter has been detected by the CIP2.
Loaded—Indicates that the ECA or PCA adapter firmware has been completely loaded.
Signal—For the ECA, this LED indicates that the Sync signal has been detected. For the PCA,
this LED indicates that the Operational Out signal has been detected. Note that even though a
system reset and selective reset both cause the operational out signal to drop, the signal LED will
still be on during those sequences.
24 Second-Generation Channel Interface Processor (CIP2) Installation and Configuration
What Is the CIP2
Following are the sequences for the CIP2 LED indicators. The enabled LED is not part of the
following sequences. On cold boots, the following LED sequences apply:
Present
Loaded
Signal
Online
Port 1
On
On
Off
Off
Port 0
Off
Off
Off
Off
Present
Loaded
Signal
Online
Port 1
On
On
On
On
Port 0
On
On
Off
Off
Present
Loaded
Signal
Online
Port 1
On
On
On
On
Port 0
On
On
On
On
The following LED sequence indicates that the CIP2 is waiting for commands from the RP (or RSP).
Present
Loaded
Signal
Online
Port 1
Off
Off
Off
Off
Port 0
Off
Off
Off
Off
On warm boots, the LEDs flash briefly. On downloads, the following three LED sequences apply;
the first indicates that the system is downloading volatile programmable logic device (VPLD) code:
Present
Loaded
Signal
Online
Port 1
On
On
On
On
Port 0
On
On
On
Off
The following sequence indicates that the CIP2 is downloading microcode:
Present
Loaded
Signal
Online
Port 1
Off
Off
Off
Off
Port 0
On
On
On
On
The following sequence indicates that the CIP2 is starting to execute the microcode:
Present
Loaded
Signal
Online
Port 1
Off
Off
Off
Off
Port 0
Off
Off
Off
Off
Second-Generation Channel Interface Processor (CIP2) Installation and Configuration
25
What Is the CIP2
ESCON and Bus and Tag Specifications
Table 3 lists the specifications for the ESCON and bus and tag interfaces.
Table 3
ESCON and Bus and Tag Specifications
Characteristic
ESCON
Bus and Tag
Supported processor I/O architectures
ESA/390
System/370
370/Xa
ESA/390
Bit transmission
Serial
Parallel
Maximum distance (for LED with ESCON)
1.9 miles (3.1 km) point-to-point
5.7 miles (9.2 km) with two ESCON Directors
400 ft (122 m)1
Channel data rate
Up to 17 MBps2
Up to 4.5 MBps
Signaling rate
3
Cable types
200
Mbps4
4.5 MBps
Fiber-optic (62.5/125 micron multimode)
Addition of devices to running systems
Dynamic
5
Copper bus and tag
Static
6
Number of addressable devices per channel
256 x 16 x 16 x 253
256
Connectable control units per channel
Up to 59 (through a 9032 ESCON Director)
Up to 8
Connectable channels per adapter
Up to 59 (through a 9032 ESCON Director)
Varies by control unit
1
1. The IBM 3044 C/D (host side/remote side) copper-to-fiber repeater can be used to extend this distance up to 1.2 miles (2 km).
2. MBps = megabytes per second.
3. For bus and tag, the signaling rate matches the channel data rate. For example, if you use a 3.0 MBps channel, the signaling rate is
3.0 MBps. The ESCON interface signals at a constant rate; the bus and tag interface signals at the data rate.
4. Mbps = megabits per second.
5. The CIP2 ESCON requires dynamic = NO with HCD.
6. Where 256 represents available unit addresses, 16 represents the number of partitions (LPARs), 16 represents the number of control
unit images, and 253 represents the number of ESCON director paths. It is unlikely a system would have the resources to support the
total number of available addresses.
ESCON Cable
The ECA interface uses 62.5/125 micrometer, multimode, fiber-optic cable with male duplex
connectors at each end. (See Figure 13.) ESCON cables are not available from Cisco Systems. Refer
to the ESCON specifications in Table 3, and contact your cable supplier or the vendor of your host
CPU to order the correct ESCON cable.
ESCON Interface Duplex Connector for the ECA
H2454
Figure 13
26 Second-Generation Channel Interface Processor (CIP2) Installation and Configuration
What Is the CIP2
Bus and Tag Cables
Following are descriptions and illustrations of the bus and tag cables.
Y Cable
The bus and tag cable with three 78-pin connectors (shown in Figure 14 on page 27) has a DB-78
male (PCA) connector on the CIP2 end, a DB-78 female connector on the next-control-unit end, and
a DB-78 male connector on the from-host end.
Figure 14
PCA Bus and Tag Cable (CAB-PCA-Y)
Male, DB-78 PCA connector
Female, DB-78 connector to
next control unit (light gray)
Male, DB-78 connector from
host (dark gray or black)
H2444
Male, DB-78
terminator block
The model number is CAB-PCA-Y (referred to as the Y cable) The male connector might be labeled
IN and is typically black, but can also be a dark gray. The female connector might be labeled OUT
and is typically light gray. The female OUT cable is nearest to the select/bypass switch, which is
discussed on the following page. (The IBM part number is 89F8392; however, this is subject to
change.)
Caution The Y cable must connected directly to the PCA. Do not connect any other cables directly
to the PCA.
Second-Generation Channel Interface Processor (CIP2) Installation and Configuration
27
What Is the CIP2
Note the switch marked S (for select mode) and B (for bypass mode). The switch is located on the
rear of the PCA connector. (See Figure 15.) The select/bypass switch is required to allow the cable
to be separated from the PCA without “opening” the select-out loop.
Caution To prevent halting the system or negatively affecting the mainframe operating system,
verify that the select/bypass switch is in bypass mode before you remove the PCA connector from
the CIP2.
Select/Bypass Switch on the Rear of the PCA Connector (CAB-PCA-Y Bypass Shown)
H2445
Figure 15
In select mode the PCA is operational, and the select-out signal is passed in a loop to all control lines
on the channel. All control units have a relay that shorts the incoming select-out signal to the
outgoing select-out signal when power is not applied to the control unit. When power is applied, the
relay is opened, and the signal is passed to the PCA.
Without the select/bypass switch in bypass mode, the channel would need to be taken offline before
servicing or replacing a CIP2. If the selected address does not match, the select-out signal is passed
to the next control unit. If the select-out signal gets all the way back to the channel, the control unit
being addressed is not present.
Note In bypass mode, the incoming select-out signal is shorted to the outgoing select-out signal,
bypassing the PCA and allowing other devices on the channel to function properly.
Caution Make sure you provide adequate strain relief for the heavy bus and tag cables that attach
to the PCA, to prevent damaging the PCA connector on the CIP2 by unintentionally disconnecting
the Y cable from the PCA connector.
VA and VB Cables
The two bus and tag cables with connector blocks have a DB-78 (male or female) connector on the
CIP2 end and 48-pin type-A connector blocks on the bus and tag ends. (See Figure 16.) VA and VB
cables are 56 inches (1.42 meters) in length.
For the bus and tag cable that attaches between the host and the PCA, the model number is
CAB-PCA-VA, and it is referred to as the VA cable. The female 78-pin connector might be labeled
IN and is typically light gray. The cable labeled P2 is bus, and the cable labeled P3 is tag. Looking
into the end of the female 78-pin connector (on the VA cable), with the wide part of the connector
D-shell on top, the P2 (bus) cable is on the right, and the P3 (tag) cable is on the left. The plastic on
the ends of the bus and tag connectors might be black or dark gray.
28 Second-Generation Channel Interface Processor (CIP2) Installation and Configuration
What Is the CIP2
The IBM part number is 12G8058; however, this is subject to change. The VA cable ships with a
terminator; the Cisco model number CAB-PCA-VA includes this terminator. The terminator and VA
cable together have the IBM part number 12G7988; however, this is subject to change.
For the bus and tag cable that attaches between the next control unit and the PCA, the model number
is CAB-PCA-VB, and it is referred to as the VB cable. The male 78-pin connector might be labeled
OUT and is typically black or dark gray. The cable labeled P2 is bus, and the cable labeled P3 is tag.
Looking into the end of the male 78-pin connector (on the VB cable), with the wide part of the
connector D-shell on top, the P2 (bus) cable is on the left, and the P3 (tag) cable is on the right. The
plastic on the ends of the bus and tag connectors might be light gray (as opposed to the black or dark
gray plastic on the VA cable). The IBM part number is 12G7933; however, this is subject to change.
Caution To prevent potential system problems, do not connect the VB cable directly to the PCA.
You must connect the Y cable to the PCA, then connect the VB cable to the Y cables as appropriate.
Figure 16
PCA Bus and Tag, VA and VB Cables
DB-78 connector
Light gray for
CAB-PCA-VA
(female)
Dark gray or black
for CAB-PCA-VB
(male)
48-pin type-A
connector blocks
Bus
Tag
H2432
Dark gray for
for CAB-PCA-VA;
light gray for
CAB-PCA-VB
(plastic end)
The Y cable always attaches to the PCA. The VA cable attaches between the male end of the Y cable
and the host. The VB cable attaches between the female end of the Y cable and the next (or new)
control unit. Do not connect the VB cable directly to the PCA. If the PCA is the last control unit,
channel termination is required at the end of the Y cable that points away from the host. (See
Figure 14.) For attachment instructions refer to the section “Attaching the CIP2 to the Channel” on
page 35.
Second-Generation Channel Interface Processor (CIP2) Installation and Configuration
29
CIP2 Hardware Installation
Caution To prevent damaging the PCA connector on the CIP2 by unintentionally disconnecting the
Y cable from the PCA connector, provide adequate strain relief for the heavy bus and tag cables that
attach to the PCA.
CIP2 Hardware Installation
The following sections describe the procedures for installing or replacing the CIP2:
•
•
•
Removing a CIP2 or an Interface Processor Filler, page 31
Installing a CIP2, page 34
Attaching the CIP2 to the Channel, page 35
Caution To avoid unnecessary errors, read the section “Guidelines for Interface Processor Removal
and Installation” before removing or replacing a CIP2.
Before installing a newCIP2, ensure that your system meets the minimum software and microcode
requirements described in the sections “CIP2 Software, Hardware, and Microcode Prerequisites,” on
page 4, and “CIP2 Microcode Overview” on page 6.
While you can remove and install a CIP2 without turning off system power, we do recommend that
you administratively shut down CIP2 interface before insertion and removal. In any case, you must
follow the insertion instructions carefully; for example, failure to use the ejector levers or insert the
CIP2 properly can cause system error messages indicating a card failure.
Each unused interface processor slot contains an interface processor filler (which is an interface
processor carrier without an interface card) to keep dust out of the chassis and to maintain proper
airflow through the interface processor compartment.
If you install a new CIP2, select an empty interface processor slot and remove the interface processor
filler. If you replace a CIP2, you can retain the existing interface configuration by removing the
existing interface processor and installing the new one in the same slot; however, the new CIP2 must
have the same channel adapter configuration as the CIP2 you replaced.
Proceed to the section “Removing a CIP2 or an Interface Processor Filler,” on page 31, for
instructions on making an interface processor slot available for the new CIP2, then to the section
“Installing a CIP2,” on page 34, for the installation instructions. After the new CIP2 is secure, follow
the procedures in the section “Checking the CIP2 Installation,” on page 40, to verify that it is
installed and functioning properly.
30 Second-Generation Channel Interface Processor (CIP2) Installation and Configuration
CIP2 Hardware Installation
Removing a CIP2 or an Interface Processor Filler
You do not need to shut down the interface or the system power when you remove a CIP2; however,
to prevent a possible interface control check on the mainframe, consult with your system
administrator to take appropriate precautions. If you are installing a new CIP2, select an available
slot and remove the interface processor filler. If you are replacing a CIP2, first remove the existing
CIP2 and immediately place it component side up on an antistatic surface, then insert the new CIP2
in the same slot to retain the previous configuration for the new channel interface.
Figure 17 shows proper handling of an interface processor for installation in the Cisco 7010 or Cisco
7505 models. The processor slots are oriented horizontally in the Cisco 7010 and Cisco 7505, and
vertically in the Cisco 7000, Cisco 7507, and Cisco 7513. When installing interface processors in
these latter chassis, handle the interface processor in the same manner, but rotated 90 degrees
clockwise.
Handling Interface Processors during Installation
H1985
Figure 17
Captive installation
screws
Second-Generation Channel Interface Processor (CIP2) Installation and Configuration
31
CIP2 Hardware Installation
Figure 18 shows the functions of the ejector levers in the correct orientation for the horizontal
processor slots in a Cisco 7010 and Cisco 7505 chassis. In a Cisco 7000, Cisco 7507, and Cisco 7513
chassis, the function of the ejector levers is the same, but the orientation is rotated 90 degrees
clockwise for the vertical processor slots.
Figure 18
Function of the Ejector Levers
Interface processor
card slot
Ejector
lever
Interface processor card
carrier guide (black)
a
b
Captive
installation
screw
H1984
c
32 Second-Generation Channel Interface Processor (CIP2) Installation and Configuration
CIP2 Hardware Installation
The function of the ejector levers (see Figure 18) is to align and seat the card connectors in the
backplane. Failure to use the ejector levers and insert the interface processor properly can disrupt the
order in which the pins make contact with the backplane.
Following are examples of incorrect insertion practices and their results:
•
Using the handle to force the interface processor all the way into the slot can pop the ejector
levers out of their springs. If you then try to use the ejector levers to seat the interface processor,
the first layer of pins (which are already mated to the backplane) can disconnect and then remate
with the backplane, which the system interprets as a card failure.
•
Using the handle to force or slam the interface processor all the way into the slot can also damage
the pins on the card connectors if they are not aligned properly with the backplane.
•
When using the handle (rather than the ejector levers) to seat the interface processor in the
backplane, you may need to pull the interface processor back out and push it in again to align it
properly. Even if the connector pins are not damaged, the pins mating with and disconnecting
from the backplane will cause the system to interpret a card failure. Using the ejector levers
ensures that the card connector mates with the backplane in one continuous movement.
•
Using only the handle to seat or remove an interface processor, or failing to push the ejector
levers flat against the CIP2 faceplate, can leave some (not all) of the connector pins mated to the
backplane, a state that will halt the system.
Using the ejector levers and making sure that they are pushed fully into position ensures that all three
layers of pins are mated with (or free from) the backplane.
It is also important to use the ejector levers when you remove an interface processor to ensure that
the card connector pins disconnect from the backplane in the logical sequence expected by the
system. Any processor module that is only partially connected to the backplane can halt the bus.
In the following procedures, two channel-related terms are used: vary offline refers to disabling an
interface; vary online refers to enabling an interface. For instructions on how to vary the host channel
or addresses online or offline, refer to the documentation for your mainframe operating system.
Refer to Figure 18 while performing the following steps to remove a CIP2 or interface processor
filler. If you are removing an interface processor filler, proceed to Step 5. If you are replacing an
existing CIP2, begin at Step 1.
Follow these steps to remove a CIP2 or an interface processor filler:
Step 1
Vary offline the addresses assigned to the PCA or ECA. For instructions on how to vary
offline, refer to the documentation for your mainframe operating system.
Step 2
Use the shutdown interface command to shut down the appropriate interfaces.
Step 3
On the PCA connector, place the select/bypass switch in bypass mode. (See Figure 15 on
page 28.)
Step 4
Disconnect the interface cables from the CIP2 interface ports.
Step 5
Use a screwdriver to loosen both the captive installation screws on the CIP2 or interface
processor filler. (See Figure 18a.)
Step 6
Place your thumbs on the ends of each of the ejector levers and simultaneously pull them
both outward, away from the interface port (in the opposite direction from that shown in
Figure 18c) to release the carrier from the slot. If you are removing a CIP2, this also
releases the CIP2 bus connector from the backplane.
Step 7
Grasp the handle with one hand and pull the CIP2 or interface processor filler straight out
of the slot, keeping your other hand under the carrier to guide it. (See Figure 17.) Keep
the carrier parallel to the backplane. Avoid touching the card or any connector pins.
Second-Generation Channel Interface Processor (CIP2) Installation and Configuration
33
CIP2 Hardware Installation
Step 8
Place the removed CIP2 on an antistatic mat or foam pad, or place it in an antistatic bag
if you need to return it to Cisco Systems. If you removed an interface processor filler,
store the filler in case you need it later to fill an empty slot.
Step 9
If the interface processor slot is to remain empty, install an interface processor filler to
keep dust out of the chassis and to maintain proper airflow through the interface processor
compartment.
This completes the removal procedure. Proceed to the next section to install a new CIP2.
Installing a CIP2
The CIP2 slides into any available interface processor slot and connects directly to the backplane of
the Cisco 7000 series or Cisco 7500 series router. The backplane slots are keyed so that the CIP2 can
be installed only in an interface processor slot. (Refer to Figure 3, Figure 5, Figure 7, Figure 8, or
Figure 9, depending on your chassis type.) Figure 18 shows the functional details of inserting an
interface processor and using the ejector levers. Figure 17 shows proper handling of an interface
processor during installation.
Caution Remove or insert only one interface processor at a time. Allow at least 15 seconds for the
system to complete the preceding tasks before removing or inserting another interface processor.
Disrupting the sequence before the system has completed its verification can cause the system to
assume that there has been a hardware failure.
Follow these steps to install a CIP2:
Step 1
Ensure that a console terminal is connected to the RP (or RSP) console port and that the
console power switch is turned ON.
Step 2
Choose an available interface processor slot for the CIP2 and ensure that the interface
cables are of sufficient length to connect the CIP2 to the channel.
Step 3
Hold the CIP2 handle with one hand, and place your other hand under the carrier to
support the CIP2 (see Figure 17), and guide it into the slot. Avoid touching the card or
any connector pins.
Step 4
Place the back of the CIP2 in the slot and align the notches along the edge of the carrier
with the grooves in the slot. (See Figure 18a on page 32.)
Step 5
Keeping the carrier parallel to the backplane, carefully slide the CIP2 into the slot until
the back of the faceplate makes contact with the ejector levers, then stop. (See Figure 18b
on page 32.)
Caution Always use the ejector levers when installing or removing interface processor modules. A
module that is partially seated in the backplane will cause the system to halt and subsequently crash,
and shoving or slamming the interface processor into the slot can damage the backplane and
connector pins.
34 Second-Generation Channel Interface Processor (CIP2) Installation and Configuration
CIP2 Hardware Installation
Step 6
Using the thumb and forefinger of each hand to pinch each ejector lever, simultaneously
push both ejector levers inward (toward the interface ports) until they snap into place and
are parallel to the faceplate. (See Figure 18c on page 32.)
Step 7
Use a screwdriver to tighten the two captive screws on the interface processor faceplate,
before installing additional interface processors. This prevents the interface processor
from becoming partially dislodged from the backplane and ensures proper EMI shielding.
(These screws must be tightened to meet EMI specifications.)
Proceed to the next section to attach the bus and tag and/or ESCON cables between the CIP2
interface ports and your channel.
Attaching the CIP2 to the Channel
The CIP2 can be connected to the channel using the bus and tag cables (for the PCA) and/or using
a fiber-optic ESCON cable with duplex connectors (for the ECA). Bus and tag and ESCON
connections each have their own special requirements.
The following sections discuss bus and tag and ESCON connections:
•
•
Attaching the Bus and Tag Cables
Attaching the ESCON Cable, page 39
Attaching the Bus and Tag Cables
The PCA is connected using the bus and tag cable with 78-pin connectors (the Y cable) and the bus
and tag cables with 48-pin, type A connector blocks (the VA and VB cables). In general, a Y cable
attaches to the PCA on the CIP2, and the VA and VB cables attach to the remaining ends of the Y
cable.
Attaching the PCA to the Host Channel
Attach the PCA to the host as follows.
Caution To reduce the potential for problems, you should have an authorized service representative
or other qualified service person perform the following procedure. To prevent hardware problems
with your host processor, all the channel connections must be tight. A loose connection can cause
the host processor or its channel to halt. All connections must be screwed together.
Step 1
Vary offline the host channel to which the PCA will be attached.
For instructions on how to vary the host channel offline, refer to the documentation for
your mainframe operating system.
Caution Ensure the select/bypass switch is in the bypass position; otherwise, the mainframe
operating system can be negatively affected.
Second-Generation Channel Interface Processor (CIP2) Installation and Configuration
35
CIP2 Hardware Installation
Connecting or Removing the Y Cable
0
Figure 19
Attach the PCA connector of the Y cable to the PCA. (See Figure 19.)
Single PCA
1
Step 2
From host or mainframe
(male, dark gray or black)
To next control
unit or terminator
(female, light gray)
Step 3
H2450
PCA connector
Attach the female (light-gray) end of the Y cable (see Figure 20a) to the male (dark gray
or black) end of the VB cable (that goes to the next control unit).
If the PCA is the last control unit on the channel, attach a terminator to the female end of
the Y cable. (See Figure 20b.) Do not attach a VB cable.
Note If the PCA is the last control unit, channel termination is absolutely required to loop signals
back to the host.
Caution To prevent potential system problems, do not connect the VB cable directly to the PCA.
You must connect the Y cable to the PCA, then connect the VB cable to the Y cables as appropriate.
Figure 20
To next control unit
Connecting the VB Cable Between the Y Cable and the Next Control Unit
VB cable
Y cable
Dark gray or black
Light gray
a
Light gray
plastic end
Tag
Male
Female
b
Bus
36 Second-Generation Channel Interface Processor (CIP2) Installation and Configuration
H2452
Terminator
CIP2 Hardware Installation
Figure 21
If required, extend the length of the Y cable connections (between the VA and VB cables)
with a straight-through cable (shown in Figure 21) that is available from IBM. This cable
is not available from Cisco Systems.
Straight-Through Cable
78-pin
78-pin
Female
Male
Step 5
Figure 22
Attach the male (dark gray or black) end of the Y cable to the female (light gray) end of
the VA cable that comes from the host. (See Figure 22.)
Connecting the VA Cable Between the Y Cable and the Host
Y cable
VA cable
Dark gray or black
From host
Light gray
Female
Tag
Dark gray
plastic end
H2451
Male
H2455
Step 4
Bus
Step 6
Leave the select/bypass switch (see Figure 15 on page 28) in bypass mode until the PCA
connector is attached to the PCA.
Step 7
Connect the Y cable to the PCA.
Step 8
Place the select/bypass switch in select mode.
Step 9
If the CIP2 replaces another interface processor or occupies a previously empty interface
processor slot, configure the interface(s) on the CIP2; otherwise, interface configuration
is not required.
Step 10
Vary online the host channel.
For instructions on how to vary the host channel online, refer to the documentation for
your mainframe operating system.
Second-Generation Channel Interface Processor (CIP2) Installation and Configuration
37
CIP2 Hardware Installation
It is also possible to connect the PCA to the host or mainframe using the straight-through
cable (CAB-PCA-S) as shown in Figure 23.
Step 11
This connection technique uses the Y cable and eliminates the requirement for the VA and
VB cables from the host and to the next control unit, respectively. A straight-through
cable can also be used from the Y cable to the next control unit; however, if no control
unit exists, use a terminator.
1
Connecting the PCA and Host Using the Y Cable and Straight-Through Cable (CAB-PCA-S)
0
Figure 23
PCA connector
Single PCA
From host or mainframe
(male, dark grey or black)
To next control
unit or terminator
(female, light grey)
H2481
Straight-through
cable
To host or mainframe
(male)
Caution To prevent damaging the PCA connector on the CIP2, by unintentionally disconnecting
the Y cable from the PCA connector, make sure you provide adequate strain relief for the heavy bus
and tag cables that attach to the PCA.
Detaching the Y Cable from the PCA
To properly detach a Y cable from the PCA, use the following procedure.
Caution To reduce the potential for problems, you should have an authorized service representative
or other qualified service person perform the following procedure. To prevent hardware problems
with your host processor, all the channel connections must be tight. A loose connection can cause
the host processor or its channel to halt. Every cable must be tightly seated in its mating connector.
Step 1
Have the system operator vary offline all addresses assigned to the PCA. For instructions
on how to vary addresses offline, refer to the documentation for your mainframe
operating system.
Step 2
Place the select/bypass switch on the PCA connector in bypass mode. (See Figure 15 on
page 28.)
To allow the propagation of channel signals to downstream control units while the PCA
cable is disconnected, leave this switch in bypass mode.
Caution If the select/bypass switch is in select mode when the PCA connector is removed, other
devices on the channel and the mainframe operating system might not operate properly.
38 Second-Generation Channel Interface Processor (CIP2) Installation and Configuration
CIP2 Hardware Installation
Step 3
Remove the PCA cable connector (on the Y cable) from the PCA. (See Figure 19.)
Step 4
When you are finished with the task that required you to detach the PCA from the host
channel, reattach the PCA connector (on the Y cable) to the PCA.
Step 5
Place the select/bypass switch on the PCA connector in select mode. (See Figure 15 on
page 28.)
Step 6
Vary online all addresses assigned to the PCA. For instructions on how to vary addresses
online, refer to the documentation for your mainframe operating system.
Caution To prevent damaging the PCA connector on the CIP2 by unintentionally disconnecting the
Y cable from the PCA connector, provide adequate strain relief for the heavy bus and tag cables that
attach to the PCA.
Attaching the ESCON Cable
Following is the procedure for attaching the ESCON cable between the ECA and the host channel.
Caution To reduce the potential for problems, you should have an authorized service representative
or other qualified service person perform the following procedure. To prevent hardware problems
with your host processor, all the channel connections must be tight. A loose connection can cause
the host processor or its channel to halt. Every cable must be tightly seated in its mating connector.
Step 1
Make certain the ECA interface is shut down (using the shutdown interface command)
to prevent excessive error messages from being sent to the router log output. It is
recommended, but not necessary, to vary offline the host channel to which the ECA will
be attached. For instructions on how to vary the host channel offline, refer to the
documentation for your mainframe operating system.
Step 2
Attach an ESCON cable between the ECA and the host channel. (See Figure 24.) Make
certain the ESCON cable plug “clicks” into place in the receptacle on the ECA. If not, the
connection will be incomplete and connection problems could result. It is best to visually
inspect the connection after you make it, rather than relying on an audible cue in a noisy
lab environment.
0
H2453
Connecting an ESCON Cable to the ECA
1
Figure 24
Single ECA
To an ESCON Director (switch)
or host CPU
Step 3
Vary online the host channel. For instructions on how to vary the host channel online,
refer to the documentation for your mainframe operating system.
This completes the procedure for attaching an ESCON cable.
Second-Generation Channel Interface Processor (CIP2) Installation and Configuration
39
Checking the CIP2 Installation
Checking the CIP2 Installation
After you install the CIP2 and cables, verify the installation by observing the LED states and the
console display. When the system has reinitialized all inserted interfaces, the enabled LED on the
newly inserted CIP2 should go on. The console screen will also display a message as the system
discovers each interface during its reinitialization. If you need to verify the operation of the
interfaces, refer to the section “Running CIP2 Diagnostic Tests” on page 49.
When you remove and replace interface processors, the system provides status messages on the
console screen. These messages are for information only. The following sample display shows the
events logged by the system as a CIP2 is removed from slot 1; the system makes as down the CIP2
that was removed. If the appropriate cables are connected and the no shutdown command is entered
after the CIP2 is reinserted, the system marks the interface(s) as up again.
The sample display follows:
Router#
%OIR-6-REMCARD: Card removed from slot 1, interfaces disabled
Router#
%OIR-6-INSCARD: Card inserted in slot 1, interfaces administratively shut down
When a new CIP2 is inserted or when a CIP2 is moved to a new slot, the system recognizes the new
interface, but leaves it in an administratively shutdown state until you configure it and change the
state to up with the no shutdown command.
The following sample display shows the events logged by the system as a new single-PCA CIP2 is
inserted in slot 3:
Router#
%OIR-6-INSCARD: Card inserted in slot 3, interfaces administratively shut down
Verify that the CIP2 is installed correctly, as follows:
Step 1
Step 2
While the system reinitializes each interface, observe the messages on the console display
and verify that the system discovers the CIP2, as follows:
•
If you installed a new CIP2 that occupies a slot not previously occupied by a similarly
configured CIP2, the system should recognize the new interface(s), but leave the
interface(s) configured as administratively shut down.
•
If you replaced a CIP2 with a new CIP2, the system should recognize the interface(s)
and place the interface(s) in the same state (up or down) that existed before you
removed the first CIP2.
•
If the systems displays an error message, or fails to recognize the CIP2, verify that the
currently running system software and microcode meet the minimum requirements
for CIP2 operation. (See the sections “CIP2 Software, Hardware, and Microcode
Prerequisites,” on page 4, and “CIP2 Microcode Overview” on page 6.) To do this, use
the show microcode command, the show controllers cbus command, or the dir slot0
command. If the Cisco IOS and microcode versions are correct, reboot the router.
Check the enabled LED. (Refer to the state descriptions in the section “CIP2 LED
Indicators and Sequences” and Figure 12 on page 24.) If no LEDs remain on, the CIP2
has not been successfully configured by the system and will not function, or the CIP2 is
not inserted properly.
40 Second-Generation Channel Interface Processor (CIP2) Installation and Configuration
Checking the CIP2 Installation
Step 3
When the reinitialization is complete, verify that the enabled LED on the CIP2 goes on
and remains on. (See Figure 25.)
CIP2 LED Indicators
R
T
PO
0
R
T
H2433
PO
EN
T
A
D
E
SI D
G
N
O AL
N
LI
N
E
LO
PR
ES
EN
AB
LE
D
1
Figure 25
If the enabled LED does go on, the installation check is complete.
If the enabled LED on the CIP2 fails to go on, the CIP2 card connector might not be fully
seated in the backplane or the correct version of CIP2 microcode was not available for
download. To check the CIP2 card’s connections, proceed to Step 4. To check the
microcode, use the show microcode command, the show controllers cbus command, or
the dir slot0 command.
Step 4
Proceed as follows:
•
Loosen the captive installation screws, then firmly push the ejector levers inward
(toward the interface port) until both are parallel to the CIP2 faceplate.
•
•
Tighten the captive installation screws.
After the system reinitializes the interfaces, the enabled LED on the CIP2 should go
on.
If it does go on, the installation check is complete. If it does not go on, proceed to
Step 5.
Step 5
If the enabled LED still fails to go on, remove the CIP2 and try installing it in another
available interface processor slot.
•
If the enabled LED goes on when the CIP2 is installed in the new slot, there could be
a failed backplane port in the original interface processor slot.
•
If the enabled LED still fails to go on, but other LEDs on the CIP2 are on and indicate
activity, the enabled LED on the CIP2 has probably failed. Proceed to Step to resume
the installation check.
•
If the enabled LED still does not go on, do not proceed with the installation. Contact
a service representative to report the faulty equipment and obtain further instructions.
(Instructions for obtaining technical assistance are provided at the end of this
document.)
If the present LED fails to go on, the connection between the ECA or PCA and the motherboard
might be faulty; however, do not attempt to disassemble the CIP2 in order to check this connection.
Instead, contact a service representative.
If the interface is new, refer to the publications listed in the section “If You Need More Information,”
on page 2, to configure the new interface. (This does not have to be done immediately, but an
interface will not be available until you configure it.)
If this installation was to replace a CIP2, use the show interfaces or show controllers cxbus EXEC
commands to verify the status of the interface. (For complete descriptions of the show commands,
refer to the publications listed in the section “If You Need More Information,” on page 2.)
Second-Generation Channel Interface Processor (CIP2) Installation and Configuration
41
CIP2 Microcode Guidelines
If an error message is displayed on the console terminal, refer to the System Error Messages
publication for error message definitions. If you experience other problems that you are unable to
solve, contact a service representative for assistance.
This completes the CIP2 hardware installation.
Note For complete CIP2 configuration information, refer to the appropriate software configuration
guide and command reference listed in the section “If You Need More Information” on page 2.
CIP2 Microcode Guidelines
The following sections discuss CIP2 microcode configuration requirements:
•
•
•
How Does CIP Microcode Ship?
CIP2 Microcode Upgrade Overview, page 43
Configuring Microcode, page 44
(For additional information about specific microcode requirements, refer to the section “ESCON
Channel Adapter Software, Hardware, and Microcode Prerequisites” on page 7.)
How Does CIP Microcode Ship?
For the Cisco 7000 series and Cisco 7500 series routers, CIP2 microcode is available on floppy
diskettes, Flash memory cards (which also include the Cisco IOS release compatible with the
microcode version), and via Cisco Connection Online (CCO).
As of Cisco IOS Release 11.1, the CIP2 microcode is shipped or available on the following media:
•
Via electronic download from CCO using File Transfer Protocol (FTP) for all 7000 family
routers
•
On a separate set of floppy diskettes shipped with Cisco IOS Release 11.1 diskettes for all
Cisco 7000 series and Cisco 7500 series routers
•
On floppy diskettes shipped with Cisco IOS Release 11.1 ROMs (RP-based Cisco 7000 series
routers only)
•
Preinstalled on a Flash memory card with Cisco IOS Release 11.1 (available as an upgrade for
RP-based Cisco 7000 series routers only)
Note CIP2-compatible microcode images are bundled with all other Cisco IOS releases that
support CIP2, including Cisco IOS Release 10.2(13), or later, Release 10.3(13), or later,
Release 11.0(10), or later, or Release 11.0(10)BT or later.
42 Second-Generation Channel Interface Processor (CIP2) Installation and Configuration
CIP2 Microcode Guidelines
CIP2 Microcode Upgrade Overview
Following is an overview of what you need to do to upgrade unbundled CIP2 microcode (that
shipped on floppy diskettes and Flash memory cards) for the Cisco 7000 series and Cisco 7500 series
routers.
Caution To prevent system problems in the following procedure, a CIP2-compatible,
bootloader-capable Cisco IOS image must be booted before the CIP2 microcode image is copied to
Flash memory.
Upgrading from Floppy Diskettes
For CIP2 microcode images that shipped on floppy diskettes or were obtained from CCO, do the
following:
Step 1
Upload the CIP2 microcode image (and the Cisco IOS image if not on ROMs) on floppy
diskettes or from CCO to a TFTP server.
Step 2
Remove any configuration commands that specify a CIP2 microcode image from the
running configuration.
Step 3
Save your running configuration to a TFTP server or Flash memory.
Note If you have a Cisco 7000 series router and plan to install new software ROMs with Cisco IOS
Release 11.1 or later, skip Steps 4 and 5 and turn off power to your router.
Install the new ROMs, then proceed to Step 6.
Step 4
Download the Cisco IOS image to Flash memory.
Step 5
Configure the router to boot from the Flash memory where the Cisco IOS image resides.
Step 6
Boot the Cisco IOS image.
Note The router must already be running a CIP2-compatible Cisco IOS image before performing
a copy of the CIP2 microcode image to Flash memory in the following step, because the CIP2
microcode image must be “exploded” from the single image file on the TFTP server to multiple files
in Flash memory. This capability is available in Cisco IOS Release 11.1 or later.
Step 7
Download the CIP2 microcode image to the Flash memory card in slot 0.
Step 8
Restore the running configuration with the configuration you saved to the TFTP server in
Step 3.
Step 9
Reconfigure the router, as required, to use the CIP2 microcode image stored in the Flash
memory card in slot 0.
Step 10
Perform a microcode reload.
Second-Generation Channel Interface Processor (CIP2) Installation and Configuration
43
CIP2 Microcode Guidelines
Upgrading from a Flash Memory Card
For CIP2 microcode that shipped on Flash memory cards, do the following:
Step 1
Insert the Flash memory card into a Flash memory card slot 0.
Step 2
Configure the router to boot from the Flash memory card in slot 0.
Note For the specific procedures associated with the steps in this overview, refer to the companion
publication Upgrading Software and Microcode in Cisco 7000 Series and Cisco 7500 Series Routers
(Document Number 78-1144-xx), which includes the information and procedures necessary to
upgrade your CIP2 microcode.
The Upgrading Software and Microcode in Cisco 7000 Series and Cisco 7500 Series Routers
publication includes information on upgrading software and microcode images, transferring files to
and from Trivial File Transfer Protocol (TFTP) servers, copying files between nonvolatile
random-access memory (NVRAM) and Flash memory, and between TFTP servers and Flash
memory; the publication also includes basic instructions for booting your system.
Configuring Microcode
This section describes how to modify the startup configuration to load different microcode images
at startup, or to change existing configuration instructions and reenable the system default.
At system startup or reload, the system loads a microcode image for each processor type. All
processors of the same type use the same microcode image; only one image for each type can load
at startup. The CIP2 Flash memory provides a CIP2 microcode boot image. The entire CIP2
microcode image is located in a Flash memory card, on a floppy disk, or is available from CCO or
from a TFTP server.
Whenever you upgrade software or microcode by downloading new images into Flash memory, you
must configure the system to load the new image at startup. Otherwise, the system will continue to
load the default image from the system, or attempt to load the previous image (if any) if it is still
specified in the configuration file.
Note If you are running anything other than the default CIP2 microcode with your Cisco IOS image
and you want to upgrade to a later version of Cisco IOS, and want to use the default CIP2 microcode
that comes with that later version, you have to remove the microcode cip flash statement from the
system configuration file, otherwise the Cisco IOS will try to load that old version of the CIP2
microcode.
To instruct the system to boot a CIP2 microcode image other than the default at startup, use the
microcode cip flash [bootflash | slot0 | slot1 ]:filename configuration command to add the
instructions to the configuration file.
Note If you are currently running a previous Cisco IOS release, refer to the appropriate
configuration and command reference publications for specific commands that apply to this
procedure depending on your Cisco IOS release. All Cisco IOS release documentation is available
on the Cisco Connection Documentation, Enterprise Series CD-ROM.
44 Second-Generation Channel Interface Processor (CIP2) Installation and Configuration
CIP2 Microcode Guidelines
If you plan to load a microcode image from an individual file or a bundled system image stored in
Flash memory, enter the show flash slot0: EXEC command to display the contents and verify the
exact name of the file (cip1234 is used in this example):
Router> show flash slot0:
(additional displayed text omitted)
-#- ED --type-- --crc--- -seek-- nlen -length- -----date/time------ name
1
.. FFFFFFFF A831B720 3828CC 16
3549260 Feb 24 1996 20:28:56 rsp-k-mz.111-5
2
.. FFFFFFFF 83A6447F 8B8D18 16
761932
Apr 17 1996 15:15:59 cip1234
(additional displayed text omitted)
5419388 bytes available (15158916 bytes used)
Follow these steps to configure the microcode for a CIP2 on a router configured with Cisco IOS
Release 11.1(5) or later.
Step 1
Enter the privileged EXEC mode command interpreter, as follows:
Router> enable
Password:
Router#
Note For complete information on the command interpreter and software functions, refer to the
publications listed in the section “If You Need More Information” on page 2.
Step 2
If you need to copy a new CIP2 microcode image into your system’s Flash memory, refer
to the section “Using Flash Memory,” on page 46, then proceed to Step 3.
Step 3
In privileged command mode, enter router configuration mode and specify that the
console terminal will be the source of the configuration subcommands, as follows:
Router# configure terminal
To load the microcode from an individual microcode image that is stored as a file in Flash
memory, enter the microcode command, the processor type, the specific memory
location of the CIP2 microcode image, and the exact argument for filename (cip1234 is
used in this example):
Router(config)# microcode cip flash slot0:cip1234
The no microcode command cancels any existing instructions to load an image from
Flash memory:
Router(config)# no microcode cip flash slot0:cip1234
Second-Generation Channel Interface Processor (CIP2) Installation and Configuration
45
CIP2 Microcode Guidelines
Step 4
To save the configuration file, press Ctrl-Z, then copy the new configuration to
nonvolatile random-access memory (NVRAM) as follows:
Router# copy running-config startup-config
The microcode reload command must be invoked whenever you modify the system
default to load a microcode image, using the microcode cip flash command.
If you see either of the following error messages displayed, this indicates that you must
upgrade the Cisco IOS software and CIP2 microcode by observing and complying with
the ESCON channel adapter Cisco IOS software and microcode prerequisites; refer to
Table 2 and the section “ESCON Channel Adapter Software, Hardware, and Microcode
Prerequisites.”
%CIP2-0-MSG: %ADAPTER-0-DIAGFAIL: Port 0 failed the I/O chip tests diagnostic
%CIP2-0-MSG: %ADAPTER-0-DIAGDATA: Module Call: 123 Error ID: FF85
If you see the following error messages, your Cisco IOS software and CIP2 microcode
support the latest ECA installed in your system:
%CIP2-0-MSG: %ADAPTER-0-DIAGFAIL: Port 0 failed the Electrical wrap diagnostic
%CIP2-0-MSG: %ADAPTER-0-DIAGDATA: Module Call: 1221 Error ID: FE14
Note Running CIP2 microcode versions earlier than cip21-11 and cip22-12 with the latest ECA,
will always result in error messages. Running CIP2 microcode versions earlier than cip21-14 and
cip22-15 with the latest ECA, might result in error messages.
Step 5
To verify that the correct microcode is loaded according to the new instructions, enter the
show controller cbus EXEC command. The resulting display indicates the currently
loaded and running microcode version for each interface processor.
Step 6
To verify the contents of the configuration file, enter the show running-config and show
startup-config EXEC commands. You can also verify that the correct system image is
configured to load at system restart or reload.
This completes the procedure for configuring microcode. For complete descriptions of the show
commands, refer to the publications listed in the section “If You Need More Information” on page 2.
Using Flash Memory
The following sections discuss various Flash-memory functionality that you might need for
microcode configuration:
•
•
•
Copying to Flash Memory on an RSP or RSP7000, page 47
Additional Flash Memory Commands, page 48
Recovering from Locked Blocks, page 49
46 Second-Generation Channel Interface Processor (CIP2) Installation and Configuration
CIP2 Microcode Guidelines
Copying to Flash Memory on an RSP or RSP7000
Copying a new image to Flash memory might be required whenever a new microcode image
becomes available. Use the command copy tftp:filename [ bootflash | slot0 | slot1 ]:filename for the
copy procedure where tftp:filename is the source of the file and [ bootflash | slot0 | slot1 ]:filename
is the destination in onboard Flash memory or on either of the Flash memory cards. An example of
the copy tftp:filename command for Cisco IOS Release 11.1 follows:
Router# copy tftp:cip1234 slot0:cip1234
2283972 bytes available on device flash, proceed? [confirm]
Address or name of remote host [biff.cisco.com]?
Accessing file “cip1234” on biff.cisco.com ...FOUND
Loading mhoerler/cip1234 from 1.1.1.22 (via Ethernet0/0): !Verifying via checksum...
Flash verification successful.
Length = 1, checksum = 0xFFFF
--- expanding multi-segment file --flash:cip1234_kernel_hw4 size = 238626
!!!!!!!!!!!!!!!!!!!!!!!!!Verifying via checksum... vvvvvvvvvvvvvv
Flash verification successful.
Length = 238626, checksum = 0x0000
--- expanding multi-segment file --flash:cip1234_seg_802 size = 198600
!!!!!!!!!!!!!!!!!!!!!!!!!Verifying via checksum... vvvvvvvvvvvv
Flash verification successful.
Length = 198600, checksum = 0x9237
--- expanding multi-segment file --flash:cip1234_seg_csna size = 102392
!!!!!!!!!!!!!!!!!!!!Verifying via checksum... vvvvvv
Flash verification successful.
Length = 102392, checksum = 0x771E
--- expanding multi-segment file --flash:cip1234_seg_eca size = 461408
!!!!!!!!!!!!!!!!!!!!!!!!!!!!!!! Verifying via checksum... vvvvvvvvvvvvvvvvvvvvvvvvvvvv
Flash verification successful.
Length = 461408, checksum = 0xB791
--- expanding multi-segment file --flash:cip1234_seg_offload size = 52608
!!!!!!!!!!Verifying via checksum... vvv
Flash verification successful.
Length = 52608, checksum = 0x0FBC
--- expanding multi-segment file --flash:cip1234_seg_pca size = 69360
!!!!!!!!!!!!!!Verifying via checksum... vvvv
Flash verification successful.
Length = 69360, checksum = 0x737F
--- expanding multi-segment file --flash:cip1234_seg_tcpip size = 175320
!!!!!!!!!!!!!!!!!!!!!!!!!!!!!!!!!!Verifying via checksum... vvvvvvvvvv
Flash verification successful.
Length = 175320, checksum = 0xD416
Note In the preceding example, the exclamation points (!!!) appear as the file is downloaded, and
the “v” characters signify calculation of the checksum, which is a verification that the file has been
correctly downloaded to the Flash memory card.
Second-Generation Channel Interface Processor (CIP2) Installation and Configuration
47
CIP2 Microcode Guidelines
Additional Flash Memory Commands
Following are additional commands related to the Flash memory in the single in-line memory
module (SIMM) on the RSP1, RSP2 and RSP7000 (called bootflash) and in PCMCIA Flash memory
cards. (The following example assumes you are currently accessing the Flash memory card in
PCMCIA slot 0.) You can determine which PCMCIA slot you are accessing using the pwd
command as follows:
Router# pwd
slot0
You can move between Flash memory media using the cd [ bootflash | slot0 | slot1 ] command as
follows:
Router# cd slot0
slot0
Router# cd slot1
Router# pwd
slot1
You can list the directory of any Flash memory media using the dir [ bootflash | slot0 | slot1 ]
command as follows:
Router# dir
-#- -length1
4601977
6
679
7
1
-----date/time-----May 19 1994 09:42:19
May 19 1994 05:43:56
May 19 1994 09:54:53
name
myfile1
todays–config
fun1
You can delete a file from any Flash memory media using the delete command as follows:
Router# delete slot0:fun1
Router# dir
-#- -length- -----date/time------ name
1
4601977 May 19 1994 09:42:19 myfile1
6
679
May 19 1994 05:43:56 todays–config
To verify that the delete command was successful, use the dir/all/long command.
Note Files that are deleted are simply marked as deleted, but still occupy space in Flash memory.
To remove them, use the squeeze command.
The squeeze command permanently removes files, which are marked as deleted, and pushes all other
undeleted files together to eliminate spaces between them.
Following is the syntax of the squeeze command:
Router# squeeze slot0:
All deleted files will be removed, proceed? [confirm]
Squeeze operation may take a while, proceed? [confirm]
ebESZ
To prevent loss of data due to sudden power loss, the “squeezed” data is temporarily saved to another
location of Flash memory, which is specially used by the system.
48 Second-Generation Channel Interface Processor (CIP2) Installation and Configuration
Running CIP2 Diagnostic Tests
In the preceding command display output, the character “e” means this special location has been
erased (which must be performed before any write operation). The character “b” means that the data
that is about to be written to this special location has been temporarily copied. The character “E”
signifies that the sector which was temporarily occupied by the data has been erased. The character
“S” signifies that the data was written to its permanent location in Flash memory.
The squeeze command operation keeps a log of which of these functions has been performed so
upon sudden power failure, it can come back to the right place and continue with the process. The
character “Z” means this log was erased after the successful squeeze command operation.
Recovering from Locked Blocks
A locked block of Flash memory occurs when power is lost or a Flash memory card is unplugged
during a write or erase operation. When a block of Flash memory is locked, it cannot be written to
or erased, and the operation will consistently fail at a particular block location. The only way to
recover from locked blocks is by reformatting the Flash memory card with the format command.
Caution Formatting a Flash memory card to recover from locked blocks will cause existing data to
be lost.
Running CIP2 Diagnostic Tests
There are six PCA and ECA diagnostic test routines, as follows:
•
•
•
•
•
•
Processor test 1
Processor test 2
I/O device tests
Serial link controller (SLC) device tests
Internal electrical wrap
External optical wrap (ECA only) or external electrical wrap (PCA only)
The external wrap routine will run in two modes: optical and electrical.
Note All diagnostic tests are run every time the adapter is started. They cannot be run
independently. The wrap tests require special wrap plugs for the PCA and ECA; contact a service
representative to obtain the appropriate wrap plugs.
Second-Generation Channel Interface Processor (CIP2) Installation and Configuration
49
Running CIP2 Diagnostic Tests
The interface has to pass the first five tests. The sixth test (which is the same as the fifth, but with a
different mode for the optical wrap plug for the ECA, instead of electrically wrapping the interface)
will fail if no wrap plug is installed or if the interface is connected to the channel. This type of failure
will not affect the channel.
If a wrap plug is inserted, following is how the wrap diagnostics will be repeated:
•
•
Until a failure occurs
•
Until you enable the second adapter (as in a dual channel CIP2)
Until the wrap plug is removed (which may be reported as a failure depending on when you pull
the wrap plug)
If you suspect that an adapter might be the cause of a problem you are seeing, you can run a single
pass of the diagnostic tests on an installed PCA or ECA interface by entering configuration mode
and specifying that the console terminal will be the source of the configuration subcommands, as
follows:
Router# configure terminal
Next, specify the slot/port number (interface processor slot number/port number) of the interface for
which you want the diagnostic tests to run by entering the interface channel command followed by
the slot/port of the interface.
The example that follows is for a CIP2 interface in interface processor slot 1:
Router(config)# interface channel 1/0
To run the diagnostic tests once, enter the shutdown command and then the no shutdown command,
as follows:
Router(config)# shutdown
Router(config)# no shutdown
Ctrl-Z
Router#
The no shutdown command causes the diagnostic tests to run on the PCA or ECA interface you
selected. If no failures occur, you can rule out that adapter as the source of your problem.
50 Second-Generation Channel Interface Processor (CIP2) Installation and Configuration
Cisco Connection Online
Cisco Connection Online
Cisco Connection Online (CCO) is Cisco Systems’ primary, real-time support channel. Maintenance
customers and partners can self-register on CCO to obtain additional information and services.
Available 24 hours a day, 7 days a week, CCO provides a wealth of standard and value-added
services to Cisco’s customers and business partners. CCO services include product information,
product documentation, software updates, release notes, technical tips, the Bug Navigator,
configuration notes, brochures, descriptions of service offerings, and download access to public and
authorized files.
CCO serves a wide variety of users through two interfaces that are updated and enhanced
simultaneously: a character-based version and a multimedia version that resides on the World Wide
Web (WWW). The character-based CCO supports Zmodem, Kermit, Xmodem, FTP, and Internet
e-mail, and it is excellent for quick access to information over lower bandwidths. The WWW version
of CCO provides richly formatted documents with photographs, figures, graphics, and video, as well
as hyperlinks to related information.
You can access CCO in the following ways:
•
•
•
•
•
WWW: http://www.cisco.com
WWW: http://www-europe.cisco.com
WWW: http://www-china.cisco.com
Telnet: cco.cisco.com
Modem: From North America, 408 526-8070; from Europe, 33 1 64 46 40 82. Use the
following terminal settings: VT100 emulation; databits: 8; parity: none; stop bits: 1; and
connection rates up to 28.8 kbps.
For a copy of CCO’s Frequently Asked Questions (FAQ), contact [email protected]. For
additional information, contact [email protected].
Note If you are a network administrator and need personal technical assistance with a Cisco
product that is under warranty or covered by a maintenance contract, contact Cisco’s Technical
Assistance Center (TAC) at 800 553-2447, 408 526-7209, or [email protected]. To obtain general
information about Cisco Systems, Cisco products, or upgrades, contact 800 553-6387,
408 526-7208, or [email protected].
This document is to be used in conjunction with the appropriate installation and configuration guide that shipped with your router. (3335cip2.fm[78-3335-03])
AtmDirector, AutoConnect, AutoRoute, AXIS, BPX, Catalyst, CD-PAC, CiscoAdvantage, CiscoFusion, Cisco IOS, the Cisco IOS logo, CiscoLink, CiscoPro, the CiscoPro logo,
CiscoRemote, the CiscoRemote logo, CiscoSecure, Cisco Systems, CiscoView, CiscoVision, CiscoWorks, ClickStart, ControlStream, EdgeConnect, EtherChannel, FairShare, FastCell,
FastForward, FastManager, FastMate, FastPADlmp, FastPADmicro, FastPADmp, FragmentFree, FrameClass, Fulcrum INS, IGX, Impact, Internet Junction, JumpStart, LAN2LAN
Enterprise, LAN2LAN Remote Office, LightSwitch, MICA, NetBeyond, NetFlow, Newport Systems Solutions, Packet, PIX, Point and Click Internetworking, RouteStream, Secure/IP,
SMARTnet, StrataSphere, StrataSphere BILLder, StrataSphere Connection Manager, StrataSphere Modeler, StrataSphere Optimizer, Stratm, StrataView Plus, StreamView, SwitchProbe,
SwitchVision, SwitchWare, SynchroniCD, The Cell, The FastPacket Company, TokenSwitch, TrafficDirector, Virtual EtherSwitch, VirtualStream, VlanDirector, Web Clusters, WNIC,
Workgroup Director, Workgroup Stack, and XCI are trademarks; Access by Cisco, Bringing the Power of Internetworking to Everyone, Enter the Net with MultiNet, and The Network
Works. No Excuses. are service marks; and Cisco, the Cisco Systems logo, CollisionFree, Combinet, EtherSwitch, FastHub, FastLink, FastNIC, FastPacket, FastPAD, FastSwitch,
ForeSight, Grand, Grand Junction, Grand Junction Networks, the Grand Junction Networks logo, HSSI, IGRP, IPX, Kalpana, the Kalpana logo, LightStream, MultiNet, MultiWare,
OptiClass, Personal Ethernet, Phase/IP, RPS, StrataCom, TGV, the TGV logo, and UniverCD are registered trademarks of Cisco Systems, Inc. All other trademarks, service marks,
registered trademarks, or registered service marks mentioned in this document are the property of their respective owners.
Copyright © 1996–1997, Cisco Systems, Inc.
All rights reserved. Printed in USA.
9611R
Second-Generation Channel Interface Processor (CIP2) Installation and Configuration
51
Cisco Connection Online
52 Second-Generation Channel Interface Processor (CIP2) Installation and Configuration