1
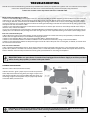
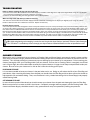
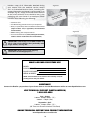
DO NOT RETURN THIS PRODUCT TO RETAILER
Return Merchandise Authorization Number (RMA#) is Required. To obtain RMA #, Technical Support or to
review Troubleshooting Videos and Step-By-Step Troubleshooting Procedures
please visit www.AquaProducts.com/Service.
JET CLEANERS
OPERATOR MANUAL
AND
TROUBLESHOOTING GUIDE
Please Read Carefully Before Using Your Pool Cleaner
This manual is for use with a variety of Aqua Products Robotic pool cleaners.
TABLE OF CONTENTS
JET CLEANERS
Table of Contents............................................................................................................................. 2
Introduction...................................................................................................................................... 3
How it Works.................................................................................................................................... 3 - 4
Operating Instructions...................................................................................................................... 5 - 6
Power Supply & Floating Cable Connection.................................................................................. 7
Cleaning Pattern / Directional Guidance Mechanism.................................................................... 8
Setting Power Supply Timer............................................................................................................ 9
Knowing / Using Model Features.................................................................................................... 10
When to Clean the Filter Bag / Removing Cleaner from pool /
Cleaning or Changing the Filter Bag............................................................................................... 11
Troubleshooting................................................................................................................................ 12
Cleaner Storage................................................................................................................................ 13
Preparing Your Cleaner for Shipping............................................................................................... 14 -15
Notes.................................................................................................................................................. 16
Regsistration & Assistance.............................................................................................................. 17
This manual is for use with a variety of Aqua Products Robotic pool cleaners.
www.AquaProducts.com/Service
2
INTRODUCTION
Dear Customer,
Welcome to the family of Aqua Products and congratulations on purchasing the most reliable pool cleaner technology on the market today!
Your new cleaner is a fully automatic, “robotic” mobile filtration system engineered with the patented SimplyReliable™ hydraulic jet
drive propulsion system. Working without any of the complex circuitry or wearable drive components found on all other cleaner types
your cleaner eliminates the hassle of hoses, the expense of costly to run booster pumps and works independently external pump and
filtration systems to save you money and time. To get the most out of your investment, be sure to read this operator manual as you will
find within it tips on how to keep your robot running smoothly to continue to save you money for years to come. Feel welcome to visit
our site at AquaProducts.com for the latest product information, including additional savings tips, troubleshooting videos and more.
How it Works
Rather than connecting to your pool’s filter or requiring a booster pump, your cleaner is equipped with its own built-in Pump Motor that
provides it the ability to vacuum dirt and debris independently. An internal, reusable Filter traps the debris allowing only clean water to
pass through. The filtered water that is expelled is efficiently used to hydraulically drive or jettison your cleaner about the pool. Simple.
Reliable. Effective. Efficient.
3. Power Washing Hydro-Jets* help lift up the
fine particles off the pool’s surface and direct
the debris into the path of the Intake Ports to
be vacuumeed into the internal Filter Bag.
1. Water is sucked up into the pump at a rate of up to
4800 Gallons Per Hour.
* Note: Hydro-scrubbing Jets are NOT available on all models.
4. High pressure filtered, clean water travels
out of one of the Exit Valves and Jet Propulsion
forces your cleaner to move in that direction.
2. Debris is swallowed and trapped into the
Internal Filter Bag via the offset Intake Ports
on the Bottom Lid Assembly.
3
Complete Coverage: Like a car, your cleaner has two Axles; the front Axle turns your cleaner and the back axle is fixed. Your cleaner
will operate using one of two turning systems.
Turning Arc, cleaner
moves to the left
in an forwards curve
Turning Arc, cleaner
moves to the right
in an forwards curve
Rear Axle is fixed
Rear Axle is fixed
Locking Pin: The front Axle can slide all the way forwards and backwards in its slot. By simply inserting the provided Locking Pin into a
either the left or right [punched through] Locking Pin Holes so that the Front Axle is in front of the Locking Pin and its corresponding Hole
away from the cleaner’s body. This way, one side of the front Axle will remain forwards at all times, while the other side will freely slide
back and forth depending on the direction your cleaner is traveling. When your cleaner moves forward, the free side will slide towards
your cleaner’s Body, while the locked side will remain in place causing your cleaner to turn in a curved motion. When your cleaner reverses, the free side will slide back to a parallel position with your cleaner’s Body and rear fixed Axle, resulting in a straight line movement.
The result is a systematic, highly efficient scanning pattern.
Mechanical Wedge: The front Axle Guard has a mechanical wedge system hidden within that forces your cleaner’s front Axle to
systematically tilt diagonally to the opposite side every time your cleaner moves forwards or backwards. This provides full coverage of
any pool shape by moving organically with the pool’s surface contours. Your cleaner is also equipped with a Locking Pin to allow you to
override the constant left / right turning to enable it to move straight in one direction and curved in the other, which is typically useful for
floor-only cleaning or pools with narrow widths.
4
Saving Your Wallet & The Planet
Mobile Filtration System: Once the dirt is vacuumed into your cleaner’s body it is immediately trapped and filtered by its internal,
reusable Filter Bag system, which traps the dirt and debris - so your pool filter system doesn’t have to work so hard. In essence, your
cleaner is a mobile filtration system that works without hoses or costly, energy consuming main pool pumps or booster pumps. Since
everything is trapped within your cleaner your pool’s main filtration systems will need less cleaning, which can save you thousands of
gallons of water annually if it normally requires backwashing and your cleaner will save you as much as 80% of filter media replacement,
plus extend the life of your pool’s filter.
Eco-Efficient: Every hour that your cleaner works to keep your pool clean is an hour that you may run your pool filtration system less
by up to 70% in total - saving you as much as $2,000 a year in energy. Your cleaner’s pump is so powerful that it can actually redistribute
chemicals that have become suspended in the lower, cooler , chemically rich waters within your pool to mix with the warmer, chemically
depleted water above. By doing so it provides a much healthier swimming environment due to the more uniform chemical composition,
a reduction in overall chemical consumption due to a more accurate water test sample and because cleaner water means less chemicals
used. The same powerful mixing action can raise temperatures below by several degrees, saving you more money and energy by reducing heater usage, while also saving you more water by decreasing the temperature of the water above, resulting in reduced water evaporation, including saving thousands of gallons of year by reducing main filter backwashing needs by as much as 80%. Additionally, you can
be proud knowing that you are doing your part to help protect the environment as your cleaner reduces the impact of chemically treated
water from entering the environment and decreases the use of chemicals, water and energy.
OPERATING FEATURES
This manual has been created to represent the set-up and troubleshooting practices required for a variety of Aqua Products
cleaners. Although the shape and color of some components featured herein may not be identical to those of your cleaner,
their operating and service procedures are. As there are a variety of features and components applicable to the various
models produced, some pages may show features not available on your cleaner model. Please disregard these while fully
reviewing the material applicable to your specific cleaner model.
Figure 1
What’s inside?
2
1
4
9
3
5
10
5
6
8
8
7
5
1.
2.
3.
4.
5.
6.
12
Body
Jet Valve Housing
Wire Support Frame
Handle
Side Plate
Non-marring Wheels
7.
8.
9.
10.
11.
12.
5
11
Locking Pin
Locking Pin Hole(s)
Protective Motor Screen
Filter Bag
Pump Motor
Axle Guard
OPERATING FEATURES
Figure 1a
BOTTOM LID ASSEMBLY
12
11
15
16
14
13
15
11
Figure 1b
12
21
15
13.
14.
15.
16.
18
11
Bottom Lid
Wire Frame Bag Support
“H” - Float
Side Pocket Floats
11
17.
18.
19.
20.
15
20
Debris Intake Port Flap
Filter Bag
Square Floats
Float Screws & Washers
17
19
21. Variable Port Depth Extensions
22. NeverStuck™ Rollers
23. Debris Intake Port Width Selector
Figure 2
Cross-section of Pump Motor and Jet Valve Housing
24
24.
25.
26.
27.
28.
29.
30.
Dual-directional Exit Ports
Directional Valve Flap
Propeller
Propeller Housing
Pump Motor
Filter Screen
Hydro-Scrubbing* Jet Outlet
24
25
27
26
30
29
* Note: Hydro-scrubbing Jets are NOT available on all models.
28
6
Important: Your cleaner may be of different shape or color and with features located in varying locations than
those pictured in this operator manual. However, most of the operating functions are identical and therefore
the following instructions should be reviewed thoroughly.
Power Supply & Floating Cable Connections
1
Fig. 1
2
Power Supply (Transformer) with:
• Built-in Forwards/Reverse Timer
• Built-In 2-Hour Automatic Shut-Off
1. Power Supply
2. Power (ON/OFF) Switch
3. Socket (For Floating Cable)
4. Fuse Holder
5. Power Supply Cord
Floating Cable
Female Plug
(U.S.A.)
Floating Cable
Male Plug
(International)
3
4
3
5
3
1
Fig. 2
Power Supply (Transformer) with:
• Adjustable 0-60 (or 90) Seconds Dial Timer
• Built-In 2-Hour Automatic Shut-Off
1. Power Supply
2. Power (ON/OFF) Switch
3. Socket (For Floating Cable)
4. Fuse Holder
5. Power Supply Cord
6. Adjustable Dial Timer
7. Safety Reset Button
2
6
Floating Cable
Female Plug
(U.S.A.)
Floating Cable
Male Plug
(International)
7
3
4
3
5
3
1
Fig. 3
Power Supply (Transformer) with:
• Adjustable 0-90 Seconds Digital Timer
• Built-In 2-Hour Automatic Shut-Off and External Timer Operable
2. Power (ON/OFF) Switch
3. Socket (For Floating Cable)
4. Fuse Holder
5. Power Supply Cord
6. Safety Reset Button
2
6
Floating Cable
Female Plug
(U.S.A.)
Floating Cable
Male Plug
(International)
3
4
3
5
3
CAUTION: To reduce the risk of electric shock, do not remove electrical components or Motor screws. No userserviceable parts inside. Refer servicing to Authorized Service Centers / Manufacturer only.
Never allow anyone to swim in the pool while the cleaner is in the pool!
7
Cleaning Pattern / Directional Guidance
Mechanism
8
OPERATING INSTRUCTIONS
Never allow anyone to swim in the pool while the cleaner is in the pool!
STEP 1
SETTING UP THE POWER SUPPLY
1. Place the Power Supply in a dry, sheltered area at least 12 feet / 4 meters away from the pool. Since the Power Supply is water resistant, not water proof, therefore should be placed in an elevated dry area where it will not be allowed to sit in puddles of water.
2. Plug the Power Supply Cord into a standard Ground Fault Circuit Interrupted (GFCI) / Residual Current Device (R.C.D.)
protected outlet. If an outlet is not close enough, then a proper outdoor grounded extension cord may be used to connect
to the nearest grounded outlet as indicated above. (Remember to always keep the Power Supply at least 12 feet / 4 meters
away from the pool).
NOTE: For optimum cleaning performance locate the Power Supply at the mid-point of your pool’s longest side. This will
allow your cleaner to make the best use of its Floating Cable length without using excess Cable, which could result in it
unnecessarily twisting or kinking. Excess Cable should be kept coiled outside the pool near the Power Supply.
IMPORTANT: Your pool cleaner system has an internal timer, which will automatically shut off the cleaner after 2 hours
of operation. However, the Power Switch will remain in the “ON” position. To re-start the pool cleaner for another cycle,
switch the Power Supply “OFF”, and then switch it back to the “ON” position and press the Reset Button. Some models
are equipped with the ability to connect to and be operated by an external time source, such as an auto-control system for
pools or standard plug-in timers.
Please refer to “EXTERNAL AUTO TIMER OPERATING INSTRUCTIONS” for detailed instructions for this type of operation.
WARNING! A Ground Fault Circuit Interrupter (GFCI) / Residual Current Device (R.C.D), must be installed and
connected with to protect your electric outlet and to prevent and possible electrical shock!
STEP 2
Never operate your cleaner when it is not totally submersed in the pool water! Doing so may cause severe
damage to motor and require costly repairs!
PLACING THE CLEANER IN THE POOL
1. With the Power Supply ON/OFF Switch in the OFF position, plug your cleaner’s Floating Cable into the Power Supply Socket..
2. Holding your cleaner firmly by its Handle, place your cleaner in the pool upside down, gently tilting it side to side to
allow any trapped air to escape. Once the air is removed, turn your cleaner right side up and allow your cleaner to sink to
the pool bottom, with its wheels down.
NOTE: If your cleaner does not sink it is because air is still trapped inside. Repeat Step 2.
3. Uncoil the Floating Cable that extends from the cleaner’s body and spread it over the pool water surface as evenly as possible. If your pool is elongated (rectangular, oval, etc.), place the Floating Cable at the middle of the pool’s
length to allowing adequate Cable length to reach the entire pool. Make sure that the Floating Cable is not tangled
or kinked.
Set the operating mode for your cleaner after the cleaner has been placed in the pool, the Floating Cable from
the cleaner has been plugged in to the Power Supply and the Power Supply has been plugged into a GFCI
protected 115v electrical outlet.
The Power Supply should be placed in a sheltered area, at 12 feet / 4 meters away from the pool. While the
Power Supply is weather-resistant, it should be placed in an elevated area where it will not sit in puddles of
water.
9
SETTING A DIGITAL TIMER...
Green LED
Red “ON” LED
Continuous Run
(CRUN) button
Digital timer
display
Up & Down
arrow buttons
RESET button
Continuous Operation
Press the C-RUN button, both the green LED above the C-RUN
button and the Red “ON” LED will illuminate.
The Cleaner will now clean your pool until you stop it by
switching the Power Supply Switch to the “OFF” position.
Timed Operation
You can control the length of the forwards / reverse movement
time of your cleaner by using the control pad on the Power
Supply. Press the “UP” arrow button once for each second of
operation you desire (up to 90 seconds). The optimal amount of
time to set your cleaner’s movements is so that it reaches the
furthest edge, waits for several seconds and then reverses. As
your cleaner’s internal Filter becomes saturated with dirt the
amount of flow coming through it will be reduced and thus your
cleaner will require more time to cross the pool. By the end of
its cleaning cycle it may only spend about 1 second every time
it reaches the pool’s edge. When you have selected the proper
number of seconds, press the RESET button to set the cleaning
time.
NOTE: You may add or subtract seconds by simply pressing the
“UP” or “DOWN” arrow button. This may be done while the
cleaner is in operation.
NOTE: The Power Supply will shut down and restart every eight
minutes. This feature will help keep the cleaner from becoming
stuck in the pool.
Set the operating mode for your cleaner after the cleaner has been placed in the pool, the Floating Cable from
the cleaner has been plugged in to the Power Supply and the Power Supply has been plugged into a GFCI /
R.C.D. protected electrical outlet.
The Power Supply should be placed in a sheltered area, at least 12 feet / 4 meters away from the pool. While
the Power Supply is weather-resistant, it is not waterproof and therefore it should be placed in an elevated
area where it will not sit in puddles of water.
EXTERNAL TIMER OPERATION
The size of your pool, and the amount of debris in it, will determine the length of time required to clean the pool.
The time required may vary up to two hours.
Operating instructions for the Digital Timer (90 second / 7 Hour) Setting for an External Timer.
“90 second” timer:
1. Please make sure that the Power Supply is turned OFF and plugged into a properly grounded GFCI / R.C.D.
outlet.
2. Turn the Power Switch ON and wait a few seconds until “- -“ keeps blinking on the display.
3. Make sure that the GREEN light above the C-RUN button is not blinking. If it is blinking then the timer is
already set to the external timer mode. If it is not blinking then proceed to the next step.
4. Push and release the C-RUN button once. This should light up the GREEN light.
5. After this press and hold the C-RUN button for about 5-6 seconds until the GREEN light starts to blink. Now,
the timer has been set to the external timer mode. Make sure that the Power Switch is on the ON position AT
ALL TIMES.
6. In order to reset the Power Supply back to the on-board timer mode, turn the Power Switch ON (if it is turned
OFF) and wait till the GREEN light is blinking.
7. Now, press and hold the C-RUN button for about 5-6 seconds until the GREEN light stops blinking and
remains OFF. Now, the timer has been set to the on-board timer mode.
10
KNOWING / USING MODEL FEATURES
SETTING THE POWER SUPPLY TIMER (INTERNAL AND / OR EXTERNAL)
If your cleaner has an adjustable Dial or Digital timer, you can set it for Continuous Run or Internal Timed Operation. All
Power Supplies, including No Timer, Dial timer and Digital timer models, may be connected to an external, separately
purchased timer, such as a house-type timer or pool control system. In this External Timed Operation mode you cleaner
can externally be set to automatically turn ON / OFF / ON / OFF as needed depending on Power Supply Timer type.
Continuous Run Operation (C-RUN)
Continuous Run mode means that the cleaner will operate continuously until you physically press the ON / OFF Switch
to OFF. After pressing OFF, to restart its operation you must physically press the Switch back to ON. For automatic ON /
OFF operation in “C-Run” mode.
No Timers
If your Power Supply does not have an Adjustable Timer (Dial or
Digital), then it is considered to always be in Continuous Run mode.
1. Press the Main Power ON / OFF Switch to “ON”. Your cleaner
is now set to Continuous Run mode.
Figure 4a
Figure 4b
(Dial Timer)
(Digital Timer)
Green LED
Continuous
Run (CRUN)
button
Dial Timers (Fig. 4a)
1. With your Power Supply OFF, rotate Dial Timer counterclockwise until you feel it “click”.
2. Press the Main Power ON / OFF Switch to “ON”. Your
cleaner is now set to Continuous Run mode.
Digital Timers (Fig. 4b)
1. Turn the Main Power ON / OFF Switch to “ON.
2. Press the “C-Run” (Continuous Run) button until it is lit.
Your cleaner is now set to Continuous Run mode.
Red “ON” LED
Safety
Reset
button
Dial timer
display
Digital timer
display
Time Selector
Arrow buttons
IMPORTANT: In “Continuous Run” External Timed mode, the Safety Reset button feature becomes inactive and
can not protect models with this feature from accidental “out of water” start up. Therefore, it is imperative that
you always unplug the Floating Cable from its Power Supply when removing your cleaner from the pool!
The mode for operating your cleaner should be set after the cleaner has been placed in the pool, the Floating
Cable has been plugged into the Power Supply and the Power Supply has been plugged into the Ground Fault
Circuit Interrupted (GFCI) / Residual Current Device (R.C.D.) protected 115V electrical outlet with the Power
Supply located at least 12 feet / 4 meters from the pool’s edge!
Internal Timed Operation
Internal Timed Operation enables owners of cleaner models whose Power Supply are equipped with either Dial or Digital
timers to customize their cleaner’s automatic operating cycle to clean anywhere from 1 to 7 hours and then automatically
shut OFF. Know that the Internal Timed mode will not automatically turn the cleaner back ON.
1. Press the Main Power ON / OFF switch to the “ON” position.
2. Adjust the Timer Control to the desired cleaning time (1 to 7 hours) depending on suggested cleaning cycle for your
model, pool size and amount of debris in pool (i.e. more debris = longer cleaning time).
Dial Timers (Fig 4a): Rotate Dial Timer clockwise to increase time (corresponding with the hour represented on the
face of the Dial Timer) and counterclockwise to decrease operating time.
Digital Timers (Fig 4b): Press the Time Selector Arrows upwards to increase time or downwards to decrease operating
time. Each time you press up or down the digital face will display the number of hours you have selected the timed
operation for.
(DIGITAL TIMERS) NOTE: When pressing the Main Power Switch to “ON” should the Green LED above the C-RUN Button blink
then the Power Supply is currently set to the External Timed Operation mode and needs to be reset to the Internal Timed
Operation mode by doing the following. Press and hold the C-RUN Button for approximately 5 seconds until the Green LED stops
blinking and remains off. If it has stopped blinking and is off then the Internal Timed Operation mode is set.
3. Press the Safety Reset Button (Fig. 4a, 4b). Your cleaner is now set to its Internal Timer.
NOTE: Your Power Supply will remain in the Internal Timed Operation mode until you physically reset it to the External Timed
Operation mode and will not reset to the External Timed Operation mode even if the power to the Power Supply is turned off or
is set to the OFF position.
11
OPERATING INSTRUCTIONS
WHEN TO CLEAN FILTER BAG
It is suggested that you clean the Filter Bag after every use to ensure the strongest hydraulic drive and vacuum suction.
Your cleaner begins to slow down considerably, (constantly reverses direction before reaching portions of the pool it
would normally reach), it is sending a signal that it is time to clean the Filter Bag. Always thoroughly clean the Filter Bag
and rinse your cleaner and its components prior to storing it for any length of time.
REMOVING CLEANER FROM THE POOL
1. When your cleaner has completed its cleaning cycle it will automatically shut off. Turn off the Power Supply by pressing
the ON/OFF switch to the OFF position.
IMPORTANT: Although a Filter Bag may appear clean it is capable of microfiltering out particulates 20 times smaller
than what the naked eye can see! It is crucial to thoroughly clean the Bag with each use to ensure its ability to
properly cover and clean your pool!
NOTE: A complete cycle is 2 hours, which is built-in to the Power Supply.
With your cleaner in the pool, gently pull it toward you using the Floating Cable. When your cleaner is within reach, reach
and grab its Handle firmly and remove it from the water using the Handle only. Rest the cleaner on its side to allow water
to drain from its body.
TIP: When resting your cleaner on its side, be sure to place it on a non-abrasive surface (i.e. Towel, doormat, etc.) to avoid
scuffing and scratching your cleaner.
IMPORTANT: Using the Floating Cable to lift the cleaner out of the water will cause severe damage to your cleaner
and may result in costly repair!
IMPORTANT: Do not remove cleaner from pool for 20 minutes after cleaning cycle is complete to enable its motor to
properly cool and avoid costly motor damage!
CLEANING OR CHANGING THE FILTER BAG
NOTE: Make sure that the Power Supply is turned OFF and that your cleaner’s Floating Cable is unplugged from the Power
Supply before removing your cleaner from the pool.
1. With your cleaner on its back on a soft surface to avoid scratching it, use your thumbs to, push the Lock Tabs (located
on the sides of your cleaner’s underside) away from the center of the cleaner to unlock the Bottom Lid Assembly to release
the Bottom Lid Assembly that holds the Filter Bag.
2. Remove the Bottom Lid Assembly out from the body of your cleaner.
3. Remove Filter Bag Clips from each Wire Frame.
4. Remove the Filter Bag from the bag support Wire Frames.
5. Turn the Filter Bag inside out (the Fine Filter Bag has a soft felt-like surface on the inside), discard the large debris, and
wash off visible dirt using one of the following methods: (a) garden hose (b) Faucet. With any method gently agitate the
Bag in your hands to help remove tine particles while wringing, cleaning and squeezing the Bag gently until rinse water
is clear. Use of a washing machine (cold water, gentle cycle only) is recommended when visible dirt will not rinse off by
other methods. DO NOT USED DETERGENT or BLEACH! DO NOT MACHINE DRY!” to “a high pressure garden hose or
by dunking it in a clean bucket of water while gently agitating the Bag in your hands to help remove fine particles, and
wring the Bag until rinse water becomes clear. You may machine wash (Gentle Cycle / Cold Water ONLY) the Bag with NO
DETERGENT OR BLEACH. DO NOT iron or machine dry the Filter Bag.
6. Turn the Filter Bag “right side out” (felt-like surface on the inside), remount the Bag on the Wire Frames making sure
that the Label on the Bag is centered on either of the long sides of the Bottom Lid Assembly directly beneath one of the
Wire Frames.
7. At the top, pull, excess Bag toward the middle of each Wire Frame so that the Bag corners are snug against the corners
of the Wire Frame, bunch the excess Bag into the center area of the Wire Frames and pull the corners of the Filter Bag into
the Wire Frame corners by pulling the Filter Bag material from both sides towards the center of the Wire Frame.
8. Reinstall each Filter Bag Clips to hold the Filter Bag in place.
9. Re-install the Bottom Lid Assembly. Make sure that neither debris nor the Filter Bag itself interferes with complete
closure of the Bottom Lid Assembly. A locking sound from each Lock Tab will be heard when locked properly.
12
TROUBLESHOOTING
Should none of the troubleshooting procedures provided herein correct your specific issue, please visit our customer service department online at AquaProducts.com/Service to view troubleshooting videos and step-by-step procedures.
Contact our customer service department toll free at 1-800-845-4856.
Moves slowly or inefficient vacuuming
• Check to see if the Filter Bag is thoroughly clean. FYI: The Fine Filter Bag is capable of filtering particles 20 times smaller than the
naked eye can see. Therefore, thorough cleaning of the bag may be required! NOTE: Use the Fine Filter Bag to trap smaller debris
such as algae, bacteria, sand and silt. Use the Mesh Filter Bag to trap larger debris such as leaves, acorns, twigs and pine needles.
It may be necessary to rinse with high pressure water and wring the Filter Bag in a bucket of clean water. Rinse, wring, squeeze dry
and repeat until the rinse water is clear.
• Check to see if the Intake Valve Flaps on the bottom of the cleaner are free to open and close. These Flaps should move easily to
allow the entry of water and debris.
• If you are not satisfied yet, remove the bag, reinstall the Bottom Lid (without the Bag), and run it in the pool. If the cleaner moves
quickly, this is an indication that your Bag is not clean enough, and you must repeat the cleaning instructions until the Bag is clean.
Does not cover the entire pool
• Adjust the timing cycle on the Power Supply so that the cleaner reaches the other side of the pool (preferably to waterline) and
remains there for approximately 2 seconds before changing direction.
• Check to see if the Filter Bag is clean and not clogged with debris. (Especially fine dirt)
• Check to see if the Wheel rotation and Axle movement is free of obstructions like hair, string or accumulated debris.
• Check to see if the Floating Cable has adequate length to reach all sides of the pool and is not tangled, or hooked, as this will limit
the movement of the cleaner.
Does not reverse direction
• Take a garden hose with high pressure, spray into the Valve Housing at each Valve Port opening. This should free the Jet Valve
System of any debris. If this does not solve the problem, there is most likely debris wrapped around the Propeller beneath the Jet
Valve or between the Valve Flap and the Valve Housing wall, proceed below to “Cleaning The Propeller”.
IMPORTANT: Make sure your cleaner is turned off and unplugged from the Power Supply to avoid any accidents
whilst cleaning the propeller, jet valves inside your cleaner.
CLEANING THE PROPELLER
• Remove valve outlet (2 horizontal screws).
• Bend a common “giant” paper clip into a hook and push the
center flap of the Valve Housing with your finger to open it and
look into the Propeller. You may find debris like hair, string, or a
small twig caught in the Propeller. Use your paper clip to hook
or free the debris, and remove it.
CAUTION: To reduce the risk of electric shock, do not remove electrical components, Motor or Power Supply
screws. No user-serviceable parts inside. Refer servicing to Authorized personnel only.
13
TROUBLESHOOTING
Reverses before reaching the opposite end of the pool
• Turn the Time Control Dial (located on the Power Supply) clockwise a few degrees or adjust the digital timer using the “up” button to increase the time between reversals. Repeat if necessary.
• Check to see if the Filter Bag is thoroughly clean and installed properly.
Waits too long at the side of the pool before reversing
Turn the Time Control Dial on the Power Supply counter-clockwise a few degrees or adjust your Digital Timer using the “down”
button to decrease the time in between reversals. Repeat if necessary.
Floating cable is twisting
• Your new pool cleaner was designed to clean most pools without issue, but some pool shapes may cause the Floating Cable to coil,
or tangle. This cleaner operates in a systematic cleaning pattern that varies in nature. This may cause the Floating Cable to twist. For
this reason we have added the EZ-Swivel™feature to most cleaners. This patented feature will allow you to untwist your Cable easily.
Disconnect the Power Supply Cord from the Power Supply, place your cleaner on the ground outside of the pool perpendicular to
you. At the end of the Power Cable, located near the connection plug to the Power Supply, is the EZ-Swivel™ plastic handle. Grab the
handle firmly. Walk away from the cleaner while pulling the handle. This will cause the Cable to rotate within the plastic handle and
force the Cable to untwist itself. For best results remember to pull the handle until the Cable is completely untwisted.
TIP! Cable straightening and untangling is made fast and simple with Aqua Products’ optional E-Z Swivel Cable Detangler.
The “E-Z Swivel” is available to purchase through your Aqua Products Authorized Dealer or online at AquaProducts.com.
CLEANER STORAGE
When not in use it is important that your cleaner, its Floating Cable and Power Supply are properly stored in a clean and dry
area, away from direct sunlight, protected from below freezing temperatures and exposure to chemicals and their fumes (i.e.
chlorine). This will help prevent any unnecessary wear or damage to your cleaner or its components. Prior to storing your
cleaner, thoroughly clean your Filter Bag and dry off your cleaner. Ensure that its Floating Cable is untangled, not twisted
nor in a figure eight, but rather coiled either around your cleaner’s body or in large circular loops and positioned under your
cleaner. Be sure to rest your cleaner on its side so that its Brushes do not get flat spots.
IN-SEASON STORAGE
It is not recommended to leave your cleaner in the pool when not in use. Doing so, will reduce the life of your Filter Bag and
pool cleaner. After removing the cleaner from the pool you should clean the Filter Bag and rinse down your entire cleaner to
help extend its life and reduce fading. Then, rest the cleaner in a dry, shaded area along with its Power Supply and properly
coiled Floating Cable.
OFF-SEASON STORAGE
In areas where the pool will be closed you should remove your cleaner from the pool and thoroughly clean the Filter Bag.
Make sure that there is no water residue in the cleaner. Completely untangle and then properly coil the Floating Cable. Your
cleaner and Power Supply should be stored in a dry, protected area away from potentially freezing temperatures.
14
IMPORTANT: A Return Authorization Number (RMA) must be obtained from Aqua Products prior to shipping
cleaner to its repair facility. Any item shipped to Aqua Products without a proper RMA number will be refused
and returned!
PREPARING YOUR CLEANER FOR SHIPPING
In the event that you should have to send your cleaner in for repair, you must package the cleaner properly to ensure it
reaches the repair facility safely and without incurring damage during transport. This will delay your repair turnaround
time and require you to contact your shipper directly to dispute damages.
If the troubleshooting methods shown within the Troubleshooting Guide have not corrected your technical service issue or
has proven that your cleaner requires review by an Aqua Products Authorized Service Center, please visit Aqua Products’
Customer Service Department online at AquaProducts.com/Service to locate your local Authorized Service Center.
NOTE: A log of all information from your contact with an Aqua Products technical service analyst (i.e. RMA, name of analyst, dates,
cleaner model and serial number, etc.) should be kept with your operator manual and / or other important documents for your
reference.
Ask the technical service analyst whether the Power Supply needs to accompany the cleaner. If yes, the Power
Cord should be coiled (Fig. 5a) and the Power Supply should be entirely well wrapped in bubble-wrap or equivalent
protective material (Fig. 5b). The Power Supply should be positioned in the center of the base of the shipping box
and the shipping box base must be firmly sealed (Fig. 5b).
Figure 5a
Figure 5b
The cleaner’s Floating Cable should be coiled
and encircled around the Power Supply located
at the base of the shipping box (Fig. 6).
A protective barrier (preferably thick
cardboard) should be placed on top of the
Floating Cable and Power Supply (Fig. 6a).
Figure 6
Figure 6a
Figure 6b
Your cleaner should be completely wrapped in
bubble-wrap or equivalent protective material. The
protected cleaner should be positioned in the center
at the base of the protective barrier that is shielding
the cleaner from the Power Supply and the Floating
Cable underneath. Insulated protective material like
bubble-wrap should be placed between the cleaner
and the shipping box at walls and top to secure the
cleaner and around shipping during transit (Fig. 6b).
15
Include a copy of all information obtained during
your contact with the technical service analyst
and / or Authorized Service Center, including your
contact information and cleaner’s serial number in an
envelope (Fig. 6c). A copy of the information relevant
to the current technical issue should be sent in the
packaging with your cleaner in an envelope. Please
include a letter indicating the following:
Figure 6c
ts
duc e
o
r
nc
aP
Aqu sponde
e
r
r
Co
• Technical issue
• Troubleshooting procedures that you completed
• Who you spoke with, when and what was determined
(Aqua Products and, if applicable, the Authorized
Service Center)
• RMA # if being sent to Aqua Products
Figure 6d
• Your contact information (name, email, phone number,
address cleaner model name and serial number)
IMPORTANT: Prominently list the RMA number on
all six sides of the shipping box (preferably with
magic marker). See Fig. 6d.
IMPORTANT: Keep a copy of your shipping
information for tracking purposes!
MAKE A RECORD FOR FUTURE USE
MODEL PURCHASE DATE PLACE PURCHASED SERIAL NUMBER NOTE: Serial number can be found on the warranty card, the
packing carton and your cleaner.
QUESTIONS?
Contact the Retailer you purchased your cleaner from or visit the Manufacturer online at www.AquaProducts.com
Live Technical Support (North America)
1-800-845-4856
June - August
9:00am - 8:00pm (Mon. - Fri.)
9:00am - 1:00pm (Sat.)
September - April
9:00am - 5:00pm (Mon. - Fri.)
(All Times are Eastern Standard Time Zone)
Online Technical support and product information
www.AquaProducts.com/Service
16
DO NOT RETURN CLEANER TO RETAILER!
If you have a technical service issue
PLEASE REFER TO THIS MANUAL OR
Contact Aqua Products
for immediate support. Note that the absolute majority of
technical issues can be resolved over the phone (1-800-845-485),
by referring to this Operator manual or reviewing
troubleshooting videos and information online anytime at
www.AquaProducts.com/Service.
Part #820123