1
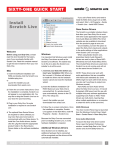
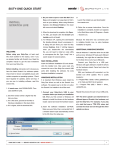
SIXTY-EIGHT QUICK START If you add a Rane device and need to install its ASIO driver, plug it into a USB, and select: Start > All Programs > Serato > Scratch Live > Install ASIO Drivers. Install Scratch Live Welcome Before using your Sixty-Eight, at least read this short booklet for the basics, even if you are already familiar with Scratch Live. Read the complete manual to get the best investment from your new Sixty-Eight.This guide will help you get one computer connected using USB A. Mac 1. Insert the Software Installation CDROM and double-click the Scratch Live Installer.mpkg icon. or Launch the installer you just downloaded from serato.com. 2. Follow the on-screen instructions. Once the installation is complete, Scratch Live will appear in your applications list. You may like to drag the Scratch Live icon to your dock for quick launching. 3. Plug in your Sixty-Eight. No extra installation is required to use Scratch Live. 4. The optional Rane Device Drivers are required for other software you may have that uses Core Audio to communicate with your Rane device. To install the Core Audio drivers, doubleclick the .pkg file inside the appropriate product folder in the Rane Device Drivers folder on the software installation CD. Rane Device Drivers Windows It is important that Windows users install the Sixty-Eight drivers as well as the Scratch Live software. The easiest way to do this is to allow the Scratch Live installer to do all the work. 1. Connect your Sixty-Eight USB A to the computer before you insert your installation CD. When you first connect it, Windows will attempt to install the drivers via the hardware wizard. Cancel and close this wizard. 2. Insert the Software Installation CDROM. Make sure your Sixty-Eight is connected first. If a window doesn’t open automatically, browse to the CD drive. Run setup.exe. or Launch the installer you just downloaded from serato.com. The Scratch Live installer includes drivers that allow your Rane Sixty-Eight to work with other audio applications that support Core Audio (Mac) and ASIO (PC). Driver updates are also available to download from the product’s page at rane.com. Once installed, you have the option to select the Sixty-Eight’s inputs and outputs in the audio settings of other applications when Scratch Live is not open. When using Serato Scratch Live, proprietary Serato Audio Research drivers are used in place of Rane ASIO (Windows) and Core Audio (Mac) drivers. The included Rane drivers are used when Scratch Live is not running, and will not run the same time as Scratch Live. NOTE: These drivers only work with audio applications that are compatible with these audio standards (ie. some DAWs might not work with 64-bit drivers, you also can’t use these to output core Windows sounds). Rane ASIO and Core Audio drivers allow the Sixty-Eight to act as a 12-record 10-playback sound card at each USB port for use with multiple third-party software applications supporting Core Audio or ASIO. These drivers are multi-client, allowing multiple applications to share the mixer at the same time. 3. Follow the on-screen instructions. Once the installation is complete, Scratch Live appears in the Start Menu under All Programs > Serato > Scratch Live. ASIO (Windows) Because the Sixty-Eight was connected prior to installing Scratch Live, no extra hardware installation is required. Core Audio (Macintosh) Additional Windows Drivers The driver Control Panel may be launched from the Windows Control Panel. Select Start > Control Panel > Rane Sixty-Eight. To launch the Sixty-Eight driver Control Panel, open the System Preferences window. Locate Sixty-Eight in the “Other” section and click the Sixty-Eight icon. Once Scratch Live is installed, any additional hardware that is connected will be recognized and the drivers will be automatically installed. RANE SIXTY-EIGHT FOR SERATO SCRATCH LIVE • QUICK START 1 Connections the correct direction of playback. If your songs play backwards, you probably have the left and right channels swapped from your deck. 2.Input Level Selection Set each input to the correct input level using the P - L - S switches. P = Phono, L = Line (for CD players) and S = S/PDIF. Unused inputs are best set to L. System Overview The Scratch Live control records and CDs are pressed with an audible tone specifically developed for controlling the Scratch Live software application. The Sixty-Eight converts the control signal coming from each deck into digital audio, to be sent via USB to the Scratch Live software, which decodes that signal into a stream of information based on what the DJ is doing with the control disc. A virtual ‘deck’ replicates the movements of the control disc. Audio files loaded onto the Virtual Decks are then played back through the outputs of the SixtyEight, with any manipulation of the control discs reproduced on the audio, effectively emulating vinyl control of the files loaded in software. Connecting the Sixty-Eight Follow these steps to set up the SixtyEight for Scratch Live, using up to four turntables or CD players to control the software playback: 1.Inputs Connect your CD players or turntables to the ANALOG INPUTS on the Sixty-Eight. If your CD players have S/PDIF outputs, connect these to the S/PDIF inputs on the Sixty-Eight. We recommend connecting decks left of the mixer to 1 and 2, and decks on the right to 3 and 4. Match the L channel from each of your decks (usually white) with the white (uppermost) RCA sockets on the mixer and R (usually red) with the red sockets. This is important to give Scratch Live 2 3.USB Audio Select Scratch Live as the audio source for a channel by turning a PGM SOURCE knob to a USB input. Any of the four analog inputs may be used for Scratch Live vinyl emulation control. Control input sources are selected in Scratch Live software. 4. Connect a Sixty-Eight USB Using the provided USB cable, connect either USB A or USB B to an available USB 2.0 port on your computer. The Sixty-Eight automatically switches its control point if only one of the USB ports is connected. Make sure you connect it directly to your computer and not through a hub or splitter. Turntable Setup 1.Set the tone arms to the specific recommendations of the cartridge used, so that the needle never leaves the record, but not heavy enough that it heats up significantly. Both produce poor tracking. 2.Grounding is extremely important when using Scratch Live. Make sure you have good connections from the ground wires of your turntables to a grounding post on the Sixty-Eight. If you do not ground your turntables properly, the control signal will be noisy and the tracking of the record position will be erratic. CD Player Setup Disable all built-in effects on the CD player, including keylock/master tempo. Calibrating Scratch Live Since Scratch Live is controlled by an analog signal, there is no guarantee of what state that signal will be in by the time the software gets to interpret it. Therefore, Scratch Live needs to be able to handle a wide range of signals, and be configurable to use them optimally. Calibrating is just configuring the software to your situation. Calibration is equally important for both vinyl and CD users of Scratch Live. There are two parts to the Scratch Live control signal: The directional tone, and the noise map. Listening to the control vinyl, the directional tone is the 1 kHz tone. The noise map sounds like random noise over the top of the tone. The directional tone provides the current speed and direction of the record, while the noise map tells the software precisely where on the record the needle is currently. The Noise Threshold A threshold is a lower limit, below which a process will not occur. In the case of Scratch Live, the noise threshold is the limit below which the input signal will not be interpreted as control signal; in other words if it’s below the threshold, it is considered noise and ignored. This setting is necessary because a stylus is very sensitive, and will inevitably pick up noise from the environment as well as the signal on the record, especially in the noisy environment of a live show. RANE SIXTY-EIGHT FOR SERATO SCRATCH LIVE • QUICK START How to Calibrate Scratch Live The Scopes Calibration Troubleshooting With music playing in the background (from any source), put your needle on the record with the turntable stopped. If you are using CD players, the same rules apply. Have the CD deck paused or stopped while calibrating. Ensure the rear panel P - L - S switches are set correctly. Click and hold the estimate button until the slider stops moving. Moving the threshold slider to the left will make Scratch Live more sensitive to slow record movement, but also more sensitive to background noise. The scopes on the Setup screen in Scratch Live display the input signal as a phase diagram. The key factors to look at on the scope display are crisp clean lines, round shape, and the tracking percentage in the lower right corner. Start both turntables or CD players. You will see green rings appear in the scope view as shown above. For optimal performance the inner ring should be as close to circular as possible. Use the scope zoom slider (1x to 16x) to zoom in or out as necessary. Use the scope L/R Balance and P/A Balance controls to adjust the shape of the inner ring. The number in the top left corner of the scope view gives the current absolute position within the control record or CD. The number in the top right corner is the current speed in RPM. In the bottom left is the current threshold setting, and the number in the bottom right shows the percentage of readable signal — this number should be close to 85% when your system is calibrated properly. After calibration, the number in the upper right corner of the scope view should say 0.0 while the needle is on the record and the turntable is stopped. If that number is fluctuating then manually move the Estimate slider to the right until that number is stable at 0.0. If you’ve moved the slider all the way to -24 and its still fluctuating then you have a grounding or interference problem somewhere in the chain. If so, the first thing to check is that the grounding wire coming from your turntable is connected to a Sixty-Eight grounding post. Next, make sure that the Sixty-Eight isn’t sitting next to a power source such as a power strip and that the RCA cables aren’t laying across other power conducting cables. If you are still experiencing issues, you might have to adjust the placement of your setup. For example, make sure bass bins aren’t directly under the turntables. If you have trouble getting the rings circular, you probably need to clean or change your needles. If the image appears as a line, then you have a missing channel. Check your RCA connections and needles. For more calibration troubleshooting help see “Scope Reading and Fixes” in the manual. Repeat the process for each deck. Things to remember: •Your needle must be on the record. •Your turntable (or CD player) must be stationary. •The background music playing must be at a similar level to which you will play your set at. •Calibrate Scratch Live every time you play. TIP: If the slider jumps to the far right, then you have a problem with noise in your turntables/CD players/mixer. Check all your connections and make sure your equipment is well earthed. In some situations you will not be able to improve the signal quality, and you will have to play on regardless. In this situation, stick to REL mode. RANE SIXTY-EIGHT FOR SERATO SCRATCH LIVE • QUICK START 3 Importing and Playing Music 2. Once you have located your music, drag the folder or files you want to import onto the purple “ All...” icon. This is located to the left of your screen at the top of the crates and playlist window. If you wish to import all of your music, just drag your whole music folder onto this icon. TIP: You can also import by dragging files and folders directly from Windows Explorer (PC version) or Finder (Mac version) into the Scratch Live library. Importing Your Music The easiest way to load music into your library is by using the Files button: 1. Click on the Files button to open the files panel. The left side of this window displays various locations on your computer hard drive (and external drives if you have one). Click on these locations to navigate your computer and find your music. By default, your music will usually be found in either “Music” (Mac) or “My Music” (Windows). Supported File Types The Offline Player The offline player is a useful tool for preparing crates, auditioning tracks, and setting cue and loop points. The offline player is available when Scratch Live hardware is not connected, and outputs through the current default audio device. Load a track to the offline player by dragging and dropping onto the Deck, or pressing shift+left arrow. If the end of the loaded track is reached, the next track in the current playlist is played automatically. Click the Offline Player Controls button (under the pointer below) to expand and hide the offline player controls. Scratch Live supports fixed and variable bit rate .MP3, .MP4, Ogg Vorbis, .AAC, .AIFF, .ALAC, .WAV and Whitelabel (wl. mp3) file types. M3U playlists are also supported. Note: FLAC is supported in version 2.4.3 and higher. *Apple Quicktime is required for AAC and ALAC. NOTE: Older iTunes Music Store DRM files cannot be played back by Scratch Live. iTunes Plus files are DRM-free. For information on rescanning, moving, copying, deleting and backing up, see “File Management” in the manual. How to Analyze Files Before you play your music in Scratch Live, It is important to first analyze your files. The analyze files function processes the songs in your library to detect file corruption, saves the waveform overview to an ID3 tag*, and calculates auto-gain and BPM values. To analyze files, run Scratch Live with the Sixty-Eight disconnected. On the left side of the main screen, click the Analyze Files button to automatically build overviews for all the tracks in your library. You can drag and drop individual folders, crates or files onto the Analyze Files button to force the building of overviews at any time. About Corrupt Files If Scratch Live detects a corrupt file it will tag it with a corrupt file icon: It is very important that you delete ANY corrupt files from your library as they can cause Scratch Live to crash regardless if you play the file or not. See “Status Icons” and “Corrupt File Descriptions and Diagnoses” in the manual. 4 RANE SIXTY-EIGHT FOR SERATO SCRATCH LIVE • QUICK START Set Auto BPM up the needle and placing it further into the record, just as with regular records (This is known as needle dropping). Track Display If this option is checked while analyzing files, Scratch Live will calculate the estimated tempos of your files. If Scratch Live is confident that the Auto BPM estimate for a file is accurate, it will be written to an ID3 tag* in the file. The Auto BPM function will not be applied if the track already contains BPM information. To re-analyze these files and use Auto BPM or auto gain on them, drag them onto the Analyze Files button. If you know your file’s BPM will fall within a certain range, use the range drop down to avoid double or half value BPMs being calculated. *NOTE: ID3 tags contain data about your tracks and are saved inside the files themselves. Genre, track name and artist are examples of common tag information. See “Editing ID3 tags” in the manual. Playing Music Click on the “ All...” icon to show all the tracks in your library. Use the keyboard shortcut Shift - Left Arrow to load the highlighted track on to the Left Deck, and Shift - Right Arrow to load the highlighted track on to the Right Deck. Display Modes When a track is loaded, the track name, artist and length are displayed in the track title bar, and the Virtual Deck shows a solid black line. If the track has BPM or key information written in the tag, this will also be displayed. Primary & Secondary Deck Layers When using the Sixty-Eight with more than two Virtual Decks, layers are used to determine which Decks respond to keyboard shortcuts and the Control Strips on the Sixty-Eight. The Primary Deck layer is the main left and right Decks that you will use, while the Secondary Deck layer is the other secondary Decks. You decide which Decks are to be the Primary and Secondary Decks, this can be configured on the Setup screen. See “Select Primary Decks” in the manual. To switch focus between the Primary and Secondary Deck layers, use the Layer button on the Sixty-Eight or the ~ (tilde) keyboard shortcut. TIP: You can also load tracks to Decks using the mouse. Click and drag a track from the track list area on to either Virtual Deck. To start playing a track, simply put the needle on the record and start the turntable. The track will start playing as soon as it detects the signal from the control vinyl (or CD). In ABS mode, the track will play from the position dictated by the placement of the needle on the record. If you place the needle at the beginning of the record, the track will start playing from the beginning. You can skip through the track by picking RANE SIXTY-EIGHT FOR SERATO SCRATCH LIVE • QUICK START Scratch Live gives you the option of four different display modes to suit your style of performance. The Display Mode buttons are located in the top left of the Main Screen. They are: Library Mode: Maximizes your library space by minimizing the Virtual Deck information displayed. In Library Mode only the track information, Virtual Deck, mode, track overview display and meter are displayed. TIP: Use the space bar to toggle between Library Mode and your current display mode. Classic Vertical Mode: Two Decks are displayed on the left and right sides of the screen with vertical waveforms in the middle. Classic Horizontal Mode: Two Decks are displayed on the left and right sides of the screen with horizontal waveforms in the middle. 2-Deck Stack Mode: Two Decks are stacked on top of each other in a horizontal fashion. Stack Mode aligns the waveforms on top of each other, while maximizing waveform space. The controls for all Decks can be shown or hidden by pressing the Show Deck Controls Button on any Deck. 4-Deck Stack Mode: Four Decks are stacked on top of each other in a horizontal fashion, as in 2-Deck Stack Mode. 5 Absolute Mode Relative Mode ABS mode is the default mode, and most closely resembles the properties of normal vinyl. The beginning of the track is mapped to the start of the record, and by picking up the tone arm and moving the needle to another part of the record (needle dropping) you can move to a different position within the track. ABS mode faithfully reproduces the movement of vinyl control records, including stops, starts, scratching, needle dropping, rubbing and other turntablist techniques. When you reach the end of the record using either REL or ABS modes, Scratch Live automatically switches to INT mode. This is known as Emergency Internal mode, and prevents long tracks from stopping when you run out of record. You can switch from Emergency Internal mode to ABS mode by lifting the needle and placing it in the lead-in of the control record. Emergency Internal mode will activate after 1 second. Use the keyboard shortcut F1 (left deck) or F6 (right deck) to switch to ABS mode. REL mode observes the relative forward and backward movement of the record, but does not take into account the position within the record. REL mode disables needle dropping, but allows skipfree scratching. NOTE: Be careful when scratching near the end of the record not to accidentally go past this point and into internal mode, or the track will no longer respond to record movement! TIP: Use the keyboard shortcut F2 (left deck) or F7 (right deck) to switch to REL mode. Virtual Decks USB Sources & Analog Inputs Each Virtual Deck in Scratch Live has a USB source, which allows you to select which Analog input on the Sixty-Eight is used to control it. You can then configure which Virtual Deck in Scratch Live plays through which channel on the Sixty-Eight. To set a USB Source in Scratch Live, click the USB Source dropdown box above the Virtual Deck. Any Virtual Deck with USB Source 1 or 2 selected can output through channels 1 or 2 on the Sixty-Eight, while any Virtual Decks with USB Source 3 or 4 selected can output through channels 3 or 4. Once you have set USB sources for all the Virtual Decks, use the PGM Source knobs on the Sixty-Eight to select a USB source for that channel. Scratch Live Modes Scratch Live has three different modes of operation. You can switch between these modes by clicking the mode buttons near each Virtual Deck. 6 See: “Drop To Absolute Position” in the manual. REL mode adds additional speed controls: Previous track – Go to the previous track in the list. Rewind - The rewind function speeds up the longer you press the button. Fast forward – The fast forward function speeds up the longer you hold the button. Next track – Jump to the next track in the list. RANE SIXTY-EIGHT FOR SERATO SCRATCH LIVE • QUICK START Internal Mode INT mode allows playing tracks without external vinyl (or CD) control. INT mode has a start / stop function and a virtual pitch slider. Holding down the shift key moves the pitch slider slowly. Holding the ctrl key and clicking on the pitch slider resets it to 33 RPM or 45 RPM, depending on which you are closest to at the time. Scratch Live automatically switches to INT mode when the end of the control record is reached; you can switch back to ABS mode by placing the needle in the lead-in of the control record. If you switch from ABS or REL into INT mode, Scratch Live automatically adjusts pitch to maintain playback speed as set by the turntable. Use the keyboard shortcut F3 (left deck) or F8 (right deck) to switch to INT mode. INT mode adds these additional controls: Play / pause reverse - Press to play, press again to stop playback. You can adjust the braking knob in the setup screen to range from an immediate stop to a slow turntable-style ‘power down’. See “Braking” in the manual. Pitch Slider - Use the pitch slider to make pitch adjustments while using INT mode. Drag the pitch slider with the mouse to make large pitch movements, or hold the shift key and drag the pitch slider to make fine adjustments. Clicking the RANGE button above the slider changes the slider range to ±8%, ±10%, ±16%, ±50% or ±100%. Temporary Cue There is a temporary cue point that can be used like the cue button on many DJ CD players. Press ctrl-I to set this temporary cue point on the Left Deck, and ctrl-K to set it on the Right Deck. This temp cue point is shown in the main waveform as a white marker. This cue point is not saved with the track, and by default is set to the beginning of the track. Press I to jump to this temporary cue point on the Left Deck, and K for the Right Deck. If you hold down the I or K key while the track is stopped, it will play from the temporary cue point. As soon as you release the key, it will jump back to the temporary cue point. Note that you can use this shortcut to jump to the beginning of the track if the temporary cue point has not been set. See “Cue Points” in the manual. Play / pause forward – Press to play, press again to stop playback. Uses the same braking as described above. More Controls The complete list of keyboard shortcuts is on the last page of this Quick Start. Click on the waveform to ‘scrub’ or make fine adjustments to your position within the track. This may be useful if you wish to set cue points in your tracks, and don’t have your turntables or CD players connected. NOTE: If you play a track in INT mode, and then switch to ABS or REL mode, the pitch adjustment will be dictated by the turntable, so there will be a jump in pitch unless they are already perfectly matched. TIP: If you are in ABS or REL mode and you get a build up of dust on the needle that is breaking up the audio, hold down ctrl and press the INT button. This will take you to INT mode and reset the pitch to zero. More Help This Quick Start just gives the highlights to get you running. You will want to read the full manual while using the Sixty-Eight to understand it. Before calling the factory for support, first look for your question in the manual. The next place to search online in the Forum at serato.com/forum, where thousands of tips are updated daily. You will definitely want to bookmark this one in your browser. The Support Articles are another valuable resource at serato.com/ scratchlive/support. Over 70 topics including a Laptop Buying Guide, Your First Party with Scratch Live, Recording Your Set, and Moving Your Library and Crates to a New Computer or Hard Drive. Bend down - Create a temporary decrease in the playback speed. Use bend down if the two tracks are in time, but this track is slightly ahead of the other track. Bend up – Create a temporary increase in the playback speed. Use bend up if the two tracks are in time, but this track is slightly behind the other track. RANE SIXTY-EIGHT FOR SERATO SCRATCH LIVE • QUICK START 7 Keyboard Shortcuts KEY ctrl - L ctrl - R ctrl - F ctrl - A ctrl - C ctrl - E ctrl - V ctrl - X ctrl - Z shift - ctrl - shift - ctrl - ctrl - P ctrl - N ctrl - O - or + ctrl - or + tab ctrl - del and ctrl - backspace alt - del and alt - backspace ctrl - shift - del and ctrl - shift - backspace ctrl - shift - / esc SP-6 SAMPLE PLAYER Load to sample slot Play sample slot LEFT DECK ctrl - or shift - ctrl - shift - shift - alt - ctrl - , (comma) ctrl - 1, 2, 3, 4, 5 1, 2, 3, 4, 5 F1 F2 F3 F5 Q W E R T Y U I O P [ ctrl - [ alt - Q alt - W alt - 1, 2, 3, 4, 5 ctrl - alt - 1, 2, 3, 4, 5 alt - E alt - R alt - O alt - L alt - space bar ctrl - I Actions Accessed Directly from the Computer Keyboard ACTION Locate the current track. This will highlight the track you most recently loaded. Pressing ctrl - L again will alternate between the tracks recently loaded on both decks. Reveal - the highlighted song is opened in a file browser. Find - moves the cursor to the search box. Select all. Copy text in edit mode. Edit text. Paste text in edit mode. Cut text in edit mode. Undo last track load. Move focus up / down through the library or crates. Note that if you have a song highlighted in the song view, and use shift - ctrl - you will move up or down through the library or crates. When you release the shift or ctrl key, the focus will go back to the song view so that you can move up and down through songs using . Add tracks to the prepare window. Start a new mic recording. Open the track in your default MP3/WAV/OGG/AIF player. Zoom the main waveform display. Zoom the library text size. Alternate focus between crates or songs. Remove track from library., remove track from crate, delete crate (does not delete the file). Remove track from crate and from library. Delete the file from your library and send to the recycle bin. (Note to iTunes users: files in your iTunes library cannot be deleted this way). Toggle the input reverse switch Clear search string if searching, or exit Scratch Live. slot 1 slot 2 slot 3 slot 4 slot 5 slot 6 ctrl - alt - Z ctrl - alt - X ctrl - alt - C ctrl - alt - V ctrl - alt - B ctrl - alt - N Z X C V B N ACTION Load the highlighted song to a deck. Load the track currently on one deck onto the other deck as well (instant doubles). Unload the track from a deck. Place a cue point. Place a cue point in a slot. Jump to cue points slots. (rel and int modes) Switch deck to absolute mode. Switch deck to relative mode. Switch deck to internal mode. Key lock on / off. Play / pause reverse. Play / pause forward. Pitch down. Pitch up. Bend down. (rel and int modes) Bend up. (rel and int modes) Censor. (rel and int modes) Go to temporary cue point. (rel and int modes) Set / adjust loop in-point. Set / adjust loop out-point. Loop on / off. Jump to selected loop. Load previous track. Load next track. Auto loop on / off. Loop roll. Rewind. (rel and int modes) Fast forward. (rel and int modes) Previous loop. Next loop. Activate the tempo tapper. Set temporary cue point. (rel and int modes) RIGHT DECK ctrl - or shift - ctrl - shift - shift - alt - ctrl - . (period) ctrl - 6, 7, 8, 9, 0 6, 7, 8, 9, 0 F6 F7 F8 F10 A S D F G H J K L ; ' ctrl - ' alt - A alt - S alt - 6, 7, 8, 9, 0 ctrl - alt - 6, 7, 8, 9, 0 alt - D alt - F alt - P alt - ; alt - space bar (x2) ctrl - K RANE SIXTY-EIGHT MIXER FOR SERATO SCRATCH LIVE • QUICK START • PART 21325