1
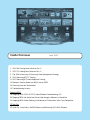
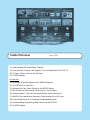
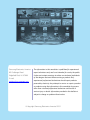
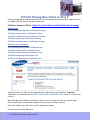
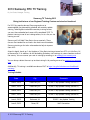
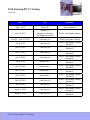
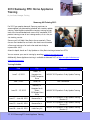
Samsung Techtalk
Your source for service information
Samsung Techtalk
Your source for service information
Inside this issue
June, 2013
1 2013 HA Training Now Online on Plus 1!
2 2013 TV Training Now Online on Plus 1!
3 The 20th Anniversary of Samsung’s New Management Strategy
9 2013 Samsung RTC TV Training
11 2013 Samsung RTC Home Appliance Training
13 Warranty Training Videos are NOW Live on GSPN
14 Samsung Contract Amendments
15 Troubleshooting Insanity
Stopping REDO
16 Stopping REDO: 2012-2013 TV Video Problem Troubleshooting 101
20 Stopping REDO: No Audio from Smart Hub through a Receiver or Sound Bar
21 Stopping REDO: Water Pooling in the Bottom of Dishwashers After Cycle Completion
CE Tech Tips
23 Quick Tip: Cisco/Linksys EA4500 Routers and Samsung 2013 Wi-Fi Products
Samsung Techtalk
Your source for service information
Inside this issue
June, 2013
24 Understanding ARC (Audio Return Channel)
26 Using the New Customer “Self Diagnosis” Test to Troubleshoot 2013 LED TVs
29 TV Resets (Power Cycles) or Has No Power
30 CE GSPN Updates
HA Tech Tips
31 New Model 4 Door Refrigerator Uses R600A Refrigerant
32 2013 RF31FM O/L Relay Test
33 Removing the Glass Touch Display on the NEF900 Range
35 How the Samsung Dishwasher Condensing Dry System Works
36 Kitchen Solutions - The New Dishwasher Basket Adjuster Service Kit
37 WA50F9A Top Load Washer Frequency Check Resolves NF or ND Errors
38 Smart Washer/Dryer Wi-Fi Connection Troubleshooting Guide
40 Troubleshooting the Sparkling Water Function on the RF31FM
42 HA GSPN Updates
Samsung Techtalk
Your source for service information
Samsung Electronics America
85 Challenger Road
Ridgefield Park, NJ 07660
E-mail:
[email protected]
The information in this newsletter is published for experienced
repair technicians only and is not intended for use by the public.
It does not contain warnings to advise non-technical individuals
of the dangers that exist when servicing a product. Only
experienced professional technicians should repair products
powered by electricity. Any attempt to service or repair a product
or products using the information in this newsletter by anyone
other than a trained professional technician could result in
serious injury or death. Information provided in this bulletin is
subject to change or update without notice.
© Copyright Samsung Electronics America 2013
2013 HA Training Now Online on Plus 1!
Samsung is pleased to announce that the 2013 HA training courses are now online. Keep your skills
up to date. Take the courses and get certified now!
Click here to access Plus 1: https://my.plus1solutions.net/clientPortals/samsung/
New Courses
2013 Samsung Refrigerator Certification Training
2013 Samsung Laundry Certification Training
2013 Samsung Dishwasher Certification Training
2013 Samsung Range Certification Training
2013 Samsung Microwave Certification Training
New Tests for Certification
2013 Samsung Refrigerator Certification Test
2013 Samsung Laundry Certification Test
2013 Samsung Dishwasher Certification Test
2013 Samsung Range Certification Test
2013 Samsung Microwave Certification Test
Take these courses to learn all you need to know to repair Samsung HA products. Important:
Technicians must take and pass the 2013 Samsung HA Certification Exams, either in a live class or
on Plus 1.
We encourage you to obtain certification as soon as you can to get the skills you need to repair
Samsung HA products and provide exceptional service to our mutual customers.
Don’t wait. Update your skills. Start an HA training course today!
The Samsung Training Department
1 2013 HA Training Now Online on Plus 1
2013 TV Training Now Online on Plus 1!
Samsung is pleased to announce that the 2013 TV training course is now online. Keep your skills up
to date. Learn to repair Samsung’s latest models. Take the course and get certified now!
Click here to access Plus 1: https://my.plus1solutions.net/clientPortals/samsung/
For 2013, we’ve consolidated the online TV training into one course/one test.
2013 Samsung TV Certification Course (Video - Released 3.31.2013) - This training covers 2013 TV
product and repair in detail. Take this course to learn all you need to know to repair Samsung 2013
TVs.
Important: Technicians must also take and pass the 2013 Samsung TV Certification Exam, either in
a live class or on Plus 1, by 7/31/13 to obtain Panel Certification for the year.
We encourage you to obtain certification as soon as you can so you’ll have the skills you need to
repair 2013 TVs and provide exceptional service to our mutual customers.
Don’t wait. Update your skills. Start the TV training course today!
The Samsung Training Department
2 2013 TV Trainig Now Online on Plus 1
The 20th Anniversary of Samsung’s
New Management Strategy
By Paul Yun, Assistant Manager, Operations Support
A brief history of Samsung’s achievements since New Management…
In June 1993, while on a global tour, Samsung’s chairman, Lee Kun Hee arrived at a hotel in Frankfurt,
Germany. He summoned all of Samsung’s executives from around the world for a senior meeting,
where he gave a three day speech laying out his vision for the future of Samsung and what the
company had to do to become successful - the New Management Strategy.
The most famous quote that came from the speech was: “Change everything except for your family.”
Since then, Samsung has risen to become a global leader in consumer electronics.
June, 2013 will mark the 20th anniversary of New Management.
The Meaning of the Samsung Logo:
In Korean, the word Samsung means “three stars.” The name was chosen by Samsung founder Lee
Byung-chull, whose vision was for his company to become powerful and everlasting like stars in the
sky.
The three stars remained as the company logo in various forms until 1993, when the current logo was
introduced.
3 The 20th Anniversary of Samsung’s New Management Strategy
The 20th Anniversary of Samsung’s New
Management Strategy
continued
Commitment to Quality:
In March, 1995, Samsung’s Chairman Lee Kun Hee was not content with the quality of Samsung
products. To get his employees to understand the importance of quality better, he had his staff
assemble a pile of 150,000 phones and fax machines in a field outside the Gumi factory in South
Korea. More than 2,000 employees gathered to watch the destruction of the old devices, ushering in
a new era centered on product quality.
Since that day, Samsung has focused on creating high-quality premium products that have gained
critical and commercial success globally.
4 The 20th Anniversary of Samsung’s New Management Strategy
The 20th Anniversary of Samsung’s New
Management Strategy
continued
People:
With over 230,000 employees around the world, Samsung is as much a local company as it is a
global one.
Samsung’s ties to the community run deep, as does its commitment to local investment and R&D
efforts. Samsung doesn’t just build an office, it looks for ways to provide jobs, bring in new business,
and sponsor local events. Samsung believes in the power of community to provide opportunity and
spur creativity.
Revenue:
Samsung’s revenue in 2012 was $188 billion. By 2020, Samsung plans to reach $400 billion in
revenue.
This target will be driven by continued focus on consumer electronics, but also through a concerted
drive into new growth areas, such as enterprise sales and medical devices.
The Samsung Brand:
Samsung was ranked 9th on the 2012 Interbrand Best Global Brands list. That is eight places higher
than the year before, and represents a 40% jump in brand value.
Samsung’s brand promise is creating products and services that expand experience and open
possibilities – possibilities for everyone, everywhere. It means upholding a belief in shared
responsibility – to our people, our planet and our society.
5 The 20th Anniversary of Samsung’s New Management Strategy
The 20th Anniversary of Samsung’s New
Management Strategy
continued
No.1 in TVs:
Samsung sees television as much more than just a screen. It’s a window into new experiences, new
discoveries, and new possibilities.
Samsung makes televisions for every market, offering premium TVs with Smart Hub that sets new
standards for performance, usability, and design.
Samsung truly believes in innovation for all; that’s why 100 Samsung TVs are sold every minute and
Samsung has been the world’s most successful TV manufacturer for the past seven straight years.
6 The 20th Anniversary of Samsung’s New Management Strategy
The 20th Anniversary of Samsung’s New
Management Strategy
continued
Pursuit of Innovation:
At Samsung, we put creativity at the center of what we do. That’s reflected in products that give our
customers the power to express their own unique talents and individuality.
Samsung Galaxy Note II with S Pen provides faster, more accurate input. The S9 Ultra HD TV offers
unprecedented picture clarity and detail. The Smart TV Evolution Kit allows owners of select 2012
Samsung HDTV models to upgrade their sets with the latest hardware and software features. Galaxy
Camera is the first 4G-enabled, Android based digital camera.
7 The 20th Anniversary of Samsung’s New Management Strategy
The 20th Anniversary of Samsung’s New
Management Strategy
continued
Environmental Certification:
Innovation at Samsung means more than new capabilities and smarter product features. Equally
important is saving energy and using safe materials – merging advanced technology with a
commitment to social responsibility.
This can be seen throughout Samsung’s range of products and services. From phone screens that
save power by dimming when you look away, to washers that are made for cold water usage,
Samsung is working smartly so its customers can too.
From 2013, 100% of products are set to receive global standard environmental certifications.
Samsung also ranked as the world’s most sustainable technology company in the 2011 Dow Jones
Sustainability Index and was voted ENERGY STAR ‘Partner of the Year’ for the third-consecutive year in
2013.
Future Technologies:
Samsung’s passion is to bring people innovation that they’d never dreamed was possible. Honoring
this commitment, Samsung incubates future technology though the Samsung Advanced Institute
of Technology, focusing on Future IT & Convergence, New Materials & Nanotechnology, Energy &
Environment, and Bio & Health.
Samsung believes technology can change our world for the better. It can open up a universe of ideas,
spark unknown passions, and connect people half a world away. That’s why, every day, Samsung is
thinking of new ways to bring our technology to more people across the globe.
For Samsung, it’s about more than just products and services. We believe technology can open the
door to a world of new possibilities.
Sourced from Samsung Live Story
8 The 20th Anniversary of Samsung’s New Management Strategy
2013 Samsung RTC TV Training
By Jim Foster, Manager, Training
Samsung TV Training 2013
Being held at one of our Regional Training Centers and at select locations!
For 2013, by popular demand, Samsung continues to
accommodate your demanding schedule with one day update
training. To be eligible to attend the one day training session,
you must have attended and successfully completed 2012 TV
product training in one of our training centers, or at a live, on-site
training session.
Samsung will still hold 3 day Basic classes quarterly. These
classes are intended for new techs who have never attended a
Samsung training or for techs who need extra help to improve
their skills.
Attend in-depth, hands-on 1 day Update or 3 day Basic training at one of our RTCs in Little Ferry, NJ
or Bensenville, IL! In addition, we will be holding limited on-site trainings at various locations around
the country. You can reserve your seat in training by emailing us at [email protected]
You can always obtain the most up to date training list by sending an email to [email protected].
com
Additionally, TV training is available on-demand 24/7 at https://my.plus1solutions.net/clientPortals/
samsung/
Training Schedule:
Date
City
Comments
June 4, 2013
Little Ferry, NJ
FE/ASC 1 day Update Training (Session 1)
June 5, 2013
Little Ferry, NJ
FE/ASC 1 day Update Training (Session 2)
June 6, 2013
Little Ferry, NJ
FE/ASC 1 day Update Training (Session 3)
June 7, 2013
Little Ferry, NJ
FE/ASC 1 day Update Training (Session 4)
June 4, 2013
Richmond, VA
FE/ASC 1 day Update Training
June 6, 2013
Dover, DE
MAC Convention
9 2013 Samsung RTC TV Training
2013 Samsung RTC TV Training
continued
Date
City
Comments
June 7, 2013
Dover, DE
MAC Convention
June 11, 2013
Houston, TX
Hampton Inn & Suites
160 Wagon Point Drive
FE/ASC 1 day Update Training
June 25 – June 27, 2013
Little Ferry, NJ
FE/ASC 3 day Basic Training
July 9, 2013
Little Ferry, NJ
July 10, 2013
Little Ferry, NJ
July 11, 2013
Little Ferry, NJ
July 12, 2013
Little Ferry, NJ
July 9, 2013
Bensenville, IL
July 10, 2013
Bensenville, IL
July 11, 2013
Bensenville, IL
July 12, 2013
Bensenville, IL
July 30, 2013
Little Ferry, NJ
July 31, 2013
Little Ferry, NJ
August 1, 2013
Little Ferry, NJ
August 2, 2013
Little Ferry, NJ
10 2013 Samsung RTC TV Training
FE/ASC 1 day Update Training
(Session 1)
FE/ASC 1 day Update Training
(Session 2)
FE/ASC 1 day Update Training
(Session 3)
FE/ASC 1 day Update Training
(Session 4)
FE/ASC 1 day Update Training
(Session 1)
FE/ASC 1 day Update Training
(Session 2)
FE/ASC 1 day Update Training
(Session 3)
FE/ASC 1 day Update Training
(Session 4)
FE/ASC 1 day Update Training
(Session 1)
FE/ASC 1 day Update Training
(Session 2)
FE/ASC 1 day Update Training
(Session 3)
FE/ASC 1 day Update Training
(Session 4)
2013 Samsung RTC Home Appliance
Training
By Jim Foster, Manager, Training
Samsung HA Training 2013
For 2013, per popular demand, Samsung continues to
accommodate your demanding schedule with two day update
training. To be eligible to attend the two day training session,
techs must have attended and successfully completed 2012
product training in one of our training centers, or at a live, onsite training session.
Samsung will still hold 4 day Basic classes quarterly. These
classes are intended for new techs who have never attended
a Samsung training or for techs who need extra help to
improve their skills.
Attend in-depth, hands-on 2 day Update or 4 day Basic training at one of our RTCs!
You can reserve your seat in training by emailing [email protected]
Additionally, Home Appliance training is available on-demand 24/7 at https://my.plus1solutions.net/
clientPortals/samsung/
Training Schedule:
Date
City
Comments
June 5 - 6, 2013
Dallas, TX
Hampton Inn 11069 Composite
Drive
ME/ASC 2013 products 2 day Update Training
June 7, 2013
Dover, DE
MAC Convention
June 12 – 13, 2013
Houston, TX
Hampton Inn &
Suites
150 Wagon Point
Drive
ME/ASC 2013 products 2 day Update Training
June 17 – June 18, 2013
Bensenville, IL
ME/ASC 2013 products 2 day Update Training
(Session 1)
June 19 – June 20, 2013
Bensenville, IL
ME/ASC 2013 products 2 day Update Training
(Session 2)
June 18 – June 19, 2013
Little Ferry, NJ
ME/ASC 2013 products 2 day Update Training
(Session 1)
11 2013 Samsung RTC Home Appliance Training
2013 Samsung Home Appliance Training
continued
Date
City
Comments
June 20 – June 21, 2013
Little Ferry, NJ
ME/ASC 2013 products 2 day Update Training
(Session 2)
June 24 – 25, 2013
June 27 – 29, 2013
Fort Lauderdale, FL
Hampton Inn
4499 W Commercial
Blvd.
Tamarac, FL
Atlanta, GA
8110 Troon Circle
Austell, GA 30168
(Old Samsung
Training Center)
ME/ASC 2013 products 2 day Update Training
ME/ASC 2013 products 2 day Update Training
July 16 - 19, 2013
Little Ferry, NJ
ME/ASC 2013 products 4 day Basic Training
July 23 – 26, 2013
Bensenville, IL
ME/ASC 2013 products 4 day Basic Training
12 2013 Samsung RTC Home Appliance Training
Warranty Training Videos are NOW Live
on GSPN
By Jet Nyamwange, Warranty Department
GSPN serves as the data processing environment for all repairs electronically submitted to Samsung
(SEA) by Authorized Service Centers (ASC). To ensure efficiency and cater to all time zones, warranty
videos are now available on GSPN for your use around the clock.
The videos listed below are NOW available on GSPN:
Video 1. GSPN Accessing Basic Warranty Information
This warranty video shows how to access basic warranty information within the GSPN system. It
includes how to view warranty terms for products, how to access your labor rates, how to view the
products you are authorized to repair, and how to perform model checks and other functions.
Video 2. GSPN Creating Warranty Claims V2
This warranty video shows how to create a Warranty Claim within the GSPN system. It includes
how to access service tickets by searching the service order number, how to document the repair
process, how to complete the ticket, and how to file your warranty claim directly from the ticket.
Video 3. GSPN Modifying Warranty Claims
This warranty video shows how to access and modify or make a change to a Warranty Claim
within the GSPN system. It includes how to access your already billed claims to check the status,
how to make necessary changes to claims on Hold by ASC, and how to download any warranty
data for your records.
To view the videos, you need to download QuickTime. This is the link: http://www.apple.com/quicktime/
download/
1. Download and install QuickTime.
2. Log into GSPN.
3. Click the Business Section (Labeled A, below).
4. Click the Video Link: Click here for Warranty Training Videos (Labeled B, below).
Any questions or concerns email: [email protected]
13 Warranty Training Videos are NOW Live on GSPN
Samsung Contract Amendments
By Stanley Sherrard, Senior Manager, Field Service
Samsung recently sent contract amendments to all service centers. Most changes were created to
bridge some of the gaps raised during our 2012 service audit. Other modifications were necessary
to address general business changes that occurred over the past couple of years. Please take some
time to review the changes, and then return your signed amendments to Samsung Field Service no
later than June 10th 2013.
There are up to 14 modifications/additions based on your account type and product authorizations.
The main changes are outlined below:
• Rejected Warranty Claim Correction Term: In the past, service centers have had up to 90 days
from repair completion to make corrections to warranty claims on hold. In an effort to reduce AR
by paying servicers in a timelier manner, and reduce the overall number of claims on hold at any
given time, Service Centers are now required to make their warranty claim corrections within 30
days from the date the claim was initially submitted to Samsung.
• Addition of Stock Repair Major Rate for Home Appliance: For most accounts, the Samsung HA
labor rate for Major Stock Repairs was the same rate as Minor Stock Repairs. The new SR Major
Rate has been added to pay a higher rate when a major HA Stock Repair is performed.
• Elimination of TV Major/Minor Rates: TV Carry-in and In-home repairs no longer have a major
and minor rate structure. Samsung has developed a flat rate which we believe will simplify the
warranty claims submission process while maintaining a similar overall labor payment amount.
• Background Screening: All Samsung Technicians must pass a bi-annual criminal and driver
screening. In addition, Samsung now requires the Owner/Controlling Person from all Authorized
Service Centers (ASC) to pass background screening. This does not apply to an Owner/Controlling
Person from Dealer Service Centers.
• Insurance: Workman’s Compensation Insurance is mandatory if required by applicable State Law.
• Repair Warranty: Service Centers are required to warrant their repairs for 90 days. Previous
contracts typically listed a 30 day Service Warranty.
• Reporting of Active Technicians: Samsung now requires Service Centers to report all active
technicians. The module for doing so will soon be available on the GSPN website.
If you have any additional questions regarding the new contract changes, please contact your Field
Service Team Member or send an email to [email protected].
14 Samsung Contract Amendments
Troubleshooting Insanity
By Scott Whitman, Senior Manager, CE Product Support
“Insanity is doing the same thing over and over again and expecting different results.”
Albert Einstein
There are three general methods of troubleshooting:
•• Divide and conquer
•• Signal tracing
•• Signal injection
All provide good results. Still, no matter which method you use, there are times when you come to a
standstill and scratch your head. Here’s an example of what not to do next.
The Scenario: The Customer’s symptom is no Wi-Fi connection
Using some of the various testing procedures that Samsung teaches in technical training, you narrow
the issue to the Wi-Fi module itself. After replacing the module, however; you find the symptom still
exists. At this point, (for those service calls that Product Support has tracked) comes the guessing
game. With no evidence indicating any defect with the main board, you change it. Again, after
powering on the TV and setting up the new main board, you find the symptom still exists. At this
point, you are out of parts and time. After a brief explanation to the customer about a defective
replacement part, you leave for your next call and request another Wi-Fi module from GPCA. A few
days later, you return with the new module and install it in the TV. Guess what - same issue. But
wait, you have another brand new main board, so you try it too. Again, there is no change in the
original symptom.
Seem farfetched? Actually not!
This is only one example of the many service calls we have reviewed that have similar
troubleshooting paths and results.
If we review this specific scenario for the root cause of the first time fix failure, the key area is the
original troubleshooting which identified the Wi-Fi module as the cause of the symptom. In this
specific case, the only test the tech performed was using the customer menu to see if the TV detected
the Wi-Fi signal. Remember your electronics 101 training. Not only is there an input and output signal,
but also supply voltages (which does include ground). Just because there is board with a connector
that can be changed quickly doesn’t mean it is always the best or correct path.
The second error in this repair attempt is the failure to use all that Samsung has to offer. There
was, for example, no call to Samsung technical support. A second set of eyes can only increase
your technical performance. Also, reporting field service issues via our technical support line helps
Samsung improve the product.
The point I am making is this: Replacement parts seldom arrive DOA with the exact same issue as the
original part. Changing the same part over and over again and expecting that to resolve the issue
leads to a lot of wasted time, tech and customer frustration, and a failed repair. Insanity!!
15 Troubleshooting Insanity
Stopping REDO Stopping REDO
Stopping REDO
Stopping REDO: 2012-2013 TV Video
Problem Troubleshooting 101
By Khaled Abuali and Paul Kim, Managers, Product Support Engineering
Group
Samsung TVs have a built-in test picture and built-in test patterns to help service technicians
troubleshoot video issues and pinpoint problems. There is also a T-Con jig available to help you test
TV Power and T-CON TEST PATTERNS without the Main Board.
Using the Picture Test in the TV menu
1. Disconnect all video connections to the TV.
2. Go to Menu>Support>Self Diagnosis>Picture Test.
3. If you see a proper picture, as shown below, the problem is caused by either:
•• The cable connection
•• The source (the A/V device connected to the TV)
Using the Built-in Test Patterns to Isolate the Problem to the Main Board, T-Con, Logic Board, or
Panel
•• Main Board Test Pattern: Press [Mute] + 147 + [Mute]
•• T-Con/Logic Test Pattern: Press [Mute] + 369 + [Mute]
Test Results and Repair Guide Table
Main Test Pattern
Results
OK
T-Con/Logic Test
Pattern Results
OK
Possible Cause of
Problem
Source
Repair Guide
Check Source cable.
Try different input.
NG
OK
NG
NG
16 Stopping REDO
Main Board or LVDS
Cable
T-Con/Logic or Panel
Try a different source.
Try reseating the LVDS
Cable.
Use T-Con Jig [LED
only].
Stopping REDO Stopping REDO
Stopping REDO: 2012-2013 TV Video Problem
Troubleshooting 101
continued
Using the T-Con Jig (Part Number SPC-2011)
The T-CON Test Jig is available for 2011 thru 2013 LCD/LED models to help you test TV Power and
T-CON TEST PATTERNS without the Main Board.
The jig works with 2011, 2012, and 2013 TVs, 32 inches and larger. Do not use on models that are
not supported. You can damage the TV.
The Test Jig comes with a set of LVDS cables for all supported models to help you troubleshoot LVDS
related issues.
Common Symptoms
Use the on-screen symptom guides below to determine which part(s) to replace.
Common LED Symptoms
17 Stopping REDO
Stopping REDO Stopping REDO
Stopping REDO: 2012-2013 TV Video Problem
Troubleshooting 101
continued
18 Stopping REDO
Stopping REDO Stopping REDO
Stopping REDO: 2012-2013 TV Video Problem
Troubleshooting 101
continued
19 Stopping REDO
Stopping REDO Stopping REDO
Stopping REDO: No Audio from Smart
Hub through a Receiver or Sound Bar
By Paul Kim, Manager, Product Support Engineering Group
Cause: Some A/V Receivers and Sound Bars can only support the PCM digital audio format. Playing a
video from a video streaming application such as Netflix or Vudu can result in no audio or continuous
static because the app is streaming audio in the Dolby Digital format.
Resolution: Change the audio output format from Dolby Digital to PCM.
For Netflix, follow the steps below to change the audio format:
1. Launch the Netflix application.
2. Play any movie.
3. Change the Audio Format setting on the TV:
On 2012 TVs:
Go to TV Menu → Sound → SPDIF Output → Audio Format → Select ‘PCM’
→
→
On 2013 TVs:
Go to TV Menu → Sound → Digital Audio Out → Audio Format → Select ‘PCM’
For Vudu, follow the steps below to change the audio format:
Go to My Vudu → Info & Settings → Audio Settings → Select ‘PCM Stereo’
→
20 Stopping REDO
→
Stopping REDO Stopping REDO
Stopping REDO: Water Pooling in the
Bottom of Dishwashers After Cycle
Completion
By Keith Robinson, Manager, HA Product Support Engineers
Recently, we’ve had reports of dishwashers (DMT 400, DMT800, and DW7933LRASR/XXA) that do not
fully drain after the completion of a cycle. The water is pooled at the rear of the dishwasher and the
dishwasher seems incapable of draining the water out. The cause is, in most cases, easy to diagnose:
During the installation, the unit was not leveled correctly.
For example, in installations where kitchen floor tiles do not extend completely to the rear of the area
where the dishwasher is installed, the two front legs – resting on the tiles - can be set higher than the
rear adjustment leg. This tips the front of the dishwasher up and can cause water to pool in the back
of the tub and not be removed during the drain cycle.
If you see that a dishwasher is not level, or if you are required to remove a dishwasher for any
reason, follow the steps below to ensure that the dishwasher is installed – or re-installed - level.
1. Open the door and place a level against the inside top of the
tub, and then check whether the dishwasher is level side to
side. If it is not level, rotate the leveling legs at the bottom
front of the dishwasher until the dishwasher is level.
2. Check whether the dishwasher is upright (perpendicular) as
shown in the figure to the right.
3. Open the door of the dishwasher, and
then check whether the tub and the door
clearances are correct. If not, rotate the
leveling legs at the bottom front of the
dishwasher.
21 Stopping REDO
Stopping REDO Stopping REDO
Stopping REDO: Water Pooling in the Bottom of
Dishwashers After Cycle Completion
continued
Note: Rotate the leveling legs to the left (counterclockwise)
to raise the front of the dishwasher. Rotate the leveling
legs to the right (clockwise) to lower the front of the
dishwasher.
Note: You can adjust the height of the rear leg using a Hex
L-wrench or similar tool. Rotate the Hex bolt located on the
front of the dishwasher base.
When you pull out or lay the dishwasher down for
installation, adjust the back leg height. When done, tighten
the leg to prevent it from breaking.
22 Stopping REDO
CE Tech Tips
Quick Tip: Cisco/Linksys EA4500 Routers
and Samsung 2013 Wi-Fi Products
By Michael Vigliotti, Assistant Manager, Product Support
There has been a few compatibility issues reported with 2013 Samsung products and the Cisco
Linksys EA4500 Router.
Affected Models: 2013 TVs with wireless capability, BD-F5900 and up, HT-F5500 and up.
Symptom: Customers can connect wirelessly to the router at first, but when they check the network
status or try to go to Smart Hub, the network connection fails.
Cause: In simple terms, the cause is an incompatibility between the Cisco Linksys router and the
Samsung Product’s wireless access card. In more detail, the issue is caused by the Cisco router
sending illegal (or Runt) packets of information to the Samsung Product and the Samsung product
then ignoring future communication from the router and dropping the network connection. Normal
Address Return Protocol (ARP) format states that all Ethernet headers must be at least 46 bits in
length, but this router is sending ARP headers that are only 36 bits in length.
Solution: We are currently developing firmware updates for our Samsung products that will make
it possible for them to read these illegal packets of information. After the firmware update, the
Samsung Product will be able to keep the Internet connection with the Cisco Router, and Smart Hub
and the Browser will be available normally. Please reference the table below to see which firmware is
needed for each product and which is currently available.
Platform
Ex Model
Firm-code
Version
Released
Fox
LED TV F7450, F7500,
F7500, PDP TV F8500
LED TV F5500,
F6300~F7200, PDP TV
F5500
BD-F5900, F6700,
F7500
HT-F5500, 6500
T-FXPAKUC
1104.3
5/28/2013
T-MST12AKUC
1104.3
5/28/2013
B-FXBBSPWWC
1010.2
-
6/7/2013
B-FXBHTSWWC
1009.2
-
6/7/2013
X12
Fox
Fox
Expected
Release
Important: If a customer is having a network related problem, it is very important to ask for more
information about the router’s brand and model so you can check if there are any reported issues.
23 CE Tech Tips
Understanding ARC (Audio Return
Channel)
By Paul Kim, Manager, Product Support Engineering Group
Audio Return Channel (ARC) was introduced in HDMI standard version 1.4. This function lets your
Home Theater system input audio from your Samsung Smart TV through the same HDMI cable that
outputs audio and video from the Home Theater system to the TV. Using ARC, you do not need an
extra audio cable connection such as an Optical (SPDIF) or analog audio cable. This simplifies cabling
by combining the upstream audio capability into a single HDMI Cable.
[BEFORE ARC]
[AFTER ARC]
24 CE Tech Tips
Understanding ARC (Audio Return Channel
continued
To take advantage of ARC, both the TV and A/V Receiver (or Sound Bar) must have ARC capability.
To use ARC, check the owner’s manual and make sure both the TV and the A/V receiver have ARC
compatible HDMI jacks. For Samsung Smart TVs, ARC can be established on either HDMI 2 or 3,
depending on the Smart TV model.
[Example: TV Input]
25 CE Tech Tips
[Example: A/V Receiver Input]
Using the New Customer “Self Diagnosis”
Test to Troubleshoot 2013 LED TVs
By Chuck Russo, Assistant Manager, Training
You can use the new, 2013 LED TV Customer Self Diagnosis Picture Test to troubleshoot 2013 LED
TVs models with FRC control (120Hz or 240Hz). The Picture Test can help you determine Main/LVDS,
T-CON, or Panel failure issues.
To access the Picture Test, select Menu -> Support -> Self Diagnosis -> Picture Test.
Running the Self Diagnosis Picture Test
1. Enter Picture Test.
2. Run Test 1: The photo is
from Main Board. If it’s
OK, suspect the source,
cable, or input.
3. Run Test 2: The test
pattern is from the
T-Con (pre). If it’s OK, the
problem lies in the Main
Board or LVDS.
26 CE Tech Tips
Using the New Customer “Self Diagnosis” Test to
Troubleshoot 2013 LED TVs
continued
4. Run Test 3: The test
pattern is from the T-Con
(post). If it’s OK and Test
2 failed, then the problem
lies in the T-Con Board.
5. At the end of the Picture
Test, the TV displays the
results. In the sample
on the right, the TV
failed Test 1 and Test 2,
and passed Test 3. The
problem is in the T-Con
Board.
For more Self Diagnosis Test results and their meanings, see the table on the next page.
27 CE Tech Tips
Using the New Customer “Self Diagnosis” Test to
Troubleshoot 2013 LED TVs
continued
New Customer Picture Test Error Chart for LED Models
Main Board
Pre-T-Con.
Post T-Con.
Test Result
Problem
Pass
Pass
Pass
Check
Signal
Source and
other
inputs.
Fail
Pass
Pass
Main Board
or LVDS
Cable
Fail
Fail
Pass
T-Con.
Board
Fail
Fail
Fail
T-Con or
Panel
28 CE Tech Tips
TV Resets (Power Cycles) or Has No
Power
By Khaled Abuali, Manager, Product Support Engineering Group
The TV power cycles or does not turn on. The Standby LED may be blinking.
Models: PN**F4500, PN**F4550, PN**4900, PN**5300
Cause: Voltage regulator IC failure on the Main Board.
Solution:
Symptom 1: The set has no power or continuously power cycles and was manufactured before March.
Replace the main board.
Note 1: The production month is the 9th digit of the serial number. Please refer to the table below.
Note 2: The bad IC is indicated by lot numbers 1247, 1248, 1249, and 1250.
Month
1
2
3
4
5
6
7
8
9
10
11
12
9th
Digit
1
2
3
4
5
6
7
8
9
A
B
C
Symptom 2: The set intermittently power cycles and was manufactured in or after March. Update the
software to version 1015.0 or higher. The software is only available on GSPN.
29 CE Tech Tips
CE GSPN Updates
By Jeff Brutman, Senior Staff, Publications
We encourage you to use our GSPN site to find the latest service bulletins to aid you with your repairs:
http://gspn3.samsungcsportal.com/
CE Service Bulletins uploaded to GSPN in May, 2013:
Bulletin Number
Subject
Applicable Models
Plasma TVs
SUBJECT: Pink Banding
ASC2013052800
SYMPTOM: A horizontal pink band on the screen.
REPAIR: Upgrade the Logic S/W.
PN58C550G1FXZA,
PN63C550G1FXZA,
PN58C590G2FXZA,
PN58C590G4FXZA,
PN63C590G4FXZA,
PN58C6400TFXZA,
PN58C6500TFXZA,
PN58C680G5FXZA,
PN58C7000YFXZA,
PN63C7000YFXZA,
PN58C8000YFXZA,
PN63C8000YFXZA
To access service bulletins on GSPN, first visit http://service.samsungportal.com. Login using your User
ID and Password. Click on “Knowledge” at the top, then “Product Info” in the left column. The Product
Information menu will appear. Click on “Service Bulletin (Local) to bring up the Service Bulletins (Local)
screen. To search for a bulletin, enter the bulletin number in the Subject field on the left side of the
screen, and then click the Search button on the far right. If for some reason the bulletin does not
appear, it can still be searched using the “Category” drop-down menus, the Subject field, or the Model
field. You can also try using the Search field at the top of the screen.
30 CE Tech Tips
HA Tech Tips
New Model 4 Door Refrigerator Uses
R600A Refrigerant
By Wes Sirois, Manager, HA Product Support
SUBJECT: Introduction of new 4 Door Refrigerator, Model RF32FMQDBSR
IMPORTANT INFORMATION:
•• This refrigerator contains 2 complete sealed systems with 2 compressors, one for the freezer and
variable room and a separate one for the fresh food section.
•• The fresh food sealed system and compressor use Refrigerant R600A.
Sealed System Repair Policy:
If the R600A system (identified by red paint on the tubing) should leak or the compressor fails, do not
attempt to repair. Contact Tech Support from the home.
If the R134A system needs repair, proceed in the usual manner.
31 HA Tech Tips
2013 RF31FM O/L Relay Test
By Juan Morales, Regional Technical Trainer
The Over Load (O/L) Relay found on the 2013 Samsung RF31M refrigerator protects the compressor
by opening if an excessive amount of current is detected.
Unfortunately, the line it opens will prevent L1 from reaching the refrigerator’s Inverter Driver PCB.
Should you come across a completely “dead” RF31FM, first verify the wall outlet is wired correctly
and that it is supplying 120V AC. If the outlet is OK, check the O/L Relay and make sure it is not open.
You can check the relay by testing continuity between the L1 post on the power connector and the
output of the fuse located on the inverter driver PCB. By testing at these two points, you will also
verify whether the fuse is good.
32 HA Tech Tips
Removing the Glass Touch Display on
the NEF900 Range
By Nicholas Webert, Regional Technical Trainer
The new Samsung slide in range, model NEF900, has a glass touch control panel along the front of
the unit. If you need to replace the glass panel, you must remove and replace the range’s entire front
panel.
To remove the front panel, follow these steps:
1. Open the door to the range, and then locate and remove the four screws circled in red in the
picture below.
2. Pull the front panel up to expose the board underneath.
33 HA Tech Tips
Removing the Glass Touch Display on the NEF900
Range
continued
3. Remove the two screws on the sub PCB, disconnect the two wire harnesses and the ribbon cable,
and then remove the sub PCB. Be careful when removing the ribbon cable. It is fragile and can be
damaged easily. Do not bend or twist it.
SUB BOARD
4. Remove the cook top control knobs, and then the screws that hold the infinite switches in the
control panel. Remove the infinite switches.
5. Remove the control panel assembly.
6. Reverse the instructions to reassemble the control panel assembly. Be careful when replacing the
sub PCB. The ribbon cable is fragile and can be easily damaged. Do not bend or twist it.
34 HA Tech Tips
How the Samsung Dishwasher
Condensing Dry System Works
By Jason Abrams, Assistant Manager, HA Product Support
The other day, a tech asked me how the Samsung dishwasher drying cycle worked. A customer of his
was complaining that their dishes were not drying and he wanted to resolve the problem. However, he
was not sure how the dry system worked and what could be done to improve its performance.
Admittedly, the Samsung dishwasher dry system is different. Compared to other dishwashers which use a heater to dry dishes - Samsung dishwashers use a condensing dry system that is far
more energy efficient and does not exhaust hot steam. However, the condensing dry system is more
complex than a heater drying system and relies on three factors to work. If one of these factors is not
present, the system will fail.
The first factor is rinse aid. Rinse aid prevents water droplet formation on the surface of items in
the dishwasher. By stopping water droplet formation, rinse aid not only prevents spots from forming
on the items, but also removes excess water that can stay on those items. This increases the drying
performance because the drying system has less moisture to remove.
The second factor is water temperature. The heat from the water used during the last rinse cycle will
heat up the stainless steel interior and provide heat to aid the drying process. The incoming water
temperature must be above 120 °F to ensure that the unit gets hot enough for proper drying to occur.
The last factor is airflow. When the dishwasher is in the drying cycle, the vent at the top of the door
opens and a fan comes on. This process pushes moist air out of the dishwasher and pulls dry air into
the dishwasher from the room. The two types of air mix in a condensing unit and the moisture from
the air is removed. The bottom of the door must be kept clear of any obstructions that will prevent air
flow.
With all of that said, even if all of these factors are met, certain items do not dry completely in a
dishwasher. First, plastic items will not dry completely. Plastic is more porous than ceramic, glass, or
metal. It will absorb water and retain more of it than these other materials. Secondly, water that pools
on the bottoms of glasses and cups will not dry because there is too much water to be removed.
Understanding how the system works should help you diagnose the unit and explain to the customer
the correct operation of the dishwasher.
35 HA Tech Tips
Kitchen Solutions - The New Dishwasher
Basket Adjuster Service Kit
By Keith Robinson, Manager, HA Product Support Engineers
The Left and Right Basket Adjusters used on the DMR78 and DMT800 dishwashers were previously
only available as separate parts. If the basket adjuster failed due to the mounting hook breaking, you
would have had to order 2 separate parts. See the entry under Before in the table below.
In an effort to help reduce service costs and make sure you get all the parts you need the first time,
the 2 separate parts have now been merged into one service kit. If you need to order the Left and
Right Basket Adjusters for the DMR78 or DMT800 going forward, order the kit for the appropriate
model listed under After in the table below.
Before
Part
1. DMT800
• DD97-00119B, ASSY-BASKET
ADJUSTER (R)
• DD97-00120B, ASSY-BASKET
ADJUSTER (L)
2. DMR78
• DD97-00119A, ASSY-BASKET
ADJUSTER (R)
• DD97-00120A, ASSY-BASKET
ADJUSTER (L)
Picture
After
1. DMT800,
• DD82-01121B, A/S ASSY-BASKET ADJUSTER
2. DMR78
• DD82-01121A, A/S ASSY-BASKET ADJUSTER
Left
Right
The Basket Adjuster has also been improved with the addition of a rib to strengthen the clip.
Before
36 HA Tech Tips
After
WA50F9A Top Load Washer Frequency
Check Resolves NF or ND Errors
By Juan Morales, Regional Technical Trainer
A common cause for NF or ND error codes on top load washers is a defective water level sensor or a
defect or blockage in the pressure hose attached to it. You can easily access and test the functionality
of the water level sensor (pressure switch) in the Quick Test Mode by following these steps:
1. With the unit powered OFF, press the SPIN, SOIL LEVEL and POWER buttons at the same time, and
then hold them for a few seconds. (You’ll hear a signal and all the LEDs will light.)
2. Once the washer is in Quick Test Mode, turn the jog-dial counterclockwise until the Colors/Darks
LED is lit.
• At this point, if the tub is empty, you should have a reading of approximately 2500 to 2600
Hz.
• If the tub has water in it, this number will be lower, but the exact value will depend on how
much water is actually inside the tub.
3. Add water to the tub to verify the number is indeed dropping as the pressure inside the tub
increases.
4. If this number is inconsistent with the description above, inspect the pressure hose, and verify it is
not restricted or cut.
5. In some cases, simply blowing through the hose will clear it of any debris that may be blocking it.
37 HA Tech Tips
Smart Washer/Dryer Wi-Fi Connection
Troubleshooting Guide
By Kyeong Tae Lee, Assistant Manager, HA Product Support
To resolve connection issues, follow these steps:
1. Check if the washer/dryer is connected to the network. If one or no connection bars are present
on the Wi-Fi connection status screen (Settings → Network → Wi-Fi Status), there is an issue with
the connectivity between the unit and the home network. If the unit is having connection issues,
make sure the WI-FI access point is close enough to the unit. Then, confirm that the unit has the
latest software installed (Settings → Network → Software update). The Software Update screen
should display “0E86” for the washer and “1887” for the dryer. If not, tap the software version to
update.
2. If the unit has no connectivity issues with the network and has the latest software, check the
mobile device the customer wants to use to control the washer. Is it connected to the same
network and access point? Both the washer/dryer and the mobile device must be connected to the
same Local Area Network (LAN) for the App’s “Indoor” function to work correctly.
3. Confirm that the mobile App installed on the device is the newest version: Go to Settings →
Version Info (v 2.1.1 is the newest version). Also, go to Settings → Select a Country, and make
sure that “USA” is selected.
4. While the washer/dryer is turned on, and the “Smart Control” function on the washer/dryer display
is checked and enabled, open the Samsung Smart Washer mobile App. Select Washer or Dryer at
the bottom tab, depending on the unit you want to control, and then select “Indoor control.” The
App will begin searching for a Samsung Smart washer/dryer that is connected to the network.
Once the App finds the washer/dryer, select the unit and the App will connect.
Note: If you see a “Connection Error” message after attempting to connect turn the Smart Control
off and on, and then try again.
38 HA Tech Tips
Smart Washer/Dryer WI-FI Connection
Troubleshooting Guide
continued
5. If you see the “Smart Control” message shown at right
after selecting the unit, then the Smart Control function
on the unit is not enabled. Find the Smart Control key
on the top right of the unit’s display, and make sure it’s
enabled, and then try again. If the Smart Control function
is not enabled, the app will only let you view the cycle
progress while disabling remote control of the unit.
6. After the unit has connected with the mobile APP and you have selected the unit, a screen showing
the available cycles will appear. After you select a cycle, the screen will update and display a Start
button, as shown below.
39 HA Tech Tips
Troubleshooting the Sparkling Water
Function on the RF31FM
By Dorian Rua, Content Developer, Product Support
If the RF31FM sparkling water refrigerator does not dispense soda, follow these steps:
1. Check for any error codes in Diagnostic mode. Error codes 17E, 94E, and 93E are associated with
the sparkling water feature. Check the fast track for more details.
2. Confirm that Sparkling Water is selected on the display. Sparkling water will not dispense if Ice
is selected. To select sparkling water, press the Sparkling Water button. A sparkling icon (see the
illustration below) indicates that sparkling water is selected. See if the refrigerator dispenses
sparkling water.
Note: If you see the word OFF above the sparkling icon, the sparkling water production function
is off. The refrigerator can still dispense existing sparkling water, but it won’t produce additional
sparkling water. To turn on sparkling water production, hold the Cubed / Crushed button for 3
seconds until the word OFF has disappeared. If the amount of sparkling water in the Sparkling
Water tank is low, the refrigerator will automatically begin making sparkling water. See Step 3.
3. Confirm that the unit is not currently making sparkling water. The refrigerator produces sparkling
water by injecting CO2 from a SodaStream carbonator into water held in the Sparkling Water tank.
A 1-2-3 blinking interval indicates that the refrigerator is actively making sparkling water. While it
is making sparkling water, the refrigerator will not dispense sparkling water. If the refrigerator is
making sparkling water, wait until it is done, and then try dispensing sparkling water.
Note: The maximum production time is approximately 30 minutes for Level 3 carbonation.
Opening the door will stop the production process. Closing the door will restart it in about a
minute.
4. Check if the dispenser lever switch is broken or stuck.
5. Test the CO2 valve. Open the door, and then press/hold the Energy saver button for 5 seconds.
•• The CO2 valve will open and you will hear the valve operating.
•• Confirming the sound indicates that the Soda valve is operating properly.
40 HA Tech Tips
Troubleshooting the Sparkling Water Function
continued
6. Run the Cylinder Reset Function. Hold the Sparkling water button for 3 seconds to run the Cylinder
Reset function. The refrigerator will start making sparkling water. Wait until the refrigerator is
done – in about 20 minutes – and then try dispensing sparkling water.
7. If the Sparkling Water does not dispense after sparkling water production ends, replace the Display
PCB.
Note: Check for any Error codes and follow all the steps above before replacing the PCB.
41 HA Tech Tips
HA GSPN Updates
By Jeff Brutman, Senior Staff, Publications
We encourage you to use our GSPN site to find the latest service bulletins to aid you with your repairs:
http://gspn3.samsungcsportal.com/
HA Service Bulletins uploaded to GSPN in May, 2013:
Bulletin Number
Subject
Applicable Models
SUBJECT:
To improve quality, the ASSY Pump Drain location
has been changed.
ACTION:
ASC20130509001
•• To improve quality, we changed the position
of the ASSY PUMP DRAIN and ASSY WIRE
HARNESS from the bottom of the TUB to the
BASE of the washer on new production.
•• This improvement required us to change the
ASSY GUIDE HOSE, Cover Pump, and Wire
Harness, and add an ASSY HOSE DRAIN and
HOLDER WIRE SADDLE.
Washing Machine
WA400, WA422,
WA456
•• This improvement is not backwardly
compatible to units manufactured before
December 23, 2012
SUBJECT:
Fresh Food section shelves out of alignment
Symptom: Shelves tilt at the center and may not
line up correctly.
ASC20130507001
42 HA Tech Tips
Background: In production, the wrong
size screw (30mm) was used to attach the
Evaporator cover and shelf support ladder. This
screw must be 35mm long.
French Door
Refrigerator
RF220NCTA**
RF221NCTA**
RF260BEAE**
RF261BEAE**
RF263BEAE**
RF263TEAE**
HA GSPN Updates
continues
Bulletin Number
Subject
Applicable Models
SUBJECT:
Introduction of new 4 Door Refrigerator, Model
RF32FMQDBSR
IMPORTANT INFORMATION:
•• This refrigerator contains 2 complete sealed
systems with 2 compressors, one for the
freezer and variable room and a separate one
for the fresh food section.
ASC20130515001
French Door
Refrigerator
•• The fresh food sealed system and compressor
use refrigerant R-600.
RF32FMQDBSR
Sealed System Repair Policy:
•• If the R-600 system (identified by red paint
on the tubing) should leak or the compressor
fails, do not attempt to repair. Contact Tech
Support from the home.
•• If the R-134A system needs repair, proceed in
the usual manner.
To access service bulletins on GSPN, first visit http://service.samsungportal.com. Login using your User
ID and Password. Click on “Knowledge” at the top, then “Product Info” in the left column. The Product
Information menu will appear. Click on “Service Bulletin (Local) to bring up the Service Bulletins (Local)
screen. To search for a bulletin, enter the bulletin number in the Subject field on the left side of the
screen, and then click the Search button on the far right. If for some reason the bulletin does not
appear, it can still be searched using the “Category” drop-down menus, the Subject field, or the Model
field. You can also try using the Search field at the top of the screen.
43 HA Tech Tips