1
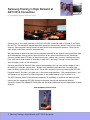
Samsung Techtalk
Your source for service information
Samsung Techtalk
Your source for service information
Inside this issue
April, 2013
1 Samsung Electronics Wins 2013 ENERGY STAR® Partner of the Year - Sustained Excellence
Award
2 Stopping REDO Section Added to Samsung Newsletter
3 Samsung Training in High Demand at ASTI 2013 Convention
4 2013 Samsung TV Training
5 2013 Samsung TV Training
6 2013 Samsung RTC Home Appliance Training
7 Service Action Worksheet (SAW) Process Reminder
Stopping REDO
8 Stopping REDO: The Importance of Proper Dishwasher Installation
9 Stopping REDO: SE Errors and Control Panel Lock on the ME179KFETSR/AA Microwave/
Convection Oven
11 Stopping REDO: 2012 LED TV Auto Power Cycling/Reset Issue
CE Tech Tips
12 Quick Tip: How to Set the Option Bit on DVD Players
Samsung Techtalk
Your source for service information
Inside this issue
April, 2013
13 How to Troubleshoot the 2012 TV Bluetooth Module
14 How to Access the Factory Menu on 2013 Smart TVs
15 The Secret of ARC (Audio Return Channel)
HA Tech Tips
16 Replacing a SodaStream 60L Carbonator in the New Samsung Sparkling Water Refrigerator
18 Gas Dryer Assembly Pipe Thread Defect
19 Refrigerator Replacement Part Change
20 Calibration Mode for 2012 Top Load Washers
22 HA GSPN Updates
Samsung Techtalk
Your source for service information
Samsung Electronics America
85 Challenger Road
Ridgefield Park, NJ 07660
E-mail:
[email protected]
The information in this newsletter is published for experienced
repair technicians only and is not intended for use by the public.
It does not contain warnings to advise non-technical individuals
of the dangers that exist when servicing a product. Only
experienced professional technicians should repair products
powered by electricity. Any attempt to service or repair a product
or products using the information in this newsletter by anyone
other than a trained professional technician could result in
serious injury or death. Information provided in this bulletin is
subject to change or update without notice.
© Copyright Samsung Electronics America 2013
Samsung Electronics Wins 2013
ENERGY STAR® Partner of the Year Sustained Excellence Award
By Joonil Kim, Manager, Strategic Service Planning
The U.S. Environmental Protection Agency (EPA) has recognized Samsung Electronics for its ongoing leadership
in protecting the environment through superior energy efficiency.
Samsung Electronics received the 2013 ENERGY STAR Partner of the Year – Sustained Excellence
Award from the U.S. Environmental Protection Agency (EPA) for continued leadership in protecting
the environment through various activities all focused on providing products with superior energy
efficiency. Some of the reasons Samsung was selected from nearly 20,000 organizations in the U.S.
participating in the ENERGY STAR program for this honor are:
•• Offering 1,435 Energy Star-qualified models across multiple product categories, four of which
received the Eco-Design and Sustainability Award from the CEA. In 2012, Samsung had more
Energy Star-qualified televisions and clothes washers than any other consumer electronics brand.
•• Highlighting the importance of energy efficiency and greenhouse gas reduction with various
consumer programs that actively promote the “Change the World, Start with Energy Star”
campaign, including an electronic billboard in Times Square, an Eco-zone at International CES,
and programs at Boys & Girls Club of America events throughout the year.
•• Working with employees, retailers, and distributors to create training programs on energy
efficiency and greenhouse gas reductions.
“We are thrilled to be selected for the Energy Star Partner of the Year – Sustained Excellence Award,”
stated Yangkyu (Y.K.) Kim, Samsung Electronics North America president and CEO. “This prestigious
honor recognizes our corporate commitment to sustainability and encourages us to continue seeking
smarter ways to manage our operations sustainably while developing the most innovative and energy
efficient products.”
In addition to being named 2013 Energy Star Partner of the Year – Sustained Excellence, Samsung
has earned the past Energy Star awards:
•• 2012 Energy Star Partner of the Year – Product Manufacturer Award
•• 2011 Energy Star Partner of the Year – Product Manufacturer Award
•• 2010 Energy Star Excellence in Energy Star Promotion
•• 2009 Energy Star Excellence in Energy Star Labeling
Samsung formally accepted the ENERGY STAR Partner of the Year – Sustained Excellence Award at
the award ceremony in Washington, D.C. on March 26, 2013. For more information about Samsung’s
sustainability efforts, please visit www.samsung.com/us/environment.
※ This article is based on Samsung Electronics Corporate Strategy & Communication PR newsletter
1 Samsung Electronics Wins 2013 ENERGY STAR® Partner of the Year - Sustained Excellence Award
Stopping REDO Section Added to
Samsung Newsletter
By Scott Whitman, Senior Manager, CE Product Support
To support our ASC network and to help reduce multiple service visits, Product Support will analyze
and then report the top causes of REDO each month in a special Stopping REDO section of the
Samsung newsletter - starting this month. We’ll cover product quality issues, parts related failures,
technician troubleshooting errors, and all the other causes of REDO.
REDO, as we can all agree, affects many aspects of service. It costs you extra time if you need to
revisit customers. It costs customers their time if they need to be available for extra service calls. It
also costs Samsung money (for the parts used that were not needed) and causes customers to lose
confidence in Samsung service and products.
Working together to reduce REDO, therefore, will increase customer satisfaction, reduce costs, and
improve your level of service which directly affects your profits. It’s a Win – Win situation!
To get started, take a look at the Stopping REDO section in this issue. It begins on page 8. Then,
be sure to look for the Stopping REDO section in the Samsung Newsletter every month. You’ll be glad
you did.
Help Your Fellow Techs. Register Those Tough Dog Repairs
So you can help your fellow technicians, I remind you of the service tip section in GSPN under My
Knowledge which allows you to register a “tough dog” repair.
Just log into GSPN, and under the Knowledge section click:
My Knowledge => My Knowledge => Register
At the top right of the page, click “Create”. Using the various drop down menus, select the specific
product information pertinent to the service tip, and then enter your specific service information into
the text box. You can even attach photos or a short audio or video clip. (Refer to supported file types
listed midway down the registration page.)
2 Stopping REDO Section Added to Samsung Newsletter
Samsung Training in High Demand at
ASTI 2013 Convention
By Nick Webert, Regional Technical Trainer
Samsung was a very large presence at the 2013 ASTI/USA Convention held in Orlando, FL on March
6th and 7th. The convention hosted about 600 technicians and business owners from all over North
America. Samsung held training classes on both laundry and refrigeration products. These classes
were taught in four hour sessions, twice each day.
We are pleased to report that there was an enormous demand for our product training and that more
techs attended our training classes than the classes of any other manufacture at the convention.
Samsung trained about 200 techs in those four classes, making many sessions standing room only.
Even with such a large number of attendees in each class, Samsung’s training surveys came back
with the highest marks of the convention.
Samsung would like to thank all those who have attended our classes over the last couple of years
for helping us sculpt our training skills. Without your attendance and comments, we could have
never raised our training skills to this level. These skills resulted in Samsung receiving the ASTI/USA
Presenter award. So when I say thank you, I also mean congratulations! “Why congratulations,” you
ask? Because you are part of the Samsung team, so the award belongs to you as much as us.
The ASTI Presenter Award is bestowed on companies for excellence in technical and administrative
training and for supporting ASTI/USA through information sharing and relationship building.
Samsung’s support has helped ASTI/USA grow into the largest appliance servicer organization in North
America.
2013 ASTI/USA Presenter Award
3 Samsung Training in High Demand at ASTI 2013 Convention
2013 Samsung TV Training
By Jim Foster, Manager, Training
Samsung TV Training 2013
Being held at one of our Regional Training Centers and at select locations!
For 2013, by popular demand, Samsung continues
to accommodate your demanding schedule with one
day update training. To be eligible to attend the one
day training session, you must have attended and
successfully completed 2012 TV product training in
one of our training centers, or at a live, on-site training
session.
Samsung will still hold 3 day Basic classes quarterly.
These classes are intended for new techs who have never
attended a Samsung training or for techs who need extra help to improve their skills.
Attend in-depth, hands-on 1 day Update or 3 day Basic training at one of our RTCs in Little Ferry, NJ
or Bensenville, IL! In addition, we will be holding limited on-site trainings at various locations around
the country. You can reserve your seat in training by emailing us at [email protected]
You can always obtain the most up to date training list by sending an email to [email protected].
com
Additionally, TV training is available on-demand 24/7 at https://my.plus1solutions.net/clientPortals/
samsung/
Training Schedule:
Date
City
Comments
April 11, 2013
Franklin, MA (Hampton
Inn)
FE/ASC 1 day Update Training
April 12, 2013
Bensenville, IL
FE/ASC 1 day Update Training
April 18, 2013
Grapevine, TX (Comfort
Suites DFW)
FE/ASC 1 day Update Training
April 19, 2013
Little Ferry, NJ
FE/ASC 1 day Update Training
April 23, 2013
Bensenville, IL
FE/ASC 1 day Update Training (Session 1)
April 24, 2013
Bensenville, IL
FE/ASC 1 day Update Training (Session 2)
4 Samsung 2013 TV Training
(Class almost full)
2013 Samsung TV Training
continued
Date
City
Comments
April 25, 2013
Bensenville, IL
FE/ASC 1 day Update Training (Session 3)
April 26, 2013
Bensenville, IL
FE/ASC 1 day Update Training (Session 4)
April 25, 2013
Austell, GA (Old
Samsung RTC)
FE/ASC 1 day Update Training
April 25, 2013
Aurora, CO (Hilton
Garden Inn Denver
Airport)
FE/ASC 1 day Update Training
April 30, 2013
Little Ferry, NJ
FE/ASC 1 day Update Training (Session 1)
May 1, 2013
Little Ferry, NJ
FE/ASC 1 day Update Training (Session 2)
May 2, 2013
Little Ferry, NJ
FE/ASC 1 day Update Training (Session 3)
May 3, 2013
Little Ferry, NJ
FE/ASC 1 day Update Training (Session 4)
May 3, 2013
Los Angeles, CA
(Location TBD shortly)
FE/ASC 1 day Update Training
May 10, 2013
Fort Lauderdale, FL
(Location TBD shortly)
(Class almost full)
FE/ASC 1 day Update Training
May 21, 2013
Bensenville, IL
FE/ASC 1 day Update Training (Session 1)
May 22, 2013
Bensenville, IL
FE/ASC 1 day Update Training (Session 2)
May 23, 2013
Bensenville, IL
FE/ASC 1 day Update Training (Session 3)
May 24, 2013
Bensenville, IL
FE/ASC 1 day Update Training (Session 4)
5 2013 Samsung TV Training
2013 Samsung RTC Home Appliance
Training
By Jim Foster, Manager, Training
Samsung HA Training 2013
For 2013, per popular demand, Samsung continues
to accommodate your demanding schedule with two
day update training. To be eligible to attend the two
day training session, techs must have attended and
successfully completed 2012 product training in one of
our training centers, or at a live, on-site training session.
Samsung will still hold 4 day Basic classes quarterly.
These classes are intended for new techs who have never
attended a Samsung training or for techs who need extra
help to improve their skills.
Attend in-depth, hands-on 2 day Update or 4 day Basic training at one of our RTCs!
You can reserve your seat in training by emailing [email protected]
Additionally, Home Appliance training is available on-demand 24/7 at https://my.plus1solutions.net/
clientPortals/samsung/
Training Schedule:
Date
City
Comments
April 30 – May 1, 2013
Bensenville, IL
ME/ASC 2013 products 2 day Update Training
(Session 1)
May 2 -3, 2013
Bensenville, IL
ME/ASC 2013 products 2 day Update Training
(Session 2)
May 21 – May 22, 2013
Little Ferry, NJ
ME/ASC 2013 products 2 day Update Training
(Session 1)
May 23 - 24, 2013
Little Ferry, NJ
ME/ASC 2013 products 2 day Update Training
(Session 2)
May 28 – May 29, 2013
Bensenville, IL
ME/ASC 2013 products 2 day Update Training
(Session 1)
May 30 - 31, 2013
Bensenville, IL
ME/ASC 2013 products 2 day Update Training
(Session 2)
6 2013 Samsung Home Appliance Training
Service Action Worksheet (SAW)
Process Reminder
By Joe Ferro, Senior Staff, CB Service - Network Management
To avoid possible delays in your TAT, you should submit SAW requests for Extra Man, Extra Mileage, or
Minor REDO as soon as you receive the ticket and contact the customer. Please note that the normal
processing time by Samsung is 1 business day or less, however this may vary slightly depending on
volume.
It is also important to note that any REDO tickets dated within 30 days of your previous repair do not
receive additional labor unless you submit a Minor REDO and we approve it. Approval will be granted
if the same part has failed or if the second repair is for a completely different failure or defect.
7 Service Action Worksheet (SAW) Process Reminder
Stopping REDO Stopping REDO
Stopping REDO
Stopping REDO: The Importance of
Proper Dishwasher Installation
By Jason Abrams, Assistant Manager, HA Product Support
Recently, I was analyzing the redo rate data for dishwashers because I wanted to understand why
it often took multiple visits to a customer’s home to fix a dishwasher. As I examined the data, I
discovered that on many service tickets, the problem was dishes coming out dirty and the resolution
on far too many of these tickets was to replace a part such as the main control board or the sump
assembly. While I can understand how a failure of these parts can cause dishes to come out dirty,
changing these parts often did not resolve the problem on the first trip and as a result, multiple visits
were required to repair the dishwasher.
In my experience, many customer complaints about dishwashers not cleaning properly are caused by
improper installation and, as we know, the correct installation of a dishwasher is vital to it operating
properly. Confirming that the dishwasher has been installed correctly can save you time because
installation issues are easy to spot and easy to correct. This allows you to solve the issue on the
first trip, reducing the chances you will have to go back to the customer’s house to re-diagnose the
unit. In addition, consumer confidence in the product and in you, the servicer, increases because you
diagnosed the product correctly the first time and repaired it without having to replace any parts.
With this in mind, I provide a checklist of installation issues below. While these points may seem
elementary, they are often overlooked. If you check these points first when diagnosing a dishwasher, I
believe you can reduce your redo rate for dishwashers substantially, which benefits everyone involved.
•• Make sure the dishwasher is level. A dishwasher that is not level can cause water in the tub basin
to pool on the lowest side of the tub basin creating water circulation issues that will cause dishes
to come out dirty.
•• Ensure that the drain hose has a high drain loop or is connected to an air gap. If there is no point
where the drain hose is higher than the drain, waste water can flow back into the dishwasher.
•• If the drain hose is connected to a garbage disposal, make sure the disposal is not clogged. If the
disposal is clogged, the drain water can back up in the disposal and flow back into the unit.
•• Confirm that the dishwasher is connected to a hot water supply. If it is connected to a cold water
supply, it can prevent the dishwasher detergent from dissolving fully and cause dishes to come
out dirty.
8 Stopping REDO
Stopping REDO Stopping REDO
Stopping REDO: SE Errors and Control
Panel Lock on the ME179KFETSR/AA
Microwave/Convection Oven
By Keith Robinson, Manager, HA Product Support
The ME179KFETSR/AA Microwave oven has seen a number Control Box assembly failures. The failures
are typically indicated by one or more of the following symptoms:
1. SE Error. If a microwave displays an “SE” error, this means there is a communications failure
between the Touch Panel Controller on the ASSY PCB Main and the ASSY Touchpad itself.
2. The Control Panel locking and not allowing any entry via the Touchpad. The Control Dial ASSY will
allow you to change selections, but you cannot enter the selection using the Touchpad.
3. Some Microwave functions turning on spontaneously, primarily the OTR lights or the exhaust fan.
On past models, you could correct an SE error and most control malfunctions by replacing the ASSY
CONTROL PANEL for that unit. The ME179KFETSR/AA microwave oven, however, uses a different
technology. Instead of the MEMBRANE technology of previous models, the ME179KFETSR/AA uses a
GLASS TOUCHPAD. With this change, the failure mode of this microwave is different, even though it
displays the familiar “SE” error.
Solution
At this time, the only way to repair these types of failures - only on the ME179KFETSR/AA
Microwave oven - is to replace the ASSY CONTROL BOX.
ASSY CONTROL BOX, PN DE94-02944A
Because of the many changes in the ASSY CONTROL BOX, changing just the ASSY CONTROL PANEL or
the ASSY PCB MAIN will not correct the problem. Changing any part but the CONTROL BOX will most
likely result in a REDO call.
9 Stopping REDO
Stopping REDO Stopping REDO
Stopping REDO: SE Errors and Control Panel
Lock on the ME179KFETSR/AA Microwave/
Convection Oven
continued
These issues are primarily in units that were produced before February 1, 2013.
How to Check the Production Date using the S/N
Digit
1
2
3
4
5
6
7
8
9
10
11
12
13
14
15
(Ex)
J
6
S
6
7
W
O
C
8
0
0
3
5
9
B
The production date is indicated by digits 8 and 9 in the Serial Number where digit 8 is the production
year and digit 9 the production month. In the example above, digit 8 = C and digit 9 =8. Using the
table below, you see that C = 2012 and 8 = AUGUST.
CODE
YEAR
CODE
MONTH
S
Z
B
C
2009
2010
2011
2012
1
thru
9
A
B
C
Jan
thru
Sept.
Oct
Nov
Dec
10 Stopping REDO
Stopping REDO Stopping REDO
Stopping REDO: 2012 LED TV Auto
Power Cycling/Reset Issue
By Khaled Abuali and Paul Kim Managers, Product Support Engineering
Group
TV Models: LED ES7500 and ES8000
Symptoms:
•• The TV sometimes displays vertical lines on the screen and then turns OFF and ON by itself.
•• The WD Count in Service Menu>Control>Sub Option is higher than 0.
Resolution:
1. Check the power cable between the Main board and SMPS (Power Supply).
a. If the cable or connector on the SMPS is discolored, replace the cable and SMPS board.
b. If the cable or connector on the Main board is discolored, replace the cable and Main board.
c. If the cable and the connectors are OK, do not replace the cable or the SMPS or the Main
board and skip to Step 2.
Discoloration on pins 17 and 19
2. Replace both the LVDS cable and T-Con board.
11 Stopping REDO
CE Tech Tips
Quick Tip: How to Set the Option Bit on
DVD Players
By Michael Vigliotti, Assistant Manager, Product Support
If a DVD Player doesn’t function after you repair it or you see the “No Option” message on the home
screen, then you know you have to reset the DVD player’s Option Bits.
To reset the option bits manually, follow these steps:
1. Make sure there is no Disc in the player.
2. Press the Repeat button on the remote until the No Disc message disappears.
3. Press Rewind -> SkipFoward -> FastForward -> Skip Back -> Play.
4. Input the option bit for your set. Each product model has a different option bit. See the table
below.
Note: Blank squares mean the option bit is off, all other numbers not listed are also off)
Year
2010
2011
2012
12 CE Tech Tips
OPTION NUMBER
3
8
9
19
21
22
24
DVD-C550/XAA (worldtech)
3
8
9
19
22
DVD-C550/XAA (IM)
3
8
9
19
DVD-C500/XAA (worldtech)
3
8
19
21
22
24
DVD-C500/XAA (IM)
3
8
19
21
24
DVD-C450/XAA (worldtech)
3
8
9
19
22
DVD-C450/XAA (IM)
3
8
9
19
DVD-C350/XAA (worldtech)
3
8
19
21
22
24
DVD-C350/XAA (IM)
DVD-D530/ZA (worldtech)
DVD-D530/ZA (IM)
DVD-D530/ZA (IMVE)
DVD-E360/ZA (worldtech)
DVD-E360/ZA (IM)
DVD-E360/ZA (IMVE)
DVD-E360/ZA (WTVE)
3
3
3
3
3
3
3
3
8
8
8
8
9
9
9
9
9
9
9
19
19
19
19
19
19
19
19
21
21
21
21
21
21
21
21
22
22
22
24
24
24
24
How to Troubleshoot the 2012 TV
Bluetooth Module
By Chuck Russo, Assistant Manager, Training and Paul Kim, Manager, Product
Support Engineering Group
You can troubleshoot the Bluetooth Module by measuring the voltages at the connector pins on the
Module.
►
1. With the TV in Standby, measure Pins 2/3/8 and verify that the DC voltages are correct. If the
voltages are missing or not correct, check the cabling and supply feed from the Main Board.
2. Turn on the TV, measure Pins 2/3/8, and also Pin 1 for correct DC Supply voltages. If the voltages
are missing or not correct, check the cable and supply feed from the Main Board.
3. Now measure Pins 4 and 5 which are the Bluetooth Signals. If the voltages for Pins 4 and 5 are
missing or not correct in the Power On state, the problem is likely the Bluetooth module.
Pin 1
Pin
Pin
Pin
Pin
Pin
Pin
Pin
2
3
4
5
6
7
8
*
13 CE Tech Tips
Stand-by
Power On
Note
0 VDC
3.3 VDC
DC
3.3 VDC
3.3 VDC
DC
5.3 VDC
5.3 VDC
DC
0V
0V
0V
0V
2.0VDC
1.1VDC *
2.0 VDC *
0V
0V
3.1 VDC
BT (2.4Ghz) Signal
BT (2.4Ghz) Signal
N/A
N/A
DC
Left: The Actual “Bluetooth Signal”. The effective DC volt readings are in the
table above for Pins 4 and 5.
How to Access the Factory Menu on 2013
Smart TVs
By Paul Kim, Manager, Product Support Engineering Group
2013 Smart TV’s HDMI 1 source is dedicated to the
Cable/Satellite box connection. If you set the TV’s
source to HDMI 1, the TV’s Info OSD is not available
when you press the ‘Info’ button. Consequently,
because the Info button is essentially inactivated, you
cannot access the Factory Menu when you have set a
2013 Smart TV to the HDMI 1 source.
2013 Smart TV models:
•• LED: UF6400, UF7000, UF8000
•• PDP: PF550, PF5500, PF8500
To access the Factory Menu on 2013 Smart TVs:
1. Change the source to TV or HDMI 2/3/4.
2. Press the ‘Info’ and ‘Factory’ buttons.
Factory Remote
14 CE Tech Tips
The Secret of ARC (Audio Return
Channel)
By Jorge Tavora, CE and HA Tech Support Manager
There’s a lot of confusion when it comes to what the ARC is used for. Here’s a quick explanation of
how it works.
Samsung’s LED 7450/7500, 8000, and PDP 8000 series TVs support the ARC (Audio Return Channel)
function. ARC lets a TV input and output digital sound through the same HDMI cable. However, ARC is
only available through the TV’s HDMI (ARC) port and only when the TV is connected to an ARC-enabled
AV device.
When you connect an HDMI cable to the TV’s HDMI (ARC) connector and an ARC enabled device’s HDMI
output connector, and then activate the ARC function in the TV’s menu, the TV can input digital sound
from the ARC enabled device and output digital sound to the ARC enabled device.
15 CE Tech Tips
HA Tech Tips
Replacing a SodaStream 60L Carbonator
in the New Samsung Sparkling Water
Refrigerator
By Dorian Rua, Content Developer, Product Support
Samsung’s new Sparkling Water refrigerator (RF31FMESBSR) uses a 60 liter SodaStream CO2
Carbonator to make sparkling (carbonated) water. Sooner or later, though, the Carbonator will run out
of CO2 and need to be replaced. How? Follow the steps below. For more detailed information, refer to
the user manual or other technical information.
1. Turn off the Sparkling Water Production function by pressing the Cubed/Crushed Button for 3
Seconds.
2. Open the cylinder door cover, flip the lever up, pull the Carbonator off the support, and then turn
the cylinder counter clockwise to remove it from the regulator.
Note: The Carbonator’s lifetime varies depending on the carbonation level (1, 2, or 3) the customer
sets by pressing the Sparkling Water button and by the customer’s sparkling water usage.
3. Attach a new SodaStream 60L Carbonator to the regulator, and then rotate it clockwise.
4. Push the Carbonator onto the support, press the lever down to lock it in place, and then close the
cylinder door cover.
5. Press the Sparkling Water button for
3 seconds to activate the Cylinder
Reset function. The Sparkling Water
Production function turns on. The
refrigerator begins making sparkling
water and the Carbonation Icons
light up in succession. While the
16 HA Tech Tips
Replacing a SodaStream 60L Carbonator in the
New Samsung Sparkling Water Refrigerator
continued
refrigerator is making sparkling water, it will not dispense sparkling water.
Note: The refrigerator takes between 20 and 30 minutes to make sparkling water, depending on
the Carbonation level the customer has chosen.
Note: Tell the customer not to drink the first cup of sparkling water because it may contain
residue.
17 HA Tech Tips
Gas Dryer Assembly Pipe Thread Defect
By KT Lee, Assistant Manager, HA Product Support
Models:
All Gas Dryers.
Symptom:
Gas Pipe Connection Failed or Gas Leaking from Pipe Connection.
Cause :
The pipe threading is defective.
Solution :
If Assy Pipe Thread is defective, replace the Assy Pipe (DC99-00507B).
ASSY Pipe Thread Defect
18 HA Tech Tips
Refrigerator Replacement Part Change
By Wes Sirois, Manager, HA Product Support
Subject: Replacement Parts Change. The Flow Sensor has been removed from the Water Tank
Assembly and/or Water Valve.
Models: RF4267HA, RFG296HD, RFG297HD, RFG298HD, RFG29PHD, RFG29THD. All colors..
The original parts incorporated a flow sensor. All replacement parts and new production will not have
the flow sensor.
Original Water Valve
Replacement Water Valve
DA62-03148A or DA62-03150A/B
DA62-03148E or DA62-03150E/F
Photo #1
Photo #2
Photo #3
Important: The part numbers for “Assembly Case Filter Water Tank” (Photo #1) have not changed.
Refrigerators that came with the flow sensor will have three harnesses. If the new assembly has
only two (Photo # 2), you can leave the harness for the flow sensor disconnected. If the refrigerator
did not come with a flow sensor and the new part has three harnesses (Photo # 3), just leave the
flow sensor harness disconnected. The production change began with October, 2012 models (serial
number date code CA).
19 HA Tech Tips
Calibration Mode for 2012 Top Load
Washers
By Tony Perkins, Regional Technical Trainer
A new feature of the 2012 Top Load washers (and Front Load washers too) is Calibration Mode. Its
purpose is to provide the Main PCB of the washer with good reference information that it can store
and use for comparison when balancing wash loads and performing ”untying” operations during
regular usage. Although this procedure is typically performed by the installer or the customer during
the initial installation, it is also necessary to run the calibration when you service the washer for any
Suspension component, Washer Tub part, or Clutch Assy part. Also, when you service the DD Motor or
Main PCB, replace a damaged foot, or when the unit is relocated. Since the Calibration Mode function
affects the proper operation of the washer and is affected by so many components, it is a good ruleof-thumb to run Calibration Mode anytime the washer is serviced, moved, or has it’s initial position
disturbed.
The procedure to start Calibration Mode varies slightly for the different Top Load models. The specific
instructions are below. The common elements of the procedure are: Before beginning the calibration,
insure the unit is level, empty (no water or clothing), and working properly.
Refer to the figures and instructions below or the instructions in the Owner’s Manual. Yes, I said,
“Owner’s Manual”. Unfortunately, unlike the Front Load models, the Top Load’s Calibration Mode
instructions are only found in the Owner’s Manual and not in the Service or Technical Manuals.
CB
CB
To run Calibration Mode:
1. Remove any water, contents, or laundry from the washing machine, and then turn the washing
machine ON.
2. For the WA456: Press the “Delay Start” and “Echo Plus” buttons simultaneously.
20 HA Tech Tips
Calibration Mode for 2012 Top Load Washers
continued
3. For the WA422/WA400: Press the “Delay Start” and “Pre Soak” buttons simultaneously.
4. Press the “Start/Pause” button to begin Calibration Mode. “CB” is shown in the display.
5. The pulsator rotates clockwise and counterclockwise for approximately 1 minute.
6. When “Calibration Mode” is finished:
a. The WA456 will display “End”
b. The WA422/WA400 will display “En”
7. The machine automatically turns off and is now ready for use.
21 HA Tech Tips
HA GSPN Updates
By Jeff Brutman, Senior Staff, Publications
We encourage you to use our GSPN site to find the latest service bulletins to aid you with your repairs:
http://gspn3.samsungcsportal.com/
HA Service Bulletins uploaded to GSPN in March, 2013:
Bulletin Number
Subject
Flow Sensor removed from Water Tank Assembly
and/or Water Valve.
ASC20130325001
The original parts incorporated a flow sensor. All
replacement parts and new production will not
have the flow sensor.
Applicable Models
RF4267HA,
RFG296HD,
RFG297HD,
RFG298HD,
RFG29PHD,
RFG29THD.
All Colors.
To access service bulletins on GSPN, first visit http://gspn3.samsungcsportal.com/ . Login using your
User ID and Password. Click on “Knowledge” at the top, then “Product Info” in the left column.
The Product Information menu will appear. Click on “Service Bulletin (Local) to bring up the Service
Bulletins (Local) screen. To search for a bulletin, enter the bulletin number in the Subject field on
the left side of the screen, and then click the Search button on the far right. If for some reason the
bulletin does not appear, you can still search for it using the “Category” drop-down menus, the
Subject field, or the Model field. You can also try using the Search field at the top of the screen.
22 HA Tech Tips