1
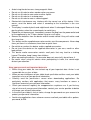
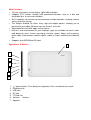
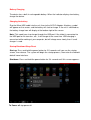
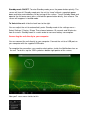
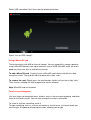
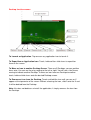
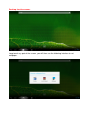
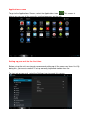
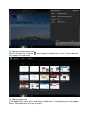
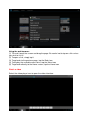
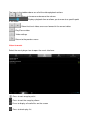
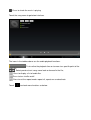
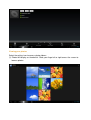
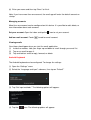
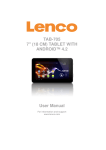
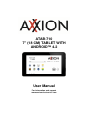
ATAB-710
7" (18 CM) TABLET WITH
ANDROID™ 4.2
User Manual
For information and support
www.axxion-electronics.com
Dear customer,
Thank you for buying this Axxion product. Quality and usability is our top priority. In
order to let you fully enjoy this tablet, we have manufactured this product using high
quality standards, materials, components, and care.
Please read all safety instructions
use this tablet.
and
national restrictions,
before
you
Note:
This user manual was printed prior to the development of this product. When operability
or other functions needed improvement, priority went to the product
specification itself, and not to this manual. In such instances, the instruction
manual may not entirely match all the functions of the actual product. Therefore,
the actual product and packaging, as well as the name and illustration, may
differ from the manual. The screen shown as an example in this manual may differ from
the actual screen display.
Axxion is not liable for any consequential damage.
Safety instructions
Explanation of symbols
This symbol indicates that there are important operating maintenance instructions
in the user manual accompanying the device.
This symbol indicates that dangerous voltage is present within this device,
constituting a risk of electronic shock or personal injury.
CAREFULLY READ THE FOLLOWING SAFETY INSTRUCTIONS BEFORE USE.
WARNING
RISK OF ELECTRIC SHOCK
DO NOT OPEN THIS DEVICE
WARNING: DO NOT REMOVE ANY SCREWS OR OTHER COMPONENTS
OF THE DEVICE TO PREVENT THE RISK OF ELECTRIC SHOCK.
Install and use the device only as described in the user manual.
This device must be used in combination with a power supply as specified in the
specification table. If you are not sure of the type of power supply used in your home,
consult your power company.
Do not use loose or damaged cords and/or plugs.
The power outlet must be located close the device and must be easily accessible.
Make sure that power outlets or extension cables are not over overloaded.
Overloading can cause short-circuits or fire.
Always pull the plug when removing it from the power outlet.
Do not pull the power cord. This may cause a short-circuit.
If you notice smoke, an excessive build-up of heat or any other unexpected
phenomena, you should disconnect the plug from the power outlet immediately.
Disconnect the plug from the power outlet during lightning storms.
Disconnect the plug from the outlet when the device will not be used for a long time.
Do not step on the power cord and don’t pinch the power cord.
Do not place heavy objects on the power cord or any other cables as this may
damage the cord or cables.
Keep the device away from children! When they play with the power cord, they can
seriously injure themselves.
Keep the power cable away from rodents and rabbits.
Make sure all ventilation openings are clear at all times, do not cover or block them.
Leave 5 cm (2”) free space around the device.
Always make sure the device is well ventilated.
Keep the device away from heat sources such as radiators, heaters, stoves, candles
and other heat-generating products
Avoid using the device near strong magnetic fields.
Do not use this device when condensation may occur.
Do not use this device near water or other liquids.
Do not use this device in a damp room.
Do not use this device near a swimming pool.
Electrostatic interference may interfere with the normal use of this device. If this
occurs, reset the device and restart it according to the instructions in the user
manual.
The display is made of plastic and might break when it’s damaged. Beware of sharp
plastic splinters when the screen breaks to avoid injury.
Should the unit become wet, immediately remove the plug from the power outlet and
let the appliance fry for 72 hours before trying to use it again.
Remove the batteries from the device and/or remote control if they will not be used
for a long time.
This device and the supplied accessories contain sensitive components. Never drop
them, put them in a microwave, burn them or paint them.
Do not bite or suck on the device and/or supplied accessories.
Do not insert the device or the supplied accessories in your ears, mouth or other
body orifices.
This device and/or accessories contain small parts that may lead to a choking
hazard. Therefore, keep it away from children.
When connecting the device, if a connector does not seem to fit, do not force it.
Be careful when using this device when participating in traffic, the sound might
distract your attention.
Keep your personal and important data safe
While using your tablet, be sure to back up all your important data. Axxion is not
responsible for any loss of data.
When you want to dispose of your tablet, back up all data and then reset your tablet
to prevent misuse of your personal information.
Carefully read the permissions screen when downloading applications. Be
particularly cautious with applications that access many functions or access a
significant amount of your personal information.
Check your accounts regularly for unapproved or suspicious use. If you find any
sign of misuse of your personal information, contact your service provider to delete
or change your account information.
In the event your tablet is lost or stolen, change the passwords on your accounts to
protect your personal information.
Avoid using applications from unknown sources and lock your tablet with a pattern,
password, or PIN.
Main Functions
• 7.0 inch, multi-touch screen display, 1024*600 resolution;
• Supports OTG function, through USB connected interfaces such as U disc and
removable disc, to save and read data.
• Wi-Fi capability can connect to and remember multiple networks, enabling internet
access wherever you go.
• The Google Android OS offers many app and widget options, allowing you to
personalize your tablet. Whatever you can think of, it can do!
• Download and install APK apps via the internet.
• Business and entertainment at your fingertips: apps are available for email, word,
web browsing, news, instant messaging, financial reports, blogs, online gaming,
online video, stock market, weather reports, mobile tv, maps, entertainment software,
etc.
• Supports up to 32GB Micro SD card.
Appearance & Buttons
7
1
2
3
4
5
6
1.
2.
3.
4.
5.
6.
7.
“ ”: power button: Press briefly to sleep/wake. Press and hold to turn on/off.
Earphone jack
USB jack
DC jack
TF card slot
Volume + Volume –
Speaker
Battery Charging
The device has a built-in rechargeable battery. When the indicator displays low battery,
charge the device.
Charging the battery
Plug the Micro USB cable into the unit, then to the AC/DC Adaptor. A battery symbol
will appear on the screen, and the battery will start to charge. If the unit is switched on,
the battery charge icon will display at the bottom right of the screen.
Note: This model can also charge through the USB port. If the tablet is connected via
the USB port for file transfers, etc., it will charge at the same time. USB charging is
convenient while working at your computer, but will charge more slowly than if a wall
charger is used.
Startup/Shutdown/Sleep/Reset
Start up: Press and hold the power button for 2-5 seconds until you see the startup
screen, then release. The system will begin the startup process, then enter the Android
default home interface.
Shutdown: Press and hold the power button for 3-4 seconds until this screen appears:
To Power off: tap power off.
Standby mode ON/OFF: To enter Standby mode, press the power button quickly. The
screen will turn off. Standby mode puts the unit to “sleep” without a complete power
down and helps extend battery life by turning off the screen. To exit Standby Mode and
operate the unit once more, press and hold the power button briefly, then release. The
screen will reappear in locked mode.
To Unlock the unit: slide the Lock icon to the right.
You can adjust the unit to automatically enter Standby mode in the settings menu –
Select Settings / Display / Sleep. Then choose between 15 seconds and 30 minutes
from the menu. Standby mode is used in order to conserve battery consumption.
Connecting the unit directly to your computer
You can connect the unit directly to your computer. Connect the unit to a USB port on
your computer with the supplied USB cable.
To complete the connection, you need to select options inside the Notifications bar on
the unit. To do this, tap the USB symbol on bottom right portion of the screen,
Now you’ll see a menu similar to this:
Select USB connected. You’ll then see the following interface:
Select “turn on USB storage”.
Using a Micro SD card
The device comes with 8GB of internal storage. You can expand this storage space by
using a MicroSD Memory card up to maximum size of 32GB. MicroSD cards are also a
good way to transfer files to and from the device.
To add a Micro SD card: Carefully insert a MicroSD card into the slot with the label
facing the screen. The card will lock into place with a light “click.”
To remove the card: Simply press the card inwards slightly until you feel a light “click.”
Then release, allowing the card to pop out for careful removal.
Note: MicroSD card not included.
Touch-screen Navigation
Use your fingers to manipulate icons, buttons, menus, the onscreen keyboard, and other
items on the touch screen. You can also change the screen's orientation.
To select or activate something, touch it.
To type something, such as a name, password, or search terms, just touch where you
want to type. A keyboard will pop up onscreen, allowing you to type.
Other common gestures include:
•
Touch & hold: Touch & hold an item on the screen by touching it and not lifting your
finger until an action occurs.
•
Drag: Touch & hold an item for a moment and then, without lifting your finger, move
your finger on the screen until you reach the target position. For example, you can
drag to reposition shortcuts on the Home screen.
•
Swipe or slide: Quickly move your finger across the surface of the screen without
pausing when you first touch (so you don't drag something instead). For example,
you can slide a Home screen left or right to view the other Home screens.
•
Pinch: In some apps (such as Maps, Browser, and Gallery), you can zoom in and
out by placing two fingers on the screen at once and pinching them together (to zoom
out) or spreading them apart (to zoom in).
To avoid scratching or crushing, do not place objects on the touch screen surface.
Navigating the screen
Menu: For ALL Android applications and screens, pressing the MENU icon (depending
on which screen you are on, it will be on the left bottom portion or the extreme top right
corner of the unit) or the Menu Button (right hand side on the front of the unit) will reveal
the menu items and options available with that operation.
At the bottom of the screen, you'll see three Navigation buttons. They are always
available. No matter what you're doing with your unit, you can always get back to the
main Home screen or return to previous screens:
Back button
: Opens the previous screen you were working in, even if it was in a
different app. Once you back up to the Home screen, you can’t go back any further in
your history.
: Opens Home. If you’re viewing a left or right Home screen, opens
Home button
the central Home screen
Recent apps
: Opens a list of thumbnail images of apps you’ve worked with recently.
To open an app, touch it. To remove a thumbnail from the list, swipe it to the right.
Screen shoots
make screen shoots.
: Vol –
Go to submenu.
Vol+
Desktop function menus:
To Launch an Application: Tap once on any application icon to launch it.
To Reposition an Application Icon: Touch, hold and then slide icons to reposition
them on the screen.
To Move an Icon to another Desktop Screen: There are 5 Desktops you can position
icons onto. You can see these by swiping to the left or right. You will see a faint frame
moving to indicate another Desktop. To move an icon from one Desktop to another:
touch, hold and slide icons onto the desired Desktop screen.
To Remove an Icon from the Desktop: Touch and hold the icon until you see an X
appear at the top centre of the screen. Without releasing the icon, slide it onto the X and
it will be deleted from the Desktop.
Note: this does not delete or uninstall the application; it simply removes the icon from
the Desktop.
Desktop function menus
Long touch any part of the screen, you will then see the following interface to set
wallpaper.
Applications screen
To go to the Applications Screen, select the Applications icon
. This screen is
where you can see all the currently installed programs on the unit:
Setting up your unit for the first time
Before using the unit, we strongly recommend setting up all the necessary items first. By
doing this, you are assured all is set up correctly to provide trouble free use.
To start set up your unit, select the Settings icon to reveal this screen.
Wi-Fi: Access the Wi-Fi management interface
Data usage: Check mobile data usage
More: Set Airplane mode, Ethernet, VPN, Portable hotspot, Mobile networks
Sound: Adjust sound settings
Display: Adjust screen settings
Storage: Check storage space
Battery: Check battery usage
Apps: Manage all applications
Location access: Use your location info or not
Security: Set password/screen lock
Language and input: Set up input parameters
Back up and reset: Backup the unit/ Reset it
Add Accounts : Set up all accounts
Date and time: Set the time and date
Accessibility: Set talkback
Developer options: Set desktop backup password, USB debugging etc.
About tablet: Device specifications
Accessing the Internet
Establishing a Wi-Fi connection: The device connects to the internet using a wireless
broadband connection. You can connect to a home network, or when you’re out and
about by using the many free hotspots that you can find in coffee shops, libraries etc.
To connect to a Wi-Fi network:
1. Tap the Settings icon
2. Slide the Wi-Fi button to the right so it’s in the “ON” position
3. The device will scan the area and display a list of all available Wi-Fi hotspots.
Choose a network from the list, then tap “connect” to connect. If the hotspot is password
protected you need to get the password from your Internet Service Provider, or from
your network administrator.
Note:
1. The available network list is constantly refreshed automatically
2. When Wi-Fi is enabled, the device will connect automatically to your configured
networks when they are in range.
3. If the unit reports “no connection” or “connection failed” the password may have been
entered incorrectly. To retry, select the network name from the Wi-Fi menu and
select “Forget?” Restart the Wi-Fi and start the procedure again.
4. Once you have connected to a network for the first time, the unit will remember it and
connect automatically when it in range. The connection process will not need
repeated.
Using a 3G dongle: It is also possible to connect to the internet by using a 3G dongle.
Before using a dongle, disconnect the Wi-Fi network and ensure that the “Mobile data”
setting is selected. Connect a 3G dongle (not provided) to the device via a USB host
cable (not provided) to enable 3G internet. A 3G icon will display at the bottom right side
of the screen.
Note:
1. A 3G dongle is not supplied with the product. It must be purchased separately.
2. When using a 3G dongle, be sure to disconnect from the Wi-Fi network.
3. This product supports most brands/types of 3G dongle, but it is recommended to test
compatibility with the tablet before purchase.
Web Browser
On the applications page, press the
icon to open the browser. To reach a website,
type its URL into the address bar. After opening a web page, touch the screen to scroll
up and down, scan, and select other parts of the website.
Bookmark manager
(1) Bookmarking a web page
While in the browser, click the “ ” icon to add the current web page to your bookmarks.
The following screen will display. Click OK to confirm.
(2) Opening a bookmarked site
While in the browser, click the “ ” icon to open the bookmarks menu. Tap the desired
link to open the web page.
(3) Editing a bookmark
In the bookmarks menu, press and hold any bookmark. The following menu will appear.
Select “Edit bookmark” to make changes.
Using the web browser:
(1) To scroll, touch the screen and drag the page. Be careful not to tap on a link unless
you wish to visit it!
(2) To open a link, simply tap it
(3) To go back to the previous page, tap the Back icon
(4) To display the available menu items, tap the Menu icon
(5) To go back directly to the Home screen, tap the Home icon
Watch a video
Select the video player icon to open the video interface:
The icons in the toolbar above are all of the video playback actions:
: Press to increase or decrease the volume.
: Displays playback time or allows you to move to a specific point
in the video.
: Select last/next video, reverse or forward in the current video.
: Play/Pause video
: Video settings
: Return to the previous menu
Listen to music
Select the music player icon to open the music interface:
: Press to sort songs by artist
: Press to sort the songs by album
: Press to display all audio files on the screen
: Press to check play list
: Press to check the music is playing
Touch the song name to go below interface.
The icons in the toolbar above are the audio playback functions:
: To visualize the playback time or to move to a specific point of the
audio file.
:Select previous/next song, move back or forward in the file;
: Press to display a list of audio files
: Press to turn shuffle on/off
: Press to set the repeat mode: repeat all, repeat one or deactivate
Touch
to check more functions as below:
Viewing your photos
Select the gallery icon to access photo albums
(1) Photos will display as thumbnails. Slide your finger left or right across the screen to
browse photos.
(2) Tap a photo thumbnail to view the photo in full screen.
.
(3) To display previous/next picture, slide your figure across the screen.
(4) Display menu: While viewing a picture, tap on the screen or the Menu icon to bring
up the menu options.
(5)Touch
to manage the photo and go to below interface.
(6) Touch
to send out the photo by email,etc.
(7) Touch
for more functions as below.
Sending and receiving emails
This device has an email application pre-installed. You can send or receive emails at
any time with this device. Make sure you have an internet connection before using the
email app. In the Home Screen, tap the Applications shortcut to display all applications.
Tap the Email icon to launch the app.
Configuring an Email Account
In order to send or receive mails on the device, you first need to specify an email
account.
(1) Open the email application by tapping the Email icon. You will be prompted to
configure an email account.
(2) Enter your email address and password in the text boxes. You can specify this as
your default address by selecting “Send email from this account by default.”
(3) Tap ”Manual Setup” or “Next “ to set the email server information
(4) Select the server type for your account: POP3, IMAP, or Exchange for incoming
emails. To find out what type of server your account requires, you can consult your
service provider.
(5) Enter the server, port, and other information. If you are not sure about the settings,
contact your service provider, network administrator or the internet
(6) Select the server type for outgoing emails, and enter the required server information.
(7) Click “Next” to continue. Your tablet will check the server settings. When it prompts
you that “Your account is set up, and email is on its way,” your account is set up
successfully.
(8) Enter your name and then tap “Done” to finish.
Note: If you have more than one account, the email app will enter the default account on
startup.
Managing accounts
More than one account can be configured on this device. It is possible to add, delete, or
view information about each account.
Set your account: Open the inbox and tap the
Add an email account: Touch
icon to set your account.
to add an email account.
Viewing emails
Your inbox should open when you start the email application.
(1) Inside the mailbox, slide your finger up and down to scroll through your email list.
(2) Tap on an email to open it.
(3) Tap and hold an email to reply, forward, or delete.
Android Keyboard
The Android keyboard can be configured. To change the settings:
(1) Open the “Settings” menu
(2) Select the “Language and input” submenu, then tap on “Default””
(3) Tap “Set input methods.” The following options will appear:
(4) Tap the
icon. The following options will appear:
(5) Select “Input language”
(6) Check the ”Use system language” box
The default keyboard will set to the language indicated.
For example, when "French (French)” is set as the default language, the default
keyboard will be French.
Product Specifications
•
•
•
•
•
•
•
•
•
•
•
•
•
•
•
•
•
•
•
7" capacitive 5-point touch screen,
Resolution: 1024*600 pixels
Operation System: Android 4.2,2 supports Adobe Flash 11.x
CPU: RK3026, Cortex A9 at 1.0 GHz processor
Plastic case
Built-in Wi-Fi IEEE802.11b/g/n
Built-in RAM: 512MB DDRIII
Built-in Flash: 4GB-32GB
Built-in 0.3M pixels Front Camera
Multi-language support
4-Directions Gravity sensor, Speaker, Earphone jack, Mini USB slot
Supports TF card, supports Max 32GB external Micro SD card (not included)
Support external 3G dongle
Video Decoding: AVI,MP4,M4V,MOV,3GP,MKV,VOB,MPG,MPEG,PMP,FLV,
TS,TP,M2TS
Music Decoder: MP3、M4A、WMA、APE、FLAC、AAC、WAV、AMR、OGG
Picture formats: JPG, JPEG, GIF, BMP, PNG
Built-in 3.7V@2500mAh rechargeable Lithium Polymer battery
Dimension: 191.2*116*11.5mm
Weight: 307g
Frequently Asked Questions
APK
Q: What is APK?
A: APK is the acronym for Android Installation Packages.
Q: Where can I find APKs?
A: APKs can be downloaded by a PC-side installation or found in the Android Market.
Email
Q: Can I use any of my personal email addresses to send/receive email?
A: The device supports POP3 and SMTP accounts. Some free email accounts are not
supported on mobile devices. Check with your email provider to see if your account is
supported.
Q: Which media cards are compatible with my device?
A: Micro SD cards.
Wi-Fi
Q: Do I need a Wi-Fi adapter to connect to the Internet?
A: No. The Wi-Fi adapter is built into the device.
Service and support
For information:
For support:
http://www.axxion-electronics.com/
http://axxionsupport.zendesk.com
Axxion helpdesk:
Germany
0900-1520530 (Local charges)
The Netherlands 0900-23553626
(Local charges + 1ct P/min)
Belgium
02-6200115
(Local charges)
France
0170480005
(Local charges)
The helpdesk is accessible from Monday to Friday from 9 AM till 6 PM.
In case your device needs repair, our helpdesk will redirect you to your local dealer.
Axxion offers service and warranty in accordance to European law, which means that in
case of repair (both during and after the warranty period), you should contact your local
dealer. Please note: It is not possible to send products to directly Axxion for repair.
Important note: If this unit will be opened, or accessed in any way by a non-official
service center, the warranty expires immediately.
This symbol indicates that the relevant electrical product or battery
should not be disposed of as general household waste in Europe. To
ensure the correct waste treatment of the product and battery, please dispose them in
accordance to any applicable local laws of requirement for disposal of electrical
equipment or batteries. In so doing, you will help to conserve natural resources and
improve standards of environmental protection in treatment and disposal of electrical
waste (Waste Electrical and Electronic Equipment Directive).
Products with the CE marking comply with the EMC Directive
(2004/108/EC) and the Low Voltage Directive (2006/95/EC) issued by
the Commission of the European Community
Hereby, STL Group BV, Ankerkade 20 NL 5928 PL Venlo, declares that this product is in
compliance with the essential requirements and other relevant provisions of Directive
1999/5/EC.
This product operates at 2400 - 2483.5 MHz and is designated only to be used inside a
normal household environment. This product is suited for this purpose within all EU
counties.
®All rights reserved
www.axxion-electronics.com