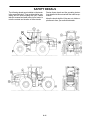
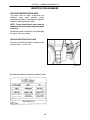
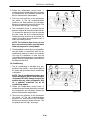
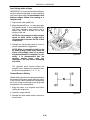
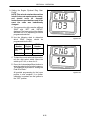
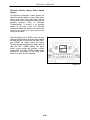
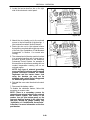
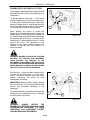
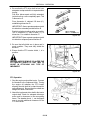
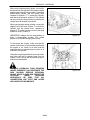
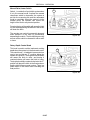
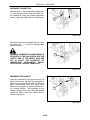
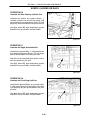
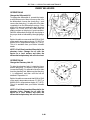
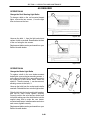
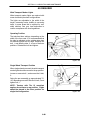
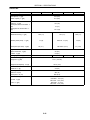
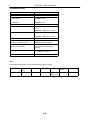
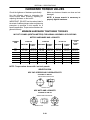
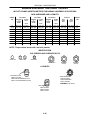
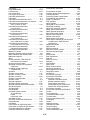
1
TO THE OWNER:
This manual contains information concerning the operation, adjustment, and maintenance of Buhler Versatile
4WD tractors. You have purchased a dependable machine, but only by proper care and operation can you
expect to receive the performance and long service built into this tractor. HAVE ALL OPERATORS READ
THIS MANUAL CAREFULLY AND KEEP IT AVAILABLE FOR READY REFERENCE.
The tractor was designed to pull agricultural equipment in agricultural applications at field speeds of 7.2 KPH
(4.5 MPH) or greater. Proper ballasting to provide equal traction to front and rear axles under moderate to
heavy load will improve tractor performance and life. Using the tractor in industrial only applications (ie. road
building) will not be covered by warranty.
Your Buhler Versatile dealer will instruct you in the general operation of your tractor. Your dealer’s staff of factory-trained service technicians will be glad to answer any questions that may arise regarding the operation of
your tractor.
For engine maintenance not covered in this manual, follow the instructions provided in the Cummins Engine
Operator’s manual. Before putting the tractor in service, become familiar with the procedures outlined in both
manuals.
The warranty coverage that is extended to your Buhler Versatile 4WD tractor is explained in the Warranty and
Limitation of Liability form. Your dealer will provide you with a copy of the warranty and retain a copy which you
have signed. After you read the warranty, ask your dealer to explain any points that you may not understand.
Do not modify, alter, or permit anyone else to modify or alter this tractor or any of its components, or any tractor
function, without first consulting an authorized Buhler Versatile dealer. If you have any questions regarding
tractor modifications, contact Buhler Versatile Inc., 1260 Clarence Ave. Winnipeg MB, R3T 1T2.
Your safety, and the safety of those around you depends upon the care and good judgement you use while
operating this equipment. Read the safety precautions carefully.
For a complete list of the delivery service checks performed by your dealer, refer to the Delivery Report in this
manual. The first copy is your record of the service performed and the second copy, which is to be removed
from the manual, is your dealer’s record. MAKE SURE THAT YOU AND THE DEALER SIGN BOTH COPIES.
After you have operated the tractor for 50 hours, have your dealer perform the factory recommended 50-hour
service. Return this manual with your tractor to the dealer so the “First 50-Hour Service” checklist can be filled
out. You will be responsible for the cost of lubricants, fluids, filters and other items replaced as part of normal
maintenance. Prior to taking the tractor to your selling dealer for service, it is recommended that you contact
them to determine any other charges for which you may be responsible.
All data given in this book is subject to production model variations. Dimensions and weights are approximations only, and the illustrations do not necessarily show tractors in standard condition. For exact information
about any particular tractor, please consult your Buhler Versatile dealer.
CAUTION: THIS SYMBOL IS USED THROUGHOUT THIS BOOK WHENEVER PERSONAL SAFETY IS
INVOLVED. TAKE TIME TO READ AND FOLLOW THE INSTRUCTIONS. BE CAREFUL!
CAUTION: PICTURES IN THIS MANUAL MAY SHOW PROTECTIVE SHIELDING OPEN OR REMOVED
TO BETTER ILLUSTRATE A PARTICULAR FEATURE OR ADJUSTMENT.
BE CERTAIN, HOWEVER, TO CLOSE OR REPLACE ALL SHIELDING BEFORE OPERATING THE
MACHINE.
IMPROVEMENTS
Buhler Versatile Inc. is continually striving to improve its products. We reserve the right to make improvements
or changes when it becomes practical and possible to do so, without incurring any obligation to make changes
or additions to the equipment sold previously.
386
CALIFORNIA EMISSION CONTROL WARRANTY STATEMENT
Your Warranty Rights and Obligations
The California Air Resources Board and Buhler Versatile are pleased to explain the emission control system warranty on your engine. In
California, new 1996 and later heavy-duty off-road engines from 175 to 750 HP must be designed, built, and equipped to meet the State’s
stringent anti-smog standards. Buhler Versatile must warrant the emission control system on your engine for the periods of time listed below,
provided there has been no abuse, neglect, or improper maintenance of your engine.
Your emission control system includes parts such as the fuel injection system and the air induction system.
Manufacturer’s Warranty Coverage:
The 1996 and later heavy-duty off-road engines are warranted from the original date of delivery for five years or 3,000 hours of operation,
whichever occurs first. If any emission-related part on your engine is defective, the part will be repaired or replaced by Buhler Versatile.
Owner’s Warranty Responsibilities:
D
As the heavy-duty off-road engine owner, you are responsible for the performance of the required maintenance listed in your owner’s
manual. Buhler Versatile recommends that you retain all receipts covering maintenance on your heavy-duty off-road engine, but Buhler
Versatile cannot deny warranty solely for the lack of receipts or for your failure to ensure the performance of all scheduled maintenance.
D
As the heavy-duty off-road engine owner, you should, however, be aware that Buhler Versatile may deny you warranty coverage if your
heavy-duty off-road engine or a part has failed due to abuse, neglect, improper maintenance, or unapproved modifications.
D
Your engine is designed to operate on commercially available diesel fuel only. Use of any other fuel may result in your engine no longer
operating in compliance with California’s emissions requirements.
D
You are responsible for initiating the warranty process. The ARB suggests that you present your heavy-duty off-road engine to a Buhler
Versatile dealer as soon as a problem exists. The warranty repairs should be completed by the dealer as expeditiously as possible.
If you have questions regarding your warranty rights and responsibilities, you should contact the Buhler Versatile Warranty Department.
D
Prior to the expiration of the warranty, you must give notice of any failure of an emission control warranted part. Such notice must be given
to Buhler Versatile or an authorized dealer, and you must deliver the engine to the repair location.
D
You, the owner, are responsible for incidental costs incurred by yourself or your employees as a result of a warrantable failure. Examples
of such costs are communication expenses, meals and lodging.
D
The owner is responsible for any business costs or losses, any “downtime” expenses and any “cargo” damage which result from the
failure of a warranted part. Buhler Versatile is not responsible for other incidental or consequential damages, including but not limited to
fines, theft, vandalism or collisions.
Parts covered:
This emission control system warranty applies to the following 675TA/V emission control parts.
Fuel Injection Pump
Fuel Injectors
Turbocharger
Intake Manifold
Charge Air Cooler
Exhaust Manifold
Any replacement part, equivalent in performance and durability, may be used in the performance of any maintenance or repairs and must be
provided without charge to the owner. The use of these parts does not reduce the warranty obligations of Buhler Versatile. However, Buhler
Versatile recommends the use of new, genuine Buhler Versatile service parts or Buhler Versatile approved rebuilt parts and assemblies. Buhler
Versatile also recommends that the engine be serviced by a Buhler Versatile authorized dealer.
Buhler Versatile Responsibilities
Warranty work will be provided at no charge to the owner at any authorized dealer, using new genuine Buhler Versatile service parts or Buhler
Versatile approved rebuilt parts or assemblies..
The owner will not be charged for diagnostic labor which leads to the determination that a warranted part is defective, if the diagnostic work was
performed at a warranty station.
Buhler Versatile is liable for damages to other engine components caused by the failure under warranty of any warranted part.
Warranty Limitations
Buhler Versatile is not responsible for failures resulting from abuse or neglect by owner or operator.
Buhler Versatile warrants to the ultimate purchaser and each subsequent purchaser that the engine is designed, built, and equipped so as to
conform with all applicable regulations adopted by the Air Resources Board, and that it is free from defects in materials and workmanship which
cause the failure of a warranted part.
Any warranted part which is not scheduled for replacement as required maintenance, or which is scheduled only for regular inspection to the
effect of “repair or replace as necessary” is warranted for the warranty period.
Any warranted part which is scheduled for replacement as required maintenance is warranted for the period of time prior to the first scheduled
replacement point for that part.
Buhler Versatile is liable for damages to other engine components caused by the failure under warranty of any warranted part.
0-1
FEDERAL EMISSIONS WARRANTY
(California owner’s emissions warranty is covered elsewhere)
Buhler Versatile warrants that your new 2001 and later heavy-duty off-road diesel engine was designed, built, and equipped to conform to
applicable U.S. Environmental Protection Agency regulations for a period of use of five years or 3,000 hours of operation, whichever occurs
first.
The new model year, class of diesel engine, and emission application determination for your engine are identified on the emission control
information label affixed to the top of your engine’s rocker arm cover. The warranty period begins on the date the new equipment is sold to the
first retail purchaser.
Any emission control system parts which are proven defective during normal use will be repaired or replaced during the warranty period. The
warranty repairs and service will be performed by any authorized Buhler Versatile dealer at the dealer’s place of business, with no charge for
parts or labor (including diagnosis).
As the engine owner, you are responsible to perform all the required maintenance listed in your owner’s manual. Buhler Versatile will not deny
an emission warranty claim solely because you have no record of maintenance; however, a claim may be denied if your failure to perform
maintenance resulted in the failure of a warranted part. Receipts covering regular maintenance should be retained in the event of questions and
these receipts should be passed on to each subsequent owner of the engine.
It is recommended replacement parts used for maintenance or repairs be Buhler Versatile Service Parts to maintain the quality originally
designed into your emission certified engine. The use of non-Buhler Versatile parts does not invalidate the warranty on other components
unless the use of such parts causes damage to warranted parts.
Buhler Versatile wishes to assure the emission control systems warranty is being properly administered. If you believe you have not received
the service entitled to under this warranty, you should contact the Buhler Versatile Service Department.
Service Department
Buhler Versatile Inc.
1260 Clarence Avenue
Winnipeg , MB R3T 1T2
(204) 661--8711
Please note that the Emission Warranty does not cover:
1. Systems and parts that were not first installed on the new equipment or engine as original equipment by Buhler Versatile.
2. Part malfunctions caused by abuse, misuse, improper adjustment, modification, alteration, tampering, disconnection, improper or
inadequate maintenance, or use of non-recommended fuels and lubricating oils.
3. Accident caused damage, acts of nature, or other events beyond Buhler Versatile’s control.
4. Replacement of expendable items made in connection with scheduled maintenance.
5. Parts requiring replacement, inspection or adjustment maintenance intervals for reasons other than being defective.
6. Parts which are not Buhler Versatile Service Parts.
7. Loss of time, inconvenience, loss of use of equipment/engine or commercial loss.
8. Equipment with altered or disconnected hourmeter where the hours cannot be determined.
9. Equipment normally operated outside the United States.
10.
Non-defective parts replaced by other than Buhler Versatile dealers.
Coverage
This emission control system warranty applies to the following 675TA/V emission control parts.
Fuel Injection Pump
Fuel Injectors
Turbocharger
Intake Manifold
Charge Air Cooler
Exhaust Manifold
Boost Pressure Tubing
0-2
CONTENTS
SAFETY . . . . . . . . . . . . . . . . . . . . . . . . . . . . . . . . . . . . . . . . . . . . . . . . . . . . . . . . . . . . . . . . . . . . . . . . . 0-4
SECTION 1 - GENERAL INFORMATION . . . . . . . . . . . . . . . . . . . . . . . . . . . . . . . . . . . . . . . . . . . . . 1-1
SECTION 2 - OPERATION . . . . . . . . . . . . . . . . . . . . . . . . . . . . . . . . . . . . . . . . . . . . . . . . . . . . . . . . . 2-1
SECTION 3 - LUBRICATION AND MAINTENANCE . . . . . . . . . . . . . . . . . . . . . . . . . . . . . . . . . . . 3-1
SECTION 4 - TROUBLESHOOTING . . . . . . . . . . . . . . . . . . . . . . . . . . . . . . . . . . . . . . . . . . . . . . . . 4-1
SECTION 5 - SPECIFICATIONS . . . . . . . . . . . . . . . . . . . . . . . . . . . . . . . . . . . . . . . . . . . . . . . . . . . . 5-1
INDEX . . . . . . . . . . . . . . . . . . . . . . . . . . . . . . . . . . . . . . . . . . . . . . . . . . . . . . . . . . . . . . . . . . . . . . . . . . 5-31
DELIVERY REPORT . . . . . . . . . . . . . . . . . . . . . . . . . . . . . . . . . . . . . . . . . . . . . . . . . . . . . . . after Index
0-3
PRECAUTIONARY
STATEMENTS
PERSONAL SAFETY
Throughout this manual and on machine decals, you will find precautionary statements (“CAUTION”,
“WARNING”, and “DANGER”) followed by specific instructions. These precautions are intended for the
personal safety of you and those working with you. Please take the time to read them.
CAUTION: THE WORD “CAUTION” IS USED WHERE A SAFE BEHAVIORAL PRACTICE ACCORDING TO OPERATING AND MAINTENANCE INSTRUCTIONS AND COMMON SAFETY
PRACTICES WILL PROTECT THE OPERATOR AND OTHERS FROM ACCIDENT INVOLVEMENT.
WARNING: THE WORD “WARNING” DENOTES A POTENTIAL OR HIDDEN HAZARD WHICH HAS
A POTENTIAL FOR SERIOUS INJURY. IT IS USED TO WARN OPERATORS AND OTHERS TO EXERCISE EVERY APPROPRIATE MEANS TO AVOID A SURPRISE INVOLVEMENT WITH MACHINERY.
DANGER: THE WORD “DANGER” DENOTES A FORBIDDEN PRACTICE IN CONNECTION WITH
A SERIOUS HAZARD.
FAILURE TO FOLLOW THE “CAUTION”, “WARNING”, AND “DANGER” INSTRUCTIONS MAY
RESULT IN SERIOUS BODILY INJURY OR DEATH.
MACHINE SAFETY
Additional precautionary statements (“ATTENTION” and “IMPORTANT”) are followed by specific instructions. These statements are intended for machine safety.
ATTENTION: The word “ATTENTION” is used to warn the operator of potential machine damage if a
certain procedure is not followed.
IMPORTANT: The word “IMPORTANT” is used to inform the reader of something he needs to know to
prevent minor machine damage if a certain procedure is not followed.
0-4
SAFETY
PRECAUTIONARY STATEMENTS
National Safety Council statistics indicate many people die or suffer serious injury each year as
a result of farm accidents.
Don’t become a statistic or victim.
Carefully review the procedures given in this manual with all operators ANNUALLY. It is
important that all operators be familiar with, AND FOLLOW, safety precautions.
Operating instructions must be given to everyone using the tractor before operation and at least
once yearly thereafter in compliance with OSHA Regulation 1928.57 (United States).
A careful operator is the best operator. Most accidents can be avoided by observing certain
precautions. To help prevent accidents, read and take the following precautions before
operating the tractor. Equipment should be operated only by those who are responsible and
instructed to do so.
THE TRACTOR
DRIVING THE TRACTOR
1. Read the Operator’s Manual carefully
before using the tractor. Lack of
operating knowledge can lead to
accidents.
1. Always sit in the driver’s seat while
starting or driving the tractor.
2. When driving on public roads, have
consideration for other road users. Pull to
the side of the road so that any following
traffic may pass.
2. Only allow properly trained and qualified
persons to operate the tractor.
3. Do not permit anyone but the operator to
ride on the tractor. There is no safe place
for extra riders.
3. Dim the tractor lights when meeting a
vehicle at night. Make sure the lights are
adjusted to prevent blinding the driver of
an oncoming vehicle.
4. Replace all missing, illegible or damaged
safety decals.
4. Reduce engine speed before turning or
applying the brakes.
5. Keep safety decals free of dirt or grime.
5. Any towed vehicle whose total weight
exceeds that of the towing tractor must be
equipped with brakes for safe operation.
6. Do not modify, alter, or permit anyone
else to modify or alter the tractor or any of
its components or any tractor function
without first consulting an authorized
Buhler Versatile dealer.
6. Never apply the differential lock when
turning. When engaged, the differential
lock will increase the effort required to
turn the tractor and increase the turning
radius.
7. Install all shields before starting or
operating the tractor.
8. Never jump from the tractor. There is a
danger of catching clothing on
protruding parts.
7. Always check overhead clearance,
especially when transporting the tractor.
Watch where you are going, especially at
row ends, on roads, and around trees and
low overhanging obstacles.
0-5
8. Use extreme caution when operating on
steep slopes.
9. To avoid overturns, drive the tractor with
care and at speeds compatible with
safety, especially when operating over
rough ground, when crossing ditches or
slopes and when turning corners.
10. Keep the tractor in the same gear when
going down hill as would be used when
going uphill. Do not coast or freewheel
down hills.
11. When descending steep grades, select a
sufficiently low gear to maintain control
with minimum braking.
20. Be aware of the transport width of towed
implements. Install additional lights to
the sides of wide implements to alert
passing traffic. Keep clear of the
approaching lane.
21. Use hazard warning flashers as required
by law when transporting or driving the
tractor on public roads. Use extremity
lighting kit when required or deemed
necessary.
22. Use extreme caution when pulling heavy
loads at road speeds. Avoid hard
application of the tractor brakes at high
speed.
OPERATING THE TRACTOR
12. Drive the tractor slowly on hillsides and
curves to eliminate the danger of tipping.
Avoid slopes which are too steep for safe
operation. Avoid sharp uphill turns.
1. Apply the parking brake, place the PTO
control in the “OFF” position, the lift
control in the down position, the remote
control valve levers in the neutral
position and the transmission lever in
neutral before starting the tractor.
13. When driving out of a ditch, gully or up a
steep hillside, engage the clutch slowly.
Avoid sharp uphill turns.
2. Do not start the engine or operate
controls while standing beside the
tractor. Always sit in the tractor seat when
starting the engine or operating the
controls.
14. Use caution when driving near the edge of
a ditch or gully. It may cave in, causing the
tractor to roll over.
15. Use extreme caution when operating the
tractor on single wheels. The danger of
tipping increases. Do not travel at high
speeds.
3. Do not bypass the transmission neutral
start switch. Consult your authorized
dealer if your neutral start controls
malfunction. Use jumper cables only in
the recommended manner. Improper use
can result in a tractor runaway.
16. Before transporting the tractor and
implement on public roadways, check
with authorities for local regulations.
17. Use the wide transport marker lights to
clearly indicate the full width of the tractor
with those tire options.
4. Avoid accidental contact with the gear
shift lever while the engine is running.
Unexpected tractor movement can result
from such contact.
18. Equip
towed
implements
with
slow-moving vehicle (SMV) signs when
traveling on public roads.
5. Do not get off the tractor while it is in
motion.
6. Shut off the engine and PTO and apply the
parking brake before getting off the
tractor.
19. Install additional lights on implement rear
to safeguard against rear-end collisions.
Daybreak and dusk are particularly
dangerous. Buhler Versatile tractors
have seven-pin trailer connectors to
facilitate installation of extra lighting.
7. Do not park the tractor on a steep incline.
0-6
However, noise (sound pressure level) in
the workplace can exceed 86dB(A) when
the cab windows are open. Therefore, it is
recommended that the operators wear
suitable ear protectors when operating in
high noise level conditions.
8. Do not operate the tractor engine in an
enclosed building without adequate
ventilation. Exhaust fumes can cause
death.
9. The cab air filter is designed to remove
dust from the air but will not exclude
chemical vapor. Follow the chemical
manufacturer’s directions regarding
protection from dangerous chemicals.
10. Always wear a protective mask when
working with toxic spray chemicals.
Follow the directions on the chemical
container.
11. If the power steering or engine ceases to
operate, stop the tractor immediately as
the tractor will be more difficult to control.
12. Stop the engine and relieve pressure
before connecting or disconnecting
hydraulic, steering, water, or fuel lines.
13. Pull only from the swinging drawbar. Use
only a drawbar pin that locks in place.
Pulling from the tractor rear axle or any
point above the axle may cause the
tractor to overturn.
14. Be sure hydraulic couplers are properly
mounted and will disconnect safely in
case of accidental detachment of the
implement.
15. Do not leave equipment in the raised
position when the vehicle is stopped or
unattended.
16. Ensure any attached equipment or
accessories are correctly installed, are
approved for use with the tractor, do not
overload the tractor and are operated and
maintained in accordance with the
instructions issued by the equipment or
accessory manufacturer.
17. Remember that your tractor, if abused or
incorrectly used, can be dangerous and
become a hazard both to the operator and
to bystanders. Do not overload or operate
with attached equipment which is unsafe,
not designed for the particular task, or is
poorly maintained.
19. Always keep sleeves, jackets or other
clothing relatively tight and belted. Loose
clothing may catch in moving parts and
result in personal injury or death.
20. Use steps and handholds when mounting
and dismounting the tractor or for
servicing components too high to reach
from the ground.
21. Lock the seat in position and buckle your
safety belt before operating the tractor.
22. Do not operate the tractor when you are
tired, sick, or impaired in any way.
23. Never operate the tractor in confined
areas, or when visibility next to the tractor
is reduced. Injury to bystanders or
damage to the tractor or equipment may
result.
24. When hitching drawn equipment to the
drawbar, only allow an assistant between
the tractor and implement if the tractor is
off, in neutral and the brakes are engaged.
25. Do not leave implements with the
hydraulic cylinders fully extended or
retracted where the heat from the sun can
cause the hydraulic fluid to expand.
Hydraulic pressure can rupture the
hoses, releasing high pressure oil
causing personal injury.
26. Be careful when turning with an
implement. Lift it from the ground if
possible during turns. Side thrust caused
by the implement could damage the tire
and implement.
27. Use transport locks, lower the implement
to the ground and securely block the
frame before servicing the implement.
Relieve pressure from the hydraulic
system and shut off the tractor.
18. The cab is designed to provide the
minimum noise level at the operator’s
ears and, in fact, meets or exceeds
applicable standards in this respect.
0-7
OPERATING THE PTO
4. To prevent fire or explosion, keep open
flames away from the battery or coldweather starting aids. To prevent sparks
which could cause explosion, use jumper
cables according to instructions.
1. When operating PTO-driven equipment,
shut off the engine and wait until the PTO
stops before getting off the tractor and
disconnecting the equipment.
5. Do not attempt to service the air
conditioning system. It is possible to
suffer severe frost bite or injury from
escaping refrigerant. Special equipment
and instruments are required to service
the air conditioning system which uses
R134A refrigerant. See your authorized
Buhler Versatile dealer for service.
2. Do not wear loose clothing when
operating the power take-off or when near
rotating equipment.
3. When operating stationary PTO-driven
equipment, always apply the tractor
parking brake and block the rear wheels
front and back. Engage the articulation
lock.
6. Stop the engine before performing any
service on the tractor.
4. To avoid injury, do not clean, adjust,
unclog or service PTO driven equipment
when the tractor engine is running.
7. Escaping diesel/hydraulic fluid under
pressure can penetrate the skin causing
serious injury.
5. Make sure all PTO shields are in position
at all times.
- DO NOT use your hand to check for
leaks. Use a piece of cardboard or
paper to search for leaks.
6. Be sure the articulation lock is engaged,
the park brake is set and the gearshift
lever is in neutral when using the PTO in
stationary applications. Do not leave the
tractor unattended. If you must leave the
tractor for any reason, stop the tractor
and remove the key.
7. Take special care in
implements to the PTO.
hook-up
- Stop the engine and relieve pressure
before connecting or disconnecting
lines.
- Tighten all connections before starting
the engine or pressurizing lines.
of
- If fluid is injected into the skin, obtain
medical attention immediately or
gangrene may result.
SERVICING THE TRACTOR
Most accidents can be avoided by observing
certain precautions. To help prevent
accidents, read and take the following
precautions before servicing the tractor.
8. Do not modify, alter or permit anyone else
to modify or alter the tractor or any of its
components or any tractor function
without first consulting an authorized
Buhler Versatile dealer.
1. The cooling system operates under
pressure which is controlled by the
radiator cap. It is dangerous to remove
the cap while the system is hot. Always
turn the cap slowly to the first stop and
allow the pressure to escape before
removing the cap entirely. Wear gloves
when removing the cap.
2. Do not smoke while refueling the tractor.
Keep any type of open flame away.
3. Keep the tractor and equipment,
particularly
brakes
and
steering,
maintained in a reliable and satisfactory
condition to ensure your safety and
comply with legal requirements.
9. The fuel oil in the injection system is
under high pressure and can penetrate
the skin. Unqualified persons should not
remove or attempt to adjust a pump,
injector, nozzle or any other part of the
fuel injection system. Failure to follow
these instructions can result in serious
injury.
10. Continuous long-term contact with used
engine oil may cause skin cancer. Avoid
prolonged contact with used engine oil.
Wash skin promptly with soap and water.
0-8
DIESEL FUEL
11. Tractor wheels are very heavy. Handle
with care and ensure, when stored, they
cannot fall and cause injury.
1. Under
no
circumstances
should
gasoline, alcohol or blended fuels be
added to diesel fuel. These combinations
can create an increased fire or explosive
hazard. In a closed container, such as a
fuel tank, these blends are more
explosive than pure gasoline. Do not use
these blends.
12. Dispose of all drained fluids and removed
filters properly. Follow local laws
governing disposal of used engine oil.
13. Never oil, grease or adjust the tractor
while it is running. Do not leave the
engine running while the tractor or drawn
equipment is being adjusted, repaired or
cleaned.
2. Do not smoke while refueling the tractor
or when standing near fuel. Keep any type
of open flame away.
14. Be sure all connections are tight and lines
and hoses are undamaged. Before
disconnecting hydraulic lines, relieve all
pressure. Do not overfill the hydraulic
tank.
3. Never remove the fuel cap or refuel with
the engine running. Allow the tractor to
cool off before fueling.
4. Use the proper fuel transfer hose and
nozzle. Make sure the nozzle and hose are
grounded to dissipate static electric
charges.
15. Do not smoke and avoid open flames if
servicing any batteries.
16. Starting fluid is highly flammable. Do not
use near fire, sparks, or open flames.
5. When refueling, make sure the nozzle is in
contact with the filler neck of the tractor
fuel tank before fuel starts to flow and
during the entire time fuel is flowing.
17. Remove mud, crop residue, chains and
tools from steps and operator’s platform.
They may interfere with pedal operation
or entry/exit from the tractor.
6. Maintain control of the fuel filler pipe
nozzle when filling the tank.
18. Never operate with a damaged tire. The
tire may explode.
7. Do not fill the fuel tank to capacity. Allow
room for expansion.
19. Tighten all connections before starting
the engine or pressurizing lines.
8. Wipe up spilled fuel immediately.
9. Always tighten the fuel tank cap securely.
10. If the original fuel tank cap is lost, replace
it with a genuine replacement cap. A
non-approved cap may not be safe.
11. Keep equipment clean and properly
maintained.
12. Do not drive equipment near open fires.
13. Never use fuel for cleaning purposes.
14. Arrange fuel purchases so that summer
grade fuels are not held over and used in
the winter.
15. Ground fuel storage tanks to prevent
static buildup.
0-9
SAFETY CAB
3. Never attach chains or ropes to the cab or
main frame for pulling purposes.
Your tractor is equipped with a safety cab
which must be maintained in a serviceable
condition. Be careful when driving through
doorways or working in confined spaces with
low headroom.
4. Never take unnecessary risks even
though your safety cab affords you the
maximum protection possible.
5. Do not carry harmful chemicals in the
cab. Chemicals may rupture the
container, and the fumes may poison the
operator.
1. Do not modify, drill, weld, or alter the
safety cab in any way. Doing so could
render you liable to legal prosecution in
some countries.
6. The tractor cab is not designed to provide
a “sprayer safe” environment for the
operator. When applying chemicals from
a spray unit, do not rely on the cab filter
elements to provide protection to the
operator from the airborne chemicals.
2. Never attempt to straighten or weld any
part of the main frame or retaining
brackets which have suffered damage.
By doing so you may weaken the
structure and endanger your safety.
Replace all damaged parts.
0-10
SAFETY DECALS
The following decals were installed on the tractor
in the areas indicated. They are intended for your
safety and for those working with you. Please
take this manual and walk around your tractor to
note the content and location of these decals.
Review these decals and the operating instructions detailed in this manual with the machine operators.
Keep the decals legible. If they are not, obtain replacements from your authorized dealer.
14
0-11
1. ROPS Certificate - Located rear left of cab.
2. Implement Attaching - Located on the
drawbar at the rear of the tractor.
3. Slow-Moving Vehicle - Located rear center
of tractor.
4. Jump Starting - Located on the left side of
the tractor on the starter.
5. Battery Boosting - Located on the
underside of the battery cover.
0-12
6. Pivoting Frames - Located on the right and left sides of
the rear frame in the articulation area.
8. Radiator Cap Pressure - Located on the
left side of the hood at the access hole for
the radiator cap.
86000553
7. ROPS Caution - Located inside
the cab on the rear left post.
0-13
9. Hot Exhaust - Located on the right side
engine hood.
10. Park Brake - Located in the front
windshield in the center.
9702854
11. Ground Speed Radar - Located on the
front left side of the tractor.
12. PTO Safety - Located on top of the PTO
master shield.
13. Engine Cooling Fan - Located under the
engine side shields.
14. Fuse and Relay Panel - Located
on rear shelf of cab in panel
compartment.
0-14
ADDITIONAL SAFETY ITEMS
ARTICULATION LOCK
1. Use the articulation lock, 1, during stationary
applications, servicing, jacking or overhaul
operations. Do not use when the tractor is
operating.
1
2. Before engaging the lock, drive the tractor to a
level surface, put the steering straight,
engage the park brake, put the gearshift in
neutral and stop the engine.
3. Remove the pin from the storage position on
the swing frame right and put the pin through
the hole on the swing frame left.
19992745
Figure 0- 1
NOTE: It may be necessary to start the
engine and articulate the frame slightly to
be sure the articulation pin is positioned
properly and completely seated through
the frame pieces.
ALTERNATE EXIT
1. The cab has an emergency exit located in the
right rear of the cab. Pull the pin attaching the
lever to the glass window. This will allow the
window to open beyond the latch. If greater
access is required, the silicone hinge/seal can
be sliced to remove the window completely.
19992746
Figure 0- 2
0-15
SAFETY CAB
A safety cab incorporating a Roll Over Protective
Structure (ROPS) and safety belt were standard
equipment for the tractor at time of factory assembly. The safety belt, when used by the operator,
maximizes the protection offered by the ROPS.
WARNING: ALWAYS USE YOUR SAFETY
BELT WITH THE CAB/ROPS TO PREVENT
BEING THROWN FROM THE TRACTOR IN
THE EVENT OF A ROLLOVER. SAFETY BELTS
SAVE LIVES WHEN THEY ARE USED.
Information regarding the safety cab/Roll Over
Protective Structure and safety belt are available
from your authorized Buhler Versatile dealer.
ROPS Maintenance and Inspection
After the first 50 hours of operation and every
1500 hours of operation (or yearly, whichever
comes first):
1. Check the torque of the cab/ROPS mounting
bolts, as detailed in the lubrication and
maintenance section of this manual.
2. Check the operator’s seat mounting bolts and
the safety belt mounting bolts. Tighten the
seat mounting bolts to 40 N⋅m (30 ft. lbs.).
Replace any worn or damaged parts.
Damage to the Cab/ROPS
If the tractor has rolled over or the cab/ROPS has
been damaged (such as striking an overhead object during transport), it must be replaced to provide the original protection.
After an accident, check for damage to the cab/
ROPS, operator’s seat, safety belt and safety belt
mountings. Before you operate the tractor, replace all damaged parts.
0-16
19992747
Figure 0- 3
IMPORTANT: Do not try to weld or straighten the
cab/ROPS.
WARNING: NEVER ATTACH CHAINS, ROPES
OR CABLES TO THE CAB/ROPS FOR
PULLING PURPOSES. ALWAYS PULL FROM
THE TRACTOR DRAWBAR. BE CAREFUL
WHEN DRIVING THROUGH DOOR OPENINGS
OR UNDER LOW OVERHEAD OBJECTS.
MAKE SURE THERE IS SUFFICIENT
OVERHEAD
CLEARANCE
FOR
THE
CAB/ROPS.
WARNING: IF THE CAB/ROPS IS REMOVED
OR REPLACED, MAKE CERTAIN THAT THE
PROPER HARDWARE IS USED AND THE
RECOMMENDED TORQUE VALUES ARE
APPLIED TO THE ATTACHING BOLTS. SEE
YOUR AUTHORIZED BUHLER VERSATILE
DEALER.
0-17
19992747
Figure 0- 4
0-18
SECTION 1
GENERAL INFORMATION
INTRODUCTION TO THIS MANUAL
This manual has been prepared to assist you in
the correct procedure for breaking in, driving,
operating, and maintaining your tractor.
The company policy is one of continuous
improvement, and the right to change prices,
specifications or equipment at any time without
notice is reserved.
The manual is divided into five sections as
detailed in the “Contents” page. An index is
provided at the back of the manual.
Section “0” of this manual lists the precautions to
be observed to ensure your safety and the
safety of others. Read the safety precautions
carefully and follow the advice offered BEFORE
operating the tractor.
Read this manual carefully and keep it in the
manual holder attached to the rear of the seat for
future reference. If at any time you require
advice concerning your tractor, do not hesitate
to contact your authorized Buhler Versatile
dealer. He has factory-trained personnel,
genuine replacement parts, and the necessary
equipment for your service requirements.
OPERATOR’S MANUAL HOLDER
A manual holder, 1, is attached to the rear of the
seat. Store the operator’s manual and other
tractor information in the holder.
Your tractor has been designed and built to give
maximum performance, economy and ease of
operation under a wide variety of operating
conditions. Prior to delivery, the tractor was
carefully inspected, both at the factory and by
your dealer, to ensure that it reaches you in
optimum condition. To maintain this condition
and ensure trouble-free operation, it is
important that the routine services, as specified
in this manual, are carried out at the
recommended intervals.
All data given in this book is subject to
production variations. Dimensions and weights
are approximate only, and the illustrations do
not necessarily show tractors in standard
condition. For exact information about any
particular tractor, please consult your
authorized dealer.
Figure 1-1
1-1
SECTION 1 - GENERAL INFORMATION
TRACTOR STATEMENT OF USE
Buhler Versatile has designed the 2290, 2335,
2360, 2375 and 2425 4WD articulated tractors
to be used in customary agricultural
applications. Using the tractor in an industrial
only application (ie. road building) will not be
covered by warranty.
To obtain maximum performance and durability,
the tractor must be operated and maintained in
a manner as described in this manual. Failure to
follow the information contained in this manual
may lead to premature deterioration or personal
injury.
The machine is constructed to use specific tire
combinations along with additional ballast to
properly distribute weight and power for the
operation of agricultural equipment.
You have made a substantial investment in this
agricultural tractor and it demands proper
operation
and
maintenance.
PLEASE
FOLLOW YOUR OPERATOR’S MANUAL.
Thank you for purchasing your Buhler Versatile
tractor.
1-2
SECTION 1 - GENERAL INFORMATION
TRACTOR ORIENTATION
OVERALL DESCRIPTION
The Models 2290, 2335, 2360, 2375 and 2425
tractors are classified as 4-wheel drive
articulating vehicles. The tractors consist of front
and rear frame assemblies which steer by
pivoting at the center articulation joint.
The front frame, 1, incorporates the engine, fuel
tanks, transmission, front drive axle, and cab.
The rear frame, 2, incorporates the rear drive
axle and supports any implements that are
operated by the tractor. This type of design
allows for greater flexibility of weight distribution,
depending upon operating conditions and type of
implement. The operator can ballast the tractor
to best suit the needs of the particular operation.
1
2
The construction of the tractor is a modular-type
construction. This means that the major
components are individual units which are
supported within the front and rear frames. This
makes for easier serviceability and longer life
due to reduced structural stress on components.
Figure 1-2
TRACTOR TERMINOLOGY
This manual uses the following terms to describe
tractor function and directional relationships:
Front, 1 - The engine end of the tractor. This
direction will also be referred to as “Forward
Direction of Travel.”
Right, 2 - The console side of the cab.
Back , 3 - The drawbar end of the tractor, which is
used for pulling implements.
1
2
4
3
Left, 4 - The doorway side of the cab.
Figure 1-3
1-3
SECTION 1 - GENERAL INFORMATION
Articulation - The ability to steer by pivoting
between front and rear frame sections.
Figure 1-4
Oscillation - The ability of a vehicle to twist,
allowing travel over uneven terrain.
Figure 1-5
1-4
SECTION 1 - GENERAL INFORMATION
IDENTIFICATION NUMBERS
TRACTOR IDENTIFICATION DATA
The tractor and its major components are
identified using serial numbers and/or
manufacturing codes. The following provides the
locations of the identification data.
NOTE: Tractor identification data must be
supplied to the dealer when requesting parts
or service.
Identification data is needed to aid in identifying
the tractor if it is ever stolen.
VEHICLE IDENTIFICATION PLATE
The vehicle identification plate is located on the
left rear corner, 1, of the cab.
1
Figure 1-6
Record the identification data in the sample ID plate.
1-5
SECTION 1 - GENERAL INFORMATION
TRACTOR IDENTIFICATION
1
The serial number is stamped on the front frame
beside the left fuel tank, 1.
Figure 1-7
This serial number stamp is used in the event
that the Tractor Identification Plate is removed or
mutilated.
30XXXX
Figure 1-8
ENGINE IDENTIFICATION
The Cummins engine used in your Buhler
Versatile 4WD tractor is serviced solely by the
Cummins Engine Company through its
authorized dealers and distributors. For service,
warranty, and parts information, contact your
Buhler Versatile dealer. Many Buhler Versatile
dealers are authorized Cummins dealers. If your
dealer is not, he will arrange for the engine
service on your tractor by an authorized
Cummins engine dealer or distributor.
1-6
SECTION 1 - GENERAL INFORMATION
For the 2290, 2335, 2375 tractor (Cummins
QSM11 engine), the Engine Identification Plate,
(1), is located on the left side of the engine block
below the valve cover.
1
Please record this information on the lines
provided.
Figure 1-9
For the 2360 and 2425 tractors (Cummins N14
engine), the Engine Identification Plate, 1, is
located on the left side of the engine ahead of the
fuel injection pump.
Please record this information on the lines
provided.
NOTE: It is very important to include the
engine number, engine family, and engine
CPL number (control parts listing) when
contact is made with a Cummins dealer or
distributor.
1-7
1
Figure 1-10
SECTION 1 - GENERAL INFORMATION
TRANSMISSION IDENTIFICATION
Quad Shift III Transmission
(12x4 Synchronized)
The serial number plate, 1, is on the right rear of
the transmission case. This is a 6-digit alpha
numeric number. Record this number on the line
provided.
1
Figure 1-11
Powershift Transmission (12x2 Powershift)
The serial number plate, 1, is located on the left
rear of the transmission housing.
1
Figure 1-12
The serial number plate contains information
that may be required for parts, service, or
warranty. Record the identification data in the
sample ID plate.
1-8
SECTION 1 - GENERAL INFORMATION
FRONT AND REAR AXLE
IDENTIFICATION
On the underside (or topside) of the input shaft is
the Differential Identification Plate, 1, containing
Eaton differential model information. Record this
information on the lines provided.
1
19988494
NOTE: Make a copy of the information
recorded in the preceding paragraphs and
keep in a safe location in the event your
operator’s manual is lost or destroyed.
1-9
Figure 1-13
SECTION 1 - GENERAL INFORMATION
PROTECTIVE SHIELDING
ENGINE SIDE COVERS
1
The side covers, 1, protect the operator from
heated and/or moving parts. Do not operate the
tractor without the engine side covers in place
and latched.
Figure 1-14
BATTERY COVER
1
The battery cover, 1, protects the batteries from
damage and the electrical connections from
accidental contact. The battery cover must
always be in place and latched during operation.
Figure 1-15
STARTER SOLENOID SHIELD
The shield, 1, covers the starter solenoid
electrical connections to prevent accidental
contact. The shield must be installed whenever
the batteries are connected to the electrical
system.
DANGER: NEVER ATTEMPT TO START THE
TRACTOR BY BYPASSING THE WIRES TO
THE STARTER MOTOR.
1
19992828
Figure 1-16
1-10
SECTION 1 - GENERAL INFORMATION
MASTER PTO SHIELD
The shield, 1, covers the PTO stub shaft, if so
equipped. The shield does not pivot or lift up.
CAUTION: DO NOT REMOVE OR MODIFY
THE PTO SHIELD.
1
Figure 1-17
CENTER PTO ARTICULATION
DRIVE SHAFT SHIELD
The shield, 1, covers the PTO drive shaft, if so
equipped, as it passes through the articulation
area.
CAUTION: DO NOT REMOVE OR MODIFY
THE PTO SHIELD.
1
Figure 1-18
WARNING: INSTALL PROTECTIVE SHIELDS
BEFORE STARTING OR OPERATING THE
TRACTOR.
1-11
SECTION 1 - GENERAL INFORMATION
TIRE CONFIGURATIONS
The 2290, 2335, 2360, 2375 and 2425 tractors are designed to be used with specific tire configurations
and should only be used with those tires approved for use on a specific model. The detailed charts on
the following pages give all tire configurations by model that can be used on a particular model tractor.
IF A SPECIFIC TIRE SIZE IS NOT LISTED UNDER THE MODEL TRACTOR YOU OWN, DO NOT
ATTEMPT TO INSTALL THAT SIZE OR CONFIGURATION OF TIRE.
ARTICULATION STOP SPACERS - QUICK REFERENCE CHART
DRUM DUAL
INNER
DRUM DUAL
OUTER
BAND
SPACER
DUAL INNER
24.5x32
N/A
N/A
NONE
NONE
N/A
30.5x32
N/A
N/A
NONE
38_
N/A
18.4x38
NONE
NONE
NONE
NONE
N/A
20.8x38
NONE
NONE
NONE
NONE
N/A
18.4x42
38_
38_
38_
38_
31_
20.8x42
38_
38_
38_
38_
31_
18.4x46
38_
38_
N/A
N/A
31_
700/65x38
38_
33_
N/A
N/A
N/A
710/70x38
38_
33_
N/A
N/A
N/A
750/65x38
38_
33_
N/A
N/A
N/A
850/60x38
31_
31_
N/A
N/A
N/A
1-12
BAND
SPACER
DUAL OUTER
DRUM DUAL
TRIPLE
SECTION 1 - GENERAL INFORMATION
2290
TIRE SIZE
CONFIGURATION
RIM STYLE
MAXIMUM
ARTICULATION
ANGLE (1)
24.5R32 RADIAL **
SINGLES
TIE ROD
42°
20.8R38 R1W RADIAL
SINGLES
DRUM
42°
20.8R42 R1W RADIAL
SINGLES
DRUM
38°
30.5x32 R1 10 PLY
SINGLES
TIE ROD
38°
30.5x32 R2 10 PLY
SINGLES
TIE ROD
38°
710/70R38 RADIAL **
SINGLES
DRUM
38°
710/70R38 R1W RADIAL
SINGLES
DRUM
38°
700/65x38 8 PLY
SINGLES
DRUM
38°
750/65R38 8 PLY
SINGLES
DRUM
38°
850/60R38 8 PLY
SINGLES
DRUM
31°
18.4x38 R1 6 PLY
DUALS
TIE ROD
42°
18.4x38 R2 6 PLY
DUALS
TIE ROD
42°
18.4R38 RADIAL *
DUALS
TIE ROD
42°
18.4x42 R1 8 PLY
DUALS
TIE ROD
42°
20.8x38 R1 8 PLY
DUALS
TIE ROD
42°
20.8x38 R2 8 PLY
DUALS
TIE ROD
42°
20.8R38 RADIAL *
DUALS
TIE ROD
42°
20.8R38 R1W RADIAL
DUALS
TIE ROD
42°
20.8x42 R1 10 PLY
DUALS
TIE ROD
38°
20.8R42 RADIAL **
DUALS
TIE ROD
38°
20.8x42 R2 RADIAL
DUALS
TIE ROD
38°
20.8R42 R1W RADIAL
DUALS
TIE ROD
38°
24.5x32 R1 10 PLY
DUALS
TIE ROD
42°
24.5R32 RADIAL *
DUALS
TIE ROD
42°
30.5x32 R2 10 PLY
DUALS
TIE ROD
33°
30.5R32 R1 RADIAL
DUALS
TIE ROD
33°
18.4R46 RADIAL ***
DUALS
DRUM
38°
20.8R38 R1W RADIAL
DUALS
DRUM
42°
20.8x42 R1 8 PLY
DUALS
DRUM
38°
20.8R42 RADIAL **
DUALS
DRUM
38°
20.8R42 R1W RADIAL
DUALS
DRUM
38°
20.8R42 R2 RADIAL
DUALS
DRUM
38°
700/65x38 8 PLY
DUALS
DRUM
33°
710/70R38 RADIAL **
DUALS
DRUM
33°
710/70R38 R1W RADIAL
DUALS
DRUM
33°
750/65R38 8 PLY
DUALS
DRUM
33°
18.4x38 R1 8 PLY
DUALS
DRUM (30″) ROW CROP
42°
18.4R38 RADIAL *
DUALS
DRUM (30″) ROW CROP
42°
18.4x42 R1 10 PLY
DUALS
DRUM (30″) ROW CROP
38°
18.4R42 RADIAL **
DUALS
DRUM (30″) ROW CROP
38°
18.4R46 RADIAL ***
DUALS
DRUM (30″) ROW CROP
38°
Radial tires are identified according to rating by a star code - either one star (*), two stars (**) or three stars (***).
(1) Any tractor that is equipped with a PTO option requires a 38° articulation block kit be installed on it . If the tire size of the
tractor requires a 33° or 31° articulation kit, use those kits instead of the 38° kit for a PTO option.
1-13
SECTION 1 - GENERAL INFORMATION
2335
TIRE SIZE
CONFIGURATION
RIM STYLE
MAXIMUM
ARTICULATION
ANGLE (1)
24.5R32 RADIAL **
SINGLES
TIE ROD
42°
20.8R38 R1W RADIAL
SINGLES
DRUM
42°
20.8R42 R1W RADIAL
SINGLES
DRUM
38°
30.5x32 R1 10 PLY
SINGLES
TIE ROD
38°
30.5x32 R2 10 PLY
SINGLES
TIE ROD
38°
710/70R38 RADIAL **
SINGLES
DRUM
38°
710/70R38 R1W RADIAL
SINGLES
DRUM
38°
700/65x38 8 PLY
SINGLES
DRUM
38°
750/65R38 8 PLY
SINGLES
DRUM
38°
850/60R38 8 PLY
SINGLES
DRUM
31°
18.4x38 R1 6 PLY
DUALS
TIE ROD
42°
18.4x38 R2 6 PLY
DUALS
TIE ROD
42°
18.4R38 RADIAL *
DUALS
TIE ROD
42°
18.4x42 R1 8 PLY
DUALS
TIE ROD
42°
20.8x38 R1 8 PLY
DUALS
TIE ROD
42°
20.8x38 R2 8 PLY
DUALS
TIE ROD
42°
20.8R38 RADIAL *
DUALS
TIE ROD
42°
20.8R38 R1W RADIAL
DUALS
TIE ROD
42°
20.8x42 R1 10 PLY
DUALS
TIE ROD
38°
20.8R42 RADIAL **
DUALS
TIE ROD
38°
20.8x42 R2 RADIAL
DUALS
TIE ROD
38°
20.8R42 R1W RADIAL
DUALS
TIE ROD
38°
24.5x32 R1 10 PLY
DUALS
TIE ROD
42°
24.5R32 RADIAL *
DUALS
TIE ROD
42°
30.5x32 R2 10 PLY
DUALS
TIE ROD
33°
30.5R32 R1 RADIAL
DUALS
TIE ROD
33°
18.4R46 RADIAL ***
DUALS
DRUM
38°
20.8R38 R1W RADIAL
DUALS
DRUM
42°
20.8x42 R1 8 PLY
DUALS
DRUM
38°
20.8R42 RADIAL **
DUALS
DRUM
38°
20.8R42 R1W RADIAL
DUALS
DRUM
38°
20.8R42 R2 RADIAL
DUALS
DRUM
38°
700/65x38 8 PLY
DUALS
DRUM
33°
710/70R38 RADIAL **
DUALS
DRUM
33°
710/70R38 R1W RADIAL
DUALS
DRUM
33°
750/65R38 8 PLY
DUALS
DRUM
33°
18.4x38 R1 8 PLY
DUALS
DRUM (30″) ROW CROP
42°
18.4R38 RADIAL *
DUALS
DRUM (30″) ROW CROP
42°
18.4x42 R1 10 PLY
DUALS
DRUM (30″) ROW CROP
38°
18.4R42 RADIAL **
DUALS
DRUM (30″) ROW CROP
38°
18.4R46 RADIAL ***
DUALS
DRUM (30″) ROW CROP
38°
Radial tires are identified according to rating by a star code - either one star (*), two stars (**) or three stars (***).
(1) Any tractor that is equipped with a PTO option requires a 38° articulation block kit be installed on it . If the tire size of the
tractor requires a 33° or 31° articulation kit, use those kits instead of the 38° kit for a PTO option.
1-14
SECTION 1 - GENERAL INFORMATION
2360
TIRE SIZE
CONFIGURATION
RIM STYLE
MAXIMUM
ARTICULATION
ANGLE (1)
24.5R32 RADIAL *
SINGLES
TIE ROD
42°
20.8R38 R1W RADIAL
SINGLES
DRUM
42°
20.8R42 R1W RADIAL
SINGLES
DRUM
38°
30.5x32 R2 10 PLY
SINGLES
TIE ROD
38°
710/70R38 RADIAL **
SINGLES
DRUM
38°
710/70R38 R1W RADIAL
SINGLES
DRUM
38°
700/65 x 38 8 PLY
SINGLES
DRUM
38°
750/65R38 8 PLY
SINGLES
DRUM
38°
850/60R38 8 PLY
SINGLES
DRUM
31°
20.8x38 R2 8 PLY
DUALS
TIE ROD
42°
20.8R38 R1W RADIAL
DUALS
TIE ROD
42°
20.8x42 R1 10 PLY
DUALS
TIE ROD
38°
20.8R42 RADIAL **
DUALS
TIE ROD
38°
20.8R42 R2 RADIAL
DUALS
TIE ROD
38°
20.8R42 R1W RADIAL
DUALS
TIE ROD
38°
24.5x32 R1 10 PLY
DUALS
TIE ROD
42°
24.5R32 RADIAL *
DUALS
TIE ROD
42°
30.5x32 R2 10 PLY
DUALS
TIE ROD
33°
30.5R32 R1 RADIAL
DUALS
TIE ROD
33°
18.4R46 RADIAL ***
DUALS
DRUM
38°
20.8R38 R1W RADIAL
DUALS
DRUM
42°
20.8x42 R1 8 PLY
DUALS
DRUM
38°
20.8R42 RADIAL **
DUALS
DRUM
38°
20.8R42 R2 RADIAL
DUALS
DRUM
38°
20.8R42 R1W RADIAL
DUALS
DRUM
38°
700/65x38 8 PLY
DUALS
DRUM
33°
710/70R38 RADIAL **
DUALS
DRUM
33°
750/65R38 8 PLY
DUALS
DRUM
33°
850/65R38 8 PLY
DUALS
DRUM
31°
18.4R46 RADIAL ***
DUALS
DRUM (30″) ROW CROP
38°
18.4R46 R1 RADIAL
TRIPLES ⊗
DRUM
31°
20.8x42 R1 8 PLY
TRIPLES ⊗
DRUM
31°
20.8R42 RADIAL **
TRIPLES ⊗
DRUM
31°
20.8R42 R2 RADIAL
TRIPLES ⊗
DRUM
31°
Radial tires are identified according to rating by a star code - either one star (*), two stars (**) or three stars (***).
⊗ - Triple tires mounted on the 2360 only when the tractor is equipped with heavy-duty axles.
(1)
Any tractor that is equipped with a PTO option requires a 38° articulation block kit be installed on it . If the tire size of the
tractor requires a 33° or 31° articulation kit, use those kits instead of the 38° kit for a PTO option.
1-15
SECTION 1 - GENERAL INFORMATION
2375
TIRE SIZE
CONFIGURATION
RIM STYLE
MAXIMUM
ARTICULATION
ANGLE (1)
24.5R32 RADIAL *
SINGLES
TIE ROD
42°
20.8R38 R1W RADIAL
SINGLES
DRUM
42°
20.8R42 R1W RADIAL
SINGLES
DRUM
38°
30.5x32 R2 10 PLY
SINGLES
TIE ROD
38°
710/70R38 RADIAL **
SINGLES
DRUM
38°
710/70R38 R1W RADIAL
SINGLES
DRUM
38°
700/65 x 38 8 PLY
SINGLES
DRUM
38°
750/65R38 8 PLY
SINGLES
DRUM
38°
850/60R38 8 PLY
SINGLES
DRUM
31°
20.8x38 R2 8 PLY
DUALS
TIE ROD
42°
20.8R38 R1W RADIAL
DUALS
TIE ROD
42°
20.8x42 R1 10 PLY
DUALS
TIE ROD
38°
20.8R42 RADIAL **
DUALS
TIE ROD
38°
20.8R42 R2 RADIAL
DUALS
TIE ROD
38°
20.8R42 R1W RADIAL
DUALS
TIE ROD
38°
24.5x32 R1 10 PLY
DUALS
TIE ROD
42°
24.5R32 RADIAL *
DUALS
TIE ROD
42°
30.5x32 R2 10 PLY
DUALS
TIE ROD
33°
30.5R32 R1 RADIAL
DUALS
TIE ROD
33°
18.4R46 RADIAL ***
DUALS
DRUM
38°
20.8R38 R1W RADIAL
DUALS
DRUM
42°
20.8x42 R1 8 PLY
DUALS
DRUM
38°
20.8R42 RADIAL **
DUALS
DRUM
38°
20.8R42 R2 RADIAL
DUALS
DRUM
38°
20.8R42 R1W RADIAL
DUALS
DRUM
38°
700/65x38 8 PLY
DUALS
DRUM
33°
710/70R38 RADIAL **
DUALS
DRUM
33°
750/65R38 8 PLY
DUALS
DRUM
33°
850/65R38 8 PLY
DUALS
DRUM
31°
18.4R46 RADIAL ***
DUALS
DRUM (30″) ROW CROP
38°
18.4R46 R1 RADIAL
TRIPLES ⊗
DRUM
31°
20.8x42 R1 8 PLY
TRIPLES ⊗
DRUM
31°
20.8R42 RADIAL **
TRIPLES ⊗
DRUM
31°
20.8R42 R2 RADIAL
TRIPLES ⊗
DRUM
31°
Radial tires are identified according to rating by a star code - either one star (*), two stars (**) or three stars (***).
⊗ - Triple tires mounted on the 2375 only when the tractor is equipped with heavy-duty axles.
(1)
Any tractor that is equipped with a PTO option requires a 38° articulation block kit be installed on it . If the tire size of the
tractor requires a 33° or 31° articulation kit, use those kits instead of the 38° kit for a PTO option.
1-16
SECTION 1 - GENERAL INFORMATION
2425
TIRE SIZE
CONFIGURATION
RIM STYLE
MAXIMUM
ARTICULATION
ANGLE (1)
20.8R38 R1W RADIAL
SINGLES
DRUM
42°
20.8R42 R1W RADIAL
SINGLES
DRUM
38°
30.5x32 R2 10 PLY
SINGLES
TIE ROD
38°
710/70R38 RADIAL **
SINGLES
DRUM
38°
710/70R38 R1W RADIAL
SINGLES
DRUM
38°
700/65x38 8 PLY
SINGLES
DRUM
38°
750/65R38 8 PLY
SINGLES
DRUM
38°
850/60R38 8 PLY
SINGLES
DRUM
31°
20.8x38 R2 8 PLY
DUALS
TIE ROD
42°
20.8R38 R1W RADIAL
DUALS
TIE ROD
42°
20.8x42 R1 10 PLY
DUALS
TIE ROD
38°
20.8R42 RADIAL **
DUALS
TIE ROD
38°
20.8R42 R2 RADIAL
DUALS
TIE ROD
38°
20.8R42 R1W RADIAL
DUALS
TIE ROD
38°
24.5x32 R1 10 PLY
DUALS
TIE ROD
42°
24.5R32 RADIAL *
DUALS
TIE ROD
42°
30.5x32 R2 10 PLY
DUALS
TIE ROD
33°
30.5R32 R1 RADIAL
DUALS
TIE ROD
33°
20.8R38 R1W RADIAL
DUALS
DRUM
42°
20.8x42 R1 10 PLY
DUALS
DRUM
38°
20.8R42 RADIAL **
DUALS
DRUM
38°
20.8R42 R2 RADIAL
DUALS
DRUM
38°
20.8R42 R1W RADIAL
DUALS
DRUM
38°
700/65x38 8 PLY
DUALS
DRUM
33°
710/70R38 RADIAL **
DUALS
DRUM
33°
750/65R38 8 PLY
DUALS
DRUM
33°
850/65R38 8 PLY
DUALS
DRUM
31°
18.4R46 RADIAL ***
DUALS
DRUM (30″) ROW CROP
38°
18.4R46 R1 RADIAL
TRIPLES
DRUM
31°
20.8x42 R1 10 PLY
TRIPLES
DRUM
31°
20.8R42 RADIAL **
TRIPLES
DRUM
31°
20.8R42 R2 RADIAL
TRIPLES
DRUM
31°
Radial tires are identified according to rating by a star code - either one star (*), two stars (**) or three stars (***).
(1)
Any tractor that is equipped with a PTO option requires a 38° articulation block kit be installed on it . If the tire size of the
tractor requires a 33° or 31° articulation kit, use those kits instead of the 38° kit for a PTO option.
1-17
SECTION 1 - GENERAL INFORMATION
EXTERNAL LIGHTING
Your tractor is equipped with lights to allow for
nighttime and low light operation.
3
Front lighting consists of four worklamps, 1,
above the grille, one worklamp, 2, on each front
fender and two safety flashers, 3, at the top of the
cab.
1
2
Figure 1-19
Rear lighting consists of two worklamps, 1,
located on each rear fender. A combination
brake, turn and taillight, 2, is located in the rear
fenders and amber safety flashers, 3, are
mounted on the cab as standard equipment.
3
1
2
Figure 1-20
Wide transport marker lights are standard
equipment on all tractors. These are adjustable
to indicate the full width of the tires.
Figure 1-21
1-18
SECTION 1 - GENERAL INFORMATION
Optional high mount worklamps, 1, for mounting
on top of the cab can be purchased from your
local Buhler Versatile dealer.
1
Figure 1-22
1-19
SECTION 1 - GENERAL INFORMATION
CONTROLS AND INSTRUMENTS OVERVIEW OF LOCATION AND FUNCTION
The information on the following pages
identifies, locates and briefly describes the
function of the controls and instruments located
in the cab.
IMPORTANT: The following information in this
section provides a general overview of location
of the controls, but does not provide detailed
operational information. Thoroughly read
Section 2 - “Operation” for details on how to use
the controls and read the instruments before
operating the tractor.
The controls have been divided into the
following six areas:
1. Forward operator controls
2. Foot and floor controls
3. Overhead controls
WARNING: DO NOT OPERATE THE
TRACTOR UNTIL YOU ARE THOROUGHLY
FAMILIAR WITH THE LOCATION AND
OPERATION OF ALL CONTROLS.
4. Right side console controls
5. Additional cab controls
6. Operator seat controls
1-20
SECTION 1 - GENERAL INFORMATION
FORWARD OPERATOR CONTROLS
3
2
1 Electronic monitor digit select switch
4
1
2 Instrument cluster
3 Engine oil pressure gauge
16
15
5 Engine water temperature gauge
6 Warning light bar
8 Electronic monitor rotary select switch
9 Radio (if equipped)
13
7
9
17
11
14
7 Electronic monitor acknowledge/reset button
6
8
18
4 Electronic monitor
5
12
10
Figure 1-23
10 Ignition switch
11 Steering wheel tilt control lever
12 Ether start button
13 Ashtray
14 Combination horn, turn signal and
headlight dimmer switch lever
15 Front windshield wiper switch
16 Rear window wiper switch
17 Front and rear windshield washer switch
18 Rotary light switch
Steering wheel (removed in figure)
Steering wheel height control knob
(removed in figure)
1-21
SECTION 1 - GENERAL INFORMATION
FOOT AND FLOOR CONTROLS
1 Clutch control pedal
2 Brake pedal
2
1
3 Decelerator pedal
3
Figure 1-24
OVERHEAD CONTROLS
2
1 Air duct
3
7
5
2 Speaker (2)
3 Air conditioner on/off switch
1
4 Fan rotary select switch
4
5 Temperature control rotary select switch
6 Recirculation baffle rotary control
9
7 Recirculation vent (2)
6
8
8 Auxiliary three-pin connector
9 Rearview mirror
Figure 1-25
1-22
SECTION 1 - GENERAL INFORMATION
RIGHT SIDE CONSOLE CONTROLS
4
1 Transmission shift levers - 12x4
Quad Shift III*
6
2
1
3
2 Speed chart
11
12
7
3 Flow control knob - grey circuit only
10
4 Tractor Performance Monitor (if equipped)
5 Cup holder
6 Remote valve control levers
8
7 PTO switch (optional)
13
14
9
5
8 Differential lock switch (optional)
Figure 1-26
9 Three-point hitch switch (optional)
10 Throttle control lever
11 Flow control knobs - blue, tan, and green
circuits
12 Cigarette lighter
13 Cruise control on/off switch
14 Cruise control +/-- switch
* See the following pages for powershift
transmission control lever.
ADDITIONAL CAB CONTROLS
Fuel Gauge - Mounted on the right-hand front
pillar of the cab.
Figure 1-27
1-23
SECTION 1 - GENERAL INFORMATION
Liquid Crystal Display Readout - Powershift
Tractors Only - Mounted above the fuel gauge.
Figure 1-28
Electrical Control Panel - Directly behind the
operator’s seat, right-hand corner of the cab.
Figure 1-29
Dome Light and Coat Hook
Figure 1-30
1-24
SECTION 1 - GENERAL INFORMATION
Console Light - The console light, 1, is mounted
in the front right-hand cab post directly below the
fuel gauge.
1
Figure 1-31
Powershift Transmission Control Lever, 1 Powershift Transmissions Only
1
Figure 1-32
Three-Point Hitch Controls - Optional - Located
on the right-hand console.
Figure 1-33
1-25
SECTION 1 - GENERAL INFORMATION
Trouble Light - Mounted in the lower left rear
corner of the cab under the rear shelf.
Figure 1-34
Side Window - Right-hand rear window of the
cab. The only window that swings outward from
the cab.
Figure 1-35
1-26
SECTION 1 - GENERAL INFORMATION
OPERATOR SEAT CONTROLS
2
The seat control levers shown in this figure are:
6
1 Right-hand armrest height adjustment
2 Left-hand armrest height adjustment
3
3 Seat belt buckle
1
4 Fore and aft adjustment
5 Seat belt retractor
5
6 Air ride position control switch
4
Figure 1-36
The seat control levers shown in this figure are:
1
1 Lumbar control knob
2 Backrest position control lever
3 Fore and aft isolation lever
4 Lateral isolation lever
2
3
5 Damping knob
6 Seat swivel control lever
4
6
5
Figure 1-37
1-27
SECTION 1 - GENERAL INFORMATION
INSTALLATION OF CAB-MOUNTED ACCESSORIES
IMPLEMENT MONITOR BOXES,
GAUGES, CB RADIO, AND CELLULAR
PHONE
1. The cab has convenient mounting hardware,
1, located on the cab pillars to attach brackets
for monitor boxes, radios, or phones to be
placed near the operator.
1
Figure 1-38
A bracket P/N 86029617, 1, can be
purchased to aid in the installation of a
monitor on the cab pillar.
1
Figure 1-39
A bracket -- monitor/powerbar P/N 86031182,
2, can be purchased to aid in the installation of
a monitor and/or power bar on the cab pillar.
This powerbar includes a harness, 1, for
monitor power. The harness includes: 1
Cigarette Type Receptacle, 3, and 2 3-Pin
Auxiliary Connectors, 4.
1 -- Key Switch Power -- 30 Amp
2 -- Live Battery Power -- 15 Amp
3 -- Ground
*
*
2
3
*
1
4
1
3
2
Figure 1-40
1-28
SECTION 1 - GENERAL INFORMATION
Some monitors require a true ground speed
signal from a radar unit to be fed into them for
proper operation.
Buhler Versatile 4WD tractors equipped with
a Tractor Performance Monitor (TPM) option
can provide this signal to the monitor by
tapping into the existing wire harness on the
tractor.
To tap into the existing signal wire on the
tractor, use the following procedure:
a. Remove the cover from the rear of the
TPM module on the right-hand console.
The cover, 1, is held in position with velcro.
Figure 1-41
b. Pull out wire harness, 1, that is tucked into
the rear of the TPM.
c. The TPM is connected to the main cab wire
harness with a green 8-pin connector.
Locate the gray wire marked “CM-90” that
is plugged into the connector.
1
Wire “CM-90” is a processed 5-volt signal
that supplies the TPM with a 58.9 Hz/mph
output from the Electronic Instrument
Control System monitor
d. Using a pigtail-type splice connector, tie
into the “CM-90” wire with the wire leading
into the implement monitor.
The monitor will now receive a signal from
the radar unit at the front of the tractor.
e. Route the signal wire along the right-hand
console and out to the implement monitor.
f. Reinstall the TPM wire harness and
connect back into place and install the
TPM backplate.
1-29
Figure 1-42
SECTION 1 - GENERAL INFORMATION
2. There are also four mounting bolt locations
directly above the dash so that a “Heads Up”
type monitor could also be located in front of
the operator.
Figure 1-43
3. The cab has a three-pin auxiliary connector,
1, located at the top of the right rear cab pillar
inside the cab.
1
Figure 1-44
4. The three-pin auxiliary connector has three
terminals inside of it. Pin, 1, is a switched
12-volt power source protected by a 20-amp
fuse. Pin 2 is an unswitched (live) 12-volt
power source protected by a 20-amp fuse.
The third pin, 3, is a ground pin.
3
1
2
Figure 1-45
1-30
SECTION 1 - GENERAL INFORMATION
Buhler Versatile has a male connector, 1, that
will plug into the three-pin auxiliary connector.
It is available from your local Buhler Versatile
dealer using part #86032122. This number
will contain all parts necessary to install the
male connector. Please contact your Buhler
Versatile dealer for assistance in assembling
the connector. A special tool is required to
crimp the pins in the kit.
1
Figure 1-46
5. There is a secondary power source located
on a four-pin bus bar behind the cowling that
secures the fuel gauge. To access the four-pin
bus bar, remove the four cap screws, 1, that
secure the panel to the cab post.
NOTE: The power source pins are
protected by a 10-amp and 3-amp fuse,
respectively. The pins may not be suitable
for use with an implement monitor (due to
electrical load the monitor requires) and
are intended for use with additional
gauges installed by the operator. It is
suggested that the 3-pin auxiliary
connector be used to power the monitor.
1
Figure 1-47
1-31
SECTION 1 - GENERAL INFORMATION
The bus bar pins are identified as follows:
Pin 1 is a switched 12-volt power source
that is live when the ignition is in the “RUN”
position (10-amp circuit protection).
Pin 2 is a switched 12-volt power source
that is live when the rotary light switch is in
the roadway or field use positions (3-amp
circuit protection).
Pin 3 is a ground pin.
Pin 4 is a secondary source for external
signals to access the external alarm
control of the Electronic Instrument
Control System.
For more information on how to hook up the
external alarm control, see the “Electronic
Instrument Control System” section of this
manual.
4
3
2
1
Figure 1-48
NOTE: The cowling that secures the bus
bar and fuel gauge has circular scribe
marks that can be cut out for installing
additional gauges. The scribe marks are
sized to standard size gauges.
6. To route umbilical cords to a monitor box,
remove the cover plate, 1, on the underside of
the right rear corner of the cab and route the
cord up into the cab.
1
Figure 1-49
1-32
SECTION 1 - GENERAL INFORMATION
The rear shield, 1, in the back of the cab can
be removed by loosening the two wing nuts, 2,
and pulling the shield away from the rear wall
of the cab. Once the shield is removed, the
umbilical cord can be routed to the monitor
box.
1
2
2
Figure 1-50
7. Antennas for CB radios and cellular phones
can be installed in the roof cap, 1. These items
should be of such quality that they are
shielded to prevent interference with tractor
controls and instruments. Consult the radio or
phone manufacturer for proper antenna
installation.
1
The roof cap has additional antenna mounts
under the right-hand and left-hand rear corner
of the roof panel. These mounts can be used
by the operator for additional electrical
devices that require an antenna be mounted
on the tractor.
The roof cap also has two flat mounting
locations on top for mounting rotary style
beacons.
1-33
Figure 1-51
SECTION 1 - GENERAL INFORMATION
WELDING & BATTERY CHARGING
PRECAUTIONS: WELDING
PRECAUTIONS: BATTERY CHARGING
To avoid damage to the electronic/electrical
systems, always observe the following:
1. Never make or break any of the charging
circuit connections, including the connection
at the batteries, when the engine is running.
1. Always disconnect the ground cable from the
batteries before carrying out arc welding on
the tractor or on any implement attached to
the tractor.
2. Never short any of the charging components
to ground.
3. Do not use a booster battery of higher than
12 volts nominal voltage.
2. Position the welder ground cable clamp as
close to the welding area as possible. Never
weld on one frame member (i.e., front or rear
frame) and have the ground strap of the
welder on the other frame. Doing this can
cause damage to the hoses, articulation
bearings, and wire harnesses in the
articulation joint area.
4. Always observe correct polarity when
installing the batteries or using a booster
battery to jump start the engine. Follow the
instructions in this manual when jump
starting the tractor. Connect positive to
positive and negative to negative.
5. Always disconnect the negative cable from
the batteries when charging the batteries in
the tractor with a battery charger.
3. Never allow welding cables to lay on, near or
across any electrical wiring or electronic
component while welding is in progress.
4. On powershift transmission equipped units,
remove the electrical connectors attached to
the transmission electronic controller, even
when the negative cable of the battery is
disconnected,
to
provide
additional
protection to the transmission controller.
WARNING: BATTERIES CONTAIN SULFURIC
ACID. IN CASE OF CONTACT WITH SKIN,
FLUSH THE AFFECTED AREA WITH WATER
FOR FIVE MINUTES. SEEK MEDICAL
ATTENTION IMMEDIATELY.
5. Always have an assistant standing by with a
fire extinguisher to put out any fires that may
start due to welding procedures.
AVOID CONTACT WITH THE SKIN, EYES OR
CLOTHING. WEAR EYE PROTECTION WHEN
WORKING NEAR BATTERIES.
6. Always completely clean the area to be
welded so that it is free of any grease, fuel or
oil before welding.
1-34
SECTION 1 - GENERAL INFORMATION
TOWING THE TRACTOR
IMPORTANT: The tractor should only be towed
a short distance, such as out of a building. Do
not tow down roadways or as a method of
transport. Haul the tractor on a trailer or truck for
transport.
WARNING: IF BOTH DRIVE SHAFTS TO
BOTH AXLES ARE DISCONNECTED AT
THE SAME TIME THERE WILL BE NO
BRAKES ON THE TRACTOR AND A
POSSIBLE COLLISION MAY RESULT.
Use a strong chain if towing the tractor is
necessary. Tow the tractor BACKWARD from
the drawbar or FORWARD from the axle. Use
the tie-down slots in the front and rear frames to
attach the chains to the tractor.
If the transmission has failed and it is
necessary to disconnect the drive shafts
between the transmission and both the front
and rear axle, a solid towing bar must be
hooked between the tractor drawbar and the
towing vehicle. The towing vehicle must be of
adequate size to stop the towed tractor.
IMPORTANT: Do not tow the tractor by hooking
to the engine cross brace.
1. Place the transmission in neutral and engage
the park brake. Attach the chain to the tractor.
2. If possible start the engine and let the engine
run so that full use can be made of the power
steering. If the engine cannot be run, engage
the articulation lock.
CAUTION: DO NOT TOW THE TRACTOR
FASTER THAN 8 KPH (5 MPH). ENGAGE THE
ARTICULATION LOCK WHEN IT IS NOT
POSSIBLE TO STEER THE TRACTOR (WITH
THE ENGINE RUNNING).
If the engine is not operational, and the
transmission internal components are
rotated by the axle drive shafts for a long
period of time, possible transmission
damage due to lack of lubrication may
result.
WARNING: DO NOT USE CABLES OR ROPE
TO TOW THE TRACTOR. IF THE CABLE OR
ROPE BREAKS OR SLIPS, IT MAY WHIP
WITH SUFFICIENT FORCE TO CAUSE
SERIOUS INJURY. WHEN USING A CHAIN,
ATTACH WITH THE HOOK OPEN SIDE
FACING UP; IF IT SLIPS, IT WILL DROP
DOWN INSTEAD OF FLYING UP AND
CAUSING SERIOUS INJURY.
IMPORTANT: When the engine is running,
the clutch, transmission input shaft, and
transmission output shafts will also be
driven. Be sure that these components are
functional prior to starting the engine.
3. Release the park brake and tow the tractor.
4. If a failure has occurred in the front axle,
disconnect the drive shaft from the
transmission to the front axle only. Do not
disconnect the drive shaft between the
transmission and the rear axle.
1-35
SECTION 1 - GENERAL INFORMATION
HAULING THE TRACTOR ON A TRANSPORTER
1. Haul the tractor with all four wheels on a
flatbed trailer or truck.
2. Remove the outer duals or triples during
hauling unless special permits allow for
over-width hauling. Consult local authorities
for information on over-width hauling.
3. Make an accurate measurement of the
highest point on the tractor when it is on the
flatbed of the truck. Consult local authorities
regarding over height hauling based on the
measurement taken.
4. Tie-down brackets are located on either side
of the drawbar cage, 1, to allow a chain of
adequate size to be routed through the
brackets and hold down the rear end of the
tractor.
1
Figure 1-52
5. There are cutout slots, 1, on either side of the
front frame of the tractor to allow a chain hook
to fasten the front end of the tractor down.
6. Always install the articulation lock pin and set
the park brake while transporting the vehicle.
1
Figure 1-53
1-36
SECTION 1 - GENERAL INFORMATION
PRE-OPERATION CHECKS
Before operating the tractor, be sure you are
thoroughly familiar with the location and
operation of the controls.
D
Tires for damage
D
Hardware for looseness
Perform all daily lubrication and maintenance
operations as outlined in Section 3.
D
After completing the daily maintenance
operations, perform a walk around visual
inspection of the tractor. Pay particular attention
to the following items:
D
D
Fan belt for cracks
D
Engine area for accumulation of debris
D
D
Driveline and hydraulic pump areas for
leaks or debris accumulation
Make sure the tractor is ballasted properly
for the work to be performed (see
“Ballasting” in Section 2)
Check dual or triple wheel mounting bolt
torque
Make any necessary repairs before using the
tractor.
Hoses, lines, and fittings for leaks or
damage.
1-37
SECTION 1 - GENERAL INFORMATION
1-38
SECTION 2
OPERATION
INTRODUCTION
Read this section thoroughly. It details the
location and operation of the various
instruments, switches and controls on your
tractor. Even if you operate other tractors, you
should thoroughly read this section of the
manual and be sure that you are familiar with the
location and function of all the features of the
tractor.
Pay particular attention to the break-in
recommendations to ensure that your tractor
will give the long and dependable service for
which it was designed.
See Section 3 for lubrication and maintenance
requirements. Tractor specifications are listed in
Section 5.
Do not start the engine or attempt to drive or
operate the tractor until you are fully
accustomed to all the controls. It is too late to
learn after the tractor is moving. If in doubt about
any aspect of operation of the tractor, consult
your authorized dealer.
2-1
SECTION 2 - OPERATION
PRECAUTIONARY STATEMENTS
CAUTION: DO NOT OPERATE
TRACTOR IN A CLOSED BUILDING.
THE
USE THE ARTICULATION LOCK IN
STATIONARY
APPLICATIONS
AND
SERVICING. DO NOT USE WHEN THE
TRACTOR IS MOVING.
BEFORE STARTING THE ENGINE, BE SURE
ALL OPERATING CONTROLS ARE IN
NEUTRAL OR OFF AND THE PARK BRAKE
IS ENGAGED.
ON
HIGHWAYS,
SIGNAL
BEFORE
STOPPING, TURNING, OR SLOWING THE
TRACTOR.
OPERATE ALL CONTROLS ONLY FROM
THE OPERATOR’S SEAT.
USE PROPER SAFETY DEVICES TO WARN
OF
SLOW-MOVING
VEHICLE
WHEN
DRIVING ON PUBLIC ROADS. CHECK WITH
LOCAL
AUTHORITIES
CONCERNING
HIGHWAY TRAVEL.
STOP THE ENGINE BEFORE SERVICING
THE TRACTOR.
KEEP ALL SHIELDS IN PLACE.
WIDE TRANSPORT MARKER LIGHTS ARE
SUPPLIED WITH ALL TIRE OPTIONS. USE
THEM.
STOP THE ENGINE BEFORE RAISING THE
ENGINE SIDE SHIELDS.
USE HANDHOLDS AND STEPS WHEN
MOUNTING AND DISMOUNTING THE
TRACTOR.
2-2
SECTION 2 - OPERATION
CAB
ENTERING THE CAB
The cab has been designed for operator comfort
and convenience. The roof and floor are
insulated to reduce noise.
CAUTION: THE CAB IS NOT DESIGNED TO
PROVIDE A “SPRAYER SAFE” ENVIRONMENT
FOR THE OPERATOR. WHEN APPLYING
CHEMICALS FROM A SPRAY UNIT, DO NOT RELY
ON THE CAB FILTER ELEMENTS TO PROVIDE
PROTECTION TO THE OPERATOR FROM
AIRBORNE CHEMICALS.
Standard features include one door, tinted glass,
hinged window, assist rails, a fresh air
heater/defroster, air-conditioning, interior light,
an air suspension seat, storage tray, cigar lighter,
and ashtray.
The cab has an entry ladder, 1, and grab rails, 2,
located on the left side of the tractor. Use these to
gain entrance to the cab.
3
There is one door, 3, on the left side of the cab
and is the only means of entering the cab.
2
2
1
Figure 2-1
The door has a push-button latch, 1, located on
the outside. To enter the cab, push the button and
swing the door outward from the cab.
1
Figure 2-2
2-3
SECTION 2 - OPERATION
The push-button latch can be locked by using the
ignition key. When the key slot in the push-button
latch is in the horizontal position, the door is
unlocked. When the slot is in the vertical position,
the door is locked.
NOTE: Be careful not to lock the keys in the
cab.
Figure 2-3
The latch on the inside of the door is a lever type.
To open the door, pull forward on the lever. The
inside latch will open the door even if the door is
locked from the outside.
The door is front hinged and is retained in the
fully opened position by a gas spring.
Figure 2-4
2-4
SECTION 2 - OPERATION
RIGHT REAR WINDOW
The right rear window, 1, can be opened to
provide ventilation. The window can be locked
open, closed, or positioned partially open.
1
To lock the window, pull the handle in and forward
in an arc. The handle will fold, go over center and
lock.
Figure 2-5
To open the window, pull the handle back and
push out. The handle will unfold. There are four
detents in the handle, which will hold the window
in a partially open position. To lock in the full open
position, continue rotating the handle outward
until the handle stops. This is also an over center
position, which will prevent the window from
closing unless the latch is pulled.
Figure 2-6
The right rear window serves as an emergency
exit in the event that the cab door cannot be
opened. Pull the latch pin to open the window
wide enough for exit. If necessary, the window
can be removed by slicing the silicon hinge.
Figure 2-7
2-5
SECTION 2 - OPERATION
OPERATOR’S SEAT
The seat has an electronically controlled
pneumatic suspension.
The seat is equipped with controls to permit
adjustment for personal comfort.
NOTE: Before operating the tractor, it is
important to adjust the seat, steering wheel,
and controls to the most comfortable
position.
SEAT BELT
WARNING: THIS TRACTOR IS EQUIPPED
WITH A RETRACTABLE SEAT BELT. ALWAYS
USE THE SEAT BELT.
1
The seat belt retracts when not in use. The belt
automatically adjusts for the size of the individual
in the seat.
To fasten the belt, pull the belt from the reel and
push the tongue end, 1, into the buckle end, 2,
until a click indicates it is properly engaged.
2
3
To release the belt, push the red release button,
3, on the buckle and remove the tongue from the
buckle.
To clean the belt, sponge with clean, soapy
water. Do not use solvents, bleach or dye on the
belt as these chemicals will weaken the webbing.
Replace the belt when it shows signs of fraying,
damage or general wear.
2-6
Figure 2-8
SECTION 2 - OPERATION
SEAT ADJUSTMENTS
NOTE: All adjustments should be made in the
following order while sitting in the seat.
Adjust the seat using the following procedures:
NOTE: Turn the ignition switch to the “ACC”
position to use the electric functions of the
seat. DO NOT START THE ENGINE.
1. Height/Weight Adjustment
Raise -- Depress the top of the switch. Release
when the desired height is obtained.
Lower -- Depress the bottom of the switch.
Release when the desired height is achieved.
2. Backrest Angle Adjustment
Lift the lever and tilt the backrest to the desired
position. Release the lever to lock the backrest in
position.
NOTE: The backrest will tilt backward far
enough to contact the rear window.
3. Fore/Aft Position Adjustment
Pull up on the lever and move the seat fore/aft
through the 178 mm (7”) adjustment range to the
desired position. Release the lever to lock the
seat into position.
4. Fore/Aft Float
Pull up on the lever to allow the seat to float fore
and aft 51 mm (2”). Push down on the lever to
lock the seat into position.
5. Lateral Float
Pull up on the lever to allow the seat to float
laterallt 51 mm (2”). Push down on the lever to
lock the seat into position.
6. Storage tray
Pull out for access.
2-7
Figure 2-9
SECTION 2 - OPERATION
STEERING WHEEL AND COLUMN
The steering column may be tilted and
telescoped to provide a comfortable operating
position.
Steering Wheel Tilt Control
Pulling the tilt control lever, 1, allows the steering
column, 2, to be tilted to a comfortable operator
position. The steering wheel can be tilted upward
to the top stop to allow easy entry and exit of the
cab.
2
1
Figure 2-11
Steering Wheel Telescopic Adjustment
Rotating the center locking knob, 1,
counterclockwise, will unlock the steering
column so the steering wheel, 2, can be
telescoped to a comfortable operating position.
Tighten the column in place by rotating the
locking knob, 1, clockwise.
IMPORTANT: Your tractor is equipped with
hydrostatic power steering. Never hold the
steering wheel against either of the articulation
stops for more than 10 seconds or for more than
a total of 10 seconds in any one minute. Failure to
observe this precaution may result in damage to
the steering system components.
2-9
Figure 2-12
SECTION 2 - OPERATION
OPERATOR’S CONTROL CONSOLE
The following is a description of the switches and
gauges located on the front operator’s console.
The electronic monitor and related controls will
be covered in the next section.
1 Rotary light switch
3
2
1
4
10
11
12
5
2 Engine oil pressure gauge
3 Engine coolant temperature gauge
9
4 Warning light bar
8
5 Radio (if equipped)
6 Ignition switch
7
6
Figure 2-13
7 Ether start button
8 Ashtray
9 Combination horn, turn signal, and headlight
dimmer switch lever
10 Front windshield wiper switch
11 Rear window wiper switch
12 Front and rear windshield washer switch
2-10
SECTION 2 - OPERATION
Ignition Switch
1
The ignition switch has four positions:
2
Stop, 1 - When the switch is in this position,
the following cab functions will operate: rotary
headlight switch, brake lights, dome light,
cigar lighter, horn, turn signals, dimmer
switch, pin 2 of the 3-pin auxiliary connector,
trouble light, and fuel gauge. These items are
live with the ignition switch in the stop
position.
ACC, 2 - When the switch is in this position,
the following cab functions are live in addition
to the items listed in number one above: seat,
front and rear windshield wiper switches, front
and rear windshield washer switch, radio, fan
rotary switch, and air-conditioner switch.
Run, 3 - When the switch is in this position, the
following cab functions are live in addition to
the items listed in number two above: pin 1 of
3-pin auxiliary connector, electronic monitor
select
switch,
electronic
monitor
acknowledge switch, electronic monitor
rotary select switch, warning light bar, PTO
switch (if equipped), differential lock switch (if
equipped), engine fuel solenoid, tractor
performance monitor, and ether cold start
button.
Engine Start, 4 - When the switch is turned
and held in this position, the engine will crank
and start as long as the safety start switch
circuit is complete. The following items will
turn off momentarily when the switch is turned
to the start position, but will be live again when
the key is released and returns to the run
position: radio, air conditioner, and fan control
switch.
The switch has a starter protection feature
built-in. If the switch is rotated to the start
position, and then released to the run position, it
will be necessary to rotate the switch to the stop
position in order to make another attempt at
starting the tractor. This will prevent accidental
engagement of the engine starting motor when
the engine is already running.
2-11
3
4
Figure 2-14
SECTION 2 - OPERATION
Ashtray and Cigarette Lighter
The ashtray can be tilted out for convenient use.
To clean the ashtray, pull it outward from the dash
and empty.
Figure 2-15
The cigarette lighter, 1, is located at the center of
the right console. Push the lighter in to activate. It
will automatically pop out when heated.
1
Figure 2-16
Ether Aid Button
The ether aid button, 1, is used to inject ether, a
highly combustible substance, into the engine
intake manifold. Ether will ignite in the engine at
temperatures far below those needed to ignite
diesel fuel. Use the ether to assist the engine
starting in temperatures at or below 0°C (32°F).
Only depress the ether start button while the
starter motor is cranking the engine. Depress the
button again after 10 seconds if the engine does
not start.
A temperature sensor, mounted on the side of
the engine block, prevents ether from being
injected into the engine if the engine block
temperature is above 27°C (80°F). See “Engine
Starting” later in this section.
2-12
1
Figure 2-17
SECTION 2 - OPERATION
Combination Horn, Turn Signal,
Headlight Dimmer Switch Lever
and
1
The stalk-type multifunction switch, 1, operates
the horn, turn signals, headlight flash and is used
to select high or low beam.
Turn Signals - Move the stalk upward to indicate
a right turn, or downward to indicate a left turn.
The turn signal warning light on the warning light
bar will flash when the signals are operated. The
opposite warning light on the warning light bar
will also light, but will remain steady. The turn
signal must manually be returned to neutral after
the turn is completed.
Figure 2-18
Headlights (High/Low Beams) - With the rotary
select headlight switch in the roadway use
position, the multifunction switch can be pulled
toward the steering column to change the
headlights from high to low beam and vice versa.
Headlight Flash - With the headlight rotary
select switch in the off position, the multifunction
switch can be pulled toward the steering column
to flash the high or low beams of the grillemounted headlights.
Horn - Press the button on the end of the
multifunction switch to activate the horn.
Front Windshield Wiper Switch
The front windshield wiper switch, 1, is a threeposition switch. Position one (when the bottom of
the switch is flush with the dash) is the off
position. Position two (when the switch is in the
center rocker position) is low speed. Position
three (when the top of the switch is pressed flush
with the dash) is high speed.
NOTE: When the front windshield wiper
switch is turned off, the wiper arm will always
stop on the right side of the windshield.
1
Figure 2-19
2-13
SECTION 2 - OPERATION
Rear Window Wiper Switch
The rear windshield wiper switch, 2, is a threeposition switch. Position one (when the bottom of
the switch is flush with the dash) is the off
position. Position two (when the switch is in the
center rocker position) is low speed. Position
three (when the top of the switch in pressed flush
with the dash) is high speed.
NOTE: When the rear windshield wiper
switch is turned off, the wiper arm will always
stop on the left side of the rear cab window.
2
Figure 2-20
Front and Rear Windshield Washer Switch
The washer switch, 3, is a three position,
momentary-type switch. Position one (when
switch is in the center rocker position) is the off
position. Position two (when the top of the switch
is pressed flush with the dash) will provide
washer fluid to wash the front windshield.
Position three (when the bottom of the switch is
flush with the dash) will provide washer fluid to
wash the rear window.
3
Figure 2-21
2-14
SECTION 2 - OPERATION
Engine Oil Pressure Gauge
The engine oil pressure gauge, 1, is a
mechanical gauge that has a capillary tube to the
engine to provide oil pressure for the gauge. The
gauge has a 0 to 500 kPa (0 to 75 PSI) display on
its face. The gauge is tied into the Electronic
Instrument Control System to warn the operator
that an unusual engine oil pressure reading is
present during operation. For further information
about the electronic dash module and how it
relates to oil pressure, see “Electronic
Instrument Control System” later in this section.
The gauge also has red (warning) and green
(normal operation) segments on the face of the
gauge to indicate the operating range. The red
(warning) segment, 2, stretches from 0 to 100
kPa (0 to 15 PSI) and indicates the engine is
running at a lower than normal oil pressure. The
green (normal operation) segment, 3, stretches
from 100 to 500 kPa (15 to 75 PSI) and indicates
the engine is running within normal oil pressure
parameters.
1
3
2
Figure 2-22
Engine Coolant Temperature Gauge
The engine coolant temperature gauge, 1, is a
mechanical gauge that has a capillary tube to the
engine to provide a coolant temperature reading
for the gauge. The gauge is tied into the
Electronic Instrument Control System to warn
the operator that an unusual engine coolant
temperature reading is present during operation.
For further information about the electronic dash
module and how it relates to engine coolant
temperature, see the “Electronic Instrument
Control System” portion of this section. The
gauge is numberless with two indicator bands on
it to display engine coolant temperature. The
green zone, 2, (normal operating temperature)
ranges from 54°C to 109°C (130°F to 228°F).
The red band, 3, (warning operating
temperature) ranges from 109°C to 121°C
(228°F TO 250°F).
NOTE: On 2360 and 2425 tractors equipped
with electronic engines, the engine coolant
temperature gauge is not tied into the
module. The system has its own temperature
sending unit. See “Electronic Instrument
Control System” portion if this manual for
more information.
2-15
1
3
2
Figure 2-23
SECTION 2 - OPERATION
1
2
3
4
5
6
7
8
9
11
12
13
14
15
16
17
18
19
10
20
Figure 2-24
Warning Light Bar
8 Alternator Output - illuminates when the
alternator has stopped sending a charging
output to the electrical system.
The warning light bar provides visual indication
of specific functions as follows:
1 Left Turn Signal and Flasher Indication
Arrow - illuminates when the multifunction
switch is placed in the left turn position
(flashes), when the multifunction switch is
placed in the right turn position (steady) and
when the rotary light switch is in positions two
or three (flashes).
2 High Beams - illuminates when the
multifunction switch is pulled toward the
steering column for headlight flash or high
beam position.
3 Air Filter Restriction - illuminates when there
is 635 mm (25″) of H2O vacuum being
caused by a restriction in the engine air filter
assembly.
4 Park Brake - illuminates when the park brake
handle is pulled upward in the lock position
and goes out when the park brake is in the
downward (operate) position.
5 Safety Belt - illuminates when the ignition
switch is turned to the “RUN” position and
stays illuminated for five seconds to remind
the operator to fasten the safety belt. The
light will then go out and will not re-light until
the ignition switch is turned off and then
turned back to the run position.
6 Low Fuel Level - illuminates when the fuel in
the tanks is at 1/12 or less capacity (1/12
equals 68.1 L or 18 US gals).
9 Front Differential Lock - illuminates when the
differential lock switch is placed in the “ON”
position. The light goes off when the
differential lock switch is placed in the “OFF”
position or when the brake is depressed.
10 Right Turn Signal and Flasher Indication
Arrow - illuminates when the multifunction
switch is placed in the right turn position
(flashes), when the multifunction switch is
placed in the left turn position (steady) and
when the rotary light switch is in positions two
or three (flashes).
11 Engine Coolant Level - illuminates when the
engine coolant in the radiator has dropped
4.5 L (5.3 US qts.) below the acceptable fill
level in the radiator.
12 Red Engine Coolant Temperature illuminates when the engine coolant
temperature reaches 109°C (228°F),
indicating engine overheating requiring
shutdown.
13 Not used.
14 Engine Oil Pressure - illuminates when the
engine oil pressure reaches 100 kPa (15
PSI), indicating the engine oil pressure has
reached a point unacceptable for proper
engine lubrication.
7 PTO Switch - illuminates when the PTO
switch is placed in the “ON” position and
power is supplied to the circuit supplying the
PTO solenoid.
2-16
SECTION 2 - OPERATION
1
2
3
4
5
6
7
8
9
11
12
13
14
15
16
17
18
19
10
20
Figure 2-25
15 Hydraulic Oil Temperature - illuminates when
the hydraulic oil temperature has reached
99°C (210°F), which is unacceptable for
normal operation.
16 Transmission Lube Pressure - illuminates
when the transmission oil pressure being
supplied for transmission lubrication is below
20 kPa (3 PSI) and unacceptable for proper
transmission lubrication.
17 Transmission Lube Filter - illuminates when
the transmission lube filter has a pressure
drop of 210 kPa (40 PSI) indicating a
restricted filter. The filter is now in its bypass
condition and is no longer filtering the oil
returning to the transmission.
19 Yellow Engine Warning Light (electronic
engines only) - illuminates when a
non-critical fault occurs in the electronic
engine control system. As soon as possible,
contact your Buhler Versatile dealer.
20 Red Engine Warning Light (electronic
engines only) - illuminates when a critical
fault occurs in the electronic engine controls.
Stop the tractor immediately and contact
your Buhler Versatile dealer. This light will
also come on when the system detects an
engine overspeed condition. The red engine
warning light when illuminated can be used
to retrieve engine fault codes that have
occured.
18 Hydraulic Lube Filter - illuminates when the
hydraulic lube filter has a pressure drop of
210 kPa (40 PSI) indicating a restricted filter.
The filter is now in its bypass condition and is
no longer filtering the oil returning to the
reservoir.
2-17
SECTION 2 - OPERATION
RIGHT CONSOLE
On the right side of the cab is a console which
contains controls for operation of the throttle, 1;
transmission (Quad Shift III shown), 2; PTO, 3, (if
equipped); differential lock, 4, (if equipped);
cruise control, 5; remote control valves, 6; and
flow control, 7.
2
4
1
7
3
5
6
Figure 2-26
On tractors equipped with the powershift
transmission, the right console is laid out exactly
the same as the Quad Shift III equipped tractors
with the exception of the shift lever, 1.
1
Figure 2-27
Convenience items on the right console include
the cup holder, 1, and two storage trays, 2.
2
1
Figure 2-28
2-18
SECTION 2 - OPERATION
On 3-point hitch equipped tractors, the 3-point
hitch control switches and dials are located on
the rear portion of the right console.
Figure 2-29
At the lower front corner is an adjustable
heater/air-conditioning vent, 1, and the
decelerator pedal, 2.
1
2
Figure 2-30
Above the front corner of the right console on the
cab post is the fuel gauge, 1. If the tractor is
equipped with the powershift transmission, a
digital readout, 2, displaying transmission
information is located above the fuel gauge.
2
1
Figure 2-31
2-19
SECTION 2 - OPERATION
ARTICULATION LOCK
The articulation lock pin prevents the tractor
frames from articulating when placed in the lock
position. The pin has two positions in the frame:
1
When the pin is in the right side of the frame, 1, it
is in the operate position.
Figure 2-32
When the pin is in the left side of the frame, 2, it is
in the lock position.
2
Use the articulation lock during stationary
applications, servicing, jacking or overhaul
operations. Do not use when the tractor is
operating. To install the articulation lock, use the
following procedure:
1. Before engaging the lock, drive the tractor to a
level surface, put the steering straight,
engage the park brake, put the gearshift in
neutral, and stop the engine.
2. Remove the pin from the operate position on
the right side of the frame and put the pin
through the hole on the left side of the frame.
NOTE: It may be necessary to start the
engine and articulate the frame slightly to
be sure the articulation pin is positioned
properly and completely seated through
the frame pieces.
2-20
Figure 2-33
SECTION 2 - OPERATION
TRACTOR START-UP AND ENGINE OPERATION
6. Check the drawbar and 3-point hitch for
wear, especially around metal-to-metal
contact parts.
WARNING: AVOID POSSIBLE INJURY OR
DEATH FROM A MACHINE RUNAWAY.
ENGINE STARTING
IMPORTANT: Protect the turbocharger during
start-up by not opening the throttle or
accelerating above 1000 RPM until the engine
oil pressure gauge reads in the normal range.
Avoid excessive engine speed during warm-up.
DO NOT START THE ENGINE BY SHORTING
ACROSS STARTER TERMINALS. THE
ENGINE CAN START AND THE MACHINE
CAN MOVE WHEN THE STARTING SAFETY
SWITCH IS BYPASSED.
1. Fasten your seat belt.
2. Put the transmission in neutral.
3. On tractors equipped with a PTO, put the
switch to the “OFF” position. A safety switch
on PTO-equipped models permits engine
starting only when the PTO is off.
CAUTION:
PREVENT
INADVERTENT
TRACTOR OR IMPLEMENT MOVEMENT.
BE SURE THE HYDRAULIC CONTROL
LEVERS ARE IN NEUTRAL AND THE
3-POINT HITCH IS SET TO THE LOWEST
POSITION PRIOR TO STARTING THE
TRACTOR WHEN ATTACHED TO AN
IMPLEMENT.
4. Engage the park brake.
IMPORTANT: A safety switch in the park
brake will not permit the tractor to start unless
the park brake is engaged.
THE TRACTOR CAN MOVE AS SOON AS
THE ENGINE IS STARTED BY TURNING THE
STEERING WHEEL, EVEN WITH THE PARK
BRAKE
ENGAGED
AND
THE
TRANSMISSION IN NEUTRAL. BE SURE ALL
PERSONNEL ARE CLEAR OF THE
TRACTOR BEFORE STARTING.
5. Check to be sure that the remote hydraulic
levers are in the neutral position.
PRESTART INSPECTION
8. Turn the ignition to “RUN” to activate the
electrical accessories.
6. On tractors equipped with a 3-point hitch,
make sure that the hitch controls are set to
the lowest position.
7. Set the engine throttle to the lowest position.
Do the following before starting the engine each
day:
Observe the warning lamps to be sure they
are functioning.
1. Check the engine oil level and adjust, if
necessary.
9. Turn the ignition to the “START” position to
crank the engine, and release when the
engine starts.
2. Check the coolant level and adjust, if
necessary.
The switch has a starter protection feature
built-in. If the switch is rotated to the start
position, and then released to the run
position, it will be necessary to rotate the
switch to the stop position in order to make
another attempt to start the tractor. This will
prevent an accidental engagement of the
engine starter motor when the engine is
already running.
3. Check and clean the radiator and grill for dirt
and debris, if required.
4. Check the transmission and hydraulic oil
tank levels and adjust, if necessary.
5. Inspect the condition of all belts, lights,
switches, hoses, lines, fittings, seals, tires,
nuts and bolts. Replace or tighten, if
required.
2-21
SECTION 2 - OPERATION
IMPORTANT: To prevent starter motor
damage, never crank the engine for more
than 30 seconds. If the engine does not start
within 30 seconds, wait 2 minutes to cool the
starter motor before recranking.
10. Once the engine has started, allow it to idle
and warm up before adding a working load.
IMPORTANT: Pay attention to the warning
light bar and electronic monitor for any
indication of a problem. Stop the tractor
immediately and investigate the problem.
Cold-Weather Starting
CAUTION: STARTING FLUID IS HIGHLY
FLAMMABLE. DO NOT USE NEAR FIRE,
SPARKS, OR FLAMES. BE SURE ALL
OPERATORS READ THE CAUTIONARY
INFORMATION ON CONTAINERS.
NOTE: A feature on the starting aid prevents
starting fluid injection if the engine
temperature is above 27° C (80° F).
After following steps 1 to 10 under “Engine
Starting,” proceed as follows:
11. If the engine does not start within 15 seconds
of cranking, depress the cold start switch, 1,
for two seconds while the engine is cranking
and release to inject starting fluid. If the
engine does not start after 15 more seconds,
release the ignition switch. Allow the starter
motor to cool down for two minutes, and
repeat the procedure.
IMPORTANT: Use only one starting fluid
charge per engine crank cycle of 30 seconds.
Never hold the button longer than 5 seconds,
as damage to the electric solenoid valve may
result.
1
Figure 2-34
2-22
SECTION 2 - OPERATION
12. If, after the engine starts, it runs roughly while
at low idle with an outside ambient
temperature below 0° C (32° F), it is
permissible to press the cold start button and
inject an additional amount of starting fluid
into the engine to aid in engine warm-up.
NOTE: The cold start system injects a
4.8 cc metered shot of starting fluid into
the engine with each depression of the
switch.
The engine is protected from starting fluid
being injected into it when the engine
temperature is above 27° C (80° F) by a
temperature sensor, 1, mounted on the side of
the engine block.
1
ATTENTION: Use a maximum of three
injections of starting fluid into the engine for
initial start-up and engine warm-up. If the
engine will not start or will not smooth out,
shut the tractor off and investigate the cause.
See “Engine Troubleshooting” in Section 4 of
this manual.
13. Once the engine has started, allow it to warm
up before putting it under load.
IMPORTANT: Pay attention to the warning
light bar and electronic monitor for any
indication of a problem. Stop the tractor
immediately and investigate the problem.
NOTE: If the engine fails to start after three
attempts, use a block heater or other
means to warm the engine.
2-23
Figure 2-35
SECTION 2 - OPERATION
Engine Block Heater
1. Block heaters are standard equipment on
Buhler Versatile tractors. The block heater
cord, 1, is located on the right side of the
engine.
2. A 3-wire 15-amp extension cord is required to
connect the block heater to a grounded 115volt electrical outlet.
1
WARNING: TO AVOID SHOCKS OR
OTHER INJURIES, NEVER USE AN
UNGROUNDED
OR
INADEQUATE
EXTENSION CORD. ALWAYS USE A
GROUNDED 3-WIRE EXTENSION CORD
WITH A 3-WIRE PLUG WHICH IS RATED
FOR AT LEAST A 15-AMPERE LOAD, AND
PROTECTED BY A SUITABLE FUSE OR
CIRCUIT BREAKER.
3. To operate the heater, plug the heater cord in
for at least four hours before attempting to
start. Maximum starting ability is usually
obtained within four hours.
4. Disconnect the cord when the engine has
started.
WARNING: ELECTRICAL SHOCK HAZARD!
BE SURE CORDS ARE PROPERLY
GROUNDED; DO NOT HANDLE IF WET.
DO NOT PLUG THE HEATER IN IF NOT
IMMERSED IN COOLANT. IT MAY
OVERHEAT AND BURST CAUSING
INJURY.
2-24
Figure 2-36
SECTION 2 - OPERATION
Tractor Boosting
1. Set the park brake, put the transmission in
neutral, PTO clutch control and all
accessories OFF.
CAUTION:
WHEN
SERVICING
BATTERIES,
DISCONNECT
THE
NEGATIVE (BLACK) CABLES BEFORE
THE POSITIVE (RED) CABLES. WHEN
CONNECTING CABLES, CONNECT THE
POSITIVE (RED) CABLE FIRST, THEN
THE NEGATIVE (BLACK). THIS WILL
REDUCE
THE
POSSIBILITY
OF
SPARKING AND BATTERY EXPLOSION.
2. Attach one end of the booster cable to the
positive terminal of the booster batteries and
the other end of the same cable to the
positive terminal of the center battery on the
tractor.
3. Attach one end of the negative cable to the
negative terminal of the booster battery, and
the other end of the same cable to a ground
on the tractor frame at least 305 mm (12″)
from the discharged batteries. DO NOT
CONNECT TO THE NEGATIVE POST OF
THE DISCHARGED BATTERIES.
WARNING: ALL BATTERIES GENERATE
HYDROGEN GAS, WHICH IS HIGHLY
FLAMMABLE. IF IGNITED BY A SPARK
OR FLAME, THE GAS MAY EXPLODE
VIOLENTLY CAUSING A SPRAY OF ACID,
FRAGMENTATION OF THE BATTERY,
AND POSSIBLE SEVERE PERSONAL
INJURY, PARTICULARLY TO THE EYES.
4. Be sure that the clamps from one cable do
not touch the clamps of the other cable. Do
not lean over the battery when making
connections.
5. Start the tractor following normal engine
starting procedures.
THEREFORE,
PRECAUTION:
6. When the tractor starts, remove the booster
cables. Disconnect the negative cable, then
the positive cable.
AS
A
SAFETY
WEAR PROTECTIVE CLOTHING AND
GOGGLES.
7. If the tractor fails to start, charge the
batteries.
DO NOT SMOKE OR EXPOSE THE
BATTERY TO OPEN FLAME.
All models have three batteries connected in
parallel that have 950 CCA (BCI Group 31).
DO NOT CONNECT OR DISCONNECT
LIVE CIRCUITS.
FOLLOW
THE
CONNECTION
PROCEDURE AS OUTLINED ABOVE.
2-25
SECTION 2 - OPERATION
THROTTLE
The tractor is equipped with a hand throttle,
located on the right console. Rated operating
speed is 2100 RPM Idle speed is 850--900 RPM.
High idle no load speed varies by model from
2250 RPM to 2300 RPM.
To increase engine speed, move the lever
forward (rabbit). Pulling the lever backward will
reduce engine speed (turtle).
Fuel consumption can be reduced by operating
at lower engine speeds under light load.
Figure 2-37
CRUISE CONTROL OPERATION
Cruise control automatically keeps the engine
speed at a specified RPM. Two switches control
cruise mode operation. The “CRUISE/OFF”
button, 1, enters and exits cruise mode. The
“+/–(SET)” button, 2, adjusts the cruise setting.
When cruise mode is activated, the engine
returns to the last cruise setting, if possible,
based on throttle lever position.
1
The cruise function can be set to any engine
RPM, but the operating cruise RPM cannot
exceed the normal RPM for the current throttle
position. For example, if the cruise setting is
1800 RPM but the hand throttle is at a normal
1700 RPM position, cruise will not increase the
RPM.
On the 2360/2425 models equipped with the
N14 the operating cruise RPM always stays
about 100 RPM under the normal throttle
position RPM.
On the models, 2290, 2335 and 2375 equipped
with the QSM 11 the cruise RPM is always less
than or equal to the normal throttle RPM.
2
Figure 2-38
Setting - Move the throttle handle higher than
the desired cruise setting and press the
“CRUISE” button, 1, to enter cruise operation.
On the QSM 11 engine cruise will not engage
unless the throttle is set to a higher operating
speed than the previous set point. The engine
speed will go to the RPM of the cruise setting.
Adjust the cruise setting with the “+/–(SET)”
button, 2. Set the cruise mode with the throttle
lever at Full Throttle (throttle lever fully forward)
whenever possible. Cruise function will
disengage if the cruise RPM is set to a value
equal to the throttle position RPM--moving the
throttle to a higher position will return cruise
function.
2-26
SECTION 2 - OPERATION
The “+/–(SET)” button will change the setting 10
RPM per momentary push. When the button is
held down, the RPM will continue to move up or
down. However, the dash RPM display will not
keep up with RPM changes when the button is
held down. In this case, it is advisable to
estimate the setting by ear, wait for the dash to
catch up, and fine tune the RPM using
momentary pushes. It is never possible to set
the cruise higher than the current throttle lever
position.
In situations where engine load is minimal and
tractor ground speed is high above 18.5 KPH
(above 11.5 MPH), the Electronic Engine
Control System will progress to an alternate
engine speed overrun condition. The full throttle
overrun will now be 15% (2450 +/-- 50 RPM)
instead of the normal 6% (2225 +/-- 50 RPM). An
example of this would be a tractor traveling at
12.9 KPH (8 MPH), over the road, with the
throttle lever fully forward and the cruise switch
in the OFF position. Maximum engine RPM
shown on the EICS of the tractor will be 2225 +/-50 RPM. If the transmission is shifted into a
higher gear and ground speed increases above
18.5 KPH (11.5 MPH), the engine will accelerate
to a new higher speed, with the EICS now
displaying a maximum engine speed of 2450
+/-- 50 RPM.
If the last cruise setting was above the throttle
position, the system will remember that cruise
setting unless the “+/–(SET)” button is pressed
in cruise mode. The cruise RPM will return to the
stored cruise setting if the throttle is moved
above that RPM.
The electronic system remembers the current
cruise control setting at all times. The cruise
setting remains in memory after the cruise
switch is turned off, after the engine is shut off, or
if the batteries are disconnected.
The alternative engine speed overrun feature of
the electronic engine controls provide a higher
ground speed when traveling over the road with
the tractor.
If tractor ground speed is reduced below 18.5
KPH (11.5 MPH), the system will revert to the
6% normal overrun mode.
Alternate Engine Speed Overrun - All N14
engines in 2360 and 2425 tractors have a rated
engine speed of 2100 RPM. Actual high engine
speed, when the throttle lever is placed in the full
forward position, is 2225 +/-- 50 RPM. The
difference between the rated speed and the
actual full throttle speed (125 RPM) is called
throttle overrun (or sometimes referred to as
high speed droop). The 125 RPM results in a 6%
overrun (125 RPM ÷ by 2225 RPM = 0.06 x
100%) of the engine in normal loaded operating
conditions when tractor ground speed is below
approximately 18.5 KPH (11.5 MPH).
IMPORTANT: Loads placed on the engine while
roading (implements, road grade) will affect
tractor ground speed and the alternate speed
overrun feature.
2-27
SECTION 2 - OPERATION
Deceleration (manual or pedal) - When in
cruise mode and hand throttle, 1, moves lower
than the cruise setting, the cruise RPM
decreases as well and stays 100 RPM less than
the normal RPM for that throttle position. The
RPM will increase back up to the cruise setting if
the throttle handle is moved forward again.
Example: With the throttle handle at Full
Throttle, the cruise is set to 1800 RPM. When
the throttle handle is moved back past the
normal 1800 RPM position, the cruise speed will
drop to 1700 RPM and continue to decrease as
the throttle decreases. When the handle moves
back up to full throttle, the cruise speed
increases until it reaches 1800 RPM again.
1
Figure 2-39
Using the deceleration pedal in cruise mode
works the same as moving the throttle handle. If
the deceleration pedal causes the throttle
linkage to decrease past the cruise setting, the
cruise speed will decrease as well. When the
deceleration pedal is released, the cruise RPM
will return to the specified setting. It is not
possible to use the “+” button to increase
the cruise setting higher than the current
throttle position.
Exiting Cruise Mode - Pressing the “OFF”
button, 1, exits cruise mode and returns to the
normal engine speed for the current throttle
position. The cruise function can be used in this
way for two-speed applications. The throttle
position for high speed, the cruise setting for low
speed.
1
Figure 2-40
2-28
SECTION 2 - OPERATION
STOPPING THE TRACTOR
1. Gradually slow down the tractor. Set the
throttle as low as possible.
2. Disengage the clutch, apply the brake and put
the controls into neutral.
3. Reduce the engine speed to Idle. Run the
engine for 3 to 5 minutes before shutdown to
allow the engine to cool.
4. Shut down the engine and remove the key.
Turn all electrical accessories OFF.
IMPORTANT: If the engine has overheated,
allow it to idle an extended length of time to
reduce the temperature. If the temperature
does not return to normal or the coolant level
warning lamp is ON, shut down the tractor
immediately.
OVERHEAD CLIMATE CONTROLS
Above the right console is a panel containing the
climate controls. These consist of a rocker
switch, which activates the air conditioning, and
three rotary switches, controlling the pressurizer
fan, temperature, and recirculation mix.
CAUTION: THE CAB IS NOT DESIGNED TO
PROVIDE A “SPRAYER SAFE” ENVIRONMENT
FOR THE OPERATOR. WHEN APPLYING
CHEMICALS FROM A SPRAY UNIT, DO NOT RELY
ON THE CAB FILTER ELEMENTS TO PROVIDE
PROTECTION TO THE OPERATOR FROM
AIRBORNE CHEMICALS.
Heater
1. To activate the heater, open the heater hose
valve, 1, on the right side of the engine block.
Under most cold-weather conditions it is not
necessary to have the valve completely open.
During hot weather, shut the heater valve off
on the side of the engine. This will ensure no
heated engine coolant will flow into the heater
core.
1
Figure 2-41
2-29
SECTION 2 - OPERATION
2. Rotate the temperature control knob, 1,
counterclockwise (toward the red) to increase
the temperature and clockwise (toward the
blue) to decrease the temperature.
2
4
3
3. There are four positions on the pressurizer
fan switch, 2. The full counterclockwise
position is off. Each detent in the clockwise
direction increases the speed of the fan. The
fan speeds are low, high, and purge.
4. The recirculation knob, 3, controls the mix
between external air and recirculated cab air.
To increase the amount of fresh air entering
the cab, rotate the knob counterclockwise.
Rotate the knob clockwise to recirculate the
cab air. Do not block the recirculation vent, 4,
when recirculating cab air.
1
Figure 2-42
NOTE: The left-hand side of the cab roof
has a second recirculation vent that has a
fixed opening and is not adjustable.
5. To dehumidify the cab air during cold weather,
use the heater in conjunction with the airconditioning system to reduce air humidity.
Turn the air conditioner on and turn the
recirculation knob clockwise to recirculate the
cab air. Place the temperature control knob to
the desired heat level.
Air Conditioning
1. The air conditioning is activated by a twoposition rocker switch, 1. An indicator light on
the switch will glow when the air conditioning
is activated.
NOTE: The air-conditioning system uses
R134A refrigerant. DO NOT mix with other
refrigerants. DO NOT attempt to top off the
system with any other refrigerants. Rely
on a qualified technician for all air
conditioning repairs.
2. Rotate the temperature control knob, 2,
counterclockwise (toward the red) to increase
the temperature and clockwise (toward the
blue) to decrease the temperature.
3. There are four positions on the pressurizer
fan switch, 3. The full counterclockwise
position is off. Each detent in the clockwise
direction increases the speed of the fan. The
fan speeds are low, high, and purge.
2-30
1
4
3
2
Figure 2-43
SECTION 2 - OPERATION
4. The recirculation knob, 4, controls the mix
between external air and recirculated cab air.
To increase the amount of fresh air entering
the cab, rotate the knob counterclockwise.
Rotate the knob clockwise to recirculate the
cab air. Do not block the recirculation vent
when recirculating cab air.
NOTE: The left-hand side of the cab roof
has a second recirculation vent that has a
fixed opening and is not adjustable.
IMPORTANT: Always turn the air conditioner
off when cooled or dehumidified air is not
required. For proper air conditioner operation,
the cab air filter must be serviced regularly.
Pressurizer Vents
The pressurizer fan has several adjustable vents
to direct air flow as required. All vents can be
rotated to adjust direction and have adjustable
fins to direct the angle of air flow. The forward
vents, 1, can be adjusted for the front or side
windows. The rearward vents, 2, are for operator
comfort.
2
1
Figure 2-44
For additional comfort, a floor vent, 1, is provided
at the bottom of the right console.
1
Figure 2-45
2-31
SECTION 2 - OPERATION
MIRROR
An interior rearview mirror, 1, is provided for your
convenience. It is located on the right post and is
adjustable.
NOTE: To provide a wider view, the mirror has
a convex lens. This causes objects to appear
farther away than they are.
1
Figure 2-46
RADIO (Optional Equipment)
There are various optional radios that can be
installed in the cab. If no radio has been installed
in your tractor, your Buhler Versatile dealer can
install the radio of your choice.
A separate operator’s manual is supplied with
each radio purchased through Parts and should
be followed for proper radio operation.
Figure 2-47
2-32
SECTION 2 - OPERATION
BRAKING SYSTEM
PARK BRAKE
The park brake is located on the floor just to the
right of the operator’s seat. The parking brake
must be engaged (pulled up) to start the tractor.
A light on the warning light bar will indicate park
brake engagement.
NOTE: The tractor will not start if the park
brake is not engaged.
Figure 2-48
FOOT BRAKE
The foot brake pedal, 1, is located in the lower
right corner of the operator’s console near the
cab floor. The pedal should be depressed to
bring the tractor to a stop once the clutch pedal is
fully depressed.
CAUTION: KEEP THE CAB FLOOR AREA
FREE FROM DEBRIS OR OBJECTS WHICH
MAY OBSTRUCT THE OPERATION OF THE
BRAKE PEDAL. KEEP THE PEDAL CLEAN
AND DRY TO PREVENT YOUR FOOT FROM
SLIPPING OFF THE PEDAL.
DANGER: NEVER LEAVE THE OPERATOR’S
SEAT WITHOUT FIRST BRINGING THE
TRACTOR TO A COMPLETE STOP USING
THE FOOT BRAKE, AND THEN ACTIVATING
THE PARK BRAKE.
DANGER: NEVER OPERATE THE TRACTOR
IF THE FOOT OR PARK BRAKE DOES NOT
FUNCTION PROPERLY.
DANGER: NEVER RELY SOLELY ON THE
TRANSMISSION TO HOLD THE TRACTOR
STATIONARY WHEN PARKED; ALWAYS SET
THE PARK BRAKE.
2-33
1
Figure 2-49
SECTION 2 - OPERATION
TRANSMISSION OPERATION
QUAD SHIFT III 12 x 4 OPERATION
All gears in the transmission are constantly in
mesh. When a range is selected, shift collars
splined to the shafts are being engaged with the
range gears. The tractor must be at full stop
in order to shift between ranges.
The transmission has three forward ranges and
one reverse range.
Within each range,
including reverse, there are four synchronized
speeds. The synchronized speeds allow for
easier shifting within each range. This
combination allows for twelve forward speeds
and four reverse speeds.
The transmission bearings and gears are
pressure lubricated. The lubrication circuit
consists of a gear pump located on and driven
by the transmission, an oil cooler located in front
of the engine radiator, a filter located inside the
frame at the front of the tractor, and the oil
distribution manifold on the transmission. The
transmission case acts as a reservoir.
All shifting is done manually, in conjunction with
the clutch. The transmission incorporates a
shaft brake, which is designed to stop
transmission rotation when shifting between
ranges. This is activated when the range lever is
in neutral and the clutch pedal is fully
depressed.
Should the transmission oil pressure light come
on, immediately shut down the tractor and
contact your Buhler Versatile dealer to
investigate the cause of lubrication failure.
IMPORTANT: Engage the clutch at a low throttle
setting and as light a draft load as possible to
extend clutch and synchronizer life. Do not
engage the clutch when the throttle is set higher
than 1700 RPM while under load. Raise the
implement whenever possible during shifting.
Use the decelerator pedal to bring the engine
speed down when shifting or engaging the
clutch.
CAUTION: KEEP THE CAB FLOOR AREA
FREE FROM DEBRIS OR OBJECTS WHICH
MAY OBSTRUCT THE OPERATION OF THE
CLUTCH PEDAL. KEEP THE PEDAL CLEAN
AND DRY TO PREVENT YOUR FOOT FROM
SLIPPING OFF THE PEDAL, CAUSING
ABRUPT ENGAGEMENT.
2-34
SECTION 2 - OPERATION
QUAD SHIFT III SHIFTING
1
Range Shifting
2
1. Be sure the engine speed is below 1700
RPM. Whenever possible, reduce engine
speed to idle.
2. Depress the clutch fully and bring the tractor
to a complete stop. Place the range shift
lever, 1, in neutral. Wait three to four seconds
to allow the gears to slow down to a near
stopped condition. Select the desired range.
Shift pattern decals, 2, are located behind the
shift lever indicating range position. A decal
on the right cab window gives the range and
gear position for speed selections based on
tire size options.
Figure 2-50
3. If you are not able to move to the desired
position, turn the steering wheel to the left or
right to allow gears to mesh.
4. Slowly release the clutch pedal to achieve a
smooth start.
5. Reset the engine speed to operating range.
The range shift decal located behind the range
shift lever displays the position the range shift
lever should be in for high (H), medium (M), low
(L), or reverse (R) range.
Figure 2-51
2-35
SECTION 2 - OPERATION
Gear Shifting within a Range
IMPORTANT: It is recommended that shifting on
the fly be limited to light draft or rolling loads and
only within a gear range. Do not attempt to shift
between ranges without first coming to a
complete stop.
1. Depress the clutch pedal fully.
2. Move the gearshift lever, 1, to the proper gear.
Shift pattern decals, 2, are located below the
shift lever indicating gear position and a
speed chart decal is located on the right
window of the cab.
1
2
NOTE: It is not necessary to reduce engine
speed for shifts within a range, but is
recommended to increase the life of shift
components.
3. Release the clutch pedal slowly to insure a
smooth transmission engagement.
NOTE: While it is possible to shift on the
fly within a range, under heavy loads the
tractor will probably come to an abrupt
stop before the shift is complete. For your
safety, it is recommended that the
operator throttle down, raise any
implements, and stop before attempting
any shifts.
Figure 2-52
The gearshift decal located behind the
gearshift lever displays the gearshift lever
position during operation (1 - 2 - 3 - 4).
Forward/Reverse Shifting
Shuttle shifting should not be attempted between
the forward and reverse ranges while the tractor
is still moving. Harsh transmission engagement
will occur as well as damage to the range shift
mechanisms in the transmission.
1. Bring the tractor to a complete stop before
shifting the range lever.
2. Select the range desired.
3. Release the clutch pedal slowly to achieve a
smooth start.
2-36
Figure 2-53
SECTION 2 - OPERATION
POWERSHIFT TRANSMISSION OPERATION
The powershift transmission gears are
constantly in mesh. Gear shifting is done by the
use of eight clutches in the transmission.
There are twelve forward speeds and two
reverse speeds.
Clutch selection is controlled by electric solenoid
valves which direct hydraulic oil to the required
clutches. When the operator selects a gear, an
electronically controlled shift system activates
the solenoids required for the specified gear.
The tractor may be started by either moving the
shift lever in the appropriate direction (forward or
reverse) or by using the clutch pedal.
The clutch pedal is used to modulate pressure to
the master clutch allowing the operator to feather
engagement to any of the first seven forward
gears or first reverse gear. Use of the clutch
pedal allows for safe, accurate positioning of the
tractor when hitching up implements or operating
in confined spaces. Optimum inching control,
particularly with heavy loads, is best achieved in
lower gears and by reducing engine RPM.
The powershift transmission controller has
built-in error codes which may appear on the
powershift display of the tractor. Refer to
“Transmission Troubleshooting” in Section 4 for
an explanation and possible causes of the error
codes.
Powershift Transmission Shifting
When the tractor is started, the transmission
display module will display 3N showing that the
shifter is in neutral position and that it is the
default 3rd gear selection. Depressing the clutch
pedal with the tractor stationary will
automatically change the transmission to the first
gear setting. By shifting the shift lever forward
with inching pedal released, the transmission
automatically will go to any operator pre-selected gear from 1st thru 7th gears.
NOTE: When gears 4 thru 7 are selected, the
programming starts the tractor in 3rd gear
and automatically shifts up to the pre-selected gear.
2-37
3N
Figure 2-54
SECTION 2 - OPERATION
The powershift transmission is operated by a
single control lever, 1. Because the
transmission has only one control lever, it is
extremely easy to use.
1
2
NOTE: The control lever is equipped with a
neutral lock button, 2. The control lever
may only be moved to the forward or
reverse positions if the neutral lock button
on the control lever knob is depressed.
Neutral may be selected without
depressing the neutral lock button.
The control lever is used to select forward or
reverse travel and to change transmission
speeds. Move the lever forward for forward
travel and rearward for reverse travel.
IMPORTANT: Shifting the transmission at low
throttle setting and a light draft load will extend
clutch life.
The control lever is also used to make
instantaneous upward or downward gear
ratio changes. Nudge the lever to the right for
upward changes and to the left for downward
changes. (In this context, “nudge” means
move the lever and then release.)
Consecutive gear ratio changes may be
made, either by nudging the lever several
times or by holding the lever to the left or right
and allowing the transmission to shift through
the gear ratios automatically.
NOTE: Reverse gears are displayed as Rl
and R2.
2-38
Figure 2-55
SECTION 2 - OPERATION
Automatic Range Select
Forward/Reverse Shifting
Depressing the clutch pedal while the tractor is
moving causes a neutral condition, allowing the
electronic control to automatically select a
transmission range matching tractor ground
and engine speeds when the clutch pedal is
released. For example, if the tractor is in ninth
gear forward and the operator depresses the
clutch pedal, tractor ground speed will be
reduced but engine RPM will remain the same.
The transmission controller will sense the
reduction in ground speed and automatically
shift the transmission down to a gear that will
match the ground speed when the clutch pedal
is released.
The automatic modulation feature of the
transmission allows the transmission to be
shuttled from a pre--selected forward gear (1st
through 7th gear) to R1 using the control lever.
Shuttling the control lever back to forward will
return the tractor to the pre--selected gear up to
7th gear.
It is not necessary to come to a complete stop for
this shuttle shifting operation.
If the clutch pedal is held down and the tractor
comes to a rolling stop, the transmission
controller will shift the tractor to first gear. The
transmission will not shift to neutral unless the
control lever is put in the neutral position.
2-39
SECTION 2 - OPERATION
DECELERATOR PEDAL
At the lower front of the right console is a
mechanically actuated decelerator pedal, 1,
which can be used to reduce engine speed when
turning or while shifting. When fully depressed,
engine speed will drop to a preset level. If the
pedal is not fully depressed, engine speed will be
reduced proportionally. When the pedal is
released, engine speed will return to the
previous throttle setting.
1
IMPORTANT: Do not release the decelerator
before completing the turn. If the transmission is
in a high gear, the tractor will accelerate quickly,
reducing the time to correct tractor direction.
Figure 2-56
The factory presets the decelerator pedal to
reduce the engine speed to 1400 RPM. See
Section 3 of this manual for adjustment
procedures.
DIFFERENTIAL LOCK
The tractor may be factory equipped with an
electronically controlled front axle differential
lock. This will provide additional tractive effort on
hillsides or wet ground. The switch, 1, is a threeposition momentary switch located on the right
console. To activate, push the front side of the
switch. An indicator light will illuminate on the
warning light bar. The differential lock can be
locked when the tractor is moving or stopped.
IMPORTANT: Do not engage the lock when the
tractor wheels are spinning or when the wheels
are turning at different speeds, such as an end of
the field turn. Drivetrain damage may result.
To disengage the differential lock, push the rear
of the switch down until the indicator light on the
warning light bar turns off. Depressing the brake
pedal will also disengage the differential lock.
Disengage the differential lock when not
required, such as during high speeds and road
travel, turning and parking, or when additional
traction is not needed.
CAUTION: DO NOT USE THE DIFFERENTIAL
LOCK WHEN DRIVING THE TRACTOR ON
ROADS OR STEERING MAY BE IMPAIRED.
2-40
1
Figure 2-57
SECTION 2 - OPERATION
DRIVING THE TRACTOR
WARNING: OBSERVE THE FOLLOWING
PRECAUTIONS WHEN DRIVING THE
TRACTOR:
REDUCE SPEED BEFORE TURNING OR
APPLYING THE BRAKE.
WATCH WHERE YOU ARE GOING ESPECIALLY AT ROW ENDS, ON ROADS,
AND AROUND TREES.
NEVER APPLY THE DIFFERENTIAL
LOCK WHEN TURNING.
USE CAUTION WHEN OPERATING ON
SLOPES.
USE EXTREME CAUTION AND AVOID
HARD APPLICATIONS OF THE TRACTOR
BRAKE WHEN PULLING HEAVY, TOWED
LOADS AT ROAD SPEEDS.
KEEP THE TRACTOR IN GEAR WHEN
GOING DOWNHILL. USE A LOW GEAR
TO MAINTAIN CONTROL WITH MINIMUM
BRAKING.
TOWED LOADS THAT WEIGH MORE
THAN THE WEIGHT OF THE TRACTOR
SHOULD HAVE BRAKES FOR SAFE
OPERATION. ENSURE COMPLIANCE
WITH LOCAL REGULATIONS.
ALWAYS USE THE DRAWBAR FOR
PULL-TYPE WORK. DO NOT PULL FROM
ANY OTHER PART OF THE TRACTOR
SINCE IT MAY TIP OVER.
ALWAYS SIT IN THE DRIVER’S SEAT
WHILE STARTING OR DRIVING THE
TRACTOR.
DIM THE TRACTOR HEADLIGHTS WHEN
MEETING A VEHICLE ON THE HIGHWAY
AT NIGHT. KEEP THE LIGHTS ADJUSTED
SO THEY DO NOT BLIND THE OPERATOR
OF AN ONCOMING VEHICLE.
ALWAYS USE A SLOW-MOVING VEHICLE
(SMV) EMBLEM WHEN TRAVELING ON
PUBLIC ROADS.
ENGAGE THE CLUTCH PEDAL SLOWLY
WHEN DRIVING OUT OF A DITCH, GULLY,
OR UP A STEEP HILLSIDE.
2-41
SECTION 2 - OPERATION
TRACTOR LIGHTING
Rotary Light Switch
3
The rotary light switch is a five-position switch.
Rotating the switch clockwise will activate the
tractor lighting as follows:
1 Off
2 Hazard lights
3 Roadway use
4 Field use
5 Field use
1
Figure 2-58
Position One - “OFF” - No lights will be lit.
NOTE: When the rotary light switch is in
position two, and the multifunction switch is
placed in the right or left turn signal position,
the front and rear roof-mounted amber
warning lights will stop flashing, except for
the front and rear roof-mounted warning
lights on the side to which the turn is being
made. The opposite front and rear mounted
warning lights will remain lit, but will not flash
(as will the extremity lights).
When the rotary light switch is in position
two, depressing the brake pedal will cause
the taillights to get brighter.
WARNING: FOR YOUR PROTECTION, USE
THE HAZARD WARNING LIGHTS WHEN
TRAVELING ON PUBLIC ROADS UNLESS
PROHIBITED BY LAW
2-42
5
2
NOTE: The rotary light switch is wired live at
all times and will work with the ignition key
switch in any position.
Position Two - “Hazard Lights” - The two front
roof-mounted amber lights, 1, and the two rear
roof-mounted amber lights, 2, will flash (as will
the wide transport marker lights). The red
taillights, 3, on each of the rear fenders will be lit.
4
1
2
3
Figure 2-59
SECTION 2 - OPERATION
Position Three - “Roadway Use” - When the
rotary switch is in this position, the front and rear
roof-mounted amber warning lights and the
taillights mounted on the rear fenders will
continue to work as described in position two (as
will the wide transport marker lights). In addition,
the left and right outermost headlights, 1,
mounted above the front grille, will be lit.
1
1
The grille-mounted headlights are adjustable left
and right, and up and down, without loosening
any hardware.
The background lights on the operator’s control
panel behind the engine oil pressure and engine
coolant temperature gauges, as well as the
background light behind the fuel gauge and
powershift gear display, if equipped, mounted on
the right front cab post, will light. The small amber
console light on the right front cab post under the
fuel gauge, and the background light in the
performance monitor display window will also be
lit.
NOTE: If the multifunction switch is put in the
“High/Low Beam” position, the right and left
inner headlights mounted above the front
grille will turn off and on, depending on beam
selection.
When the high beam position is selected, a
blue indicator light will light on the warning
light bar indicating that the high beams are
on.
WARNING: FOR YOUR PROTECTION, USE
THE HAZARD WARNING LIGHTS WHEN
TRAVELING ON PUBLIC ROADS, UNLESS
PROHIBITED BY LAW
2-43
Figure 2-60
SECTION 2 - OPERATION
Position Four - “Field Use” - Rotating the switch
to position four will shut off the front and rear
roof-mounted warning lights and the rear
fender-mounted taillights. The two sets of work
lights, 1, located on the rear fenders will light. The
single work lights, 2, located on the right and left
front fenders will also light. All four headlights
located above the front grille will also be lit.
2
1
All fender-mounted work lights can be adjusted
up and down without loosening any hardware.
The background lights on the operator’s control
panel behind the engine oil pressure and engine
coolant temperature gauges, as well as the
background light behind the fuel gauge and
powershift gear display, if equipped, mounted on
the right front cab post, will light. The small amber
console light on the right front cab post under the
fuel gauge and the background light in the
performance monitor display window will also be
lit.
Figure 2-61
NOTE: The multifunction stalk switch will not
operate the high/low beam when the rotary
light switch is in this position, even though
the blue high beam light indicates high beam.
All other functions of the multifunction stalk
switch operate as if the rotary light switch
was in the “OFF” position.
Position Five - “Field Use” - Rotating the switch to
position five will do the same functions as in
position four, but will also turn on the front and
rear roof-mounted work lights, 1, if the tractor is
equipped with this optional feature.
1
Figure 2-62
2-44
SECTION 2 - OPERATION
Cab Dome Light
1
The cab dome light, 1, mounted on the upper left
side of the cab, has a three-position control
switch, 2. The light switch functions as follows:
2
Center - Light is off.
Bottom - Light is on constantly.
Top - Light is on only when the cab door is open.
Light will turn off when door is closed.
Figure 2-63
Trouble Light
A trouble light, 1, is located in the left, rear corner
of the cab, under the rear shelf. The light has an
5.5 m (18′) cord attached to it that can be reeled
in and out using the crank handle, 2. To remove
the light, flip the lever, 3, downward and pull the
light from the receptacle.
The light switch, 4, is a two-position switch. With
the switch lever in the off position (horizontal),
the light is off. With the switch lever in the on
position (vertical), the light is on as long as the
cab door is open. When the cab door closes, the
light goes out.
The trouble light is used in conjunction with the
cab dome light to illuminate the cab interior when
the cab door is open.
To put the trouble light in the storage position,
reel the cable all the way in with the crank handle,
2, insert the light into its socket, and flip the lever,
3, upward to catch the small knob on the side of
the light.
2-45
4
2
1
3
Figure 2-64
SECTION 2 - OPERATION
Wide Transport Marker Lights
Wide transport marker lights are standard with all
tire options.
The flashing wide transport marker lights
function in unison with the front and rear
roof-mounted warning lights. The lights will flash
in the hazard lights, roadway use, and turn signal
position of the rotary light switch and
multifunction switch.
Figure 2-65
The wide transport marker lights have an
adjustable width with three settings depending
on the size of tires used. It is recommended that
the tube be adjusted so the outside edge does
not extend passed the tire edge. To change the
width of the tube, remove the bolt, 1, from the
tube and reposition it to the desired width.
Reinstall the bolt and tighten.
1
Figure 2-66
When not in use, the wide transport marker lights
can be swung up toward the tractor frame at
approximately either 70° or 90° angle and held in
this position using the existing hardware.
See Section 3 for information on how to adjust
the light to the storage position.
Figure 2-67
2-46
SECTION 2 - OPERATION
Roof-Mounted Work Lights (Optional)
Additional roof-mounted work lights, 1, are
available to provide increased illumination to the
front and back of the tractor. The lights are fully
adjustable side to side, and up and down.
1
The roof-mounted work lights will be activated
when the rotary light switch is in position five.
Figure 2-68
Trailer Socket
1
The trailer socket, 1, is attached to the hydraulic
remote coupler bracket at the rear of the tractor.
It is a seven-pin connector that can be used for a
trailer light hookup or as an outlet to attach the
implement status switch on tractors equipped
with an optional performance monitor.
Figure 2-69
The pins in the socket are identified as follows:
1
Pin 1 - Ground
7
2
Pin 2 - Trailer lights
Pin 3 - Left flasher
6
3
Pin 4 - Implement status switch
Pin 5 - Right flasher
5
Pin 6 - Tail lamps
4
Pin 7 - Auxiliary
19992757
Figure 2-70
2-47
SECTION 2 - OPERATION
There is a male connector, 1, available through
your Buhler Versatile dealer, part #V59624, that
can be purchased to accommodate trailer wire
harnesses.
1
Figure 2-71
2-48
SECTION 2 - OPERATION
ELECTRONIC INSTRUMENT CONTROL SYSTEM
The 2290, 2335, 2360, 2375 and 2425 tractors
are equipped with an Electronic Instrument
Control System designed to provide the operator
with information concerning tractor functions,
calibration procedures to meet specific operation
requirements, and serve as a visual and audio
warning system of malfunctions that have
occurred in the tractor operating systems.
2
1
3
4
The Electronic Instrument Control System is
comprised of four dash-mounted components
and various senders and switches located
throughout the tractor. The four dash-mounted
components are identified as follows:
1 Electronic monitor digit select switch
Figure 2-72
2 Electronic monitor
3 Electronic monitor acknowledge/reset button
4 Electronic monitor rotary select switch
Electronic Monitor Digit Select Switch
The electronic monitor digit select switch is a
five-position switch used to select digits and
units of measurement during the calibration of
the electronic monitor:
Center - neutral position
Up - changes the selected digit upward between
zero and nine. Tapping the switch changes one
value at a time. Holding the switch up will roll the
numbers.
Down - changes the selected digit downward
between nine and zero. Tapping the switch
changes one value at a time. Holding the switch
down will roll the numbers.
Left - selects the next digit position to the left.
Right - selects the next digit position to the right.
The switch does not function during normal
operation of the tractor, but only when the
operator has selected the calibration mode to
program the system for specific operational
requirements.
2-49
Figure 2-73
SECTION 2 - OPERATION
Electronic Monitor
The electronic monitor, 1, is an LCD (Liquid
Crystal Display) that is divided into two sections;
an upper section, 2, and a lower section, 3.
1
2
The upper section of the monitor is dedicated to
providing engine RPM readout at all times during
normal tractor operation, regardless of the
position of the rotary select switch.
3
The lower section of the monitor is dedicated to
providing six different readouts, based on the
position of the rotary select switch during normal
tractor operation.
The electronic monitor also has an audible alarm
which will call the operator’s attention to the
Electronic Instrument Control System.
Electronic
Button
Monitor
Figure 2-74
Acknowledge/Reset
The electronic monitor acknowledge/reset
button is a push-button two-position momentary
switch that allows the operator to acknowledge
information provided by the Electronic
Instrument Control System. The button is also
used during the calibration procedure.
Figure 2-75
Electronic Monitor Rotary Select Switch
The electronic monitor rotary select switch is a
six-position rotary switch used to select LCD
readouts on the lower half of the electronic
monitor.
1 Electrical system voltage
2
1
3
4
5
2 PTO speed
6
3 Tractor ground speed
4 Service interval one
5 Service interval two
6 Tractor accumulated hours
The rotary select switch is active at all times
during normal operation of the tractor.
2-50
Figure 2-76
SECTION 2 - OPERATION
Engine and EICS
The large 4WD tractors are equipped with
electronic engine controls. The Cummins
Engine Company Electronic Fuel Control
System controls the injection of fuel (both
quantity
and
timing).
The
Cummins
electronically engines have a control module, 1,
(N14 engine shown) and related control and
sensing devices are attached to the engine at
various locations.
1
Tractors equipped with these Electronic
controlled engines have additional electronic
control features. Some of the control features
are tied into the EICS of the tractor and
illuminate certain warning light bar lamps when
a condition is present in the engine that the
Operator needs to be aware of. Some of the
control features are passive to the Operator as
far as visual indications (no lights illuminated)
are concerned, but a definite change in engine
performance will be noticed when the condition
is present.
Figure 2-77
Engine Derate and EICS Warning Lights
If an alarm condition exists on the Cummins
electronic engine, the system will usually
(depending on source of alarm condition) react
with a change in engine performance output.
The change in engine performance is called an
engine “derate”. The term derate means the
module will control the fuel system of the tractor
to do one of the following:
1. Lower the engine rpm to a preset level (1400
rpm) and allow no acceleration of the engine
above that level.
2. Lower the horsepower output level of the
engine a preset amount (20% of gross
horsepower) but maintain full range of
engine rpm based on throttle position.
3. Lower the engine rpm to a preset level (1400
rpm) and allow no acceleration of the engine
above that level AND lower the horsepower
output level of the engine a preset amount
(20% of gross horsepower).
2-51
SECTION 2 - OPERATION
The throttle lever, 1, in the cab of the tractor is
attached to a potentiometer (POT) in the right
hand side console. The POT sends an
electronic signal (via the tractor wire harness) to
the controller on the side of the engine, telling it
where to set the engine speed. By moving the
throttle lever, the POT signal is changed and the
module reacts accordingly to set engine speed
to match the lever position. During an engine
speed derate (engine speed reduced by the
engine control module to 1400 rpm), the module
will not recognize or react to a throttle position
above the 1400 rpm POT signal. If the throttle
lever is moved above the 1400 rpm position, the
engine will not speed up.
1
Figure 2-78
The engine control module controls the timing of
and the amount of fuel that is injected into the
engine via the electronic fuel injectors. This is
called fuel metering and is the basis of power
derate. Power derate will occur within a
specified time span (e.g. low engine oil
pressure) or will be gradual based on severity of
the alarm condition present on the tractor (e.g.
engine coolant temperature). The engine will
now perform to a modified horsepower curve
(20% less then maximum gross horsepower),
with the end result being that it will no longer pull
the same load at the same ground speed or at
the same working depth. The tractor may have
to be downshifted or the implement raised out of
the ground to continue operation (or both).
Electronic Engine
The Cummins engine control module is also tied
to three indicator lights on the warning light bar
of the EICS. The Module controls illumination of
these lights:
Figure 2-79
1. Engine Coolant Level
2. Yellow Engine Warning Light
3. Red Engine Warning Light
The EICS and Cummins control module
combine to protect the engine from damage by
informing the operator that a particular condition
exists using the lights, performance derate or
both lights and derate.
1
2
3
Figure 2-80
2-52
SECTION 2 - OPERATION
NORMAL OPERATION OF THE
ELECTRONIC INSTRUMENT CONTROL
SYSTEM
The following is a description of how the
Electronic Instrument Control System will work
at engine start-up and field operation. The
information is based on a tractor that has no
errors indicated and is properly calibrated.
Key to the “RUN” Position - Engine Off
Turning the key to the “RUN” position without
starting the tractor will cause the electronic
monitor to display all the LCD segments for one
second and the audible alarm to sound twice.
The display will then show zero and the engine
symbol in the upper half of the module. The
lower half of the module will display a readout
based on the position of the rotary select switch.
When the ignition switch turns to the “RUN”
position without the engine running, the system
also checks certain sensors and the operation
of the warning light bar. The warning light bar
activates these lights:
Figure 2-81
•
Park Brake
•
Safety Belt
•
Alternator Output
•
Engine Coolant Level
•
Engine Oil Pressure
•
Hydraulic Oil Temperature
•
Transmission Lube Pressure
•
Transmission Lube Filter
•
Hydraulic Lube Filter
•
Yellow Engine Warning
•
Red Engine Warning
After several seconds, the system turns off the
Engine
Coolant Level,
Hydraulic Oil
Temperature, Transmission Lube Filter,
Hydraulic Lube Filter, Safety Belt, Yellow Engine
Warning, and Red Engine Warning lamps.
With the key in the “RUN” position, four lights will
remain on until the switch moves to the
“ENGINE START” position:
•
Park Brake
•
Alternator Output
•
Engine Oil Pressure
•
Transmission Lube Pressure
2-53
SECTION 2 - OPERATION
Key to the “ENGINE START” Position Engine Cranking
Key in the “RUN” Position - Engine
Running
When the key turns to the “ENGINE START”
position, the engine starts to crank and the four
lights illuminated with the switch in the “RUN”
position remain on.
Once the engine is running, the Engine Oil
Pressure and Transmission Lube Pressure
lamps will go out as soon as sufficient pressure
builds up to cancel the warnings. The alternator
output lamp will also go out when the alternator
begins to charge. The park brake goes out when
the park brake is released. Any other illuminated
light indicates a problem.
NOTE: In low, ambient temperatures the
transmission lube filter and the hydraulic filter
by-pass light may stay on until the oil reaches
operating temperature.
At first key “ON” the following warning lamps will illuminate
After a few seconds only the following warning lamps should remain on
PARK BRAKE MUST BE ENGAGED
FOR THIS LAMP TO BE ON.
ALTERNATOR NOT CHARGING
LAMP WILL REMAIN ON UNTIL
ENGINE IS RUNNING
ENGINE COOLANT LEVEL LAMP
WILL ONLY REMAIN ILLUMINATED
IF THE ENGINE COOLANT LEVEL IS
LOW.
ENGINE OIL PRESSURE LAMP
WILL REMAIN ON UNTIL ENGINE IS
RUNNING
TRANSMISSION LUBE PRESSURE
MUST REMAIN ILLUMINATED. IF
LAMP DOES NOT TURN ON CHECK
TRANSMISSION LUBE PRESSURE
SWITCH ON TRANSMISSION.
2-54
RED ENGINE WARNING LAMP WILL REMAIN
ILLUMINATED ONLY IF AN ENGINE FAULT
CODE IS ACTIVE. REFER TO ENGINE
DIAGNOSTIC SECTION IF THIS LAMP
REMAINS ON.
YELLOW ENGINE WARNING LAMP WILL
REMAIN ILLUMINATED ONLY IF AN ENGINE
FAULT CODE IS ACTIVE. REFER TO ENGINE
DIAGNOSTICS SECTION IF THIS LAMP
REMAINS ON.
SECTION 2 - OPERATION
Engine Running - Normal Operation
There are six different modes the electronic
monitor will be in depending on the position of the
rotary select switch.
The upper half of the display will always show
engine RPM no matter what position the rotary
select switch is set at. The bottom half of the
display will show a readout based on the position
of the rotary select switch.
The readout will appear as follows for the six
positions of the rotary select switch:
NOTE: See “Tractor Ground Speed” position
for operation of the Electronic Instrument
Control System at speeds greater than 20
km/h (12.5 MPH) when the rotary select
switch is in positions other than “Tractor
Ground Speed.”
Electrical System Voltage - The lower half of
the display will show the condition of the battery
voltage to the tenth of a volt and will also show
the word “VOLTS” in the upper right corner of the
lower display.
The readout value can be as much as one to
one-and-a-half volts higher than with the engine
off.
Figure 2-82
2-55
SECTION 2 - OPERATION
PTO Speed - The lower half of the display will
show the speed at which the PTO shaft is
turning based on the engine RPM. The letters
“PTO” will also be displayed in the lower right
corner of the lower display.
The readout value shown for PTO speed is a
factor of engine speed and is automatically
calculated by the electronic monitor. There is
no sensor on the tractor reading actual PTO
output speed.
Figure 2-83
Tractor Ground Speed - The lower half of the
display will show the true ground speed (if
equipped with optional radar unit) and the
radar symbol, or calculated ground speed
(unit less radar option). The display will read
km/h or MPH on the right side of the lower
display based on the unit of measurement
selected by the operator (see “Calibrating the
Electronic Control Instrument System” later in
this section for unit of measurement
selection).
Figure 2-84
If the tractor is equipped with the optional
radar unit, the radar symbol, 1, will also
appear on the lower display indicating that the
value shown is a true ground speed. If the
radar symbol is not shown, then the ground
speed is being calculated by the monitor
based on a sensor signal on the transmission
output shaft.
1
The value shown will be to the tenth of the unit
of measurement, MPH or km/h, as selected
by the operator.
Figure 2-85
2-56
SECTION 2 - OPERATION
NOTE: The Electronic Instrument Control
System has a feature to alert the operator
of tractor ground speeds over 20 km/h
(12.5 MPH). If at any time the tractor
ground speed reaches 20 km/h (12.5
MPH), the lower portion of the monitor will
display the ground speed and MPH or
km/h symbol no matter which position the
rotary select switch is in.
Figure 2-86
The operator can switch the lower portion
of the monitor back to its former display by
pressing the acknowledge/reset button.
The former readout will return to the
monitor and the symbol “km/h” or “MPH”
will flash to remind the operator that the
tractor is traveling at a speed of 20 km/h
(12.5 MPH) or greater.
Figure 2-87
Service Interval One - The purpose of the
service interval one position is to allow the
user to preprogram the hour value to perform
a specific tractor service. An example of this
would be a 50-hour lubrication service. The
user can preprogram the monitor alarm to
indicate that 50 hours have been
accumulated on the tractor and lubrication is
required. Any value above ten hours can be
selected and programmed into the monitor
(see “Calibrating the Electronic Instrument
Control System” later in this section for
information on how to program the service
interval one setting).
Usually the service interval one position is
used for low-hour lubrication checks.
2-57
SECTION 2 - OPERATION
When the service interval one position is
selected, the lower half of the display will
show a “service one” symbol and the hours
accumulated since the last service was
performed on the tractor. If the user presses
the acknowledge/reset button, the lower half
of the display will show the setting at which
service interval one has been programmed.
Pushing the acknowledge/reset button again
will return the display back to the accumulated
hours for service interval one.
NOTE: If the rotary select switch is in any
other position except “Service Interval
One,” the service interval one symbol will
flash in the lower portion of the monitor
when the accumulated hours on the
tractor are within ten hours of the preset
interval. This alerts the operator that
service interval one maintenance will be
required in ten hours or less.
Service Interval Two Position - The purpose
of the service interval two position is to allow
the user to preprogram an hour value to
perform a specific tractor service, but different
than service interval one. An example of this
would be a 250-hour maintenance check. The
user can preprogram the monitor alarm to
indicate that 250 hours have accumulated on
the tractor and maintenance is required. Any
value above ten hours can be selected and
programmed into the monitor (see
“Calibrating the Electronic Instrument Control
System” later in this section for information on
how to program the service interval two
setting).
Usually the service interval two position would
be used for high-hour maintenance checks.
2-58
Figure 2-88
SECTION 2 - OPERATION
When the service interval two position is
selected, the lower half of the display will
show a “service two” symbol and the hours
accumulated since the last service was
performed on the tractor. If the user presses
the acknowledge/reset button, the lower half
of the display will show the setting at which
service interval two has been programmed.
Pushing the acknowledge/reset button again
will return the display back to the accumulated
hours for service interval two.
NOTE: If the rotary select switch is in any
other position except “Service Interval
Two,” the service interval two symbol will
flash in the lower portion of the monitor
when the accumulated hours on the
tractor are within ten hours of the preset
interval. This alerts the operator that
service interval two maintenance will be
required in ten hours or less.
Figure 2-89
Tractor Accumulated Hours - The tractor
accumulated hours position on the rotary
select switch has two functions:
Function one is to show total tractor hour
usage. The lower half of the display will show
a whole number (without tenths) and an
hourglass symbol in the lower right corner.
This display of a whole number will remain on
the lower portion of the monitor for ten
seconds any time the rotary select switch is
turned from any of the other five positions
available or if the tractor is in the tractor
accumulated hour position and the tractor is
started. The highest whole number possible
to accumulate on total tractor hours is 19999.
Once this value is reached, the display will
reset to zero.
2-59
Figure 2-90
SECTION 2 - OPERATION
The second function of the tractor
accumulated hours position is to display a
whole number value (to the tenth digit)
reflecting the total number of hours
accumulated on the tractor up to 1999.9. This
allows the user to keep track of tractor usage
accumulated
during
different
tractor
operations. This will appear on the lower half
of the display along with the hourglass symbol
after the total tractor hours display
disappears. At any time, the operator can
press the acknowledge/reset button and zero
the display to begin recounting hours for a
specific function. This will not affect total
tractor accumulated hours. Unless the
operator does it manually, the display will
automatically revert back to zero after it has
reached 1999.9 hours.
2-60
Figure 2-91
SECTION 2 - OPERATION
Entering the Calibration Mode
CALIBRATING THE ELECTRONIC
INSTRUMENT CONTROL SYSTEM
It will be necessary to put the system into the
calibration mode. To do this, the ignition must be
in the “OFF” position. Place the rotary select
switch in the desired position to be calibrated.
Press and hold the acknowledge/reset button.
Continue to hold the acknowledge/reset button
and turn the ignition to the “RUN” position. The
display monitor will go through its normal initial
test sequence. Once this is done, release the
acknowledge/reset button.
As detailed in “Normal Operation of the
Electronic Control Instrument System” (earlier
in this section), certain values must be
preprogrammed into the control module for
proper operation and maximum benefit.
A detailed description of proper programming
and calibration of the module follows. It is not
necessary to follow the steps in the order shown
to properly program the module. Select the area
to be calibrated and follow the instructions
given. The only required step is “Entering the
Calibration Mode.” If the tractor is being
calibrated for the first time, use the following
steps in the order shown.
The monitor is now in the calibration mode and
ready to be programmed. No matter which of the
nine items is to be calibrated, the upper portion
of the monitor will always display the words
“SET UP” along with a flashing display based
upon the position of the rotary select switch.
This tells the user that he is in the calibration
mode for that particular function.
All programming and calibration is done with the
key switch in the “RUN” position and the engine
off.
NOTE: At any time, the calibration mode can
be exited by the user by simply turning the
ignition to the “OFF” position and then
turning the ignition back to the “RUN”
position. This will place the system back into
the normal operate mode. The words “SET
UP” will disappear from the upper portion of
the monitor display.
There are nine possible items to calibrate when
in one of the three rotary select switch positions:
Tractor Ground Speed Position
1. Setting the Tire Rolling Radius
2. Programming Units of Ground Speed
Measurement (MPH or km/h)
Service Interval One Position
3. Service Interval One Reset
4. Service Interval One Alarm Reset
Service Interval Two Position
5. Service Interval Two Reset
6. Service Interval Two Alarm Reset
Tractor Accumulated Hours Position
7. Setting the Final Drive Ratio (FDR)
8. Setting the Transmission Output Shaft Gear
Profile (GEAR) N14 engine only
9. Setting the Engine Flywheel Ring Gear
Profile (Eng)
2-61
SECTION 2 - OPERATION
1. Setting the Tire Rolling Radius
NOTE: Setting the tire radius is only
necessary when the tractor is not
equipped with the Tractor Performance
Monitor option. If the tractor being
calibrated
is
equipped
with
the
performance monitor, skip this step and
proceed to “Programming Units of
Ground Speed Measure.”
A. If the tractor is not equipped with the
optional Tractor Performance Monitor, the
upper portion of the monitor will flash
“RAD” with “SET UP” displayed when the
calibration mode is first entered. The lower
portion of the monitor will have a number
displayed with the tenth digit (0.1) flashing.
B. Without a Tractor Performance Monitor
radar unit installed on the tractor, it is
necessary to measure the rolling radius of
the tires that are installed on the tractor
and program this value into the system for
accurate displays of ground speed.
Figure 2-92
C. To measure the rolling radius of the tire, the
tractor must have its duals/triples installed,
if equipped, and be properly ballasted and
inflated (See “Ballasting” later in this
section). Park the tractor on a flat surface
and apply the park brake. Take a tape
measure and accurately measure the
distance from the center of the level plug,
1, (located next to the axle oil level sight
gauge) to the ground on the front and rear
axle. The measurement must be taken
from the exact center of the level plug.
Record these measurements.
1
19988494
Figure 2-93
2-62
SECTION 2 - OPERATION
D. Add the two measurements taken and
divide by two to give an average rolling
radius value. Round this value to the
nearest tenth (0.1).
EXAMPLE
Axle #1
87 cm (34.25″)
Axle #2
86 cm (33.75″)
Total
173 cm (68.00″) ÷ 2 = 86 cm
(34.00″)
Rounded Totals 86 cm (34.0″)
E. To place the value into the monitor, use the
digit select switch to select the necessary
numbers. The monitor will accept values
between 50.8 cm and 127.0 cm (20.0″ and
50.0″).
F. Push the acknowledge/reset button again
to enter the value into the monitor’s
memory. The display will now go to
“Programming Units of Ground Speed
Measurement.” If no further calibration is
needed, turn the ignition to the “OFF”
position. If further calibration is needed in
other areas, select the area to be
calibrated with the rotary select switch and
proceed as detailed for that switch
position.
2-63
SECTION 2 - OPERATION
2. Programming Units of Ground Speed
Measurement
A. With the upper portion of the monitor
flashing “SEL” and “UNIT,” and displaying
the word “SET UP,” select the unit of
measurement desired (MPH or km/h) in
the lower portion of the monitor. To do this,
move the monitor select switch up or
down.
B. Moving the digit select switch upward will
make the MPH symbol become steady in
the lower display. This means that the unit
of measurement for tractor ground speed
will be measured in miles per hour (MPH).
The “km/h” will flash.
Moving the digit select switch downward
will make the km/h symbol become steady.
This means that the unit of measurement
will be measured in kilometers per hour.
The “MPH” will now flash.
C. After the unit of measurement has been
selected, press the acknowledge/reset
button once to enter the selection into the
monitor’s memory.
NOTE: On tractors without the optional
Tractor Performance Monitor, the
display will now return to “Setting the
Tire Radius.” On tractors with the
optional Tractor Performance Monitor,
the display will now return to step 1 of
“Programming Units of Ground Speed
Measurement.”
All possible calibration numbers for the
ground speed position of the rotary select
switch are now entered. If no further
calibration is needed, turn the ignition to
the “OFF” position. If further calibration is
needed in other areas, select the area to
be calibrated with the rotary select switch
and proceed as detailed for that switch
position.
2-64
Figure 2-94
SECTION 2 - OPERATION
3. Service Interval One Reset
Follow this procedure after the Electronic
Instrument Control System has notified you
that service interval one should be performed.
Go through the scheduled service and then
reset the accrued hours to zero.
A. The upper portion of the monitor will flash
“PUSH,” “RE,” and “SET” along with
displaying “SET UP.” The bottom portion
will show the current hour meter reading
accrued since the last service interval one
reset.
Figure 2-95
B. Press the acknowledge/reset button once.
The upper portion of the monitor will flash
“RE” and “SET” along with displaying “SET
UP.” The bottom portion of the display will
show zero and has been reset. The
monitor will now begin to recount the hours
accumulated for the next service interval
one.
If no further calibration is needed, turn the
ignition to the “OFF” position. If further
calibration is needed in other areas, select
the area to be calibrated with the rotary
select switch and proceed as detailed for
that switch position.
Figure 2-96
2-65
SECTION 2 - OPERATION
4. Service Interval One Alarm Reset
NOTE: If any changes are made to the
alarm, the accrued hours that have been
recorded for service interval one will be
reset to zero automatically during the
alarm
reset
procedures.
It
is
recommended that the alarm setting be
changed once the service interval one
setting has been reached and needs to be
reset.
A. If you want to change the hour interval at
which the audible alarm indicates service
interval one is required, follow the steps
detailed in “Service Interval One Reset”
and push the acknowledge/reset button
again.
B. The upper portion of the monitor will flash
“ALR” and “SET” while displaying “SET
UP.” The lower portion of the monitor will
show the current hour level setting at
which the alarm will sound with the last
digit flashing. Use the digit select switch to
program the value between 10 and 1500
hours at which the alarm will notify the
operator to perform service interval one.
C. Push the acknowledge/reset button again
to enter the value into the monitor’s
memory. The display will now return to
“Service Interval One Reset” mode.
All possible programming for the service
interval one position is now complete. If no
further calibration is needed, turn the
ignition to the “OFF” position. If further
calibration is needed in other areas, select
the area to be calibrated with the rotary
select switch and proceed as detailed for
that switch position.
2-66
Figure 2-97
SECTION 2 - OPERATION
5. Service Interval Two Reset
Follow this procedure after the Electronic
Instrument Control System has notified you
that service interval two should be performed.
Go through the scheduled service and then
reset the accrued hours to zero.
A. The upper portion of the monitor will flash
“PUSH,” “RE,” and “SET” along with
displaying the word “SET UP.” The bottom
portion will show the current hour meter
reading accrued since the last service
interval two reset.
Figure 2-98
B. Press the acknowledge/reset button once.
The upper portion of the monitor will flash
“RE” and “SET” along with displaying “SET
UP.” The bottom portion of the display will
show zero and has been reset. The
monitor will now begin to recount the hours
accumulated for the next service interval
two.
If no further calibration is needed, turn the
ignition to the “OFF” position. If further
calibration is needed in other areas, select
the area to be calibrated with the rotary
select switch and proceed as detailed for
that switch position.
Figure 2-99
2-67
SECTION 2 - OPERATION
6. Service Interval Two Alarm Reset
NOTE: If any changes are made to the
alarm, the accrued hours that have been
recorded for service interval two will be
reset to zero automatically during the
alarm
reset
procedures.
It
is
recommended that the alarm setting be
changed once the service interval two
setting has been reached and needs to be
reset.
A. If you want to change the hour interval at
which the audible alarm indicates that
service interval two is required, follow the
steps detailed in “Service Interval Two
Reset” and push the acknowledge/reset
button again.
B. The upper portion of the monitor will flash
“ALR” and “SET” along with displaying the
words “SET UP.” The lower portion of the
monitor will show the current hour level
setting at which the alarm will sound with the
last digit flashing. Use the digit select switch
to program the value between 10 and 1500
hours at which the alarm will notify the user
to perform service interval two.
C. Push the acknowledge/reset button again
to enter the value into the monitor’s
memory. The display will now return to
“Service Interval Two Reset” mode.
All possible programming for the service
interval two position is now complete. If no
further calibration is needed, turn the
ignition to the “OFF” position. If further
calibration is needed in other areas, select
the area to be calibrated with the rotary
select switch and proceed as detailed for
that switch position.
2-68
Figure 2-100
SECTION 2 - OPERATION
7. Setting the Final Drive Ratio
NOTE: This value is set when the machine
is built. It does not require operator setup,
and
should
never
be
changed.
Instructions are provided here only in the
event the value was inadvertently
changed.
A. The upper portion of the monitor will flash
“FDR” and “SET,” with “SET UP”
displayed when the calibration mode is
first entered. The lower portion of the
display will have the number displayed
with the tenth digit (0.1) flashing.
B. The final drive ratio should be set at 25.8.
Figure 2-101
C. To place the correct value into the monitor,
use the digit select switch to select the
necessary numbers. The monitor will
accept a value of 25.8.
D. Push the acknowledge/reset button to
enter the value into the monitor’s memory.
The display will now go to “Setting the
Transmission Output Shaft Gear Profile.”
If no further calibration is needed, turn the
ignition switch to the “OFF” position. If
further calibration is needed in other
areas, select the area to be calibrated with
the rotary select switch and proceed as
detailed for that switch position.
2-69
SECTION 2 - OPERATION
8. Setting the Transmission Output Shaft
Gear Profile
NOTE: Operation not applicable to
tractors equipped with QSM 11 engines.
NOTE: This value is set when the machine
is built. It does not require operator setup,
and
should
never
be
changed.
Instructions are provided here only in the
event the value was inadvertently
changed.
A. The upper portion of the monitor will flash
“GEAR” and “SET,” with “SET UP”
displayed. The lower portion of the display
will show 30 or 60 depending on current
programmed selection.
Figure 2-102
B. The output shaft gear profile is set
depending on the transmission installed
in the tractor:
12 x 4 Quad Shift III - 30
12 x 2 Powershift - 60
C. To place the correct value into the monitor,
use the digit select switch. Move the
switch to “UP” for 60, or “DOWN” for 30.
D. Push the acknowledge/reset button to
enter the value into the monitor’s memory.
The display will now go to “Setting the
Engine Flywheel Ring Gear Profile.” If no
further calibration is needed, turn the
ignition switch to the “OFF” position. If
further calibration is needed in other
areas, select the area to be calibrated with
the rotary select switch and proceed as
detailed for that switch position.
2-70
SECTION 2 - OPERATION
9. Setting the Engine Flywheel Ring Gear
Profile
NOTE: This value is set when the machine
is built. It does not require operator setup,
and
should
never
be
changed.
Instructions are provided here only in the
event the value was inadvertently
changed.
A. The upper portion of the monitor will flash
“ENG” and “SET” with “SETUP”
displayed. The lower portion of the display
will show 103 or 12, depending on current
programmed selection.
B. Use the following chart to determine
which “ENG” number should be
programmed into the EIC:
Engine
“ENG”
Number
2290, 2335,
2375
QSM11
12
2360, 2425
N14
103
Model
Number
Figure 2-103
12
C. To place the correct value into the monitor,
use the digit select switch. Move the
switch up for 103, or down for 12.
D. Press the Acknowledge/Reset button to
enter the value into the monitor’s memory.
The display will now return to “Setting the
Final Drive Ratio.”
All possible programming for the hours
position is now complete. If no further
calibration is needed, turn the ignition to
the “OFF” position.
Figure 2-104
2-71
SECTION 2 - OPERATION
AUDIBLE/VISUAL ALARMS OF THE
ELECTRONIC INSTRUMENT CONTROL
SYSTEM
Low Transmission Lube Pressure
The Electronic Instrument Control System will
notify the operator that the transmission
lubrication pressure is below 21 kPa (3 PSI) and
the quantity of oil entering the transmission is not
adequate to properly lubricate the internal
components. See “Transmission” in Section 4
for possible causes of low transmission lube
pressure. Failure to correct the low pressure
condition can cause serious damage to the
transmission. The following description details
the reaction of the electronic monitor and audible
alarm in the event of low transmission lube
pressure:
With the engine running and transmission lube
pressure below 21 kPa (3 PSI), the transmission
pressure warning light, 1, on the warning light bar
will illuminate. There will be a six-second delay
before the audible alarm sounds a solid tone for
four seconds. The upper portion of the monitor
will flash “CHK” “LMPS,” indicating the operator
should look at the light bar to determine the
function causing the alarm to sound, i.e.,
transmission lube pressure. The lower portion of
the monitor will continue to display whatever is
selected on the rotary select switch.
The operator can cancel the audible alarm and
the “CHK” “LMPS” display on the upper portion of
the monitor by pressing the acknowledge/reset
button once. The transmission lubrication light
on the warning light bar will stay lit until the low
pressure condition is corrected. The audible
alarm and “CHK” “LMPS” display will not return
until the ignition switch is turned to the “OFF”
position and the tractor is restarted.
Transmission lube pressure is considered a
non-critical alarm function and will not cause the
electronic monitor to go into the “STOP” mode or
cause the automatic shutdown to activate.
ATTENTION: It is important that the operator
shut the tractor off and find out the cause of the
low transmission lube pressure light indication.
Take corrective action immediately to prevent
damage to the transmission.
2-72
1
Figure 2-105
SECTION 2 - OPERATION
Transmission Lubrication Filter Bypass
The Electronic Instrument Control System will
notify the operator that the transmission
lubrication filter is in the bypass condition and oil
entering the transmission is not passing through
the filter element. The transmission will still
receive lubrication oil, but the oil will not be
filtered, and may contain contaminants. See
“Transmission Troubleshooting” in Section 4 for
possible causes of filter bypass. Failure to
correct the filter bypass condition may cause
damage to the transmission components. The
following description details the reaction of the
electronic monitor and audible alarm in the event
of transmission lubrication filter bypass:
With the engine running, and the transmission
lube filter in the bypass condition, the
transmission lube filter warning light, 1, on the
warning light bar will illuminate. There will be a
six-second delay before the audible alarm
sounds a solid tone for four seconds. The upper
portion of the monitor will flash “CHK” “LMPS,”
indicating the operator should look at the light bar
to determine the function causing the alarm to
sound, i.e., transmission lube filter bypass. The
lower portion of the monitor will continue to
display whatever is selected on the rotary select
switch.
The operator can cancel the audible alarm and
the “CHK” “LMPS” display on the upper portion of
the monitor by pressing the acknowledge/reset
button once. The transmission lube filter bypass
light on the warning light bar will stay lit until the
bypass condition is corrected. The audible alarm
and “CHK” “LMPS” display will not return until the
ignition switch is turned to the “OFF” position and
the tractor is restarted.
Transmission lube filter bypass is considered a
non-critical alarm function, and will not cause the
electronic monitor to go into the “STOP” mode or
cause the automatic shutdown to activate.
ATTENTION: It is important that the operator
shut the tractor off and find out the cause of the
transmission lube filter bypass light indication.
Take corrective action immediately to prevent
damage to the transmission.
2-73
1
Figure 2-106
SECTION 2 - OPERATION
Hydraulic System Filter Bypass
The Electronic Instrument Control System will
notify the operator that the hydraulic system filter
is in the bypass condition and oil entering the
hydraulic system is not passing through the filter
element. The hydraulic system will still receive
oil, but the oil will not be filtered and may contain
contaminants.
See
“Hydraulic
System
Troubleshooting” in Section 4 for possible
causes of filter bypass. Failure to correct the filter
bypass condition may cause damage to the
hydraulic system components. The following
description details the reaction of the electronic
monitor and audible alarm in the event of
hydraulic system filter bypass:
With the engine running and the hydraulic
system filter in the bypass condition, the
hydraulic system filter warning light, 1, on the
warning light bar will illuminate. There will be a
six-second delay before the audible alarm
sounds a solid tone for four seconds. The upper
portion of the monitor will flash “CHK” “LMPS,”
indicating that the operator should look at the
light bar to determine the function that is causing
the alarm to sound, i.e., hydraulic system filter
bypass. The lower portion of the monitor will
continue to display whatever is selected on the
rotary select switch.
The operator can cancel the audible alarm and
the “CHK” “LMPS” display on the upper portion of
the monitor by pressing the acknowledge/reset
button once. The hydraulic system filter bypass
light on the warning light bar will stay lit until the
bypass condition is corrected. The audible alarm
and “CHK” “LMPS” display will not return until the
ignition switch is turned to the “OFF” position and
the tractor is restarted.
Hydraulic system filter bypass is considered a
non-critical alarm function and will not cause the
electronic monitor to go into the “STOP” mode or
cause the automatic shutdown to activate.
ATTENTION: It is important that the operator
shut the tractor off and find out the cause of the
hydraulic system filter bypass light indication.
Take corrective action immediately to prevent
damage to the hydraulic system components.
2-74
1
Figure 2-107
SECTION 2 - OPERATION
Low Engine Oil Pressure
(below 100 kPa (15 psi))
The Electronic Instrument Control System will
notify the operator that the engine lubrication oil
pressure has dropped to a point that will no
longer provide adequate lubrication to the
engine. Simultaneously, the module of the
Cummins engine will begin an engine derate
sequence that will protect the engine from harm
due to low oil pressure. The engine may be
receiving oil, but it may not be providing
sufficient lubrication causing possible engine
damage. See “Engine” in Section 4 of the
Operator’s manual for possible causes of low
engine oil pressure. Failure to correct the
low--pressure condition can cause serious
damage to the engine. The following description
details the reaction of the EICS, Cummins
Module and audible alarm in the event of low
engine oil pressure (below 100 kPa (15 psi)):
With the engine running, and the engine oil
pressure at the low pressure point (100 kPa (15
psi)), the oil pressure warning light, 1, will
illuminate on the warning light bar. The audible
alarm will beep rapidly for 10 seconds with the
word “STOP” flashing in the upper portion of the
monitor. The lower portion of the monitor will
flash all of the symbols related to the rotary
select switch. Any numerical display in the lower
portion of the monitor, regardless of the position
of the rotary select switch, will be gone. This is
called the pre--alarm sequence of the monitor.
During the 10--second time period of the
pre--alarm sequence, the Operator can press
the acknowledge/reset button on the dash
panel. This will stop the EICS in the pre--alarm
stage and keep it from progressing into the full
critical alarm stage. The engine will continue to
run, but the EICS will stay in the pre--alarm
stage. This will allow the Operator to move the
tractor from an undesirable location and make
repairs.
1
Figure 2-108
ATTENTION: If the low engine oil pressure
warning sequence is stopped in the pre--alarm
stage, the engine will continue to run while not
receiving adequate amounts of lubrication.
Serious engine damage can result from running
the engine in this condition. It is imperative that
the low engine oil pressure condition be
investigated as soon as possible so as to avoid
serious engine damage.
2-75
SECTION 2 - OPERATION
If the Operator does not press the
acknowledge/reset button during the pre--alarm
sequence, the EICS will progress to the full
critical alarm stage. The EICS will display a
constant “STOP” message in the upper portion
of the display and the lower portion will display
all symbols related to the rotary select switch.
The audible alarm will become a steady, solid
tone. If the automatic shutdown system is
enabled on the tractor, the engine will shut off
automatically. If the automatic shutdown system
is not enabled, the tractor will continue to run.
See “Automatic Shutdown Conversion” in the
Operator’s manual for information on how to
enable and disable this system. Pressing the
acknowledge/reset button will not clear the
display or audible alarm after the EICS has
reached the critical alarm stage.
The module will sense the low oil pressure
condition and begin an engine speed/engine
power derate. The module will lower the engine
rpm to a preset level (1400 rpm) allowing no
acceleration of the engine above that level AND
lower the horsepower output of the engine a
preset amount (20% of gross horsepower) as
long as the low engine oil pressure condition
exists.
Both the speed and engine power derate will be
gradual and simultaneous. Elapsed time of the
speed and power derate from maximum
horsepower and 2100 engine rpm to the 1400
rpm and 20% reduced horsepower output level
will
be
approximately
25
seconds
(approximately 40 rpm/second, and 1%
horsepower/second). This reduced speed and
power output mode will allow the Operator to
move the tractor from an undesirable location
and make repairs.
ATTENTION: If the tractor electrical system is
not converted to the automatic shut down mode,
the engine will continue to run while not
receiving adequate amounts of lubrication.
Serious engine damage can result from running
the engine in this condition. It is imperative that
the low engine oil pressure condition be
investigated as soon as possible so as to avoid
serious engine damage
The Operator cannot cancel or interrupt the
derate sequence from occurring on the engine.
The module does not recognize activation of,
nor is it tied into the EICS acknowledge/reset
button on the dash of the tractor.
If the tractor is shut down and then restarted,
and the alarm condition still exists, (low engine
oil pressure) the EICS and module will repeat
the alarm and derate sequence. If the tractor is
restarted and the alarm condition has been
corrected, the tractor will return to normal
operation. If the tractor is not shut down, and the
alarm condition is corrected, the tractor will
return to normal operation without having to
shut it off and restart it.
Whether the Operator chooses to stop the EICS
in the pre--alarm stage, or allow it to progress to
the critical alarm stage (not converted to
automatic shut down) the module on the engine
will be simultaneously reacting to the low engine
oil pressure signal it is receiving from its own
sending unit circuit.
NOTE: If the Operator allows the EICS to
progress to the critical alarm stage and has
the tractor converted to automatic shut
down, the engine will shut off without the
module causing a derate to the engine.
There will not be enough time for the module
to react from the pre--alarm sequence to the
critical alarm sequence and shut down.
2-76
SECTION 2 - OPERATION
Low Engine Oil Pressure (140--210 kPa
(20--30 psi)) at Engine Speeds
Above 1200 rpm
The Module on the Cummins engine will react to
a condition of low engine oil pressure (140 -- 210
kPa (20--30 psi)) when the engine speed is
above 1200 rpm. The quantity of oil in the lube
circuit is not adequate to properly protect the
engine components at the selected engine
speed (normal oil pressure for engine speeds
above 1200 rpm is 210 -- 345 kPa (30--50 psi)).
See “Engine” in Section 4 of the Operator’s
manual for possible causes of low engine oil
pressure. Failure to correct the low oil pressure
condition can cause serious damage to the
engine. The following description details the
reaction of the EICS, Cummins Module and
audible alarm in the event of low engine oil
pressure when engine speed is above 1200
rpm:
With the engine running at a speed above 1200
rpm and the engine lubrication pressure
between 140 -- 210 kPa (20--30 psi), no warning
lights will be illuminated on the EICS of the
tractor.
1
The module, 1, will sense the low oil pressure
condition and begin an engine speed/engine
power derate. The module will lower the engine
rpm to a preset level (1400 rpm) allowing no
acceleration of the engine above that level AND
lower the horsepower output of the engine a
preset amount (20% of gross horsepower) as
long as the low engine oil pressure condition
exists.
Figure 2-109
Both the speed and engine power derate will be
gradual and simultaneous. Elapsed time of the
speed and power derate from maximum
horsepower and 2100 engine rpm to the 1400
rpm and 20% reduced horsepower output level
will
be
approximately
25
seconds
(approximately 40 rpm/second, and 1%
horsepower/second). This reduced speed and
power output mode will allow the Operator to
move the tractor from an undesirable location
and correct the concern.
ATTENTION: The engine will continue to run
while not receiving adequate amounts of
lubrication. Serious engine damage can result
from running the engine in this condition. It is
imperative that the low engine oil pressure
condition be investigated as soon as possible so
as to avoid serious engine damage.
2-77
SECTION 2 - OPERATION
If engine oil pressure continues to drop and
reaches 100 kPa (15 psi), the EICS will react as
detailed in “Low Engine Oil Pressure (below 100
kPa (15 psi)) at Any Engine Speed” in this
manual.
If the tractor is shut down and then restarted, and
the alarm condition still exists, (low engine oil
pressure at engine speeds above 1200 rpm) the
module will repeat the derate sequence. If the
tractor is restarted and the alarm condition has
been corrected, the tractor will return to normal
operation. If the tractor is not shut down, and the
alarm condition is corrected, the tractor will
return to normal operation without having to shut
it off and restart it.
The Operator cannot cancel or interrupt the
derate sequence from occurring on the engine.
The module does not recognize activation of,
nor is it tied into the EICS acknowledge/reset
button on the dash of the tractor.
2-78
SECTION 2 - OPERATION
Low Coolant Level
The Electronic Instrument Control System will
notify the operator that the engine coolant level
has dropped 4.5 L (5.3 US qts) below the
acceptable fill level in the radiator.
Simultaneously, the module of the Cummins
engine will begin an engine derate sequence
that will protect the engine from harm due to low
engine coolant. A low coolant level condition
can overheat the engine, causing extensive
engine damage. See “Engine” in Section 4 of
the Operator’s manual for possible causes of
low engine coolant. Failure to correct the low
engine coolant condition can cause serious
damage to the engine. The following description
details the reaction of the EICS and Cummins
module in the event of low engine coolant level:
With the engine running and the coolant level
4.5 L (5.3 US qts) below the acceptable fill level
in the radiator, the low engine coolant light, 1, on
the warning light bar will illuminate. The EICS
will not react in any other fashion (no error
message, no audible alarm). Pressing the
acknowledge/reset button on the dash will not
cancel the low coolant level lamp on the EICS.
The light will only turn off when the coolant level
returns to the proper level.
The module will also sense the low engine
coolant level and begin an engine power derate.
Engine speed will not be affected by the derate
in power, and the Operator will have full range of
engine speed available using the hand throttle.
The module will lower the horsepower output of
the engine a preset amount (20% of gross
horsepower) as long as the low engine coolant
condition exists.
1
Figure 2-110
The engine power derate will be gradual as long
as the condition exists on the tractor and the
engine is running. Elapsed time of the power
derate from maximum horsepower to the derate
output level will be approximately 25 seconds
(approximately 1% horsepower/second). This
reduced power output mode will allow the
Operator to move the tractor from an
undesirable location in order to make repairs.
2-79
SECTION 2 - OPERATION
The Operator cannot cancel or interrupt the
derate sequence from occurring on the engine.
The module does not recognize activation of,
nor is it tied into the EICS acknowledge/reset
button on the dash of the tractor.
tractor is restarted and the alarm condition has
been corrected, the tractor will return to normal
operation. If the tractor is not shut down, and the
alarm condition is corrected, the tractor will
return to normal operation without having to shut
it off and restart it.
If the tractor is shut down and then restarted, and
the alarm condition still exists on the tractor (low
engine coolant level), the EICS and module will
repeat the alarm and derate sequence. If the
2-80
SECTION 2 - OPERATION
High Engine Coolant Temperature
The Electronic Instrument Control System will
notify the operator that the engine coolant
temperature has reached a point that will no
longer provide adequate cooling, and engine
overheating may occur. Simultaneously, the
module of the Cummins engine will begin an
engine derate sequence that will help protect
the engine from harm due to high engine coolant
temperature. See “Engine” in Section 4 of the
Operator’s manual for possible causes of high
engine coolant temperature. Failure to correct
the high engine coolant temperature can cause
serious damage to the engine components. The
following description details the reaction of the
EICS and Cummins module in the event of high
engine coolant temperature:
With the engine running, and the coolant
temperature at 103_C (218_ F), the module will
sense the high engine coolant temperature and
begin an engine power derate. Engine speed
will not be affected by the derate in power, and
the Operator will have full range of engine speed
available using the hand throttle. The engine
power derate will be gradual as long as the high
coolant temperature condition exists and the
engine is running. The derate will occur in
stages based on the temperature of the engine
coolant. For every degree of coolant
temperature above 103_C (218_ F), the power
level of the engine will be reduced 2% of gross
engine horsepower, to a maximum of 20%
power derate at 103_C (218_ F). An example of
this would be an engine that is operating at
106_C (222_ F). The coolant temperature is
3_C (4_ F) over 103_C (218_ F), therefore the
derate in power is 8%.
Electronic Engine
Figure 2-111
At this point, two choices for continuing
operation of the tractor are available. First, the
Operator can reduce the load on the engine by
shifting down and/or raising the implement out
of the ground. Secondly, the Operator can stop
the tractor forward motion and allow the engine
to run with no load on it.
2-81
SECTION 2 - OPERATION
Doing either one of these two items will allow the
engine coolant temperature to drop below 106_C
(222_ F), where normal horsepower level will
resume.
If the Operator takes no action to cool the engine
down (reduce load or stop tractor motion and
run engine unloaded), the engine coolant
temperature will continue to increase. The
module will continue the proportional derate of
2% power decrease for each 1_C (1_ F) of
coolant temperature above 106_C (222_ F).
When the engine coolant temperature reaches
109_C (228_ F), the module will have reached a
full 20 % derate level for engine power output.
The engine coolant temperature light, 1, will
illuminate. The audible alarm will beep rapidly
for 10 seconds with the word “STOP” flashing in
the upper portion of the monitor. The lower
portion of the monitor will flash all of the symbols
related to the rotary select switch. Any
numerical display in the lower portion of the
monitor, regardless of the position of the rotary
select switch, will be gone. This is called the
pre--alarm sequence of the monitor. During the
10--second time period of the pre-alarm
sequence, the Operator can press the
acknowledge/reset button on the dash panel.
This will stop the EICS in the pre-alarm stage
and keep it from progressing into the full critical
alarm stage. The engine will continue to run, but
the EICS will stay in the pre-alarm stage. The
Operator can cool the engine down by reducing
the load or by stopping the tractor motion and
allow the engine to run unloaded.
1
Figure 2-112
ATTENTION: If the high engine coolant
temperature warning sequence is stopped in
the pre--alarm stage and the engine is continued
to be run in a loaded condition, the coolant
temperature will continue to raise above 109_C
(228_ F). Serious engine damage can result
from running the engine in this condition. It is
imperative that the high coolant temperature
condition be corrected and investigated as soon
as possible so as to avoid serious engine
damage.
2-82
SECTION 2 - OPERATION
If the Operator does not press the
acknowledge/reset button during the pre--alarm
sequence, the EICS will progress to the full
critical alarm stage. The EICS will display a
constant “STOP” message in the upper portion
of the display and the lower portion will display
all symbols related to the rotary select switch.
The audible alarm will become a steady, solid
tone. If the automatic shutdown system is
enabled on the tractor, the engine will shut off
automatically. If the automatic shutdown system
is not enabled, the tractor will continue to run.
See “Automatic Shutdown Conversion” in the
Operator’s manual for information on how to
enable and disable this system. Pressing the
acknowledge/reset button will not clear the
display or audible alarm after the EICS has
reached the critical alarm stage.
ATTENTION: If the tractor electrical system is
not converted to the automatic shut down mode,
the engine will continue to run at a high engine
coolant temperature. Serious engine damage
can result from running the engine in this
condition. It is imperative that the high coolant
temperature condition be corrected and
investigated as soon as possible so as to avoid
serious engine damage.
If the tractor is shut down and then restarted, and
the alarm condition still exists on the tractor (High
Engine Coolant Temperature), the EICS and
module will repeat the alarm and derate
sequence. If the tractor is restarted and the alarm
condition has been corrected, the tractor will
return to normal operation. If the tractor is not shut
down, and the alarm condition is corrected, the
tractor will return to normal operation without
having to shut it off and restart it.
2-83
SECTION 2 - OPERATION
Electrical System High/Low Voltage
The Electronic Instrument Control System will
notify the operator that the electrical system of
the tractor is operating at a voltage too high or too
low for normal operation. The following operating
conditions will cause the voltage warning system
to actuate:
A. The tractor running and more than 15 volts is
measured in the electrical system.
B. The tractor running above 1500 RPM and less
than 12.5 volts is measured in the electrical
system.
C. The tractor running at any speed and less than
11.5 volts is measured in the electrical
system.
See “Electrical System Troubleshooting” in
Section 4 for the proper steps to follow to find a
possible electrical system high/low voltage
problem. Failure to correct this problem may
cause damage to the electrical system. The
following description details the reaction of the
electronic monitor and audible alarm in the event
of electrical system high/low voltage:
With the engine running and any of the above
three conditions existing in the electrical system,
the lower portion of the monitor will flash
“VOLTS” along with the numerical value of the
electrical system voltage. The audible alarm will
sound a steady tone for four seconds. Even if the
rotary select switch is not in the electrical system
voltage position, the lower portion of the monitor
will still revert to the “VOLTS” display. The upper
portion of the monitor will continue to display
engine speed. The alternator output warning
light on the warning light bar will not illuminate.
The electronic monitor is not tied in specifically to
alternator output. It is reading total electrical
system voltage. The warning light is dedicated to
alternator output and will only illuminate if the
alternator stops charging.
2-84
Figure 2-113
SECTION 2 - OPERATION
The operator can cancel the audible alarm and
the “VOLTS” only display on the lower portion of
the monitor by pressing the acknowledge/reset
button. The lower portion of the monitor will
revert back to its previous display based on the
position of the rotary select switch, but “VOLTS”
will flash in the lower portion of the monitor along
with the selected display. The audible alarm will
not return until the ignition switch is turned to the
“OFF” position and the tractor is restarted.
High/low electrical system voltage is considered
a non-critical alarm function and will not cause
the electronic monitor to go into the “STOP”
mode or cause the automatic shutdown to
activate.
ATTENTION: It is important that the operator
shut the tractor off and find out the cause of the
high/low electrical system voltage indication.
Take corrective action immediately to prevent
damage to the electrical system.
2-85
Figure 2-114
SECTION 2 - OPERATION
Fuel Level
The Electronic Instrument Control System will
notify the operator that the fuel level in the fuel
tanks has reached 1/12 of total fuel capacity 1/12
equals 68.1 L (18 gals.) and that tractor refueling
is required.
The system also has a feature to assist the
operator during refueling procedures. An audible
indicator for fuel level alerts the operator that the
tanks are 3/4 and 7/8 full.
The following description details the reaction of
the electronic monitor, low fuel level indicator
light, and audible alarm during a low fuel level
situation and tractor refueling operations:
With the key in the “RUN” position, and the fuel
level at 1/12 capacity in the tanks, the low fuel
level warning light, 1, on the warning light bar will
illuminate. There will be a six-second delay
before the audible alarm sounds a solid tone for
four seconds. The upper portion of the monitor
will flash “LOW” “FUEL”. The lower portion of the
monitor will continue to display whatever is
selected on the rotary select switch.
The operator can cancel the audible alarm and
the “LOW” “FUEL” display on the upper portion of
the monitor by pressing the acknowledge/reset
button once. The low fuel level light on the
warning light bar will stay lit until the low fuel level
is corrected. The audible alarm and “LOW”
“FUEL” display will not return until the ignition
switch is turned to the “OFF” position and then
returned to the “RUN” position.
Low fuel level is considered a non-critical alarm
function and will not cause the electronic monitor
to go into the “STOP” mode or cause the
automatic shutdown to activate.
ATTENTION: It is important that the operator
refuel the tractor as soon as possible.
2-86
1
Figure 2-115
SECTION 2 - OPERATION
During refueling of the tractor, when the ignition
is in the “RUN” position and the engine off, and
the fuel level reaching 3/4 capacity, the audible
alarm will sound raidly. The top portion of the
monitor will flash the words “FULL” “3/4”
indicating the fuel tanks are nearing capacity.
3/4
Figure 2-116
Continued filling of the tanks to the 7/8 level will
cause the audible alarm to sound a solid tone
continuously and the upper portion of the monitor
will flash “FUEL” “FULL”. This audible and visual
alarm system will allow the operator to monitor
the refueling procedure and not overfill the tank.
CAUTION: ALWAYS SHUT THE ENGINE OFF
DURING REFUELING PROCEDURES.
The operator can cancel the audible alarms and
the “FUEL” “3/4” and “FUEL” “FULL” displays on
the upper portion of the monitor at any time by
pressing the acknowledge/reset button once. If
the acknowledge/reset button is not pressed, the
tone and display will continue until the ignition is
turned to the “OFF” position and then turned
back to the “RUN” position or the
acknowledge/reset button is pressed.
2-87
Figure 2-117
SECTION 2 - OPERATION
Transmission Speed Sensor Failures
The Electronic Instrument Control System will
notify the operator that the transmission speed
sensor or the wiring to the sensor has an open or
short circuit. See “Electrical Troubleshooting” in
Section 4 for the proper steps to follow to find a
possible open or short circuit. The following
description details the reaction of the electronic
monitor and audible alarm in the event of an open
or short in the transmission speed sensor circuit.
When the ignition is in the “RUN” position and an
open circuit is detected, the lower portion of the
monitor will flash “OPEN” and display the MPH or
km/h symbol. The audible alarm will sound
continuously. This will happen no matter what
position the rotary select switch is in. The upper
portion of the monitor will continue to display
engine RPM.
If the operator presses the acknowledge/reset
button, the audible alarm will turn off and the
lower portion of the monitor will display “OPEN”
steadily. If the ignition is turned to the “OFF”
position and then turned back to the “RUN”
position, the process will repeat itself until the
open circuit is corrected.
Figure 2-118
When the ignition is in the “RUN” position and a
short circuit is detected, the lower portion of the
monitor will flash “SHCR” and display the MPH or
km/h symbol. The audible alarm will sound
continuously. The upper portion of the monitor
will continue to display engine RPM.
If the operator presses the acknowledge/reset
button, the audible alarm will turn off and the
lower portion of the monitor will display the word
“SHCR” steadily. If the ignition is turned to the
“OFF” position and then turned back to the
“RUN” position, the process will repeat itself until
the short circuit is corrected.
Figure 2-119
2-88
SECTION 2 - OPERATION
A transmission speed sensor open or short
circuit is considered a non-critical alarm function
and will not cause the electronic monitor to go
into the “STOP” mode or cause the automatic
shutdown to activate.
ATTENTION: It is important that the operator
shut the tractor off and find the cause of the open
or short circuit to maintain proper operation of the
Electronic Instrument Control System.
Park Brake Alert
The Electronic Instrument Control System will
notify the operator that the park brake has been
left on while the tractor is moving. In the lower
gear ranges, the tractor has enough power to
over power the park brake if it is not fully
released. Failure to release the park brake
completely can cause damage to the brake and
related driveline components. The following
description details the reaction of the electronic
monitor and audible alarm in the event the park
brake is engaged with the tractor moving:
NOTE: Any time the park brake is not fully
released, the park brake indicator light on the
warning light bar will be illuminated. The
indicator light is completely independent of
the electronic monitor and audible alarm.
When the tractor is moving and the park brake
partially or fully engaged, the audible alarm will
sound rapidly and the upper portion of the
monitor will flash “PARK” and “BRAK.” The lower
portion of the monitor will continue to display
whatever is selected on the rotary select switch.
Pressing the acknowledge/reset button will
cancel the audible alarm but the “PARK” “BRAK”
display will remain on the upper portion of the
monitor. Releasing the park brake completely
will cancel the “PARK” “BRAK” display, the
audible alarm, and the park brake warning light.
A park brake alert is considered a non-critical
alarm function and will not cause the electronic
monitor to go into the “STOP” mode or cause the
automatic shutdown to activate.
ATTENTION: It is important that the operator
release the park brake fully so that there is no
damage to the brake or driveline components.
2-89
Figure 2-120
SECTION 2 - OPERATION
Electronic Monitor Rotary Select Switch
Failures
The Electronic Instrument Control System will
notify the operator that the rotary select switch
has an open circuit. The select switch will not
function in any of the calibration modes or normal
operation positions. Refer to “Electrical
Troubleshooting” in Section 4 for possible
causes of an open circuit. The following
description details the reaction of the electronic
monitor in the event of an open circuit on the
rotary select switch:
With the ignition in the “RUN” position and an
open circuit detected on the rotary select switch,
the lower portion of the monitor will flash “SEL”
and “OPEN.” No audible alarm will sound.
Pressing the acknowledge/reset button will not
clear the “SEL” “OPEN” display. The upper
portion of the monitor will continue to show
engine RPM. The “SEL” “OPEN” display will be
activated in any position of the rotary select
switch if an open circuit is detected.
Figure 2-121
2-90
SECTION 2 - OPERATION
Engine Overspeed Condition
The engine control module monitors engine
speeds (rpm) during normal tractor operation.
The module will protect the engine from an
overspeed condition anytime it senses engine
speed above 2630 rpm. Overspeed can
damage
internal
engine
components
(especially valve train components), causing
severe failure of the engine.
An example of this would be a tractor that is
towing an implement and operating at the full
throttle position (e.g. transporting the tractor
over the road). If the tractor was to go down an
incline, the implement could begin to push the
tractor, causing the drivetrain to overspeed the
engine. If the engine speed reaches 2630 rpm,
the module will illuminate the red engine
warning light, 1, on the EICS light bar. The
module will also cut power off to the fuel
solenoid valve on the fuel pump so as to slow the
engine down and prevent damage to internal
components. When the engine speed drops
below 2630 rpm, the red engine warning light
will go out. When engine speed drops below
2000 rpm, the module will re-apply power to the
fuel solenoid valve, and the engine will return to
normal operation.
2630
13.5
1
Figure 2-122
The Operator cannot cancel or interrupt the
engine overspeed protection sequence from
occurring on the engine. The module does not
recognize activation of, nor is it tied into the
EICS acknowledge/reset button on the dash of
the tractor.
WARNING: KEEP THE TRACTOR IN GEAR
WHEN GOING DOWNHILL. DO NOT SHUT
THE TRACTOR ENGINE OFF, OR SHIFT THE
TRANSMISSION TO NEUTRAL. USE A LOW
GEAR TO MAINTAIN CONTROL WITH
MINIMUM BRAKING. NEVER COAST THE
TRACTOR DOWNHILL.
WARNING: TOWED LOADS THAT WEIGH
MORE THAN THE WEIGHT OF THE
TRACTOR SHOULD HAVE BRAKES FOR
SAFE OPERATION. ENSURE COMPLIANCE
WITH LOCAL REGULATIONS.
2-91
SECTION 2 - OPERATION
Yellow and Red Engine Warning Lights
The EICS has two engine lamps located in the
lower right hand corner of the warning light bar.
The module on the side of the engine controls
these lights.
The yellow engine warning light, 1, will
illuminate when the module senses non--critical
electrical faults. Non--critical faults are related to
the engine electrical components that
communicate with the module. These
components receive data from or send data to
the module, which is used to control the engine
performance. When a fault is detected in one of
the electrical component circuits, the module
will notify the Operator by illuminating the yellow
engine warning lamp. Examples of electrical
faults that can cause the yellow lamp to
illuminate are (but not limited to):
-- Loss of ground speed signal into the
module from the tractor EICS
-- Low/High voltage at specific
connectors of the module
1
pin
Figure 2-123
-- Open/Shorted circuits connected to the
module
The red engine warning light, 1, will illuminate
when the module senses critical faults. Critical
faults are related to the module itself (internal
hardware) or to the engine electrical
components that communicate with the module.
These components receive data from or send
data to the module, which is used to control the
engine performance. When a fault is detected in
the module hardware or one of the electrical
component circuits, the module will notify the
Operator by illuminating the red engine warning
lamp. Examples of electrical faults that can
cause the red lamp to illuminate are (but not
limited to):
-- Failure of the internal microprocessor of
the module
1
-- High/Low voltage signal from the throttle
POT inside the tractor cab
Figure 2-124
-- Loss of engine speed signal into the
module
2-92
SECTION 2 - OPERATION
The module will illuminate the appropriate
engine warning light (yellow or red) based on the
source of the fault, and will take additional action
by adjusting the performance of the engine by
one of following methods:
If the tractor is shut down and then restarted,
and the electrical fault still exists on the tractor
(non--critical or critical), the module will repeat
the warning light and derate sequence. If the
tractor is restarted and the fault has been
corrected, the tractor will return to normal
operation. If the tractor is not shut down, and the
alarm condition is corrected, the tractor will
return to normal operation without having to
shut it off and restart it.
-- Illuminate engine warning light only, no
performance modification
-- Illuminate engine warning light, perform
speed derate only
Important: Whenever an engine warning light
(yellow or red) is illuminated on the EICS of the
tractor shut the tractor down and contact your
Buhler Versatile Dealer to investigate the cause
of the concern. Your Buhler Versatile Dealer will
coordinate the repair of the engine via an
authorized Cummins Engine Company
dealer/distributor.
-- Illuminate engine warning light, perform
power derate only
-- Illuminate engine warning light, perform
speed and power derate
The appropriate engine warning light will remain
illuminated and the performance derate will
remain in effect until the system fault is
corrected. The Operator cannot cancel or
interrupt the derate sequence from occurring on
the engine. The module does not recognize
activation of nor is it tied into the EICS
acknowledge/reset button on the dash of the
tractor.
2-93
SECTION 2 - OPERATION
ADDITIONAL FEATURES OF THE
ELECTRONIC INSTRUMENT CONTROL
SYSTEM
Automatic Shutdown Conversion - Each
tractor is manufactured so that the operator can
convert the Electronic Instrument Control
System to shut the tractor engine off. Tractors
are assembled with the engine shutdown feature
disabled. The operator has the option of enabling
the feature at any time.
If the operator desires to enable the automatic
shutdown feature, proceed as follows:
1. Unhook the battery cables from the batteries.
This will prevent any possibility of an
accidental short while making the conversion.
See Section 3 for information on how to
disconnect the cables.
NOTE: Disconnecting the batteries will
not remove any calibration numbers from
the memory of the Electronic Instrument
Control System. If the tractor is equipped
with an optional Tractor Performance
Monitor (TPM), the TPM may have to be
reset.
2. Remove the cover, 1, from the electrical
control panel located directly behind the
operator’s seat.
1
Figure 2-125
2-94
SECTION 2 - OPERATION
3. Locate the small pin connector, 1, for the
shutdown circuit. The pin connector is
between the 3-amp turn signal fuse and the
10-amp tail lamp fuse. Remove the 3-amp
fuse and 10-amp fuse from their locations to
give better access to the small pin connector.
1
Figure 2-126
4. Using a small pair of needle-nose pliers, pull
straight upward on the small pin connector, 1,
and reinstall it so the front two pins are
connected together. The rear pin will now be
bare. Reinstall the 3-amp and 10-amp fuses.
1
Figure 2-127
5. Locate the shutdown relay position, 1, ( the
fourth relay from the right), and install a relay
(part #9706720 purchased from your Buhler
Versatile dealership). Press the relay firmly
into the electrical control panel.
6. Reinstall the cover onto the electrical control
panel.
1
7. Reconnect the battery cables.
To disable the shutdown feature, follow this
procedure in reverse order.
Figure 2-128
2-95
SECTION 2 - OPERATION
External Shutdown Conversion - Each tractor
is manufactured so that the operator can convert
the Electronic Instrument Control System to shut
the tractor engine off via a signal from an outside
source (i.e., a towed implement that is powered
by a separate engine). If the tractor Electronic
Instrument Control System receives a signal
from an external source, the Electronic
Instrument Control System will react in the same
manner as detailed in “Low Engine Oil Pressure ”
or “High Engine Coolant Temperature”
If the external shutdown conversion is made on
the tractor and a shutdown situation is present,
the electronic monitor will not inform the operator
whether it is a tractor function or an external
signal causing the shutdown. The operator must
look at the warning lights and gauges on the dash
to determine the cause.
NOTE: Only low engine oil pressure or high
engine coolant temperature will cause a
tractor related automatic shutdown.
Tractors are assembled with the external engine
shutdown feature disabled. The operator has the
option of enabling the feature at any time.
If the operator desires to enable the external
automatic shutdown feature, proceed as follows:
1. Unhook the battery cables from the batteries.
This will prevent any possibility of an
accidental short while making the conversion.
See Section 3 in this manual for information
on how to disconnect the cables.
NOTE: Disconnecting the batteries will
not remove any calibration numbers from
the memory of the Electronic Instrument
Control System. If the tractor is equipped
with the optional Tractor Performance
Monitor (TPM), the TPM may have to be
reset.
2-96
SECTION 2 - OPERATION
2. Locate the two-terminal bus bar, 1, on the
right side of the electronic control panel.
1
Figure 2-129
3. Attach the wire leading out to the external
source to the right terminal of the bus bar, 1,
(the terminal is marked “Shutdown External”).
1
4. Route the wire out to the external source
through the cover plate at the right rear corner
of the cab. See “Installation of Cab-Mounted
Accessories” for correct wire routing.
5. The external end of the wire must be hooked
to a grounded sending unit of some type to
provide a ground source for the Electronic
Instrument Control System. An example of
this would be an oil pressure sending unit or a
coolant temperature sending unit on an
external engine.
NOTE: Any type of external grounding
source will work, but there must be a good
ground connection between the towed
implement and the tractor frame. Just
using the drawbar pin may not be
adequate, and a safety chain is suggested
for additional ground contact.
6. Reinstall the cover onto the electrical control
panel.
7. Reconnect the battery cables.
To disable the shutdown feature, follow this
procedure in reverse order.
2-97
Figure 2-130
SECTION 2 - OPERATION
External Alarm Control Conversion - Each
tractor is manufactured so that the Electronic
Instrument Control System can be converted to
inform the operator, via the electronic monitor
and audible alarm, that there is a problem with an
outside source (i.e., a towed implement that is
powered by a separate engine).
If the tractor Electronic Instrument Control
System receives a signal from an external
source, the upper portion of the electronic
monitor will flash “EXT” “ALR”. The audible alarm
will beep rapidly. The lower portion of the monitor
will continue to display whatever is selected on
the rotary select switch.
The operator can cancel the audible alarm and
the “EXT” “ALR” display by pressing the
acknowledge/reset button. The audible alarm
and display will return if the external signal is
received by the monitor again.
NOTE: On tractors equipped with a Tractor
Performance Monitor (TPM), the external
alarm feature will activate when the “% slip”
or “Time of Day” alarm settings are reached.
See the TPM operation section of this manual
for further information.
When the external audible alarm control is
enabled and a signal is received by the
Electronic Instrument Control System from an
outside source, the automatic shutdown feature
will not be engaged.
Tractors are assembled with the external alarm
control feature disabled. The operator has the
option of enabling the feature at any time.
If the operator desires to enable the external
alarm control feature, proceed as follows:
1. Unhook the battery cables from the batteries.
This will prevent any possibility of an
accidental short while making the conversion.
See Section 3 for information on how to
disconnect the cables.
NOTE: Disconnecting the batteries will
not remove any calibration numbers from
the memory of the Electronic Instrument
Control System. If the tractor is equipped
with the optional Tractor Performance
Monitor (TPM), the TPM may have to be
reset.
2-98
Figure 2-131
SECTION 2 - OPERATION
2. Locate the two-terminal bus bar on the right
side of the electronic control panel.
1
Figure 2-132
3. Attach the wire leading out to the external
source to the left terminal of the bus bar, 1,
(the terminal is marked “Audio External”).
4. Route the wire out to the external source
through the cover plate at the right rear corner
of the cab (See “Installation of Cab-Mounted
Accessories” in Section 1 for correct wire
routing).
5. The external end of the wire must be hooked
to a grounded sending unit of some type to
provide a ground source for the Electronic
Instrument Control System. An example of
this would be an oil pressure sending unit or a
coolant temperature sending unit on an
external engine.
NOTE: Any type of external grounding
source will work, but there must be a good
ground connection between the towed
implement and the tractor frame. Just
using the drawbar pin may not be
adequate, and a safety chain is suggested
for additional ground contact.
6. Reinstall the cover onto the electrical control
panel.
7. Reconnect the battery cables.
To disable the shutdown feature, follow this
procedure in reverse order.
NOTE: There is a secondary source for
connecting an external signal to the external
alarm control system. This source is the
number four pin (the bottom post) on the
four-post bus bar located in the right front
cab post, behind the gauge cowling. See
“Installation of Cab-Mounted Accessories”
in Section 1 for more information on the four
post bus bar.
2-99
1
Figure 2-133
SECTION 2 - OPERATION
Engine Diagnostics
The control module on the engine has
diagnostic features built into it that allow an
authorized Cummins dealer/distributor to
access and review fault codes that have
occurred in the engine.
Each time a fault occurs in the system, the
module records it in memory. The Cummins
dealer/distributor can retrieve these codes to
assist in diagnosing an engine failure. Two
methods of error code retrieval are possible:
Flashing Light Retrieval: Your Buhler Versatile
Dealer can use a shorting connector located on
the fuse and relay panel at the rear of the tractor
cab.
The
connector,
1,
labeled
“DIAGNOSTICS”, is located in the lower right
hand corner of the panel. When activated, the
shorting connector will cause the yellow engine
warning light to flash once, then the red engine
warning light (both lights located on EICS light
bar) to flash in a predetermined sequence
based on the fault code resident in the memory
of the module. The yellow engine warning light
will flash once more to signify the end of the error
code sequence. To cycle to the next error code
press the cruise +/-- switch once, and the engine
lights will begin a new flash sequence for the
next code. Continue this way until error codes
start to repeat, signifying no new codes are
present. The flashing light sequences are then
decipherable to fault codes that tell the Buhler
Versatile Service Technician the concern with
the engine. The flashing light method of fault
code retrieval is very similar to Morse code
communication between the engine and the
service technician.
Figure 2-134
Echekt/Compulinkt/Insitet
Connection:
Authorized Cummins dealers/distributors have
access to hand held diagnostic tools that can be
connected to the electronic module via a data link
connector resident on the engine wire harness.
The Echek/Compulink/Insite diagnostic tools
allow the technician to read engine fault code
information
directly,
download
software
upgrades to the module and make modifications
to existing software in the module.
Regardless of the method of fault code retrieval,
the electronic engine control system makes it
easy for the service technician to diagnose
engine concerns and make repairs to the cause
of the fault code.
Do not attempt to enter the diagnostic mode of the
module without direct involvement from your Buhler
Versatile Dealer or Cummins dealer/distributor.
ATTENTION: Diagnostic procedures on the engine
are to be completed only by an authorized Cummins
dealer/distributor or Buhler Versatile Dealer.
Figure 2-135
2-100
SECTION 2 - OPERATION
TRACTOR PERFORMANCE MONITOR (Optional)
DESCRIPTION AND OPERATION
The optional Tractor Performance Monitor
automatically begins to work as the ignition
switch is turned to the “RUN” position.
Transmission Output Shaft Sensor - Actual
wheel speed.
The system provides operating information on:
The system consists of the following items:
Area/Hour - Acres (or Hectares) per hour based
on last five seconds of operation.
Control Console - LCD display and three
touch-sensitive switches.
Area - Total accumulated area (since the last
reset of AREA display).
Radar Ground Speed Sensor- Determines
true ground speed.
Slip - Wheel slip in percent (%) with alarm.
Implement Status Switch - Determines
whether implement is engaged.
Each function readout can be displayed by
touching the respective switch (except alarms)
at any time.
2-101
SECTION 2 - OPERATION
Implement Status Switch
The implement status switch, 1, installed at a
location on the 3-point hitch or on the drawbar
implement, indicates to the console whether the
implement is up (area accumulation off) or down
(area accumulation on).
1
The console displays an “UP” message which
should be synchronized with the implement
position.
Figure 2-138
OPERATOR’S CONTROLS
The various functions of the touch-sensitive
switches of the performance monitor are detailed
in the following description. Read through this
description completely before attempting to
use the switches.
Each of the three touch-sensitive switches is
multifunctional, performing one function in the
OPERATE mode and another function in the
SET UP mode.
The SET UP functions are indicated on the
switch by symbols in the lower half and
OEPRATE functions in the upper half.
NOTE: Whenever the ignition switch is
turned from “OFF” to “RUN,” the Tractor
Performance Monitor will automatically be in
the OPERATE mode.
Each correct touch operation of any switch will
be accompanied by a short beep from the alarm.
2-103
SECTION 2 - OPERATION
Caret 1/ Pos. A
Acre accumulator
This displays the acres covered in XXX.X format
based on the implement width and the ground
speed. The display increments as long as the
implement status is down. When the implement
status is up, the acres value stops accumulating
and flashes the value when the acre
accumulator caret is selected.
Caret 2/ Pos. B
Acres per hour
This displays the calculated acres covered per
hour in XXX.X format based on the implement
width and ground speed. This display updates
as long as the implement status is down. When
the implement status is up, the acre per hour
value will display “.0” and an alarm will sound for
3 seconds to indicate that the implement is up.
Caret 3/ Pos. C
Distance Accumulator
(Feet)
This accumulates feet from the radar input in an
XXXX format. To start and stop the distance
accumulator, select a distance accumulator
caret function and press the start/stop touch
switch. To reset the distance accumulator press
and hold the start/stop touch switch until the
LCD blinks and displays “0”. The distance
accumulators (feet and meters) are tied
together, so starting, stopping, or resetting
either distance accumulator does the same
action on the other caret function. The
accumulated
distance
flashes
when
accumulation stops.
Caret 4/ Pos. D
Percent slip
This displays the percentage difference
between the radar input and the sensor input
from the transmission in XXXX format. The slip
caret flashes when the slip is greater than the
slip alarm percentage regardless of what
function is being viewed. When the caret is
flashing, a continuous alarm sounds until the
slip drops below the slip alarm percentage.
While in the alarm condition, other carets can
still selected and viewed; however the slip caret
will continue to flash until the slip drops below
the slip alarm value. The default alarm
percentage is 15%.
Caret 5/ Pos. E
Distance Accumulator
(Meters)
This accumulates meters from the radar in an
XXXX format. To start and stop the distance
accumulator, select a distance accumulator
caret function and press the start/stop touch
2-105
switch. To reset the distance accumulator press
and hold the start/stop touch switch until the
LCD blinks and displays “0”. The distance
accumulators (feet and meters) are tied
together, so that starting, stopping, or resetting
either distance accumulator does the same to
the other caret function. The accumulated
distance will flash when accumulation has
stopped.
Caret 6/ Pos. F
Hectares per hour
This displays the calucated hectares covered
per hour in XXX.X format based on the
implement width and ground speed. This
display updates as long as the implement status
is down. When the implement status is up the
hectare per hour value will display “.0” and an
alarm will sound for 3 seconds to indicate that
the implement is up.
Caret 7/ Pos. G
Hectare accumulator
This will display the hectares covered in XXX.X
format based on the implement width and the
current speed in XXX.X format. This display will
increment as long as the implement status is
down. When the implement status is up the
hectares value will stop accumulating and flash
that value when the hectare accumulator caret
is selected.
Slip Alarm
When the percent slip is above the alarm
percent setting a continuous audible alarm
sounds and the slip caret flashes until the
percent slip drops below the alarm value. If the
percent slip caret is selected during an alarm
condition, the current slip value will be displayed
and updated. The maximum value that can be
displayed is 30%.
NOTE: Whether in Percent Slip mode or not,
when the alarm percentage is reached, the TPM
will activate the alarm.
Zeroing Slip Function
To set the zero slip, select the percent slip caret
and drive the tractor at a constant speed in a
zero slip condition then press and hold the reset
touch switch for three seconds until the LCD
blinks.
Acres Accumulator Zeroing Function
To reset the acres accumulators to zero, select
the acres area accumulator and press and hold
the reset touch switch for three seconds until the
LCD blinks and displays “.0”. This resets the
acre area accumulator to zero.
SECTION 2 - OPERATION
IMPLEMENT STATUS SWITCH
The implement status switch is to be mounted to
the tractor for 3-point hitch applications, or to the
implement for drawbar applications, to provide
an “on/off” signal to the Tractor Performance
Monitor (TPM) to start and stop the calculation of
the area covered.
Figure 2-140
Examples of various mounting arrangements
are shown:
A. Tractor Equipped with 3-Point Hitch - The
implement status switch is attached to the
fender and connected to the lift arm.
Figure 2-141
B. Remote Mount to an Implement - The
implement status switch is attached to the
linkage that lifts the implement.
Instructions for mounting the switch are
provided with the kit. Tractors with a factoryinstalled TPM will have the switch shipped
with it.
Figure 2-142
2-110
SECTION 2 - OPERATION
NOTE: In order to remote mount the
implement status switch on a trailing
implement, the tractor will require a
remote mount wiring harness kit available
from your Buhler Versatile dealer (part
#86001101). The wiring harness has a
male connector that will plug into the
trailer light socket at the rear of the tractor
and will connect the remote mount
implement status switch with the TPM via
the tractor’s wiring harness. No additional
wiring modifications are necessary to
remote mount the implement status
switch.
Figure 2-143
DRAWBAR ASSEMBLY
Manual Hitch Pin - BSN 300919
Figure 2-144
Automatic Hitch Pin - ASN 300918
Figure 2-145
2-111
SECTION 2 - OPERATION
DRAWBAR ASSEMBLY
The drawbar height is fixed and must not be
altered. It is designed to produce maximum
traction for the wheelbase, tire size, weight
distribution and ballast of the tractor. The
drawbar length is nonadjustable and the hitch pin
distance is 508 mm (20″) from the end of the PTO
shaft if the tractor is equipped with the optional
PTO.
The bolt-on clevis on the manual hitch pin, 1, can
be removed and bolted to the bottom of the
drawbar to accommodate implement and PTO
hookup.
IMPORTANT: A clip pin must be installed
through the drawbar pin to hold it when the clevis
is flipped over for PTO use.
IMPORTANT: This arrangement is not approved
with the Automatic Hitch Pin.
1
19992760
Figure 2-146
The drawbar is free--swinging and should be
positioned for the best performance and the
least side draft. There are five drawbar
positions on a unit without a 3--point hitch
option. To swing the drawbar, pull the hairpin
clips, 1, from the wear blocks, 2. Remove the
wear blocks, swing the drawbar to the desired
position, and reinstall the wear blocks. On
tractors without 3--point hitch, one single pin is
used on any position except the center
position, where two are used.
1
2
NOTE: Drawbar with Manual Hitch Pin
shown.
Figure 2-147
On tractors that have a 3-point hitch installed,
both wear block pins can be installed when
the drawbar is swung to the right or left
position. Three-point hitch equipped tractors
have three drawbar positions.
Choose a position that is right for the job and
insert the pin and wear block(s) in that
position to keep the drawbar from moving.
2-112
SECTION 2 - OPERATION
It is recommended that the drawbar be pinned in
position at all times. On occasion, it may be
necessary to allow the drawbar to swing freely for
implements that place side loads on the rear of
the tractor. The drawbar can be used in a
swinging application but may require
replacement of the drawbar wear block after
extended use.
Clevis-type implement hitches should be
connected only to the lower plate of the drawbar.
Other hitches should be connected between the
plates as shown on the decal on top of the
drawbar wear block.
DRAWBAR WITH MANUAL HITCH PIN
All Models are manufactured with a 50.8 mm (2″)
drawbar pin, 1.
2
1
The tractor can have a kit installed to convert it to
the 38.1 mm (1-1/2″) drawbar pin.
The drawbar pin, regardless of size, is retained in
place using a latch, 2, that locks the pin in place.
The 38.1 mm (1-1/2″) pin also has a click pin
installed at the bottom of the pin.
Figure 2-148
To remove the drawbar pin from the drawbar, lift
the front side of the latch, 1, and pull the pin from
the drawbar. Reinstall the pin and pivot the latch
forward to lock the pin in place.
1
CAUTION: NEVER ATTACH AN IMPLEMENT
TO THE DRAWBAR IF THE DRAWBAR PIN
LATCH IS DAMAGED OR MISSING. REPAIR
OR REPLACE THE LATCH.
CAUTION: DO NOT ALLOW MATERIAL
BUILDUP IN THE DRAWBAR PIN AREA SO
THAT THE MATERIAL CAN INTERFERE WITH
PROPER
DRAWBAR
PIN
LATCH
OPERATION.
2-113
Figure 2-149
SECTION 2 - OPERATION
DRAWBAR WITH AUTOMATIC HITCH PIN
1
The drawbar is equipped with a hitch pin that will
automatically drop in place when hitching up to
implements.
2
5
To operate, place the hitch pin, 1, in the raised
position. Retaining ring, 2, fits in the upper notch,
3, of the clevis to hold the hitch pin in the raise
position. Release strap, 4, must be positioned in
front of the retaining ring as shown. The drawbar
is now prepared to hitch to the implement.
4
3
When backing the tractor to attach the
implement, the implement hitch will contact the
release strap, 4, when aligning the drawbar. As
the release strap is pushed forward it dislodges
the retaining ring, 2. Hitch pin, 1, will drop as the
retaining ring, 2, slides down the incline, 5, on the
front of the clevis. The implement is now
attached to the tractor without requiring the
operator to leave the cab of the tractor or a
second operator.
Figure 2-150
WARNING: NEVER ALLOW ANYONE TO STAND
BETWEEN THE TRACTOR AND IMPLEMENT
WHILE BACKING THE TRACTOR TO THE
IMPLEMENT. ALWAYS BRING THE TRACTOR TO
A COMPLETE STOP AND ENGAGE THE PARKING
BRAKE BEFORE ALLOWING ANYONE BEHIND
THE TRACTOR TO HITCH THE IMPLEMENT.
After hitch pin, 1, drops into place, retaining ring,
2, locks into the lower notch, 3, of the clevis.
Notch, 3, holds the retaining ring in the lower
position preventing the hitch pin from
inadvertently unhitching.
2
3
IMPORTANT: Always install a safety retaining
pin in the hitch pin, 4, to secure the hitch pin and
prevent any accidental unhitching of the
implement.
To manually unhitch the implement, first pivot the
retaining ring, 2, up away from notch, 3, then pull
the hitch pin from the clevis.
1
4
Figure 2-151
WARNING:
ALWAYS
SECURE
THE
DRAWBAR TO PREVENT SWINGING WHEN
TRANSPORTING EQUIPMENT OR WHEN
OPERATING ANY EQUIPMENT EXCEPT
GROUND ENGAGING EQUIPMENT.
2-114
SECTION 2 - OPERATION
38.1 mm (1/2”) Drawbar Pin Kit
(Manual Hitch Pin)
Figure 2-152
38.1 mm (1/2”) Drawbar Pin Kit
(Automatic Hitch Pin)
Figure 2-153
38.1 mm (1/2”) Drawbar Pin Kit
The 38.1 mm (1-1/2″) drawbar pin conversion kit
is available from your Buhler Versatile dealer as
part #86027940 (Manual) and #86030679
(Automatic). This kit allows the existing drawbar
pin to be replaced with a 38.1 mm (1-1/2″)
diameter pin to fit implements with 38.1 mm
(1-1/2″) tongue holes.
2-115
SECTION 2 - OPERATION
DRAWBAR LOADING
The maximum recommended weight that can be
carried on the drawbar is as follows:
Drawbar Position
508 mm (20″)
Max. Vertical Load
2700 kg (6000 lbs.)
IMPORTANT: Loads on the drawbar increase
greatly when traveling in rough conditions.
Reduce speed to reduce the possibility of
damage to the tractor or implement.
The vertical load on the drawbar must be
considered as ballast and added to the weight of
the tractor. Do not exceed the maximum
operating weight of the tractor.
NOTE: An optional drawbar support is
available for applications that may require
extra support.
IMPLEMENT SAFETY CHAINS
Implements that have safety chains can be
attached to the tractor using the tie-down slots, 1,
and the chain slot, 2, on the drawbar and drawbar
cage. Make sure the chain has enough slack in it
to allow the tractor to turn and not restrict
implement turning.
The safety chain should be strong enough to
carry the gross weight of the implement to be
towed by the tractor. Check the implement
operator’s manual for weight and safety chain
attachment instructions.
1
2
Your Buhler Versatile dealer can assist in
properly attaching safety chains to the tractor.
Figure 2-154
1
2
Figure 2-155
2-116
SECTION 2 - OPERATION
IMPLEMENT TRANSPORT
Use the following precautions when attaching
and towing implements with the tractor:
Hook equipment to the drawbar only.
Be sure that the drawbar is locked in position
with the side wear blocks to keep it from
swinging side to side.
When transporting implements on the
highway, place the drawbar in the center
position to stabilize the tractor and towed
implement
Use the drawbar pin retainer on the drawbar
at all times to prevent the equipment from
unhitching from the tractor.
Use safety chains from the drawbar and
drawbar cage to the implement when on
public roads to prevent the equipment from
rolling into oncoming traffic or ditches should
the hitch pin be lost.
Use a safe towing speed as specified by the
implement manufacturer.
Use safety warning equipment as required by
law.
CAUTION: WHEN TOWING LOADS OR
IMPLEMENTS ABOVE 16 KM/H (10 MPH),
THE TOWED IMPLEMENT MUST NOT
EXCEED THE WEIGHT OF THE TRACTOR,
UNLESS THE IMPLEMENT IS EQUIPPED
WITH BRAKES. IF EQUIPPED WITH BRAKES,
THE IMPLEMENT WEIGHT MUST NOT
EXCEED 2 TIMES THE TRACTOR WEIGHT.
2-117
SECTION 2 - OPERATION
PTO OPERATION
PTO Requirements
CAUTION: BE SURE ALL SHIELDS AND
GUARDS ARE IN PLACE BEFORE
OPERATING THE PTO.
CAUTION: USE THE ARTICULATION LOCK
FOR STATIONARY PTO APPLICATIONS OR
TRACTOR SERVICING.
IMPORTANT: Excessive clutch slippage can
cause premature clutch failure. Do not attempt
to unplug a jammed implement by repeatedly
engaging and disengaging the PTO clutch.
A PTO is a factory- or dealer-installed option. If
your tractor does not have a factory-installed
PTO, and you desire one, see your Buhler
Versatile dealer.
The PTO is a wet disc type clutch with an
integral brake, controlled by a solenoid
operated valve. It can be operated through the
full range of engine RPM, but cannot be
engaged when the engine speed is above 1400
RPM.
NOTE: Any tractor equipped with a PTO
option must be equipped with 38°
articulation blocks (or 33° - 31° based on tire
options).
2-118
The implement PTO drive shaft must have a 45
mm (1-3/4″) diameter splined shaft (20 spline)
yoke designed for 1000 RPM. Do not use an
adapter for a smaller yoke.
CAUTION: DO NOT USE A 35 MM (1-3/8″)
PTO ADAPTOR SHAFT. THE SHAFT MAY
BREAK AND CAUSE SERIOUS PERSONAL
INJURY.
Before operating any PTO implement:
1. Lock the drawbar directly behind the PTO
shaft to eliminate any swinging action.
2. Check for proper clearance of the PTO
drivelines to the PTO shaft and 3-point hitch,
especially when turning or in rough terrain.
3. The correct distance between the drawbar
hitch pin and the PTO shaft is 508 mm (20″).
This distance is not adjustable. No drawbar
extension is necessary to operate PTO
driven implements at 1000 RPM.
NOTE: Some implement manufacturers
may require a specific drawbar to PTO
shaft distance relationship. Refer to the
implement operator’s manual.
SECTION 2 - OPERATION
4. Be sure that the PTO drive shaft halves have
adequate overlap and will not separate when
turning.
Pull drive halves apart until fully extended,
just before they come completely apart. This
is dimension A.
From dimension A, subtract 152.4mm (6″),
establishing dimension B.
IMPORTANT: Never operate equipment with
the driveline extended past dimension B.
Push drive halves together as far as possible.
This is dimension C. Add 25.4mm (1″) to
dimension C to establish dimension D.
DIM “D” EQUALS
DIM “C” + 25.4MM (1 in.)
Figure 2-156
IMPORTANT: Never operate equipment with
the driveline collapsed past dimension D.
5. Be sure that all shields are in place and in
good condition. They must fully shield the
driveline.
6. Ensure that the PTO master shield, 1, is in
position.
DANGER: NEVER REMOVE OR ALTER THE
PTO MASTER SHIELD AT ANY TIME TO
ASSIST IN ATTACHING ANY TYPE OF
IMPLEMENT.
1
Figure 2-157
PTO Operation
1. Stop the engine and park the tractor. Connect
the drawbar to the implement hitch. Turning
the engine off releases the PTO brake,
allowing the stub shaft to be hand turned for
spline alignment. Be sure the drive shafts are
straight for easier connection.
2. Attach the implement drive shaft to the tractor
output shaft. Check for adequate telescope
action and for clearance to the surrounding
frame. The drawbar clevis, 1, can be flipped
over to provide additional clearance for the
PTO drive shaft.
1
Figure 2-158
2-119
SECTION 2 - OPERATION
3. Start the tractor with the transmission in
neutral and the PTO switch, 1, in the off
(clutch disengaged) position.
4. With the PTO clutch disengaged, raise and
lower the implement to ensure proper
clearance exists between the tractor and
implement. Be sure the implement is free of
obstructions.
1
Figure 2-159
2-120
SECTION 2 - OPERATION
5. With the engine at 1000 RPM, engage the
PTO. It is activated by a two-motion switch, 1,
located on the right console. To engage the
clutch, push down on the center button, 1, and
lift up on the outer knob, 2. An indicator lamp
will light on the warning light bar. The PTO has
built-in modulation to provide a smooth
transition during start-up of the PTO clutch.
NOTE: The PTO will not engage if engine
speed is greater than 1400 RPM. If the
engine speed is dropping from above 1400
RPM, the PTO will not engage until the
engine speed drops below 1340 RPM.
Shut the switch off, lower the engine
speed, and turn the switch on.
6. Increase the engine speed to 2100 RPM
before beginning field operation. To display
PTO output speed, turn the rotary select
switch to the “PTO Speed” position.
NOTE: When the engine speed is at 2100
RPM, the PTO speed will be 1000 RPM. Be
sure to adjust the loaded or unload engine
speed to 2100 RPM to maintain 1000 RPM
on the PTO shaft.
7. If possible, lower the engine RPM, disengage
the PTO, and raise the implement before
making sharp turns.
8. Be sure that the park brake is on, the
transmission is in neutral and the tractor is in a
straight line configuration with the articulation
lock engaged for stationary applications.
DANGER: NEVER LEAVE THE TRACTOR
SEAT WITH THE ENGINE RUNNING
AND/OR THE PTO ENGAGED.
2-121
2
1
Figure 2-160
SECTION 2 - OPERATION
9. The PTO can be shut off at any time by simply
pressing the PTO knob, 1, downward. If the
engine is shut off with the PTO switch in the
“ON” position, the tractor will not start until the
PTO switch is placed in the off position.
1
IMPORTANT: When using implements with
high momentum, such as combines and
forage harvesters, brake the speed of the
implement by lowering the engine speed
before disengaging the PTO clutch. This will
increase the PTO brake life.
Figure 2-161
2-122
SECTION 2 - OPERATION
HYDRAULIC SYSTEM OPERATION
HYDRAULIC SYSTEM
The tractor is equipped with a specially
designed hydraulic system that consists of a
hydraulic reservoir, a load-sensing variable-flow
hydraulic pump, an implement valve assembly
with flow control capability, quick couplers, a
filter and oil coolers as standard equipment.
Optional equipment available for the hydraulic
system include a 3-point hitch and a 1.9mm
(3/4″)coupler kit for high flow requirements.
These optional features can be dealer or factory
installed.
The steering system of the tractor uses a
separate constant displacement pump to supply
oil to the steering valve. The steering pump oil is
also supplied to the implement valve (when
required) to supplement hydraulic pump flow
2-123
during high flow demand situations (i.e., air
seeder operation). Steering oil flow has first
priority for the steering circuit, then
supplementing
implement
valve
oil
requirements.
The steering system consists of a constant
displacement pump, a P.O. valve, priority valves
(2), a closed center steering motor and steering
cylinders.
The steering system shares the hydraulic
reservoir, filter and oil coolers with the hydraulic
system.
Figure 2-162 shows the complete layout of the
hydraulic system.
Figure 2-163 shows the orientation of hydraulic
components on the tractor.
SECTION 2 - OPERATION
Figure 2-163
2-125
SECTION 2 - OPERATION
REMOTE CONTROL OPERATION
3
Four remote hydraulic control levers are located
on the right console. These are color-coded to
match the quick couplers at the rear of the tractor.
The colors should be (from left to right), blue, 1;
green, 2; tan, 3; and gray, 4.
4
2
1
Figure 2-164
The levers have four positions: neutral, 1; extend
(or raise), 2; retract (or lower), 3; and float, 4, as
indicated by the decals. When not in use, the
levers should be in the neutral position where
they can be locked to prevent accidental
actuation.
4
3
1
2
Figure 2-165
For the extend position, the lever, 1, is pulled
toward the operator. This is normally the
implement raise position. An adjustable
pressure release detent will hold the lever in the
raised position until the cylinder reaches the end
of its travel, then release to the neutral position.
The lever lockout has no function in this position.
1
Figure 2-166
2-126
SECTION 2 - OPERATION
For the retract position, the lever, 1, should be
moved away from the operator one position. An
adjustable pressure detent will hold the control
lever in this position until the cylinder reaches the
end of its travel, then release to the neutral
position. To prevent over-travel into the float
position, the lockout lever can be moved to the
first (center) position.
1
IMPORTANT: Do not manually restrain a lever to
override the detent release for continuous
operation or excessive noise and detent damage
may occur.
Figure 2-167
The float position is the position farthest away
from the operator (two detents from neutral).
The float position will be locked out when the
lockout lever is in the first detent and the control
lever is in neutral. Once in the retract or float
position, the lockout lever can be moved to the
second detent to prevent the lever from moving
back into the neutral position for motor operation.
The float position is generally used for
implements that are designed to “float” over the
ground during normal operation. When the
remote valve is in the float position, hydraulic oil
on the rod end and piston end of a cylinder can
flow freely from one side of the cylinder to the
other.
Figure 2-168
LOCKOUT LEVERS
Below each control lever is a corresponding
lockout lever to prevent or limit travel of the
control lever. The lockout lever has three
positions.
1
The rearward position, 1, (closest to the
operator) releases the lock and allows full travel
to all control lever positions.
Figure 2-169
2-127
SECTION 2 - OPERATION
The second position, 1, prevents the control
lever from entering the float position.
1
Figure 2-170
The final position, 1, has two functions. It will lock
the lever into the neutral position to prevent
accidental actuation of the lever. If the lockout
lever is moved to this position while the control
lever is in the retract position, the control lever is
limited to travel between the float and retract
positions. This position can be used for
continuous flow applications.
By limiting the travel of the remote control lever
from returning to the neutral position during
continuous flow applications, the lockout will
protect the hydraulic system from pressure
spikes created by hydraulically driven
implements during implement shutdown.
1
Figure 2-171
IMPORTANT: When shutting off hydraulically
driven implements, place the remote lever in the
float position to allow the implement to coast to a
stop. Shut the tractor off and place the remote
lever in the neutral position.
FLOW CONTROL ADJUSTMENT
Each valve spool has a flow control valve to
meter oil flow to that coupler. Flow can range
from a minimum of 11.4 L/min (3 GPM) to full
available flow 114L/min (approximately 30
GPM).
1
Buhler Versatile 4WD tractors are equipped with
four rotary knob style flow controls as standard
equipment. (1 (grey section) shown in figure
2--195)
The knob can be rotated counterclockwise to
increase flow and clockwise to decrease flow.
This knob will control only the grey valve section.
By pushing the button in the center of the knob,
the control knob can be pulled upward or pushed
downward to change the flow control setting.
2-128
Figure 2-172
SECTION 2 - OPERATION
The blue, green and tan in cab flow control knobs
are in the right rear corner of the cab and function
identically to the grey flow control.
Figure 2-173
PRESSURE RELEASE DETENT
ADJUSTMENT
The detent adjustment screw, 1, located on the
rear of the valve, may be adjusted to vary the
system pressure required to return each lever to
the neutral position.
To adjust, loosen the jam nut and rotate the
screw clockwise to increase the release detent
pressure. A variable pressure flowmeter should
be used to slowly raise the system pressure to
accurately set each detent. The adjustment
should be made by your authorized Buhler
Versatile dealer.
NOTE: The factory pressure release detent
setting is 15.0 bar (2175 PSI).
WARNING: ONLY ADJUST THE SCREW
WHEN THE REMOTE CONTROL LEVERS
ARE IN NEUTRAL AND THE TRACTOR IS
SHUT OFF.
2-129
1
Figure 2-174
SECTION 2 - OPERATION
QUICK COUPLERS
Each remote valve section has a set of hydraulic
quick couplers, 1, located at the rear of the
tractor. These are self-sealing, leverless
couplers that require no tools for connecting and
disconnecting hoses. These couplers also
permit hoses to be pulled from the coupler if an
implement should become disconnected from
the tractor.
The upper couplers are the “retract/lower”
couplers and the lower couplers are the
“extend/raise” couplers.
Each set of couplers has a decal next to it to
identify which remote lever they are hooked to
and which coupler extends or retracts a cylinder.
1
2
Figure 2-175
Excess oil drain hoses, 2, are attached to each
coupler to drain away oil released during
connection and separation of the couplers.
The couplers will accept standard 12mm (1/2″).
SAE or ISO tips. The couplers can be connected
or disconnected under pressure.
COUPLER CONNECTION
1. To connect couplers, wipe the outside of the
coupler and the tip of the implement to
remove
any
dust
and
minimize
contamination.
2. Insert the coupler tip through the seal and into
the coupler, making sure the coupler is
properly seated.
3. Actuate the remote valve to supply hydraulic
pressure which will complete the hydraulic
coupling of the tractor and implement.
Figure 2-176
2-130
SECTION 2 - OPERATION
When using a double-acting cylinder, connect the
feed hose from the cylinder to the bottom coupler
and the return hose to the top coupler. To extend a
double-acting cylinder, pull the remote lever
rearward to position 2. To retract the cylinder,
push the lever forward to position 3. The cylinder
can be put into the float position by pushing the
remote lever full forward in position 4.
When using a single-acting cylinder, connect the
supply line to the lower coupler. To extend the
cylinder, pull the remote lever rearward to
position 2. To retract, push the control lever fully
forward to “float,” position 4.
IMPORTANT: Always use the float position to
lower a single-acting cylinder. The retract
position is for double-acting cylinders only.
Figure 2-177
To disconnect the coupler, make sure that the
remote control lever is in the neutral position and
the engine is off. Check to be sure that the
implement has its transport stops in place or is
lowered to the ground.
Grasp the coupler tip behind its hose connection
and firmly pull the tip straight back from the
coupler. Cover the tip with a protective cap to
minimize contamination.
WARNING: HYDRAULIC FLUID ESCAPING
UNDER PRESSURE CAN PENETRATE THE
SKIN CAUSING SERIOUS PERSONAL
INJURY. WEAR GLOVES AND PROTECTIVE
CLOTHING
WHEN
SERVICING
HYDRAULICS. BE SURE THAT ALL
CONNECTIONS ARE TIGHT AND HOSES
AND LINES ARE UNDAMAGED.
2-131
Figure 2-178
SECTION 2 - OPERATION
BLEEDING REMOTE CYLINDERS
When connecting a cylinder with trapped air (i.e.,
a new cylinder, one that has been out of service,
or one that has had the hoses disconnected), it
will be necessary to bleed the cylinder to remove
the air.
With the hoses connected to the remote control
valve couplers at the rear of the tractor, position
the cylinder with the hose end uppermost and
extend and retract the cylinder seven or eight
times using the remote control valve operating
lever. Check the hydraulic tank oil level before
and after operating the remote cylinder.
OPERATING
CONTINUOUS
HYDRAULIC EQUIPMENT
FLOW
Continuous flow hydraulic equipment (i.e.,
hydraulic motors) should be connected to the
right-side (color-code gray) remote control valve
couplers with the pressure hose connected to
the upper coupler and the return hose connected
to the lower coupler. These are indicated by a
hydraulic motor symbol at the couplers with
counterclockwise rotation on the upper coupler
and clockwise rotation shown on the lower
coupler.
NOTE: There is a “zero return” line, 1,
installed next to the implement valve on the
right-hand side. This line runs directly back
to the hydraulic reservoir and is intended to
be used as a hydraulic motor case drain line.
1
Figure 2-179
2-132
SECTION 2 - OPERATION
Use the flow control to regulate the motor speed.
This will ensure that the hydraulic system will
supply only the oil required by the motor. This
will allow higher oil flow reserve for other valve
sections and their oil circuits.
NOTE: Hydraulic motors that are equipped
with (1/2″) supply and return hoses, and
require less than 10 GPM, can be hooked up
directly to the gray couplers. Hydraulic
motors that have (3/4″) supply and return
hoses, and require greater than 37.85 L/min
(10 GPM), should be hooked up to the
optional (3/4″) coupler kit. See “Optional
Hydraulic Equipment” later in this section
for more information on this kit.
With the remote control valve lever fully forward
in the float position, the motor will be stationary.
The hydraulic motor will operate if the lever is
pulled back one detent to the retract position. To
stop the motor, move the lever from the retract
position to the float position. In the float position,
the motor will be able to stop slowly, which will
not damage the motor. When moving from the
float position to the neutral position, i.e., for road
travelling, move through the retract position
quickly to prevent pressurizing the circuit.
2-133
IMPORTANT: When operating continuous flow
equipment, the remote control valve lever must
not be moved from the full on position to the
neutral or raise positions as damage to the
equipment may result. Use the lockout levers
on the control levers to prevent the levers from
moving to these positions.
Observe the following to further protect the
tractor and equipment:
D
D
D
Do not open any bypass valve in the
equipment or motor. Use the flow control
valve to control the rate of flow or speed of
the motor.
Do not hold the remote control valve lever
to operate the equipment. If the detent will
not hold the lever in the retract position,
check the equipment for proper
adjustment or contact your dealer for
assistance in adapting the equipment to
suit the tractor.
To ensure optimum hydraulic oil cooling,
operate continuous flow equipment at the
highest flow setting (by use of the flow
control valve) and lowest engine speed
that will give the required machine
performance and speed.
SECTION 2 - OPERATION
HYDRAULIC MOTOR APPLICATIONS
The hydraulic system is a load sensing, pressure
and flow compensating system. Pressure and
flow are regulated by a load sensing line from the
implement valve. For proper and efficient use of
the system, low volume open center hydraulic
motors or closed center system motors with
restricting orifices removed and bypass valve
closed should be used. Motor speed must be
regulated with tractor implement valve flow
control rather than bypass valves and orifices at
the motor. This will reduce heat buildup, save oil
for other simultaneous operations of the
implement valve, and increase system reliability.
1. Use hydraulic motors designed for open
center or pressure/flow load compensating
hydraulic systems only. Do not use a
hydraulic motor designed for closed center
hydraulic systems unless it is adapted for use
by removing the inlet restricter.
2. Be sure the hydraulic motor does not have
restricters in the ports or fittings.
3. Hydraulic motors rated at less than 37.85
L/min (10 US GPM) may be equipped with
12mm (1/2″) ID hoses and standard
(ASAE/SAE/ISO) couplers.
4. Hydraulic motors rated at greater than 10 US
GPM (37.85 L/min) should be connected with
19mm (3/4″) hoses and (ASAE/SAE/ISO)
couplers to prevent excessive restriction and
heat generation. Use the optional 19mm
(3/4″) coupler kit P/N 86010513 available
from your Buhler Versatile dealer. See
“Optional Hydraulic Equipment” later in this
section for more information on this kit.
2-134
OPERATING REMOTE EQUIPMENT
SIMULTANEOUSLY OR REMOTE
EQUIPMENT AND HYDRAULIC LIFT
SIMULTANEOUSLY
NOTE: Hydraulic pump output varies with
engine speed. Oil flow will be relatively
constant in the remote control valve circuits
if the flow control valve is used to provide
reduced oil flow, thus providing constant
operating speed for hydraulic motors, etc.
even if engine speed varies. Maintain the
engine speed above the minimum required
for simultaneous operation of all required
circuits and vary ground speed by selection
of the appropriate gear ratio.
If operating two or more remote control valves
simultaneously or remote valves and 3-point hitch,
the flow control should be adjusted to provide a
partial flow to each valve circuit. (The hydraulic
system of the tractor is designed to provide
adequate oil flow to the implement valve to satisfy
system demand, regardless of the number of
valve sections that are activated (i.e., running an
air seeder fan motor and lifting the cultivator).)
By adjusting the flow control of each valve
section, the system performance will be
maximized and will show up as proper
performance of the implement functions.
SECTION 2 - OPERATION
OPTIONAL HYDRAULIC EQUIPMENT
19 mm (3/4″) Coupler Kit P/N 86010513
This kit will allow hydraulic motors that require
19 mm (3/4″) supply and return hoses and
couplers, 1, to be hooked to the tractor and
operated using the gray remote control circuit.
1
The kit also contains a case drain line, 2, for the
motor if required in the application. The case
drain line hooks into the existing “zero return” line
on the right-hand side of the implement valve.
Operation of the gray circuit when equipped with
the 19 mm (3/4″) kit is identical to operation of the
circuit without the kit.
2
Figure 2-180
3-POINT HITCH (Optional)
3-POINT HITCH DESCRIPTION
All tractors can be equipped with a Category IV
Narrow 3-point hitch which converts to a
Category III hitch. The 3-point hitch can be
factory or dealer installed.
The 3-point hitch is an electrohydraulic system
that has an automatic position control feature
to maintain implement depth as determined by
the operator.
Figure 2-181
Be sure that the implements used conform to the
hitch dimensions shown:
(A) 51 mm (2″)
(B) 45 mm (1.78″)
(C) 920 mm (36.23″)
(D) 51 mm (2″)
Figure 2-182
2-135
SECTION 2 - OPERATION
3-POINT HITCH CONTROLS
There are two control switches and two rotary
control knobs located on the right console of the
cab, and a flow control adjustment on the 3-point
hitch electrohydraulic valve that controls the
3-point hitch. The function of these controls is as
follows:
Automatic Raise/Lower Switch
Switch, 1, controls the 3-point hitch when the
system is in the automatic mode. Pressing the
switch will put the system into the automatic
mode from the manual mode. When the system
is in the automatic mode, it will automatically
adjust the implement depth position as defined
by the operator using the depth control.
Pressing the top of the switch when the system is
in the automatic mode will cause the hitch to
raise to its fullest upward position for transporting
the implement or when turning at the end of a
field. Pressing the bottom of the switch when the
system is in the automatic mode will cause the
hitch to lower to a predetermined position as
defined by the operator with the depth control
knob.
1
Figure 2-183
When the system is in the automatic mode, and
the auto raise/lower switch is depressed for
either raise or lower, the hitch will cycle through
its full range of movement. There is no
incremental control of the hitch in the automatic
mode.
Anytime the system is in the automatic mode, the
small indicator light, 1, will be illuminated.
1
Figure 2-184
2-136
SECTION 2 - OPERATION
Manual Raise/Lower Switch
Switch, 1, controls the 3-point hitch system when
it is in the manual mode. Anytime the manual
raise/lower switch is depressed, the system is
put into the manual mode and the automated
mode is overridden. When the system is in the
manual mode, the operator can control the
height of the hitch to any desired position.
1
Pressing the top of the switch will cause the hitch
to raise, and depressing the bottom of the switch
will lower the hitch.
The operator can control incremental raise and
lower positions of the hitch by momentarily
depressing the switch. The hitch will stop moving
as soon as the switch is released for either raise
or lower.
Figure 2-185
Rotary Depth Control Knob
This knob is used to set the implement working
depth when the system is in the automatic mode.
The control knob, 1, is labeled in increments from
one to ten and has an “F” position below the
number one position. Turning the knob clockwise
will cause the hitch to raise, and turning it
counterclockwise will cause the hitch to lower.
Turning the knob fully counterclockwise to the “F”
position will place the hitch in the float mode so
that the hitch follows ground contour. There is a
small detent in the control knob indicating the
float position.
1
Figure 2-186
2-137
SECTION 2 - OPERATION
Rotary Lowering Rate Control Knob
Knob, 1, is used to set the rate at which the
implement will drop to the ground. Turn the knob
clockwise to increase the lowering rate and
counterclockwise to decrease the lowering rate.
1
NOTE: Each time an implement is changed
on the tractor, the lowering rate must be reset
for that particular implement.
The control operates in the manual and
automatic mode with the exception of the
automatic float mode.
Figure 2-187
Rate of Hitch Raise Adjustment
1
The electrohydraulic valve has a flow control
adjustment located at the front of the valve that
will determine the rate at which the 3-point hitch
will raise.
To access the flow control adjustment, the rear
frame deck shield, 1, must be removed from
above the implement valve. Loosen the four
screws, 2, that attach the shield to the tractor and
lift if off.
2
Figure 2-188
Turn the adjustment, 1, counterclockwise to
increase the rate of raise and clockwise to
decrease the rate of raise. The operator can set
this adjustment to any position desired for the
implement attached to the tractor.
WARNING: ONLY ADJUST THE RAISE RATE
WHEN THE 3-POINT HITCH CONTROLS ARE
IN NEUTRAL AND THE TRACTOR IS SHUT
OFF. ENGAGE THE ARTICULATION LOCK
WHEN WORKING IN THE ARTICULATION
AREA.
1
Figure 2-189
2-138
SECTION 2 - OPERATION
HITCH ADJUSTMENTS
Lower Links
When the lift links are adjusted halfway, the lower
link hitch point, 1, should be 200 mm - 250 mm
(8″ - 10″) from the ground when the lift cylinders
are fully retracted. Be sure that the implement is
level on the right and left sides of the hitch by
adjusting the lift link length.
1
Figure 2-190
Lift Links
The lift links, 1, on the 3-point hitch may be
adjusted to level the hitch or an implement from
side to side by turning the latch handle, 2, on the
link to raise or lower that side of the hitch. Fold
the handle out and turn it until the lift link is
adjusted. Return the handle to the storage
position by lining up the square sides of the
threaded lift link rod with the handle and
snapping it down onto the lift link.
2
1
NOTE: Only level the implement side to side
when it is in the full down position and the
weight is off the hitch.
Figure 2-191
Upper Link
The upper link, 1, is used to level the implement
from front to rear. Loosen the locking plates, 2, on
the upper link. Turn the center collar to shorten or
lengthen the upper link to level the implement.
Tighten the locking plates.
1
2
Figure 2-192
2-139
SECTION 2 - OPERATION
Place the upper link in the appropriate hitching
point on the upper link bracket. The top hole, 1, is
for Category III or IV implements. The bottom
hole, 2, is for Category III implements only.
1
2
Figure 2-193
To store the upper link, remove the two small
hairpin clips, 1, that attach the storage bracket, 2,
to the upper link bracket, and pull the bracket
away from the tractor. Swing the upper link
upward and reinstall the bracket and clips.
1
2
Figure 2-194
Shims
Shims, 1, prevent the lower links from contacting
the tires when the lower links are not connected
to an implement and are free to move side to
side. Use shims so that the lower links do not
contact the tires when in their maximum sway
position, or when the links are unhooked from the
implement.
1
Shims can be removed or installed by removing
the two bolts that hold the shims in place.
Tractors are shipped from the factory with
approximately 25.4 mm (1″) shim packs
installed.
2-140
Figure 2-195
SECTION 2 - OPERATION
Float (Mechanical)
To put the lift links into mechanical float position,
remove the pin, 1, securing the lower link to the
hole on the lift link. Reconnect the lower link to
the lift link using the slot on the lift link. Reverse
this procedure to convert to non-float position.
1
When in this position, the hitch will float
approximately 76mm (3″) when fully lowered.
NOTE: Full float position is achieved by
adjusting the hitch position knob on the side
console to its float detent position when in
the automatic mode.
Figure 2-196
Sway Blocks
Sway blocks, 1, have two positions for use with
the 3-point hitch. When the blocks are in the
sway position, the lower links can move side to
side approximately 51mm (2″). When in the
non-sway position, the lift arms will be limited in
their side-to-side movement when hooked to an
implement.
1
Figure 2-197
When the sway blocks, 1, are in the sway
position, the block is rotated so that the narrow
end of the block is downward.
1
Figure 2-198
2-141
SECTION 2 - OPERATION
When the sway block, 1, is in the non-sway
position, it is rotated 90° so that the narrow
portion of the block is turned away from the lower
link and the block is of equal thickness from top to
bottom.
1
Figure 2-199
To convert the block from the sway to the
non-sway position, or vice versa, loosen and
remove the two attaching bolts, 1, from inside the
drawbar cage. Rotate the block to the desired
position, and reinstall the attaching bolts. Torque
the bolts to 270 N⋅m . (200 ft. lbs)
1
Figure 2-200
Drawbar Positioning
To eliminate interference between the drawbar
and mounted implement, lock the drawbar into
the middle position.
PTO (Option)
IMPORTANT: The 3-point hitch must be in the
non-sway position to use the PTO.
When using the PTO to power 3-point hitch
mounted implements, put the hitch into the
non-sway position with sway blocks to prevent
damage to the PTO drivelines and universal
joints.
2-142
SECTION 2 - OPERATION
Category Conversion
The hitch is shipped in the Category IV Narrow
position. To convert the hitch to the Category III
position (implement side), proceed as follows:
1
Remove the pin, 1, that attaches the lift link to the
lower link by removing the klick pin and washer
from inside the lower link.
Figure 2-201
Remove the lower links, 1, by removing the
locking plate bolt, 2, and locking plate, 3.
Remove the lower link attaching pin, 4, and
bushing.
2
Turn the lower links end over end and attach the
lower link to the tractor using pin, 4; locking plate,
3; and bolt, 2. Store the bushing on the storage
pin.
3
4
1
Figure 2-202
Reattach the lift link to the lower link, using the
rearmost hole on the lower link, with the klick pin
and washer.
Repeat this procedure for the other side of the
hitch.
Figure 2-203
2-143
SECTION 2 - OPERATION
Turn the upper lift link end over end and mount it
to the bottom hole in the upper link bracket.
NOTE: Turn end over end means that the
hitch point of the link becomes the link point
and vice versa.
Figure 2-204
Put the Category III bushings that are stored on
the drawbar cage storage pin into the ball
swivels, 1, at the upper and lower link hitch
points.
1
Figure 2-205
Add or remove shims, 1, to ensure that the lower
links do not contact the tires when they are free of
the implement.
1
Reverse these steps to convert from a Category
III to Category IV Narrow.
Be sure that the correct diameter pins are used in
the hitch attaching points. Undersized pins may
break and damage the implement or ball ends.
IMPORTANT: Use the correct diameter pins in
the 3-point attaching links. Category III upper link
pin size: 32 mm (1-1/4″) diameter. Lower link pin
size: 37 mm (1-7/16″) diameter. Category IVN
upper link pin size: 45 mm (1-3/4″) diameter.
Lower link pin size: 50 mm (2″) diameter.
2-144
Figure 2-206
SECTION 2 - OPERATION
Quick Hitch Installation
(Optional - Category III/IVN)
CAUTION: BE SURE NO ONE IS BETWEEN
THE IMPLEMENT AND TRACTOR WHEN
BACKING UP.
An optional quick hitch is available to attach to
the Category III/IVN 3-point hitch that allows
quick attachment of implements to the tractor. To
use the quick hitch, proceed as follows:
The 3-point hitch can be set for Category III or
Category IVN with the quick hitch. If Category III
is used , it will be necessary to remove the
bushings in the link pins. The quick hitch uses
Category IVN pins.
Connect the quick hitch, 1, to the upper and lower
hitch points of the 3-point hitch with pins and
cotter pins.
1
Figure 2-207
The upper implement attaching point of the quick
hitch must be positioned properly for either a
Category III or a IVN implement. Remove the
eight attaching bolts, 1, from the quick hitch
frame and position the bracket properly for the
implement to be used.
NOTE: When Category III implements are
attached to the quick coupler, proper
bushings must be used to adapt the coupler
to the implement. The coupler attaching
points are set up for Category IV implements.
1
Figure 2-208
2-145
SECTION 2 - OPERATION
IMPLEMENT CONNECTION
With the levers, 1, horizontal and the safety pins,
2, in the storage position, back the tractor up to
the implement. Using the manual raise/lower
switch, couple the quick hitch to the implement.
1
2
Figure 2-209
When the lower links are seated properly, insert
the safety pins, 1, to lock the spring-loaded
latches in place.
1
WARNING: WHENEVER AN IMPLEMENT IS
ATTACHED TO THE QUICK HITCH, USE THE
SAFETY PINS. IF THE SAFETY PINS ARE
NOT IN PLACE, THE POSSIBILITY OF
INADVERTENT
DETACHMENT
EXISTS,
PARTICULARLY DURING TRANSPORT.
Figure 2-210
IMPLEMENT DISCONNECT
Lower the implement to the ground where you
want to disconnect. Be sure the implement is
sitting in a secure position and will not shift or tip
when disconnected from the quick hitch.
Remove the safety pins, 1, and move the lever, 2.
to a vertical position. The implement is now
attached only by the top link. Using the manual
raise/lower switch, lower the 3-point hitch to
clear the top link pin.
2
1
Figure 2-211
2-146
SECTION 2 - OPERATION
FEEDBACK POTENTIOMETER
On occasion, the feedback potentiometer,
located on the right hand side of the rockshaft,
may need to be adjusted. This will ensure that
the lift cylinders do not overextend or retract too
far and place the hydraulic system in high
pressure standby during full raise or lower
modes of operation while in the automatic
mode. To adjust the potentiometer, use the
following procedure:
1. Park the tractor on level ground. Set the
parking brake and engage the articulation
lock.
2. Engage the manual switch and raise the
hitch to the full up position.
3. Turn the engine off.
4. Measure the length of the exposed lift
cylinder rod from the base of the rod ,1, to the
grease zerk, 2.
5. Start the tractor and lower the three-point
hitch.
2
6. Engage the automatic mode of operation and
raise the hitch to the full UP position.
7. Turn the engine off.
1
Figure 2-212
8. Measure the length of the exposed lift
cylinder rod from the base of the rod , 1, to the
grease zerk, 2. The measurement should be
approximately 6mm to 5mm (1/4″ to 3/16″)
shorter than the measurement obtained in
step 4 of this procedure.
2
1
Figure 2-213
2-147
SECTION 2 - OPERATION
9. If the measurement is not within specs,
loosen the feedback potentiometer cover
screws, 1.
10. Adjust the potentiometer by rotating the
potentiometer cover plate tab, 2, CW to raise
the hitch and CCW to lower the three-point
hitch.
11. Tighten the adjustment screws and repeat
the measuring procedures as detailed in
steps 2 through 8.
12. A final quick check for the proper adjustment
is to lift the three-point hitch in the automatic
mode. Switch to the manual mode and
depress in the raise position. The lift cylinder
should extend approximately 6mm (1/4″)
upward from the full automatic raise position.
IMPORTANT: In the automatic raise mode,
the three-point hitch must automatically stop
raising before the cylinders are fully
extended.
2-148
2
1
Figure 2-214
SECTION 2 - OPERATION
IMPLEMENT HOOK-UP
3-Point Hitch Implements
IMPORTANT: Before hitching implements to the
3-point hitch, be sure that the implement is
compatible with the tractor hitch.
IMPORTANT: The hitch pins must fit snugly
into the connection points. If loose, the
implement and tractor have different hitch
dimensions. Verify the correct hitch category.
4. Level the implement.
5. Install sway blocks and shims as required.
Semi-integral Implements
CAUTION: BE SURE THAT NO ONE IS
BETWEEN THE TRACTOR AND IMPLEMENT
WHEN BACKING UP THE TRACTOR.
Before attaching 3-point hitch implements, be
sure that the drawbar does not interfere when
the implement is raised or lowered.
CAUTION: SHUT THE TRACTOR OFF WHEN
HOOKING UP AN IMPLEMENT.
1. Back the tractor so that the lower link hitch
points are even with the implement
connections.
2. Connect the lower links to the implement with
the correct size hitch pins and secure with
klick pins.
3. Adjust the upper link length and setting on
the link bracket. Connect the link to the
implement with the hitch pin and lock with
klick pins.
2-149
1. Large rear-mounted equipment is usually
connected to the two lower lift links only.
2. Attach the implement in the same manner as
a 3-point hitch implement, but do not connect
the upper link. The lower links lift the
implement front, and a remote hydraulic
cylinder lifts the rear.
3. See the “Hydraulic System Operation” earlier
in this section for information on the
connection of hydraulics to lift semi-integral
implements.
CAUTION: WHEN SERVICING IMPLEMENTS
MOUNTED TO THE 3-POINT HITCH, BE
SURE THAT THE IMPLEMENT IS PROPERLY
SUPPORTED WITH BLOCKING.
SECTION 2 - OPERATION
3-POINT HITCH OPERATION
NOTE: See “3-Point Hitch Controls” earlier in
this section for an explanation of the function
of the controls.
WARNING: DO NOT SET THE ROTARY
DEPTH CONTROL KNOB TO THE FLOAT
POSITION WHEN IN THE AUTOMATIC MODE
UNLESS THE IMPLEMENT WEIGHT IS ON
THE GROUND. IF THE KNOB IS SET IN THE
FLOAT POSITION WITH THE IMPLEMENT
RAISED, IT WILL DROP QUICKLY, POSSIBLY
CAUSING DAMAGE.
1. Start the tractor. The hitch will be in the
manual mode.
2. Raise the hitch fully, using the manual
raise/lower switch.
3. Set the rotary lowering rate control knob, 1, to
the fully counterclockwise position. Press
and hold the manual raise/lower switch, 2, in
the lower position. Slowly turn the lowering
rate control knob clockwise to set the rate of
lowering for the implement. Release the
manual raise/lower switch. Repeat this
procedure until the desired rate of lowering is
reached.
2
1
4. Set the raise rate of the implement using the
flow control on the 3-point hitch section of the
implement valve. (See “3-Point Hitch
Controls” earlier in this section.)
NOTE: The lowering and raise rate of the
implement has to be set for each
implement of different weight.
WARNING: ONLY ADJUST THE RAISE
RATE WHEN THE 3-POINT HITCH
CONTROLS ARE IN NEUTRAL AND THE
TRACTOR IS SHUT OFF. ENGAGE THE
ARTICULATION LOCK WHEN WORKING
IN THE ARTICULATION AREA.
2-150
Figure 2-215
SECTION 2 - OPERATION
5. Raise the hitch to the full up position using the
manual raise/lower switch.
6. Set the rotary depth control knob to 10 (fully
raised position).
7. Press the auto raise/lower switch, 1, to place
the hitch in the automatic mode. The light will
come on to indicate automatic mode
operation. Start the tractor and implement
down through the field and use the rotary
depth control knob to control the height of the
implement. Once the working depth is
reached, the hitch will automatically keep the
implement at the preset depth unless the
depth is changed by the operator using the
rotary depth control knob.
8. Use the auto raise/lower switch to raise the
hitch at the end of the field or row.
Press the top of the switch to fully raise the
hitch. Make the turn with the tractor and start
down the field. Press the bottom of the switch
to return the implement to the preselected
working depth.
9. Use the manual raise/lower switch to raise or
lower the hitch manually. The hitch will stop
when the switch is released. The manual
raise/lower switch will override the automatic
mode and place the hitch to manual.
IMPORTANT: The auto switch must be
depressed to resume auto operation.
Pressing the lower portion of the auto
raise/lower switch will resume auto operation
and position the hitch to the height preset with
the rotary depth control knob, regardless of
the current hitch position. Pressing the top of
the auto raise/lower switch will also resume
auto operation, and the hitch will raise to the
highest position.
2-151
1
Figure 2-216
SECTION 2 - OPERATION
10. The hitch can be put into the float mode any
time the system is in the automatic mode.
Rotate the rotary depth control knob to the
“F” position until it detents. The hitch will now
follow the ground contour. Pressing the top of
the auto raise/lower switch will cause the
hitch to fully raise, and pressing the bottom of
the switch will return the hitch to the float
position.
WEIGHT IS ON THE GROUND. IF THE
KNOB IS SET IN THE FLOAT POSITION
WITH THE IMPLEMENT RAISED, IT WILL
DROP QUICKLY, POSSIBLY CAUSING
DAMAGE.
11. When transporting implements, set the
rotary depth control to the fully raised
position (10). Place the hitch in the automatic
mode and press the top of the auto
raise/lower switch to raise the hitch. Do not
use auto or move the rotary depth control
knob as the hitch may drop during transport.
WARNING: DO NOT SET THE ROTARY
DEPTH CONTROL KNOB TO THE FLOAT
POSITION WHEN IN THE AUTOMATIC
MODE UNLESS THE IMPLEMENT
2-152
SECTION 2 - OPERATION
TIRES AND ARTICULATION BLOCKS
PROPER TIRE SELECTION
Factors Determining Best Tire Performance
Selecting the proper size and type of tires is
important in achieving maximum tractor
efficiency. Various sizes and types of tires are
available for your tractor. Refer to Section 1 of
this manual for approved tire sizes by tractor
model number.
If a specific size of tire or tire configuration is not
listed under a particular model, do not attempt to
install that size tire.
The tires selected for your tractor must be able
to support the weight of the tractor and
equipment. The tires must also be able to
provide adequate tire traction to utilize the
tractor engine horsepower and turn it into useful
drawbar horsepower.
You will have to adjust the ballast, tire pressure
and tractor weight split between the front and
rear axles for various loads and conditions to
achieve the best ride and performance.
Always maintain the proper air pressure in the
tire to carry the load. Do not over inflate radial or
bias ply tires. Radial tires will work with LOWER
air pressures. Radial tires will show up to 20%
sidewall deflection or bulge when properly
inflated.
The force that enables the tires to drive the
tractor must be transmitted through the tire
sidewalls. The tires work best when all the tires
on a given axle are working at the same rate.
Think of them like a shock absorber; they must
respond the same way to share the load equally.
Good Performance
Proper air pressure for the load
Proper sidewall deflection
8%-15% wheel slip
Proper tire size for expected load
Less than 50% fill of liquid ballast
Maintaining equal tire pressure in all tires on a
given axle
Poor Performance
High or low air pressure
Stiff sidewalls
High or low wheel slip
Overloaded or underloaded tire
Excessive liquid calcium in a tire
Treating tires on an axle differently
Bias ply tires are rated using a ply rating and
radial-type tires are rated using a * rating on the
sidewall of the tire. Refer to Section 5 of this
manual for information on load carrying capacity
based on ply or * rating.
As a general comparison, the following chart
details the relationship between ply and *
ratings of bias and radial tires.
Bias Ply Rating
6
8
10
12
Radial * Equivalent
*
*
**
***
Refer to “Ballasting” later in this section for
proper tractor weight procedures once the tire
size has been selected.
2-153
SECTION 2 - OPERATION
ARTICULATION BLOCKS
Each individual tire size requires a specific
articulation block to be used with that tire size.
Refer to “Tire Configurations” in Section 1 for the
maximum articulation angle allowed based on
tire selection.
There are four possible articulation angles used
on the tractors. They are 42°, 38°, 33°, 31°. The
following information shows what each
articulation block configuration looks like. The
articulation blocks are located on the front frame
adjacent to each fuel tank.
IMPORTANT: Install the proper articulation
blocks on the tractor before the dual or triple
wheels are installed on the unit to prevent any
accidental damage from occurring.
NOTE: Any tractor that is equipped with a
PTO option requires a 38° articulation block
kit be installed on it. If the tire size of the
tractor requires a 33° or 31° articulation kit,
use those kits instead of the 38° kit for a PTO
option.
WARNING: IMPROPER ASSEMBLY OF THE
ARTICULATION BLOCKS CAN CAUSE THE
TRACTOR WHEELS TO CONTACT THE FUEL
TANK WHEN TURNING, LIMITING TURNING
ABILITY AND CONTROL OF THE TRACTOR.
42° - The maximum turning angle allowed by the
steering cylinders is 42°. If your tractor tire size
allows an angle of 42°, no articulation blocks are
required.
Figure 2-217
2-154
SECTION 2 - OPERATION
38° - To limit the articulation angle to 38°, use the
articulation blocks with the thin portion toward
the inside.
NOTE: Any tractor that is equipped with a
PTO option requires a 38° articulation block
kit be installed on it. If the tire size of the
tractor requires a 33° or 31° articulation kit,
use those kits instead of the 38° kit for a PTO
option.
Figure 2-218
33° - To limit the articulation angle to 33°, use the
articulation blocks with the thick portion to the
inside.
Figure 2-219
31° - To limit the articulation angle to 31°, use the
articulation blocks in conjunction with the
backing plate, 1. The articulation block should
have the thick portion toward the inside.
1
Figure 2-220
2-155
SECTION 2 - OPERATION
BALLASTING
Basic Rules of Thumb for Ballasting
1. When using fluid, put equal amounts in each
tire on a given axle.
2. Ballast tractors to a minimum amount as a
starting point.
3. For light-duty application, weight distribution
front to rear is not as important as in heavier
draft applications.
4. At maximum operating weight, the correct
recommended weight distribution of 55/45
(front/rear) for drawbar applications and
65/35 (front/rear) for 3-point hitch
applications is essential.
5. Set tire inflation pressures based on weight
carried by each wheel. Do not go below 55
kPa (8 PSI) on radials or 83 kPa (12 PSI) on
bias tires.
Application and Ballasting
Buhler Versatile 4WD tractors work in many
different conditions and operations. Therefore it
is up to the operator to ensure that the tractor is
performing at its peak in its specific operations.
Unlike crawler-type tractors, these tractors are
designed to operate at speeds of 7.2 KPH (4.5
MPH) and higher. At these speeds, they are
more productive and are less likely to have
mechanical breakdowns.
Many factors determine a tractor’s productivity.
Factors such as the size of the load, tractor
wheel slip, tire rolling resistance, tractor
operating weight and tractor weight distribution
all must be taken into consideration when
operating an Buhler Versatile 4WD tractor.
Loads Matched to the Tractor
Do not operate the tractor with heavy implement
loads that need the use of gears in the lower
ranges. The tractor is made for continued field
operation at the rated HP and ground speed of
7.2 KPH (4.5 MPH) and faster with a load that is
correctly matched to the tractor. If you operate
the tractor with too much ballast and pull too
heavy a load for a long period of time in the low
gears, you will cause damage to the drivetrain
and decrease tire life.
2-156
The best traction occurs when wheel slip is
between 8% and 15% for drawbar work and
13% to 15% for 3-point hitch work. The extra 5%
is to compensate for additional tire distortion
caused by weight transfer from the hitch.
If possible, remove ballast when not needed for
lighter loads.
Pull lighter loads at a faster speed to do more
work and increase efficiency. Do not overweight
the tractor to pull very heavy loads.
If the implement cannot be pulled at the needed
depth at 7.2 KPH (4.5 MPH) or greater, the
implement is over matched for your tractor.
The best guide to follow in ballasting is to not
have the full load wheel slippage fall below 12%.
This amount of slippage is your best protection
against overloading.
Wheel Slip
Wheel slippage is a vital consideration in any
farming operation. Too much slippage
represents lost time and wasted production. Too
much wheel slippage is a major cause of wheel
traffic-induced soil compaction. Too little can
result in reduced reliability of the drivetrain.
Strive for 8% to 15% wheel slippage on a 4WD.
Wheel slip is defined as the amount of tire
rotation “wasted” during one complete rotation
of a tire. Wheel slip is not a deterrent to tractor
operation. It is a necessary function of the tires
and helps prevent damage to the tractor
drivetrain due to tractor overload.
Every time a tractor wheel makes a revolution,
the wheel covers a certain distance. On a very
firm dry surface (i.e., asphalt), the distance
covered in one tire revolution will be very close
to the actual circumference of the tire. On a very
loose surface (i.e., sand), the distance covered
in one tire revolution will be significantly less
than the actual circumference of the tire. This
“wasted” distance is referred to as wheel slip.
SECTION 2 - OPERATION
Every tire contact on every surface will produce
some amount of wheel slip. If there were no
wheel slip, significant drivetrain wear would be
present and damage to the tractor may occur.
Ballasting the tractor and operating with the
proper size and inflated tires will maintain wheel
slip at a manageable level (8%-15%).
Measuring Wheel Slip
Tractors that are equipped with an optional
Tractor Performance Monitor will measure
wheel slip automatically and inform the operator
if the wheel slip is at an unacceptable level
based on a preprogrammed value set by the
operator. For more information on the wheel slip
feature on the Tractor Performance Monitor, see
“Tractor Performance Monitor” earlier in this
section.
If the tractor does not have the optional Tractor
Performance Monitor, wheel slip can be
measured as follows:
1. Put a reference mark on the side of the
tractor rear tire.
2. Operate the tractor with the implement in the
ground.
3. While the tractor is moving, have an assistant
put a marker on the ground outside the
implement width where the reference mark
on the tire comes down to the ground.
6. Operate the tractor, with the implement
raised, from the first ground marker to the
second ground marker. Count the number of
wheel revolutions between the two ground
markers.
7. The tire will require fewer revolutions to cover
the same distance because of less slip. The
following table will determine the percent of
wheel slip from the number of wheel
revolutions:
Revolutions of Wheel
9-1/2
9
8-1/2
8
7-1/2
7
Slip %
5
10
15
20
25
30
When you have too much ballast installed on the
tractor, you will see the clear shape of the tire bar
in the ground which is an indication of no
slippage. With too little ballast, the tire bar marks
will not show because of the tire slippage.
Too Little Ballast
1.
2.
3.
4.
5.
Excessive wheel spin
Power loss
Tire wear
Excessive fuel consumption
Lower productivity
Too Much Ballast
DANGER: MAKE SURE THE ASSISTANT
IS CLEAR OF THE IMPLEMENT AND
TRACTOR
DURING
WHEEL
SLIP
MEASUREMENTS.
4. Continue to move along with the tractor and
count ten wheel revolutions. Put a second
marker on the ground outside the implement
width where the reference mark on the tire
comes down to the ground for the tenth time.
5. Lift the implement out of the ground. Put the
tractor in position and put a new reference
mark on the rear tire aligned with the first
ground marker.
2-157
1. Increased drivetrain load and power
operating cost
2. Power loss
3. Tire strain
4. Soil compaction
5. Lower productivity, i.e., more power required
to move the overloaded tractor, allowing less
power available to pull the implement.
SECTION 2 - OPERATION
Rolling Resistance
The greatest loss of engine power occurs in the
area of traction factors such as rolling
resistance and wheel slippage. Those losses
will occur in any and every practical traction
situation.
Therefore, choosing the right amount of weight
is the first step. Too little weight permits
excessive wheel slippage while too much
weight increases soil compaction and rolling
resistance. Rolling resistance is the power
required to roll the tractor’s tires forward with no
load except weight.
Tractor Weight Distribution
Although Buhler Versatile 4WD tractors are
manufactured with an approximate weight
distribution of 65% to 67% over the front axle
and 33% to 35% over the rear axle, the intent of
the design is to have the tractor operating in the
field with an ideal 50/50 dynamic weight
distribution.
2-158
The benefits of operating a tractor in the field
under the ideal 50/50 dynamic weight
distribution are:
1. The work is divided equally between the
axles, allowing a more even distribution of
work and load.
2. Compaction is lessened since the axles are
the lightest force possible on the soil. If a
13,636 kg (30,000-lb.) tractor has a 50/50
split, each axle exerts a force of 6,818 kg
(15,000 lbs.). A 60/40 split would create an
8,182 kg (18,000-lb.) force under the heavier
axle, increasing the compaction by 1364 kg
(3000 lbs.).
3. Maximum traction, with the least rolling
resistance, is gained by distributing the load
equally between both axles.
4. With the total tractor weight equally divided
(under load) on all four wheels, you increase
reliability by spreading the torque output of
the tractor equally to all four wheels. The
greatest torque always goes to the wheels
with the most weight.
SECTION 2 - OPERATION
CALCULATION OF BALLAST
The following information is provided as a guide
for proper ballasting:
Shipping Weight and Fore/Aft Ratio
Generally the tractor will come from the factory
with an approximate weight distribution of 65% 67% on the front axle and 33% - 35% on the rear
axle. Do not assume that every tractor will
come from the factory with this weight
distribution. Various options and wheel
packages will significantly change the weight of
the tractor. Determine the shipping weight
BEFORE any ballast is added to the tractor by
weighing the tractor on a scale. This is the most
accurate method of determining actual tractor
weight and ballasting the unit correctly. Possible
locations of a scale of adequate size to weigh
the tractor would be a feed/fertilizer store,
asphalt plant, gravel quarry, grain elevator, etc.
NOTE: There is an additional method of
calculating the shipping weight of the
tractor using calculated weight from
theoretical value charts located in the
Section 5 of this manual. Weighing the
tractor on a scale is preferred.
When weighing the tractor, pull the front axle on
the scale first. Make sure the inside wheels of
the dual or triple tires are fully on the scales and
the outer tires are off of the ground. Since most
scales are less than 3 m (10′) wide, driving the
inner wheels up on wooden blocks will
accomplish this. Repeat this procedure for the
rear axle. Record the unballasted weight of
each axle. Add the weight recorded for each
axle together to get a total tractor shipping
weight. Divide the individual axle weights by the
total tractor shipping weight to get the front to
rear weight distribution percentage.
2-159
Example:
2335 Unballasted Shipping Weight
Front axle weight:
7,265 kg (16,017 lbs.)
Rear axle weight:
3,966 kg (8743 lbs.)
Total tractor shipping weight:
11,231 kg
(24,760 lbs.)
Weight distribution
front axle:
7,265÷11,231
(16,017 ÷ 24,760)=65%
Weight distribution
rear axle:
3,966÷11,231
(8,743 ÷ 24,760)=35%
NOTE: The above example is not an exact
shipping weight of a 2335. Weigh your
specific tractor to get accurate figures to
work with.
The optimum ballast to be obtained is to get the
tractor weighted so that 50% of the load is being
carried on each axle during field work. This
makes each axle pull its share of the load so that
one component is not overworked.
Operating Weight and Fore/Aft Ratio
Buhler Versatile has determined that Buhler
Versatile 4WD tractors operate at top efficiency
when ballasted to 43.1 Kg (95 lbs.) per engine
brake horsepower. This is the total vehicle
weight at which the tractor can pull an
implement and propel itself without causing
excess soil compaction. The following chart
shows recommended operating weights based
on tractor model by horsepower at 43.1 Kg (95
lbs.) per horsepower ballast.
MODEL
RATED
HORSEPOWER
RECOMMENDED
OPERATING
WEIGHT AT
95 LBS/HP
2290
290
12,500 kg
(27,550 lbs.)
2335
335
14,440 kg
(31,825 lbs.)
2360
360
15,515 kg
(34,200 lbs.)
2375
375
16,160 kg
(35,625 lbs.)
2425
425
18,315 kg
(40,375 lbs.)
SECTION 2 - OPERATION
Additional Ballast Requirements
Total ballast to be added can now be calculated
by subtracting the shipping weight of the tractor,
from the recommended operating weight,
determined from the chart. Example:
Recommended Operating Weight
of 2335 (335 HP)
14,440 kg (31,825 lbs.)
Shipping Weight
of 2335
11,231 kg (24,760 lbs.)
Total Ballast to
Be Added
3,209 kg (7,065 lbs.)
The figure of 3,209 kg (7,065 lbs.) is the total
amount of ballast to be added to the tractor to
get it to 43.1 kg (95 lbs) per horsepower. This
total ballast figure now needs to be divided
between the front and rear axle.
To calculate the amount of ballast to be added to
each axle, first determine what type of
implement the tractor will be used with.
If the tractor is to be used with a drawbar
pull-type implement, the field ready ballasted
weight distribution should be 55% on the front
axle and 45% on the rear axle of the
recommended operating weight. Once the
tractor is in the field operating with the
implement, the draft load imposed on the tractor
by the implement will balance the weight
distribution between the axles to a 50/50
dynamic ratio.
If the tractor is to be used with a 3-point
hitch-type implement, the field ready ballasted
weight distribution should be 65% on the front
axle and 35% on the rear axle of the
recommended operating weight. Once the
tractor is in the field operating with the
implement, the draft load imposed on the tractor
by the implement will balance the weight
distribution between the axles to a 50/50
dynamic ratio.
The following charts detail the proper front to
rear ballast for a drawbar application and a
3-point hitch application based on the previous
examples.
2-160
Example A: Drawbar pull-type implement on a
2335 (335 HP) tractor.
WEIGHTS
Total
Front
Rear
kg (lbs.)
kg (lbs.)
kg (lbs.)
Optimum
Operating
Weight &
Percentage
43.1kg x 338
@ (95 lb x
335)
14,440kg
(31,825lbs.)
7,942kg
(17,503 lbs.)
6,498kg
(14,322lbs.)
Scaled
Shipping
Weight
11,231kg
(24,760lbs.)
7,625kg
(16,017lbs.)
3,966kg
(8,743lbs.)
Additional
Ballast
Required/Axle
3,209kg
(7,065lbs.)
677kg
(1,486lbs.)
2,046kg
(5,579lbs.)
Example B: 3-point hitch implement on a 2335
(335 HP) tractor.
NOTE: Since this example tractor is
equipped with a 3-point hitch, the overall
weight of the tractor will increase from
11,255 kg (24,760 lbs.) to approximately
11,945 kg (26,333 lbs.). The additional 713.5
kg (1,573 lbs.) is the approximate weight of
the 3-point hitch kit that has been installed.
The full 713.5 kg (1,573 lbs) has been applied
to the rear axle of the tractor only. Front axle
weight will remain the same. Notice that with
the 3-point hitch kit installed, the front and
rear axle shipping weight ratios change
significantly.
WEIGHTS
Total
Front
Rear
kg (lbs.)
kg (lbs.)
kg (lbs.)
Optimum
Operating
Weight &
Percentage @
43.1kg x 338
(95 lbs x 355)
14,440kg
(31,825lbs.)
9,386kg
(20,686lbs.)
5,054kg
(11,139lbs.)
Scaled
Shipping
Weight
11,945kg
(26,333lbs.)
7,265kg
(16,017lbs.)
4,679kg
(10,316lbs.)
Additional
Ballast
Required/Axle
2,495kg
(5,492lbs.)
2121kg
(lbs.)
375kg
(823lbs.)
SECTION 2 - OPERATION
Weight on Buhler Versatile 4WD tractors is to be
added in the form of liquid ballast to the tires or by
using the front or rear weight kits available.
Once the weight per axle of additional ballast is
determined, the preferred method of adding this
weight is to use as much dry weight (i.e., front
and rear weight kits) before liquid ballast is
added to the tires. This will allow ballast to be
easily removed or installed, depending on
varying needs. Also, by reducing the liquid
ballast inside of a tire, more benefit can be
derived from the construction of the tires. When
liquid ballast is installed inside of a tire, either
bias ply or radial, some of the cushioning action
of the tire is reduced and the ability to adjust tire
air pressure within a specific range is diminished.
These are important factors when trying to
eliminate concerns with wheel slippage and
“power hop.”
The front weight kit can have either thirty-nine 30
kg (67-lb.), suitcase-style weights and, along
with its brackets and hardware, weighs
approximately 1300 kg (2,860 lbs.). Or twelve 30
kg (67-lb.), suitcase-style weights and, along
with its brackets and hardware, weighs
approximately 443 kg (934 lbs.). Most
applications will not require front weight
packages.
Front weights can be removed by taking the tie
rod, 1, out of the weight package, loosening the
bolt, 2, on the rear of the bracket, then removing
the cast block, 3, and lifting the weights from the
bracket. The last four weights on the right and left
hand side have the cast block installed through
the weight cut out. The remaining weights are
held in position by the tie rod.
2-161
1
3
2
Figure 2-221
SECTION 3 - LUBRICATION AND MAINTENANCE
EVERY 500 HOURS
Slide the boot toward the front of the tractor on
the tube. Look at the inlet, 1, of the precleaner,
and remove any debris accumulated in this area.
1
After the precleaner is cleaned, reinstall the boot
and tighten the hose clamps securely.
(2360 and 2425 models illustrated)
Figure 3-61
OPERATION 40
Clean the Fuel Tank Vent
1
Clean the fuel tank vent to be sure the fuel
system does not create a vacuum or pressurize
causing a malfunction of the fuel pump.
To access the vent, open the SMV sign latch and
allow the sign and windshield washer bottle to
pivot outward. The vent, 1, is attached to the rear
wall of the cab by a bracket.
The vent does not need to be removed to clean it.
Use low pressure compressed air 3.5 bar (50 PSI
or less) to remove any debris collected around the
vent.
Figure 3-62
OPERATION 41
1
Clean the Hydraulic Suction Screen
The hydraulic suction screen can be removed
from the top of the hydraulic tank without draining
the hydraulic fluid.
To remove the suction screen, first clean the top
of the tank where the hydraulic pump suction
hose attaches to the suction screen port. Loosen
the hose clamps, 1, that attach the suction hose
to the steering pump.
Figure 3-63
3-45
SECTION 2 - OPERATION
The rear weight kit, 1, has thirty-three 30 kg
(67-lb.), suitcase-style weights and, along with
its
brackets
and
hardware,
weighs
approximately 1100 kg (2,400 lbs.).
NOTE: The rear weight kit cannot be installed
on units that have a PTO option or a 3-point
hitch option. The 3-point hitch or PTO is now
considered part of the rear axle ballast, and
the remaining additional weight required can
be installed as liquid weight in the tires.
1
Figure 2-222
Rear weights can be removed by loosening the
nut, 1, on the left side of the tie rod, 2, and pulling
the tie rod fully to the right against the right tire.
1
2
Figure 2-223
Remove the two, capscrews, 1, from the
underside of the weight package.
1
1
Figure 2-224
2-162
SECTION 2 - OPERATION
Pry upward on the fifth weight (from the left), 1,
and remove it from the tractor.
1
Figure 2-225
Starting with the sixth weight from the left,
remove six additional weights from the package.
Slide the four left hand weights, 1, to the right (on
the bracket) and remove the cast retaining block,
2, from the left hand weights.
2
1
Figure 2-226
Remove all remaining weights from the bracket
by sliding them to the left and lifting off of the
bracket. This will expose the right hand cast
retaining block, 1. Remove the block and remove
the remaining four weights.
1
Figure 2-227
2-163
SECTION 2 - OPERATION
Additional rear weight can be added by installing
an auxiliary rear weight kit, 1. This kit has
twenty-four 30 kg (67-lb.) suitcase-style weights
and, along with its brackets and hardware,
weighs approximately 738 kg (1628 lbs.). This
auxiliary rear weight kit is in addition to, and not
part of, the rear weight that fastens to the rear of
the tractor.
1
Figure 2-228
Auxiliary rear weights can be taken off by
removing the tie rod, 1, then loosening the nut on
the front of the bracket, removing the bolt, 2, and
clip, 3, and lifting the weight from the bracket.
1
NOTE: The auxiliary rear weight kit cannot be
installed on tractors that have a 3-point hitch
option. It can be installed on tractors that
have a PTO or rear weight kit installed.
2
After dry ballast has been installed on the tractor,
liquid ballast (if required) should be put into the
wheels evenly across the duals or triples. This
will allow lower tire air pressures to be used to
help improve the ride of the tractor. Tire air
pressure is based on the individual load a tire will
carry. The total weight on the axle should be
divided by the number of tires on that axle to
determine the load that each individual tire will
carry. By using the “Tire Load and Inflation
Tables” in Section 5, proper tire air pressure can
be determined.
For more information on liquid ballast and tire air
pressures, refer to the charts in Section 5.
Never exceed the maximum operating weight of
a specific model tractor as specified in the
following chart. Staying as close as possible to
the recommended operating weights will
provide the greatest degree of customer
satisfaction and tractor performance.
2-164
3
Figure 2-229
Maximum Operating Weight
Model
2290
2335
2360
2375
2425
Maximum weight
13,800 kg (30,500 lbs.)
16,000 kg (35,000 lbs.)
17,200 kg (38,000 lbs.)
17,900 kg (39,500 lbs.)
20,300 kg (44,500 lbs.)
SECTION 2 - OPERATION
TOOLBOX/STORAGE TRAY
Toolbox
The toolbox is located on the right front frame on
tractors equipped with a PTO, rear weight kit, or
3-point hitch. If the tractor does not have any of
these options, the toolbox will be mounted on the
rear frame, directly above the drawbar.
The toolbox has a hole drilled through the lid to
accommodate a lock.
Figure 2-230
Storage Tray
A storage tray is located under the operator’s
seat and can be pulled out to store
miscellaneous articles.
Figure 2-231
2-165
SECTION 2 - OPERATION
BREAK-IN PERIODS
BREAK-IN PERIOD
The first 50 hours of operation are the most
critical for insuring long and dependable
tractor life. Do the following:
1. Review the tractor Predelivery Checklist
contained in the assembly manual with your
dealer. Be sure all applicable items on the
sheet have been checked.
2. Check all fluid levels and be sure all systems
are filled with the correct fluids for your
operating conditions.
3. Check the engine, transmission, and
hydraulic oil levels hourly during the first 10
hours of operation.
4. Inspect the tractor for leaks hourly during the
first 10 hours of operation.
5. Torque the tie rods and wheel bolts after the
first hour of operation and every 50 hours
thereafter. Torque the tie rods to 300 N⋅m
(220 ft. lbs.), jam nuts to 320 N⋅m (235 ft.
lbs.), and wheel bolts to 715 N⋅m (525 ft. lbs.).
6. Operate the engine at 3/4 load as much as
possible during the first 50 hours (3/4 load is
approximately one gear lower than would be
normally used to pull a matched load).
2-166
7. Do not operate the engine at idle speed or
maximum horsepower for more than 5
minutes at a time for the first 50 hours.
8. Check the frame pivot pin, drag link and
steering cylinder cap screw torques after the
first 10 hours of operation. Torque the frame
pivot pin to 1365 N⋅m (1000 ft. lbs.) and the
remaining pins to 175 N⋅m (130 ft. lbs).
9. Have your dealer complete the “First
50-Hour Service” checklist at the end of this
manual.
ENGINE BREAK-IN
The Cummins engine used in Buhler Versatile
4WD tractors has been run on a dynamometer
before installation but not enough to be
considered broken in.
1. Do not operate the engine at more than 3/4
load for the first 24 hours of operation. Full
load should only be held for short intervals
during the next 24 hours of operation.
2. Check the oil level every 8 to 10 hours for the
first 100 hours of operation.
3. Follow the recommendations outlined in the
Cummins manual supplied with your tractor.
SECTION 3
LUBRICATION AND MAINTENANCE
GENERAL INFORMATION
INTRODUCTION
This section gives full details of the service
procedures necessary to maintain your tractor
at peak efficiency. The Lubrication and
Maintenance Chart provides a ready reference
to these requirements. Each operation is
numbered for easy reference.
In addition to the regular maintenance
operations listed, check the following items
every 10 hours or daily during the first 50 hours
of operation:
D
Wheel hardware for tightness.
D
Planetary hub and differential oil level
IMPORTANT: Park the tractor on level ground
and, where applicable, extend all cylinders
before checking oil levels.
SAFETY PRECAUTIONS
Read and observe all safety precautions listed
in Section 0, “Safety: Servicing The Tractor.”
NOTE: Dispose of used filters and fluids
properly. Consult local officials for proper
procedures.
CAUTION: DO NOT CHECK, LUBRICATE,
SERVICE OR ADJUST THE TRACTOR WITH
THE ENGINE RUNNING.
PREVENTING SYSTEM
CONTAMINATION
To prevent contamination when changing oils,
filters, etc., always clean the area around the
filler caps, level plugs, drain plugs, dipsticks and
filters prior to removal. Before connecting
remote cylinders, ensure that oil contained
within them is clean, has not degenerated due to
long storage, and is of the correct grade.
3-1
To prevent dirt entry during greasing, wipe dirt
from the grease fittings before greasing. Wipe
excess grease from the fitting after greasing.
FLEXIBLE MAINTENANCE INTERVALS
The intervals listed in the Lubrication and
Maintenance Chart are guidelines to be used
when operating in normal working conditions.
Adjust the intervals for environmental and
working conditions. Intervals should be
shortened under adverse (wet, muddy, sandy,
extremely dusty) working conditions.
LUBRICATION AND MAINTENANCE
CHART
The chart lists the intervals when routine
checks, lubrication, service and/or adjustments
should be performed. Use the chart as a quick
reference guide when servicing the tractor. The
operations follow the chart.
FIRST 50-HOUR SERVICE
At the first 50-hour service, ensure that the
maintenance operations listed on the “First
50-Hour Service” checklist, located at the back
of this manual, are carried out.
IMPORTANT: Items listed in the first 50-hour
check are important. If not performed, early
component failure and reduced tractor life may
result.
SECTION 3 - LUBRICATION AND MAINTENANCE
FUELING THE TRACTOR
CAUTION: WHEN HANDLING DIESEL FUEL,
OBSERVE THE FOLLOWING:
DO NOT SMOKE AROUND DIESEL FUEL.
UNDER NO CIRCUMSTANCES SHOULD
GASOLINE, ALCOHOL, GASOHOL OR
DIESELHOL (A MIXTURE OF DIESEL FUEL
AND ALCOHOL) BE ADDED TO DIESEL
FUEL BECAUSE OF INCREASED FIRE OR
EXPLOSION RISKS. IN A CLOSED
CONTAINER, SUCH AS A FUEL TANK, THEY
ARE MORE EXPLOSIVE THAN PURE
GASOLINE. DO NOT USE THESE BLENDS.
ADDITIONALLY, DIESELHOL IS NOT
APPROVED
DUE
TO
POSSIBLE
INADEQUATE LUBRICATION OF THE FUEL
INJECTION SYSTEM.
WHEN REFUELING, MAKE SURE THE
NOZZLE IS IN CONTACT WITH THE FILLER
NECK OF THE TRACTOR FUEL TANK
BEFORE FUEL STARTS FLOWING AND
DURING THE ENTIRE TIME FUEL IS
FLOWING.
FUEL STORAGE
Take the following precautions to ensure stored
fuel is kept free of dirt, water, and other
contaminants.
D
D
CLEAN THE FILLER CAP AREA AND KEEP
IT FREE OF DEBRIS.
FILL THE TANKS AT THE END OF EACH DAY
TO REDUCE OVERNIGHT CONDENSATION.
NEVER TAKE THE CAPS OFF OR REFUEL
WITH THE ENGINE RUNNING.
KEEP CONTROL OF THE FUEL NOZZLE
WHILE FILLING THE FUEL TANKS.
DON’T FILL THE TANKS TO CAPACITY.
ALLOW ROOM FOR EXPANSION. IF THE
ORIGINAL FUEL TANK CAPS ARE LOST,
REPLACE THEM WITH BUHLER VERSATILE
CAPS AND TIGHTEN SECURELY.
WIPE UP SPILLED FUEL IMMEDIATELY.
USE ONLY INTERNALLY GROUNDED
FUELING HOSE FROM STORAGE TANK
AND PUMP TO TRACTOR FUEL TANK. IF IN
DOUBT CHECK WITH YOUR FUEL HOSE
SUPPLIER. (AN ACCEPTABLE FUEL HOSE
WOULD BE ONE WITH AN INTERNAL WIRE
THAT CAN BE CHECKED USING A
CONTINUITY TESTER.)
3-2
D
D
D
D
Store fuel in black iron tanks, not galvanized
tanks, as the zinc coating will react with the
fuel and form compounds that will
contaminate the injection pump and
injectors.
Install bulk storage tanks away from direct
sunlight and angle them slightly so sediment
in the tanks will settle away from the outlet
pipe. Check the fuel storage tanks regularly
for condensation by draining from the tank
bottom.
To facilitate moisture and sediment removal,
provide a drain plug at the lowest point at the
end opposite the outlet pipe.
If fuel is not filtered from the storage tank, put
a funnel with a fine mesh screen in the fuel
tank filler neck when refueling.
Arrange fuel purchases so summer grade
fuels are not held over and used in winter.
Ground the storage tanks to prevent static
buildup.
SECTION 3 - LUBRICATION AND MAINTENANCE
Fuel Requirements
The quality of fuel used is an important factor for
dependable performance and satisfactory
engine life. Fuels must be clean, well-refined,
and noncorrosive to fuel system parts. Be sure
to use fuel of a known quality from a reputable
supplier.
To obtain optimum combustion and minimum
engine wear, the fuel selected for use should
conform to the application and property
requirements outlined in the following “Diesel
Fuel Selection Chart.”
Do not use Number 2-D fuel at temperatures
below -7°C (20°F). The cold temperatures will
cause Number 2-D fuel to thicken, which may
keep the engine from running. (If this happens,
contact your Buhler Versatile dealer.)
For the best fuel economy, use Number 2-D
whenever the temperature will permit.
To be sure a fuel meets the required properties,
enlist the aid of a reputable fuel oil supplier. The
responsibility for clean fuel lies with the fuel
supplier as well as the fuel user.
NOTE: When long periods of idling or
cold-weather conditions below 0°C (32°F)
are encountered or when continuously
operating at an altitude above 1,524 m
(5,000′), use Number 1-D fuel.
Using diesel fuel with sulphur content above
0.50% requires more frequent oil changes as
noted in the maintenance schedule.
The use of diesel fuel with a sulphur content
above 1.3% is not recommended.
Diesel Fuel Selection Chart
General
Fuel Class
Final Boiling
Point (Max.)
No. 1-D
288°C (550°F)
No. 2-D
357°C (675°F)
Cetane
(Min.)
Sulphur Content
(Max.)
-7°C (20°F)
and below
40*
0.30%
-7°C (20°F)
and above
40
0.50%
Temp. Range
*When continually operating at low temperatures or high altitude, a minimum cetane of 45 is required.
Cummins position relative to use of Biodiesel fuel
At this time biodoesel blends up to B5 are the only blends approved for use in all Cummins engines for
both On Highway and Off highway markets. B5 which is a blend of 5 percent pure biodiesel (B100) and
95 percent standard petroleum diesel has demonstrated to have no impact on engine performance,
durability or maintenance. The industry standard known as ASTM D6751 defines the specifications for
B100. However, this standard currently lacks a specification for stability. Without a specification, the
quality of the fuel in blends higher than B5 could degrade to a point which could be damaging to
engines. Cummins is supporting industry efforts to add a stability specification to the current ASTM
standard, and continues to evaluate the impact of these blends on durability of engines. Until this spec
is developed and tested, other blends of biodiesel will be unsuitable for use in Cummins On highway
and Off highway engines.
3-3
SECTION 3 - LUBRICATION AND MAINTENANCE
ADDING DIESEL FUEL
1
Fuel can be added to either tank. The two tanks
are connected via a crossover tube. Total
usable capacity of the two tanks is 870L (230
U.S. gallons).
When filling the tanks, make sure the vent, 1,
located at the rear of the cab, behind the washer
fluid reservoir, is unobstructed.
CAUTION: DO NOT OVER FILL THE TANKS
TO CAPACITY. EITHER FILL TO BOTTOM OF
FILLER NECK OR USE THE ELECTRONIC
INSTRUMENT CONTROL SYSTEM TO AID
IN REFUELING. WHEN THE ALARM
SOUNDS A SOLID TONE, THE TANK IS
FULL. ALLOW ROOM FOR EXPANSION.
FUEL EXPANSION OF OVER FILLED TANKS
CAN RESULT IN FUEL ENTRY TO ENGINE
CYLINDERS
AND
ACCOMPANYING
HYDRAULIC LOCK.
Figure 3-1
IF THE ORIGINAL FUEL TANK CAPS ARE
LOST, REPLACE THEM WITH BUHLER
VERSATILE
CAPS
AND
TIGHTEN
SECURELY.
To add fuel to the tractor, follow the steps below:
1. Clean the area around the fuel cap(s) to
prevent debris from entering the fuel tank.
1
2. To remove the cap, turn handle, 1, in the
center of the cap counterclockwise until
loose and pull the cap from the tank. Place it
in a clean area during refueling.
NOTE: With the engine off, and the
ignition switch in the “RUN” position, the
fuel fill mode of the Electronic Instrument
Control System will be operational and
will assist in refueling procedures. Refer
to “Electronic Instrument Control
System” in Section 2 for further
information.
3. After filling the tank, replace and tighten the
fuel cap. The cap has a locking tab for
additional security.
3-4
Figure 3-2
SECTION 3 - LUBRICATION AND MAINTENANCE
REMOVING SHIELDING TO GAIN ACCESS TO COMPONENTS
FOR INSPECTION AND MAINTENANCE
ENGINE ACCESS
In order to perform service, inspection and
lubrication operations to the tractor, it may be
necessary to open or remove various panels and
shields.
IMPORTANT: After performing work on the
tractor, install all safety shields before operating
the tractor.
OPENING THE HOOD PANELS
To provide easy access to the engine, each hood
side panel swings open vertically. There is an
external latch, 1, that releases the panel. Each
panel is held open by a single gas strut.
1
Close the hood panels by pulling downward from
the side of it and keeping a steady pressure on
the panel. The gas strut will collapse and the
panel will go over center and latch. Do not force
the panel down against the gas strut.
Figure 3-3
REMOVING THE HOOD PANELS
The hood panels can be removed easily if
greater access is required for a maintenance or
service operation.
1. Remove the hairpin clip, 1, from the front
pivot stud.
1
2. Unhook the gas strut from under the hood.
3. Slide the panel front and clear the front pivot
stud.
4. Slide the panel toward the rear of the tractor
to remove the panel from the rear pivot stud.
5. Set the panel off to the side out of the way.
Figure 3-4
To reinstall the panels, reverse the above
procedure.
3-5
SECTION 3 - LUBRICATION AND MAINTENANCE
BATTERY ACCESS
The batteries are located on top of the right side
fuel tank. Release the latch and lift the battery
cover. It is supported by a gas spring.
Make sure the cover is down and latched when
operating the tractor.
Figure 3-5
REMOTE VALVE ACCESS
1
The remote valve, located on the rear frame, is
protected by a rear deck plate, which also
provides a step for access to the cab filter. To
access the remote valve, it may be necessary to
remove the rear deck plate.
There are four bolts, 1, which hold the rear deck
plate, 2, to the frame. The frame is slotted so it is
only necessary to loosen the bolts to remove the
rear deck plate.
2
Figure 3-6
FRONT GRILLE
The front grille will swing out for access to the
cooling system components. To open the front
grille, lift the latch, 1, and swing the grille
outward.
1
Figure 3-7
3-6
SECTION 3 - LUBRICATION AND MAINTENANCE
BLANK PAGE
3-7
SECTION 3 - LUBRICATION AND MAINTENANCE
EVERY 10 HOURS OR DAILY
OPERATION 1
Clean the Front Grille, Hydraulic Coolers,
Transmission
Cooler,
Air-Conditioning
Condenser, Radiator and Fuel Cooler.
Access to the components can be gained by
unlatching the front grille screen at the front of the
tractor. Swing the grille screen out.
Figure 3-8
2360 and 2425 Tractors
To swing the oil coolers, air-conditioning
condenser, and fuel cooler out, pull the latch
lever, 1, downward 90° and swing the cooler
outward using the crossbar, 2.
1
2
Figure 3-9
The coolers, 1; condenser, 2; radiator, 3; grille
screen, 4, and fuel cooler, 5, are now exposed
and can be cleaned using compressed air.
Thoroughly remove any chaff or debris that has
accumulated in any of the fins of the
components. Blowing compressed air in both
directions through the fins will clean the
components completely. Make sure that all
perimeters of the components are cleaned out
(not just the center area where the engine fan
circulates).
1
3
2
4
5
NOTE: Never use a high-pressure washer to
clean out radiator fins. The fins will be bent
over and the radiator core rendered useless.
Figure 3-10
3-10
SECTION 3 - LUBRICATION AND MAINTENANCE
EVERY 10 HOURS OR DAILY
If the engine coolant is low, add coolant through
the radiator cap, 1, at the top of the hood.
1
CAUTION:
THE
COOLING
SYSTEM
OPERATES UNDER PRESSURE WHICH IS
CONTROLLED BY THE RADIATOR CAP. IT IS
DANGEROUS TO REMOVE THE CAP WHILE
THE SYSTEM IS HOT. ALWAYS TURN THE
CAP SLOWLY TO THE FIRST STOP AND
ALLOW THE PRESSURE TO ESCAPE
BEFORE REMOVING THE CAP ENTIRELY.
WEAR GLOVES WHEN REMOVING THE CAP.
The coolant added to the engine must meet
specific requirements. Use a low silicate
antifreeze which meets Engineering Standard
GM 6038-M, or which contains no more than
0.1% anhydrous alkali metasilicate and meets
either Engineering Standard GM 1825-M or GM
1899-M, which are performance specifications.
NOTE: Factory fill is a fully formulated
coolant mixture (pink in colour). Propylene
and ethylene glycol can be mixed in the
cooling system.
Use soft water in the coolant mixture.
Contaminants in hard water neutralize the
corrosion inhibitor components. Water must not
exceed 300 ppm hardness, or contain more than
100 ppm of either chloride or sulfate.
3-12
Figure 3-13
SECTION 3 - LUBRICATION AND MAINTENANCE
EVERY 10 HOURS OR DAILY
Antifreeze must be used in any climate for both
freeze and boiling point protection. Cummins
Engine Company, Inc. recommends a 50%
concentration level, 40% - 60% range of
ethylene glycol or propylene glycol in most
climates. Antifreeze at 68% concentration
provides the maximum freeze protection and
must never be exceeded under any condition.
Antifreeze protection decreases above 68%.
40%
50%
60%
68%
Ethylene Glycol
Propylene Glycol
-23°C (-10°F)
-37°C (-34°F)
-54°C (-65°F)
-71°C (-90°F)
-21°C (-6°F)
-33°C (-27°F)
-40°C (-56°F)
-63°C (-82°F)
NOTE:
Propylene
glycol
antifreeze
protection levels CANNOT be checked using
the same hydrometer as would be used with
ethylene glycol antifreeze.
You must check the concentration level
using a refractometer. This tool is available
from your Buhler Versatile dealer under part
#FGCC2805DS. Both propylene and ethylene
glycol protection levels (of a mixture of both)
can be measured with the refractometer.
Once the protection level of the coolant is
decided (ratio of water to antifreeze), the mixture
must contain one unit of Cummins DCA4 (dry
chemical additive) per gallon of coolant. A DCA
unit is equal to 42.5 g (1.5 dry ounces) or120 ml
(4 liquid ounces). Your Buhler Versatile dealer
can assist you in obtaining the DCA4 additive.
IMPORTANT: Failure to maintain DCA4 in the
cooling system will cause cooling system
corrosion and engine failure.
IMPORTANT: The concentration of DCA4
should be checked with a test kit, available from
Cummins and Fleetguard through your Buhler
Versatile dealer.
IMPORTANT: Do not add cold coolant to a hot
engine. Engine castings can be damaged. Allow
the engine to cool to below 50°C (120°F).
3-13
SECTION 3 - LUBRICATION AND MAINTENANCE
EVERY 10 HOURS OR DAILY
OPERATION 3
Check the Fan Belt Tension
The QSM11 and N14 engines use a spring-loaded
idler, 1, (N14 illustrated) to keep a constant
tension on the fan belt. No adjustment is required.
If the belt is not tight, check the pivot of the
spring-loaded idler for binding. If it is free, the belt
is probably worn out and requires replacement.
If the belt requires replacement, install a square
end of a 95mm (3/8″) breaker bar into the slot of
the idler and release the spring tension by pushing
down on the wrench. Slip the old belt off the
engine pulleys and install a new belt. Release the
wrench and allow the spring-loaded idler to apply
belt tension.
NOTE: Refer to your Cummins Engine Manual
for more information regarding belt
replacement, wear guidelines, and pulley
alignment.
NOTE: Fan drive belts are supplied by Buhler
Versatile. Contact your Buhler Versatile dealer
if a new fan belt is required.
3-14
1
Figure 3-14
SECTION 3 - LUBRICATION AND MAINTENANCE
EVERY 10 HOURS OR DAILY
OPERATION 4
Check the Engine Water Pump Drive Belt
Tension (2360 and 2425 Only)
Use a belt tension gauge to check and/or adjust
belts, or use firm thumb pressure and measure
the deflection method. With firm thumb pressure,
a properly adjusted belt should deflect 0.8 mm
(1/32″) for each 25 mm (1”) of span between
pulleys. If the belt requires adjustment, use the
following procedure:
Loosen the locknut, 1, which secures the idler
pulley to the water pump. Turn the adjusting
screw, 2, to adjust the belt tension. Tighten the
idler pulley locknut. Recheck the belt tension.
Secure the idler pulley in position by tightening
the locknut to 70 N⋅m (50 ft. lbs.). Loosen the
adjusting screw 1/2 turn to prevent breakage.
NOTE: The water pump drive belt is supplied
by Buhler Versatile. Contact your Buhler
Versatile dealer if a new belt is required.
NOTE: Refer to your Cummins Engine
Manual for more information regarding belt
replacement, wear guidelines, and pulley
alignment.
3-15
2
1
Figure 3-15
SECTION 3 - LUBRICATION AND MAINTENANCE
EVERY 10 HOURS OR DAILY
OPERATION 5
Check Air-Conditioner Compressor Belt
Tension
Use a belt tension gauge to check and/or adjust
belts, or use the firm thumb pressure and
deflection method. With firm thumb pressure a
properly adjusted belt should deflect 0.8 mm
(1/32″) for each 25 mm (1”) of span between
pulleys. If the belt requires adjustment, use the
following procedures based on tractor model:
2290, 2335, 2375 (QSM11) Engine
Loosen the compressor pivot bolt located behind
the compressor next to the engine block. Tighten
the adjustment nut, 1, to increase belt tension.
Torque the pivot bolt to 79 N·m (58 ft. lbs.).
1
IMPORTANT: Do not adjust belt tension to full
value with the adjusting nut. Belt tension can
increase when the pivot bolt is tightened and,
therefore, reduce belt and bearing life.
If the belt requires replacement, the adjustment
should be backed off all the way, and the belt
slipped up around the pulleys. Install the new belt
by reversing the procedure and tension it as
detailed above. Never pry a belt off or on a pulley
as damage to the pulley and belt may result.
NOTE: The air-conditioning compressor
drive belt is supplied by Buhler Versatile.
Contact your Buhler Versatile dealer to
obtain a new belt.
3-16
Figure 3-16
SECTION 3 - LUBRICATION AND MAINTENANCE
EVERY 10 HOURS OR DAILY
2360 and 2425 (N14) Engine
3
Loosen the compressor pivot bolt located behind
the compressor next to the engine block. Loosen
the adjuster clamp bolt, 1, and adjustment
locknut, 2. Tighten the adjuster bolt, 3, to
increase belt tension. Tighten the adjuster clamp
bolt, 1, locknut, 2, and pivot bolt after the correct
belt tension is obtained. Recheck the belt tension
once all hardware is tightened. Torque the pivot
bolt and adjuster clamp bolt to 79 N⋅m (58 ft. lbs.),
and the locknut to 61 N⋅m (45 ft. lbs.).
IMPORTANT: Do not adjust belt tension to full
value with the adjusting screw. Belt tension can
increase when the locknut is tightened and,
therefore, reduce belt and bearing life.
If the belt requires replacement, the adjustment
should be backed off all the way, and the belt
slipped up around the pulleys. Install the new belt
by reversing the procedure and tension it as
detailed above. Never pry a belt off or on a pulley
as damage to the pulley and belt may result.
NOTE: The air-conditioning compressor
drive belt is supplied by Buhler Versatile.
Contact your Buhler Versatile dealer to
obtain a new belt.
3-17
1
2
Figure 3-17
SECTION 3 - LUBRICATION AND MAINTENANCE
EVERY 10 HOURS OR DAILY
OPERATION 6
2
Check the Alternator Drive Belt Tension
3
2290, 2335, 2375 QSM11Engine
The QSM11 engines use a spring-loaded idler,
(N14 illustrated) to keep a constant tension on
the alternator belt. This is a shared drive using
the fan belt. See operation 3, for details on
checking tension.
2360, 2425 (N14) Engine
Use a belt tension gauge to check and/or adjust
belts, or use the firm thumb pressure and
deflection method. With firm thumb pressure, a
properly adjusted belt should deflect 0.8 mm
(1/32″) for each 25 mm (1”) of span between
pulleys. If the belt requires adjustment, use the
following procedure:
Loosen the pivot bolt, 1, which secures the
alternator to the engine. Loosen the adjuster
clamp bolt, 2, and locknut, 3. Adjust the belt
tension by tightening the adjuster bolt, 4. Torque
the adjuster clamp bolt to 79 N⋅m (58 ft. lbs.).
(Recheck the belt tension.) Torque the locknut to
79 N⋅m (58 ft. lbs.) and pivot bolt to 61 N⋅m (45 ft.
lbs.).
IMPORTANT: Do not adjust belt tension to full
value with the adjusting screw. Belt tension can
increase when the adjuster clamp bolt is
tightened and, therefore, reduce belt and
bearing life.
NOTE: 2360, and 2425 tractor models use the
same alternator adjustment bracket.
If the belt requires replacement, the adjustment
should be backed off all the way, and the belt
slipped up around the pulleys. Install the new belt
by reversing the procedure and tension it as
detailed above. Never pry a belt off a pulley as
damage to the pulley may result.
NOTE: The alternator drive belt is supplied by
Buhler Versatile. Contact your Buhler
Versatile dealer if a new belt is required.
NOTE: Refer to your Cummins Engine
Manual for more information regarding belt
replacement, wear guidelines, and pulley
alignment.
3-18
4
1
Figure 3-18
SECTION 3 - LUBRICATION AND MAINTENANCE
EVERY 10 HOURS OR DAILY
OPERATION 7
Check the Engine Oil Level
Check the engine oil level using the dipstick
located on the right side of the engine. This
should be done after the engine has been turned
off and oil in the lubrication system has had time
to drain back into the oil pan. (N14 shown in
illustration)
2
1
Figure 3-19
3-19
SECTION 3 - LUBRICATION AND MAINTENANCE
EVERY 10 HOURS OR DAILY
2290, 2335, 2375 (QSM11), 2360 and 2425
(N14) Engine
Check the engine oil level using the dipstick
located on the right side of the engine. This
should be done after the engine has been turned
off and oil in the lubrication system has had time
to drain back into the oil pan.
Unscrew the dipstick handle, 1, and pull the
dipstick from the tube. The dipstick is marked to
show the minimum (L) and maximum (H) oil level
for the engine. If additional oil is needed in the
engine, unscrew the filler cap handle, 2, and add
oil as necessary. (N14 Engine Shown in
Illustration)
NOTE: The vehicle must be level when
checking the oil level.
IMPORTANT: Never operate the engine with the
oil level below the L (Low) mark or above the H
(High) mark. Wait at least five minutes after
shutting off the engine to check the oil. This
allows time for the oil to drain to the oil pan.
NOTE: The engine is filled with 10W-30 oil at
the factory. This weight oil aids in coldweather starting at the manufacturing
facility. SAE 15W-40 oil as listed is the
preferred viscosity oil for normal operation.
Buhler Versatile and Cummins Engine Co.
recommend the use of a high quality SAE
15W-40 heavy-duty engine oil with an API
classification of CE or CF-4 for most
applications. Contact your Buhler Versatile
dealer to obtain engine oil.
Additional information on engine oil use under
extreme conditions (hot or cold weather) can be
found in the Cummins Engine Manual provided
with the tractor.
3-20
2
1
Figure 3-20
SECTION 3 - LUBRICATION AND MAINTENANCE
EVERY 10 HOURS OR DAILY
OPERATION 8
Drain the Fuel Filter
During operation, the fuel filter on the engine will
separate water that may be in the fuel system.
1
This accumulated water can be drained from the
fuel filter by opening the small plastic valve, 1, on
the bottom of the filter, and draining fluid out until
clean fuel runs from the valve. Close the valve
and hand tighten only.
Figure 3-21
3-21
SECTION 3 - LUBRICATION AND MAINTENANCE
OPERATION 9
Check the Hydraulic Oil Level
The oil level in the hydraulic oil reservoir must be
maintained to ensure proper operation of the
hydraulic system.
The hydraulic reservoir incorporates a sight
gauge that can be viewed by looking down from
the right side of the engine compartment. The
sight gauge is in the upper right corner of the tank
and is marked with an “ADD” and “FULL” line
indicating oil level. If additional hydraulic oil is
required, remove the cap, 1, from the filler tube
and add oil as necessary.
When checking oil level, take into consideration
the implement attached to the tractor. Depending
on whether the implement is in a raised or
lowered position, the tank level could be above or
below the optimum level.
3-22
1
Figure 3-22
SECTION 3 - LUBRICATION AND MAINTENANCE
EVERY 10 HOURS OR DAILY
OPERATION 10
Check the Transmission Oil Level
The oil level for the 12x4 Quad Shift III
transmission is easily checked by looking at the
sight gauge located on the rear lower left corner
of the transmission case. Check the oil level
when the engine is off.
The sight gauge, 1, has an “ADD” and “FULL”
line indicated on it. If additional transmission oil is
required, remove the cap, 2, from the filler tube
and add oil as necessary.
The oil level for the 12x2 powershift is checked
by looking at the sight gauge located on the rear
lower left corner of the transmission case. Check
the oil level with the tractor parked on a level
surface with the engine shut off.
S With cold oil, the oil level should show in the
sight glass section designated as cold. Add oil
if necessary to bring the oil level to the bottom
of the cold section of the sight glass.
S With hot oil, the oil level should show in the
sight glass section designated as hot. Add oil
if necessary to bring the oil level to the bottom
of the hot section of the sight glass.
ATTENTION:
Do
not
operate
the
transmission with oil levels above or below
the recommended settings. Either condition
can result in overheating or loss of power
and damage to the equipment.
1
2
Figure 3-23
OPERATION 11
Check the Brake Reservoir Level
The brake fluid level must be maintained for
proper operation. The reservoir is located on the
left front fire wall of the cab, below the air cleaner.
1
The reservoir, 1, has a minimum and maximum
level line on its outside diameter indicating
proper fluid level. Remove the cap of the
reservoir and add fluid as necessary.
Only use DOT3 brake fluid available from your
Buhler Versatile Dealer
Figure 3-24
3-23
SECTION 3 - LUBRICATION AND MAINTENANCE
EVERY 10 HOURS OR DAILY
OPERATION 12
Brake Adjustment
The foot and park brake unit is self-adjusting and
requires no maintenance.
1
Engaging and disengaging the park brake lever,
1, several times will activate the self-adjusting
mechanism within the caliper and keep the brake
in proper adjustment. This will ensure a proper
set point for the brake to stop the tractor and hold
it on an incline when parked.
Figure 3-25
Visually inspect the brake rotor, 1, for nicks or
damage and the brake pads for wear. The pads
must be replaced if they are worn to 1 mm (1/32″)
or less. Consult your Buhler Versatile dealer for
assistance in replacement of the brake rotor or
pads.
1
WARNING: DO NOT OPERATE THE
TRACTOR WITHOUT THE BRAKES IN GOOD
WORKING ORDER.
Figure 3-26
OPERATION 13
Lubricate the Optional 3-Point Hitch
The 3-point hitch linkage requires lubrication to
maximize performance.
Lubricate the grease fittings, 1, located at the top
pivot pin point of each lift cylinder.
1
Figure 3-27
3-24
SECTION 3 - LUBRICATION AND MAINTENANCE
EVERY 10 HOURS OR DAILY
Lubricate the front and rear grease fittings, 1,
located on the upper link.
1
These four grease fittings are the only points that
require lubrication on the 3-point hitch.
Use lithium base EP high temperature grease
available from your Buhler Versatile dealer.
Figure 3-28
OPERATION 14
Lubricate the Lower Articulation Pin
Lubricate the grease fitting, 1, until grease flows
from around the pin seals. This will purge any dirt
accumulated in the pivot pin area.
1
Start the unit and articulate from side to side to
work the grease into the joint.
Use Moly based EP high temperature grease
available from your Buhler Versatile dealer.
Figure 3-29
OPERATION 15
Lubricate the Front Steering Cylinder Pins
1
Lubricate the grease fittings (one on each side),
1, until grease flows from around the pin seals.
This will purge any dirt accumulated in the pivot
pin area.
Use Moly based EP high temperature grease
available from your Buhler Versatile dealer.
Figure 3-30
3-25
SECTION 3 - LUBRICATION AND MAINTENANCE
EVERY 10 HOURS OR DAILY
OPERATION 16
Lubricate the Rear Steering Cylinder Pins
Lubricate the bottom two grease fittings, 1,
remotely mounted on the left rear frame, until
grease flows from around the pin seals. This will
purge any dirt accumulated in the pivot pin area.
1
Use Moly based EP high temperature grease
available from your Buhler Versatile dealer.
Figure 3-31
OPERATION 17
Lubricate the Upper Articulation Pin
Lubricate the grease fitting, 1, until grease flows
from between the frame pieces. This will purge
any dirt accumulated in the pivot pin area.
Start the unit and articulate from side to side to
work the grease into the joint.
Use Moly based EP high temperature grease
available from your Buhler Versatile dealer.
1
Figure 3-32
OPERATION 18
Lubricate the Front Drag Link Pins
Lubricate the grease fittings (one on each side),
1, until grease flows from around the pin seals.
This will purge any dirt accumulated in the pivot
pin area.
Use Moly based EP high temperature grease
available from your Buhler Versatile dealer.
1
Figure 3-33
3-26
SECTION 3 - LUBRICATION AND MAINTENANCE
EVERY 10 HOURS OR DAILY
OPERATION 19
Lubricate the Rear Drag Link Pins
1
Lubricate the top two grease fittings, 1, remotely
mounted on the left rear frame, until grease flows
from around the pin seals. This will purge any dirt
accumulated in the pivot pin area.
Use Moly based EP high temperature grease
available from your Buhler Versatile dealer.
Figure 3-34
OPERATION 20
Lubricate the Rear Axle Drive Shaft Steady
Bearing
1
Lubricate the grease fitting, 1, until grease flows
from the bearing area. This will purge any dirt
accumulated in this area.
Use lithium base EP high temperature grease
available from your Buhler Versatile dealer.
Figure 3-35
REMINDER
For the first week of operation all wheel mounting
hardware should be re-tightened to the specified
torque after the first hour of operation, then after
every three hours of operation for the first day.
Re-tighten to the specified torque daily until
wheel hardware maintains specified torque.
Refer to pages 3-79 thru 3-87.
3-27
SECTION 3 - LUBRICATION AND MAINTENANCE
EVERY 50 HOURS
OPERATION 21
Check the Engine Air Cleaner Connections
The air induction system pipe work must be
checked for proper sealing.
On the 2360 and 2425 (N14), check to be sure
that the hose clamps, attaching the pipe work
between the turbocharger and air cleaner are
tight and that no air can enter the air induction
system without first passing through the air
cleaner. (N14 engine shown in illustration)
1
On the 2290, 2335 and 2375 (QSM11), check the
hose clamps, on the pipe work between the air
cleaner and turbocharger. Make sure the clamps
are tight and no air can enter the engine air
induction system without first passing through
the air cleaner.
Figure 3-36
3-28
SECTION 3 - LUBRICATION AND MAINTENANCE
EVERY 50 HOURS
OPERATION 22
Clean the Cab Air Filter
The cab air filter, 1, located on the rear of the cab
must be cleaned to keep the cab air system
operating at maximum efficiency.
Note: In humid conditions, such as occur on
most early mornings, do not switch on the blower
prior to servicing the filter. Damp particles drawn
into the filter may be difficult to remove without
washing.
1
Note: The filter is made of specially treated
paper with a rubber sealing strip bonded to the
upper surface. Do not damage the element
during removal.
Figure 3-37
To remove the cab air filter, lift up on the filter
frame handle, 1, and unhook the latch, 2. Allow
the filter and frame to lower toward the cab
window. Remove the filter element. The filter
element may be cleaned using either method A
or B depending on the condition of the element.
METHOD A
Clean the element with compressed air not
exceeding 2 bar (30 PSI). Hold the nozzle at least
300 mm (12”) from the filter to prevent damage to
the paper pleats. Direct the compressed air
through the filter opposite the normal air flow.
1
2
Figure 3-38
WARNING
Wear eye protection and a face mask when
carrying out this operation.
3-29
SECTION 3 - LUBRICATION AND MAINTENANCE
METHOD B
1 Soak the filter for 15 minutes in warm water
containing a mild detergent.
2 Rinse the filter with running water below 1.4
bar (20 PSI).
3 Shake off excess water and allow to air dry.
IMPORTANT: Do not attempt to dry the filter with
heat or compressed air and do not install until
thoroughly dry as the filter may rupture. It is
recommended that a new filter is installed at this
service and the washed one put aside for
installation at a subsequent service. Store the
spare filter in a dry place and wrap it to prevent
dust contamination or damage.
NOTE: Wash the filter more frequently when
operating in extremely dusty conditions.
1
NOTE: Replace the filter when holes or tears are
visible.
NOTE: The element may be washed a maximum
of 10 times.
Reinstall the element into its frame and check the
seal, 1, around the perimeter of the element for
nicks or cracks. Replace the element if any
damage is found.
Figure 3-39
Clean the filter with a damp, lint--free cloth.
3-30
SECTION 3 - LUBRICATION AND MAINTENANCE
EVERY 50 HOURS
Reinstall the filter into its frame on the back of the
cab roof. Lift the frame latch handle, 1, and hook
the latch tab, 2, onto the frame.
WARNING
The cab air filter is designed to remove
dust from the air but will not exclude
chemical vapor. Follow the chemical
manufacturers
directions
regarding
protection from dangerous chemicals.
1
2
Figure 3-40
OPERATION 23
1
Check the Differential Oil Level
Differential oil level must be maintained to
provide adequate lubrication and cooling to the
differential components.
Check the differential oil level when the tractor is
on a level surface and has been stationary for
one hour to allow the oil in the axle and planetary
hubs to level out.
Each axle housing has a convenient sight gauge,
1, located on the right half of the axle when facing
the differential input. The oil level in the gauge
should be even with the center of plug, 2. If
additional differential oil is required, remove the
plug, 2, and add oil as necessary.
Buhler Versatile recommends 85W140 GL5 oil
be used in temperatures above or 80W90 GL5 in
temperatures below 0°C (32°F). This oil is
available at your Buhler Versatile dealer.
3-31
2
Figure 3-41
SECTION 3 - LUBRICATION AND MAINTENANCE
EVERY 50 HOURS
OPERATION 24
Check the Planetary Hub Oil Level
1
The oil in the four planetary hubs (two on each
axle) must be maintained at the proper level to
provide lubrication for the outboard planetaries.
To check the planetary hub oil level, rotate the tire
so that the check plug, 1, is at the 3 o’clock
position. Remove the check plug and see if oil
runs out or is level with the plug opening. If no oil
runs out, the hub requires oil. Remove the fill
plug, 2, and add oil until it runs out of the check
plug, 1.
Check the differential oil level when the tractor is
on a level surface and has been stationary for
one hour to allow the oil in the axle and planetary
hubs to level out.
Buhler Versatile recommends 85W140 GL5 oil
be used in temperatures above 0°C (32°F) or
80W90 GL5 in temperatures below 0°C (32°F).
This oil is available from your Buhler Versatile
dealer.
OPERATION 25
Check Tire Air Pressure
It is extremely important that tires (singles, duals,
or triples) are kept at proper inflation pressures,
based on the load being carried by the tires.
A special tire gauge capable of measuring low
pressure,0 to 1.4 bar (0 to 20 PSI), is available
from your Buhler Versatile Dealer.
NOTE: If the tires are ballasted with a calcium
chloride/water solution, check pressure with
the valve stem at the top of the tire.
See the “Tire Load and Inflation Tables” in
Section 5 of this manual for the proper inflation
pressures.
3-32
2
Figure 3-42
SECTION 3 - LUBRICATION AND MAINTENANCE
EVERY 250 HOURS
OPERATION 26
Change the Engine Oil and Filter
1
To change the engine oil and filter, operate the
engine until the coolant temperature reaches
60°C (140°F). Shut off the engine.
There are two oil plugs, 1, located on the bottom
of the oil pan. Either plug can be removed to drain
the oil. Drain the oil completely to make sure all
the oil and suspended contaminates are
removed from the engine.
Figure 3-43
Clean the area around the lubricating oil filter
head, 1. Remove the filter, 2.
1
NOTE: All model tractors use one single oil
filter mounted on the right-hand side of the
engine.
Clean the sealing surface of the filter head. The
O ring may stick on the filter head. Make sure it is
removed.
Using the correct oil filter for your engine, fill it
with clean engine oil. The lack of lubrication
during the delay until the filter is pumped full of oil
is harmful to the engine. Apply a light film of oil to
the gasket sealing surface before installing the
new filter.
Install the filter on the filter head. Tighten the filter
until the gasket contacts the filter head surface.
Tighten the filter an additional 1/2 to 3/4 of a turn.
NOTE: Over-tightening can distort the
threads or damage the filter element seal. Do
not use tools to tighten the filter.
Clean and check the oil drain plug threads and
the sealing surface. Install and tighten the oil
drain plug to 88 N⋅m (65 ft. lbs.).
3-33
2
Figure 3-44
SECTION 3 - LUBRICATION AND MAINTENANCE
EVERY 250 HOURS
Fill the engine with oil to the proper level as
indicated by the dipstick. The capacities of the
engines are as follows:
2290, 2335, 2375 (QSM11)
Oil Pan Capacity - 34 L (9.0 gals.)
Filter Capacity - 2.7 L (0.7 gal.)
2360, 2425 (N14)
Oil Pan Capacity - 36 L (9.5 gals.)
Filter Capacity -2.7 L (0.7 gal.)
Buhler Versatile and Cummins Engine Co.
recommend the use of a high quality 15W-40
multi-viscosity oil for most applications.
Available from your Buhler Versatile dealer.
NOTE: The engine is filled with 10W-30 oil at
the factory. This weight oil aids in coldweather starting at the manufacturing
facility. SAE 15W-40 oil as listed is the
preferred viscosity oil for normal operation.
3-34
Operate the engine at idle speed to inspect for
leaks at the filters and drain plugs.
NOTE: Engine oil pressure must be
indicated on the Electronic Instrument
Control System within 10 seconds after
starting. If oil pressure is not registered
within 10 seconds, shut off the engine
immediately to avoid engine damage.
Confirm the correct oil level in the oil pan.
Shut off the engine. Wait approximately five
minutes to let the oil drain from the upper parts of
the engine. Check the oil level again.
Add oil as necessary to bring the oil level to the
“H” (High) mark on the dipstick.
IMPORTANT: Discard used engine
according to local laws and regulations.
oil
SECTION 3 - LUBRICATION AND MAINTENANCE
EVERY 250 HOURS
OPERATION 27
1
Change the Coolant System Filter
The coolant system filter must be changed to
ensure the proper level of DCA4 (dry chemical
additive) is maintained in the engine cooling
system to provide maximum protection against
corrosion. To change the filter, proceed as
follows:
Turn the coolant shutoff valve, 1, to the “OFF”
position. Remove the radiator cap. Remove and
discard the coolant filter, 2. Clean the gasket
surface. Apply a light film of lubricating oil to the
gasket sealing surface before installing the new
coolant filter.
NOTE: All model tractors have one single
coolant system filter with a shut off valve
mounted on the right-hand side of the
engine.
WARNING: DO NOT REMOVE THE
RADIATOR CAP FROM A HOT ENGINE. HOT
STEAM WILL CAUSE SERIOUS PERSONAL
INJURY. REMOVE THE COOLANT SYSTEM
PRESSURE CAP AND CLOSE THE SHUTOFF
VALVES
BEFORE
REMOVING
THE
COOLANT FILTER. FAILURE TO DO SO CAN
RESULT IN PERSONAL INJURY FROM
HEATED COOLANT SPRAY.
NOTE: Do not allow oil to get inside the filter.
Oil will adversely affect the DCA4.
Install the filter on the filter head. Tighten the filter
until the gasket contacts the filter head surface.
Tighten the filter an additional 1/2 to 3/4 of a turn.
NOTE: Over-tightening can distort the
threads or damage the filter head. Do not use
tools to tighten the filter.
Turn the coolant shutoff valve to the “ON”
position. Operate the engine, and check for
coolant leaks. After the air has been purged from
the system, check the coolant level again.
3-35
2
Figure 3-45
SECTION 3 - LUBRICATION AND MAINTENANCE
EVERY 250 HOURS
OPERATION 28
Check the Engine DCA4 Protection Level
The DCA4 protection level must be checked
whenever coolant is added to the cooling system
or whenever the cooling system filter is changed.
Buhler Versatile has a test kit available, part
number FGCC2602, to check the concentration
level. Instructions are included with the test kit.
Contact your Buhler Versatile dealer to obtain
the test kit.
Follow the instructions in the kit to maintain
proper DCA4 protection level.
Figure 3-46
OPERATION 29
Change the Fuel Filter
The fuel filter is located on the left side of the
engine. To replace the fuel filter, 1, unscrew it
from its filter head, 2, and discard the old filter. Fill
the new filter with clean fuel and install it onto the
filter head. Hand tighten the filter 1/2 to 3/4 of a
turn after the seal on top of the filter contacts the
filter head.
1
2
IMPORTANT: Discard the used fuel filter
following local laws and regulations.
NOTE: There is no shutoff provided at the
filter head to stop the flow of fuel from the
tanks. The filter head is located high enough
on the engine so that no fuel should escape
when the filter is removed.
3-36
Figure 3-47
SECTION 3 - LUBRICATION AND MAINTENANCE
EVERY 250 HOURS
OPERATION 30
Check the Air-Conditioner Sight Glass
The air-conditioner sight glass should be
checked to see if the system is functioning
properly.
The receiver/drier, 1, is located on the back of the
condenser, in the front grille of the tractor on the
2360 and 2425 tractors (shown in illustration). It
is located on the rear left hand hood support on
the 2290, 2335 and 2375 tractors. Check the
sight glass on the top of the receiver tank every
250 hours. If clear, the system is in good
condition; if bubbles flow across the sight glass
with the engine running, the system may be low
on refrigerant. If the glass is cloudy, it is an
indication that the system is contaminated with
moisture. When moisture is present, the dryer
will have to be replaced by qualified airconditioning service technicians. Contact your
Buhler Versatile dealer.
WARNING: NEVER LOOSEN, REMOVE OR
DISCONNECT ANY HOSE IN THE AIRCONDITIONING SYSTEM.
THE AIR-CONDITIONER HOSES ARE UNDER
PRESSURE AT ALL TIMES, EVEN WHEN THE
TRACTOR IS NOT RUNNING.
DO NOT ATTEMPT TO SERVICE THE AIRCONDITIONING SYSTEM. IT IS POSSIBLE TO
SUFFER SEVERE FROSTBITE OR INJURY
FROM ESCAPING REFRIGERANT. SPECIAL
EQUIPMENT AND INSTRUMENTS ARE
REQUIRED TO SERVICE THE AIRCONDITIONING SYSTEM WHICH USES
R134A
REFRIGERANT.
SEE
YOUR
AUTHORIZED BUHLER VERSATILE DEALER
FOR SERVICE.
3-37
1
Figure 3-48
SECTION 3 - LUBRICATION AND MAINTENANCE
EVERY 250 HOURS
OPERATION 31
Check the Air-Conditioner Drain Hoses
Check to be sure the drain hoses, 1, located on
each rear corner of the cab, are free of any
obstructions and are not kinked or twisted
blocking the free flow of water that is draining
from the evaporator at the top of the cab.
The hoses are routed down into the front frame
and should not interfere with any portion of the
articulation area.
1
Figure 3-49
OPERATION 32
Check the Weight Kit Hardware Torque
(Optional)
Check the hardware securing the front and rear
weight brackets and weights to the tractor.
Front weight kit - Check the weight mounting
bolts, 1, securing the weights to the weight
bracket and torque to 480 N⋅m (354 ft. lbs.).
Check the hardware 2, securing the bracket to
the tractor and torque to 633 N⋅m (467 ft. lbs.).
Check the tie rod nuts, 3, and torque to 633 N⋅m
(467 ft. lbs.).
2
3
1
Figure 3-50
Rear weight kit - Check the weight mounting
bolts, 1, securing the weights to the weight
bracket and torque to 480 N⋅m (354 ft. lbs.).
Check the eight nuts securing the bracket to the
tractor and torque to 633 N⋅m (467 ft. lbs.). Check
the tie rod nuts and torque to 633 N⋅m (467 ft.
lbs.).
1
1
Figure 3-51
3-38
SECTION 3 - LUBRICATION AND MAINTENANCE
EVERY 250 HOURS
Auxiliary rear weight kit - Check the weight
mounting nuts, 1, securing the weights to the
weight bracket and torque to 480 N⋅m (354 ft.
lbs.). Check the six nuts (three on each bracket)
securing the bracket to the tractor and torque to
633 N⋅m (467 ft. lbs.). Check the tie rod nuts, 2,
and torque to 633 N⋅m (467 ft. lbs.).
1
2
Figure 3-52
OPERATION 33
Check the Wheel Hardware Torque
All wheel mounting hardware must be checked
for proper torque. The following chart shows
wheel torques, based on wheel configuration.
NOTE: For identification of particular
hardware components, see Operation 75
later in this section.
CONFIGURATION
TORQUES
Singles
Wheel to Hub Nuts 710 N⋅m (525 ft. lbs.)
Special Tie Rod Duals
Wheel to Hub Nuts 710 N⋅m (525 ft. lbs.)
Backing Nuts 440 N⋅m (325 ft. lbs.)
Outer Wheel Nuts 300 N⋅m (220 ft. lbs.)
Jam Nuts 320 N⋅m (235 ft. lbs.)
Standard Tie Rod Duals
Wheel to Hub Nuts 710 N⋅m (525 ft. lbs.)
Outer Wheel Nuts 300 N⋅m (220 ft. lbs.)
Jam Nuts 320 N⋅m (235 ft. lbs.)
Standard and Special Row Crop
Drum Duals
Wheel to Hub Nuts 710 N⋅m (525 ft. lbs.)
Drum Style Triples
Wheel to Hub Nuts 710 N⋅m (525 ft. lbs.)
Center Wheel to Outer Wheel Nuts 710 N⋅m (525 ft. lbs.)
3-39
SECTION 3 - LUBRICATION AND MAINTENANCE
EVERY 250 HOURS
Figure 3-53
OPERATION 34
Driveline Cross and Bearing Lubrication
NOTE: Not all models require lubrication of
the cross and bearing on a given driveline.
Read the procedure carefully to identify
which cross and bearing requires lubrication
on your particular tractor.
Lubricate the following items:
1 Transmission input cross and bearing (2290
2335, 2360* and 2375* only)
2 Rear axle cross and bearing (2290, 2335,
2360* and 2375* only)
3 Rear axle driveline articulation cross and
bearing (2290, 2335, 2360* and 2375* only)
4 Transmission rear output cross and bearing
(2290, 2335, 2360* and 2375* only)
5 Transmission front output cross and bearing
(2290, 2335, 2360* and 2375* only)
6 Front axle cross and bearing (2290, 2335,
2360* and 2375* only)
Use lithium base EP high temperature grease
available from your Buhler Versatile dealer.
*Applies to units equipped with standard duty
axles.
3-40
SECTION 3 - LUBRICATION AND MAINTENANCE
EVERY 500 HOURS
OPERATION 36
1
Clean the Battery Connections
The battery connections must be cleaned and
tightened to maintain proper operation of the
electrical system of the tractor.
Remove the three battery ground cable
connections, 1, first, and then the six positive
cable connections, 2, before cleaning. Each
connection has a rubber boot covering it for
protection. The connections are loosened by
turning the nut counterclockwise and pulling the
connection from the battery mounting stud.
Clean the battery stud, battery cable and
mounting nut thoroughly with a brush and
reinstall the cables. Attach the positive cables
first and the ground cables last.
CAUTION:
WHEN
SERVICING
THE
BATTERIES, DISCONNECT THE NEGATIVE
(BLACK) CABLES BEFORE THE POSITIVE
(RED) CABLES. WHEN CONNECTING THE
CABLES, CONNECT THE POSITIVE CABLE
FIRST, THEN THE NEGATIVE. THIS WILL
REDUCE THE POSSIBILITY OF SPARKING
AND BATTERY EXPLOSION.
WARNING: ALL BATTERIES GENERATE
HYDROGEN GAS, WHICH IS HIGHLY
FLAMMABLE. IF IGNITED BY A SPARK OR
FLAME,
THE
GAS
MAY
EXPLODE
VIOLENTLY CAUSING A SPRAY OF ACID,
FRAGMENTATION OF THE BATTERY, AND
POSSIBLE SEVERE PERSONAL INJURY,
PARTICULARLY TO THE EYES.
THEREFORE, AS A SAFETY PRECAUTION:
WEAR PROTECTIVE CLOTHING AND
GOGGLES.
DO NOT SMOKE OR EXPOSE THE
BATTERY TO OPEN FLAME.
DO NOT CONNECT OR DISCONNECT
LIVE CIRCUITS.
3-42
2
Figure 3-56
SECTION 3 - LUBRICATION AND MAINTENANCE
EVERY 500 HOURS
If the batteries require removal, disconnect the
cables as previously detailed. Loosen the wing
nuts, 1, and lower the clamps, 2, downward. Lift
the battery to be removed from the battery tray.
1
2
Figure 3-57
OPERATION 37
Check the Battery Electrolyte Level
To check the battery electrolyte level, clean the
top of the batteries with a damp cloth.
1
Remove the six fill plugs, 1, from each battery.
Check that the electrolyte level is 6 mm (1/4″)
below the filler neck of each cell. Add distilled or
demineralized water as required. Do not overfill.
Replace all fill plugs.
Check for loose cable connections. Tighten as
required.
Figure 3-58
WARNING: BATTERIES CONTAIN SULFURIC
ACID. IN CASE OF CONTACT WITH SKIN,
FLUSH THE AFFECTED AREA WITH WATER
FOR FIVE MINUTES. SEEK MEDICAL
ATTENTION IMMEDIATELY.
WARNING: AVOID CONTACT WITH THE
SKIN, EYES OR CLOTHING. WEAR EYE
PROTECTION WHEN WORKING NEAR
BATTERIES.
3-43
SECTION 3 - LUBRICATION AND MAINTENANCE
EVERY 500 HOURS
OPERATION 38
Check the Starter Battery Connections
Check to be sure that the battery cable
connection, 1, and the ground connection, 2, are
tight and clean where they attach to the engine
starter. Clean and tighten as necessary.
1
The starter is located on the left side of the
engine.
2
WARNING: DISCONNECT THE BATTERY
CABLES AT THE BATTERY BEFORE
WORKING ON THE BATTERY CABLE
CONNECTIONS AT THE STARTER.
Figure 3-59
OPERATION 39
Clean the Engine Air Precleaner
The engine air precleaner must be checked to be
sure that debris is not causing any obstruction at
the precleaner inlet.
2
1
3
4
5
To inspect the inlet to the precleaner, loosen the
hose clamp, 1, attaching the air cleaner tube, 2,
to the rubber boot, 3. Loosen the hose clamp, 4,
attaching the boot to the precleaner, 5.
(2360 - 2425 models illustrated).
Figure 3-60
3-44
SECTION 3 - LUBRICATION AND MAINTENANCE
EVERY 500 HOURS
Loosen and remove the two hose clamps
securing the suction hose, 1, to the suction
screen port. Remove the suction hose. Unscrew
the suction screen, 2, from the top of the
hydraulic tank and remove it. Cover the hole in
the tank so contaminants cannot enter.
The suction screen can be washed in a cleaning
solvent to remove any debris accumulated in it.
Reinstall the suction screen into the top of the
tank and tighten securely. Reinstall the suction
hose onto the steering pump and suction screen
and tighten the hose clamps to ensure that no air
can enter the hydraulic system.
Figure 3-64
OPERATION 42
Clean the Hydraulic Reservoir Breather
1
Clean the hydraulic reservoir breather, 1, so that
the hydraulic system can breathe properly.
Remove the breather from its mounting bolt and
unscrew the breather from its hose. Clean it out
using low pressure air 1.7 bar (25 PSI) or less.
Reinstall the hose and replace the breather in its
mounting location.
Figure 3-65
3-46
SECTION 3 - LUBRICATION AND MAINTENANCE
EVERY 500 HOURS
OPERATION 43
Change the Hydraulic Filter
1
The hydraulic filter is located under the front end
of the tractor, directly below the engine, and is the
filter on the right side of the frame (when viewing
it from the operator’s seat).
The hydraulic filter, 1, is a spin-on, throwaway
type and is removed by turning it
counterclockwise. To install the new filter,
lubricate the O ring on top of the new filter with
clean hydraulic oil. Install the filter to the filter
head, hand-tightening until the seal contacts the
filter head. Tighten the filter an additional 1/2 to
3/4 turn.
Figure 3-66
NOTE: Some oil, approximately 1.9 L (2 qts.),
may be lost when the filter is unscrewed from
the filter head. Be sure to replenish the lost
oil.
Start the engine and check for leaks at the filter.
NOTE: The transmission filter and hydraulic
filter are the same part number.
OPERATION 44
Change the Transmission Filter
1
The transmission filter is located under the front
end of the tractor directly below the engine, and
is the filter on the left side of the frame (when
viewing it from the operator’s seat).
The transmission filter, 1, is a spin-on,
throwaway type and is removed by turning it
counterclockwise. To install the new filter,
lubricate the O ring on top of the new filter with
clean transmission oil. Install the filter to the filter
head, hand-tightening until the seal contacts the
filter head. Tighten the filter an additional 1/2 to
3/4 turn.
NOTE: Some oil, approximately 0.95 L (1 qt.),
may be lost when the filter is unscrewed from
the filter head. Be sure to replenish the lost
oil.
Start the engine and check for leaks at the filter.
NOTE: The transmission filter and hydraulic
filter are the same part number.
3-47
Figure 3-67
SECTION 3 - LUBRICATION AND MAINTENANCE
EVERY 500 HOURS
OPERATION 45
1
Change the Differential Oil
To change the differential oil, operate the tractor
a sufficient amount of time to warm up the oil in
the differentials. Loosen the check plug, 1, and
remove the drain plug, 2, to allow the oil to drain
completely from the differential housings. Once
all the oil is removed, replace the drain plug and
tighten it to 74 N⋅m (55 ft. lbs.). Make sure the
sealing surface on the plug is in good condition.
Refill the differentials through the check plug to
the proper level as indicated by the sight gauge,
3.
3
2
Buhler Versatile recommends that 85W140 GL5
oil be used in temperatures above 0°C (32°F) or
80W90 GL5 in temperatures below 0°C (32°F).
This oil is available from your Buhler Versatile
dealer.
Figure 3-68
NOTE: Oil will flow from the differential to the
planetary hubs. Change the oil with the
tractor on a level surface and allow the
differential and planetary hub oil to level out.
OPERATION 46
Change the Planetary Hub Oil
To drain the planetary hub oil, rotate the tire so
that the drain plug, 1, is at the 6 o’clock position.
Loosen the fill plug, 2, to allow all of the oil to drain
from the planetary hub. Make sure that the plug,
1, is retightened, and then refill the hub as
detailed in Operation 24.
Buhler Versatile recommends that 85W140 GL5
oil be used in temperatures above 0°C (32°F) or
80W90 GL5 in temperatures below 0°C (32°F).
This oil is available from your Buhler Versatile
dealer.
NOTE: Oil will flow from the differential to the
planetary hubs. Change the oil with the
tractor on a level surface and allow the
differential and planetary hub oil to level out.
3-48
2
1
Figure 3-69
SECTION 3 - LUBRICATION AND MAINTENANCE
EVERY 500 HOURS
OPERATION 47
Check the Axle Mount Bolt Torque
Check the axle mount bolts for proper torque.
1
2
Torque the nuts, 1, and 2, must be torqued to
1335 N⋅m (1000 ft. lbs.). There are four sets of
nuts on each end of both axles.
Figure 3-70
OPERATION 48
Check the Drawbar Wear Blocks
4
5
2
Inspect the stop wear blocks, 1, for excessive
wear. If there is wear on the blocks, rotate them
90° to provide a new wear surface for the
drawbar to ride against.
Measure the clearance between the top bridge
plate, 2, and the drawbar support, 3. If there is 3
mm (1/8″) or less clearance, replace the wear
block under the bridge plate. Support the
drawbar and remove the clevis, 4, from the top of
the drawbar. Remove the bolt, 5, and lift off the
top bridge plate. Replace the wear block and
reassemble the bridge plate. Torque the bridge
plate bolt to 952 N⋅m (702 ft. lbs.). Replace the
clevis and torque the clevis mounting bolts to 952
N⋅m (702 ft. lbs.).
NOTE: The wear block under the bridge plate
is attached to the plate with four cap screws.
Be sure to reinstall the wear block cap
screws during reassembly.
3-49
1
3
Figure 3-71
SECTION 3 - LUBRICATION AND MAINTENANCE
EVERY 1000 HOURS
OPERATION 50
Change the Engine Inner and Outer Air
Cleaner Elements
1
2360 and 2425 models illustrated.
The engine air cleaner consists of a large outer
element, smaller safety element, and an exhaust
aspirated precleaner. The precleaner removes
dirt from the air and discharges it through the
exhaust muffler.
2
IMPORTANT: When servicing the air cleaner,
wear a mask when changing the air filters. Do not
breath in dust.
Figure 3-72
To access the inner and outer elements, remove
the large wing nut, 1, on the outside of the cover.
Remove the cover, 2, from the cleaner.
Remove the outer element, 1, by removing the
wing nut, 2, and pulling the element from the
canister. Discard the old element.
1
2
Figure 3-73
Remove the inner element, 1, by removing the
wing nut, 2, and pulling the element from the
canister. Discard the old element.
1
2
Clean the air cleaner body with a lint-free towel
before installing the element.
Figure 3-74
3-51
SECTION 3 - LUBRICATION AND MAINTENANCE
EVERY 1000 HOURS
Inspect the seal, 1, on both new elements before
installing. Cracks or chips in the element sealing
rubber indicate that the element is defective and
must be replaced.
1
Figure 3-75
Install the elements into the canister. Be sure that
the seal on the end of the filters fully contacts the
air cleaner body. The wing nuts, 1, have a small
seal on the inner face which should be in good
condition before the wing nuts are tightened. If
the seals on the wing nuts are damaged, replace
them. Tighten the nuts securely.
1
NOTE: Contact your Buhler Versatile dealer
to obtain the correct filter part numbers.
Figure 3-76
OPERATION 51
Change the Cab Air Filter
The cab air filter, 1, located on the rear of the cab
must be changed periodically to keep the cab air
system operating at maximum efficiency.
1
Figure 3-77
3-52
SECTION 3 - LUBRICATION AND MAINTENANCE
EVERY 1000 HOURS
To remove the cab air filter, lift up on the filter
frame handle, 1, and unhook the latch, 2. Allow
the filter and frame to lower toward the cab
window.
1
2
Figure 3-78
Hold a light on one side of the new element and
check for ruptures. A pinpoint of light indicates a
rupture in the element paper. If this occurs, the
element is defective and must be replaced.
1
Install the new element into the frame and check
the seal, 1, around the perimeter of the element
for nicks or cracks. Replace the element if any
damage is found.
Figure 3-79
Reinstall the filter into its frame on the back of the
cab roof. Lift the frame latch handle, 1, and hook
the latch tab, 2, into the frame.
WARNING
The cab air filter is designed to remove
dust from the air but will not exclude
chemical vapor. Follow the chemical
manufacturers
directions
regarding
protection from dangerous chemicals.
1
2
Figure 3-80
3-53
SECTION 3 - LUBRICATION AND MAINTENANCE
EVERY 1500 HOURS OR YEARLY
OPERATION 52
Change the Transmission Oil
To drain the transmission oil, use the following
procedure based on the type of transmission the
tractor is equipped with.
Quad Shift III Transmission - Operate the tractor
a sufficient amount of time to warm up the
transmission oil. Remove the drain plug, 1, from
the transmission housing and allow the oil to
drain into a pan.
1
Replace the drain plug and tighten. Refill the
transmission with new oil through the fill tube to
the proper level as indicated by the sight gauge.
Figure 3-81
Quad Shift III transmissions equipped with a
PTO option will not have a drain plug on the
transmission. A PTO lubrication hose, 1, will be
installed into the drain port. Loosen the hose and
allow the hose to drain from the transmission.
Replace the hose and tighten.
1
Figure 3-82
If the tractor is equipped with the PTO option, the
PTO clutch housing will also require draining. To
do this, remove the hose, 1, from the bottom of
the clutch housing and allow the oil to drain from
the clutch. Reattach the hose after the oil is
removed. Tighten the hose fitting.
Adj-3
1
Figure 3-83
3-54
SECTION 3 - LUBRICATION AND MAINTENANCE
EVERY 1500 HOURS OR YEARLY
Powershift Transmission (with or without PTO
option) - Operate the tractor a sufficient amount
of time to warm up the transmission oil. Remove
the drain plug, 1, from the lower left hand rear
location on the transmission housing and allow
the oil to drain into a pan.
1
Replace the drain plug and tighten. Refill the
transmission with new oil through the fill tube to
the proper level as indicated by the dipstick.
Figure 3-84
On powershift tractors with a PTO, the PTO
clutch housing will also require draining. To do
this, remove the hose, 1, from the bottom of the
clutch housing and allow the oil to drain from the
clutch. Reattach the hose after the oil is
removed. Tighten the hose fitting.
1
Figure 3-85
3-55
SECTION 3 - LUBRICATION AND MAINTENANCE
EVERY 1500 HOURS OR YEARLY
With either PTO equipped transmission, the PTO
drop box is pressure lubricated by the
transmission lube system. Drain the drop box at
the rear of the tractor by removing the hose, 1,
from the bottom of the box and allow the oil to
drain out completely. Replace the hose and
tighten the hose fitting.
Refill the transmission with new oil through the fill
tube, 2, to the proper level as indicated by the
sight gauge, 3, (or dipstick on powershift units).
See “Checking the Transmission Oil Level”
(Operation 10). Start the tractor at low idle and
allow it to run for two minutes to refill the PTO
clutch housing and rear PTO drop box. Shut the
tractor off and recheck the transmission level.
Add additional transmission oil as necessary.
NOTE: The PTO drop box located on the rear
of the transmission does not require draining
during transmission oil changing.
1
Figure 3-86
3
2
Figure 3-87
3-56
SECTION 3 - LUBRICATION AND MAINTENANCE
EVERY 1500 HOURS OR YEARLY
OPERATION 53
Clean the Transmission Suction Screen
(12x4 Quad Shift III Transmission Only)
1
The 12x4 transmission has a removable sump
screen located under the suction tube that will
require cleaning periodically. To remove the
suction screen, proceed as follows:
Drain the transmission oil.
Loosen and remove the four cap screws, 1, that
mount the suction tube block to the rear face of
the transmission. Push the tube out of the way to
access the suction port.
Figure 3-88
Remove the suction screen from the port and
clean it in a suitable solvent. Replace the screen
into the suction port.
Check the O ring on the front face of the suction
tube block to be sure that it is in good condition
and is positioned properly. Replace the O ring if it
is damaged. Reinstall the suction tube block
bolts and torque to 75 N⋅m (55 ft. lbs.).
IMPORTANT: The powershift transmission has a
non-removable suction screen that does not
require maintenance.
Figure 3-89
OPERATION 54
Check the Transmission Mounts
Check the rubber transmission mounts and
mounting hardware for condition and torque on
both the powershift and Quad Shift III
transmissions.
The Quad Shift III transmission is held in the front
frame of the tractor by four bottom mounts, 1,
and two top mounts, 2. Inspect the mounts for
deterioration and wear. Torque the lower
mounting bracket bolts, 3, to 224 N⋅m1 (165 ft.
lbs.) and the upper mounting bracket bolts, 4, to
397 N⋅m (293 ft. lbs.). Torque the mount bolts, 5,
to 280 N⋅m (205 ft. lbs.).
3-57
Figure 3-90
SECTION 3 - LUBRICATION AND MAINTENANCE
EVERY 1500 HOURS OR YEARLY
The powershift transmission is held in the front
frame of the tractor by four bottom mounts, 1,
and two top mounts, 2. Inspect the mounts for
deterioration and wear. Torque the lower
mounting bracket bolts, 3, and the upper
mounting bracket bolts, 4, to 224 N⋅m1 (165 ft.
lbs.). Torque the mount bolts, 5, to 280 N⋅m (205
ft. lbs.).
If the mounts require replacement, contact your
Buhler Versatile dealer.
Figure 3-91
OPERATION 55
Change the Hydraulic Oil
To drain the hydraulic oil from the hydraulic
reservoir, use the following procedure:
1
Run the tractor to warm up the hydraulic system,
and collapse all external remote cylinders or
3-point hitch lift cylinders to decrease the amount
of oil remaining in the hydraulic system when the
oil is drained.
Remove the drain plug, 1, from the bottom of the
hydraulic reservoir tank under the front frame of
the tractor. Allow all the oil to drain from the
reservoir.
Replace the plug and tighten securely. Refill the
reservoir to the proper level as indicated on the
sight gauge. Restart the tractor. Extend any
remote mounted cylinders and 3-point hitch lift
cylinders and recheck the oil level. Add oil as
necessary.
3-58
Figure 3-92
SECTION 3 - LUBRICATION AND MAINTENANCE
EVERY 1500 HOURS OR YEARLY
OPERATION 56
Check the engine mounts
The engine is mounted in stationary rubber
mounts at the two rear corners and the front
center of the engine in the front frame of the
tractor. The front center mount is a double
rubber mount assembly.
On the 2290 and 2335, 2375 (QSM11) engine,
check the two rear mounts, 1, for wear or
deterioration and torque the mount bolt and nut
to 280 N⋅m (205 ft. lbs.). Torque the mounting
bracket to engine bolts, 2, to 260 N⋅m (190 ft.
lbs.).
2
1
Figure 3-93
Check the 2290, 2335, and 2375 front mounts, 1,
for wear or deterioration and torque the mount
bolts and nuts to 280 N⋅m (205 ft. lbs.). Torque
the mounting bracket to engine bolts, 2, to 45
N⋅m (35 ft. lbs.).
2
1
Figure 3-94
On the 2360 and 2425 (N14) engines, check the
two rear mounts, 1, for wear or deterioration and
torque the mount bolt and nut to 280 N⋅m (205 ft.
lbs.). The mounting bracket to engine bolts are
not easily accessible. If a concern of possible
loose hardware is suspected, contact your
Buhler Versatile dealer.
1
Figure 3-95
3-59
SECTION 3 - LUBRICATION AND MAINTENANCE
EVERY 1500 HOURS OR YEARLY
Check the front mounts, 1, for wear or
deterioration and torque the mount bolts and
nuts to 280 N⋅m (205 ft. lbs.). Torque the
mounting bracket to engine bolts, 2, to 45 N⋅m
(35 ft. lbs.).
2
1
Figure 3-96
OPERATION 57
Check the Engine Turbocharger
Connections
1
On the Model 2290, 2335 and 2375 (QSM11),
check the exhaust pipe to turbo outlet clamp, 1.
Torque the clamp to 9 N⋅m (80 in. lbs.). Torque
the lower oil drain line cap screws, 2, to 27 N⋅m
(239 in. lbs.). Tighten the upper oil supply line
fitting, 3. 20 N m (177 in. lbs.)
3
2
Tighten the four nuts that mount the turbocharger
to the exhaust manifold of the engine to 61 N⋅m
(45 ft. lbs.).
Figure 3-97
3-60
SECTION 3 - LUBRICATION AND MAINTENANCE
EVERY 1500 HOURS OR YEARLY
On the Model 2360 and 2425 (N14), check the
exhaust pipe to turbo outlet clamp, 1, and the
compressor housing to turbo body clamp, 2.
Torque the clamps to 8 N⋅m (72 in. lbs.). Torque
the lower oil drain line cap screws, 3, to 27 N⋅m
(20 ft. lbs.). Make sure the upper oil line fitting, 4,
is tight.
4
2
1
Tighten the four nuts that mount the turbocharger
to the exhaust manifold of the engine to 65 N⋅m
(50 ft. lbs.).
3
If any oil leaks or broken connections are found,
contact your Buhler Versatile dealer.
Figure 3-98
OPERATION 58
Check the Radiator and Heating System
Hoses
2
Check the upper and lower radiator hoses, 1, for
deterioration due to heat or contact with other
engine components. Inspect the heater hoses, 2,
for any wear or damage.
If any hoses in the engine cooling system or
tractor heating system require replacement,
contact your Buhler Versatile dealer.
1
Figure 3-99
OPERATION 59
Check the Cab Mounts
The cab is mounted on four rubber mounts in
each corner of the cab.
Check the mounts, 1, for wear or deterioration
and torque the mount bolt and nut to 217 N⋅m
(160 ft. lbs.). Torque the bolts, 2, that hold the
mounts to the frame to 97 N⋅m (72 ft. lbs.).
1
2
If the mounts require replacement, contact your
Buhler Versatile dealer.
Figure 3-100
3-61
SECTION 3 - LUBRICATION AND MAINTENANCE
EVERY 2000 HOURS OR 2 YEARS
OPERATION 60
Remove the radiator cap from the top of the
radiator.
Change the Engine Coolant
WARNING: BEFORE DRAINING THE
COOLING SYSTEM, WAIT UNTIL THE
ENGINE TEMPERATURE IS BELOW 50°C
(120°F)
BEFORE
REMOVING
THE
RADIATOR PRESSURE CAP. FAILURE TO
DO SO CAN CAUSE PERSONAL INJURY
FROM HEATED COOLANT SPRAY.
The cooling system must be clean to work
correctly. Drain the system, and flush with clean
water. If the system shows mineral buildup,
scale, rust, or oil, clean with a heavy-duty engine
coolant cleaner and follow the manufacturer’s
directions.
To drain the cooling system, first turn the
temperature control knob in the cab to the
maximum heat position. Make sure the heater
shutoff valve on the engine is wide open.
3-62
WARNING: THE COOLANT SYSTEM
OPERATES UNDER PRESSURE WHICH IS
CONTROLLED
BY
THE
RADIATOR
PRESSURE CAP. IT IS DANGEROUS TO
REMOVE THE PRESSURE CAP WHILE THE
SYSTEM IS HOT. WHEN THE SYSTEM HAS
COOLED, USE A THICK CLOTH AND TURN
THE CAP SLOWLY TO THE FIRST STOP AND
ALLOW THE PRESSURE TO ESCAPE
BEFORE FULLY REMOVING THE CAP.
COOLANT SHOULD BE KEPT OFF THE
SKIN. ADHERE TO THE PRECAUTIONS
OUTLINED ON THE ANTIFREEZE AND
INHIBITOR CONTAINERS, WHERE USED.
SECTION 3 - LUBRICATION AND MAINTENANCE
EVERY 2000 HOURS OR 2 YEARS
To drain the radiator, open the petcock, 1, at the
bottom center of the radiator. This will drain
whatever coolant is contained in the radiator.
1
Figure 3-101
To remove the coolant in the engine block,
disconnect the lower radiator hose, 1, from the
base of the radiator. This will drain whatever
coolant is in the water jacket of the engine.
Drain all the coolant into a suitable container and
follow all local laws and regulations for disposal.
Turn off the coolant filter shutoff valve so the filter
is isolated from the cooling system during
cleaning and flushing operations.
IMPORTANT: Failure to isolate the cooling
system filter by closing the shutoff valve will
contaminate the cooling system filter, and the
filter will have to be replaced whether its change
interval has been reached or not.
Flush the system with a commercial coolant
system cleaner. Follow the instructions supplied
with the cleaner.
Cummins Engine Co. recommends the use of a
heavy-duty cooling system cleaner which
removes corrosion products, silicate gelatin and
other deposits. Your Buhler Versatile dealer has
system cleaner, part number FGCC2610DS,
available for cleaning the cooling system.
After the cooling system is cleaned, retighten the
petcock and reinstall the lower radiator hose.
Open the cooling system filter shutoff valve.
3-63
1
Figure 3-102
SECTION 3 - LUBRICATION AND MAINTENANCE
EVERY 2000 HOURS OR 2 YEARS
The coolant added to the engine must meet
specific requirements. Use coolant from one of
the following sources:
NOTE: Factory fill is a fully formulated
coolant mixture, (pink in color). Propylene
and ethylene glycol can be mixed in the
cooling system.
A. Refill the cooling system using a low silicate
antifreeze which meets Engineering
Standard GM 6038-M, or which contains no
more than 0.1% anhydrous alkali
metasilicate and meets either Engineering
Standard GM 1825-M or GM 1899-M, which
are performance specifications.
Use soft water in the coolant mixture.
Contaminants in hard water neutralize the
corrosion inhibitor components. Water must
not exceed 300 ppm hardness or contain
more than 100 ppm of either chloride or
sulfate.
Antifreeze must be used in any climate for
both freeze and boiling point protection.
Cummins
Engine
Company,
Inc.
recommends a 50% concentration level,
40% - 60% range of ethylene glycol or
propylene glycol in most climates. Antifreeze
at 68% concentration provides the maximum
freeze protection and must never be
exceeded under any condition. Antifreeze
protection decreases above 68%
40%
50%
60%
68%
Ethylene Glycol
Propylene Glycol
-23°C (-10°F)
-37°C (-34°F)
-54°C (-65°F)
-71°C (-90°F)
-21°C (-6°F)
-33°C (-27°F)
-40°C (-56°F)
-63°C (-82°F)
Once the protection level of the coolant is
determined (ratio of water to antifreeze), the
mixture must contain one unit of Cummins
DCA4 (dry chemical additive) for every gallon of
mix. A DCA unit is equal to 42.5 g (1.5 dry
ounces) or 120 ml (4 liquid ounces). Your Buhler
Versatile dealer can assist you in obtaining the
DCA4 additive.
IMPORTANT: Failure to maintain the DCA4 in
the cooling system will cause cooling system
corrosion and engine failure.
IMPORTANT: Check the concentration of DCA4
with a test kit, available from Cummins and
Fleetguard through your Buhler Versatile
dealer.
IMPORTANT: Do not add cold coolant to a hot
engine. Engine castings can be damaged. Allow
the engine to cool to below 50°C (120°F).
Start and run the engine until normal operating
temperature is reached. Stop the engine and
allow the coolant to cool.
NOTE: The coolant level will drop as coolant
is pumped around the system.
Remove the radiator cap and add coolant to the
radiator to bring the coolant level to the bottom
of the filler neck. Install the radiator cap.
NOTE: If the engine is not going to be
operated immediately following the coolant
and filter change, run the engine for one
hour to ensure that the chemical conditioner
within the system is dispersed into the
cooling system.
The coolant capacity will vary based on the
tractor model:
NOTE:
Propylene
glycol
antifreeze
protection levels CANNOT be checked using
the same hydrometer as would be used with
ethylene glycol antifreeze.
You must check the concentration level
using a refractometer. This tool is available
from your Buhler Versatile dealer under part
#FGCC2800DS.
Both
propylene
and
ethylene glycol protection levels (of a
mixture of both) can be measured with the
refractometer.
3-64
Model
Capacity
2290
2335
2375
2360
2425
59 L (15.6 gal)
59 L (15.6 gal)
59 L (15.6 gal)
60 L (15.9 gal)
60 L (15.9 gal)
SECTION 3 - LUBRICATION AND MAINTENANCE
INDICATED BY WARNING LIGHT
OPERATION 61
Clean the Engine Air Cleaner Outer Element
IMPORTANT: When servicing the air cleaner:
D
D
D
Do not service unless the restriction indicator
light on the dash shows cleaning is
necessary. Cleaning the filter too frequently
will decrease the service life.
Wear a mask when cleaning the air filter. Do
not breath in dust.
Do not attempt to clean the filter by knocking
the element against a tire or other objects.
This will cause the element paper to crack
and allow dirt through the filter.
To access the outer element, remove the large
wing nut, 1, on the outside of the cover. Remove
the cover, 2, from the cleaner.
(2360 and 2425 models illustrated)
1
2
Figure 3-103
Remove the outer element, 1, by removing the
wing nut, 2, and pulling the element from the
canister. Clean the element with compressed air
not exceeding 690 kPa (100 PSI). Keep the
nozzle at least 150 mm (6″) away from the
element so as not to cause damage. Put the
nozzle inside the element and blow the dust
outward.
(2360 and 2425 models illustrated.)
1
2
Figure 3-104
3-65
SECTION 3 - LUBRICATION AND MAINTENANCE
INDICATED BY WARNING LIGHT
Rinse the element with clean, running water.
Rinse from the inside of the element through to
the outside until the water is free of dirt. If a hose
is used, do not exceed 2 bar (30 PSI). A gentle
trickle of water is sufficient and will ensure that
the element is not ruptured.
Shake out excess water from the element and
allow to air dry. DO NOT use compressed air, a
light bulb or heat to dry the element.
NOTE: It usually takes one to three days for a
filter element to dry.
IMPORTANT: Do not attempt to dry the element
with heat or compressed air and do not install
until thoroughly dry as it may rupture. It is
recommended that a new or previously cleaned
element be installed at this service and the
washed element be put aside for installation at
the next service. The spare element should be
stored in a dry place and wrapped to prevent dust
contamination or damage.
When the element is dry, insert a light inside and
check for ruptures. A pinpoint of light indicates a
rupture in the element paper. If this occurs,
replace the element.
1
Figure 3-105
1
Clean the air cleaner body with a lint-free towel
before installing the element.
Inspect the element seal, 1, before installing.
Cracks or chips in the element sealing rubber
indicates a new element must be installed.
Install the air filter back into the canister. Be sure
the seal on the end of the filter fully contacts the
air cleaner body. The wing nut, 1, has a small
seal on the inner face, and the seal should be in
good condition before the wing nut is tightened. If
the seal is damaged on the wing nut, replace it.
Tighten the nut securely.
3-66
Figure 3-106
SECTION 3 - LUBRICATION AND MAINTENANCE
AS REQUIRED
OPERATION 62
1
Headlight/Work Lights Bulb Replacement
The sealed beam headlights and work lights can
have the bulbs replaced in them by the following
procedure:
Pivot the light to expose the two screws, 1, on the
back of the molded plastic cover. Remove the
two screws.
Figure 3-107
Unplug the wire connectors from the bulb and
discard it. Reattach the wire connectors to the
new bulb and place it into the cover. Reinstall the
screws.
Replacement bulbs can be purchased from your
Buhler Versatile dealer.
Figure 3-108
3-67
SECTION 3 - LUBRICATION AND MAINTENANCE
AS REQUIRED
OPERATION 63
1
Change the Roof Warning Light Bulbs
To change a bulb on the roof-mounted hazard
lights, remove the two screws, 1, from the light
lens and remove the lens.
Figure 3-109
Unscrew the bulb, 1, from the light socket and
replace it with a new bulb. Reassemble the lens
to the roof using the two screws.
1
Replacement bulbs can be purchased from your
Buhler Versatile dealer.
Figure 3-110
OPERATION 64
Change the Brake Light Bulbs
To replace a bulb in the rear fender-mounted
brake lights, remove the two mounting screws, 1,
on the lens of the light. First, remove the nuts on
the underside of the fender which retain the
shield, 2. Then the screws, 1, can be removed,
allowing access to the bulb, 3.
Unscrew the bulb from the socket and install a
new bulb. Reinstall the lens onto the light socket.
Slide the light into the fender and install a washer
and nut on each screw; tighten securely.
Properly position the wire harness shield back
into place making sure the shield hooks into the
support strap that is under the rear fendermounted work lamps. Install a washer and nut on
each screw; tighten securely
Replacement bulbs can be purchased from your
Buhler Versatile dealer.
3-68
3
1
2
Figure 3-111
SECTION 3 - LUBRICATION AND MAINTENANCE
AS REQUIRED
OPERATION 65
GND
Change Fuses/Relays
The fuse and relay panel is located in the right,
rear corner of the cab on the rear shelf.
20A
F2
20A
F3
3A
IGN MAIN (25A)
F4
25A
COLD START (15A)
F5
15A
F6
3A
F7
10A
HEAD LAMPS (25A)
F8
25A
FUEL SOLENOID (3A)
F9
TURN SIGNAL SW (3A)
INT
AUX
PWR
HAZARD LAMPS (3A)
HEAD
LAMPS
F12 10A
F13
F15 10A
F17 10A
STOP LAMPS (10A)
F18 10A
LIGHTER (10A)
F19 10A
WIPER FRONT REAR (10A)
F20 10A
SPARE 10A
SPARE 15A
RADIO (3A)
HIGH
BEAM
3A
F22 25A
A/C BLOWER (30A)
F23 30A
A/C CLUTCH (5A)
F24
5A
DOME/REEL LAMP (5A)
F25
5A
ENGINE 1 (15A)
F37 15A
EXT
AUX
PWR
ENGINE 2 (15A)
F38 15A
SPARE 25A
DIFF
LOCK
F26
3A
POWER SHIFT (5A)
F27
5A
TPH (5A)
F28
5A
DIFF LOCK CONTROL (3A)
F29
3A
F30 25A
REAR FENDER LAMPS (25A)
F31 25A
TRAILER LAMPS (25A)
F32 25A
EXT AUX PWR (20A)
F33 20A
PTO (5A)
F34
TRAILER
LAMPS
K12
5A
DIFF UNLOCK (20A)
F35 20A
DIFF LOCK (20A)
F36 20A
EXT AUX
POWER
K13
TP1 TP2 TP3 TP4
FRONT FENDER LAMPS (25A)
FENDER
LAMPS
K11
SPARE 30A
INSTRUMENTATION (3A)
HIGH BEAM
K10
TRAILER
LAMPS
A/C BLOWER
K9
SPARE 20A
FENDER
LAMPS
F21
ROOF LAMPS (25A)
ROOF LAMPS
K8
F16 15A
SEAT
K7
SEAT (15A)
LIGHT SW MAIN (10A)
RH TURN
K5
LH TURN
K6
RH
TURN
LAMPS
A/C
BLOWER
3A
F14 10A
LH TURN LAMPS (10A)
SHUT
DOWN
ROOF
LAMPS
3A
RH TURN LAMPS (10A)
SEAT
A
F11
SHUTDOWN
K4
TAIL LAMPS (10A)
PTO
3A
F10 15A
HEAD LAMPS
K3
NEUTRAL START (3A)
CONSOLE LAMPS (10A)
HORN (15A)
LH
TURN
LAMPS
SPARE 5A
A. Turn signal flasher location.
F1
AUX PWR IGN (20A)
PTO
K2
TURN SIGNAL FLASHER LOCATED UNDER COVER
SPARE 3A
Figure 3-112
AUX PWR BATT (20A)
INSTRUMENTATION BATT (3A)
PROCESS ID
1
BATT
INT AUX
POWER
K1
S.N. LABEL
To access the relay panel, lift the cover, 1, from
the panel. It is held on by velcro.
SHUTDOWN
EXTERNAL
SHUTDOWN
INTERNAL
IGN
TRANS NEUTRAL
LIFT COVER
TO REMOVE
PTO “OFF”
DIFF LOCK
K14
POWERSHIFT
DIAGNOSTICS
3A
5A
CELECT
DIAGNOSTICS
F40
F39
PARK BRAKE “ON”
Figure 3-113
3-69
SECTION 3 - LUBRICATION AND MAINTENANCE
AS REQUIRED
The fuse and relay panel is clearly marked for all
electrical functions. There are no circuit breakers
on Buhler Versatile 4WD tractors. Not all relays
that are used in the electrical system are housed
in the fuse and relay panel area. If equipped with
a powershift transmission, the neutral relay is
located near the powershift control under the RH
console. The brake/tail light relays (2 used) are
located near the lower RH rear corner of the
CAB, below the fuse/relay panel. In-line fuses for
the optional ‘Back--up Alarm’, ‘Beacon Light’,
‘Motorized Flow Control’ are located beside the
fuse/relay panel.
There are extra fuses, 1, located at the front of
the fuse panel and a fuse removing tool, 2, is
located in the right front corner of the panel. The
fuses are clearly marked for amperage rating.
2
1
Figure 3-114
OPERATION 66
Check the Throttle Settings
1
DANGER: ANY THROTTLE ADJUSTMENT
MUST BE MADE WITH THE ENGINE OFF AND
THE PARK BRAKE APPLIED.
The throttle settings for the engine are controlled
by the electronic module, 1, on the engine. The
low idle speed is 850 -- 900 RPM. High idle speed
is 2225 ± 50 RPM. All settings are adjustable only
by an authorized Buhler Versatile dealer or
Cummins dealer/distributor.
(2360 and 2425 models illustrated)
3-70
Figure 3-115
SECTION 3 - LUBRICATION AND MAINTENANCE
AS REQUIRED
OPERATION 67
Adjust the Decelerator Pedal Setting
The decelerator pedal, when pushed, reduces
the engine speed to a set speed. Move the hand
throttle to Full Throttle and depress the
decelerator pedal. The engine RPM should drop
to a consistent set speed.
NOTE: The suggested decelerator speed
setting is 1400 engine RPM.
1
To increase the decelerator RPM setting, turn the
adjusting bolt, 1, on the bottom of the pedal
counterclockwise. To decrease the RPM setting,
turn the bolt clockwise.
Proper operation of the decelerator will let the
throttle lever, 1, stay in the preset position when
the decelerator is depressed. If the throttle lever
moves rearward, tighten the nut on the lever. The
nut can be reached through slot, 2. Tighten the
nut 1/4 turn at a time until proper operation is
achieved.
OPERATION 68
Figure 3-116
2
1
Clean the Cab Floor
Keep the cab floor free of dirt and debris that may
cause an obstruction or safety hazard, especially
around the brake and clutch pedal area.
The cab floor should be kept clean by periodically
vacuuming or sweeping, and washing.
The floor mat can be removed from the cab floor
by rolling it away from the walls of the cab and
pulling it upward and away from the floor. The
floor mat is a two-piece rubber mat that can be
washed using a mild detergent.
OPERATION 69
Clean the Cab Seat and Upholstery
When the soft trim material and seat become
dirty, they should be wiped clean. Dip a cloth in a
warm water/detergent solution and wring out as
much of the water as possible. Wipe the interior
material with the damp cloth.
The interior molding inside the cab can be
cleaned with a water/detergent solution as
needed.
3-71
Figure 3-117
SECTION 3 - LUBRICATION AND MAINTENANCE
AS REQUIRED
OPERATION 70
1
Check the Windshield Washer Fluid
To replenish the windshield washer fluid, turn the
latch on the SMV sign on the rear of the cab.
Allow the sign to pivot outward. Remove the lid,
1, on the reservoir and add fluid as necessary.
Figure 3-118
OPERATION 71
Change the Windshield Wiper Blades
The front and rear windshield wiper blades can
be changed using the following procedure:
1
Pivot the wiper arm outward away from the
window. Remove the blade bolt, 1, from the
center of the blade. Install the new blade and
reinstall the center bolt.
Figure 3-119
The front windshield wiper blade is 457 mm (18″)
long and the rear wiper blade is 660 mm (26″)
long.
The small screws, 1, can be loosened to adjust
the blade angle, which should be parallel to the
edge of the window. Retighten the screws when
the blade is adjusted properly.
1
Figure 3-120
3-72
SECTION 3 - LUBRICATION AND MAINTENANCE
AS REQUIRED
OPERATION 72
Change the Brake Fluid
The brake fluid should normally not require
changing except in the case where
contamination of the brake system has occurred.
To change the brake fluid and bleed the air from
the brake system, use the following procedure:
Shut the tractor off, chock the wheels, and install
the articulation lock.
Remove the small clamp and hose from the side
of the brake reservoir and allow the fluid to drain.
Reinstall the hose and clamp.
1
Figure 3-121
Loosen the supply tube, 1, at the caliper and
allow the oil trapped in the tube and caliper to
drain out. Reinstall the tube to the caliper and
tighten.
Refill the reservoir with brake fluid. Have an
assistant sit in the operator’s seat and slowly
pump the brake pedal several times. After the
assistant pumps the brake pedal, apply a steady
downward pressure on the pedal.
While the assistant holds the brake pedal down,
loosen the brake bleeders, 1, and allow any air
and fluid to escape from the caliper pistons.
There is a front and rear bleeder on the caliper;
alternate loosening the bleeders to purge any air
from the system. Make sure the assistant
keeps steady downward pressure on the
brake pedal anytime the bleeders are open.
The pedal will bottom out during each bleeding
operation; close the bleeder and repeat the
process until the system is purged of all air and
the pedal is firm when pressed.
Use DOT 3 brake fluid which may be obtained
from your Buhler Versatile dealer.
Figure 3-122
3-73
SECTION 3 - LUBRICATION AND MAINTENANCE
AS REQUIRED
OPERATION 73
Change the Ether Canister
The cold start solenoid is located between the oil
cooler/condenser and the radiator in the front
nosepiece on the 2360 and 2425 tractors (shown
in illustration). Access the oil cooler/condenser
by unlatching the front grille of the tractor and
swinging it out to the side.
To release the oil cooler/condenser assembly,
pull the release handle to a flat position (90°) and
pull the assembly toward you. It will swing the
opposite direction of the grille. The cold start
solenoid valve assembly, 1, is located on the
left-hand wall of the tractor front nosepiece (your
right as you look toward the radiator from the
front of the tractor).
The cold start solenoid is located at the left hand
rear hood support on the 2290, 2335 and 2375
tractors.
Remove the protective yellow cap, 2, or the
empty ether canister from the top of the solenoid
valve, but not the gasket. Lubricate the gasket
with a light film of clean oil.
Remove the protective cap from the new ether
canister.
3-74
2
1
Figure 3-123
SECTION 3 - LUBRICATION AND MAINTENANCE
AS REQUIRED
Lower the ether canister, 1, into the top of the
solenoid valve, 2; screw it in clockwise.
3
Tighten the ether canister hand tight only.
Once the ether canister is screwed into the
solenoid valve, secure the canister firmly by
attaching the hose clamp, 3, to the bracket and
around the canister. Tighten the hose clamp.
1
2
CAUTION: STARTING FLUID IS HIGHLY
FLAMMABLE. DO NOT USE NEAR FIRE,
SPARKS, OR FLAMES. BE SURE ALL
OPERATORS READ THE CAUTIONARY
INFORMATION ON THE CANISTER.
Figure 3-124
CAUTION: THE ETHYL ETHER USED AS
COLD START FLUID IS EXTREMELY
FLAMMABLE, TOXIC, AND FATAL IF
SWALLOWED. AVOID CONTACT WITH EYES
OR SKIN. AVOID BREATHING THE FUMES.
IF SWALLOWED, DO NOT INDUCE
VOMITING. CALL DOCTOR IMMEDIATELY.
IF COLD START FLUID ENTERS EYES OR
FUMES IRRITATE EYES, WASH EYES WITH
LARGE QUANTITIES OF CLEAN WATER FOR
15 MINUTES. CONTACT A DOCTOR,
PREFERABLY
AN
EYE
SPECIALIST,
IMMEDIATELY.
OPERATION 74
Drain the Fuel Tanks
The fuel tanks can be drained by opening the
petcock, 1, located on the inside of each tank.
Allow the diesel fuel to drain and retighten the
petcock. Dispose of the fuel (if necessary)
according to local laws and regulations.
1
Figure 3-125
3-75
SECTION 3 - LUBRICATION AND MAINTENANCE
AS REQUIRED
OPERATION 75
WHEEL INSTALLATION
Articulation Blocks
IMPORTANT: Install the proper articulation
blocks on the tractor before the single, dual, or
triple wheels are installed on the unit to prevent
any accidental damage from occurring.
Articulation blocks are required for many tire
sizes and configurations. Determine the
articulation blocks to be used for your tractor and
tires from the tire configuration charts in Section
1.
Use the following procedures to obtain the
desired setting.
WARNING: IMPROPER ASSEMBLY OF THE
ARTICULATION BLOCKS CAN CAUSE THE
TRACTOR WHEELS TO CONTACT THE FUEL
TANK WHEN TURNING, LIMITING TURNING
ABILITY AND CONTROL OF THE TRACTOR.
42° - The maximum turning angle allowed by the
steering cylinders is 42°. If your tire size allows
an angle of 42°, no articulation blocks are
required.
Figure 3-126
3-76
SECTION 3 - LUBRICATION AND MAINTENANCE
AS REQUIRED
38° - To limit the articulation angle to 38°, use the
articulation blocks with the thin portion toward
the inside. Torque the mounting bolt to 177 N⋅m
(137 ft. lbs.).
NOTE: Any tractor that is equipped with a
PTO option requires a 38° articulation block
kit be installed on it. If the tire size of the
tractor requires a 33° or 31° articulation kit,
use those kits instead of the 38° kit for a PTO
option.
Figure 3-127
33° - To limit the articulation angle to 33°, use the
articulation blocks with the thick portion to the
inside. Torque the mounting bolt to 177 N⋅m (137
ft. lbs.).
Figure 3-128
31° - To limit the articulation angle to 31°, use the
articulation blocks in conjunction with the
backing plate. The articulation block should have
the thick portion toward the inside. Torque the
mounting bolt to 177 N⋅m (137 ft. lbs.).
Figure 3-129
3-77
SECTION 3 - LUBRICATION AND MAINTENANCE
AS REQUIRED
Rear Fender Height Adjustment
Rear fender height can be adjusted to two
positions by removing the four bolts, 1, that
attach the fenders to the rear frame. Move the
fender to the desired height and reinstall the
bolts. Torque the bolts to 165 N⋅m (125 ft. lbs.).
1
Figure 3-130
3-78
SECTION 3 - LUBRICATION AND MAINTENANCE
AS REQUIRED
SINGLE, DUAL AND TRIPLE WHEEL
INSTALLATION
The tire configuration charts detail single, dual
and triple tire configurations by model. Find the
tire size and configuration to be used on the
tractor. Determine the proper installation
procedure from the five methods of wheel
installation detailed below.
CAUTION: USE EXTREME CAUTION WHEN
REMOVING AND HANDLING WHEELS. USE
A CARRIER FOR HANDLING WHEELS.
CAUTION: STOP THE ENGINE AND
ENGAGE THE PARK BRAKE AND
ARTICULATION LOCK BEFORE WORKING
ON TIRE INSTALLATION.
CAUTION: BLOCK THE WHEELS OF THE
TRACTOR WHEN JACKING UP THE AXLES.
1. Single wheels
Tire configurations approved for single wheel
use (both a tie rod style rim and a drum-style
rim) may be positioned with the dish of the
wheel inset or outset depending upon the
operator’s choice.
CAUTION: WITH THE WHEEL INSET, THE
TRACTOR WILL BE LESS STABLE ON
HILLSIDES. FOR HILLY TERRAIN, IT IS
RECOMMENDED THAT THE TIRES BE
OUTSET.
1
Torque the wheel mounting nuts, 1, to 710
N⋅m (525 ft. lbs.).
REMINDER
All wheel mounting hardware should be
re-tightened to the specified torque after the first
hour of operation, then after every three hours of
operation for the first day. Re-tighten to the
specified torque daily until wheel hardware
maintains specified torque.
3-79
Figure 3-131
SECTION 3 - LUBRICATION AND MAINTENANCE
AS REQUIRED
Special Tie Rod style dual wheels
((32″) dual wheels)
a. It is only permissible to install the inner
wheel with the rim inset (narrow tread
width). Do not torque the wheel lug nuts at
this time.
2
6
8
1
5
b. Place a jack under the axle housing and
raise one side. Remove every second
wheel mounting stud, 1, from the wheel
rim. Be sure a stud is removed on both
sides of the positioning lugs.
NOTE: Try not to remove a stud which
is aligned with the tube valve stem.
Valve stem access will then be
hampered by a dual rod later.
c. Check and retorque all remaining wheel
mounting nuts, 2, to 710 N⋅m (525 ft. lbs.).
e. Install the tie rod flanged backing nut
assembly into the holes in the inner
wheel. Secure each tie rod with an inner
tie rod flanged locknut, 5. Do not torque.
f. Install a spacer, 6, into the inside of the
inner wheel rim. Be sure the positioning
lugs on the inner wheel (one lug) and the
spacer (two lugs) interlock.
g. Lightly tap the spacer for a snug fit to the
inner wheel.
h. Rotate the outer wheel so that the
positioning lugs lock together - one lug on
the inside of the outer rim and two on the
spacer. All tie rods must protrude through
the holes provided on the outer wheel, 7.
NOTE: The outer wheel must be inset
the same as the inner wheel when
installed.
NOTE: Install the wheels so that both
inner and outer treads face the same
direction.
3-80
3
7
4
Figure 3-132
SECTION 3 - LUBRICATION AND MAINTENANCE
AS REQUIRED
i. Draw in the wheels by gradually
cross-torquing the outer wheel flanged
nuts, 8, to 300 N⋅m (220 ft. lbs.). Do not
overtighten the bolts or thread damage
may result.
2
6
8
1
IMPORTANT: Do not lubricate the threads
of the tie rods with any type of grease, oil,
or lubricating spray.
NOTE: Special tool BLR20025 deep
well socket is available to assist in
tightening the outer wheel nuts. Order
the tool from SPX/OTC tool company.
j. Be sure that the spacer is entering the
diameter of the inner and outer wheels
evenly and without any distortion of the
spacer or wheels.
k. Be sure the flanged backing nut, 3, is
against the inner wheel disc. Hold the tie
rod with a pipe wrench or vise grip pliers to
prevent rotation during the torquing
procedure. Torque the flanged backing
nuts, 3, to 440 N⋅m (325 ft. lbs.). The inner
tie rod flanged locknut should not need
torquing. It will be drawn up tight when the
backing nut is torqued.
NOTE: Special crowfoot wrench
BLR20027 is available to torque the
backing nuts. Order the tool from
SPX/OTC tool company.
l. Install jam nuts (not shown) on top of the
outer wheel nuts, 8, and torque them to
320 N⋅m (235 ft. lbs.).
m. Repeat the above procedure for the
remaining three sets of duals.
n. Drive the tractor steering from lock to lock.
Park the tractor and recheck the torques
on the outer wheel nuts as detailed in
Steps i and l.
REMINDER
All wheel mounting hardware should be
re-tightened to the specified torque after the first
hour of operation, then after every three hours of
operation for the first day. Re-tighten to the
specified torque daily until wheel hardware
maintains specified torque.
3-81
5
3
7
4
Figure 3-133
SECTION 3 - LUBRICATION AND MAINTENANCE
AS REQUIRED
3. Standard Tie Rod Style Dual Wheels
a. It is only permissible to install the inner
wheel with the rim inset (narrow tread
width). There is no drive lug on the outset
side of the wheel.
1
b. Place a jack under one side of the axle
housing. Raise the side and torque the
inner wheel mounting nuts, 1, to 710 N⋅m
(525 ft. lbs.).
Figure 3-134
c. Place two tie rods, 1, in the outer holes, 2,
of the inner wheel 180° apart. Place a
flange nut on the back side of the inner
wheel disc on each tie rod. The two tie
rods will help align the inner and outer
wheels during initial assembly.
1
2
1
Figure 3-135
d. Install a spacer, 1, into the inside of the
inner wheel rim. Be sure the positioning
lugs on the inner wheel (one tab) and the
spacer (two tabs) interlock.
1
e. Lightly tap the spacer for a snug fit to the
inner wheel. Push the two tie rods in
toward the frame so they do not protrude
through the spacer.
Figure 3-136
3-82
SECTION 3 - LUBRICATION AND MAINTENANCE
AS REQUIRED
f. Rotate the outer wheel so the lugs lock
together, one on the inside of the rim and two
on the spacer. Raise the axle of the tractor up
or lower it down to assist the spacer in
entering the diameter of the outer wheel.
Once the outer wheel is positioned on the
spacer, pull the two tie rods through the
brackets, 1, on the outer wheel rim. Install a
flat washer and flanged nut on each of the
two tie rods and snug the nuts to hold the
assembly in place. Install the remaining tie
rods with flange nuts on the inner wheel and
through the outer wheel brackets.
NOTE: The outer wheel must be inset
(narrow tread width) the same as the inner
wheel when installed.
1
Figure 3-137
NOTE: Install the wheels so that both
inner and outer treads face the same
direction.
g. Install remaining outer flanged wheel nuts, 1,
and washers, 2, onto the ends of each tie rod.
Tighten the outer wheel nuts to draw the
wheels together by gradually cross-torquing
to 300 N⋅m (220 ft. lbs.) on the outer flanged
wheels. Do not overtighten the bolts or
thread damage may result. Be sure that the
spacer is entering the diameter of the inner
and outer wheels evenly and without any
distortion of the spacer or wheels.
1
2
NOTE: Special tool BLR20025 deep well
socket is available to assist in tightening
the outer wheel nuts. Order the tool from
SPX/OTC tool company.
IMPORTANT: Do not lubricate the threads of
the tie rods with any type of grease, oil, or
lubricating spray.
3-83
Figure 3-138
SECTION 3 - LUBRICATION AND MAINTENANCE
AS REQUIRED
h. Add a jam nut, 1, to both ends of the tie rod
and torque the jam nut to 320 N⋅m (235 ft.
lbs.).
i. Repeat the above procedure for the
remaining three sets of duals.
1
j. Drive the tractor steering from lock to lock.
Park the tractor and recheck the torques on
the outer wheel nuts as detailed in Step g.
Figure 3-139
4. Standard and row crop drum style dual
wheels.
a. Standard and row crop drum style duals
are assembled the same way. Row crop
drum duals have a longer drum on the
outer wheel to give proper spacing for 30″
row crops. Follow the listed procedure for
both styles of duals.
b. Put 51 mm - 76 mm (2″ - 3″) wood blocking
under the wheel to be dualed.
c. There are 16 nuts, 1, that retain the inner
wheel to the planetary hub. Remove 14 of
the 16 nuts from the wheel, leaving two
nuts, 2, 180° apart on the wheel as shown.
This will retain the rim to the hub and fit
into the notches on the outside duals rim.
Choose the two remaining nuts carefully
so that the valve stem of both wheels will
align for easier tire inflation pressure
maintenance later.
2
1
2
Figure 3-140
3-84
SECTION 3 - LUBRICATION AND MAINTENANCE
AS REQUIRED
d. Using an appropriate lifting device, lift the
outside wheel rim and pilot it onto the
planetary studs. Make sure that the two
slots in the outer wheel rim align with the
two nuts remaining on the inner wheel rim.
DANGER: THE DRUM-STYLE DUAL
WHEELS ARE EXTREMELY HEAVY
AND WILL EASILY TIP TOWARD THE
DRUM END OF THE WHEEL. USE AN
APPROPRIATE LIFTING DEVICE AND
SAFETY CHAINS WHEN HANDLING
DRUM-STYLE WHEELS.
Figure 3-141
e. Reinstall the 14 nuts, 1, removed in Step
1.
f. Torque the wheel nuts to 710 N⋅m (525 ft.
lbs.).
1
g. Repeat the above procedure for the other
remaining wheels.
h. Drive the tractor steering lock to lock. Park
the tractor and recheck the torques on the
wheel nuts as described in Step f.
REMINDER
All wheel mounting hardware should be
re-tightened to the specified torque after the first
hour of operation, then after every three hours of
operation for the first day. Re-tighten to the
specified torque daily until wheel hardware
maintains specified torque.
3-85
Figure 3-142
SECTION 3 - LUBRICATION AND MAINTENANCE
AS REQUIRED
5. Standard Drum-Style Triple Wheels
a. For triple tire configuration, it is only
permissible to install the inner wheel
with the rim inset (narrow tread width).
b. Put a 51 mm - 76 mm (2″-3″) wood block
under the wheel to be tripled.
c. There are sixteen nuts, 1, that retain the
inner wheel to the planetary hub. Remove
fourteen of the sixteen nuts from the
wheel, leaving two nuts, 2, 180° apart on
the wheel as shown. This will retain the
rim to the hub and fit into the notches on
the center wheel’s rim. Choose the two
remaining nuts carefully so that the valve
stem of all wheels will align for easier tire
inflation later.
2
1
2
d. Using an appropriate lifting device, lift the
center wheel rim and pilot it onto the
planetary studs. Make sure that the two
slots in the center wheel rim align with the
two nuts remaining on the inner wheel rim.
Figure 3-143
DANGER: THE DRUM-STYLE DUAL
WHEELS ARE EXTREMELY HEAVY
AND WILL EASILY TIP TOWARD THE
DRUM END OF THE WHEEL. USE AN
APPROPRIATE LIFTING DEVICE AND
SAFETY CHAINS WHEN HANDLING
DRUM-STYLE WHEELS.
NOTE: Do not mix up the center wheel
with the outer wheel. The center wheel
has a dish welded in the inner diameter
to bolt the outside drum to.
NOTE: Install the wheels so that both
inner and center treads face the same
direction.
NOTE: Install the center wheel so that
the valve stem is in line with the inner
and outer wheels.
3-86
Figure 3-144
SECTION 3 - LUBRICATION AND MAINTENANCE
AS REQUIRED
e. Reinstall the fourteen nuts, 1, removed in
Step c. Torque the wheel nuts to 710 N⋅m
(525 ft. lbs.).
1
REMINDER
All wheel mounting hardware should be
re-tightened to the specified torque after the first
hour of operation, then after every three hours of
operation for the first day. Re-tighten to the
specified torque daily until wheel hardware
maintains specified torque.
Figure 3-145
f. Using an appropriate lifting device, lift the
outer wheel and pilot it into the center
wheel. Line up the holes in the center
wheel dish with the holes in the outer
wheel drum.
NOTE: Install the wheels so that both
center and outer treads face the same
direction.
Figure 3-146
g. Install the fourteen cap screws through
the holes in the wheels and place the
fourteen nuts, 1, onto the cap screws.
Torque the nuts to 710 N⋅m (525 ft. lbs.).
1
NOTE: The drums on the center and
outer wheels have large cutouts in
them to assist in installing the drum
hardware.
h. Repeat the above procedure for the other
three sets of triple wheels.
i. Drive the tractor steering from lock to lock.
Park the tractor and recheck the torques
on the inner and outer wheel nuts as
detailed in Steps g and e.
3-87
Figure 3-147
SECTION 3 - LUBRICATION AND MAINTENANCE
AS REQUIRED
Wide Transport Marker Lights
Wide transport marker lights are required with
some dual and triple wheel configurations.
The lights are adjustable to the width of the
tractor, increasing tractor visibility to oncoming
traffic. In some areas this is required for over
width vehicles. See your local authorities to
confirm compliance with local regulations.
Operating Position
The tube has three settings, depending on the
width of the tires used. It is recommended that
the tube be adjusted so the outside edge does
not extend beyond the tire edge. Remove the
bolt, 1, and slide the tube, 2, to one of the three
positions. Reinstall the bolt and tighten.
1
2
Figure 3-148
Single Wheel Transport Position
When single wheels are used, the wide transport
marker lights should be moved to the up position.
Loosen or remove bolt, 1, and remove the U-bolt,
2.
Swing the arm assembly up approximately 70°
-90° depending on model. Reinsert U-bolt, 2, and
tighten bolt, 1.
NOTE: Tractors with Tier III compliant
engines do not have an up position. Lights
should be placed in the inner position for
single tire configuration.
3-88
1
2
Figure 3-149
SECTION 3 - LUBRICATION AND MAINTENANCE
AS REQUIRED
OPERATION 76
Block up the tractor to remove weight from
the tires.
Storing the Tractor
NOTE: Storage refers to periods
approximately six months or greater.
of
Cover the tires if they will be exposed to
heat or direct sunlight.
If the tractor is to be stored outside, cover
it with a waterproof canvas or other
protective material.
Preparation:
Change the hydraulic oil.
Remove the batteries from the tractor and
store them in a cool, dry, weatherproof
area. Do not store on a concrete floor.
Change the transmission oil.
Change the engine coolant.
Drain and flush the oil from the
differentials and planetary housings. Fill
with new oil.
Change the engine oil and filter.
Start the engine. While the engine is
warming up, operate the transmission,
hydraulic
system,
steering
and
differentials to distribute new lubricant to
components. Warm engine to at least
70°C (160°F). Stop the engine.
Clean the tractor of all debris, dirt, and
accumulated grease.
Removal from Storage
Remove the protective covering from the
tractor tires and seals from the air intake
filter, muffler, fuel tank and engine
crankcase breather.
Remove the blocks. Lower the tractor
onto the tires.
Correct any leaks.
Inflate the tires to the recommended
pressure.
Drive the tractor to the storage location.
Install fully charged batteries. Tighten the
battery connections.
Relieve tension on the alternator,
compressor, water pump, and fan belt.
Tension the alternator, compressor, water
pump and fan belt.
Coat all exposed hydraulic cylinder shaft
areas with grease or a rust preventive.
Check the fluid level of the engine
crankcase, differentials, planetaries,
transmission, hydraulic reservoir, brake
cylinder reservoir and engine cooling
system.
Fill the fuel tanks with fuel.
Storing:
Use plastic bags or tape to seal the
following openings: muffler, fuel tank
breather, air intake filter, and engine
crankcase breather.
Touch up all scratches or chips.
3-89
If the fuel filter is changed during or after
storage, be sure that the filter, pump and
lines are primed.
Drain sediment from the fuel tanks.
SECTION 3 - LUBRICATION AND MAINTENANCE
AS REQUIRED
Initial Engine Start-up
Initial engine start-up after long periods of
storage can place abnormal loads on the
cranking system. Do not crank the engine
longer than 30 seconds. Allow at least two
minutes between cranking cycles to permit the
starting motor to cool and the batteries to
recover.
IMPORTANT: On initial start of engine, do not
increase speed above 1000 RPM, unless
necessary to prevent stalling, until the engine oil
pressure is normal.
See “Engine Starting” and “Cold-Weather
Starting” in Section 2.
3-90
If the engine does not start after 30 seconds,
prime the fuel system using the following
procedure:
Remove the fuel filter and fill it with clean
filtered fuel.
IMPORTANT: Fuel poured directly into the
filter will not be cleaned by the filter and will
go directly into the fuel pump. Be sure that
the fuel is clean.
Remove the suction line from the fuel
injection pump and squirt clean filtered fuel
into the pump.
Start the engine. If the engine still does not
start, consult your Buhler Versatile dealer.
SECTION 4
TROUBLESHOOTING
The troubleshooting charts in this section list possible problems, their cause(s), and corrective
action(s). The systems are presented in the following order:
TROUBLESHOOTING CHART
PAGE
Engine . . . . . . . . . . . . . . . . . . . . . . . . . . . . . . . . . . . . . . . . . . . . . . . . . . . . . . . . . . . . . . . . . . . . . 4-2
Transmission . . . . . . . . . . . . . . . . . . . . . . . . . . . . . . . . . . . . . . . . . . . . . . . . . . . . . . . . . . . . . . . 4-5
Electrical System . . . . . . . . . . . . . . . . . . . . . . . . . . . . . . . . . . . . . . . . . . . . . . . . . . . . . . . . . . . 4-7
Hydraulic System . . . . . . . . . . . . . . . . . . . . . . . . . . . . . . . . . . . . . . . . . . . . . . . . . . . . . . . . . . . 4-9
3-Point Hitch . . . . . . . . . . . . . . . . . . . . . . . . . . . . . . . . . . . . . . . . . . . . . . . . . . . . . . . . . . . . . . 4-10
Brakes . . . . . . . . . . . . . . . . . . . . . . . . . . . . . . . . . . . . . . . . . . . . . . . . . . . . . . . . . . . . . . . . . . . . 4-10
Cab . . . . . . . . . . . . . . . . . . . . . . . . . . . . . . . . . . . . . . . . . . . . . . . . . . . . . . . . . . . . . . . . . . . . . . . 4-11
Tractor Performance Monitor . . . . . . . . . . . . . . . . . . . . . . . . . . . . . . . . . . . . . . . . . . . . . . . 4-12
Electronic Instrument Control System . . . . . . . . . . . . . . . . . . . . . . . . . . . . . . . . . . . . . . . 4-13
Power Take-Off (PTO)
. . . . . . . . . . . . . . . . . . . . . . . . . . . . . . . . . . . . . . . . . . . . . . . . . . . . . 4-14
Operation . . . . . . . . . . . . . . . . . . . . . . . . . . . . . . . . . . . . . . . . . . . . . . . . . . . . . . . . . . . . . . . . . 4-14
4-1
SECTION 4 - TROUBLESHOOTING
BLANK PAGE
4-2
SECTION 4 - TROUBLESHOOTING
ENGINE
PROBLEM
Engine will not start, or
starts hard
Engine runs rough and/or
stalls
Engine does not appear to
develop full power
POSSIBLE CAUSE
CORRECTION
Incorrect starting procedure.
Review starting procedures.
Low or no fuel.
Check fuel level.
Air in fuel lines.
Bleed fuel system.
Incorrect engine oil viscosity.
Use correct viscosity oil.
Incorrect fuel for operating
temperature.
Use correct type fuel for
temperature conditions.
Contaminated fuel system.
Clean system.
Clogged fuel filter.
Replace filter element.
Malfunctioning fuel injector(s).
Contact Buhler Versatile dealer.
Malfunctioning fuel solenoid or
solenoid relay.
Contact Buhler Versatile dealer.
Clogged air filter.
Clean or replace air filter.
Clogged fuel filter.
Replace filter.
Clogged air filter.
Clean or replace air filter.
Engine cylinder temperature too
low for clean fuel burn.
Refer to “Cold-Weather Starting”
(Section 2).
Contaminated fuel system.
Clean system.
Fuel solenoid not properly
adjusted.
Contact Buhler Versatile dealer.
Malfunctioning fuel injector(s).
Contact Buhler Versatile dealer.
Engine overloaded.
Shift to lower gear or reduce load.
Air cleaner restricted.
Service air cleaner.
Clogged fuel filter.
Replace filter.
Incorrect type of fuel.
Use correct fuel.
Engine overheated.
See “Engine Overheats” (later
in this chart).
Low engine operating
temperature.
Contact Buhler Versatile dealer.
Implement incorrectly adjusted.
See implement operator’s manual.
Malfunctioning fuel injector(s).
Contact Buhler Versatile dealer.
High idle speed is low.
Contact Buhler Versatile dealer.
Engine Power Derate
Refer to EICS operation Section
2. Contact Buhler Versatile dealer.
4-3
SECTION 4 - TROUBLESHOOTING
PROBLEM
Engine knocks
Low engine operating
temperature
Low oil pressure
Excessive oil consumption
Engine overheats
POSSIBLE CAUSE
CORRECTION
Low oil level.
Add correct grade and amount of
oil.
Low oil pressure.
Contact Buhler Versatile dealer.
Engine overheated.
See “Engine Overheats” (later
in this chart).
Engine temperature gauge faulty.
Contact Buhler Versatile dealer.
Malfunctioning thermostat(s).
Contact Buhler Versatile dealer.
Tractor used on very light loads.
Contact Buhler Versatile dealer.
Low oil level.
Add oil as required.
Oil pressure gauge faulty.
Contact Buhler Versatile dealer.
Wrong grade or viscosity oil.
Drain and refill with correct grade
and viscosity oil.
Engine component failure.
Contact Buhler Versatile dealer.
Engine oil level too high.
Reduce oil level.
Incorrect viscosity oil.
Use correct viscosity.
External oil leaks.
Contact Buhler Versatile dealer.
Plugged breather tube vent filter.
Contact Buhler Versatile dealer.
Restricted cooling system fins.
Clean.
Excessive engine load.
Shift to a lower gear or reduce
load.
Low engine oil level.
Add oil as required.
Low coolant level.
Fill cooling system. Check for
leaks.
Faulty radiator cap.
Replace cap.
Loose or worn fan belt.
Check automatic tensioner.
Replace belt if worn.
Cooling system plugged.
Flush cooling system.
Malfunctioning thermostat(s).
Contact Buhler Versatile dealer.
Hose connection leaking.
Tighten hose connection.
Malfunctioning temperature
gauge.
Contact Buhler Versatile dealer.
4-4
SECTION 4 - TROUBLESHOOTING
PROBLEM
Air filter restricted
Excessive fuel consumption
POSSIBLE CAUSE
CORRECTION
Clogged air filter.
Clean or replace filter.
Aspirator malfunction.
Contact Buhler Versatile dealer.
Incorrect type of fuel.
Use correct fuel.
Clogged or dirty air cleaner.
Service air cleaner.
Engine overloaded.
Shift to lower gear or reduce load.
Implement incorrectly adjusted.
See implement operator’s
manual.
Low engine temperature.
Contact Buhler Versatile dealer.
Excessive ballast.
Adjust ballast.
Fuel injection nozzles dirty.
Contact Buhler Versatile dealer.
External leaks.
Repair leaks.
Fuel pump calibration changed.
Contact Buhler Versatile dealer.
4-5
SECTION 4 - TROUBLESHOOTING
TRANSMISSION
12x2 POWERSHIFT TRANSMISSION
The following list of error codes are shown on the gear display of the tractor if a fault is present. Listed
with the error codes are their possible causes, effects, and the corrective measures required. Detailed
trouble shooting information may be obtained by contacting a Buhler Versatile Dealer.
If the cause of the error code cannot be corrected by the measures suggested, contact your Buhler
Versatile dealer.
NOTE: Repairs and adjustments to the powershift control system require special service tools
and procedures to be performed by qualified technicians only; contact your Buhler Versatile
dealer.
ERROR CODE
PP
CAUSE
TO CLEAR CODE
Input power has dropped below
10.4 volts for more than 0.1
seconds.
Low battery voltage
Loose connection
Bad ground
Bad power relay contacts
Contact Buhler Versatile dealer.
I1, I2, I3, I4, I5
Internal control problem
Contact Buhler Versatile dealer.
TA
Output speed signal missing
transmission shifts to neutral if
clutch pedal depressed -- 1st
engaged when clutch is released.
T2
Range selector switch combination
invalid.
Contact Buhler Versatile dealer.
T3
Clutch pedal signal out of range or
bottom pedal switch error.
Contact Buhler Versatile dealer.
T5
Engine load signal out of proper
range.
Contact Buhler Versatile dealer.
T6
Input speed sensor circuit shorted
or open.
Contact Buhler Versatile dealer.
T7
Output speed sensor circuit shorted
or open.
Contact Buhler Versatile dealer.
Designated solenoid shorted or
open.
Contact Buhler Versatile dealer.
S1, S2, S3, S4, S5, S6,
S7, S8, S9
4-6
Contact Buhler Versatile dealer.
SECTION 4 - TROUBLESHOOTING
12x4 QUAD SHIFT III AND 12x2 POWERSHIFT
The following troubleshooting guide pertains to both the 12x4 Quad Shift III and 12x2 powershift
transmissions.
PROBLEM
Tractor does not move
Low transmission lube
pressure
Transmission lubrication
filter bypass
POSSIBLE CAUSE
CORRECTION
Transmission out of oil.
Check oil level and fill as
necessary.
Failure of input driveline or engine
coupler.
Contact Buhler Versatile dealer.
Park brake engaged.
Disengage park brake.
Clutch cable stuck.
Contact Buhler Versatile dealer.
Transmission out of oil.
Check oil level and fill as
necessary.
Defective sensor circuit.
Contact Buhler Versatile dealer.
Restricted transmission filter.
Replace filter.
Pressure sender failure.
Contact Buhler Versatile dealer.
Filter is restricted.
Replace filter.
Extremely cold temperature.
Run tractor at low idle for 30
minutes to warm up system. If
light is still illuminated, contact
Buhler Versatile dealer.
Sensor circuit failure.
Contact Buhler Versatile dealer.
Sensor failure.
Contact Buhler Versatile dealer.
4-7
SECTION 4 - TROUBLESHOOTING
ELECTRICAL SYSTEM
PROBLEM
POSSIBLE CAUSE
Electrical system is
inoperative
Loose or corroded battery
connections.
Clean and tighten connections.
Sulfated batteries.
Check each battery open circuit
voltage for 12.6 volts minimum.
Check electrolyte level and
specific gravity.
Fuse or relay failure.
Check fuse panel.
Ignition switch failure.
Contact Buhler Versatile dealer.
Loose or corroded connections.
Clean and tighten connections.
Low battery output.
Check each battery open circuit
voltage for 12.6 volts minimum.
Check electrolyte level and
specific gravity of each battery.
Incorrect viscosity engine oil.
Use correct viscosity oil for
temperature conditions.
Defective starter.
Contact Buhler Versatile dealer.
Transmission speed lever in gear.
Place shift lever in neutral.
Park brake not engaged.
Engage park brake.
Loose or corroded connections.
Clean and tighten loose
connections.
Dead batteries.
Charge or replace batteries.
PTO (option) switch on.
Turn switch off.
Incorrect ignition operation.
Turn ignition to “OFF,” then to
“START” position.
Neutral start switch or PTO switch
malfunction.
Contact Buhler Versatile dealer.
Low engine idle speed.
Increase idle speed.
Loose belt.
Check automatic belt tensioner.
Malfunctioning battery(ies).
Check each battery open circuit
voltage for 12.6 volts minimum.
Check electrolyte level and
specific gravity.
Malfunctioning alternator.
Contact Buhler Versatile dealer.
Starter speed low and
engine cranks slowly
Starter inoperative
Charge indicator lamp stays
on with engine running
4-8
CORRECTION
SECTION 4 - TROUBLESHOOTING
PROBLEM
Tractor runs for a short time
and shuts off
POSSIBLE CAUSE
CORRECTION
Automatic shutdown mode
activated.
Check audio and visual indicators
for cause of shutdown. Contact
Buhler Versatile dealer.
Partially restricted fuel line.
Contact Buhler Versatile dealer.
Electronic monitor rotary
select switch failure (“SEL”
“OPEN”)
Open circuit on rotary select
switch for electronic instrument
control system.
Reconnect plug on back of switch.
Transmission speed sensor
“OPEN” or “SHCR”
Malfunction in sensor or sensor
wiring.
Sensor is unplugged, reconnect.
Replace faulty switch.
Sensor wiring is damaged, repair
wiring.
Contact Buhler Versatile dealer.
Engine speed sensor
“OPEN” or “SHCR”
Malfunction in sensor or sensor
wiring.
Sensor is unplugged, reconnect.
Sensor wiring is damaged, repair
wiring.
Contact Buhler Versatile dealer.
Electrical system high/low
voltage
Batteries will not charge
Loose or corroded terminal
connections.
Clean and tighten connections.
Shorted out electrical system.
Contact Buhler Versatile dealer.
Sulfated batteries.
Check each battery open circuit
voltage for 12.6 volts minimum.
Check electrolyte level and
specific gravity.
Loose or worn belt.
Check alternator belt tension.
Replace belt if required.
Loose or corroded terminal
connections.
Clean and tighten connections.
Sulfated batteries.
Check each battery open circuit
voltage for 12.6 volts minimum.
Check electrolyte level and
specific gravity.
Loose or worn belt.
Check alternator belt tension.
Replace belt if required.
4-9
SECTION 4 - TROUBLESHOOTING
HYDRAULIC SYSTEM
PROBLEM
Complete hydraulic system
does not operate
POSSIBLE CAUSE
CORRECTION
Low oil level.
Fill system.
Restricted hydraulic filter.
Replace hydraulic filter.
Restricted reservoir suction
screen.
Clean screen.
Malfunctioning hydraulic system.
Contact Buhler Versatile dealer.
Oil level low or high.
Adjust oil level.
Oil cooler or radiator plugged.
Clean oil cooler and radiator.
Blocked oil filter element.
Replace filter.
Flow control improperly adjusted.
Adjust flow control to lower flow
position.
Hydraulic load or orbit motor
system not matched to tractor.
Contact Buhler Versatile dealer.
Hoses will not uncouple
Hoses being pulled at 15° angle
or greater.
Pull straight back on hoses.
Hoses will not couple
Incorrect male connectors.
Replace connectors with
ISO-(1/2″) standard connectors
available from your Buhler
Versatile dealer.
Detent disengages
prematurely
Detent release pressure set too
low.
Contact Buhler Versatile dealer.
Remote attachment
operates too fast or too
slow
Flow control not properly
adjusted.
Adjust flow control.
Hydraulic filter bypass
Clogged filter.
Replace filter.
Remote attachment does
not operate
Hoses not completely connected.
Attach hoses correctly.
Load exceeds system capacity.
Reduce load or increase cylinder
size.
Lever lock restricts control lever
movement.
Reposition lock.
Hydraulic oil overheats
4-10
SECTION 4 - TROUBLESHOOTING
3-POINT HITCH
PROBLEM
Hitch will not raise
POSSIBLE CAUSE
CORRECTION
Low oil level.
Check and fill hydraulic reservoir.
Loose electrical connections.
Check connections at
electrohydraulic valve and
controls.
Blown fuse.
Replace fuse.
Hitch raises too slowly or
quickly
Rate of raise adjustment
incorrectly set.
Adjust flow control on 3-point
hitch valve section.
Hitch drops too slowly or
quickly
Lowering rate adjustment
incorrectly set.
Adjust rate of lowering flow
control knob.
Hitch overstrokes during
raise or lower and puts the
pump into high pressure
standby
Feedback potentiometer
incorrectly adjusted.
Adjust potentiometer.
BRAKES
PROBLEM
Park brake inoperative
Pedal bottoms out or feels
mushy
POSSIBLE CAUSE
CORRECTION
Worn brake pads.
Replace brake pads.
Broken park brake cable.
Replace broken cable.
Brake out of adjustment.
Operate park brake lever several
times to automatically adjust
brakes. If no result, contact your
Buhler Versatile dealer.
Brake piston seal leaking.
Contact Buhler Versatile dealer.
Worn brake pads.
Replace brake pads.
Brake bleeder not sealing.
Tighten bleeder.
Leakage in brake valve.
Contact Buhler Versatile dealer.
Air in system.
Bleed brake system.
Reservoir level low.
Fill reservoir with proper brake
fluid.
Brakes out of adjustment.
Operate park brake lever several
times to automatically adjust. If no
result, contact Buhler Versatile
dealer.
4-11
SECTION 4 - TROUBLESHOOTING
CAB
PROBLEM
POSSIBLE CAUSE
Dust enters the cab
Improper seal around filter
element.
Check seal condition.
Plugged filter.
Clean or replace filter.
Defective filter.
Replace filter.
Excessive air leak(s) in cab floor,
windows, or door.
Seal air leak(s).
Plugged filter.
Clean or replace filter.
Heater core or evaporator core
plugged.
Contact Buhler Versatile dealer.
Excessive moisture in cab air
system.
Position air vents toward
windows.
Pressurizer air flow low
Cab windows fog up
CORRECTION
Use air-conditioner system and
recirculation control along with the
heating system to dehumidify cab
air.
Check air-conditioner drain hoses
for restriction.
Heating system does not
heat
Air-conditioner does not
cool
Defective engine thermostats.
Contact Buhler Versatile dealer.
Heater core plugged.
Contact Buhler Versatile dealer.
Heater valve shut off at engine.
Turn on heater valve at engine
and adjust temperature control
knob to the heat position.
Condenser plugged.
Clean radiator, oil cooler, and
condenser.
Low refrigerant.
Check sight glass for bubbles.
Contact your Buhler Versatile
dealer.
Compressor belt slipping or
damaged.
Heater control turned on.
4-12
Check belt tension and belt
condition.
Turn temperature control knob
fully counterclockwise for
maximum cooling. Shut off heater
hose valve at engine.
SECTION 4 - TROUBLESHOOTING
TRACTOR PERFORMANCE MONITOR
PROBLEM
POSSIBLE CAUSE
CORRECTION
Display blank
Loss of +12 VDC power
Replace fuse for TPM (3-amp
instrumentation fuse).
“Err” displayed
Recent loss of +12 VDC power
Reprogram the time of day
function.
Selected function is detected to
contain an invalid number
Reprogram the indicated function.
Incorrect installation of implement
status switch
Turn tractor ignition switch to ON,
performance monitor should
power-up. Press RESET (AREA)
switch, with AREA displayed; if
UP message was displayed, it
should clear. The UP message
should alternate on and off each
time the switch is pressed. If so,
check installation of the
implement status switch. Be sure
the trip spring to implement status
switch is correctly stretched. If no
implement status switch is being
used, be sure the “UP” indicator
does not show on the display.
Implement status switch input
inhibited due to broken or
damaged cable or because
implement status switch is
defective
Visually inspect the implement
status switch cable for damage. If
damage is found, replace the
cable.
No axle speed input
Use the electronic instrument
cluster to check out the operation
of the transmission output speed
sensor. If the dash will not
indicate a ground speed, contact
your Buhler Versatile dealer.
No radar speed input
Use the distance measuring
feature of the performance
monitor to determine if the radar
is functioning. If not, contact your
Buhler Versatile dealer.
No AREA accumulation or
AREA/HR prediction
No wheel slip indication
4-13
SECTION 4 - TROUBLESHOOTING
ELECTRONIC INSTRUMENT CONTROL SYSTEM
PROBLEM
POSSIBLE CAUSE
CORRECTION
Lower portion of module
reverts to ground speed
automatically when
monitoring other functions
Tractor moving over 20 km/h
(12.5 MPH).
Normal operation. See Section 2 “Normal Operation of the
Electronic Instrument Control
System.”
Lower portion of display
flashes the service interval
one or two indicator
Accrued hours approaching
(within 10 hours) or have reached
preset service interval value.
Normal operation. See Section 2 “Normal Operation of the
Electronic Instrument Control
System.”
Upper portion of module
has the words “SET” and
“UP” displayed and system
functions erratically
System is in the calibrate mode.
Turn ignition switch to “OFF”
position and back to “RUN” to
enter the normal operation mode.
Ground speed displayed on
lower portion of module
inaccurate (tractors less
TPM option only)
Values entered into the calibrate
mode are incorrect.
Recalibrate system. See
“Electronic Instrument Control
System” in Section 2.
Values displayed in lower
portion of module are
inaccurate
Units of measure are incorrect
(English or metric).
Recalibrate system. See
“Electronic Instrument Control
System” in Section 2.
Display is blank
Loss of +12V power.
Replace instrumentation fuse.
Contact Buhler Versatile dealer.
Engine Warning Lights (Red
or Yellow) illuminated
Critical (red) or non-critical
(yellow) failure in electronic
engine control circuit.
Contact Buhler Versatile dealer.
Engine Warning Light (red)
illuminated
Engine overspeed.
Reduce engine speed (below
2630 RPM)
Display flashed “EXT ALR”
when turning or at certain
times of the day (TPM
equipped tractors only)
Slip or time of day feature of TPM
reacting.
See TPM in Section 2 of this
manual.
4-14
SECTION 4 - TROUBLESHOOTING
POWER TAKE-OFF (PTO)
PROBLEM
POSSIBLE CAUSE
CORRECTION
PTO will not engage
Engine speed above 1400 RPM.
Lower engine speed to below
1340 RPM and engage PTO.
PTO slips under load
Malfunction in the PTO system.
Contact Buhler Versatile dealer.
PTO turns when in the off
position
Malfunction in the PTO system.
Contact Buhler Versatile dealer.
OPERATION
PROBLEM
Tractor rides rough
Tractor “hops” or bounces
during operation
POSSIBLE CAUSE
CORRECTION
Incorrect seat adjustments.
Adjust seat ride and dampener.
Faulty seat suspension.
Contact Buhler Versatile dealer.
Incorrect ballast.
Ballast tractor correctly.
Tire inflation pressure too high.
Inflate tires correctly.
Implement mismatched with
tractor.
Remove implement from tractor.
Implement adjusted incorrectly.
Adjust implement per implement
operator’s manual.
Incorrect ballast.
Ballast tractor correctly.
Incorrect tire pressure.
Inflate tires correctly.
Incorrect tire size, configuration or
type.
Contact Buhler Versatile dealer.
4-15
SECTION 4 - TROUBLESHOOTING
BLANK PAGE
4-16
SECTION 5
SPECIFICATIONS
The specifications on the following pages are
given for your information and guidance. For
further information concerning the tractor,
consult your authorized Buhler Versatile dealer.
All data given in this book is subject to
production variations. Dimensions and weights
are approximate only. For exact information
about any particular tractor, please consult your
authorized Buhler Versatile dealer.
Our policy is one of continuous improvement,
and the right to change prices, specifications, or
equipment at any time without notice is
reserved.
GENERAL DIMENSIONS
Length
2290
2335
2360
2375
Wheelbase - Center of axle to center of axle
3380 mm (133″)
Overall Length - Front nose to end of drawbar (no weight kits)
6750 mm (266″)
Center of front axle to nose of tractor (no weight kit)
2160 mm (85″)
Center of rear axle to end of drawbar
1210 mm (47.5″)
5-1
2425
SECTION 5 - SPECIFICATIONS
Heights
The overall height of the tractor will be determined by the tire size chosen. Single, dual, or triple tire configuration
will not affect height. The following dimensions are for all model tractors based on tire size.
Tire Size
24.5
24.5
30.5
30.5
30.5
800/65
18.4
18.4
18.4
20.8
20.8
20.8
20.8
650/65
700/65
710/70
710/70
750/65
850/60
18.4
18.4R
20.8
20.8
20.8
20.8
520/85
900/50
18.4
R32
R32
R32
R32
R32
R32
R38
R38
R38
R38
R38
R38
R38
R38
R38
R38
R38
R38
R38
R42
R42
R42
R42
R42
R42
R42
R42
R46
Height To Top
Of Exhaust
R1
R1
R1
R2
R1
R1W
R1
R2
R1
R1
R2
R1
R1W
R1W
Bias . . . . . .
Radial . . . .
Bias . . . . . .
Bias . . . . . .
Radial . . . .
Radial . . . .
Bias . . . . . .
Bias . . . . . .
Radial . . . .
Bias . . . . . .
Bias . . . . . .
Radial . . . .
Radial . . . .
Radial . . . .
Special . . .
R1 Radial . . . .
R1W Radial . . . .
Special . . .
Special . . .
R1 Bias . . . . . .
R1 Radial . . . .
R1 Bias . . . . . .
R2 Radial . . . .
R1 Radial . . . .
R1W Radial . . . .
R1W Radial . . . .
R1W Radial . . . .
R1 Radial . . . .
3667 mm (144.4″)
3632 mm (143.0″)
3667 mm (144.4″)
3682 mm (145.0″)
3634 mm (143.1″)
3678 mm (144.8″)
3660 mm (144.1″)
3661 mm (144.1″)
3638 mm (143.2″)
3684 mm (145.0″)
3697 mm (145.6″)
3671 mm (144.5″)
3674 mm (144.6″)
3670 mm (144.5″)
3697 mm (145.6″)
3700 mm (145.7″)
3705 mm (145.9″)
3743 mm (147.4″)
3743 mm (147.4″)
3713 mm (146.2″)
3692 mm (145.4″)
3738 mm (147.2″)
3763 mm (148.1″)
3721 mm (146.5″)
3724 mm (146.6″)
3724 mm (146.6″)
3719 mm (146.4″)
3741 mm (147.3″)
Height To Top
Of Cab
.......
.......
.......
.......
.......
.......
.......
.......
.......
.......
.......
.......
.......
.......
.......
.......
.......
.......
.......
.......
.......
.......
.......
.......
.......
.......
.......
.......
5-2
3422 mm (134.7″)
3387 mm (133.3″)
3422 mm (134.7″)
3437 mm (135.3″)
3389 mm (133.4″)
3432 mm (135.1″)
3414 mm (134.4″)
3416 mm (134.5″)
3393 mm (133.6″)
3439 mm (135.4″)
3452 mm (135.9″)
3426 mm (134.9″)
3429 mm (135.0″)
3424 mm (134.8″)
3452 mm (135.9″)
3455 mm (136.0″)
3460 mm (136.2″)
3498 mm (137.7″)
3498 mm (137.7″)
3468 mm (136.5″)
3447 mm (135.7″)
3493 mm (137.5″)
3518 mm (138.5″)
3476 mm (136.9″)
3479 mm (137.0″)
3477 mm (136.9″)
3472 mm (136.7″)
3496 mm (137.6″)
Height To Top
Of Drawbar
.........
.........
.........
.........
.........
.........
.........
.........
.........
.........
.........
.........
.........
.........
.........
.........
.........
.........
.........
.........
.........
.........
.........
.........
.........
.........
.........
.........
448 mm (17.6″)
413 mm (16.3″)
448 mm (17.6″)
463 mm (18.2″)
415 mm (16.3″)
457 mm (18.0″)
441 mm (17.4″)
442 mm (17.4″)
419 mm (16.5″)
465 mm (18.3″)
478 mm (18.8″)
452 mm (17.8″)
455 mm(17.9″)
450 mm (17.7″)
478 mm (18.8″)
481 mm (18.9″)
486 mm (19.1″)
524 mm (20.6″)
524 mm (20.6″)
494 mm (19.4″)
473 mm (18.6″)
519 mm (20.4″)
544 mm (21.4″)
502 mm (19.8″)
505 mm (19.9″)
503 mm (19.8″)
498 mm (19.6″)
522 mm (20.6″)
SECTION 5 - SPECIFICATIONS
OVERALL WIDTHS
The overall width of the tractor will be determined by the tire size chosen. Single, dual, or triple tire
configuration will also affect machine widths. The following chart details overall widths by tire size,
configuration, and tractor model. Width is outside of outer tire to outside of outer tire.
Tire Size
24.5 R32 R1 Radial
30.5 R32 R1
Configuration
2290
Singles-Tie Rod
Singles-Tie Rod
2335
2375
2360
2425
2456 mm (96.7″) Inset
N/A
2659 mm (104.7″) Outset
N/A
N/A
2621 mm (103.2″) Inset
2824 mm (111.2″) Outset
30.5 R32 R2
Singles-Tie Rod
2602 mm (102.4″) Inset
2805 mm (110.4″) Outset
20.8 R38 R1W Radial
Singles - Drum
2368 mm (93.2″) Inset
2571 mm (101.2″) Outset
700/65 R38 Special
Singles - Drum
N/A
710/70 R38 R1 Radial
Singles - Drum
710/70 R38 R1W Radial
Singles - Drum
750/65 R38 Special
Singles - Drum
2667 mm (105″) Inset
850/60 R38 Special
Singles - Drum
2908 mm (114.5″) Inset
20.8 R42 R1W Radial
Singles - Drum
2368 mm (93.2″) Inset
2617 mm (103.0″) Inset
2628 mm (103.5″) Inset
N/A
2628 mm (103.5″) Inset
2571 mm (101.2″) Outset
24.5 R32 R1
Duals - Tie Rod
4028 mm (158.6″)
24.5 R32 R1 Radial
Duals - Tie Rod
4017 mm (158.1″)
30.5 R32 R2
Duals - Tie Rod
30.5 R32 R1 Radial
Duals - Tie Rod
4704 mm (185.2″)
800/65 R32 R1W Radial
Duals - Tie Rod
4785 mm (188.4″)
18.4 R38 R1
Duals - Tie Rod
3672 mm (144.6″)
N/A
18.4 R38 R2
Duals - Tie Rod
3658 mm (144.0″)
N/A
18.4 R38 R1 Radial
Duals - Tie Rod
3668 mm (144.4″)
N/A
20.8 R38 R1
Duals - Tie Rod
3820 mm (150.4″)
N/A
20.8 R38 R2
Duals - Tie Rod
3806 mm (149.8″)
N/A
20.8 R38 R1 Radial
Duals - Tie Rod
3821 mm (150.4″)
N/A
20.8 R38 R1W Radial
Duals - Tie Rod
650/65 R38 R1W Radial
Duals - Tie Rod
18.4 R42 R1
Duals - Tie Rod
N/A
3666 mm (144.3″)
N/A
18.4 R42 R1 Radial
Duals - Tie Rod
N/A
3666 mm (144.3″)
N/A
20.8 R42 R1
Duals - Tie Rod
20.8 R42 R1W Radial
Duals - Tie Rod
20.8 R42 R1W Radial
Duals - Tie Rod
3821 mm (150.4″)
520/85 R42 R1W Radial
Duals - Tie Rod
4262 mm (167.8″)
20.8 R42 R2 Radial
Duals - Tie Rod
3812 mmX (150.1″)
20.8 R38 R1W Radial
Duals - Drum
N/A
N/A
4685 mm (184.4″)
3821 mm (150.4″)
4475 mm (176.2″)
3826 mm (150.6″)
N/A
3821 mm (150.4″)
3825 mm (150.6″)
5-3
SECTION 5 - SPECIFICATIONS
OVERALL WIDTHS - Continued
Tire Size
Configuration
2290
2335
2375
2360
2425
700/65 R38 Special
Duals - Drum
4625 mm (182.1″)
710/70 R38 R1 Radial
Duals - Drum
N/A
710/70 R38 R1W Radial
Duals - Drum
N/A
750/65 R38 Special
Duals - Drum
850/60 R38 Special
Duals - Drum
20.8 R42 R1
Duals - Drum
3819 mm (150.4″)
20.8 R42 R1 Radial
Duals - Drum
3814 mm (150.2″)
520/85 R42 R1W Radial
Duals - Drum
3846 mm (151.4″)
900/50 R42 R1W Radial
Duals - Drum
20.8 R42 R2 Radial
Duals - Drum
18.4 R46 R1 Radial
Duals - Drum
18.4 R38 R1
Duals - Drum
Row Crop
3532 mm (139.1″)
N/A
18.4 R38 R1 Radial
Duals - Drum
Row Crop
3528 mm (138.9″)
N/A
18.4 R42 R1
Duals - Drum
Row Crop
3526 mm (138.8″)
N/A
18.4 R42 R1 Radial
Duals - Drum
Row Crop
3529 mm (138.9″)
N/A
18.4 R46 R1 Radial
Duals - Drum
Row Crop
20.8 R42 R1
Triples - Drum
N/A
5271 mm (207.5″)
20.8 R42 R1 Radial
Triples - Drum
N/A
5266 mm (207.3″)
520/85 R42 R1W Radial
Triples - Drum
20.8 R42 R2 Radial
Triples - Drum
N/A
5266 mm (207.3″)
18.4 R46 R1 Radial
Triples - Drum
N/A
5062 mm (199.3″)
4636 mm (182.5″)
4636 mm (182.5″)
N/A
4675 mm (184.1″)
N/A
5075 mm (199.8″)
N/A
4486 mm (176.6″)
3805 mm (149.8″)
3651 mm (143.7″)
N/A
3526 mm (138.8″)
N/A
5-4
5296 mm (208.5″)
SECTION 5 - SPECIFICATIONS
WHEEL TREAD WIDTH
The wheel tread width of the tractor will be determined by the tire size chosen. Single, dual, or triple tire
configuration will also affect wheel tread width. The following chart details overall width by tire size,
configuration, and tractor model. Tread width is shown from center of inner wheel to center of
inner wheel, and center of outer wheel to center of outer wheel. (Center of middle wheel to
center of middle wheel also shown for triple option.)
Tire Size
24.5 R32 R1 Radial
30.5 R32 R1
Configuration
2290
2335
Singles
g
- Tie Rod
Singles - Tie Rod
2375
2360
2425
1829 mm (72″) Inset
N/A
2032 mm (80″) Outset
N/A
1829 mm (72″) Inset
N/A
2032 mm (80″) Outset
30.5 R32 R2
Singles - Tie Rod
1829 mm (72″) Inset
2032 mm (80″) Outset
20.8 R38 R1W Radial
Singles - Drum
1829 mm (72″) Inset
2032 mm (80″) Outset
700/65 R38 Special
Singles - Drum
710/70 R38 R1 Radial
Singles - Drum
710/70 R38 R1W
Radial
Singles - Drum
750/65 R38 Special
Singles - Drum
850/60 R38 Special
Singles - Drum
20.8 R42 R1W Radial
Singles - Drum
1917 mm (75.5″) Inset
N/A
1917 mm (75.5″) Inset
N/A
1917 mm (75.5″) Inset
1917 mm (75.5″) Inset
N/A
2058 mm (81″) Outset
1829 mm (72″) Inset
2032 mm (80″) Outset
24.5 R32 R1
1829 mm (72″) Inner
Duals - Tie Rod
3390 mm (133.5″) Outer
24.5 R32 R1 Radial
1829 mm (72″) Inner
Duals - Tie Rod
3390 mm (133.5″) Outer
30.5 R32 R2
Duals - Tie Rod
1829 mm (72″) Inner
N/A
3912 mm (154″) Outer
30.5 R32 R1 Radial
Duals - Tie Rod
1829 mm (72″) Inner
3912 mm (154″) Outer
800/65 R32 R1W
R di l
Radial
Duals - Tie Rod
18.4 R38 R1
Duals - Tie Rod
18.4 R38 R2
18.4 R38 R1 Radial
20.8 R38 R1
20.8 R38 R2
1869 mm (73.6″) Inner
3952 mm (155.6″) Outer
Duals - Tie Rod
Duals - Tie Rod
Duals - Tie Rod
1829 mm (72″) Inner
N/A
3188 mm (125.5″) Outer
N/A
1829 mm (72″) Inner
N/A
3188 mm (125.5″) Outer
N/A
1829 mm (72″) Inner
N/A
3188 mm (125.5″) Outer
N/A
1829 mm (72″) Inner
N/A
3282 mm (129.2″) Outer
N/A
1829 mm (72″) Inner
Duals - Tie Rod
3282 mm (129.2″) Outer
5-5
SECTION 5 - SPECIFICATIONS
WHEEL TREAD WIDTH - Continued
Tire Size
20.8 R38 R1 Radial
20.8 R38 R1W Radial
Configuration
2290
Duals - Tie Rod
2335
2375
2360
2425
1829 mm (72″) Inner
N/A
3282 mm (129.2″) Outer
N/A
1829 mm (72″) Inner
Duals - Tie Rod
3282 mm (129.2″) Outer
650/65 R38 R1W
R di l
Radial
Duals - Tie Rod
18.4 R42 R1
Duals - Tie Rod
18.4 R42 R1 Radial
20.8 R42 R1
1600 mm (63″) Inner
3683 mm (145″) Outer
1829 mm
(72″) Inner
N/A
3188 mm
(125.5″)
Outer
N/A
Duals - Tie Rod
1829 mm (72″) Inner
N/A
3188 mm (125.5″) Outer
N/A
1829 mm (72″) Inner
Duals - Tie Rod
3282 mm (129.2″) Outer
20.8 R42 R1 Radial
1829 mm (72″) Inner
Duals - Tie Rod
3282 mm (129.2″) Outer
20.8 R42 R1W Radial
Duals - Tie Rod
520/85 R42 R1W
R di l
Radial
Duals - Tie Rod
20.8 R42 R2 Radial
Duals - Tie Rod
N/A
1829 mm (72″) Inner
N/A
3282 mm (129.2″) Outer
1387 mm (54.6″) Inner
3470 mm (136.6″) Outer
1829 mm (72″) Inner
3282 mm (129.2″) Outer
20.8 R38 R1W Radial
Duals - Drum
1829 mm (72″) Inner
3275 mm (129″) Inner
700/65 R38 Special
p
1917 mm (75.5″) Inner
Duals - Drum
3925 mm (154.5″) Outer
710/70 R38 R1 Radial
710/70 R38 R1W
R di l
Radial
750/65 R38 Special
Duals - Drum
Duals - Drum
N/A
1917 mm (75.5″) Inner
N/A
3925 mm (154.5″) Outer
N/A
1917 mm (75.5″) Inner
N/A
N/A
3925 mm (154.5″) Outer
N/A
Duals - Drum
1917 mm (75.5″) Inner
3925 mm (154.5″) Outer
850/60 R38 Special
Duals - Drum
N/A
2058 mm (81″) Inner
4125 mm (162.4″) Outer
20.8 R42 R1
1829 mm (72″) Inner
Duals - Drum
3275 mm (128.9″) Outer
20.8R R42 R1 Radial
1829 mm (72″) Inner
Duals - Drum
3275 mm (128.9″) Outer
5-6
SECTION 5 - SPECIFICATIONS
WHEEL TREAD WIDTH - Continued
Tire Size
Configuration
20.8 R42 R1W Radial
Duals - Drum
2290
2335
2375
2360
2425
1829 mm (72″) Inner
3275 mm (129″) Inner
20.8 R42 R2 Radial
1829 mm (72″) Inner
Duals - Drum
3275 mm (128.9″) Outer
520/85 R42 R1W
R di l
Radial
Duals - Drum
900/50 R42 R1W
R di l
Radial
Duals - Drum
18.4 R46 R1 Radial
Duals - Drum
18.4 R38 R1
18.4 R38 R1 Radial
18.4 R42 R1
18.4 R42 R1 Radial
18.4 R46 R1 Radial
20.8 R42 R1
20.8 R42 R1 Radial
520/85 R42 R1W
R di l
Radial
1859 mm (73.2″) Inner
3305 mm (130.1″) Outer
2499 mm (98.4″)
N/A
3945 mm (155.3″)
Duals - Drum
R
Row
C
Crop
Duals - Drum
R
Row
C
Crop
Duals - Drum
R
Row
C
Crop
Duals - Drum
R
Row
C
Crop
1829 mm (72″) Inner
N/A
3173 mm (124.9″) Outer
N/A
1600 mm (63″) Inner
N/A
3048 mm (120″) Outer
N/A
1600 mm (63″) Inner
N/A
3048 mm (120″) Outer
N/A
1600 mm (63″) Inner
N/A
3048 mm (120″) Outer
N/A
1600 mm (63″) Inner
N/A
3048 mm (120″) Outer
N/A
1600 mm (63″) Inner
Duals - Drum
R
Row
C
Crop
Triples
p
- Drum
Triples
p
- Drum
3048 mm (120″) Outer
N/A
N/A
1825 mm (71.9″) Inner
N/A
N/A
3276 mm (129″) Center
N/A
N/A
4727 mm (186.1″) Outer
N/A
N/A
1825 mm (71.9″) Inner
N/A
N/A
3276 mm (129″) Center
N/A
N/A
4727 mm (186.1″) Outer
Triples - Drum
1857 mm (73.1″) Inner
N/A
3307 mm (130.2″) Center
4757 mm (187.3″) Outer
20.8 R42 R2 Radial
18.4 R46 R1 Radial
Triples
p
- Drum
N/A
N/A
1825 mm (71.9″) Inner
N/A
N/A
3276 mm (129″) Center
N/A
N/A
4727 mm (186.1″) Outer
Triples - Drum
N/A
1598 mm (62.9″) Inner
3048 mm (120″) Center
4572 mm (180″) Outer
5-7
SECTION 5 - SPECIFICATIONS
TURNING GEOMETRY
Turnaround diameter is measured from the center point of the front axle and is a measurement of how
far a tractor will move with each turn. The turnaround diameter is based solely on articulation
angle and is not a function of tire size or configuration.
Articulation Angle
Turnaround Diameter
42°
38°
33°
31°
. . . . . . . . . . . . . . . . . . . . . . . . . . . . . . . . . . . . . . . . . . . . . . . . . . . . . . . . . . . . . . . . . . . . 8.69 m (342″)
. . . . . . . . . . . . . . . . . . . . . . . . . . . . . . . . . . . . . . . . . . . . . . . . . . . . . . . . . . . . . . . . . . . . 9.73 m (383″)
. . . . . . . . . . . . . . . . . . . . . . . . . . . . . . . . . . . . . . . . . . . . . . . . . . . . . . . . . . . . . . . . . . . 11.33 m (446″)
. . . . . . . . . . . . . . . . . . . . . . . . . . . . . . . . . . . . . . . . . . . . . . . . . . . . . . . . . . . . . . . . . . . 11.73 m (462″)
MAXIMUM ALLOWABLE MACHINE WEIGHT
The following table shows the maximum allowable weight of each tractor model.
Model
Maximum Weight
2290 . . . . . . . . . . . . . . . . . . . . . . . . . . . . . . . . . . . . . . . . . . . . . . . . . . . . . . . . . . . . . . . . . . .
2335 . . . . . . . . . . . . . . . . . . . . . . . . . . . . . . . . . . . . . . . . . . . . . . . . . . . . . . . . . . . . . . . . . . .
2360 . . . . . . . . . . . . . . . . . . . . . . . . . . . . . . . . . . . . . . . . . . . . . . . . . . . . . . . . . . . . . . . . . . .
2375 . . . . . . . . . . . . . . . . . . . . . . . . . . . . . . . . . . . . . . . . . . . . . . . . . . . . . . . . . . . . . . . . . . .
2425 . . . . . . . . . . . . . . . . . . . . . . . . . . . . . . . . . . . . . . . . . . . . . . . . . . . . . . . . . . . . . . . . . . .
13,154 kg (33,000 lbs.)
14,545 kg (36,000 lbs.)
15,422 kg (38,000 lbs.)
17,273 kg (39,000 lbs.)
19,958 kg (44,000 lbs.)
TRACTOR SHIPPING WEIGHT
Shipping weight of a tractor can be calculated based on the standard equipment and options ordered
(or dealer installed) before any liquid ballast is added to the tractor. To calculate the shipping weight,
pick the appropriate front, rear, and total weight values from the following tables (A-F). Once the
shipping weight is found, the tractor can be ballasted and the tire air pressure set. See “Ballasting” in
Section 2. Example:
Tractor: 2375 tractor with powershift transmission, 20.8 x 42 R1 drum-style duals, PTO, 1/2 tank of fuel.
Table Info
Front Axle
Weight
kg (lbs.)
Rear Axle
Weight
kg (lbs.)
Total
Weight
kg (lbs.)
A . . . . . . . . . . . . . . . . . . . . . . . . . . . . 5,924 (13,059) . . . . . . . . . . . 2,624 (5,785) . . . . . . . . . . . 8,548 (18,844)
B . . . . . . . . . . . . . . . . . . . . . . . . . . . . 1,521 (3,354) . . . . . . . . . . . . 1,521 (3,354) . . . . . . . . . . . . 3,043 (6,708)
C . . . . . . . . . . . . . . . . . . . . . . . . . . . . . . . . N/A . . . . . . . . . . . . . . . . . . . . . N/A . . . . . . . . . . . . . . . . . . . . N/A
D . . . . . . . . . . . . . . . . . . . . . . . . . . . . . . 227 (500) . . . . . . . . . . . . . . . 227 (500)) . . . . . . . . . . . . . . 453.6 (1,000)
E . . . . . . . . . . . . . . . . . . . . . . . . . . . . . (-41) (-90)) . . . . . . . . . . . . . . 494 (1,090) . . . . . . . . . . . . . . 454 (1,000)
F . . . . . . . . . . . . . . . . . . . . . . . . . . . . . . 226 (498) . . . . . . . . . . . . . . . 164 (361) . . . . . . . . . . . . . . . 390 (859)
Totals . . . . . . . . . . . . . . . . . . . . . . . . 7,857 (17,321) . . . . . . . . . . . 5,030 (11,090) . . . . . . . . . . . 12,887 (28,411)
NOTE: The weights shown in tables A-F are calculated values. Exact weights are only
obtainable by putting the tractor on a scale.
5-8
SECTION 5 - SPECIFICATIONS
A. Base Tractor Weight
A base tractor is considered to be with the 12x4 Quad Shift III mechanical transmission, no tires or rims,
a standard drawbar, no fuel in the fuel tanks, no operator, no special added equipment, and no ballast
(dry or liquid).
Tire Size
2290
2335
2375
2360
2425
Front Axle Weight
5923.6 kg (13059 lbs.)
6129.5 kg (13513 lbs.) 6242.9 kg (13763 lbs.)
Rear Axle Weight
2624.1 kg (5785 lbs.)
2836.8 kg (6217 lbs.)
Total Base Tractor
Weight
8547.6 kg (18844 lbs.)
9002.8 kg (19730 lbs.) 9230.9 kg (20230 lbs.)
2950.9 kg (6467 lbs.)
B. Tire Weights
The following chart lists the weight of the tire, tube, rim and spacer (for tie rod duals) by tire size and
wheel configuration.
Buhler Versatile offers a choice of Goodyear, Trelleborg, Firestone, and Titan tires. The chart is
based on an average tire weight of the brand offered for a particular tire size. The weights
shown are for front and rear axle and overall weight by configuration.
Tire Size
24.5
30.5
30.5
20.8
20.8
700/65
710/70
710/70
750/65
850/60
24.5
24.5
30.5
30.5
800/65
18.4
18.4
18.4
18.4
18.4
18.4
20.8
20.8
20.8
20.8
650/65
20.8
20.8
20.8
20.8
520/85
20.8
700/65
710/70
710/70
R32
R32
R32
R38
R42
R38
R38
R38
R38
R38
R32
R32
R32
R32
R32
R38
R38
R38
R42
R42
R42
R38
R38
R38
R38
R38
R42
R42
R42
R42
R42
R38
R38
R38
R38
Configuration
R1
R1
R2
R1W
R1W
R1
R1
R1W
R1
R1
R1
R1
R2
R1
R1W
R1
R2
R1
R1
R1
R1
R1
R2
R1
R1W
R1W
R1
R1
R1W
R2
R1W
R1W
R1
R1
R1W
Front Axle
Rear Axle
Total Tire Weight
kg (lbs.)
kg (lbs.)
kg (lbs.)
Radial . . Singles - Tie Rod . . . . . 659.1 (1453) . . . . 659.1 (1453) . . . 1317.7 (2905)
10 Ply . . Singles - Tie Rod . . . . . . 706 (1553) . . . . . . 706 (1553) . . . . . 1412 (3107)
10 Ply . . Singles - Tie Rod . . . . . 851.5 (1873) . . . . 851.5 (1873) . . . 1701.7 (3746)
Radial . . . Singles - Drum . . . . . . 654.5 (1440) . . . . 654.5 (1440) . . . 1309.1 (2880)
Radial . . . Singles - Drum . . . . . . 720.9 (1586) . . . . 720.9 (1586) . . . 1442.3 (3173)
8 Ply . . . . Singles - Drum . . . . . . 936.2 (2064) . . . . 936.2 (2064) . . . 1872.5 (4128)
Radial . . . Singles - Drum . . . . . . 927.2 (2044) . . . . 927.2 (2044) . . . 1854.3 (4088)
Radial . . . Singles - Drum . . . . . . 1012.7 (2228) . . . 1012.7 (2228) . . . 2025.5 (4456)
8 Ply . . . . Singles - Drum . . . . . . 1400.9 (3082) . . . 1400.9 (3082) . . . 2801.8 (6164)
8 Ply . . . . Singles - Drum . . . . . . . 1670 (3674) . . . . 1670 (3674) . . . . 3340 (7348)
10 Ply . . Duals - Tie Rod . . . . . 1250.6 (2757) . . . 1250.6 (2757) . . . 2501.2 (5514)
Radial* . . Duals - Tie Rod . . . . . . . 1408.4 (3105) . . . 1408.4 (3105) . . . 2816.9 (6210)
10 Ply . . Duals - Tie Rod . . . . . 1793.6 (3946) . . . 1793.6 (3946) . . . 3587.3 (7892)
Radial . . Duals - Tie Rod . . . . . 1503.2 (3307) . . . 1503.2 (3307) . . . 3006.4 (6614)
Radial . . Duals - Tie Rod . . . . . . 1651 (3640) . . . . 1651 (3640) . . . . 3302 (7280)
6 Ply . . . Duals - Tie Rod . . . . . 932.1 (2055) . . . . 932.1 (2055) . . . . 1864.3 (4110)
6 Ply . . . Duals - Tie Rod . . . . . 1108.1 (2443) . . . 1108.1 (2443) . . . 2216.3 (4886)
Radial* . . Duals - Tie Rod . . . . . . . 1090.5 (2404) . . . 1090.5 (2404) . . . 2180.9 (4808)
6 Ply . . . . . Duals - Tie Rod . . . . . . 1144.5 (2518) . . 1144.5 (2518) . . 2289.0 (5036)
10 Ply . . Duals - Tie Rod . . . . . . 1190 (2618) . . . . 1190 (2618) . . . . 2380 (5236)
Radial . . Duals - Tie Rod . . . . . . 1275 (2805) . . . . 1275 (2805) . . . . 2550 (5610)
8 Ply . . . Duals - Tie Rod . . . . . 1114.9 (2458) . . . . 1114.9 (2458) . . . 2229.9 (4916)
8 Ply . . . Duals - Tie Rod . . . . . 1276.9 (2815) . . . 1276.9 (2815) . . . 2553.8 (5630)
Radial* . . Duals - Tie Rod . . . . . . . 1242.4 (2739) . . . 1242.4 (2739) . . . 2484.8 (5478)
Radial . . Duals - Tie Rod . . . . . 1295.5 (2850) . . . 1295.5 (2850) . . . 2590.9 (5700)
Radial . . Duals - Tie Rod . . . . . . 1499 (3305) . . . . 1499 (3305) . . . . 2998 (6610)
10 Ply . . Duals - Tie Rod . . . . . 1341.7 (2958) . . . 1341.7 (2958) . . . 2683.5 (5916)
Radial** . . Duals - Tie Rod . . . . . . . 1425.7 (3143) . . . 1425.7 (3143) . . . 2851.3 (6286)
Radial . . Duals - Tie Rod . . . . . 1428.2 (3142) . . . 1428.2 (3142) . . . 2856.4 (6283)
Radial** . Duals - Tie Rod . . . . . 1595.5 (3510) . . . 1595.5 (3510) . . . 3191.0 (7020)
Radial . . Duals - Tie Rod . . . . . . 1463 (3225) . . . . 1463 (3225) . . . . 2926 (6450)
Radial . . . Duals - Drum . . . . . . 1478.2 (3252) . . . 1478.2 (3252) . . . 2956.4 (6504)
8 Ply . . . . Duals - Drum . . . . . . 2108.2 (4638) . . . 2108.2 (4638) . . . 4216.4 (9276)
Radial** . . . Duals - Drum . . . . . . . . 2094.7 (4618) . . . 2094.7 (4618) . . . 4189.4 (9236)
Radial . . . . Duals - Drum . . . . . . . . 4894 (2224.5) . . . 4894 (2224.5) . . . 9788 (4449.1)
5-9
SECTION 5 - SPECIFICATIONS
B. Tire Weights - Continued
750/65
850/60
20.8
20.8
20.8
20.8
520/85
900/50
18.4
18.4
R38
R38
R42
R42
R42
R42
R42
R42
R46
R38
18.4
R38
18.4
R42
18.4
R42
18.4
R46
20.8
20.8
20.8
520/85
18.4
R42
R42
R42
R42
R46
R1
8 Ply . . . . Duals - Drum . . . . . . . 2620 (5764) . . . . 2620 (5764) . . . . 5240 (11,528)
R1
8 Ply . . . . Duals - Drum . . . . . . 2997.3 (6594) . . . 2997.3 (6594) . . . 5994.5 (13,188)
R1
10 Ply . . . Duals - Drum . . . . . . 1521.4 (3354) . . . 1521.4 (3354) . . . 6708 (3042.7)
R1
Radial*** . . Duals - Drum . . . . . . . . 1605.3 (3539) . . . 1605.3 (3539) . . . 3210.6 (7078)
R1W Radial . . . Duals - Drum . . . . . . 1630.5 (3587) . . . 1630.5 (3587) . . . 3260.9 (7174)
R2
Radial** . . Duals - Drum . . . . . . 1775.5 (3906) . . . 1775.5 (3906) . . . 7812 (3551.0)
R1W Radial . . . . Duals - Drum . . . . . . . 1651 (3640) . . . . 1651 (3640) . . . . 3302 (7280)
R1W Radial . . . . Duals - Drum . . . . . . . 2926 (6450) . . . . 2926 (6450) . . . 5851 (12,900)
R1
Radial*** . . Duals - Drum . . . . . . . . 1586.2 (3497) . . . 1586.2 (3497) . . . 3172.5 (6994)
R1
6 Ply . . . . . . . . Duals . . . . . . . . . . 1136.3 (2505) . . . 1136.3 (2505) . . . 2272.5 (5010)
Drum Row Crop
R1
Radial* . . . . . . . . Duals . . . . . . . . . . . . . 1294.6 (2854) . . . 1294.6 (2854) . . . 2589.1 (5708)
Drum Row Crop
R1
8 Ply . . . . . . . . Duals . . . . . . . . . . 1279.2 (2820) . . . 279.2 (2820) . . . 2558.8 (5641)
Drum Row Crop
R1
Radial** . . . . . . . . Duals . . . . . . . . . . . . . 1425.7 (3143) . . . 1425.7 (3143) . . . 2851.3 (6286)
Drum Row Crop
R1
Radial*** . . . . . . . Duals . . . . . . . . . . . . . 1624.3 (3581) . . . 1624.3 (3581) . . . 3248.7 (7162)
Drum Row Crop
R1
10 Ply . . . Triples - Drum . . . . . . 2512.0 (5538) . . . 2512.0 (5538) . . . 5024.1 (11,076)
R1
Radial** . . . Triples - Drum . . . . . . . . 2638.1 (5816) . . . 2638.1 (5816) . . . 11,631 (5275.8)
R2
Radial** . . . Triples - Drum . . . . . . . . 2893.6 (6366) . . . 2893.6 (6366) . . . 5787.3 (12,732)
R1W Radial . . . . Triples - Drum . . . . . . . 2703 (5960) . . . . 2703 (5960) . . . . 5407 (11,920)
R1
Radial . . . Triples - Drum . . . . . . . 2665 (5863) . . . . 2665 (5863) . . . . 5330 (11,726)
5-10
SECTION 5 - SPECIFICATIONS
C. Weight Packages Adding a front or rear weight package to a tractor affects the weight distribution
per axle as well as the total tractor weight. In addition, the actual weight effect applied to the axle is
amplified by the distance the weight is hung away from the axle center line. The following chart
shows the gross weight of each weight kit and the net result of adding the kit on the front and
rear axle.
Total Weight of Kit
kg (lbs.)
Effect on Front Axle
kg (lbs.)
Effect on Rear Axle
kg (lbs.)
Rear Weight Kit 40.8 kg (90 lbs.) bracket with
33 x 30 kg (67 lbs.) weights . . . . . . 1030 (2301) . . . . . . . Removes 185 (414) . . . . . . . Adds 1216 (2715)
Auxiliary Rear Weight Kit 18.2 kg (40 lbs.) brackets with
24 x 30 kg (67 lbs.) weights . . . . . . 738 (1648) . . . . . . . . Removes 118 (264) . . . . . . . Adds 856 (1912)
Front Weight Kit 59 kg (130 lbs.) bracket with
12 x 30 kg (67 lbs.) weights . . . . . . . 419 (934) . . . . . . . . . Adds 716 (1597) . . . . . . . Removes 297 (663)
Front Weight Kit 59 kg (130 lbs.) bracket with
39 x 30 kg (67 lbs.) weights . . . . . . 1229 (2743) . . . . . . . Adds 2102 (4691) . . . . . . . Removes 873 (1947)
Midmount Weight Kit 314 kg (692 lbs.) frame with
30 x 30 kg (67 lbs.) weights . . . . . . 1214 (2702) . . . . . . . . . Adds 147 (324) . . . . . . . . . Adds 1067 (2378)
Total Effect of Putting a
Complete Front, Rear, Midmount and Auxiliary
Rear Weight Kit on a Tractor . . . . . 4211 (9394) . . . . . . . . Adds 1946 (4337) . . . . . . . . Adds 2266 (5058)
Multiply every pound of weight added to the front weight kit by 171% and add this figure to the front
axle. Multiply every pound of weight added to the front weight kit by 71% and subtract this figure
from the rear axle weight. The total effect on the tractor should be the sum of the front effect less the
rear effect and should equal the weight added.
Multiply every pound of weight added to the rear weight kit by 118% and add this figure to the rear
axle. Multiply every pound of weight added to the rear weight kit by 18% and subtract this figure from
the front axle weight. The total effect on the tractor should be the sum of the front effect less the rear
effect and should equal the weight added.
Multiply every pound of weight added to the auxiliary rear weight kit by 116% and add this figure to
the rear axle. Multiply every pound of weight added to the auxiliary rear weight kit by 16% and
subtract this figure from the front axle weight. The total effect on the tractor should be the sum of the
front effect less the rear effect and should equal the weight added.
5-11
SECTION 5 - SPECIFICATIONS
D. Optional Transmission and Axle Weights
Adding an axle or transmission option to a tractor will affect the weight on the front and rear axle
based on the option selected and the model tractor. The following chart shows the effect on the axle
by option and model. (The 2290 and 2335 have no axle options available.)
Model
Option
Effect on
Front Axle
kg (lbs.)
2290 . . . . . . . . . Powershift Trans. . . . . . .
2335 . . . . . . . . . Powershift Trans. . . . . . .
2375 . . . . . . . . . Powershift Trans. . . . . . .
2360/2375 Quad Shift III Trans. and
Heavy-Duty Axles . . . . . .
Powershift Trans. . . . . . .
Powershift Trans. and
Heavy-Duty Axles . . . . . .
2425 . . . . . . . . . Powershift Trans. . . . . . .
Effect on
Rear Axle
kg (lbs.)
Total
Weight Change
kg (lbs.)
Adds 227 (500) . . . . Adds 227 (500) . . . Adds 454 (1000)
Adds 227 (500) . . . . Adds 227 (500) . . . Adds 454 (1000)
Adds 227 (500) . . . . Adds 227 (500) . . . Adds 454 (1000)
Adds 113 (250) . . . . Adds 113 (250) . . . . Adds 226 (500)
Adds 272 (600) . . . . Adds 181 (400) . . . Adds 453 (1000)
Adds 387 (850) . . . . Adds 296 (650) . . . Adds 680 (1500)
Adds 227 (500) . . . . . Adds 227 (500) . . . . Adds 454 (1000)
E. Optional Equipment Adding an option to the tractor will affect the axle weight of a unit. The
following chart details the three major options available for Buhler Versatile 4WD tractors and their
effect on axle and total weight when installed on a tractor.
Option
Effect on
Front Axle
kg (lbs.))
Effect on
Rear Axle
kg (lbs.)
Total Weight
Added
kg (lbs.)
PTO . . . . . . . . . . . . . . . . . . . . . . . Removes 41 (90) . . . . . . Adds 494 (1090) . . . . . . . . . Adds 454 (1000)
3-Point Hitch . . . . . . . . . . . . . . . Removes 128 (283) . . . . Adds 842 (1856) . . . . . . . . . Adds 714 (1573)
Quick-Attach Coupler . . . . . . . . Removes 73 (160) . . . . . . Adds 254 (560) . . . . . . . . . . Adds 181 (400)
F. Diesel Fuel
Fuel added to the fuel tanks has to be factored in to the base tractor weight. To do this, use the
following equation:
liters of fuel x 0.84 kg/L = fuel weight (kg)
(Gallons of fuel x 7.01 lbs./gal.) = fuel weight (lbs.)
The effect on the front and rear axle must also be calculated. Multiply the total fuel weight by 0.58 for
the front axle and 0.42 for the rear axle.
Example:
100 L fuel added
100 L x 0.84 kg/L = 84 kg
84 kg x 0.58 = 49 kg added to front axle
84 kg x 0.42 = 35 kg added to rear axle
100 gal. fuel added
100 gal. x 7.01 lbs./gal. = 701 lbs.
701 lbs. x 0.58 = 407 lbs. added to front axle
701 lbs. x 0.42 = 294 lbs. added to rear axle
5-12
SECTION 5 - SPECIFICATIONS
ENGINE
2290
2335
Manufacturer
Cummins Engine Co.
Engine Model
QSM11
Maximum Horsepower Rating kW
(BHP @ 2100 RPM) SAE J 1995
Type
216 (290)
250 (335)
2375
280 (375)
6-cylinder, 4-cycle,In-Line, Overhead 4 Valve per cyclinder Diesel Engine
Aspiration
Turbocharged & Aftercooled
Bore x Stroke - mm (in.)
125x147
(4.921x5.79)
Displacement - L (in3)
10.8 (659)
Compression Ratio
16.3:1
Firing Order
1-5-3-6-2-4
Lubrication System:
Pressure @ Idle
kPa (PSI)
103
(15)
Pressure @ Rated Speed
kPa (PSI)
241
(35)
Maximum Fuel Consumption: @
Maximum Rated Output &
Speed - gm/kwShr (lbs/hp-hr) *
203
(0.33)
Low Idle Speed - RPM
875
High Idle Speed - RPM
2225
Engine Torque @ Rated Speed
(2100 RPM) ft.lbs. (N·m)
983
(725)
1136
(838)
1272
(938)
Peak Engine Torque @ listed
Engine Speed - N·m (ft.lbs.) @
RPM
1478 (1090)
@ 1400
1702 (1255)
@ 1400
1898 (1400)
@ 1400
50
50
49
8409-SC3
2828-SC2
2829-SC1
Torque Rise - %
CPL # (Control Parts Listing)
* -- 1 Liter of diesel fuel weighs approximately 0.84 Kg.
* -- 1 gallon (US) of diesel fuel weighs approximately 7.01 lbs.
5-13
SECTION 5 - SPECIFICATIONS
ENGINE -- Continued
2360
2425
Manufacturer
Cummins Engine Co.
Engine Model
N14
Maximum Horsepower Rating kW
(BHP @ 2100 RPM) SAE J 1995
Type
Aspiration
268 (360)
317 (425)
6-cylinder, 4-cycle,In-Line, Overhead
Valve Diesel Engine
Turbocharged & Aftercooled
Bore x Stroke - mm (in.)
140x152
(5.50x6.00)
Displacement - L (in3)
14 (855)
Compression Ratio
16.5:1
Firing Order
1-5-3-6-2-4
69
(10)
Lubrication System:
Pressure @ Idle
kPa (PSI)
Pressure @ Rated Speed
kPa (PSI)
Maximum Fuel Consumption: @
Maximum Rated Output &
Speed - kg/hr (lbs/hr) *
207 - 345
(30 - 50)
54
(120)
66
(146)
Low Idle Speed - RPM
850 - 900
High Idle Speed - RPM
2225 ± 20
Engine Torque @ Rated Speed
(N·m)(2100 RPM) ft.lbs.
1220
(900)
1441
(1063)
Peak Engine Torque @ listed
Engine Speed - N·m (ft.lbs.) @
RPM
1649 (1215)
@ 1400
1899 (1400)
@ 1400
35
32
Torque Rise - %
CPL # (Control Parts Listing)
2403
* -- 1 Liter of diesel fuel weighs approximately 0.84 Kg.
* -- 1 gallon (US) of diesel fuel weighs approximately 7.01 lbs.
5-14
SECTION 5 - SPECIFICATIONS
ENGINE AIR INTAKE AND EXHAUST
2290
2335
AIR INTAKE
Precleaning
2375
2425
Exhaust Aspirated w/ Precleaner
Air Filter Configuration
Air Flow - L/S (CFM) @ 2100 RPM
2360
Primary (Outer)
Secondary (Inner)
382 (810)
413 (875)
414 (878)
507 (1075)
519 (1100)
EXHAUST OUTLET
MufflerType
Perforated tube and center plug with venturi for intake. Precleaner aspiration.
Air Flow - L/S (CFM) @ 2100 RPM
798 (1690)
873 (1850)
414 (878)
1132 (2400)
1261 (2675)
2290
2335
2375
2360
2425
FUEL SYSTEM
Fuel Tanks:
Total Capacity - L (gal.)
927 (245)
Usable Capacity - L (gal.)
871 (230)
Vented
Both Tanks
Fuel Filter
Single Element
Cold Start
Measured 4.8 cc shot of fluid at each switch activation.
Thermoguard protected above 27°C (81°F)
Fuel Flow
Drawn from left tank, passes through the engine fuel system. Return fuel goes
through the fuel cooler back to the right tank. Crossover pipe between the two
tanks. Separate fill spout and drain on each tank.
COOLING SYSTEM
2290
Coolant capacity - L (gal.)
2335
2425
60 (15.9)
60 (15.9)
7
6
7
838 (33)
x 89 (3.5)
813 (32)
x 89 (3.5)
838 (33)
x 89 (3.5)
978 x 894 (38.5 x 35.2)
Fins per Inch
Fan Diameter - mm (in.) x Blade
Pitch Width - mm (in.)
2360
59 (15.6)
Radiator Core Size (LxW) - mm (in.)
Number of Rows
2375
9
6
6
813 (32)
x 89 (3.5)
Number of Blades
8
Pressure Cap Setting - kPa (PSI)
97 (14)
Thermostat Opens
82°C (180°F)
Thermostat Full Open
93°C (200°F)
Type of System
Pressurized recirculating full flow bypass with filter and corrosion inhibitor.
5-15
SECTION 5 - SPECIFICATIONS
TRANSMISSION
12x4 Quad Shift III Mechanical Transmission
Number of speeds . . . . . . . . . . . . . . . . . . . . . . . . . . . . . . . . . . . . . . . . . . . 12 forward speeds; 4 reverse speeds
Shift type . . . . . . . . . . . . . . . . . . . . . . . . . . . . . . . . . . . . . . . . 4 synchronized gears in each of 3 forward ranges
Gear shifting . . . . . . . . . . . . . . . . . . . . . . . . . . . . . . . . . . . . . . . double cone style synchronizer on the top shaft
Range shifting . . . . . . . . . . . . . . . . . . . . . . . . . . . . . . . . . . . . . . . . . . . . . . . . . sliding collars on the bottom shaft
Lubrication . . . . . . . . . . . . . . . . . . . . . . . . . . . . . . . . . . . . . . . . . . . . . . self-contained pump, reservoir providing
pressurized lubrication to bearings and gears
Clutch type . . . . . . . . . . . . . . . . . . . . . . . . . . . . . . . . . . . . . hydraulically actuated wet clutch on the input shaft
Clutch diameter . . . . . . . . . . . . . . . . . . . . . . . . . . . . . . . . . . . . . . . . . . . . . . . . . . . . . . . . . . . . . . . . . 280 mm (11″)
Number of clutch plates . . . . . . . . . . . . . . . . . . . . . . . . . . . . . . . . . . . . . . . . . . . . . . . . . . . . 6 friction, 6 separator
Clutch brake . . . . . . . . . . . . . . . . . . . . . . . . . . . . . . . . . . . . . . . . . . . . . . . hydraulically actuated on second shaft
140 mm (5.5″) diameter,
3 plates (1 separator, 2 friction)
Filter . . . . . . . . . . . . . . . . . . . . . . . . . . . . . . . . . . . . . . . . . . . . . . . . . 10-micron w/344 kPa (50 PSI) bypass relief
12x2 Powershift Transmission
Number of speeds . . . . . . . . . . . . . . . . . . . . . . . . . . . . . . . . . . . . . . . . . . . 12 forward speeds; 2 reverse speeds
Shifting type . . . . . . . . . . . . . . . . . . . . . . . . . . . . . . . . electrically actuated - valve activates 3 (out of 8) clutch
packs to provide the selected gear ratio
Type of gear . . . . . . . . . . . . . . . . . . . . . . . . . . . . . . . . . . . . . . . . . . . . . . . . . . . . . . . . . . . . . . . constant mesh spur
Clutch type . . . . . . . . . . . . . . . . . . . . . . . . . . . . . . . . . . . . . . . . . . . . . . . . . hydraulically actuated on fourth shaft
Clutch diameter . . . . . . . . . . . . . . . . . . . . . . . . . . . . . . . . . . . . . . . . . . . . . . . . . . . . . . . . . . . . . . . . . . 229 mm (9″)
Clutch brake . . . . . . . . . . . . . . . . . . . . . . . . . . . . . . . . electronically controlled by activating opposing clutches
Lubrication . . . . . . . . . . . . . . . . . . . . . . . . . . . . . . . . . . . . . . . . . . . . . . self-contained pump, reservoir providing
pressurized lubrication to bearings and gears
Filter . . . . . . . . . . . . . . . . . . . . . . . . . . . . . . . . . . . . . . . . . . . . . . . 10-micron w/344.8 kPa (50 PSI) bypass relief
5-16
SECTION 5 - SPECIFICATIONS
DRIVELINES
COMPONENT
Torsional coupler @
engine torque
rating N·m (in.lbs.)
Engine To Transmission
Drive Shaft
Size
Cross and bearing lube interval hrs.
Slip yoke lube - interval
hrs.
Transmission to Front
Axle Drive Shaft
Size
Cross and bearing lube interval hrs
Slip yoke lube - interval
hrs
Articulation Drive Shaft
Size
Cross and bearing lube interval hrs
Slip yoke lube - interval
hrs
Rear Axle Drive Shaft
Size
Cross and bearing lube interval hrs
Slip yoke lube - interval
hrs
2290
PS
2290
QS
2235
PS
2335
QS
2360
PS
2360
QS
2375
PS
2425
QS
2425
PS
2270
(20,000)
1412
(12,500)
1610
7C
250
NR
250
250
1610
8C
250
NR
250
250
1610
8C
250
NR
250
250
1610
250
8C
NR
250
PTO Articulation Drive
Shaft (Optional)
Size
Cross and bearing lube interval hrs
Slip yoke lube - interval
hrs
250
1550
NR
250
PTO Rear Drive Shaft
(Optional)
Size
Cross and bearing lube interval hrs
Slip yoke lube - interval
hrs
1550
NR
250
NR - Not Required
5-17
SECTION 5 - SPECIFICATIONS
AXLES/DIFFERENTIALS
2290
PS
2290
QS
2335
PS
2335
QS
2360
PS
2360
QS
Differential Make
Eaton
Differential Series
23,000
Differential
Reduction
4.88
Differential Spiral
Direction
Front Axle
Rear Axle
2375
PS
2425
QS
2425
PS
No
No
Yes
Yes
LH
RH
Differential Shot
Peened?
Yes
Planetary Hub
Reduction
5.285
Planetary Sun
Gear Shot
Peened?
2375
PS
Yes
No
No
No
No
No
* The 2425 axle is specified for triple tires and is available on the 2360 and 2375 as a factory installed option. The 2360/2375
triple axle does have a shot peened sun gear in the planetary hub.
POWER TAKE-OFF (Optional)
2290
2335
Engine Speed @ 1000 PTO RPM
2360
2425
2100 RPM
Shaft Diameter - mm (in.)
44.5 mm (1-3/4″)
Number of Splines
Drive Shaft Bearings
2375
20
Permanent Seal (No Greasing Required)
PTO Clutch
Electrohydraulic, Multi-Disc Wet
PTO Brake
Integral Hydraulic Brake
HYDRAULIC SYSTEM
Type of system . . . . . . . . . . . . . . . . . . . . . . . . . . . . . . . . . . . . . . . . . . . . . . . . . . . . . . . closed center load sensing
Nominal pressure
High (standby) . . . . . . . . . . . . . . . . . . . . . . . . . . . . . . . . . . . . . . . . . . . . . 19.3 - 19.9 mPa (2850 - 2900 PSI)
Low (standby) . . . . . . . . . . . . . . . . . . . . . . . . . . . . . . . . . . . . . . . . . . . . . . . . . 20.7 - 22.4 kPa (300 - 325 PSI)
Flow at rated engine speed . . . . . . . . . . . . . . . . . . . . . . . . . . . . . . . . 2290, 2335, 2375 - 170 L/min (45 GPM)
2360, 2425 - 189 L/min (50 GPM)
Pump . . . . . . . . . . . . . . . . . . . . . . . . . . . . . . . . . . . . . . . . . . . . . . . . . . . . . . . . . . . . . variable displacement piston
. . . . . . . . . . . . . . . . . . . . . . . . . with supplemental flow from a fixed displacement gear pump on demand.
Suction filter . . . . . . . . . . . . . . . . . . . . . . . . . . . . . . . . . . . . . . . . . . . . . . . . . . . . . . . . . . . . . . . . . 100-mesh screen
Main filter . . . . . . . . . . . . . . . . . . . . . . . . . . . . . . . . . . . . . . . . . . . 10-micron w/344.8 kPa (50 PSI) bypass relief
Remote control valve . . . . . . . . . . . . . . . . . . . . . . . . . . . . . . . . . . . . . . . . . 4 section (5 section w/ 3-point hitch)
Detent pressure . . . . . . . . . . . . . . . . . . . . . . . . . . . . . . . . . . . . . . . . . . . . . . . . . . . . . . . . . . . 15.5 mPa (2250 PSI)
Flow control . . . . . . . . . . . . . . . . . . . . . . . . . . . . . . . . . . . . . . . . . . . . . . . . . . . . . . . . individual adjustment in cab
Couplers
Number . . . . . . . . . . . . . . . . . . . . . . . . . . . . . . . . . . . . . . . . . . . . . . . . . . . . . . . . . . . . . . . . . . . . . . . . . . . . 4 sets
Type . . . . . . . . . . . . . . . . . . . . . . . . . . . . . . . . . . . . . . . . . . . . . . . . . . . . . . . . . . . . . leverless quick disconnect
5-18
SECTION 5 - SPECIFICATIONS
3-POINT HITCH (Optional)
Linkage . . . . . . . . . . . . . . . . . . . . . . . . . . . . . . . . . . . . . . . . . . . . . . . . . . . . . . . . . . . . . . . . . . . . . Category IV N / III
Maximum lift capacity @ 610 mm (24″) behind lower links . . . . . . . . . . . . . . . . . . . . . . 5897 kg (13,000 lbs.)
Cylinder
Diameter . . . . . . . . . . . . . . . . . . . . . . . . . . . . . . . . . . . . . . . . . . . . . . . . . . . . . . . . . . . . . . . . . . . . 104.6 mm (4″)
Stroke . . . . . . . . . . . . . . . . . . . . . . . . . . . . . . . . . . . . . . . . . . . . . . . . . . . . . . . . . . . . . . . . . . . . . 330.2 mm (13″)
Drawbar . . . . . . . . . . . . . . . . . . . . . . . . . . . . . . . . . . . . . . . . . . . . . . . . . . . . . . . . . . . . . . . . . . 3-position swinging
Maximum drawbar offset . . . . . . . . . . . . . . . . . . . . . . . . . . . . . . . . . . . . . . . . . . . . . . . . . . . . . . . . . 214 mm (8.4″)
DRAWBAR
Hitch pin
Standard . . . . . . . . . . . . . . . . . . 2290, 2335, 2360, 2375 - 38 mm (1-1/2″) Class 4 - 51mm (2″) optional
2425 - 51 mm (2″) Class 4 - 38 mm (1-1/2″) optional
Type . . . . . . . . . . . . . . . . . . . . . . . . . . . . . . . . . . . . . . . . . . . . . . one-piece 5-position w/ replaceable wear block
(3-point hitch - 3-position)
Clevis . . . . . . . . . . . . . . . . . . . . . . . . . . . . . . . . . . . . . . . . . . . . . . . . . . . . . . . . . . . . . . . . . . . bolt-on w/ safety latch
bolt-on bottom lowers hitch point 90 mm (3.5″)
Clevis throat opening . . . . . . . . . . . . . . . . . . . . . . . . . . . . . . . . . . . . . . . . . . . . . . . . . . . . . . . . . . . . . 90 mm (3.5″)
Height to top of drawbar . . . . . . . . . . . . . . . . . . . . . . 419 to 522 mm (16.5″ to 20.6″) (depending on tire size)
Maximum offset . . . . . . . . . . . . . . . . . . . . . . . . . . . . . . . . . . . . . . . . . . . . . . . . . . . . . . . . . . . . . . . . 366 mm (14.4″)
BRAKES
Type . . . . . . . . . . . . . . . . . . . . . . . . . . . . . . . . . . . . . . . . . . . . . . . . . . . . . . . . . . . . . . . . . . . . . . . . . . . single dry disc
Disc diameter . . . . . . . . . . . . . . . . . . . . . . . . . . . . . . . . . . . . . . . . . . . . . . . . . . . . . . . . . . . . . . . . . . . 508 mm (20″)
Disc thickness . . . . . . . . . . . . . . . . . . . . . . . . . . . . . . . . . . . . . . . . . . . . . . . . . . . . . . . . . . . . . . . . . . 19 mm (0.75″)
Service brake . . . . . . . . . . . . . . . . . . . . . . . . . . . . . . . . . . . . . . . . . . . . . . . . . . . . . . hydraulic-actuated foot pedal
Park brake . . . . . . . . . . . . . . . . . . . . . . . . . . . . . . . . . . . . . . . . . . . . . . . . cable-operated mechanically-actuated
Caliper . . . . . . . . . . . . . . . . . . . . . . . . . . . . . . . . . . . . . . . . . . . . . . . . . . . . . . . . . . . . . . . . . . . . . single w/dual pads
STEERING
Pump . . . . . . . . . . . . . . . . . . . . . . . . . . . . . . . . . . . . . . . . . . . . . . . . . . . . . . . . . . . . . . . . . . open center gear pump
Maximum pressure . . . . . . . . . . . . . . . . . . . . . . . . . . . . . . . . . . . . . . . . . . . . . . . . . . . . . . . . . 17.2 bar (2500 PSI)
Flow at rated engine speed
2290, 2335, 2375 . . . . . . . . . . . . . . . . . . . . . . . . . . . . . . . . . . . . . . . . . . . . . . . . . . . . . . . 102 L/min (27 GPM)
2360, 2425 . . . . . . . . . . . . . . . . . . . . . . . . . . . . . . . . . . . . . . . . . . . . . . . . . . . . . . . . . . . . . 114 L/min (30 GPM)
Cylinder diameter . . . . . . . . . . . . . . . . . . . . . . . . . . . . . . . . . . . . . . . . . . . . . . . . . . . . . . . . . . . . . . . . 89 mm(3.5″ )
Cylinder stroke . . . . . . . . . . . . . . . . . . . . . . . . . . . . . . . . . . . . . . . . . . . . . . . . . . . . . . . . . . . . . . . . . 419 mm (16.5″)
Maximum articulation angle (no blocks) . . . . . . . . . . . . . . . . . . . . . . . . . . . . . . . . . . . . . . . . . . . . . . . . . . . . . . 42°
Steering column
Tilt . . . . . . . . . . . . . . . . . . . . . . . . . . . . . . . . . . . . . . . . . . . . . . . . . . . . . . . . . . . . . . . . . . . . . . . . . . . . . . . . . . . 45°
Telescope . . . . . . . . . . . . . . . . . . . . . . . . . . . . . . . . . . . . . . . . . . . . . . . . . . . . . . . . . . . . . . . . . . 100 mm (3.88″)
Steering wheel
Diameter . . . . . . . . . . . . . . . . . . . . . . . . . . . . . . . . . . . . . . . . . . . . . . . . . . . . . . . . . . . . . . . . . . . . 406 mm (16″)
Turning effort (engine idle) . . . . . . . . . . . . . . . . . . . . . . . . . . . . . . . . . . . . . . . . . . . . . . . 1.7 N⋅m (1.25 ft. lbs.)
5-19
SECTION 5 - SPECIFICATIONS
ELECTRICAL
2290
Batteries
Power (SAE Group 31)
Qty
Alternator
2335
2375
2360
12V Low Maintenance
12V Low Maintenance
625 CCA
3
950 CCA
3
12V - 130-amp Maximum Voltage - 13.8 V
Starter
12V Negative Ground
Lights
55W Quartz Halogen Sealed Beam
Qty
4 - 3x5, 6 - 4x6
Optional
Wide Transport Marker
Lights
Safety
y
2425
4 - 3x5 Roof Mounted
2 -- Extendable arm mounted lights
4 - Amber Roof Mounted Flashers
2 - Stop/Tail Rear Fender Mounts
AIR-CONDITIONING SYSTEM/HEATING SYSTEM
Refrigerant . . . . . . . . . . . . . . . . . . . . . . . . . . . . . . . . . . . . . . . . . . . . . . . . . . . . . . . . . . . . . . . . . . . . . . . . . . . R-134A
Refrigerant charge . . . . . . . . . . . . . . . . . . . . . . . . . . . . . . . . . . . . . . . . . . . . . . . . . . . 2.27± 0.1 kg (5.0± 0.25 lbs.)
Cooling capacity . . . . . . . . . . . . . . . . . . . . . . . . . . . . . . . . . . . . . . . . . . . . . . . . . . . . . . . . . . . . . . . . . 24,000 btu/hr
Heating capacity . . . . . . . . . . . . . . . . . . . . . . . . . . . . . . . . . . . . . . . . . . . . . . . . . . . . . . . . . . . . . . . . . 23,250 btu/hr
Fan volume . . . . . . . . . . . . . . . . . . . . . . . . . . . . . . . . . . . . . . . . . . . . . . . . . . . . . . . . . . . . 14.2 mm3/min (500 cfm)
Filter area . . . . . . . . . . . . . . . . . . . . . . . . . . . . . . . . . . . . . . . . . . . . . . . . . . . . . . . . . . . . . . . . . . 1716 cm2 (266 in2)
Compressor
Oil capacity . . . . . . . . . . . . . . . . . . . . . . . . . . . . . . . . . . . . . . . . . . . . . . . . . . . . . . . . . . . . . . . . 310 ml (10.4 oz)
Number of pistons . . . . . . . . . . . . . . . . . . . . . . . . . . . . . . . . . . . . . . . . . . . . . . . . . . . . . . . . . . . . . . . . . . . . . . . 7
Displacement . . . . . . . . . . . . . . . . . . . . . . . . . . . . . . . . . . . . . . . . . . . . . . 154.9 cc per rev (9.5 cu in per rev)
Clutch . . . . . . . . . . . . . . . . . . . . . . . . . . . . . . . . . . . . . . . . . . . . . . . . . . . . . . . . . . . . . electromagnetic actuation
5-20
SECTION 5 - SPECIFICATIONS
CAPACITIES
Component
2290
2335
Fuel Tanks
Total Capacity - L (gal)
Usable Capacity - L (gal)
2360
2425
927 (245)
871 (230)
Hydraulic
Reservoir - L (gal)
Total System w/o 3-Point Hitch - L
(gal)
Total System w/ 3-Point Hitch - L
(gal)
Axle/Differential
Differential Housing - L (gal)
2375
75.7 (20)
117 (31)
123.7 (33)
26.9 (7.1)
26.9 (7.1)
26.9 (7.1)
Planetary Hubs (each) - L (gal)
7.6 (2)
HD Axle - 12 (3.2)
12 (3.2)
Total System (one axle) - L (gal)
42 (11.1)
HD Axle 51 (13.5)
51 (13.5)
Engine
Engine Crankcase - L (gal)
Oil Filter - L (gal)
Cooling System - L (gal)
34 (9.0)
2.7 (0.7)
55 (14.5)
Air-Conditioning System
Refrigerant - kg (lbs)
59 (15.6)
2.3±.1 (5.0±.25)
Refrigerant Oil Capacity - ml (oz)
307.5 (10.4)
Windshield Washer
Reservoir - L (qt)
3.3 (3.5)
Brake System
Reservoir - ml (oz)
Total System - ml (oz)
296 (10)
896 (30.3)
Transmission System
QS Trans. - 37.9 (10)
PS Trans. - 47.4 (12.5)
QS Trans. - 41.6 (11)
PS Trans. - 51.2 (13.5)
w/o PTO - L (gal)
w/ PTO - L (gal)
5-21
60 (15.9)
60 (15.9)
SECTION 5 - SPECIFICATIONS
LUBRICANTS/FLUIDS
Component
Specification
Engine Oil
15W40 API CI4
Transmission Oil
Quad Shift III
See Note 1 below
Powershift
See Note 1 below
Hydraulic Oil
See Note 1 below
Differential Oil
85W140 GL5 -- ABOVE 0°C (32°F)
80W90 GL5 -- BELOW 0°C (32°F)
Planetary Hub Oil
85W140 GL5 -- ABOVE 0°C (32°F)
80W90 GL5 -- BELOW 0°C (32°F)
Brake Fluid
DOT 3
Grease -- Severe service for the
articulation / drag link bearings
LITHIUM BASE EP HIGH
TEMPERATURE WITH MOLY
Engine Coolant
(Includes DCA4 Additive)
FACTORY FILLED -FULLY FORMULATED (PINK IN
COLOR)
Fuel
2-D -- ABOVE --7°C (20°F)
1-D -- BELOW --7°C (20°F)
A/C Refrigerant
R134A
Note 1:
Lubricant brand equivalency chart for the transmission/hydraulic systems:
BRAND
Imperial Oil
Shell
Texaco
Amoco
Petro-Canada
Exxon Mobil
Donax TD
TDH
2016 (USA)
Duratran
424
Esso
SPECIFICATION
Hydraul 56
01055 (Can)
5-22
12 X 4 QUAD
SHIFT III
5-23
787 mm (31.0”)
790 mm (31.1”)
813 mm (32.0”)
820 mm (32.3”)
820 mm (32.3”)
823 mm (32.4”)
826 mm (32.5”)
820 mm (32.3”)
30.5 R32 R1 Radial
18.4 R38 Radial
18.4 x 38 R1 Bias
24.5 x 32 R1 Bias
18.4 x 38 R2 Bias
20.8 R38 Radial
20.8 R38 R1W Radial
30.5 x 32 R1 Bias
4
5
7.7
(4.8)
8.0
(5.0)
8.3
(5.2)
30.5 x 32 R2 Bias
18.4 R42 Radial
710/70 R38 R1W Radial
710/70 R38 Radial
20.8 x 38 R2 Bias
700/65 x 38 Special
18.4 R42 Radial
1
7.7
(4.8)
8.0
(5.0)
8.3
(5.2)
20.8 x 38 R1 Bias
TIRE GROUP B
6.4
(4.0)
6.7
(4.2)
7.0
(4.4)
4
6.7
(4.2)
7.0
(4.4)
7.2
(4.5)
9.1
(5.7)
9.6
(6.0)
9.9
(6.2)
6
9.0
(5.6)
9.3
(5.8)
9.8
(6.1)
2
10.7
(6.7)
11.2
(7.0)
11.7
(7.3)
7
10.4
(6.5)
10.9
(6.8)
11.4
(7.1)
3
DESIRED
ENGINE SPEED
2100 RPM
CHART SPEED
GROUND SPEED
4
12.8
(8.0)
13.4
(8.4)
14.1
(8.8)
8
12.2
(7.6)
12.6
(7.9)
13.3
(8.3)
1
15.2
(9.5)
15.8
(9.9)
16.6
(10.4)
9
15.8
(9.9)
16.5
(10.3)
17.3
(10.8)
866 mm (34.1”)
856 mm (33.7”)
851 mm (33.5”)
848 mm (33.4”)
848 mm (33.4”)
843 mm (33.2”)
836 mm (32.9”)
836 mm (32.9”)
Rolling Radius
MEDIUM RANGE
To calculate ground speed at an engine speed other than 2100 RPM, use the following formula:
785 mm (30.9”)
24.5 R32 R1 Radial
3
5.3
(3.3)
5.6
(3.5)
5.8
(3.6)
2
4.5
(2.8)
4.6
(2.9)
5.0
(3.1)
1
3.7
(2.3)
4.0
(2.5)
4.1
(2.6)
3
5.8
(3.6)
5.9
(3.7)
6.2
(3.9)
2
5.0
(3.1)
5.1
(3.2)
5.3
(3.3)
1
4.2
(2.6)
4.3
(2.7)
4.6
(2.9)
Rolling Radius
C
B
A
C
B
A
TIRE
GROUP
TIRE GROUP A
2290
2335
2360
2375
2425
2290
2335
2360
2375
2425
12 X 2
POWERSHIFT
TRACTOR
MODELS
TRANSMISSION
LOW RANGE
3
21.9
(13.7)
23.0
(14.4)
24.0
(15.0)
11
21.4
(13.4)
22.6
(14.1)
23.5
(14.7)
20.8 R42 R2 Radial
18.4 R46 Radial
850/60 x 38 Special
750/65 x 38 Special
20.8 x 42 R1 Bias
4
25.9
(16.2)
27.2
(17.0)
28.3
(17.7)
12
25.1
(15.7)
26.2
(16.4)
27.4
(17.1)
20.8 R42 R1W Radial
20.8 R42 Radial
TIRE GROUP C
18.2
(11.4)
19.0
(11.9)
19.8
(12.4)
10
18.4
(11.5)
19.4
(12.1)
20.2
(12.6)
2
HIGH RANGE
SPEEDS AT 2100 ENGINE RPM - Km/h (MPH)
SPEED CHART
1
4.6
(2.9)
4.9
(3.1)
5.1
(3.2)
1
5.4
(3.4)
5.8
(3.6)
5.9
(3.7)
3
7.4
(4.6)
7.8
(4.9)
8.2
(5.1)
914 mm (36.0”)
894 mm (35.2”)
894 mm (35.2”)
894 mm (35.2”)
889 mm (35.0”)
876 mm (34.5“)
874 mm (34.4”)
Rolling Radius
8.0
(5.0)
8.5
(5.3)
8.8
(5.5)
2
6.4
(4.0)
6.7
(4.2)
6.9
(4.3)
2
REVERSE
4
8.6
(5.4)
9.1
(5.7)
9.6
(6.0)
SECTION 5 - SPECIFICATIONS
LIQUID BALLAST TABLE
The following table provides data on the filling of tractor tires with water or calcium chloride solution
based on valve level 75% full.
Tire Size
Weight of Water
Weight of
1.6 kg (3-1/2 lbs.)
CaCl2
Weight of
2.3 kg (5 lbs.) CaCl2
Total Solution in Tire
@ 75% Fill
18.4 R38
416kg (917 lbs.)
505 kg (1113 lbs.)
539 kg (1187 lbs.)
416 L (110 gals.)
18.4 R42
435 kg (959 lbs.)
527 kg (1160 lbs.)
563 kg (1240 lbs.)
435 L (115 gals.)
18.4 R46
488 kg (1075 lbs.)
596 kg (1314 lbs.)
635 kg (1400 lbs.)
488 L (129 gals.)
20.8 R38
530 kg (1168 lbs.)
645 kg (1421 lbs.)
690 kg (1521 lbs.)
530 L (140 gals.)
20.8 R42
560 kg (1234 lbs.)
682 kg (1503 lbs.)
726 kg (1600 lbs.)
560 L (148 gals.)
24.5 R32
643 kg (1418 lbs.)
785 kg (1729 lbs.)
835 kg (1841 lbs.)
644 L (170 gals.)
30.5 R32
821 kg (1809 lbs.)
999 kg (2202 lbs.)
1065 kg (2347 lbs.)
821 L (217 gals.)
480/80 R46
488 kg (1075 lbs)
596 kg (1314 lbs)
617 kg (1360 lbs)
488 L (129 gals.)
520/85 R42
560 kg (1234 lbs)
682 kg (1503 lbs)
726 kg (1600 lbs)
560 L (148 gals.)
650/65 R38
609 kg (1343 lbs)
741 kg (1634 lbs)
787 kg (1734 lbs)
609 L (161 gals.)
700/65 R38
695 kg (1532 lbs.)
848 kg (1858 lbs.)
901 kg (1987 lbs.)
695 L (184 gals.)
710/70 R38
760 kg (1676 lbs.)
924 kg (2036 lbs.)
986 kg (2174 lbs.)
761 L (201 gals.)
750/65 R38
880 kg (1936 lbs.)
1071 kg (2356 lbs.)
1141 kg (2511 lbs.)
878 L (232 gals.)
800/65 R32
847 kg (1868 lbs)
1031 kg (2273 lbs)
1095 kg (2415 lbs)
848 L (224 gals.)
850/60 R38
995 kg (2188 lbs.)
1210 kg (2662lbs.)
1290 kg (2837 lbs.)
992 L (262 gals.)
900/50 R42
857 kg (1893 lbs)
1047 kg (2309 lbs)
1114 kg (2455 lbs)
1060 L (280 gals.)
3.8 liter (1 gallon) of water weighs 3.8 Kg (8.3 lbs).
3.8 liter (1 gallon) of 1.6 Kg (3-1/2 lbs). CaCl2 weighs 4.6 Kg (10.1 lbs).
3.8 liter (1 gallon) of 2.3 Kg (5 lbs). CaCl2 weighs 4.9 Kg (10.8 lbs).
5-24
SECTION 5 - SPECIFICATIONS
TIRE LOAD AND INFLATION TABLES
Use the following chart and guidelines to determine the proper inflation pressure for tires on a given
axle. Divide the axle weight by the number of tires on an axle to determine the load to be carried by each
tire. The values shown in the shaded areas are for bias ply tires.
U.S. Measure
Inflation
Pressure (PSI)
8
9
10
12
14
16
18
20
22
24
Singles - lbs.
3500
3760
3980
4440
4860
5260
5680
5980
6330
6660
Duals - lbs.
3080
3310
3500
3910
4280
4630
5000
5260
5570
5860
Singles - lbs.
3700
3960
4200
4680
5120
5540
6000
6310
6670
7020
Duals - lbs.
3700
3960
4200
4680
5120
5540
6000
6310
6670
7020
Singles - lbs.
3880
4160
4420
4920
4920
5820
6150
Duals - lbs.
3410
3660
3890
4330
4330
5120
5410
Triples - lbs.
3170
3430
3610
4050
4400
4790
5040
Singles - lbs.
4240
4540
4840
5380
5880
6350
6800
7250
7670
8070
Duals - lbs.
3730
4000
4260
4730
5170
5590
5980
6380
6750
Singles - lbs.
4480
4800
5100
5680
6200
6700
7150
7650
8090
Duals - lbs.
3940
4220
4490
5000
5460
5900
6290
6730
7120
Triples - lbs.
3670
3940
4180
4660
5080
5490
5860
6730
7120
Singles - lbs.
5100
5460
5800
6450
7050
7650
8250
8700
9200
9680
Duals - lbs.
4490
4800
5100
5680
6200
6730
7260
7660
8100
8520
Singles - lbs.
6150
6600
6950
7600
8550
9100
9650
Duals - lbs.
5410
5810
6120
6690
7520
8010
8490
Singles - lbs.
4050
4300
4550
5080
5450
6000
7150
7150
7650
8000
Duals - lbs.
3600
3780
4000
4470
4800
5850
6300
6290
6700
7050
Triples - lbs.
3350
3530
3700
4170
4500
5450
5850
5860
6550
6550
Singles - lbs.
4650
5200
5675
6275
7000
7700
8250
8825
Duals - lbs.
4100
4575
5000
5525
6150
6775
7250
7750
Triples - lbs.
3825
4250
4650
5150
5750
6325
6775
7225
Singles - lbs.
4780
5340
5840
6450
7200
7840
8250
8800
Duals - lbs.
4215
4700
5150
5675
6350
6900
7250
7750
Singles - lbs.
5600
5900
6450
6980
7950
8400
Duals - lbs.
4930
5190
5675
6140
6995
7390
18.4 R38
18.4 R42
18.4 R46
20.8 R38
20.8 R42
24.5 R32
30.5 R32
480/80 R46
520/85 R42
650/65 R38
700/65 R38*
5-25
SECTION 5 - SPECIFICATIONS
710/70 R38
Singles - lbs.
6400
6950
7400
8050
8550
9650
10700
Duals - lbs.
5620
6110
6500
7080
7520
8490
9460
Singles - lbs.
5969
6509
7048
7599
8084
9020
Duals - lbs.
5253
5728
6203
6687
7114
7937
Singles - lbs.
6200
6940
7600
8375
9225
10000
10700
11550
Duals - lbs.
5460
6120
6675
7375
8100
8800
9425
10175
Singles - lbs.
6564
7169
7753
8260
8877
9912
Duals - lbs.
5776
6300
6823
7269
7811
8722
Singles - lbs.
6425
7150
7850
8650
9650
10625
11400
12000
Duals - lbs.
5650
6275
6900
7625
8500
9350
10025
10560
750/65 R38*
800/65 R32
850/60 R38*
900/50 R42
Minimum tire pressure for radial tires: 8 PSI (55 kPa) (singles, duals, or triples)
Minimum tire pressure for bias tires:
Singles: 16 PSI (110 kPa)
Duals: 12 PSI (83 kPa)
Triples: 12 PSI (83 kPa)
*These special tire sizes have a minimum inflation pressure of 8 PSI (55 kPa) (singles, duals, or triples).
5-26
SECTION 5 - SPECIFICATIONS
Metric Measure
Inflation
Pressure (kPa)
55
62
69
83
97
110
124
138
152
166
Singles - kg
1597
1716
1816
2026
2218
2400
2592
2729
2888
3039
Duals - kg
1405
1510
1597
1784
1953
2113
2282
2400
2542
2674
Singles - kg
1688
1807
1916
2135
2336
2528
2738
2879
3044
3203
Duals - kg
1488
1588
1688
1880
2058
2227
2409
2532
2678
2820
Singles - kg
1770
1898
2017
2245
2245
2656
2806
Duals - kg
1556
1670
1775
1976
1976
2336
2469
Triples - kg
1435
1560
1640
1835
1995
2175
2295
Singles - kg
1935
2072
2208
2455
2683
2898
3103
3308
3500
3682
Duals - kg
1702
1825
1944
2158
2359
2551
2729
2911
3080
Singles - kg
2044
2190
2327
2592
2829
3057
3263
3491
3691
Duals - kg
1798
1926
2049
2282
2491
2692
2870
3071
3249
Triples - kg
1675
1798
1907
2126
2318
2505
2674
3071
3249
Singles - kg
2327
2491
2647
2943
3217
3491
3764
3970
4198
4417
Duals - kg
2049
2190
2327
2592
2829
3071
3313
3495
3696
3888
Singles - kg
2800
3000
3150
3450
3875
4125
4375
Duals - kg
2465
2640
2770
3035
3410
3630
3850
Singles - kg
1837
1950
2064
2304
2472
2722
3243
3243
3470
3629
Duals - kg
1633
1715
1814
2028
2177
2654
2858
2853
3039
3198
Triples - kg
1520
1601
1678
1894
2041
2472
2654
2658
2971
2971
Singles - kg
2109
2359
2574
2846
3175
3493
3742
4003
Duals - kg
1860
2075
2268
2506
2790
3073
3289
3515
Triples - kg
1734
1927
2109
2336
2608
2868
3073
3277
Singles - kg
2168
2422
2648
2925
3266
3556
3742
3992
Duals - kg
1912
2132
2336
2574
2880
3130
3289
3515
Singles - kg
2554
2690
2941
3183
3625
3830
Duals - kg
2248
2367
2588
2800
3190
3370
Singles - kg
2920
3171
3377
3673
3901
4403
4882
Duals - kg
2564
2788
2966
3231
3431
3874
4317
18.4 R38
18.4 R42
18.4 R46
20.8 R38
20.8 R42
24.5 R32
30.5 R32
480/80 R45
520/85 R42
650/65 R38
700/65x38*
710/70 R38
5-27
SECTION 5 - SPECIFICATIONS
750/65 R38*
Singles - kg
2708
2953
3197
3447
3667
4091
Duals - kg
2383
2599
2814
3033
3227
3600
Singles - kg
2812
3148
3447
3799
4184
4536
4853
5239
Duals - kg
2477
2776
3028
3345
3674
3992
4275
4615
Singles - kg
2977
3247
3517
3747
4027
4496
Duals - kg
2620
2858
3095
3298
3543
3957
Singles - kg
2914
3243
3561
3924
4377
4819
5171
5443
Duals - kg
2563
2846
3130
3459
3856
4241
4547
4790
800/65 R32
850/60 R38
900/50 R42
Minimum tire pressure for radial tires: 55 kPa (8 PSI) (singles, duals, or triples)
Minimum tire pressure for bias tires:Singles:
110 kPa (16 PSI)
Duals:83 kPa (12 PSI)
Triples:83 kPa (12 PSI)
*These special tire sizes have a minimum inflation pressure of 55 kPa (8 PSI) (singles, duals, or triples).
5-28
SECTION 5 - SPECIFICATIONS
TIRE LOADED RADIUS
The loaded radius by tire size is shown in the following table. Radius is from the center of the axle to
the ground at moderate inflation pressure.
Tire Size
Radius
24.5 R32 R1 Bias . . . . . . . . . . . . . . . . . . . . . . . . . . . . . . . . . . . . . . . . . . . . . . . . . . . . . . . . . . . . . . 819 mm (32.2″)
24.5 R32 R1 Radial . . . . . . . . . . . . . . . . . . . . . . . . . . . . . . . . . . . . . . . . . . . . . . . . . . . . . . . . . . . . . 784 mm (30.9″)
30.5 R32 R1 Bias . . . . . . . . . . . . . . . . . . . . . . . . . . . . . . . . . . . . . . . . . . . . . . . . . . . . . . . . . . . . . . 820 mm (32.3″)
30.5 R32 R2 Bias . . . . . . . . . . . . . . . . . . . . . . . . . . . . . . . . . . . . . . . . . . . . . . . . . . . . . . . . . . . . . . 836 mm (32.9″)
30.5 R32 R1 Radial . . . . . . . . . . . . . . . . . . . . . . . . . . . . . . . . . . . . . . . . . . . . . . . . . . . . . . . . . . . . . 787 mm (31.0″)
800/65 R32 R1W Radial . . . . . . . . . . . . . . . . . . . . . . . . . . . . . . . . . . . . . . . . . . . . . . . . . . . . . . . . . 831 mm (32.7″)
18.4 R38 R1 Bias . . . . . . . . . . . . . . . . . . . . . . . . . . . . . . . . . . . . . . . . . . . . . . . . . . . . . . . . . . . . . . 813 mm (32.0″)
18.4 R38 R2 Bias . . . . . . . . . . . . . . . . . . . . . . . . . . . . . . . . . . . . . . . . . . . . . . . . . . . . . . . . . . . . . . 818 mm (32.2″)
18.4 R38 R1 Radial . . . . . . . . . . . . . . . . . . . . . . . . . . . . . . . . . . . . . . . . . . . . . . . . . . . . . . . . . . . . . 790 mm (31.1″)
20.8 R38 R1 Bias . . . . . . . . . . . . . . . . . . . . . . . . . . . . . . . . . . . . . . . . . . . . . . . . . . . . . . . . . . . . . . 836 mm (32.9″)
20.8 R38 R2 Bias . . . . . . . . . . . . . . . . . . . . . . . . . . . . . . . . . . . . . . . . . . . . . . . . . . . . . . . . . . . . . . 849 mm (33.4″)
20.8 R38 R1 Radial . . . . . . . . . . . . . . . . . . . . . . . . . . . . . . . . . . . . . . . . . . . . . . . . . . . . . . . . . . . . . 823 mm (32.4″)
20.8 R38 R1W Radial . . . . . . . . . . . . . . . . . . . . . . . . . . . . . . . . . . . . . . . . . . . . . . . . . . . . . . . . . . . 826 mm (32.5″)
650/65 R38 R1W Radial . . . . . . . . . . . . . . . . . . . . . . . . . . . . . . . . . . . . . . . . . . . . . . . . . . . . . . . . . 823 mm (32.4″)
700/65 R38 Special . . . . . . . . . . . . . . . . . . . . . . . . . . . . . . . . . . . . . . . . . . . . . . . . . . . . . . . . . . . . . 849 mm (33.4″)
710/70 R38 R1 Radial . . . . . . . . . . . . . . . . . . . . . . . . . . . . . . . . . . . . . . . . . . . . . . . . . . . . . . . . . . 852 mm (33.5″)
710/70 R38 R1W Radial . . . . . . . . . . . . . . . . . . . . . . . . . . . . . . . . . . . . . . . . . . . . . . . . . . . . . . . . . 856 mm (33.7″)
750/65 R38 Special . . . . . . . . . . . . . . . . . . . . . . . . . . . . . . . . . . . . . . . . . . . . . . . . . . . . . . . . . . . . . 894 mm (35.2″)
850/60 R38 Special . . . . . . . . . . . . . . . . . . . . . . . . . . . . . . . . . . . . . . . . . . . . . . . . . . . . . . . . . . . . . 894 mm (35.2″)
18.4 R42 R1 Bias . . . . . . . . . . . . . . . . . . . . . . . . . . . . . . . . . . . . . . . . . . . . . . . . . . . . . . . . . . . . . . 865 mm (34.1″)
18.4 R42 R1 Radial . . . . . . . . . . . . . . . . . . . . . . . . . . . . . . . . . . . . . . . . . . . . . . . . . . . . . . . . . . . . . 844 mm (33.2″)
20.8 R42 R1 Bias . . . . . . . . . . . . . . . . . . . . . . . . . . . . . . . . . . . . . . . . . . . . . . . . . . . . . . . . . . . . . . 890 mm (35.0″)
20.8 R42 R1 Radial . . . . . . . . . . . . . . . . . . . . . . . . . . . . . . . . . . . . . . . . . . . . . . . . . . . . . . . . . . . . . 873 mm (34.4″)
20.8 R42 R1W Radial . . . . . . . . . . . . . . . . . . . . . . . . . . . . . . . . . . . . . . . . . . . . . . . . . . . . . . . . . . . 876 mm (34.5″)
20.8 R42 R2 Radial . . . . . . . . . . . . . . . . . . . . . . . . . . . . . . . . . . . . . . . . . . . . . . . . . . . . . . . . . . . . . 915 mm (36.0″)
520/85 R42 R1W Radial . . . . . . . . . . . . . . . . . . . . . . . . . . . . . . . . . . . . . . . . . . . . . . . . . . . . . . . . . 876 mm (34.5″)
900/50 R42 R1W Radial . . . . . . . . . . . . . . . . . . . . . . . . . . . . . . . . . . . . . . . . . . . . . . . . . . . . . . . . . 871 mm (34.3″)
18.4 R46 R1 Radial . . . . . . . . . . . . . . . . . . . . . . . . . . . . . . . . . . . . . . . . . . . . . . . . . . . . . . . . . . . . . 893 mm (35.2″)
480/80 R46 R1W Radial . . . . . . . . . . . . . . . . . . . . . . . . . . . . . . . . . . . . . . . . . . . . . . . . . . . . . . . . . 899 mm (35.4″)
5-29
SECTION 5 - SPECIFICATIONS
Part Numbers For High Usage Items
Component
2290
2335
2375
Belt, A/C Compressor
Belt, Alternator
2360
2425
9707241
See fan belt
86020846
86030708
86020845
N/A
V57260
Block Heater
86030710
86013631
Block Heater Cord
9706670
9706671
Belt, Fan
Belt, Water Pump
Ether, Canister
V30347
Filter, Cab
9707323
Filter, Engine Air (Inner)
86029149
Filter, Engine Air (Outer)
86033101
86029150
Filter, Engine Fuel (Primary Electronic)
86029143
Filter, engine fuel water separator
86029143
Filter, Engine Oil
86030711
86029144
Filter, Engine Water
9672301
Filter, Hydraulic
86029146
Filter, Transmission
86029146
Flasher
86000362
Fuse 3-amp
61118
Fuse 5-amp
9623775
Fuse 10-amp
V61120
Fuse 15-amp
9623774
Fuse 20-amp
9804895
Fuse 25-amp
9846342
Fuse 30-amp
92277
Fuse Puller
86000363
Key, Ignition
86502201
Replacement Bulbs
BVI Bulb Number
Description
Fuel Gauge Lamp
N/A (IND. STD. NO. 1893)
Dash Warning Lamp
86000318
Trouble Lamp
N/A (IND. STD. NO.232)
RH Console Lamp
86000527
Cab Interior Lamp
470016
RH Head Lamps
86001156
LH Head Lamps
86001156
Fender-Mount Worklamps
N/A (IND. STD. NO.4929415)
RH Roof-Mount Worklamps
86001156
LH Roof-Mount Worklamps
86001156
Stop/Tail Lamps
86537133
Wide Transport Marker Lights
529068
TPM Lamp
N/A (IND. STD. NO. 194)
Roof Warning Lamps
529068
5-30
SECTION 5 - SPECIFICATIONS
Paint (Spray Cans)
Color
Part Number
Red
86029274
Cream
86029270
OPTIONAL EQUIPMENT
The following chart lists the optional field--and factory installed accessories that are available for 2290,
2335, 2360, 2375 and 2425 tractors. Not all kits are available for all models. Consult your Buhler
Versatile dealer for option availability.
KIT PART
NUMBER
DESCRIPTION
INSTALLATION INSTALLATION
TIME
INSTRUCTIONS
(Hours)
PUBLICATION
NUMBER
86030576 Front Weight Kit (12 weights)
2.0
89002203
86027842 Front Weight Kit (39 weights)
2.0
89002203
86027840 Rear Weight Kit (not compatible with 3PTO or 3--point hitch)
2.0
89002203
86070707 3--Point Hitch w/PTO (not compatible with Rear Weight Kit)
12.0
89002215
86070706 3--point Hitch w/o PTO (not compatible with Rear Weight Kit)
12.0
89002215
86070703 33° and 38° Articulation Block Kit
0.5
89002200
86070702 31° Articulation Block Kit
0.5
89002200
109029
Transmission Sump Heater (12 X 4 Quadshift ΙΙΙ Non--PTO Only)
2.0
89002208
V59624
Trailer 7 Pin Electrical Connector
0.5
N/A
0.5
89002202
1.5
89002204
86030679 (1.5”) Diameter Hitch Pin Kit (Auto ASN 300918)
0.5
89002201
86010513 (3/4”) Coupler Kit (Blue Tractor)
1.5
89002206
86030999 (3/4”) Coupler Kit (Red Tractor)
1.5
89002206
86027940 (1.5”) Diameter Pin Kit (Manual BSN 300919)
0.5
89002201
86029617 Control Monitor Bracket Kit
0.5
89002216
86030428 Tractor Performance Monitor (TPM) Kit
2.0
89002222
89029081 PTO Kit 12--speed Transmission (not compatible with Rear Weight Kit)
18.0
89002212
86029082 PTO Kit Powershift Transmission (not compatible with Rear Weight Kit)
18.0
89002212
86001101 Implement Status Switch Harness Extension (TPM)
0.5
89002210
86032122 Auxiliary 3--Pin Connector Kit
0.5
89002205
9702509
1.0
89002211
86027838 Auxiliary Rear Weight Kit (not compatible with 3--point hitch)
2.0
89002203
86027932 Debris/Mud Kit
10.0
89002207
86029318 Deluxe Radio--with Cassette/Weather Band
0.5
N/A
86027919 Quick Hitch Kit ( 3--Point Hitch equipped tractors only)
9707118
Roof--Mounted Front and Rear Worklight Kit
Implement Status Switch (TPM only)
5-31
SECTION 5 - SPECIFICATIONS
OPTIONAL EQUIPMENT
The following chart lists the optional field--and factory installed accessories that are available for 2290,
2335, 2360, 2375 and 2425 tractors. Not all kits are available for all models. Consult your Buhler
Versatile dealer for option availability.
86029319 Deluxe Radio with Premium Cassette/Weather Band
0.5
N/A
86029320 Deluxe Radio with Compact Disc Player/Weather Band
0.5
N/A
86029940 Deluxe External Mirror Kit
2.0
89002220
9707116
French Canadian Decal Kit
0.5
89002224
86513451
Radar “Y” Adapter Harness
0.2
N/A
86031188
Backup Alarm Kit (Powershift Equipped Tractors)
1.0
89002226
86031297
Motorized Hydraulic Flow Control Kit
2.5
89002233
86030510
Monitor Bracket/Power Bar Kit
1.2
89002234
86033740
Cigar lighter power adapter kit
0.1
N/A
86027840 Rear Weight Kit (not compatible with 3PTO or 3--point hitch)
2.0
89002203
86034113 Drawbar Support Kit (less 3pt hitch)
0.8
89002250
86031163 Rotating Beacon Kit
2.5
89002229
5-32
SECTION 5 - SPECIFICATIONS
BLANK PAGE
5-33
SECTION 5 - SPECIFICATIONS
HARDWARE TORQUE VALUES
Check the tightness of hardware periodically.
Make sure fastener threads are clean and not
damaged
Use the following charts to determine the
correct torque when checking, adjusting or
replacing hardware on the tractor.
NOTE: A torque wrench is necessary to
properly tighten hardware.
IMPORTANT: DO NOT use the values listed in
the charts if a different torque value or tightening
procedure is specified in this manual for a
specific application. Torque values listed are for
general use only.
MINIMUM HARDWARE TIGHTENING TORQUES
IN FOOT POUNDS (NEWTON-METERS) FOR NORMAL ASSEMBLY APPLICATIONS
METRIC HARDWARE AND LOCKNUTS
NOMINAL
SIZE
CLASS 5.8
UNPLATED
M4
M6
M8
M10
M12
M16
M20
M24
15* (1.7)
51* (5.8)
124* (14)
21 (28)
36 (49)
89 (121)
175 (237)
303 (411)
CLASS 8.8
PLATED
w/ZnCr
19* (2.2)
67* (7.6)
159* (18)
27 (36)
46 (63)
117 (158)
226 (307)
392 (531)
UNPLATED
23* (2.6)
79* (8.9)
195*(22)
32 (43)
55 (75)
137 (186)
277 (375)
478 (648)
CLASS 10.9
PLATED
w/ZnCr
30* (3.4)
102* (12)
248* (28)
41 (56)
72 (97)
177 (240)
358 (485)
619 (839)
UNPLATED
PLATED
w/ZnCr
33* (3.7)
115* (13)
274* (31)
45 (61)
79 (107)
196 (266)
383 (519)
662 (897)
42* (4.8)
150* (17)
354* (40)
58 (79)
102 (138)
254 (344)
495 (671)
855 (1160)
NOTE: Torque values shown with * are inch pounds.
IDENTIFICATION
HEX CAP SCREWS AND CARRIAGE BOLTS
CLASSES 5.6 AND UP.
MANUFACTURER’S IDENTIFICATION
PROPERTY CLASS
HEX NUTS AND LOCKNUTS
CLASSES 05 AND UP.
MANUFACTURER’S IDENTIFICATION
PROPERTY CLASS
CLOCK MARKING
5-34
LOCKNUT
CL.8
w/CL8.8
BOLT
16* (1.8)
56* (6.3)
133* (15)
22 (30)
39 (53)
97 (131)
195 (265)
338 (458)
SECTION 5 - SPECIFICATIONS
MINIMUM HARDWARE TIGHTENING TORQUES
IN FOOT POUNDS (NEWTON-METERS) FOR NORMAL ASSEMBLY APPLICATIONS
INCH HARDWARE AND LOCKNUTS
NOMINAL
SIZE
1/4
5/16
3/8
7/16
1/2
9/16
5/8
3/4
7/8
1
SAE GRADE 2
UNPLATED
or
PLATED
SILVER
PLATED
w/ZnCr
55* (6.2)
115* (13)
17 (23)
27 (37)
42 (57)
60 (81)
83 (112)
146 (198)
142 (193)
213 (289)
7.2* (8.1)
149* (17)
22 (30)
35 (47)
54 (73)
77 (104)
107 (145)
189 (256)
183 (248)
275 (373)
GOLD
SAE GRADE 5
UNPLATED
or
PLATED
SILVER
86* (9.7)
178* (20)
26 (35)
42 (57)
64 (87
92 (125)
128 (174)
226 (306)
365 (495)
547 (742)
SAE GRADE 8
PLATED
w/ZnCr
UNPLATED
or
PLATED
SILVER
GOLD
112* (13)
229* (26)
34 (46)
54 (73)
83 (113)
120 (163)
165 (224)
293 (397)
473 (641)
708 (960)
LOCKNUTS
PLATED
w/ZnCr
GR.B
w/GR5
BOLT
NOMINAL
SIZE
GR.C
w/GR8
BOLT
GOLD
121* (14)
157* (18)
250* (28)
324* (37)
37 (50)
48 (65)
59 (80)
77 (104)
91 (123)
117 (159)
130 (176) 169 (229)
180 (244) 233 (316)
319 (432) 413 (560)
515 (698) 667 (0904)
773 (1048) 1000 (1356)
61* (6.9)
125* (14)
19 (26)
30 (41)
45 (61)
65 (88)
90 (122)
160 (217)
258 (350)
386 (523)
86* (9.8)
176* (20)
26 (35)
42 (57)
64 (88)
92 (125)
127 (172)
226 (306)
364 (494)
545 (739)
1/4
5/16
3/8
7/16
1/2
9/16
5/8
3/4
7/8
1
NOTE: Torque values shown with * are inch pounds.
IDENTIFICATION
CAP SCREWS AND CARRIAGE BOLTS
GRADE 2 SAE
GRADE 5 SAE
GRADE 8 SAE
REGULAR NUTS
SAE GRADE 5
HEX NUTS
SAE GRADE 6
HEX NUTS
LOCKNUTS
GRADE IDENTIFICATION
GRADE IDENTIFICATION
GRADE A NO NOTCHES
GRADE A NO MARKS
GRADE B ONE CIRCUMFERENTIAL NOTCH
GRADE B THREE MARKS
GRADE C TWO CIRCUMFERENTIAL NOTCHES
GRADE C SIX MARKS
MARKS NEED NOT BE LOCATED
AT CORNERS
GRADE IDENTIFICATION
GRADE A NO MARK
GRADE B LETTER B
GRADE C LETTER C
5-35
INDEX
Adding diesel fuel . . . . . . . . . . . . . . . . . . . . . . . . . 3-4
Additional cab controls . . . . . . . . . . . . . . . . . . . . 1-23
Additional features, Electronic instrument
control system . . . . . . . . . . . . . . . . . . . . . . . . 2-94
Air conditioning system specifications . . . . . . . 5-20
Articulation blocks . . . . . . . . . . . . . . . . . . . . . . . 2-154
Articulation lock . . . . . . . . . . . . . . . . . . . . . . . . . . 2-20
Ashtray and cigarette lighter . . . . . . . . . . . . . . . 2-12
Audible/Visual Alarms of the electronic
instrument control system . . . . . . . . . . . . . . 2-72
Axles / differentials specifications . . . . . . . . . . . 5-18
Ballasting . . . . . . . . . . . . . . . . . . . . . . . . . . . . . . 2-156
Base tractor weight . . . . . . . . . . . . . . . . . . . . . . . . 5-9
Battery access . . . . . . . . . . . . . . . . . . . . . . . . . . . . 3-6
Battery charging precautions . . . . . . . . . . . . . . . 1-34
Battery cover . . . . . . . . . . . . . . . . . . . . . . . . . . . . 1-10
Bleeding remote cylinders . . . . . . . . . . . . . . . . 2-132
Brakes specifications . . . . . . . . . . . . . . . . . . . . . 5-19
Braking system . . . . . . . . . . . . . . . . . . . . . . . . . . 2-33
Break-in period . . . . . . . . . . . . . . . . . . . . . . . . . . 2-166
Break-in periods . . . . . . . . . . . . . . . . . . . . . . . . . 2-166
Cab . . . . . . . . . . . . . . . . . . . . . . . . . . . . . . . . . . . . . 2-3
Cab controls, additional . . . . . . . . . . . . . . . . . . . 1-20
Cab dome light . . . . . . . . . . . . . . . . . . . . . . . . . . . 2-45
Cab-mounted accessories . . . . . . . . . . . . . . . . . 1-28
Installation . . . . . . . . . . . . . . . . . . . . . . . . . . . . 1-28
Calculation of ballast . . . . . . . . . . . . . . . . . . . . . 2-159
Calibrating the electronic instrument
control system . . . . . . . . . . . . . . . . . . . . . . . . 2-61
Capacities . . . . . . . . . . . . . . . . . . . . . . . . . . . . . . . 5-21
Center PTO articulation drive shaft . . . . . . . . . . 1-11
Cold weather starting . . . . . . . . . . . . . . . . . . . . . 2-22
Combination horn, turn signal, and
headlight dimmer switch lever . . . . . . . . . . . 2-13
Control console . . . . . . . . . . . . . . . . . . . . . . . . . 2-102
Controls and instrument overview . . . . . . . . . . 1-20
Cooling system specifications . . . . . . . . . . . . . . 5-15
Coupler connection . . . . . . . . . . . . . . . . . . . . . . 2-130
Cruise control operation . . . . . . . . . . . . . . . . . . . 2-26
Setting . . . . . . . . . . . . . . . . . . . . . . . . . . . . . . . 2-26
Alternate engine speed overrun . . . . . . . . . 2-27
Deceleration (manual or pedal) . . . . . . . . . . 2-28
Exiting cruise mode . . . . . . . . . . . . . . . . . . . . 2-28
Decelerator Pedal . . . . . . . . . . . . . . . . . . . . . . . . 2-40
Delivery Reports . . . . . . . . . . . . . . . . . . . . . . . . . 5-39
Differential lock . . . . . . . . . . . . . . . . . . . . . . . . . . 2-40
Drawbar assembly . . . . . . . . . . . . . . . . . . . . . . . 2-111
Manual hitch pin . . . . . . . . . . . . . . . . 2-111, 2-113
Automatic hitch pin . . . . . . . . . . . . . 2-111, 2-114
Drawbar loading . . . . . . . . . . . . . . . . . . . . . . . . . 2-116
Drawbar pin kit . . . . . . . . . . . . . . . . . . . . . . . . . . 2-115
Drawbar positioning . . . . . . . . . . . . . . . . . . . . . 2-142
Drawbar specifications . . . . . . . . . . . . . . . . . . . . 5-19
Drivelines . . . . . . . . . . . . . . . . . . . . . . . . . . . . . . . 5-17
Driving the tractor . . . . . . . . . . . . . . . . . . . . . . . . 2-41
Electrical specifications . . . . . . . . . . . . . . . . . . . 5-20
Electrical system high/low voltage . . . . . . . . . . 2-84
Electronic instrument control system . . . . . . . . 2-49
Emissions warranty . . . . . . . . . . . . . . . . . . . . . . . . 0-2
Engine access . . . . . . . . . . . . . . . . . . . . . . . . . . . . 3-5
Engine air intake and exhaust specifications . . . . 5-15
Engine block heater . . . . . . . . . . . . . . . . . . . . . . 2-24
Engine break-in . . . . . . . . . . . . . . . . . . . . . . . . . 2-166
Engine coolant temperature gauge . . . . . . . . . 2-15
Engine diagnostics . . . . . . . . . . . . . . . . . . . . . . 2-100
Engine identification . . . . . . . . . . . . . . . . . . . . . . . 1-6
Engine oil pressure gauge . . . . . . . . . . . . . . . . . 2-15
Engine overspeed condition . . . . . . . . . . . . . . . 2-91
Engine side covers . . . . . . . . . . . . . . . . . . . . . . . 1-10
Engine specifications . . . . . . . . . . . . . . . . . . . . . 5-13
Engine starting . . . . . . . . . . . . . . . . . . . . . . . . . . . 2-21
Entering the cab . . . . . . . . . . . . . . . . . . . . . . . . . . . 2-3
Ether aid button . . . . . . . . . . . . . . . . . . . . . . . . . . 2-12
External lighting . . . . . . . . . . . . . . . . . . . . . . . . . . 1-18
Feedback potentiometer . . . . . . . . . . . . . . . . . . 2-147
First 50-hour service . . . . . . . . . . . . . . . . . . . . . . . 3-1
Flexible maintenance intervals . . . . . . . . . . . . . . 3-1
Flow control adjustment . . . . . . . . . . . . . . . . . . 2-128
Fluids specifications . . . . . . . . . . . . . . . . . . . . . . 5-22
Foot and floor controls . . . . . . . . . . . . . . . . . . . . 1-22
Foot Brake . . . . . . . . . . . . . . . . . . . . . . . . . . . . . . 2-33
Forward operator controls . . . . . . . . . . . . . . . . . 1-21
Front and rear axle identification . . . . . . . . . . . . . 1-9
Front and rear windshield washer switch . . . . 2-14
Front grill . . . . . . . . . . . . . . . . . . . . . . . . . . . . . . . . . 3-6
Front windshield wiper switch . . . . . . . . . . . . . . 2-13
Fuel level . . . . . . . . . . . . . . . . . . . . . . . . . . . . . . . 2-86
Fuel requirements . . . . . . . . . . . . . . . . . . . . . . . . . 3-3
Fuel storage . . . . . . . . . . . . . . . . . . . . . . . . . . . . . . 3-2
Fuel system specifications . . . . . . . . . . . . . . . . . 5-15
Fueling the tractor . . . . . . . . . . . . . . . . . . . . . . . . . 3-2
Gear shifting within a range . . . . . . . . . . . . . . . . 2-36
General dimensions . . . . . . . . . . . . . . . . . . . . . . . 5-1
General information . . . . . . . . . . . . . . . . . . . . . . . . 1-1
Horn . . . . . . . . . . . . . . . . . . . . . . . . . . . . . . . . . . . . 2-13
Hardware torque values . . . . . . . . . . . . . . . . . . . 5-34
Hauling the tractor on a transporter . . . . . . . . . 1-36
Headlights (high/low beam) . . . . . . . . . . . . . . . . 2-13
Headlight flash . . . . . . . . . . . . . . . . . . . . . . . . . . . 2-13
Heating system specifications . . . . . . . . . . . . . . 5-20
High engine coolant temperature . . . . . . . . . . . 2-81
Hitch adjustments . . . . . . . . . . . . . . . . . . . . . . . 2-139
Hood panels, opening . . . . . . . . . . . . . . . . . . . . . . 3-5
Hood panels, removing . . . . . . . . . . . . . . . . . . . . . 3-5
Hydraulic motor applications . . . . . . . . . . . . . . 2-134
Hydraulic system . . . . . . . . . . . . . . . . . . . 2-123, 5-18
Hydraulic system filter bypass . . . . . . . . . . . . . . 2-74
Hydraulic system operation . . . . . . . . . . . . . . . 2-123
Identification numbers . . . . . . . . . . . . . . . . . . . . . . 1-5
Ignition switch . . . . . . . . . . . . . . . . . . . . . . . . . . . . 2-11
Implement CB radio and cellular phone . . . . . . 1-28
Implement connection . . . . . . . . . . . . . . . . . . . . 2-146
Implement disconnect . . . . . . . . . . . . . . . . . . . . 2-146
Implement guages . . . . . . . . . . . . . . . . . . . . . . . . 1-28
Implement hook-up . . . . . . . . . . . . . . . . . . . . . . 2-149
Implement monitor boxes . . . . . . . . . . . . . . . . . . 1-28
Implement safety chains . . . . . . . . . . . . . . . . . . 2-116
Implement status switch . . . . . . . . . . . . 2-103, 2-110
Implement transport . . . . . . . . . . . . . . . . . . . . . 2-117
Inch Hardware and locknuts chart . . . . . . . . . . 5-35
5-36
Introduction . . . . . . . . . . . . . . . . . . . . . . . . . . . . . . . 1-1
Liquid ballast table . . . . . . . . . . . . . . . . . . . . . . . . 5-24
Lockout levers . . . . . . . . . . . . . . . . . . . . . . . . . . 2-127
Low coolant level . . . . . . . . . . . . . . . . . . . . . . . . . 2-79
Low engine oil pressure . . . . . . . . . . . . . . . . . . . 2-75
Lubricants specifications . . . . . . . . . . . . . . . . . . 5-22
Lubrication . . . . . . . . . . . . . . . . . . . . . . . . . . . . . . . 3-1
Lubrication and maintenance chart . . . . . . . . . . 3-8
Lubrication and maintenance, as required . . . 3-67
Lubrication and maintenance,
every 10 hours or daily . . . . . . . . . . . . . . . . . 3-10
Lubrication and maintenance,
every 50 hours . . . . . . . . . . . . . . . . . . . . . . . . 3-28
Lubrication and maintenance,
every 250 hours . . . . . . . . . . . . . . . . . . . . . . . 3-33
Lubrication and maintenance,
every 500 hours . . . . . . . . . . . . . . . . . . . . . . . 3-42
Lubrication and maintenance,
every 1000 hours . . . . . . . . . . . . . . . . . . . . . . 3-51
Lubrication and maintenance,
every 1500 hours or yearly . . . . . . . . . . . . . . 3-54
Lubrication and maintenance,
every 2000 hours or 2 years . . . . . . . . . . . . 3-62
Lubrication and maintenance,
indicated by warning light . . . . . . . . . . . . . . . 3-65
Lubrication and maintenance . . . . . . . . . . . . . . . 3-1
Master PTO shield . . . . . . . . . . . . . . . . . . . . . . . . 1-11
Maximum allowable machine weight . . . . . . . . . 5-8
Metric hardware and locknuts chart . . . . . . . . . 5-34
Midmount weight kit . . . . . . . . . . . . . . . . . . . . . . 5-11
Mirror . . . . . . . . . . . . . . . . . . . . . . . . . . . . . . . . . . . 2-32
Normal operation of the electronic
instrument control system . . . . . . . . . . . . . . 2-53
Opening the hood panels . . . . . . . . . . . . . . . . . . . 3-5
Operating continuous flow hydraulic
equipment . . . . . . . . . . . . . . . . . . . . . . . . . . . 2-132
Operating remote equipment,
simultaneously . . . . . . . . . . . . . . . . . . . . . . . 2-134
Operation . . . . . . . . . . . . . . . . . . . . . . . . . . . . . . . . 2-1
Operator seat controls . . . . . . . . . . . . . . . . . . . . 1-27
Operator’s control console . . . . . . . . . . . . . . . . . 2-10
Operator’s controls . . . . . . . . . . . . . . . . . . . . . . 2-103
Operator’s manual holder . . . . . . . . . . . . . . . . . . . 1-1
Operator’s seat . . . . . . . . . . . . . . . . . . . . . . . . . . . 2-6
Optional equipment . . . . . . . . . . . . . . . . . . . . . . . 5-31
Optional hydraulic equipment . . . . . . . . . . . . . 2-135
Optional transmission and axle weights . . . . . . 5-12
Overall description . . . . . . . . . . . . . . . . . . . . . . . . . 1-3
Overall heights . . . . . . . . . . . . . . . . . . . . . . . . . . . . 5-2
Overall widths . . . . . . . . . . . . . . . . . . . . . . . . . . . . . 5-3
Overhead climate controls . . . . . . . . . . . . . . . . . 2-29
Air conditioning . . . . . . . . . . . . . . . . . . . . . . . . 2-30
Heater . . . . . . . . . . . . . . . . . . . . . . . . . . . . . . . 2-29
Pressurizer vents . . . . . . . . . . . . . . . . . . . . . . 2-31
Overhead controls . . . . . . . . . . . . . . . . . . . . . . . . 1-22
Overview, controls and instruments . . . . . . . . . 1-19
Park brake alert . . . . . . . . . . . . . . . . . . . . . . . . . . 2-89
Park Brake . . . . . . . . . . . . . . . . . . . . . . . . . . . . . . 2-33
Part numbers for high usage items . . . . . . . . . . 5-30
Power take--off (optional) specifications . . . . . 5-18
Powershift transmission operation . . . . . . . . . . 2-37
Powershift transmission shifting . . . . . . . . . . . . 2-37
Precautionary statements . . . . . . . . . . . . . . . . . . 0-5,
2-2
Pre-operation checklist . . . . . . . . . . . . . . . . . . . . 1-37
Pressure release detent adjustment . . . . . . . . 2-129
Prestart Inspection . . . . . . . . . . . . . . . . . . . . . . . 2-21
Preventing system contamination . . . . . . . . . . . . 3-1
Programming and calibrating . . . . . . . . . . . . . . 2-106
Proper Tire selection . . . . . . . . . . . . . . . . . . . . . 2-153
PTO operation . . . . . . . . . . . . . . . . . . . . . . . . . . 2-118
Quick couplers . . . . . . . . . . . . . . . . . . . . . . . . . . 2-130
Quad Shift III 12x4 operation . . . . . . . . . . . . . . . 2-34
Quad Shift III shifting . . . . . . . . . . . . . . . . . . . . . . 2-35
Quick hitch operation (optional) . . . . . . . . . . . 2-145
Radar ground speed sensor . . . . . . . . . . . . . . 2-102
Radio (optional equipment) . . . . . . . . . . . . . . . . 2-32
Rear window wiper switch . . . . . . . . . . . . . . . . . 2-14
Remote control operation . . . . . . . . . . . . . . . . . 2-126
Remote valve access . . . . . . . . . . . . . . . . . . . . . . 3-6
Removing the hood panels . . . . . . . . . . . . . . . . . 3-5
Removing the shielding to gain access to
components for inspection and
maintenance . . . . . . . . . . . . . . . . . . . . . . . . . . . 3-5
Replacement bulbs . . . . . . . . . . . . . . . . . . . . . . . 5-30
Right console . . . . . . . . . . . . . . . . . . . . . . . . . . . . 2-18
Right rear window . . . . . . . . . . . . . . . . . . . . . . . . . 2-5
Right side console controls . . . . . . . . . . . . . . . . 1-23
Roof-mounted work lights . . . . . . . . . . . . . . . . . 2-47
Safety . . . . . . . . . . . . . . . . . . . . . . . . . . . . . . . . . . . 0-4
Safety decals . . . . . . . . . . . . . . . . . . . . . . . . . . . . 0-11
Seat adjustments . . . . . . . . . . . . . . . . . . . . . . . . . . 2-7
Seat belt . . . . . . . . . . . . . . . . . . . . . . . . . . . . . . . . . 2-6
Shield, removing . . . . . . . . . . . . . . . . . . . . . . . . . . 3-5
Shielding . . . . . . . . . . . . . . . . . . . . . . . . . . . . . . . . 1-10
Specifications . . . . . . . . . . . . . . . . . . . . . . . . . . . . . 5-1
Speed chart . . . . . . . . . . . . . . . . . . . . . . . . . . . . . 5-23
Starter solenoid shield . . . . . . . . . . . . . . . . . . . . 1-10
Steering specifications . . . . . . . . . . . . . . . . . . . . 5-19
Steering wheel and column . . . . . . . . . . . . . . . . . 2-9
Stopping the tractor . . . . . . . . . . . . . . . . . . . . . . . 2-29
Storage tray . . . . . . . . . . . . . . . . . . . . . . . . . . . . 2-165
3-Point hitch (optional) . . . . . . . . . . . . . . . . . . . 2-135
3-Point hitch description . . . . . . . . . . . . . . . . . . 2-135
3-Point hitch controls . . . . . . . . . . . . . . . . . . . . 2-136
Automatic raise/lower switch . . . . . . . . . . . 2-136
Manual raise/lower switch . . . . . . . . . . . . . 2-137
Rotary depth control knob . . . . . . . . . . . . . 2-137
Rotary lowering rate control knob . . . . . . . 2-138
Rate of hitch raise adjustments . . . . . . . . . 2-138
3-Point hitch operation . . . . . . . . . . . . . . . . . . . 2-150
3-Point Hitch (optional) specifications . . . . . . . 5-19
Throttle . . . . . . . . . . . . . . . . . . . . . . . . . . . . . . . . . 2-26
Tire configuration . . . . . . . . . . . . . . . . . . . . . . . . . 1-12
Tire load and inflation table . . . . . . . . . . . . . . . . 5-25
Tire load radius . . . . . . . . . . . . . . . . . . . . . . . . . . 5-29
Tires and articulation blocks . . . . . . . . . . . . . . 2-153
Tire weights . . . . . . . . . . . . . . . . . . . . . . . . . . . . . . 5-9
Toolbox . . . . . . . . . . . . . . . . . . . . . . . . . . . . . . . . 2-165
Towing the tractor . . . . . . . . . . . . . . . . . . . . . . . . 1-35
TPM switch & ICMS . . . . . . . . . . . . . . . . . . . . . 2-104
Tractor boosting . . . . . . . . . . . . . . . . . . . . . . . . . . 2-25
Tractor identification . . . . . . . . . . . . . . . . . . . . . . . 1-6
Tractor identification data . . . . . . . . . . . . . . . . . . . 1-5
5-37
Tractor lighting . . . . . . . . . . . . . . . . . . . . . . . . . . . 2-42
Tractor orientation . . . . . . . . . . . . . . . . . . . . . . . . . 1-3
Tractor performance monitor (optional) . . . . . 2-101
Tractor shipping weight . . . . . . . . . . . . . . . . . . . . . 5-8
Tractor start-up and engine operation . . . . . . . 2-21
Tractor statement of use . . . . . . . . . . . . . . . . . . . . 1-2
Tractor Terminology . . . . . . . . . . . . . . . . . . . . . . . 1-3
Trailer socket . . . . . . . . . . . . . . . . . . . . . . . . . . . . 2-47
Transmission identification . . . . . . . . . . . . . . . . . . 1-8
Transmission lubrication filter bypass . . . . . . . 2-73
Transmission operation . . . . . . . . . . . . . . . . . . . 2-34
Transmission speed sensor failures . . . . . . . . . 2-88
Transmission specifications . . . . . . . . . . . . . . . . 5-16
Trouble light . . . . . . . . . . . . . . . . . . . . . . . . . . . . . 2-45
Troubleshooting . . . . . . . . . . . . . . . . . . . . . . . . . . . 4-1
Troubleshooting, 12x2 powershift
transmission . . . . . . . . . . . . . . . . . . . . . . . . . . . 4-6
Troubleshooting, 12x4 Quad Shift III
and 12x2 powershift transmission . . . . . . . . . 4-7
Troubleshooting, brakes . . . . . . . . . . . . . . . . . . . 4-11
Troubleshooting, cab . . . . . . . . . . . . . . . . . . . . . 4-12
Troubleshooting, electrical system . . . . . . . . . . . 4-8
Troubleshooting, electronic instrument
control system . . . . . . . . . . . . . . . . . . . . . . . . 4-14
Troubleshooting, engine . . . . . . . . . . . . . . . . . . . . 4-3
Troubleshooting, hydraulic system . . . . . . . . . . 4-10
Troubleshooting, operation . . . . . . . . . . . . . . . . 4-15
Troubleshooting, power take-off (PTO) . . . . . . 4-15
Troubleshooting, 3-point hitch . . . . . . . . . . . . . . 4-11
Troubleshooting, tractor performance
monitor . . . . . . . . . . . . . . . . . . . . . . . . . . . . . . . 4-13
Troubleshooting, transmission . . . . . . . . . . . . . . . 4-6
Turn signals . . . . . . . . . . . . . . . . . . . . . . . . . . . . . 2-13
Turning geometry . . . . . . . . . . . . . . . . . . . . . . . . . 5-8
Vehicle identification plate . . . . . . . . . . . . . . . . . . 1-5
Warning light bar . . . . . . . . . . . . . . . . . . . . . . . . . 2-16
Warranty statement . . . . . . . . . . . . . . . . . . . . . . . 0-1
Weight packages . . . . . . . . . . . . . . . . . . . . . . . . . 5-11
Welding and battery charging . . . . . . . . . . . . . . 1-34
Welding precautions . . . . . . . . . . . . . . . . . . . . . . 1-34
Wide transport marker lights . . . . . . . . . . . . . . . 2-46
Wheel tread width . . . . . . . . . . . . . . . . . . . . . . . . . 5-5
Yellow and red engine warning lights . . . . . . . . 2-92
5-38
DEALER COPY
DELIVERY REPORT
2290, 2335, 2360, 2375, 2425 TRACTORS
Delivery Date
Owner’s Name
Address
Dealer’s Name
Address
Tractor: Model No.
Serial No.
Engine: Model No.
Serial No.
Using the Operator’s Manual as a guide, instruction was given as indicated by the check marks.
( )
Safety precautions and practice
( )
Lubrication points and schedule
( )
Use of optional equipment
( )
Operation of all controls
( )
Preseason service
( )
All safety shielding is installed
( )
End-of-season service
( )
Warranty coverage
( )
Proper use of operator’s manual
( )
Customer given operator’s manual
( )
Local Cummins Dealer/Distributor contacted with engine information
Dealer Representative’s Signature
“I have been instructed in the operation, maintenance, and safety features of this machine as detailed
in the operator’s manual.”
Owner’s Signature
5-39
5-40
OWNER COPY
DELIVERY REPORT
2290, 2335, 2360, 2375, 2425 TRACTORS
Delivery Date
Owner’s Name
Address
Dealer’s Name
Address
Tractor: Model No.
Serial No.
Engine: Model No.
Serial No.
Using the Operator’s Manual as a guide, instruction was given as indicated by the check marks.
( )
Safety precautions and practice
( )
Lubrication points and schedule
( )
Use of optional equipment
( )
Operation of all controls
( )
Preseason service
( )
All safety shielding is installed
( )
End-of-season service
( )
Warranty coverage
( )
Proper use of operator’s manual
( )
Customer given operator’s manual
( )
Local Cummins Dealer/Distributor contacted with engine information
Dealer Representative’s Signature
“I have been instructed in the operation, maintenance, and safety features of this machine as detailed
in the operator’s manual.”
Owner’s Signature
5-41
5-42
DEALER COPY
FIRST 50-HOUR SERVICE
CHECK AND ADJUST, AS REQUIRED
DESCRIPTION
OK
DESCRIPTION
STATIONARY CHECKS -- ENGINE OFF:
Check engine coolant level.
Lubricate the lower articulation pin.
Check engine fan belt tension.
Lubricate the front steering cylinder.
Check engine water pump belt tension
(2360 and 2425 only).
Lubricate the rear steering cylinder pin.
Check air conditioner compressor belt tension.
Lubricate the front drag link pin.
Check alternator drive belt tension.
Lubricate the rear drag link pin.
Check the air cleaner connections.
Lubricate the rear axle drive shaft steady bearing.
Change the fuel Filter(s).
Lubricate rear axle drive shaft articulation slip yoke.
Change the engine oil.
Change the engine oil filter.
Lubricate the PTO articulation drive shaft slip yoke
(option).
Change the engine coolant system filter.
Lubricate the PTO drive shaft rear slip yoke (option).
Check the level of DCA4 coolant additive.
Lubricate the input driveline slip yoke.
Check the battery connections at the starter.
Lubricate the front output driveline slip yoke.
Check the radiator, heater hoses and connections.
Lubricate the transmission input cross and bearing
(2290 2335,
(2290,
2335 2360*,
2360* 2375* only).
only)
*When equipped with standard axles option.
Clean the engine air cleaner outer element.
Check brake reservoir level.
Adjust the brakes.
Check tire air pressure according to ballast on axle.
Clean the cab outer air filter.
Check the air conditioner sight glass.
Check the battery connections at the battery.
Check the battery electrolyte level.
Check the windshield washer fluid level.
Lubricate the upper articulation pin.
Lubricate the rear axle cross and bearing (2290,
2335 2360*,
2335,
2360* 2375* only).
only)
*When equipped with standard axles option.
Lubricate the rear axle articulation cross and
bearing (2290,
(2290 2335,
2335 2360*,
2360* 2375* only).
only)
*When equipped with standard axles option.
Lubricate the transmission rear output cross and
bearing (2290,
(2290 2335,
2335 2360*,
2360* 2375* only).
only)
*When equipped with standard axles option.
Lubricate the front output cross and bearing (2290,
2335 2360*,
2335,
2360* 2375 *only).
*only)
*When equipped with standard axles option.
Change the planetary hub oil.
Lubricate the front axle cross and bearing (2290,
2335 2360*,
2335,
2360* 2375* only).
only)
*When equipped with standard axles option.
Change the differential oil.
Check all wheel hardware torque.
Check the transmission oil level.
Check all optional weight kit hardware torque.
Check the seat for proper operation.
Change the transmission filter.
Change the hydraulic oil.
Check the axle mounting bolt torque.
Change the hydraulic filter.
Lubricate the 3-point hitch (option).
Check cab mount hardware torque.
5-43
OK
DESCRIPTION
OK
SAFETY ITEMS CHECKS:
DESCRIPTION
PERFORMANCE SERVICE CHECKS:
Seat belt operation.
All safety shields installed.
Road test engine operation including throttle and
governor operation.
Neutral start switch(es) operative.
Transmission.
Parking brake operation and adjustment.
Steering control.
Articulation lock operation.
Differential lock engagement and disengagement.
STATIONARY CHECKS -- ENGINE RUNNING:
Brake action.
All operative checks are to be performed with the tractor
at normal operating temperature.
Lights and instruments for proper operation.
Maximum no-load and idle speed adjustments.
Hydraulic system.
Remote control valves and lockout levers.
Flow control operation.
3-point hitch operation (option).
Transmission shifting and gear selection.
PTO operation and brake (option).
SERVICE PERFORMED
TRACTOR MODEL NO.
TRACTOR SERIAL NO.
OWNER’S SIGNATURE
DATE
DEALER’S SIGNATURE
DATE
5-44
OK
OWNER COPY
FIRST 50-HOUR SERVICE
CHECK AND ADJUST, AS REQUIRED
DESCRIPTION
OK
DESCRIPTION
STATIONARY CHECKS -- ENGINE OFF:
Check engine coolant level.
Lubricate the lower articulation pin.
Check engine fan belt tension.
Lubricate the front steering cylinder.
Check engine water pump belt tension
(2360 and 2425 only).
Lubricate the rear steering cylinder pin.
Check air conditioner compressor belt tension.
Lubricate the front drag link pin.
Check alternator drive belt tension.
Lubricate the rear drag link pin.
Check the air cleaner connections.
Lubricate the rear axle drive shaft steady bearing.
Change the fuel Filter(s).
Lubricate rear axle drive shaft articulation slip yoke.
Change the engine oil.
Change the engine oil filter.
Lubricate the PTO articulation drive shaft slip yoke
(option).
Change the engine coolant system filter.
Lubricate the PTO drive shaft rear slip yoke (option).
Check the level of DCA4 coolant additive.
Lubricate the input driveline slip yoke.
Check the battery connections at the starter.
Lubricate the front output driveline slip yoke.
Check the radiator, heater hoses and connections.
Lubricate the transmission input cross and bearing
(2290 2335,
(2290,
2335 2360*,
2360* 2375* only).
only)
*When equipped with standard axles option.
Clean the engine air cleaner outer element.
Check brake reservoir level.
Adjust the brakes.
Check tire air pressure according to ballast on axle.
Clean the cab outer air filter.
Check the air conditioner sight glass.
Check the battery connections at the battery.
Check the battery electrolyte level.
Check the windshield washer fluid level.
Lubricate the upper articulation pin.
Lubricate the rear axle cross and bearing (2290,
2335 2360*,
2335,
2360* 2375* only).
only)
*When equipped with standard axles option.
Lubricate the rear axle articulation cross and
bearing (2290,
(2290 2335,
2335 2360*,
2360* 2375* only).
only)
*When equipped with standard axles option.
Lubricate the transmission rear output cross and
bearing (2290,
(2290 2335,
2335 2360*,
2360* 2375* only).
only)
*When equipped with standard axles option.
Lubricate the front output cross and bearing (2290,
2335 2360*,
2335,
2360* 2375 *only).
*only)
*When equipped with standard axles option.
Change the planetary hub oil.
Lubricate the front axle cross and bearing (2290,
2335 2360*,
2335,
2360* 2375* only).
only)
*When equipped with standard axles option.
Change the differential oil.
Check all wheel hardware torque.
Check the transmission oil level.
Check all optional weight kit hardware torque.
Check the seat for proper operation.
Change the transmission filter.
Change the hydraulic oil.
Check the axle mounting bolt torque.
Change the hydraulic filter.
Lubricate the 3-point hitch (option).
Check cab mount hardware torque.
5-45
OK
DESCRIPTION
OK
SAFETY ITEMS CHECKS:
DESCRIPTION
PERFORMANCE SERVICE CHECKS:
Seat belt operation.
All safety shields installed.
Road test engine operation including throttle and
governor operation.
Neutral start switch(es) operative.
Transmission.
Parking brake operation and adjustment.
Steering control.
Articulation lock operation.
Differential lock engagement and disengagement.
STATIONARY CHECKS -- ENGINE RUNNING:
Brake action.
All operative checks are to be performed with the tractor
at normal operating temperature.
Lights and instruments for proper operation.
Maximum no-load and idle speed adjustments.
Hydraulic system.
Remote control valves and lockout levers.
Flow control operation.
3-Point hitch operation (option).
Transmission shifting and gear selection.
PTO operation and brake (option).
SERVICE PERFORMED
TRACTOR MODEL NO.
TRACTOR SERIAL NO.
OWNER’S SIGNATURE
DATE
DEALER’S SIGNATURE
DATE
5-46
OK
PUBLICATIONS ORDER FORM
Date _____________
Attn:
Name
Address
City
State
Zip
Phone
Dealer Order Only:
Authorized
Dealer Signature
Dealer Code
Zone
Dealer: If manuals are for resale, check box
and provide sales tax registration no.
MANUAL
NO.
89002105
89002000
89002108
89002107
89002014
QTY.
Phone: (
)
Fax: ( ___ )
DESCRIPTION
2290, 2335, 2360, 2375, 2425
Tractor Operator’s Manual
2240, 2270, 2310, 2360, 2425
Tractor Repair Manual (set of 13
volumes)
2290, 2335, 2360, 2375, 2425
Tractor Assembly Manual
Model 1407 Powershift Detailed
Operator’s Manual
Model 1400 Series Powershift
Service Manual
.
TOTAL
AMOUNT
PRICE EA.
***
***
***
***
***
***Please see your Buhler Versatile Dealer to confirm catalog numbers and prices.
Total Order (U.S. $) $
Add Appropriate
State or Provincial
Sales Tax *
$
Shipping & Handling $
04000000
MAKE CHECK OR MONEY
ORDER PAYABLE TO:
Buhler Versatile Inc.
1260 Clarence Avenue, Box 7300
Winnipeg, MB R3C 4E8
GRAND TOTAL
5.00**
$
* Tax exempt customers must provide copy of tax exempt certificate.
** Does not apply to dealer orders.
5-47
I. DEALER ORDER INFORMATION
Service Publications will be charged to the Dealer Open Account. Please include both
your Dealer Code and Zone Number.
Telephone # (204) 284-6100 (Service/Parts Department)
Fax # (204) 477-2325
Telephone Hours: 8:00 AM to 4:30 PM CST
Fax Hours: 24 Hours-A-Day
Please allow one week for order processing plus shipping time. Express order
processing (next day air, second day air, etc.) is available; however, please be aware that
you will be charged additional freight and handling fees for this service. Please call the
Buhler Versatile Service/Parts Department at (204) 284--6100 for specific fee
information.
II. OWNER INFORMATION
Orders may be placed by mail or telephone. If placed by mail, orders must be
accompanied by payment.
Please allow one week for order processing plus shipping time. Express order
processing (next day air, second day air, etc.) is available; however, please be aware that
you will be charged additional freight and handling fees for this service. Please call (204)
284-6100 for specific fee information.
If you need further information about Buhler Versatile’s service
publications*, please contact your Buhler Versatile Dealer.
MAKE CHEQUE OR MONEY
ORDER PAYABLE TO:
Buhler Versatile Inc.
1260 Clarence Avenue, Box 7300
Winnipeg, MB R3C 4E8
5-48
CALIFORNIA
Proposition 65 Warning
Diesel engine exhaust and some of its constituents are
known to the State of California to cause cancer, birth
defects, and other reproductive harm.
Battery posts, terminals and related accessories
contain lead and lead compounds, chemicals known to
the State of California to cause cancer and birth defects
or other reproductive harm. Wash hands after handling.