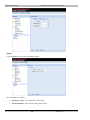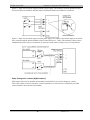
1
ES9600 User Guide ES9600 User Guide Copyright © 2009, 2010 Electrosonic, Inc. All rights reserved No part of this documentation may be reproduced or transmitted in any form or by any means, electronic or mechanical, including photocopying and recording, without the prior written permission of Electrosonic, Inc. The information in this documentation is supplied without warranty of any kind, either directly or indirectly, and is subject to change without prior written notice. Electrosonic, Inc. its employees or appointed representatives will not be held responsible for any damages to software, hardware, or data, howsoever arising as a direct or indirect result of the product(s) mentioned herein. Issued by: Electrosonic, Inc. 3320 North San Fernando Blvd Burbank, CA 91504 Sales Support Toll Free: 1.888.343.3602 Tel: 1.818.333.3602 Fax: 1.818.333.3679 E-mail : [email protected] Technical Support Toll Free: 1.888.832.4374 E-mail: [email protected] Preface About This User Guide This manual contains detailed information about your Electrosonic ES9600 JPEG2000 Player. We recommend that the user read ‘Chapter1: Introduction/Quick Reference Guide’ before setting up the Player. This will give a basic understanding of how to use the ES9600. The manual is comprised of the following chapters: Chapter 1: Introduction Chapter 2: Quick Start Chapter 3: Player Interface – Front Pane/LCD Chapter 4: Player Interface – Web Chapter 5: Linear Timecode (LTC) Chapter 6: Genlock Chapter 7: Data Transfer Chapter 8: Remote Control Protocols Chapter 9: Using the GPIO Interface Appendix A: TCP/IP Communications Appendix B: Encoding Guidelines Appendix C: Specifications Index A full contents list appears after this preface. ES9600 T es ted To Comply with FCC Standards CE Compliance This Information Technology Equipment has been tested and found to comply with the following European directives: IEMC Directive 89/336/EEC amending directive 92/31/EEC & 93/68/EEC as per EN55024: 1998 EN55022: 1998 Class B FCC Compliance This equipment has been tested and found to comply with the limits for a Class B digital device, pursuant to part 15 of the FCC Rules. These limits are designed to provide reasonable protection against harmful interference in a residential installation. This equipment generates, uses and can radiate radio frequency energy and, if not installed and used in accordance with the instructions, may cause harmful interference to radio communications. However, there is no guarantee that interference will not occur in a particular installation. If this equipment does cause harmful interference to 1 Version 1.13 radio or television reception, which can be determined by turning the equipment off and on, the user is encouraged to try to correct the interference by one or more of the following measures: Reorient or relocate the receiving antenna. Increase the separation between the equipment and receiver. Connect the equipment into an outlet on a circuit different from that to which the receiver is connected. Consult the dealer or an experienced radio/TV technician for help. ROHS This device complies with Lead Free/ROHS requirements Trademarks ELECTROSONIC ®, ES ® and the ELECTROSONIC ® logo are registered trademarks of ELECTROSONIC Ltd. WINDOWS ® is a registered trademark of MICROSOFT CORPORATION. All other brand and product names are trademarks or registered trademarks of their respective holders. Document History VERSION DATE BY 1.0 02.25.09 Staff Release Version 1.1 04.17.09 Staff Release Version 1.11 07.31.09 Staff Release Version 1.12 01.05.10 Staff Release Version 1.13 02.24.10 Staff 2 COMMENTS Version 1.13 ES9600 User Guide Table of Contents Preface .......................................................................................................... 1 About This User Guide ....................................................................................................................................1 CE Compliance...............................................................................................................................................1 FCC Compliance ............................................................................................................................................1 ROHS .................................................................................................................................................................2 Trademarks.......................................................................................................................................................2 Document History............................................................................................................................................2 Table of Contents ......................................................................................... 3 Chapter 1: Introduction .......................................................................... 8 Main Features ..................................................................................................................................................8 Video Outputs .................................................................................................................................................9 2-Channel ....................................................................................................................................................9 2-Channel -Locked.....................................................................................................................................9 1-Channel ....................................................................................................................................................9 Installation, Warnings and Cautions...........................................................................................................10 Ventilation..................................................................................................................................................10 Power connection....................................................................................................................................10 Mains disconnect devices ......................................................................................................................10 Air Filter(s) ...................................................................................................................................................11 Protection from liquids .............................................................................................................................11 Ignition sources .........................................................................................................................................11 Battery precautions ..................................................................................................................................11 Normal operating conditions ......................................................................................................................11 Temperature ..............................................................................................................................................11 Humidity .....................................................................................................................................................11 Player Connections ......................................................................................................................................12 AC Power input (Mains power) ..............................................................................................................12 Cabling Standards....................................................................................................................................12 Video/Audio Interface.............................................................................................................................13 Communications/Control Interface ......................................................................................................13 PCI Slot........................................................................................................................................................14 System Configuration ...................................................................................................................................14 Chapter 2: Quick Start ............................................................................... 15 Front Panel Features .....................................................................................................................................15 STATUS LEDs ................................................................................................................................................15 CONTROL KEYPAD (TRANSPORT) BUTTONS ...........................................................................................15 LCD SCREEN/CONFIDENCE MONITOR...................................................................................................16 ENCODER KNOB........................................................................................................................................16 Navigating the LCD ......................................................................................................................................16 “Quick Start” ..................................................................................................................................................17 To play a Test File: .....................................................................................................................................17 Chapter 3: Player Interface – Front Panel/LCD .................................. 18 Ch.1 Status / Ch. 2 Status.............................................................................................................................19 Playlist .........................................................................................................................................................19 3 Version 1.13 ES9600 User Guide Clip ............................................................................................................................................................. 20 Video.......................................................................................................................................................... 20 Frame ......................................................................................................................................................... 20 Shuttle ........................................................................................................................................................ 21 Loop ........................................................................................................................................................... 21 Mute ........................................................................................................................................................... 21 Settings ........................................................................................................................................................... 22 Audio.......................................................................................................................................................... 22 Date and Time.......................................................................................................................................... 23 LCD Screen ............................................................................................................................................... 23 Network Settings (Interface 1, Interface 2, Gateway, Ping IP) ......................................................... 24 Player ......................................................................................................................................................... 26 Reboot ....................................................................................................................................................... 27 Serial Port (RS232)..................................................................................................................................... 27 System Info ................................................................................................................................................ 28 Video - Settings......................................................................................................................................... 29 HDSDI Mode:............................................................................................................................................. 30 Genlock ..................................................................................................................................................... 30 Timecode .................................................................................................................................................. 31 Analog Ch1, Analog CH2 ....................................................................................................................... 31 Lock ................................................................................................................................................................ 32 Help ................................................................................................................................................................ 32 System Status................................................................................................................................................. 33 About ............................................................................................................................................................. 33 Chapter 4: Player interface – Web ......................................................34 Player Control ............................................................................................................................................... 34 Loading a Clip or Playlist onto a Player Channel ............................................................................... 35 Channel..................................................................................................................................................... 35 Using Transport Controls .......................................................................................................................... 35 Clip Information/Set as Autoplay .......................................................................................................... 36 Playlist Editor .................................................................................................................................................. 37 Creating a New Playlist ........................................................................................................................... 38 Adding Clips to a Playlist......................................................................................................................... 38 Rearranging Clips in a Playlist ................................................................................................................ 38 Managing the Playlist .............................................................................................................................. 38 To Remove a Clip from the Playlist:....................................................................................................... 38 Edit Playlist Properties: ............................................................................................................................. 39 To Delete a Playlist: .................................................................................................................................. 40 Setup .............................................................................................................................................................. 40 Serial Ports ................................................................................................................................................. 41 Networking - Ethernet.............................................................................................................................. 43 Video Mode.............................................................................................................................................. 44 Video Autoplay ........................................................................................................................................ 46 Video Analog Output.............................................................................................................................. 46 Video HDSDI Output ................................................................................................................................ 48 Audio Configuration ................................................................................................................................ 49 Player ......................................................................................................................................................... 50 About ......................................................................................................................................................... 51 Chapter 5: Linear Timecode................................................................52 Synchronized multi-player operation ........................................................................................................ 52 4 Version 1.13 ES9600 User Guide System Components ................................................................................................................................52 Show Control Programming ........................................................................................................................53 Command Descriptions...........................................................................................................................53 Control Example............................................................................................................................................54 Command sequence ..............................................................................................................................54 Reference ..................................................................................................................................................55 Configuring as a Timecode Master............................................................................................................55 Start Time....................................................................................................................................................55 Play At ........................................................................................................................................................55 Stop At ........................................................................................................................................................55 Configuring as a Timecode Receive (Slave)............................................................................................57 Chapter 6: Genlock ............................................................................. 58 ESGEN Genlock Mode .................................................................................................................................58 Master.........................................................................................................................................................59 ES Genlock (Slave) ...................................................................................................................................60 ES MS9200 Genlock (Slave) .....................................................................................................................60 Chapter 7: Data Transfer ...................................................................... 61 To Up-Load a Digital Cinema Package (DCP) using FTP:.......................................................................61 To Delete a DCP from the ES9600 using FTP .........................................................................................61 To Up-Load a DCP with Internet Explorer ..................................................................................................61 To Delete a DCP from the ES9600 using Internet Explorer ..................................................................63 To Up-Load a 9600 Software Upgrade ......................................................................................................63 Chapter 8: Remote Control Protocols ................................................ 64 Serial Port Pinout .......................................................................................................................................64 RJ45 Ethernet .................................................................................................................................................64 RJ45 Pinout.................................................................................................................................................64 Command Structure ................................................................................................................................64 Text Command Protocol (Telnet Protocol) ...............................................................................................65 To Run Telnet..............................................................................................................................................65 Testing ES/MSVPP Commands from the Web Interface .........................................................................65 Command Reference..................................................................................................................................67 Configuration Commands ......................................................................................................................67 Serial Port Commands .............................................................................................................................76 Ethernet Configuration Commands ......................................................................................................77 Media Management Commands .........................................................................................................79 Clip Commands........................................................................................................................................80 Playlist Commands ...................................................................................................................................81 Playback Commands ..............................................................................................................................87 Timecode Commands.............................................................................................................................89 GPIO Commands: ....................................................................................................................................91 System/Status Commands ......................................................................................................................93 Miscellaneous Commands – (Telnet Protocol) ....................................................................................95 Chapter 9: Using the GPIO Control Interface ..................................... 98 GPIO Physical Interface ...............................................................................................................................98 Opto-Isolated Digital Inputs ....................................................................................................................98 Input Circuit Wiring Configuration..........................................................................................................98 Relay Changeover contacts (Digital Outputs)....................................................................................99 5 Version 1.13 ES9600 User Guide GPIO Command Protocol ........................................................................................................................ 100 Digital Outputs........................................................................................................................................ 100 Digital Inputs ........................................................................................................................................... 100 Appendix A: TCP/IP Communications.............................................102 An Introductory Note ................................................................................................................................. 102 Ethernet Communication ......................................................................................................................... 102 RS-232....................................................................................................................................................... 102 Ethernet ................................................................................................................................................... 102 TCP/IP Addressing ...................................................................................................................................... 102 Dynamic Assignment............................................................................................................................. 102 Static IP Assignment............................................................................................................................... 103 The IP Address ............................................................................................................................................. 103 Network and Host Identifiers ................................................................................................................ 103 Class Names............................................................................................................................................ 103 Choosing IP Addresses .............................................................................................................................. 104 Connecting to an Existing Network..................................................................................................... 104 Establishing an Independent Network ............................................................................................... 104 The Subnet Mask......................................................................................................................................... 104 Pinging a Device ........................................................................................................................................ 105 Performing a Ping................................................................................................................................... 105 Example 1: A successful Ping ............................................................................................................... 105 Example 2: Unsuccessful Pings ............................................................................................................. 105 Appendix B: Encoding Guidelines ..........................................................107 Encoding and Packaging Overview....................................................................................................... 107 Video Track Files ..................................................................................................................................... 107 Audio Track Files ..................................................................................................................................... 107 Reels ......................................................................................................................................................... 108 Composition Playlist ............................................................................................................................... 108 Packing List and Asset map ................................................................................................................. 108 Supported Video Formats ......................................................................................................................... 108 JPEG-2000 Codestream Restrictions........................................................................................................ 109 Audio Encoding Guidelines.................................................................................................................. 110 Composition Playlist Guidelines ........................................................................................................... 110 Electrosonic Show Playlist Guidelines.................................................................................................. 111 Encoding Related Specifications............................................................................................................. 112 Appendix C: Specifications ..............................................................113 Video Outputs............................................................................................................................................. 113 Video Connector ................................................................................................................................... 113 Network........................................................................................................................................................ 113 Digital Video Decoder .......................................................................................................................... 113 Video Output Formats........................................................................................................................... 114 Video Outputs Electrical ....................................................................................................................... 114 Audio Outputs............................................................................................................................................. 114 Audio Processing ........................................................................................................................................ 114 System Control Features............................................................................................................................ 115 Genlock Input......................................................................................................................................... 115 Linear Timecode (LTC) .......................................................................................................................... 115 ESGEN in and out .................................................................................................................................. 115 6 Version 1.13 ES9600 User Guide Physical Specifications .............................................................................................................................. 115 Index.......................................................................................................... 116 7 Version 1.13 ES9600 User Guide Chapter 1: Chapter 1: Introduction/Quick Reference Guide Introduction The Electrosonic ES9600 JPEG2000 Player is a high quality video and audio playback appliance capable of providing one or two video playback channels at 2K and HD output resolutions. It is designed to meet the most demanding 3D and stereoscopic applications as well as more traditional single display requirements. The ES9600 also features a built-in full-color video display (LCD-TFT), while being the interface for local control of the ES9600, also functions as a ‘confidence monitor’ for video output during playback. The user has the ability to control the ‘alpha-blend’ between the user interface display and the video playback display resulting in a moving video ‘background’ to the user display interface. The amount of ‘blend’ can be varied to the user’s preference or left alone to be switched between user interface and video monitoring as needed. Complementing its video capabilities the ES9600 provides 16 channels of AES/EBU uncompressed digital audio. The ES9600 supports playback of visually lossless MXF wrapped Digital Cinema Package (DCP) files. The DCP includes video, audio and other associated content encoded to the DCI specification. Features that enable multi-unit synchronization and integration into the most demanding applications are available through the ESGEN Video Genlock, and Timecode (LTC) interfaces. Of course, the ES9600 manipulates all program material in the digital environment to ensure that image quality is maintained irrespective of the number of times a file is displayed or copied. When integrated into a computer network, the ES9600 is accessible from remote locations making content transfer and remote control very easy. Main Features 2U 19” Rack mounted enclosure ensures maximum reliability, long product life and ease of installation Intuitive front panel user interface with TFT LCD display and rotary encoder for easy local control of the player Dual redundant power supply units (PSUs) Web interface for remote control of the ES9600 Not a PC thus no external keyboard/mouse/display requirements Support for a wide range of remote control options using Ethernet TCP/IP or Serial RS232 interfaces Networking capabilities provide the means to remotely upload new audio/video files to the Player Dual GigaBit Ethernet links provide simultaneous control and data transfer connections 8 Version 1.13 ES9600 User Guide Chapter 1: Introduction/Quick Reference Guide 1TByte of internal media storage 16 channels of uncompressed digital audio; AES/EBU 24bit @ 48/96KHz (NOTE: 16 channel audio is supported with 4:4:4 video format only. 4:2:2 video formats support 8 audio channel only. See below) Linear Time Code (LTC) features for strict system timing control ESGEN genlock capable for multi-unit synchronous operation 4 Opto-isolated inputs and 4 changeover relay contact outputs for enhanced show control Monte Vista Linux embedded OS Support for ESCAN remote control (system control software by Electrosonic) Video Outputs Supported video output resolutions: 2048x1080p (2K), 1920x1080p and 1280x720p ¾ 2048 x 1080 @24fps 4:4:4 (16 channel audio) ¾ 1920 x 1080p @24fps 4:4:4 (16 channel audio) ¾ 1920 x 1080p @25fps 4:4:4 (16 channel audio) ¾ 1920 x 1080p @30fps 4:4:4 (16 channel audio) ¾ 1920 x 1080 @29.97fps 4:2:2 (8 channel audio) ¾ 1280 x 720p @50fps 4:4:4 (16 channel audio) ¾ 1280 x 720p @60fps 4:2:2 (8 channel audio) Two DVI/I outputs RGB/YPrPb SMPTE274/296M Dual Link HDSDI SMPTE 374M or two single link HDSDI SMPTE292M Support for 12/10 bit 4:4:4 XYZ/RGB/YCrCb and 12bit 4:2:2 YCrCb NOTE: The unit can be set to function either as a dedicated HDSDI device or a dedicated DVI/I device. Please refer to the relevant sections throughout this guide for ‘how to’ information on configuring the video outputs. 2-Channel Output two discrete video signals to different display devices. 2-Channel -Locked Output two perfectly synchronized video signals to a device that is capable of receiving such an input. This is ideal for 3D projection situations. 1-Channel Output a single analog or digital signal to a display device connected to HDSDI-1 or DVI-1. NOTE: With HDSDI 4:4:4 both video outputs (HDSDI-1 and HDSDI-2) are connected to the display device. 9 Version 1.13 ES9600 User Guide Chapter 1: Introduction/Quick Reference Guide Installation, Warnings and Cautions NOTE: It is expected that the unit will be installed using professional wiring techniques and procedures appropriate for multimedia systems. The ES9600 can be mounted in a conventional 19” equipment rack. Ventilation NOTE: When installing multiple ES9600s in an equipment rack or other enclosed area it is highly recommended that the space be equipped with an active cool air intake and warm air exhaust system. To allow sufficient ventilation and cooling, four conditions must be met: 1. Clear space must be maintained at all times at the sides and to the rear of the player. The clear space required at each side is 2” (51mm); the clear space required at the rear is 6” (152mm). Cables to and from the unit are expected within this space but must be managed (cable clips / lacing bar) to prevent the obstruction of any ventilation holes. 2. The clear space to the sides and rear must also allow air movement vertically within the height of the equipment rack. 3. The front of the player must remain unobstructed at all times. 4. The air flow into and out of the unit must not be impeded by covering the ventilation openings. These requirements are usually met by any typical 19” rack mount environment. Power connection WARNING: For electrical safety the ES9600 player uses CLASS I construction (as defined in UL - IEC - EN 60065). The player must only be connected to 3 pole MAINS socket outlets with protective earth / ground connection, using an approved 3 conductor mains power cord (cable) of the type supplied with the player. Mains disconnect devices The mains connectors which supply power to this device are considered to be the disconnect devices and in order to comply with safety requirements must remain readily operable. Do not modify the mains plugs or sockets supplied with or part of this device in any way that would prevent them from being used to readily disconnect the device from the power supply for servicing purposes. WARNING: Physically disconnect BOTH power cables from the Player before opening the case for servicing. 10 Version 1.13 ES9600 User Guide Chapter 1: Introduction/Quick Reference Guide Air Filter(s) The player is equipped with 2 foam air filters which are accessible by removing the front cover. These filters should be checked every 4 to 6 months and cleaned or replaced as required, more frequently in environments containing higher levels of particulates (dust etc). Do not subject the Player to excessively dusty environments. To clean air filters: 1. Remove the front panel (8 x 6-32 screws) to access the foam filters. 2. Gently lift each filter from the receptacle. 3. Use compressed air to remove any accumulated dust. NOTE: If the user determines that the air filters are damaged please contact Electrosonic Inc. for replacements. 4. Re-insert the filters into the receptacles on the unit. 5. Replace the front panel and secure with the 8 x 6-32 screws removed earlier. Protection from liquids The player must not be exposed to dripping or splashing liquids and no objects filled with liquids, such as drink cans or bottles, shall be placed on the player. Ignition sources Do no expose the player to any open flame (e.g. flame from a match or lighter). Battery precautions The ES9600 player is provided with a permanently installed (factory soldered in place) lithium battery. CAUTION: Do not attempt to remove the battery. The battery may not be replaced by the user. A qualified technician may replace the battery though the procedure is discouraged as it will require disassembly of the Player. The battery must not be exposed to excessive heat such as the temperatures associated with soldering or hot air tools, direct sunlight, fire or the like. If the battery is replaced, the old battery must be disposed of according to applicable environmental standards, follow recommendations for hazardous waste, recycle accordingly. Normal operating conditions The ES9600 is designed to operate in an environment that conforms to the operating conditions listed below. Ensure that the facility is equipped with the necessary climate control provisions. Temperature An ambient temperature between 50°F and 104°F (10 °C and 40 °C) Humidity A relative humidity 5 – 95% non-condensing. 11 Version 1.13 ES9600 User Guide Chapter 1: Introduction/Quick Reference Guide Player Connections All system connections are made at the back of the Players. Refer to the following sections for details on each of the areas highlighted in this diagram. AC Power input (Mains power) The unit features Dual Switched/Fused/Shielded AC power inlets. Use the switches on each module to power-up or power-down as needed. Ensure both AC power supplies are connected when the ES9600 is installed in a system. Though the unit will perform reliably while running on a single AC supply, doing so will defeat the DualRedundant power supply feature important in critical applications. NOTE: REPLACE FUSE(S) WITH F1.6 AH 240V ONLY. Cabling Standards To avoid interference with other equipment, FCC and CE standards require that radio frequency emissions from electronic equipment are maintained below certain limits. To ensure that radiated emissions from systems using the 9600 player are maintained below these limits, it is important to use the correct cable types as shown below: SIGNAL TYPE CONSTRUCTION EXAMPLE CABLE TYPE AES/EBU audio Coax with braid and 100% foil shield Gepco VPM2000 or Belden 1505A HD-SDI Coax with braid and 100% foil shield Gepco VPM2000 or Belden 1505A DVI-I Multi core coax with overall 100% foil shield FRYS.com #: 4557427 Serial COMMs Multi pair with 100% foil shield Belden 1421A Network Unshielded twisted pair Belden 1583A GPIO Multi pair with 100% foil shield Belden 1421A 12 Version 1.13 ES9600 User Guide Chapter 1: Introduction/Quick Reference Guide In addition, the ferrite cores supplied with the player must be attached to any serial communication cable or GPIO cable connected to the player. The ferrite core should simply be closed around the cable (close to the connector at the player) and snapped shut. Video/Audio Interface From left: AUDIO – AES/EBU Digital Audio Output. Channels 1-16 (2 channels per BNC connector) HD/DVI-1 – High Definition Video output (Digital and Component Video). Connection for a High Definition Video display device HDSDI-1 – HD-SDI Video Output 1 (BNC) HDSDI-2 – HD-SDI Video Output 2 (BNC) HD/DVI-2 – High Definition Video output (Digital and Component Video). Connection for a High Definition Video display device GENLOCK INPUT – (FUTURE) BNC socket. Connect external Genlock Black and Burst signal generator for multiple player synchronization ESGEN – In/Out Link for Genlock connection with other ES devices (Din connectors) LTC IN/OUT – 2 Phono sockets. Connect Linear Time Code (LTC) for system control (Refer to Chapter 4: Linear Timecode LTC) Communications/Control Interface The communication and control interface is as follows: DUAL GIGABIT ETHERNET – Access the LAN for TCP/IP control capability and data transfer (Dual RJ45) RS232 – Control port (comm.) I/O port for local computer control (D9 x 2) GPIO INTERFACE – Optional control ports for external devices (Refer to Chapter 13) 13 Version 1.13 ES9600 User Guide Chapter 1: Introduction/Quick Reference Guide PCI Slot (Future) System Configuration Use the ES9600 in simple stand-alone configurations consisting of the player, a display method and an audio system, or in more complex network integrated systems. The following diagram illustrates a generic system utilizing an ES9600. Your actual system configuration may be different but will be some variant of that shown. The Show Control Computer is only necessary when using the unit in a network (LAN) controlled system, or locally controlled through the RS232 port. Refer to Chapter 8: Remote Control Configuration, for more detail. 14 Version 1.13 ES9600 User Guide Chapter 2: Quick Start Chapter 2: Quick Start Use the information in this chapter to familiarize yourself with the control buttons on the unit and play the test clip included as part of your ‘quick-start’ system verification. Front Panel Features All local user-manageable functions of the Player are accessible from the front panel. Refer to Chapter 8: Remote Control Protocols for information on using the ES9600 in a networked system. The following diagram illustrates the ES9600 front panel layout: The front panel is equipped with a number of user interface and monitoring features. STATUS LEDs Indicate (left to right in diagram): VIDEO active Hard Disk 1 active Hard Disk 2 active Hard Disk 3 active (Future) Hard Disk 4 active (Future) Ethernet 1 active Ethernet 2 active CONTROL KEYPAD (TRANSPORT) BUTTONS Last Clip – Press this button to load the previous Clip in a Playlist. Does not function if no Playlist is loaded. Frame Mode – Press this button, then and rotate <ENC> to step frame by frame, forward or reverse, through the clip while clip is in Play mode Shuttle Mode – Press this button, then rotate <ENC> to ‘shuttle’ forward or backwards through the clip at a preset rate controlled by <ENC> 15 Version 1.13 ES9600 User Guide Chapter 2: Quick Start Next Clip – Press button to load the next clip in a Playlist. Does not function if no Playlist is loaded. Play/Pause - Press this button to start or pause the current clip Stop - Press this button to stop the current clip PREV – Press this button to return to the previous menu/page. NOTE: Throughout this guide the PREV button will be referred to as <PREV>. ENTER – Press this button to initiate an action from the user interface. NOTE: Throughout this guide the ENTER button will be referred to as <ENTER>. NOTE: ‘Trick’ features (Last Clip, Frame Mode, Shuttle Mode, Next Clip) are not supported with 48fps DCPs. LCD SCREEN/CONFIDENCE MONITOR This full-color video monitor displays the User Interface for local control as well as any video being played. ENCODER KNOB Rotate this knob left/right to navigate the menu tree. Press <ENTER> or <PREV> buttons as needed. NOTE: Throughout this guide the ENCODER will be referred to by <ENC>. Navigating the LCD To navigate the LCD screens: Rotate <ENC> left/right to scroll up/down the visible options Press <ENTER> to select an option; this is the ‘enter’ command Press <PREV> to go back ‘up’ the menu to the previous page – you may navigate all the way back to the Main Menu this way. 16 Version 1.13 ES9600 User Guide Chapter 2: Quick Start “Quick Start” Assuming correct connection of the ES9600 into a display system: Turn ‘on’ the two mains-power OFF/ON switches at the rear of the player. The white LED backlit buttons on the front panel will flash on/off about 8 times followed by an Electrosonic “splash-screen” still image on the video display. NOTE: Should the buttons not illuminate, verify that the power supplies are securely connected then toggle the power switch between OFF/ON. The front panel video monitor will display Main Menu. The Player is ready for operation. To play a Test File: The user may wish to view a video Test File present on the ES9600: 1. In the Main menu rotate <ENC> to highlight ‘Ch. 1 Status’ and press <ENTER> to open the ‘Channel 1 Player Status’ page. 2. Use <ENC> to highlight the Clip window and press <ENTER> 3. Use <ENC> to scroll the list of available video clip (DCP folder) files. 4. Press <ENTER> to choose a clip. The display reverts to Channel 1 Player Status and the new name appears in the Clip window. 5. Press <PLAY/PAUSE> to start playing the file. The LCD screen will display a ‘progress-bar’ under a header ‘Playing’, as the clip runs. If connected to a display system the video output will appear. 6. Optional: Use <ENC> to highlight the Video Mode icon, Press <ENTER>, the current video will appear on the LCD. Press <PREV> to return to the ‘Channel 1 Player Status’ window. NOTE: Press <PREV> to step backwards through the ‘menu tree’ if needed. 17 Version 1.13 ES9600 User Guide Chapter 3: Chapter 3: Player Interface – LCD Player Interface – Front Panel/LCD The 9600 player is very easy to use and most of its functionality can be accessed through the front-panel interface, which is described in this chapter. Refer to the previous chapter for more information on the individual front-panel control buttons. Certain ‘advanced’ features can only be accessed through the on-line user interface, which is described in the next chapter (Player Interface – Web). Having correctly installed your ES9600 into the AV system, follow the steps below to access the font panel controls: 1. Turn ‘ON’ the two mains-power OFF/ON switches at the rear of the player. The white LED backlit buttons on the front panel will flash on/off about 8 times followed by an Electrosonic “splash-screen” still image on the video display. NOTE: Should the buttons not illuminate, verify that the power supplies are securely connected then toggle the power switch between OFF/ON. The “splash-screen” (shown in the image below) will appear for a few moments to be replaced by the default (Main Menu) display. 2. The Main Menu display: The unit is ready for operation/configuration. 3. Use the front panel encoder knob <ENC> to navigate the interface and highlight (select) the various Icons. NOTE: Throughout this User Guide ‘<ENC>’ indicates that the user is to rotate the Encoder knob to make a selection from a number of options. 18 Version 1.13 ES9600 User Guide Chapter 3: Player Interface – LCD 4. Press <ENTER> to access the function pages ‘within’ each Icon Use the main menu page to access all of the functionality of the ES9600. The Main Menu display consists of a number of screen icons. Rotate <ENC> as needed to bring each icon into view: Ch. 1 Status – Manage the Video for Channel 1/Output 1 Ch. 2 Status – Manage the Video for Channel 2/Output 2 (NOTE: Not displayed in default mode – Refer to Settings – Video Settings) Settings – Manage Player performance settings Lock – PIN access to Lock/Unlock the player Help – (FUTURE) About – Player Firmware Versions Each menu page and any sub-pages will be described in the following sections. Ch.1 Status / Ch. 2 Status Both menu pages are identical except as noted below. NOTE: The Video Mode feature is not supported on Channel 2 - see Video Mode below. In the Main Menu, rotate <ENC> to select Ch. 1 Status or Ch. 2 Status (when in 2-Channel Video mode) then press <ENTER> to open the status display: The display shows the current ‘state’ of Channel 1 (or Channel 2) whether Playing, Paused or Stopped along with a progress bar and current clip time hour:min:sec:frame and total clip length in hour:min:sec:frame. NOTE: The ‘frame’ segment of the counter is not updated during playback thus only hour:min:sec fields will be active. When in ‘Paused ’, ‘Frame’ or ‘Shuttle’ mode the counter will show the frame number. NOTE: ‘Trick’ features (Frame Mode, Shuttle Mode) are not supported with 48fps DCPs. Rotate <ENC> to highlight in turn: Playlist This window displays the currently loaded Playlist. Press <ENTER> to access available Playlists. Use <ENC> to navigate to a different Playlist and press <ENTER> to choose a different one. The new Playlist will appear in the display window. 19 Version 1.13 ES9600 User Guide Chapter 3: Player Interface – LCD Press <PLAY/PAUSE> button to run the Playlist. Clip This window displays the currently loaded Clip. Press <ENTER> to access available Clips. Use <ENC> to navigate to a different Clip and press <ENTER> to choose a different one. The new Clip will appear in the display window. Press <PLAY/PAUSE> button to play the Clip. NOTE: Ensure that the 9600 is configured for 1-channel output before attempting to load 4:4:4 or Stereoscopic content. If the player is configured for 2-channel output mode these formats will not load. To change Video Mode before loading a clip, use the <ENC> and navigate to Settings | Video | Video Mode interface. Video Set the LCD to display the currently playing content. Use <ENC> to highlight ‘Video’ Press <ENTER> to activate the display function. Frame Use <ENC> to highlight the Frame mode icon then Press <ENTER> Rotate <ENC> to the left or right to step forward or backwards frame by frame through the clip Press <PREV> to revert to the Channel 1 (or Channel 2) Status display. NOTE: Press <FRAME> Button to directly access the ‘Frame’ feature from any other ‘page’ of the user interface. 20 Version 1.13 ES9600 User Guide Chapter 3: Player Interface – LCD Shuttle Use <ENC> to highlight the Shuttle Mode icon then Press <ENTER> This feature allows <ENC> to be used like a Shuttle control wheel on a VTR by setting the Fast Forward/Reverse playback speed. Rotate <ENC> to Fast Forward / Reverse through the clip at up to 16 times regular playback speed. Rotate <ENC> until the indicator is in the middle (vertical) position to play the file from the point reached in ‘shuttle’ mode Press <PREV> to revert to the Channel 1 (or Channel 2) Status display. NOTE: Press <SHUTTLE> Button to directly access the ‘Play Speed’ feature from any other ‘page’ of the user interface. Loop Enable/disable the loop-play of the current clip: Use <ENC> to highlight ‘Loop’. Press <ENTER> to activate/deactivate the function. Mute Enable/disable the audio output from all audio channels (1-16): Use <ENC> to highlight ‘Mute’. Press <ENTER> to activate/deactivate the function. 21 Version 1.13 ES9600 User Guide Chapter 3: Player Interface – LCD Settings Use this menu page to access features that control the behavior of the player and how it interacts with the AV system and Network: NOTE: Display of the ‘Video’ icon is hidden in the default screen. Use the <ENC> to highlight the icon for a feature and press <ENTER> to open the page. Audio Control audio output. NOTE: The appearance of the ‘Audio Settings’ interface will depend on the Video Mode settings. When Video Mode is set as ‘2 Channel’ or ‘2 Channel-Locked’ the image at left is displayed. When Video Mode is set at ‘1 Channel’ the image at right is displayed. Refer to the ‘Video Settings | Video Mode’ section later in this chapter. Use <ENC> to highlight/select the feature and Press <ENTER> to set the function. Use <ENC> to adjust the various sliders as needed and Press <PREV> to return to the menu page. Volume – Set the output level for groups of eight audio channels 1-8, 9-16 Delay – Set a delay value for groups of eight audio outputs 1-8, 9-16. The default delay value is ‘0’ms. 22 Version 1.13 ES9600 User Guide Chapter 3: Player Interface – LCD Date and Time Set the Player’s internal clock to match a Time Standard. Use <ENC> to highlight/select a Time/Date window and Press <ENTER> to edit the content. Use <ENC> to adjust the value as needed and Press <ENTER>. Pres <PREV> when finished then use <ENC> to select Yes or No at the ‘Apply new settings?’ prompt. The System Settings page is displayed. NOTE: The user must change these settings if needed to accommodate for Daylight Savings Time. LCD Screen While using the LCD controls, the user may wish to see some version of the on-going video at the same time. The LCD Screen interface allows this ‘alpha blend’ capability. Use <ENC> to highlight/select an item in the display. Use <ENC> to adjust the fader as needed and Press <ENTER>. NOTE: The following display shows the LCD Screen control as it will appear with no video loaded; no adjustment is possible. When a video clip has been loaded the LCD Screen control will appear ‘alpha blended’ as shown below. GUI/Video – This is a very unique feature. The fader adjusts the ‘alpha blend’ between the control interface display and the video output display. Fully left displays 100% User interface; fully right displays 100% video. Any in-between value will display a ‘blend’ of both images. 23 Version 1.13 ES9600 User Guide Chapter 3: Player Interface – LCD For example: The image at left shows the effect of ‘alpha-blend’ about 55% between the ‘tiger’ image and the LCD Screen settings display. Brightness – Adjust the LCD brightness; Left is darker, Right is brighter Contrast – Adjust the LCD Contrast Turn OFF LCD backlight – Disable the LCD display. Press <PREV> to enable the display Factory Settings - Restore the factory default LCD settings Network Settings (Interface 1, Interface 2, Gateway, Ping IP) This menu allows the ES9600 to be set-up for use in a LAN; use it for access to all of the Network based settings for the player. Use <ENC> to highlight/select an item for editing and Press <ENTER> to open the relevant interface for editing: Interface 1 – Allow connection to a network Interface 2 – Allow a second connection to the network (Refer to Chapter 4: Player Interface – Web, section Setup | Networking – Ethernet for an example of dual IP usage). Gateway – Allow connection to the internet Ping IP – Ping another device on the same network. This feature is very useful for identifying whether another device is configured correctly within the network. Refer to Appendix A: TCP/IP Communications for more information on Networking 24 Version 1.13 ES9600 User Guide Chapter 3: Player Interface – LCD Network Interface 1, 2 IP – Adjust the IP as required Netmask – Adjust the Netmask as required by the network administrator – this is usually done at the time of installation in a network and will not be changed. Enable DHCP – Select this feature to toggle DHCP on or off. Press <ENTER> to Disable DHCP for access to the IP Settings. NOTE: If DHCP is checked the IP and Netmask settings are determined automatically by the network. Use <ENC> to highlight/select an item in the IP Settings display and Press <Apply>. NOTE: This would be a good time to record the ES9600’s IP address and name (Refer to section ‘System: Computer Name’ later in this Chapter) as this information will be required for transferring JP2K files to the ES9600 with an FTP application (refer to following chapter). Gateway Use <ENC> to adjust the setting as needed and Press <Apply>: Interface 1/Interface 2 – Choose Interface 1 or 2 Gateway – Adjust the Gateway as required 25 Version 1.13 ES9600 User Guide Chapter 3: Player Interface – LCD Ping IP Use this interface to ‘Ping’ another device on the network: Use <ENC>/<ENTER> to enter an IP Address. Use <ENC> to select the Ping button and Press <ENTER> Player Give the player an identity: Use <ENC> to highlight Name and press <ENTER> an ‘Alpha-Numeric’ keyboard appears: 26 Version 1.13 ES9600 User Guide Chapter 3: Player Interface – LCD Use the <ENC> to highlight/select each character from the keyboard. Press <ENTER> to input each character. NOTE: Select ‘Aa’ icon to use ALL CAPS. Press <PREV> to return to the Player screen Repeat procedure for the Location identification. Reboot Use <ENC> to highlight the ‘Reboot’ icon; Press <ENTER>. Use <ENC> to select ‘Yes’ or ‘No’ from the “Are you sure you want to shut down the machine?” window. Press <ENTER> to accept. The 9600 will automatically cycle power and restart. Serial Port (RS232) From the Main menu, use <ENC> /<ENTER> to select Serial Port: 27 Version 1.13 ES9600 User Guide Chapter 3: Player Interface – LCD Press <ENTER> to open the COM 1 Display. This menu allows setup of the ES9600 Comm Port(s) for remote control with ESCAN or other control applications. Use <ENC> to highlight/select an item in the display, Press <ENTER> to edit. Use <ENC> to adjust the value from the drop-down options; Press <ENTER> to save the setting. MODE – Select from: Passthrough, Device, Control or LCD Pass Through - Use the “Pass Through” setting to control another device such as a video projector (RS232) from the ES9600 with ESCAN or some other control system. NOTE: When using the Pass Through setting ensure that the Baud Rate, Parity, Data Bits and Stop Bit are set to match the device being controlled. Also, in your remote control program, set the IP Port Number to 4001 and the IP address to that of the ES9600 in use. In Pass Through mode any TCP/IP control string appearing on port 4001of the ES9600 is passed to the RS232 port. Baud Rate – Select from the options: 300, 600, 1200, 4800, 9600, 19200, 38400, 57600, 115200 Parity – Select from: None, Even or Odd Data Bits – Select from 8 or 7 Stop bits – Select from 1 or 2 System Info View a current ‘image’ the Player’s connections and settings. Use <ENC> to highlight the ‘System Info’ icon, Press <ENTER> to view the display. 28 Version 1.13 ES9600 User Guide Chapter 3: Player Interface – LCD Use the <ENC> to scroll to hidden parts of the display. Video - Settings Manage Video output settings for ‘Video’, ‘HDSDI’, ‘Genlock’, ‘Timecode’, ‘Analog Ch1’ and ‘Analog Ch2’. NOTE: ‘Analog CH2’ will not be displayed until the unit is set to 2-Channel Video Mode. Use <ENC> to highlight/select an icon and Press <ENTER> to open the dialog page: Video: Video Mode: 2-Channel – Enable/Disable dual channel output mode Video mode: 2-Channel – Locked – Lock the dual channel mode 29 Version 1.13 ES9600 User Guide Chapter 3: Player Interface – LCD Video mode: 1-Channel – Enable/Disable single Video channel output Output Enable – Toggle the output between DVI/DAC and HDSDI Ch. 1 loop enabled – Enable/Disable Channel 1 loop Play Ch. 2 loop enabled – Enable/Disable Channel 2 loop Play NOTE: When in 1-Channel mode and playing 4:4:4 content, all outputs are active (Channels 1 and 2). When in 1-Channel mode and playing 4:2:2 content, only Channel 1 outputs are active. HDSDI Mode: HDSDI Mode: Single Channel Dual Channel @ 422 12 bits Dual Channel @ 444 10 bits Dual Channel @ 444 12 bits Colorspace: RGB YCrCb BT.601 YCrCb BT.709 Genlock See Chapter 6: Genlock for more detail. Master – Set 9600 to send its internally generated ESGenlock signal to other ESI products including 9600s ES Genlock – Set 9600 to receive ES Genlock from another ES product or 9600 ES MS9200 Genlock – Set 9600 to receive MS9200 Genlock from an MS9200 player 30 Version 1.13 ES9600 User Guide Chapter 3: Player Interface – LCD Timecode Timecode Operation Mode: Chase - In Chase Mode the unit will track (stay in sync with) an in-coming Timecode signal. Trigger - In Trigger Mode the unit will respond to a specific Timecode and continue with no further response to the ongoing Timecode. signal Analog Ch1, Analog CH2 Colorspace: 31 Version 1.13 ES9600 User Guide RGB YPrPb BT.709 Chapter 3: Player Interface – LCD Lock This interface allows the user to set a password to protect the player settings from unauthorized modification. To Lock: 1. Use <ENC> to highlight the text window and Press <ENTER>. An alphanumeric keyboard opens. Use <ENC> to navigate to and <ENTER> to save each password character, Press <PREV> when finished. The password appears in the Player Lock display. 2. Use <ENC> to highlight the ‘Lock’ icon, Press <ENTER>. The Player is locked To Unlock: 1. Use <ENC> to highlight the text window and Press <ENTER>. An alphanumeric keyboard opens. Use <ENC> to navigate to and <ENTER> to save each password character, Press <PREV> when finished. The password appears in the Player Lock display. 2. Use <ENC> to highlight the ‘Unlock’ icon, Press <ENTER>. The Player is unlocked Help Use <ENC> to highlight the ‘Help’ icon; Press <ENTER>. Information for contacting Electrosonic appears: 32 Version 1.13 ES9600 User Guide Chapter 3: Player Interface – LCD System Status Use <ENC> to highlight the ‘System Status’ icon; Press <ENTER>. A real-time listing of current Voltages and Temperatures as reported by the internal sensors of the unit is displayed. This is very useful for Technical Support. About Use <ENC> to highlight the ‘About’ icon; Press <ENTER>. A current ‘Firmware Versions’ list appears. This is very useful for Technical Support. 33 Version 1.13 ES9600 User Guide Chapter 4: Chapter 4: Player Interface -Web Player interface – Web Use the Web Interface to access features of the Player that are not accessible from the front-panel. The following web browsers have been tested with the ES9600: Apple Safari (Mac and Windows) Mozilla Firefox (Mac, Windows, Linux) Microsoft Internet Explorer 7 (Windows) To connect to the Player Web Interface: 1. Open a supported web browser. 2. Type the IP address of the Player you wish to communicate with into the address field of your browser. 3. Press Enter on the computer keyboard to open the Web Interface. Click the corresponding tab in the menu bar to access the desired page: Player Control – Control the Transport (similar to a VTR). This is the default ‘page’. Properties associated with specific clips and/or playlists are accessible here as well. Playlist Editor - Manage Playlists and Playlist Content files (DCPs); manage clip specific Timecode settings Setup - Manage the player Setup/Configuration and interaction with the network system. Player Control The Player Control page provides channel status information and control functionality for the Player: Use the ‘Channel Control’ window(s) to perform ‘transport’ functions that mimic the use of a video deck. Use the ‘Media Browser’ window select content for playback Channel Controls Media Browser 34 Version 1.13 ES9600 User Guide Chapter 4: Player Interface -Web NOTE: When the 9600 is configured as a single channel device Channel 2 control window is not displayed. Loading a Clip or Playlist onto a Player Channel 1. Click the “+” icon in the panel header to open either the Clip Browser or Playlist Browser. 2. Scroll through the list of available content 3. Drag the desired Clip or Playlist from the Media Browser panel into Channel Control panel on the left half of the interface. Release the mouse button when the Clip/Playlist is over the desired channel. A green check mark will appear when the Clip/Playlist can be loaded. 4. Click the Play icon to begin the ‘show’. Channel This portion of the page displays information unique to Channel 1. When the 9600 is configured in 2-Channel mode the display will show Channel 1 and Channel 2 windows. Aside from the Transport Controls at the lower portion of each Channel display other ‘real-time’ status information is shown for the current content: Timecode: The running timecode progress at 1 second intervals Frame: This runs in sync with Timecode but when paused the actual frame will be displayed Duration: The total file running time Playlist: The name of the current Playlist if applicable Clip: The name of the current Clip if applicable Clip Info: Video format, frame rate etc. of the currently running clip Progress bar: A blue bar tracks the progress of a clip in play. If the clip is paused the progress bar will ‘freeze’; if the clip is stopped the progress bar will go blank. PROGRESS BAR JOG SHUTTLE Using Transport Controls Hover your mouse over each ‘button’ and a ‘tooltip’ will identify the feature it controls. NOTE: Shuttle tooltips are only displayed when being activated (see below). From left to right the controls are: Shuttle – Scroll back or forward through the current clip. Tooltips will display when you drag the Shuttle pointer away from its default (Play) position: Drag the pointer to the left to play in reverse: increments of -1x (normal speed but in reverse), -2x, -4x, -8x and -16x normal speed. Drag the pointer to the right to 35 Version 1.13 ES9600 User Guide Chapter 4: Player Interface -Web play forwards in increments of 1x (normal speed), 2x, 4x, 8x and 16x normal speed. You may also ‘Pause’ the 9600 by dragging the pointer one stop to the left from the default position. Previous Clip – Load the previous clip from within an active Playlist Stop – Halt the current clip (clip file will Recue) Pause – Freeze playback on the current frame Play –Play the currently loaded Clip or from the start (after a Stop command) or from a pause Next Clip – Load the next clip from within the active Playlist Jog - When a channel is paused, click within the icon to step forward or backward through the content frame by frame. Increments are +/- 1, 5, 10 and 20. NOTE: ‘Trick’ features (Last Clip, Frame Mode, Shuttle Mode, Next Clip) are not supported with 48fps DCPs. Clip Information/Set as Autoplay Audio/video details about a Clip are available from the Media Browser panel as well as the ability to set a clip to load and play automatically each time the 9600 starts-up. To access the ‘Clip Info’ dialog: 1. Select a Clip from the Media Browser panel. 2. Press the RIGHT mouse button to access a pop-up menu. 3. Click the ‘View Clip Info’ menu item to display clip information: 36 Version 1.13 ES9600 User Guide Chapter 4: Player Interface -Web 4. Click the ‘X’ to close the Clip Info window. To access the ‘Set as Autoplay’ dialog: 1. Open the Player Control. 2. In the Clip Browser window (right side of display) right-click the file desired. 3. Click ‘Set as Autoplay’ in the menu that appears. 4. Check either or both boxes to enable/disable Autoplay depending on the Channel configuration of the 9600. 5. Click ‘OK’ to save the setting and exit the window. Click ‘Cancel’ or ‘X’ to exit without saving setting. Playlist Editor Use this interface to manage playlists and content. NOTE: All video clip files to be used in a Playlist must be of identical format in order to ensure smooth transition from clip to clip. Although you can ‘build’ an invalid Playlist with multiple clips of different formats, you will receive an error massage in the player control interface and the Playlist will not run. 37 Version 1.13 ES9600 User Guide Chapter 4: Player Interface -Web Creating a New Playlist 1. Click the ‘New’ button in the Playlist Browser. A “New Playlist” dialog box appears. 2. Enter the name of the new playlist and click the “OK” button. The new playlist appears in the Playlist Browser panel. Adding Clips to a Playlist 1. Click the desired Playlist in the Playlist Browser panel. The Playlist contents appear in the Playlist Editor panel. 2. Use the mouse to drag Clips from the Clip Browser into the desired position in the Playlist Editor. A dotted bar appears at the position in the Playlist where the Clip will be added. Rearranging Clips in a Playlist 1. Click and hold the LEFT mouse button on the Clip you wish to move. 2. Drag the Clip to a new position in the Playlist. A dotted bar appears at the position in the Playlist where the Clip will be moved. Managing the Playlist Right-click an item in the Playlist Editor (middle window): This menu offers quick access to: ‘View Clip Info’ – Same as in player Control | Clip browser Edit Playlist Properties – See section later in this chapter. Remove Clip – Click to remove a clip from the playlist To Remove a Clip from the Playlist: Alternatively to using the right-click menu above: 1. Click the Clip in the Playlist Editor panel to remove. Hold the SHIFT key to select multiple Clips to remove. 2. Press the ‘Remove’ button on the toolbar at the bottom of the Playlist Editor panel. A confirmation dialog box appears. 3. Press the “Yes” button to remove the Clip(s) from the Playlist. 1. Press the “Yes” button to delete the Playlist(s). 38 Version 1.13 ES9600 User Guide Chapter 4: Player Interface -Web Edit Playlist Properties: Timecode mode and other parameters of a Playlist can be managed through the Playlist Editor. NOTE: Refer to the following chapter for more information on using Timecode with the ES9600 1. Click the desired Playlist in the Playlist Browser panel. 2. Click the “Properties” button on the toolbar at the bottom of the Playlist Editor panel (or, click the RIGHT mouse button on a Clip in the Playlist Editor and click ‘Edit playlist Properties’ from the menu). The ‘Edit Playlist Properties’ window opens. 3. In the Timecode window choose a mode from Disabled, Generate or Receive: Disabled – Player will not respond to incoming Timecode Generate – Player will generate Timecode whenever a Playlist is running (Timecode Master) Receive – Player will respond to incoming Timecode (Timecode Slave) 4. Select ‘Generate’ from the drop-down ‘Timecode’ menu or skip to Step 8 for Receive mode. 5. Enter a ‘Start Time’ hh:mm:ss:ff 6. Click the checkboxes to the right as needed and enter ‘Play At’ and/or ‘Stop At’ times. 39 Version 1.13 ES9600 User Guide Chapter 4: Player Interface -Web 7. Click Save. The window closes. 8. Select ‘Receive’ from the drop-down menu ‘Timecode’ menu. 9. Enter a ‘Play At’ time. 10. Click Save. The window closes. To Delete a Playlist: 1. Click the Playlist to delete in the Playlist Browser panel. Hold the SHIFT key to select multiple Playlists to delete. 2. Press the ‘Delete’ button on the toolbar at the bottom of the Playlist Browser panel. A confirmation dialog box appears. 3. Press the “Yes” button to delete the Playlist(s). Setup Press the Setup button on the top menu to access the Player’s configuration settings page. This is an important interface as it allows access to all of the features that govern communications to and from the 9600 when used in a system, as well as controlling the unit’s video and audio output parameters. These settings are necessary to ensure optimum performance of the Player. The ‘default’ Setup page is the ‘About’ page: 40 Version 1.13 ES9600 User Guide Chapter 4: Player Interface -Web Note: You must press the ‘Save’ button at the bottom of the page to keep changes made on any Settings page. Note: Press the “Refresh” button at the bottom of the page to read the current settings from the Player. Serial Ports This menu allows setup of the ES9600 Comm Port for remote control with ESCAN or any other control application. Click COM 1 to access settings options: Although the 9600 is equipped with two physical serial connections the second port is for factory use only. MODE – Select from: Disabled, ControlMSVPP or Passthrough: Disabled – Serial control is inactive. 41 Version 1.13 ES9600 User Guide Chapter 4: Player Interface -Web ControlMSVPP – Serial Control responds to proprietary Electrosonic control commands. Pass Through - Use the “Pass Through” setting to control another device such as a video projector (RS232) from the ES9600 with ESCAN or some other control system. NOTE: When using the Pass Through setting ensure that the Baud Rate, Parity, Data Bits and Stop Bit are set to match the device being controlled. In Pass Through mode any TCP/IP control string appearing on port 4001of the ES9600 is passed to the RS232 port. Baud Rate – Select from the options: 300, 600, 1200, 4800, 9600, 19200, 38400, 57600, 115200: Data Bits – Select from 8 or 7 Parity – Select from: None, Even or Odd Stop bits – Select from 1 or 2 Click Save to keep your changes. 42 Version 1.13 ES9600 User Guide Chapter 4: Player Interface -Web Networking - Ethernet The 9600 support two (2) Ethernet network connections (two unique IP addresses). This feature is very useful as a single unit can be deployed within two independent networks. For example the player could be incorporated into a theater system where one network connection is used for a show control subnet and the other network connection used as the main interface for content delivery. A network administrator may place an external firewall in front of the ES9600 to enable content management and prevent actual transport functions of the unit. This configuration would allow remote content upload by a contract advertiser or sponsor without need for involvement of the installation IT management personnel after initial configuration. The final configuration of the Player in a dual-network application will depend on the needs of the specific situation and will be determined by the user’s IT administration. Refer to Appendix A: TCP/IP Communications - for more information. Click either Ethernet 1 or Ethernet 2 to access the identical settings options; click Save to keep any changes made to the default settings: Mode – Chose Static or DHCP mode: Click the scroll button and select a mode. IP Address – Adjust the IP address as required. NOTE: If you choose to change the IP Address here you will lose the network connection with the 9600 after the Save action. To reconnect, simply type the new IP Address into the address window of your browser and press ‘Enter’. Netmask – Adjust the as required. 43 Version 1.13 ES9600 User Guide Chapter 4: Player Interface -Web Gateway – Adjust the Gateway as required or leave as ‘None’. NOTE: This would be a good time to record the ES9600’s IP address(s) and name (Refer to section ‘System: Computer Name’ later in this Chapter) as this information will be required for transferring DCP Folders to the ES9600 with an FTP application (refer to Chapter: 7 Data Transfer). Video Mode Use this page to configure the 9600 for best video performance . The features accessible here allow control of whether the unit is to output a single channel or dual channels of video, the type of video signal whether analog, DVI/I or HDSDI, the video colorspace, the video synchronization mechanism to be used and the video loop mode. Click on the Mode icon to open the Video Mode setup dialog window: 44 Version 1.13 ES9600 User Guide Chapter 4: Player Interface -Web NOTE: When in 1-Channel mode and playing 4:4:4 content, all outputs are active (Channels 1 and 2). When in 1-Channel mode and playing 4:2:2 content, only Channel 1 outputs are active. Use this menu to set up the Video Output channels for the ES9600: Channels – Choose ‘2 Channel’, ‘2 Channel Locked’ or ‘1 Channel’ video output mode Timecode – Chose whether the 9600 will function in ‘Chase Mode’ or ‘Trigger Mode’. In Chase Mode the unit will track (stay in sync with) in-coming Timecode. In Trigger Mode the unit will respond to a specific Timecode and continue with no further response to the ongoing Timecode. Refer to Chapter 6: Linear Timecode for more information on using Timecode with the 9600. Genlock – Choose the type of video sync mechanism to be used: Master, ES Genlock, MS9200 Genlock. See Chapter 6: Genlock for more detail. 45 Version 1.13 ES9600 User Guide Chapter 4: Player Interface -Web Output – Check either box to set the type of Video output DAC/DVI or HDSDI LoopOn – Check box to enable/disable Channel 1 or Channel 2 loop mode Video Autoplay Here the user can Enable/Disable the Autoplay feature. When enabled the 9600 play a pre-loaded clip automatically (upon start-up). The user simply checks or un-checks the box next to the required channel to Enable or Disable Autoplay. Check/Uncheck Required Channel The content will remain available for Autoplay even when the channel is disabled. To change Autoplay content the user must make an adjustment in the Player Control window (Clip-Browser – Set as Autoplay). Refer to the Player Control section earlier in this chapter for more information. Video Analog Output Click the Analog Output icon to open the dialog window: 46 Version 1.13 ES9600 User Guide Chapter 4: Player Interface -Web Use this menu to set the Video Output format for each Channel. Options for Channel 1 and Channel 2 are identical. Colorspace – Choose between RGB, YPrPp BT.709 47 Version 1.13 ES9600 User Guide Chapter 4: Player Interface -Web Video HDSDI Output Click on the HDSDI Output icon to activate this dialog window: Use this menu to set the Video Output format for each Channel. Options for Channel 1 and Channel 2 are identical. HDSDI. NOTE: These options are only available when ‘Single’ Channel has been set in the Video Mode dialog. Choose from the options listed under the scroll button: Colorspace – Choose from the options listed under the scroll button: 48 Version 1.13 ES9600 User Guide Chapter 4: Player Interface -Web Audio Configuration Click the Audio icon to activate the dialog window: 2-Channel video configuration (shown above): When using a 2-Channel video configuration, set ‘Global’ audio output features for groups of 8 audio channels, Channels 1-8 and Channels 9-16. Mute – Check/Uncheck the box to Enable/Disable audio outputs Volume – Click the scroll button(s) to Attenuate output level from 0dB (lowest value is -144dB) Delay – Click the scroll buttons to Set audio output delay time in 10ms increments between +/- 500ms Click the Save button to complete the setting(s). 1-Channel video configuration (shown following): When using a 1-Channel video configuration, set ‘Global’ audio output features for all 16 audio channels, Channels 1-16. Mute – Check/Uncheck the box to Enable/Disable audio outputs Volume – Click the scroll button(s) to Attenuate output level from 0dB (lowest value is -144dB) Delay – Click the scroll buttons to Set audio output delay time in 10ms increments between +/- 500ms Click the Save button to complete the setting(s). 49 Version 1.13 ES9600 User Guide Chapter 4: Player Interface -Web Player Click the Player icon to activate this dialog window: Give the ES9600 an ‘identity’. Host/Player Name – Give the player a unique name Location/Domain – Enter a domain name for the Player 50 Version 1.13 ES9600 User Guide Chapter 4: Player Interface -Web About Click the ‘About’ icon to activate this display: This display gives information about the software present on the player. Disk Capacity – Storage installed on the unit Free Space – Storage available on the unit Player Type – The Player application version number e.g. ES9600 0.5 Firmware Version – Lists the current versions loaded in the various components of the unit. This information will be very useful when troubleshooting the ES9600. NOTE: Clicking on the ‘Setup’ tab directly from any other tab will also open the ‘About’ display. 51 Version 1.13 ES9600 User Guide Chapter 5: Chapter 5: Linear Timecode Linear Timecode Large control systems often require a number of different, and usually diverse, pieces of equipment to operate within strict timing constraints. For example, an exhibit may use a video display with an associated multi-channel audio playback system. A method is required to ensure that the audio playback matches the video display. This is often referred to as “Lip Sync”. This synchronization problem can be solved using a Timecode signal. Timecode, as the name suggests, is a stream of coded time stamps encapsulated in an audio signal. The frequency of these time stamps is designed to match video rates for the various video standards. There are three common standards in use today: SMPTE standard is used in the USA and matches the video rate of 29.97 frames per second EBU – This standard matches the PAL specification in use in the United Kingdom, i.e. 25 frames per second FILM – This standard matches the 24 frames per second used in the motion picture industry. A typical timecode based system will incorporate a device that generates the timecode for the system, referred to as the ‘Master Timecode’. This signal is distributed to each timecode aware device in the system. These are often referred to as ‘Slaves’. A slave will usually have the ability to generate its output based on the timecode it receives. For example a lighting system could be programmed to generate a lighting scene or effect when a certain timecode is received. The ES9600 player can operate either as a timecode slave or as a master. This allows for maximum flexibility when integrating the player in a system. It is even possible for some clips to operate in the master mode while others operate in the slave mode. Note: Drop Frame timecode is not supported. Synchronized multi-player operation System Components The following equipment is required for a minimal synchronized system: Two ES9600 Players Timecode cable ESGEN Genlock cable/s Show control computer (running ESCAN or other control software) LAN (TCP/IP) or RS232 remote control cabling. The two ES9600 Players are designated as Master and Slave, for the remainder of this description. The master Player generates a timecode signal for the slave and potentially other components in the system. Time code signal is fed from its LTC output to the input on the slave unit. The ESGEN Genlock signal is fed from the master to the slave. NOTE: Timecode can also be provided by external show control equipment. In this case the master player becomes a slave to the show control equipment. Ensure that the remote control communication method for the system is correctly connected and functioning. 52 Version 1.13 ES9600 User Guide Chapter 5: Linear Timecode Show Control Programming This section explains the commands used to control a multi-player system. The messages sent to each player are the same, whether RS232 or TCP/IP is used for the physical connection. Command Descriptions NOTE: Refer to the ‘Timecode Commands’ section in Chapter 8 for details on actual command syntax. GetTimecodeMode Monitor the status of device operating mode: ‘Tcgenerate’ or ‘Tcreceive’. GetTimecodeOpMode Monitor the status of device when operating in TcReceive mode: ‘Chase’ or ‘Trigger’. LoadClip <Channel list> <clip path> this command loads the clip on to specified channels. Or, LoadPlaylist <Channel list> <playlist name> this command loads a playlist on to specified channels. The LoadClip and the LoadPlaylist commands both require an amount of time to complete because of some initialization that must occur when a new file is selected. If the 9600 is to be used in a simple scenario where a single file is repeatedly played (in a theater for example) it is more efficient to use the “Loop” command (see ‘Loopon’ command usage in Chapter 8: Remote Control Protocols). When the LoadClip (or LoadPlaylist) command is complete the 9600 Player will return the following: Channel x Cued <cr> <lf> (where x is the base channel set in the channel properties). SetTimecodeOpMode <mode> Defines the Timecode operating mode as either ‘Chase’ or ‘Trigger. Tcgenerate hh:mm:ss:ff Turns the timecode generator on and sends the timecode hh:mm:ss:ff out as a jam sync. Tcreceive <Channel> Sets the player into timecode receive mode. Tcreceiveloop <Channel> Sets the player into timecode receive mode, and loops the incoming timecode to the timecode output. Tcplayat <Channel> hh:mm:ss:ff Sets the timecode ‘playat’ time Tcstopat <Channel> hh:mm:ss:ff Sets the timecode ‘stopat’ time 53 Version 1.13 ES9600 User Guide Chapter 5: Linear Timecode Tcstart Starts the timecode running (assumes the player is in Generate mode) NOTE: When changing to ‘new’ content with a different frame rate to that currently in use in a multiple player master/slave setup, slave players should be stopped before loading new content on the master player: 1. Stop all players. 2. Load new content on master player. 3. Load new content on slave players. 4. Use the tcstart command to begin playback of the new content. Changing content on the master player without stopping the slave players may result in a flashing or green screen output being fed to the display devices until the new content is loaded on the slave players. Control Example Single file using separate control: This example is the simplest type of synchronized show. Two Players, each load a single clip and play it through to the end. This technique might be used in a 3D theater for example. The required sequence of events, triggered by show-control is: Cue the players (LoadClip or LoadPlaylist) commands - This command readies the file on each player for playback) Program the Master timecode generator (Tcgenerate) Program the “Slave” as a timecode receiver (Tcreceive) Set both devices to begin playing at a specific timecode (Tcplayat) Set the master to begin timecode generation (Tcstart) The 9600 Players will show video when the timecode specified in the Tcplayat command is reached. Command sequence To play file 0 on two 9600 units at 01:00:00:00, with a 5 second timecode lead in. NOTE: This example assumes both Players are using the same base channel (1 in this case). LoadClip responds when the file loading process is completed. If the show control system is not using these responses to control the timing of messages to the Player, a delay will be required between the LoadClip and Tcgenerate commands. The actual delay required is dependent on the file and will need to be determined empirically. Device 1 "Master" LoadClip 1 0 <cr> Tcgenerate 1 00:59:55:00<cr> Tcplayat 1 01:00:00:00 <cr> Tcstart 1 <cr> Device 2 "Slave" LoadClip 1 0 <cr> Tcreceiveloop 1 <cr> Tcplayat 1 01:00:00:00 <cr> NOTES: Adjustments to the slave Tcplayat timecode may be necessary to correct for encoding errors. 54 Version 1.13 ES9600 User Guide Chapter 5: Linear Timecode The <cr> character indicates that a carriage return, ascii character 0D (hex) is required. Reference For more information on setting up communications protocols refer to: Chapter 8: Remote Control Protocols. Appendix A: TCP/IP Communications. Configuring as a Timecode Master In the master mode the ES9600 is programmed to generate timecode when a video clip begins playing. This allows any slave devices to be locked to the video output from the Player. Each clip can have its own unique timecode and has the ability to generate a ‘pre-roll’ and/or ‘run-on’ option. Note: A Clip has to be cued using the transport controls or a remote control message for the timecode settings to be activated. Start Time This is the timecode that will be generated when a play command is received after the clip is cued. If the Play At (see below) option is not enabled, this will also be the point when video output begins. The Player will output this timecode, as a “Jam Sync” signal, when a cue command is issued. Play At Select the Play At box and enter a time for clip playback to begin. The difference between the ‘Start Time’ and ‘Play At’ time is known as “pre-roll”, i.e. a period where timecode is generated before the video starts. This might be used for pre show setup before the video begins. Stop At Select the Stop At option to set a stop point for the timecode. This time can be before or after the end of the video output. This might be used for controlling “post show” equipment such as fading house lights up. The Stop At time is independent of the length of the video clip. Stop At can be used to halt the timecode while the clip is still playing, or extend the timecode after the clip has ended. The following examples show some typical uses of the timecode generation options: Generate a timecode starting at 01:00:00:00 when the play command is received. 55 Version 1.13 ES9600 User Guide Chapter 5: Linear Timecode Generate a timecode starting at 01:00:00:00 when the play command is received, but delay start of the video playing until 01:00:10:00. Generate a timecode starting at 01:00:00:00 when the play command is received. Start the video 10 seconds later (10 second delay) and run the timecode on until 01:05:00:00. 56 Version 1.13 ES9600 User Guide Chapter 5: Linear Timecode Configuring as a Timecode Receive (Slave) In ‘Receive’ (Slave) mode the ES9600 can be programmed to begin playing when it receives a particular timecode. A different timecode can be programmed for each clip in the clip list. NOTE: When running the ES9600 as Timecode Receive the user must determine whether the 9600 will function in ‘Chase Mode’ or ‘Trigger Mode’. Access this setting through the Setup | Video – Mode Web page. Chase Mode - The unit will track (stay in sync with) in-coming Timecode. Trigger Mode - The unit will begin playback at a specific Timecode value and continue playing without further reference to the external Timecode. Alternatively, set the Timecode mode from the front panel: Set the Timecode box in the Playlist Editor interface to ‘Receive’ and use the ‘Play At’ box to set the trigger point at which the cued file will begin playing. Here the Player is set to begin running the file 10 seconds (00:00:10:00) after the timecode starts: The file will run until a ‘Stop At’ command halts the player after 5 minutes (00:05:00:00). 57 Version 1.13 ES9600 User Guide Chapter 6: Chapter 6: Genlock Genlock Genlock provides a method for ensuring that multiple ES9600 players can operate with synchronous timing on each of their outputs. Thus the first frame of video is decoded across all the players that make up the ‘genlocked’ system at the same time. ESGEN Genlock Mode The ES9600 supports proprietary ESGEN genlock. This is a proprietary feature that provides a high level of timing synchronization and allows non-standard frame rate synchronization: ES Genlock – works with most ES products ES MS9200 Genlock – unique to the 9200 series HD Player The Player can operate as a ‘master’ or a ‘slave’ depending on the system configuration: ‘Master’ - Sets the 9600 to transmit both proprietary ESGEN and ES MS9200 signals simultaneously from the ESGEN output connector (Din) on the back panel. ‘Slave’ - The ES9600 will receive either ES Genlock or ES MS9200 Genlock. NOTE: Master, ES-Genlock, and MS9200 Genlock are only applicable for Electrosonic products. Access the Genlock settings from either the front panel: Or the online interface: This mode can also be set from a control application such as ESCAN. 58 Version 1.13 ES9600 User Guide Chapter 6: Genlock Master Designate a particular 9600 as the Master (source). ESGenlock control signal is fed in a ‘daisy-chained’ connection from the ‘ESGen Output’ (Din Connector) to any other Electrosonic product (including 9600s) that is ES Gen capable. These other devices will be designated as ‘slaves’. 59 Version 1.13 ES9600 User Guide Chapter 6: Genlock ES Genlock (Slave) Designate a particular 9600 as a Slave. ESGenlock control signal from another 9600 or ES device is received through the ‘ESGen Input’ (Din Connector). ES MS9200 Genlock (Slave) Designate a particular 9600 as a Slave. ESGenlock control signal is received through the ‘ESGen Input’ (Din Connector) from a 9200 series device designated as ‘Master’. Connections are same as shown above. 60 Version 1.13 ES9600 User Guide Chapter 7: Chapter 7: Data Transfer Data Transfer Refer to Appendix A for details on Encoding content for use on the ES9600. The final encoded content (JPEG 2000 video, audio and other associated data) is collectively referred to as a DCP and must be loaded on the ES9600’s hard disk via FTP in order to be played. Transfer all DCPs to the Media (default) folder in the ES9600. NOTE: A test folder is included, already factory loaded in the Media folder with your ES9600. NOTE: The ES9600 “remote computer” and the computer containing DCP Folders for transfer (“local computer”) must be connected to a network. Connect the ES9600 to your LAN and transfer the data from your file storage system (or another computer) with any of the methods described below. There are two methods for file transfer from any PC: • Use any of the commonly available FTP stand-alone applications. FTP clients that have been tested with the ES9600 are: FileZilla – http://filezilla-project.org and ProFTPD – http://proftpd.org • Use Internet Explorer NOTE: Do not change the password to the user. To Up-Load a Digital Cinema Package (DCP) using FTP: Use the FTP application of your choice to up-load the required DCP stored on a “local computer” to the ES9600. Follow the directions given with the specific application for transferring data between computers. 1. Using the FTP application of your choice open a connection to the 9600 2. Log in with Username: es9600 and Password: electrosonic (CASE SENSITIVE). 3. Navigate to the Media folder on the 9600. 4. Copy the DCP into the into the Media folder on the unit. To Delete a DCP from the ES9600 using FTP If necessary you may remove DCPs from the ES9600: 1. Using the FTP application of your choice open a connection to the 9600as shown above 2. Open the Media folder 3. Select the file you wish to remove from the list in the window 4. Right click the file and select Delete from the menu. The file will be removed from the Media folder on the ES9600. To Up-Load a DCP with Internet Explorer 1. Open Internet Explorer on the local computer. 61 Version 1.13 ES9600 User Guide Chapter 7: Data Transfer 2. In the Address line, as shown above, type ‘ftp://yourIPaddress’ (from Chapter 2: Communications, Set IP Address), press Enter/Return the following Login dialog box will be displayed: 3. Enter the User Name: es9600 (case sensitive) Enter the Password: electrosonic (case sensitive). Click Log On. The ES9600 file structure is displayed: 4. Double click the media folder to view the contents of the 9600: 5. Open a file manager window by clicking My Computer on the desktop of the ‘local’ computer. 62 Version 1.13 ES9600 User Guide Chapter 7: Data Transfer 6. Select the file(s) you wish to transfer and drag/drop from the My Computer window (local computer) to the Internet Explorer window (ES9600). NOTE: DCP sizes may be very large. The time taken to up-load will be dependent on the file size as well as the bandwidth of the network connection. Ensure that the files have completely transferred to the ES9600 before trying to play them. Having transferred the program material to the ES9600 you are now ready to play the files. To Delete a DCP from the ES9600 using Internet Explorer If necessary you may remove DCPs from the ES9600: 1. Open Internet Explorer and log on to the ES9600 as shown above 2. Open the Media folder 3. Select the DCP you wish to remove from the list in the window 4. Right click the file and select Delete from the menu. The file will be removed from the Media folder on the ES9600. To Up-Load a 9600 Software Upgrade 1. Use any of the procedures described above and navigate to the Upgrade folder on the 9600. 2. Copy the Upgrade Package into the Upgrade folder on the unit. 3. Reboot the unit. 63 Version 1.13 ES9600 User Guide Chapter 8: Remote control Protocols Chapter 8: Remote Control Protocols The ES9600 can be controlled remotely using the ES/MSVPP command protocol. The command protocol can be accessed over the following physical links: • RS-232 serial • Ethernet LAN using TCP/IP • Ethernet LAN using HTTP The Serial and LAN connectors are located at the rear of the unit. We recommend that you use commercially manufactured connecting cables. Should you wish to make your own cables, here are the control pinouts: Serial Port Pinout 9 WAY D TYPE PLUG (FRONT VIEW) 1 6 PIN1 PIN2 PIN3 PIN4 PIN5 PIN6 PIN7 PIN8 PIN9 5 9 Data carrier detect Receive data Transmit data Data Terminal ready Ground Data set ready Request to send Clear to send Ring Indicator (DCD) (RXD) (TXD) (DTR) (SG) (DSR) (RTS) (CTS) (RI) RJ45 Ethernet This is a Gigabit Ethernet connection that supports the TCP/IP protocol. RJ45 Pinout Pin No 1 2 3 4 Signal Tx+ TxRx+ No connect Pin No 5 6 7 8 Signal No connect RxNo connect No connect Command Structure The ES/MSVPP remote control protocol is a simple but powerful text based protocol. The basic structure of a command is shown below: Command “parameter1” “parameter2” … “parameterN” <terminator> An ES/MSVPP command consists of a command word followed by zero or more parameters. The type and number of parameters varies by command. Refer to the descriptions in the following sections for the syntax of individual commands. Command words are not case sensitive. Parameters are enclosed between double quotes (“) and are separated by a single space character (ASCII 0x20). If a parameter does not contain spaces the double quotes are not required. The terminator may be a Carriage Return, a Carriage Return & Line Feed, or a NULL (0x00). Commands which affect a specific output channel require a <channel list> as the first parameter. The <channel list> is a comma-separated list of channel numbers. The following are valid <channel lists>: 64 Version 1.13 ES9600 User Guide Chapter 8: Remote control Protocols “1” “1,2” “2” Text Command Protocol (Telnet Protocol) Most users will probably include the ES9600 in a system that uses a dedicated control system application. That application can be easily setup to communicate with the player by means of the supported protocol. In the absence of a dedicated control application the user can communicate remotely with the Player using the Telnet Protocol. Telnet offers a simple ASCII text based control method designed for easy communication through a TCP/IP connection. The simplest way to test and experiment with the ES/MSVPP protocol is to connect the 9600 from a remote computer running the Telnet program (supplied with all Windows™ operating systems), and to enter commands using the remote computer’s keyboard. To Run Telnet 1. Click the Windows Start icon on the remote computer’s desktop 2. Select Run. The window below opens: 3. Enter “Telnet ‘yourIPaddress’ 4000” in the text box and click the OK button The Telnet window appears: 4. Enter your commands using the Command Structure shown in the following section. For example above we used command ‘getplayertype’ which results in a player response of PlayerType ES9600… Testing ES/MSVPP Commands from the Web Interface ES/MSVPP command can also be tested through the On-Line web interface. To access the ES/MSVPP entry page enter the following URL into the browser’s address field: http://playeraddresshere/msvpp.html 65 Version 1.13 ES9600 User Guide Chapter 8: Remote control Protocols : Type any ES/MSVPP command into the Command entry field on the web interface and press the ‘Enter’ key. The display will show the result in the Response field. 66 Version 1.13 ES9600 User Guide Chapter 8: Remote control Protocols Command Reference Each section below describes related commands. In the examples which follow, any text in fixedfont-bold-italics should be entered by the user (not all of the reference commands will give examples). Text which is in fixedfont is returned by the player. Configuration Commands Colorwash <Channel> <Red> <Green> <Blue> <Alpha> <Time> This command sets the ‘alpha blend’ between output video and black (or any color) resulting in a ‘fade-to- black’ option the end of a clip. Parameters: <channel list> The list of channels to be modified: 1 or 2. <Red> Enter value 0-255. 0 = no Red; 255 = maximum Red <Green> Enter value 0-255. 0 = no Green; 255 = maximum Green <Blue> Enter value 0-255. 0 = no Blue; 255 = maximum Blue <Alpha> Enter value 0-255. 0 = no Video; 255 = maximum Colorwash/Black <Time> Time (in seconds; e.g.: 0.00sec) for transition between full video and colorwash Note: Use a Fade in/Fade out time value below 4.0 seconds for best results. Player Response: OK or ERROR GetAudioDelay <channel list> This command returns the delay, in milliseconds, between audio and video for the requested channels. Player Response: AudioDelay <channel> <delay_ms> … AudioDelay GetAudioMaster This command returns the audio mute setting for the unit. Player Response: AudioOn … AudioMute 67 Version 1.13 ES9600 User Guide Chapter 8: Remote control Protocols GetAudioMute <channel list> This command returns the audio mute setting for the requested channels. Player Response: AudioMute <channel> <mute> … AudioMute The mute response parameter will be “1” if the channel is muted or “0” if the channel is un-muted. GetAudioVolume <channel list> This command returns the audio output attenuation level for the requested channels. Player Response: AudioVolume <channel> <left_attenuation> <right_attenuation> … AudioVolume The attenuation level is measured in decibels ranging from the value 0 (no attenuation) to -144 (full attenuation). Example: GetAudioVolume 1,2 AudioVolume 1 0 0 AudioVolume 2 -144 -144 AudioVolume In this example channel 1 is set for maximum audio output (no attenuation) and channel 2 is set for no audio output (full attenuation). GetChannelCount This command returns the number of channels available on the player. The number of channels may vary depending upon the current mode of the player. For the MS9600, the number of channels will be either 1 or 2. Player Response: ChannelCount <number> GetColorspace <video output 1> … <video output N> This command returns the colorspace of the requested video outputs. Player Response: Colorspace <video output> <colorspace> … Colorspace Examples: GetColorspace Colorspace “video.hdsdi” “CIE 1931 XYZ” 68 Version 1.13 ES9600 User Guide Chapter 8: Remote control Protocols Colorspace “ch2.video.dac” “ YPrPb BT.709” Colorspace GetGenlockMode This command returns the Genlock mode of the player. Player Response: GenlockMode <mode> GetHdsdiEnable This command returns the HD-SDI enable setting of the player. Player Response: HDSDIEnable <true|false> GetHdsdiMode This command returns the HD-SDI mode of the player output. Player Response: HDSDIMode <mode> GetInstalledLicenses This command returns a list of all licenses installed on the device. Player Response: License <license key> … License GetLoopMode This command returns the loop mode setting for the requested channels. Player Response: LoopMode <channel_1_mode> <channel_2_mode> Channel ‘loop’ mode will be either “ON” or “OFF” Example: GetLoopMode LoopMode ON OFF GetOutputResolution <channel> This command returns the current output resolution and frequency of the requested channel. Player Response: 69 Version 1.13 ES9600 User Guide Chapter 8: Remote control Protocols OutputResolution <channel> <width> <height> <i/p> <framerate> Example: GetoutputResolution 1 OutputResolution 1 1920 1080 I 59 GetPlayerType This command returns the player type and version number. Player Response: PlayerType <player_type> <player_version> Values of the player type string are shown in the following table. Player Type String Description MS9100HD 9100 series based HD players MS9200HD 9200 series based HD players. MS9300SD 9300 series based SD players MS9400HD 9400 series based HD players MS9500HD 9500 series based HD players ES9600 9600 series based JPEG-2000 Digital Cinema players The player version will be a numerically increasing version number. GetVideoMode This command returns the current output mode of the player. Player Response: VideoMode <mode_string> The mode string is taken from the mode string table described in ‘SetVideoMode’ above. InstallLicense <license_key> This command installs a list key on the device Player Response: OK | ERROR Loopoff <channel list> This command disables loop mode for the specified channels. Player Response: OK or ERROR Loopon <channel list> 70 Version 1.13 ES9600 User Guide Chapter 8: Remote control Protocols This command enables loop mode for the specified channels. When loop mode is enabled, the player will automatically repeat playback of the current playlist when it reaches the end. Player Response: OK or ERROR SetAudioDelay <channel list> <delay_ms> This command sets the amount of delay between the audio and video outputs on the specified channels. Parameters: <channel list> The list of channels to be modified. <ms_delay> Number of milliseconds of delay between audio and video. A positive value delays the audio with respect to video. A negative value advances the audio with respect to video. valid range::= -500ms < ms_delay < +500 ms Player Response: OK or ERROR 71 Version 1.13 ES9600 User Guide Chapter 8: Remote control Protocols SetAudioMaster <parameter) This command sets the audio mute for the unit. Parameters: AudioOn … AudioMute SetAudioMute <channel list> <mute> This command sets audio mute on the specified channel. Parameters: <channel list> The list of channels to be modified. <mute> Set to “1” to mute the channel. Set to “0” to unmute the channel. Player Response: OK or ERROR SetAudioVolume <channel list> <left_attenuation> <right_attenuation> This command sets the audio output attenuation level for the specified channels. The attenuation level is measured in decibels ranging from the value 0 (no attenuation) to -144 (full attenuation). Parameters: <channel list> The list of channels to be modified. <left_attenuation> The attenuation level for the left channel in decibels. <right_attenuation> The attenuation level for the right channel in decibels. Note: The left and right channel attenuation levels must be the same. Player Response: OK or ERROR SetColorspace <video output> <colorspace> This command changes the colorspace of the specified player output. Parameters: <video output> The player output to modify. <colorspace> The name of the new colorspace. The names of the video outputs are shown in the following table. Video Output Description 72 Version 1.13 ES9600 User Guide Chapter 8: Remote control Protocols “video.hdsdi” The player HD-SDI outputs. This affects both channel 1 and channel 2. “ch1.video.dac” Analog output of channel 1. “ch1.video.dvi” Digital output of channel 1. “ch2.video.dac” Analog output of channel 2. “ch2.video.dvi” Digital output of channel 2. The names of the available colorspaces are shown in the following table. Colorspace Description “RGB” tbd “CIE 1931 XYZ” “YCrCb BT.601” “YPrPb BT.709” Player Response: OK or ERROR Examples: SetColorspace “video.hdsdi” “CIE 1931 XYZ” OK SetColorspace “ch2.video.dac” “YPrPb BT.709” OK SetGenlockMode <mode> This command sets the Genlock mode of the player. Parameters: Mode Description Blackburst N/A- Receive external Video Black & Burst signal (Slave) esgen Receive control signal from another ES product (Slave) esgen_legacy Receive control signal from another ES product (Slave) master Send ESGen control signal to other ES products Player Response: OK or ERROR SetHdsdiEnable <enable> This command enables or disables the HD-SDI output of the player. Parameters: <enable> true or false. Enable or disable the HD-SDI output. 73 Version 1.13 ES9600 User Guide Chapter 8: Remote control Protocols Player Response: OK or ERROR SetHdsdiMode <mode> This command sets the HD-SDI mode of the player output. The HD-SDI mode is only active in single channel mode. Parameters: Mode Description single SMPTE 292M – Single Link Mode Only the first HD-SDI output is used. All video formats are converted to 4:2:2 10-bit. dual_422_12 SMPTE 372M – Dual Link All video formats are converted to 4:2:2 12-bit. dual_444_10 SMPTE 372M – Dual Link All video formats are converted to 4:4:4 10-bit. dual_444_12 SMPTE 372M – Dual Link All video formats are converted to 4:4:4 12-bit. Player Response: OK or ERROR SetVideoMode <mode_string> This command sets the output mode of the player..Available mode strings for the MS9600 are listed in the following table. Mode String Description “1_channel” Single video output channel available. “2_channel” Two video output channels available. Channel playback can be controlled independently. “2_channel_locked” Two video output channels available. Channel playback affects both channels simultaneously. Player Response: OK or ERROR VideoOff <channel list> Disable video on the specified channels. Player Response: OK | ERROR VideoOn <channel list> 74 Version 1.13 ES9600 User Guide Chapter 8: Remote control Protocols Enable video on the specified channels. Player Response: OK | ERROR 75 Version 1.13 ES9600 User Guide Chapter 8: Remote control Protocols Serial Port Commands GetSerialConfig <com> This command returns the settings of the specified serial port. Parameters: <com> Serial communication port. values ::= 1,2 Player Response: SerialConfig <com> <baud> <parity> <data bits> <stop bits> GetSerialMode <com> This command returns the operating mode of the specified serial port. Player Response: SerialMode <com> <mode> SetSerialConfig <com> <baud> <data bits> <parity> <stop bits> This command configures the settings of the specified serial port. Parameters: <com> Serial communication port. values::= 1,2 <baud> Baud rate. 300, 600, 200,1800,2400,4800,9600,19200,38400,57600,115200 <parity> values ::= none, even, odd <data bits> values ::= 7, 8 <stop bits> values :: 1, 2 Player Response: OK or ERROR SetSerialMode <com> <mode> This command sets the operating mode of the specified serial port. Parameters: <mode> Description “control” The serial port accepts Electrosonic MSVPP commands. “disabled” The serial port is disabled. “passthrough” The serial port passes through raw data. 76 Version 1.13 ES9600 User Guide Chapter 8: Remote control Protocols Ethernet Configuration Commands GetDhcp <interface> This command returns the DHCP setting of the specified interface. Parameters: <interface> The Ethernet interface to set. values := “eth1” | “eth2” Player Response: Dhcp <interface> <on_or_off> Dhcp Example: GetDhcp eth1 Dhcp eth1 Off Dhcp GetGateway <interface> This command returns the gateway for the specified interface. Parameters: <interface> The Ethernet interface to set. values := “eth1” | “eth2” Player Response: Gateway <interface> <ip address> Gateway Example: GetGateway eth1 Gateway eth1 192.168.4.1 Gateway GetIpConfig <interface> This command returns the IP address and netmask of the specified interface. Parameters: <interface> The Ethernet interface to set. values := “eth1” | “eth2” Player Response: IpConfig <interface> <ip address> <netmask> Example: GetIpConfig eth1 IpConfig eth1 192.168.4.232 255.255.255.0 77 Version 1.13 ES9600 User Guide Chapter 8: Remote control Protocols GetMacAddr <interface> … <interface> This command returns the Ethernet MAC address of the specified interface. Parameters: <interface> The Ethernet interface to set. values := “eth1” | “eth2” Player Response: MacAddr <interface> <mac_address> Example: GetMacAddr eth1 MacAddr eth1 00:a1:bd:09:c2:ff MacAddr SetDhcp <interface> This command sets the specified Ethernet interface into DHCP mode. Parameters: <interface> The Ethernet interface to set. values := “eth1” | “eth2” Player Response: OK or ERROR SetGateway <interface> <gateway> This command sets the gateway for the specified interface. Parameters: <interface> The Ethernet interface to set. values := “eth1” | “eth2” <gateway> The IP address of the gateway machine in dotted decimal. format ::= nnn.nnn.nnn.nnn Player Response: OK or ERROR SetIpConfig <interface> <addr> <netmask> This command sets the specified Ethernet interface into static IP address mode. Parameters: <interface> The Ethernet interface to set. values := “eth1” | “eth2” <addr> IP Address <netmask> Network mask. 78 Version 1.13 ES9600 User Guide Chapter 8: Remote control Protocols Media Management Commands GetMediaTree This command returns the directory structure of the player media storage volume. NOTE: This command does not return a listing of media files, only the directory tree of the media drives. Player Response: The player responds with a series of MediaBranch response lines. MediaBranch <channel list> <mediapath> … MediaBranch Example: The following exchange shows an example response from the player. GetMediaTree MediaBranch 1 “preview_directory” MediaBranch 1 “mainshow_directory” MediaBranch 1 “test_content” MediaBranch 79 Version 1.13 ES9600 User Guide Chapter 8: Remote control Protocols Clip Commands GetClips <mediapath> This command returns the clips in a media directory at the requested path. <media path> should be a value returned by GetMediaTree. Player Response: Clip <clippath> … Clip Example: GetClips ”/” Clip “clipname1.clp” Clip “clipname2.clp” Clip “clipname…N.clp” Clip LoadClip <channel list> <clippath> This command loads the clip onto the specified channels. Parameters <channel list> The list of channel to load with the clip. <clippath> The path of the clip to play. Player Response: OK or ERROR LoadNextClip <channel list> <clippath> This command queues the clip onto the specified channels. When the current clip completes the player will begin playing the specified clip. If multiple LoadNextClip commands are sent, all but the last will be ignored. Parameters: <channel list> The list of channel to load with the clip. <clippath> The path of the clip to queue. Player Response: OK or ERROR 80 Version 1.13 ES9600 User Guide Chapter 8: Remote control Protocols Playlist Commands AddPlaylist <playlistname> <clippath> This command appends a clip to the end of a playlist. If the playlist does not exist a new one is automatically created. Parameters: <playlistname> Name of the playlist to modify <clippath> Path of the clip to append Player Response: OK or ERROR Example: AddPlaylist “someplaylist” “someclip” The control system doesn’t need to terminate the playlist creation commands since the functionality is implied in the command. ClearPlaylist <playlistname> This command clears all the entries from a playlist. Parameters: <playlistname> Name of the playlist to modify. Player Response: OK or ERROR CreatePlaylist <playlistname> This command creates a new playlist. Parameters: <playlistname> Name of the playlist to modify. Player Response: OK or ERROR DeletePlaylist < playlistname > This command deletes a playlist from the player. Parameters: <playlistname> Name of the playlist to modify. Player Response: OK or ERROR 81 Version 1.13 ES9600 User Guide Chapter 8: Remote control Protocols DeletePlaylistItemProperties <playlistname> <index> <property1> … <propertyN> This command deletes one or more Clip properties from the specified playlist. Parameters: <playlistname> Name of the playlist to modify. <index> The index of the playlist Clip to modify <property> The name of the property to delete. Player Response: OK or ERROR DeletePlaylistProperties <playlistname> <property1> … <propertyN> This command deletes one or more playlist properties from the specified playlist. Parameters: <playlistname> Name of the playlist to modify. <property> The name of the property to delete. Player Response: OK or ERROR GetPlaylistItemProperties <playlistname> <index> <property1> … <propertyN> This command retrieves one or more Clip properties from the specified playlist. If no properties are specified, then all playlist item properties are returned. Parameters: <playlistname> Name of the playlist to modify. <index> The index of the playlist Clip to modify <property> The name of the property to retrieve. Player Response: PlaylistItemProperty <property> <value> … PlaylistItemProperty 82 Version 1.13 ES9600 User Guide Chapter 8: Remote control Protocols GetPlaylistProperties <playlistname> <property1> … <propertyN> This command retrieves one or more playlist properties from the specified playlist. If no properties are specified, then all playlist properties are returned. Parameters: <playlistname> Name of the playlist to modify. <property> The name of the property to retrieve. Player Response: PlaylistProperty <property> <value> … PlaylistProperty Example: GetPlaylistProperties intro.espl.xml prop1 prop2 prop3 PlaylistProperty “prop1” “value for prop1” PlaylistProperty “prop2” “value for prop2” PlaylistProperty “prop3” “value for prop3” PlaylistProperty InsertPlaylistItem <playlistname> <clippath> <index> This command inserts a clip into the playlist at the specified location. All items after the inserted item will have their index numbers increased by one. Parameters: <playlistname> Name of the playlist to modify <clippath> Path of the clip to append <index> The position Player Response: OK or ERROR Example: InsertPlaylistItem “someplaylist” OK “someclip” 2 ListAllPlaylists This command returns a list of all playlists stored on the player. Player Response: The player responds with a list of all playlists stored on the device. This list is terminated by an empty Playlist response line. Playlist <playlistname> … Playlist 83 Version 1.13 ES9600 User Guide Chapter 8: Remote control Protocols Example: ListAllPlaylists Playlist “someplaylist” Playlist “anotherplaylist” Playlist ListPlaylist <playlistname> This command returns a list of clips in a playlist. Parameters: <playlistname> Name of the playlist to modify. Player Response: The player responds with a list of all clips in the specified playlist. The list is terminated with an empty PlaylistEntry response line. PlaylistEntry <playlistname> <clippath> … PlaylistEntry Example: ListPlaylist someplaylist PlaylistEntry “someplaylist” “someclip.clp” PlaylistEntry “someplaylist” “anotherclip.clp” PlaylistEntry LoadPlaylist <channel list> <playlistname> This command loads a playlist onto the specified channels. The clips specified in the playlist must be available to all channels identified in <channel list>. Parameters: <channel list> A list of channels. <playlistname> Name of the playlist to load. Player Response: OK or ERROR MovePlaylistItem <playlistname> <oldindex> <newindex> This command changes the location of a clip within a playlist. Parameters: <playlistname> Name of the playlist to modify. <oldindex> Playlist index of the clip to move. <newindex> The new index of the clip after the move. Player Response: OK or ERROR 84 Version 1.13 ES9600 User Guide Chapter 8: Remote control Protocols RemovePlaylistItem <playlistname> <index> This command removes a clip from a playlist. Parameters: <playlistname> Name of the playlist to modify. <index> Playlist index of the clip to remove. Player Response: OK or ERROR SetPlaylistItemProperties <playlistname> <property1> <value1> … <propertyN> <valueN> This command sets one or more Clip properties on the specified playlist. Parameters: <playlistname> Name of the playlist to modify. <index> The index of the playlist Clip to modify <property> The name of the property to retrieve. <value> The value of the property to set. Player Response: PlaylistItemProperty <property> <value> … PlaylistItemProperty SetPlaylistProperties <playlistname> <property1> <value1> … <propertyN> <valueN> This command sets one or more playlist properties on the specified playlist. Parameters: <playlistname> Name of the playlist to modify. <property> The name of the property to set. <value> The value of the property to set. Player Response: PlaylistProperty <property> <value> … PlaylistProperty Example: SetPlaylistProperties intro.espl.xml “prop1” “hello” “prop2” “world” OK GetPlaylistProperties intro.espl.xml PlaylistProperty prop1 “hello” 85 Version 1.13 ES9600 User Guide Chapter 8: Remote control Protocols PlaylistProperty prop2 “world” PlaylistProperty Switchplaylist <channel list> <playlistname> The player performs a seamless switch to the new playlist at the end of the currently playing playlist. Parameters: <ChannelList> A list of channels <playlistname> Name of the playlist to switch to. Player Response: OK or ERROR Example: Switchplaylist 1 “Playlistname” OK 86 Version 1.13 ES9600 User Guide Chapter 8: Remote control Protocols Playback Commands FrameAdvance <channel list> <frame count> When the specified channel is paused, this command will advance the video to the next frame. The optional <FrameCount> parameter controls the direction and number of frames to advance. If omitted, <FrameCount> is assumed to be 1. Parameters: <channel list> A list of channels to control. <frame count> The direction and number of frames to advance. Player Response: OK or ERROR Examples: FrameAdvance 1,2 +1 OK FrameAdvance 1,2 -1 OK Next <channel list> This command instructs the player to jump to the next clip in the currently loaded playlist. Player Response: OK or ERROR Pause <channel list> This command pauses the currently playing content. Player Response: OK or ERROR Play <channel list> <speed> This command starts or resumes playback of the currently loaded playlist and clip. The optional <speed> parameter controls the direction and speed of playback. If <speed> is not supplied it is assumed to be 1.0 (normal speed playback in the forward direction). 87 Version 1.13 ES9600 User Guide Chapter 8: Remote control Protocols Speed Description speed > 0 Content plays in the forward direction. Example: A speed of 2.0 would be 2x fast forward. speed < 0 Content plays in the reverse direction Example: A speed of -4.0 would be 4x rewind. speed > -1.0 Content plays in slow motion. Example: A speed of 0.5 would be half speed slow. speed < 1.0 Parameters: <channel list> A list of channels to control. <speed> The desired playback speed. Player Response: OK or ERROR Previous <channel list> This command instructs the player to jump to the previous clip in the currently loaded playlist. Player Response: OK or ERROR Seek <channel list> <frame number> This command seeks to the specified frame of the playlist. Parameters: <channel list> A list of channels to control. <frame number> The frame number in the current playlist to seek to. Player Response: OK or ERROR Stop <channel list> This command stops playback and turns video off. Player Response: OK or ERROR 88 Version 1.13 ES9600 User Guide Chapter 8: Remote control Protocols Timecode Commands GetTimecodeMode This command returns the timecode mode setting. Player Response: TcGenerate or TcReceive GetTimecodeOpMode This command returns the timecode ‘receive’ mode settings. Player Response: Chase or Trigger GetTimecodeValue This command returns the timecode value (hh:mm:ss:ff) at the instant in time that the command was entered. SetTimecodeOpMode <mode> Sets the player into one of two timecode modes. Mode parameters: ‘Chase’ or Trigger’ Player Response: OK or ERROR Tcgenerate <channel list> <timecode> Turns the timecode generator on and sends the timecode hh:mm:ss:ff out as a jam sync. Player Response: OK or ERROR Tcplayat <channel list> <timecode> Sets the timecode playat time Player Response: OK or ERROR Tcreceive <channel list> Sets the player into timecode receive mode. Player Response: OK or ERROR 89 Version 1.13 ES9600 User Guide Chapter 8: Remote control Protocols Tcstart <channel list> Starts the timecode running (assumes the player is in Generate mode – refer to “The Timecode configuration dialog” section of Chapter 6: Timecode) Player Response: Tcstopat <channel list> <timecode> Sets the timecode stopat time Player Response: OK or ERROR 90 Version 1.13 ES9600 User Guide Chapter 8: Remote control Protocols GPIO Commands: Use the GPIO Interface module commands to enable the MS9600 to control or be controlled by an external device. NOTE: Refer to Chapter 9: ‘Using the GPIO Interface’ for more information. GPIO command parameters use the following conventions. <input> GPIO input. values ::= 1, 2, 3, 4 <output> GPIO output. values ::= 1, 2, 3, 4 <level> ‘+’ ::= logic level high ‘-‘ ::= logic level low Getinput <input> <input> … <input> This command returns the level of the requested GPIO inputs. If no parameters are supplied, the levels of all GPIO inputs are returned. Player Response: InputState <input><level> <input><level> … <input><level> Example: In the following example, inputs 1 and 3 are logic high and inputs 2 and 4 are logic low. GetInput InputState 1+ 2- 3+ 4GetInput 1, 3 InputState 1+ 3+ Getoutput This command returns the level of the requested GPIO outputs. If no parameters are supplied, the levels of all GPIO outputs are returned. Player Response: outputstate <output><level> <output><level> … <output><level> Example: In the following example, outputs 1 and 3 are logic high and inputs 2 and 4 are logic low. GetOutput 1, 3 OutputState 1+ 3+ Setinputtrigger <on> This command sets the GPIO inputs to automatically respond to a ‘status’ change (such as a switch closure or other external trigger). Player Response: OK 91 Version 1.13 ES9600 User Guide Chapter 8: Remote control Protocols Setinputtrigger <off> This command sets the GPIO inputs to ignore ‘status’ changes. Player Response: OK Setoutput <output><level> <output><level> … <output><level> This command sets the output level of the specified GPIO outputs. Player Response: outputstate <output><level> <output><level> … <output><level> 92 Version 1.13 ES9600 User Guide Chapter 8: Remote control Protocols System/Status Commands Getstate <channel list> Request the status of certain parameters for a specific player (Channel) Player Response: Statetc 1 “00:00:00:00” (“current timecode”) Statefile 1 “clip” “(current clip”) Stateplay 1 “status” (“playing”, “paused”, “stopped”) GetStateEx <channel list> <parameter> <parameter> … <parameter> This command returns the values of various channel parameters. Available parameters are described in the following table. Parameter Description “clip” The path of the current clip. Will return an empty string if no clip is loaded. “duration” The duration of the clip in frames. “duration_timecode” The duration of the clip as a timecode (hh:mm:ss:ff) “loop” The loop setting for the channel. values = “0”, “1” “mute” The mute setting for the channel. values = “0”, “1” “playlist” The path of the current playlist. Will return an empty string if no playlist is loaded. “playstate” The playstate of the channel. values = “paused” | “playing” | “stopped” “position” The current position of the clip in frames. “position_timecode” The current position of the clip as a timecode. “position_percentage” The current position of the clip as a percentage. “speed” The current playback speed. Example: getstateex 1,2 clip duration playstate StateEx 1 "clip" "clippath" StateEx 1 "duration" "2761" StateEx 1 "playstate" "playing" StateEx 2 "clip" "" StateEx 2 "duration" "0" StateEx 2 "playstate" "stopped" StateEx 93 Version 1.13 ES9600 User Guide Chapter 8: Remote control Protocols Reboot Reboot the HD Player. The player doesn’t send a response to this command. 94 Version 1.13 ES9600 User Guide Chapter 8: Remote control Protocols Miscellaneous Commands – (Telnet Protocol) tbd GetTemperature <sensor1> … <sensorN> This command returns the temperature reading of the requested sensors. If sensor names are omitted, the command returns the readings of all available sensors. Parameters: <sensor> The name of a sensor to retrieve. values := “front panel” | “main processor” Sensor values are listed in the following table. “front panel” Temperature sensor on the front panel board. “main processor” Temperature sensor near the main CPU. Player Response: Temperature <sensor> <temperature value> Examples: GetTemperature Temperature “front panel” 36.50C Temperature “main processor” 42.75C Temperature GetVoltage <sensor1> … <sensorN> This command returns the temperature reading of the requested sensors. If sensor names are omitted, the command returns the readings of all available sensors. Parameters: <sensor> The name of a sensor to retrieve. values := “front panel” | “main processor” “PS1 5vdc” 5V rail on power supply 1 “PS2 5vdc” 5V rail on power supply 2 “PS1 3.3vdc” 3.3V rail on power supply 1 “PS2 3.3vdc” 3.3V rail on power supply 2 “PS1 12vdc” 12V rail on power supply 1 “PS2 12vdc” 12V rail on power supply 2 “PS1 -12vdc” 12V rail on power supply 1 “PS2 -12vdc” -12V rail on power supply 2 Player Response: Voltage <sensor> <voltage> 95 Version 1.13 ES9600 User Guide Chapter 8: Remote control Protocols Examples: GetVoltage “ps1 5vdc” Voltage “ps1 5vdc” 5.39vdc Voltage SetDate tbd GetDate This command returns the current date and time of the player. Player Response: Date <MM/DD/YYYY> <HH:MM:SS> Examples: GetDate Date 03/25/2000 07:53:17 SetDeviceLocation <location> This command sets the location string of the player. Player Response: OK or ERROR Examples: SetDeviceLocation “lobby” OK GetDeviceLocation This command returns the location string of the player. Player Response: DeviceLocation <string> Examples: GetDeviceLocation DeviceLocation “lobby” SetDeviceName <name> This command sets the device name of the player. Player Response: OK or ERROR Examples: SetDeviceName “lobby player” 96 Version 1.13 ES9600 User Guide Chapter 8: Remote control Protocols GetDeviceName This command returns the name of the player. Player Response: DeviceName <string> Examples: GetDeviceName DeviceName “lobby player” GetDiskInfo This command returns the size of the player hard drive and the amount of available free space. The returned values are in 1024 byte blocks. Player Response: DiskInfo <total_blocks> <free_blocks> Examples: GetDiskInfo DiskInfo 936372 821636 GetVersionInfo This command returns the version number of various hardware and software components of the player. Player Response: VersionInfo <component1> <version> <date> … VersionInfo Examples: GetVersionInfo VersionInfo "LCD_FPGA" "1.2” 4/28" VersionInfo "Video_FPGA" "1.3” 5/5" VersionInfo "Firmware" "0.10” “May 13 2008" VersionInfo 97 Version 1.13 ES9600 User Guide Chapter 9: Chapter 9: Using the GPIO Interface Using the GPIO Control Interface GPIO Physical Interface WARNING: The GPIO interface provides a 12V DC power output. Ensure that no conductive material is allowed to come into contact with these terminals. Back view of the ES9600 GPIO Interface: The GPIO Control Interface offers opto-isolated inputs and relay change-over outputs that can are to be controlled via third party show-control software or ESCAN (show-control software by Electrosonic). The Control Interface features: Four Opto-Isolated inputs that can be configured to provide triggers to either an external show-control system or the ES9600 Four Digital outputs, each driving low current change-over relays capable of switching up to 1A at 24VDC. 12VDC Power Supply to facilitate the I/O switch functioning. Opto-Isolated Digital Inputs The digital input connections consist of a bank of screw terminal connectors with separate 3.5mm removable terminal blocks for ease of wiring. Each input is assigned two terminals indicated by a ‘+’ and a ‘-‘ symbol. Because each input is opto-isolated both connections must be used to ensure the correct operation of the input circuit. The ES9600 GPIO utilizes four (4) digital input connection channels. Input Circuit Wiring Configuration The opto-isolated input circuits provide for various connection scenarios, two common methods follow: 98 Version 1.13 ES9600 User Guide Chapter 9: Using the GPIO Interface Option 1 – Input switch contacts using the ES9600’s power supply. This method is useful in applications where the current required is within the allowable limit of the ES9600. 500mA is available for external use. Option 2 – Input switch contacts using an external power supply. The voltage of the external supply is not critical if the current through the internal 560ohm resistor is limited between 5 – 20mA. This method is preferred where installation takes place in noisy environments, or where the switch contacts wiring is run over a long distance. Relay Changeover contacts (Digital Outputs) GPIO output offers four (4) normally open/normally closed (NO/NC) sets of relay changeover contacts. These relay outputs are used as switches to control external devices. Their activity is controlled by the GPIO control sequence (macro) stored on the ES9600. 99 Version 1.13 ES9600 User Guide Chapter 9: Using the GPIO Interface GPIO Command Protocol The protocol used to communicate with the ES9600 GPIO board from ESCAN will mirror the text protocol used from the Electrosonic FrEND range of products, with an important difference: The commands do not have space separators in the command names. i.e. SET OUTPUT on the FrEND becomes SETOUTPUT on the ES9600. There are two groups of messages, one group to get and set the status of the outputs and one to get the state of the inputs and indicate when they change. All protocol messages are treated as case-insensitive on the ES9600. All protocol messages should be terminated with a carriage return 0x0d. When referencing an input or output and its state, there should be no space between the Id and the state. Thus, use 1+<space>2+ NOT 1<space>+<space>2<space>+ Digital Outputs The number of Digital outputs (Change-over relays) available on the ES9600 is currently four (4) but the protocol allows for future expansion. SET OUTPUT The output command will set the state of one of more of the digital outputs. The outputs are numbered from 1 to 4. A ‘ +’ will activate the output, a ‘ –‘ will deactivate the output. The ES9600 will respond with a single output message containing the current state of all outputs. syntax: setoutput 1[+|-] 2[+|-] 3[+|-] 4[+|-] <0x0d> return data: output 1[+|-] 2[+|-] 3[+|-] 4[+|-] <0x0d> parameters: 1, 2, 3, 4 are the output numbers 1-4 +: activates the output -: deactivates the output Examples setoutput 1+ <0x0d> Sets output 1 on. setoutput 1- 2+ <0x0d> Sets output 1 off and 2 on. GET OUTPUT The get output command is used to retrieve the current state of all outputs, without affecting the state of any of them. syntax: getoutput <0x0d> return data: output 1[+|-] 2[+|-] 3[+|-] 4[+|-] <0x0d> parameters: 1,2,3,4 represents the output number +: output is currently active -: output is currently inactive Digital Inputs The number of Digital inputs available on the ES9600 is currently four (4) but the protocol allows for future expansion. 100 Version 1.13 ES9600 User Guide Chapter 9: Using the GPIO Interface The ES9600 will send out an inputstate (See description of GET INPUT) message whenever the state of an input changes. The input state message will contain the current state of all inputs. It is up to the control system to determine which input(s) changed and act accordingly. A function is provided to read the input state at any time. GET INPUT This function will return the state of the digital inputs on the unit. syntax: getinput<0x0d> return data: inputstate 1[+|-] 2[+|-] 3[+|-] 4[+|-]<0x0d> parameters: 1,2,3,4 represent the input number +: input is currently active -: input is currently inactive 101 Version 1.13 ES9600 User Guide Appendix A: Appendix A: TCP/IP Communications TCP/IP Communications An Introductory Note A full explanation of Ethernet communication is beyond the scope of this user guide. However, the following details should provide enough information to understand the basic concepts. Ethernet Communication The ES9600 can be controlled via RS-232 and Ethernet connections. Most users will be familiar with RS-232 communication. Ethernet communication, while not a new development, is still a mystery to many. Let’s compare the differences between RS-232 and Ethernet data: RS-232 Designed for one port to connect to one device Messages transmitted as a whole No way to guarantee receipt of data Maximum data transfer speeds of around 115 Kbps Ethernet Designed to connect many devices (called a “network”) on a single port Messages transmitted in “packets”, as network traffic allows Each device in the network has a unique address, ensuring that a data message can be received only by the target device Maximum data transfer speeds greater than 100 Mbps Several types of Ethernet communications exist. The protocol, or language, that the ES9600 uses for its Ethernet communication is called TCP/IP (Transmission Control Protocol and Internet Protocol). TCP/IP Addressing Each device on a network requires a unique address to ensure that data can be received by the device it is intended to reach. Two methods exist for assigning an Ethernet addresses in a TCP/IP network: 1. Dynamic assignment 2. Static assignment Dynamic Assignment Dynamic address assignment requires the use of a DHCP (Dynamic Host Configuration Protocol) Player that automatically assigns an address to a network device each time it connects. When the device connects, it may be assigned an address that differs from the address it was last assigned. NOTE: In order for the ES9600 to obtain a dynamic IP address, a DHCP server must be incorporated into the network. 102 Version 1.13 ES9600 User Guide Appendix A: TCP/IP Communications Static IP Assignment Static assignment allows the user to assign an IP address to a device. Once assigned, it will always retain the assigned address unless changed by the user. NOTE: DO NOT ASSIGN TWO DEVICES THE SAME IP ADDRESS. The following sections discuss the structure of IP addresses, and how to assign a static address to the ES9600. The IP Address An IP Address is a 32-bit binary number that is used to identify each device on an Ethernet network. This is represented with four decimal numbers (each in the range 0 to 255) separated by dots, such as: 198.123.34.240. This is called 'dotted decimal notation'. Network and Host Identifiers An IP Address is divided into two parts: The “network identifier” The “host identifier” On a given network, each address must have the same network identifier value but have a unique host identifier. For example, the following two IP addresses could exist on the same network: 208.132.180.40 208.132.180.55 This assumes that 208.132.180 is the network identifier, and 40 and 55 are the host identifiers. The above examples are representative of a “Class C” network. Classes are explained in the next section. Class Names There are rules governing the valid numbers that can be assigned as network identifiers and host identifiers. The valid numbers are assigned “classes”. There are different “classes” of IP addresses that define: The range of valid addresses Which parts of the address are used for the network and host identifiers The most common IP Address classes are: Class Name Class A Class B Class C Valid Address 0.0.0.1 to 127.255.255.254 128.0.0.1 to 191.255.255.254 192.0.0.1 to 223.255.255.254 Range Identifier Arrangement NNN.HHH.HHH.HHH NNN.NNN.HHH.HHH NNN.NNN.NNN.HHH Where: NNN = Network identifier HHH = Host identifier 103 Version 1.13 ES9600 User Guide Appendix A: TCP/IP Communications Choosing IP Addresses Two scenarios exist that will dictate the IP address assigned to your devices: 1. Connecting to an existing network 2. Establishing an independent network. Connecting to an Existing Network If your ES9600 is to be connected into an existing network, you will need to contact the network administrator and ask that a suitable address be allocated to you. Establishing an Independent Network If the ES9600 is to be used on an independent network, you can assign an IP address of your choice. Follow the guidelines below for choosing your IP address(es). On an independent network you can (theoretically) use any addresses you wish. However, it is recommended that you use the Class C format (i.e. from 192.0.0.1 up to 223.255.255.253). Note: the ES9600 will be delivered pre-configured with a class C IP address from the 192.0.0.? family. Remember that there are two rules for choosing IP addresses: The network identifier must be the same for each address, The host identifier must be unique for each address. Applying these rules to Class C addresses, it can be seen that the first three decimal values of your IP addresses must all be the same, while the last value is used to uniquely identify each device. The following is an example of a valid Class C addressing scheme: Device IP Address ESCAN PC: ES9600 Player 1 ES9600 Player 2 208.132.180.41 208.132.180.42 208.132.180.43 The following is an example of an invalid Class C addressing scheme: Device IP Address ESCAN PC ES9600 Player 1 ES9600 Player 2 208.132.180.41 192.157.180.42 209.100.123.43 Note: These are invalid because the network identifier for each address is not the same, even though each IP Address is unique. One more concept must be discussed in order to properly assign an IP address; that of the Subnet Mask. The Subnet Mask The Subnet Mask is another 32-bit binary number that is used to 'mask' certain bits of the IP Address. This provides a method of extending the number of network options for a given IP Address. It works by allowing part of the host identifier to be used as a 'subnet identifier'. 104 Version 1.13 ES9600 User Guide Appendix A: TCP/IP Communications It is important that you set the correct value for the Subnet Mask. The basic values depend on the class of IP Address being used: Class Name Class A Class B Class C Subnet Mask 255.0.0.0 255.255.0.0 255.255.255.0 Refer to ‘Chapter 3: Player Interface – Local’, and ‘Chapter 4: Player Interface – Web’ for information on setting the IP Address and Subnet Mask for the 9600. Pinging a Device You can perform a simple test from your control computer to check that the ES9600 is responding correctly. To perform the test, you will use a command called “PING” (Packet Internet Groper). Performing a Ping 1. Click on the Windows Start button, and from the menu choose Run. 2. In the Run dialog box, type in the following: ping xxx.xxx.xxx.xxx -t Where 'xxx.xxx.xxx.xxx' is the IP Address of the ES9600 that you wish to test. 3. A 'DOS Window' will then open and show a series of responses as in the examples below. 4. To stop the ping command, press Ctrl + C on the keyboard. Example 1: A successful Ping If you have successfully 'pinged' the address 208.132.180.39, you will get the following response: Reply from 208.132.180.39: bytes=32 time=2ms TTL=32 This response indicates that the device at the specified address is communicating correctly. Note: The response 'time' value may vary according to network traffic. Example 2: Unsuccessful Pings If you are not successful pinging the address, you will get one of two messages. The message returned will indicate the type of problem. A message of: 105 Version 1.13 ES9600 User Guide Appendix A: TCP/IP Communications • Request timed out - indicates that there has been no response from the specified address. Either the device is not receiving data from the computer or the device is sending data. Check the data cabling, power and setup of the affected device. • Reply from 208.132.180.48: Destination host unreachable- indicates that you are trying to ping an address with a different network identifier than your computer. Check the value of the PC’s IP address and compare it to that of the device – the network identifiers (the first three sets of numbers in the IP addresses) are mismatched. 106 Version 1.13 ES9600 User Guide Appendix B: Encoding Guidelines Appendix B: Encoding Guidelines This section describes the process of encoding and packaging audio/video material for playback on the ES9600. The encoding and packaging process follows many of the concepts and specifications developed by the Digital Cinema Initiative (DCI). For more detailed information, refer to the references and specifications listed at the end of this section. Electrosonic provides a range of professional services to assist customers with their encoding needs. Contact your Electrosonic sales representative for more information. Encoding and Packaging Overview Creating content for the ES9600 requires three high-level phases: Encoding, Wrapping and Packaging. Encoding - In the encoding phase, each frame of the source video essence is individually compressed by passing the raw pixel data through a JPEG-2000 encoder. The output of the encoder is a JPEG-2000 codestream. The parameters applied to the encoder affect the compression level and quality of the image. The source audio essence is encoded using pulse code modulation or PCM. Wrapping - In the wrapping phase, the individual compressed video frames are combined into a single track file using the Material Exchange Format (MXF). The audio is converted into a separate MXF track file. Unlike multiplexed file formats such as MPEG program or transport streams, the compressed audio and video data are maintained in separate MXF files. Packaging - In the packaging phase, additional control files are generated which describe the format of and relationship between the audio and video files created in the wrapping phase. The resulting files are collectively known as a Digital Cinema Package (DCP) as described in the DCI specification. Video Track Files A video track file is the smallest unit of video in the system. It is an MXF container which has all the compressed video data and associated meta-information necessary to decode and render a piece of video essence. The ES9600 supports frame-wrapped video track files conforming to SMPTE 377M-2004 and SMPTE 422M-2006. Audio Track Files An audio track file is the smallest unit of audio in the system. It is an MXF container which has all the PCM encoded audio data and associated meta-information necessary to recreate a piece of audio essence. The ES9600 supports frame-wrapped audio track files conforming to SMPTE 377M-2004 and SMPTE 382M2007. 107 Version 1.13 ES9600 User Guide Appendix B: Encoding Guidelines Reels In the movie industry it is a common practice to split a feature onto several film ‘reels’ for distribution. This concept is supported digitally by splitting a feature into several separate track files. We may want to use more than one ‘reel’ in order to work with more manageable file sizes, say hundreds of gigabytes instead of a few terabytes. Composition Playlist Conceptually, a Composition Playlist represents a complete presentation of a feature, trailer or an advertisement. A Composition Playlist contains all of the information necessary to reassemble a presentation from its individually encoded components. A Composition Playlist could consist of one or many Reels depending upon the wrapping process. Packing List and Asset map The Packing List and Asset Map are described in SMPTE 429-8-2006 and SMPTE 429-9-2007, respectively. The Packing List and Asset Map provide size and checksum information for all files in the DCP so the player can ensure there was no corruption during file transfer and ingest. Supported Video Formats The ES9600 supports the resolutions and video frame rates listed in the following table. Resolution Frame Rates single HD-SDI/ 4:4:4: 60fps 1280 x 720p dual HD-SDI/ 4:2:2: 60fps 1920 x 1080 (interlaced) 1920 x 1080 (progressive) Future single HD-SDI/ 4:4:4: 24fps, 25fps, 30fps dual HD-SDI / 4:2:2: 29.97fps single HD-SDI/ 4:4:4: 24fps 2048 x 1080 dual HD-SDI / 4:2:2: 48fps 108 Version 1.13 ES9600 User Guide Appendix B: Encoding Guidelines The ES9600 supports the colorspaces and chroma subsampling formats listed in the following table. Colorspace Chroma Subsampling RGB 4:4:4 XYZ 4:4:4 YPrPb 4:2:2, 4:4:4 JPEG-2000 Codestream Restrictions JPEG-2000 codestreams must conform to ISO 15444-1:2004/PDAM 1 and more fully constrained as follows: All frames shall be untiled; the entire image shall be encoded as a single tile. The image and tile origins shall both be at <0,0>. Each compressed frame shall be less than 1,300,000 bytes. Each tile part of a compressed frame shall be less than 500,000 bytes. Compressed frames of 4:4:4 content shall have 3 tile parts. Compressed frames of 4:2:2 content shall have 2 tile parts. The progression order shall be Component Position Resolution Layer (CPRL). All frames shall contain a Tile-part Length, Main header (TLM) marker. The following markers are forbidden: o POC – Progress Order Change o PPM – Packed Packet headers, Main header o PPT – Packed Packet headers, Tile-part header o RGN – Region of interest The following markers may appear only in the main header. o COC – Coding style Component o COD – Coding style Default o QCC – Quantization Component o QCD – Quantization Default Codeblocks shall be of size 32x32 for 4:4:4, 2K and 1080p resolutions. Codeblocks shall be of size 128x32 for all other formats and resolutions. The codeblock coding style shall be SPcod, SPcoc = 0b00000000. The precinct sizes at all resolutions shall be 256x256, except the lowest frequency subband, which must have a precinct size of 128x128 There must be no more than 5 wavelet transform levels. 109 Version 1.13 ES9600 User Guide Appendix B: Encoding Guidelines Audio Encoding Guidelines The ES9600 supports Broadcast Audio WAVE files with the following properties: Sample rate 48 kHz Sample width 16, 24 or 32 bit Channel count 2, 8 or 16 channel Audio streams must conform to the following restrictions: The edit rate of the audio shall match the edit rate of the video. The audio stream shall be aligned to a full video frame boundary. The audio stream shall be the same duration as the Reel’s associated video. Composition Playlist Guidelines Composition Playlists must conform to SMPTE 429-7-2006 with the following additional restrictions: All Reels of a Composition Playlist must be of the identical audio/video format. Video assets must have the same chroma subsampling, colorspace, frame rate and resolution. All audio assets must have the same bit width and number of audio channels. Reels of a Clip may have no associated audio assets. Digital signatures are not supported. The following XML nodes and their children are ignored: o <Signer> o <{http://www.w3.or/2000/09/xmldsig}Signature> The ES9600 handles JPEG-2000 content encoded in colorspaces other than CIE 1931 XYZ defined by DCI. The colorspace of the encoded video essence is specified through a custom XML tag, <EsColorspace> attached to a Reel’s <MainPicture> node. An example is Reel is shown in the following XML snippet. <Reel> <AssetList> <MainPicture> …. <EsColorspace>Colorspace String</EsColorspace> …. </MainPicture> </AssetList> </Reel> Supported colorspace strings are listed in the following table. 110 Version 1.13 ES9600 User Guide Appendix B: Encoding Guidelines Colorspace String Description “CIE 1931 XYZ” “RGB” “YCrCb BT.601” “YPrPb BT.709” If no colorspace is specified, the default colorspace is assumed to be `CIE 193 XYZ`. Electrosonic Show Playlist Guidelines A Show Playlist defines an ordered list of Composition Playlists to be played-out in sequence by the ES9600 player. A Show Playlist is stored as an XML file with a simple schema as shown in the following example. In the example, optional XML elements are shown in italics. <?xml version=”1.0”?> <Playlist> <StartTime>00:01:59:00</StartTime> <PlayAt>00:02:00:00</PlayAt> <ClipList> <Clip> <Path>path-to-clip</Path> </Clip> </ClipList> </Playlist> All Composition Playlist paths are relative to the media directory on the ES9600. All Clips of a Show Playlist must be of the identical audio/video format. Video assets must have the same chroma subsampling, colorspace, frame rate and resolution. All audio assets must have the same bit width and number of audio channels. Reels of a Clip may have no associated audio assets. Name/value pairs of properties and metadata can be associated with a playlist or an individual clip by adding elements to the playlist XML file. The property name is used as the XML tag and the property value is stored in the element body. Property names must be valid XML tags and may not begin with ‘__’. Property values may not contain invalid XML characters such as < or >. Unsupported properties are ignored by the ES9600 player. Currently supported properties are listed in the table below. Property Element StartTime <Playlist> Specifies the initial Timecode value the player generates when a Timecode Master. TimecodeMode <Playlist> Specifies the Timecode mode of the player. values := ‘Master’, ‘Receiver’ PlayAt <Playlist> Specifies the Timecode at which a clip begins to play. PlayAt is only supported on the first clip of a playlist. StopAt <Playlist> Specifies the Timecode at which a clip stops playing. 111 Description Version 1.13 ES9600 User Guide Appendix B: Encoding Guidelines Playlist properties can be accessed and modified using the GetPlaylistProperties and SetPlaylistProperties MSVPP commands. Clip properties can be accessed and modified using the GetPlaylistItemProperties and SetPlaylistItemProperties MSVPP commands. Encoding Related Specifications SMPTE 377M-2004 “Material Exchange Format (MXF) File Format” SMPTE 422M-2006 “Mapping JPEG 2000 Codestreams into the MXF Generic Container” SMPTE 382M-2007 “Mapping AES3 and Broadcast Wave Audio into the MXF Generic Container” SMPTE 429-3-2006 “D-Cinema Packaging – Sound and Picture Track File” SMPTE 429-4-2006 “D-Cinema Packaging – MXF JPEG 2000 Application” SMPTE 429-7-2006 “D-Cinema Packaging – Composition Playlist” SMPTE 429-8-2006 “D-Cinema Packaging – Packing List” SMPTE 429-9-2007 “D-Cinema Packaging – Asset Mapping” 112 Version 1.13 ES9600 User Guide Appendix C: Appendix C: Specifications Specifications Video Outputs Analog Format: RGBHV / YPrPb to SMPTE274M and 296M DVI Format RGBHV to SMPTE374M and 296M Tri level sync on YPrPb mode as specified by EIA770 HDSDI Single Link SMPTE292M and Dual Link SMPTE 374M Video Connector 29 Pin DVI/I Socket PinOut: Pin # Name Pin # Name 1 TMDS Data 2 - 13 TMDS Data 3 + 2 TMDS Data 2 + 14 +5 V power 3 TMDS Data 2/4 Shield 15 Ground (for +5V) 4 TMDS Data 4 - 16 Hot Plug Detect 5 TMDS Data 4 + 17 TDMS Data 0 - 6 DDC Clock (SCL) 18 TDMS Data 0 + 7 DDC Data (SDA) 19 TDMS Data 0/5 Shield 8 9 10 11 12 Analog Vertical Sync TMDS Data 1 TMDS Data 1 + TMDS Data 1/3 Shield TMDS Data 3 - 20 21 22 23 23 TDMS Data 5 TDMS Data 5 + TDMS Clock Shield TDMS Data Clock + TDMS Data Clock - C1 C2 C3 Analog Red Analog Green Analog Blue C4 C5 Analog Horizontal Sync Analog GND Return: (Analog R, G, B) Network Dual RJ45 Ethernet 10/100/1000Base T auto sensing. Digital Video Decoder ISO/IEC 15444-1 JPEG2000. 32 x 32 Codeblock 9/7 Inverse Wavelet Transform 8/10/12bit samples / color component 113 Version 1.13 ES9600 User Guide Appendix C: Specifications *2048x1080p and 1920x1080 60/59/50/48fps requires DCI compatible projector. 250Mbits Max bit rate for DCI compliant files TBD bit/s Max for standard JPEG2000 Video Output Formats SMPTE274M / SMPTE296M / SMPTE292M / SMPTE374M** 2048 x 1080p 4:4:4 24 fps 1920 x 1080p 4:4:4 24 fps 1920 x 1080p 4:4:4 25 fps 1920 x 1080p 4:4:4 30 fps 1920 x 1080p 4:2:2 29.97 fps 1280 x 720p 4:4:4 50 fps 1280 x 720p 4:2:2 60 fps *2048x1080p and 1920x1080 60/59/50/48fps requires DCI compatible projector. ** Supports 4:4:4 12 bit, 30 fps. 4:2:2 60 fps not supported. Video Outputs Electrical Analogue Output Color Space Support SMPTE 170M SMPTE 240M ITU-R-BT-709 ITU-R-BT-470-2-SystemM Audio Outputs 16 Channel Audio Outputs: Digital AES/EBU via 8 BNC Sockets. Audio Output Level 3Vp-p max Range -97db to +30db Audio Processing 16 Channel Uncompressed digital audio Sampling Rates 48KHz 114 Version 1.13 ES9600 User Guide Appendix C: Specifications System Control Features Genlock Input Video Black And Burst 1V p – p, bi-level. (FUTURE) BNC Socket Linear Timecode (LTC) Timecode Input SMPTE, EBU Film (24fps)Input Connector Phono (RCA) Socket Input Impedance 600 ohms Input Level >100mV p-p Timecode Output SMPTE, EBU Film (24fps) Output Connector Phono (RCA) Socket Output Impedance 600 ohms Output Level 1V p-p ESGEN in and out Proprietary synchronization feature 6 pin mini DIN Sockets Physical Specifications Chassis Weight 23lbs (10kg) Chassis Dimensions 19” (w) x 3.5” (h) x 17” (d) (483mm x 89mm x 432mm) Power, Voltage Dual redundant Input: 90-264 VAC 47-63 Hz Auto Ranging, <130W Environmental Operating Temp: 50 - 104° F (10 – 40° C) Ambient, 5%- 90% RH non-condensing EMC approvals CE and FCC Part 15, sub part B, class B Safety Compliance NRTL approved for North American and European markets. Contact Electrosonic for further details. 115 Version 1.13 ES9600 User Guide Index Index A G About the Player Analog Output Audio Audio Encoding Autoplay 33, 51 47 49 105 36 C CE Compliance Choosing IP Addresses Clip Clip Info Codestream Restrictions Communications Composition Playlist 1 99 20 36 104 97 105 Genlock GPIO 12VDC Commands Digital Inputs Input Circuit Wiring Digital Outputs Relay Changeover contacts Data Remove FTP Internet Explorer Data Transfer FTP Internet Explorer Date and Time 61 63 61 61 23 E Encoder Knob Encoding ENTER button Environmental ESCAN ES-GEN Ethernet ETHERNET Ethernet Settings Ethernet TCP/IP 16 102 16 11 9 30, 45, 58 97 13, 14 43 8 F 94 H Help 32 I Installation IP Address D 30, 45, 58 93 93 95 93 93 10 98 L Last Clip button LCD Loop Mute LCD Screen Load Clip 15 21 21 23 35 M Mains Power 11, 12 N Network Settings Networking Next Clip button 24 9 16 P FCC Compliance Frame Frame Mode button 1 20 15 116 Packaging Pinging Play Clip Play/Pause button Player Player Lock Player Status 102 100 17 16 26, 50 32 19 Version 1.13 ES9600 User Guide Index Playlist Playlist Delete Playlist Editor Playlist Properties Playlist, New POWER OFF/ON PREV button 19 40 37 38 38 13 16 Q Quick Start 17, 18 R Reboot Remote Control Command Reference Media Management Commands Miscellaneous Telnet Commands Playback Commands Playlist Commands System Commands Timecode Commands Remote Control Protocols GPIO Commands Text Command Protocol (Telnet) Text Command Structure Remove Clip RJ45 Ethernet RJ45 Pinout RS232 27 76 90 84 77, 78 88 86 64 87 65 64 38 64 64 8, 13, 14, 27, 41 Shuttle Shuttle Mode button Static IP Assignment STATUS LEDs Stop button Subnet Mask Supported Formats System Diagram System Info System Status 21 15 98 15, 16 16 99 103 14 28 33 T TCP/IP Addressing Timecode Command Reference EBU FILM Play At Slave SMPTE Start Time Stop At Timecode Properties Transport Control 97 86 52, 58 52 55 56, 57 52 55 55 39 36 V Ventilation Video Mode VIDEO Outputs 10 20, 29 45 13 S Serial Serial Port Pinout Serial RS232 control Settings Setup 27 64 13 22 40 117 W Web Interface Clip Info Wrapping 34 36 102 Version 1.12