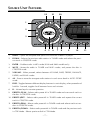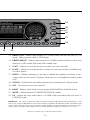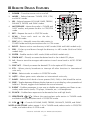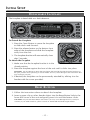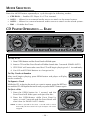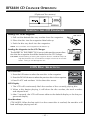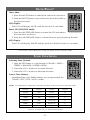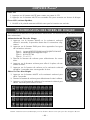
1
RFX9100 RFX9100R RFX9200 RFX9200R RFX9300 RFX9300R RFX9400 RFX9400R SOURCE UNITS Páginas de Referencia para la Instalación Schéma d’Installation Installations Beiblatt Istruzioni di Installation Installation & Operation Dear Customer, Congratulations on your purchase of the world’s finest brand of car audio source units. At Rockford Fosgate we are committed to musical reproduction at its best, and we are pleased you chose our product. Through years of engineering expertise, hand craftsmanship and critical testing procedures, we have created a wide range of products that reproduce music with all the clarity and richness you deserve. For maximum performance we recommend you have your new Rockford Fosgate product installed by an Authorized Rockford Fosgate Dealer, as we provide specialized training through Rockford Technical Training Institute (RTTI). Please read your warranty and retain your receipt and original carton for possible future use. To add the finishing touch to your new Rockford Fosgate image order your Rockford accessories, which include everything from T-shirts and jackets to hats and sunglasses. To get a free brochure on Rockford Fosgate products and Rockford accessories, in the U.S. call 480-967-3565 or FAX 480-967-8132. For all other countries, call +001-480-967-3565 or FAX +001-480-967-8132. PRACTICE SAFE SOUND™ Continuous exposure to sound pressure levels over 100dB may cause permanent hearing loss. High powered auto sound systems may produce sound pressure levels well over 130dB. Use common sense and practice safe sound. If, after reading your manual, you still have questions regarding this product, we recommend that you see your Rockford Fosgate dealer. If you need further assistance, you can call us direct at 1-800-669-9899. Be sure to have your serial number, model number and date of purchase available when you call. The serial number can be found on the outside of the box. Please record it in the space provided below as your permanent record. This will serve as verification of your factory warranty and may become useful in recovering your source unit if it is ever stolen. Serial Number: ______________________________ Model Number: _____________________________ TABLE OF CONTENTS Introduction . . . . . . . . . . . . . . . . . . . . . . . . . . . . . . . . . . . . . . . . . . . . 1 Accessory Pack. . . . . . . . . . . . . . . . . . . . . . . . . . . . . . . . . . . . . . . . . . 1 Specifications . . . . . . . . . . . . . . . . . . . . . . . . . . . . . . . . . . . . . . . . . . . 2 Precautions . . . . . . . . . . . . . . . . . . . . . . . . . . . . . . . . . . . . . . . . . . . . 3 “Quick Look” Features Matrix . . . . . . . . . . . . . . . . . . . . . . . . . . . . . . . 5 Source Unit Features. . . . . . . . . . . . . . . . . . . . . . . . . . . . . . . . . . . . . . 7 IR Remote Design Features . . . . . . . . . . . . . . . . . . . . . . . . . . . . . . . . . 9 Installation Considerations. . . . . . . . . . . . . . . . . . . . . . . . . . . . . . . . . 10 Source Unit Mounting Locations . . . . . . . . . . . . . . . . . . . . . . . . . . . . 11 Wiring the System. . . . . . . . . . . . . . . . . . . . . . . . . . . . . . . . . . . . . . . 12 Source Unit Installation . . . . . . . . . . . . . . . . . . . . . . . . . . . . . . . . . . . 13 Initial Setup . . . . . . . . . . . . . . . . . . . . . . . . . . . . . . . . . . . . . . . . . . . 15 Basic Operation . . . . . . . . . . . . . . . . . . . . . . . . . . . . . . . . . . . . . . . . 17 CD Player. . . . . . . . . . . . . . . . . . . . . . . . . . . . . . . . . . . . . . . . . . . . . 20 Multiple CD Changer Operation . . . . . . . . . . . . . . . . . . . . . . . . . . . . 25 MP3 Player Operation. . . . . . . . . . . . . . . . . . . . . . . . . . . . . . . . . . . . 27 Tuner Operation . . . . . . . . . . . . . . . . . . . . . . . . . . . . . . . . . . . . . . . . 30 International Unit Features . . . . . . . . . . . . . . . . . . . . . . . . . . . . . . . . 33 Auxiliary Audio Operation . . . . . . . . . . . . . . . . . . . . . . . . . . . . . . . . 34 IR Remote Operation . . . . . . . . . . . . . . . . . . . . . . . . . . . . . . . . . . . . 35 Troubleshooting . . . . . . . . . . . . . . . . . . . . . . . . . . . . . . . . . . . . . . . . 42 CD Changer Troubleshooting. . . . . . . . . . . . . . . . . . . . . . . . . . . . . . . 45 IR Remote Troubleshooting . . . . . . . . . . . . . . . . . . . . . . . . . . . . . . . . 46 Warranty Information . . . . . . . . . . . . . . . . . . . . . . . . . . . . . . . . . . . . 47 International Instructions . . . . . . . . . . . . . . . . . . . . . . . . . . . . . . . . . . 48 GETTING STARTED Welcome to Rockford Fosgate! This manual is designed to provide information for the owner, salesperson and installer. For those of you who want quick information on how to install this product, please turn to the Installation Section of this manual. Other information can be located by using the Table of Contents. We, at Rockford Fosgate, have worked very hard to make sure all the information in this manual is current. But, as we are constantly finding new ways to improve our product, this information is subject to change without notice. NOTE: This manual uses abbreviations for the following terms: TUNER = AM/FM Radio Tuner CDP = In-Dash CD Player CDX = CD Changer (optional) AUX = External Auxiliary Input (RFX9200/9300/9400) Visit our web site for the latest information on all Rockford products. – iii – INTRODUCTION Rockford Fosgate optimizes vicious features in the RFX source units for use in high performance car audio systems. A great tuner, a high performance CD player, and controls pioneered by Rockford Fosgate give you total control of your audio system! The following sections contain information on the features, installation, and operation for the 9100, 9200, 9300, and 9400 source units. For comparisons within the RFX line, refer to the “Quick Look” feature chart in this manual. For long term reliability of your new Rockford Fosgate source unit, please read the Precautions section on the next page. ACCESSORY PACK RFX9100 RFX9300 Installation & Operation Manual (1) Mounting Sleeve (1) Back strap (2) Chassis Release Keys (1) Hardware Package (1) 16-pin Power Harness (1) Faceplate Case (1) IR Remote Control Installation & Operation Manual (1) Mounting Sleeve (1) Back strap (2) Chassis Release Keys (1) Hardware Package (1) 16-pin Power/Aux-In Harness (1) Faceplate Case (1) IR Remote Control RFX9200 RFX9400 Installation & Operation Manual (1) Mounting Sleeve (1) Back strap (2) Chassis Release Keys (1) Hardware Package (1) 16-pin Power/Aux-In Harness (1) Faceplate Case (1) IR Remote Control Installation & Operation Manual (1) Mounting Sleeve (1) Back strap (2) Chassis Release Keys (1) Hardware Package (1) 16-pin Power/Aux-In Harness (1) Faceplate Case (1) IR Remote Control –1– SPECIFICATIONS General Operating Voltage Standby Current Operating Temperature Dynamic Power Rating (IHF-202 Standard) per channel into a 4Ω load RMS continuous power per channel, all channels driven into a 4Ω load from 20-20,000Hz with less than 0.1% Total Harmonic Distortion (THD) Speaker Impedance Preamp Output Voltage Sum Preamp Output Voltage* Preamp Output Impedance Equalization IR Receiver Eye Range Overall Dimensions (with trim-ring) Nosepiece Dimensions (without trim-ring) Weight (9100, 9200, 9300, 9400) 9100/9200 +10.8V – +16.0V DC 5mA Max Receiver: -30˚C to +70˚C CD Player: -10˚C to +65˚C 40 watts x 4 9300/9400 +10.8V – +16.0V DC 5mA Max Receiver: -30˚C to +70˚C CD Player: -10˚C to +65˚C 40 watts x 4 25 watts x 4 25 watts x 4 2Ω – 8Ω >2.0V RMS @ 0.5% THD >2.0V RMS @ 0.5% THD <100Ω Bass: ±10dB @ 60Hz Treble: ±8dB @ 15kHz ±45˚ off axis Height: 2-9/32" (58mm) Width: 7-13/32" (188mm) Depth: 7-1/4" (183.7mm) Height: 1-27/32" (46.5mm) Width: 6-3/4" (171.5mm) Depth: 13/16" (20.2mm) 3.13lbs (1.42kg) 2Ω – 8Ω 5V RMS @ 0.5% THD 5V RMS @ 0.5% THD <50Ω Bass: ±10dB @ 60Hz Treble: ±8dB @ 15kHz ±45˚ off axis Height: 2-9/32" (58mm) Width: 7-13/32" (188mm) Depth: 7-1/4" (183.7mm) Height: 1-27/32” (46.5mm) Width: 6-3/4" (171.5mm) Depth: 13/16" (20.2mm) 3.13lbs (1.42kg) FM Tuner Tuning Range Americas Eur/Aus Frequency Response Usable Sensitivity IF Rejection Image Rejection Signal-to-Noise Ratio Distortion Channel Separation Suppression 87.5 ~ 107.9MHz (200kHz spacing) 87.5 ~ 108MHz (50kHz spacing) 30Hz – 12kHz 10dB (S/N 30dB) 90dB 50dB 60dB < 0.5% ≥ 25dB @ 1kHz 35dB AM Tuner Tuning Range Americas Eur/Aus Sensitivity -6dB Bandwidth 530 ~ 1710kHz (10kHz spacing) 522 ~ 1620kHz (9kHz spacing) 20dBf max @ 10dB sensitivity 5kHz min – 12kHz max CD Player Compatible Discs Frequency Response Signal-to-Noise Ratio Distortion Channel Separation Dynamic Range 5" or 3" 20Hz – 20kHz (±3dB) >90dB (preamp output w/ 22kHz LP filter) <0.5% 86dB (preamp output w/ 22kHz LP filter) 100dB IR Remote Operation Voltage Transmitting Range Battery Replacement Dimensions +3V DC 20 ft (variable in sunlight) (1) CR2025 +3V Lithium 3-3/8"(H) x 2-1/8"(W) x 9/32"(D) (85.6mm x 54mm x 7mm) –2– PRECAUTIONS SOURCE UNIT & OPTIONAL CD CHANGER Operating Temperature +65°C –10°C Be sure the temperature inside the vehicle is between –10° C and +65° C (+14° F and +149°F). DO NOT play a disc if the temperature is higher or lower than the operating range. Moisture Condensation The CD playback may waver due to condensation. If this occurs, remove the disc from the source unit and wait approximately an hour for the moisture to evaporate. Environment Exposure DO NOT expose the Source Unit or optional CD Changer to any of the following: direct sun and heat, high humidity, excessive dust, excessive vibration and rain or water. Handling the Detachable Faceplate DO NOT drop or cause shock to the faceplate as serious damage may occur. Protect the faceplate by storing it in the supplied carrying case. Avoid Mechanical Malfunction DO NOT grab a disc while it is being automatically loaded into the source unit. Doing this may cause serious damage to the playback mechanism. IR REMOTE Environment Exposure DO NOT expose the IR Remote to any of the following: direct sun and heat, high humidity and rain or water. Handling the IR Remote DO NOT drop or cause shock to the IR Remote as serious damage may occur. –3– COMPACT DISCS • vi ngle e us s h ci o ju t of io us s o u n ds of ound s t h e ju ngle • vic ngl e • vi of us sou h ci o ju t nds of io us s o u n ds Disc Handling and Care DO NOT touch the playing side (opposite of label side) of the disc. When handling the disc, only the outer edges or center hole of the disc should be touched. DO NOT affix any sticker or label to the disc. DO NOT apply vinyl record spray, anti-static agent, acetone, or any other volatile chemicals to the disc. Damaged Disc DO NOT play a cracked, warped, or damaged disc. Doing this may cause serious damage to the playback mechanism. t h e ju • vic ngl New Discs ID O io us s o u n ds SW R IN of D h C t . e ju of us sounds e U h ci o ju Q LI t • vi ngle The CD player will eject discs that have either been inserted incorrectly or have irregular surfaces. If a new disc is ejected after loading, feel around the outer edge of the CD and its center hole. Any small burrs or irregularities could inhibit proper loading of the disc. To remove the burrs, rub the inside edge of the hole and outside edge of the disc with an object such as a ball point pen. –4– ngle • vic QUICK LOOK FEATURES FEATURES RFX9100 RFX9200 RFX9300 RFX9400 Detachable Faceplate X X X X ISO Din Mounting w/ Removable Trim Panel X X X X Control/Lighting/Appearance Multi Function Volume Knob X X X X Any Button Wake-Up X X X X Time of Day Clock X X X X Programmable Default Display X X X X Negative Image LCD Display X X X X Rear Seat Audio Controls - - - X X X X X Illumination “ON” w/ Ignition Display Back Lighting IR Remote Included Multicolored Multicolored Multicolored Multicolored X X X X Tuner World Wide Tuning X X X X AM mono/FM stereo X X X X FM Noise Blanker X X X X Auto Blend / Roll Off X X X X Multi-Path Interference Rejection X X X X 20 FM / 10 AM Presets X X X X FM1/FM2/AM X X X X Auto Store Non-Volatile Presets X X X X AM/FM Seek X X X X AM/FM Manual Tuning X X X X Pause (MUTE) X X X X Programmable Station Titles - X X X Dual 1-bit D/A Converters w/ 8 x oversampling X X X X Ignition Off Disc Load/Eject X X X X Repeat Mode X X X X Random Play (CD) X X X X Track Scan X X X X Fast Forward/Reverse X X X X CD Player –5– FEATURES (Cont’d.) RFX9100 RFX9200 RFX9300 RFX9400 Next/Previous Track X X X X Programmable Eject Mute Off X X X X Insert Disc Power Up/Play X X X X Pause/Resume Play X X X X Programmable Disc Titles - X X X MP3 PLayback via CDR/RW - - X X Preamp/Power Source Tone Memory X X X X Switchable Loudness X X X X X X X X Electronic Volume, Tone, Balance Internal Audio Amplifier Number of Pre-outs Front/Rear Sum Pre-out Pre-out Voltage Low Source Impedance External Audio Inputs (AUX-IN) 25 watts RMS 25 watts RMS 25 watts RMS 25 watts RMS (40 max) x 4 (40 max) x 4 (40 max) x 4 (40 max) x 4 4 RCA 6 RCA 6 RCA 8RCA - X X X >2.0 VRMS >2.0 VRMS 5 VRMS 5 VRMS < 100Ω < 100Ω < 50Ω <50Ω - X 2 2 X X X X Remote Functions Tuner, CD and Changer Mode Volume Up/Down X X X X Seek (Track) Up/Down X X X X Fast Forward/Reverse X X X X Tune (Disc) Up/Down X X X X Pause/Resume Play X X X X Direct Preset Access X X X X Direct Track Access X X X X CD Changer Controller X X X X Rear Seat Audio Controls - - - X Changer Repeat Mode X X X X Changer Random Play X X X X CD Changer Control Pause/Resume Play X X X X Changer Track Scan X X X X Changer Disc Scan X X X X –6– SOURCE UNIT FEATURES 21 22 20 1 SCAN RPT RDM ST 2 3 VOLUME 4 5 6 7 8 9 10 1. OPEN – Opens the faceplate and ejects CDs from the in-dash CD player. 2. DOWN – Selects the previous radio station in TUNER mode and selects the previous track in CDP/CDX mode. 3. ENTER – Enables tracks in MP3 mode (9300 and 9400 models only). 4. MUTE – Mutes the audio in TUNER and AUX* modes, and pauses the disc in CDP/CDX mode. 5. VOLUME – When pressed, selects between VOLUME, BASS, TREBLE, BALANCE, FADER, and SUM* modes. 6. AS – Press to store the strongest radio stations in each tuner bank in AUTO STORE mode. 7. DISP – Toggles between different display features in main display; when pressed and held for 1 second, toggles clock between hours and minutes. 8. R – Infrared eye for remote operation. 9. PRESET 1/SCAN – Selects radio preset #1 in TUNER mode and scans each track on the disc in CDP/CDX mode. 10. PRESET 2/RPT – Selects radio preset #2 in TUNER mode and repeats the current track in CDP/CDX mode. 11. PRESET 3/RDM – Selects radio preset #3 in TUNER mode and selects tracks at random in CDP/CDX mode. 12. PRESET 4/DOWN – Selects radio preset #4 in TUNER mode and the previous track in CDP Mode. Selects previous disk in CDX Mode. –7– 11 LOC 19 ® EON REG TP AF PTY CDX CH 18 17 16 MP3 ROOT DISC-IN V12 DIR SONG PUNCH R.SEAT 15 14 12 13 13. PRESET 5/UP – Selects radio preset #5 in TUNER mode and the next track in CDP Mode. Selects previous disk in CDX Mode. 14. PRESET 0/ROOT – Selects radio preset #0 in TUNER mode and returns unit to root directory in MP3 mode (9300 and 9400 models only). 15. T-ACC – Allows you to enter the track number you want manually . 16. D-ACC – Allows you to enter the disc number you want up to 8 discs (available only for 8 disc player). 17. R.SEAT – Enables passengers in rear seat to disable rear speakers and listen to secondary audio source (tuner, CD player, Nintendo, etc.) via headphones (9400 model only). 18. PUNCH – Enables bass and treble response to be boosted at all volume levels. 19. OFF – Turns the source unit on and off. 20. BAND – Selects which bank of tuner presets (FM1/FM2/AM) should be active. 21. MODE – Selects between TUNER/CDP/CDX/AUX* modes. 22. UP – Selects the next radio station in TUNER mode and selects the next track in CDP/CDX mode. IMPORTANT: The communication BUS used in Rockford Fosgate models RFX9100/9200/9300/9400 is used only for CD changer model RFX8810 and is not backward compatible with older RFX models. Rockford Fosgate recommends connecting only the appropriate RFX models together. Rockford Fosgate does not assume responsibility when using other manufacturers’ source units with Rockford Fosgate CD changers (or vice versa). *Features available only on RFX9200/9300/9400 –8– IR REMOTE DESIGN FEATURES 1. POWER – Turns the source unit on and off. 2. MODE – Selects between TUNER, CDP, CDX, and AUX* modes. 3. SEL – Selects between VOLUME, BASS, TREBLE, BALANCE, FADER, and SUM* modes. 4. MUTE/PAUSE – Mutes the audio in TUNER and AUX* modes, and pauses the disc in CDP/CDX mode. 22 21 20 19 18 17 16 15 14 13 12 11 1 2 3 4 5 6 7 5. RPT – Repeats the track in CD/CDX mode. 6. SCAN – Scans each track on the disc in CDP/CDX mode. 7. DISC (+/–) – Manually tunes the radio station in TUNER mode and the previous/next disc in CDX mode. 8. ROOT – Returns unit to root directory in MP3 mode (9300 and 9400 models only). 9. DIR – Cycles up and down through the directory in MP3 mode (9300 and 9400 models only). 8 9 10 10. ENTER – Enables tracks in MP3 mode (9300 and 9400 models only). 11. TRACK ACC – Directly accesses the desired track in the in-dash CD player. 12. AS – Press to store the strongest radio stations in each tuner bank in AUTO STORE mode. 13. DISC ACC – Directly accesses the desired CD in the optional CD changer. 14. PTY – Allows priority broadcasts to interrupt all other functions in international units only. 15. RDM – Selects tracks at random in CDP/CDX mode. 16. AF/TP – Allows genre music selection on international units only. 17. BAND – Selects which bank of tuner presets (FM1, FM2, or AM) should be active. 18. DISP – Toggles between different display features in main display; when pressed and held for 1 second, toggles clock between hours and minutes. 19. R.SEAT – Enables passengers in rear seat to disable rear speakers and listen to secondary audio source (tuner, CD player, Nintendo, etc.) via headphones. 20. PUNCH – Enables bass response to be boosted at low and high levels. 21. SEEK/TRACK / – Selects the previous/next radio station in TUNER mode and selects the previous/next track in CDP/CDX mode. 22. VOL / – Controls VOLUME, BASS, TREBLE, BALANCE, FADER, and SUM*. NOTE: 0-9 BUTTONS select presets 1-10 in TUNER mode, selects tracks in CDP/CDX mode, and selects discs in CDX mode. *Features available only on RFX9200/9300/9400 –9– INSTALLATION CONSIDERATIONS The following is a list of tools needed for installing the Source Unit: Volt/Ohm Meter #2 Phillips screwdriver Wire strippers Battery post wrench Wire crimpers Soldering iron Wire cutters Solder 1/8" diameter heatshrink tubing Heat gun This section focuses on some of the vehicle considerations for installing your new Source Unit. Pre-planning your system layout and best wiring routes will save installation time. When deciding on the layout of your new system, be sure that each component will be easily accessible for making adjustments. Before beginning any installation, be sure to follow these simple rules: 1. Be sure to carefully read and understand the instructions before attempting to install the Source Unit. 2. For safety, disconnect the negative lead from the battery prior to beginning the installation. 3. For easier assembly, we suggest you run all wires prior to mounting your Source Unit in place. 4. Route all of the RCA cables close together and away from any high current wires. 5. Use high quality connectors for a reliable installation and to minimize signal or power loss. 6. Think before you drill! Be careful not to cut or drill into gas tanks, fuel lines, brake or hydraulic lines, vacuum lines or electrical wiring when working on any vehicle. 7. Never run wires underneath the vehicle. Running the wires inside the vehicle provides the best protection. 8. Avoid running wires over or through sharp edges. Use rubber or plastic grommets to protect any wires routed through metal, especially the firewall. 9. ALWAYS protect the battery and electrical system from damage with proper fusing. Install the appropriate fuse holder and fuse on the +12V power wire within 18” (45.7 cm) of the battery terminal. 10. When grounding to the chassis of the vehicle, scrape all paint from the metal to ensure a good, clean ground connection. Grounding connections should be as short as possible and always be connected to metal that is welded to the main body, or chassis, of the vehicle. – 10 – SOURCE UNIT MOUNTING LOCATIONS The mounting position of your source unit will have a great effect on the performance of your in-dash CD Player. The source unit can be installed in a wide range of operating locations. However, care should be taken to ensure optimum performance. Engine Compartment Mounting the source unit in the engine compartment will void your warranty. Doing so will not only cause severe damage to your new source unit...but will immediately promote you to “customer of the month” in our technical support department. Instrument Panel Mounting the source unit in the instrument panel provides optimum access. The source unit should be securely mounted using the “Standard Mount” or “ISO Mount” method to ensure optimum CD Player performance. Center Console Mounting the source unit in the center console provides optimum access. Be sure the installation does not interfere with the operation of the gear shift or parking brake. The source unit should have a mounting angle within ±20° from horizontal. Glove Box Mounting the source unit in the glove box is adequate, but does not provide easy access. Glove box mounting should only be done if “Instrument Panel” or ”Center Console,” mounting is not acceptable (i.e., maintaining integrity of older vehicles with metal dashboards.) The source unit should be mounted within ±20° from horizontal. Under Dash Mounting the source unit under the dash is adequate, but does not provide easy access. Under dash mounting should only be done if “Instrument Panel,” ”Center Console” or ”Glove Box” mounting is not acceptable. Mount the source unit off to the side of the driver's area to reduce interference with the parking brake, gear shift, or operating pedals. The source unit should be mounted within ±20° from horizontal. – 11 – WIRING THE SYSTEM NOTICE: If you do not feel comfortable with wiring your new source unit, please see your local Authorized Rockford Fosgate Dealer for installation. • For safety, disconnect the negative lead from the battery prior to beginning the installation. 1. Install the 16-Pin Power Harness by connecting the corresponding wires to the electrical and audio system. Solder and heat shrink all connections for a reliable installation. For each connection, cut a 1" piece of heat shrink tubing and slide over one of the wires. Strip each wire 3/8" then twist together and solder. Slide the tubing over the connection and shrink the tubing with a hot air gun until no bare wire is exposed. 2. Connect the BLACK wire to chassis ground. Prepare the chassis ground by scraping any paint from the metal surface and thoroughly clean the area of all dirt and grease. Strip the end of the wire and attach a ring connector. Fasten the wire to the chassis using a non-anodized screw and star washer. 3. Connect the YELLOW wire to a source of constant +12V (for retaining memory on user-programmed functions). Connect the Yellow wire to a constant +12 volt positive source. The source should always have +12V, even when the ignition is off and the car is not running. 4. Connect the RED wire (Ignition) to a source of switched +12V (is on only when ignition key is in “accessory” or “run” position). Connect the RED wire to a switched +12 volt positive source. The switched signal is usually taken from the ACC (accessory) position of the ignition. If the vehicle does not have an ACC position, connect the wire to the switched ON position of the ignition. The current consumption through this wire is negligible. 5. Connect the ORANGE wire to the lighting switch terminal. This will dim the main display by 30% when the headlights are turned on. 6. Connect the LT. BLUE wire to the “Remote Turn-On” leads of the amplifier(s). This will turn-on the external amplifiers when the source unit is powered on. 7. Connect the BLUE/RED wire to the “Power Antenna” lead. This will raise a fully automatic antenna when the source unit is powered on, but only when the unit is in Tuner Mode. 8. Connect the pink wire for cell phone mute to the wire on the cell phone harness that provides ground when the phone rings. 9. Connect the B+, GND and Remote Turn on Wires on the 16 pin harness according to the Installation Reference Sheet. 10. Connect the AUX* to the external audio source (this inserts the audio before the volume control on the source unit). The input voltage this circuit can accept is 1–3V RMS. Connect the Speaker Wires (if external amplifiers are not used) to the corresponding speaker leads by soldering and heat shrinking all connections for a reliable installation. If only one pair of speakers is utilized in the system, use only the FRONT speaker leads and heat shrink the unused REAR leads to prevent from shorting out. Be sure to maintain speaker polarity. DO NOT chassis ground any speaker leads as unstable operation may result. 11. Install the Preamp Output Harness (if external amplifiers will be used) by plugging the RCA cables into the corresponding extension RCAs that feed the input of the amplifiers. Be sure to route the signal cables away from any high current wires to prevent coupling noise from radiated electrical fields into the audio signal. The FRONT RCAs connect to the Front speaker's amplifier. The REAR RCAs connect to the Rear speaker's amplifier. The SUM* RCAs connect to the Subwoofer amplifier. 12. Connect the CD Changer (optional) by plugging the 8-pin DIN cable into the connector located at the rear of the source unit. 13. Connect the Antenna by plugging the antenna cable into the connector located at the rear of the source unit. Be sure the antenna is securely grounded to the vehicle for proper radio reception. – 12 – SOURCE UNIT INSTALLATION USING THE INSTALLATION SLEEVE – STANDARD MOUNT • Mount the Installation Sleeve into a secure instrument panel. NOTE: Make sure to mount the Source Unit as close to horizontal as possible for optimum CD Player performance. Mounting Angles of up to ±20˚ from horizontal can be accommodated. • Bend Tabs on the installation sleeve which correspond to the chart above. • Bend Appropriate Tabs on all sides of the mounting sleeve. INSTALLING THE SOURCE UNIT – STANDARD MOUNT • Install Source Unit by sliding unit into installation sleeve until it clicks into place. • Mount Back strap securely behind the instrument panel to prevent source unit vibration. • Back strap Screw should be 6mm max (use supplied screw). • Connect Antenna to antenna jack on rear of source unit. – 13 – INSTALLING THE SOURCE UNIT – ISO-DIN MOUNT • Remove Trim Piece and Installation Sleeve from source unit. • Factory Bracket should align with two mounting holes on each side of source unit. • ISO Screws should be 6mm max (use supplied screws). • Connect Antenna to antenna jack on rear of source unit. • Install Source Unit into instrument panel. UNINSTALLING THE SOURCE UNIT – STANDARD MOUNT • Disconnect Back strap from rear of radio (if used). • Insert Release Keys into left and right sides of source unit to disengage locks. • Remove Source Unit from installation sleeve with release keys. – 14 – INITIAL SETUP DETACHABLE FACEPLATE The faceplate is detachable as a theft deterrent. ® SCAN RPT RDM ST LOC EON REG TP AF PTY CDX CH MP3 ROOT DISC-IN VOLUME V12 DIR SONG PUNCH R.SEAT To Detach the Faceplate 1. Press the Open Button to cause the faceplate to slide down and forward. 2. Press the release button on the bottom front edge of the faceplate and slide the faceplate away from the unit. 3. The faceplate bracket will automatically close after 5 seconds. To Attach the Faceplate 1. Make sure that the faceplate bracket is in the closed position. 2. Press the faceplate against the front of the unit until it clicks into place. CAUTION: Do not attempt to attach the faceplate to the faceplate bracket when the bracket is in the open position when operating in manual mode. You may cause damage to the mechanism that may void your warranty 3. If desired, the faceplate can be permanently attached by affixing it to the bracket with the screw provided. RESET BUTTON 1. Follow the instructions above to detach the faceplate. 2. Insert a paper clip or other slender object into the Reset Button hole in the lower left corner of the unit and gently press it in until the button clicks. CAUTION: Do press the Reset Button too hard or you may cause damage that may void your warranty. If you need assistance, please consult an Authorized Rockford Fosgate Dealer. – 15 – BUTTON DESCRIPTIONS The list below shows the default settings for Setup Options. The bracketed options are the alternate options contained within each Setup Option. To select these alternates, see Selecting Tuner Options on page 30. • VOLUME — adjusts volume for all. • UP/DOWN — is the auto search feature: press the Up or Down Button once and the Tuner will rapidly proceed to the next station. Press and hold either the Up or Down button and you can manually search up or down at a rate of one digit per click (pressing and holding the Up or Down button will allow rapid searching). • MODE — Cycles through CDP PLAY > CDX (if connected) > AUX1 > AUX2 > [BAND]*. • BAND — Cycles through FM1 > FM2 > AM. • DISP — Toggles between different display features in main display; when pressed and held for 1 second, (1) toggles clock between hours and minutes, or (2) immediately pressing MODE button allows selection of the default Display by toggling between Tuner frequency (or track time in CD Mode) and disc or station name, if titled (see pages 24 or 32 for Titling information). • AS — Allows you to automatically store the 10 strongest local signals available. • MUTE — Pauses the CD Player and mutes the Tuner. • ENTER — Enables tracks in MP3 mode (9300 and 9400 models only). • 1–10 — Self-programmable radio presets. • SCAN — Scans each track on the disc in CDP/CDX mode. • RPT — Continuously repeats the current CD track until pressed a second time. • RDM — Randomly selects CD tracks. • DOWN — Lowers the frequency of the Tuner; acts as backward on CD tracks. • UP — Raises the frequency of the Tuner; acts as forward on CD tracks. • PUNCH — Loudness boost. • D-ACC — Turns on Direct Disc Access and allows direct disc selection in 8-disc changer. No function if 8-disc changer is not connected. • T-ACC — Turns on Track Access and allows direct track selection on a CD or MP3 disc. • ROOT — Operates only in MP3 mode. – 16 – BASIC OPERATION POWER ON/OFF Operation 1. Press the OFF button to turn the radio on. 2. Press the OFF button again to turn the radio off. Any Button Wake-Up Press any button on the faceplate (except EJECT, DISP) to “wake-up” the radio from sleep mode. LCD Display When the radio is off (in sleep mode) the clock will be displayed. VOLUME KNOB / TONE CONTROLS The Volume knob is a multifunction controller and handles the Volume, Tone Controls., and Setup Options (see next page). To Control Volume 1. Turn the VOLUME knob clockwise to raise volume. 2. Turn the VOLUME knob counter-clockwise to lower volume. To Adjust Tone Controls 1. Press the VOLUME knob repeatedly to cycle through BASS > TREBLE > BALANCE > FADER > SUM* > VOLUME. 2. Turn the VOLUME knob clockwise to increase the selected function. 3. Turn the VOLUME knob counter-clockwise to decrease the selected function. Source Tone Memory Individual Bass & Treble settings are memorized for TUNER / CD / PLAYER / CD CHANGER / AUX. NOTE: If no adjustment is made after 5 seconds, the MENU knob will revert to VOLUME mode. Function Volume Bass Treble Balance Fader Sum Out Display VOL BAS TRE BAL FAD SUM** Range 0 to 30 -8 to +8 -8 to +8 L15 to R15 R15 to F15 0 to 30 *Features available only on RFX9200/9300/9400 – 17 – Default 15 0 0 0 0 15 SETUP OPTIONS The list below shows the default Setup Options. The bracketed items are the alternate options contained within each Setup Option. To select these alternates, see Selecting Tuner Options on page 30. • DX [LOCAL] — Adjusts the sensitivity of the tuner for rural conditions where there are weak radio stations while Local adjusts the sensitivity for city conditions where there are several strong radio stations. • AMERICAS [EUR/AUST] — Allows tuning of frequencies available in different parts of the world. • P. PLAY [EJ MUTE] — Plays the Tuner after you eject a CD while Eject Mute mutes the Tuner after you eject a CD. • VIDEO OFF [VIDEO 1, VIDEO 2] — Disables the Video RCA Inputs. VIDEO 1 and 2 allow you to plug in two external video sources (TV, Nintendo, etc.) and run their outputs through your auto A/V system. • V/BAR ON [V/BAR OFF] — Displays the Volume Bar at the bottom of the Front Panel while Volume Bar Off turns it off. • INI VOL 15 — Sets the maximum Initial Volume when the unit turns on. Initial Volume sets point of maximum volume when the unit is turned on. If the volume setting was lower than the initial volume setting when the unit is turned off, then the lower volume will be used at turn on. If the volume setting was higher than the initial volume setting, then the initial volume setting is used at turn on. This feature prevents accidental high volume turn on as well as allows high volume settings to be retained in case another preamplifier is the system’s main volume control. • CONTRAST [VIEW 6] — Controls the view angle of the display. • FLAT [80HZ] — Means third pair of RCA pre-outs is full-range while 80Hz means that the pre-outs are crossed-over for subwoofer use. • PANEL AUTO [PANEL MANU] — Automatically opens and closes Panel when loading or ejecting discs while PANEL MANU allows the front panel to remain open and CDs to be manually loaded or ejected. • AUX1 IN 0 [+6, –6] — Allows you to boost the input volume of a weak external audio source or diminish a powerful one. Useful for external sources: MP3 players, video games, VCPs, etc. • AUX2 IN 0 [+6, –6] — Same as AUX1 IN above. Selecting Setup Options 1. Press and hold the VOLUME knob for about 1 second until DX appears (this is the first Tuner Option). 2. Press the VOLUME knob repeatedly to cycle through the Tuner Options listed above. 3. To change a specific Tuner Option, press the Up or Down Button to select an alternate Tuner Option. 4. Once you have selected the Tuner Options of your choice, wait five (5) seconds and the Tuner Options will automatically save and return you to the last Mode Panel you selected. – 18 – CLOCK OPERATION Setting the Clock Hours 1. Press and hold the DISP button for 1 second until the hour flashes. 2. Press UP or DOWN button to set the hour. Setting the Clock Minutes 1. Press and the DISP button a second time and the minutes will flash. 2. Press UP or DOWN button to set the minutes. Saving the Clock Settings After the clock has flashed for 5 seconds, your settings will be saved. Considerations The clock will remain displayed when the radio power button is turned off. PUNCH BUTTON (LOUDNESS) The Punch button enables the bass and treble response of the audio output to be boosted for all listening levels. Operation 1. Press the PUNCH button to enable the Loudness feature. 2. Press the PUNCH button again to disable the Loudness feature. Display The LCD will display "Punch" when the Loudness feature is on. MUTE BUTTON Operation 1. Press the MUTE button to dampen the volume. 2. Press the MUTE button a second time to revert the audio to the previous level. LCD Display The LCD will display MUTE until the function is canceled. – 19 – MODE SELECTION Press the MODE button repeatedly to cycle through the following modes: • CDP PLAY — Enables CD Player if a CD is inserted. • AUX1 — Allows for an external audio source to attach to the sound system. • AUX2 — Allows for a second external audio source to attach to the sound system. • FM1 — Enables the Tuner. CD PLAYER OPERATION — BASIC ® SCAN RPT RDM ST LOC EON REG TP AF PTY CDX CH MP3 ROOT VOLUME DISC-IN V12 DIR SONG PUNCH R.SEAT NOTE: RFX PLAYERS WILL PLAY AUDIO CDS CREATED ON A MACINTOSH To Play a CD 1. Press OPEN button and the Front Panel will slide open. 2. Insert a CD and the Front Panel will slide closed after 5 seconds (PANEL AUTO). 3. CDP PLAY will auto-select and the CD will begin playing track 1 immediately. 4. Use UP and DOWN buttons to change tracks. To Play Tracks at Random After track begins playing, press RDM button and player will play tracks randomly. To Repeat a Track While the CD is playing the track you want to repeat, press the RPT button and the CD will repeat that track until you press the RPT button again. To Eject a Disc 1. Press the OPEN button for 1 second, and the Front Panel will slide open and eject the disc. 2. Press the OPEN button while Front Panel is open, or wait 5 seconds and the Front Panel will auto-close (in PANEL AUTO Mode). NOTE: If OPEN is pressed for less than 1 second while in Panel Auto mode, the Front Panel will open and Eject will not be engaged. – 20 – CD PLAYER OPERATION — ADVANCED CD PLAYER MODE CD Player Mode 1. Press the MODE button until CDP PLAY is displayed. 2. The disc will start playing (if no disc is in the player, the source unit will go to AUX1 Mode). LCD Display 1. The track number and elapsed time will be displayed. 2. After 5 seconds, the LCD will revert either to the default display or the last programmed display. 3. DISK IN will be displayed on the LCD. Insert CD and Play 1. Insert a disc and CDP PLAY will appear. 2. The disc will begin playing track 1 on the disc. Wake-Up Feature (when powered-off) 1. Insert a disc while the unit is off. 2. The disc will begin playing track 1 on the disc. DISC EJECT* Disc Eject 1. Press the OPEN button and hold for 1 second to eject the disc. 2. The source unit will revert to P.PLAY or EJ MUTE mode (see TUNER OPTIONS in this manual for further information on programming the default mode). 3. After car ignition is turned off, you can still press OPEN to eject a disc. LCD Display 1. The LCD will display EJECT for 5 seconds. 2. After 5 seconds, the LCD will revert to the previous display. Auto Reload 1. If the CD is left in the ejected position for more than 10 seconds the disc will automatically reload into the CD player. 2. The auto reload operation will not restart playing the disc or affect any other current mode (Except EJ MUTE Mode). *NOTE: This function works identically in both CD Player and CD Changer modes. – 21 – CDP/CDX TRACK SELECTION* Track Selection 1. Press the UP button to select the next track on the disc. 2. Press the DOWN button to select the previous track. LCD Display 1. The track number and elapsed time remain displayed. 2. After 5 seconds, the LCD will revert either to the default display or the last programmed display. Considerations CDP MODE: The disc will start over at track 1 again after the last track plays. CDX MODE: When the last track number on the current disc is reached, the next disc will load in the CD changer and begin playing track 1. CDP/CDX TRACK & DISC RANDOM* Random 1. Press the RDM button to randomize the tracks on a disk. If you have a multi-disc changer, press and hold the RDM button for 1 second to randomize the discs and tracks. 2. Random will continue until the mode is cancelled. Random Cancel Press the RDM button a second time to cancel Random mode. LCD Display The LCD will display RDM until the function is cancelled. CDP/CDX TRACK FORWARD/REVERSE* Forward/Reverse Press the DOWN button and the player will take you to the start of the same track as long as that track is more than 10 seconds in. If the track is less than 10 seconds in, pressing the DOWN button will take the player to the beginning of the previous track. Pressing UP takes you to the next track. Fast Forward/Reverse 1. Press and hold the UP button to fast forward the track. 2. Press and hold DOWN to fast rewind the track. LCD Display The LCD will display the elapsed time as long as the UP or DOWN buttons are pressed. *NOTE: This function works identically in both CD Player and CD Changer modes. – 22 – CDP/CDX TRACK REPEAT* Track repeat plays the currently playing track over again. Track Repeat 1. Press the RPT button to begin Track Repeat mode. 2. Press the RPT button a second time to cancel Track Repeat mode. Pressing and holding the UP or DOWN buttons also cancels Track Repeat. LCD Display The LCD will display RPT until the function is cancelled. CDP/CDX TRACK SCAN* Track Scan plays the intro to each track for 10 seconds before moving to the next track on the currently playing disc. Track Scan 1. Press the SCAN button to begin track scan mode. 2. Track scan will continue to scan until the mode is cancelled. Track Scan Cancel 1. Press the SCAN button a second time to cancel track scan mode. LCD Display 1. The LCD will display SCAN until the function is cancelled. 2. The LCD will display the track number and elapsed time for 10 seconds each time a new track begins its intro scan. 3. After 5 seconds the LCD will revert to the default display. CDP/CDX PAUSE* Pause CD 1. Press the MUTE button to pause the CD. 2. Press the MUTE button a second time to resume playing the disc. LCD Display 1. The LCD will display PAUSE and the track # until the function is canceled. *NOTE: This function works identically in both CD Player and CD Changer modes – 23 – PROGRAMMABLE DISC TITLE MEMORY The name of a CD can be stored in memory using up to 10 characters as a title. A maximum of 100 titles can be stored into memory. Disc Title Memory 1. Press and hold the BAND button for 1 second and the first digit of the 10-digit front panel will begin to blink. 2. Press the DISP button to cycle through the following character types: Type 1: (space)ABCDEFGHIJKLMNOPQRST UVWXYZ Type 2: abcdefghijklmnopqrstuvwxyz Type 3: 0123456789 Type 4: /\\.+?!*’") 3. Turn the VOLUME knob to select the proper character. 4. Press the VOLUME knob to move to the next space. 5. Press and hold the VOLUME knob for 1 second to store the title into memory. Disc Title Erasing 1. Press and hold the MUTE button for 1 second. 2. Turn the VOLUME knob to select the title for erasing. 3. Press and hold the VOLUME knob for 1 second to erase the title. – 24 – RFX8810 CD CHANGER OPERATION (Optional Accessory) LOADING THE CD CHANGER Loading Disc to the Magazine LABEL SIDE UP 1. Pull out the desired disc tray number from the magazine. 2. Place the disc into the magazine label side up. 3. Push the disc tray back into the magazine. NOTE: Discs numbers are arranged from the bottom up. Loading the Magazine to the CD Changer The INSERT IN THIS DIRECTION arrow indicates the proper direction that the magazine should be loaded into the CD changer. R75 INSERT IN THIS DIRECTION CAUTION: Avoid installing or leaving the magazine where it would be subject to high temperatures such as from direct sunlight or from hot air from the heater. Doing so will damage the unit. PLACE COMPACT DISC INTO MAGAZINE WITH LABEL SIDE UP. PLACER LE DISQUE COMPACT DANS LE CHARGEUR, FACE ETIQUETEE VERS LE HAUT. . COMPACT DIGITAL AUDIO CDX DISC SELECTION Disc Selection 1. Press the UP button to select the next disc in the magazine. 2. Press the DOWN button to select the previous disc in the magazine. 3. Press D-ACC and numbers 1-8 for direct disc access. LCD Display 1. The LCD will continuously flash the number of the currently playing disc. 2. When a disc begins playing, it will show the disc number, the track number, and elapsed time. 3. After 5 seconds, the LCD will revert either to the default display or the last programmed display. Considerations CDX MODE: When the last track # on the current disc is reached, the next disc will load and begin playing track #1. – 25 – CD CHANGER MODE CD Changer Mode 1. Press the MODE button until CDX PLAY is displayed. 2. The CD changer will immediately begin playing track #1 of the first available disc. 3. If the changer was previously initialized, the changer will resume playing the last track initialized. LCD Display 1. The LCD will continuously flash the number of the currently playing disc. 2. When a disc begins playing, the disc number, the track number, and elapsed time will be displayed. 3. After 5 seconds, the LCD will revert either to the default display or the last programmed display. NOTE: If no disc is loaded into the CD changer NO CD will be displayed and the source unit will revert back to AUX1 mode. 8 7 6 5 4 3 2 1 RESET EJECT CDX EJECT/RESET Magazine Eject 1. Press the OPEN button to release the magazine disc from the CD changer. 2. The source unit will revert to AUX1 mode. LCD Display 1. The LCD will display NO CD. CD Changer Reset Press the RESET button if the changer gets jammed during operation. – 26 – MP3 PLAYER OPERATION — BASIC PLAYING NOTE: RFX PLAYERS DO NOT RECOGNIZE MP3 CDS CREATED ON A MACINTOSH TO PLAY AN MP3 DISC 1. Press OPEN button and the Front Panel will slide open. 2. Insert an MP3 disc and the Front Panel will slide closed after 5 seconds, or press OPEN to close immediately. 3. CDP PLAY will auto-select and the MP3 disc will begin playing track 1 immediately. 4. Press the curved UP and DOWN buttons to go forward and backward when changing tracks. To Play Tracks at Random After inserting an MP3 disc, press RDM button and player will play tracks randomly. To Repeat a Track While the disc is playing the track you want to repeat, press the RPT button and the CD will repeat that track until you press the RPT button again. To Pause a Track Press the MUTE button to pause a track. Press MUTE again to continue playing the track. To Eject a Disc 1. Press and hold the OPEN button for 1 second, the Front Panel will open, and the disc will eject. 2. After removing the disc, press the OPEN button again to close the Front Panel. DIRECTORY STRUCTURE The MP3 directory is set up in three levels and is comprised of three components: (1) the Root, (2) Folders, and (3) Songs. Songs are played in the order and level in which they are located. As shown in the diagram to the right, all songs in Level 2 are played before the songs contained in Level 3 or lower. These levels are descriptive of the function of having songs in folders and subfolders. Any song in a level below Level 3 is treated as though it were in Level 3, but will play in the level order as shown. The songs in the diagram at the right are numbered in the order they will play. ROOT LEVEL 1 LEVEL 2 Song01 Directory01 Song02 LEVEL 3 Directory02 Directory04 Directory03 Song05 Directory05 Song03 Song06 Song04 Song07 Any level deeper than LEVEL 3 will be treated as LEVEL 3 Song10 Song09 Song11 "My MP3s" LEVEL 1 LEVEL 2 Song08 Song01 Soft Rock Song02 LEVEL 3 Hard Rock Speed Metal Top 40 Song05 Classics Song03 Song06 Song04 Any level deeper than LEVEL 3 will be treated as LEVEL 3 – 27 – Song07 Song08 Song10 Song09 Song11 MP3 PLAYER OPERATION — FILE MANAGEMENT NEGOTIATING THE MP3 DIRECTORY* The ROOT Level The ROOT Level contains the name of the disc, but no folder or song information. The first song on the disc will automatically begin playing when a disc is inserted and will continue playing until you select another song. Directly Selecting a Song by Title The MP3 file management system is a folder-based system similar to the Windows™ File Manager. Because of this, the UP and DOWN keys function differently than they do in CD or Tuner Mode. Instead of going forward or backward through your disc respectively, they go up and down through the file list. 1. Press the ROOT button and the display will show the disc name. The display will then immediately switch to show the name of the first folder on the disc and display it for 5 seconds. If no action is taken during this 5 second period, the display will default back to the song currently playing. 2. While the name of the first folder is showing, press the DOWN button to scroll alphabetically (A to Z) through the list of folders. Press the UP button to scroll in reverse. 3. Press the ENTER button and the name of the first song in the selected folder will be displayed. 4. Press the DOWN button to scroll numerically (1 to 10 or higher) through the songs contained in the selected folder. Press the UP button to scroll through the songs from 10+ to 1. NOTE: If The song name will remain displayed for 5 seconds in steps 1 through 4 above. If no action is taken during this 5 second period, the display will default back to the song currently playing. 5. Press ENTER to select the song and the song will begin playing. NOTE: If no disc is loaded into the CD player, NO CD will be displayed and the source unit will revert back to AUX1 mode. * Available on RFX9300 and 9400 only. – 28 – NEGOTIATING THE MP3 DIRECTORY (CONT’D) DOWN Button When playing an MP3 track on the RFX9300 or 9400, pressing the DOWN button will take you to the beginning of the previous track. For example, if listening to track 3, pressing the DOWN button goes to the beginning of track 2, not the beginning of track 3. However, if playing a regular audio CD track and the DOWN button is pressed, the player will take you to the beginning of the same track as long as the playing track has been playing for more than 10 seconds. If the track is within 10 seconds of its beginning, pressing the DOWN button will take the player to the beginning of the previous track. Fast Forward/Fast Reverse This function is possible in MP3 Mode, but the time will not display and there will be no sound. Maximum Writing Speed and Bit Depth The maximum speed of the CD ROM burner accepted by the RFX units is 12X. The maximum bit rate range possible is 32kb/sec–320kb/sec. For best performance of scrolling display, before creating a file system in your CDR burning program, select the CD layout properties menu and file system tabs. Use ISO9660 file format and select the Long File Names option on your PC. This allows a maximum of 16 uppercase scrolling characters to be displayed. NOTE: Depending on the type of CD-R, CD surface condition and the CD writer performance and condition, the CD-R may not operate normally. NOTE: Make sure that when a MP3 CD is burned that it is formatted as a data disc and NOT as an audio disc. Programmable Titling Programmable Titling is not available in MP3 mode. However, default is selectable to track/time or song title on disc. – 29 – RADIO TUNER OPERATION SELECTING A BAND Press the BAND button repeatedly to cycle through FM1, FM2, and AM. The act of selecting the band automatically enables that band. TUNER OPTIONS DX and AMERICAS are the default Tuner Options settings. The bracketed options are alternate options. • DX [LOCAL] • AMERICAS [EUR/AUST] Selecting Tuner Options 1. Press and hold the VOLUME knob for 1 second 2. Press the VOLUME Knob repeatedly to cycle through all Setup Options (the other Setup Options do not affect Tuner Mode). 3. To change an Option, press the UP or DOWN Button. 4. Once you have made your selections, wait 5 seconds and the Front Panel will return you to the last Mode Panel shown. PRESET BUTTONS 1–10 Each Tuner mode—FM1, FM2, and AM—has 10 presets for a total of 30 presets. To Set a Preset Button 1. Tune the Tuner to the station you wish to program. 2. Press and hold any preset button for five seconds and it will program that setting. Original Preset Memory Content (Tracking Point) Function America Eur/Aust Japan Band 1 2 3 4 5 6 7 8 9 10 FM1 87.5 90.1 98.1 106.1 107.9 87.5 90.1 98.1 106.1 107.9 FM2 87.5 90.1 98.1 106.1 107.9 87.5 90.1 98.1 106.1 107.9 AM 530 610 1000 1400 1710 530 610 1000 1400 1710 FM1 87.5 90.0 98.0 106.0 108.0 87.5 90.0 98.0 106.0 108.0 FM2 87.5 90.0 98.0 106.0 108.0 87.5 90.0 98.0 106.0 108.0 AM 522 612 999 1404 1620 522 612 999 1404 1620 FM 76.0 80.0 83.0 87.0 90.0 76.0 80.0 83.0 87.0 90.0 AM 522 603 999 1404 1629 522 603 999 1404 1629 – 30 – AUTO STORE If you want the Tuner to select the 10 most powerful stations in order of their signal strength and assign them to Preset buttons 1–10, you can use Auto Store. Auto Store 1. Press the AS button once and the Tuner will scan the entire dial. 2. Auto Store will store radio stations independently in the selected tuner bank (FM1/FM2/AM). BUTTON FUNCTION Operation 1. Press and hold the VOLUME knob for 1 second to enter Tuner Options mode. 2. Continue to press the VOLUME knob to cycle through TUNER OPTIONS DX > AMERICAS > P.PLAY > V/BAR > INI/VOL > CONTRAST > FLAT > PANEL AUTO > AUX1 IN > AUX2 IN. 3. Press the UP or DOWN button to select MODE 1 or MODE 2. Tuner Option Mode Function #1 P.PLAY Reverts the unit back to tuner mode when ejecting a CD EJ MUTE Mutes the audio when ejecting a CD LOCAL Adjusts the sensitivity for city conditions where there are several strong radio stations #2 #3 DX Adjusts the sensitivity of the tuner for rural conditions where there are weak radio stations AMERICAS Adjusts the tuner’s frequency band for American country codes EUR/AUST Adjusts the tuner’s frequency band for European/Australian country codes Country Bandwidth Frequency Spacing Americas AM = 530 – 1710kHz FM = 87.5 – 107.9MHz 10kHz 200kHz Eur/Aus AM = 522 – 1620kHz FM = 87.5 – 108.0MHz 9kHz 50kHz – 31 – PROGRAMMABLE STATION TITLE MEMORY The name of a Station can be stored in memory using up to 10 characters as a title. A maximum of 100 titles can be stored into memory. Station Title Memory 1. Press and hold the BAND button for 1 second and the first digit of the 10-digit front panel will begin to blink. 2. Press the DISP button to cycle through the following character types: Type #1: (space)ABCDEFGHIJKLMNOPQRST UVWXYZ Type #2: abcdefghijklmnopqrstuvwxyz Type #3: 0123456789 Type #4: /\\.+?!*’") 3. Turn the VOLUME knob to select the proper character. 4. Press the VOLUME knob to move to the next space. 5. Press and hold the VOLUME knob for 1 second to store the title into memory. Station Title Erasing 1. Press and hold the MUTE button for 1 second. 2. Turn the VOLUME knob to select the title for erasing. 3. Press and hold the VOLUME knob for 1 second to erase the title. – 32 – AVAILABLE ON INTERNATIONAL MODELS ONLY AF/TP MODE TP (Traffic Program) Mode will automatically switch to receive a Traffic Announcement regardless of the current operating mode of the unit. EON TA are stations that do not have a TRAFFIC PROGRAM but can provide information on other radio stations that do. AF (Alternative Frequencies) Mode compares the signal level of the current station with the signal level of other alternative frequencies on the same radio network (see PTY Mode). If the AF provides a stronger signal than the current frequency, the radio will switch to the stronger AF. Traffic Program Mode (TP) 1. Press the AF/TP button to engage TP Mode, and again to disengage TP Mode. 2. When TP is blinking, TP Mode is on and there is no TP DATA to receive. 3. The SEEK or AS function will stop only at radio stations providing TP or EON TA. Alternative Frequencies Mode (AF) 1. Press and hold the AF/TP button for 1 second to engage AF Mode. 2. Press and hold AF/TP again for 1 second to disengage AF Mode. PTY MODE PTY (Program Type) can search for radio stations via MUSIC MODE or SPEECH MODE networks. Music Mode categorizes radio stations into Pop, Rock, Modern Music, Light, Classics, and others. Speech Mode categorizes music into News, Affairs, Info, Sports, Education, Drama, Culture, and Science. REG (Region Mode) will switch the station to another that has the same PI CODE (station that provides exactly the same program) but in a different REGION. Program Type Mode 1. Press the PTY button to cycle through MUSIC, SPEECH, and PTY OFF. 2. Press the PRESET button that corresponds to the mode type (refer to chart below). Region Mode 1. Press and hold the PTY button for 1 second to turn on Region Mode. 2. Press and hold the PTY button again for 1 second to turn off Region Mode. NOTE: The LCD will display “REG” when AF and REG modes are on. KEY M1 M2 M3 M4 M5 M6 M7 M8 M9 Music Mode POP M ROCK M M.O.R.M. LIGHT M CLASSICS OTHER M – – – – 33 – Speech Mode NEWS AFFAIRS INFO SPORT EDUCATE DRAMA CULTURE SCIENCE VARIDE AUXILIARY OPERATION AUX MODE* AUX Mode 1. Press the MODE button until AUX1 or AUX2 is displayed. 2. The AUX inputs will immediately "see" the auxiliary audio input being fed into the AUX RCA jacks. LCD Display 1. AUX1 and AUX2 will be displayed for 5 seconds if Titling is used and selected as the default display. 2. After 5 seconds the LCD will revert to the default display. If no title for AUX is used, AUX will be displayed continuously. AUX Mode Titling See Disc Titling on page 24. NOTE: The input signal connected to the AUX RCA jacks is fed into the source unit prior to the volume control. If the AUX input source has a constant (non-adjustable) output level, the volume control on the faceplate can properly adjust the amplitude. To more closely match the volume of the AUX signal to CD or radio volume, use the AUX IN sensitivity adjustment (see page 18). *Features available only on RFX9200/9300/9400 POWER UP DEFAULTS The chart below shows the default settings upon startup. These are also the settings that the unit is reset to when you push the RESET button (see Reset Button on page 15). Mode Default AS/PS Off Preset memory Original memory band Scan Off Repeat Off Random Off Loudness On Button Illumination color Red Default Display Track/Time CDP Loading STBY CDX Loading Disc Start Volume Level 15 Sum 15 Bass/Treble 0 Balance/Fader 0 Local/DX DX Station + Disc Titling Clear Memory – 34 – IR REMOTE OPERATION POWER ON/OFF Power Button Operation 1. Press the PWR button to turn on the radio. 2. Press the PWR button a second time to turn off the radio. LCD Display When the radio is off (in sleep mode) the clock will be displayed. OPERATING MODE Selecting Modes 1. Consecutively press the MODE button to cycle through: TUNER > CDP > CDX > AUX* modes. 2. Release the MODE button to select the appropriate operating mode. *Features available only on RFX9200/9300/9400 VOLUME UP/DOWN Volume Button Operation 1. Press the VOL ( ) button to increase the volume. 2. Press the VOL ( ) button to decrease the volume. NOTE: The VOL button is also used to increase or decrease the Bass, Treble, Balance, Fader & Sum*. See Tone Controls in this section for further information. *Features available only on RFX9200/9300/9400 – 35 – TUNER BAND Selecting the Tuner Band 1. Press the BAND button repeatedly to cycle through the tuner bank: FM1 > FM2 > AM. 2. Stop pressing the BAND button when the display reads the desired tuner bank. SEEK (TRACK) Seek (TUNER Mode) 1. Press the SEEK ( ) button to automatically jump the tuner to the next strongest radio station. 2. Press the SEEK ( ) button to automatically jump the tuner to the last strongest radio station. 3. Press the SEEK ( ) or ( the current radio station. ) again to stop the tuner on Track Selection (CDP/CDX Mode) 1. Press the SEEK ( disc. ) button to select the next track on the 2. Press the SEEK ( ) button to select the previous track on the disc (see “Down Button” on page 29). Direct Track Selection (CDP/CDX Mode) Press any of the numbered buttons to select tracks 1 through 10. TUNE (DISC) Disc Selection (for Multi-Disc Changer only) 1. Press the 5 button to select the next disc in the multi-disc changer’s magazine. 2. Press the 4 button to select the previous disc in the magazine. – 36 – MUTE/PAUSE* Tuner Mute 1. Press the MUTE button to reduce the volume to minimum. 2. Press the MUTE button a second time to revert the audio to the previous level. LCD Display The LCD will display MUTE until the function is canceled. Pause CD (CDP/CDX Mode) 1. Press the MUTE/PAUSE button to pause the CD and reduce the volume to minimum. 2. Press the MUTE/PAUSE button a second time to resume playing the disc. LCD Display The LCD will display PAUSE and the track # until the function is canceled. * This function works identically in both CD Player and CD Changer modes. TONE CONTROLS Selecting Tone Controls 1. Press the SEL button to cycle through VOLUME > BASS > TREBLE > BALANCE > FADER > SUM*. 2. Press the VOL + button to increase function. 3. Press the VOL + button to decrease function. Source Tone Memory Individual Bass and Treble settings are programmable for TUNER / CDP / CDX / AUX* modes. NOTE: If no adjustment is made after 5 seconds, the MENU knob will revert to VOLUME mode. Function Display Range Default Volume VOL 0 to 30 15 Bass BAS -8 to +8 0 Treble TRE -8 to +8 0 Balance BAL L15 to R15 0 Fader FAD R15 to F15 0 Sum Out SUM* 0 to 30 15 *Features available only on RFX9200/9300/9400 – 37 – TRACK SCAN* Track scan plays the intro to each track for 10 seconds before moving to the next track on the currently playing disc. Track Scan 1. Press the SCAN (Preset #1) button to begin track scan mode. 2. Track scan will continue to scan until the mode is cancelled. Track Scan Cancel Press the SCAN (Preset #1) button a second time to cancel track scan mode. LCD Display 1. The LCD will display SCAN until the function is cancelled. 2. The LCD will display the track # and elapsed time for 5 seconds each time a new track begins its intro scan. 3. After 5 seconds the LCD will revert to the default display. * This function works identically in both CD Player and CD Changer modes. DISPLAY RECALL Display Recall temporarily displays the clock, radio station, station title*, CD track/time, disc title*, or AUX* on the LCD for 5 seconds. Display Recall (TUNER) 1. While in TUNER mode, press the DISP button to cycle through RADIO STATION > STATION TITLE* (if there are no stations titled, the display will remain on the station). 2. After 5 seconds, the display will revert to the default display. Display Recall (CDP/CDX) 1. While in CDP/CDX mode, press the DISP button to cycle through CLOCK > TRACK/TIME > DISC TITLE*. 2. After 5 seconds, the display will revert to the default display. Display Recall (AUX)* 1. While in AUX mode, press the DISP button to switch between CLOCK > AUX*. 2. After 5 seconds, the display will revert to the default display. NOTE: See DEFAULT/RECALL DISPLAY in the Basic Operation section of this manual for more information on programming the default display. *Features available only on RFX9200/9300/9400 – 38 – DIRECT PRESET ACCESS Direct Preset Access 1. Press numbers 1 through 0 to access the desired tuner preset. 2. The CD player or CD changer will immediately load the selected track and begin playing. LCD Display 1. The LCD will display the tuner bank and the tuner frequency being accessed for 5 seconds. 2. After 5 seconds the LCD will revert to the default display. TRACK REPEAT* Track Repeat plays the currently playing track over again from the beginning. Track Repeat 1. Press the RPT (Preset #2) button to begin track repeat mode 2. Track repeat will continue to repeat the current track until the mode is cancelled Track Repeat Cancel Press the RPT (Preset #2) button a second time to cancel track repeat mode LCD Display The LCD will display RPT until the function is cancelled TRACK RANDOM* Track random selects and plays tracks at random from the currently playing disc. Track Random 1. Press the RDM (Preset #3) button to begin track random mode. 2. Track random will continue to select and play tracks at random until the mode is cancelled. Track Random Cancel Press the RDM (Preset #3) button a second time to cancel track random mode. LCD Display The LCD will display RDM until the function is cancelled. *NOTE: This function works identically in both CD Player and CD Changer modes. – 39 – DIRECT DISC ACCESS Direct Disc Access allows any disc in the magazine to be immediately selected and played. This method is faster than manually cycling through each disc in the magazine. Direct Disc Access 1. While in CDX mode, press the DISC ACC button to select Direct Disc Access mode. 2. Press the number (1-2-3-4-5-6-7-8-9-0) to access the desired disc in the magazine. 3. The CD changer will immediately load the selected disc and begin playing track #1. NOTE: If there is no disc in the slot, the player will remain on the current disc. LCD Display 1. The LCD will display DISC and the disc # being accessed for 5 seconds. 2. After 5 seconds the LCD will revert to the default display. DIRECT TRACK ACCESS* Direct Track Access allows any track to be immediately selected and played. This method is faster than manually cycling through each track on the disc. Direct Track Access 1. While in CDP/CDX mode, press the TRACK ACC button to select Direct Track Access mode. 2. Press the number (1-2-3-4-5-6-7-8-9-0) to access the desired track on the disc. 3. The CD player or CD changer will immediately load the selected track and begin playing. LCD Display 1. The LCD will display TRACK and the track # being accessed for 5 seconds. 2. After 5 seconds the LCD will revert to the default display. *NOTE: This function works identically in both CD Player and CD Changer modes. – 40 – AUTO STORE Auto Store 1. Press the AS button once to automatically select the strongest radio stations and store them in the tuner banks. 2. Auto Store will store radio stations individually in the desired tuner bank (FM1/FM2/AM). – 41 – GENERAL TROUBLESHOOTING SYMPTOM DIAGNOSIS REMEDY Source Unit does not turn on Voltage applied to Red and Yellow wires is not between 10.8 and 16 volts or there is no voltage present Check battery, connections and fuses and repair or replace as necessary. If voltage is above +16 volts, have the electrical system inspected by an authorized car service center. Source unit is not properly grounded Check wiring and repair as necessary No backlight illumination Detachable faceplate not properly connected Detach faceplate and reinstall into chassis Speakers pop when turning Source Unit On/Off Auto antenna and remote B+ are not configured properly Check wiring and repair as necessary. Refer to “Wiring the System” section of this manual for further information Bad component in the signal chain Check connections and bypass all components between the source unit and the amplifier. Connect one component at a time to determine the culprit. Connect this component to the Blue wire and check for pops. If pops persist, repair or replace component as necessary Tuner fails to tune any radio stations Antenna is disconnected Check connections and repair as necessary Tuner has poor reception Antenna is disconnected or not properly grounded to vehicle Check connections and installation of antenna and repair or replace as necessary Antenna cable is intermittent or damaged Disconnect antenna and test with known working antenna. If tuner works, check installation and repair antenna wiring as necessary Antenna is wrong type for AM/FM frequencies Consult your local Authorized Rockford Fosgate Dealer for proper antenna selection Voltage applied to Red and Yellow wires is not between 10.8 and 16 volts or there is no voltage present Check battery, connections and fuses, and repair or replace as necessary. If voltage is above +16 volts, have the electrical system inspected by an authorized car service center Disc will not load into Source Unit (also see error codes) – 42 – SYMPTOM DIAGNOSIS REMEDY Disc will not eject Voltage applied to Yellow wire is not between 10.8 and 16 volts or there is no voltage present Check battery, connections and fuses, and repair or replace as necessary. If voltage is above +16 volts, have the electrical system inspected by an authorized car service center No initialization Press the reset button Mechanism is jammed and loading motor (or driving circuit) is defective Repair the mechanism and loading motor (or driving circuit) Foreign objects are preventing the disc from loading Check CDP mechanism load area by removing faceplate and repair as necessary Loading area in mechanism and loading motor (or driving circuit) is defective Repair the mechanism and loading motor (or driving circuit) Foreign objects are preventing disc from ejecting Check CDP mechanism eject area by removing faceplate and repair as necessary Eject area in mechanism and ejecting motor (or driving circuit) is defective Repair the mechanism and loading motor (or driving circuit) Transverse motor or switch is defective. Traverse area damaged Check CD mechanism motor, switch and transverse area. Excessive dirt or dust on disc Clean disc to remove dirt or dust as necessary Disc is warped cracked or severely damaged Put in a different disc! Excessive scratches on disk Put in a different disc! Disc is cracked, warped or severely damaged Put in a different disc! Laser pickup is defective Have service center repair laser pickup Servo unit in CDP mechanism is not operating properly Check the servo circuit area and repair as necessary (also see error codes) ERROR 1 (Initialize Error) ERROR 3 (Loading Error) ERROR 4 (Eject Error) ERROR 6 (Transverse Error) ERROR 7 (Servo Error) ERROR 9 (TOC Error) – 43 – SYMPTOM Radiated Noises CD skips excessively Engine Noise DIAGNOSIS REMEDY No RF suppression of blower motors Connect filter cap (Radio Shack #2721085) in-line on B+ as close to blower motor as possible No RF suppression of switches Connect a .1µf – .01µf non-polarized capacitor across switch contacts Source unit mounted at an incorrect angle Check mounting angle of source unit (mount within ±20˚ from horizontal) and repair as necessary Source unit not secured properly (Standard Mount) Check tightness of installation sleeve and back strap; repair or replace as necessary Source unit not secured properly (ISO Mount) Check tightness of mounting screws and repair or replace as necessary Source unit is not grounded properly Check connections and repair wiring as necessary Noise is radiating into RCA signal cable Check connections, run the RCA cables on a different route away from sources of high current Bad component in the signal chain Check connections. Bypass all components between the Source unit and the amplifier. Connect one component at a time to determine the culprit. Repair or replace components as necessary Noise is radiating into the speaker cables Disconnect speakers and connect a test speaker to the output terminals or the source unit. If noise is gone, reroute the speaker cables away from sources of high current Multiple grounds in the audio system Check ground connections and connect amplifiers, signal processors, and other components to a central location or try a different grounding point on the chassis – 44 – CD CHANGER TROUBLESHOOTING SYMPTOM ERROR 1 (Initialize Error) ERROR 2 DIAGNOSIS REMEDY Disc unit can’t detect magazine Press the eject button and pull out the magazine. Press the reset button Magazine tray load/unload problem Check tray load/unload area Magazine sensor is defective Have a service center check the magazine sensing switch Can’t eject magazine Press the reset button Magazine emitting spring is damaged Have a service center inspect and repair as necessary Magazine tray is jammed Inspect and repair as necessary Tray loading has not completed after 5 secs Press Eject, pull out the magazine, and try again. Press Reset Loading mechanism and motor (or driving circuit) is defective Repair mechanism and loading motor (or driving circuit) Tray unloading has not completed after 5 secs Press Eject, pullout the magazine, and try again. Press Reset Unloading mechanism and motor (or driving circuit) is defective Have a service center repair mechanism and loading motor (or driving circuit) Magazine tray is jammed Repair CD changer mechanism; then press Reset The laser pick-up is defective Repair the laser pick-up Disc is warped, cracked, or damaged Put in a new disc Disc is warped, cracked, or severely damaged. Eject damaged disc from source unit and play only non-damaged discs The laser pick-up is defective Have a service center repair the laser pick-up Magazine is empty or not installed in the unit Check the magazine and insert discs (Magazine Eject Error) ERROR 3 (Loading Error) ERROR 4 (Unloading Error) ERROR 5 (Elevator Error) ERROR 7 (Focus Error) ERROR 9 (TOC Error) NO CD (No Disc Error) – 45 – SYMPTOM NO CONN (Communication Error) CD Changer does not operate Disc is jammed in the CD Changer DIAGNOSIS REMEDY 8-pin DIN cable is disconnected from the CDX mechanism or source unit Check the connection of 8-pin DIN cable between the CDX and unit CDX cable is intermittent or severely damaged Check connections and repair or replace CDX cable as necessary CDX cable is disconnected from the Source Unit or CD Changer Check connections at the Source unit and CD Changer and repair wiring as necessary Communication issue Press Reset on CD Changer Disc load/unload problem Press Reset on CD Changer. If CD Changer still does not operate, see your Local Authorized Rockford Fosgate Dealer IR REMOTE TROUBLESHOOTING SYMPTOM IR Remote has poor range IR Remote does not work DIAGNOSIS REMEDY Batteries are weak Check battery condition and replace as necessary with (1) CR2025 (+3 volt) battery Excessive dirt or dust on IR Remote transmitter lens Clean transmitter lens with Plexiglas solution and a non-abrasive cloth as necessary Excessive dirt or dust on source unit receiver lens Clean receiver lens (compact disc logo) with Plexiglas solution and a non-abrasive cloth as necessary IR remote is outside of optimum transmitting range Operate IR remote within about 15 ft and ±45˚ from horizontal of the Source unit’s faceplate High sunlight conditions Operate IR remote closer to Source Unit Batteries are dead Check battery condition and replace as necessary with (1) CR2025 (+3 volt) battery Battery is installed incorrectly Check battery installation and repair as necessary (polarity is indicated on pc board) (LED does not illuminate) – 46 – LIMITED WARRANTY INFORMATION Rockford Corporation offers a limited warranty on Rockford Fosgate products on the following terms: Length of Warranty 1 year on source units What is Covered This warranty applies only to Rockford Fosgate products sold to consumers by Authorized Rockford Fosgate Dealers in the United States of America or its possessions. Product purchased by consumers from an Authorized Rockford Fosgate Dealer in another country are covered only by that country’s Distributor and not by Rockford Corporation. Who is Covered This warranty covers only the original purchaser of Rockford product purchased from an Authorized Rockford Fosgate Dealer in the United States. In order to receive service, the purchaser must provide Rockford with a copy of the receipt stating the customer name, dealer name, product purchased and date of purchase. Products found to be defective during the warranty period will be repaired or replaced (with a product deemed to be equivalent) at Rockford's discretion. What is Not Covered 1. Damage caused by accident, abuse, improper operations, water, theft 2. Any cost or expense related to the removal or reinstallation of product 3. Service performed by anyone other than Rockford or an Authorized Rockford Fosgate Service Center 4. Any product which has had the serial number defaced, altered, or removed 5. Subsequent damage to other components 6. Any product purchased outside the U.S. 7. Any product not purchased from an Authorized Rockford Fosgate Dealer Limit on Implied Warranties Any implied warranties including warranties of fitness for use and merchantability are limited in duration to the period of the express warranty set forth above. Some states do not allow limitations on the length of an implied warranty, so this limitation may not apply. No person is authorized to assume for Rockford Fosgate any other liability in connection with the sale of the product. How to Obtain Service Please call 1-800-669-9899 for Rockford Customer Service. You must obtain an RA# (Return Authorization number) to return any product to Rockford Fosgate. You are responsible for shipment of product to Rockford. Ship to: Electronics Rockford Corporation Warranty Repair Department 2055 E. 5th Street Tempe, AZ 85281 RA#: ________________________ – 47 – Ship to: Speakers Rockford Acoustic Design Speaker Returns 2356 Turner Ave NW Walker, Michigan 49544 RA#: ____________________ International Instructions ESPAÑOL FUNCIONAMIENTO BASICO ENCENDIDO Funcionamiento 1. Pulse el botón OFF para activar la unidad. 2. Pulse el botón OFF de nuevo para apagar la unidad. Activación por cualquier tecla Pulse cualquier botón del frontal (excepto EJECT, DISP) para activar la unidad. Display LCD Cuando la unidad está apagada (en modo sleep) se muestra el reloj en display. CONTROL DE VOLUMEN / CONTROLES DE TONO El botón de volumen es un controlador multifunción que permite ajustar el Volumen, el Control de Tonos y Opciones de Ajuste (ver siguiente página). Para Controlar el Volumen 1. Gire el botón VOLUME en el sentido de las agujas del reloj para aumentar el volumen. 2. Gire el botón VOLUME en el sentido contrario a las agujas del reloj para disminuir el volumen. Para ajustar les Controles de Tono 1. Pulse el botón VOLUME repetidamente para acceder cíclicamente a BASS > TREBLE > BALANCE > FADER > SUM** > VOLUME. 2. Gire el botón VOLUME en el sentido de las agujas del reloj para aumentar la función seleccionada. 3. Gire el botón VOLUME en el sentido contrario a las agujas del reloj para disminuir la función seleccionada. Memoria de Tono de Fuente Pueden memorizarse ajustes indedientes de Graves y Agudos para las fuentes TUNER / CD / PLAYER / CD CHANGER / AUX. NOTA: Si no se hace ningún ajuste durante 5 segundos, el botón MENU pasará a modo VOLUME. – 48 – OPCIONES DE AJUSTE La lista inferior muestra las Opciones de Ajuste por defecto. Los términos entre paréntesis son las opciones alternativas de cada Opción de Ajuste. Para seleccionar estas alternativas vea la sección Selección de Opciones de Sintonizador en la página 30. • DX [LOCAL] — Ajusta la sensibilidad del sintonizador para condiciones rurales donde las señales son débiles . En la posición Local se ajusta para condiciones de ciudad, donde las señales de radio son más potentes. • AMERICAS [EUR/AUST] — Permite la sintonización de frecuencias en diferentes partes del mundo. • P. PLAY [EJ MUTE] — Pasa a modo Sintonizador tras pulsar la tecla de expulsión de CD. En la posición Eject Mute no se sintoniza la radio tras expulsar el CD. • VIDEO OFF [VIDEO 1, VIDEO 2] — Desactiva las entradas de Video RCA. VIDEO 1 y 2 le permiten conectar fuentes de vídeo externas (TV, Nintendo, etc.) y pasar sus salidas a través del sistema A/V del automóvil. • V/BAR ON [V/BAR OFF] — Muestra la barra de Volumen en la parte inferior del Panel Frontal. La opción Volume Bar Off la desactiva. • INI VOL 15 — Ajusta el Volumen Inicial Máximo al activar la unidad. Si el volumen al encender el aparato es inferior al ajustado, ese nivel de volumen se mantiene. Por el contrario, si el volumen es superior al ajustado, la salida se verá decrementada al Volumen Inicial Máximo. Esta función previene de encendidos eventuales a alto volumen y t permite ajustes de alto nivel cuando utilizamos otro preamplificador como sistema principal de volumen del sistema. • CONTRAST [VIEW 6] — Controla el ángulo de visión del display. • FLAT [80HZ] — Permite que el tercer par de cables de salida de previo RCA sea de toda banda, mientras que la posición 80Hz filtra esta salida para subwoofer. • PANEL AUTO [PANEL MANU] — Abre y cierra automáticamente el panel frontal para cargar o descargar CDs, mientras que la posición PANEL MANU le permite dejar abierto el panel y expulsar o introducir los CDs manualmente. • AUX1 IN 0 [+6, –6] — Le permite realzar o atenuar el volumen de entrada de una fuente de audio externa. Es de gran utilidad con fuentes auxiliares como: Reproductores MP3, video juegos, etc. • AUX2 IN 0 [+6, –6] — Igual que AUX1 IN. Selección de Opciones de Ajuste 1. Pulse y mantenga el botón VOLUME durante 1 segundo hasta que aparezca DX en el display (esta es la primera opción de Sintonizador). 2. Pulse el botón VOLUME repetidamente para pasar por las Opciones de Sintonizador listadas anteriormente. 3. Para cambiar une Opción de Sintonizador específica, pulse los botones Up o Down para seleccionar una Opción Alternativa. 4. Una vez seleccionada la Opción de Sintonizador deseada espere 5 segundos y la opción se memorizará automáticamente y la unidad volverá al último Panel de Modo seleccionado. – 49 – FUNCIONAMIENTO DEL RELOJ Ajuste de las horas 1. Pulse y mantenga el botón DISP durante 1 segundo hasta que parpadeen las horas. 2. Pulse los botones UP o DOWN para ajustar las horas. Ajuste de los minutos 1. Pulse y mantenga el botón DISP durante 1 segundo hasta que parpadeen los minutos. 2. Pulse los botones UP o DOWN para ajustar los minutos. SPara guardar los ajustes de Reloj Una vez que el reloj ha parpadeadod durante 5 segundos, los ajustes son salvados. Consideraione 1. El reloj se visualiza aunque se desactive la unidad con el botón off. 2. Si pulsa el botón DISP el reloj se visualizará durante 5 segundos cuando está seleccionado otro display or defecto (consulte DISPLAY POR DEFECTO/RECALL en esta sección para más información sobre programación del display por defecto). BOTÓN PUNCH El botón Punch permite realzar la respuesta de audio de graves y agudos a todos los niveles de escucha. Funcionamiento 1. Pulse el botón PUNCH para activar el Loudness. 2. Pulse de nuevo el botón PUNCH para desactivar el Loudness. Display El LCD muestra "Punch" cuando el Loudness está activo. BOTÓN MUTE Funcionamiento 1. Pulse el botón MUTE para silenciar el volumen. 2. Pulse el botón MUTE una segunda vez para que el audio vuelva al nivel anterior. Display LCD El LCD mostrará MUTE hasta que se cancele la función. SELECCIÓN DE MODO Pulse el botón MODE repetidamente para pasar por los siguientes modos: • CDP PLAY — Activa el reproductor de CD cuando un CD es insertado. • AUX1 — Permite el paso al sistema de sonido de una fuente de audio externa. • AUX2 — Permite el paso al sistema de sonido de una segunda fuente de audio externa. • FM1 — Activa el Sintonizador. – 50 – FUNCIONAMIENTO BASICO DEL REPRODUCTOR DE CD NOTA: Los RFX NO REPRODUCEN CDs DE AUDIO creados en un Macintosh Para reproducir un CD 1. Pulse el botón OPEN y el Panel Frontal se deslizará para abrirse. 2. Inserte un CD y el Panel Frontal se deslizará para cerrarse tras 5 segundos. 3. Se autoseleccionará CDP PLAY y comenzará la reproducción del CD desde la pista 1. 4. Utilice los botones UP y DOWN para cambiar la pista. Reproducción Aleatoria de Pistas Una vez comenzada la reproducción, pulse el botón RDM y comenzará la reproducción en modo aleatorio. Repetición de una Pista Mientras el CD está reproduciendo la pista que usted desea repetir, pulse el botón RPT y está pista se repetirá hasta que pulse de nuevo el botón RPT. Expulsión del Disco 1. Pulse el botón OPEN durante 1 segundo y el Panel Frontal se desñizará para abrirse y expulsar el disco. 2. Pulse el botón OPEN mientras el Panel Frontal está abierto para cerrarlo, o bien espere 5 segundos y se cerrará automáticamente (en Modo AUTO). NOTA: Si se pulsa OPEN por menos de 1 segundo en modo Panel Auto, el Panel frontal se abre y no se activa la expulsión. FUNCIONAMIENTO AVANZADO DEL REPRODUCTOR DE CD MODO CD PLAYER Modo CD Player 1. Pulse el botón MODE hasta que se muestre en el display CDP PLAY. 2. Comenzará a reproducirse el disco (si no hubiera disco, la fuente pasaría al Modo AUX1). Display LCD 1. El número de pista y el tiempo transcurrido se muestra durante 5 segundos. 2. Tras 5 segundos, el LCD pasará a su display por defecto. Inserción de CD y Reproducción 1. Inserte un disco y aparecerá CDP PLAY. 2. Comenzará a reproducirse el disco desde la pista 1. Función Wake - Up (con la unidad apagada 1. Inserte un disco con la unidad apagada. 2. Comenzará a reproducirse el disco desde la pista 1. – 51 – EXPULSIÓN DEL DISCO* Expulsión del Disco 1. Pulse el botón OPEN y mantengalo durante 1 segundo para expulsar el disco. 2. La unidad pasará a modo P.PLAY o EJ MUTE (vea OPCIONES DE SINTONIZADOR en este manual para más información sobre programación del modo por defecto). 3. Aunque esté apagado el encendido del coche aún puede expulsar el disco pulsando OPEN. Display LCD 1. El LCD mostrará EJECT durante 5 segundos. 2. Tras 5 segundos, el LCD volverá a su estado anterior. Auto Recarga 1. Si se deja el CD en la posición de expulsión durante más de 10 segundos el disco se vuelve a introducir automáticamente en el reproductor. 2. El funcionamiento de auto recarga no vuelve a comenzar la reproducción ni afectará a otros modos (Excepto el Modo EJ MUTE). SELECCIÓN DE PISTA CDP/CDX* Selección de Pista 1. Pulse el botón UP para seleccionar la siguiente pista del disco. 2. Pulse el botón DOWN para seleccionar la anterior pista del disc. Display LCD 1. El número de pista y el tiempo transcurrido se muestra durante 5 segundos. 2. Tras 5 segundos, el LCD volverá a su estado anterior. Consideracione MODO CDP: el reproductor volverá a reproducir la canción 1 tras reproducir la última canción. MODO CDX: Cuando se reproduce la última canción del CD actual, se reproducirá la primera canción del disco siguiente. REPRODUCCIÓN ALEATORIA DE PISTA Y DISCO CDP/CDX* Reproducción Aleatoria 1. Pulse el botón RDM para comenzar la reproducción aleatoria. 2. La unidad escogerá y reproducirá las pistas de todos los discos disponibles de modo aleatorio hasta que se cancela el modo. Cancelación de Modo Aleatorio Pulse el botón RDM una segunda vez para cancelar el modo de reproducción aleatoria. Display LCD El LCD mostrará RDM hasta que se cancele la función. *NOTA: Esta función trabaja idénticamente en los modos CD Player y CD Changer. – 52 – AVANCE / RETROCESO DE PISTA CDP/CDX* Avance / Retroceso Pulse el botón DOWN y el reproductor se situará al inicio de la pista actual, siempre que esta haya estado reproduciéndose durante al menos 10 segundos. Si la pista está en sus primeros 109 segundos, pulsando el botón DOWN pasaremos al inicio de la pista anterior. Avance / Retroceso Rápido 1. Pulse y mantenga el botón UP para avanzar dentro de la pista. 2. Pulse y mantenga el botón DOWN para retroceder dentro de la pista. Display LCD El LCD mostrará el tiempo transcurrido al pulsarse los botones UP o DOWN. REPETICIÓN DE PISTA CDP/CDX* La repetición de pista reproduce de forma repetida la pista actual. Repetición de Pista 1. Pulse el botón RPT para empezar el modo Repetición de Canción. 2. Pulse el botón RPT por segunda vez para cancelar el modo de repetición de pista. Presionando los botones UP o DOWN también cancelará este modo. Display LCD La pantalla LCD visualizará RPT hasta que la función es cancelada. TRACK SCAN CDP/CDX * La función Track Scan reproduce los 10 segundos iniciales de cada canción del disco seleccionado saltando automáticamente de canción a canción. Track Scan 1. Pulse el botón SCAN para empezar el modo track scan. 2. Track scan continuará hasta que sea cancelado. Cancelación de Track Scan 1. Pulse el botón SCAN por segunda vez para cancelar el modo. Display LCD 1. La pantalla LCD visualizará SCAN mientras la función no sea cancelada. 2. La pantalla LCD visualizará el número de canción y el tiempo de la misma durante 5 segundos cada vez que empiece una nueva pista. 3. Tras 5 segundos la pantalla LCD volverá a su estado por defecto. *NOTA: Esta función es idéntica en la reproducción en modo CD Player y cargador de CD – 53 – PAUSA CDP/CDX * Pausa CD 1. Pulse el botón MUTE para hacer pausa en la reproducción del CD. 2. Pulse el botón MUTE por segunda vez para reanudar la reproducción. Display LCD La pantalla LCD visualizará PAUSE y el número de canción mientras la función no es cancelada. MEMORIA DE TÍTULO DE DISCO PROGRAMABLE El título de un CD puede ser memorizado con un máximo de 10 caracteres. Un máximo de 100 títulos pueden ser memorizados. Memoria del Título de Disco 1. Pulse y mantenga el botón BAND durante 1 segundo y el primer dígito de los 10 empezará a parpadear. 2. Pulse el botón DISP para circular de forma cíclica por los siguientes caracteres: Type 1: (espacio)ABCDEFGHIJKLMNOPQRSTUVWXYZ Type 2: abcdefghijklmnopqrstuvwxyz Type 3: 0123456789 Type 4: /\\.+?!*’") 3. Gire el control de VOLUMEN para seleccionar el siguiente carácter. 4. Pulse el botón VOLUMEN para moverse al siguiente espacio. 5. Pulse y mantenga durante 1 segunto el control de VOLUMEN para memorizar el título en la memoria. Borrado del Título de Disco 1. Pulse y mantenga durante 1 segundo el botón de MUTE. 2. Gire el control de VOLUMEN para seleccionar el título a ser borrado. 3. Pulse y mantenga durante 1 segundo el control VOLUMEN para borrar el título. *NOTA: Esta función es idéntica en la reproducción en modo CD Player y cargador de CD – 54 – FUNCIONAMIENTO BASICO DEL REPRODUCTOR MP3 NOTA: los reproductores RFX NO reconocen CD’s de MP3 creados en un ordenador Macintosh REPRODUCCIÓN DE UN DISCO MP3 1. Pulse OPEN para abrir el panal frontal. 2. Inserte un disco MP3 y el panel se cerrará tras 5 segundos, o pulse OPEN para cerrarlo de forma inmediata. 3. CDP PLAY se auto activará y empezará la reproducción de la pista 1 del disco MP3. 4. Pulse el botón UP o DOWN para adelantar o retroceder canciones. Reproducción de canciones de forma aleatoria (Random Tras insertar un disco MP3 pulse RDM para que el reproductor empiece a reproducir canciones de forma aleatoria. Repetición de canción Mientras el disco está reproduciendo la canción que quiere repetir, pulse el botón RPT y el CD repetirá la canción hasta que presione RPT otra vez. Pausa en una canción Pulse el botón MUTE para detener momentáneamente la canción. Pulse de nuevo MUTE para continuar la reproducción. Expulsar un Disco 1. Pulse y mantenga el botón OPEN durante 1 segundo. El panel frontal se abrirá y el disco será expulsado. 2. Tras retirar el disco pulse el botón OPEN para cerrar el panel frontal. ESTRUCTURA DE DIRECTORIOS Los directorios MP3 pueden componerse de tres niveles y comprenden tres aspectos: (1) la raíz o Root, (2) carpetas o Folders, y (3) canciones o Songs. Las canciones son reproducidas en el orden y nivel en que son localizadas. Todas las canciones contenidas en el nivel 2 son reproducidas antes de llegar al nivel 3. Estos niveles hacen referencia a tener canciones en carpetas y subcarpetas. Cualquier canción en un nivel inferior al nivel 3 es tratada como si estuviera contenida en el nivel 3, pero se reproducirá en el orden que su nivel le marque. – 55 – GESTION DE FICHEROS MP3 GESTION DEL DIRECTORIO MP3 EL NIVEL RAÍZ El nivel Raíz contiene el nombre del disco, pero ninguna información sobre canciones o carpetas. La primera canción del disco se reproducirá automáticamente cuando el disco es insertado y continuará con ella hasta que se seleccione otra canción. Selección Directa de canción por Títul El sistema de gestión de ficheros MP3 está basado en carpetas, de manera similar al sistema de gestión de ficheros de Windows™. Debido a ello, las teclas UP y DOWN funcionan aquí de manera diferente a como lo hacen en los modos CD o Tuner. En vez de avnazar o retroceder en el disco, lo que hacen es avanzar o retroceder en la lista de ficheros. 1. Pulse el botón ROOT y el display mostrará el nombre del disco. El display pasará a continuación a mostrar el nomber de la primera carpeta del disco durante 5 segundos. Si durante este tiempo no se realiza ninguna acción el display pasará a mostrar la canción en reproducción. 2. Mientras se muestra el nombre de la primera carpeta, pulse el botón DOWN para avanzar alfabéticamente (A a Z) a través de la lista de carpetas. Pulse el botón UP para avanzar en sentido opuesto. 3. Pulse el botón ENTER y se visualizará el nombre de la primera canción de la carpeta seleccionada. 4. Pulse el botón DOWN para avanzar numéricamente (1 a 10 o mayor) a través de las canciones contenidas en la carpeta seleccionada. Pulse el botón UP para avanzar en sentido opuesto 10+ a 1. NOTA: Dependiendo del tipo de CD-R, condici√≥n superficial CD y el funcionamiento y la condici√≥n CD del programa de escritura, los CD-R pueden no funcionar normalmente. NOTA: El nombre de la canción permanece en pantalla durante 5 segundos en los pasos 1 a 4. Si no se realiza ninguna acción durante este periodo, el display volverá a mostrar la canción actual. 5. Pulse ENTER para seleccionar la canción y esta empezará a reproducirse. NOTA: Si no hay un disco cargado, se mostrará NO CD en el display y la fuente pasará a modo TUNER. Botón DOWN Cuando reproduzca una pista MP3 en el RFX9300 o 9400, pulsando el botón DOWN accederá al principio de la pista anterior. Si por ejemplo está escuchando la pista 3, pulsando el botón DOWN accederá al inicio de la pista 2, no al principio de la pista 3. De todas maneras, si reproduce una pista de un CD de audio convencional y pulsa el botón DOWN, accederá al comienzo de la pista en curso, siempre que esta haya estado sonando al menos 10 segundos. Si la pista está sus primeros 10 segundos del inicio, pulsando el botón DOWN accederemos al inicio de la pista anterior. Avance / Retroceso Rápido Esta función es posible en modo MP3 pero no se visualiza el tiempo en el display y no hay sonido durante la búsqueda. – 56 – ESTION DEL DIRECTORIO MP3 (CONT’D) Máxima Velocidad de Escritura y Profundidad de Bit La máxima velocidad de copia a la que se ha grabado el CD ROM aceptable por las unidades RFX es de 12X. La gama de transferencia de bits posible es de 32kb/seg–320kb/seg. Para que el display funcione de manera óptima, antes de crear un fichero con el programa de copia del CDR, seleccione el menú de propiedades y ficheros. Utilice el formato de fichero ISO9660 y seleccione en su PC la opción de Nombres Largos de Ficheros. Asi tendrá un máximo de 16 carácteres en pantalla. NOTA: Asegúrese que el CD MP3 se crea como un disco de datos y NO de audio. . Titulación Programada No está disponible la titulaci ón en modo MP3. Por defecto se puede mostrar la pista / tiempo ó el título del disco. FUNCIONAMIENTO DE LA RADIO SELECCION DE BANDA Pulse el botón BAND repetidamente para pasar por FM1, FM2, y AM. Al seleccionar un banda se activa la misma. OPCIONES DE SINTONIZADOR El ajuste por defecto es DX y AMERICAS. Las opciones entre corchetes son alternativas. • DX [LOCAL] • AMERICAS [EUR/AUST] Selección de las Opciones de Sintonizador 1. Pulse y mantenga el control VOLUME durante 1 segundo. 2. Pulse el botón VOLUME repetidamente para pasar por las Opciones Setup (las otras opciones Setup no afectan al modo Tuner). 3. Para cambiar una Opción, pulse el botón UP o DOWN. 4. Una vez hechas las selecciones, espere 5 segundos y el Panel Frontal volverá al último modo mostrado. BOTONES PRESET 1–10 Cada modo Tuner — FM1, FM2, and AM — tiene 10 presintonías hasta un total de 30. Para guardar un Preset 1. Sintonice la emisora que desee grabar. 2. Pulse y mantenga cualquier botón de preset durante 5 segundos y quedará grabada la emisora en ese número de preset. – 57 – FUNCIONAMIENTO DE LOS BOTONES Funcionamiento 1. Pulse y mantenga el control VOLUME durante 1 segundo para entrar en el modo de Opciones de Sintonizador. 2. Continue pulsando el botón VOLUME para pasar a través de TUNER OPTIONS DX > AMERICAS > P.PLAY > V/BAR > INI/VOL > CONTRAST > FLAT > PANEL AUTO > AUX1 IN > AUX2 IN. 3. Pulse el botón SEEK para seleccionar MODE 1 o MODE 2. AUTO STORE Si desea que el sintonizador seleccione las 10 emisoras más potentes y las asigne a los botones de Preset 1–10, puede usar la función Auto Store. Auto Store 1. Pulse el botón AS una vez y el sintonizador realizará una búsqueda por todo el dial. 2. Auto Store almacena las emisoras con independencia de la banda (FM1/FM2/AM). TITULO DE EMISORA PROGRAMABLE Puede memorizarce el nombre de emisora con 10 carácteres. El número máximo de titulos memorizados es de 100. Memoria de Título de Emisora 1. Pulse y mantenga el botón BAND durante 1 segundo y el primer dígito de los 10 empezará a parpadear. 2. Pulse el botón DISP para circular de forma cíclica por los siguientes caracteres: Type 1: (espacio)ABCDEFGHIJKLMNOPQRSTUVWXYZ Type 2: abcdefghijklmnopqrstuvwxyz Type 3: 0123456789 Type 4: /\\.+?!*’") 3. Gire el control de VOLUMEN para seleccionar el siguiente carácter. 4. Pulse el botón VOLUMEN para moverse al siguiente espacio. 5. Pulse y mantenga durante 1 segunto el control de VOLUMEN para memorizar el título en la memoria. Borrado de un Título de Emisora 1. Pulse y mantenga el botón MUTE durante 1 segundo. 2. Gire el control VOLUME para seleccionar el título a borrar. 3. Pulse y mantenga el control VOLUME durante 1 segundo para borrar el título. – 58 – MODO AF / TP El modo TP (Traffic Program) conmuta automáticamente para recibir Partes de Tráfico independientemente del modo en que esté la unidad. EON TA son emisoras que no tienen TRAFFIC PROGRAM pero pueden suministrar información de otras emisoras que lo tienen. El modo AF (Frecuencias Alternativas) compara el nivel de señal de la emisora actual con el de otras frecuencias alternativas de la misma emisora (ver Modo PTY). Si la AF proporciona mejor señal que la frecuencia actual, la unidad conmuta a la frecuencia más fuerte. Modo Programa de Tráfico (TP) 1. Pulse el botón AF/TP para activar el Modo TP, y de nuevo para desactivarlo. 2. Cuando parpadea TP, el modo TP está activo y no se reciben datos TP. 3. Las funciones SEEK o AS solo pararán en emisoras con TP o EON TA. Modo de Frecuencias Alternativas (AF) 1. Pulse y mnatenga el botón AF/TP duramnte 1 segundo para activar el Modo AF. 2. Pulse y mantenga AF/TP de nuevo durante 1 segundo para desactivar el modo AF. MODO PTY PTY (Tipo de Programa) permite la búsqueda de emisoras por MUSIC MODE o SPEECH MODE. Music Mode clasifica las emisoras en Pop, Rock, Música Moderna, Ligera, Clasica, y otras. Speech Mode clasifica las emisoras en Noticias, Casos, Información, Deportes, Educación, Drama, Cultura, y Ciencia. REG (Modo Región) conmuta la emisora a otra con el mismo PI CODE (emisora que proporciona exactamente el mismo programa) pero en una REGION diferente. Modo Tipo de Programa 1. Pulse el botón PTY para pasar por MUSIC, SPEECH, y PTY OFF. 2. Pulse el botón PRESET que corresponda al tipo de modo (ver tabla inferior). Modo Region 1. Pulse y mantenga el botón PTY durante 1 segundo para activar el Modo Region. 2. Pulse y mantenga el botón PTY de nuevo para desactivar el Modo Region. NOTA: El display LCD mostrará “REG” cuando los modos AF y REG están activos. – 59 – FRANÇAIS OPERATION DE BASE INTER MARCHE ARRET Opération 1. Appuyer sur le bouton OFF pour mettre la radio en fonction. 2. Appuyer à nouveau sur le bouton OFF pour mettre la radio hors service. N’importe quels bouton allume Appuyez sur n’importe lequel des boutons de la façade (excepté EJECT, DISP) pour mettre en service la radio quand elle est en mode veille. Ecran LCD (cristaux liquides) Quand la radio est hors service (ou en mode veille), l’horloge reste en fonction. BOUTON DE VOLUME / REGLAGE DE LA TONALITE Le bouton de Volume est multifonctions, il permet d’ajuster le Volume, la Tonalité et de Choisir des Options (voir page suivante). Contrôle du Volume 1. Tourner le bouton de VOLUME dans le sens des aiguilles d’une montre pour incrémenter le niveau sonore. 2. Tourner le bouton de VOLUME dans le sens inverse des aiguilles d’une montre pour décrémenter le niveau sonore. Réglage de la Tonalité 1. Appuyer sur le bouton de VOLUME de façon répétée pour faire apparaître les indications BASS > TREBLE > BALANCE > FADER > SUM** > VOLUME. 2. Tourner le bouton de VOLUME dans le sens des aiguilles d’une montre pour incrémenter le réglage de la fonction sélectionnée. 3. Tourner le bouton de VOLUME dans le sens inverse des aiguilles d’une montre pour décrémenter le réglage de la fonction sélectionnée. Mémoire de la Tonalité de la Source Des réglages individuels des Basses & Aigus peuvent être mémorisés pour TUNER / CD / PLAYER / CHARGEUR CD / AUX. NOTE: Si aucun réglage n’est fait pendant un laps de 5 secondes, le bouton de MENU revient en mode réglage de VOLUME. – 60 – OPTIONS DE REGLAGE La liste ci-dessous montre les différentes options de réglages par défaut. Les différents choix d’options de réglage sont entre crochets. Pour les sélectionner, voir sélection des Options du Tuner en page 30. • DX [LOCAL] — Ajuste la sensibilité du tuner des conditions rurales où l’émission des radios est faible ou bien pour des conditions citadines où il y a plusieurs radios à forte émission. • AMERICAS [EUR/AUST] — Permet de changer le mode de réception dans les différentes parties du monde. • P. PLAY [EJ MUTE] — Active le tuner après éjection d’un CD tandis que Eject Mute désactive le tuner après l’éjection d’un CD. • VIDEO OFF [VIDEO 1, VIDEO 2] — Désactive les entrées RCA. VIDEO 1 et 2 permettent de connecter deux sources vidéo externes (TV, Nintendo, etc.) et de diriger leurs sorties vers le système A/V de votre voiture. • V/BAR ON [V/BAR OFF] — fait Apparaître la barre de volume au bas de la façade de façon permanente tandis que le Volume Bar Off la masque. • INI VOL 15 — Réglage du volume initial maximum lors de la mise sous tension de l’appareil. Si le volume sélectionné lors de la mise hors tension de l’appareille est moins élevé que le volume initial maximum alors le volume initial maximum ne sera pas utilisé à l’allumage de l’appareil. Si le volume sélectionné est plus élevé que le volume initial maximum alors le volume initial maximum sera utilisé à l’allumage de l’appareil. Cette option évite les accidents due à un volume trop élevé à l’allumage mais permet de conserver la sélection de volume important dans le cas ou un autre préamplificateur contrôle le volume de façon principal. • CONTRAST [VIEW 6] — Contrôle de l’angle de vue de l’afficheur. • FLAT [80HZ] — Permet de connecter une troisième paire de sorties RCA large bande ou passe-bas 80Hz en vue de l’utilisation d’un subwoofer. • PANEL AUTO [PANEL MANU] — Ouvre et ferme automatiquement le panneau lors de la mise ou de l’éjection d’un CD tandis que PANEL MANU permet de laisser le panneau ouvert et de charger ou décharger un CD manuellement. • AUX1 IN 0 [+6, –6] — Permet d’augmenter le volume d’entrée d’une source audio extern faible ou d’en diminuer le niveau. Utile pour des sources externes: MP3 players, video games, VCPs, etc. • AUX2 IN 0 [+6, –6] — De même que AUX1 IN. Sélection du Menu d’Option 1. Appuyer sur le bouton de VOLUME et le laisser enfoncé pendant 1 seconde jusqu'à l’apparition de DX (c’est la première option de tuner). 2. Appuyer sur le bouton de VOLUME de façon répété pour faire apparaître la liste des option du tuner. 3. Pour changer d’options du tuner appuyer sur les boutons Up ou Down. 4. Dès que vous avez sélectionné l’Option du Tuner de votre choix, attender 5 secondes, l’Option du Tuner sera automatiquement sauveguardé et vous retournerez dans le dernier Mode sélectionné. – 61 – REGLAGE DE L’HEURE Reglage des heures 1. Appuyer sur le bouton DISP et le maintenir enfoncé pendant 1 seconde jusqu'à ce que l’affichage des heures clignote. 2. Appuyer sur le bouton UP ou DOWN pour régler l’heure désirée. Reglage des minutes 1. Appuyer sur le bouton DISP une seconde foi pour que l’affichage des minutes clignote. 2. Appuyer sur le bouton UP ou DOWN pour régler les minutes. Mémoriser l’Heure Réglée Apres que l’horloges est clignotée pendant 5 secondes, l’heure réglée est mémorisée. Remarques 1. L’affichage de l’horloge reste actif même quand la radio est éteinte. 2. Appuyer sur le bouton DISP pendant 5 secondes quand un autre affichage par défaut est sélectionné (voir DEFAULT/RECALL DISPLAY dans cette section pour plus d’information sur les affichages par défaut). BOUTON PUNCH Le bouton Punch permet de corriger le réglage des basses et des aigus d’une sortie audio pour écouter à n’importe quel niveau. Opération 1. Appuyer sur le bouton Punch pour activer la correction physiologique (Loudness). 2. Appuyer sur le bouton PUNCH pour désactiver la correction physiologique (Loudness). Afficheur L’écran affichera “Punch” quand la correction physiologique (Loudness) sera active. BOUTON MUTE Opération 1. Appuyer sur le bouton MUTE pour baisser le volume 2. Appuyer sur le bouton MUTE une seconde foi pour revenir au niveau sonore initial. Ecran LCD (cristaux liquides) L’écran affichera MUTE jusqu'à ce que la fonction soit désactivée. SELECTION DES MODES Appuyer sur le bouton MODE de façon répérté pour faire apparaître les modes suivants: • CDP PLAY — Permet la lecture d’un CD si il y en a un d’inséré • AUX1 — Permet la connexion d’une source audio externe au système. • AUX2 — Permet la connexion d’une seconde source audio externe au système. • FM1 — Active le Tuner. – 62 – OPERATION DU LECTEUR CD — BASIC NOTE: Le lecteur RFX LIRA LES CD crée sur un Macintosh Pour Lire un CD 1. Appuyer sur le bouton OPEN et la Façade Avant s’ouvrira. 2. Insérer un CD et la Façade Avant se fermera après 5 secondes. 3. CDP PLAY sera sélectionné automatiquement et le CD commencera la lecture immédiatement sur la piste 1. 4. Utiliser les boutons UP et DOWN pour changer de piste. Lecture de piste Aléatoire Lorsqu’un CD est en lecture, appuyer sur le bouton RDM et le lecteur lira des pistes de façon aléatoire. Pour Répéter une Piste Pendant la lecture d’un morceau, appuyer sur le bouton RPT, la piste sera répété jusqu'à ce que vous appuyez une nouvelle foi sur le bouton RPT. Pour Ejecter un CD 1. Appuyer sur le bouton OPEN pendant 1 seconde, la façade avant s’ouvrira et le CD sera éjecté. 2. Appuyer sur le bouton OPEN pendant que la façade est ouverte pour la fermer, ou attendre 5 secondes et la façade se fermera automatiquement (en Mode AUTO). NOTE: Si le bouton OPEN est actionné moins d’une seconde alors que la façade est en mode Auto, la façade s’ouvrira mais le il n’y aura pas d’éjection. OPERATION DU LECTEUR CD — ADVANCED MODES DU LECTEUR CD Mode du Lecteur CD 1. Appuyer sur le bouton MODE jusqu'à ce que CDP PLAY apparaisse. 2. La lecture du CD commencera (si il n’y a pas de CD dans le lecteur, le mode AUX1 sera sélectionné). Ecran LCD (cristaux liquides) 1. Le numéro du morceau et sa durée seront affichés pendant 5 secondes. 2. Après 5 secondes, l’écran reviendra à l’affichage par défaut. Insertion et Lecture d’un CD 1. Insérer un CD et CDP PLAY apparaîtra. 2. La lecture du CD commencera au piste 1. Caractéristique de mise sous tention (quand l’appareille est éteint) 1. Insérer un disque quand l’appareil est éteint. 2. La lecture du disque commencera au piste 1. – 63 – EJECTION DU DISQUE* Ejection du Disque 1. Appuyer sur le bouton OPEN attendre 1 seconde l’éjection du CD. 2. L’appareil reviendra en mode P.PLAY ou EJ MUTE (voir OPTIONS TUNER dans ce manuel pour plus d’information sur les modes par défaut). 3. Après avoir coupeé le contact de votre voiture, vous pourrez encore éjecter le disque en appuyant sur OPEN. Ecran LCD (cristaux liquides 1. EJECT sera affiché pendant 5 secondes. 2. Apres 5 secondes, l’affichage précédent réapparaîtra. Recharge Automatique 1. Si le CD reste en position éjecté plus de 10 secondes le disque sera automatiquement rechargé dans le lecteur. 2. L’opération de recharge automatique ne fera pas redémarrer la lecture du CD ni n’affectera aucun modes courants (excepté le Mode EJ MUTE). CDP/CDX SELECTION DE PISTE* Sélection de Piste 1. Appuyer sur le bouton UP pour sélectionner la piste suivante sur le disque. 2. Appuyer sur le bouton DOWN pour sélectionner la piste précédente sur le disque. Ecran LCD (cristaux liquides) 1. Le numéro de la piste et le décompte du temps sont affichés pour 5 secondes. 2. Apres 5 secondes l’écran revient en affichage par défaut. Remarques CDP MODE: La lecture reprendra à la piste 1 à la fin de CD. CDX MODE: Apres la dernière piste d’un CD, le disque suivant du chargeur démarrera en lecture sur la piste 1. CDP/CDX CHOIX ALEATOIRE DE DISQUE ET DE PISTES* Aléatoire 1. Appuyer sur le bouton RDM pour activer le mode Aléatoire. 2. Le mode Aléatoire restera actif tant que vous ne le désactiverez pas. Désactiver le Mode Aléatoire Appuyer sur le bouton RDM une seconde foi pour désactiver le mode Aléatoire. Ecran LCD (cristaux liquides RDM sera affiché tant que la fonction ne sera pas désactivée. *NOTE: Cette fonction est identique pour les lecteurs de CD ainsi que pour les chargeurs de CD. – 64 – CDP/CDX SELECTION RAPIDE DE PISTE* Avance/Retou Appuyer sur le bouton DOWN et le lecteur reprendra au début de la même piste a condition que celle-ci est été lu plus de 10 secondes. Appuyer sur le bouton DOWN avant que la piste est atteint 10 secondes de lecture et le lecteur reprendra au début de la piste précédente. Avance/Retour rapide 1. Appuyer sur le bouton UP et le maintenir enfoncé pour obtenir l’avance rapide de la piste. 2. Appuyer sur le bouton DOWN et le maintenir enfoncé pour obtenir le retour rapide de la piste. Ecran LCD (cristaux liquides Le décompte du temps sera affiché aussi longtemps que les boutons UP et DOWN resteront enfoncés. CDP/CDPX REPETITION DE PISTE* La fonction repeat reprendra la lecture de la piste. Répétition de Piste 1. Appuyer sur le bouton RPT pour activer le mode Repeat. 2. Appuyer sur le bouton RPT une seconde fois pour désactiver le mode Repeat. Appuyer sur les boutons UP et DOWN désactivera aussi le mode Reapeat. Ecran LCD (cristaux liquides) RTP restera affiché tans que la fonction est activée. CDP/CDX SCAN PISTE* Track Scan permet de lire les 10 première secondes de chaque piste du disque. Scan Piste 1. Appuyer sur le bouton SCAN pour activer le mode scan. 2. Le mode scan sera actif tant que vous ne le désactiverez pas. Désactiver Scan Piste 1. Appuyer sur le bouton SCAN une seconde foi pour désactiver le mode scan. Ecran LCD (cristaux liquides) 1. SCAN restera affiché tant que la fonction est activée. 2.Le numéro des pistes et le décompte du temps sera affiché pendant 5 secondes à chaque introduction de chaque piste. 3. Après 5 secondes l’écran reviendra en affichage par défaut. *NOTE: Cette fonction est identique pour les lecteurs de CD ainsi que pour les chargeurs de CD. – 65 – CDP/CDX PAUSE* Pause CD 1. Appuyer sur le bouton MUTE pour mettre en pause le CD 2. Appuyer sur le bouton MUTE une seconde fois pour remettre en lecture le disque. Ecran LCD (cristaux liquides) 1. PAUSE et la piste# resteront affichés tant que la fonction est activée. MEMORISATION DES TITRES DE DISQUE 10 caractères du titre des CD peuvent être mémorisés. Un maximum de 100 titres peuvent être mémorisés. Mémorisation du Titre des Disque 1. Appuyer sur le bouton BAND et le maintenir enfoncé durant 1 seconde, la première lettre des 10 caractères clignotera. 2. Appuyer sur le bouton DISP pour faire apparaître les types de caractères suivant: Type Type Type Type 1: 2: 3: 4: (space)ABCDEFGHIJKLMNOPQRSTUVWXYZ abcdefghijklmnopqrstuvwxyz 0123456789 /\\.+?!*’") 3. Tourner le bouton de volume pour sélectionner les caractères. 4. Appuyer sur le bouton volume pour aller à la place du caractère suivant. 5. Appuyer sur le bouton de volume et le maintenir enfoncé pendant 1 seconde pour sauvegarder le titre. Effacer le Titre d’un Disque 1. Appuyer sur le bouton MUTE et le maintenir enfoncé pendant 1 seconde. 2. Tourner le bouton de volume pour sélectionner le titre à effacer. 3. Appuyer sur le bouton de volume et le maintenir enfoncé pendant 1 seconde pour effacer le titre. *NOTE: Cette fonction est identique pour les lecteurs de CD ainsi que pour les chargeurs de CD. – 66 – OPERATION SUR LECTEUR MP3 — OPERATION DE BASIC NOTE: Le lecteur RFX NE reconnaît PAS les CD MP3 créé sur un Macintosh POUR LIRE UN DISQUE EN MP3 1. Appuyer sur le bouton OPEN et la façade s’ouvrira. 2. Insérer un disque MP3 et la façade se fermera après 5 secondes, ou appuyer sur OPEN pour fermer immédiatement. 3. CDP PLAY sera automatiquement sélectionné et la lecture du disque MP3 commencera en piste 1. 4. Appuyer sur les boutons UP et DOWN incurvé pour sélectionner les pistes désirées. Lire le Piste de façon Aléatoire Apres avoir inséré un disque MP3, appuyer sur le bouton RDM et le lecteur sélectionnera les pistes de façon aléatoire. Répéter une piste Dès que le disque est sur la piste que vous voulez répéter, appuyer sur le bouton RPT et le lecteur répétera cette piste tans que vous n’aurez pas re-appuyer sur le bouton RPT une seconde fois. Mettre sur Pause une piste Appuyer sur le bouton MUTE pour mettre en pause une piste. Appuyer de nouveau sur MUTE pour redémarrer la lecture. Ejecter un disque 1. Appuyer sur le bouton OPEN et le laisser enfoncé pendant 1 seconde, la façade s’ouvrira et le disque sera éjecté. 2. Apres avoir enlevé le disque, appuyer sur OPEN une nouvel fois pour fermer la façade. STRUCTURE DU REPERTOIRE Le répertoire de MP3 est en trois partie composés de trois sous parties: (1) Principal, (2) Répertoire et (3) Chansons. Les chansons sont lu dans l’ordre du niveau ou elles sont rangées. Toutes les titres du niveau 2 sont lues avant celles du niveau 3. Ces niveaux sont décris par des répertoire et des sous répertoires. Les chansons du niveau 3 sont traitées dans ce même niveau mais peuvent être lu dans un autre. – 67 – OPERATION SUR LE LECTEUR DE MP3 — ORDRE D’UTILISATION UITILISER LE REPERTOIRE MP3 Niveau Principal Le niveau principal contient le nom du disque mais pas le répertoire ou des information sur les chansons. La première chansons du disque sera automatiquement lu dès l’insertion du disque et sera lu tant que vous n’en aurez pas sélectionner une autre. Selection directe d’une chanson par son titre Le système d’utilisation MP3 à un système de répertoire similaire à celui de Windows™. Il en résulte que les fonctions UP et DOWN sont différentes que celles dans les modes CD ou Tuner. Au lieu de sélectionner la piste d’avant ou d’après sur le disque, ils sélectionnent la piste de dessus ou de dessous sur la liste. 1. Appuyer sur le bouton ROOT et le non du disque apparaîtra. Le nom du premier répertoire sera affiché immédiatement et ce pendant 5 secondes. 2. Simultanément que le nom du premier répertoire est affiché, appuyer sur le bouton DOWN pour faire apparaître le menu déroulant dans l’ordre alphabétique (A à Z) des répertoires. Appuyer sur le bouton UP pour avoir le menu déroulant dans le sens inverse. 3. Appuyer sur le bouton ENTER et le nom de la première piste du répertoire sélectionné s’affichera. 4. Appuyer sur le bouton DOWN pour obtenir l’affichage déroulant dans l’ordre croissant (1 à 10 ou plus) de toutes les pistes contenues dans le répertoire sélectionné. Appuyer sur le bouton UP pour obtenir l’affichage déroulant dans l’ordre décroissant. NOTE: Selon le type de CD-R, état extérieur CD et l'exécution et l'état CD d'auteur, les CD-R peuvent ne pas opérer normalement. NOTE: Si le nom d’une piste reste affiché pendant 5 secondes. Si aucune action n’est effectuée pendant ce laps de temps, l’afficheur reviendra en mode courant. 5. Appuyer sur ENTER pour sélectionner la piste que vous voulez lire. NOTE: Si aucun disque n’est présent dans le lecteur CD, NO CD sera affiché et l’appareil reviendra en mode TUNER. Bouton DOWN Quand une piste MP3 est en lecture sur le RFX 9300 ou 9400, Appuyer sur le bouton DOWN sélectionnera le début de la piste suivante. A l’inverse d’un CD régulier, appuyer sur le bouton DOWN et le lecteur reprendra au début de la même piste a condition que celle-ci est été lu plus de 10 secondes. Appuyer sur le bouton DOWN avant que la piste est atteinte 10 secondes de lecture et le lecteur reprendra au début de la piste précédente. Avance et Retour Rapide Cette fonction est possible dans le mode MP3, mais d’une part, l’affichage du décompte du temps ne sera activé et d’autre part, il n’y aura pas d’émission de sons. – 68 – UITILISER LE REPERTOIRE MP3 (CONT’D) Vitesse Maximum d’Ecriture La vitesse maximum du lecteur CD ROM de l’appareil RFX est 12X. Le maximum de bits géré est 32kb/sec–320kb/sec. Pour obtenir de meilleures performances de gravure, avant de créer un CD, selectionner le format ISO9660 en option sur votre ordinateur. NOTE: Attention, pour graver un CD en MP3, il vous faut un CD vierge informatique et non pas un CD vierge audio. . Programmation de Titre La programmation des titre n’est pas valide en mode MP3. OPERATION SUR LE TUNER SELECTION D’UNE BANDE Appuyer sur le bouton BAND de façon répété, pour voir apparaître FM1, FM2, et AM. Il est possible aussi de choisir automatiquement la bande. OPTIONS DU TUNER DX et AMERICAS sont les options sélectionnées par défaut. Les anciennes options sont alternés. • DX [LOCAL] • AMERICAS [EUR/AUST] Sélection des Options du Tuner 1. Appuyer sur le bouton VOLUME et le laisser enfoncé pendant une seconde. 2. Appuyer sur le bouton VOLUME de façon répétée pour faire apparaître le menu d’options (l’ordre du menu d’option n’intervient pas sur le Mode Tuner). 3. Pour changer d’option, appuyer sur les boutons UP et DOWN. 4. Dès que vous avez votre sélection, attendre 5 secondes et l’afficheur retournera dans le dernier mode. BOUTONS DE PRESSELECTION 1–10 Chaque mode du Tuner — FM1, FM2, and AM— a 10 présélections soit un total de 30 présélections. Pour sélectionner un bouton de préselection 1. Régler le Tuner sur la station que vous voullez programmer. 2. Appuyer sur un bouton de présélection et le laisser enfoncé pendant 5 secondes, la sélection sera programmée. – 69 – BOUTON DE FONCTION Opération 1. Appuyer sur le bouton de VOLUME et le laisser enfoncé pendant 1 seconde pour rentrer dans le mode d’Option du Tuner. 2. Continué à enfoncer le bouton VOLUME pour faire apparaître les indications TUNER OPTIONS DX > AMERICAS > P.PLAY > V/BAR > INI/VOL > CONTRAST > FLAT > PANEL AUTO > AUX1 IN > AUX2 IN. 3. Appuyer sur le bouton SEEK pour sélectionner MODE 1 ou MODE 2. AUTO STORE DE RADIO Si vous voulez que le Tuner sélectionne les 10 plus puissantes radios dans l’ordre ou leurs signal arrive, appuyer sur le bouton de présélection 1-10, vous pouvez utiliser Auto Store. Auto Store 1. Appuyer sur le bouton AS une fois et le Tuner scannera l’ensemble de la bande. 2. Auto Store sélectionnera les stations indépendamment du mode sélectionné sur le tuner (FM1/FM2/AM). MISE EN MEMOIRE DES TITRES DES STATIONS Le nom des stations peuvent être mémorisées sur 10 caractères. Un maximum de 100 titres peu être mémorisées. Mémorisation du Titre des Stations 1. Appuyer sur le bouton BAND et le maintenir enfoncé durant 1 seconde, la première lettre des 10 caractères clignotera. 2. Appuyer sur le bouton DISP pour faire apparaître les types de caractères suivant: Type Type Type Type 1: 2: 3: 4: (space)ABCDEFGHIJKLMNOPQRSTUVWXYZ abcdefghijklmnopqrstuvwxyz 0123456789 /\\.+?!*’") 3. Tourner le bouton de volume pour sélectionner les caractères. 4. Appuyer sur le bouton volume pour aller à la place du caractère suivant. 5. Appuyer sur le bouton de volume et le maintenir enfoncé pendant 1 seconde pour sauvegarder le titre. Effacer le Titre d’une Station 1. Appuyer sur le bouton MUTE et le maintenir enfoncé pendant 1 seconde. 2. Tourner le bouton de volume pour sélectionner le titre à effacer. 3. Appuyer sur le bouton de volume et le maintenir enfoncé pendant 1 seconde pour effacer le titre. – 70 – MODE AF / TP Le Mode TP (Traffic Program) vous permettra de recevoir des informations sur le trafic routier sans tenir compte du mode d’opération de l’appareil en cour. EON TA sont des stations qui n’ont pas d’informations sur le TRAFIC mais qui peuvent en fournir à l’aide d’autres stations. Le mode AF (Alternative Fréquencies) compare le niveau du signal de la station avec une autre fréquence de la même station (voir le Mode PTY). Si le mode AF détecte la station sur une fréquence d’un niveau de signal plus élevé, la station sera sélectionnée. Mode Traffic Program (TP) 1. Appuyer sur le bouton AF/TP pour activer le Mode TP, ré appuyer pour le désactiver. 2. Quand l’affichage TP clignote, le mode est activé et il n’y a pas de réception TP DATA. 3. Les fonctions SEEK ou AS sélectionnerons uniquement les stations provenant des modes TP ou EON TA. Mode Alternative Frequencies (AF) 1. Appuyer sur le bouton AF/TP et le laisser enfoncé pendant 1 seconde pour activer le mode AF. 2. Appuyer sur le bouton AF/TP une seconde foi pour désactiver le Mode AF. MODE PTY Le mode PTY (Program Type) permet de chercher des stations via MUSIC MODE ou SPEECH MODE. Le Mode Musique range les différentes stations par catégories: Pop, Rock, Modern Music, Light, Classique… Le Mode Speech range les différentes stations par catégories: Informations, Affaires, Sports, Education, Culture, Sciences. Le mode REG (Mode Région) sélectionnera les différentes stations qui ont le même CODE PI (les station qui émettent exactement le même programme) mais dans des régions différentes. Mode Program Type 1. Appuyer sur le bouton PTY pour faire apparaître les indications MUSIC, SPEECH et PTY OFF. 2. Appuyer sur le bouton PRESET pour sélectionner le mode. Mode Région 1. Appuyer sur le bouton PTY et le laisser enfoncé pendant 1 seconde pour activer le mode Région. 2. Appuyer sur le bouton PTY une seconde fois pour désactiver le Mode Région. NOTE: “REG” est affiché quand les modes AF et REG sont activés. – 71 – DEUTSCH ALLGEMEINE BEDIENUNG EIN- UND AUSSCHALTEN Bedienung 1. Drücken Sie die OFF Taste, um das Radio einzuschalten. 2. Drücken Sie die OFF Taste, um das Radio auszuschalten. Einschalten über jede Taste Drücken Sie eine beliebige Taste (ausgenommen EJECT und DISP) um das Radio aus dem Schlafmodus in den Operationsmodus zu bringen. LCD Display Wenn das Radio ausgeschaltet ist (Schlafmodus) wird die Uhrzeit angezeigt. VOLUMEN-REGLER / TON-EINSTELLUNGEN Der Volumenregler ist ein Multifunktionsregler der Volumen, Baesse, Hoehen und Setup- Optionen beeinflussen kann. Lautstaerke einstellen 1. Drehen Sie den Volumenregler im Uhrzeigersinn, um die Lautstaerke zu erhoehen. 2. Drehen Sie den Volumenregler gegen den Uhrzeigersinn, um die Lautstaerke zu reduzieren. Ton-Einstellungen veraendern 1. Druecken Sie wiederholt auf den Volumenregler, um die verschiedenen Funktionen aufzurufen: BASS > TREBLE > BALANCE > FADER > SUM** > VOLUME. 2. Drehen Sie den Volumenregler im Uhrzeigersinn, um die eingestellte Funktion zu erhoehen. 3. Drehen Sie den Volumenregler gegen den Uhrzeigersinn, um die eingestellte Funktion zu reduzieren. Quellenabhaengiger Speicher Individuelle Bass & Treble Einstellungen werden jeweils für TUNER / CD / CDCHANGER und AUX gespeichert. Werden innerhalb von 5 Sekunden keine Einstellungen vorgenommen springt das Menue zurueck in die Volumenkontrolle. – 72 – EINSTELL-MOEGLICHKEITEN Die nachfolgend aufgefuehrte Liste zeigt die moeglichen Setup-Einstellungen. Angaben die in Klammern stehen sind die zu waehlenden Alternativen in den entsprechenden Bereichen. Wie diese Alternativen ausgewaehlt werden, steht unter “Selecting Tuner Options” auf Seite 30. • DX [LOCAL] – Veraendert die Empfindlichkeit des Tuners, bei schlechten Empfangsbedingungen (DX). Befinden Sie sich in starken Sendegebieten (Staedten) schalten Sie den Tuner auf (LOCAL), um die Sendertrennung zu verbessern. • AMERICAS [EUR / AUST] – Veraendert die Frequenzschritte des Tuners (Weltweiter Tuner). • P.PLAY [EJ MUTE] – Schaltet auf Tuner, nachdem die CD ausgeworfen wurde. Eject Mute: keine Wiedergabe, nachdem die CD ausgeworfen wird. • VIDEO OFF [VIDEO 1, VIDEO 2] – Schaltet die Videoeingaenge aus. VIDEO 1 und 2 erlaubt es zwei externe Bildquellen anzuschliessen (TV, Nintendo etc.) und deren Ausgaenge ueber Ihr Audio/Video System laufen zu lassen. • V/BAR ON [V/BAR OFF] – Schaltet die Volumenanzeige (Balkengrafik) auf dem Bedienteil ein oder aus. • INI VOL 15 – Bestimmt die maximale Lautstaerke beim Einschalten des Systems. War die Lautstaerke unterhalb der Maximalen INI VOL beim Ausschalten des Systems, so wird diese geringere Lautstaerke beim Einschalten wiedergegeben. Dieses feature schuetzt vor zu hohen Lautstaerken beim Einschalten des Systems. • CONTRAST [VIEW 6] – Beeinflusst den Kontrast unter verschiedenen Blickwinkeln. • FLAT [80 HZ] – Beeinflusst das dritte Paar der Vorverstaerkerausgaenge. Bei der Einstellung FLAT werden keine Frequenzen gefiltert. Bei 80 HZ handelt es sich um einen Tiefpass mit einer Trennfrequenz von 80 Hz. • PANEL AUTO [PANEL MANU] – Das Bedienteil wird automatisch auf und zugeklappt beim Einlegen oder Entfernen von CD`s. PANEL MANU laesst das Bedienteil aufgeklappt, wenn eine CD eingelegt oder entfernt wird. • AUX1 IN 0 [+6, -6] – Verändert die Empfindlichkeit des AUX1 Einganges, um diese Quellen der Radiolautstaerke anzupassen. • AUX2 IN 0 [+6, -6] – Verändert die Empfindlichkeit des AUX2 Einganges, um diese Quellen der Radiolautstaerke anzupassen. Waehlen der Setup-Einstellungen 1. Druecken und halten Sie den Volumenregler fuer eine Sekunde, bis DX auf dem Display erscheint (Dies ist die erste Option). 2. Druecken Sie den Volumenregler wiederholt, um auf die oben gelisteten Punkte zu wechseln. 3. Um eine Tuner Option zu wechseln drücken Sie bitte die UP oder DOWN Taste. 4. Wenn Sie die entsprechende Tuner Option gewaehlt haben warten Sie bitte 5 Sekunden und das Radio wird die Einstellung automatisch speichern. – 73 – EINSTELLUNGEN DER UHR Einstellen der Stunden 1. Druecken und halten Sie die DISP Taste für eine Sekunde, bis die Stundenanzeige anfaengt zu blinken. 2. Druecken Sie die UP- und DOWN-Tasten, um die Stunden zu verstellen. Einstellen der Minuten 1. Druecken Sie die DISP Taste ein weiteres Mal, bis die Minutenanzeige anfaengt zu blinken 2. Druecken Sie die UP- und DOWN-Tasten, um die Minuten zu verstellen. Sichern der eingestellten Zeit Nachdem die Zeit fuer 5 Sekunden geblinkt hat, werden die Einstellungen automatisch gespeichert. Allgemeines 1. Die Uhrzeit wird angezeigt, auch wenn das Radio ausgeschaltet ist (Vorausgesetzt die Zuendung ist eingeschaltet). 2. Wenn Sie die DISP Taste druecken erscheint die Uhrzeit fuer 5 Sekunden, wenn Sie zuvor eine andere Display Anzeige ausgewaehlt und gespeichert haben (siehe auch DEFAULT / RECALL DISPLAY, fuer weitere Instruktionen). PUNCH TASTE Die Punch Taste beeinflusst die Frequenzwiedergabe bei allen Lautstaerken. Baesse und Hoehen werden angehoben (aehnlich einer Loudness-Schaltung). Einstellung 1. Drücken Sie die PUNCH Taste, um die Loudness-Schaltung zu aktivieren. 2. Drücken Sie die PUNCH Taste erneut, um die Loudness-Schaltung zu deaktivieren. Display Auf der LCD-Anzeige erscheint PUNCH, wenn die Schaltung aktiviert ist. MUTE TASTE Einstellung 1. Drücken Sie die MUTE Taste, um die Lautstärke auf “0” zu schalten. 2. Drücken Sie die MUTE Taste erneut, um die Lautstärke auf den vorigen Level zu schalten. LCD Display Das LCD Display wird MUTE anzeigen, bis die Funktion deaktiviert ist. EINGANGS-WAHL Drücken Sie wiederholt die MODE Taste, um durch die folgenden Eingänge zu schalten: • CDP PLAY – Schaltet den CD player ein, sofern sich eine CD eingelegt ist. • AUX1 – Schaltet auf den externen Eingang AUX1. • AUX2 – Schaltet auf den externen Eingang AUX2 • FM1 – Schaltet den Tuner ein. – 74 – CD PLAYER EINSTELLUNGEN - ALLGEMEIN Alle RFX Player spielen auch CD`s, die auf einem Mac hergestellt wurden. Eine CD abspielen 1. Drücken Sie die OPEN Taste und das Bedienteil wird herunterschwenken. 2. Legen Sie eine CD ein. Das Bedienteil wird automatisch nach 5 Sekunden hochschwenken. 3. CDP PLAY wird automatisch starten und der erste Titel der CD wird gespielt. 4. Drücken Sie die UP und DOWN Tasten, um Titel zu wechslen. Zufallsgenerator Nachdem die CD anfaengt zu spielen druecken Sie die RDM Taste um den Zufallsgenerator zu starten. Wiederholen eines Titels Wenn die CD den Titel spielt, den Sie wiederholen moechten, druecken Sie die RPT Taste. Der Titel wird so lange wiederholt, bis Sie die RPT Taste noch einmal druecken. Eine CD auswerfen 1. Druecken Sie die OPEN Taste fuer eine Sekunde und das Bedienteil wird herunterschwenken und die CD wird ausgeworfen. 2. Druecken Sie die OPEN Taste, wenn das Bedienteil heruntergeschwenkt ist, schliesst sich die Abdeckung wieder oder warten Sie 5 Sekunden und das Bedienteil schliesst automatisch (im AUTO-MODE). Achtung: Wenn Sie OPEN weniger als eine Sekunde druecken (im Panel Auto Mode) schwenkt das Bedienteil herunter und die CD wird nicht ausgeworfen. CD PLAYER EINSTELLUNGEN - SPEZIFISCH CD PLAYER EINGANGSWAHL CD Player Eingangswahl 1. Drücken Sie die MODE Taste bis CDP PLAY erscheint. 2. Die CD faengt automatisch an zu spielen (wenn keine CD eingelegt ist schaltet das Radio auf den AUX1 Eingang). LCD Display 1. Die Titelnummer und die verstrichene Spielzeit wird im Display fuer 5 Sekunden angezeigt. 2. Nach 5 Sekunden wird das Display die vorige Anzeige wiedergeben. Einlegen und abspielen der CD 1. Legen Sie eine CD ein (CDP PLAY erscheint im Display) 2. Die CD Wiedergabe beginnt mit Titel 1 der CD. Einschaltmechanismuss (wenn Radio ausgeschaltet ist) 1. Legen Sie eine CD ein, wenn das Radio ausgeschaltet ist. 2. Die CD Wiedergabe beginnt mit Titel 1 der CD. – 75 – CD AUSWURF* CD Auswurf 1. Druecken Sie die OPEN Taste und halten Sie diese fuer eine Sekunde, um die CD auszuwerfen. 2. Das Steuergeraet wird auf Tuner umschalten oder die Wiedergabe unterbrechen (je nach Einstellung P.PLAY oder EJ MUTE). 3. Nachdem Sie die Zuendung ausgeschaltet haben, koennen Sie die OPEN Taste druecken, um eine CD auszuwerfen. LCD Display 1. Auf dem Display erscheint EJECT fuer 5 Sekunden. 2. Nach 5 Sekunden wird das Display die vorige Anzeige wiedergeben. Automatischer Einzug 1. Lassen Sie die CD laenger als 10 Sekunden im Einschub wird diese automatisch wieder zurueck in das Geraet gezogen. 2. Die CD wird nach diesem Einzug nicht automatisch wiedergegeben. CDP/CDX TITELANWAHL* Titelwahl 1. Druecken Sie die UP Taste um den nachfolgenden Titel auf der CD zu spielen. 2. Druecken Sie die DOWN Taste um den vorigen Titel auf der CD zu spielen. LCD Display 1. Die Titelnummer und die verstrichene Spielzeit wird fuer 5 Sekunden wiedergegeben. 2. Nach 5 Sekunden wird das Display die vorige Anzeige wiedergeben. Allgemein CDP MODE: Die CD Wiedergabe beginnt bei Titel 1, sobald der letzte Titel der CD gespielt wurde. CDX MODE: Wenn der letzte Titel der angewaehlten CD gespielt wurde, startet die Wiedergabe der nachfolgenden CD bei Titel 1. CDP/CDX TITEL- UND CD-ZUFALLSGENERATOR* Zufallsgenerator 1. Druecken Sie die RDM Taste um den Zufallsgenerator zu starten. 2. Der Zufallsgenerator wird alle Titel und CD`s zufaellig spielen, bis die Funktion wieder ausgeschaltet wird. Zufallsgenerator ausschalten Druecken Sie die RDM Taste ein weiteres Mal, um diese Funktion auszuschalten. LCD Display Das Display wir RDM solange anzeigen, bis die Funktion ausgeschaltet wird. *Diese Funktion ist im CD Player- und CD Changer Mode gegeben. – 76 – CDP/CDX TITELSPRUNG* Titelsprung vorwaerts/rueckwaerts Druecken Sie die DOWN Taste und der Player wird zum Anfang des Titels springen der gerade gespielt wird, solange dieser laenger als 10 Sekunden laeuft. Ist die verstrichene Spielzeit des Titels unter 10 Sekunden springt die Wiedergabe zum Start des vorigen Titels. Vor- und Rueckspulen 1. Drücken und halten Sie die UP Taste zum schnellen Vorspulen. 2. Drücken und halten Sie die DOWN Taste zum schnellen Rueckspulen. LCD Display Das LCD Display zeigt die verstrichene Spielzeit, solange die UP oder DOWN Taste gedrueckt wird. CDP/CDX TITEL-WIEDERHOLUNG* Diese Funktion wiederholt den gerade gespielten Titel. Titel-Wiederholung 1. Druecken Sie die RPT Taste um die Funktion einzuschalten. 2. Druecken Sie die RPT Taste ein weiteres mal, um die Funktion wieder auszuschalten. Die UP und DOWN Tasten schalten die Funktion ebenfalls aus. LCD Display Das Display wird RPT anzeigen, solange die Funktion aktiv ist. CDP/CDX ANSPIELMODUS* Der Anspielmodus spielt jeden Titel der CD fuer 10 Sekunden an und springt dann automatisch zum naechsten Titel. Anspielmodus 1. Druecken Sie die SCAN Taste um den Anspielmodus einzuschalten. 2. Der Anspielmodus bleibt solange aktiv bis er ausgeschaltet wird. Anspielmodus ausschalten Druecken Sie die SCAN Taste erneut, um den Anspielmodus auszuschalten. LCD Display 1. Das Display zeigt SCAN an, solange die Funktion aktiviert ist. 2. Das Display zeigt die Titelnummer und die verstrichene Spielzeit fuer 5 Sekunden, jedesmal wenn ein neuer Titel angespielt wird. 3. Nach 5 Sekunden wird das Display die vorige Anzeige wiedergeben. *Diese Funktion ist im CD Player- und CD Changer Mode gegeben. – 77 – CDP/CDX PAUSE* Unterbrechen der CD Wiedergabe 1. Druecken Sie die MUTE Taste, um die CD Wiedergabe zu unterbrechen. 2. Druecken Sie die MUTE Taste erneut, um mit der Wiedergabe fortzufahren. LCD Display Das Display zeigt PAUSE und die Titelnummer an, solange die Funktion aktiviert ist. PROGRAMMIEREN DES CD-TITELSPEICHERS Der Name einer CD kann im Speicher abgelegt werden (max. 10 Buchstaben). Es können maximal 100 Titel abgespeichert werden. Titelspeicher 1. Druecken und halten Sie die BAND Taste fuer 1 Sekunde und die erste Anzeige beginnt zu blinken. 2. Druecken Sie die DSP Taste um die Zeichendarstellung zu wechseln: Typ 1: (Leertaste)ABCDEFGHIJKLMNOPQRSTUVWXYZ Typ 2: abcdefghijklmnopqrstuvwxyz Typ 3: 0123456789 Typ 4: /\\.+?!*’") 3. Drehen Sie den Volumenregler, um das richtige Zeichen auszuwaehlen. 4. Druecken Sie auf den Volumenregler um zur naechsten Anzeige zu springen. 5. Druecken und halten Sie den Volumenregler fuer eine Sekunde, um den Titel zu speichern. Titelspeicher loeschen 1. Druecken und halten Sie die MUTE Taste fuer eine Sekunde. 2. Drehen Sie den Volumenregler soweit, bis der Titel erscheint, der geloescht werden soll. 3. Druecken und halten Sie den Volumenregler fuer eine Sekunde um den Titel zu loeschen. *Diese Funktion ist im CD Player- und CD Changer Mode gegeben. – 78 – ALLGEMEINE EINSTELLUNGEN ZUM BETRIEB DER MP3-FUNKTION Achtung: Die RFX Steuergeraete spielen keine MP3 CD`s, die auf Mac Rechnern erstellt wurden. WIEDERGABE EINER MP3 CD 1. Drücken Sie die OPEN Taste und das Bedienteil wird herunterschwenken. 2. Legen Sie eine MP3 CD ein. Das Bedienteil wird automatisch nach 5 Sekunden hochschwenken. Wenn Sie die OPEN Taste druecken schliesst das Bedienteil sofort. 3. CDP PLAY wird automatisch starten und der erste Titel der MP3 CD wird gespielt. 4. Drücken Sie die UP und DOWN Tasten, um Titel zu wechslen. Zufallsgenerator Nachdem die CD anfaengt zu spielen druecken Sie die RDM Taste um den Zufallsgenerator zu starten. Wiederholen eines Titels Wenn die CD den Titel spielt, den Sie wiederholen moechten, druecken Sie die RPT Taste. Der Titel wird so lange wiederholt, bis Sie die RPT Taste noch einmal druecken. Unterbrechen eines Titels Druecken Sie die MUTE Taste, um einen Titel zu unterbrechen. Druecken Sie die Taste erneut, um mit der Wiedergabe fortzufahren. Eine CD auswerfen 1. Druecken Sie die OPEN Taste und halten Sie diese fuer eine Sekunde, um die CD auszuwerfen. 2. Nachdem Sie die CD entnommen haben druecken Sie die Taste OPEN erneut, um das Bedienteil zu schliessen. VERZEICHNIS-STRUKTUR Die Dateistruktur ist in 3 Level eingeteilt. (1) Das Hauptverzeichnis, (2) die Unterverzeichnisse und (3) die Titel. Die Titel werden in der Reihenfolge wiedergegeben, wie Sie in dem Level gespeichert sind. Alle Titel in Level (2) werden vor den Titeln in Level (3) gespielt oder tiefer. Die Level sind aehnlich Verzeichnissen und Unterverzeichnissen. Alle Titel, die tiefer als Level (3) gespeichert sind, werden von der Software so behandelt, als wenn sie in Level (3) waeren. – 79 – MP3 PLAYER BEDIENUNG – DATEI MANAGEMENT ERSTELLEN EINES MP3 VERZEICHNISSES Das Hauptverzeichnis Im Hauptverzeichnis steht der Name der CD, aber keine Unterverzeichnisse oder Titelinformationen. Der erste Titel auf der CD wird automatisch abgespielt, sobald eine CD eingelegt wird. Direkte Auswahl eines Titels nach Namen Das MP3 Datei Management System ist ein Verzeichnissystem aehnlich dem bei WindowsTM. Aus diesem Grund funktionieren die UP und DOWN Tasten anders als im CD oder Tuner Modus. Anstatt vorwaerts oder rueckwaerts zu springen, wandert man die Dateiliste hoch oder runter. 1. Druecken Sie die ROOT Taste und das Display wird den Namen der CD anzeigen. Danach zeigt das Display fuer 5 Sekunden den Namen des ersten Verzeichnisses auf der CD. Falls keine anderen Tasten gedrueckt werden springt die Anzeige wieder zu dem Titel der in dem Moment gespielt wird. 2. Waehrend der Name des ersten Verzeichnisses angezeigt wird, koennen Sie die DOWN Taste druecken, um durch die Liste der Unterverzeichnisse zu springen. Druecken Sie die UP Taste, um in die andere Richtung zu springen. 3. Druecken Sie die ENTER Taste und der erste Titel in dem Verzeichnis wird angezeigt. 4. Druecken Sie die DOWN Taste um die Titel numerisch anzuwaehlen (1 bis 10 oder hoeher), die in dem Verzeichnis stehen. Druecken Sie die UP Taste, um die Titel rueckwaerts zu durchlaufen (10+ bis 1). Abhängig von der Art von CD-R, CD Oberflächenzustand und die CD Verfasserleistung und -zustand, können die CD-R möglicherweise nicht normalerweisefunktionieren. Der Titelname wird fuer 5 Sekunden im Display erscheinen, waehrend Sie die Schritte 1-4 durchlaufen. Wenn keine weitere Funktion ausgefuehrt wird springt das Display wieder zu der Anzeige des gerade gespielten Titels. 5. Druecken Sie ENTER waehrend der Name des neuen Titels im Display erscheint wird dieser wiedergegeben. Wenn sich keine CD im Player befindet zeigt das Display NO CD an , und das Steuergeraet springt zurueck zum Tuner Modus. DOWN Taste Wenn Sie die DOWN Taste druecken, waehrend Sie einen MP3 Titel wiedergeben (RFX9000, RFX9400) springen Sie zum Anfang des vorigen Titels. Beispiel: Wenn Sie den dritten Titel hoeren und die DOWN Taste druecken springen Sie zum Anfang des zweiten Titels, nicht zum Anfang des dritten Titels, wie im CD Modus. Schnelles Vor- / Rueckspulen Diese Funktion laesst sich im MP3 Modus ausfuehren, allerdings wird die verstrichene Spielzeit nicht angezeigt und die Wiedergabe des Titels verstummt. – 80 – ERSTELLEN EINES MP3 VERZEICHNISSES (CONT’D) Maximale Schreibgeschwindigkeit und Bit-Tiefe Die maximale Schreibgeschwindigkeit Ihres CD-Brenners darf 12x nicht ueberschreiten, da das Steuergeraet schnellere Geschwindigkeiten nicht lesen kann. Die Maximale BitRate betraegt 32kb/sec – 320kb/sec. Fuer beste Displayeigenschaften benutzen Sie bitte das ISO 9660 Dateiformat, was eine Titellaenge von 16 Buchstaben ermoeglicht. Stellen Sie sicher, das Ihre selbstgebrannte CD als Daten CD formatiert ist und nicht als Audio CD. Programmierbare Titel Diese Funktion steht im MP3 Modus nicht zur Verfuegung. Sie koennen aber auswaehlen, ob der Name des Titels oder die verstrichene Spielzeit angezeigt werden soll. RADIO BEDIENUNG WAEHLEN EINES BANDES Druecken Sie die BAND Taste, um von FM1 auf FM2 oder AM zu wechseln. RADIO EINSTELLUNGEN DX und AMERICAS sind die Werkseinstellungen. Die alternativen Moeglichkeiten stehen in Klammern. • DX [LOCAL] • AMERICAS [EUR/AUST] Auswaehlen der Radio Einstellungen 1. Druecken und halten Sie den Volumenregler fuer eine Sekunde, bis DX auf dem Display erscheint (Dies ist die erste Option). 2. Druecken Sie den Volumenregler wiederholt, um auf die oben gelisteten Punkte zu wechseln. 3. Um eine Tuner Option zu wechseln druecken Sie bitte die UP oder DOWN Taste. 4. Wenn Sie die entsprechende Tuner Option gewaehlt haben warten Sie bitte 5 Sekunden und das Radio wird die Einstellung automatisch speichern. FESTSTATIONEN 1-10 Jedes Radio Band – FM1, FM2 und AM kann 10 Feststationen speichern. Um eine Station zu speichern. 1. Wechseln Sie zu der Frequenz der Station, die Sie abspeichern moechten. 2. Druecken und halten Sie die Stationstaste fuer 5 Sekunden, auf der Sie den Sender abspeichern moechten. – 81 – VOLUMENREGLER Einstellung 1. Druecken und halten Sie den Volumenregler fuer eine Sekunde, bis DX auf dem Display erscheint. 2. Druecken Sie den Volumenregler wiederholt, um weitere Einstellmoeglichkeiten vorzunehmen: DX > AMERICAS > P.PLAY > V/BAR > INI/VOL > CONTRAST > FLAT > PANEL AUTO > AUX 1 IN > AUX2 IN 3. Druecken Sie die SEEK Taste um MODE 1 oder MODE 2 auszuwaehlen . AUTOMATISCHE ABSPEICHERUNG Wenn Sie die 10 staerksten Sender automatisch abspeichern wollen ( in der Reihenfolge ihrer Signalstaerke), benutzen Sie Auto Store. Auto Store 1. Druecken Sie die AS Taste einmal und der Radio wird die komplette Frequenzweite nach Sendern absuchen. 2. Auto Store wird die Sender automatisch auf den Stationstasten abspeichern. PROGRAMMIEREN UND ABSPEICHERN DER SENDERNAMEN Der Name eines Senders kann im Speicher abgelegt werden (max. 10 Buchstaben). Es können maximal 100 Sendernamen abgespeichert werden. Stationsnamenspeicher 1. Druecken und halten Sie die BAND Taste fuer 1 Sekunde und die erste Anzeige beginnt zu blinken. 2. Druecken Sie die DSP Taste um die Zeichendarstellung zu wechseln: Typ 1: (Leertaste)ABCDEFGHIJKLMNOPQRSTUVWXYZ Typ 2: abcdefghijklmnopqrstuvwxyz Typ 3: 0123456789 Typ 4: /\\.+?!*’") 3. Drehen Sie den Volumenregler, um das richtige Zeichen auszuwaehlen. 4. Druecken Sie auf den Volumenregler um zur naechsten Anzeige zu springen. 5. Druecken und halten Sie den Volumenregler fuer eine Sekunde, um den Titel zu speichern. Namensspeicher loeschen 1. Druecken und halten Sie die MUTE Taste fuer eine Sekunde. 2. Drehen Sie den Volumenregler soweit, bis der Titel erscheint, der geloescht werden soll. 3. Druecken und halten Sie den Volumenregler fuer eine Sekunde um den Titel zu loeschen. – 82 – AF / TP MODUS Der TP Modus (Verkehrsfunk) wechselt automatisch zur ausgesendeten Verkehrsnachricht, gleichgueltig welche Quelle Sie gerade hoeren. EON TA sind Sender, die keinen eigenen Verkehrsfunk produzieren, diesen aber von anderen Sendern bereitstellen. Der AF Modus (Alternative Frequenzen) durchsucht das Frequenzband nach staerkeren alternativen Frequenzen des gleichen Radiosenders und schaltet automatisch dorthin, sobald das Signal auf der Alternativfrequenz staerker ist (siehe auch PTY Modus). Verkehrsfunk (TP) 1. Druecken Sie die AF/TP Taste, um den Verkehrsfunk einzuschalten. Druecken Sie die Taste noch einmal, um diesen wieder auszuschalten. 2. Falls TP im Display blinkt ist der Verkehrsfunk eingeschaltet, allerdings empfaengt das Radio auf dieser Frequenz kein Verkehrsfunksignal. 3. Die SEEK oder AS Funktion stoppt nur bei Frequenzen auf denen ein Verkehrsfunksignal empfangen oder EON TA bereitgestellt wird. Alternativ-Frequenzen Modus (AF) 1. Druecken und halten Sie die AF/TP Taste fuer 1 Sekunde, um den AF Modus einzuschalten. 2. Druecken und halten Sie die AF/TP Taste noch einmal fuer 1 Sekunde, um den AF Modus wieder auszuschalten. PTY MODUS Der PTY Modus (Programm Typ) sucht nach Sendern eines bestimmten Genres, wie z.B. Musik, Sprache etc. Bei Musik wird unterschieden zwischen Pop, Rock, Moderne Musik, Light, Klassik und anderen. Bei Sprache wird zwischen Nachrichten, Informationen, Sport, Erziehung, Dramen und Kultur unterschieden. Der REG Modus (Region Typ) schaltet automatisch von einer Station zur naechsten, die den gleichen PI CODE unterstuetzt (Station, die das gleiche Programm sendet, allerdings in einer anderen Region). Programm-Typ Modus 1. Druecken Sie die PTY Taste um zwischen MUSIC, SPEECH und PTY OFF zu wechseln. 2. Druecken Sie die PRESET Taste um die verschiedenen Typen anzuwaehlen. Region Modus 1. Druecken und halten Sie die PTY Taste fuer 1 Sekunde um den Region Modus einzuschalten. 2. Druecken und halten Sie die PTY Taste noch einmal fuer 1 Sekunde um den Region Modus auszuschalten. Das Display zeigt REG an, wenn AF und REG eingeschaltet sind. – 83 – ITALIANO FUNZIONAMENTO DI BASE ACCENSIONE/SPEGNIMENTO Funzionamento 1. Premere il pulsante OFF per accendere la radio. 2. Premere dinuovo il pulsante OFF per spegnere la radio. Risveglio con qualsiasi pulsante Premere qualsiasi pulsante sul quadrante (ad eccezione dei pulsanti EJECT e DISP) per “risvegliare” la radio dal modo di riposo. Display LCD Quando la radio è spenta (modo di riposo) il display dell’orologio verrà visualizzato MANOPOLA DEL VOLUME/COMANDI PER IL TONO La manopola del volume è un comando a funzioni multiple e regola il volume, i comandi per il tono, e le opzioni programmabili (consultare la pagina seguente). Per controllare il volume 1. Girare la manopola del VOLUME in senso orario per alzare il volume. 2. Girare la manopola del VOLUME in senso antiorario per abbassare il volume. Per regolare i comandi per il tono 1. Premere la manopola del VOLUME ripetutamente per percorrere il ciclo BASS > TREBLE > BALANCE > FADER > SUM** > VOLUME. 2. Girare la manopola del VOLUME in senso orario per aumentare la funzione scelta. 3. Girare la manopola del VOLUME in senso antiorario per diminuire la funzione scelta. Memoria del tono di origine Le programmazioni individuali per i suoni gravi e i suoni acuti vengono memorizzati per TUNER / CD PLAYER / CD CHANGER / AUX. NOTA: Se nessuna regolazione venisse effettuata dopo 5 secondi, la manopola del MENU ritornerà al modo VOLUME. – 84 – OPZIONI PROGRAMMABILI L’elenco qui di seguito riporta le opzioni standard programmabili. Le voci in parentesi quadre rappresentano le opzioni alternative contenute entro ciascuna opzione programmabile. Per selezionare queste alternative, vedere Come selezionare le opzioni del sintonizzaztore a pagina 30. • DX [LOCAL] – Regola la sensibilità del sintonizzatore per le condizioni rurali dove le stazioni radio sono deboli mentre LOCAL regola la sensibilità per le condizioni urbane dove le stazioni radio sono più forti. • AMERICAS [EUR/AUST] – Permette la sintonizzazione delle frequenze disponibili in varie parti del mondo. • P. PLAY [EJ MUTE] – Permette di suonare il sintonizzatore dopo aver estratto un CD mentre Eject Mute silenzia il sintonizzatore dopo l’estrazione di un CD. • VIDEO OFF [VIDEO 1, VIDEO 2] – Disabilita gli ingressi Video RCA. VIDEO 1 e 2 vi permettono di collegare due fonti video esterne (TV, Nintendo, ecc.) e di far percorrere le loro uscite attraverso il sistema audiovisivo della vostra automobile. • V/BAR ON [V/BAR OFF] – Visualizza la barra del volume ubicata in fondo al pannello anteriore mentre Volume Bar Off la spegne. • INI VOL 15 – Programma il volume iniziale massimo quando l’unità viene accesa. Il volume iniziale programma il punto massimo del volume quando l’unità viene accesa. Se il volume programmato fosse più basso del volume iniziale al momento di spegnere l’unità, verrà utilizzato il volume più basso al momento dell’accensione. Se il volume programmato fosse più alto del volume inziale, verrà utilizzato il volume iniziale al momento dell’accensione. Questa caratteristica evita un volume troppo alto quando siaccende l’unità e permette di serbare le programmazioni di alto volume se un secondo amplificatore dovessere essere scelto come comando principale del volume. • CONTRAST [VIEW 6] – Comanda l’angolo di visualizzazione del display. • FLAT [80HZ] – Significa che il terzo paio delle pre-uscite RCA è a piena gamma mentre 80HZ significa che le pre-uscite sono ad incrocio per uso autoparlante a basse frequenze. • PANEL AUTO [PANEL MENU] – Apre e chiude automaticamente il pannello quando carica o estrarre dischi mentre PANEL MENU permette al pannello anteriore di rimanere aperto in modo da caricare manualmente i CD oppure estrarli. • AUX1 IN 0 [+6, -6] – Vi permette di elevare il volume d’entrata di una fonte audio esterna debole oppure diminuire il volume di una fonte più potente. Utile per le fonti esterne: MP3, giochi video, VCP, ecc. • AUX2 IN 0 [+6, -6] – Lo stesso di AUX1 IN di sopra. Come selezionare le opzioni programmabili 1. Premere e tenere premuta la manopola del volume per circa 1 secondo finchè non appaia DX (questa è la prima opzione del sintonizzatore). 2. Premere la manopola del volume ripetutamente per percorrere sul sintonizzatore tutte le opzioni elencate di sopra. 3. Per cambiare una specifica opzione sul sintonizzatore, premere il pulsante UP oppure DOWN per selezionare un’opzione alternativa. 4. Una volta selezionate le opzioni desiderate sul sintonizzatore, aspettare cinque (5) secondi. Le opzioni verranno automaticamente memorizzate e potrete ritornare all’ultimo pannello di modo che avete scelto. – 85 – FUNZIONAMENTO DELL’OROLOGIO Come programmare le ore sull’orologio 1. Premere e tenere premuto il pulsante DISP per 1 secondo finchè non si veda lampeggiare l’ora. 2. Premere il pulsante UP oppure DOWN per programmare l’ora. Come programmare i minuti sull’orologio 1. Premere il pulsante DISP una seconda volta e si metteranno a lampeggiare i minuti. 2. Premere il pulsante UP oppure DOWN per programmare i minuti. Memorizzazione delle programmazioni sull’orologio Dopo un lampeggiamento di 5 secondi sull’orologio, le vostre programmazioni verranno memorizzate. Considerazioni 1. Il display dell’orologio rimarrà visualizzato quando il pulsante di accensione della radio viene spento. 2. Premendo il pulsante DISP si potrà visualizzare il display dell’orologio per 5 secondi quando si seleziona un display standard alternativo (vedere DEFAULT/RECALL DISPLAY in questa sezione per ulteriori ragguagli sulla programmazione del display standard). PULSANTE PUNCH Il pulsante PUNCH permette di elevare i suoni bassi e acuti dell’uscita audio a tutti i livelli di ascolto. Funzionamento 1. Premere il pulsante PUNCH per abilitare l’intensità sonora. 2. Premere dinuovo il pulsante PUNCH per disabilitare l’intensità sonora. Display L’LCD visualizzerà la parola “Punch” quando l’intensità sonora è accesa. PULSANTE DI SILENZIAMENTO Funzionamento 1. Premere il pulsante MUTE per smorzare il volume. 2. Premere dinuovo il pulsante MUTE per riportare l’audio al livello precedente. Display LCD L’LCD visualizzerà la parola “MUTE” finchè la funzione non venga annullata. SELEZIONE DEL MODO Premere il pulsante MUTE ripetutamente per percorrere i seguenti modi: • CDP PLAY – Abilita il suonatore di CD se viene inserito un CD. • AUX1 – Permette di collegare una fonte audio esterna al sistema sonoro. • AUX2 – Permette di collegare una seconda fonte audio esterna al sistema sonoro. • FM1 – Abilita il sintonizzatore. – 86 – FUNZIONAMENTO BASE DEL SUONATORE DI CD NOTA: I RFX player POSSONO SUONARE CD AUDIO creati su Macintosh Per far suonare un CD 1. Premere il pulsante OPEN e il pannello anteriore si aprirà. 2. Inserire un CD e il pannello anteriore si chiuderà dopo 5 secondi. 3. CD PLAY farà una scelta automatica e il CD inizierà subito a suonare la prima pista sonora. 4. Usare i pulsanti UP e DOWN per cambiare piste sonore. Come far suonare piste sonore in modo casuale Quando la pista sonora inizia a suonare, premere il pulsante RDM e le piste sonore verranno fatte suonare in modo casuale. Come ripetere una pista sonora Mentre il CD sta suonando la pista sonora che si desidera ripetere, premere il pulsante RPT e il CD inizierà a ripetere quella pista sonora particolare finchè non venga premuto dinuovo il pulsante RPT. Come estrarre un disco 1. Premere il pulsante OPEN per 1 secondo e il pannello anteriore si aprirà, estraendo il disco. 2. Premere il pulsante OPEN mentre il pannello anteriore è aperto per chiudere il pannello anteriore, oppure aspettare 5 secondi e il pannello anteriore si chiuderàautomaticamente (in modo AUTO). NOTA: Se il pulsante OPEN viene premuto per meno di 1 secondo mentre si è in modo AUTO, il pannello anteriore si aprirà e non verrà abilitata l’estrazione. FUNZIONAMENTO AVANZATO DEL CD PLAYER MODO CD PLAYER Modo CD Player 1. Premere il pulsante MODE finchè non vengano visualizzate le parole “CDP PLAY.” 2. Il disco inizierà a suonare (se non fosse inserito un disco, l’unità di fonte passerà al modo AUX1). Display LCD 1. Il numero della pista sonora e il tempo trascorso verranno visualizzati sul display per 5 secondi. 2. Dopo 5 secondi, l’LCD ritornerà al display standard. Come inserire e far suonare un CD 1. Inserire un disco e le parole “CDP PLAY” appariranno. 2. Il disco inizierà a suonare la prima pista sonora sul disco. Risveglio (a potenza spenta) 1. Inserire un disco mentre l’unità è spenta. 2. Il disco inizierà a suonare la prima pista sonora sul disco. – 87 – ESTRAZIONE DISCHI* Come estrarre un disco 1. Premere il pulsante OPEN e tenerlo premuto per 1 secondo per estrarre il disco. 2. L’unità di fonte ritornerà al modo P.PLAY oppure EJ MUTE (vedere OPZIONI PER IL SINTONIZZATORE in questo manuale per ulteriori ragguagli in merito alla programmazione del modo standard). 3. Dopo aver spento l’accensione della vostra automobile, potrete sempre premere OPEN per estrarre un disco. Display LCD 1. Il display LCD visualizzerà la parola “EJECT” per 5 secondi. 2. Dopo 5 secondi, il display LCD ritornerà al display precedente. Ricaricamento automatico 1. Se il CD viene lasciato nella posizione di estrazione per più di 10 secondi, il disco verrà ricaricato automaticamente nel CD player. 2. Con l’operazione di ricaricamento automatico il disco non si rimetterà a suonare e non si avrà alcun effetto su nessun altro modo (ad eccezione del modo EJ MUTE). SELEZIONE PISTE SONORE PER CDP/CDX* Come selezione le piste sonore 1. Premere il pulsante UP per selezionare la pista sonora seguente sul disco. 2. Premere il pulsante DOWN per selezione la pista sonora precedente sul disco. Display LCD 1. Il numero della pista sonora e il tempo trascorso verranno visualizzati sul display per 5 secondi. 2. Dopo 5 secondi il display LCD ritornerà al display standard. Considerazioni Modo CDP: Alla fine dell’ultima pista sonora, il disco riprenderà a suonare la prima pista sonora. Modo CDX: Quando viene raggiunto il numero dell’ultima pista sonora sul disco, il disco seguente verrà caricato nel CD changer e inizierà a suonare la prima pista sonora. PISTE SONORE E DISCHI CASUALI PER CDP/CDX* Modo casuale 1. Premere il pulsante RDM per dar l’avvío al modo casuale. 2. Il modo casuale continuerà a selezionare e suonare piste sonore a caso su tutti i dischi disponibili finchè non venga annullato il modo casuale. Come annullare il modo casuale Premere il pulsante RDM una seconda volta per annullare il modo casuale. Display LCD Il display LCD visualizzerà la parola “RDM” finchè la funzione non venga annullata. *NOTA: Questa funzione opera in modo identico in entrambi i modi CD Player e CD Changer. – 88 – AVANZAMENTO/RETROMARCIA DELLE PISTE SONORE PER CDP/CDX* Marcia avanti/retromarcia Premere il pulsante DOWN per ritornare all’inizio della medesima pista sonora se la pista sta già suonando da oltre 10 secondi. Se la pista stesse suonando per meno di 10 secondi, premere il pulsante DOWN per ritornare all’inizio della pista sonora precedente. Avanzamento rapido/retromarcia 1. Premere e tenere premuto il pulsante UP per far avanzare rapidamente la pista sonora. 2. Premere e tenere premuto il pulsante DOWN per effettuare il retromarcia rapido della pista sonora. Display LCD Il display LCD visualizzerà il tempo trascorso finchè vengano premuti i pulsanti UP oppure DOWN. RIPETIZIONE PISTA SONORA PER CDP/CDX* La ripetizione della pista sonora fa suonare dinuovo la pista che sta suonando attualmente. Come ripetere una pista sonora 1. Premere il pulsante RPT per dare l’avvío al modo Ripetizione pista sonora. 2. Premere il pulsante RPT una seconda volta per annullare il modo Ripetizione pista sonora. Si potrà pure annullare il modo Ripetizione pista sonora premendo sia il pulsante UP che il pulsante DOWN. Display LCD Il display LCD visualizzerà la parola “RPT” finchè la funzione non venga annullata. SCANSIONE PISTA SONORA PER CDP/CDX* Il modo Scansione pista sonora fa suonare l’introduzione di ciascuna pista sonora per 10 secondi prima di passare alla pista sonora seguente sul disco che sta suonando attualmente. Come effettuare la scansione della pista sonora 1. Premere il pulsante SCAN per dare l’avvío al modo Scansione pista sonora. 2. Il modo Scansione pista sonora continuerà ad operare finchè non venga annullato. Come annullare la scansione della pista sonora Premere il pulsante SCAN una seconda volta per annullare il modo Scansione pista sonora. Display LCD 1. Il display LCD visualizzerà la parola “SCAN” finchè non venga annullata la funzione. 2. Il display LCD visualizzerà il numero della pista sonora e il tempo trascorso per 5 secondi ogniqualvolta una nuova pista sonora inizia la scansione dell’introduzione. 3. Dopo 5 secondi l’LCD ritornerà al display standard. *NOTA: Questa funzione opera in modo identico in entrambi i modi CD Player e CD Changer. – 89 – SOSTA PER CDP/CDX* Sosta per CD 1. Premere il pulsante MUTE per far sostare il CD. 2. Premere il pulsante MUTE una seconda volta per riprendere a suonare il disco. Display LCD Il display LCD visualizzerà la parola “PAUSE” e il numero della pista sonora finchè non venga annullata la funzione. MEMORIA TITOLO DISCO PROGRAMMABILE Il nome di un CD può essere memorizzato, utilizzando fino a 10 caratteri nel titolo. È possibile memorizzare fino a 100 titoli. Come memorizzare il titolo di un disco 1. Premere e tenere premuto il pulsante BAND per 1 secondo e la prima cifra del pannello anteriore a 10 cifre inizierà a lampeggiare. 2. Premere il pulsante DISP per percorrere i seguenti tipi di caratteri: Tipo 1: (spazio)ABCDEFGHIJKLMNOPQRSTUVWXYZ Tipo 2: abcdefghijklmnopqrstuvwxyz Tipo 3: 0123456789 Tipo 4: ^\.+?!*’") 3. Girare la manopola del VOLUME per selezionare il carattere che si desidera. 4. Premere la manopola del VOLUME per passare allo spazio seguente. 5. Premere e tenere premuta la manopola del VOLUME per 1 secondo per memorizzare il titolo. Come cancellare il titolo di un disco 1. Premere e tenere premuto il pulsante MUTE per 1 secondo. 2. Girare la manopola del VOLUME per selezionare il titolo che si desidera cancellare. 3. Premere e tenere premuta la manopola del VOLUME per 1 secondo per cancellare il titolo. *NOTA: Questa funzione opera in modo identico in entrambi i modi CD Player e CD Changer. – 90 – FUNZIONAMENTO BASE DEL MP3 PLAYER NOTA: I RFX player NON riconoscono i CD MP3 creati su Macintosh PER FAR SUONARE UN DISCO MP3 1. Premere il pulsante OPEN e il pannello anteriore si aprirà. 2. Inserire un disco MP3 e il pannello anteriore si chiuderà dopo 5 secondi, oppure premere il pulsante OPEN per chiuderlo immediatamente. 3. Il modo CDP PLAY verrà selezionato automaticamente e il disco MP3 inizierà subito a suonare la prima pista sonora. 4. Premere i pulsanti ricurvi UP e DOWN per avanzare o per fare retromarcia quandosi desidera cambiare pista sonora. Per far suonare le piste sonore in modo casuale Dopo aver inserito un disco MP3, premere il pulsante RDM per far suonare le piste sonore in modo casuale. Per far ripetere una pista sonora Mentre il disco sta suonando la pista sonora desiderata, premere il pulsante RPT e il CD ripeterà la medesima pista finchè non venga dinuovo premuto il pulsante RPT. Per far sostare una pista sonora Premere il pulsante MUTE per far sostare una pista sonora. Premere dinuovo il pulsante MUTE per far riprendere la pista sonora. Per estrarre un disco 1. Premere e tenere premuto il pulsante OPEN per 1 secondo, il pannello anteriore si aprirà, e il disco verrà estratto. 2. Dopo aver estratto il disco, premere dinuovo il pulsante OPEN per chiudere il pannello anteriore. STRUTTURA DELLA DIRECTORY La directory MP3 è sistemata in tre livelli e consiste di tre componenti: (1) la radice, (2) le cartelle, e (3) le canzoni. Le canzoni vengono fatte suonare a secondo dell’ordine e del livello in cui si trovano. Tutte le canzoni nel livello 2 vengono fatte suonare prima delle canzoni contenute nel livello 3 o più in basso. Tali livelli sono descrittivi della funzione di canzoni ubicate in cartelle o sottocartelle. Qualsiasi canzone in un livello al di sotto del livello 3 viene trattata come se fosse nel livello 3, ma verrà fatta suonare nell’ordine livello della sua ubicazione. – 91 – FUNZIONAMENTO DEL MP3 PLAYER – GESTIONE DEI FILE COME NEGOZIARE LA DIRECTORY MP3 Il livello ROOT Il livello ROOT contiene il nome del disco, ma nessun dato inerente alla cartella o alla canzone. La prima canzone sul disco inizierà a suonare automaticamente quando viene inserito un disco e continuerà a suonare finchè non verrà scelta un’altra canzone. Come scegliere direttamente una canzone secondo il titolo Il sistema di gestione dei file MP3 è un sistema a base di cartelle simile al File Manager di Windows™. Per questo motivo, i tasti UP e DOWN hanno un funzionamento diverso da quello che dimostrano nel modo CD o nel modo Sintonizzatore. Invece di far avanzare il vostro disco o fargli fare retromarcia, vanno su e giù, rispettivamente, attraverso l’elenco dei file. 1. Premere il pulsante ROOT e il display visualizzerà il nome del disco. Poi, il display cambierà per illustrare il nome della prima cartella sul disco e lo visualizzerà per 5 secondi. Se non venisse fatta alcuna scelta durante questo periodo di 5 secondi, il display ritornerà alla canzone che sta suonando attualmente. 2. Mentre viene illustrato il nome della prima cartella, premere il pulsante DOWN perpercorrere l’elenco delle cartelle in ordine alfabetico (dall’A alla Z). Premere il pulsante UP per percorrere l’elenco in senso contrario. 3. Premere il pulsante ENTER e verrà visualizzato il nome della prima canzone nella cartella selezionata. 4. Premere il pulsante DOWN per percorrere, in senso numerico (dall’1 al 10 o di più), le canzoni contenute nella cartella selezionata. Premere il pulsante UP per percorrere le canzoni dal 10+ fino all’1. NOTA: Secondo il tipo di CD-R, stato di superficie CD e le prestazioni e lo stato CD del produttore, i CD-R non possono funzionare normalmente. NOTA: Il nome della canzone rimane visualizzato per 5 secondi durante le operazioni dall’1 al 4, di sopra. Se non venisse effettuata alcuna scelta durante questo periodo di 5 secondi, il display ritornerà alla canzone che sta suonando attualmente. 5. Premere ENTER per selezionare la canzone desiderata e quest’ultima inizierà a suonare. NOTA: Se non viene inserito un disco nel CD player, le parole “NO CD” verranno visualizzate e l’unità di fonte ritornerà al modo TUNER. Pulsante DOWN Quando si vuol far suonare una pista sonora MP3 sul RFX9300 oppure sul 9400, premere il pulsante DOWN per ritornare all’inizio della pista sonora precedente. Ad esempio, se si stesse ascoltando la pista sonora 3, il pulsante DOWN permetterebbe di ritornare all’inizio della pista sonora 2, e non all’inizio della pista 3. Ciononostante, se stesse suonando una pista sonora CD normale e venisse premuto il pulsante DOWN, si ritornerebbe all’inizio della medesima pista se quest’ultima stesse già suonando da oltre 10 secondi. Se la pista stesse suonando per meno di 10 secondi, premere il pulsante DOWN per ritornare all’inizio della pista sonora precedente. – 92 – COME NEGOZIARE LA DIRECTORY MP3 (CONT’D) Avanzamento rapido/retromarcia rapida Questa funzione è possibile nel modo MP3, ma il tempo non verrà visualizzato e non ci sarà alcun suono. Velocità massima di scrittura e profondità dei bit La velocità massima del bruciatore del CD ROM che sia accettabile dalle unità RFX è di 12X. La gamma massima possibile per il tasso dei bit è di 32kb/sec-320kb/sec. Per ottenere le migliori prestazioni mentre si sta percorrando il display, selezionare il menù delle proprietà di layout dei CD nonchè le tabulazioni del complesso dei file, prima di creare un sistema di file nel vostro programma di bruciatura del CDR. Usare il formato per file ISO9660 e selezionare l’opzione Nomi di file lunghi sul vostro PC. Ciò consente la visualizzazione di un massimo di 16 caratteri maiuscoli da percorrere. NOTA: Al momento di bruciare un CD MP3, assicurarsi che quest’ultimo sia formattato come disco da dati e NON come disco audio. Titolazione programmabile La titolazione programmabile non è disponibile nel modo MP3. Ciononostante, si potrà scegliere il valore standard per rintracciare/cronometrare il titolo di una canzone su disco. FUNZIONAMENTO DEL SINTONIZZATORE RADIO COME SELEZIONARE UNA BANDA Premere il pulsante BAND ripetutamente per percorrere l’FM1, l’FM2, e l’AM. La banda viene automaticamente abilitata al momento della sua selezione. OPZIONI DEL SINTONIZZATORE DX e AMERICAS sono le programmazioni standard per le opzioni del sintonizzatore. Le opzioni in parentesi quadre sono opzioni alternative. • DX [LOCAL] • AMERICAS [EUR/AUST] Come selezionare le opzioni del sintonizzatore 1. Premere e tenere premuta la manopola del VOLUME per 1 secondo. 2. Premere la manopola del VOLUME ripetutamente per percorrere tutte le opzioni programmabili (le altre opzioni programmabili non influiscono sul modo di sintonizzazione). 3. Per cambiare un opzione, premere il pulsante UP oppure il pulsante DOWN. 4. Una volta effettuate le selezioni desiderate, aspettare 5 secondi e il pannello anteriore vi riporterà all’ultimo pannello dei modi illustrato. PULSANTI PREIMPOSTATI 1-10 Ciascun modo del sintonizzatore—FM1, FM2, e AM—ha 10 valori preimpostati per un totale di 30. Per programmare un pulsante preimpostato 1. Sintonizzare il sintonizzatore sulla stazione che si desidera programmare. 2. Premere e tenere premuto qualsiasi pulsante preimpostato per 5 secondi per effettuare quella particolare programmazione. – 93 – FUNZIONE DEI PULSANTI Funzionamento 1. Premere e tenere premuta la manopola del VOLUME per 1 secondo per entrare nel modo delle opzioni del sintonizzatore. 2. Continuare a premere la manopola del VOLUME per percorrere le TUNER OPTIONS DX > AMERICAS > P.PLAY > V/BAR > INI/VOL > CONTRAST > FLAT > PANEL AUTO > AUX1 UB > AUX2 IN. 3. Premere il pulsante SEEK per selezionare MODE 1 oppure MODE 2. MEMORIZZAZIONE AUTOMATICA Se si desidera far scegliere al sintonizzatore le 10 stazioni più potenti secondo la potenza del loro segnale e poi assegnarle ai pulsanti preimpostati dall’1 al 10, si potrà utilizzare la Memorizzazione automatica. Memorizzazione automatica 1. Premere la manopola del AS tasto ed il sintonizzatore effettuerà la scansione dell’intero quadrante. 2. La Memorizzazione automatica memorizzerà le stazioni radio in modo indipendente nella banca del sintonizzatore selezionata (FM1/FM2/AM). MEMORIA TITOLO STAZIONE PROGRAMMABILE Il nome di un stazione può essere memorizzato, utilizzando fino a 10 caratteri nel titolo. È possibile memorizzare fino ad un massimo di 100 titoli. Come memorizzare il titolo di una stazione 1. Premere e tenere premuto il pulsante BAND per 1 secondo e la prima cifra del pannello anteriore a 10 cifre inizierà a lampeggiare. 2. Premere il pulsante DISP per percorrere i seguenti tipi di caratteri: Tipo 1: (spazio)ABCDEFGHIJKLMNOPQRSTUVWXYZ Tipo 2: abcdefghijklmnopqrstuvwxyz Tipo 3: 0123456789 Tipo 4: ^\.+?!*’") 3. Girare la manopola del VOLUME per selezionare il carattere che si desidera. 4. Premere la manopola del VOLUME per passare allo spazio seguente. 5. Premere e tenere premuta la manopola del VOLUME per 1 secondo per memorizzare il titolo. Come cancellare il titolo di una stazione 1. Premere e tenere premuto il pulsante MUTE per 1 secondo. 2. Girare la manopola del VOLUME per selezionare il titolo che si desidera cancellare. 3. Premere e tenere premuta la manopola del VOLUME per 1 secondo per cancellare il titolo. – 94 – MODO AF / TP Il Modo TP (Programma del traffico) commuterà automaticamente per ricevere un annuncio sul traffico nonostante in quale modo operativo si trovi l’unità. Le stazioni EON TA sono quelle che non hanno un TRAFFIC PROGRAM ma che potranno fornire ragguagli su altre stazioni radio che lo hanno. Il Modo AF (Frequenze alternative) paragona il livello del segnale della stazione attualmente in onda con quello di altre frequenze alternative sulla stessa rete radio (vedere il Modo PTY). Se l’AF fornisce un segnale più forte rispetto alla frequenza attualmente in onda, la radio comuterà all’AF più forte. Modo del programma del traffico (TP) 1. Premere il pulsante AF/TP per abilitare il Modo TP, e premerlo dinuovo per disabilitare il Modo TP. 2. Quando il TP lampeggia, il Modo TP è acceso e non ci sono TP DATA da ricevere. 3. La funzione SEEK oppure AS si fermerà solamente a quelle stazioni radio che forniscono TP oppure EON TA. Modo delle frequenze alternative (AF) 1. Premere e tenere premuto il pulsante AF/TP per 1 secondo per abilitare il Modo AF. 2. Premere dinuovo e tenere premuto il pulsante AF/TP per 1 secondo per disabilitare il Modo AF. MODO PTY Il PTY (Programma tipo) può cercare stazioni radio via le reti MUSIC MODE oppure SPEECH MODE. Il Modo musica classifica la musica secondo i tipi Pop, Rock, Musica moderna, Musica leggera, Classica, ed altri. Il Modo linguaggio classifica la musica secondo i tipi Notizie, Affari, Informazioni, Sport, Istruzione, Dramma, Cultura, e Scienza. Il REG (Modo regione) commuterà la stazione in un’altra che ha lo stesso PI CODE (una stazione che fornisce esattamente lo stesso programma), ma in una REGION diversa. Modo del tipo programma 1. Premere il pulsante PTY per percorrere MUSIC, SPEECH, e PTY OFF. 2. Premere il pulsante PRESET che corrisponde al tipo di modo (fare riferimento alla tabella di sotto). Modo regione 1. Premere e tenere premuto il pulsante PTY per 1 secondo per accendere il Modo regione. 2. Premere dinuovo e tenere premuto il pulsante PTY per 1 secondo per spegnere il Modo regione. NOTA: Il display LCD visualizzerà la parola “REG” quando i modi AF e REG sono accesi. – 95 – – 96 – PRINTED IN KOREA Rockford Fosgate Rockford Corporation 546 South Rockford Drive Tempe, Arizona 85281 U.S.A. In U.S.A., (480) 967-3565 In Europe, Fax (49) 8503-934014 In Japan, Fax (81) 559-79-1265 www.rockfordfosgate.com B.M. 03/01 MAN-3550-B