1
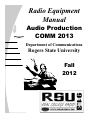
Radio Equipment Manual Audio Production COMM 2013 Department of Communications Rogers State University Fall 2012 2 Recommendations RECOMMENDATIONS FOR USING THIS MANUAL: • Remember that the radio station is a fully functioning licensed broadcast facility and that you are always a welcome guest. You must request permission ahead of time from qualified station personnel to practice using the station's equipment. Doing the opposite could bring a quick end to your radio career at Rogers State University. If you're having a problem regarding a piece of equipment, ask a station authority figure about it! • Following each section of the manual a space is provided to write your own notes regarding your progress and/or challenges with each piece of equipment. Take this book with you as you work on equipment to improve your skills. Use the Note Sheets to help you remember and to keep a log of your progress on each piece of equipment. This manual is just a small part of the learning process. This manual only works if you practice what you’ve learned with hands-on experience. • It is possible that you'll discover a technique to better explain a piece of equip-ment than the way outlined in this manual. If you do, forward your process, in writ-ing and in complete detail, to the general and/or station managers. Contact Information: Cathy Coomer RSU Radio General Manager Assistant Professor - COMM Dept. Stephen Doyle RSU Radio Operations Manager Chief Operator Office: (918) 343-7571 Cell: (918) 695-3441 Email: [email protected] Office: (918) 343-7670 Cell: (918) 636-8791 Email: [email protected] 3 Table of Contents Part 1 KRSC-FM RADIO EQUIPMENT/Studio A Arrakis, “Revolution” Digital Console…………………………………………………...Pg. 6 Behringer Headphone Amplifier………………………………………………………….Pg. 9 VU Meters & Outputs……………………………...……………………………………...Pg. 10 Transmitter Remote Unit (WVRC-8)……….…………………………………………...Pg. 11 SS32 Scott Studios...................................................………………………..……………..Pg. 13 Gentner Phone Feed Unit......................................………….……………………………Pg. 20 Audio Switching & Emergency Alert Tests..…………………………………………...Pg. 23 Sage EAS Endec Alerting System………………………………………………………..Pg. 24 Part 2 KRSC-FM RADIO EQUIPMENT/Studio B Autogram Audio Console………………………………………………………………..Pg. 28 Voice Tracker—VT32…………………………………………………………………...Pg. 31 Adobe Audition (Audio Editing Software)..........…………………………………….. .Pg.33 Gentner Telephone Coupler….…………………………………………………..……..Pg. 38 Part 3 KRSC-FM RADIO EQUIPMENT/Remote Equipment Cellcast (Remote Broadcast System)..………………………………………………….Pg. 41 Comrex Access (Remote Unit)……………….……………………………………...….Pg. 44 Yamaha Portable Sound System ..……………………………………………………..Pg. 45 4 Studio A—Arrakis, “Revolution” Digital Console · All the audio equipment in the on-air booth, also known as STUDIO A, is run through an audio console, or “board”. The board is the HEART of the Studio. The Arrakis board is a digital/analog board giving the user access to12 channels of digital capability and 20 analog. NOTE: Even though there 32 input channels, only 12 can be accessed at the same time The board’s channels are also referred to as “pots” … short for potentiometers. Each channel/pot controls a different input source. For Example: CHANNELS 1-5 MICS (Pot 5 doubles as CD 1 and MIC 5) CHANNELS 5—7 CD PLAYER CHANNELS 8—10 SS1, SS2 & HK (Scott Studio Pot 1, 2 & Hot Keys) CHANNELS 11-12 SW1 & SW2 (Switch bank of buttons) 5 Part 1 Studio “A” Arrakis Revolution Digital Console Behringer Headphone Amplifier Meters, Program, Audition, A/B switch, and Cue SS32 Scott Studio (On-Air) Gentner Phone System Sage EAS Endec Alert System Dual Turntables “Spinning the Ones and Twos” 6 Studio A- Board Overview 7 Studio A—Console, Monitor, Headphones The SW1 and SW2 switch banks are incredibly versatile and allow the announcer to access several types of audio. By accessing the corresponding button to the desired audio, then putting the correct pot into “PGM”…short for program, and raising the volume slider, several different audio sources can be accessed through these two switch banks. MONITOR/HEADPHONE LEVELS The earphone and monitor level knobs are located in the right-hand lower corner of the Arrakis console. The earphone level adjusts the main headphone audio output that feeds into the Behringer headphone amplifier. The monitor level adjusts the speaker volume in the studio. (Magnified Section) 8 Studio A - Behringer Headphone Amplifier The Behringer headphone amplifier is located above the CD1. STUDIO A features five separate headphone and microphone locations. The headphone jacks have separate level adjustments (including volume, bass, and treble) via the Behringer headphone amplifier. NOTE: Headphone stations 1 thru 3 have their own individual controls and stations 4 & 5 are wired together and controlled by Channel 4 on the amplifier. The main headphone jack is located on the left-hand side of the board near channel/pot number 1. Other headphone jacks are located next to MICS 2 thru 5. 9 Studio A – VU Meters and Outputs VU Meters (located on the upper portion of the audio console): (VU Meters Magnified) The VU METERS monitor audio output levels. If the meters are staying “in the red” , the music is too “hot”. If the meters are pulled down toward the left, you are “in the mud”, and the levels are too low. Keep the frequencies in the middle between 80%-100%. This is referred to as “THE SWEET SPOT.” A/B, Program (PGM) , Audition (AUD), & CUE : A/B: The A/B switch allows you to switch from digital input on a pot by turning the switch on, or the analog input on a pot by turning the switch off. Currently, only the CD players and Scott Studios channels are connected via digital input. PROGRAM: The PGM button must be on in order for audio on a pot to go over the air. AUDITION: The AUD button must be on in order to send audio from a pot to remote announcers connected via phone line or Comrex. CUE: The CUE button allows you to preview audio before it airs. When CUE is on, it will automatically lower the audio that is already playing on the studio monitors making it easier to hear the audio you are cueing. It will return to its normal volume once the CUE feature is deactivated. NOTE: When using the CUE feature, make sure that the channel you are attempting to listen to is either turned off or potted all the way down. Failure to do so could result in two different audio sources being played over the air at the same time. 10 Studio A– Transmitter Remote Unit (WVRC-8 ) Transmitter readings should be monitored and taken from the computer to the left of the console LARGER VIEW of the Transmitter Remote screen The transmitter remote control unit is a very important piece of equipment in the radio station. It is responsible for keeping the station on the air. The WVRC-8 system unit controls and monitors the large transmitter housed in a secured building near the tower on campus. The WVRC-8 transmitter remote is equipped with eight separate channels that offer lowering or raising functions. The reading that you will take during your shift is labeled “Transmitter Power”. For Example: If the reading is “2.219” you will report it as “2.22K” (“K” is for kilowatts) on the transmitter log. NOTE: It is VERY IMPORTANT that each announcer is trained on the operation of checking the transmitter during their shift! HOWEVER, DO NOT ATTEMPT TO ADJUST, CHANGE OR ALTER ANY SETTINGS ON THE TRANSMITTER WITHOUT CONSULTING A MEMBER OF THE STATION STAFF OR MANAGEMENT. 11 Notes on equipment from preceding pages 12 13 20 14 AUTO MODE Studio A– Burk Transmitter Remote System This mode is used when the station does not have a live announcer in the booth or a live announcer is playing music alreadyREMOTE scheduled inCONTROL the system. UNIT Every new event is IMPORTANT started automatically The TRANSMITTER is the most piecebyofthe END-OF-MESSAGE (EOM) signal placed when the event was recorded into the system. When equipment in the radio station. It is responsible for keeping the station ON THE AIR. The TCa new event starts, the previous one automatically fades out. If a live announcer is not playing 8 music System located inaStudio A,EVENT” CONTROLS and MONITORS the large transmitter outunit, of the system, “WAIT (automatic pause) is scheduled before & after scheduled breaks. The will cause SS32 to stop so that the announcer can play music off CD or vinyl. LIVE ASSIST OR MANUAL MODE Clicking on the AUTO button will immediately change the system to the MANUAL mode. NOTE: THE GREEN ARROW BUTTON HAS CHANGED TO RED PAUSES. This mode requires the announcer to input every event into the schedule. During a break, the announcer must manually press each event ONE AT A TIME by either using the touch screen or the mouse. 15 Studio A— SS32 Scott Studio MANUAL/AUTO COMBINATION Most stations use a combination of Auto and Manual operation. An announcer may use the AUTO mode when only playing a series of 2-3 songs and breaks. Prior to the announcer going LIVE on the mic, he or she will change to MANUAL, listen to the audio and begin talking based on the fade and the Countdown Clock. When done talking, the announcer will start the next event (whether it be music, a liner, promo, etc) MANUALLY and then changes the mode back to AUTO for the next 2-3 songs or break. RE-CUE Events that are not loaded in time to cue up automatically, such as last minute news or weather, will show a blank area where the play button should be and the event label will show “FILE NOT FOUND”. These events can be cued manually by clicking the RE-CUE or COUNTDOWN CLOCK and then clicking the blue double-circle beside the event that has not cued. Once the audio is ready, the play button will be displayed. Events that are expired will also show a blank area where the play button should be and the event label will show “END— DATE OUT OF RANGE”. The On-Air event can be re-cued by clicking the Countdown Clock then clicking the double circle next to the top event. HOT KEYS Hot Keys are displayed on the right side of the SS32 main screen. They are typically used by announcers during live shows and consist of customized sweepers, jingles, music beds, stingers, special effects or other funny audio clips. Hot Keys do not check events for start/end dates or times. so they can be left in for an undetermined amount of time. NOTE: Contact the Operations Manager or Production for downloading your audio. . 16 Studio A— SS32 Scott Studio PREVIEW Preview allows the announcer to hear the beginning and the end of an Event in the Stack. When Preview is clicked, two circles appear in the label area for each event. Clicking the LEFT CIRCLE will play the event from the beginning and clicking the RIGHT CIRCLE will play the last 15 seconds of the event. Click Preview again to stop the playback and turn preview off. Previews the event from the Beginning Previews the last 15 seconds Hot Keys Preview Hot Keys will display DOUBLE CIRCLES in PREVIEW. Click the HOT KEY to preview the audio from the beginning and click again to stop the preview. If it is a rotator (an event with more than one audio clip assigned to it), the next event on the Hot Key will be previewed without cycling the rotator to the next event. LOG SCREEN The Log button opens the day’s electronic log, starting at the present time, on the right side of the screen in place of the Hot Keys. The log opens, displaying the CURRENT TIME/EVENT in the middle of the screen with a gray background while also displaying the PREVIOUSLY AIRED EVENTS at the top of the screen with a black background. To view ahead or behind in the schedule, use the scroll bar to the right or the UP/DOWN buttons just below the log. To get back to the current event, click the NOW button to the left of the COUNTDOWN CLOCK. NOTE: IT IS IMPORTANT THAT YOU ASK BEFORE DELETING OR MOVING ANY EVENTS ON THE LOG. IN SOME CASES THERE MAY BE PAID SPOTS RUNNING DURING YOUR SHIFT...ACCIDENTALLY DELETING THE WRONG EVENT COULD CAUSE ISSUES WITH OUR UNDERWRITERS. 17 Studio A— SS32 PREVIOUSLY AIRED EVENTS ARE VIEWED AT THE TOP HALF OF THE SCREEN- CURRENT & TO-BEPLAYED EVENTS ARE ON THE BOTTOM HALF OF THE SCREEN IN THEIR PROPER CATEGORY COLORS DELETING, MOVING, & COPYING EVENTS As an announcer, you only have the option to delete or move an event in a few situations… such as, there are two PSA’s back-to-back in the stack, but there is only one PSA listed on the paper log. To delete that PSA in the log view, click to highlight it on the log, then select the DEL (delete button) at the top of the log. To delete it from the stack, hit the DEL button below the stack. Once the red crossed-out circles appear, click on the PSA and it will be deleted. Keep in mind that if you delete an event in the log, it will automatically remove it from the stack and vice versa. To move or copy an event to a new location in log view, click to highlight it, select CUT (or COPY) at the top of the screen, and then click the place in the log where you want to move or copy it to. To move an event that’s in the stack, click on the event (not on the play button though) and a yellow dash box will surround it. Then click the location in the stack you want to move it to. Remember, what you do in log view will be reflected on the stack and vice versa. MESSAGE BAR The message bar is located at the top right of the SS32 main screen, above the Hot Keys. IF THERE IS A PROBLEM WITH THE SYSTEM OR ANY OF THE PROGRAMS, AN ERROR MESSAGE will be displayed in RED in this area. Any other INFORMATIONAL messages will be displayed in GREEN. IT IS IMPORTANT FOR ALL ANNOUNCERS TO NOTE ALL ERROR MESSAGES & THE TIME ON THE PAPER LOG. ONCE THAT HAS BEEN DONE, PLEASE LET THE OPERATIONS MANAGER AWARE OF THE ERROR SO IT CAN BE CORRECTED. 18 Notes on equipment from preceding pages 19 Studio A—Gentner Phone Feed Unit The GENTNER FEED UNIT is specifically designed to receive LIVE phone calls via the phone line and converts the phone signal to be used over the air. There are two major parts to the GETNER PHONE SYSTEM: 1. THE MASTER UNIT. (pictured below) 2. THE TELESWITCH LINE CONTROL CONSOLE. (pictured below) 20 Studio A—Gentner Phone-call Seize Unit SEIZING & AIRING A PHONE CALL: First: Locate the SW2 switch bank on the upper right hand side of the Arrakis console. Press in the “PHONE” button on the SW2 bank. Fade up SW2 on the audio board but do not turn the pot on. Second: Put your mic in AUD and press your PGM button OFF. NOTE: Any channel on the board that you want an outside caller to hear will need to be put into AUD. Keep in mind that the PGM button sends audio from a given channel over the air. Third: When the phone lights up, turn your mic on, answer the line by selecting it on the Teleswitch, and talk to the caller via your mic. If you are calling out, pick up the phone, dial 9 and the number you are calling, then turn your mic on, select the correct line on the Teleswitch, hang up the phone once they answer, and talk to them through your mic. READY FOR YOUR REMOTE? When it’s time to go on the air, make sure your mic is in both PGM and AUD and that the SW2 pot is turned up, on, and is in PGM only. Be sure to watch your levels on the PGM VU meters (the far left meters on the board). Once you are finished with the caller, turn SW2 off and make sure you hang up the call. DID YOU REMEMBER TO PRESS SW 2 OFF? 21 Notes on equipment from preceding pages 22 Studio A – Audio Switcher & EAS Switching On-Air Control from Studio A to Studio B The Broadcast Tools ACS 8.2 Audio Switcher is located in the rack at the back of Studio A. This unit gives us the ability to switch seamlessly between studios A and B. It also allows us to put multiple studios on the air at the same time. For information on how to use this switcher, please check with station staff members. EMERGENCY ALERT SYSTEM (EAS) EAS alerts can supply information about severe weather, national disasters, terrorism, special emergency broadcasts from the National Security or Homeland Security advisor as well as announcements from the President. It is an FCC requirement that the station run weekly and monthly tests from our location. THIS IS SOMETHING THAT THE RSU ADMINISTRATION, MANAGEMENT AND STAFF TAKE VERY SERIOUSLY AND SO SHOULD YOU! 23 Studio A—Sage EAS Endec Alert System Automatic EAS Alerts An EAS test will automatically override whatever audio that is currently playing on the air. Because the EAS test is automatic, it is imperative that the announcer monitors the AIR SIGNAL regularly during their shift in order to accurately log and EAS transmission. The air signal can be selected on the monitor panel in the upper right-hand corner of the board. It is also important for the announcer to know the proper procedures when receiving an EAS test: FIRST: Tear off the print out as soon as it is done printing from the transmitter. It will list the time the test or alert was received and the time the test or alert was transmitted. SECOND: Write the time the test was received and transmitted on the available spaces at the bottom of the transmitter log. Also log the time it was transmitted and the type of alert (listed on the printout) on the front of the program log. THIRD: Throw the EAS printout away. Manual EAS Tests FIRST: Push the “MENU” button and scroll down to “SEND PENDING”. The password is 1,1,1,1. Using the up/down arrows scroll until you find SEND and push enter. Note the time it was sent and your initials. SECOND: If you want to send a weekly test, push the “WEEK” button and enter the password. Hit “SEND” to put the test over the air, else hit “ABORT” to exit without sending. Log the time and your initials on the transmitter log. . . 24 Notes on equipment from preceding pages 25 Part 2—Studio “B” Autogram Audio Console Voice Tracker—Scott Studios Adobe Audition Editing Software 26 Studio B—Autogram Audio Console All of the audio equipment in STUDIO B is ran through the AUTOGRAM board, also called the Audio Console. The AUTOGRAM is the HEART of STUDIO B. · The channels/pots are numbered on the lower end of the Autogram console. · Each source on a channel/pot controls a different function. For example: Source 1 on channel 8 controls the Dell Computer. · Due to the ever-changing atmosphere in the world of RSU Radio these sources may change at any time. Contact a member of the Radio staff if you need help locating a specific audio source. · The channels control your levels-how loud the sound is being played. (Pull up the lever to increase volume and pull down lever to decrease volume.) · Channels 1 and 2 control the Microphone Levels. · Channels 3-8 control several different audio sources. · The on/off buttons for each channel are located below each channel. To turn the channel on push in the green button and to turn the channel off push in red button. The green light shows the channel is on, and the red light shows the channel is off. Output Selection Volume Slider Input Selection Switches 27 Studio B—The Autogram Audio Console The three knobs located in the upper left corner of the Autogram board controls & monitors the HEADPHONE and CUE levels. STUDIO SPEAKER VOLUME— (upper left knob) Controls the volume of sound being played through the studio speakers. CUE VOLUME- (right knob) Controls how LOUD the sound is being played in cue. To Cue a pot - push the volume slider on a channel down until it clicks. This allows you to hear something through an internal speaker in the mixer without it being played on the main output. HEADPHONE VOLUME- (lower left knob) Controls the VOLUME you hear on your HEADPHONES. 1. To avoid FEEDBACK, the studio speakers are set to automatically shut off when a mic is turned on. You can only hear what is currently being played through your headphones. 2. Headphone jack plug-ins are located at the bottom left and right of the board. Headphones should have a stereo adaptor. (Stereo adaptors have two rings at the tip of the adaptor.) 3. If your headphones sound like they are in mono, CHECK these two things: - Are the headphones plugged in completely? - Is the microphone in CUE mode? 28 Studio B—The Autogram Audio Console Section Magnified The VU meters are located in the upper middle of the audio console. The VU meters show how high or how low the frequencies are that are being played over the air. If the meters are staying the RED, the music is too “HOT”, if the meters are pulled down toward the LEFT, you are “IN THE MUD” Try to keep the frequencies in the middle between 80%-100%. Program (P) - “P” is the main output on the board. Since this is in a production studio, P is the output that audio can be recorded from. It also serves as the main output if the production studio is on the air. Audition (A) -Allows you to “audition” audio without sending it to the main output (P). Mix/Minus (M) - Sends audio to the phone line for remote broadcasts and call-in interviews. 29 Studio B—Voice Tracker VT 32 Correct Log Date GO button used for inputting time on log that you want to go to for voice tracking. VOICE TRACKING is the process of getting an announcer’s voice on the air without having them in the studio live. The station’s program director will schedule “time slots” in the log for voice tracks to occur and the announcer will then schedule studio time to record the tracks using the Voice Tracking software. RSU Radio uses NATURAL MUSIC to schedule the voice tracks and SCOTT STUDIOS VOICE TRACKER 32 (VT32) to record them. VOICE TRACKER 32 is relatively easy to use, but not completely self explanatory. The following steps are a basic explanation of the recording process at RSU RADIO. You must follow these steps in order to ensure your voice tracks show up and run as scheduled. EVERYONE must first be trained by a member of the RSU Radio staff before attempting to use of the VT32 themselves. You must also remember to SIGN UP IN ADVANCE for time when you want to voice track. The production sign-up book is located in Studio B. 1. Open VT32 in the studio you’re tracking in: - Dispatch computer in Studio B: Open “VT32” on the desktop - On-air computer in Studio A: Select the “VT” button at the bottom of the screen. 2. Select the CORRECT LOG DATE at the top right hand of the VT32 screen. 3. Select the CORRECT HOUR you are scheduled to voice track. You can either use the clock and arrow buttons that appear directly to the right of the stack OR you can select the small “GO” button towards the bottom center of the screen and input the time (in military format) on the log that you want to go to. 30 Studio B—Voice Tracker VT 32 4. Check your mic level by selecting the REC button. When it begins flashing, talk into the mic and adjust your levels according to the VT32 meters. Select the flashing REC button once you have finished checking mic levels. 5. Using the large UP and DOWN arrows, you can automatically skip to the next scheduled voice track.. (The voice track will show up 3rd down on the stack) 6. Once you are on the correct track, select the BEGIN SESSION button. The Begin Session button will then become the RECORD VT button and the REC button above will begin FLASHING and the last few seconds of the song you will back announce will begin playing. 7.LISTEN to the song, when you feel it has reached the point where you need to begin talking, press the RECORD VT button and begin talking. The Record VT button will then become the VT EOM button. Once you are done talking, press the VT EOM button. This will start the audio element. Select the STOP RECORD button when finished. 8.Use the PREVIEW button to listen to what you have recorded. Pay close attention to your audio levels and timing. If you are not satisfied, hit BEGIN SESSION and start over. 9. Every time you finish a track, use the large UP & DOWN ARROWS to move the next scheduled voice track event. 10.When completely done voice tracking, press the EXIT button located in the button left corner of the screen. VT32 will then begin uploading your new tracks. When all the tracks displayed show that they are done and have been uploaded, press EXIT to leave the program. MIC Audio levels RECORD Button STACK Begin Session Button PREVIEW Button EXIT 31 Studios B, C, D & E—Adobe Audition RSU Radio has four editing suites open to students either enrolled in the audio classes and/or those who have already passed the classes or work at the station. They are Studios B, C, D and E. (Studios B & C are located inside the station itself; Studios D & E are located in Markham #138) STUDIO SETUP In all studios, the computer & monitor should already be on. If not, turn it on. All the computers have passwords which we will go over in class. Studio B: On the audio board, make sure that “AUX 1” is selected on both the MONITOR and PHONES switches on the upper left-hand corner of the board. Fade your mic pot(s) up and turn them on (the GREEN (ON) should be lit on the mic channel). All other pots should be turned down. Now you are ready to record in Adobe Audition. To play back your audio, turn your MIC OFF by pressing the RED off switch for the mic pot, FADE UP Channel 10 on the board, make sure PROD PC is pushed in on that channel, and make sure that A (for audition) is also selected on that channel above the pot. Studio C: On the audio board, make sure the Red record button is pushed IN on the channel for the mic that you are using to record. All other red record buttons on the board should be out. Now you are ready to record in Adobe Audition. To play back your audio, deselect the red button on the mic pot and select the black monitor button on the PC pot. Turn up the PC pot and play your audio. Studios D & E: First, make sure that all equipment is on. Press the ON switch on the back of the RIGHT speaker to turn them both on; press the switch on the BACK of the CONSOLE (right side) to turn it on. On the audio board, make sure the MIC 1 slider is TURNED UP & press the SUB button. Sub buttons on all other pots should be off. Now you are ready to record in Adobe Audition. To playback audio, turn down MIC 1, turn up the pot for PC, select the ST button on the PC pot, and turn up the ST slider. 32 Studios B, C, D & E—Adobe Audition RSU Radio has four editing computers open to students either enrolled in the audio classes and/or those who have already passed the classes or work at the station. They are Studios B, C, D and E. (Studios B & C are located inside the station itself; Studios D & E are located in Markham #138) VIEWS Adobe Audition features TWO different editing views. The first is EDIT VIEW, used for editing SINGLE files. The second is MULTI-TRACK VIEW, used for combining the individual files, used to make a multi-track session. NOTE: EDIT VIEW uses AUDIO FILES (MP3’s, WAV’s, etc.) and MULTI-TRACK VIEW uses SESSION FILES which end with (SES). EDITING AUDIO When you open an audio file in EDIT VIEW, you see the waveform display or a visual representation of the SOUND SAVE or WAVEFORM. If you open a stereo file, the waveform for the LEFT CHANNEL appears at the TOP and the waveform for the RIGHT CHANNEL appears at the BOTTOM. If you open a MONO FILE, the waveform utilizes the total height of the waveform display. The peaks and valleys in the waveform represent positive and negative air pressure. Quiet audio has both lower peaks and lower valleys than loud audio. REMOVING UNWANTED AUDIO In the waveform display, drag to select the range of audio you want to remove. Then choose Edit>Delete Selection. Or, you can select the segment of audio you want to keep and choose Edit>Trim. 33 Studios B, C, D & E—Adobe Audition SAVING AUDIO Once you are satisfied with your audio, you can save it by clicking FILE>SAVE AS. Then put it in the folder of your choice, and name it something you will remember. Each student has their own folder to save all their files and all the computers are tied together so if you begin your work in Studio C, you don’t have to finish it in C, if it is being used by another student, you can move to D or E. MULTI-TRACK LAYERING In Multi-Track View, you can mix together multiple audio files to create layered soundtracks and elaborate musical compositions. Because mixing occurs in “real time”, it is extremely flexible, meaning during playback, you can adjust mixes and record additional tracks without making any permanent changes. If you want to change a mix next week or next year, you simply remix the original audio files. INSERTING THE MULTI-TRACK To insert a full audio clip into the multi-track session, right click on the name of the clip, and select “INSERT INTO MULTI-TRACK.” If you want to put a selection from the clip into the multi-track session, select the area you want A- Vertical scroll bar B– Track Controls C– Toolbar D– Horizontal scroll bar E– Track F– Load Meter G– Mix Gauge 34 Studios B, C, D & E-Adobe Audition A- Vertical scroll bar D– Horizontal scroll bar G– Mix Gauge B– Track Controls E– Track C– Toolbar F– Load Meter SCROLLING 35 Studios B, C, D & E-Adobe Audition USING THE TRANSPORT CONTROLS MIXING DOWN FROM MULTI-TRACK MONITORING TIME Once you are finished arranging your audio clips in Multitrack View, it is necessary to mix the clips down into one audio file for use outside of Adobe Audition. Creating a “Mixdown” is quick and simple. First, it is important to select all of the clips that you want in your Mixdown. You can do this by either holding down the Ctrl button on the keyboard and clicking on each of the clips that you want to include, or by holding down the left-click button on the mouse and dragging the box across the tracks that you want to include. Once the tracks are selected, go to Edit at the top of the screen and select “Mix Down to File” and “Selected Audio Clips”. Once the Mixdown is created it will automatically come up in Edit View. Listen to it and finish any editing necessary. Finally, you are ready to save your file in the appropriate folder. 36 Audio Assignment #1 Record the following assignment & save it in your folder as Assignment #1 Cut #1. Using the editing equipment, EDIT OUT the words that are in BOLD FACE and then rerecord the entire story again and save it in your folder as Assignment #1 Cut #2. The second assignment has been recorded correctly for you to hear to get an idea of what a correct version of the completed assignment should sound like. ------------------------------------------------------------------------------------------------------------------------------- If you’ve been on the campus of RSU, then you’ve seen the realistic yet majestic and stately statues of our former presidents Thomas Jefferson… George Washington and Abraham Lincoln. They were created by sculptor Yon Sim Pak who served as an Artist in Residence during the late 1980’s and early 1990’s when the school was Rogers State College. Pak, a native of Korea, developed the Thomas Jefferson statue to commemorate the US Bicentennial. Audio Assignment #2 Record the following assignment & add music under. The music can be found in the Audio Production folder under “2011 Audio Production Sound Files”. Save in folder as Assignment #2 Cut #1. This assignment has been recorded correctly for you to hear to get an idea of what a correct version of the completed assignment should sound like. ------------------------------------------------------------------------------------------------------------------------------- If you’ve been on the campus of RSU, then you’ve seen the realistic yet majestic and stately statues of our former presidents Thomas Jefferson… George Washington and Abraham Lincoln. They were created by sculptor Yon Sim Pak who served as an Artist in Residence during the late 1980’s and early 1990’s when the school was Rogers State College. 37 Audio Assignment #3 “News You Can Use”:60 second Assignment (Responsible for researching, writing & recording 60 seconds of national, regional and/or local news, sports or weather. Can include upcoming events. Music bed already produced for open with music under your audio/produce on mulit-tracks) (Music audio–music under “With news you can use” or something equivalent, then start your first story….) Approx. 55-57 seconds later “I’m (first and last name) with News You Can Use” or how ever you started off your news segment. Audio Assignment #4 Write pre-picked :15 second promotional spots from list of approved RSU Fun Facts. The original script is longer than :15 seconds; make sure to time out the script ALOUD before recording it! AUDIO SCRIPT MUST BE PRE-APPROVED BEFORE RECORDING! The music for this spot has already been selected & is in AP folder! Must be tagged: “This has been an RSU Fun Fact.” Audio Assignment #5 Pick among designated recorded audio tags in your folder for sweeper; based on emphasis of key words, pauses and inflection add appropriate and compelling stingers and/or attacks to :15 second spot. Record in multi-track. 38 Notes on equipment from preceding pages 39 Studio B—Gentner Telephone Coupler The GENTNER HYBRID COUPLER works similar the phone system in Studio “A”. Located in Studio “B” it can be found to the right of the Autogram Audio Console. This Gentner unit is not as sophisticated as the Gentner in Studio A, and is only capable of handling ONE CALL AT A TIME. This Gentner (or the Gentner in Studio B) will seize phone calls ONLY on 343-7955. SETTING UP THE BOARD: 1. Select the “Phone” switch on Pot number 10. 2. Make sure that the “P” and “A” buttons are pressed in and that “M-” is not in above Pot 10. 3. Turn Pot 10 up and on. 4. Turn your mic up and on. 5. Make sure that “P”, “A”, and “M-” are all pressed in above your mic’s pot. 6. Plug in your headphones and adjust the volume as needed. SEIZING A PHONE CALL: 1.Remember, you can only seize a call on 343-7955 with this Gentner unit. . 2.If someone is calling in on 7955 and the board is already setup: - put your head phones on - turn on your mic - flip seize on the Gentner - talk to the caller via your mic. If you are calling out: - pick up the phone - select the 7955 line - dial 9 and the phone number you are calling - flip seize once the caller has answered - hang up the telephone, and talk to them via your microphone. the caller using the studio microphone. 3. Locate the proper “pot” on the audio console and check the audio levels before recording. 40 Notes on equipment from preceding pages 41 Part 3 -Remote Equipment Cellcast (Remote Broadcast Unit) Comrex Access Remote Unit Yamaha Portable Sound System 42 Remote—Cellcast Remote Broadcast System The MARTI DIGITAL CELLCAST UNIT is a 4-channel remote broadcast unit that allows an announcer or remote engineer to produce a live show on-the-air from a remote location. The Cellcast is basically a cell phone, the size of a laptop computer, with a built in audio mixer. Once a connection is made back to the station, any audio source connected to the Cellcast can be broadcast over the air. Setting Up the Cellcast: Equipment diagrams can be found on the following page FIRST: THE ANTENNA MUST GO ON FIRST!!! On the back of the Cellcast, below the power or the ON/OFF switch, is a plug marked “ANT” (for antenna). Plug and turn until the antenna tightens. FAILURE TO DO THIS MAY CAUSE THE POWER SUPPLY TO BURN UP! SECOND: Connect the power cables, both direct-power plug and battery to DC1 and DC2 respectively. THIRD: Connect the headsets to the appropriate jacks on the back of the Cellcast. When hooking up the units, attach the corresponding headphone or 1/4-inch jack into the same number you use for the microphone of XLR input (example: MCI and HP1 are for Headset #1) Note: The LINE IN XLR is to be used for an additional audio source such as a CD player, etc. The LINE OUT 1/4-inch jack can be used if you want to record the remote from the remote location. 43 Remote—Cellcast Remote Broadcast System SET UP (Diagrams): CELLCAST POWER CONNECTIVITY DIAGRAM . HEADPHONE JACKS/MICROPHONE XLR HOOKUPS POWER SUPPLY, PHONE, & ANTENNA HOOKUPS LINE OUT 1/4” PLUG/LINE-IN XLR HOOKUP 44 Remote—Cellcast Remote Broadcast TURNING ON THE CELLCAST Once you have determined your power source and the antenna is plugged in, turn on the Cellcast. Look at the monitor and your screen should read: SET AUDIO PHONE MODE SYSTEM SET-UP You will notice that the 1st, 2nd and 4th buttons are lit up. PUSH the button lit under PHONE MODE. The 2nd screen should read: CELL MEM POTS MAN MEM MAN When doing a remote, we usually call the station to test the Cellcast using the cell phone feature, so you will press the green light under CELL MAN (for manual dialing). Note: The POTS modes are used when dialing from a direct landline. The process for dialing is the same for both methods. After you press the CELL MAN light, you will see the following screen: ENTER # VU HANG UP To make a call, type in 343-7913 and wait for the phone to start ringing. When you hear a voice from the station on the other end you are connected. Audio Adjustments: Adjustments to your audio levels and headphone volume can be made by using the labeled knobs on the front of the Cellcast. Remember, the person at the radio station can only hear your mic if the PGM button is pressed on your channel. Hanging Up: Once you are finished with your call, press the HANG UP button. Make sure you turn OFF the power before you unplug the antenna and headphones. Take special care when putting the Cellcast back into it’s case. 45 Remote—Comrex Remote Unit COMREX ACCESS The Comrex Access is one of two remote units that are used by the radio station. The Access allows us to connect digitally by way of regular phone service or various types of internet connections. Some of the options that the Access offers are: Connectivity by Phone-line. Connectivity by internet using Wi-Fi, Ethernet hard-line, or 3G wireless service. Five hour battery backup. Portability as a hand-held unit. Various input and output combinations are possible. High quality audio. Touch-screen operation. Permission must be given before anyone is allowed to use either of the remote units! For more information about this unit, ask the General Manager or Operations Manager. 46 Remote—Yamaha Portable Sound System 47 Remote—Yamaha Portable Sound System 48 Remote—Yamaha Portable Sound System 49 Remote—Yamaha Portable Sound System NOTE: Once the power is turned on, you may turn the Main, Monitor, and Mic/Instrument levels back up to an appropriate volume. 50 Remote—Yamaha Portable Sound System 51 Notes on equipment from preceding pages 52 53