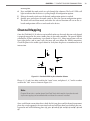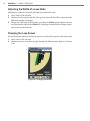
1
SmartSensor Matrix
USER GUIDE
SmartSensor Matrix
USER GUIDE
www.wavetronix.com
•
78 East 1700 South Provo, Utah 84606 • 801.734.7200
© 2014 Wavetronix LLC. All Rights Reserved.
Wavetronix, SmartSensor, Click, Command, and all associated product names and logos are trademarks of Wavetronix LLC. All other
products or brand names as they appear are trademarks or registered trademarks of their respective holders.
Protected by US Patent Nos. 6,556,916; 6,693,557; 7,426,450; 7,427,930; 7,573,400; 7,889,097; 7,889,098; 7,924,170; 7,991,542;
8,248,272; 8,665,113; Canadian Patent Nos. 2461411; 2434756; 2512689; and European Patent Nos. 1435036; 1438702; 1611458. Other
US and international patents pending.
The Company shall not be liable for any errors contained herein or for any damages arising out of or related to this document or the
information contained therein, even if the Company has been advised of the possibility of such damages.
This document is intended for informational and instructional purposes only. The Company reserves the right to make changes in the
specifications and other information contained in this document without prior notification.
FCC Part 15 Compliance: The Wavetronix SmartSensor sensors comply with Part 15 of the Federal Communications Commission (FCC)
rules which state that operation is subject to the following two conditions: (1) this device may not cause harmful interference, and (2) this
device must accept any interference received, including interference that may cause undesirable operation. FCC compliance statements
for applicable optional modules are to be found in the module specifications. Unauthorized changes or modifications not expressly approved by the party responsible for compliance with the FCC rules could void the user’s authority to operate this equipment.
Hereby, Wavetronix LLC, declares that the FMCW Traffic Radar (SmartSensor Matrix, model number SS-225) is in accordance with
the 2004/108/EC EMC Directive.
The device has been designed and manufactured to the following standards:
•
•
•
IEC/EN 60950-1:2006, A11:2009, A1:2010, A12:2011 - Electronic equipment safety requirements
EN 300 440-2 - Electromagnetic compatibility and Radio spectrum Matters (ERM); Short range devices; Radio equipment to be
used in the 1 GHz to 40 GHz frequency range; Part 2: Harmonized EN under article 3.2 of the R&TTE Directive.
EN 301 489-3 - Immunity to RF interference. Compliance with transmission limitations under 1GHz and conducted
trans¬mission over power lines, ESD.
The equipment named above has been tested and found to comply with the relevant sections of the above referenced specifications.
The unit complies with all essential requirements of the Directives. This equipment has been evaluated at 2000m.
IP Protection: IP66
For installation into restricted access location.
All interconnecting cables shall be suitable for outdoor use.
The protective earthing terminal shall be reliably connected to the external power supply and earth. The provision for permanent connection of protective earthing conductor shall be installed by qualified service personnel in restricted access location.
Disclaimer: The advertised detection accuracy of the Wavetronix SmartSensor sensors is based on both external and internal testing,
as outlined in each product’s specification document. Although our sensors are very accurate by industry standards, like all other sensor manufacturers we cannot guarantee perfection or assure that no errors will ever occur in any particular applications of our technology. Therefore, beyond the express Limited Warranty that accompanies each sensor sold by the company, we offer no additional
representations, warranties, guarantees or remedies to our customers. It is recommended that purchasers and integrators evaluate the
accuracy of each sensor to determine the acceptable margin of error for each application within their particular system(s).
WX-500-0053
03/2014
Contents
Introduction
5
SmartSensor Matrix Package 6 • Selecting a Mounting Location 7
Part I
Installing the SmartSensor Matrix
Chapter 1
Installing the SmartSensor Matrix
13
Sensor Mounting Guidelines 14 • Attaching the Mount Bracket
to the Pole 15 • Attaching the Sensor to the Mount Bracket 16
• Aligning the Sensor to the Roadway 16 • Applying the Silicon
Dielectric Compound 18 • Connecting the SmartSensor 6-conductor Cable 18 • Grounding the Sensor 19
Chapter 2
Connecting Power and Surge Protection
21
Mounting the Backplate 22 • Connecting AC Power 22 • Providing System Surge Protection 26 • Terminating SmartSensor
6-conductor Cables 28
Chapter 3
Contact Closure Communication
Using the Click 112/114 DIP Switches 32 • Using the Click
104 Rotary Switch 34 • Attaching and Programming the Click
112/114 35 • Attaching and Programming the Click 104 37 •
Channel Mapping 39
31
Part II
Using SmartSensor Manager Matrix
Chapter 4
Installing SmartSensor Manager Matrix
45
Installing SSMM 46 • Microsoft .NET Framework 48
Chapter 5
Communication
49
Serial Connection 51 • Internet Connection 53 • Virtual Connection 56 • Viewing Connection Information 58 • Upgrading
the Sensor’s Embedded Software 59
Chapter 6
Sensor Settings
63
General Sensor Settings 63 • Comm Sensor Settings 64 •
Advanced Tab 66
Chapter 7
Lanes & Stop Bars
67
Display Options 68 • Menu Bar 71 • Automatic Configuration
74 • Manual Configuration 75
Chapter 8
Zones & Channels
79
Menu Bar 80 • Placing Zones 81 • Channel Type 82 • Mapping
Zones to Channels 84 • Measuring Zones 87
Chapter 9
Verification
89
Channel Indicators 90 • Verification Menu Bar 91
Chapter 10
Tools
93
Backup/Restore 94 • Rack Cards Tools 95 • Sensor Self Tests
99
Appendix
101
Appendix A – Cable Connector Definitions 101 • Appendix
B – Cable Lengths 103 • Appendix C – Click 221 User Reference Guide 104 • Appendix D – Click 600 Installation 105 •
Appendix E – Matrix Extended Range 109
Introduction
In this chapter
˽˽ SmartSensor Matrix Package
˽˽ Selecting a Mounting Location
The Wavetronix SmartSensor Matrix™ is a stop bar presence detector designed for use at
signalized intersections (see Figure I.1). The SmartSensor Matrix detects vehicles through
the use of a 24.125 GHz (K band) operating radio frequency. Using what is classified as
frequency modulated continuous wave (FMCW) radar, SmartSensor Matrix detects and
reports vehicle presence in as many as 10 lanes simultaneously.
Figure I.1 – Wavetronix SmartSensor Matrix
SmartSensor Matrix is a first-of-its-kind radar stop bar detector with Radar Vision™. It
delivers the reliability of radar and the simplicity of non-intrusive detection for stop bar
presence detection. In many situations, the sensor is installed on the roadside in order to
prevent the need for lane closures and traffic control. Once the unit is installed, the configu-
6
INTRODUCTION • SMARTSENSOR MATRIX USER GUIDE
ration process is quick and easy. After installation, the sensor will require little or no on-site
maintenance and can be remotely configured.
This user guide outlines the step-by-step process of installing and configuring the SmartSensor Matrix. Any questions about the information in this guide should be directed to
Wavetronix or your distributor.
SmartSensor Matrix Package
A standard SmartSensor Matrix package may contain the following items:
˽˽
˽˽
˽˽
˽˽
˽˽
˽˽
˽˽
˽˽
SmartSensor Matrix detector(s) with installed sensor backplate
Sensor mounting kit(s)
SmartSensor 6-conductor cable(s)
Intersection preassembled backplate
Click 112/114 detector rack card(s) with patch cable(s)
Click 104 four-channel DIN rail contact closure module
SmartSensor Manager Matrix (SSMM) software
SmartSensor Matrix User Guide
Note
Instead of the intersection preassembled backplate, you may be using the Click 600
cabinet interface device, the preassembled 19-inch rack, or the segmented preassembled backplate. The coming chapters will note installation differences between
these devices and the preassembled backplates where applicable.
SmartSensor Matrix system options include (see Figure I.2):
˽˽ AC power conversion – Provides reliable power for the sensors and backplate components. This option is normally recommended instead of the DC surge protection
because it will not burden the existing DC power modules.
˽˽ Remote IP connection – Provides a way (via a Click 301 serial to Ethernet converter)
to connect to the sensor from a remote location. The Click 301 is recommended for
remote management.
INTRODUCTION • SMARTSENSOR MATRIX USER GUIDE
Control Bridge to Rack Cards
AC Power
Conversion
Option
Control Bridge
on T-bus
Configuration Toolkit
(attach to T-bus)
Remote IP Connection Option
(attach to T-bus)
Figure I.2 – SmartSensor Matrix System Options
Control Bridge to Sensors
Note
SmartSensor Matrix systems provide a control bridge to manage all connected
SmartSensor and Click devices. The control bridge is completely separate from the
dedicated channels used for communication of contact closure detection calls in real
time.
Selecting a Mounting Location
Consider the following guidelines when selecting a mounting location for each SmartSensor Matrix:
˽˽ Corner radar – The SmartSensor Matrix is a corner radar device with a panoramic
90°, 140-ft. (42.7-m) view (see Figure I.3). The sensor’s mounting location should be
selected so that all stop bar detection zones on an approach are within a 6–140-ft.
(1.8–42.7-m) radial distance.
7
INTRODUCTION • SMARTSENSOR MATRIX USER GUIDE
140 ft
8
Sensor Pole
140 ft
Figure I.3 – Corner Radar
˽˽ Line of sight – Position the sensor so that it will be able to detect the entire area of
interest. Avoid occlusion by installing the sensor away from trees, signs and other roadside structures.
˽˽ Detection coverage – Position the sensor so that it will be able to reach all the specified
stop bar detection zones. The sensor will often work better if you position it so that it
tracks vehicles for several feet before the first zone in each lane. If the sensor has a view
several feet beyond the stop bar, it is more likely to accurately detect queue dissipation.
˽˽ Closest roadside – Mount the sensor on the side of the road closest to the lanes of primary interest. Always mount the sensor high enough to prevent traffic from occluding
approaching vehicles.
˽˽ Mounting height – A minimum height of 12 ft. (3.6 m) is recommended. Mounting
the sensor higher will generally improve line of sight and decrease the possibility of
occlusion.
˽˽ Mounting offset – A minimum offset of 6 ft. (1.8 m) to the first lane of interest is
required.
˽˽ Redundant detection – It is possible to have multiple sensors monitoring the same
approach. Multiple sensors are needed when zones are spread over more than 140 ft.
(42.7 m).
˽˽ Sensor proximity – When multiple sensors are mounted at the same intersection, interference can be avoided by configuring each sensor to operate on a unique RF channel.
˽˽ Departing lanes – There is usually no need to view traffic in departing lanes or to configure departing lanes. However, if they are configured, then the stop bar should not
be configured.
˽˽ Suspended electrical cables – The sensor is designed to work in the presence of suspended power lines and other electrical cables. However, these cables should be at least
10 ft. (3 m) away from the front of the sensor.
˽˽ Neighboring structures and parallel walls – The sensor should not be mounted with
INTRODUCTION • SMARTSENSOR MATRIX USER GUIDE
signs or other flat surfaces directly behind it. This will help reduce multiple reflection
paths from a single vehicle.
˽˽ Cable length – Make sure that you have sufficient homerun and sensor cabling. Cable
runs as long as 500 ft. (152.4 m) can be achieved using 24 VDC operation and the system’s native RS-485 communications. If your application requires a cable length longer
than 500 ft. (152.4 m), contact Wavetronix Technical Services for assistance.
The SmartSensor Matrix should be mounted using one of the following options (see Figure
I.4):
➋
➊
➌
Figure I.4 – Mounting locations
1
2
3
The back side of mast arm – This location allows the sensor to be placed near the lanes
of interest and may be the best location option for wide approaches. If you mount the
sensor on the back side of a mast arm, mount it near the end of the arm to reduce the
possibility of the mast arm or departing traffic occluding approaching vehicles.
The far side of approach – The sensor is usually mounted on a corner vertical mast
pole or strain pole. If the sensor is mounted on a vertical pole with a mast arm, you
can usually avoid occlusion by mounting the sensor away from or below the mast arm.
The near side of approach – This mounting location is typically best if detecting the
left turn lane is less important. This location also allows you to mount the sensor high
enough to avoid occlusion.
Other mounting locations may be possible if these are not available at your intersection.
Contact Wavetronix Technical Services for assistance if you would like to use an alternative
mounting location.
9
Part I
Installing the SmartSensor
Matrix
Chapter 1 – Installing the SmartSensor Matrix
Chapter 2 – Connecting Power and Surge Protection
Chapter 3 – Contact Closure Communication
Installing the SmartSensor Matrix
1
In this chapter
˽˽
˽˽
˽˽
˽˽
˽˽
˽˽
˽˽
Sensor Mounting Guidelines
Attaching the Mount Bracket to the Pole
Attaching the Sensor to the Mount Bracket
Aligning the Sensor to the Roadway
Applying the Silicon Dielectric Compound
Connecting the SmartSensor 6-conductor Cable
Grounding the Sensor
1
The installation process includes attaching the mounting bracket to the pole; attaching the
sensor to the mounting bracket; aligning the sensor; applying a silicon dielectric compound
to the sensor connector; and connecting the SmartSensor 6-conductor cable to the sensor.
Caution
Do not attempt to service or repair this unit. This unit does not contain any components and/or parts serviceable in the field. Any attempt to open this unit, except
as expressly written and directed by Wavetronix, will void the customer warranty.
Wavetronix is not liable for any bodily harm or damage caused if service is attempted
or if the back cover of the SmartSensor unit is opened. Refer all service questions to
Wavetronix or an authorized distributor.
14
CHAPTER 1 • INSTALLING THE SMARTSENSOR MATRIX
Warning
Use caution when installing any sensor on or around active roadways. Serious injury
can result when installation is performed using methods that are not in accordance
with authorized local safety policy and procedures. Always maintain an appropriate
awareness of the traffic conditions and safety procedures as they relate to specific
locations and installations.
Sensor Mounting Guidelines
The sensor is fairly insensitive to mounting height, but every site will vary based on lane
configuration and the presence of barriers and structures in and around the detection area.
The following table will help you determine how high to mount the sensor (see Table 1.1).
These figures are only suggestions, but a good rule to follow is—the farther away the first
lane is to the sensor, the higher you will want to mount the sensor to avoid occlusion.
Closest Lane
Sensor Height
6–15 feet
12–25 feet
15–50 feet
15–25 feet
> 50 feet
25–60 feet
Table 1.1 – Suggested Mounting Guidelines
Note
In certain conditions, lanes that have stop bars or detection zones placed at extended
range may show some loss in performance, even with a proper mounting height. This
is more apparent at locations with many travel lanes or where detection zones are
placed near the far edges of detection. If you have any questions regarding the use
of SmartSensor Matrix at a particular location, please contact Wavetronix Technical
Services or your authorized Wavetronix dealer for more information.
Use the following guidelines to determine the best mounting height, then place your sensor
accordingly:
˽˽ In general, the sensor should be placed at a height of roughly 20 ft. (6.1 m), give or take
5 ft. (±1.5 m).
˽˽ The maximum recommended mounting height for the SmartSensor Matrix is 60 ft.
(18.2 m). The minimum is 12 ft. (3.6 m). Placing the sensor above or below these limits
will adversely affect detection accuracy.
CHAPTER 1 • INSTALLING THE SMARTSENSOR MATRIX
˽˽ Take into consideration the sensor’s field of view, which reaches 140 ft. (42.7 m) from
the sensor. Place the sensor so that the field of view covers all the areas of interest.
˽˽ The mast arm is frequently a good place to mount the sensor.
˽˽ The mounting position should have a clear view of the detection area. Poles, mast arms,
signal heads, or other objects should not block the view of the detection area.
˽˽ Placing the sensor higher will result in less occlusion. Placing it lower could result in
more occlusion. However, if the nearest detection area is less than about 20 ft. (6.1 m)
away, the sensor may perform better with a lower mounting position.
Note
It is possible to mount the sensor lower than 12 ft. (3 m) in some scenarios. The sensor will continue to detect vehicles at lower heights, but missed detections due to
occlusion may become more prevalent or problematic in lanes that are farther away
from the sensor.
Attaching the Mount Bracket to the Pole
Before attaching the mount bracket to the pole, first make sure that your cables are long enough
to reach the sensor height and to stretch across the distance from the sensor to the cabinet.
Follow the steps below to correctly attach the mount to the pole:
1
2
3
Insert the stainless steel straps through the slots in the mount bracket.
Position the mount on the pole so that the head of the mount is pointing toward the
lanes of interest at about a 45° angle.
Tighten the strap screws.
Figure 1.1 – Attach the Mount Bracket to the Pole
The sensor double-swivel mount may need to be adjusted later to fine-tune the alignment.
15
16
CHAPTER 1 • INSTALLING THE SMARTSENSOR MATRIX
One swivel joint is used to pan the sensor field of view left or right and the other swivel joint
is used to tilt the sensor down towards the roadway. If you are not using the double swivelmount, make sure the pole straps are adjustable at this point in the installation process.
Attaching the Sensor to the Mount Bracket
Use the following steps to securely fasten the sensor to the mount bracket:
1
2
3
Align the bolts on the sensor’s backplate with the holes in the mount bracket. The eight-pin
connector receptacle on the bottom of the sensor should be pointing towards the ground.
Place the lock washers onto the bolts after the bolts are in the mount bracket holes.
Thread on the nuts and tighten (see Figure 1.2)
Figure 1.2 – Attach the Sensor to the Mount Bracket
Caution
Do not over-tighten the fasteners.
Aligning the Sensor to the Roadway
The sensor’s beams fan out 45° to the left and 45° to the right, creating a 90° corner radar
field of view. In most applications, you will want to position the corner radar so that its 90°
footprint covers all lanes approaching the stop bar (see Figure 1.3).
Edge of first lane of interest
CHAPTER 1 • INSTALLING THE SMARTSENSOR MATRIX
45°
45°
Pan sensor
towards stop bar
Stop Bar
Figure 1.3 – Corner Radar Field of View Position
To visualize the extent of the sensor field of view, the 90° field of view is imprinted on the top
and bottom of the sensor case. If more of a visual indicator is needed, then a square framing
tool (e.g. rafter square) or other tool with a right angle can be held above the sensor. By looking down both edges of the tool, you can visualize the extent of the radar’s coverage.
Usually the front edge of the sensor’s field of view is aligned to provide coverage beyond
the stop bar (see Figure 1.4). This allows you to place detection zones beyond the stop bar
to detect those vehicles that do not stop at or behind the stop line and will also allow the
sensor to see vehicles exiting queues. If the sensor pole is upstream from the stop bar, it is
recommended to pan in the direction of the stop bar.
Fron
t ed
ge o
f fie
ld o
f vie
w
Figure 1.4 – Sensor Aligned by Rotating Towards the Stop Bar
Use the following steps to correctly align the SmartSensor Matrix:
1
Adjust the side-to-side angle so that the front edge of the field of view provides a view
17
18
CHAPTER 1 • INSTALLING THE SMARTSENSOR MATRIX
2
3
downstream of the stop bar.
Tilt the sensor down so it is aimed at the center of the lanes of interest.
If necessary, rotate the sensor so that the bottom edge of the sensor is parallel with the
roadway. This is necessary where the intersection approach has a significant grade.
Note
To fully complete sensor alignment, you will need to connect to the Matrix sensor
using SmartSensor Manager Matrix and verify that your alignment is detecting the
vehicles in the lanes of interest (see Chapter 8).
Applying the Silicon Dielectric Compound
Use the following steps to correctly apply the silicon dielectric compound to the cable connector:
1
2
Tear the tab off of the tube of silicon dielectric compound.
Squeeze about 25% of the silicon onto the pins of the receptacle side of the connector
at the base of the SmartSensor Matrix (see Figure 1.5). Be sure to wipe off any excess
compound.
Figure 1.5 – Connector Receptacle (left) and Grounding Lug (right)
Connecting the SmartSensor 6-conductor Cable
The next step is to plug the SmartSensor 6-conductor cable into the connector. The sensor
connector is keyed to ensure proper connection (see Figure 1.6); simply twist the plug end
of the connector clockwise until you hear it click into place. To avoid undue movement
from the wind, strap the 6-conductor cable to the pole or run it through a conduit, but leave
a small amount of slack at the top of the cable to reduce cable strain. Route the cable from
the sensor location back to the main traffic cabinet.
CHAPTER 1 • INSTALLING THE SMARTSENSOR MATRIX
Figure 1.6 – Sensor 6-conductor Cable Connector
To set up your network in an orderly fashion, it is recommended that labeling be used
on the service end of each SmartSensor 6-conductor cable. A convenient way to label the
cables is to mark the last seven digits of the serial number on each sensor and the direction
of traffic monitored (see Figure 1.7).
Figure 1.7 – Service End Labeling
Grounding the Sensor
The SmartSensor Matrix must now be grounded:
1
2
Connect a grounding wire to the grounding lug on the bottom of the sensor (see Figure
1.5).
Connect the other end of the grounding wire to the earth ground for the pole that the
sensor is mounted on. Do not attempt to run the grounding wire back to the main
traffic cabinet.
19
20
CHAPTER 1 • INSTALLING THE SMARTSENSOR MATRIX
Caution
Be careful of Electrostatic Discharge (ESD) when handling the SmartSensor Matrix
device before and during installation. ESD triggered by the sensor handler, particularly on the outer grounding lug before being properly grounded, may cause harmful
effects to internal Matrix components.
Connecting Power and
Surge Protection
2
In this chapter
˽˽
˽˽
˽˽
˽˽
Mounting the Backplate
Connecting AC Power
Providing System Surge Protection
Terminating SmartSensor 6-conductor Cables
2
After installation, each SmartSensor Matrix will need to be integrated into the main traffic cabinet for power and surge protection. This chapter contains information on how to
provide power and surge protection to a preassembled backplate that accommodates four
SmartSensor Matrix sensors (one for each stop bar of a common four-approach intersection).
Note
Also available to use are the intersection preassembled 19-inch rack for server racks,
the intersection segmented preassembled backplate for easier installation in traffic
cabinets, and the Click 600 cabinet interface device (which combines all the functionality of the backplates in one module). Installation procedures for the rack and the
segmented backplate will be very similar to the instructions that follow; installation
procedures for the Click 600 can be found in Appendix D of this guide.
The standard four-approach preassembled backplate is 11 in. (28 cm) wide and 11.5 in.
(29.2 cm) high. All wiring on the rack and backplates is done using stranded wires with wire
ferrules for screw terminal connections (see Figure 2.1).
22
CHAPTER 2 • CONNECTING POWER AND SURGE PROTECTION
Figure 2.1 – Intersection Preassembled Backplate
Mounting the Backplate
Use the following steps to mount the backplate in the traffic cabinet:
1
2
Locate the area planned for mounting the backplate. The backplate can usually be
mounted on the side panel of a NEMA-style cabinet.
Attach the backplate with the U-channel mounting screws.
Note
If you have a 330 series (170/2070 style cabinet) with a 19-inch EIA rack, please contact Wavetronix Technical Services for assistance. Wavetronix can provide modified
backplates that attach to a 19-inch rack.
Connecting AC Power
Since SmartSensor Matrix operates on 10–28 VDC, the standard preassembled backplates
provide an AC power conversion option. The backplate includes an AC to DC power converter, power surge and circuit breaker.
CHAPTER 2 • CONNECTING POWER AND SURGE PROTECTION
Warning
Make sure power to AC mains is disconnected while wiring the AC input. If your installation does not require AC power, you will need to use surplus DC power inside
the traffic cabinet. In this case, Wavetronix recommends you use the Click 221 (8 A
DC surge protector) to protect the backplate and SmartSensor Matrix units from DC
surges. See Appendix C for information regarding the Click 221.
Figure 2.2 – Connecting AC Power to the Preassembled Backplate
Use the following steps to connect power to the AC terminal block on the bottom DIN rail
(see Figure 2.2):
1
2
3
4
5
6
Connect a neutral wire (usually a white wire) to the bottom side of the terminal block
labeled “N” for neutral.
Connect a ground wire (usually a green wire) to the bottom of the terminal block labeled “G” for ground. (see the Wiring Protective Earth Ground section below).
Connect a line wire (usually a black wire) to the bottom of the terminal block labeled
“L” for line.
Turn on AC mains power.
Press the circuit breaker switch on the left side of the top DIN rail to switch power to
the backplate. The switch is on if the button is below the level of the device housing; the
switch is off if the button is raised above the surface of the housing.
Verify that DC power is properly regulated by making sure the DC OK LEDs are illuminated on the Click 201/202/204.
23
24
CHAPTER 2 • CONNECTING POWER AND SURGE PROTECTION
Caution
An authorized electrical technician should install the preassembled backplate. Persons other than authorized and approved electrical technicians should NOT attempt
to connect the backplate to a power supply and/or traffic control cabinet, as there is a
serious risk of electrical shock through unsafe handling of the power source. Extreme
caution should be used when connecting the backplate to an active power supply.
The AC power conversion section of the backplate will come pre-wired as shown in Figure
2.3. The main three components of the AC power conversion section include:
˽˽ Click 201/202/204 AC to DC converter – A Click 201 provides 1 A of power and is capable of powering a single sensor; a Click 202 provides 2 A and can power two sensors;
a Click 204 provides 4 A and can power four sensors.
˽˽ Click 210 circuit breaker – Interrupts power during overload conditions and provides
a convenient way to turn power on and off for the entire system.
˽˽ Click 230 AC surge protector – Helps protect equipment from current surges on the
power lines.
Figure 2.3 – AC Power Conversion
Wiring Protective Earth Ground
All connections are surge protected when the protective earth ground is wired to the PE
terminal block on the backplate. Normally, the backplate should be mounted to the chassis
of the cabinet to provide a ground path. It is strongly recommended that you provide a low
impedance protective earth connection.
CHAPTER 2 • CONNECTING POWER AND SURGE PROTECTION
Follow the steps below to provide a low impedance protective earth connection:
1
2
Connect one end of a protective earth ground wire to the bottom of the PE terminal
block. A 10 AWG stranded wire is recommended for protective earth ground connections and is also the largest that will fit in the terminal block.
Connect the other end of the protective earth ground wire to a protective earth screw
terminal within the main traffic cabinet.
Controlling DC Power Distribution
The Click 210 circuit breakers provide a convenient way to turn power on or off for each
sensor independently (see Figure 2.4). To enable or disable DC power to the backplate,
switch the main circuit breaker (left side of upper DIN rail); to enable or disable DC power
to an individual sensor, switch the individual circuit breaker (left side of each sensor’s set
of terminal blocks).
Push this
button to
turn power
on or off
Figure 2.4 – DC Power Distribution
Note
The switch is ON when the switch button is level with the device housing; the switch
is OFF when the switch button is raised above the housing.
The four-approach preassembled backplate has 24 VDC power wired from the output of the
AC to DC converter into a 5-position screw terminal on the left side of the T-bus (see Figure
2.5). The green T-bus conducts DC power and RS-485 communications from the left to the
right side of the modules; the gray T-bus conducts only DC power from the left to the right
side of the modules.
25
26
CHAPTER 2 • CONNECTING POWER AND SURGE PROTECTION
+24V DC
-DC
+RS-485
-RS-485
GND
Power
(red wire )
( black wire )
Green
Gray
Green
RS-485
Figure 2.5 – T-bus Pinout Diagram
Providing System Surge Protection
The Click 222 system surge protector is designed to prevent electrical surges conducted
along underground cables from damaging the cabinet equipment (see Figure 2.6).
Figure 2.6 – Click 222 Faceplate
Note
The SmartSensor Matrix has built-in surge protection and so there is no need to use
a pole-mount box for surge protection on the sensor side of the cable. However, it is
strongly recommended that the sensor be connected to a surge protection device in
the main traffic cabinet. If you choose not to use surge protection in your main traffic
cabinet, please contact Wavetronix Technical Services for assistance.
When a Click 222 is present, the power and RS-485 serial connections on the T-bus and
faceplate are protected from surges on the incoming SmartSensor 6-conductor cables.
The Click 222 faceplate has four activity indicator LEDs:
˽˽ PWR – Indicates that the device has power.
˽˽ DC Surge OK – Indicates that DC surge protection is operational.
CHAPTER 2 • CONNECTING POWER AND SURGE PROTECTION
˽˽ TD – Indicates when data is transmitted over the T-bus or over the control bridge. This
LED does not indicate data transmitted on the A or B ports.
˽˽ RD – Indicates when data is received over the T-bus or over the control bridge. This
LED does not indicate data received on the A or B ports.
Note
If the DC Surge OK LED is not on when the Click 222 is powered, call Wavetronix Technical Services for assistance.
The Click 222 provides the following three independent serial connections:
˽˽ Topmost jack: control bridge
˽˽ Middle jack: dedicated communications for sensor 2 detection calls
˽˽ Lowest jack: dedicated communications for sensor 1 detection calls
The control bridge enables a multi-drop shared communication bus between all sensors
connected to the backplate. This allows control of all SmartSensor Matrix sensors, rack
cards and other connected Click devices. The remaining two serial connection ports provide communications to only one sensor each, as outlined above.
On a four-sensor preassembled backplate (see Figure 2.7):
˽˽ The sensor wired into the left-most terminal blocks will be connected to ports A and
C on the Click 222 on the left. Port A is for detection calls and port C is connected to
the control bridge.
˽˽ The sensor wired to the second set of terminal blocks will be wired to ports B and D
on the Click 222 on the left. Port B is for detection calls and port D is connected to the
control bridge.
˽˽ The sensor wired to the third set of terminal block from the left will be wired to ports
A and C on the Click 222 on the right.
˽˽ The sensor wired to the right-most terminal block will be wired to ports B and D on
the Click 222 on the right.
27
28
CHAPTER 2 • CONNECTING POWER AND SURGE PROTECTION
Port A & Port C
x
OUT
x
x
x
x
x
x
x
x
x
x
x
x
x
x
x
x
PWR GND 485+ 485- 485+ 485- DRN
IN
x
x
x
x
x
x
x
x
x
x
OUT
x
x
x
x
x
x
IN
x
x
x
x
x
x
x
x
x
PWR GND 485+ 485- 485+ 485- DRN
x
Port B & Port D
OUT
x
x
x
x
x
x
x
PWR GND 485+ 485- 485+ 485- DRN
SSMatrix #4
x
x
Port A & Port C
SSMatrix #3
x
OUT
SSMatrix #2
x
x
x
PWR GND 485+ 485- 485+ 485- DRN
IN
Port B & Port D
IN
x
x
x
x
x
x
x
x
Figure 2.7 – Click 222 Ports A, B, C and D
Terminating SmartSensor 6-conductor Cables
The SmartSensor Matrix will receive power once each SmartSensor 6-conductor cable is
correctly landed into the plug-in terminals on the backplate (see Figure 2.8 and Table 2.1).
Each 6-conductor cable has one DC power wire pair, two RS-485 communication pairs, and
a drain wire. The service end of the cable connects to plug-in terminals on the preassembled
backplate (see Figure 2.8).
Figure 2.8 – Color Label on Plug-in Terminals
CHAPTER 2 • CONNECTING POWER AND SURGE PROTECTION
Note
Do not strip the service end of the cable until after it has been routed through conduit. The cable should be one continuous run without any splices.
Use the steps below to land the sensor cables:
1
2
3
4
After routing your SmartSensor 6-conductor cable into the cabinet, carefully strip back
the cable jacket and shielding on the service end of the cable.
Open the insulation displacement connectors on the plug by inserting a small screwdriver into each square slot and rocking it back.
Insert the wire leads into the bottom side of the plug-in terminal according to the color
code shown in Table 2.1 and Figure 2.8. Make sure the wires are completely inserted
in the terminal.
Close the insulation displacement connector by reinserting the screwdriver into the
square slot and rocking it forward. The plug-in terminals will automatically complete
the electrical connection. There is no need to manually strip the insulation on the end
of each wire.
There are two measures in place to ensure that the plugs are always returned to their correct
terminal block sections.
First, for visual confirmation, one part of the plug is blue (see Figure 2.8) and must be
visually matched up to a blue terminal block. The location of the blue piece rotates in the
different plugs and terminal block sections: in the first, the first block is blue, in the second,
the second is blue, etc.
Second, the plugs are keyed (see the blue piece in Figure 2.8) so they will only fit into their
correct terminal block sections.
Wire Color
Signal
Red (PWR)
DC+
Black (GND)
DC-
White with Blue stripe (485+)
Control bridge 485+ (port1)
Blue (485-)
Control bridge 485 - (port 1)
White with Orange stripe (485+)
Data bus 485+ (port 2)
Orange (485-)
Data bus 485- (port 2)
Bare metal (DRN)
Drain
Table 2.1 – Cable Wiring Color Code
29
Contact Closure Communication
3
In this chapter
˽˽
˽˽
˽˽
˽˽
˽˽
Using the Click 112/114 DIP Switches
Using the Click 104 Rotary Switch
Attaching and Programming the Click 112/114
Attaching and Programming the Click 104
Channel Mapping
3
Each SmartSensor Matrix communicates with standard traffic cabinets using either the
Click 104 DIN rail contact closure module or the Click 112/114 detector rack cards (see
Figure 3.1). During real-time operations, up to four channels from each sensor can be signaled to a Click 114 or Click 104 (or to a pair of Click 112 cards daisy-chained together).
Figure 3.1 – Click 104 (left) and Click 112/114 Rack Cards (right)
32
CHAPTER 3 • CONTACT CLOSURE COMMUNICATION
Note
See the Click 100–400 Series User Guide for complete information on how to connect and configure the Click 104 DIN rail contact closure module and the Click 112/114
detector rack cards.
Each SmartSensor Matrix could potentially use up to 16 channels using a combination of
Click 104/112/114 contact closure modules. This means that a standard four-approach stop
bar detection system can be accommodated by a 64-channel detector rack.
The Click 112/114 cards can be configured using DIP switches on the circuit board, the
front panel menu on the faceplate or Click Supervisor. The Click 104 can be configured using the rotary switch, the front panel menu on the faceplate or Click Supervisor.
Using the Click 112/114 DIP Switches
The DIP switches allow you to program the baud rate and input mapping using the hardware. If the Click 112/114 cards are programmed using the DIP switches, the settings can be
viewed, but not modified, using the front panel menu or Click Supervisor.
If you are planning to use either the front panel menu or Click Supervisor to program the
device settings, then you will need to first make sure that the DIP switches are set to allow
for software configuration; to set this, simply make sure that all relevant switches are turned
off (see Figure 3.2).
Input Mapping Switches Baud Rate Switches
S4
S5
3
1
2
3
4
Channel
Group
5
6
7
8
1
2
Bus 1
6
4
5
7
8
On
Off
Bus 2
Makes channel group selection software configurable
Figure 3.2 – DIP Switch Setting for Software Configuration Mode (left)
There is no need to change the baud rate of the Click 112/114 cards from the factory default
of 9600 baud. The settings for the input mapping, however, will need to be set. This process
is explained in the following sections.
CHAPTER 3 • CONTACT CLOSURE COMMUNICATION
Note
An advantage of using the DIP switches for configuration is that if you ever need to
replace a Click 112/114, you can simply set the DIP switches on the new card to match
the pattern of the DIP switches on the card you are replacing, then slide the new one
into the same slot in the detector rack.
Click 114 Input Mapping DIP Switch Settings
On a Click 114, channel group 1 comprises input channels 1–4. When this channel group
is selected; sensor channel 1 will be mapped to output channel 1; sensor channel 2 will be
mapped to output channel 2; sensor channel 3 will be mapped to output channel 3; and sensor channel 4 will be mapped to output channel 4.
Use Figure 3.3 below to set the DIP switch settings to select channel group 1:
Input Mapping Switches Baud Rate Switches
S4
S5
4
1
2
3
3
5
Channel
Group
6
7
8
1
2
Bus 1
On
6
4
5
7
8
Off
Bus 2
Click 114 – Selects Matrix channels 1 through 4 for output
Figure 3.3 – Click 114 DIP Switch Settings
Click 112 DIP Switch Settings
On a Click 112, channel group 1 comprises input channels 1 and 2, where sensor channel 1
will be mapped to output channel 1 and sensor channel 2 will be mapped to output channel 2. In order to map sensor channel 3 to output channel 1 and sensor channel 4 to output
channel 2, you will need to select channel group 2.
If you are using two Click 112 devices, you will need to set the DIP switches differently for
each card and daisy-chain the cards together using bus 1.
Figure 3.4 below shows how to set the DIP switches on the Click 112 card on the left. This
will select Matrix output channels 1 and 2 for output.
33
34
CHAPTER 3 • CONTACT CLOSURE COMMUNICATION
Input Mapping Switches Baud Rate Switches
S4
S5
4
1
2
3
3
5
6
7
8
Channel
Group
1
2
On
6
4
Bus 1
5
7
8
Off
Bus 2
Click 112 –Selects channels 1 & 2
Figure 3.4 – Click 112 DIP Switches for Channels 1 and 2
Figure 3.5 shows how to set the DIP switches on the Click 112 on the right. This will assign
sensor output channels 3 and 4 for output.
Input Mapping Switches Baud Rate Switches
S5
S4
3
1
2
3
4
Channel
Group
5
6
7
8
1
2
Bus 1
On
6
4
5
7
8
Off
Bus 2
Click 112 – Selects channels 3 & 4
Figure 3.5 – Click 112 DIP Switches for Channels 3 and 4
For information on how to use other DIP switch configuration options, as well as the front
panel menu and Click Supervisor, see the Click 112/114 chapter in the Click Series User
Guide.
Using the Click 104 Rotary Switch
The rotary switch is located on the lower part of the faceplate and can be used to change
the channel input mapping. The switch can be twisted by inserting a small screwdriver into
the arrow slot.
If you use this switch to set the channel input mapping, you won’t be able to use the Click
Supervisor software or the front panel menu to change this particular parameter (although
you will still be able to use them to change other parameters).
If the switch is set to 0, the device is in Software mode. This means that all parameters are
set by the front panel menu or Click Supervisor. If the switch is set to any other number, the
device is in Hardware mode, meaning that the channel input mapping is set by the rotary
switch.
The Click 104 has four output channels; if you need more than this, you’ll need to use multiple devices daisy-chained together.
CHAPTER 3 • CONTACT CLOSURE COMMUNICATION
As shown in the table below, the outputs are mapped sequentially—that is, they can only
be mapped in numerically ordered groups of four (1–4, 5–8, etc.). If you set the switch to 3,
for 9–12, then sensor channel 9 would be mapped to output 1, sensor channel 10 would be
mapped to output 2, sensor channel 11 would be mapped to output 3, and sensor channel
12 would be mapped to output 4.
Switch
Channels
0
Software mode
1
1–4
2
5–8
3
9–12
4
13–16
5
17–20
6
21–24
7
25–28
8
29–32
9
33–36
Table 3.1 – Click 104 Rotary Switch Channel Input Map Settings
Attaching and Programming the Click 112/114
Use the following steps to set up the contact closure rack cards for each sensor:
1
2
Make sure the DIP switches are set according to Figure 3.3 for a Click 114 and Figures
3.4 and 3.5 for Click 112 cards.
Power all the cards by plugging them into the detector rack.
Figure 3.6 – Wiring the Click 112/114 Rack Cards
3
Connect a 6-ft. (1.8-m) patch cord from the Click 222 RS-485 A port to a bus 1 port on
the appropriate rack card (see Figure 3.6).
35
36
CHAPTER 3 • CONTACT CLOSURE COMMUNICATION
4
5
6
7
Connect a 6-ft. (1.8-m) patch cord from the Click 222 RS-485 B port to a bus 1 port on
another rack card.
If you are using Click 112 cards, use an 6-in. (15-cm) patch cord to share bus 1 between
cards dedicated to the same sensor. Also, configure one card to use Matrix channels 1
and 2 and configure the other card to use Matrix channels 3 and 4. If you have more
than two sensors in your system, repeat steps 2–4 to connect bus 1 for all remaining
rack cards.
Connect a 5-ft. (1.5-m) patch cord from one of the Click 222 bridge ports to bus 2 of
the rack cards.
Use the 6-in. (15 cm) patch cords to create a daisy-chain that shares bus 2 between all
of the rack cards. Bus 2 will be used for device configuration.
Click 112/114 LEDs
Once you have completed the wiring, check the Menu Level 1 LEDs, which have both
menu-indicating and general status–indicating functions. The list below contains information on the general status–indicating functions of the LEDs:
˽˽ PWR (red) – Indicates the device is powered.
˽˽ PU (blue) – This LED is not associated with any general status function and should
remain off while the card is in normal operating mode.
˽˽ TD (green) – Indicates the card is transmitting serial communication.
˽˽ RD (yellow) – Indicates the card is receiving serial communications.
The red LED should be on, showing the card is powered and operating normally.
The list below contains additional information about the rest of the LEDs:
˽˽ Detection Channel LEDs (red) – Indicates when a call is placed on the corresponding
contact closure output channel.
˽˽ Menu Level 2 – Used for the configuration menu that is activated using the Mode
switch.
˽˽ General Status (Menu Level 1) – In addition to the functions listed above, these are
used to cycle through and select options from the front panel menu.
CHAPTER 3 • CONTACT CLOSURE COMMUNICATION
Detection
Channel
Menu Level 2
Menu Level 1
Mode Switch
Figure 3.7 – Click 112/114 Menu
Normally, a SmartSensor Matrix sensor will send 10 contact closure messages each second.
If a rack card does not receive communications from a sensor within 10 seconds, the rack
card will go into fail-safe mode and all of the contact closures will be activated and the corresponding detection channel LEDs on the faceplate will turn on.
Attaching and Programming the Click 104
Use the following steps to set up the DIN rail contact closure module for each sensor:
1
Mount the Click 104 on a DIN rail over a T-bus connector. This connects the device’s
control bus (bus 2) to the installation’s shared communication bus; you can connect
your computer to another device on this shared bus, such as the Click 305 USB converter, to access the Click 104 to configure it using Click Supervisor. Mounting the
Click 104 on the T-bus also connects it to the power source.
Figure 3.8 – Wiring the Click 104 Module
2
Send detection data to the data bus (bus 1). Connect a Click 222 to the Click 104 by
connecting jumper cables from the RJ-11 jacks on the faceplate of the Click 222 to the
RJ-11 jacks on the faceplate of the Click 104 (see Figure 3.8).
37
38
CHAPTER 3 • CONTACT CLOSURE COMMUNICATION
3
If needed, daisy-chain multiple Click 104 devices together by utilizing both RJ-11 jacks
on each device’s faceplate.
Click 104 LEDs
The front panel of the device features a push-button and three banks of LEDs for on-device
configuration and monitoring. The first bank of LEDs, labeled Channel, displays the state of
the contact closure outputs (see Figure 3.9).
1
Channel
2
3
Menu
4
PWR OK TD RD
Figure 3.9 – Click 104 LEDs
The two lower banks of LEDs, labeled Menu, and the push-button, labeled Mode Switch, are
used for navigating through Menu mode.
The lower bank of LEDs will be referred to as Level 1 and is used in selecting menu options.
The upper bank will be referred to as Level 2 and is used in configuring the menu options.
Level 2 LEDs only light up when a menu selection is made using the Level 1 LEDs.
The mode switch push-button is used to enter Menu mode (see Figure 3.10). To use the
menu:
1
2 3
Menu
4
Level 2
Level 1
PWR OK TD RD
Mode Switch
Figure 3.10 – Click 104 LED Menu
1
2
3
Press and hold the mode switch to enter Menu mode. The Level 1 LEDs will start to
light up to indicate that the device is cycling through all menu options.
Release the mode switch when you reach the desired menu option. (Pressing and holding again will resume cycling through menu options.)
Quickly press and release the mode switch to select the current menu option. Once it’s
selected, the Level 2 LEDs will start to let you configure the options for the selected
CHAPTER 3 • CONTACT CLOSURE COMMUNICATION
4
5
6
menu option.
Press and hold the mode switch to cycle through the submenu. The Level 2 LEDs will
light to indicate that the device is cycling though all configuration options.
Release the mode switch once the desired configuration option is reached.
Quickly press and release the mode switch to select the current configuration option.
The device will exit Menu mode, and either the selected function will run or the selected configuration will be set and saved to the device.
Channel Mapping
Once the Click 104/112/114 devices are installed, make sure that each detector rack channel
is properly mapped to the correct traffic phase in the traffic controller. The general NEMA
standard for 8-phase numbering is presented in Figure 3.11. Many intersections will not
have eight phases, and in some cases they may not even follow the NEMA convention.
Check the plans in the traffic signal cabinet to verify how the phases are numbered at each
intersection.
3 8
6 1
7 4
5 2
Figure 3.11 – Standard NEMA 8-phase Number Scheme
Phases 1, 2, 5 and 6 are often used for the “main” street, and phases 3, 4, 7 and 8 are often
used for the “side” street as shown in Figure 3.11.
Note
Chapter 10 contains a section about Rack Card Tools which explains how the channelto-phase mapping can be verified with or without the sensors installed.
Since each Matrix sensor often detects both the left-turn phase and the through-movement
phase for a single approach, the associated rack card will have often have channels that correspond to one of the following phase (ф) pairs: ф2 and ф5; ф6 and ф1; ф4 and ф7; ф8 and
ф3.
39
40
CHAPTER 3 • CONTACT CLOSURE COMMUNICATION
NEMA TS2, 2070 and other advanced traffic cabinet systems usually allow software programming of the detector card channel outputs to traffic phases via a channel-to-phase
mapping grid in the controller menu. Figure 3.12 illustrates how the detector channels 1 to
16 of a NEMA TS-2 rack can be assigned to the standard eight phases using four Click 114
cards. The rack card slots are numbered across the top and the controller’s detection channels are represented by the gray labels C1–C16.
Slot 1
Slot 2
Slot 3
Slot 4
Slot 5
Slot 6
Slot 7
Slot 8
C3
C1
C7
C5
C11
C9
C15
C13
Φ6
Φ1
Φ2
Φ5
Φ8
Φ3
Φ4
Φ7
C4
C2
C8
C6
C12
C10
C16
C14
Φ6
Φ6
Φ2
Φ2
Φ8
Φ8
Φ4
Φ4
↓
↓
↓
↓
↓
↓
↓
↓
↓
↓
↓
↓
↓
↓
↓
↓
Figure 3.12 – NEMA TS-2 Type 1 Rack Channel to Traffic Phase Example
In Figure 3.12, four channels are used from each SmartSensor Matrix. In this example,
channel 1 from the first sensor is mapped to traffic phase 1 (left-turn phase on main street).
Channels 2, 3 and 4 from the first sensor are mapped to traffic phase 6. This represents a
case where detections from three through-movement lanes are brought in separately. This
type of lane-by-lane detection can be beneficial in some situations. Wavetronix typically
recommends the use of 4-channel cards because it offers greater flexibility of signaling contact closures.
Note
With NEMA TS1 and other legacy systems, the programming is often done via a wiring panel on the side of the controller cabinet. With wired systems, you will need to
verify that the wiring on the detector programming panel provides the proper mapping from the rack channel outputs to the controller input wires dedicated for ф1–ф8
detector calls.
Part II
Using SmartSensor Manager
Matrix
Chapter 4 – Installing SmartSensor Manager Matrix
Chapter 5 – Communication
Chapter 6 – Sensor Settings
Chapter 7 – Lanes & Stop Bars
Chapter 8 – Zones & Channels
Chapter 9 – Verification
Chapter 10 – Tools
Installing SmartSensor
Manager Matrix
4
In this chapter
˽˽ Installing SSMM
˽˽ Microsoft .NET Framework
4
The SmartSensor Manager Matrix (SSMM) software enables you to configure and interact
with the SmartSensor Matrix. SSMM can be run on any Windows-capable device up to and
including Windows 8.
Note
Windows RT, found on many new Windows tablets, is distinct from Windows 8 and
will not run SmartSensor Manager Matrix.
The software can be downloaded on other computers by going to www.wavetronix.com.
This chapter explains how to download and install the SSMM software.
Using the Click 421
The Click 421 converts wired or wireless serial data to RS-485 communication and sends
it to all devices on a shared multi-drop communication bus on the backplate. This allows
control of all SmartSensor Matrix units from a single access point.
You can make a wired connection using a USB-to-serial converter and a USB adapter cable;
alternatively, you can make a wireless connection using a preconfigured Bluetooth link. A
whip antenna can be attached to the Click 421 to increase the distance and reliability of the
46
CHAPTER 4 • INSTALLING SMARTSENSOR MANAGER MATRIX
wireless link.
Follow the steps below to use the Click 421 to communicate with the SmartSensor Matrix:
1
2
Rock the Click 421 device onto the green T-bus to the left of the gray T-bus connector
on the second DIN rail on the backplate.
Make a wired (using the serial port on the front of the device) or wireless (Bluetooth)
connection between the Click 421 and the handheld computer.
If you wish to establish a wired connection with a laptop computer instead of the handheld
device, use the laptop’s native RS-232 serial port to connect to the Click 421, or a USB-toserial converter if the laptop does not have an RS-232 serial port. You can also establish a
Bluetooth connection from your laptop to the Click 421. To do so, consult your laptop’s
software guidelines on how to discover Bluetooth devices and configure a Bluetooth serial
connection.
An RJ-11 patch cord with a pigtail on one end can be wired to the RS-485 screw terminal
on the Click 421 and used to patch into RJ-11 sockets on the rack cards or backplate for
troubleshooting.
Once you’ve connected to the Click 421, you can connect to the sensor using SmartSensor
Manager Matrix, as outlined in the next chapter.
Installing SSMM
You can install SSMM to your Windows OS device. Everything needed for this installation
is contained in the SSMM Setup.exe file.
Note
You must have Administrator rights to run the setup program.
Follow these steps to install SSMM:
1
2
3
To download the install file, go to the Wavetronix website at www.wavetronix.com.
Click the Support link near the top of the page and follow the controls to find the correct link for the SmartSensor Manager Matrix install file.
Once you’ve downloaded the file, double-click on it. Opening it executes a setup program that will copy all the necessary files to the hard drive and place icons in the Start
menu and on the desktop (see Figure 4.1).
CHAPTER 4 • INSTALLING SMARTSENSOR MANAGER MATRIX
Figure 4.1 – SSMM Setup Wizard
4
Select an installation location. The default location provided is normally “C:\Program
Files\Wavetronix.” If desired, click Browse to choose another location (see Figure 4.2).
Figure 4.2 – Location to be Installed
5
6
Click the Install Now button.
After SSMM is installed, you can create shortcuts to the SSMM software on the desktop and in the Start menu using the corresponding checkboxes (see Figure 4.3). If no
shortcuts are desired, uncheck the corresponding boxes.
Figure 4.3 – Shortcut Options
7
Click the View release notes when finished checkbox to view the SSMM release notes.
The release notes contain additional information about the current version of the
47
48
CHAPTER 4 • INSTALLING SMARTSENSOR MANAGER MATRIX
8
SSMM software. A PDF reader program (i.e. Adobe Acrobat Reader) is required to
view the release notes.
Click Finish to complete the setup process.
Note
SSMM is designed for the 96 DPI display setting. The application may not display text
properly, and may not function properly in general, if the display is not set to 96 DPI.
Microsoft .NET Framework
The SSMM setup program will automatically detect whether Microsoft .NET Framework
v3.5 is installed on your PC. If it is not installed, you will be prompted to install it (see Figure 4.4).
Figure 4.4 – Microsoft .NET Framework V3.5 Prompt
Click the Install Framework button and you will be taken to the Microsoft website where
you can install the latest version of Microsoft .NET Framework.
Communication
5
In this chapter
˽˽
˽˽
˽˽
˽˽
˽˽
Serial Connection
Internet Connection
Virtual Connection
Viewing Connection Info
Upgrading the Sensor’s Embedded Software
5
Once the sensors are installed, use the SSMM software to change settings, view data and
configure the sensors to the roadway.
Launch SSMM by either clicking on the icon that was placed on your desktop or clicking
the icon found in the Start menu. The SSMM splash screen and then main screen shown in
Figure 5.1 will appear.
50
CHAPTER 5 • COMMUNICATION
Figure 5.1 – SSMM Splash Screen (left) and Main Screen (right)
You can always view the version of SSMM you are using by right-clicking on the main
screen and then clicking SSM Matrix Version. To see the version, date and timestamp of
the individual components that make up the program, select Component Version (see Figure 5.2).
Figure 5.2 – Matrix Version (top) and Component Version (bottom)
If you are using SSMM on a computer, you can use the panel in the lower left of the main
screen to change the size of the user interface on your computer. Click any of the three
squares to increase or decrease the size of the user interface.
CHAPTER 5 • COMMUNICATION
The first step is to make a connection to the sensor. The following three types of connections
can be made:
˽˽ Serial connection – Connect using Bluetooth, RS-232, or RS-485 communication.
˽˽ Internet connection – Connect using an IP address and a serial to Ethernet converter.
˽˽ Virtual connection – Connect to a virtual sensor within software (used for learning
and demonstrating SSMM functionality).
Communication settings are stored in the system registry each time a connection is established.
After the first connection is made to the Matrix sensor, the SSMM software will save the connection settings that were used. Click the magnifying glass icon on the right side of the communication link to connect using the most recently used parameters stored in the registry.
Serial Connection
1
2
3
4
Click on Communication to access the Communication window (see Figure 5.2).
Select the Serial tab.
Set Port and Timeout to the desired settings.
Select the type of search (Full or Quick) you would like to perform. A full search will
find all SmartSensor Matrix units on the selected RS-485 control bus and can take
up to 30 seconds; a quick search can be used after the first time a full search has been
performed.
Note
A quick search should not be used the first time you connect to sensors on an RS-485
control bus. If you add or replace a sensor on an existing control bus, a full search will
need to be performed before a quick search can be made.
Note
If you perform a full search and then cancel before the search is complete, the sensors not discovered before the full search was terminated will also not be visible after
a quick search. You will then need to perform a full search to completion before all
sensors can be discovered using a quick search.
5
6
7
Click the Search button.
Click on the desired sensor row from the list to select a sensor (see Figure 5.3). The sensor list shows the sensor ID, location, and approach of each discovered sensor.
Click the Connect button. You will be directed back to the home page once a connection is established.
51
52
CHAPTER 5 • COMMUNICATION
Figure 5.3 – Serial Connection
After you have connected to a sensor, the next time you would like to connect you
can simply click the magnifying glass icon in the upper right corner of the screen.
This will take you to the last connection settings you used to connect to a sensor.
The first time you connect to a sensor, the default Sensor ID will be the last seven digits of
the sensor’s serial number. However, the names in the Location and Approach fields will
be set to default values.
Note
It is recommended that you label the service end of each SmartSensor Matrix cable
when the cable is pulled so that the approach the sensor is monitoring can be documented. You may need to power down all sensors except for the one you are configuring in order to determine which approach it is monitoring.
If you have problems connecting:
1
2
Make sure that all power and communication wiring is correct.
Check the port settings (Port ID).
Connection failure can occur for various reasons; if a failure occurs repeatedly, call Wavetronix Technical Support for assistance.
Once you have selected a sensor from the device list, you can click again on that
row to bring up a Sensor Info pop-up (see Figure 5.4). To bring up the Sensor Info
pop-up, you can also click on the sensor icon that appears in the upper right corner
of the screen. The information in the Sensor Info screen cannot be edited.
CHAPTER 5 • COMMUNICATION
Figure 5.4 – Sensor Info Screen
The Sensor Info screen lists the following sensor settings and version information:
˽˽ Sensor ID – The last seven digits of the sensor serial number. This field is not editable.
˽˽ Description – Used to describe the application (e.g. stop bar detection); can also be
used for GPS coordinates. This field is not editable from this screen.
˽˽ Location – Used to describe the intersection where the sensor is located. This field is
not editable from this screen.
˽˽ Approach – Used to indicate which approach of the intersection the sensor monitors.
This field is not editable from this screen.
˽˽ Sensor Version – Overall sensor product version, which represents a released combination of the DSP, Algorithm, FPGA and FPAA subcomponent versions.
˽˽ DSP Rev – DSP code version date (YYYY-MM-DD).
˽˽ Algorithms Rev – Algorithm code version date (YYYY-MM-DD).
˽˽ FPGA Version – FPGA version date (YYYY-MM-DD).
˽˽ FPAA Version – FPAA version date (YYYY-MM-DD).
˽˽ Signal Rack Cards – When the switch is on, any rack cards connected to this sensor’s
data port will identify themselves by flashing a blink sequence on the main menu LEDs
of the rack card.
Internet Connection
The SmartSensor Matrix can be connected to the Internet, allowing access to the sensor
from anywhere with Internet access. The following is a list of ways to connect the SmartSensor Matrix to the Internet:
˽˽ Serial to Ethernet Converter – The SmartSensor Matrix can be connected to a local
area network (LAN) by using a Click 301 serial to Ethernet converter.
˽˽ Serial to 802.11b Wireless – The SmartSensor Matrix can be connected using a Click
53
54
CHAPTER 5 • COMMUNICATION
420 serial to 802.11b converter. The Click 420 provides serial devices with an IP address on a wireless 802.11b network.
˽˽ Internet Service Providers – The SmartSensor Matrix can be equipped with optional
external modems (CDMA, GMS or GPRS) and assigned an Internet address on these
networks. (Please contact Wavetronix Technical Services for assistance.)
Note
The Internet connection is made to the control bridge and NOT to the data ports.
Use the steps below to connect to the SmartSensor Matrix using an Internet connection:
1
2
Click on Communication.
Click the Internet tab and the Internet setting options will appear (see Figure 5.5).
Figure 5.5 – Internet Connection Screen
3
4
5
6
7
8
Enter the IP address or URL of the sensor of interest. Enter the IP address assigned to
either the CDMA modem or the Click 301 serial to Ethernet converter.
Enter the port number assigned to the CDMA modem or the Click 301 serial to Ethernet converter in the Port field. This will be an integer value in the range of 0–65536.
The Click 301 port number automatically defaults to 10001.
Set the Timeout value to 1000.
Select the type of search (Full or Quick) you would like to perform (see the Serial Connection section of this chapter for more on these two searches).
Click the Search button. This may take up to 30 seconds while the sensors on your
control bus are discovered and listed. (You can click Cancel as soon as the sensor of
interest is listed.)
Click on the desired row from the list to select a sensor (see Figure 5.6).
CHAPTER 5 • COMMUNICATION
Figure 5.6 – Internet Connection Screen
9
Click the Connect button. When a connection is established you will be directed back
to the home page.
If you have problems connecting:
1
2
Make sure that all power and communication wiring is correct.
Check the address and port number.
Connection failure can occur for various reasons; if a failure occurs repeatedly, call Wavetronix Technical Support for assistance.
Address Book
The Address Book is available on the Internet connection tab and allows you to save IP connection settings for future use.
Click the Address Book button located at the bottom of the Communication page to add
new connection settings to the Address Book (see Figure 5.7).
55
56
CHAPTER 5 • COMMUNICATION
Deletes an
Address Book
Imports an
Address Book
Exports an
Address Book
Edits the
Selected Device
Adds a Device to
the Address Book
Deletes a Device from
the Address Book
Figure 5.7 – Address Book
Virtual Connection
A virtual connection allows you to use the SSMM software without being connected to an
actual sensor. Making a virtual connection can be useful for the following reasons:
˽˽
˽˽
˽˽
˽˽
To view a saved sensor setup file
To play back previously logged traffic
To demonstrate functionality for different traffic applications
To review how the software works
Use the following steps to make a virtual connection:
1
2
Click the Communication button.
Select the Virtual tab (see Figure 5.8).
CHAPTER 5 • COMMUNICATION
Figure 5.8 – Virtual Connection Screen
3
4
5
6
Select or create a virtual sensor file (.vsf) by clicking the magnifying glass icon.
Click the Search button. This may take up to 30 seconds while the sensors on your virtual control bus are discovered and listed. (You can click Cancel if the sensor of interest
has already been listed.)
Click on the desired row from the list to select a sensor.
Click the Connect button. When a connection is established you will be directed back
to the home page.
Virtual Sensor File
Since a virtual connection is not made to an actual sensor, a virtual sensor file (.vsf) is used
to save the configuration settings much like an actual sensor’s flash memory. SSMM comes
with default virtual files that you can see once you click the Search button. If you create
your own virtual sensor file, you will have to find it in the virtual files directory by clicking
the magnifying glass icon under the Virtual Sensor Files Location heading.
Note
When you are connected using a virtual sensor file, changes that would normally be
saved to a sensor’s flash memory will automatically be saved to the virtual sensor
file.
Virtual sensor files can be converted to sensor setup files and can be restored to an actual
sensor; sensor setup files that have been backed up from a sensor can also be converted to
virtual sensor files. To convert a sensor setup file to a virtual sensor file, make a virtual connection and then use the Restore Sensor Setup tool in the Tools menu (See Chapter 10).
To convert a virtual sensor file to a sensor setup file, use the Back-up Sensor Setup tool.
57
58
CHAPTER 5 • COMMUNICATION
Note
To configure channels for a future installation, connect using a virtual connection,
create a virtual sensor file and then back up the configuration settings that you created. After the file is successfully backed up, the virtual sensor file will change to a
sensor setup file and can be restored to any sensor in the field.
When a connection is made to the SmartSensor Matrix, the main menu will appear and all
configuration options will become available (see Figure 5.9).
Figure 5.9 – Main Menu (Connected)
Viewing Connection Information
Once connected, you can view additional information about the connection you have established by clicking on the moving arrows icon on the top right of the main menu page or
on the bottom right of the Communication screen (see Figure 5.10). These arrows are only
visible when there is an established connection.
Figure 5.10 – Connection Info Screen
CHAPTER 5 • COMMUNICATION
Below is a list of the information available on the Connection Info screen:
˽˽
˽˽
˽˽
˽˽
˽˽
Status – Shows that you are connected.
Sensor – Shows the subnet and sensor ID.
Type – Shows the type of connection.
Duration – Shows how long you have been connected.
Failures – Shows the amount of failures during the connection, the percentage rate of
failure and a link to the communication error log.
Communication Error Log
The error log contains all errors stored in the sensor’s memory buffer. If you are having
trouble connecting, using the error log may be helpful in the troubleshooting process. If you
continue having trouble, save the error log file and contact Wavetronix Technical Services.
Note
The error log is cleared every time you close SSMM, so if you need to save the file, do
so before shutting the program down.
Click the View Error Log link to view the communications error log (see Figure 5.11). The
error log can also be accessed by clicking on the Error Log icon at the bottom of the Communication screen.
Figure 5.11 – Error Log
Upgrading the Sensor’s Embedded Software
After clicking the Connect button, the software will check to see if your software version
matches the version of the sensor’s embedded software. If a discrepancy is detected, the Ver-
59
60
CHAPTER 5 • COMMUNICATION
sion Control screen may appear asking you to install firmware upgrades (see Figure 5.13).
If you think you have reached this screen in error, clicking the Recheck button will have the
software retry and ensure that there has not been a communication issue. Clicking the Details button will display the current sensor and software information. Click the UPLOAD
FIRMWARE button to upgrade the software.
Checking the Upload to all sensors checkbox will broadcast the upgrade to all the sensors
on the control bridge. Check the Disable fast pacing checkbox if you are connected using
Bluetooth or other devices with a slow connection speed (see Figure 5.12).
Figure 5.12 – Sensor’s Embedded Software Upgrade (left) and Details Table (right)
Click the Details button to view the firmware versions of both the SSMM software and the
SmartSensor Matrix.
Once the Version Control screen appears, you can do one of the following:
˽˽ Upgrade the sensor’s embedded software by clicking the UPLOAD FIRMWARE button.
˽˽ Click the Close button and continue the configuration process.
˽˽ Find the version of SSMM software that is compatible with the sensor’s embedded
software.
Note
Clicking the Close button and continuing configuration without upgrading may cause
problems with functionality.
If any row is highlighted in red, the firmware upgrade may need to be installed. Compare
the sensor number with the SSMM number in the Digital row of the details table. If the
CHAPTER 5 • COMMUNICATION
SSMM firmware version date is more recent than the sensor firmware version date, the
newer firmware will need to be installed; if the sensor’s firmware date is more recent than
the SSMM firmware version date, a warning will appear notifying you that older firmware
will be uploaded to the sensor (see Figure 5.13).
Figure 5.13 – Sensor Firmware Downgrade (left) Back Up Configuration (right)
If the downgrade message appears, it means that the sensor firmware is newer than the version of SSMM that was used to connect to the sensor. The newest version of SSMM can be
downloaded from www.wavetronix.com.
If you are upgrading from certain versions of SSMM, the upgrade may cause you to lose
your sensor configuration. Follow the steps in the back up message to back up your sensor’s
configuration.
Note
If you are upgrading the software, it is always a good idea to back up your sensor configuration. There is always a chance that the sensor configuration could be lost after
upgrading. You can create a back up file by going to the Tools screen (see Chapter 10).
Click the UPLOAD FIRMWARE button to install the firmware embedded in SSMM onto
the SmartSensor Matrix. The Recheck button will query the sensor to see if the firmware
bundled in SSMM is different than the version running on the sensor.
61
Sensor Settings
6
In this chapter
˽˽ General Sensor Settings
˽˽ Comm Sensor Settings
˽˽ Advanced Sensor Settings
6
Click the Sensor Settings link on the main menu to change and save settings on the sensor.
General Sensor Settings
The General tab of the Sensor Settings screen allows you to change the sensor description,
RF channel and other settings (see Figure 6.1).
64
CHAPTER 6 • SENSOR SETTINGS
Figure 6.1 – Serial Settings Window
The General tab contains the following fields:
˽˽ Serial Number – Contains the sensor serial number and cannot be edited.
˽˽ Sensor ID – Contains the ID used to uniquely identify all sensors on a multi-drop bus.
This ID is the last seven digits of the sensor’s serial number and cannot be edited.
˽˽ Description – Allows you to enter a description for each sensor. Limited to 64 characters.
˽˽ Location – Allows you to enter the intersection location of the sensor. Limited to 64
characters.
˽˽ Approach – Allows you to enter information about the direction of traffic the sensor is
detecting (e.g. NB, SB, EB, WB). Limited to 32 characters.
˽˽ RF Channel – Lets you set which one of the eight radio frequency channels the sensor
is using. Using multiple sensors in close proximity will require each sensor to be set
to a different RF channel (see the introduction for more information about mounting
the sensor).
˽˽ Sensor Height – The height of the sensor in feet. This value affects the sensor’s detection algorithms. Entering an approximate height measurement for the sensor allows
detections to be placed correctly on the roadway.
˽˽ Units – Allows sensor height, zone dimensions and road objects to be viewed in metric
mode rather than standard units.
Comm Sensor Settings
The Comm tab allows you to change the response delay, and other settings (see Figure 6.2).
CHAPTER 6 • SENSOR SETTINGS
Figure 6.2 – Comm Tab
˽˽ Response Delay – Used to configure how long the sensor will wait before responding
to a message received. This is useful for some communications devices that are unable
to quickly change transmission direction. The default value is 10 milliseconds. This
value can be selected for both of the sensor’s ports independently.
Note
In many cases, SSMM will be connected over port 1. A green arrow is used to show the
port over which SSMM is connected to the sensor. During troubleshooting or other
special cases, you may want to connect to the sensor over port 2. Port 2 is connected
to the orange RS-485 wire pair and is typically used for detection calls.
˽˽ Data Push – Data can be pushed over port 1, port 2 or both. To disable data push, select
None. In many cases, data push will only occur over port 2.
If you would like to change which port is used to push data, please contact Wavetronix
Technical Services first, as changing this setting can affect how the sensor, and other
devices connected to it, are wired.
Note
If for some reason SSMM connects over the same port that SmartSensor Matrix is
using to push data, the software will continue to poll the sensor for detection call
messages. This will help keep the intersection operating normally during the configuration process.
65
66
CHAPTER 6 • SENSOR SETTINGS
˽˽ Source – In normal use, the source is always the radar antenna. However, in some
cases, other sources may be used for demonstrations or evaluations. When the source
is switched to Diagnostic, the antenna is no longer used. Instead, a predetermined
sequence of traffic will appear.
Advanced Tab
The Advanced tab contains higher-level features that will not typically need to be adjusted
by normal users (see Figure 6.3).
Figure 6.3 – Advanced Tab
˽˽ Wash-out time – Used to set the amount of time a tracker has to be detected before it
is washed out into the background. Range of valid values: 4-60 minutes.
Lanes & Stop Bars
7
In this chapter
˽˽
˽˽
˽˽
˽˽
Display Options
Menu Bar
Automatic Configuration
Manual Configuration
7
After Sensor Settings, the next option available from the main menu is Sensor Setup. When
you click this option, the first screen that appears is Lanes & Stop Bars.
The Lanes & Stop Bars screen shows the sensor’s 140-ft. (42.7-m), 90° degree view and
provides automatic and manual controls to quickly and easily configure the sensor to the
roadway. The sensor’s view has the appearance of a baseball infield with the sensor icon
shown at the position where home plate would be (see Figure 7.1).
Figure 7.1 – Lanes & Stop Bars Tab
68
CHAPTER 7 • LANES & STOP BARS
Vehicle detections are represented by tracks (a series of dots) along the sensor’s view. The
vehicle tracks show where the sensor is detecting traffic and will later help you configure
lanes. Vehicle track history can be cleared from the screen by clicking the Clear Tracks button below the sensor view.
Note
Vehicle tracks are not constrained to lanes, even after you have saved a lane configuration to the sensor.
Display Options
The Lanes & Stop Bar tab has the following display options:
˽˽ Edit Area
˽˽ Edit Area with Saved Configuration Overlay
˽˽ Edit Area with Automatic Configuration Overlay
Edit Area
The edit area is where manual changes to the sensor’s configuration are made (see Figure
7.2). The changes you make in the edit area will only be saved if you click on the Save Config button or click on another tab.
Edit Area
Figure 7.2 – Edit Area
You can copy elements from the saved and automatic configuration, which will be described
later.
CHAPTER 7 • LANES & STOP BARS
The Edit Area also contains the approach name in a small window outside of the sensor’s
view (see Figure 7.3) If needed, click on the name box to see the entire approach name. This
allows you to always know which approach is being configured. The approach name can be
edited in the Sensor Settings window.
Figure 7.3 – Approach Name
Saved Configuration Overlay
The Saved Configuration overlay shows everything that has been saved to the sensor (see
Figure 7.4). The purpose of this feature is to compare what is currently saved to the sensor
with the changes you are making in the edit area. To show or hide this overlay, click the
Saved Cfg button.
Figure 7.4 – Saved Configuration Overlay
Automatic Configuration Overlay
The Automatic Configuration overlay shows lanes and stop bars that have been automatically discovered (see Figure 7.5). To show or hide this overlay, click the Auto Cfg button.
69
70
CHAPTER 7 • LANES & STOP BARS
Figure 7.5 – Automatic Configuration Overlay
SmartSensor Matrix is constantly running the auto-configuration process in order to find
undiscovered lanes and stop bars. During this process, lanes will appear in the Auto Cfg
overlay. You will need to select and capture auto-configured lanes in order to save them to
the sensor (see the Capturing Lanes and Stop Bars section below). Wait at least 2–3 cycles
of the intersection to accurately detect the lanes and stop bars.
Capturing Lanes and Stop Bars
Lanes that appear in the Saved Configuration Overlay or in the Automatic Configuration
Overlay can be captured by clicking on them. Once a lane is captured, it becomes part of the
edit area. Captured lanes are only copied to the edit area and are NOT saved to the sensor
until after clicking on the Save Config button.
Note
It is recommended to not start the auto-configuration process when traffic is
stopped, as stopped vehicles may be interpreted as part of the normal background
when the sensor is initiating its configuration scans. Depending on vehicle volume,
users may want to temporarily disable the “Blind Sensor Enters Failsafe” feature (see
the Advanced tab in Chapter 6) when running auto-configuration to reduce the possibility of the sensor prematurely triggering a blind sensor condition during start-up
due to lack of vehicles.
To capture lanes:
1
2
3
Select a lane by clicking on it once.
Click on the lane a second time to bring up the Capture window (see Figure 7.6).
Click on the Capture Lane button to capture the selected lane. If you want to capture
all the configured lanes, click the Capture All button.
CHAPTER 7 • LANES & STOP BARS
Figure 7.6 – Capture Window
Note
If a stop bar is found for a lane during the auto-configuration process, it will be captured with the lane.
Menu Bar
The menu bar at the bottom of the screen allows you to perform a variety of operations
during sensor configuration. Click the
button at the right side of the menu bar to open
a window that shows descriptions for the various menu icons (see Figure 7.7).
Figure 7.7 – Sensor Setup Menu Window
The Menu Bar contains the following options:
To Main Menu – Returns you to the main menu.
Save Config – Saves the lanes and stop bars to the sensor.
Undo Last Edit – Undoes the last change in the edit area.
Clear Edit Area – Deletes all lanes from the edit area.
Move Sensor – Moves the sensor to a different corner of the edit area and rotates the
view accordingly.
˽˽ Restart/Reboot – Gives you the option to restart automatic configuration or reboot
the sensor.
˽˽ Edit Thresholds – Allows you to edit the sensor’s thresholds.
˽˽ Pause Traffic – Suspends or resumes movement of vehicle tracks on the screen.
˽˽
˽˽
˽˽
˽˽
˽˽
71
72
CHAPTER 7 • LANES & STOP BARS
Saving the Configuration
After automatic and manual configuration is complete, click the Save Config button to save
the changes to the sensor. If you attempt to leave the Lanes & Stop Bar view before saving
your changes, the following prompt will appear (see Figure 7.8).
Figure 7.8 – Save Changes Dialog
Moving the Sensor View
The SSMM software shows the position of the SmartSensor Matrix and the view is drawn
from the perspective of the sensor. The sensor’s default position is in the bottom-left corner
of the display. If the perspective in the software does not match your perspective of the
roadway, click the Rotate View button until the sensor position matches the approach you
are configuring.
Note
Moving the sensor in the software will have no effect on the sensor’s performance.
Its purpose is to facilitate the configuration process.
Restarting Auto Lane Config/Rebooting the Sensor
Restarting the automatic lane configuration will erase any auto-configuration information
that may have been gathered and will start the auto-configuration process over again.
Rebooting the sensor will also erase any auto-configuration information, but in addition
will clear and reconfigure the sensor thresholds.
Follow the steps below to restart the automatic lane configuration process or reboot the
sensor:
1
2
Click the Restart/Reboot button and the Restart or Reboot window will appear (see
Figure 7.9).
Select the appropriate radio button and click OK.
CHAPTER 7 • LANES & STOP BARS
Figure 7.9 – Restart or Reboot Window
Note
After you have mounted and aligned the sensor, you should always reboot the sensor
so that thresholds can adjust to the current view.
Editing Thresholds
Warning
Changing Matrix thresholds can have an adverse effect on Matrix performance when
done incorrectly. It is recommended only to edit the Matrix thresholds under the direction of Wavetronix Technical Support.
1
2
Click on the Edit Thresholds button. This will turn the sensor’s view green and allow
you to change the sensitivity of certain areas in the view.
Click anywhere within the sensor’s view and the Sensitivity window will appear (see
Figure 7.10).
Figure 7.10 – Sensitivity Window
The Sensitivity window contains the following options:
˽˽ Adjust All – Allows you to edit all of the sensor thresholds.
˽˽ Adjust Region – Allows you to adjust thresholds in a selected region of the sensor view.
˽˽ Zoom In – Allows you to zoom in and change thresholds of selected areas in the sensor
view (see Figure 7.11).
˽˽ Reset Region – Allows you to reset only a selected region of thresholds to default settings.
˽˽ Reset All – Allows you to reset all the sensor thresholds to default settings.
73
74
CHAPTER 7 • LANES & STOP BARS
Figure 7.11 – Zoom In Feature
After you click on Adjust Bins or Adjust All, the Sensitivity Slider window will appear (see
Figure 7.12). Click on the up/down buttons to change the sensitivity (in decibels). Negative
values will lower the rejection threshold in order to increase sensitivity; positive values will
increase the rejection threshold in order to decrease sensitivity.
Figure 7.12 – Sensitivity Slider Window
Automatic Configuration
Use the following steps to auto-configure the SmartSensor Matrix:
1
2
3
4
5
6
Move the sensor to the appropriate location by clicking the
button.
Click the
button to clear the edit area.
If necessary, restart Automatic Lane Configuration by clicking the
button and selecting Restart Auto Lane Cfg from the window. Allow the intersection to cycle at least
twice before proceeding (this will take approximately 5 to 10 minutes).
Capture lanes & stop bars to edit area.
Make any necessary manual adjustments.
Save the desired changes to the sensor.
Note
Lanes have a direction shown by white arrows on top of the lane. To switch the lane
direction, simply click on the arrows. (To be able to change lane direction, there must
not be any display overlays on.) Before you save the configuration, make sure that all
the arrows are pointing in the correct direction.
CHAPTER 7 • LANES & STOP BARS
Manual Configuration
After the automatic configuration process is complete, manual adjustments can be made to
fine-tune the sensor configuration. In some cases, it will be easier to configure the sensor
manually than to use the auto-configured lanes and stop bars. The following manual operations can be performed:
˽˽
˽˽
˽˽
˽˽
˽˽
Adding/deleting a lane
Inserting/deleting/moving a stop bar
Inserting/deleting a lane node
Moving a lane node
Adjusting the width of a lane node
Adding/Deleting/Moving a Lane
To add a new lane:
1
2
Click in the edit area where you would like to add a lane and the Edit Area window will
appear (see Figure 7.13).
Click on the Add Lane button. You are allowed to have a maximum of ten lanes and
you will not be able to save your configuration if any lanes overlap.
Figure 7.13 – Edit Area Window
To delete a lane:
1
2
Click in the edit area to select the lane you would like to delete and the Edit Lane window will appear (see Figure 7.14).
Click the Delete Lane button.
Figure 7.14 – Edit Lane Window
To move a lane, simply click and drag the lane wherever you need. If you move a lane outside the edit area, a window will appear asking you if you would like to delete the lane (see
Figure 7.15).
75
76
CHAPTER 7 • LANES & STOP BARS
Figure 7.15 – Moving Lane Outside Edit Area
Inserting/Deleting/Moving a Stop Bar
To insert a lane stop bar:
1
2
3
Select a lane in the edit area.
Click on the selected lane again to bring up the Edit Lane window (see Figure 7.14).
Click on the Insert Stop Bar option of the Edit Lane window.
To delete a lane stop bar:
1
2
Select a lane in the edit area.
Click on the Delete Stop Bar option of the Delete Stop Bar window (see Figure 7.16).
Figure 7.16 – Deleting a Stop Bar
Additionally, you can click and drag or click on the arrows to move the stop bar in the
desired direction. The number between the arrows indicates the distance in feet from the
lane’s end node.
Inserting/Deleting a Lane Node
A lane node is a point, placed within a lane, that can be used to adjust a lane by moving its
trajectory, adding turns or corners, or widening part or all of a lane. Each lane starts out
with two nodes, one on each end. More can be added as needed.
To insert a lane node:
1
2
3
Select a lane in the edit area.
Click on the selected lane in the vicinity of the desired node to bring up the Edit Lane
window (see Figure 7.14).
Click on the Insert Node option. A lane can have a maximum of six nodes.
CHAPTER 7 • LANES & STOP BARS
To delete a lane node:
1
2
3
Select a lane in the edit area.
Click on the selected lane in the vicinity of the desired node to bring up the Node Adjustment window (see Figure 7.17).
Click on the Delete Node option.
Figure 7.17 – Node Adjustment Window
Moving a Lane Node
1
2
Select a lane in the edit area.
Click and drag the lane node to the desired location (see Figure 7.18). Additionally, you
can click on the selected lane in the vicinity of the desired node to bring up the Node
Adjustment window (see Figure 7.17). The numbered pair (x,y) between the arrows
indicates the distance within the sensor’s view. Click on the arrows to move the node
in the desired direction.
Figure 7.18 – Moving a Lane Node
Adjacent lane nodes can be placed to follow the curve of a lane. However, the lane curve
cannot exceed 45°. While you will be able to move the node anywhere on the screen, when
you try to save, a message will appear notifying you that the lane configuration is invalid if
the allowable limits are exceeded.
77
78
CHAPTER 7 • LANES & STOP BARS
Adjusting the Width of a Lane Node
Adjusting the width of a lane node will adjust the width of the lane.
1
2
3
Select a lane in the edit area.
Click on the selected lane and then click again on the node that will be adjusted and the
Edit Node window will appear.
Change the width (in feet) of the node, by clicking the Width up/down buttons or enter
the desired node width in the Width field. Adjusting the node width will impact detection search area for that lane.
Changing the Lane Arrows
You can change the arrows on the lanes to represent exactly what is present at the intersection.
1
2
Select a lane in the edit area.
Click on the arrow in the lane to toggle through the different arrow options (see Figure
7.19).
Figure 7.19 – Changing Lane Arrows
Zones & Channels
8
In this chapter
˽˽ Menu Bar
˽˽ Placing Zones
˽˽ Measuring Zones
8
After you have configured the lanes and stop bars, click on tab 2 to configure the zones and
channels. The Zones & Channels screen allows you to place zones and configure detection
channels (see Figure 8.1).
Figure 8.1 – Zones & Channels Tab
Each Matrix sensor supports up to 16 zones and 16 channels. If unused, the 16 zones are
stacked outside the sensor view and labeled Z1–Z16.
80
CHAPTER 8 • ZONES & CHANNELS
When you enter the Zones & Channels tab and you haven’t yet configured any zones, you
will be prompted to add auto zones (see Figure 8.2). If you click Yes, a zone will be placed in
each configured lane. Lanes and stop bars must be defined before you can add auto zones.
Note
Lanes and stop bars must be defined and saved before you will be able to add auto
zones.
Figure 8.2 – Auto Zones
If you enter a negative number in the Distance from stop bar: field, the zone will be placed
after the stop bar. To add a negative distance from the stop bar, make the distance 0, highlight the whole field and then click the down arrow once.
You can add a zone up to 100 ft. past the stop bar and a zone can be anywhere from 5 to
100 ft. long.
Menu Bar
The menu bar on the bottom of the screen allows you to make changes to the zones and
channels. Click the
button at the right side of the menu bar to see a window with menu
descriptions (see Figure 8.3).
CHAPTER 8 • ZONES & CHANNELS
Figure 8.3 – Zones & Channels Menu Bar
The Zones & Channels menu bar contains the following options:
˽˽
˽˽
˽˽
˽˽
˽˽
˽˽
˽˽
˽˽
To Main Menu – Returns you to the main menu.
Save Config – Saves the zones and channel mapping to the sensor.
Undo Changes – Undoes changes made to the zones and channels.
Edit Zone – Allows you to move a zone and specify the channels to which it is mapped.
Zone/Channel Map – Allows you to map zones to channels.
Edit Channel – Allows you to map channels and change extend and delay settings.
Output Settings – Allows you to change extend and delay settings for each channel.
Place AutoZones – Allows you to easily place one zone per lane at each stop bar.
How to use these menu options will be covered in the next section.
After the configuration is complete, click the Save Config button to save the changes to the
sensor. If you attempt to leave the Zones & Channels view before saving your changes, you
will be presented with the following prompt:
Figure 8.4 – Save Changes Dialog
Placing Zones
Zones can also be placed by dragging them from the stack on the edge of the view to a
location within the view. The boundaries of the zones can be moved by selecting the zone,
clicking on one of the corners and dragging it to a new location. The first ten automatically
placed zones are also mapped to the first ten detection channels respectively.
81
82
CHAPTER 8 • ZONES & CHANNELS
Editing Zones
Click the Edit Zone button to adjust the currently selected zone. An entire zone can be
moved by clicking and dragging or by using the arrow buttons on the Edit Zone window
(see Figure 8.5). Zones can overlap each other. This window can also be used to add a delay
or extend time (in seconds) to this particular zone.
Figure 8.5 – Edit Zone Window
Placing AutoZones
Click the Place Auto Zones button if you would like to replace your manually configured
zones with auto zones. Placing auto zones requires you to insert the distance from the stop
bar and also the auto zone width (see Figure 8.6). Clicking Yes will add a zone to each automatically configured lane.
Figure 8.6 – Placing Auto Zones Prompt
If zones are too long for the SSMM view, the zones will be cropped so that the entire zone
can be seen. For more information on auto zones, see the auto zone information at the beginning of this chapter.
Note
Please note that all existing zones will be removed before new zones are placed automatically.
Channel Type
There are three different types of channels to choose from: Normal, Counting and Pulse.
CHAPTER 8 • ZONES & CHANNELS
Normal Channel
The normal channel detects presence in the zone. This means that as soon as the leading
edge of the vehicle breaks the plane of the leading edge of the zone, the channel will be
activated (see Figure 8.7).
Pulse
Channel LED
Channel LED
Channel LED
Figure 8.7 – Normal Channel
If there are no delay or extend settings, the zone will remain activated until all cars have
exited the zone.
Counting Channel
A counting channel counts each vehicle that passes through the zone. The channel is activated once the middle of the vehicle crosses the leading edge of the zone (see Figure 8.8).
Note
If you use a counting channel, you need to position the zones so that the vehicle is
detected and tracked before it arrives at the zone. Also, fast-traveling vehicles may
not be counted as accurately as slow-moving vehicles.
Pulse
Channel LED
Channel LED
Channel LED
Figure 8.8 – Counting Channel
Once you select a counting channel type, the delay and extend settings will be disabled.
83
84
CHAPTER 8 • ZONES & CHANNELS
Pulse Channel
A pulse activates the channel for a very short period of time once the front edge of the vehicle crosses the leading edge of the zone (see Figure 8.9). You can configure how long you
would like the pulse to be by changing the pulse channel width setting (see Figure 8.13). A
new pulse will only be sent after a car enters a zone when the zone is empty.
Pulse
Channel LED
Channel LED
Channel LED
Figure 8.9 – Pulse Channel
Even though the zone stays activated, the contact closure call will only stay on for the time
specified in the pulse channel width setting. You can verify the duration of the pulse channel calls by viewing the virtual LEDs in the SSMM software. Once you have selected the
pulse channel type, the extend setting will be disabled.
Note
A pulse channel may be difficult to view in the SSMM software. The default pulsed
channel width is 200 ms. To better view the pulse channel activation, increase the
pulsed channel width in the output settings window (see the Output Settings section below).
Mapping Zones to Channels
After the zones are placed, the zones must be mapped to output channels. Channel mapping
is described in the following sections.
Zone/Channel Map
The Zone/Channel map allows you to map or un-map zones to channels (see Figure 8.10).
To map a zone to a channel, determine which zone you want to map to which channel and
click on the gray indicator in the Zones/Channels table. A zone is mapped to a channel only
if the corresponding indicator is green. To see Channels 9–16, click and drag anywhere
inside the table.
CHAPTER 8 • ZONES & CHANNELS
Figure 8.10 – Zone/Channel Map Window
Each channel column contains channel number and channel type (N=normal, C=count,
P=pulse). Click on the individual zones in the zone column to highlight the zones in the
edit area.
Editing Channels
The Edit Channel button will allow you to choose the channel type, map/un-map zones to
a selected channel, and change delay/extend settings (see Figure 8.11). Click on the Z1–Z16
indicators to map a zone/zones to the channel (only the configured zones will be visible).
Click on the channel indicator in the top-left corner or the Edit Channel button to quickly
cycle through channels.
Figure 8.11 – Edit Channel Window
The Edit Channel window also allows you to do the following:
˽˽ AND/OR – Channels support AND and OR logic for all zones. Using the AND logic
means that all the selected zones have to be active for the channel to be triggered; the
OR logic means that any activity in any zone will trigger the channel. Click on the
AND or OR button to change the logic.
˽˽ Delay/Extend Settings – Delay and extend settings can be viewed and then edited for a
selected channel. The channel delay is used to ignore alert outputs that are shorter than
the specified delay time. The extend feature is used to continue a channel output after
the required conditions have been met. The delay and extend settings will be disabled
for all counting channels and the extend setting will be disabled for all pulse channels.
To edit the extend and delay, click anywhere in the white box with the D and E, and
the corresponding box will appear (see Figure 8.12). Manually edit or use the up/down
buttons to change the delay/extend settings.
85
86
CHAPTER 8 • ZONES & CHANNELS
Figure 8.12 – Output Settings (Normal, Counting, Pulse)
˽˽ Detector Input – The Detector Input number provides a way for you to map inputs to
the intersection phase in the controller. By default, the Detector Input will be set to
“00;” if the input is left at “00,” then it is unassigned. This setting is for reference purposes only and does not actually change the sensor.
˽˽ Phase – Since the SmartSensor Matrix is capable of monitoring more than one phase,
this setting allows you to enter the phase number that most closely represents the phase
the sensor is monitoring. By default, the Phase will be set to “00;” if the phase is left
at “00,” then it is unassigned. This setting is for reference purposes only and does not
actually change sensor operation.
˽˽ Channel Type – This drop-down list allows you to select the type of channel (Normal,
Counting or Pulse). A normal channel is presence detection; a counting channel is
a special pulse based on counting algorithms; and a pulse channel is a generic pulse
based on zone presence.
˽˽ Invert – This option allows the channel output to be inverted (i.e. channel output defaults to on, then switches off when a vehicle is detected).
Output Settings
The extend and delay settings can also be specified using the Output Settings button. This
button will open a window that will allow you to select individual channels to edit and also
to specify the minimum pulse width and pulsed channel width (Figure 8.13). The minimum
pulse width is the minimum duration a presence detection will be signaled via the contact
closure rack cards. The pulsed channel width is the duration the contact closure message
lasts for a pulse or counting channel. All output settings are specified in seconds.
CHAPTER 8 • ZONES & CHANNELS
Figure 8.13 – Output Settings Pop-up
The dashes in the table mean that those particular settings are disabled due to the selected
channel type. Double click on any channel row to change the output settings for that channel.
Measuring Zones
The SSMM software contains a feature that allows you to see how large a zone is as well as
a number of other distance measurements. Click on the ruler icon at the top of the Zones
& Channels window and then click on the zone you would like to measure and the zone’s
dimensions will appear (see Figure 8.14).
Figure 8.14 – Zone Measurements
Flags
A red and blue flag will also appear once a zone is selected. These flags can be used to measure the distance from that zone to anywhere in the edit area. These flags will be saved to
the sensor.
Two additional flags are also available near the ruler icon. These flags can be dragged any-
87
88
CHAPTER 8 • ZONES & CHANNELS
where on the edit area and used to measure anything in the sensor’s view (see Figure 8.15).
These flags will NOT be saved to the sensor.
Figure 8.15 – Using Flags
9
Verification
In this chapter
˽˽ Channel Indicators
˽˽ Verification Menu Bar
9
After the configuration is complete, you will need to verify that the sensor was configured
correctly. To verify lane configuration and channel mapping, click on tab 3. This will bring
up the Verification window (see Figure 9.1).
Figure 9.1 – Verification View
In the Verification window, vehicle detections will appear as light blue rectangles. The extent of these detections will vary based upon the length of the detected vehicle and the
length of queued traffic.
90
CHAPTER 9 • VERIFICATION
Vehicle detections in a stopped queue are represented by a stationary light blue rectangle.
Channel Indicators
When detections enter a zone, they will cause the indicators for the channel mapped to that
zone to turn red. To see the zones mapped to a particular channel, select that channel by
clicking on its indicator (see Figure 9.2). Active zones for the selected channel will be red;
inactive zones for the selected channel will be gray. The channel type will be indicated by
the letter under the channel number (C = Counting, N = Normal, P = Pulse). An “I” will
also be added if the channel is inverted. Click on the yellow button on either side of the
channel indicators to see channels 9–16.
Figure 9.2 – Channel Verification
Note
Only the zones for selected channels will appear. If zones are not mapped to any
channel, they will not be seen in the Verification window.
To see the delay/extend, logic and detector input/phase settings for a single zone, click and
hold on a channel indicator and the following window will appear (see Figure 9.3).
CHAPTER 9 • VERIFICATION
Figure 9.3 – Delay and Extend Zone Settings
When vehicles stop before and after a zone, the stopped vehicle queue is extended to fill the
space between the two vehicles. This ensures that a queue of vehicles that extends in front
and behind a zone will always activate the zone even if the vehicles are not directly over it
(see Figure 9.4).
Stopped
Vehicle
Stopped Vehicle
Queue Extension
Stopped
Vehicle
Figure 9.4 – Two Vehicles Stopped With a Zone in Between
If a vehicle stops within 30 feet of the stop bar, then the stopped vehicle queue will be extended to the stop bar. This ensures that a vehicle will activate a zone even if it stops behind
the zone (see Figure 9.5).
Stopped
Vehicle
Stopped Vehicle
Queue Extension
Figure 9.5 – A Vehicle Stopped Behind the Stop Bar
Verification Menu Bar
As on the Edit Lanes & Stop Bar screen, you can use the menu bar to save a configuration,
91
92
CHAPTER 9 • VERIFICATION
undo your last edit, edit thresholds and pause/play traffic (see Figure 9.6). Click the
ton at the right side of the menu bar to see a window with menu descriptions.
but-
Figure 9.6 – Verification View Menu Bar
The Verification menu bar contains the following options:
˽˽ To Main Menu – Returns you to the main menu.
˽˽ Save Config – Saves the zones and channel mapping to the sensor.
˽˽ Channel Info – This screen will show you presence counts and channel information in
table form (see Figure 9.7). These counts are not saved on the sensor, but this shows
how many times the channel has been activated since you opened the Channel Info
window.
Figure 9.7 – Channel Info Screen
˽˽ Edit Thresholds – Allows you to edit sensor thresholds (see Chapter 7 for more information about editing thresholds).
˽˽ Pause Traffic – Suspends or resumes movement of vehicle detections on the screen.
˽˽ Help – Displays a help window listing the channel type letters for reference.
Note
The SSMM interface cannot accurately show all pulsed outputs unless the pulsed
channel width is greater than 500 ms. If the SSMM software misses a counting
pulse, the counts will not be accurate. The software only reports what it receives
through its messages.
10
Tools
In this chapter
˽˽
˽˽
˽˽
˽˽
Backup/Restore
Rack Cards Tools
Tracker Logging
Sensor Self Tests
10
The Tools screen allows you to back up or restore your sensor configuration, log vehicle detections, and perform several other functions (see Figure 10.1). When connected to a sensor, all
the options will be active except for the Rack Card Tools option. When a sensor connection is
not active, the Rack Card Tools option will be available but the other options will not.
Figure 10.1 – Tools Screen
94
CHAPTER 10 • TOOLS
Backup/Restore
To back up or restore the sensor settings that you have changed, click the Backup/Restore
button on the Tools screen (see Figure 10.2).
Figure 10.2 – Backup/Restore
To create a backup, click on the magnifying glass icon in the Back-up File section. Choose
a destination, type in a filename for your new backup and click OK, then click the Back-up
Sensor Setup button.
Note
The backup will appear as an .mxc file. While this file can be opened as a text file by
using Notepad, do not edit the file, as it will change the settings you backed up.
The restore function allows you to restore a set of sensor settings you have backed up. To
restore, click on the magnifying glass icon in the Restore File section. Select the backup file
you wish to restore and click OK, then click the Restore Sensor Setup button.
Warning
Restoring sensor settings will cause you to lose the settings previously on the sensor,
unless they are backed up.
To restore the sensor to factory defaults, click the Restore Factory Setup button on the
bottom of the screen.
CHAPTER 10 • TOOLS
Rack Cards Tools
Access tools for working with rack cards and other contact closure devices by clicking the
Rack Card Tools button on the Tools screen when a sensor connection is NOT active (see
Figure 10.3).
Figure 10.3 – Rack Card Tools
The Rack Card Tools screen allows you to verify that you have the correct channel mapping
into the traffic controller, without being connected to a sensor. Serial data messages sent by
the rack card tool reach the rack cards via a T-bus and the patch cord connections from the
Click 222 control bridge to the contact closure cards.
Since this tool can be used without a sensor, it can reduce the amount of time spent on-site
when installing a SmartSensor Matrix system. You can use the rack card tool to verify rack
card connections while cable is being pulled through conduit or the sensors are being installed.
Note
When used with SmartSensor Matrix, the rack cards should be configured to communicate at the default 9600 bps. If you are having communication issues, you may
want to verify that the rack cards are configured to communicate at 9600 bps.
Using the Rack Card Tool
To search for Click 112/114 rack cards or a Click 104 contact closure device using the rack
card tool:
1
Click on the Settings button and select the correct communications port and baud rate
(see Figure 10.4).
95
96
CHAPTER 10 • TOOLS
Figure 10.4 – Rack Card Tool Serial Settings
2
3
After you have entered the correct settings, close the Serial Settings window and click
the Search button.
Once a list of devices appears, click on the desired row. You can identify a device by its
ID, Device, Description or Location fields. If you would like to communicate to all the
devices, select All Rack Cards in the device column.
Status
The Status field indicates whether the rack card is operating normally or whether it is in failsafe mode. If the device is in fail-safe mode, the text message may help you understand why
the device is in fail-safe. For example, if the text reads “Failsafe Initializing,” this indicates
that the rack card has never seen any detection call messages since it was rebooted. If the
message reads “Failsafe Timeout (No Data),” this indicates that the rack card was previously
receiving detection calls, but hasn’t received any in the last 10 seconds or more. The message will always say "Timeout: (No Data)” when you are connected to the Rack Card Tools.
Firmware Version
The Firmware Version field lists the version of the rack card firmware. When you would
like to refresh the status of these fields, click the associated Refresh button. If you are communicating with all devices, the status and firmware version fields are not applicable (N/A).
Signal Cards Switch
You can use the Signal Cards toggle switch to help single out devices. When the switch is
ON, all main menu LEDs on the selected devices will begin flashing. If you have selected
All Rack Cards, then the main menu LEDs of every card connected on the bus will begin
flashing.
CHAPTER 10 • TOOLS
Channel Outputs Switch
The Channel Outputs toggle switch and 1–16 checkboxes are used to help assist in testing
of the rack card outputs.
If the Channel Outputs switch is ON, all the selected channel outputs on the Click 112/114
rack card or Click 104 contact closure device will be active. The LEDs that indicate an active output channel will light up accordingly. An output will only be active when the corresponding box is checked.
Note
It is recommended that you disable pushing by sensors or disconnect the detection
call bus patch cord for each sensor before using this tool. Otherwise, the rack card
may be receiving conflicting calls on its other bus.
The Channel Outputs switch can be very helpful in verifying the I/O channel mapping from
the rack card outputs to the traffic controller inputs. By sequentially checking boxes 1–16,
you should be able to quickly verify the mapping of each channel, even in the absence of
traffic.
Tracker Logging
Access the Tracker Logging tool by clicking on the Tracker Logging button on the Tools
screen. This tool will allow you to log vehicle detections as they are tracked through the
sensor’s view (see Figure 10.5). This tool can be used to record trackers and replay them at
a later time for demonstration purposes.
Figure 10.5 – Tracker Logging Tool
97
98
CHAPTER 10 • TOOLS
This tool records vehicle detections as shown on the Verification page. Recorded vehicle
detections can be used later for playback using a virtual connection.
Click on the open folder icon to select a log file. The Select Tracker Log File screen allows
you to specify the name of an existing log file or to create a new file (see Figure 10.6).
Figure 10.6 – Select Detection Log File Screen
Click the ON/OFF toggle switch icon to the ON position to begin logging vehicle detections. Once activated, the duration of the logging session is displayed on the timer display.
Click the toggle switch to the OFF position to end a logging session.
The vehicle detection log file is an ASCII text file and can be viewed using a standard text
editor. Click on the View Log icon to view the current log file using the system’s default text
editor (see Figure 10.7).
Figure 10.7 – Log File
CHAPTER 10 • TOOLS
Sensor Self Tests
The Sensor Self Tests screen allows you to check the sensor to verify it is working properly
(see Figure 10.8). To run the sensor self test, click the Run Sensor Self Tests button.
Figure 10.8 – Sensor Diagnostics
The test results will appear as either “Success” or “Failed” (see Figure 10.9). If the sensor fails
a sensor self test, contact Wavetronix Technical Services for assistance.
Figure 10.9 – Sensor Self Tests (Success and Failed)
99
Appendix
In this chapter
˽˽
˽˽
˽˽
˽˽
˽˽
Appendix A –Cable Connector Definitions
Appendix B –Cable Lengths
Appendix C – Click 221 User Reference Guide
Appendix D – Click 600 Installation
Appendix E - Matrix Extended Range
11
Appendix A – Cable Connector Definitions
The connector end of the SmartSensor 6-conductor cable mates to the 8-pin connector on
the SmartSensor Matrix (see Figure A.1).
102
APPENDIX
G
A
H
B
F
C
E
D
Figure A.1 – SmartSensor Matrix Connector
The SmartSensor 6-conductor cable has seven wires. Table A.1 details the pinout of the
cable connector and the corresponding wire in the cable. The sensor itself also contains
internal wires that connect to the protective earth lug.
Pin
Cable Wire
Signal Description
A
Red
DC+
B
Orange and white stripe
Data bus 485+ (Sensor port 2)
C
Orange
Data bus 485- (Sensor port 2)
D
Drain / Shield
Drain
E
Blue
Control 485- (Sensor port 1)
F
Blue and white stripe
Control 485+ (Sensor port 1)
G
Black
Common (Ground)
H
----
Reserved
Table A.1 – Pinout for Power and Communication Signals
Creating Custom Cables
Proper connector crimping tools are necessary to create custom cables. The SmartSensor
6-conductor cable connector uses a MILC-C-26482 Series 1 connector, crimping contacts
and a watertight back shell. A kit with these parts can be ordered directly from Wavetronix.
Size 20 contacts are used to accommodate the 20 and 22 AWG wires in the cable. (The
SmartSensor 6-conductor cable’s red and black wires provide a 20 AWG wire pair. The other
pairs on the SmartSensor 6-conductor cable are 22 AWG and are normally used for communication.)
Follow the steps below to create a custom cable (see Figure A.2):
1
2
Slide the strain relief, follower, grommet and back shell over the cable.
Strip the cable jacket and shielding back about 11/2 in. (4 cm).
APPENDIX
3
4
Strip each of the seven SmartSensor cable wires back about 1/4 in. (0.6 cm).
Insert the wires into the contacts and verify the wire is visible through the contact
inspection hole.
5 Crimp the wires by following the crimping tool instructions. Daniels Manufacturing
Company provides professional grade crimping tools and detailed instructions on
crimping. Wavetronix recommends the DMF AF8 M22520/1-01 or equivalent tool for
crimping.
6 Manually press the contacts into the back side of the connector plug.
7 Use a DMC DAK20 (or equivalent) insertion tool to fully seat the contact into the connector plug. Check the mating face of the connector to ensure that all the contacts are
fully inserted. A DMC DRK20 extractions tool (or equivalent) is necessary to remove
a misplaced or misaligned contact.
8 Thread the back shell onto the connector plug. To keep the connector from rotating
during the threading process, connect the plug and coupling ring to a sensor connector receptacle.
9 Press all of the connector parts together. Thread the strain relief onto the back shell.
10 Tighten the strain relief screws on the back.
Figure A.2 – Connector Sub-assembly Parts
Appendix B – Cable Lengths
It is recommended that the sensor be powered by 24 VDC to achieve reliable operation up
to 500 ft. (152.4 m) away. Table B.1 lists maximum cable lengths for 12 and 24 VDC.
Power Wire Gauge
24 Volts
12 Volts
20 AWG
500 ft. (152.4 m)
90 ft. (27.4 m)
Table B.1 – Maximum Cable Length for Power (ft)
For communications, both of the sensor’s RS-485 communication ports operate at 9600
bps.
103
104
APPENDIX
Note
Contact Wavetronix Technical Services if you have a need for a cabled connection over
500 ft. (152.4 m).
Appendix C – Click 221 User Reference Guide
The Click 221 is a DC 8 A surge protector (8 A is the maximum rating of a T-bus connector). The DC source voltage and PE (protective earth) should be wired into the screw terminals on the bottom side of the device. A 12 AWG protective earth wire is recommended.
The device works with up to 8 A of continuous current at a maximum of 28 VDC.
Note
This appendix covers the basics of the Click 221. For a full explanation of how to use
the Click 221, see the Click Series User Guide.
Outgoing DC- voltage onto the T-bus is protected from electrical surges incoming from the
DC+ and DC- screw terminals. These terminals do not have reverse-polarity protection,
but assumes that all downstream devices will have proper polarity protection. The surge
protection meets the IEC 61000-4-S 4KV (Class 4) specification.
Figure C.1 – Click 221
The LED on the faceplate will be on if the device is properly powered and the surge protection is operational (see Figure C.1). The LED will be off if the DC wires are wired backwards
APPENDIX
(reverse polarity), the device is not powered or the surge protection circuitry is no longer
operational. If the LED flickers on an then off when power is applied, this means that the
device is conducting power, but the surge is no longer fully functional. When the surge is no
longer fully functional, please contact Wavetronix Technical Services for assistance.
Appendix D – Click 600 Installation
The Click 600 cabinet interface device is a single, compact module that performs all the
functions of the preassembled backplates: power conversion, surge protection, and sending
detection data to the appropriate contact closure devices.
Figure D.1 – Click 600
The Click 600 is a shelf-mount device, meaning it’s meant to be set on a shelf in the traffic
cabinet. However, if you’d prefer to affix it to the wall of a NEMA-style traffic cabinet, attach
the included U-channel mounting brackets to the device and use them to mount it on the
cabinet wall.
Connecting AC Power
Included with the Click 600 is an AC power cord. Connect it from your AC power source
to the IEC connector on the back of the device. The Click 600 will take that AC power and
convert it to DC, then send that power to any connected sensors (which run on 10–28
VDC).
Warning
Make sure power to AC mains is disconnected while wiring the AC input.
Next to the IEC connector is a switch that turns power on and off for the whole device. Next
to each sensor connector is a switch that turns power on and off for the associated sensor.
105
106
APPENDIX
During normal operation, be sure that all appropriate switches are turned on.
Caution
An authorized electrical technician should install the preassembled backplate. Persons other than authorized and approved electrical technicians should NOT attempt
to connect the backplate to a power supply and/or traffic control cabinet, as there is a
serious risk of electrical shock through unsafe handling of the power source. Extreme
caution should be used when connecting the backplate to an active power supply.
The Click 600 has a connector for a 5-position screw terminal, which can be used to power
other Click devices in the cabinet; this will be covered in greater detail in the Using the
Control Bus to Configure the Sensors section of this appendix.
Providing Surge Protection
You don’t need to do anything to get the surge protection running; just be aware that this
device provides protection for the cabinet from surges coming in on the sensor cables.
(Each SmartSensor Matrix has its own onboard surge protection.)
Terminating the SmartSensor 6-conductor Cable
Each Click 600 can interface with up to four sensors. On the back of the device are four
connectors, as shown below.
Figure D.2 – Click 600 Sensor Connectors
If you look at the side of the Click 600, you’ll see on the label that these four sensor connectors are labeled as 1 through 4. These connectors are where you’ll plug in the sensor cables.
Terminating the cables in these connectors provides the sensors with DC power, lets you
APPENDIX
configure the sensor, and lets the sensor send its detection data back to the cabinet.
Before you can plug in the cables, you’ll need to terminate each one into the terminal blocks
included with your Click 600. The method for doing this is identical to the method used
with the preassembled backplates, so for detailed instructions on how to terminate the cables, please see the Terminating SmartSensor 6-conductor Cables section in chapter 2 of
this guide.
Note
You’ll note, however, that chapter 2 refers to part of the terminal block plug being
blue. This is the only spot where the two terminal block sets differ; the Click 600
terminal blocks won’t have any blue portions.
Once the cables have been properly terminated into the terminal blocks, plug them into
the connectors on the back of the Click 600. Keep track of which connector corresponds to
which sensor.
Connecting the Data Ports to Contact Closure Devices
If you look at the faceplate of the device, you’ll notice that it’s divided into two buses: Data
and Control. The data bus is for taking detection data from the sensors and sending them to
contact closure devices; the control bus allows users to connect to the sensors to configure
them.
Figure D.3 – Data Bus
The data bus faceplate interface consists of four RJ-11 jacks. Use the jumper cables included
with your Click 600 to connect from these jacks to your contact closure devices. Information on how to use contact closure devices can be found in chapter 3 of this guide.
107
108
APPENDIX
Note
You don’t have to do anything special to tell the device to push data on any port; all
data received on any port is automatically pushed on all other ports.
The data bus portion of the faceplate also has the following features: next to each RJ-11 jack
is a switch that turns power on and off to the associated sensor; under each jack is an LED
that illuminates when the associated sensor has power.
Using the Control Bus to Configure the Sensors
The lower portion of the faceplate has the ports that make up the physical interface of the
control bus. These ports allow you to configure any sensors connected to the Click 600. You
can connect to the Click 600 and thereby to the sensors using any of the following options:
Figure D.4 – Control Bus
˽˽
˽˽
˽˽
˽˽
RJ-11 jacks – The Click 600 has two RJ-11 jacks that allow you to connect via RS-485.
USB port – Next to the RJ-11 jacks is a USB mini-B connector for connecting via USB.
DB-9 connector – Under the USB port is a DB-9 connector for connecting via RS-232.
T-bus port – At the bottom of the faceplate is a T-bus connector. You can use this to
make the Click 600 part of a shared power and RS-485 communication bus. This isn’t
usually necessary because the Click 600 performs all basic necessary functions, but it
is an option.
If you do intend on doing that, see the Click 100–400 Series User Guide for information about how to use a T-bus. Once you have your T-bus assembled and installed on a
DIN rail somewhere in the cabinet, do the following:
1
2
Find five wires (or a cable) that will reach from the shelf to the T-bus; strip the ends of
each wire.
Insert each wire into one of the screw terminals on a T-bus 5-position connector. The
terminals are all labeled for your ease.
APPENDIX
3
4
Insert the other end of each wire into a second 5-position connector.
Plug one connector into the T-bus port on the Click 600; plug the other into the end
of your T-bus.
Lastly, there are four LEDs on the faceplate. These LEDs have the following functions:
˽˽
˽˽
˽˽
˽˽
Red LED (PW) – Illuminates when device has power
Blue LED (OK) – Extinguishes if device has been disabled by surges
Green LED (TD) – Illuminates when data is transmitted on the control bus
Yellow LED (RD) – Illuminates when data is received on the control bus
Use these LEDs to monitor the state of the Click 600.
Appendix E – Matrix Extended Range
There are a few things that you should be aware of when using SmartSensor Matrix near the
edge of its 140 foot range..
Angle Resolution
At ranges of 0–100 feet, the angular resolution is sufficient to provide a ground range resolution that is close to the average width of a lane. This allows the sensor algorithms to distinguish between two vehicles traveling side by side in adjacent lanes.
As the range is extended, the ground resolution gets larger. At 140 feet, the smallest beam’s
footprint is about 11 feet and the outside antennas have a footprint of about 18 feet. This
means that even though the center of the sensor’s view may be able to detect adjacent targets, these same targets may not be detected when they are close to the edges of the sensor’s
view.
109
110
APPENDIX
26'
200 ft
15'
18'
140
ft
13'
11'
100
ft
8'
Figure E.1 – Matrix Beam Footprints
In an installation where the SmartSensor Matrix is installed in its preferred stop bar location, angular resolution will likely not be a problem. This is because as the vehicles approach
the stop bar they will pass through the middle of the sensor’s view and be resolved. Also, as
the cars approach the stop bar they move into a more side-fire orientation to the beams and
then can be resolved by their range differences.
Using the extended range to monitor two approaches puts the sensor in a position where it
has to monitor lanes at its extreme edges. This is not a recommended application because
the beams are the widest at the edge of the sensor’s view, resulting in unfavorable angular
resolution.
APPENDIX
200 ft
140
100
ft
ft
Figure E.2 – Dual Approach Monitoring
Signal-to-Noise Ratio and the Stop bar Effect
The SmartSensor Matrix collects data beyond its advertised range. However, the signal-tonoise ratio, or the signal-to-clutter ratio, is not large enough at the far ranges to consistently
detect a vehicle. This means that even though the sensor does detect some energy, the UI
doesn’t show constrained trackers.
This will normally not affect sensor performance for stop bar applications when the sensor
detects a stopped vehicle. However, the sensor does not allow new stopped trackers to be
created within a certain distance of the stop bar unless it has been detected for approximately 15 seconds. This feature allows the sensor to prevent slow moving objects, such as
pedestrians, bicycles and cars cutting the corner, from creating false detections. This is what
is referred to as the "stop bar effect."
Occlusion
Occlusion becomes a bigger problem the farther the range. In the intersection, it is complicated by the fact that the vehicles can be stopped in a long queue, for example in a left hand
turn lane, and the sensor may never see a vehicle passing in a farther lane.
If the range to the sensor of an object is doubled, then the amount of ground range that can
be occluded by on object is also doubled.
111
112
APPENDIX
Example
A semi truck is is situated in a left turn lane and its far edge is 30 feet from the sensor.
If the sensor is mounted 20 feet above the roadway and a 13-foot tall semi is in the lane
closest to the sensor, then a vehicle that is 5 feet tall would be fully occluded within a
34 foot area. Now, in that same situation, if the lane is placed so that the far edge of
the semi is at 60 feet, then the occluded ground range is doubled to 68 feet.
34'
20'
13'
Occluded Area
5'
30'
68'
20'
13'
Occluded Area
5'
60'
Figure E.3 – Doubling the range of an object to the sensor doubles its occluded area
Occlusion is also made worse by the stop bar effect, especially when trying to monitor
two approaches at once. When traffic crosses in front of vehicles at the stop bar, they have
the possibility of occluding the vehicles long enough to cause the detection to drop. If the
detection drops, there will be a delay of approximately 15 seconds before the vehicles are
"re-detected." The occlusion logic built into the sensor minimizes this to a certain extent,
but it cannot overcome all situations.
As always, if you have questions regarding the suitability of a location for SmartSensor
Matrix deployment, please contact Wavetronix Technical Services or your authorized Wavetronix dealer for assistance.
Appendix F – Command Line Arguments
Command line arguments have been added to SSMM for two purposes:
1
As an alternative to using the SSMM address book file, users have the option of organizing the information pertaining to their network of sensors with an external program
or service. The external system can then automatically launch SSMA with connection
parameters for a sensor selected from the external address book or database.
APPENDIX
2
Perform a batch upgrade of sensors to a new version of firmware. As a simple example,
a Microsoft Windows batch file can be used to sequentially upgrade all the sensors
listed in the file.
Note
The auto upgrade command line feature will connect to one sensor at a time and
upgrade if necessary. If connection is successful but upgrade is not necessary, then
SSMA will automatically close the connection and shut down. If a long list of sensors is in the process of being upgraded and a problem occurs when connecting to
or manually upgrading a specific sensor, it may be possible to manually abort for an
individual sensor and return to it later.
SSMM is launched using the Windows command shell and the connection parameters are
passed as command line arguments. The connection parameters are organized as follows:
˽˽ Argument 1 is a character string that specifies the connection type as Internet or serial.
˽˽ Argument 2 is a character string that specifies the sensor address connection method as:
˿˿ AutoDetect (will auto-discover sensor IDs at the specified connection endpoint
and present a selection list)
˿˿ Broadcast (will connect to the first sensor listed in Argument 3, or first sensor it
finds in a search. If AutoUpgrade is specified, it will upgrade all sensors.)
˿˿ UseID (will connect to the specified sensor ID)
˽˽ Argument 3 is a character string that specifies the ID for the UseID or Broadcast connection. A comma separated list of ID’s may be given. SSMM will connect to the first
sensor listed, but will list all valid devices. “Unknown” can be used for the “Broadcast”
connection method, which means SSMM will search for all sensors at the intersection
and connect to the first. The “AutoDetect” connection method ignores this argument.
The remainder of the arguments depends upon the connection type.
For Internet connections arguments 4–8 are as follows:
˽˽ Argument 4 is the IP address with the standard dotted decimal notation (e.g.
10.10.10.10).
˽˽ Argument 5 is the IP port (e.g. 4002).
˽˽ Argument 6 is the communication timeout specified in ms (e.g. 1000).
˽˽ Argument 7 is the buffer size as specified in bytes (e.g. 02048).
˽˽ Argument 8 is for automatically upgrading the sensor (e.g. AutoUpgrade).
If you are making an Internet connection and arguments 2–7 are not specified, a connection will be made assuming the last settings used. For example, it is possible to connect to
the last sensor connected to with the following command line:
113
114
APPENDIX
“C:\Program Files\Wavetronix\SmartSensor Manager Matrix v1.4.2\Bin\SSM Matrix
v1.4.2.exe” Internet
Or it is possible to specify all of the connection options as in the following example:
“C:\Program Files\Wavetronix\SmartSensor Manager Matrix v1.4.2\Bin\SSM Matrix
v1.4.2.exe” Internet UseID 18,20 10.10.254.21 4002 1000 02048
For serial connections Arguments 4–12 are as follows:
˽˽
˽˽
˽˽
˽˽
˽˽
˽˽
˽˽
˽˽
˽˽
Argument 4 is the communication port (e.g. COM1).
Argument 5 is the baud rate (e.g. 9600).
Argument 6 is the communication timeout specified in ms (e.g. 250).
Argument 7 is the buffer size specified in bytes (e.g. 02048).
Argument 8 is the number of data bits (e.g. 8).
Argument 9 is the flow control (e.g. None).
Argument 10 is the parity (e.g. None).
Argument 11 is the stop bits (e.g. 1).
Argument 12 is for automatically upgrading the sensor (e.g. AutoUpgrade).
Arguments 6–11 are usually the same and do not have to be specified every time if so. The
following is the example of how to connect to an isolated sensor on a specific communications port assuming the usual advance settings:
“C:\Program Files\Wavetronix\SmartSensor Manager Matrix v1.4.2\Bin\SSM Matrix
v1.4.2.exe” Serial Broadcast Unknown COM1 9600
It is recommended to list all sensor IDs when doing an AutoUpgrade using the Broadcast
connection. When the device ID is “Unknown” or not all devices are listed, then all sensors might not be backed up and restored. However, all sensors at the intersection will be
upgraded.
www.wavetronix.com