1
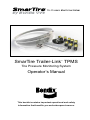
SmarTire Trailer-Link TPMS
™
Tire Pressure Monitoring System
Operator’s Manual
This booklet contains important operational and safety
information that benefits you and subsequent owners.
Sources of Additional Information about
your SmarTire ® System by Bendix™ CVS
Consult the vehicle manufacturer’s documentation.
Visit www.bendix.com for free downloads of these
publications from the Literature Center at www.bendix.com.
BW2799 SmarTire Tire Pressure Monitoring System
(TPMS) Operator’s Manual
BW2809 SmarTire TPMS Hand Tool Manual
BW2820 SmarTire Low Frequency (LF) Tool Users Manual
BS2822 SmarTire TPMS Walk Around Card
or
Contact the Bendix Tech Team at
[email protected] or
1-800-AIR-BRAKE (1-800-247-2725, option 2).
Representatives are available
Mon. - Fri. 8:00 a.m. to 6:00 p.m. ET.
The trademarks used in this document, including Bendix™, are United States
trademarks owned by or licensed to Bendix Commercial Vehicle Systems LLC.
2
INDEX
About the SmarTire® TPMS and SmarTire Trailer-Link™ TPMS . . . . . . . . . 5
Section A - System Overview . . . . . . . . . . . . . . . . . . . . . . . . . . 7
1.0 System Overview . . . . . . . . . . . . . . . . . . . . . . . . . . . 7
1.1 System Components . . . . . . . . . . . . . . . . . . . . . . . . . . 7
1.2 Maintenance Tool . . . . . . . . . . . . . . . . . . . . . . . . . . . 7
1.3 How Does The SmarTire Trailer-Link™ TPMS System Work? . . . . 8
1.4 Fundamentally, Why Is Temperature Monitoring Important? . . . . . 9
2.0 Tire Maintenance . . . . . . . . . . . . . . . . . . . . . . . . . . . 12
Section B - System Installation – Tire Sensors . . . . . . . . . . . . . . . . 14
3.0 System Installation: Tire Sensors . . . . . . . . . . . . . . . . . . 14
3.1 Sensor Overview . . . . . . . . . . . . . . . . . . . . . . . . . . . 14
3.2 Tools Required . . . . . . . . . . . . . . . . . . . . . . . . . . . . 14
3.3 Tire Sensor Installation . . . . . . . . . . . . . . . . . . . . . . . . 15
3.4 Re-mounting Tires After A Sensor Has Been Installed . . . . . . . 16
3.5 Removing A Tire That Has A SmarTire® Sensor Installed . . . . . . 20
3.6 Tire Sensor Specifications . . . . . . . . . . . . . . . . . . . . . . 22
Section C: System Installation – Components and Programming . . . . . . 23
4.0 Installing The SmarTire Trailer-Link System . . . . . . . . . . . . . 23
4.1 Configuring & Customizing Your SmarTire Trailer-Link System . . . 27
4.2 SmarTire Trailer-Link Axle CIP Adjustment Instructions . . . . . . 28
Section D: SmarTire Trailer-Link Display Options . . . . . . . . . . . . . . . 34
5.0 Trailer Information Display Options . . . . . . . . . . . . . . . . . 34
5.1 Tractor SmarTire Dash Display . . . . . . . . . . . . . . . . . . . 34
5.2 Tractor SmarTire Dash Display Alerts . . . . . . . . . . . . . . . . 35
5.3 Trailer-Link To SmarTire Dash Display Link-Up Procedure . . . . . 35
5.4 Trailer Lamp Blink Codes . . . . . . . . . . . . . . . . . . . . . . 35
Section E: Additional Component Details . . . . . . . . . . . . . . . . . . . 37
6.0 Trailer-Link System Component Details . . . . . . . . . . . . . . . 37
6.1 Trailer-Link Module Specifications . . . . . . . . . . . . . . . . . . 37
Section F: Troubleshooting . . . . . . . . . . . . . . . . . . . . . . . . . . 41
7.0 Troubleshooting Guide . . . . . . . . . . . . . . . . . . . . . . . . 41
7.1 SmarTire Gauge Display And Trailer-Link Module Q&A . . . . . . . 41
7.2 SmarTire System Q&A . . . . . . . . . . . . . . . . . . . . . . . . 46
7.3 Diagnosing A Defective, Missing, Or Misplaced Sensor . . . . . . . 46
7.4 SmarTire Hand Tool Troubleshooting . . . . . . . . . . . . . . . . 47
Appendix 1: Replacement Parts . . . . . . . . . . . . . . . . . . . . . . . . 48
8.0 Replacement Parts . . . . . . . . . . . . . . . . . . . . . . . . . 48
Appendix 2: System Scope Of Use & Alerts . . . . . . . . . . . . . . . . . 49
9.0 System Scope Of Use And Alerts . . . . . . . . . . . . . . . . . . 49
9.1 System Installation And Usage . . . . . . . . . . . . . . . . . . . 49
9.2 Use Of Chemicals . . . . . . . . . . . . . . . . . . . . . . . . . . 49
9.3 Reacting To Alerts . . . . . . . . . . . . . . . . . . . . . . . . . . 49
9.4 FCC Notice . . . . . . . . . . . . . . . . . . . . . . . . . . . . . 50
3
GENERAL SAFETY GUIDELINES
WARNING! PLEASE READ AND
FOLLOW THESE INSTRUCTIONS
TO AVOID PERSONAL INJURY OR DEATH:
When working on or around a vehicle, the following
guidelines should be observed AT ALL TIMES:
▲ Park the vehicle on a level surface, apply the parking
brakes and always block the wheels. Always wear
personal protection equipment.
▲ Stop the engine and remove the ignition key when
working under or around the vehicle. When working
in the engine compartment, the engine should be shut
off and the ignition key should be removed. Where
circumstances require that the engine be in operation,
EXTREME CAUTION should be used to prevent personal
injury resulting from contact with moving, rotating,
leaking, heated or electrically-charged components.
▲ Do not attempt to install, remove, disassemble or
assemble a component until you have read, and
thoroughly understand, the recommended procedures.
Use only the proper tools and observe all precautions
pertaining to use of those tools.
▲ If the work is being performed on the vehicle’s air brake
system, or any auxiliary pressurized air systems, make
certain to drain the air pressure from all reservoirs
before beginning ANY work on the vehicle. If the vehicle
is equipped with a Bendix® AD-IS® air dryer system, a
Bendix® DRM™ dryer reservoir module, or a Bendix®
AD-9si™ air dryer, be sure to drain the purge reservoir.
▲ Following the vehicle manufacturer’s recommended
procedures, deactivate the electrical system in a manner
that safely removes all electrical power from the vehicle.
▲ Never exceed manufacturer’s recommended pressures.
▲ Never connect or disconnect a hose or line containing
pressure; it may whip. Never remove a component or
plug unless you are certain all system pressure has
been depleted.
▲ Use only genuine Bendix® brand replacement parts,
components and kits. Replacement hardware, tubing,
hose, fittings, etc. must be of equivalent size, type
and strength as original equipment and be designed
specifically for such applications and systems.
▲ Components with stripped threads or damaged parts
should be replaced rather than repaired. Do not
attempt repairs requiring machining or welding unless
specifically stated and approved by the vehicle and
component manufacturer.
▲ Prior to returning the vehicle to service, make certain all
components and systems are restored to their proper
operating condition.
▲ For vehicles with Automatic Traction Control (ATC),
the ATC function must be disabled (ATC indicator
lamp should be ON) prior to performing any vehicle
maintenance where one or more wheels on a drive axle
are lifted off the ground and moving.
▲ The power MUST be temporarily disconnected
from the radar sensor whenever any tests USING A
DYNAMOMETER are conducted on a Bendix® Wingman®
Advanced™-equipped vehicle.
▲ You should consult the vehicle manufacturer's
operating and service manuals, and any related
literature, in conjunction with the Guidelines above.
4
About the SmarTire® Tire Pressure Monitoring
System (TPMS) and SmarTire Trailer-Link™ TPMS
Full SmarTire® TPMS System Overview
Thank you for purchasing the SmarTire Trailer-Link™ Tire Pressure Monitoring
System (TPMS) by Bendix CVS. With SmarTire Trailer-Link TPMS onboard,
your vehicle is equipped with a wireless communication network allowing
seamless integration of wireless tire pressure sensing technology.
The SmarTire Trailer-Link TPMS system is an advanced tire pressure
monitoring system specifically designed for commercial vehicle trailers. The
system monitors the pressure and temperature of each trailer tire in order
to provide real-time, tire status information and to warn the driver of a tirerelated problem before it becomes dangerous.
Bendix SmarTire System Advantages
●●
Extends tire life;
●●
Reduces maintenance costs and time;
●●
Helps maximize fuel economy by ensuring that tires are properly inflated;
●●
Reduces trailer downtime; and
●●
Reduces accident risk caused by a tire blowout or tire fire.
System Features
●●
Temperature compensated alerts: Know when your tires are at risk no
matter how long you’ve been driving;
●●
Real-time trailer tire information displayed on the dash whenever the
tractor is equipped with the SmarTire TPMS system by Bendix CVS;
●●
Tire alerts provide instant visual warning of a tire problem using the
tractor’s dash display or a trailer lamp;
●●
There are three types of tire alerts: Pressure Deviation Alert, Critical
Low Pressure Alert, and High Temperature Alert;
●●
The SmarTire Trailer-Link system data can be sent through the tractor’s
J1939 communication network via the tractor-mounted SmarTire TPMS
for seamless vehicle integration; and
●●
The trailer tire data can be broadcast on the J1939 communication
network and accessed by telematics devices for back-office reporting
of tire data.
5
IMPORTANT NOTICE: PLEASE READ
To prevent sensor damage, when mounting and dismounting tires that
have SmarTire® TPMS tire sensors, be sure that the maintenance facility
is aware that a tire pressure monitoring system is installed.
If any rims are relocated or replaced, be sure to follow the SmarTire by
Bendix system guidelines to permit the system to re-learn the tire sensor
positions.
To monitor your trailer tires with your existing SmarTire by Bendix tractor
ECU, you must ensure that the SmarTire Trailer-Link™ enable function
is set to ON in the SmarTire TPMS system tractor-mounted ECU (part
number 200.0216).
Additionally, for tractors equipped with ECU part number 200.0184, in order
for the ECU to be able to communicate with the SmarTire Trailer-Link ECU,
the ECU firmware MUST BE updated to new firmware. For instructions
on performing this update, please contact your Bendix account manager
or call 1-800 AIR-BRAKE (1-800-247-2725), option 2.
6
Section A - System Overview
1.0 System Overview
1.1 System Components
Harnesses
Stainless Steel
Tire Straps
Tire Sensors
and Cradles
Trailer-Link ECU
Maintenance
Hand tool
Figure 1 - System Components and Hand Tool
ECU. The Electronic Control Unit (ECU) of the SmarTire Trailer-Link™ Tire
Pressure Monitoring System receives data transmissions from individual tire
sensors mounted on each trailer wheel. The information received is compared
to user-defined settings. An alert is triggered if the system detects that a tire
is under-inflated and/or above expected temperatures.
Where the tractor is equipped with Bendix™ SmarTire ® TPMS, the data
and alerts are communicated to a dash display along with the tractor tire
information. Alternately, where the tractor is not equipped with a SmarTire
TPMS system, the Trailer-Link system alerts the driver using an optional
trailer-mounted lamp.
Sensors. Designed for the harsh environment of a commercial truck tire,
each tire sensor is mounted in a break-away cradle for extra protection.
The tire sensor measures internal tire pressure and temperature every 12
(twelve) seconds and transmits data every three to five minutes. If the system
detects a pressure change of 3 PSI (0.206 bar) or greater, it does not wait
until the next transmission, but will transmit the data immediately.
Sensor Straps. Sensors are mounted to the surface of the rim using a
stainless steel strap, a reliable and universal method of sensor installation.
Harness. Designed to not require a separate power supply, the harness
supplies trailer ABS system power to the SmarTire Trailer-Link Tire Pressure
Monitoring System ECU.
1.2 Maintenance Tool
Maintaining tires in the yard is just as important as real-time tire information
for the driver, but many TPMS systems don’t include functionality to help
yard maintenance personnel. The SmarTire universal hand tool acts like an
“electronic billy-club” allowing maintenance personnel to wirelessly ‘ping’
each tire to measure its pressure and temperature. The SmarTire hand tool
reduces diagnostic time and helps keep every tire rolling safely and costeffectively. (For the Maintenance Tool manual, see BW2809.)
7
1.3 How Does The SmarTire TrailerLink™ TPMS System Work?
Full SmarTire® TPMS System Overview
1.
The SmarTire Trailer-Link™ ECU creates a wireless bubble around the
trailer, allowing it to sense and transfer trailer tire data to a SmarTire®equipped tractor.
2.
Tire sensors mounted on each trailer wheel measure tire pressure and
temperature every twelve (12) seconds and wirelessly transmit tire data
every three to five minutes.
3.
Industrially-designed for the rugged requirements of a commercial trailer
chassis, the SmarTire Trailer-Link ECU can monitor up to eight (8) wheel
positions when linked with a tractor with SmarTire TPMS, and more
when applied as a stand alone trailer TPMS. The total number of tires
monitored on both the tractor and trailer cannot exceed twenty.
4.
When the tractor connects up to the trailer, the wireless transmissions of
the SmarTire Trailer-Link ECU will link up to the SmarTire tractor ECU.
Once the link up is achieved, the tractor SmarTire display will restart and
add the additional trailer axles to the tractor display. The new axles will
be indicated as trailer axles by showing a “T” in front of the axle number,
e.g. T1, T2, etc.
5.
Real-time tire pressure and temperature information is available to the
driver on demand via the SmarTire TPMS tractor display, if equipped.
An easy-to-read and simple-to-use interactive gauge that provides realtime tire status information, the SmarTire display will alert the driver to a
low pressure or high temperature trailer tire condition before it becomes
dangerous.
6.
Trailer tires can also be monitored using the system as a stand-alone
application connected to an optional trailer-mounted alert lamp.
7. The SmarTire maintenance hand tool is used to check trailer tire
pressures and temperatures during maintenance inspections. It can
also be connected directly to the SmarTire Trailer-Link ECU to set the
trailer axle Cold Inflation Parameters (CIPs) and to configure trailer tire
sensor IDs. The SmarTire maintenance hand tool improves inflation
accuracy and reduces diagnostic time in order to keep every tire rolling
cost-effectively. Please refer to section 3.2 of this manual or BW2809
for detailed information on programming the SmarTire Trailer-Link ECU
with the maintenance hand tool.
8
1.4 Fundamentally, Why Is Temperature
Monitoring Important?
The Pressure/Temperature Relationship
Tire manufacturers specify that tire pressures should be checked and adjusted
when a tire is “cold”, but most people may not know why, or even what a
“cold tire” is. The temperature of a tire actually has a significant impact on
its inflation pressure.
According to tire manufacturers, a tire is considered to be “cold” when
its temperature is 65°F (18°C). The inflation values provided by vehicle
manufacturers, fleet maintenance personnel, or industry-published load
inflation tables are called ‘Cold Inflation Pressures’ (CIP) because they
represent the correct amount of pressure a tire should be inflated to when
it is “cold”. The reason that tires have cold inflation pressures set at
specific temperatures is because a tire’s pressure will change relative to its
temperature.
Air naturally expands when heated and contracts when cooled. Inside a
contained vessel such as a tire, this expansion and contraction causes a
change in contained air pressure. As a tire heats up, its pressure will naturally
increase and as it cools down, its pressure will naturally decrease.
For example, a tire inflated to a CIP of 105 PSI at 65°F will increase in pressure
to 125 PSI at 152°F and decrease in pressure to 97 PSI at 32°F. The SmarTire
Trailer-Link™ tire monitoring system considers these changes in temperature
and pressure as part of normal operation and adapts accordingly to provide
more accurate information while helping to prevent false alerts.
Tire manufacturers never recommend inflating a tire to less than the specified
cold inflation pressure. In extreme cases, the beads of a commercial tire
can unseat if its pressure gets too low resulting in a catastrophic tire failure.
Always refer to the vehicle manufacturer’s recommendations for minimum
cold inflation pressures.
9
The charts below illustrate the equivalent inflation values for a series of Cold
Inflation Pressures (CIPs) at various temperatures. The temperature values
represent the temperature of the air contained inside the tire. This temperature
can be estimated for a cold tire using the outside, ambient temperature.
Chart 1
Chart 2
The charts above are to be used as a guide only. Always refer to the
tire and/or vehicle manufacturer’s recommendations for minimum CIPs.
10
Thermal Equilibrium
As a vehicle moves, its tires naturally heat up due to friction from the road
and the flexing of its side-walls. Weight, vehicle speed and a tire’s starting
inflation pressure all have an impact on how much, and how quickly, heat
is generated.
As the tire generates heat, its pressure increases, causing a reduction in
side-wall flexing. Less side-wall flexing and road resistance, combined with
air rushing past the tire as the vehicle moves, effectively counteract the
conditions that cause the tire to heat up. As a result, the temperature increase
tapers off until the tire reaches a point of balance called “thermal equilibrium.”
Tire thermal equilibrium is the point where the heat being generated is
equal to the heat being dissipated. Tires are designed with the principles
of temperature and pressure in mind in order for them to achieve thermal
equilibrium. Once a properly inflated tire reaches thermal equilibrium, it will
operate at its peak; providing the best performance, handling, tire life and
fuel economy.
SmarTire Trailer-Link™ TPMS Temperature Compensation
Since a tire’s contained air pressure naturally increases as a vehicle moves,
it can be difficult to tell if a hot tire is under-inflated. Without some form of
temperature compensation, a hot tire that is under-inflated might appear to
be fine because its contained air pressure is at, or above, its Cold Inflation
Pressure (CIP).
For example, a tire correctly inflated to a CIP of 105 PSI at 65°F will reach
thermal equilibrium when its temperature increases to 152°F and its pressure
increases to 125 PSI. A tire starting at 95 PSI at 65°F (10 PSI under inflated)
would have to reach 202°F for it to reach thermal equilibrium (125 PSI). The
tire will then be running 50°F hotter than it should be, causing more tire wear
and the potential for a catastrophic failure or tire fire.
When checked using a handheld gauge or a tire monitoring system that does
not measure operating temperature, this 10 PSI under-inflated tire can appear
to be normal. When equipped with tire sensors that mount inside the tire,
SmarTire Trailer-Link TPMS measures both tire pressure and temperature
in order to provide “Temperature Compensated” pressure deviation values
and alerts. By measuring the operating temperature of a tire and comparing
it to the CIP value programmed into the system, the SmarTire Trailer-Link
system will know what a tire’s pressure is supposed to be in relation to its
operating temperature.
The system is able to warn the driver of an under-inflated tire even if that
tire’s actual contained air pressure is at — or above — its CIP.
11
The advantages of temperature compensation are even more dramatic when
a tire has a slow leak. A tire that is constantly losing pressure will not be
able to reach thermal equilibrium because the contained air simply cannot
expand enough to generate the required pressure, regardless of how hot the
tire becomes. Since the leak is slow, the tire may appear over an extended
period of time to be properly inflated when it is actually dangerously underinflated and operating well above its temperature capacity.
As air leaks from the tire, increased side-wall flexing and rolling resistance
cause the tire’s temperature and pressure to increase. The pressure increase
will soon plateau and begin to slowly decrease while the tire’s temperature
continues to increase. Eventually, the tire will become so hot that its structure
will degrade, and then fail in the form of a blow-out and/or tire fire.
2.0 Tire Maintenance
Proper tire maintenance is critically important for keeping tires rolling
smoothly. When properly maintained and inflated, tires will provide shorter
stopping distances, better vehicle handling in emergency situations, improved
fuel economy and increased tire life.
Maintenance Tips for Long Tire Life:
●●
Keep tires properly inflated at all times.
●●
Visually inspect tires for injuries prior to each trip.
●●
Match dual tires for size and keep pressures within 5 PSI (0.344 bar).
●●
Re-tread tire before wear causes excessive belt damage or fatigue.
12
IMPORTANT
READ THESE INSTRUCTIONS PRIOR TO INSTALLATION
This SmartTire Trailer-Link™ TPMS kit is pre-programmed and ready to use,
subject to your application:
●●
The sensors have been PRE-ASSIGNED TO WHEEL POSITIONS and
are identified on each unit with a position label (P1, P2, P3, etc.) – install
the sensors as shown in Figure 1.
●●
Default values have been assigned to each axle for the following
(depending on kit configuration):
◊
Cold Inflation Pressure (CIP) – preset to 100 PSI
◊
First Alert Level (FAL) – preset to ±15% from expected (temperature
compensated)
◊
Second Alert Level (SAL) – preset to -20% from CIP
◊
High temperature alert – 185°F (85°C)
Figure 2
13
Section B - System Installation – Tire Sensors
3.0 System Installation: Tire Sensors
3.1 Sensor Overview
The SmarTire® TPMS sensor monitors tire pressure and temperature every
twelve (12) seconds and transmits tire data every three (3) to five (5) minutes.
If a pressure change of 3 PSI is detected, the sensor will not wait for the next
regular transmission and will transmit tire data immediately. The sensor has
an estimated battery life of five (5) years.
3.1.1 Break Away Cradle
If proper care is not taken when removing or installing a tire on a rim that
has a tire sensor installed, damage can occur. Each SmarTire tire sensor is
conveniently mounted in a break-away cradle so that if damage accidentally
occurs, the inexpensive cradle is broken instead of the sensor.
IMPORTANT NOTICE: PLEASE READ
Please read this section carefully and follow each step precisely to
ensure that you do not damage a sensor and that the sensors are
installed in the correct, pre-programmed locations.
SmarTire tire sensors can be broken when mounting and dismounting
a tire unless specific instructions are followed. If tire work is done
by an unauthorized facility, please let them know that a tire pressure
monitoring system is installed on the vehicle before they remove a tire
from a wheel.
Exercise caution and take precautions when cutting the steel strap
(See Section 3.3 step 2.). Beware of potential sharp edges!
Figure 3
3.2 Tools Required
Installing the Sensors
1.
5/16" or 8 mm hexagon driver
2.
Metal cutter
3.
Torque wrench
14
4.
Tire changing equipment
5.
Tire balancing equipment
3.3 Tire Sensor Installation
1.
Remove the wheel from the vehicle and then remove the tire.
2.
Wrap the strap around the rim in the lowest point of the drop center well
and mark it 1” (2.5 cm) past the worm gear. Cut the strap at the mark.
Excess strap MUST be removed or it will break-off and damage the tire.
3.
Slide on the sensor.
1"
Figure 4
4.
5.
With the strap and sensor positioned in
the lowest point of the center well, feed
the end of the strap into the worm gear
and pull it tight. Orient the sensor so that
it is positioned at the valve with the worm
gear 4" (10 cm) away from the edge of
the sensor. The sensor MUST always
be installed at the valve in order to know
its approximate location after the tire has
Figure 5
been mounted.
Tighten the strap using a 5/16" (8 mm) hexagon driver until the sensor
can not be moved. Reference torque: 35 in-lbs (4 Nm).
CAUTION: Do not over tighten the strap.
6.
Indicate the location of the sensor by
applying the supplied rim label to a
clean and dry location on the rim.
Figure 6 - The actual
label design may vary
15
3.4 Re-mounting Tires After A Sensor Has Been Installed
Please read this section carefully and follow each step precisely to ensure you
do not damage the sensor when mounting the tire. If steps are not taken to
avoid the sensor located in the drop center well of the rim, it can be damaged
by tire beads as the tire is mounted.
3.4.1 Internal Tire Sensor Servicing
SmarTire® TPMS tire sensors are designed to be serviceable if damage occurs
during the mounting or de-mounting process. Each sensor is mounted inside
a break-away cradle that is designed to absorb the impact of damage during
the tire mounting / de-mounting process. If damage occurs, the inexpensive
cradle will break instead of the tire sensor.
If a sensor cradle is damaged, it along with the mounting strap must be
replaced. Carefully remove the tire sensor from the damaged cradle, re-insert
it into a new cradle (Bendix part number 264.00228N), and then continue
the mounting process.
16
3.4.2 Re-Mounting Tires Using Tire Irons
To avoid damaging the sensor, simply mount the tire ensuring that the last
part of the bead to slip over the flange happens directly at the sensor. Start
at one end of the tire and work towards the opposite end with the tire oriented
so that the beads are first pushed under the rim flange directly opposite the
sensor (1) and then worked over the flange toward the sensor (2). The bead
will finally slip over the rim flange at the sensor without contacting it (3).
Repeat for the remaining bead.
1
2
3
Figure 7
17
3.4.3 Re-Mounting Commercial Tires
Using a Vertical Tire Machine
1.
Place the rim on the machine so that the rim flange clamp is at the
12 o’clock position, the sensor is at the 2 o’clock position and the
mounting hook is at the 8 o’clock position.
Rim Flange Clamp
Sensor
Figure 8
2.
Advance the wheel clockwise to pass both beads over the rim flange
simultaneously. The tire should mount onto the wheel without contacting
the sensor.
Mounting
Hook
Figure 9
3.4.4 Re-Mounting Commercial Vehicle Tires
Using A Center Post Tire Machine
1.
Place the rim on the machine with the mounting shoe at the 9 o’clock
position and the sensor at the 5 o’clock position.
Mounting
Shoe
Sensor
Figure 10
18
2.
Place the tire on the rim with the bottom bead under the flange at the
6 o’clock position with the mounting shoe at the 9 o’clock position.
3.
Advance the mounting shoe clockwise to pass the lower bead over the
rim flange.
4.
Return the mounting shoe to the 9 o’clock position, depress the upper
bead under the rim flange at the 6 o’clock position and advance the
mounting shoe clockwise until the second bead is completely mounted.
3.4.5 Dual Wheel Assemblies
In order to accommodate SmarTire® TPMS system programming, dual wheels
MUST always be mounted on the vehicle with the valve stems 180° apart or
as close as possible to opposite each other.
Outboard Tire
Inboard Tire
Sensor
Valve Stem
Valve Stem
Sensor
Figure 11
3.4.6 Re-Mounting Light Truck Tires Using a Tire Machine
1.
Place the rim on the turn-table of a tire mounting machine with the sensor
at the 7 o’clock position and the mount head at the 12 o’clock position.
2.
Starting from the mount head, manually depress the bottom bead of the
lubricated tire on the rim and into the drop center well until its pinch point
is approximately 3” (7.5 cm) before the sensor.
(Note: The pinch point, also known as a “traction point” is the position
on the rim where the tire bead encounters resistance when trying to slip
over the rim flange.)
Figure 12
19
3.
Advance the turn-table clockwise using the mount head to guide the rest
of the bottom bead over the flange and on to the rim. When assembled
correctly, the bead will slip over the flange without contacting the sensor.
4.
Repeat for the top bead. Do not allow the pinch point to slip as the rim
rotates or the sensor could be broken.
5.
Finish the tire installation as normal (seat the beads, install the valve
core, inflate to the recommended cold inflation pressure, balance tires
and mount wheels in specified locations).
3.5 Removing A Tire That Has A
SmarTire® TPMS Sensor Installed
This section outlines the correct methods for removing a tire from a wheel
that is equipped with a SmarTire® sensor. Instructions for using both tire
irons and a tire mounting machine are provided.
Please read these instructions carefully and follow each step precisely to
ensure you do not damage a sensor when dismounting the tire. If steps are
not taken to avoid the sensor located in the drop center well of the rim, it can
be crushed by the beads as the tire is removed.
3.5.1 Using Tire Irons
1.
After removing the deflated tire / wheel assembly from the vehicle, lay
the assembly on a floor mat and unseat both beads directly opposite
the sensor. The sensor should be located at the valve stem (the rim
mounted decal should also indicate the sensor’s location). Do not unseat
the bead at or near the sensor/valve stem.
Figure 13
2.
Ensure that the mounting side of the wheel is facing upward and both
the bead and wheel flange are properly lubricated.
3.
Starting near the sensor, lift the top bead over the wheel flange using tire
irons and progressively work away from the sensor until the top bead is
free. Be careful not to contact the sensor with the tire irons.
4.
Again starting near the sensor, repeat the process for the bottom bead
until the tire is free from the wheel.
20
3.5.2 Using a Tire Mounting Machine
1.
After removing the deflated tire / wheel assembly from the vehicle, unseat
the beads directly opposite the sensor and valve stem. The sensor should
be located at the valve stem (the rim mounted decal should also indicate
the sensor’s location). Do not break the bead at or near the sensor /
valve stem.
2.
Position the lubricated tire / wheel assembly on the machine so that the
dismount head and the sensor are approximately aligned.
3.
Lift the bead over the rim flange with the bead lifting bar and then advance
the assembly / dismount head clockwise to remove the top bead.
4.
Repeat steps 2 and 3 to remove the bottom bead.
NOTE: This information should be provided to tire installers that are not
authorized SmarTire® TPMS distribution outlet to ensure a sensor is not
broken when a tire is dismounted.
21
3.6 Tire Sensor Specifications
Tire Sensor (with cradle)
Power
Internal Lithium Battery
Weight
1.89 oz (58.7 g)
Dimensions
3.58 x 1.65 x 1.34 in. (91 x 42 x 34 mm)
Operating Temperature
(-40º C to 125º C)
-40º F to 257º F
Pressure Accuracy at 0ºC
to 50º C
+/- 2.39 PSI (0.65 bar)
Maximum Cold Inflation
Pressure
160 PSI (11.03 bar)
Maximum Sensing
Pressure
188 PSI (13.0 bar)
Battery Life
5 years operational, 5 year shelf
Table 3
22
Section C: System Installation –
Components and Programming
4.0 Installing The SmarTire Trailer-Link™ System
The following steps describe the installation of the SmarTire Trailer-Link
system components and are intended for trailers built after 1998 with
integrated power supply lines and ABS modules already equipped. Installation
of the TPMS sensors onto wheels is excluded in this section. For additional
harness, component, and sensor installation details, refer to sections B and E.
CAUTION. It is recommended to install all Trailer TPMS sensors
in their pre-assigned locations prior to the following steps and in
accordance with the sensor mounting instructions in Section B.
Step 1. For a multi-axle trailer, use Figure 3 to identify the ideal SmarTire
Trailer-Link ECU mounting location. To do so, picture a line drawn from the
left front trailer tire to the rear right trailer tire and a line drawn from the front
right to the rear left tire. Where the lines intersect should approximately be
the mounting location of the provided SmarTire Trailer-Link bracket and ECU.
For a single axle trailer, place the ECU slightly in front of the axle.
Figure 14
To ensure optimal signal reception, make sure the distance between any tire
and the SmarTire Trailer-Link ECU does not exceed six (6) feet.
Step 2. To install the SmarTire Trailer-Link ECU mounting bracket, find a
flat surface at or near the location indicated in Figure 3, and use a minimum
of three hex bolts to secure the bracket against the surface. Trailer cross
members are ideal for mounting the bracket. For dimensions of the mounting
bracket, please refer to section D.
23
Step 3. Mount the SmarTire Trailer-Link™ ECU against the bracket by using
the two provided hex bolt sets. Ensure that the ECU module’s flat top is
facing parallel to the trailer tires with the harness connector facing away from
the driving direction. See mounting example below; arrow shows driving
direction of the trailer.
Figure 15
Step 4. Find the ABS power supply on the underside of the trailer. This power
supply is usually located just ahead of the trailer axles along the frame or
directly next to the ABS module. Free the connector of any dirt and debris
and wipe down the ABS connection joint with a dry cloth before moving on.
Lift the plastic locking tab slightly to pull the ABS power splice connection
apart. Be careful as this tab can break off easily if pushed up too far!
Step 5. Interconnect the SmarTire Trailer-Link ABS-Power Splice Harness
Part No: K075867 with the original ABS power supply. Ensure the locking tab
is re-engaged and that the connector plugs are greased with the supplied
dielectric grease.
24
Detail C-C
Detail B-B
E
E
C
B
C
A
B
D
A
D
Packard Recpt
Packard plug
15 Inch
C
B
P1
P2
Packard Plug
C
B
Packard Recpt
A
A
P3
Detail A-A
Figure 16 - SmarTire Trailer-Link™ TPMS ABS Power Splice Part No: K075867
Step 6. After installing the ABS Power Splice harness, connect the 3-pin
power connector, P3 in Figure 16 to the SmarTire Trailer-Link™ TPMS Wiring
Harness, P3 in Figure 17. Then route the harness along the underside of the
trailer, taking care to avoid any slider mounts and suspension components.
Secure the harness every foot with zip ties. Connect the other end of the
harness, P1 in Figure 17 to the SmarTire Trailer-Link ECU.
P3
Detail B-B
P1
Detail A-A
DEUTSCH
12
11
10
9
8
7
1
2
3
4
5
6
DTM06-3S-E007
P3
B
B
DTM06-12SA-E007
P2
P5
8 Inch
A
P1
B
12 Inch
A
Delphi Fuse
Bullet Connector
64 Inch
P4
36 Inch
C
A
P4
Detail C-C
4
3
C
1
2
DTM06-4S-E007
Figure 17 - 6 ft SmarTire Trailer-Link TPMS Harness Part No: K075868
25
In some cases, the supplied 6ft harness may not be sufficient for your
installation. If this is the case, there is an optional 15 ft SmarTire Trailer-Link™
TPMS Harness Part No: K075869 available. Please contact your distributor
to order this part.
Step 7. Route the 4-pin diagnostic LED line to the side of the trailer or slider
and secure the line every foot with zip ties. Ensure the Bendix diagnostics
LED Cap part number K075866 is placed over the end of the diagnostic
connector, P4 in Figure 17 when not used with the Maintenance Hand tool.
Connect the trailer to power and watch for the LED to light up briefly to confirm
the SmarTire Trailer-Link ECU is functional. Refer to the blink code table in
section C for more information.
Step 8. If needed, adjust the Cold Inflation Pressure (CIP) of each axle using
the SmarTire® Maintenance Hand tool (090.0011) and diagnostics harness
part number K092501 as described in section 3.1 to complete the installation.
If the optional trailer warning lamp is not installed, please use the supplied
dielectric grease and fill the trailer lamp output connector (P5 in Figure 17)
with grease to protect it from corrosion. For instructions on how to install the
optional trailer warning lamp, continue to step 9.
Optional Step 9. Using the lamp output
connector (P5 in Figure 17) a trailer lamp may
also be installed at the nose of the trailer to
provide trailer TPMS alerts regardless if the
tractor is equipped with a SmarTire TPMS
unit. Extend a power line from the connector
to the lamp (standard 12-24V lamp with max
one (1) Amp draw can be used, not provided
by Bendix) and ground the lamp to the trailer
chassis at its mounting point. Place the
provided Trailer Lamp alert sticker underneath
the trailer lamp. See section C for blink codes.
Figure 18
CAUTION: A 5-Amp fuse is included with all SmarTire Trailer-Link
TPMS harnesses. If the fuse needs to be replaced, use a maximum
5-Amp fuse to protect the SmarTire Trailer-Link ECU.
26
4.1 Configuring & Customizing Your
SmarTire Trailer-Link™ System
During the installation process, the default settings for SmarTire Trailer-Link™
TPMS should be customized to the trailer by the installer. Using the SmarTire
Trailer-Link Diagnostics Software within Bendix® ACom® Diagnostics 6.6 (or
higher), alert thresholds can be made more or less sensitive and system
settings can be adjusted to accommodate trailer changes and use.
Replacing trailer tires or installing the system on a new trailer may also require
adjustment of pre-configured settings. The following section describes how
to adjust the pre-configured settings of your SmarTire Trailer-Link TPMS.
4.1.1 Pre-Configured Settings
Generally, the SmarTire Trailer-Link TPMS is pre-configured with the default
settings listed below. Depending on your vehicle, your system may have a
different initial setup.
●●
Cold Inflation Pressure (CIP):
◊
4-Wheel (2-axle Configuration)
•
◊
Trailer Axle 1&2: 100 PSI (6.89 bar)
8-Wheel (2-axle Configuration)
•
Trailer Axle 1&2: 100 PSI (6.89 bar)
●●
First Alert Level (FAL) Pressure Deviation Alert: CIP ±15% (temperature
compensated)
●●
Second Alert Level (SAL) Critical Low Pressure Alert: CIP -20%
●●
High Temperature Alert: 185°F (85°C)
Default cold inflation pressure settings should always be customized to the
trailer. Check the trailer’s placard or the industry published load inflation
table to determine the recommended cold inflation pressure settings. Bendix
recommends setting the Second Alert Level (SAL) critical low pressure alert
at 20% below the recommended cold inflation pressure for your trailer. Bendix
also does not recommend changing the First Alert Level (FAL) pressure
deviation alert setting as well as the High Temperature Alert setting of 185F.
To make changes to the FAL, SAL, and High Temperature settings refer
to the SmarTire Trailer-Link Diagnostics settings within Bendix ACom
Diagnostics. For programming sensor IDs and changing the axle CIP using
the Maintenance Hand tool, see the instructions that follow. These instructions
can also be found in the Maintenance Hand tool manual (BW2809).
27
4.2 SmarTire Trailer-Link™ Axle Cold Inflation
Pressure (CIP) Adjustment Instructions
4.2.1 Equipment
●●
SmarTire Trailer-Link™ Diagnostic Harness Kit K092501
●●
SmarTire® TPMS Maintenance Hand tool Kit 090.0011
4.2.2 Trailer CIP Programming Procedure
The default CIP programmed into the SmarTire Trailer-Link ECU is 100 PSI
for all axles. Each axle can be configured to have a unique CIP. If the case
arises where different CIP values are required, the following programming
procedure should be used.
Perform the following steps:
1.
Power up the SmarTire Trailer-Link ECU. In most cases the trailer will
need to be connected to a tractor in order to receive power. The diagnostic
LED on the SmarTire Trailer-Link harness can be viewed at power up to
ensure that the ECU has power.
2.
Using the Maintenance Hand Tool, press and hold the Setup
until a list of menu items appear.
3.
Select the Trailer CIP menu item and press the Return
4.
Use the Up and Down arrow buttons to configure the system for the
total number of axles installed on the trailer. A maximum of 5 axles can
be configured. When the correct number of axles is selected, press the
Return button.
5.
Next, adjust the CIP value for each axle. The default value of 100 PSI
will be shown on the screen (if imperial units are selected).
button
button
Figure 19
Figure 20
Use the Up and Down arrow buttons to adjust the value of the CIP.
Holding down the arrow buttons will cause the values to increment at
an increasing rate. Press the Return/Right button to advance to the
next axle.
28
6.
When the Cold Inflation Pressure (CIP) values have been adjusted to
the desired setting, press and hold the Return button for 3 seconds
until the programming screen bellow is displayed.
Figure 21
7. Using the SmarTire Trailer-Link™ programming cable (Part Number
K092501), connect the tool to the SmarTire Trailer-Link harness.
Figure 22
8.
Press the Check
button to initiate programming. You may also press
the Return button to return to the CIP adjustment screen or press the button to return to the main menu.
9.
Once programming has been initiated, the following screen is shown:
Figure 23
10. After successful programming, the following screen is shown:
Figure 24
11. Press the Return
button to exit to the main menu.
12. In the case of a programming error, the following screen is shown:
Figure 25
If this occurs, ensure the SmarTire Trailer-Link ECU is powered and the
connection from the tool to the SmarTire Trailer-Link harness is correct.
button to retry the operation, press the Return
Press the Check
button to return to the CIP adjustment screen in step 5, or press the
button to abort the programming and return to the main menu.
29
4.2.3 Trailer Sensor ID Walk-Around Learn Procedure
The following steps are only to be used for the SmarTire Trailer-Link™ ECU.
When the tires are rotated or replaced on a trailer equipped with a SmarTire
tire pressure monitoring system, the trailer TPMS module must be taught the
new position of each sensor ID code. The Walk-Around Learn procedure is
used to activate each sensor in its new location, store the sensor information
and download this information into the SmarTire Trailer-Link ECU.
The SmarTire Maintenance Hand Tool (P/N 090.0011) will learn and store the
location of each sensor as the user walks around the trailer in a U-Shaped
pattern, starting at the left side (looking forward) front most tire location (see
Figure 28). If this is a dual tire axle, start with the inner tire location. The new
location information (ID codes) for each sensor collected is then uploaded to
the SmarTire Trailer-Link receiver.
1.
Power up the SmarTire Trailer-Link receiver. In most cases the trailer
will need to be connected to a tractor in order to receive power. The
diagnostic LED on the SmarTire Trailer-Link harness can be viewed at
power up to ensure that the ECU has power.
2.
Using the Maintenance Hand Tool, press and hold the Setup
until a list of menu items appear.
button
3.
Select the Walk-Around Learn
button.
4.
Use the Up and Down
on the trailer.
icon and press the Return
arrow buttons to select the number of tires
Figure 26
5.
When the correct number of tires is selected, press the Return
to initiate the walk around learn procedure.
Figure 27
30
button
6.
Using the SmarTire® TPMS Maintenance Hand Tool, go to the first tire to
be programmed and proceed to activate each of the trailer’s tire pressure
sensors in the proper order. Starting on the left side (road side) of the
trailer at the forward axle, begin by activating the inner tire and proceed
to work counterclockwise from inner to outer tire. Work in a U-shaped
pattern around the trailer ending with the right side (curb side) forward
outer tire. If using wide-based single tires, simply start at the forward
left side tire and work in a U-Shaped pattern around the trailer ending
with the right side forward tire. Some examples are shown below:
Figure 28
7.
To activate the tire pressure sensor, hold the SmarTire Maintenance Hand
Tool’s antenna against the tire’s upper sidewall in-line with the valve stem.
Press the Learn
Button to learn the ID code of the sensor. In most
cases, the Maintenance Hand Tool is able to receive signals from the
inner tire on the dual tire configuration as well. To program the inner tire,
hold the tool in line with the circumferential position of the valve stem of
the inner wheel, as indicated below:
Outboard Tire
Inboard Tire
Sensor
22-24 inch LF
Field Range
Valve Stem
Figure 29 - Initiating Transmissions From Dual Wheels
If the sensor is not programmed from this position, you many also place the
tool between the dual tire assemblies and activate the sensor by placing the
antenna near the tire sidewall, in-line with the inner valve stem. Pressing
button will abort the Walk-Around Learn procedure.
the
31
8. Once the tool has learned the tire pressure sensor ID for the given
position, it briefly displays the received ID code and automatically
switches to the next tire position.
Figure 30
Figure 31
Press the Learn button to initiate the next tire sensor. Repeat until all
the tires have been learned into the tool. At this point you may also press
the Up and Down arrow buttons to select and view any previously
learned wheel positions. If needed, you may also reprogram a tire
position by simply selecting a previously learned position and pressing
the Learn
button. Any previously learned sensor ID codes will be
replaced by the new ID code for that position.
9.
If a sensor failed to activate, the following screen will be displayed (Figure
32). If this occurs, ensure that the tool is placed at the correct position
around the tire and retry the sensor activation by pressing the Learn
button.
Figure 32
10. If, while learning a particular wheel position, a tire pressure sensor ID
code is received that is already used in a different position, the following
“Duplicate ID” error screen is displayed.
Figure 33
Pressing the
button will delete the received ID and the screen will
go to the previously learned position. Press the Learn button to learn
the tire sensor into the position again.
11. After the last tire position has been learned into the tool, press the Down
arrow button. The tool is now ready to transmit this information to the
SmarTire Trailer-Link™ receiver.
Figure 34
12. Using the SmarTire Trailer-Link programming cable (Part Number
K092501), connect the tool to the SmarTire Trailer-Link harness.
32
Figure 35
13. Press the Check
button to begin downloading the new tire sensor
IDs into the SmarTire Trailer-Link™ receiver.
Figure 36
14. In the case of a programming error, the following screen is shown:
Figure 37
15. If this occurs, ensure the SmarTire Trailer-Link™ ECU is powered and the
connection from the tool to the SmarTire Trailer-Link harness is correct.
button to retry the operation, press the Return
Press the Check
button to return to the learn procedure screen in step 5, or press the
button to abort the learn procedure and return to the main menu.
16. If the tool screen reverts back to the screen for entering the number of
tires, then the number of tires entered does not match the number of
tires currently programmed into the SmarTire Trailer-Link receiver.
Figure 38
Make sure the number of tires entered on the tool matches the number of
tires being monitored by the SmarTire Trailer-Link receiver and then return
to Step 4 and repeat the Walk-Around Learn procedure.
33
Section D: SmarTire Trailer-Link™ TPMS Display Options
5.0 Trailer Information Display Options
5.1 Tractor SmarTire Dash Display
When the SmarTire Trailer-Link™ TPMS system is combined with a tractor
equipped with the SmarTire® TPMS system, the trailer tires will be added in
the form of ‘T’ axles following the last tractor axle on the 2-inch SmarTire dash
display. The dash gauge will reboot shortly after the wireless connection is
established with the SmarTire Trailer-Link system and the new trailer axle
positions will be displayed for the tractor. To become more familiar with the
functions of the SmarTire dash display, refer to section C of the SmarTire
Operator’s Manual BW2799 before continuing on in this section.
CAUTION: The tractor dash display cannot be used to make any
SmarTire Trailer-Link system parameter adjustments or to change the
sensor configuration programmed into the SmarTire Trailer-Link ECU!
These parameters are stored directly in the SmarTire Trailer-Link ECU
and must be configured by connecting to the SmarTire Trailer-Link ECU
as described in section 4.1.
Ensure the SmarTire Trailer-Link Enable function is set in the SmarTire
tow-vehicle-mounted ECU part number 200.0216.
For tractors equipped with the part number 200.0184 ECU to be able
to communicate with the SmarTire Trailer-Link ECU, the ECU firmware
MUST BE updated to new firmware. For instructions on performing
this update, please contact your Bendix account representative or call
1‑800‑AIR‑BRAKE (1-800-247-2725).
Figure 39
34
5.2 Tractor SmarTire® TPMS Dash Display Alerts
After the SmarTire Trailer-Link™ connection has been established, the same
three tire alerts, first level pressure, second level pressure and temperature
alerts will be reported from the trailer that are reported from the tractormounted SmarTire® TPMS system. In addition, trailer tire sensor Diagnostic
Trouble Codes (DTCs) and low battery alerts will also be reported. Please
note, alert levels configured in the tractor TPMS ECU do not override the
settings in the SmarTire Trailer-Link ECU. For example, if the tractor has its
first level alert set to 10% -- but the SmarTire Trailer-Link ECU is configured
for a 15% first level alert – the driver will see trailer tire alerts based on the
15% figure stored in the Trailer-link ECU.
Pressure Deviation
Critical Low Pressure
High Temperature
Figure 40
5.3 SmarTire Trailer-Link™ To SmarTire TPMS
Dash Display Link-Up Procedure
The SmarTire ® ECU must be configured to allow SmarTire Trailer-Link
connections. There are three options available and can be configured with
the Bendix ACom 6.6 (or later) diagnostic software.
1.
Disabled: In this mode Trailer Linking is disabled and trailer tires will not
show up on the dash display.
2.
Automatic Learn Mode: In this mode the SmarTire ECU will try and auto
detect the attached trailer. In this mode the SmarTire Trailer-Link should
link up within 30 seconds but could take as long as 5 minutes.
3.
Dedicated Trailer Mode. In this mode the ID code of a particular trailer
can be programmed into the SmarTire ECU. This mode is normally used
if the tow vehicle always pulls the same trailer. Link-up in this mode
should take 30 seconds.
When the tractor drops a trailer, it will unlink from the SmarTire ECU in 9
minutes at which time the dash display will remove the trailer tires.
5.4 Trailer Lamp Blink Codes
If an optional trailer lamp is installed and connected via the lamp output on
the SmarTire Trailer-Link ECU, the following table shows the blink codes that
will be displayed by the system in the event of an active Diagnostic Trouble
Code (DTC) condition. The SmarTire Trailer-Link lamp alerts will be displayed
for one (1) minute after system power-up and then will either show the lamp
on — or off — depending on status of the system.
35
TPMS Lamp Alerts
(repeated for 1 Minute
after Start-up, then ON
or OFF depending on
Priority)
Cause and Solution
5x Blinks
High
& then
Temperature ON after 1
min.
Contained Air Temperature is over 85C/185F –
Stop and allow tire to cool down, assess cause
of temperature increase, possible brake,
wheel bearing, or pressure issue
Critical Low
Pressure
4x Blinks
& then
ON after 1
min.
Tire Pressure has dropped below the critical
threshold (-20% default), stop and check for
punctures, bead leaks, valve leaks, etc. and
air up the tire
Minor Over
or Under
Pressure
2x Blinks
& then
OFF after
1 min.
The minor over- or under-pressure threshold
has been reached, have the tire serviced
during the next maintenance check, set the
recommended pressure and compensate for
changes in ambient temperature (see temp
chart in section A)
Sensor
Diagnostic
Trouble
Code (DTC)
1x Blink
& then
OFF after
1 min.
Data from a TPMS sensor has not been
received for 35 min. This may be related to
the signal reception of the sensor. Continue
to drive to clear the DTC. If the Diagnostic
Trouble Code (DTC) persists, check the
programming and functionality of all trailer
TPMS sensors by using the Maintenance
Hand tool 090.0011 and replace sensors if
unresponsive
Setup
Diagnostic
Trouble
Code (DTC)
3x Blinks
& then
OFF after
1 min.
The SmarTire Trailer-Link™ ECU is not properly
programmed and is unable to connect. Check
the programming using the Maintenance
Tool, Diagnostics Software and Diagnostics
Harness K092501
Table 4
36
Section E: Additional Component Details
6.0 SmarTire Trailer-Link™ System Component Details
6.1 SmarTire Trailer-Link Module Specifications
6.1.1
Power, Mounting, and Environmental Requirements
●●
Operating voltage range 9 – 36V
●●
Typical current consumption (with no external loads) 30mA
●●
5A fuse is required between the main power line of the trailer link and
the vehicle battery
●●
Frequency 433.92 MHz
●●
Modulation type: OOK
●●
Design protected for FSK
●●
500 kHz Band Width
●●
Sensitivity (OOK) at 433.92 MHz : -112 dBm
●●
Internal antenna only
●●
Uses standard Deutsch enclosure
●●
Tested to SAE J1455 Specifications
●●
Operating temperature range: -40C to +85C
●●
Survivability temperature range: -40C to +85C
●●
Sealed to IP67
●●
Preferred mounting orientation to shed water is vertical (Connector side
facing rear of trailer, away from driving direction)
●●
Preferred Mounting hardware: ¼ -20 (M6X1) Flange Head CAPSCREW,
torque to 7-10 FT/LBS (13 Nm)
●●
The SmarTire Trailer-Link ECU has an internal antenna and should be
mounted free of any metal (only half the enclosure should be covered
by the chassis or metal bracket)
37
6.1.2
SmarTire Trailer-Link™ Module
Dimensions in Inches/[mm]
4.7 in. (119.5 mm)
5.28 in.
(134 mm)
1.43 in. (36.4 mm)
4.0 in. (102 mm)
Figure 41
6.1.3 SmarTire Trailer-Link Module
Connector Pin Description
Position
Signal
1
RS232-TX
2
NOT USED
3
BRAKE LIGHT-L
4
NOT USED
5
NOT USED
6
VIN
7
NOT USED
8
LED-DIAG
9
NOT USED
10
LAMP DRIVER
11
GROUND
12
RS232-RX
Figure 42 - PIN-OUT TABLE
38
6.1.4 SmarTire Trailer-Link™ TPMS Diagnostics
Interface Harness Part No: K071016
D-SUB-MALE
6
7
8
9
1
2
3
4
5
P2
Detail A-A
72 Inch
10 Inch
A
P3
Detail C-C
P2
TP
S
M
OL
TO
A
1
2
B
P1
PC
Back View
B
D-SUB-FEMALE
9
8
7
6
5
4
3
2
1
4
3
7
P3
C
P1
Detail B-B
DTM04-4P
C
Figure 43
39
6.1.5 SmarTire Trailer-Link™ Mounting Bracket
Part No: K092801 (dimensions in inches)
1.2 in.
12 in.
3 in.
Figure 44
40
Section F: Troubleshooting
7.0 Troubleshooting Guide
7.1 SmarTire® TPMS Gauge Display And
SmarTire Trailer-Link™ Module Q&A
7.1.1 Q: The SmarTire Trailer-Link™ module does not connect to the
tractor. How can the SmarTire Trailer-Link module be diagnosed
further?
A: In the event that the SmarTire Trailer-Link ECU does not connect with the
SmarTire vehicle-mounted TPMS system, follow these steps:
1.
Check to make sure the SmarTire Trailer-Link ECU and vehicle-mounted
TPMS ECU power up during start up. The red diagnostics LED (P/N
K075866) on the SmarTire Trailer-Link harness should light up during
power-up to confirm that power is being supplied to the SmarTire TrailerLink ECU.
2.
Ensure the SmarTire Trailer-Link Enable function is set in the SmarTire
tow-vehicle-mounted ECU part number 200.0216 and that the tow-vehicle
ECU is loaded with TPMS firmware part number is 248.0091 min. version
1.02 and CAN firmware part number 248.0092 min. version 1.03. Use
Bendix ACom 6.6 (or later) Diagnostics to verify the software version on
the vehicle-mounted ECU.
3.
Check the SmarTire Trailer-Link harness to ensure all connections are
secure. Ensure the locking tab on the ABS-power splice is engaged as
well as the main connector on the SmarTire Trailer-Link ECU module.
4.
Cycle power to restart the link-up process and reset the ECUs.
5.
If the SmarTire Trailer-Link ECU still does not connect with the SmarTire
vehicle-mounted TPMS system please refer to 7.1.4 for further
Diagnostics.
41
7.1.2 Q: The gauge only displays dashes for the trailer tire information;
there is no pressure, temperature, or deviation value.
A: After the wireless link between the tractor SmarTire® TPMS ECU and
the SmarTire Trailer-Link™ module has been established and the gauge has
rebooted, trailer tire sensor data will be displayed within five (5) to eight (8)
minutes on the gauge.
To facilitate the quicker display of tire information, use the SmarTire LF Tool
or SmarTire Maintenance Hand tool and initiate each of the tires that have not
reported to the Gauge. On the SmarTire TPMS Maintenance Hand tool, press
the left-most button as you point the tool’s antenna into the tire sidewall above
the valve stem (default sensor location). Remember, that both the SmarTire
LF Tool and SmarTire Maintenance Hand tool are capable of activating the
inner tire on a dual tire assembly from the outboard tire position. For use of
the SmarTire LF Tool, please refer to manual BW2820.
In cases where no transmissions were received from a specific tire, move the
Hand tool five (5) inches in a clockwise or counterclockwise direction and try
again. Should the problem persist, a defective, missing, or misplaced sensor
may need to be diagnosed – see section 7.3.
Outboard Tire
Inboard Tire
Sensor
22-24 inch LF
Field Range
Valve Stem
Figure 45
42
7.1.3 Q: When the Gauge first powers up, the alert lamp is blinking and
a triangle with an exclamation mark is displayed. A few minutes later
the alert clears and the display returns to normal. Was there an alert?
A: During the start up sequence, the
Gauge may clear itself of a previous alert
condition or issue a momentary alert if a
tire sensor has not reported in.
Figure 46
As soon as the tire sensors report their latest readings and they do not
constitute an alert condition, the Gauge will clear the alert.
Ensure that the user keeps an eye on the particular alert until it is cleared.
If the alert does not clear itself, the user may indeed have an alert condition
that needs to be checked further. Updating the given tire position with new
information by using the LF Tool or Maintenance Hand tool (press “Initiate”),
would clear the alert faster, unless an alert condition does exist or the sensor
is malfunctioning.
43
7.1.4 Q: What additional diagnostic information is available?
A: The external LED part # K075866 is connected via the cable harness as a
separate plug. Please refer to Section C, 4.0, step 7 for details on installation
and location of this LED. The LED functions as described in the table below.
Flashing with pattern will have periods of 0.3 second on and 0.3 second off
repeating every 6 seconds. The number of high pulses in each 6–second
window will be determined by a code. For example if the flash code is 2, the
pattern will be 0.3 second on, 0.3 second off, 0.3 second on, 5.1 seconds
off and repeating.
Alarms
Priority
External LED
No Alarms
0
Off
-
Second Level Low Pressure (SAL)
6
Pattern flashing
code: 4
-
SAL Cleared
0
Off
-
First Level High Pressure (FAL_H)
4
Pattern flashing
code: 2
-
First Level Low Pressure (FAL_L)
3
Pattern flashing
code: 2
-
FAL Cleared
0
Off
-
High Temperature
7
Pattern flashing
code: 5
-
High Temperature Cleared
0
Off
-
Sensor Diagnostic Trouble Code (DTC) Set
2
Pattern flashing
code: 1
1
Sensor DTC Cleared
0
Off
-
ROM To Both Copy Performed
10
Pattern flashing
code: 7
2
Set Up DTC
5
Pattern flashing
code: 3
3
Set Up DTC Cleared
0
Off
-
Factory To Custom Copy Performed
9
Pattern flashing
code: 7
2
Custom To Factory Copy Performed
8
Pattern flashing
code: 7
4
Watchdog Reset
11
Pattern flashing
code: 8
5
Sensor Battery Low Alert
1
Pattern flashing
code: 6
-
Table 5
44
See
Note
Notes for Table 5
Note 1: This Diagnostic Trouble Code (DTC) occurs when the SmarTire
Trailer-Link™ ECU has not received information from a tire sensor for 35
minutes. Possible causes are:
1.
A tire has been replaced and a tire sensor is no longer in range of the
ECU and is therefore no longer being received. In this situation the
missing sensor must be replaced and the ECU reconfigured to add this
new sensor.
2.
There is poor radio frequency signal quality between the sensor and the
ECU. Check the installation of the ECU and ensure it is not mounted
close to any metal objects and is in the correct location as described in
Section C, 4.0.
3.
There is a malfunctioning sensor in one of the vehicle’s tires. In this
situation the malfunctioning sensor must be replaced and the ECU
reconfigured to add this new sensor.
Note 2: This Diagnostic Trouble Code (DTC) is generated when the
configuration information within the ECU has become corrupt. During this
DTC the ECU’s configuration is restored to the default factory setting. If this
DTC occurs all sensors registered in the ECU will be lost and all programmable
settings restored to factory settings. The ECU must be re-configured to
become operational again.
Note 3: This DTC is active if there are no tire sensors registered in the ECU.
This could be caused if the ECU was never configured or corruption of the
configuration information has occurred as in Note 3. To correct this situation,
tire sensors installed on the trailer must be learned into the ECU.
Note 4: This DTC is generated when the configuration information within the
ECU has become corrupt. The ECU has recovered from this by restoring
the configuration from a backup copy. Normally this DTC is self-corrected by
the ECU but the configuration should be analyzed to make sure all settings
are correct.
Note 5: This DTC is generated when the ECU has restarted due to a software
related failure. If this DTC occurs on a regular basis, the ECU should be
returned to Bendix for analysis.
45
7.2 SmarTire® TPMS System Q&A
7.2.1 Q: A trailer tire continues to show a deviation value/alert although
it was aired up properly.
A: Set the Cold Inflation Pressure value (CIP) for each trailer axle to make
sure it matches that of the intended inflation value for the tire in question.
To do so, please refer to Section C 4.2.2 as well as the inflation tables in
Section A under section 1.4. If the CIP value is matched to the recommended
inflation pressure for the vehicle and the prevailing ambient temperature but
the deviation value continues to show up, the tire is exhibiting a slow leak.
Take appropriate steps to have the tire inspected for any damage or leaks.
7.2.2 Q: Pressure readings at a tire location do not change on the
gauge when air is added, or removed, to correct tire pressure, and a
new transmission has been received.
A: Wheel assemblies may have been relocated/rotated on the trailer without
the SmarTire Trailer-Link™ ECU having been updated. To correct this,
follow the steps in Section C 4.2.3 in combination with the SmarTire® TPMS
Maintenance Hand tool to relearn sensors into their correct tire positions.
7.3 Diagnosing A Defective, Missing, Or Misplaced Sensor
In the event that a tire sensor does not report to the display after having
gone through the steps above, the following sensor checks should also be
performed:
a. Try to initiate the sensor opposite of
the valve stem. There are times when
the tire installer accidentally places the
sensor 180 degrees opposite of the
valve by misreading the instructions
(sensors are required to be placed 180
degrees opposite of each other for dual
wheel assemblies). Check for new data
on the gauge for the affected wheel
Figure 47
position.
b. If step a. was unsuccessful, try to initiate the sensor at the bottom of the
wheel, no matter where the valve stem is located. If this attempt updated
the display screen, rotate the wheel 180 degrees forward and initiate the
sensor again at the BOTTOM of the wheel. If the second initiation also
provided new data (cycle power between tries to empty the screen, not
necessary when using SmarTire Maintenance Hand tool), it is evidence
of a broken cradle and/or strap. The sensor is simply falling to the lowest
point in the wheel after each rotation. Remove the tire and replace the
cradle and strap. Depending on the damage done to the sensor itself,
46
it may simply be pressed into a new cradle for reuse. Avoid reusing the
strap – worm gear could be damaged internally.
c.
If points a. and b. did not yield any results, the sensor is either missing or
has been damaged. Remove the wheel carefully and inspect the inside
tire lining for any damage if the sensor, strap, and cradle are found to
have been damaged and non-operational. Replace strap, cradle, and
sensor. Program the new ID into the system using the SmarTire® TPMS
Maintenance Hand tool as described in Section C 4.2.3.
7.4 SmarTire® TPMS Hand Tool Troubleshooting
7.4.1 Q: The Tool does not power-up or turns off when the “Activate”
button is pressed.
A: Replace the batteries.
7.4.2 Q: No tire pressure sensor data is received.
A: Make sure the Activate Antenna is held within 6" of the tire pressure sensor
and positioned before the “Activate” button is momentarily pressed and that
the tool is held in that position for at least 3.5 to 5 seconds. Try to activate
and receive tire pressure sensor data from another tire sensor.
Activate Antenna
On/Off
Button
Display Screen
Flash
Connector
Selection
Buttons
Figure 48
47
Appendix 1: Replacement Parts
8.0 Replacement Parts
OE Part
Number
DESCRIPTION
AM Bendix
Part Number
Bolt Kit for Receiver Mounting Plate
090.0017
090.0017N
Bolt Kit for Mounting Trailer ECU to Plate
090.0020
090.0020N
SmarTire Trailer-Link™ ECU
200.0189
200.0189N
-
090.0011
SmarTire ® TPMS Maintenance Tool Kit
-
090.0021
Tire Sensor with Cradle
SmarTire LF Tool
201.0007
201.0007N
6 ft SmarTire Trailer-Link TPMS Harness
K075868
K095615
15 ft SmarTire Trailer-Link TPMS Harness
K075869
K095616
-
K092501
SmarTire Trailer-Link ABS-Power Splice Harness
K075867
K095614
Sensor Mounting Cradle – High
264.0228
264.0228N
SmarTire Trailer-Link Mounting Bracket
K092801
K096638
SmarTire Trailer-Link TPMS Diagnostics Interface
Harness
Plate-style SmarTire Trailer-Link Mounting Bracket
K068737
K092425
Rim Labels
269.0155
269.0155N
Strap for 22.5" Rims
264.0328
264.0328N
Strap for 24.5" Rims
264.0332
264.0332N
Sensor Replacement Kit for 22.5" Rims (Includes
Sensor, Strap and Rim Label)
-
115.0003
Sensor Replacement Kit for 24.5" Rims (Includes
Sensor, Strap and Rim Label)
-
115.0004
Table 6
Contact your local authorized Bendix distribution outlet for parts pricing.
Note: The parts in the table above are for reference purposes only during
ordering of spare and replacement components. The table does not represent
the contents of any kit.
48
Appendix 2: System Scope Of Use & Alerts
9.0 System Scope Of Use And Alerts
This tire monitoring system does not in any way replace the need for regular
maintenance of the tire pressures and visual inspection of tires for damages.
9.1 System Installation And Usage
Warranty of the SmarTire® TPMS system requires that it has been properly
installed and programmed by qualified personnel according to Bendix
specifications. This includes all manuals and any supplementary installation
instructions included with system components.
9.2 Use Of Chemicals
Use of temporary re-sealing or re-inflation products containing internal sealers
or propellants in any tire/wheel assembly may adversely affect the operation
of the Sensor/Transmitters and void the warranty.
9.3 Reacting To Alerts
CAUTION. When an alert is detected, reduce vehicle speed to an
appropriate, safe level and proceed to a safe stopping location or facility
where the tire can be inspected and serviced.
49
9.4 Federal Communications Commission (FCC) Notice
This device complies with part 15 of the FCC rules. Operation is subject to
the following two conditions:
1.
This device may not cause harmful interference, and
2.
This device must accept any interference received, including interference
that may cause undesired operation. This equipment has been tested
and found to comply with the limits for a class B digital device, pursuant to
part 15 of the FCC rules. These limits are designed to provide reasonable
protection against harmful interference in a residential installation. This
equipment generates, uses and can radiate radio frequency energy
and, if not installed and used in accordance with the instructions, may
cause harmful interference to radio communications. However, there is
no guarantee that interference will not occur in a particular installation.
If this equipment does cause harmful interference to radio or television
reception, which can be determined by turning the equipment off and on,
the user is encouraged to try to correct the interference by one or more of
the following measures:
●●
Reorient or relocate the receiving antenna,
●●
Increase the separation between the equipment and receiver,
●●
Connect the equipment into an outlet on a circuit different from that to
which the receiver is connected,
●●
Consult the dealer or an experienced radio/TV technician for help.
Changes or modifications to this device without the express approval of
Bendix may void the user’s authority to use this device.
50
51
Log-on and Learn from the Best
On-line training that's available when you are
Visit www.brake-school.com.
24/7/365.
See Page 2 for a list of further
sources of information.
BW2920 © 2013 Bendix Commercial Vehicle Systems LLC, a member of the Knorr-Bremse Group. All Rights Reserved. 10/13