1
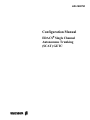
LBI-38987B Configuration Manual EDACS Single Channel Autonomous Trunking (SCAT) GETC ericssonz LBI-38987B REVISION HISTORY REVISION DATE REASON FOR CHANGE B May-96 Correct drawing on page 28. A Oct-95 Updated to replace existing SCAT software with Release 5 Station GETC and Station Turbo software, 349A9607G5 and 344A4414G5. Also replaces SCAT Downlink software with Release 5 Link GETC and Link Turbo software, 344A4895G5 and 350A1121G5. May-94 Original. NOTICE! This manual covers Ericsson and General Electric products manufactured and sold by Ericsson Inc. NOTICE! Repairs to this equipment should be made only by an authorized service technician or facility designated by the supplier. Any repairs, alterations or substitution of recommended parts made by the user to this equipment not approved by the manufacturer could void the user's authority to operate the equipment in addition to the manufacturer's warranty. NOTICE! The software contained in this device is copyrighted by Ericsson Inc. Unpublished rights are reserved under the copyright laws of the United States. This manual is published by Ericsson Inc., without any warranty. Improvements and changes to this manual necessitated by typographical errors, inaccuracies of current information, or improvements to programs and/or equipment, may be made by Ericsson Inc., at any time and without notice. Such changes will be incorporated into new editions of this manual. No part of this manual may be reproduced or transmitted in any form or by any means, electronic or mechanical, including photocopying and recording, for any purpose, without the express written permission of Ericsson Inc. EDACS and MASTR are registered trademarks, and GETC, Failsoft, Aegis, Guardog, and ProSound are trademarks of Ericsson Inc. Copyright May 1994, Ericsson, Inc. 2 LBI-38987B TABLE OF CONTENTS Section/Paragraph Page REVISION HISTORY.................................................................................................................................... 2 TABLE OF CONTENTS................................................................................................................................ 3 LIST OF FIGURES ........................................................................................................................................ 4 LIST OF TABLES .......................................................................................................................................... 5 INTRODUCTION........................................................................................................................................... 6 DESCRIPTION ............................................................................................................................................... 6 SOFTWARE UPGRADES ............................................................................................................................. 6 RELEASE 5 SOFTWARE......................................................................................................................... 6 Feature Enhancements ........................................................................................................................ 7 Hardware Requirements...................................................................................................................... 7 SCAT Data.......................................................................................................................................... 7 RELATED PUBLICATIONS ........................................................................................................................ 8 SOFTWARE COMPATIBILITY.................................................................................................................. 8 EDACS COMPATIBILITY ...................................................................................................................... 8 RADIO COMPATIBILITY....................................................................................................................... 8 OPERATION .................................................................................................................................................. 10 STAND-ALONE SCAT ............................................................................................................................ 10 NETWORK SCAT .................................................................................................................................... 10 SCAT and Downlink........................................................................................................................... 11 Wide Area Digital Option................................................................................................................... 11 CONFIGURATION ........................................................................................................................................ 12 EQUIPMENT REQUIRED ....................................................................................................................... 12 HARDWARE INSTALLATION............................................................................................................... 12 Stand-alone SCAT System.................................................................................................................. 12 Network SCAT Option ....................................................................................................................... 12 Upgrading Hardware........................................................................................................................... 13 GETC Logic Board Installation .......................................................................................................... 13 Turbo Board Installation..................................................................................................................... 13 Rockwell Modem Installation ............................................................................................................. 13 Jumper Installation.............................................................................................................................. 14 GETC SOFTWARE INSTALLATION..................................................................................................... 16 SCAT Station GETC .......................................................................................................................... 16 De-installing The GETC-1e Software................................................................................................. 16 Downlink GETC ................................................................................................................................. 17 TURBO BOARD SOFTWARE INSTALLATION................................................................................... 17 Equipment Required ........................................................................................................................... 17 PC Programmer Setup......................................................................................................................... 17 PERSONALITY PROGRAMMING ......................................................................................................... 19 Programming a Personality Using TQ-3357 V3 (or earlier) ............................................................... 19 Programming a Personality Using TQ-3357 Version 4.03 (or later) .................................................. 20 SCAT Personality ............................................................................................................................... 23 OPERATIONAL CHECKOUT..................................................................................................................... 24 DIP SWITCH SETTINGS......................................................................................................................... 24 SCAT Station GETC .......................................................................................................................... 24 3 LBI-38987B TABLE OF CONTENTS Section/Paragraph Page SCAT Downlink GETC ......................................................................................................................24 CLEAR VOICE CHECKOUT ...................................................................................................................24 Locally Initiated Calls .........................................................................................................................24 Multisite Initiated Calls.......................................................................................................................25 DIGITAL VOICE CHECKOUT................................................................................................................25 Locally Initiated Calls .........................................................................................................................25 Multisite Initiated Calls.......................................................................................................................25 LED Indicators ................................................................................................................................................26 TROUBLESHOOTING..................................................................................................................................26 DOWNLINK ACTIVITY LOGGER .........................................................................................................26 IN CASE OF DIFFICULTY ......................................................................................................................26 INTERCONNECT DIAGRAM......................................................................................................................27 PARTS LIST....................................................................................................................................................30 GETC CABLE 19C336863G1...................................................................................................................30 CABLES AND HARNESSES.........................................................................................................................31 LIST OF FIGURES Figure Title Page Figure 2 - Stand-alone SCAT ............................................................................................................................... 10 Figure 1 - Network SCAT Station ........................................................................................................................ 10 Figure 3 - Downlink to CEC/IMC Communication.............................................................................................. 11 Figure 4 - SCAT to Downlink Communication .................................................................................................... 11 Figure 5 - GETC Phone Line Level Adjustments................................................................................................. 13 Figure 6 - Station GETC (19D904266) Jumper and Test Point Locations........................................................... 15 Figure 7 - System Hook-Up Using J100............................................................................................................... 19 Figure 8 - Programming DIP Switch Settings....................................................................................................... 20 Figure 9 - System Hook-Up Using J104............................................................................................................... 20 Figure 10 - Typical SCAT Station DIP Switch Settings....................................................................................... 24 4 LBI-38987B LIST OF TABLES Table Title Page Table 1 - New Software Releases..........................................................................................................................7 Table 2 - EDACS Component Software Compatibility.........................................................................................9 Table 3 - Radio Compatibility...............................................................................................................................9 Table 4 - Indicators in Programming Mode Using J100 .......................................................................................20 Table 5 - Indicators in Programming Mode Using J104 .......................................................................................20 Table 6 - Sample Station Personality ....................................................................................................................21 Table 7 - SCAT Station GETC, CC Mode............................................................................................................24 Table 8 - LED Indications, Clear Voice Local Call ..............................................................................................24 Table 9 - LED Indications, Clear Voice Multisite Call .........................................................................................25 Table 10 - LED Indications, Digital Voice Local Call..........................................................................................25 Table 11 - LED Indications, Digital Voice Multisite Call.....................................................................................25 Table 12 - LED Indications, Summary..................................................................................................................26 5 LBI-38987B INTRODUCTION NOTE INTRODUCTION This manual provides instructions for configuring the Ericsson GE Trunking Card (GETC) for use in a Single Channel Autonomous Trunking (SCAT) station. The information presented in this manual is applicable to EDACS SCAT stations using the MASTR II, IIe or MASTR III repeaters. The manual provides instructions for installing the SCAT Station GETC hardware and software, Turbo software, and programming the system’s personality. It also provides instructions for performing a functional checkout of the GETC's. DESCRIPTION SCAT is a unique application of a GETC shelf that is configured as an option to an EDACS Repeater. The SCAT option allows a single repeater to alternately perform the Control Channel or Working Channel functions. This extends the trunked operation into difficult areas such as ravines, tunnels, etc. and extremely low traffic density areas such as shopping malls. SCAT systems are available for all EDACS wideband configurations: VHF, UHF, and 800 MHz. The SCAT channel may be configured as stand-alone system or as part of a multisite trunking network. The SCAT Station GETC uses a Lightning GETC (GETC1e) platform 19D901868G3 or G4 consisting of the following sub-assemblies: SCAT Station GETC: • • • • • NOTE GETCs using Logic Board 19D904266G1 with Group 5 station software must be upgraded with the Speedy (80C320) microprocessor and Amps Modem chips, U4 and U19 (19A704727P4). A FerriShield Toroid (REG70469/1) must also be installed around the Turbo Board’s harness. (Refer to Upgrading Hardware section of this manual.) SCAT Downlink GETC: • • Logic Board 19D904266G1 (used with Group 3 shelf) or 19D904266G4 (used with Group 4 shelf). GETC Expansion Module (Turbo Board) 19D903536P1. • Regulator Board 19C366861G2. • Rockwell Modem 19A705178P1. • • Software: GETC - 344A4895G5 Ver. 5.01 (EPROM media) Turbo - 350A1121G5 Ver. 5.01 (diskette media) SCAT Interconnect Cable 19C337102P1. NOTE NOTE In MASTR III systems, a cable (19D903880P10) is added to allow easy access to the MIII Tx and Rx Audio (J101). This cable is routed from the MIII Interface Board J101 to the Downlink GETC TB10 pins 1, 2, 3, and 4. Logic Board 19D904266G1 (used with Group 3 shelf) or 19D904266G4 (used with Group 4 shelf). GETC Expansion Module (Turbo Board) 19D903536P1. Regulator Board 19C366861G2. Rockwell Modem 19A705178P1 (optional). (The modem is required when the SCAT Station is setup to use the Wide Area Digital option.) Software: GETC - 349A9607G5 Ver. 5.04 (EPROM media) Turbo - 344A4414G5 Ver. 5.01 (diskette media) SOFTWARE UPGRADES The GETC software product is continuously being improved and upgraded to include new features. The following paragraphs provide brief descriptions of the new features introduced by recent software releases. Information is also provided when hardware or software issues affect the GETC’s configuration. For a complete description of the new or enhanced features and its use, refer to Software Release Notes (SRN) for the specific software release. In example, for 349A9607G4 software refer to SRN1060-4, For 349A9607G5 software refer to SRN1060-5, etc. RELEASE 5 SOFTWARE Upgrading the GETC Station software 349A9607G5 adds SCAT functionality to the standard Station GETC 6 SOFTWARE UPGRADES platform. As a result, it is no longer necessary to replace the Station GETC software with unique SCAT GETC software. Feature Enhancements The Release 5 GETC1e software adds SCAT Data, ProSound, Enhanced Multisite Login, and Voted Digital Interconnect (VDI) features. The SCAT operating mode will acquire many of these new features. These features are activated in the GETC personality using the GETC1e PC Programmer TQ-3357 V4.03 (with Field Macro “gtc_9505.mac”) or V5.0. Another significant change is the SCAT Downlink GETC software being replaced by standard Link GETC software. The specific software changes are listed in Table 1: Hardware Requirements When upgrading to the 349A9607G5 Station GETC software, the 19D901868G3 GETC must have the “speedy” microprocessor modification installed. Systems using the 19D901868G4 GETC platform include the “speedy” microprocessor. Refer to the Upgrading Hardware section for details. SCAT Data The Group 5 software release adds the SCAT RF and Landline Data functions. Configuration Considerations: • • Table 1 - New Software Releases SOFTWARE PURPOSE PREVIOUS SOFTWARE RELEASE 5 SOFTWARE SCAT Station GETC (EPROM) 344A3835G2 (SRN1009) 349A9607G5 (SRN1060) SCAT Station GETC Turbo Software (diskette) 344A4414G2 (SRN1062 344A4414G5 (SRN1062) SCAT Downlink GETC (EPROM) 344A3835G2 (SRN1009) 344A4895G5 (SRN1061) SCAT Downlink Turbo Software (diskette) 344A4414G2 (SRN1062) 350A1121G5 (SRN1061) LBI-38987B • Radio users must have SCAT options enabled. When selecting Landline data, a Rockwell modem must be installed and EDG must be set up (refer to EDG documentation). Configuration requires using PC Programmer V4.03 and Field Macro “gtc_9505.mac” to access applicable parameters. NOTE NOTE Only PC Programmer TQ-3357 V4.03 (or later) can be upgraded through the use of Field Macros. New Field Macros may be downloaded from the accompanying Station Turbo Software distribution disk or from Ericsson’s “One1Call” Electronic Information Retrieval system. 7 LBI-38987B RELATED PUBLICATIONS RELATED PUBLICATIONS It may be necessary to consult one or more of the following documents during the installation process. These manuals will also provide additional guidance if you encounter technical difficulties during the configuration process. SOFTWARE COMPATIBILITY EDACS COMPATIBILITY The data presented in Table 2 represents the minimum EDACS component software versions required to support the Release 5 software features. LBI-38430 - MASTR IIe Control Shelf Maintenance Manual. RADIO COMPATIBILITY LBI-38636 - MASTR III Base Station Installation Manual. LBI-38822 - Turbo Board (GETC1e) Maintenance Manual. LBI-38894 - GETC Trunking Card Maintenance Manual. LBI-38896 - EDACS Site Downlink and CEC/IMC Uplink Configuration Manual. LBI-38988 - EDACS Station GETC1e Configuration Manual. LBI-39149 - EDACS Compact Vertical Voter Maintenance Manual. LBI-39186 - EDACS Simulcast Control Point Maintenance Manual. LBI-39187 - EDACS Voted Digital Interconnect Configuration Manual. SRN-1009 -Software Release Notes for GETC SCAT Software344A3835G2 SRN-1010 - Software Release Notes for GETC Turbo Board Software, 344A4414G1 only. SRN-1060 - Software Release Notes for GETC1e Software, 349A9607G1 (or later). SRN-1061 -Software Release Notes for Link Software, 344A4895G1 (or later) and Link Turbo Software 350A1121G4 (or later). SRN-1062 - Software Release Notes for Turbo Board with GETC1e Software, 344A4414G2 (or later). TQ-3357 8 - GETC Shelf Programming Manual SCAT operation can only be performed by radios equipped to use a SCAT channel. Table 3 describes the minimum software requirements for radio products supporting the features included in Release 5 software. SOFTWARE COMPATIBILITY LBI-38987B Table 2 - EDACS Component Software Compatibility EDACS COMPONENT Required for SCAT Data C3 MAESTRO IMC U58 U59 U3 N/A 344A3567G11 344A3568G11 344A3565G11 344A3630G11 MOM Site Controller N/A VAX System Manager PDP System Manager 344A4583G2 19A149495G8 Link GETC Link Turbo 344A4895G5 350A1121G5 PC Programmer TQ-3357 Ver 4.03 Voter / Simulcast N/A Jessica PI N/A EDG Application 147 ROMs VC24 ROMs 350A1069G1 350A1101G1 350A1072G1 Required for Enhanced Multisite Login Required for ProSound Required for Voted Digital Interconnect Required for Failsoft Patch Operation 344A3922G4 344A3922G4 344A3922G4 344A3922G4 344A3567G8 344A3568G8 344A3565G7 344A3630G4 344A3567G11 344A3568G11 344A3565G11 344A3630G11 344A3567G11 344A3568G11 344A3565G11 344A3630G11 344A3567G11 344A3568G11 344A3565G11 344A3630G11 344A3265G3 344A3265G6 344A3265G6 344A3265G2 344A4583G2 19A149495G8 344A4583G2 19A149495G8 344A4583G2 19A149495G8 344A4583G2 19A149495G8 344A4895G5 350A1121G5 344A4895G5 350A1121G5 344A4895G4 350A1121G4 Ver 4.03 (gtc_9505.mac) Ver 4.03 Ver 4.03 Ver 4.03 19A149567G12 19A149567G12 19A149567G13 N/A N/A N/A N/A N/A 349A9982G3 N/A 19A149567G12 349A9982G3 N/A Table 3 - Radio Compatibility FEATURE MPA MDX MDR MRK ORION Alpha FMD ProSound G15 G9 G8 G22 G22 N/A Enhanced Multisite Login G16 G10 N/A G22 G22 G2 Modified Data Protocol N/A G10 N/A G19 G19 G2 SCAT G8 G1 G1 G19 G19 G1 SCAT Data N/A G10 N/A G22 G22 G2 Interconnect G10 G1 G1 G1 G1 G1 Digital Interconnect G12 G1 N/A G5 G1 G1 9 LBI-38987B OPERATION OPERATION SCAT GETC STAND-ALONE SCAT The stand-alone SCAT consists of a standard EDACS Station as shown in Figure 1, with the GETC personality configured for SCAT operation (special SCAT software 344A3835G2 required prior to release 5). In this configuration, the repeater transmits Control Channel information until a radio requests a channel. The SCAT repeater then assigns itself as the Working Channel and begins routing audio. When the call is complete, the SCAT channel resumes operating as the Control Channel. NETWORK SCAT The second configuration is a Network SCAT channel used as part of an EDACS Multisite system. In this configuration, the SCAT station is connected to the Console Electronics Controller or Integrated Multisite and Console Controller (CEC/IMC) as shown in Figure 2. Each SCAT channel has its own Downlink and audio/data interface into the CEC/IMC. The Network SCAT channel configuration requires a standard EDACS station with the SCAT option (XXCP3Y). This option adds a SCAT Downlink GETC and a SCAT interconnect cable to link the SCAT Station GETC to the Downlink GETC. Prior to release 5, the option also included SCAT software (344A3835G2) which was installed in both the SCAT Station GETC and the SCAT Downlink GETC. With release 5, the system uses a standard Station GETC (with “speedy” processor upgrade) and standard Link GETC with personalities setup for SCAT operation. MASTR II/IIe/III Repeater Figure 1 - Stand-alone SCAT The CEC/IMC controls and routes SCAT calls, allowing the user to enjoy trunking features and the same trunked user interface. The CEC/IMC must be configured with a site interface (MSZM3R) for the SCAT system. As a result of the SCAT station using only one channel, only one conversation can occur at any one time through the SCAT site. While the SCAT site is busy, every call request (mobile request or console request) is queued. The mobile radio generates the Call Hold Off queue tone and automatically places a call request upon completion of the first call. Only console request for the active group will be processed immediately. The SCAT channel and SCAT radios are designed to minimize the overloading of the inbound SCAT channel by prioritizing all calls. This allows the system to respond to emergency calls immediately upon availability of the channel. 4 wire 9600 baud SCAT Downlink GETC Data Link Uplink GETC SCAT GETC CEC or IMC 4 wire Audio MASTR II/IIe/III Repeater Figure 2 - Network SCAT Station 10 CONTROL AUDIO LBI-38987B Except for interconnect calls, all group and individual calls appear as transmission trunked calls to the radio and the CEC/IMC. This assures the mobile's quick return to the Control Channel. Local interconnect is unavailable on SCAT sites. However, use of the Centralized Telephone Interconnect System (CTIS or Jessica) is available in the multisite configuration. correction, general control of timer and IO functions (DIP switch, LED's, UART's, etc.), receive and transmit buffer management, message scheduling, and Turbo interfacing. BSL Data Blocks SCAT SCAT and Downlink Downlink Rx The SCAT Station GETC provides the control functions necessary to implement EDACS access to the SCAT service area. The Downlink is essentially a message conduit providing a data communication path between the SCAT station and the CEC/IMC. The Downlink's modem data is synchronous at 9600 baud using the full duplex operating mode. Data flows simultaneously in both directions as illustrated in Figure 3. BSL Tx OR BSL BSL Downlink SCAT Rx Data Blocks Tx Figure 4 - SCAT to Downlink Communication Tx SCAT Downlink Rx Data Blocks Rx Data Blocks Tx Wide Area Digital Option CEC/IMC Uplink Figure 3 - Downlink to CEC/IMC Communication The SCAT to Downlink format is asynchronous at 19.2K baud using the half duplex operating mode. Data flows in one direction at a time as shown in Figure 4. Since these two protocols are different, the Downlink converts from one format to the other. In addition, both the SCAT and Downlink perform data error detection and The Wide Area Digital option (SXSF7A) enables the SCAT station to support Digital Voice communications. A hardware option (SXMD1D) provides an additional Rockwell Modem for the SCAT Station GETC. This enables the SCAT Station GETC to send and receive 9600 baud digital voice to the CEC/IMC using the four wire audio line. NOTE NOTE The SCAT software must be 344A3835G2 or 349A9607G5 (or later) to support Digital Voice communications. 11 LBI-38987B CONFIGURATION CONFIGURATION The scat configuration process involves the following procedures and should be completed in the order presented: 1. Hardware Installation - The Hardware Installation procedure verifies proper installation of GETC hardware. 2. GETC Software Installation - The GETC Software Installation procedure provides instructions for installing the GETC operating software. 3. Turbo Board Software Installation - This procedure provides instructions for installing the Turbo Board software. 4. Personality Programming - This procedure provides instructions for programming and storing system configuration data in the GETC. 5. Operational Checkout - The Operational Checkout procedure provides instructions for verifying the GETC operation when the configuration is complete. NOTE NOTE When interfacing the SCAT system into a network, refer to LBI-38896 for the Downlink GETC configuration instructions. EQUIPMENT REQUIRED The following equipment and software may be required to configure the GETC: • IBM compatible PC with at least 640K memory, monitor, and keyboard. • Hard disk is recommended; but, not required. • Serial Port configured as either COM1 or COM2. • TQ-3360 programming cable. • Male DB-25 to female DB-9 adapter. • Software distribution diskette 344A4414. • Oscilloscope. HARDWARE INSTALLATION Typically, a Station GETC is installed in the station cabinet just above the station's radio assembly. The GETC 12 is mounted within a slide out shelf measuring 1.75 inches high (one rack unit) by 19 inches wide. Installation or removal of the shelf sub-assemblies involves sliding the GETC shelf out of the cabinet and into the service position. This position allows access to the shelf's sub-assemblies. Refer to the MASTR II, IIe, or MASTR III Application Assembly Diagrams for detailed information on installing the GETC Shelf. Stand-alone SCAT System The Stand-alone SCAT system is based on a standard EDACS Station GETC using 349A9607G5 Station GETC software with 344A4414G5 Turbo software. Earlier SCAT systems required replacing the station GETC software with unique SCAT software 344A3835G2. NOTE NOTE Systems upgrading to Group 5 software and using GETC Logic Board 19D904266G1 must be upgraded with the Speedy (80C320) microprocessor and Amps Modem chips, U4 and U19 (19A704727P4). (Refer to Upgrading Hardware section of this manual.) A FerriShield Toroid (REG70469/1) must also be installed around the Turbo Board’s harness for EMI suppression, refer to LBI-38822 for details. Network SCAT Option SCAT systems integrated into a multisite network require adding a Downlink GETC using 344A4895G5 GETC software and 350A1121G5 Link Turbo software. Earlier SCAT systems replaced the standard software with unique SCAT software 344A3835G2. In addition, a special interconnect cable must be installed between the Station GETC and the Downlink GETC. The Network SCAT option consists of a Downlink GETC, a GETC interconnect cable. The interconnect cable provides the connection from the Station GETC to the Downlink GETC using their Backup Serial Ports. Both the Station and Downlink GETCs are configured with a Turbo Board for additional memory and processing capability. Data communication between the Downlink GETC and the CEC/IMC Uplink GETC is carried on a four-wire, data grade, type 3002 audio circuit. As shown in Figure 3, the SCAT Site is configured as a dedicated site connected to the CEC/IMC through the Uplink GETC. Therefore, the maximum number of SCAT channels on a multisite network is equal to the maximum number of sites allowed on the CEC/IMC. CONFIGURATION operational. If you suspect that the GETC Logic board is not operating properly, refer to the Troubleshooting section in this manual. Upgrading Hardware GETC Shelves 19D901868G3 which are upgrading to the 349A9607G5 software must ensure their hardware is upgraded to the proper level. (The 19D901868G4 GETC Shelf meets all Release 5 requirements.) Turbo Board Installation This manual assumes the Turbo Board is previously installed and fully functional. If, after installing or attempting to install the Turbo Software, the Turbo Board is not functioning properly, refer to the Troubleshooting section. Additional maintenance information is also available in LBI-38822, SRN1060 and SRN1062. Upgrading the hardware involves three elements: • The microprocessor U1, 19A705557P1 (80C32), is replaced with a faster “Speedy” microprocessor RYT 121 6060/A (80C320). • Replacing the AMPS modem chips U4 and U19 with the TI AMPS modem chips 19A704727P4. • Installing a Ferrite Toroid on the Turbo Board harness to suppress EMI spurs at 74 MHz. Rockwell Modem Installation The Rockwell Modem provides a high speed synchronous serial interface between the Downlink GETC and the CEC/IMC's Uplink GETC. The Station GETC uses the modem to send and receive serial digital data representing GID information, polling messages, keying messages, and channel assignments. Data transfer rates are 9600 bits per second (bps) using dedicated 3002 data grade four-wire audio lines. Technical specifications for the modem may be found in LBI-33031. Information on installing and testing the modem may be found in LBI38894, and LBI-38822. The replacement microprocessor and Ferrite Toroid are available in the field installable upgrade kit SPK9505. If replacement of the modem chips is necessary, they must be ordered separately. Refer to LBI-38894 and LBI-38822 for complete installation instructions. GETC Logic Board Installation This manual assumes the GETC Logic Board (19D904266G1 or G4) is previously installed, setup for the default configuration (Wideband EDACS Station), and fully Parallel Data Bus Receiving Half of Telephone Line J6-07 J6-06 8 T1 D11 D0 D1 D2 D3 D4 D5 D6 D7 TP105 Unmodulated Tx Data U19 6 Serial Data 19 Rx 5 R36 604 TP107 Demodulated Rx Data 4 5 6 7 8 9 1 0 1 1 LBI-38987B Transmitting Half of Telephone Line J6-09 J6-08 8 T2 Tx 21 2 5 1 2 J11 1 2 J67 D10 R1 5K Rx Level U18A 4558 2 1 3 Rockwell Modem 19A705178 J3C-22 J3C-24 J3A-32 J3A-31 R2 1K Telephone Line Level Adjustments Tx Level 6 2 R146 604 U18B 4558 5 7 6 D13 D12 R38 220 Figure 5 - GETC Phone Line Level Adjustments 13 LBI-38987B CONFIGURATION Use the following procedure to install the modem if it is not already installed: 4. Verify the presence of demodulated signal data at TP107. 5. Adjust the transmit level potentiometer R2 for the maximum output level allowed by the phone line, microwave link, or equivalent communication line. For telephone lines linking the Station GETC to the CEC/IMC Uplink GETC, adjust R2 for .77 Vrms (0 dBm) measured across J6-8 and J6-9 (TB10-1 and 2). For microwave links, adjust R2 for -10 dBm across J6-8 and J6-9. 6. Initialize the modem by pressing S4 (on the GETC Logic Board) to reset the Station GETC or cycle the GETC Shelf's operating power. NOTE NOTE If the SCAT station is setup to use the Wide Area Digital option, a Rockwell Modem must also be installed in the Station GETC. This allows the station to send and receive digital information to the CEC/IMC through the audio path. Use the following steps to set up the basic audio line levels. If the Station GETC is linked to a MultiSite system other than the CEC/IMC (i.e. Data Gateway), different levels may be required. Consult the applicable system installation manual for the required levels. 14 1. Ensure jumpers are installed on J11 pins 1 & 2 and J12 pins 1 & 2. 2. Apply power to the GETC. 3. Adjust the receive level by monitoring U18 pin 1 (refer to Figures 5 and 6) and adjusting the receive level potentiometer R1 (located on the GETC Logic Board) for 400 mVpp as measured with an oscilloscope (85 mVrms if using an RMS Voltmeter). Jumper Installation There are a few jumpers on the GETC Logic Board which must be re-configured for different applications. To properly configure the GETC jumpers, refer to jumper tables in SRN1060 or SRN1061 and install or remove jumpers according the intended GETC application. The location of the jumpers may be found using the board layout diagram in Figure 6. TP109 TP107 TP110 TX Level Adj J3 R2 1 1 U19 S1 TP109 1 TP110 19D904266 1 1 J62 J68 J54 J11 TP107 J49 TP108 1 R2 1 Dip Switches S2 1 U3 J72 1 J29 S3 U4 U2 S4 TP108 J10 Reset Switch 1 1 J52 J27 J61 1 J12 1 1 1 J15 J9 1 U1 J67 1 J55 1 J44 U35 1 J8 J64 L1 1 J71 J18 L2 1 L3 J66 J65 J26 1 1 1 L4 1 1 J73 J69 1 L5 1 R1 LED Indicators 1 J63 1 J20 J14 J7 L6 R31 J21 1 1 J74 1 L7 1 1 1 J24 J28 TP104 1 J53 J19 TP111 1 J17 J16 1 J25 J50 T2 J51 TP114 1 J60 J46 R141 1 U18 T1 J6 1 J48 J13 1 1 R31 1 J47 TP111 R141 TP114 TP104 U18 Receive Level Adjustment R1 CONFIGURATION LBI-38987B Figure 6 - Station GETC (19D904266) Jumper and Test Point Locations 15 LBI-38987B CONFIGURATION GETC SOFTWARE INSTALLATION 4. Ensure microprocessor U1 is the “Speedy” microprocessor 80C320 (RYT 121 6060/A). This processor is required when upgrading the software to 349A9607G5. The processor is available in the Speedy Upgrade Kit SPK9505. Replace if necessary. Refer to LBI-38894 for installation instructions. 5. Ensure Turbo Board harness has Ferrite Toroid installed. Toroid is included in the SPK9505 Speedy Upgrade Kit. Replace if necessary. Refer to LBI-38822 for installation instructions. 6. Remove the old EPROM (U2) from the GETC Logic Board. 7. Install the new EPROM into the XU2 socket, being sure to properly orient the chip. 8. Remove EEPROM U35, if necessary, from the Logic Board. The GETC personality will reside in the Turbo Board and this device is no longer required. 9. Power up the channel. The GETC software installation procedure involves installing the latest version of the EPROM containing the GETC operating software. NOTE NOTE Download applicable Field Macros into the PC Programmer TQ-3357 prior to configuring the GETC software. SCAT Station GETC The following procedures provide instructions for installing the GETC software 349A9607G5 into the SCAT Station GETC: caution CAUTION h Observe precautions for handling ELECTROSTATIC SENSITIVE DEVICES NOTE NOTE Upgrading to Release 5 software is backward compatible in functionality with 344A3835G2 software. However, GETCs using the 19D904266G1 Logic Board must be upgraded to the 80C320 microprocessor (U1), and 19A704727P4 Modem (U4 & U19). 10. Place the Turbo processors U1 and U2 in the program mode by switching Turbo Board switches S2 and S3 toward the front of the Turbo Board. 11. Download the Turbo Board Software from the disk provided in the Turbo Media Kit, 344A4414. Refer the Turbo Board Software Installation section, SRN1060, SRN1062, and LBI-38822. 12. After downloading the Turbo Board software, move switches S2 and S3 toward the back of the Turbo Board and press the GETC Logic Board Reset button, S4. 13. The two LEDs on the Turbo Board should light. The Turbo Board using 344A4414G5 software must also be upgraded to include a Ferrite Toroid. Refer to the Upgrading Hardware section for details. 14. Program the GETC’s personality using the Personality Programming procedures contained in this manual and the detailed instructions contained in TQ-3357 and SRN1060. 15. Verify system performance using the Operational Checkout procedures. 1. 16 Power down the channel and place the GETC into the service position. Refer to LBI-38894 if necessary. 2. If the Turbo Board is not installed, remove RAM chip U3 and install Turbo Board. Refer to LBI38822 for instructions. 3. Ensure Modem chips U4 and U19 are TI AMPS modems 19A704272P4. TI Amps modems are required when upgrading to 349A9607G5, replace if necessary. De-installing The GETC-1e Software If a problem arises while upgrading or installing the new software, it may be necessary to de-install the software. Restoring the site to its original configuration will depend on the original hardware platform. The two cases are described below. If the original equipment configuration was a GETC1e (GETC with Turbo) platform, then perform the following steps: CONFIGURATION 1. Replace Group 5 GETC PROM with original software. 2. Reload original Programmer. Turbo software using PC 3. If changes were made to the personality, then reload the previous parameters. 4. The Speedy microprocessor upgrade, if installed, does not need to be reversed. If the original equipment was a GETC (GETC with no Turbo) platform, then perform the following steps:: 1. Replace Group 5 GETC PROM with original software. 2. Disable the Turbo by sliding Turbo switches S2 and S3 toward the front of the GETC shelf. 3. Re-install the original personality EEPROM, if it was removed, else no change. 4. The Turbo upgrade, if installed, does not need to be reversed. 5. Re-install the original microprocessor. The Speedy microprocessor upgrade is not compatible with original 344A3835 software. LBI-38987B data from the PC files is routed to the Turbo Board microprocessors through Turbo Board programming connector J100 at the rear of the GETC Shelf. When using PC Programmer TQ-3357 V4.03 (or later), the Turbo software is downloaded to the Turbo Board microprocessors through Turbo Board programming connector J104. Programming through J104 also allows you to load the GETC personality without changing setups. In addition, the V4.03 PC Programmer will diagnose any problems between the PC and the GETC during the downloading process and simplify the handling and archiving of the Turbo software. NOTE NOTE PC Programmer TQ-3357 V4.03 must be used when upgrading to 349A9607G5 (or later). Only TQ-3357 V4.03 (or later) is capable of using Field Macros. When using 349A9607G5 software, the Field Macro “gtc_9505.mac” must be installed into TQ-3357 to access the new features’ parameters. Equipment Required Downlink GETC When configuring the SCAT station’s Downlink GETC, refer to LBI-38896. NOTE NOTE When the SCAT Station GETC is upgraded to 349A9607G5 software, the SCAT Downlink GETC software 344A3835G2 with Turbo Board software 344A4414G2 must be replaced by Link software 344A4895G5 with Link Turbo software 350A1121G5, respectively. Refer to LBI-38896, Downlink GETC Configuration Manual for details. • • Hard disk is recommended; but, not required. • Serial Port configured as either COM1 or COM2. • TQ-3360 programming cable. • • TURBO BOARD SOFTWARE INSTALLATION This procedure provides instructions for downloading the Turbo software. The software is included in the Turbo Media Kit, 344A4414. The installation process involves downloading the GETC1E utilities to an IBM compatible personal computer (PC), and connecting the programming cable (TQ-3360) between the PC and the Turbo Board programming connector. IBM PC/XT/AT or compatible with at least 640K memory, monitor and keyboard running MS-DOS version 3.0 or higher. • Male DB-25 to female DB-9 adapter or cable if the PC's serial port connector is a male DB-9 connector instead of a male DB-25 connector. Station Turbo Software distribution diskette 344A4414G5 required when installing 349A9607G5 GETC Software). Refer to SRN1060 and SRN1062 to verify software compatibility. Field Macro “gtc_9505.mac” (supplied with the Station Turbo Software distribution disk). PC Programmer Setup Prepare the PC for programming the GETC Turbo Board by performing the following steps: When using PC Programmer TQ-3357 V3 (or earlier) and downloading 344A4414G3 (and earlier) software, the 17 LBI-38987B CONFIGURATION TQ-3357 V4.03 (or later) 1. 2. Connect the TQ-3360 programming cable from the PC's serial port connector to the GETC Shelf connector J104 (A DB-25 to DB-9 adapter may be needed.) Using the TQ-3357’s LOAD utility, copy the Station Turbo software (344A4414) into the PC Programmer’s working directories. 3. Load the Field Macro “gtc_9505.mac” into the TQ-3357 PC Programmer using the instructions contained in Chapter 5 of the TQ-3357 manual. 4. Refer to TQ-3357 Chapter 5 Load1E Utility for complete instructions on downloading the Turbo software . TQ-3357 V3 (or earlier) 18 3. 1. Connect the TQ-3360 programming cable from the PC's serial port connector to the GETC Shelf connector J100 (A DB-25 to DB-9 adapter may be needed.) 2. Using standard DOS commands or a software file manager, create a directory named "LOAD1E" on the PC's hard drive. 4. Make "LOAD1E" the current directory and copy the following files from the software diskette into the "LOAD1E" directory: • load1e.exe • 1etop.hex • 1ecrc.hex • 1ebot.hex Run the load1e.exe program. Follow the on screen instructions and program the Turbo Board. Additional programming instructions may be found in SRN1062 and LBI-38822. NOTE NOTE When using Turbo Board 344A4414 Group 2 (or later) software, re-programming the GETC Turbo Board will not alter previously stored Personality Data. When Personality Data is present, “load1e.exe” clears and performs CRC functions over the code portion of memory only. CONFIGURATION LBI-38987B NOTE PERSONALITY PROGRAMMING NOTE It is not necessary to recreate the personality when upgrading from 344A3835G2 software to 349A9607G5 except when upgrading non-turbo platforms. Personality refers to the system configuration data stored in the GETC's memory. The GETC's Personality includes system configuration information such as channel frequencies, call parameters, operating modes, and identification information. To activate new features, read the existing personality and edit the personality as required. The Personality Programming process involves using the TQ-3357 GETC Shelf PC Programmer which includes the programming software to create the desired personality and transfer the Personality data to the battery backed-up RAM located on the Turbo Board. Programming a Personality Using TQ-3357 V3 (or earlier) When using TQ-3357 Version 3 (or earlier) you must program the personality through J100. NOTE If installing GETC software 349A9607G5 (or later), PC Programmer TQ-3357 V5.0 or V4.03 with Field Macro file “gtc_9505.mac” is required to access 349A9607G5 features’ parameters. 1. Connect one end of the serial programming cable (TQ3360) to the computer. Connect the other end of the serial cable to the GETC Shelf connector J100, see Figure 7. 2. Set the GETC DIP switches S1, S2, and S3 for the programming mode as shown in Figure 8. Set S2-8, S33 and S3-6 to OPEN. All other S3 positions should be CLOSED. Switches S1-1 thru S2-7 can be in any position and need not be changed. DIP switches S1-S3 are located near the front of the GETC Shelf, see Figure 6. 3. Reset the GETC by either applying power or pressing the GETC RESET switch S4, see Figure 6, located just below the DIP switches. Resetting the GETC, in combination with the DIP switch settings, places the The TQ-3357 V4.03 (or later) also allows you to upload the GETC’s Personality without changing the DIP switch settings. Software Disk TQ-3357 V3 or earlier Cable TQ-3360 J100 Harness 19C336863G2 J10 J27 J9 J7 J8 J5 J8 TQ3357 J19 T1 T2 U1 J49 J49 To COM 1 or COM 2 R1 1 1 U18 1 U2 U1 U3 11 U19 U19 1 J3 J3 TP107 TP107 U4 U2 S1 S2 Dip Switches S1-S3 Switch S4 S3 S4 L1 Turbo Board L2 L3 L4 L5 L6 L7 Lightning GETC GETC Shelf 19D901868G3 Figure 7 - System Hook-Up Using J100 19 LBI-38987B CONFIGURATION S1 1 2 3 4 5 S2 6 7 8 1 2 OPEN 3 4 5 S3 6 7 8 1 2 3 OPEN 4 5 6 7 8 Programming a Personality Using TQ-3357 Version 4.03 (or later) When using TQ-3357 Version 4.03 (or later), program the personality through J104. OPEN 1. Connect one end of the serial programming cable (TQ3360) to the computer. Connect the other end of the cable to the GETC Shelf connector J104. See Figure 9. 2. Move Switch S2 on the Turbo Board to the front placing the GETC into the Personality Programming mode. See Figure 9. 3. Verify that front panel LEDs L6 and L7 are flashing, as shown in Table 5. This indicates the GETC is ready for programming. Figure 8 - Programming DIP Switch Settings GETC into the Personality Programming mode. 4. Verify that front panel LEDs L3, L4, and L5 are ON, as shown in Table 4. This indicates the GETC is ready for programming. Table 4 - Indicators in Programming Mode Using J100 LED Indicators L1 L2 L3 L4 L5 L6 L7 Programming Mode ❍ ❍ ● ● ● ❍ ❍ Legend: 5. 6. ❍ = OFF ● = ON Table 5 - Indicators in Programming Mode Using J104 LED Indicators L1 L2 L3 L4 L5 L6 L7 Programming Mode ❍ ❍ ❍ ❍ ❍ ❉ ❉ ❉ = FLASHING Review the SCAT Personality section in the manual and proceed with the Personality programming as described in TQ-3357 Chapter 4. ❍ = OFF Legend: 5. ● = ON ❉ = FLASHING Review the SCAT Personality section in the manual and proceed with the Personality programming as described in TQ-3357 Chapter 4. After saving the personality and downloading it into the GETC, perform an operational checkout of the GETC. Software Disk TQ3357 V4 or later Cable TQ-3360 J103 J104 Harness 19C337712G1 J3 J2 J10 J27 TQ-3357 J9 J7 J8 J5 J19 T1 U1 T2 J49 To COM Port S2 R1 1 1 U18 1 U2 U1 U3 S3 1 U19 1 J3 TP107 U4 U2 S1 S2 S3 S4 L1 Turbo Board L2 L3 L4 L5 L6 L7 GETC Logic Board GETC Shelf 19D901868G3 Figure 9 - System Hook-Up Using J104 20 CONFIGURATION LBI-38987B Table 6 - Sample Station Personality Personality: C:\GE\GTC\PERS\SCAT_PER.GTC ~~~~~~~~~~~~~~~~~~~~~~~~~~~~~~~~~~~~~~~~~~~~~~~~~~~~~~~~~~~~~~~~~~~~~~~~~~~~ Personality Description These are SCAT Site and SCAT Downlink Personalities. Centralized Telephone Interconnect System (CTIS) Option is enabled. Channel Allocations Channel Number 1234 56789 11111 11111 01234 56789 22222 22222 01234 56789 333 012 Control Channel Y... Clear Voice Y... Digital Voice .... Data .... Pager (DnLink GETC).... Interconnect .... Allow DV Telephone .... Multisite Downlink .... Downlink (to TSIN) .... ..... ..... ..... ..... ..... ..... ..... ..... ..... ..... ..... ..... ..... ..... ..... ..... ..... ..... ..... ..... ..... ..... ..... ..... ..... ..... ..... ... ... ... ... ... ... ... ... ... Transmit Frequencies Freq Band: 800 MHz Ch # Freq (Mhz) 1 857.0125 2 0.0000 3 0.0000 4 0.0000 5 0.0000 6 0.0000 7 0.0000 8 0.0000 9 0.0000 Ch # Freq (Mhz) 10 0.0000 11 0.0000 12 0.0000 13 0.0000 14 0.0000 15 0.0000 16 0.0000 17 0.0000 18 0.0000 ..... ..... ..... ..... ..... ..... ..... ..... ..... ..... ..... ..... ..... ..... ..... ..... ..Y.. ..... Ch 19 20 21 22 23 24 25 # Freq (Mhz) 0.0000 0.0000 0.0000 0.0000 0.0000 0.0000 0.0000 Site Data Site Name : SCATSITE1 Date : 08/03/94 Channel Assignment: Descending Indv. Call Update : One Slot IMC Platform : IMC/CEC Wideband Pwr Sense: Disabled Jamming Threshold : 0 Rem Site DV Delay : 0 Max Interconnects : 1 Msg Trunked Timer : 300 Site ID : Morse ID : Rotating Assign: No Multisite Syst.: Yes Simulcast Syst.: No CTIS(Telephone): Yes Voter System : No SCAT : Yes LIDs>8192 : Yes 9 Indv. Call Hang : Group Call Hang : Telephn Call Hang: Dig. Voice Hang : Emerg. Call Hang : Sys All Call Hang: TX Trunked Timer : Morse Intvl Timer: 5 5 30 0 5 5 120 0 21 LBI-38987B CONFIGURATION Table 6 - Sample Station Personality (Continued) CONFIRMED CALL ENABLES STATUS: Clear Voice Digital Voice ----------------------Group Calls: No No Indiv Calls: No No Teleph Calls: No No Conventional Network Interface Data Digital Voice Group ID **GETC Personality Extended Options: ~~~~~~~~~~~~~~~~~~~~~~~~~~~~~~~~~~~~~~~~~ CV C-Call Timeout 0 DV C-Call Timeout 0 Wide Area DV No Data Mode RF Data Polarity Invert None Baud Rate 9600 Dig.Voted Inter. Unavail Data Protocol Normal Data Queuing Disabled Msg Trunked Data Disabled DataCall Hangtime 0 FS Patch Enable Disabled LSTX Polarity Normal MII/IIe 900MHz? No Conv. FS Enable Disabled MS Confirmation 0 Site Color None BCH Correction Enabled Group ID Group ID Group ID 1 2 3 4 5 6 7 8 9 10 11 12 13 14 15 16 17 18 0 0 0 0 0 0 0 0 0 0 0 0 0 0 0 0 0 0 19 20 21 22 23 24 25 26 27 28 29 30 31 32 33 34 35 36 0 0 0 0 0 0 0 0 0 0 0 0 0 0 0 0 0 0 37 38 39 40 41 42 43 44 45 46 47 48 49 50 51 52 53 54 0 0 0 0 0 0 0 0 0 0 0 0 0 0 0 0 0 0 Conventional Network Logical ID : 0 C.N.I Group ID C.N.I Channel Guard Tone NOTE NOTE ** The contents of the GETC Personality Extended Options panel will display the parameters for new features when the Field Macro(s) is installed into the PC Programmer. Field Macros keep the programmer current until a fully upgraded PC Programmer which includes all features is made available. The Field Macros are supplied with the Turbo Software Media Kit and may be downloaded from Ericsson’s “One1Call” retrieval system. 22 CONFIGURATION 6. Read the existing personality from the SCAT Station GETC to the PC. If the personality does not exist, retrieve the sample SCAT Personality (shown in Table 6) from the PC. Change the personality parameters as required. NOTE NOTE LBI-38987B channel. As a TRACKED group, the SCAT channel only receives requests from the CEC/IMC for groups that are logged into the SCAT system. The CEC/IMC bypasses the SCAT system with other multisite calls making the SCAT channel available for users within the SCAT system coverage area. Refer to LBI-38984 for System Manager programming. The personality data for SCAT Downlink GETC must be the same as the Station GETC. Confirmed Calls 7. After entering the personality parameters, select the "Program Card" function to program the personality into the GETC. 8. Verify that the GETC has properly stored the personality data by selecting the "Read Unit Into File" function while in the Current Personalities Screen. The CEC/IMC may experience excessive delays waiting for a confirmation response from a SCAT system. To prevent unnecessary delays, we recommend SCAT systems be excluded from Confirmed Calls. At the CEC/IMC Manager, set the Confirmed Call Parameter to "Y - Ignore Site for Call Confirmation." Refer to the EDACS CEC/IMC Manager (MOM PC) Operation's Manual, LBI-39024, section 3.2.9. 9. After completing the programming, save the revised personality to disk. 10. Reset the DIP switches and press S4 to reset the GETC. 11. Disconnect the TQ-3360 cable and verify GETC operation. SCAT Personality Wide Area Digital Option The Wide Area Digital option is activated at the factory using a unique code for each repeater. This code is stored with the GETC Personality. Thus changes to the personality should be made by reading the existing personality, modifying the data, and writing the modified data back to the GETC. CEC/IMC Personality Configuration At the System Manager, configure the SCAT groups as TRACKED to maximize the availability of the SCAT 23 LBI-38987B OPERATIONAL CHECKOUT OPERATIONAL CHECKOUT Verify that the GETC is operating correctly by performing the following steps: DIP SWITCH SETTINGS The GETC DIP Switch settings depend on the GETC's usage (Station GETC or SCAT Downlink GETC), channel, and frequency. Through improvements in software and hardware, fewer changes in DIP switch settings are required. As a result more switch positions are being ignored and their functionality is being programmed into the GETC via the Personality Programming. 5. Set S3-6 and S3-8 to OPEN and S3-7 to CLOSED. SCAT Downlink GETC Set the three GETC DIP switches (S1 - S3) for SCAT Downlink operation. Refer to the Link GETC Configuration manual, LBI-38896, and SRN1061 for instructions. CLEAR VOICE CHECKOUT The following tests allow you to confirm the SCAT Station GETC operation when the GETC operates as a Control Channel GETC and when making Clear Voice (CV) calls Locally Initiated Calls This procedure assumes that the test radios being used have their personalities programmed to enable SCAT, set to the SCAT group frequency, and operating in Clear Voice mode. Figure 10 - Typical SCAT Station DIP Switch Settings 1. Apply power to the station (or reset the GETCs). The station should default to the Control Channel mode. 2. Verify the SCAT and SCAT Downlink GETC LEDs when the station is in the Control Channel mode (see Table 7). Set the GETC DIP switches using the following procedures: • SCAT Station GETC - L1, L6, and L7 turn ON. SCAT Station GETC Table 7 - SCAT Station GETC, CC Mode Set the three GETC DIP switches (S1 - S3) for SCAT Station operation, as shown in Figure 8. 1. LED Indicators Set S1-1 thru S1-7 and S2-1 thru S2-4 to the repeater's operating frequency. Refer to Station GETC manual LBI-38988 or SRN1060 for DIP switch settings. For MASTR II/IIe (using 349A9607G5 or later) and MASTR III stations, set DIP switches S1-1 through S1-7 and S2-1 through S2-4 to the CLOSED position. Frequency is selected via the Personality programming. 2. Set S1-8 to the OPEN position. 3. Set S2-5, 6 and 8 to CLOSED and S2-7 to the OPEN position. Legend: 24 Set S3-1 to OPEN and S3-2 thru S3-5 to CLOSED. This sets the SCAT Station GETC for operation on channel number 1. ❍ = OFF ● = ON Set test radios 1 and 2 to group 1. 4. Initiate a call from radio 1 to radio 2. 5. Verify that the SCAT Station GETC switches from the Control Channel mode to the Working Channel mode as shown in Table 8 (LED L7 goes OFF). Table 8 - LED Indications, Clear Voice Local Call LED Indicators CV Working Channel 6. ● ❉ = FLASHING 3. Legend: 4. ● ❍ ❍ ❍ ❍ ● Control Channel (Idle Mode) NOTE NOTE L1 L2 L3 L4 L5 L6 L7 ❍ = OFF L1 L2 L3 L4 L5 L6 L7 ● ❍ ❍ ❍ ❍ ● ❍ ● = ON ❉ = FLASHING Verify that voice can be heard on both radios and that the ID of the transmitting radio is displayed on the receive radio. OPERATIONAL CHECKOUT 7. Unkey the radio and verify that the station returns to the Control Channel mode. Multisite Initiated Calls 1. 2. LBI-38987B 2. Initiate a call from radio 1 to radio 2 using the Digital Voice mode. 3. When the call is received, verify that SCAT Station GETC LEDs L1, L6, and L7 turn ON (see Table 10). Initiate a multisite call or a console call to a radio assigned to the SCAT station. Table 10 - LED Indications, Digital Voice Local Call When the call is received, verify that SCAT Station GETC LED L7 turns OFF and L2 turns ON as shown in Table 9. LED Indicators DV Working Channel (Locally initiated call.) L1 L2 L3 L4 L5 L6 L7 ● ❍ ❍ ❍ ❍ ● ● Table 9 - LED Indications, Clear Voice Multisite Call Legend: LED Indicators L1 L2 L3 L4 L5 L6 L7 CV Working Channel (Multisite initiated call.) Legend: 3. ❍ = OFF ● 4. ● ❍ ❍ ❍ ● ❍ ● = ON ❉ = FLASHING When the call is finished, verify that the LEDs change state indicating the station has returned to the Control Channel mode. ● = ON ❉ = FLASHING When the call is finished, verify that the LEDs change state indicating the station has returned to the Control Channel mode. Multisite Initiated Calls 1. Initiate a multisite or console DV call to a radio assigned to the SCAT station. 2. When the call is received, verify that SCAT Station GETC LED's L1, L2, L6, and L7 turn ON as shown in Table 11. DIGITAL VOICE CHECKOUT The following tests allow you to confirm the SCAT Station GETC operation when making Digital Voice (DV) calls ❍ = OFF Table 11 - LED Indications, Digital Voice Multisite Call LED Indicators L1 L2 L3 L4 L5 L6 L7 Locally Initiated Calls 1. Setup the radios for Digital Voice operation. DV Working Channel (Multisite initiated call.) Legend: NOTE NOTE The SCAT Station GETC must have the Wide Area Digital option enabled to perform this test. Contact your EGE Sales Representative and ask for option SXSF7A. If your SCAT Station GETC does not have a Rockwell Modem, also order option SXMD1D. 3. ❍ = OFF ● ● ❍ ❍ ❍ ● ● = ON ● ❉ = FLASHING When the call is finished, verify that the LEDs change state indicating the station has returned to the Control Channel mode. 25 LBI-38987B LED INDICATORS LED Indicators TROUBLESHOOTING Table 12 is a summary of the operating modes and the associated LED indications. The hardware used in the GETC is extremely reliable, making component failure the unlikely cause of most problems. The most common causes of problems are programming errors and interface connections. Table 12 - LED Indications, Summary LED Indicators L1 L2 L3 L4 L5 L6 L7 SCAT STATION GETC Control Channel ● ❍ ❍ ❍ ❍ ● CV Working Channel. Locally initiated call. ● ❍ ❍ ❍ ❍ ● ❍ CV Working Channel. Multisite initiated call. ● DV Working Channel. Locally initiated call. ● ❍ ❍ ❍ ❍ ● DV Working Channel Multisite initiated call. ● ● Legend: Verify proper operation of front panel LEDs. 2. Verify that all cables are properly connected and secure. 3. Verify the GETC’s personality is properly programmed for the specific application. Refer to TQ-3357, PC Programmer and SRN1061. 4. In Downlink GETCs, verify the Turbo Board is properly configured if applicable. Refer to LBI38822, TQ-3357, and SRN 1061. 5. If you suspect that the GETC has failed, replace the GETC with a known good unit properly configured for this application. ● ❍ ❍ ❍ ● ● ● DOWNLINK ACTIVITY LOGGER ● ❍ = OFF 1. ● ❍ ❍ ❍ ● ❍ Downlink GETC Downlink. Use the following guidelines when troubleshooting a GETC on site: ● ❍ ❍ ● = ON ❉ ❉ = FLASHING ❉ ❍ A diagnostic feature introduced with the 344A4895G4 software is the Downlink Activity Logger. This feature allows the Downlink GETC to log and save information about communication activity between the Downlink and Uplink GETC. In General, the information supplied by the Downlink Activity Logger is EDACS specific and in some cases may need technical assistance for interpretation. For detailed instructions on using the Channel Activity Logger, refer to SRN1061 and TQ 3357 V4.03 (or later). IN CASE OF DIFFICULTY If you are unable to resolve a problem to your satisfaction, then contact the Ericsson Technical Assistance Center (TAC) at 1-800-528-7711 (outside USA, 804-5287711). 26 INTERCONNECT DIAGRAMS J100 To Site Controller (MSL) 1 6 2 7 3 8 4 9 5 J102 To Other GETCs (BSL) 1 6 2 7 3 8 4 9 5 19C336863G1 P8 J101 3 2 1 6 4 5 P1 9 1 6 2 7 3 8 4 9 5 4 6 3 2 1 3 2 1 6 4 5 19C320811 (MASTR II/IIe) 19B802401 (MASTR III) Lightning GETC 19D904266 J8 GND RxD TxD BSL RxD BSL TxD J19 4 GND 6 FSL 3 GND 2 RxD 1 TxD J3 J6 Delay PTT Phone Rx Phone Rx Phone Tx Phone Tx Det Dis (MIII) DATA (MII) CLK (MII) LOCK DET (MII) LD EN (MII) REM PTT OUT P6 1 6 7 8 9 10 11 12 13 15 13 J7 VOL/SQ HI GETC Data (TX MOD) REM PTT IN RUS IN RUS OUT Rockwell Modem 19A705178 P 7 (P 27) J 10 2 1 J 19 J104 Serial Interface For Initial Turbo Board Programming 1 6 2 7 3 8 4 9 5 1 6 2 7 3 8 4 9 5 5 CG HI (LSD) P3 1 6 7 8 9 10 11 12 13 15 13 Interconnect Harness to EDACS Station 2 2 4 4 9 9 14 14 15 15 PWR GND 13.8 VDC J103 Serial Interface For Initial Turbo Board Programming LBI-38987B P1 0 2 1 P19 5 J3 2 1 2 RxD 1 TxD 3 3 GND 2 1 2 RxD 1 TxD 3 3 GND P2 J2 J 27 P1 19D903536 Turbo Board XU3 5 VDC RM Regulated 5 VDC RM Unregulated GND 13.8 VDC 5 VDC Unregulated 5 VDC Regulated 1 2 3 4 5 6 P1 1 2 3 4 5 6 A2 Voltage Regulator 19C336816G2 19C234898G1 19C337712G1 STATION GETC SHELF INTERCONNECT DIAGRAM 27 LBI-38987B INTERCONNECT DIAGRAM MASTR II (IIe) EDACS NETWORK SCAT INTERCONNECTION DIAGRAM 28 INTERCONNECT DIAGRAM LBI-38987B MASTR III EDACS NETWORK SCAT INTERCONNECTION DIAGRAM (188D5683, SH.1, REV.) 29 LBI-38987B PARTS LIST GETC CABLE 19C336863G1 SYMBOL PART NUMBER DESCRIPTION ------------------- JACKS ------------------- J100 thru J102 19B209727P18 Connector: 9 contacts; sim to AMP 205203-1. ------------------- PLUGS -----------------P8 19A700041P32 Shell: 6-Position; sim to Molex 22-012065. P19 19A700041P32 Shell: 6-Position; sim to Molex 22-012065. ----------- MISCELLANEOUS ----------- 30 2 19B209727P11 Contact, electrical: sim to AMP 166504-0. 3 19A704779P26 Contacts: 22-30 AWG; sim to Molex 08-55-0101, Qty of 10. 4 19J706152P5 Retainer strap: sim to Panduit Corp. SST-1. 6 19A149502P3 Sleeving, spiral. 13 19B209727P9 Machine Screw. CABLE AND HARNESS DIAGRAMS LBI-38987B GETC CABLE 19C336863G1 (19C336863, Sh. 1, Rev. 4; 19C336866, Sh. 1, Rev. 0) 31 LBI-38987B CABLE AND HARNESS DIAGRAM SCAT INTERCONNECT CABLE 19C337102G1 (19C337102, Sh. 1, Rev. 0) 32 LBI-38987B This page intentionally left blank 33 LBI-38987B Ericsson Inc. Private Radio Systems Mountain View Road Lynchburg, VA 24502 1-800-528-7711 (Outside USA, 804-528-7711) Printed in U.S.A.