1
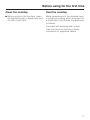
Operating and Installation
Instructions
Ceramic Cooktop with Induction
KM 5773
To prevent accidents and
appliance damage,
read these instructions
before
installation or use.
en - US
M.-Nr. 06 766 180
Contents
IMPORTANT SAFETY INSTRUCTIONS. . . . . . . . . . . . . . . . . . . . . . . . . . . . . . . . . 4
Guide to the cooktop . . . . . . . . . . . . . . . . . . . . . . . . . . . . . . . . . . . . . . . . . . . . . . 10
Cooktop . . . . . . . . . . . . . . . . . . . . . . . . . . . . . . . . . . . . . . . . . . . . . . . . . . . . . . . . . 10
Control panel . . . . . . . . . . . . . . . . . . . . . . . . . . . . . . . . . . . . . . . . . . . . . . . . . . . . . 11
Burner display . . . . . . . . . . . . . . . . . . . . . . . . . . . . . . . . . . . . . . . . . . . . . . . . . . . . 12
Timer display . . . . . . . . . . . . . . . . . . . . . . . . . . . . . . . . . . . . . . . . . . . . . . . . . . . . . 13
Burner data . . . . . . . . . . . . . . . . . . . . . . . . . . . . . . . . . . . . . . . . . . . . . . . . . . . . . . 13
Induction . . . . . . . . . . . . . . . . . . . . . . . . . . . . . . . . . . . . . . . . . . . . . . . . . . . . . . . . 14
How it works. . . . . . . . . . . . . . . . . . . . . . . . . . . . . . . . . . . . . . . . . . . . . . . . . . . . . . 14
Noises . . . . . . . . . . . . . . . . . . . . . . . . . . . . . . . . . . . . . . . . . . . . . . . . . . . . . . . . . . 15
Cookware . . . . . . . . . . . . . . . . . . . . . . . . . . . . . . . . . . . . . . . . . . . . . . . . . . . . . . . . 16
Before using for the first time. . . . . . . . . . . . . . . . . . . . . . . . . . . . . . . . . . . . . . . 17
Heat the cooktop . . . . . . . . . . . . . . . . . . . . . . . . . . . . . . . . . . . . . . . . . . . . . . . . . . 17
Resetting the touch controls . . . . . . . . . . . . . . . . . . . . . . . . . . . . . . . . . . . . . . . 18
Use . . . . . . . . . . . . . . . . . . . . . . . . . . . . . . . . . . . . . . . . . . . . . . . . . . . . . . . . . . . . 19
Touch controls . . . . . . . . . . . . . . . . . . . . . . . . . . . . . . . . . . . . . . . . . . . . . . . . . . . . 19
Turning on the cooktop . . . . . . . . . . . . . . . . . . . . . . . . . . . . . . . . . . . . . . . . . . . . . 19
Turning on a burner . . . . . . . . . . . . . . . . . . . . . . . . . . . . . . . . . . . . . . . . . . . . . . . . 19
Settings . . . . . . . . . . . . . . . . . . . . . . . . . . . . . . . . . . . . . . . . . . . . . . . . . . . . . . . . . 20
Auto-heat . . . . . . . . . . . . . . . . . . . . . . . . . . . . . . . . . . . . . . . . . . . . . . . . . . . . . . . . 21
Cooking without Auto-heat. . . . . . . . . . . . . . . . . . . . . . . . . . . . . . . . . . . . . . . . . . . 22
Booster function . . . . . . . . . . . . . . . . . . . . . . . . . . . . . . . . . . . . . . . . . . . . . . . . . . . 23
Turning off a burner . . . . . . . . . . . . . . . . . . . . . . . . . . . . . . . . . . . . . . . . . . . . . . . . 25
Turning off the cooktop . . . . . . . . . . . . . . . . . . . . . . . . . . . . . . . . . . . . . . . . . . . . . 25
Residual heat indicator . . . . . . . . . . . . . . . . . . . . . . . . . . . . . . . . . . . . . . . . . . . . . 25
Timer . . . . . . . . . . . . . . . . . . . . . . . . . . . . . . . . . . . . . . . . . . . . . . . . . . . . . . . . . . . 26
Setting the timer . . . . . . . . . . . . . . . . . . . . . . . . . . . . . . . . . . . . . . . . . . . . . . . . . . . 26
Automatic switch-off . . . . . . . . . . . . . . . . . . . . . . . . . . . . . . . . . . . . . . . . . . . . . . . 27
Combi mode . . . . . . . . . . . . . . . . . . . . . . . . . . . . . . . . . . . . . . . . . . . . . . . . . . . . . 28
Timer start value . . . . . . . . . . . . . . . . . . . . . . . . . . . . . . . . . . . . . . . . . . . . . . . . . . 28
Safety features . . . . . . . . . . . . . . . . . . . . . . . . . . . . . . . . . . . . . . . . . . . . . . . . . . . 29
Child Safety Lock . . . . . . . . . . . . . . . . . . . . . . . . . . . . . . . . . . . . . . . . . . . . . . . . . . 29
Stop and Go. . . . . . . . . . . . . . . . . . . . . . . . . . . . . . . . . . . . . . . . . . . . . . . . . . . . . . 30
Safety cut-out feature. . . . . . . . . . . . . . . . . . . . . . . . . . . . . . . . . . . . . . . . . . . . . . . 31
Overheating protection . . . . . . . . . . . . . . . . . . . . . . . . . . . . . . . . . . . . . . . . . . . . . 32
2
Contents
Cleaning and Care . . . . . . . . . . . . . . . . . . . . . . . . . . . . . . . . . . . . . . . . . . . . . . . . 33
Programming . . . . . . . . . . . . . . . . . . . . . . . . . . . . . . . . . . . . . . . . . . . . . . . . . . . . 34
Frequently asked questions . . . . . . . . . . . . . . . . . . . . . . . . . . . . . . . . . . . . . . . 37
Technical Service. . . . . . . . . . . . . . . . . . . . . . . . . . . . . . . . . . . . . . . . . . . . . . . . . 40
Installation instructions . . . . . . . . . . . . . . . . . . . . . . . . . . . . . . . . . . . . . . . . . . . 41
IMPORTANT SAFETY INSTRUCTIONS. . . . . . . . . . . . . . . . . . . . . . . . . . . . . . . . 42
Installation . . . . . . . . . . . . . . . . . . . . . . . . . . . . . . . . . . . . . . . . . . . . . . . . . . . . . . 44
Installation dimensions . . . . . . . . . . . . . . . . . . . . . . . . . . . . . . . . . . . . . . . . . . . . . 45
Ventilation . . . . . . . . . . . . . . . . . . . . . . . . . . . . . . . . . . . . . . . . . . . . . . . . . . . . . . . 46
Installing the cooktop. . . . . . . . . . . . . . . . . . . . . . . . . . . . . . . . . . . . . . . . . . . . . . . 47
Electrical connection . . . . . . . . . . . . . . . . . . . . . . . . . . . . . . . . . . . . . . . . . . . . . . 49
Help protect our environment. . . . . . . . . . . . . . . . . . . . . . . . . . . . . . . . . . . . . . . 50
3
IMPORTANT SAFETY INSTRUCTIONS
READ THE OPERATING
INSTRUCTIONS CAREFULLY
BEFORE USING THE
COOKTOP
~ Be certain your appliance is
WARNING -
~ Do not connect the appliance to the
This appliance is intended for
residential cooking only.
When using your appliance follow
basic safety precautions including
the following:
Installation
properly installed and grounded by a
qualified technician in accordance with
national and local safety regulations.
main electrical supply using an
extension cord. Extension cords do not
meet the safety requirements of this
appliance.
~ Before servicing, disconnect the
appliance from the main power supply.
~ To guarantee the electrical safety of
this appliance, continuity must exist
between the appliance and an effective
grounding system. It is imperative that
this basic safety requirement be met. If
there is any doubt, have the electrical
system of the house checked by a
qualified electrician.
~ Only for frame/facet cooktops:
A small gap will be visible between
cooktop and countertop for the first
days after installation. The gap will
decrease as the cooktop is used. The
electrical safety of your appliance is
warrantied despite the small gap.
4
IMPORTANT SAFETY INSTRUCTIONS
Use
~ Only use the cooktop for residential
cooking, and for the purposes
described in this manual.
Other uses are not permitted and can
be dangerous.
~ Persons who lack physical, sensory
or mental abilities, or experience with
the appliance should not use it without
supervision or instruction by a
responsible person.
~ Individuals with a pacemaker or
similar medical device: Please note
that an electromagnetic field develops
when the cooktop is turned on.
Although unlikely that this will affect a
pacemaker or other medical device,
please consult the device manufacturer
or your doctor if you have concerns.
~ Do not use the appliance until it has
been properly installed in the
countertop.
~ This appliance is equipped with an
overheating protection feature. See
"Overheating protection" for more
information.
~ Be sure to use the proper type of
cookware. Follow the manufacturer's
instructions.
~ Never heat up empty pans. This
could damage the appliance and
cookware.
~ If the cooktop is installed above a
pyrolytic oven it should not be used
during the pyrolytic process. The
overheating protection feature of the
cooktop might be activated.
~ Keep magnetized items, e.g. credit
cards, disks, etc. away from the
cooktop while in operation. Damage
may result.
5
IMPORTANT SAFETY INSTRUCTIONS
Injury prevention
~ Children should not be left
unattended in an area where the
cooktop is in use. Never allow children
to sit or stand on any part of the
cooktop.
Caution: Do not store items of interest
to children in cabinets above the
cooktop. Children climbing on the
cooktop to reach these items could be
injured.
~ Use the Child Safety Lock to prevent
children from turning on the burners or
changing the settings. See "Child
Safety lock" for more information.
~ Keep all pots and pans out of
children's reach. Danger of burning or
scalding.
~ The appliance gets hot when in use
and remains hot for quite a while after
being turned off. As long as the surface
temperature is high enough to cause a
burn, the Residual Heat Indicator will
remain lit. Once sufficient time has
passed and the cooktop surface is safe
to touch, the Residual Heat Indicator
will go out.
~ Protect your hands with insulated
gloves or potholders when using the
appliance. Use only dry, heat resistant
potholders. Moist or damp potholders
used on hot surfaces can result in
steam burns. Do not let the potholder
touch the hot heating elements. Do not
use towels or other bulky items near the
appliance.
6
~ Be aware of loose fitting or hanging
clothing when operating the cooktop,
they may present a fire hazard.
~ Pot and pan handles should be
turned inward and not extend over the
countertop to reduce the risk of burns,
ignition of flammable materials, and
spills.
~ Never leave a cooktop unattended
at high settings or when cooking with oil
or fat. Overheated oil could ignite.
Always heat oil slowly, monitoring it as it
heats.
~ Do not use water on grease fires.
Smother or use a dry chemical or
foam-type extinguisher on any fire or
flame.
~ When frying food make sure that the
food is as dry as possible before
placing it in oil. Moisture can cause hot
oil to splatter and boil over. At high
settings, be cautious of splattering
grease or boiling over liquids which
may produce smoke.
~ Do not flambé under an exhaust
hood. Flames could be drawn up into
the hood by the suction and the grease
filters may ignite.
IMPORTANT SAFETY INSTRUCTIONS
~ Do not heat unopened containers.
Built-up pressure may cause the
container to burst and result in injury.
~ Flammable materials should not be
~ Before removing pots and pans be
fan. Drawers under the cooktop are not
recommended. If a drawer is fitted
directly underneath the cooktop, ensure
that there is sufficient space between
the drawer, its contents and the
underside of the appliance in order to
ensure sufficient ventilation for the
cooktop. Do not store small items or
paper in the drawer. They could get
sucked into the housing by the fan and
cause damage or impair cooling.
Ensure that no aerosols, combustible
liquids or other flammable materials are
kept in this drawer. If cutlery inserts are
to be placed in the drawer they must be
made of heat-resistant material.
sure to turn off the burners.
~ To prevent burns and breathing
difficulty, allow the cooktop to cool
before cleaning. Some cleaners may
produce toxic fumes if applied to a hot
surface.
~ When wiping spills on a hot cooktop
with a wet sponge or cloth, be careful
to avoid steam burns.
~ Do not let flammable materials,
i.e. cooking grease, accumulate on the
appliance.
~ Never cover the cooktop with a
cloth. A fire may result.
stored on or near the appliance.
~ The cooktop is fitted with a cooling
~ Do not place items other than pots
and pans on the cooktop.
7
IMPORTANT SAFETY INSTRUCTIONS
Damage protection
~ Never place hot pots or pans on the
touch controls, this may damage the
electronics.
~ Any spills should be removed as
quickly as possible to prevent them
from burning on and becoming difficult
to remove.
Do not use a steam cleaner to clean
~ Do not drop anything on the ceramic ~
this appliance. Steam could penetrate
surface of the cooktop. Even
lightweight objects may cause damage.
~ Do not use pots or pans with
pronounced edges or ridges on the
ceramic cooktop. These could scratch
the cooktop permanently. See
"Cookware" for more information. Grains
of salt and sand can cause scratches.
Make sure that the bases of any pots
and pans are clean, free of any fat or
oils, and are dry.
~ Do not allow solid or liquid sugar,
pieces of plastic or foil to fall on the
burners when they are hot. If these
residues are allowed to cool on the
ceramic surface pitting or even
cracking may occur.
8
electrical components and cause a
short circuit.
IMPORTANT SAFETY INSTRUCTIONS
Appliance safety
Further safety notes
~ In the event of any damage to the
appliance, it must be turned off
immediately and disconnected from the
main power supply. Contact Miele’s
Technical Service Department.
Do not use the appliance until it has
been repaired. Ensure power is not
supplied to the appliance until repair
work is completed.
~ Make certain that the power cords of
~ Do not cook on a damaged cooktop.
Any breakages or cracks in the ceramic
surface of the appliance are defects
and must be treated as such. If the
cooktop should break, cleaning
solutions and spills may penetrate the
broken cooktop and create a risk of
electric shock. Do not use the
appliance until it has been repaired.
small appliances do not come in
contact with the cooktop. The insulation
of the cable could become damaged.
Danger of electric shock!
~ Keep pets away from the cooktop at
all times and activate the Safety Lock. If
a pet gets on the cooktop a touch
control sensor could be activated
turning on a burner.
SAVE THESE INSTRUCTIONS
AND REVIEW THEM
PERIODICALLY
~ Repairs should only be performed
by qualified technicians to ensure
safety. Repairs and other work by
unqualified persons could be
dangerous. Do not open the outer
casing of the appliance under any
circumstances.
~ While the appliance is under
warranty repairs should only be
performed by an authorized service
technician. Otherwise the warranty is
void.
9
Guide to the cooktop
Cooktop
abde Burners with single booster
c
10
Burner with double booster
Guide to the cooktop
Control panel
Touch controls
Indicators
a Booster On/Off
e Child Safety Lock
b Power level
h Cooktop On
c Burner On/Off
d Timer On/Off, switch between
functions and select a burner
f Child Safety Lock
g Cooktop On/Off
11
Guide to the cooktop
Burner display
a Booster indicator
b Display:
=
0
=
1 to 12 =
#
=
ß
=
I
=
II
=
F
=
A
=
P0 etc. =
S0 etc. =
Burner is ready for use
Burner is turned on
Power level
Residual heat
Missing or unsuitable cookware (see "Induction")
Single booster function activated
Double booster function activated (rear middle burner only)
Fault (see "Safety cut-out feature")
Auto-heat with extended power level range
Program (see "Programming")
Status (see "Programming")
c Indicator for extended power level (see "Programming")
d Lighting circle
The number of segments lit corresponds with the selected power setting
(exception: see "Auto-heat").
12
Guide to the cooktop
Timer display
a Indicator for relevant burner, e.g. rear right burner
b Time display
Burner data
Burner
minimum to
maximum diameter *
Rating in watts
208 V**
240 V**
y
6 5/16" - 9"
16 -23 cm
normal:
with booster:
2100
2900
2400
3350
w
4" - 6 5/16"
10 - 16 cm
normal:
with booster:
1250
1650
1450
1900
b
7" - 11"
18 - 28 cm
normal:
with booster 1:
with booster 2:
2200
2700
3350
2500
3100
3850
x
4" - 6 5/16"
10 - 16 cm
normal:
with booster:
1250
1650
1450
1900
z
6 5/16" - 9"
16 - 23 cm
normal:
with booster:
2100
2900
2400
3350
10,000
11,600
All burners
* Pots with a bottom diameter in the stated range.
** The stated power may vary depending on the size and material of the
cookware.
13
Induction
How it works
An induction coil is located under each
burner. When a burner is switched on,
this coil creates a magnetic field which
impacts directly on the base of the pan
and heats it up. The burner itself is
heated indirectly by the heat given off
by the pan.
Induction burners only work when a
magnetic based pan is placed on it
(see "Cookware").
Induction automatically recognizes the
size of the pan, i.e. heat is only
generated in the area covered by the
base of the pan.
The burner will not work:
– if it is switched on without a pan in
place, or if the pan is unsuitable
(non-magnetic base).
– if the diameter of the pan is too small.
– if the pan is taken off the burner
when it is switched on.
If this happens, ß will flash in the
relevant burner display alternating with
0 or the last selected power level
selected.
14
If a suitable pan is placed on the burner
within 3 minutes, the ß will go out and
you can continue cooking as normal.
If no pan or an unsuitable pan is placed
on the burner, the burner and the
cooktop will switch off automatically
after 3 minutes.
Be careful not to place cutlery or
other metal objects on the cooktop.
When the appliance is switched on,
or when there is residual heat
present, there is the risk of metal
objects heating up quickly.
Beware of burns.
Depending on the material, other
objects left on the cooktop could
also melt or catch fire. Switch the
burners off after use.
Induction
Noises
When using an induction burner, the
following noises can occur in the pan,
depending on what it is made of and
how it is constructed.
– Higher power settings may cause a
buzz. This will decrease or cease
altogether when the power setting is
reduced.
The appliance has a cooling fan to help
extend the life of the electronics. When
the cooktop is being used at high levels
for a long period of time, this will come
on and you will hear a whirring sound.
The fan may continue to run after the
appliance has been switched off.
– If the pan base is made of layers of
different materials (e.g. a
sandwiched base), a cracking sound
may be heard.
– Whistling might occur if linked
burners (see "Booster function") are
being used on the highest setting at
the same time, and the pans have
bases made of layers of different
materials.
– You may hear a clicking sound from
the electronic switches, especially on
lower settings.
15
Induction
Cookware
Pan size
Suitable pans include:
To make optimum use of the burners,
choose cookware that fits between the
inner and outer marking of the burner. If
the base diameter of the pan is smaller
than the inner marking, the induction
heating will not work. The burner will
behave as if it had no pan on it.
– stainless steel pans with a magnetic
base
– enameled steel pans
– cast iron pans
Unsuitable pans:
– stainless steel pans without a
magnetic base
– aluminum and copper pans
– glass, ceramic or earthenware pots
and pans
To test whether a pot or pan is suitable
for use on an induction cooktop, hold a
magnet to the base of the pan. If the
magnet sticks, the pan is suitable.
Unless the pan manufacturer states
that you can do so, do not use pans
with very thin bases on this cooktop.
,Never heat up empty pans.
This could damage the appliance
and cookware.
16
Before using for the first time
Clean the cooktop
Heat the cooktop
^ Before using for the first time, clean
the appliance with a damp cloth and
dry with a soft cloth.
Metal components of the cooktop have
a protective coating which may give off
a slight odor the first time the appliance
is heated.
The smell will dissipate after a short
time and does not indicate a faulty
connection or appliance defect.
17
Resetting the touch controls
Automatic reset
Manual reset
To ensure the cooktop functions
properly the touch controls will
automatically reset:
^ Make sure no direct light (sun or
artificial) beams on the cooktop. The
surrounding area of the cooktop
should not be completely shaded or
brightly lit.
– when the cooktop is connected to
the power supply,
– if there is an interruption to the power
supply, and
– during use in response to changing
light conditions.
During the automatic reset of the touch
controls the Child Safety Lock indicator
lights and the cooktop cannot be
turned on.
If the automatic reset could not be
completed:
– an A will light in the front left and right
burner displays,
– a F will light in the rear left burner
display, and
– the right rear burner display and the
timer display will show numbers.
In this case the touch controls must be
manually reset.
18
^ Make sure the cooktop and the touch
controls are not covered. Remove all
pots and pans, and clean the
cooktop if necessary.
^ Trip the circuit breaker to the cooktop
or turn off the power main for 1
minute.
The touch controls will automatically
reset when the power is restored.
If the problem persists, contact Miele
Technical Service.
Use
Touch controls
Turning on the cooktop
The control panel is equipped with
electronic sensors. They respond to a
finger touch.
To operate the burners, simply touch
the corresponding sensor area(s). Each
time a command is registered, a signal
will be heard.
^ Put a pot or pan on the desired
burner.
Be sure to touch only the desired
sensor area and keep the control
panel clean and clear. Otherwise,
the touch controls may not respond,
or unintentional commands may be
given, even causing the cooktop to
switch off automatically (see the
section on "Safety cut-out feature").
NEVER place hot cookware on the
sensor areas. The electronics can
be damaged.
^ Touch the ON/OFF "s" cooktop
touch control.
You will see a dash - in each of the
burner displays, and 00 in the timer
display. If a setting is not chosen within
a few seconds the cooktop will turn off
as a safety measure.
Turning on a burner
^ Touch the s On/Off touch control for
the desired burner.
The respective burner display shows 0.
^ Select a power level between 1 and
12 by pressing the - or + sensor.
When turning on the cooktop you can
decide whether you want to cook with
auto heat or not. See "Auto-heat" for
more information.
Turn on with + to:
cook without auto-heat.
Turn on with – to:
cook with auto-heat.
19
Use
Settings
Power level *
Use for
Melting butter, chocolate, etc.
Dissolving gelatine
extended**
standard factory
settings
settings
(12 power levels) (23 power levels)
1-2
1 - 2.
3
3 - 3.
4-5
4-5
6
5. - 6.
Parboil larger quantities, for example for stews
Cook pasta
7-8
7-8
Gently sauté fish, cutlets, sausages, fried eggs (without
smoking the oil/fat)
9 - 10
8. - 10.
Frying pancakes, crepes, etc.
11
11 - 11.
Boil large quantities of water
12
12
Thickening sauces containing egg yolk and/or butter
Warming small quantities of food/liquid
Cooking rice
Thaw frozen vegetables (blocks)
Warm liquid or half-set foods
Thickening creams and sauces, e.g. Hollandaise sauce
Cook pudding
Defrosting frozen food
Steam vegetables, fish, etc.
Steam grains
* These settings are intended as guidelines only. With deep pans, larger quantities of food or when
cooking without a lid, a higher setting is required. For smaller quantities, select a lower setting.
** If you wish to fine-tune a setting, you can extend the power level range (see "Programming"). The
intermediate setting will be represented by an indicator next to the number.
20
Use
Auto-heat
When Auto-heat has been activated,
the burner switches on automatically at
the highest setting and then switches to
the continued power level which was
selected. The "heat-up" time depends
on which continued power level has
been chosen (see table).
Taking a pan off the burner while
Auto-heat is in operation interrupts the
function. It will resume if a pan is
placed back on the burner within
3 minutes.
Continued
power level*
Heat-up time
(approx.)
min : sec
1
0 : 15
1.
0 : 15
2
0 : 15
2.
0 : 15
3
0 : 25
3.
0 : 25
4
0 : 50
4.
0 : 50
5
0 : 50
5.
2 : 00
6
2 : 00
6.
2 : 00
7
5 : 50
7.
5 : 50
8
5 : 50
8.
2 : 50
9
2 : 50
9.
2 : 50
10
2 : 50
10.
2 : 50
11
2 : 50
11.
2 : 50
12
-
* The continued cooking settings with a dot
after the number are only available if the
power level range has been extended
(see "Programming").
21
Use
To activate Auto-heat
Cooking without Auto-heat
^ Turn the burner on.
^ Turn the burner on. Touch the +
sensor until the desired power level is
displayed, e.g. 4.
^ Touch the - sensor until the desired
power level is displayed, e.g. 3.
12 segments will light in the lighting
circle during the auto-heat time. After
the auto-heat time has elapsed only the
number of segments will light which
correspond to the selected power level.
Example:
during Auto-heat:
during the continued cooking time:
The continued power level can be
increased or decreased during the heat
up phase with the -/+ controls. The heat
up time will change accordingly.
22
Additionally the power level is indicated
by the number of segments in the
lighting circle. For example: Power level
4 shows four segments.
Use
Booster function
Each burner is equipped with a booster
function to temporarily increase the
power level. When the booster function
is on, the burners increase to power
level 12 for 10 minutes. This boost is
intended for quickly bringing large
quantities of water to the boil,
e.g. cooking pasta.
A maximum of 3 booster functions can
be used at a time.
If the booster is activated, when
– no power setting is selected, the
burner will revert to power level 12 at
the end of the booster time or when
the booster is switched off.
– a power setting is selected, the
burner will revert to this pre-selected
power setting at the end of the
booster time or when the booster is
switched off.
The extra boost of energy is only
available by taking a proportion of
energy away from another burner. For
this reason, the burners are networked
in pairs as shown.
When the booster is activated:
– if Auto-heat is activated or either
burner of the same network, it will
switch off.
– the power level on the other linked
burner may decrease.
The original and reduced power
levels blink back and forth until the
Booster turns off. The reduced power
level is also represented by the
number of segments in the lighting
circle.
Taking a pan off the burner while the
booster is in operation interrupts the
booster function. It will resume if a pan
is placed back on the burner within 3
minutes.
The booster can be switched off by
touching the - sensor.
23
Use
Single booster (all burners)
^ Touch the s On/Off touch control for
the desired burner.
^ Select the "B" touch control for the
relevant burner.
I appears in the display, the indicator
for the booster function and all
segments in the lighting circle light.
Double booster (middle burner only)
^ Touch the s On/Off touch control for
the desired burner.
^ Select touch control "B" for the
relevant burner.
I appears in the display, the indicator
for the booster function and all
segments in the lighting circle light.
^ Select the touch control "B" for the
burner again.
II appears in the burner display.
24
Use
Turning off a burner
Residual heat indicator
^ Touch the s On/Off touch control for
the desired burner.
The bars of the residual heat indicator
go out one after another as the burners
cool. The last horizontal line only goes
out when the burner is safe to touch.
The display will show - for a few
seconds. If the burner is still hot the
residual heat indicator will show.
Turning off the cooktop
^ Touch the s On/Off control for the
cooktop.
All burners are turned off. If any burners
are still hot the residual heat indicator
will show in the respective display.
The residual heat indicator also
reacts to hot dishes and plates
being placed on a burner that is not
switched on.
Do not touch any burner or place
any heat sensitive items on a burner
where the residual heat indicator is
lit. Danger of burns and fire hazard.
,Please note that the residual
heat indicators do not light when
there is a fault message, even if the
burners are hot.
25
Timer
The cooktop has a timer which can be
used to:
– time any activity in the kitchen.
– automatically switch-off one (any)
burner.
The functions above can also be used
simultaneously.
Quick Guide:
Turn on
Touch m
Set
With - set from 99
to 00 minutes
With + set from 00
to 99 minutes
Toggle between
the functions
Touch m
Reset back to 00
Touch - and +
simultaneously
Setting the timer
The timer can be set with the cooktop
either turned on or off. It can be set
from 1 to 99 minutes.
^ Touch the m, - or + touch control to
turn the timer on.
The display shows 00.
^ Touch the - or + sensor until the
desired time is displayed, e.g. 15
minutes.
The set time counts down in minutes in
the timer display. The remaining time is
displayed and can be changed at any
time by pressing - or +.
After the set time has elapsed the
display shows 00 and an audible signal
is heard. After a few seconds the tone
will stop and the 00 will go out.
^ To end the signal select the m touch
control.
26
Timer
Automatic switch-off
Setting an additional burner
Use this function to turn a burner off
automatically.
The automatic switch-off can be used
for several burners at the same time.
If you would like to set another burner
to switch-off automatically, repeat the
above steps.
^ Turn the desired burner on and
select a power level.
^ Select the m touch control until the
indicator light for that burner flashes.
If more than one burner is turned on,
the indicator will light up clockwise from
front left to front right with each touch of
the m control.
^ Touch the - or + sensor until the
desired time is displayed, e.g. 15
minutes.
If several different switch-off times are
programmed, the shortest remaining
time is shown in the display, and the
indicator light for that burner will flash.
The other indicator lights will show a
steady light.
If you would like to see the other
remaining times:
^ Select the m touch control until the
indicator light of the desired burner
flashes.
The set time counts down in minutes in
the timer display. The remaining time is
displayed and can be changed at any
time by pressing - or +.
27
Timer
Combi mode
Timer start value
The timer and automatic switch-off
functions can be used at the same
time.
The timer is factory set so that the +
and - touch controls start at 01 and 99
respectively.
If you are using the automatic switch-off
function and would like to use the timer
as well:
These settings can be adjusted so that
they start with the most recently set
(and completed) time (see
"Programming - P14").
^ Touch the m sensor until the
indicator light for the programmed
burner(s) lights steadily and 00
appears in the display.
If you are using the timer and would like
to use the automatic switch-off function
as well:
^ Touch the m sensor until the
indicator for the desired burner
flashes.
After the last entry, the shortest
remaining time will appear in the
display.
Toggle between functions
Automatic switch-off function: Touch
the m touch control until the indicator
light for the desired burner flashes.
Timer: Touch the m touch control until
the indicator light for the desired burner
is lit.
Starting with the shortest remaining
time which is shown in the display, all
burners that are in use and the timer
can be selected clockwise from left to
right.
28
Example:
You entered Program P14, Status S1,
with the timer most recently set to 5
minutes. When you switch on the timer,
00 appears in the display; when you
then touch + or -, 05 appears.
Note: If the setting is changed you can
still select any time desired, as usual.
Safety features
Child Safety Lock
Keep children away from the
cooktop for their own safety.
The cooktop has a Child Safety Lock to
prevent children from turning on the
burners or changing the settings.
The Child Safety Lock can be activated
while the cooktop is on or off.
Activating the Child Safety Lock
during cooktop use
– The settings for the burners and
timer cannot be altered.
– The burners and cooktop can still be
turned off but once turned off cannot
be turned on again.
Activating the Child Safety Lock
when the cooktop is turned off
– The cooktop cannot be turned on.
To activate the Child Safety Lock
^ Press and hold the $ Child Safety
Lock control until the respective
indicator lights.
The indicator will go out after a short
time.
If you touch the $ Child Safety Lock
control or select a setting, the indicator
will come on to show that the Child
Safety Lock is activated.
To deactivate the Child Safety Lock
^ Press and hold the $ Child Safety
Lock control until the indicator goes
out.
In the case of a power failure the
Child Safety Lock will be
deactivated.
29
Safety features
Stop and Go
To deactivate Stop and Go:
Your appliance has a Stop and Go
feature which, when activated, reduces
the power of all burners that have been
switched on.
^ Press and hold the control $ until the
indicator goes out.
If you then deactivate the feature, the
burners will automatically return to the
previous level.
If the feature is not de-activated, the
cooktop will turn off after 1 hour.
If you wish to use this feature, you will
need to alter the factory setting (see
"Programming - P5").
To activate Stop and Go:
^ Press and hold the sensor $ until you
hear two consecutive beeps.
Be careful not to continue touching
the $ sensor for too long, as this will
activate the safety lock.
The Child Safety Lock indicator will
flash. The power for the activated
burner(s) will reduce to level 1, and 1
will appear in the respective display.
When activating "Stop and Go":
– the countdown of the programmed
time for the automatic switch-off
function will be interrupted. When
deactivating "Stop and Go", the
countdown will continue,
– the timer will continue without
interruption.
30
The burners will now run at the level
previously set.
Safety features
Safety cut-out feature
Covered touch controls
The cooktop is on too long
The cooktop has a safety cut-out
feature in case it is not turned off after
use.
If one of the burners is heated for an
unusually long period of time (see
table), and the power level settings are
not adjusted, the cooktop will turn itself
off automatically and the residual heat
indicator will light.
Power level*
Maximum operating
hours
1/1.
10
2/2.
5
3/3.
5
4/4.
4
5/5.
4
6
4
6.
3
7/7.
3
8/8.
3
9/9.
2
10/10.
2
11/11.
2
12
1
The cooktop will turn off automatically if
any of the touch controls are covered
for more than 10 seconds, e.g. by
finger contact, food boiling over or by
an object such as an oven mitt or towel.
A tone will also sound every 30 secs.
for a maximum of 10 min and an F will
flash in the display of the sensor which
is covered.
^ Clean the touch controls or remove
the object covering it.
This will turn off the signal tone and the
displayed F will go out.
^ Turn the cooktop on again with the s
touch control. The burners can now
be used.
* The power settings with a dot after the number
are only available if the power setting range has
been extended (see "Programming - P16").
^ To use the burners again, switch the
cooktop back on in the usual way.
31
Safety features
Overheating protection
Overheating can be caused by:
The induction coils and the cooling
element of the electronic are fitted with
a overheating protection feature. This
prevents the induction coils and cooling
element from overheating.
– heating an empty pan.
This mechanism works on the affected
burner or on the entire cooktop in the
following ways:
– If the booster function is being used,
it will be switched off.
– If the power level is set between 10
and 12, it will be reduced. The set
and reduced power level will flash
alternately in the display. The
reduced power level is also shown
by the number of segments in the
lighting circle.
– If an induction coil is affected, the
burner will automatically turn off. A 0
and the residual heat indicator will
show in the display.
The burner can be used again as soon
as it has cooled to a safe temperature.
– If the cooling system is affected, all
burners will automatically turn off,
and the display will show 0
alternating with the set power level.
Once the system has sufficiently
cooled, the burners will automatically
operate at the originally set power level.
32
– fats or oils being heated on the
highest power setting.
– there being insufficient ventilation to
the under side of the appliance.
If the overheating protection
mechanism triggers again, contact
Miele Technical Service.
Cleaning and Care
Do not use a steam cleaner to clean
this appliance. Steam could
penetrate electrical components and
cause a short circuit. Pressurized
steam could cause permanent
damage to the surface and to
components.
Do not use any sharp pointed
objects which could damage the
seal between the ceramic surface,
the surrounding frame and the
countertop.
Never use abrasive or caustic (oven)
cleaners, dishwasher detergent,
scouring pads, steel wool or hard
brushes. They will damage the
surface.
The ceramic surface can be cleaned
using a cleaner for ceramic
surfaces. Follow the manufacturer’s
instructions.
Make sure that no cleaner residue
remains on the ceramic surface by
carefully wiping the cooktop with a
damp cloth. They may damage the
cooktop or produce toxic fumes
when heated.
Be sure that pot and pan bases are
clean and dry.
After cleaning, dry the ceramic
surface with a soft cloth to prevent a
build up of limescale deposits.
Clean any spills immediately before
they become difficult to remove.
Clean the appliance regularly,
preferably after each use. Allow the
appliance to cool before cleaning.
^ Wipe off any soiling using a damp
cloth. Stubborn soiling is best
removed with a shielded scraper
blade.
^ Apply a ceramic cleaner using a soft
cloth or paper towel. To remove any
limescale deposits or metallic residue
apply a ceramic cleaner using a soft
cloth and a shielded scraper blade if
necessary.
^ After cleaning wipe the ceramic
surface with a damp cloth and dry.
A cleaner with a special additive to
prevent water marks and smears on the
ceramic surface may be used.
Any melted solids like sugar, plastic or
aluminum foil should be removed as
soon as possible, while the burner is
still warm. If they are allowed to harden
the cooktop may become pitted.
^ Turn the burner off.
^ Using a shielded scraper blade,
scrape the melted item immediately
off the burner while it is still hot.
Use caution: Danger of burns!
^ Allow the cooktop to cool and clean
as previously described.
33
Programming
The cooktop's default settings can be
adjusted (see table).
^ While the cooktop is turned off, touch
On/Off "s" control and Child Safety
Lock "$" control at the same time
until the Child Safety Lock indicator
flashes.
The burner display shows P (Program)
and S (Status) with a number. The
number indicates the current setting.
To set the desired program:
^ Touch the + or – control of the front
left burner to select the program
desired.
To set the status (see table):
^ Touch the + or – control of the front
right burner to select the desired
status.
Several programs can be adjusted one
after another by repeating the steps
listed above.
34
Saving the settings
^ Press and hold the On/Off "s" touch
control until the displays go out.
Not saving the settings
^ Press and hold the Child Safety Lock
"$" control until the displays go out.
Programming
Programming Table
Program*
P
P
P
P
P
P
P
P
0
1
2
3
4
5
6
Demonstration mode and
factory default settings
Status** Setting
S
0
Demonstration mode on
S
1
Demonstration mode off
S
9
Restore Factory default settings
Keypad tone when a
control is touched
S
0
Off
S
1
On
Warning tone when there
is no pan or the pan is
unsuitable
S
0
Off
S
1
On
Timer tone
S
0
Off
S
1
Continued tone 10 seconds
S
2
Continued tone 4 minutes
S
0
One-touch-lock by $
S
1
Three-finger-lock by $ and + of
the two right burners
S
0
Off
S
1
On
S
0
Quiet
S
1
Medium
S
2
Loud
S
0
0
S
1
5 (only selectable if auto-heat is
activated)
Child Safety Lock
Stop and Go
Timer tone volume
10 Power level when turning
the burner on
* Programs / status not shown are not allocated.
** The factory default setting is printed in bold.
35
Programming
Program *
P 12
P 13
P 14
P 15
P 16
Auto-heat
Residual heat indicator
Timer start value
Timer function
Extended power level
Status** Settings
S
0
off
S
1
Activate by setting the power
level with –.
S
2
Activate by setting the power
level with +.
S
3
Activate with every turn on
S
0
H as Residual heat display
S
1
# as Residual heat display
S
0
01
S
1
Time last set
S
0
Only Timer function
S
1
Only Switch-off function
S
2
Combi function
S
0
12 Power levels
(1, 2, 3 ... to 12)
S
1
23 power level
(1, 1., 2, 2., 3 ... to 12)
Therefore:
Display of auto-heat by
flashing the power level
alternating with A.
* Programs / status not shown are not allocated.
** The factory default setting is printed in bold.
36
Frequently asked questions
,Repairs should only be carried out by an authorized technician in
accordance with local and national safety regulations. Unauthorized repairs
could cause injury or appliance damage.
The cooktop or the burners cannot be turned on.
Possible fault
Solution
The cookware is not suitable.
See "Cookware".
The Child Safety Lock is activated. Deactivate the Child Safety Lock.
See "Child Safety Lock".
The main fuse has blown.
Check the main fuse.
Remove the fuse or "trip" the circuit
breaker.
If neither of the above is the case,
disconnect the appliance from the
electrical supply for 1 minute.
Reconnect the power and turn the
appliance on. If it still does not heat,
contact Miele Technical Service.
The burners do not heat but can be turned on and a power setting can be
selected.
Possible fault
Solution
The cooktop is in the demo mode.
See "Programming - P0".
The burner display shows ß.
Possible fault
Solution
The burner is turned on but no
cookware is placed on it.
Turn the burner off or place suitable
cookware on the burner.
The cookware may not be suitable See "Cookware" for information on type and
for induction or sufficient in size.
size of cookware.
37
Frequently asked questions
A single burner or the cooktop turns off automatically.
Possible fault
Solution
The overheating protection has
been activated.
See "Overheating protection".
One of the following errors occurs:
– The booster function turns off automatically ahead of time.
– The selected power level 10, 11 or 12 flashes alternating with a lower power
level in the burner display. The lower power level is also shown by the
number of segments in the lighting circle.
Possible fault
Solution
The overheating protection feature See "Overheating protection".
has been activated.
The food does not cook when using auto-heat.
Possible fault
Solution
Large amounts of food are being
cooked.
Select a higher continued power level.
The pot or pan does not transfer
the heat properly.
Use the correct pots and pans, see
"Cookware".
The cooling fan continues to run after the cooktop was turned off.
Possible fault
Solution
This is not a fault.
The fan continues to run until the appliance
has sufficiently cooled. It will turn off
automatically.
38
Frequently asked questions
The cooktop is turned off, the timer display shows numbers and the burner
displays show A, F and numbers.
Possible fault
Solution
The touch controls could not be
reset automatically.
They must be reset manually, see "Resetting
the touch controls - Manual reset".
If the problem persists, contact Miele
Technical Service.
The rear burner display shows F, the front burner display E and the timer
shows numbers.
Possible fault
Solution
An error occurred.
Trip the circuit breaker to the cooktop or
disconnect the appliance from the main
power supply for 1 minute.
If the problem persists, contact Miele
Technical Service.
39
Technical Service
In the event of a fault which you cannot
easily fix yourself, please contact the
Miele Technical Service Department
using the information on the back of this
manual.
When contacting Technical Service
quote the serial number and model of
the cooktop. This information is visible
on the silver data plate.
MieleCare
(USA only)
MieleCare, our Extended Service
Contract program; gives you the
assurance of knowing that your
appliance investment is covered by 5
years of worry free ownership.
MieleCare is the only Extended Service
Contract in the industry that guarantees
repairs by a Miele Authorized Service
Provider using genuine Miele parts.
Only genuine Miele parts installed by
factory trained professionals can
guarantee the safety, reliability and
longevity of your Miele appliance.
Please note that unless expressly
approved in writing by the Miele
Service department, Extended Service
Contracts offered by other providers for
Miele products will not be recognized
by Miele. Our goal is to prevent
unauthorized (and untrained) service
personnel from working on your Miele
products, possibly doing further
damage to them, you and/or your
home.
To learn more about MieleCare
Extended Service Contracts, please
contact your appliance dealer or visit
us online at:
http://miele.com/mielecare
40
Installation Instructions
To prevent accidents
and machine damage
read these instructions
before
installation or use.
IMPORTANT SAFETY INSTRUCTIONS
Note to the installer:
Please leave this instruction book
with the consumer for the local
electrical inspector’s use.
2”
The minimum distances given in
these Installation Instructions must
be observed in order to ensure safe
operation. Failure to do so increases
the risk of fire.
The cabinetry and venting hood
should be installed first to prevent
damage to the cooktop.
~ The cooktop should only be installed
as shown in the illustrations while
maintaining the required safety
distances shown. Do not install the
cooktop between two tall cabinets, this
is a fire hazard.
a A minimum distance of 2"
(50 mm) from the cooktop to the rear
wall and a side wall or cabinet must
be maintained for safety.
recommended
2”
50mm
b
not recommended
~ The countertop must be bonded
with heat resistant (212 °F/100 °C)
adhesive to prevent distortion or
dissolving.
~ The cooktop must not be installed
over a dishwasher, washer, dryer,
refrigerator or freezer. Heat radiated by
the cooktop may damage them.
~ The cooktop must only be installed
above an oven if it has a built-in cooling
fan.
42
not allowed
IMPORTANT SAFETY INSTRUCTIONS
~ To eliminate the risk of burns or fire
by reaching over heated surfaces
cabinet storage space above the
cooktop should be avoided. If cabinet
storage is necessary, the risk can be
reduced by installing a venting hood to
project horizontally a minimum of 5"
(127 mm) beyond the bottom of the
cabinets.
~ Because of the heat radiated it is not
recommended to install the cooktop
above a drawer. It should be installed
above a cabinet base unit with a
dummy drawer front. A protective base
should also be installed between the
dummy drawer and the cooktop. There
must be a minimum distance of 4 ½"
(110 mm) between the top of the
countertop and the top of the protective
base to ensure proper ventilation.
~ This appliance has not been
designed for maritime use or for use in
mobile installations such as recreational
vehicles or aircraft. However, under
certain conditions it may be possible for
installation in these applications. Please
contact the Miele Technical Service
Department with specific requirements.
~ The cooktop must not be
permanently sealed into the countertop
when installed. The sealing strip under
the edge of the cooktop provides a
sufficient seal for the countertop.
Safety distances above the
appliance
The minimum safety distance given by
the hood manufacturer must be
maintained between the cooktop and
the hood above it. See the installation
instructions of the hood for these safety
measurements.
If the hood manufacturers instructions
are not available or if flammable objects
are installed over the cooktop (e.g.
cabinets, utensil rail, etc.), a minimum
safety distance of 30" (760 mm) must
be maintained.
If there is more than one appliance
beneath a hood (e.g. wok burner
and electric cooktop), and they have
different minimum safety distances
always observe the greater
distance.
~ Once installed, be sure that the
power cord cannot come into contact
with the underside of the cooktop or
any mechanical parts.
43
Installation
Cooktops flush with the countertop
a Wall
b Wall covering
c Back splash
d Countertop
e Countertop cut-out
f 2" (50 mm) minimum distance
44
Frame/Facet cooktops
Installation
Installation dimensions
"
5/16 )
m
"
(8m 9/16
2 mm)
(65
20 1/4"
36
(514m
m)
5/8"
)
0mm
(93
"
/16 )
ß 3 4mm
b
ax
m /16"
9
ßR
1
)
0
(0 502"
mm
)
m
m
0
x4
a
(m
6"
1911/16
(50
0 +- 1
1
"+1/1
mm
)
6"
1
+1/
m)
+ 1m
6
1
"
/16
36(9
0
(0502" a
mm
)
a
d
3 15/16"
(100mm)
8"
31/2"
(89
16
,5m
7/
)
m
m
28
(4
m)
c
a Front of cooktop
b Installation height
c Power cord encased by flexible metal conduit
Length = 3' 11" (1200 mm) C = 3/4" (19 mm)
d Installation height for the power supply
45
Installation
(max 40mm)
1 9/16"
b
32 5/16"
(820mm)
3"
(75mm)
c
(min 110mm)
min 41/2"
Ventilation
a
a Front of cooktop
b Cut-out at the rear wall of the cabinet for ventilation
c Protective base
If a protective base is fitted, there must be a distance of at least 4 ½" (110 mm)
between the top of the protective base and the top of the countertop, for proper
ventilation of the appliance. At the back there has to be a gap of 3" (75 mm) for
the power cord.
46
Installation
Cut out
Installing the cooktop
^ Make the countertop cut-out following
the dimensions given in the
illustration.
Remember to maintain a minimum
distance of 2" (50 mm) between the
rear wall and the right or left side.
See also the "IMPORTANT SAFETY
INSTRUCTIONS".
^ Feed the cooktop connection cable
down through the cut-out.
^ Seal the cut surfaces with a suitable
heat-resistant sealant to avoid
swelling caused by moisture.
If during installation the seal around
the frame does not sit flush with the
countertop in the corners, the corner
radius, maximum 3/16" (4 mm), can
be carefully filed down to fit.
^ Place the cooktop centrally in the
cut-out. When doing so make sure
that the seal under the cooktop sits
flush with the countertop on all sides.
This is important to ensure an
effective seal. Do not use sealant.
^ Connect the cooktop to the main
power supply.
^ Turn the cooktop on and check the
function.
This cooktop has a seal underneath
to keep it securely in position.
Spring clips are not required. Any
gap between the frame and the
countertop will reduce as the
cooktop is used.
47
Installation
The sealing strip under the edge of the
top part of the cooktop provides a
sufficient seal for the worktop.
Do not let sealant get in between the
cooktop frame and the worktop.
This could cause difficulties if the
cooktop ever needs to be taken out
for servicing and possibly result in
damage to the cooktop frame or the
worktop.
48
Electrical connection
,CAUTION: Before installation or
servicing, disconnect the power
supply by either removing the fuse,
shutting off the main power supply
or manually "tripping" the circuit
breaker.
Installation work and repairs should
only be performed by a qualified
technician in accordance with all
applicable codes and standards.
Repairs and service by unqualified
persons could be dangerous.
Before connecting the appliance to
the power supply, make sure that
the voltage and frequency listed on
the data plate correspond with the
household electrical supply. This
data must correspond to prevent
appliance damage. Consult an
electrician if in doubt.
Connection
The cooktop is equipped with a flexible
metal conduit encasing 3 wires ready
for connection to a grounded power
supply.
208/240 V, 60 Hz, 50 A fuse rating
Black wire: connect to L1 (hot)
Red wire: connect to L2 (hot)
Green wire: connect to GND (ground)
A dedicated line and junction box
should be used to connect the cooktop
to a 50 A circuit..
For further information, see the wiring
diagram provided with the appliance.
, WARNING:
THIS APPLIANCE MUST BE
GROUNDED!
Only operate the cooktop after it has
been installed into the countertop.
Installer:
Please leave these instructions with
the consumer.
Power supply
^ Be sure your electrical supply
matches the data plate.
49
Help protect our environment
Disposal of packing materials
Disposal of an old appliance
The cardboard box and packing
materials are biodegradable and
recyclable. Please recycle.
Old appliances contain materials that
can be recycled. Please contact your
local recycling authority about the
possibility of recycling these materials.
Ensure that any plastic wrappings,
bags, etc. are disposed of safely and
kept out of the reach of children.
Danger of suffocation!
50
Before discarding an old appliance
disconnect it from the electrical supply
and cut off the power cord to prevent it
from becoming a hazard.
51
Alterations rights reserved / 4513
M.-Nr. 06 766 180 / 06
INFORMATION IS SUBJECT TO CHANGE. PLEASE REFER TO OUR WEBSITE TO OBTAIN THE MOST
CURRENT PRODUCT SPECIFICATIONS, TECHNICAL & WARRANTY INFORMATION.