1
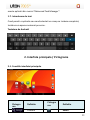
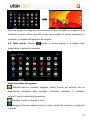
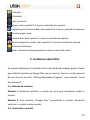
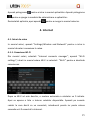
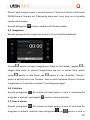
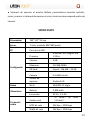
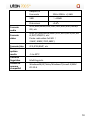
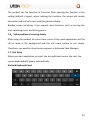
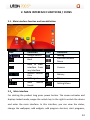
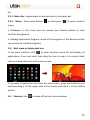
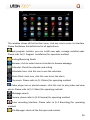
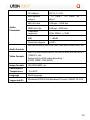
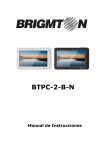
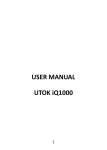
MANUAL DE UTILIZARE UTOK 700 S 1 CUPRINS MASURI DE PRECAUTIE.............................................. 3 FUNCTII PRINCIPALE .................................................. 5 AFISAJ SI BUTOANE .................................................... 6 1. Pornire rapida ........................................................ 6 2. Interfata principal / Pictograme........................... 11 3. Instalarea aplicatiilor ........................................... 14 4. Internet ................................................................ 15 5. Operare interfata principala ................................ 17 6. Functie OTG ......................................................... 21 7. Tastatura USB sau Mouse .................................... 22 8. Utilizarea cardului SD ........................................... 22 9. Setari de baza....................................................... 22 10. Rezolvarea problemelor uzuale ......................... 27 SPECIFICATII ............................................................. 29 DECLARATIE DE CONFORMITATE ............................. 31 2 IMPORTANT 1. Inainte de a folosi tableta, va rugam sa cititi informatiile din acest manual, pentru a putea folosi produsul in mod corect. 2. Compania noastra detine drepturile de autor pentru acest manual si orice multiplicare sau interpretare a acestui manual, partiala sau in intregime, este strict interzisa. 3. Cand folositi acest produs, va rugam sa salvati datele importante. Producatorul este reponsabil doar de produsul in sine si nu isi asuma raspunderea fata de pierderea sau distrugerea datelor personale datorate intretinerii sau operarii gresite a produsului. MASURI DE PRECAUTIE Manualul include informatii importante referitoare la masurile de precautie si la folosirea in bune conditii ale produsului. Pentru a preveni orice accident, va rugam sa va asigurati ca ati citit manualul inainte de a folosi produsul. Nu folositi produsul in conditii de temperatura foarte ridicata, umiditate ridicata sau unde este prezent foarte mult praf. Nu lasati produsul in masina cu geamurile inchise pe timpul verii. Nu il lasati sub lumina directa a soarelui. Evitati socurile asupra produsului si de asemenea vibratiile puternice sau loviturile in zona ecranului; in urma loviturilor, ecranul se poate defecta si poate sa nu functioneze corect. 3 Va rugam alegeti volumul potrivit pentru sunet. Evitati folosirea la maxim a volumului cand folositi un set de casti. In cazul in care sunetul nu este clar, va rugam sa micsorati volumul sau sa opriti folosirea. Nu intrerupeti conexiunea cand produsul este formatat, cand se deruleaza operatiuni de upload sau download. In caz contrar, pot aparea erori in anumite programe. Producatorul nu isi asuma responsabilitatea pentru pierderi de date datorate socurilor sau reparatiilor efectuate asupra produsului. Nu dezasamblati acest produs. Nu curatati suprafata produsului cu alcool, benzina sau substante chimice. Nu folositi produsul intr-un loc in care folosirea produselor electronice nu este permisa, cum ar fi la bordul unui avion. Nu folositi produsul in timp ce conduceti masina sau cand traversati strada, pentru a preintampina posibile accidente. Acest produs nu poate fi folosit in apa. 4 FUNCTII PRINCIPALE 7” TFT ecran touch capacitiv, rezolutie 800 x 480. 0.3 MegaPixeli camera frontala Microfon cu functie de inregistrare Functie vibratie Suport mouse USB extern, tastatura, etc; Suport functie OTG, U-disc, hard disk portabil prin OTG transfer de date. (In timp ce conectati hard-disk-ul portabil, produsul trebuie sa fie conectat la sursa de curent, in caz contrar produsul se poate defecta.) Suport conexiuni multiple la Internet. Cu ajutorul WiFi, va puteti bucura de Internet oriunde si oricand. G-sensor, pe langa operarea in plan orizontal sau vertical, puteti instala diferite aplicatii ce pot folosi aceasta functie, cum ar fi rotirea textului, schimbarea melodiilor sau utilizarea jocurilor; Cu ajutorul sistemului de operare inteligent Google Android, puteti personaliza produsul cu programe si aplicatii descarcate si instalate de Dumneavoastra. Cu acest produs puteti beneficia de programe si aplicatii de divertisment sau pentru birou, cum ar fi E-Mail, Word, navigare pe Internet, Stiri, mesagerie instant, blog, jocuri online, video online, starea vremii, programe TV, harti, etc. Formate audio suportate: MP3, M4A, WMA, APE, FLAC, AAC, MID, WAV, AMR, OGG, etc. Suport decodare video full HD (2160P, 1080P, 720P, 480P); formate video: MKV, AVI, RM/RMVB, WMV, 3GP, MOV, MP4, ASF, MPG, DAT, VOB, FLV, etc. 5 Formate de imagine suportate: JPG, JPEG, BMP, PNG, etc. Card SD cu o capacitate de pana la 32GB. Setari pentru personalizare: luminozitate, sunet, schimbarea imaginilor pe ecran, etc. Suport lingvistic. AFISAJ SI BUTOANE DEFINITII 1 – Microfon 2 – “ ” Buton Power: apasati lung acest buton pentru a porni / inchide produsul; apasati scurt acest buton pentru a bloca ecranul. 3 – Mufa casti 6 4 – Port USB: Micro USB 5 Pin suporta U-disc, MP3, MP4, mouse, 3G card Internet wireless, etc. 5 – Buton Acasa: apasati scurt pentru a reveni in ecranul principal 6 – slot Card SD / port HDMI 7 – buton Reset 1. Pornire rapida 1-1. Pornire/Oprire/Blocare/Deblocare: Cand produsul este inchis, apasati pentru 3 secunde butonul “ ” pentru a porni produsul. Dureaza aproximativ 100 secunde pentru a porni sistemul de operare, dupa care mutati pictograma “ ” in partea dreapta pentru a debloca ecranul: Salvare energie si mod blocat: dupa o perioada de neutilizare, produsul intra automat in starea de salvare energie; din acest mod, apasati “ aprinde ecranul, apoi mutati “ ” pentru a ” pentru a debloca. Nota: In modul salvare energie, produsul va fi in continuare in functiune, doar 7 ecranul va fi oprit. Fisierele de muzica sau de film vor rula in continuare. Oprirea produsului: din modul de utilizare normal, apasati “ ” pentru 5 secunde iar ecranul va afisa optiunea de oprire. Selectati optiunea de oprire, confirmati si produsul se va opri automat. Nota: In cazul in care puterea bateriei este la un nivel redus, va exista un semnal sonor; conectati produsul la o sursa de curent pentru a incepe incarcarea acumulatorului. 1-2. Baterie si incarcare La prima folosire, bateria trebuie incarcata pentru 8 – 12 ore pentru a asigura capacitatea maxima. Va rugam folositi incarcatorul aprobat de producator. Inainte de a incepe alimentarea, conectati cablul la tableta si apoi la sursa de curent. In momentul in care bateria se incarca, pictograma va afisa statusul corespunzator. Va rugam nu deconectati pana in momentul in care bateria este incarcata 100%. Va rugam notati urmatoarele masuri de precautie referitoare la protejarea bateriei: a. Nu incarcati bateria in mediul cu temperaturi inalte sau direct sub razele soarelui; b. Bateria pe Litiu nu trebuie sa se descarce complet. Puteti sa o reincarcati chiar daca mai are energie disponibila. c. In timpul incarcarii, este normal ca atat incarcatorul cat si produsul sa se incalzeasca usor. 8 1-3. Conectarea la PC si transfer de fisiere Conectati produsul la computer cu ajutorul unui cablu USB si veti observa pictograma de conectare pe bara de mesaje. Atunci cand produsul este conectat USB, acesta se si incarca. În cazul în care conectati hard-disk-ul extern, trebuie sa activati setarea de pornire automata, apoi veti observa optiunea "conectare USB". Faceți clic pe aceasta opțiune si apoi pe “USB conectat” în conformitate cu pictograma din partea din stanga sus. Din acest moment, utilizatorii pot accesa hard disk-ul extern. Din modul de stocare USB, faceți clic pe pictograma din nou pentru a deconecta functia USB și a reveni la modul de încărcare. Prin deconectarea din modul de stocare USB, se va trece in starea normală, la fel ca imaginea de mai jos: 9 1-4. Folosirea ecranului tactil Exista mai multe metode de operare. Puteti lucra in ecranul principal, in meniu sau in lista de programe si aplicatii. 1-4-1. Introducere date Cand doriti sa folositi tastatura de pe ecran pentru a introduce date, pur si simplu atingeti ecranul in dreptul campului unde doriti sa scrieti. Tastatura se va activa automat. 1-4-2. Activare aplicatii In cazul in care doriti sa deschideti o aplicatie, pur si simplu apasati pictograma acesteia. 1-4-3. Navigare intre ecrane Glisati stanga / dreapta pentru a naviga intre ecrane. 1-4-4. Mutarea pictogramelor Inainte de a muta pictograma pe noua pozitie dorita, tineti apasata pictograma pentru cateva secunde pentru a o putea deplasa. 1-5. G-Sensor Produsul este dotat cu G-Sensor. Dupa ce activati optiunea de rotire automata a ecranului, odata ce rotiti ecranul la 90 de grade, acesta va ajusta automat imaginea, atat orizontal cat si vertical. 1-6. Rezolvarea functionarii lente a produsului Dupa functionarea produsului pentru o perioada de timp, este posibil ca acesta sa functioneze mai lent, datorita programelor care nu au fost inchise, sunt inca active si ruleaza in background. In acest caz trebuie sa inchideti 10 aceste aplicatii din meniul “Advanced Task Manager”. 1-7. Introducere de text Cand porniti o aplicatie sau cand selectati un camp ce trebuie completat, tastatura va aparea automat pe ecran. Tastatura de Android 2. Interfata principala / Pictograme 2-1. Functiile interfetei principale Pictogra ma Definitie Cautare Pictogra ma Definitie Setari 11 Google Meniu functii operare Inapoi Inapoi la interfata principala Ora curenta Semnal WIFI Produs nou detectat Camera foto / video Nivel baterie Meniu Aplicatii deschise 2-2.Interfata principala. Introducere In aceasta interfata puteti activa aplicatiile principale, adauga programe sau aplicatii, schimba fondul ecranului, vedea statusul, etc. 2-2-1. Bara de notificari: Glisati in jos din partea superioara a ecranului pentru a activa bara de stare si pentru a vedea toate notificarile. 2-2-2. Meniu:Apasati pictograma sau pentru a deschide meniul principal: Imagine de fundal: in acest meniu puteti alege una din pozele preferate si o puteti seta ca imagine de fundal. Meniul pentru aplicatii: puteti verifica toate programele instalate pe tableta si, de asemenea, puteti sterge aplicatii de care nu mai aveti nevoie. 2-3. Adaga/Muta/Sterge pictograme In ecranul principal, apasati pictograma pentru a accesa meniul principal. Tineti apasat si apoi mutati pictograma pe ecranul principal. 12 Pentru a sterge o pictograma din meniul principal, va trebui sa o apasati si sa mentineti pentru cateva secunde iar apoi sa o mutati in partea superioara a ecranului, in dreptul pictogramei de stergere. 2-4. Taste rapide: Apasati pentru a accesa meniul si a vedea toate programele si aplicatiile instalate. Explicatii pentru pictograme: Aplicatie pentru instalare program: puteti instala noi aplicatii sau sa administrati aplicatiile deja instalate. Consultati capitolul 3, “Instalare aplicatii” pentru metodele de operare. Trimitere / primire mesaje E-mail. Navigare Internet: apasati pentru a intra in aplicatie si pentru a naviga pe Internet 13 Calendar Calculator Ceas cu alarma Muzica. Vezi capitolul 5-1 pentru metodele de operare. Aplicatie pentru fisiere video. Vezi capitolul 5-2 pentru metode de operare. Cautare pagini web. Camera foto: Vezi capitolul 5-4 pentru metode de operare. Meniu inregistrare audio. Vezi capitolul 5-5 pentru metode de operare. Administrare fisiere. Setari. Apasati pictograma pentru a intra in meniul de setari. 3. Instalarea aplicatiilor Pe aceasta tableta pot fi instalate fisiere apk (Android package) gratuit. Puteti gasi astfel de aplicatii pe Google Play sau pe Internet. Pentru a instala aplicatii de pe Internet, accesati “Setting/Application Program”, apoi selectati “surse necunoscute”. 3-1. Metode de instalare: Metoda 1: Descarcati aplicatia, o copiati pe card, apoi introduceti cardul in produs. Metoda 2: Prin aplicatia “Google Play” preinstalata in produs, descarcati aplicatia si o puteti instala imediat. 3-2. Dezinstalare aplicatii: 14 Apasati pictograma pentru a intra in meniul aplicatiilor. Apasati pictograma pentru a ajunge in modulul de administrare a aplicatiilor: Dezinstalati aplicatia, apoi apasati pentru a merge in meniul anterior. 4. Internet 4-1. Setari de retea In meniul setari, apasati “Settings/Wireless and Network” pentru a intra in meniul de setari conexiune la retea. 4-1-1. Conexiune WI-FI Din meniul setari, selectati “Internet connects manager”, apasati “Wi-Fi settings”, intrati in meniul setare Wi-Fi si selectati “Wi-Fi” pentru a deschide conexiunea. Dupa ce Wi-Fi-ul este deschis, o cautare automata a retelelor va fi initiata. Apoi va aparea o lista a tuturor retelelor disponibile. Apasati pe numele retelei la care doriti sa va conectati, introduceti parola iar peste cateva secunde veti fi conectat la Internet. 15 Cand nu folositi conectarea la Internet prin WiFi, va sugeram sa dezactivati optiunea WiFi pentru a economisi energie si pentru a obtine o durata mai mare de utilizare a produsului fara conectare la o sursa de curent. 4-2. Conexiune 3G a. Prin Dongle USB extern Conectati dongle-ul USB 3G la produs prin intermediul cablului OTG-USB. Sistemul va detecta dongle-ul si il va activa. Intrati apoi in meniul Setari / WiFi si alte Retele, selectati “Retele Mobile” iar sistemul se va conecta la Internet automat. Inainte de a conecta modulul 3G, va sugeram sa dezactivati optiunea WiFi. Inainte de a conecta modulul 3G, va sugeram sa va asigurati ca produsul este incarcat suficient. Modul 3G consuma cu aproximativ o treime mai multa energie. In cazul in care nu folositi modulul 3G, va sugeram sa il deconectati pentru a salva energie si pentru a extinde durata de viata a bateriei. 4-3. Navigare Internet Apasati pictograma de pe ecranul principal, si tastati numele paginii de Internet pe care doriti sa o accesati. Glisati pe ecran in sus si in jos pentru a vedea in intregime pagina respectiva. 4-4. E-mail Cu ajutorul acestui produs puteti primi si trimite mesaje E-mail. In cadrul meniului exista un ghid de instalare pentru E-mail. Urmand instructiunile, veti putea sa setati e-mail POP3 sau IMAP sau E-Mail Web server cum ar fi Yahoo, Gmail sau Hotmail. Nota: Inainte de a seta E-mail-ul, asigurati-va ca aveti conexiune la Internet si 16 ca data este setata corect. 4-4.1. Primire si trimitere de E-mail-uri Pe ecranul principal, apasati pictograma “E-mail” pentru a accesa folderul cu mesaje. Odata ajunsi aici, sistemul va incarca automat toate mesajele Dumneavoastra. Apasati pe mesaj pentru a-l citi. Din interfata E-mail, apasati “Meniu” si “Scriere” pentru a intra in modul de scriere a unui mesaj nou. Va trebui sa introduceti adresa de e-mail a destinatarului, subiectul si informatia propriu-zisa in corpul mesajului. Daca doriti sa adaugati un fisier, apasati “Adauga un fisier” pentru a putea selecta un atasament. Apoi apasati “Trimite” iar mesajul va fi expediat automat. 5. Operare interfata principala 5-1. Muzica Apasati pictograma “Music”, pentru a intra in lista de fisiere audio. Selectati prin apasare orice fisier pe care vreti sa il rulati. Definitii pictograme Listati fisierele audio dupa artist Listati fisierele audio dupa categorie Listati toate fisierele audio Puteti vizualiza fisierele audio adaugate recent Cu ajutorul acestei pictograme puteti intra in interfata aplicatiei pentru fisiere audio. 17 :Melodia precedenta / melodia urmatoare, derulati inapoi / derulati / inainte; / :Rulare / Pauza; : Rulare fisiere audio la intamplare :Repeta toata lista : Repeta un singur fisier audio 5-2. Video Apasati pictograma video pentru a intra in aplicatia destinata fisierelor video. Apasati pentru a sterge un fisier video. Apasati pentru a deschide meniul de informatii referitoare la un anumit fisier. Selectati un anumit fisier pentru a deschide interfata de vizualizare a clipurilor video si apasati pentru a rula filmul. / :Crestere / scadere volum / :Selectati fisierul video anterior / urmator, derulati inapoi / inainte pe videoclipul prezent. / :Rulare / Pauza fisier video; 18 Apasati pentru a va intoarce la meniul anterior; : Pictograma pentru subtitrare : Pictograma pentru optiuni subtitrare :Optiuni codare subtitrare :Optiuni culoare pentru subtitrare :Optiuni marime pentru subtitrare :Optiuni timp afisare pentru subtitrare :Selectie fisiere audio :Moduri afisare imagine: dimensiune originala, 4/3, 16/9; :selectie mod 3D; : Intoarcere la meniul anterior. 5-3. Galerie foto In ecranul principal, apasati pentru a intra in lista de fotografii. Aici apasati lung si apoi selectati in cazul in care doriti sa stergeti un fisier. Selectati “Cancel” pentru a renunta la operatiunea de stergere. 5-4. Camera foto / video Apasati pictograma pentru a selecta modul fotografie /film. 5-4-1. Camera foto Tastati pictograma pentru a face poze. Fotografia va fi salvata automat cu extensie .jpg in folderul DCIM/Camera, iar fisierele vor fi denumite dupa anul, luna, ziua, ora si minutul cand au fost salvate. Apasati pentru a vedea toate pozele salvate. 5-4-2. Camera Video Apasati pictograma pentru a intra in meniul film, apoi apasati a incepe efectiv inregistrarea. Dupa ce ati incheiat, apasati pentru pentru a salva 19 fisierul, apoi mergeti inapoi in meniul anterior. Filmul va fi salvat in directorul DCIM/Camera; fisierele vor fi denumite dupa anul, luna, ziua, ora si secunda cand au fost salvate. Apasati pictograma pentru a vedea toate filmele salvate. 5-5. Inregistrare Apasati pictograma de inregistrare pentru a intra in interfata dedicata. Apasati pentru a incepe inregistrarea. Dupa ce ati finalizat, apasati si alegeti daca doriti sa pastrati inregistrarea sau nu; in acelasi timp, puteti apasa pentru a reda filmul sau pentru a-l opri. Selectati “Salvare” pentru a pastra fisierul sau “Anulare” daca nu doriti salvarea filmului. Fisierele inregistrate vor fi salvate cu numele “recordingxxxxx.3gpp”. 5-6. Calculator Apasati pictograma din meniul principal pentru a intra in sectiunea de programe si aplicatii, apoi apasati pentru a intra in aplicatie. 5-7. Ceas si alarma Apasati pictograma din meniul principal pentru a intra in sectiunea de programe si aplicatii. Selectati apoi pictograma sau pentru a intra in 20 meniul de setari pentru alarma. 5-8. Manager fisiere In meniul principal, apasati pictograma , apoi selectati [SD Card] sau [Disc local] sau [Disc mobil] pentru a vizualiza toate directoarele si fisierele. Aici puteti copia, muta sau redenumi fisierele. Apasati lung pe un director sau fisier pentru a activa meniul de editare si pentru a putea apoi alege variantele mentionate mai sus. 6. Functie OTG Acest produs este dotat cu functia OTG, prin aceasta putand recunoaste produse de stocare pe USB, precum si alte dispozitive cum ar fi MP3, MP4 player. Tableta va detecta automat echipamentul USB dupa conectarea prin cablul OTG. Imediat dupa activare, veti avea acces la toate fisierele stocate pe acest echipament. 21 In cazul in care nivelul bateriei este la minim, va sugeram sa nu folositi functia OTG, deoarece dispozitivul USB se poate opri in foarte scurt timp. 7. Tastatura USB sau Mouse Dupa ce mouse-ul este conectat, indicatorul acestuia va aparea pe ecran. Folositi butonul din stanga pentru confirmare, butonul din dreapta pentru intoarcere la pagina anterioara, iar butonul din mijloc pentru a naviga intre ecrane. 8. Utilizarea cardului SD Acest produs este dotat cu port pentru cardul SD. Odata inserat, tableta va putea reda continutul cardului. Pentru a putea scoate cardul, trebuie intai sa apasati usor pe el, apoi acesta va fi eliberat din port. Acest produs suporta carduri intre 128 MB si 32GB. 9. Setari de baza Apasati pictograma pentru a intra in meniul principal: Wireless si retele, Sunet, Afisare, Stocare, Acumulator, Aplicatii, Conturi si sincronizare, Servicii de localizare, Securitate, Limba si metoda de intrare, Copie de rezerva si resetare, Data si ora, Accesibilitate, Optiuni dezvoltator, Despre tableta. 22 9-1. Wireless & Setari de retea Apasati pe “Wireless and Networks” din Settings pentru a accesa interfata 1. Wi-Fi: Apasati “ON” pentru a activa Wi-Fi. 2. Setari Wi-Fi: Vezi capitolul 2-1 3. Retele mobile: Apasati “Mai mult” si apoi “Retele Mobile” si activati modemul. Daca optiunea WiFi este activa, veti primi mesajul pentru a dezactiva aceasta optiune. Apasati “Da” pentru a inchide WiFi. 4. Setarile retelei mobile: Apasati pentru a seta trafic date, date in roaming, numele pentru Acces Point, operatorii de retea, etc. A. Trafic de date activ: activati accesul la date B. Trafic de date in roaming: Prin apasarea in acest meniu, activati serviciile de date in roaming. C. Numele punctelor de acces: Apasati “Numele punctelor de acces” pentru a intra in meniu si apoi apasati pictograma ecranului sau apasati in coltul din dreapta sus a pentru a deschide meniul de informatii. Apoi puteti urma pas cu pas instructiunile primite. D. Operatori retea: Apasati pentru a selecta operatorul de retea preferat. Setari Ethernet: Vezi capitolul 4-3 referitor la operarea sertarilor pentru Ethernet. 9-2. Setari sunet si ecran Apasati “Sunet” in meniul ”Setari” pentru a intra in interfata de sunet. A:Volumele: Apasati aici pentru a avea acces la toate setarile de sunet. 23 B:Sunete si notificari: Apasati pentru a seta tonurile pentru sonerie, pentru notificari, etc. C:Sistem: Apasati pentru a seta sunetele sau vibratiile emise in momentul atingeri ecranului. 9-3. Apasati “Afisare” in meniul “Setari” pentru a intra in interfata dorita. A. Luminozitate: apasati pentru a putea ajusta luminozitatea ecranului. B. Imagine de fundal: Apasati pentru a alege imaginea de fundal ca poza simpla sau poza in miscare, precum si alte optiuni. C. Rotire automata a ecranului: apasati pentru a activa functia de rotire automata a ecranului. D. Inactivitate: apasati pentru a ajusta timpul de inactivitate dupa care tableta intra in starea mentionata. Aveti optiunile urmatoare: 15, 30 secunde, 1, 2, 5, 10, 30 minute. E. Dimensiune font: Apasati pentru a putea ajusta marimea literelor vizibile pe ecran. F. Accelerometru: Apasati pentru a seta coordonate speciale pentru anumite jocuri. G. Adaptare ecran: Apasati pentru a ajusta dimensiunile ecranului pentru anumite jocuri. 9-4. Stocare: Apasati pentru a verifica spatiul disponibil pe cardul SD sau pe dispozitivul intern de stocare, pentru a dezinstala cardul SD sau pentru a-l formata. 9-5. Acumulator: apasati pentru a verifica nivelul de incarcare al bateriei, 24 precum si aplicatiile care au condus la consumarea energiei. 9-6. Aplicatii : Apasati pentru a activa optiunea de instalare pentru aplicatii diverse sau pentru a administra aplicatiile instalate, pentru a vizualiza si administra toate serviciile active. 9-7. Servicii de localizare: puteti activa serviciile de localizare Google, sau locatie si cautare Google. 9-8. Locatie si securitate: Puteti seta administrarea dispozitivelor, siguranta ecranului sau parole. 1. Surse necunoscute: Prin aceasta optiunea permiteti instalarea aplicatiilor din afara Google Play. Setare parola: A:Fara:Dezactivare securitate tableta B:Model: Desenati pe modelul de pe ecran pentru activare C:PIN:Introduceti PIN numeric pentru activare D:Parola:Introduceti o parola pentru activarea tabletei 9-9. Limba si metoda de intrare:Setati limba pentru meniu si modul in care doriti sa introduceti textul. 9-10. Salvare date:Puteti alege optiuni precum salvare date, revenire la 25 setarile din fabrica, etc. 9-11. Data si ora A:Setare data: Apasati pentru a alege anul, luna, ziua. B:Selectati fusul orar; Selectati fusul orar si confirmati C: Setati ora: Apasati pentru a seta ora si minutele, apoi confirmati. D: Alegeti formatul de afisare al datei. Apasati pe formatul preferat pentru a-l confirma. 9-12.Accesibilitate 9-13.Optiuni dezvoltator 9-14.Despre tableta Puteti verifica informatiile legale, numarul modelului, versiunea de Android, precum si alte informatii. 26 10. Rezolvarea problemelor uzuale 1. Tableta porneste destul de greu La prima pornire, dupa actualizarea sistemului de operare sau dupa revenirea la setarile din fabrica, in mod normal tableta porneste in 2-3 minute. Acest interval de timp este necesar pentru a preinstala anumite aplicatii necesare. Timpul necesar pornirilor urmatoare va fi mult mai scurt. 2. Nu se conecteaza la reteaua WiFi sau are semnal slab Asigurati-va ca routerul WiFi functioneaza corect. Asigurati-va ca numele si parola sunt introduse corect. Asigurati-va ca antena interna nu este blocata de la a receptiona semnalul. Asigurati-va ca tableta este in aria de acoperire a semnalului routerului WiFi. 3. Nu se conecteaza la 3G sau semnalul este slab Asigurati-va ca dongle-ul 3G USB este corect conectat la tableta iar cartela SIM este corect montata si abonamentul de date valabil si functional. Asigurati-va ca dongle-ul 3G USB face parte din modelele suportate de aceasta tableta. Asigurati-va ca sunteti intr-o zona in care exista semnal. Asigurati-va ca setarile din meniul “Retele si Wireless” sunt corect introduse. 4. Fisierele nu se copiaza Tableta trebuie sa fie conectata in mod corect la computer. 27 Va rugam sa va asigurati ca exista suficient spatiu liber pe tableta. Cablul USB trebuie sa functioneze corect. 7. Nu se aude sunetul in casti ● Asigurati-va ca volumul nu este setat la 0. ● Verificati conexiunea castilor la tableta sa fie corect realizata si cablul sa nu fie rupt. 8. Tableta da erori in functionare ● Cand instalati aplicatii din afara Google Play, este posibil sa intampinati probleme de functionare. Va sugeram sa restartati tableta si sa dezinstalati aplicatiile mentionate. 9. Nu se poate folosi E-mail-ul ● Va rugam sa va asigurati ca reteaua functioneaza corect. ● Va rugam sa va asigurati ca E-mail-ul si contul de E-mail sunt setate corect. ● Va rugam sa va asigurati ca ora setata in sistem corespunde cu ora locala. ● Va rugam rulati aplicatia “Advanced Task Manager” pentru a opri functionarea altor aplicatii care ar putea bloca sau ingreuna rularea aplicatiei de E-mail. 10. Capacitatea de memorie este diferita de cea mentionata. ● La fel ca in cazul hard-disk-ului de computer, capacitatea afisata de tableta este de obicei mai mica decat cea nominala; acest fapt se datoreaza anumitor algoritmi de calcul folositi de producatorii echipamentelor de stocare. In computer, 1GB=1024MB, pe cand producatorii de echipamente de stocare folosesc 1GB=1000MB. 28 ● Sistemul de operare al acestei tablete preinstaleaza anumite aplicatii, jocuri, precum si sistemul de operare in sine, toate acestea ocupand spatiu de stocare. SPECIFICATII Dimensiuni 192*117*11 mm Ecran Conexiune PC 7 inch; rezolutie 800*480 pixels Configuratie Retea Alimentare Parametri audio Port micro USB Procesor Allwinner A13 Single Core 1.2Ghz Stocare 4 GB Memorie 512 MB DDR3 SD Card Suport, 128 MB ~ 32 GB Camera Sistem de operare 0.3 MB Frontal Wi-Fi IEEE 802.11 b/g/n Baterie 2,400 mAh Incarcator Volum casti DC 5V, 1.5-2A (L)7mW+(R)7mW (32 ohm) MP3 bit rate 32K bps – 320K bps WMA bit rate 16K bps – 320K bps Android 4.0 29 Formate audio Formate video Formate foto Temperatura optima mediu Variante lingvistice Sistem de operare compatibil Raspuns in frecventa 20Hz-20KHz +/-3dB SNR >=85dB Distorsiuni <0.6% MP3,M4A,WMA,APE,FLAC,AAC,MID,WAV,AMR,O GG, etc MKV,AVI,RM/RMVB,WMV,3GP,MOV,MP4,ASF,MP G,DAT,VOB,FLV, etc. Poate reda video Full HD( 2160P,1080P,720P,480P) JPG,JPEG,BMP, etc -5 to 40℃ Multilingvistic Windows2K/XP/Vista/Windows7/Linux2.4/MAC OS 10.4 30 DECLARATIE DE CONFORMITATE Nr. 367 / 25.07.2013 Produs marca UTOK, Model 700 S Noi, S.C. SKIN MEDIA S.R.L., cu sediul in Str. Ocna Sibiului 46-48, Bucuresti 1, avand Certificatul de Inregistrare nr. 1049291 din 03.07.2007, J40/8241/2000, CIF RO13348504, in calitate de importator, asiguram, garantam si declaram pe propria raspundere, ca echipamentele electrice si electronice la care se refera aceasta declaratie respecta cerintele H.G. 1022/2002, conform prevederilor art. 5, privind regimul produselor si serviciilor care pot pune in pericol viata, sanatatea, securitatea muncii si protectia mediului si nu produc un impact negativ asupra mediului. Echipamentele electrice si electronice puse pe piata de compania noastra respecta prevederile urmatoarelor acte normative: Hotararea nr. 1022/2002, H.G. 497/2003 (privind compatibilitatea electromagnetica), H.G. 457/2003, modificata prin Hotararea 1514/2003 (privind asigurarea securitatii utilizatorului de echipamente electrice de joasa tensiune) precum si toate actele normative incidente, H.G. 992/2005 (privind limitarea utilizarii substantelor periculoase), H.G. 448/2005 (privind prevenirea producerii de deseuri de echipamente electrice si electronice) si Directivele UE 2002/95/CE, 1999/5/EC. 31 Produsul a fost evaluat conform urmatoarelor standarde, mentionate in anexa II a H.G. 88/2003: EN 55022:2010 + AC:2011, EN 61000-3-2: 2006 + A1: 2009 + A2: 2009, EN 61000-3-3: 2008, EN 55024: 2010. Toate documentele justificative ale evaluarilor primite de la producator, sunt depozitate la sediul companiei noastre. Produsul are aplicat marcajul CE. Garantia produselor se asigura in conformitate cu O.G. 21/1992, Legea 449/2003, Legea 296/2004 si O.U.G 174/2008, privind protectia consumatorului. Acesta declaratie este valabila pentru produsul marca UTOK, model 700 S. Declaratia este disponibila si la adresa web www.utok.com. 25.07.2013 Director, Camil Perian 32 USER MANUAL UTOK 700 S CONTENTS 33 IMPORTANT DECLARATION ...................................... 35 PRECAUTIONS .......................................................... 35 MAIN FUNCTIONS .................................................... 37 APPEREANCE AND BUTTONS ................................... 38 1. Quick Start ........................................................... 39 2. MAIN INTERFACE FUNCTIONS / ICONS ................ 44 3. Installing applications .......................................... 47 4. Internet ................................................................ 47 5. Operating details of main interface ..................... 50 6. OTG Function ....................................................... 56 7. External USB Mouse / Keyboard Function........... 56 8. Usage of SD Card ................................................. 56 9. Basic Settings ....................................................... 57 10. TROUBLE SHOOTING.......................................... 60 SPECIFICATIONS ....................................................... 62 DECLARATION OF CONFORMITY .............................. 64 34 IMPORTANT DECLARATION 1. Before using the tablet, please first read all information provided so you can use this product correctly. 2. Our company reserves the copyright of this manual, any random duplication or interpretation of the full or partial manual is forbidden in commercial activities. 3. When using this product, please make backup for the data. The manufacturer will be responsible just for the product itself, and will not undertake any responsibility for any loss or damage of personal data and information due to wrong operations of hardware. PRECAUTIONS This manual includes important information on safety precautions and proper usage of this product. To prevent any accident, please make sure that you have read this manual carefully before using the product. Do not keep this product in a place with a high temperature, humidity or too much dust. Especially do not place this product in a car with all windows closed in summertime and keep out from direct sunlight. Avoid dropping or shocking this product and avoid shaking the TFT display 35 violently, otherwise, the TFT display may be damaged or cannot play correctly. Please choose a suitable audio volume. Avoid excessively high volume when using a headset. If you feel any ear noise, please decrease the volume or stop using. Do not break the connection suddenly when this product is conducting formatting, uploading or downloading operations, otherwise program errors may occur. This company will not undertake any responsibility for any memory loss due to product damage, repairing or other reasons. Do not dissemble the product by yourself and do not clean the surface of the product with alcohol, thinner or benzene. Do not use the product in a place where the using of electronic device is prohibited, such as on an airplane. Do not use this product while driving a car or walking on the street, as traffic accident may occur. (This product has no water-proof function) 36 MAIN FUNCTIONS 7” TFT capacitive touch screen, resolution 800 x 480. 0.3 Mega front camera Microphone recording function Vibration function Support external USB mouse, keyboard, etc; Support OTG function, support U-disc, portable hard disc by OTG to transfer data. (While connecting to portable hard disc, DC power must be connected to supply power for the product; otherwise the tablet PC will crash due to insufficient power supply) Multiple network access to the Internet. Supporting Wi-Fi, you can enjoy the internet anywhere, anytime. Gravity sensor (G-sensor), in addition to the horizontal, vertical screen switch, you can also install various software to extent this function, such as turning the text, switching songs, and funny games, etc. With Google Android intelligent operating system, abundant software extension function, you can personalize the space with apks by yourself. With this product, you can easily have business and entertainment via downloaded applications, such as E-Mail, word, website browsing, news, instant messaging, financial, blog, games online, video online, stock market , weather report , mobile TV, maps, fun software, etc. Supporting MP3, M4A, WMA, APE, FLAC, AAC, MID, WAV, AMR, OGG, etc. Supporting full HD video decoding (2160P, 1080P, 720P, 480P); video formats: MKV, AVI, RM/RMVB, WMV, 3GP, MOV, MP4, ASF, MPG, DAT, VOB, FLV, etc. 37 Supporting JPG, JPEG, BMP, PNG, etc. formats image browsing.. Supporting TF Card, with capacity up to 32GB. Personalized settings-freely adjustable brightness, key tone on or off, changing wallpaper and so on. Supporting multi-languages. APPEREANCE AND BUTTONS Definition: 1 – Microphone 2 – “ ” Buton Power: Power Button-long press this button to turn On/Off the player, short press this button to lock screen in order to avoid operation error. 3 – Earphone Jack 4 – USB Port: Micro USB 5 Pin data cable supports external U-disc, MP3, 38 MP4, wired mouse, 3G wireless Internet card, etc. 5 – Home button: press to return to homescreen 6 – TF Card slot / HDMI slot 7 – Reset button 1. Quick Start 1-1. Power On/Off and unlock: at the status of power off, long press “ ” for three seconds to turn on. It will take some time to power on, please wait. It will take about 100 seconds to enter system, drag unlock icon “ ” to the camera icon on the left to take photo and to the right to unlock. Energy-saving and locking mode: at the process of using, system will automatically enter energy-saving mode, press “ then slip “ ” to wake up the screen, ” to unlock. Notes: At the status of energy saving mode, the main operation won’t stop, only LCD screen will be off, showing black screen. Music or film continues playing. 39 Power Off: At the status of using, press “ ” for 5 seconds, the screen will show power off option. Select “Power off” option, confirm your choice and system will automatically turn off. Select “Cancel” to cancel power off operation. Notes: At the status of low-power, it will have warning tone; connect the DC adapter and begin to charge. 1-2.Battery and charge Battery should be charged for 8 to 12 hours for the first time in order to ensure enough power for the battery. Please use charger approved by our company for charging. Before charging, insert the miniport of the adaptor into DC jack and the other end into power socket. When the device is being charged, the battery icon will show the charging status. Please don’t disconnect the charger until device is fully charged. Battery icon will show when it is fully charged. Please note the following precautions for protecting lithium battery a) Don’t charge in high temperature environment (like under direct sunshine) b) Lithium battery doesn’t need to discharge completely. User can charge the battery when there is still power left. c) While charging, it is normal that both charger and device will heat up. 40 1-3. Computer connection & file transfer Connecting the product to the computer with USB cable, the top status bar will show USB has connected. If connecting external mobile hard disk, you need to pull automatic running list at the top status, then “USB connected” option is visible. Click the option, show USB status switch interface; according to the note icon on the upper left corner “Open USB storage equipment”, switch into USB storage status. At this time the users can access the external hard disk. At the status of USB storage, click the icon again to disconnect USB and recover to charge mode. USB storage mode system will limit the users’ access to the local disk reference application. Disconnecting USB storage mode will recover normal status. 41 1-4.Use of Touch Screen There are various operation methods. You can view the main screen, menu and application program. 1-4-1.Input method and opening applications When you want to use screen keyboard input, just touch the input filed and the keyboard will automatically activate. For opening an application program in the main interface, just touch the incon on the screen. 1-4-2.Application options When you want to open the available options or to make a shortcut for an application in the main interface, just press and hold the icon. The special options menu will activate automatically. 1-4-3.Navigate between main screens Swype to right or left if you want to see all screens available. 1-4-4.Icons repositioning If you want to reposition a incon, press it and hold for 2 seconds and then move to the desired location on the screen. 1-5.G-Sensor 42 The product has the function of G-sensor. After opening the function in the setting (default is open), when rotating the machine, the screen will realize horizontal and vertical screen switching automatically. Besides screen switching, it can support more function, such as turning the text, switching music and funny games. 1-6.Solve problem of running slowly After using the product for some time, some of the used applications will be still at work in the background and this will cause system to run slowly. Therefore, you need to close these programs in Advanced Task Manager. 1-7. Text Entry When you start application or select the text edit box to enter the text, the screen keyboard will appear automatically. Android Keyboard Panel 43 2. MAIN INTERFACE FUNCTIONS / ICONS 2-1. Main interface function and icon definition Icon Definition Google Search Back Back to main interface from any interface System current time WIFI signal New device found Icon Definition Setting Function Module Menu Camera Battery Menu Setting Menu 2-2.Main Interface For starting the product long press power button. The screen activates and displays locked mode; swype the unlock key to the right to unlock the device and enter the main interface. In this interface, you can view the status, change the wallpaper, add widgets, add program shortcut, start programs, 44 etc. 2-2-1. Status Bar: Swype down to read prompts in the status bar. 2-2-2.Menu:Press menu button “ ” or short press “ ” to open interface menu: Wallpaper: in this menu you can choose your favorite photos as main interface background. Manage Application Program: check all the programs in this device and you can remove all installed programs. 2-3.Add, move or delete desk icon In the main interface click to enter function menu list and display all applications. Press and hold, then drag the icon to copy it to current desk, such as setting shortcuts on the main screen. If you want to delete the icon from the main screen, press and hold the icon and then drag it to the upper side of the screen and place it on the delete option. 2-4.Shortcut: click to show all function icons as below: 45 This window shows all the function icons, click any icon to enter its interface. Please find below the definitions for all applications: apk program installer: you can install new apks, manage installed apks. Please refer to (3. Program Installation) for operation method. Sending/Receiving Emails Browser: click to enter Internet interface to browse webpage Calendar: Check the calendar and setting Calculator Icon: click this icon to use the calculator. Alarm Clock: clock icon, click this icon to set the alarm Play music. Please refer to (5-1 Music) for operating method. Video player icon or photo browser: click this icon to play video and view photo. Please refer to (5-2 Video) for operating method. Webpage search Camera: please refer to (5-4 Camera) for operating method. Enter recording interface. Please refer to (5-5 Recording) for operating method. File Manager: check all the file types and content. 46 Setting icon, click this icon to enter system setting interface. 3. Installing applications This device can install apk( Android Package) freely from Adroid Market. You can get also third-party applications from the Internet, which are suitable for this operating system. To be able do install these apps, first open “Setting/Application Program” and then select “unknown sources”. 3-1.Installation method: Method 1: Download the apk and copy it to the SD card. Method 2: From “Google Play”, simply download and install the application on your device. 3-2. Program Uninstall: Click to enter application menu. Here you can find all installed applications. Click the icon to go to the applications manager: Click uninstall this application if you want to remove it, or click to go back to previous menu. 4. Internet 4-1. Network Setting Click the shortcut in the main interface, choose “Setting/Wireless and Network” to enter network setting interface: 47 4-1-1. WI-FI Connection Click the main interface shortcut, select “Internet connections manager”, click “WIFI setting”, enter WIFI setting interface, select the “WI-FI” and activate. After WIFI is active, it will automatically search for the wireless Internet networks and show the complete list of networks in range. Click on the desired wireless network, input the password, connect and seconds later your device will be connected to the Internet. When the WIFI is active, the power consumption will increase with 1/4. Considering this, when not using the WIFI, please turn it off to extend the using time. 4-2. 3G Connection a. External USB dongle 3G card First, connect USB 3G card to the product through OTG-USB cable. One moment later, the system will detect this device and automatically switch the mode. After successful switch, enter “Setting / Wi-Fi and Network”, select “Mobile Network” and the system will connect to the network automatically. Connection completed, you can use 3G. 48 Before connecting 3G, please close Wi-Fi. Before connecting 3G, please make sure the product has enough power or is connected to a power source. Since 3G will consume more power (add about 1/3 more), if you don't use it, unplug the dongle to save power and extend battery life. 4-3. Webpage browser Set up the network according to the method explained in chapter 2-1 and you can use the web browser. Click shortcuts in the main interface, select the "browser" into the browser interface, click the "Menu" button, pop-up browser settings menu; Click "Start" pop-up address bar, enter the URL and open the web page; swype down to view the entire page. 4-4. E-mail You can receive and send E-Mail with this device. There is an E-Mail settings guide in the application program, it can add POP3 or IMAP E-Mail account for normal WEB E-Mail server (Such as Yahoo, Gmail, Hotmail). Notes: Before setting E-Mail, please ensure your Internet is working and the device time is set correctly. 4-4.1. Receiving and sending E-mail Click shortcut key in the main interface, select icon “E-mail” to enter inbox. All new e-mails will be updated automatically, click to read. In the inbox, click “Menu”, click “Writing” to enter in writing E-Mail interface. Input the receiver’s E-Mail address, subject and information; if you want to add attachment, click “Menu”, “Add attachment” and select the file you want 49 to send. Then click “Send” to send the E-Mail. 5. Operating details of main interface 5-1. Music Select the “music” icon to enter the audio files list and select the file you want to play. List music files by artists classification List music files by album category; List all the song files; You can see the music files added recently Enter the music interface (Click to enter the music playing interface directly.) / :previous / next song, rewind / fast-forward; click the progress bar directly can also fast rewind / fast forward. / :Play/Pause the music; : Random playing 50 :Repeat All : Repeat one 5-2. Video Select video play icon, click to enter video files list. Long press video files to pop up a icon in the video list, and click file. Click to pop up “information details”. Select file to enter video playing interface. Click if you want to delete one video to play video. / :Volume Increase / Decrease / :Select last/next video, fast backward/fast forward in the current video; click Progress Bar directly can realize fast backward/fast forward function. / Click :Play/Pause video; Return to previous menu; : Subtitles switch, paddling the progress bar, designated to the left subtitles switched on, the plan to the right subtitle switch off, click OK to confirm; (Note: the subtitle file must match the video) : Subtitle list of options (Note: the subtitle file must match the video) :Subtitle encoding options (Note: the subtitle file must match the 51 video) :Subtitle colors , choose the needed color, click to confirm (Note: the subtitle file must match the video) :Select the subtitle font size. Select the font size, click OK to confirm; (Note: the subtitle file must match the video) :The subtitle delay options, Select the subtitle delay time, click OK to confirm; (Note: the subtitle file must match the video) :The audio tracks selection - Mandarin, Japanese, Cantonese; (Note: The video file should contains a variety of audio tracks to choose) :The zoom mode selection----full-screen (screen ratio), the original size, 4/3, 16/9, click OK to confirm; :3D mode selection; : Return to the previous menu level; 5-3. Photo Browser In the main interface click to enter video and photo browser list. Long press video files to pop up a icon in the upper right corner and click if you want to delete a video file. Select “Cancel” to cancel the deleting. Select a picture file; view the interface in full-screen picture. Click to bring up sub- menu: slide show, edit, rotate left, rotate right, trim photos for more information. Click to return to previous menu. 5-4.Camera Select camera icon to enter camera mode. 52 5-4-1.Self-timer Photos At the status of self-timer photos, click to take the photo. The photo will be automatically saved as .jpg picture, and be saved into DCIM/Camera folder, the files will be named by year, month, day, hour, minute, second. Click to view all the photos taken. 5-4-2.Self-timer Videos At the status of self-timer videos, click begin record, click to enter record mode, click to to save files and go back to camera status. The video will be saved to DCIM/Camera folder; the files will be named by year, month, day, hour, minute, second. Click to view all the videos taken. 5-5.Recording Click the recording icon to enter recording interface. 53 Click to start recording. After recording, click again and pop out to select whether to keep this recording or not; at the same time, you can click to play and click to stop. Select “Save” to keep this file or select “Cancel” to discard. Recorded files will be saved as “recordingxxxxx.3gpp” format in Files Manager. 5-6. Calculator Click the application program icon in the main interface to enter application program management interface, select and click icon to enter calculator interface. 5-7.Clock In the main interface click icon Select the clock icon to enter the interface of application list. or click the icon in the main interface to enter alarm setting. 54 5-8.File Manager In main interface, click file manager icon , select [SD Card] or [Local Disk], [Mobile Disk] to expand the drop-down folders and related files. Here you can copy, move, paste or rename files. Long press a single folder or file and the Edit dialog box will pop up with choices to delete, rename, copy, paste or send as E-Mail. 55 6. OTG Function This product has OTG function, It can support USB disk and some other devices like MP3, MP4, self-powered hard disk, etc. This product will automatically detect the USB device after connecting to it via OTG cable. And you can have access to the USB device files like the files on the player. With low battery or DC charger not charging, please don’t use OTG function, or the player may turn off automatically because of low power. 7. External USB Mouse / Keyboard Function After mouse connected, mouse pointer will appear on the screen. The left button is confirm button, the right button to return and the middle slider to slide up and down . 8. Usage of SD Card This product comes with SD card slot. When using, insert the SD card to the product. To disconnect the SD card, push it inside and release; TF card will pop out automatically. This product supports TF card from 1GB to 32GB. 56 9. Basic Settings Click icon to enter menu setting: Wireless & Networks, Sound, Display, Storage, Battery, Applications, Accounts & sync, Location services, Security, Language & input, Backup & reset, Date & time, Accessibility, Developer options, about tablet. 9-1. Wireless & Network Setting Click Wireless & network in “Settings” menu to enter the interface (as follows). 1. Wi-Fi: Click “ON” to open Wi-Fi. 2. Wi-Fi setting: Please refer to the operation in Chapter 2-1 for Wi-Fi Setting. 3. Mobile networks: Click “More”, then “Mobile networks” and turn on Modem power. If Wi-Fi is on, there will pop up a dialog box to prompt that “Please turn off Wi-Fi first”. 4. Mobile network settings: Click to set Data enabled, Data roaming, Access Point Names, Network operators, etc. A. Data Traffic Enabled: Enable data access of mobile network B. Data roaming: Tick in this menu means roaming data services. C. Access Point Names: Click “Access Point Names” to enter and click the icon in the upper right corner of the screen or click to pop up new APN information. You can follow the prompts step-by-step. D. Network Operators: Click to select your access network operator. Ethernet Settings: Please refer to the operation of 4-3 Ethernet Settings. 9-2. Sound & Display Setting 57 Click “Sound” in Settings Menu to enter the setting interface (as follows): A:Volumes: Click here for all the volume settings. B:Ringtone & Notifications: Click here to set Phone ringtone, Default notification, Vibration and ring. C:System: Click here to set touch sound, notice sound, vibration on touch. 9-3. Click Display in Settings menu to enter the setting interface A. Brightness: click here to adjust the brightness for your device. B. Wallpaper: Click here to set Live Wallpaper, Super-HD Player, Wallpapers. C. Screen Auto-rotation: Click here to activate or deactivate the auto-rotation function for the screen. D. Sleep: Click here to adjust the time for automatic screen lock with choices of 15 seconds, 30 seconds, 1 minute, 2 minutes, 5 minutes, 10 minutes, 30 minutes. E. Font size: Click here to adjust the font size for the player. F. Accelerometer coordinate system: Click here to set a special coordinate for games and other applications. G. Screen: Click here to adjust the screen size for specific games. 9-4. Storage: Click here to check the space for SD card or internal storage of the player, uninstall or format the SD card. 9-5. Battery: click here to check battery usage. 9-6. Apps: Click here to set “whether to allow third-party applications to be installed”, “manage/delete the installed applications, view and manage running services. 9-7.Location services: Google’s location service, Location & Google search 58 9-8. Location and Security: You can set up device administration, screen lock and password visibility. 1: Unknown sources: Allow installation of non-Market applications. A:Screen Unlock; Click【Set up screen lock】to enter interface shown below: A:None:Disable screen unlock security B:Pattern:Draw pattern to unlock screen C:PIN:Enter a numeric PIN to unlock screen D:Password:Enter a password to unlock screen 9-9.Language & Keyboard:Set up languages & input method 9-10.Backup and Restore:Set up “whether to show my location, back up my data & Factory reset”. 9-11. Date and Time A:Set Date; Click to set up year, month, day, click to confirm. B:Select Time Zone: Select your time zone and confirm. C: Set Time Click to set up hour, minute,for example:10:56,click confirm. D: Set Date Format; Click the date format you prefer and confirm. 9-12.Accessibility to 59 9-13.Developer Options 9-14.About Tablet You can check legal information, model number, Android version, Baseband version. 10. TROUBLE SHOOTING 1. The tablet turns on slowly at first time ● After system update or factory restore, it takes about 2-3 minutes to start the product, as some preinstalled applications need to load at the first startup. After this, the starting time will be quicker. 2. Unable to connect WIFI or weak signal ● Ensure the Network is working properly. ● Ensure the user name and password is correct. ● Ensure the internal antenna is not blocked. ● Ensure the tablet is within the proper distance of the Network and there is no wall or other obstructions between. 60 3. Unable to connect 3G or weak signal ● Ensure the 3G USB Dongle is connected to the tablet correctly and the SIM card with enough fees to access to the Internet. ● Ensure the 3G USB Dongle is among the models supported by the tablet. ● Ensure you are in an area that gets access to the signal ● Check if the “Wireless and Network” is correctly set. 4. Fail to copy files ● Ensure the tablet is connected to the computer correctly. ● Ensure there is still disk space. ● Ensure the USB cable is functionally well. 5. No sound in the earphone ● Ensure that the volume is not set to 0. ● Check whether the headset is correctly connected and the wire is proper condition. 6. The system has some trouble ● When you install some third-party applications it may lead to some functional problems. You can restart the tablet or uninstall the applications. 7. Unable to set E-mail or use registration applications. ● Ensure your Network is working properly. ● Ensure the E-Mail account is correctly set. ● Ensure your system time is the same with the local time. ● Please run the “Advanced Task Manager” to stop some other running applications. 61 8. The memory capacity is different from the nominal figure. ● Just like hard disk on computer or laptop, the capacity shown on the computer is usually less than the nominal capacity; this is due to different unit conversion used by computer and storage device manufacturers. In computer, 1GB=1024MB, but storage device manufacturers use 1GB=1000MB as default. ● The OS of this tablet pre-installs some applications, games and the OS itself occupies some capacity. SPECIFICATIONS Dimension 192*117*11 mm Display 7 inch; resolution 800 * 480 pixels PC Connection High speed microUSB CPU Allwinner A13 Single Core 1.2GHz ROM 4 GB RAM 512 MB DDR3 SD Card Supported, 128 MB ~ 32 GB Camera Opperating System 0.3 MB Front Network Wi-Fi IEEE 802.11 b/g/n Power Battery 2,400 mAh Configuration Android 4.0 62 Audio Parameter DC Adapter Microphone output DC 5V, 1.5-2A (L)7mW+(R)7mW(32 ohm) MP3 bit rate 32K bps – 320K bps WMA bit rate Frequency response 16K bps –320K bps SNR >=85dB 20Hz-20KHz +/-3dB Distortion degree <0.6% MP3,M4A,WMA,APE,FLAC,AAC,MID,WAV,AMR,OGG, etc Audio Formats Video Formats MKV,AVI,RM/RMVB,WMV,3GP,MOV,MP4,ASF,MPG,DAT ,VOB,FLV, etc. Supporting Full HD video decoding( 2160P,1080P,720P,480P) Image formats Environment Temperature JPG,JPEG,BMP, etc Language Multilanguage Supported OS Windows2K/XP/Vista/Windows7/Linux2.4/MAC OS 10.4 -5 to 40℃ 63 DECLARATION OF CONFORMITY Nr. 366 / 25.07.2013 UTOK Product, Model 700 S We, S.C. SKIN MEDIA S.R.L., based in Ocna Sibiului street 46-48, Bucharest 1, with certificate no. 1049291 from 03.07.2007, J40/8241/2000, CIF RO13348504, as importer and distributor, make, guarantee and declare on his own responsability that electrical and electronic equipment to which this declaration relates complies with the requirements of HG 1022/2002, according to Art. 5, regarding the products and services that may endanger the life, health, work safety and environmental protection and do not have a negative impact on the environment. Electrical and electronic equipment imported and distributed on the market by our company comply with the following regulations: Decision no. 1022/2002, H.G. 497/2003 (Electromagnetic Compatibility), H.G. 457/2003, amended by Decision 1514/2003 (regarding the safety of users of electrical, low voltage) and all incidental acts, H.G. 992/2005 (the Restriction of Hazardous Substances), H.G. 448/2005 (the prevention of waste electrical and electronic equipment) and EU Directives 2002/95/EC, 1999/5/EC. 64 The product has been assessed according to the following standards listed in Annex II to HG 88/2003: EN 55022:2010 + AC:2011, EN 61000-3-2: 2006 + A1: 2009 + A2: 2009, EN 61000-3-3: 2008, EN 55024: 2010. All documents received from the producer of the evaluations are stored at our headquarter. The product has CE marking. Product warranty is provided in accordance with O.G. 21/1992, Law 449/2003, Law 296/2004 and O.U.G. 174/2008 regarding the consumer protection. This statement is valid for the product UTOK, model 700 S. The declaration of conformity is also available on web address www.utok.com. 25.07.2013 Director, Camil Perian 65