1
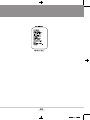
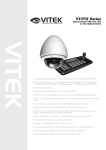
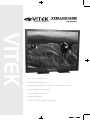
VTM-LCD194M
19” Metal Encased Professional
LCD Monitor
VITEK
• 19" LCD Display Panel
• Heavy-Duty Metal Case
• Dual Looping BNC Composite & 1 VGA Video Inputs
• Dual Looping Audio Inputs
• Front Panel Controls
• Internal Speakers
• VESA 100mm Standard Mounting
BLACK
1.
Use at the rated power voltage.
Use of non-rated voltage may cause fire, electric shock and breakdown.
2.
Do not open the cabinet and external cover.
The high voltage inside of this product may cause the electric shock.
3.
Do not remodel or disassemble this product.
Remodeling or disassembling in wrong method may cause fire, electric shock or breakdown.
4.
Do not insert or drop any foreign substance such as metals or flammable object inside from the air hole.
It may cause fire, electric shock or breakdown.
If any foreign substance is inserted inside of this product, turn off the power, pull the plug out of the socket and contact
the sales department. Do not use the product with the foreign substance in.
5.
Do not place any vase, potted plant, cup, medicine and any container with water on this product.
If the liquid is spilt, it may cause the fire, electric shock or breakdown.
6.
Do not place this product with water nor moisten it.
If water flows in it, it may cause the fire, electric shock or breakdown.
If there is water inside of the product, turn off the power immediately, pull the plug out of the socket and contact the
sales department. Do not use the product with water in it.
7.
Never touch the antenna lie or power plug if it stars to thunder.
It may cause the electric shock.
8.
If any impact is applied, the parts inside of the product may be fallen out or broken to be the cause of fire, electric shock
or breakdown.
9.
Clean the dust on the power plug periodically.
The dusty power plug may cause the poor insulation due to the moisture to be the reason of fire.
10. Do not destroy, process, make closer to heating device, bend or twist forcibly, place any heavy object on nor bind the
power cord or power plug. If it is used in the broken condition, it may cause fire or electric shock.
11. Do not touch the power plug with wet hands.
If you pull in or out the power plug with wet hands, it may cause electric shocks.
12. Put the power plug in firmly.
Putting the plug incompletely may cause the electric shock or fire by the generation of heat.
13. Do not use any non-rated power socket with numerous devices jointed on one power socket or cable device.
The wire of non-designated capacity may cause the fire due to the generation of heat.
14. In case of malfunction, turn off the power switch immediately and pull out the power plug.
If this product is used in the abnormal condition such as damage to it, foreign substance inside of the product, generation of joints, smelling, smoking, overheating and non production of signal, it may cause fire, electric shock or breakdown.
Turn off the power switch immediately, pull the power plug out of the socket and contact to the sales store..
15. Leave space 10 cm or more from the wall for the installation of the device.
Do not install it close to the wall nor block the ventilation of the air.
Insufficient ventilation or accumulated heat inside of the product may cause the fire.
16. Do not install it at the unstable location such as on the bouncing prop or tilted place.
It may be tipped over as it loses balance or damaged as it is fallen down.
17. Do not install at the place with moisture or dust.
It may cause the fire or the electric shock
2
18. Do not install it at the place with poisonous gas.
It may cause the fire.
19. Do not install it at the location with continuous vibration.
It may be tipped over as it loses balance or damaged as it is fallen down.
20. Do not install it at the place on the strong magnetic field or current field.
It may cause fire, electric shock or break down.
This equipment may be observed deterioration of the picture by electromagnetic radiation in electromagnetic environment.
21. Fasten the wheel of the product or shelf with wheels when installing this product.
If it moves or is tipped over, it may be damaged.
22. Do not leave it in the car under the burning sun for a long time.
The high temperature may distort the cabinet or the parts inside may be broken down or heated.
If you use this product in this condition, it may cause the fire, electric shock or breakdown due to the short circuit or poor
insulation.
23. Do not place any fire source such as candlelight close to this product or place it on this product.
If it is tipped over or fallen down, it may cause damage or fire.
24. Do not sprinkle water drops or water on this product.
It may cause the fire, the electric shock or breakdown.
25. Do not place heavy objects on this product.
It may be tipped over as it loses balance or damaged as it is fallen down.
26. Do not transport it with the power cord or the connection cable connected.
If you move this product with the power cord or the connection cable connected, the damaged power cord, connection
cable or connection terminal may cause the fire, the electric shock or breakdown.
27. Pull the power cord out while holding the plug portion.
If you pull the power cord out by force, the cord may the fire or the electric shock.
28. Do not use it outdoor.
Dust or rainstorm may cause the fire, electric shock or breakdown.
29. Do not climb on this product.
If you climb on it, it may damage or hurt it.
30. 2 persons or more shall transport the device, which is heavier than 18 kg.
If you drop or tip over the device, it may damage it.
The weight is indicated on the user's manual.
31. Use the this unit shall be connected to a mains socket outlet with a protective earthing connection.
And connection cable, or those, which are indicated on the user's manual.
If you do not use the designated power cord and connection cable, it may cause the electric shock or breakdown.
32. Turn off the power switch when connecting the power cord or connection cable.
If you not turn off when connecting it, it may cause the electric shock or breakdown.
33. Do not use any chemical such as the paint thinner or benzine to clean the cabinet.
It may scratch the surface or disappear the indication to cause wrong operation, whch can be the reason for disorder.
34. Clean the cabinet with 5~6 time diluted neutral detergent water on smooth cloth as stirring to remove the contamination.
After that, clean it with dry cloth to remove any stain.
3
BLACK
Explanation of Safety Related Symbols
CAUTION
RISK OF ELECTRIC SHOCK
DO NOT OPEN
CAUTION : TO REDUCE THE RISK OF
ELECTRIC SHOCK, DO NOT REMOVE
COVER (OR BACK).
NO USER-SERVICEABLE PARTS
INSIDE. REFER SERVICING TO
QUALIFIED SERVICE PERSONNEL.
Shock Hazard Marking and Associated Graphical Symbols
CAUTION
RISK OF ELECTRIC SHOCK
DO NOT OPEN
This symbol is intended to alert the user to the presence of uninsulated "dangerous voltage" within the product's enclosure that may be of sufficient magnitude to
constitute a risk of electric shock to persons.
This symbol is intended to alert the user to the presence of important operating and maintenance (servicing) instructions in the literature accompanying
the appliance.
WARNING - To Reduce The Risk Of Fire Or Electric Shock, Do Not Expose This Apparatus To
Rain Or Moisture.
4
This marking shown on the product or its literature, indicates that it should not be disposed with other
household wastes at the end of its working life. To prevent possible harm to the environment or
human health from uncontrolled waste disposal, please separate this from other types of wastes and
recycle it responsibly to promote the sustainable reuse of material resources.
Household users should contact either the retailer where they purchased this product, or their local
government office, for details of where and how they can take this item for environmentally safe recycling.
Business users should contact their supplier and check the terms and conditions of the purchase
contract. This product should not be mixed with other commercial wastes for disposal.
This device complies with Part 15 of the FCC Rules and Regulations. Operation is subject to the following
two conditions: (1) This device may not cause harmful interference, and (2) this device must tolerate any
interference encountered, including interference that may cause improper operation.
The equipment has been tested and found to comply with the requirements stipulated in Part 15 of FCC
regulations for a Class A digital device. These requirements are designed to provide reasonable protection
against harmful interference in a residential installation.
This equipment generates, uses and can radiate radio frequency energy and, if not installed and used in
strict compliance with the instructions, may disrupt radio communications. However, there is no guarantee
that interference will not occur in a particular installation. If this equipment does cause detrimental interference with radio or television reception, which can be determined by turning the equipment off and on, the
user is encouraged to try to correct the interference by taking one or more of the following measures:
Reorienting or relocating the receiving antenna.
Increasing the separation between the equipment and the receiver.
Connecting the equipment into an outlet on a circuit different from that to which the
receiver is connected.
Consulting the dealer or an experienced radio/TV technician for help.
Shielded interconnected cables and shielded power cords must be used with this equipment to ensure
compliance with the pertinent RFD emission limits governing this device.
Changes or modifications not expressly approved by the manufacturer could void the user's right to operate the equipment.
Notice of Compliance with Canadian Interference-causing Equipment Regulations.
This Class A digital apparatus meets all requirements of the Canadian Interference-Causing Equipment
Regulations.
Cet appareil numerique de classe A satisfait toutes les exigences des reglementations canadiennes inherentes aux equipements generant des interferences.
5
BLACK
Q'ty Description
1
1
1
1
1
2
19-inch TFT LCD monitor with attached stand (removable)
Power cord
VGA cable with 15-pin D-sub connection
Installation/ Operation manual
Remote Control unit
AAA Batteries
6
WALL MOUNT
1. Remove the stand after loosing screws fixing the stand.
2. Wall-mounted bracket at the screw holes (4 places)
located in the middle part of the rear LCD MONITOR, with screws.
Do not use longer screw than 12mm length except mount parts
when you use vesa mount bracket.
7
BLACK
1. DC OUT:
To output DC power from monitor(12V, Max. 0.5A)
2. Audio(loop through):
Mono RCA audio inputs.
3. S-Video(loop through): Connection of S-Video signals from external sources.
Video loops through the four-pin DIN S-Video output.
4. Video(loop through):
Input connections from Digital Video record or time-lapse VCRs.
5. VGA:
Connection to VGA output of a computer or any device with VGA output.
8
1. MENU: Displays the main on-screen menu.
2. SOURCE: Selects the input source and confirms your choice.
3.
and
4. Vol
: Navigates through the on-screen menu.
and
: Increases or decreases the volume.
Also selects or adjusts items on the on-screen menu.
5. Power: Turns on/off the monitor.
6. Power indicator:
Indicates power status. Red means the power is off,
green means the power is on.
7. Remote control signal receiver: Receives remote control signal.
9
BLACK
1.
Open and remove the battery cover on the back of the remote control.
2.
Install two AAA size batteries (supplied). Match the positive (+) and negative (-) signs on the batteries to the
signs on the battery compartment.
3.
Close the battery cover. Make sure the lock snaps closed.
WARNINGS:
Dispose of batteries in a designated disposal area. Do not throw batteries into a fire.
Do not mix battery types.
Remove dead batteries immediately to prevent battery acid from leaking into the battery compartment.
Remove the batteries if you do not intend to use the remote control for a long period of time.
10
1. POWER:
Turn the monitor on or off .
2. MUTE:
Temporarily silence the sound.
To return the sound: press MUTE again,
VOL +, or VOL -.
3. VIDEO1:
Select VIDEO1 as the Source.
4. VIDEO2:
Select VIDEO2 as the Source.
5. S-VIDEO:
Select S-VIDEO as the Source.
6. VGA:
Select VGA as the Source.
7. DVI:
Not used
8. MENU/EXIT:
9.
/VOL- ,
Displays/exits the on-screen menu.
/ VOL+ ,
and :
Controls the cursor in the on-screen menu,
and also adjust the volume up or down.
10. ENTER:
Confirms (store or enter) your choice in the
11. AUTO:
Selects auto adjustment of the screen in
on-screen menu. (Optional)
VGA mode.
12. COLOR TEMP: Adjusts the color temperature (Kelvin) of the
screen.
13.
Not used
11
BLACK
Input Source Display
Input source name is displayed on the upper left-hand corner in case of changing input source,
or pressing ENTER key on the remote controller.
To use the menus:
1. Press the MENU button to access the Main menu.
2. Use the
and
arrow buttons to highlight a selection.
3. Press the Enter (or
4. Use the
/ VOL- and
/ VOL+) button to select an item.
/VOL+ arrow buttons to adjust the setting on a selected item.
12
13
BLACK
Video1 Video2, S-Video Mode Menu Field Definitions
Source: Select VIDEO1, VIDEO 2, S-VIDEO.
Contrast: Adjusts black level of the video screen image (0 to 100).
Brightness: Adjusts white level of the video screen image (0 to 100).
Sharpness: Adjust the picture softer or sharper (0 to 15).
Color: Adjusts the color saturation of the video signal (0 to 100).
Tint: Adjusts the range of color: green to red (0 to 100).
3D NR: Reduces the background noise of the video signal (NR ON or OFF).
Disabled when VGA and DVI input is selected.
Language: Select English, German, French, Spanish or Italian for the OSD display.
Key Lock: Select UNLOCK or LOCK. Locks/unlocks the buttons on the front panel.
Screen Size: Select Under, 16:9, Over or 4:3.
OSD Setting: Select SETUP for the on-screen display. Then select one of the following:
H.Position: Adjusts the OSD horizontal position (0 to 100).
V.Position: Adjusts the OSD vertical position (0 to 100).
Display Time: Selects off, 5 to 30 secs.
Color Temperature: Select NORMAL, COOL, or USER.
If you select USER, then select from the following calibrations:
R-Gain: Adjusts gain for red (0 to 100).
G-Gain: Adjusts gain for green (0 to 100).
B-Gain: Adjusts gain for blue (0 to 100).
R-Offset: Adjusts the offset (or cut) for red (0 to100).
G-Offset: Adjusts
sts the offset (or cut) for green (0 to 100).
B-Offset: Adjusts the offset (or cut) for blue (0 to 100).
Reset: Select Restore to return to the original color temperature settings.
Reset: Select Restore to return to the default settings.
14
15
BLACK
VGA Mode Menu Field Definitions
NOTE: It consists of the following options: Source, Contrast, Brightness, H-Position, V-Position,
Frequency, Phase, Language, Key Lock, Screen Size, OSD Setting, Color Temp. Reset
Source: Select VGA.
Contrast: Adjusts black level of the video screen image (0 to 100).
Brightness: Adjusts white level of the video screen image (0 to 100).
H-Position: Adjusts the horizontal position (0 to 100).
V-Position: Adjusts the vertical position (0 to 100).
Frequency: Adjusts the horizontal size of the screen image (0 to 100).
Phase: Adjusts image distortion appearing as horizontal noise on the screen (0 to 100).
Language: The choices are English, Italian, French, Spanish, and German.
Key Lock: Select UNLOCK or LOCK. Press Enter. Locks/unlocks the buttons on the front panel.
Authorized users can release the key lock feature by pressing and holding the SOURCE button for
five seconds.
Screen Size: Select FULL, OVER, 4:3, UNDER.
OSD: Select Setup for the on-screen display. Then select one of the following:
OSD H.Position: Adjusts the OSD horizontal position (0 to 100).
OSD V.Position: Adjusts the OSD vertical position (0 to 100).
OSD Display Time: Select OFF or a range of 5 to 30 seconds.
Color Temperature: Select NORMAL, COOL, or USER. If you select USER, then select from the
following calibrations:
R-Gain: Adjusts gain for red (0 to 100).
G-Gain: Adjusts gain for green (0 to 100).
B-Gain: Adjusts gain for blue (0 to 100).
R-Offset: Adjusts the offset (or cut) for red (0 to 100).
G-Offset: Adjusts the offset (or cut) for green (0 to 100).
B-Offset: Adjusts the offset (or cut) for blue (0 to 100).
Reset: Select Restore to return to the original color temperature settings.
Reset: Select Restore to return to the default settings.
16
If the quality of the picture is poor and cannot be improved by making adjustments on the front control panel, inspect
all system connections and cable runs.
WARNING: To reduce the risk of electrical shock, do not remove the cover or back of the monitor. No userserviceable parts are inside. Refer servicing to qualified personnel.
CLEANING
Gently wipe your screen with a clean camel hair brush or a soft, clean, lint-free cloth.
Gently apply pressure to the screen surface to clean the display.
Do not spray any liquid directly on the screen or the LCD monitor casing.
Chemical cleaners can damage the screen or the LCD monitor casing.
17
BLACK
18
Specifications
Panel Type
Display Colors
Pixel Pitch
Resolution
Contrast Ratio
Brightness
Viewing Angle
Response Time
Scanning Frequency
Video Inputs/Outputs
PC Inputs
Audio Inputs
Screen Control
LCD Lamp
Weight
Power Supply
Dimensions (w/o Stand)
19" TFT Color LCD
16.2 Million Colors
0.294 mm
SXGA (1280 x 1024)
700:1
300 cd/m2
H: 160 degrees V: 160 degrees
5ms
H: 31~65kHz V: 56~75Hz
Dual Looping BNC Composite / Looping S-Video
15 pin D-Sub (Analog RGB) / HDMI
Stereo RCA In /Out
OSD (On Screen Display Menu)
25,000 hours
13.2 lbs. (6Kg)
AC 100~240V 50/60Hz
16.06" x 14.21" x 4.84" (408 x 361 x 123mm)
19
BLACK
28492 CONSTELLATION ROAD VALENCIA, CA 91355
WWW.VITEKCCTV.COM | 888-VITEK-70