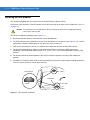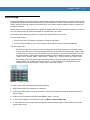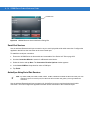
1
VC6000 Series Vehicle Computers
Product Reference Guide
VC6000 Series
Product Reference Guide
6802986C08
Rev. A
December 2008
ii
VC6000 Series Product Reference Guide
© 2008 by Motorola, Inc. All rights reserved.
No part of this publication may be reproduced or used in any form, or by any electrical or mechanical means,
without permission in writing from Motorola. This includes electronic or mechanical means, such as
photocopying, recording, or information storage and retrieval systems. The material in this manual is subject to
change without notice.
The software is provided strictly on an “as is” basis. All software, including firmware, furnished to the user is on
a licensed basis. Motorola grants to the user a non-transferable and non-exclusive license to use each
software or firmware program delivered hereunder (licensed program). Except as noted below, such license
may not be assigned, sublicensed, or otherwise transferred by the user without prior written consent of
Motorola. No right to copy a licensed program in whole or in part is granted, except as permitted under
copyright law. The user shall not modify, merge, or incorporate any form or portion of a licensed program with
other program material, create a derivative work from a licensed program, or use a licensed program in a
network without written permission from Motorola. The user agrees to maintain Motorola’s copyright notice on
the licensed programs delivered hereunder, and to include the same on any authorized copies it makes, in
whole or in part. The user agrees not to decompile, disassemble, decode, or reverse engineer any licensed
program delivered to the user or any portion thereof.
Motorola reserves the right to make changes to any software or product to improve reliability, function, or
design.
Motorola does not assume any product liability arising out of, or in connection with, the application or use of
any product, circuit, or application described herein.
No license is granted, either expressly or by implication, estoppel, or otherwise under any Motorola, Inc.,
intellectual property rights. An implied license only exists for equipment, circuits, and subsystems contained in
Motorola products.
MOTOROLA and the Stylized M Logo and Symbol and the Symbol logo are registered in the US Patent &
Trademark Office. Bluetooth is a registered trademark of Bluetooth SIG. Microsoft, Windows and ActiveSync
are either registered trademarks or trademarks of Microsoft Corporation. All other product or service names
are the property of their respective owners.
Motorola, Inc.
One Motorola Plaza
Holtsville, New York 11742-1300
www.motorola.com/enterprisemobility
Patents
This product is covered by one or more patents. For patent information go to:
www.motorola.com/enterprisemobility/patents.
Warranty
Subject to the terms of Motorola's hardware warranty statement, the VC6000 Series computer VC6000 Series
products are warranted against defects in workmanship and materials for a period of one year from the date of
shipment. For the complete Motorola hardware product warranty statement, go to:
www.motorola.com/enterprisemobility/warranty.
iii
Revision History
Changes to the original manual are listed below:
Change
Date
-01 Rev A
11/30/2008
Description
Initial release
iv
VC6000 Series Product Reference Guide
Contents
Patents.................................................................................................................................................. ii
Warranty ............................................................................................................................................... ii
Revision History .................................................................................................................................... iii
About This Guide
Introduction ...........................................................................................................................................
Documentation Set
Configurations.......................................................................................................................................
Software Versions.................................................................................................................................
Chapter Descriptions ............................................................................................................................
Notational Conventions.........................................................................................................................
Related Documents ..............................................................................................................................
Service Information...............................................................................................................................
xi
xi
xi
xii
xiii
xiii
xiv
xiv
Chapter 1: Getting Started
Introduction ..........................................................................................................................................
Unpacking the VC6000 Series .............................................................................................................
Optional Accessories .....................................................................................................................
Model Configurations ...........................................................................................................................
Features ...............................................................................................................................................
System Indication LED ........................................................................................................................
Application LEDs .................................................................................................................................
Getting Started .....................................................................................................................................
Installing a SIM Card ......................................................................................................................
Installing an SD Memory Card .......................................................................................................
Installing the VC6000 Series ..........................................................................................................
Starting with the VC6000 Series ....................................................................................................
Standby Mode ..........................................................................................................................
Resume from Standby Mode ...................................................................................................
1-1
1-1
1-2
1-3
1-3
1-6
1-6
1-7
1-7
1-8
1-8
1-9
1-9
1-9
vi
VC6000 Series Product Reference Guide
Controlling Screen Brightness .................................................................................................
Controlling Keypad Illumination ...............................................................................................
Resetting the VC6000 Series .........................................................................................................
Warm Boot ...............................................................................................................................
Cold Boot .................................................................................................................................
Clean Boot ...............................................................................................................................
Function Keys ................................................................................................................................
1-9
1-9
1-10
1-10
1-10
1-10
1-10
Chapter 2: Installation
Introduction ..........................................................................................................................................
Installing the VC6000 Series in a Vehicle ............................................................................................
Guidelines for Routing Cables .......................................................................................................
Connecting the Vehicle Power Cable ............................................................................................
Cigarette Lighter Cable ..................................................................................................................
Telemetry Cables ...........................................................................................................................
Supported Bus Types ..............................................................................................................
9 Pin Deutsch Cable ................................................................................................................
6 Pin Deutsch Cable ................................................................................................................
6 Pin Deutsch Telemetry Cable ..............................................................................................
9 Pin Deutsch Telemetry Cable ...............................................................................................
50 Pin Accessory Cable ...........................................................................................................
Auxiliary Port Pin layout ...........................................................................................................
Mounting the Combination Antenna (VC6096 only) .......................................................................
Installing the GPS Antenna ..................................................................................................................
Using the VC6000 Series Indoor .........................................................................................................
Optional Mounting ................................................................................................................................
Free-standing Pedestal Mount .................................................................................................
Desk Mount ..............................................................................................................................
Mounting Bracket Template for the VC6000 Series .......................................................................
2-1
2-2
2-2
2-3
2-3
2-4
2-4
2-5
2-5
2-6
2-6
2-7
2-7
2-10
2-12
2-13
2-14
2-14
2-15
2-15
Chapter 3: Getting Started Series
Introduction ..........................................................................................................................................
Using the Keyboard .............................................................................................................................
Keyboard Functionality ........................................................................................................................
Soft Keyboard ......................................................................................................................................
Starting the Mobile Computer Boot Up ................................................................................................
Today Screen ......................................................................................................................................
Status Icons .........................................................................................................................................
Programs .............................................................................................................................................
Settings ................................................................................................................................................
Adjusting Volume .................................................................................................................................
3-1
3-2
3-3
3-3
3-5
3-5
3-6
3-8
3-10
3-14
Chapter 4: Using the Phone
Introduction ..........................................................................................................................................
Accessing the Phone Keypad ..............................................................................................................
Turning the Phone On and Off .............................................................................................................
Audio Modes ........................................................................................................................................
4-1
4-1
4-2
4-3
Table of Contents
Using a Bluetooth Headset ............................................................................................................
Adjusting Audio Volume .................................................................................................................
Making a Call .......................................................................................................................................
Using the Phone ............................................................................................................................
Using Contacts ...............................................................................................................................
Using Call History ..........................................................................................................................
Making a Speed Dial Call ...............................................................................................................
Making an Emergency Call ..................................................................................................................
Answering a Call ..................................................................................................................................
Incoming Call Features ..................................................................................................................
Smart Dialing .......................................................................................................................................
Muting a Call ........................................................................................................................................
Taking Notes ........................................................................................................................................
Using Speed Dial .................................................................................................................................
Adding a Speed Dial Entry .............................................................................................................
Editing a Speed Dial Entry .............................................................................................................
Deleting a Speed Dial Entry ...........................................................................................................
Using Call History ................................................................................................................................
Managing Call History ....................................................................................................................
Changing the Call History View ...............................................................................................
Resetting the Recent Calls Counter .........................................................................................
Deleting Call History Items by Call Date ..................................................................................
Deleting All Call History Items ..................................................................................................
Viewing Call Status ..................................................................................................................
Using the Call History Menu ....................................................................................................
Swapping Calls ....................................................................................................................................
Conference Calling ..............................................................................................................................
Text Messaging ...................................................................................................................................
Viewing Text Messages .................................................................................................................
Sending a Text Message ...............................................................................................................
vii
4-3
4-3
4-4
4-4
4-4
4-4
4-5
4-5
4-6
4-6
4-7
4-8
4-8
4-9
4-9
4-10
4-11
4-12
4-12
4-12
4-12
4-13
4-13
4-14
4-15
4-15
4-16
4-17
4-17
4-19
Chapter 5: Wireless Applications
Introduction .......................................................................................................................................... 5-1
Signal Strength Icon ............................................................................................................................ 5-2
Turning the WLAN Radio On and Off .................................................................................................. 5-3
Chapter 6: Using Bluetooth
Introduction ..........................................................................................................................................
Adaptive Frequency Hopping ..............................................................................................................
Security ................................................................................................................................................
Turning the Bluetooth Radio Mode On and Off ...................................................................................
Disabling Bluetooth ........................................................................................................................
Enabling Bluetooth .........................................................................................................................
Bluetooth Power States .................................................................................................................
Cold Boot .................................................................................................................................
Warm Boot ...............................................................................................................................
Suspend ...................................................................................................................................
Resume ....................................................................................................................................
6-1
6-1
6-2
6-3
6-3
6-3
6-4
6-4
6-4
6-4
6-4
viii
VC6000 Series Product Reference Guide
Modes ..................................................................................................................................................
Wizard Mode ..................................................................................................................................
Explorer Mode ................................................................................................................................
Discovering Bluetooth Device(s) ..........................................................................................................
Available Services ...............................................................................................................................
File Transfer Services ....................................................................................................................
Creating a New File or Folder ..................................................................................................
Deleting a File ..........................................................................................................................
Getting a File ............................................................................................................................
Copying a File ..........................................................................................................................
Connecting to the Internet Using an Access Point .........................................................................
Dial-Up Networking Services .........................................................................................................
Object Exchange Push Services ....................................................................................................
Sending a Contact ...................................................................................................................
Swapping Contacts ..................................................................................................................
Fetching a Contact ...................................................................................................................
Sending a Picture .....................................................................................................................
Headset Services ...........................................................................................................................
Hands-free Services ......................................................................................................................
Serial Port Services .......................................................................................................................
ActiveSync Using Serial Port Services ..........................................................................................
Personal Area Network Services ...................................................................................................
IrMC Synchronization Services ......................................................................................................
Bonding with Discovered Device(s) .....................................................................................................
Deleting a Bonded Device .......................................................................................................
Accepting a Bond .....................................................................................................................
Bluetooth Settings ................................................................................................................................
Device Info Tab ..............................................................................................................................
Services Tab ..................................................................................................................................
Dial-Up Networking Service .....................................................................................................
File Transfer Service ................................................................................................................
Hands-Free Audio Gateway Service ........................................................................................
Headset Audio Gateway Service .............................................................................................
IrMC Synchronization Service ..................................................................................................
OBEX Object Push Service .....................................................................................................
Personal Area Networking Service ..........................................................................................
Serial Port Service ...................................................................................................................
Security Tab ...................................................................................................................................
Discovery Tab ................................................................................................................................
Virtual COM Port Tab .....................................................................................................................
HID Tab ..........................................................................................................................................
Profiles Tab ....................................................................................................................................
System Parameters Tab ................................................................................................................
Miscellaneous Tab .........................................................................................................................
6-4
6-4
6-4
6-6
6-9
6-9
6-11
6-11
6-11
6-11
6-11
6-12
6-13
6-13
6-14
6-15
6-15
6-16
6-17
6-18
6-18
6-20
6-20
6-20
6-22
6-22
6-23
6-23
6-23
6-24
6-25
6-26
6-26
6-26
6-27
6-28
6-29
6-29
6-30
6-31
6-32
6-32
6-33
6-33
Chapter 7: GSM Configuration
Introduction .......................................................................................................................................... 7-35
Quick Startup Steps ............................................................................................................................. 7-35
VC6000 Series Service Verification ..................................................................................................... 7-36
Table of Contents
Ensuring Network Coverage ..........................................................................................................
Configuring a Data Connection ......................................................................................................
Establishing a Data Connection .....................................................................................................
Ending a Data Connection .............................................................................................................
VC6000 Series Settings .......................................................................................................................
Phone .............................................................................................................................................
Sounds .....................................................................................................................................
Security ....................................................................................................................................
Services .........................................................................................................................................
Call Barring (Call Blocking) ......................................................................................................
Caller ID ...................................................................................................................................
Call Forwarding ........................................................................................................................
Call Waiting ..............................................................................................................................
Voice Mail and Text Messages ................................................................................................
Fixed Dialing ............................................................................................................................
Network ..........................................................................................................................................
Changing Networks Manually ..................................................................................................
Viewing Available Networks .....................................................................................................
Setting Preferred Networks ......................................................................................................
Phone Info ......................................................................................................................................
Network Time Synchronization ............................................................................................................
Enhanced Operator Name String ........................................................................................................
Service Provider Name Display ...........................................................................................................
ix
7-36
7-37
7-38
7-39
7-41
7-41
7-41
7-42
7-43
7-43
7-43
7-44
7-44
7-45
7-45
7-46
7-46
7-46
7-47
7-48
7-48
7-49
7-49
Chapter 8: Using GPS Navigation
Introduction ..........................................................................................................................................
Software Installation ............................................................................................................................
VC6000 Series GPS Setup ..................................................................................................................
Operation .............................................................................................................................................
GPS Maps on microSD Cards .......................................................................................................
Answering a Phone Call While Using GPS ....................................................................................
Losing the GPS Signal While in a Vehicle .....................................................................................
Assisted GPS .......................................................................................................................................
8-1
8-1
8-1
8-2
8-2
8-2
8-2
8-2
Chapter 9: ActiveSync
Introduction ..........................................................................................................................................
Installing and Setting Up ActiveSync ...................................................................................................
First Time Sync Connection ...........................................................................................................
Routine Sync Connection ..............................................................................................................
9-1
9-1
9-1
9-2
Chapter 10: Maintenance and Troubleshooting
Introduction ..........................................................................................................................................
Maintaining the VC6000 Series ...........................................................................................................
Cleaning ...............................................................................................................................................
Materials Required .........................................................................................................................
Cleaning the VC6000 Series ..........................................................................................................
Housing ....................................................................................................................................
10-1
10-1
10-2
10-2
10-2
10-2
x
VC6000 Series Product Reference Guide
Display .....................................................................................................................................
Connectors ...............................................................................................................................
Cleaning Frequency .......................................................................................................................
Troubleshooting ...................................................................................................................................
VC6000 Series ...............................................................................................................................
Bluetooth Connection .....................................................................................................................
10-2
10-2
10-3
10-4
10-4
10-6
Appendix A: Specifications
VC6096/VC6000 Specifications ........................................................................................................... A-1
Index
Glossary
About This Guide
Introduction
This guide provides information about using the VC6000 Series and accessories.
NOTE
Screens and windows pictured in this guide are samples and can differ from actual screens.
Documentation Set
The documentation set for the VC6000 Series is divided into guides provide information for specific user needs.
• VC6000 Quick Reference Guide - describes how to start using the VC6000 Series.
Configurations
This guide covers the following configurations:
Configuration
Operating
System
GPS
Bluetooth
Wireless
LAN
Wireless
WAN
Vehicle
Telemetry
VC6000
Windows
Mobile 6.1
Classic
No
Yes
No
No
No
VC6096
Windows
Mobile 6.1
Professional
Yes
Yes
Yes
(802.11 a/b/g)
Yes
(HSDPA,
UMTS, GSM,
GPRS, EDGE
Voice and data)
Yes
xii
VC6000 Series Product Reference Guide
Software Versions
This guide covers various software configurations and references are made to operating system or software
versions for:
• OEM version
• Hardware version.
OEM Software
To determine the OEM software version:
Tap Start > Settings > System info icon > System tab.
To determine the hardware version:
Tap Start > Settings > System Info icon > HW Version tab.
To view the software information:
Tap Start > Settings > System Info icon > Package tab.
About This Guide
xiii
To view the hardware and software configuration information:
Tap Start > Settings > System Info icon > ConfigInfo tab.
Chapter Descriptions
Topics covered in this guide are as follows:
• Chapter 1, Getting Started, provides information on getting the VC6000 Series up and running for the first
time.
• Chapter 2, Installation, provides instructions for installing the VC6000 Series in a vehicle or on a desktop.
Provides instructions for installing accessories.
• Chapter 3, Operating the VC6000 Series, explains how to use the VC6000 Series. This includes resetting the
VC6000 Series entering data.
• Chapter 4, Wireless Applications, provides instructions for using and configuring the VC6000 Series on a
wireless LAN.
• Chapter 5, Using Bluetooth, explains how to use Bluetooth functionality on the VC6000 Series.
• Chapter 6, ActiveSync, provides instructions for installing and configuring ActiveSync.
• Chapter 7, Maintenance and Troubleshooting, includes instructions on cleaning the VC6000 Series, and
provides troubleshooting solutions for potential problems during VC6000 Series operation.
Notational Conventions
The following conventions are used in this document:
• “VC6000 Series” refers to the Vehicle Computers 6000 and 6096.
• Italics are used to highlight the following:
• Chapters and sections in this and related documents
xiv
VC6000 Series Product Reference Guide
• Bold text is used to highlight the following:
• Key names on a keypad
• Button names on a screen or window.
• Dialog box, window and screen names
• Drop-down list and list box names
• Check box and radio button names
• Icons on a screen.
• Bullets (•) indicate:
• Action items
• Lists of alternatives
• Lists of required steps that are not necessarily sequential
• Sequential lists (e.g., those that describe step-by-step procedures) appear as numbered lists.
NOTE
This symbol indicates something of special interest or importance to the reader. Failure to read the note
will not result in physical harm to the reader, equipment or data.
CAUTION
This symbol indicates that if this information is ignored, the possiblity of data or material damage may
occur.
WARNING!
This symbol indicates that if this information is ignored the possibility that serious personal
injury may occur.
Related Documents
• VC6000 Series Quick Reference Guide, p/n 6802986C09.
• Microsoft® Applications for Windows Mobile 6 User Guide, p/n 72E-108299-xx
• ActiveSync software, available at: http://www.microsoft.com.
• Enterprise Mobility Application Guide, p/n 72E-68901-xx
• Enterprise Mobility Developer Kits (EMDKs), available at:
http://www.motorola.com/enterprisemobility/support.
For the latest version of this guide and all guides, go to: www.motorola.com/enterprisemobility/manuals.
Service Information
If you have a problem with your equipment, contact Motorola Enterprise Mobility Support for your region. Contact
information is available at: www.motorola.com/enterprisemobility/support.
When contacting Enterprise Mobility Support, please have the following information available:
About This Guide
xv
• Serial number of the unit
• Model number or product name
• Software type and version number.
Motorola responds to calls by E-mail, telephone or fax within the time limits set forth in support agreements.
If your problem cannot be solved by Motorola Enterprise Mobility Support, you may need to return your equipment
for servicing and will be given specific directions. Motorola is not responsible for any damages incurred during
shipment if the approved shipping container is not used. Shipping the units improperly can possibly void the
warranty.
If you purchased your Enterprise Mobility business product from a Motorola business partner, contact that business
partner for support.
xvi
VC6000 Series Product Reference Guide
Chapter 1 Getting Started
Introduction
The Motorola VC6000 Series is a high-performing and rugged data communication and computing solution. It is
specifically designed for the harsh conditions of the mobile environment areas that are not suitable for conventional
notebook or desktop computers.
The computer enables real-time data access, collection, capture and report of information related to the driver’s
workflow, status and location.
The fixed-mount computer consists of a touch-screen with an integrated QWERTY keyboard. Data can be entered
using the touch-screen or keyboard.
The VC6000 Series has multiple communication capabilities that include: Wireless Local Area Network (WLAN),
Wireless Wide Area Network (WWAN), BluetoothTM and a Global Positioning System (GPS) receiver.
Bluetooth technology is used for cordless connection of peripheral devices such as printers, bar code scanners,
handsfree speakers and headsets to the computer. Cellular and WiFi radios are used to exchange voice and data
with wide and local area networks. Among its many communication interfaces, the computer contains an internal
GPS module, ensuring reliable and accurate vehicle location.
Unpacking the VC6000 Series
When you remove the VC6000 Series from its box, save the box and shipping material in case you need to ship or
store it. Check the contents of the box against the invoice for completeness and contact your local Motorola service
representative if there is a problem.
The VC6000 Series shipping box contains:
• VC6000 Series vehicle computer
• Hardware Kit (including five M4 installation screws)
• Quick Reference Guide.
1-2
VC6000 Series Product Reference Guide
Inspect the equipment for damage. If you are missing any equipment or if you find any damaged equipment,
contact the Motorola Enterprise Mobility Support immediately. See Service Information on page xiv for contact
information.
NOTE
A hardware kit that contains optional accessories is provided separately inside the shipping box.
Optional Accessories
Table 1-1 describes the optional accessories of the VC6000 Series.
Table 1-1 Optional Accessories
Part Number
Description
FLN4048
Combination Antenna
8508851K59
External GPS Antenna
0102246H51
Indoor Power Supply Unit
50-16000-221R
AC Cord (USA)
3087568V84
VC6096 WWAN RF Cable (3m, 9.8ft.)
3087568V83
VC6096 WLAN RF Cable (3m, 9.8ft.)
3071815Y17
VC6096 Cigarette Lighter Cable (CLA) Power Supply Cable
3071815Y13
VC6096 Vehicle Power Cable
3071815Y15
9-Pin Deutsch Cable
3071815Y14
6-Pin Deutsch Cable
3089906V60
50 Pin Cable Cable
3089906V63
9-Pin Deutsch Telemetry Cable
3089906V61
6-Pin Deutsch Telemetry Cable
0771837Y11
Sapphire Mounting Adaptor
Getting Started
1-3
Model Configurations
Table 1-3 describes the VC6000 Series model configurations.
Table 1-2 VC6000 Series - Model Configurations
Configuration Model
VC6000
VC6096
Operating System
Windows Mobile 6.1 Classic
Windows Mobile 6.1 Professional
GPS
No
Yes
Bluetooth
Yes
Yes
Wireless LAN
No
Yes (802.11a/b/g)
Cellular Radio
(HSDPA, UMTS, GSM, GPRS, EDGE)
No
Yes (Voice and data)
Vehicle Telemetry
No
Yes
Features
The VC6000 Series has the following features:
• Ergonomic design with a color LCD touch screen
• Windows Mobile 6.1 operating system
• Internal Bluetooth radio to enable wireless connection to a Bluetooth printer, bar code scanner, headset and
other Bluetooth peripherals
• Connection to WLAN in 802.11a/b/g standards (VC6096 only)
• Connection to WWAN using a Global System for Mobile communication (GSM) cellular radio and
High-Speed Downlink Packet Access (HSDPA) (VC6096 only)
• 10/100 Ethernet port for connection to Local Area Network (LAN)
• Vehicle motion and location detection via the vehicle telemetry and the GPS receiver (VC6096 only)
• Serial RS232 interface
• Full speed USB ports
• Wide-range of input power (10 V DC to 33 V DC) to accommodate a wide range of vehicles
• Reliable operation in cold environments, as low as -20 °C (- 4 °F)
• Maximum operational temperature 60 °C (140 °F)
1-4
VC6000 Series Product Reference Guide
Application LEDs - two Green LEDs Driven by Application1
Power Button with System Indication LED
Touch Screen
Volume up/down Key
Function Keys 2
Brightness up/down Key
Speaker (embedded)
Microphone (embedded)
Select Key
Navigation Key
Full QWERTY Keypad
End Key (Model
VC6096)
Back Key (Model
VC6000)
Call Key (Model
VC6096)
Home Key (Model
VC6000)
Left Soft Key
Right Soft Key
Figure 1-1 Front View
1.
To program the operation of the Application LEDs, refer to the Enterprise Mobility Developer Kits (EMDKs).
2.
To program the operation of the Function Keys, refer to the Enterprise Mobility Developer Kits (EMDKs).
Getting Started
USB Port, Type A 2
Mini USB Port, Type B 2
1-5
M4 Screw Mounting Bosses
USB Port, Type A 2
M4 Ground Screw Boss
Power Connector
Cable Retention
Bracket
SD Memory Card Slot 2
SIM Card Slot
(used in VC6096 only)
GPS Antenna Connector
(used in VC6096 only)
Auxiliary Port 2 3
WWAN Antenna Connector 1
10/100 Ethernet LAN Port 2, 4
(used in VC6096 only)
WLAN Antenna Connector 1
(used in VC6096 only)
Figure 1-2 Back View
3.
Reverse thread - rotate counterclockwise to fasten connector.
4.
Keep covered when not in use.
5.
Includes: 8 digital inputs, 8 digital outputs, 2 analog inputs, 2 pins for debugging, 2 full RS232 ports, CAN2.0 J1939 (Telemetry), J1708 (Telemetry) ports.
6.
To activate the 10/100 Ethernet LAN Port, refer to Ethernet LAN Power program in Table on page 3-8.
1-6
VC6000 Series Product Reference Guide
System Indication LED
The system indication LED is located inside the Suspend Button.
Table 1-3 describes the LED indications.
Table 1-3 LED Indications
LED State
Indication
Off
Normal operation.
Fast flashing amber
• Critical power event. Input power is out of operating range. The computer
may turn off - save your entries.
• Vehicle engine start - no action is required.
• Cold reset is active - no action is required.
Slowly flashing amber
Critical temperature event. Ambient temperature is out of operating range -20 °C
to 60 °C (-4 °F to 140 °F).
The VC6000 Series may turn off.
Application LEDs
The Application LEDs are located on the upper left hand side of the VC6000 Series front panel.
To know more about the function of Application LEDs, refer to the operating manual provided by your organization.
Getting Started
1-7
Getting Started
In order to start using the VC6000 Series for the first time:
• Install a SIM Card
• Install a SD Memory Card
• Install the VC6000 Series in a vehicle or on a desktop.
• Start the VC6000 Series.
Installing a SIM Card
Before using the VC6096 in a cellular network, make sure that the VC6096 is equipped with a Subscriber Identity
Module (SIM) card, obtained form your service provider. The SIM card is a small smart card that fits into the
VC6096. The SIM card holds the personalized information about the VC6096, including network activation and
phone book entries.
To install the SIM card:
1.
Remove the T8 screw that secures the SIM card door and open the door.
2.
Position the SIM card with the contacts facing the back of the VC6096, and insert into the SIM slot. The SIM
card corner notch fits into the slot only one way (see Figure 1-3).
3.
Use a pen to push the SIM card inwards to lock.
4.
Place the SIM card door and secure the T8 screw.
3NOTE
5.
The VC6096 powers on only if the T8 screw is fully secured.
Torque the T8 screw to 3.4 kgf-cm (3 in-lbs).
SIM Slot
SIM Card
T8 Screw
SIM Card Door
Figure 1-3 SIM Card Installation
CAUTION
Ensure to torque the screw to seal the VC6000 Series properly. Otherwise, sealing can be
compromised.
1-8
VC6000 Series Product Reference Guide
Installing an SD Memory Card
A Secure Digital (SD) memory card provides secondary non-volatile data storage. Use MMC and non-SDHC SD
memory cards. The card slot is located on the side panel of the VC6000 Series.
To install the SD memory card:
1.
Lift up the Protective Rubber Cap that covers the Memory Card Slot.
2.
Position the SD memory card with the contacts facing the back of the VC6000 Series and insert into the
Memory Card Slot. The corner notch of the SD memory card fits into the Memory Card slot only one way.
3.
Use your a pen to push the SD memory card inwards to lock.
4.
Replace the Protective Rubber Cap to seal the Memory card slot.
Protective Rubber Cap
Memory
Card Slot
SD Memory Card
Figure 1-4 SD Card Installation
Installing the VC6000 Series
Refer to Chapter 2, Installation for information on installing the VC6000 Series onto a vehicle or on a desktop, as
well as installing accessories.
Getting Started
1-9
Starting with the VC6000 Series
The VC6000 Series is automatically powered on when connected to the vehicle. The VC6000 Series turns to
Standby mode when the vehicle is turned off. In Standby mode, the screen automatically turns off after some time.
Standby Mode
Standby mode is a power saving mode enabled only when the vehicle
ignition key is switched to the OFF position.
Power Button
In Standby mode, the screen display and backlight illumination
automatically turn off after a period of two minutes when VC6000 Series
is not active.
Figure 1-5 Power Button
Resume from Standby Mode
To resume from Standby mode, press any key, touch the screen or momentarily press the Power Button
.
The VC6000 Series can be programmed to automatically resume from Standby mode when: turning On the ignition
key, connecting or removing a USB device, pressing a keyboard key, receiving an alarm, pressing the touch
screen, communicating over Bluetooth, communicating over WWAN, Telemetry signal (1939 protocol only),
Ethernet signal (magicPacket), GPIO signal.
To program the operation of Standby mode, refer to the VC6000 Series Software Enterprise Mobility Developer Kit
for C (EMDK).
Controlling Screen Brightness
There are five levels of screen brightness.
To adjust the brightness of the screen, press the Brightness down button to decrease the brightness or the
Brightness up button to increase the brightness.
Controlling Keypad Illumination
There are five levels of keypad illumination. To adjust the keypad illumination:
1.
Press the Ctrl key to lock in down position.
2.
Press the Brightness up/down key to increase/decrease the keypad illumination.
3.
Press the Ctrl key to unlock in up position.
1 - 10 VC6000 Series Product Reference Guide
Resetting the VC6000 Series
If the VC6000 Series stops responding to inputs, perform the reset actions in the following order:
Warm Boot
Warm boot may become necessary when an application running on your VC6000 Series does not respond after
performing initial reset.
CAUTION
Warm boot may cause lost of information from programs currently running on the computer.
To perform warm boot:
Press and hold the Power Button
for five seconds and release.
Cold Boot
Cold boot may become necessary when your VC6000 Series is jammed and does not respond after performing
warm boot.
Cold boot restarts the VC6000 Series by performing an ungraceful shutdown of all running applications and
powering off the VC6000 Series. Cold boot resets information stored in all running applications. Data saved
on flash memory or a memory card is not lost.
To perform a cold boot:
Press and hold
+
+ Power Button
.
You can also perform cold boot by holding the Power Button
pressed for 25 seconds.
Clean Boot
CAUTION
A clean boot should only be performed by an authorized system administrator. Removing power from
the VC6000 during a clean boot may render the VC6000 inoperable.
Clean boot may become necessary when your VC6000 Series is jammed and does not respond to cold boot.
A clean boot resets the VC6000 Series to the factory default settings. All applications installed by your organization
are erased and should be re-installed on the VC6000 Series.
To perform a clean boot:
Press and hold
+
+ Suspend Button
and the splash screen is visible.
+ Left Soft Key
. The VC6000 Series starts to boot
Function Keys
The five function keys on the front right hand side of the panel can be set to perform dedicated functions, such
switching between different software application screens. To know more about the function of each key, refer to
your enterprise application guide. To program the operation of the Function keys, refer to the VC6000 Series
Software Enterprise Mobility Developer Kit for C (EMDK).
Chapter 2 Installation
Introduction
This chapter describes how to install the VC6000 Series in a vehicle or on a desktop and connecting the VC6000
Series to a power source. This chapter also describes how to install the various accessories for the VC6000
Series. Read all of the following instructions before you begin.
WARNING!
CAUTION
To avoide injury, the VC6000 Series must be firmly secured to a surface of the vehicle that can
support the VC6000 Series weight in extream driving conditions.
Do not install the VC6000 Series or any accessory in a location that affects the vehicle safety,
driveability, or visibility.
The installation of the VC6000 Series should be performed in accordance with your organization
procedures and requirements.
A competent engineer must perform the installation in a vehicle. Improper installation can damage
your vehicle and/or the VC6000.
2-2
VC6000 Series Product Reference Guide
Installing the VC6000 Series in a Vehicle
Guidelines for Routing Cables
• Establish a neat route for the cable, staying clear of moving parts or hot surfaces.
• Fix the cable to an existing cable runs inside the vehicle using cable ties.
• When the cabling must go through a panel, use a suitable cable guard.
• When fixing a conduit or a cable on the outside of a vehicle, use P-Clips. Either drill and tap the hole or use a
nut and bolt to secure the clip.
• Ensure the cable does not have tight bends. The minimum recommended radius is 6.35 cm (2.5 inches).
• Ensure cables do not swing or chafe on the structure. This often requires using cable ties approximately
every one foot, and ensuring the cables do not flex often, especially where they connect to the VC6000
Series.
• If you must re-position the VC6000 Series occasionally, ensure there is enough slack in the cable to
accommodate movement without putting tension on the cable.
• Take the power from as close to the battery terminals as possible, and avoid using existing wiring.
• Ensure that all fuses are as close as possible to the power source.
• Use plastic cable ties to secure the cables to the cable tie bracket of the VC6000 (see Figure 2-1)..
Cable Tie Bracket
Figure 2-1 Cable Tie Bracket
Installation
2-3
Connecting the Vehicle Power Cable
CAUTION
DO NOT install the VC6000 Series in a vehicle with a positive ground electrical system.
To connect the power cable (see Figure 2-2):
1.
Disconnect the power terminals from the vehicle battery.
2.
Connect the black wire to the vehicle’s negative power source.
3.
Connect the green wire to the vehicle’s ignition switch.
4.
Connect the red wire to the vehicle’s positive power source. Place a 10 A slow blow fuse inside the fuse holder,
connected in-line with the red wire approximately 4” from the cable end, as shown in the figure below.
5.
Connect the cable’s Power Plug to the VC6000 Series Power Connector (PWR) (see Figure 2-2) and turn
clockwise to lock. The length of the cable is 9.8 ft. (3 m).
Power Plug
Pin 1 - Power
Pin 2 - Ignition
Pin 3 - N.C
Pin 4 Ground
10 A Fuse SLO BLO
Ground - Black Wire
Fuse Holder
Power - Red Wire
Ignition - Green Wire
Shrink Tubing
Figure 2-2 Power Cable
6.
When routing wires, slide Shrink Tubing over wires as required.
7.
Connect the power terminals of the Vehicle Power Cable to the terminals of the vehicle battery.
Cigarette Lighter Cable
The Cigarette Lighter Cable (see Figure 2-3) is a power extension cord that plugs into a cigarette lighter outlet of
the vehicle. The maximum length of the cable is 8.2 ft. (9.1 m).
Power Plug
Pin 1 - Power
Pin 2 - Ignition
Pin 3 - N.C
Pin 4 Ground
Figure 2-3 Cigarette Lighter Cable
10A Fuse SLO BLO
2-4
VC6000 Series Product Reference Guide
Telemetry Cables
The VC6000 Series vehicle telemetry system enables remote access to information and services relating to the
operation and performance of a vehicle. Information from the vehicle telemetry circuit is received via wire
communication and processed by VC6000 Series. The driver then access the computer application menus, such
as the Web browser or GPS, in order to obtain various telemetry data relating to the vehicle(s).
Vehicle telemetry information is also used for maintenance and diagnose of the vehicle condition.
The VC6000 Series is equipped with a built in (on–board) capability to interface with Heavy-Duty type bus (SAE
J1708, J1939) without an external adapter. Vehicle bus type can be selected manually or automatically via API.
Supported Bus Types
The VC6000 Series supports communication with the following Vehicles Telemetry Bus types (see Table 2-1):
Table 2-1 Vehicles Telemetry Bus Types
Vehicle Bus Type
Physical Layer
(Including data link & network layers)
Protocol Layer
Heavy-Duty Vehicle
SAE J1708
SAE J1587
Heavy-Duty Vehicle
SAE J1939-21 (CAN2.0)
SAE J1939-71
Heavy-Duty Vehicle
SAE J1708
SAE J1587
Installation
2-5
9 Pin Deutsch Cable
1.
Connect J1 connector into the Auxiliary port of the VC6000 Series (see Figure 2-4). Fasten the connector’s
screws.
2.
Connect J2 - J3 plugs to the telemetry receptacles of your vehicle data bus.
3.
Connect the I/O Wires as required (see Table 2-2).
J1 to VC6000 Series Auxiliary Port
J2 RS232 (D-type Male) Connector
J3 Deutsch 9 Pin
Telemetry Connector
(HD17-9-1939s)
I/O Wires: 8 digital inputs, 8 digital outputs, 2 analog inputs, Debug (2 wires for debugging). See label on wires. Maximum
current through wires 0.5 A
Figure 2-4 9 Pin Deutsch Cable
6 Pin Deutsch Cable
1.
Connect J1 connector into the Auxiliary port of the VC6000 Series (see Figure 2-5). Fasten the connector’s
screws.
2.
Connect J2 - J3 plugs to the telemetry receptacles of your vehicle data bus.
3.
Connect the I/O Wires as required (see Table 2-2).
J1 to VC6000 Series Auxiliary Port
J2 RS232 (D-type Male) Connector
J3 Deutsch 6 Pin
Telemetry Connector
(HD16-6-12s)
I/O Wires: 8 digital inputs, 8 digital outputs, 2 analog inputs, Debug (2 wires for debugging). See label on wires. Maximum
current through wires 0.5 A
Figure 2-5 6 Pin Deutsch Cable
2-6
VC6000 Series Product Reference Guide
6 Pin Deutsch Telemetry Cable
NOTE
The 6 Pin Deutsch Telemetry Cable only supports heavy-duty vehicle bus type SAE J1708.
The 6 Pin Deutsch Telemetry Cable supports protocol 1708 interface with Heavy-Duty type bus (SAE J1708)
1.
Connect J1 serial connector into the Auxiliary port of the VC6000 Series (see Figure 2-6). Close the
connector’s fastening screws.
NOTE
2.
Use the 50 Pin Accessory Cable (see 50 Pin Accessory Cable on page 2-7) to adapt betwwen the 6 Pin Deutsch
Telemetry Cable and the Auxiliary port of the VC6000 Series.
Connect J2 plug to the telemetry receptacles of the vehicle data bus (see Table 2-2).
J1, 9 PIN (D-type - Male) to VC6000 Series Auxiliary port
via 50 Pin Accessory Cable
J2 to vehicle Deutsch 6 Connector (HD16-6-12s)
Figure 2-6 6 Pin Deutsch Telemetry Cable
9 Pin Deutsch Telemetry Cable
1.
Connect J1 serial connector into the Auxiliary port of the VC6000 Series (see Figure 2-7). Close the
connector’s fastening screws.
NOTE
2.
Use the 50 Pin Accessory Cable (see 50 Pin Accessory Cable on page 2-7) to adapt betwwen the 9 Pin Deutsch
Telemetry Cable and the Auxiliary port of the VC6000 Series.
Connect J2 plug to the telemetry receptacles of the vehicle data bus (see Table 2-2).
J1 (D-type - Male) to VC6000 Series Auxiliary Port via 50
Pin Accessory Cable
Figure 2-7 9 Pin Deutsch Telemetry Cable
J2 To vehicle Deutsch 9 Connector
(HD17-9-1939s)
Installation
2-7
50 Pin Accessory Cable
The 50 Pin Accessory Cable serves as an adaptor cable betwwen the 9 Pin Deutsch Telemetry Cable (P.N
3089906Y63) or 6 Pin Deutsch Telemetry Cable (P.N 3089906Y63) and the VC6000 Series.
1.
Connect the cable into the Auxiliary port of the VC6000 Series (see Figure 2-8). Fasten the connector’s
screws.
2.
Connect J2, J3 and J4 connectors to the telemetry receptacles of your vehicle data bus.
3.
Connect the I/O wires as required (see Table 2-2).
J1 To VC6000 Series Auxiliary Port
J2 RS232 (D-type Male) Connector
J3 RS232 (D-type Male) Connector
J4 RS232 (D-type Female) Connector
I/O Wires: 8 digital inputs, 8 digital outputs, 2 analog inputs, Debug (2 wires for debugging). See label on wires. Maximum
current through wires 0.5 A
Figure 2-8 50 Pin Accessory Cable
Auxiliary Port Pin layout
For connecting the I/O wires, use the I/O wires lables and the Auxiliary connector pinout detailed in Table 2-2
below.
Table 2-2 Auxiliary Connector Pinout Details
Pin #
Name
Functionality
1
RD_OUT1
General purpose output port for relay drive (maximum current load 0.5A )
Relay state restors to initial position after Warm or Cold boot.
3
RD_OUT2
General purpose output port for relay drive (maximum current load 0.5A )
Relay state restors to initial position after Warm or Cold boot.
5
RD_OUT3
General purpose output port for relay drive (maximum current load 0.5A )
Relay state restors to initial position after Warm or Cold boot.
7
RD_OUT4
General purpose output port for relay drive (maximum current load 0.5A )
Relay state restors to initial position after Warm or Cold boot.
9
RD_OUT5
General purpose output port for relay drive (maximum current load 0.5A )
Relay state restors to initial position after Warm or Cold boot.
11
RD_OUT6
General purpose output port for relay drive (maximum current load 0.5A )
Relay state restors to initial position after Warm or Cold boot.
15
RD_OUT8
General purpose output port for relay drive (maximum current load 0.5A )
Relay state restors to initial position after Warm or Cold boot.
2-8
VC6000 Series Product Reference Guide
Table 2-2 Auxiliary Connector Pinout Details (Continued)
Pin #
Name
Functionality
2
DI1
General purpose digital input port1 (switch detect, 5,12 or 24V inputs).
Negative sense to either vehicle Ground or battery negative terminal.
4
DI2
General purpose digital input port1 (switch detect, 5,12 or 24V inputs).
Negative sense to either vehicle Ground or battery negative terminal.
6
DI3
General purpose digital input port1 (switch detect, 5,12 or 24V inputs).
Negative sense to either vehicle Ground or battery negative terminal.T
8
DI4
General purpose digital input port1 (switch detect, 5,12 or 24V inputs).
Negative sense to either vehicle Ground or battery negative terminal.
10
DI5
General purpose digital input port1 (switch detect, 5,12 or 24V inputs).
Negative sense to either vehicle Ground or battery negative terminal.
12
DI6
General purpose digital input port1 (switch detect, 5,12 or 24V inputs).
Negative sense to either vehicle Ground or battery negative terminal.T
14
DI7
General purpose digital input port1 (switch detect, 5,12 or 24V inputs).
Negative sense to either vehicle Ground or battery negative terminal.
16
DI8
General purpose digital input port1 (switch detect, 5,12 or 24V inputs).
Negative sense to either vehicle Ground or battery negative terminal.
17
UART_Tx/XCVR
Debuging port for maintenance.
18
UART_Rx/XCVR
Debuging port for maintenance.
19
Analog In 1-P
Sense of analog input signal2 (positive terminal)
20
Analog In 1-N
Analog input signal, negative terminal.
21
Analog In 2-P
Sense of analog input signal2 (positive terminal)
22
Analog In 2-N
Analog input signal negative terminal.
23
GND
Ground point
24
GND
Ground point
25
BAT_POS
Vehicle battery output (maximum current load 0.5A)
26
GND
Ground point
27
GND
Ground point
28
GND
Ground point
29
RS232 Port 1
RxD
30
RS232 Port 1
TxD
31
RS232 Port 1
RTS
32
RS232 Port 1
CTS
33
RS232 Port 1
DSR
34
RS232 Port 1
DTR
Installation
2-9
Table 2-2 Auxiliary Connector Pinout Details (Continued)
Pin #
1
2
Name
Functionality
35
RS232 Port 1
CD
36
RS232 Port 1
RI
37
RS232 Port 2
RxD
38
RS232 Port 2
TxD
39
RS232 Port 2
RTS
40
RS232 Port 2
CTS
41
RS232 Port 2
DSR
42
RS232 Port 2
DTR
43
RS232 Port 2
CD
44
RS232 Port 2
RI
45
J1708_P
J1708 Telemetry Communication port for receiving and transmitting data
to the ECU’s (Electronic Control Unit) over vehicle bus (positive terminal).
46
J1708_N
J1708 Telemetry communication port (negative terminal)
47
CAN2B_P
J1939 telemetry communication port with vhicle bus (positive terminal).
48
CAN2B_N
J1939 telemetry communication port (negative terminal)
49
CAN_Shield
CAN Shield (RC to GND)
50
GND
GND
To program the operation of input/output, refer to Enterprise Mobility Developer Kits (EMDKs).
To program minimum and maximum thresholds for port notification, refer to the VC6000 Series Software Developer
Kit for C (SDK).
2 - 10 VC6000 Series Product Reference Guide
Mounting the Combination Antenna (VC6096 only)
The Combination Antenna is an optional omni-directional WWAN and WLAN antenna used with the VC6096. The
antenna mounts inside/outside the vehicle cabin or indoors/outdoors (see Figure 2-10).
or
Vehicle Windshield
Figure 2-9 Combination Antenna - Vehicle Mount
The antenna has two external RF connectors that connect to the VC6096 via two low loss RF coax cables
CAUTION
To avoid damage to the VC6096, make sure to disconnect the power cable from the VC6096 before
connecting the antenna cable. When installing the antenna cable, make sure to connect the antenna
side of the cable before connecting to the VC6096.
To install the Combination Antenna (see Figure 2-10):
1.
Connect the WWAN and WLAN Cable
Connectors.
2.
Place the Lower Cables Bracket under the
cables so that the two holes align with the
screw inserts on the antenna.
3.
Place the Upper Cables Bracket on top of the
WWAN and WLAN Cable Connectors.
4.
Align the two holes on the Upper and Lower
Cables Brackets with the screw inserts and
secure the two M4 Screws (Torque 5 in-lbs).
5.
Use the three (x3) Antenna Bracket Inserts to
mount the antenna. Secure the antenna using
three M4 screws.
Antenna Bracket Inserts (x3)
Screw Inserts (x2)
Upper Cables Bracket
M4 Screws (x2)
WLAN Cable Connector
(Keep covered when not in use).
Lower Cables Bracket
WWAN Cable Connector (Keep covered when not in use).
Figure 2-10 Combination Antenna - Installation Guidelines
Installation 2 - 11
Combination antenna installation guidelines (see Figure 2-10):
1.
For best performance, it is recommended to install the antenna outside of the cabin. When installing the
antenna in the vehicle cabin or indoors, keep a minimum distance of 70 cm (2.3 ft.) between the antenna and
the VC6096.
2.
The antenna should be directed vertically to the horizon to assure maximum exposure.
3.
To ensure best performance, the antenna should be mounted as far away as possible from walls, floors and
metal containing objects. Keep an obstacle free zone of 10 cm (3.9 inches) from walls, cabinets, air duct,
metal-framed windows, doors etc.
4.
When mounting the antenna inside the vehicle, it is recommended to install the antenna at the top right hand
side of the windshield.
WARNING! 1. Keep a minimum lateral distance of 20 cm (8 inches) between the driver/passenger and the antenna.
Contact your professional installer, VAR, or antenna manufacturer for proper installation requirements.
2. To ensure safe driving, when mounting the Combination Antenna next to the windshield, do not block the
driver’s field of view.
2 - 12 VC6000 Series Product Reference Guide
Installing the GPS Antenna
The VC6096 is supplied with an internal module of Global Positioning System (GPS).
Connect the cable connector of the GPS antenna to the GPS connector at the back of the VC6096 (see Figure 1-2
on page 1-5).
CAUTION
To avoid damage to the VC6000 Series, disconnect the power cable from the VC6000 Series before
connecting the antenna cable.
GPS antenna Installation guidelines (see Figure 2-11):
1.
Recommended GPS antenna - Motorola part number 8508851K59.
2.
The GPS antenna must be installed on the top of the dashboard or on vehicle roof (see Figure 2-11). For best
performance, install the GPS antenna on the center-line of the vehicle roof.
3.
Keep a minimum distance of 40 cm (16”) between the Combination antenna and the GPS antenna.
4.
The antenna is attached by a magnet to a flat metal surface. Before installing the GPS antenna on a
dashboard, install a flat Metal Plate (minimum 2.75” x 2.75”, 7cm x 7 cm) on the dashboard to hold the GPS
antenna.
5.
The antenna should be directed parallel to the horizon to assure exposure to as many GPS satellites as
possible.
6.
If possible, the antenna location must not be obstructed by any structure or object. When installing the antenna
on a roof, ensure at least 3” of clear space around it.
GPS Antenna
Metal Plate
Figure 2-11 GPS Antenna Installation
Installation 2 - 13
Using the VC6000 Series Indoor
When using the VC6000 Series indoor, the VC6000 Series can be placed on a desk and powered using an Indoor
Power Supply Unit.
To connect the VC6000 Series indoor (see Figure 2-12):
1.
Connect a ground wire between the VC6000 Series and the facility ground system.
WARNING!
To ensure proper grounding, use a 18AWG ground wire between the VC6000 Series Ground
Point (GND) and the facility ground system.
The ground wire ring lugs should be connected to the Ground Point (GND) at the back of the VC6000 Series
using M4 screw.
2.
Mount the Combination Antenna outdoor. Contact the mast of the antenna, by a metal bonding, to a ground
wire that runs directly into the earth, via a deep ground rod. For antenna installation guidelines, (see Mounting
the Combination Antenna (VC6096 only) on page 2-10).
WARNING!
Keep a minimum lateral distance of 20 cm (8 inches) between the VC6000 Series user and the antenna. Contact
your professional installer, VAR, or antenna manufacturer for proper installation requirements.
3.
Connect the WWAN plug of the Combination Antenna cable to the WWAN antenna connector at the back of
the VC6000 Series (VC6096 only). Rotate clockwise to fasten the connector.
4.
Connect the WLAN plug of the Combination Antenna cable to the WLAN antenna connector at the back of the
VC6000 Series (VC6096 only). Rotate counterclockwise to fasten the connector.
5.
Attach the 12 V DC cable of the Indoor Power Supply Unit to the Power Connector at the back of the VC6000
Series and turn clockwise to lock. Rotate clockwise to lock the connector.
6.
Connect the AC Cord into the Indoor Power Supply Unit.
7.
Connect the AC Cord plug into a 100-240 V AC / 50-60 Hz power outlet.
AC Cord
Indoor Power Supply Unit
For indoor use only in dry locations
Power Connector
Ground Point
GND
12 V DC Cable
WLAN Antenna Connector
WWAN Antenna Connector
Figure 2-12 Desktop Power Supply Connection
3NOTE The total length of the power supply cables is 14.1 ft (4.3 m).
2 - 14 VC6000 Series Product Reference Guide
Optional Mounting
The following mounting examples are used for installation demonstration only. For optional mounting instructions,
refer to the documentation provided by the mount manufacturer.
WARNING!
Vehicles equipped with air bags - An air bag inflates with great force. DO NOT install the
VC6000 Series or place objects, including other communication equipment, in the area over
the air bag or in the air bag deployment area. If the communication equipment is improperly
installed and the air bag inflates, this could cause serious injury.
Free-standing Pedestal Mount
R
The Free-standing Pedestal Mount (see Figure 2-13) allows the VC6000 Series to be easily readjusted to either the
driver or passenger sides in the most comfortable location. A single adjustment knob enables simultaneous
adjustment of both upper and lower ball joints. The mount affixes to the VC6000 Series using the M4 screws,
included inside the hardware kit, and to the vehicle’s dashboard using self tapping screws or bolts, provided by the
mount manufacturer.
Adjustment knob
Figure 2-13 Free-standing Pedestal Mount
Installation 2 - 15
Desk Mount
The Desk Mount (see Figure 2-14) allows the VC6000 Series to be easily placed on a desk and adjusted to a most
comfortable screen view position. A single adjustment knob enables adjustment of both upper and lower ball joints
simultaneously. The mount affixes to the VC6000 Series using the M4 screws, included inside the hardware kit.
Figure 2-14 Desk Mount
Mounting Bracket Template for the VC6000 Series
Figure 2-15 shows the drill hole locations for the Mounting Bracket Template of the VC6000 Series.
100 mm ± 0.1 mm 3.94 ± 0.004 in.
100 mm ± 0.1 mm 3.94 ± 0.004 in.
Drill Holes: 4.8 mm ± 0.1 mm
0.256 ± 0.004 in.
Figure 2-15 Mounting Bracket Template of the VC6000 Series
2 - 16 VC6000 Series Product Reference Guide
Mounting surface must be flat and stiff and it must extend evenly for the entire length of the mounting bracket
surface.
• All four mounting holes must be used.
• All nuts and bolts must be checked periodically and tightened if required.
• When installing the VC6000 Series, care must be taken to ensure that the mounting bracket footprint is fully
supported. Additional plates may be required to achieve this.
Chapter 3 Getting Started Series
Introduction
This chapter explains the keyboard, buttons, status icons and controls on the VC6000 Series, and
provides basic instructions for using the VC6000 Series, including powering on and resetting the
VC6000 Series, and entering and capturing data.
3-2
VC6000 Series Product Reference Guide
Using the Keyboard
QWERTY of the VC6000 or VC6096 can be used with the full-screen VC6000 Series. For keyboard functionality,
Refer to Figure 3-1 and Figure 3-1 for a description of the keys.
F1
Function Keys
Fn Key Active
Fn Key Lock
F5
Navigation Keys
Figure 3-1 .VC6000 Series Keyboard
Getting Started
3-3
Keyboard Functionality
Table 3-1 VC6000 Series Keyboard Functionality
Key
Description
Shift
Press the Shift key followed by a alpha key to create uppercase alphabetic
Caps
When typing with Caps Lock on, all letters are CAPITALIZED. The Caps Lock key is toggled of and off
by pressing the button.
Esc
Press the Esc key to initiate an escape sequence from the function you are using.
Tab
Press the Tab key to advance the cursor to the next tab stop.
Press the Windows key to open the Start Menu
Ctrl
Press the Ctrl key to activate alternate control functions.
Alt
Press the Alt key to activate alternate keyboard functions.
Fn
Press the Fn (Function) key1 once to activate alternate functions that are shown on the keyboard in
amber text. When the FN key is pressed twice, the Fn Lock icon
shows to indicate that the
keyboard is locked in the function mode.
Press the Fn key again to return to normal keyboard mode.
A through Z
Produces the lowercase alphabetic character shown on the key. Produces uppercase alphabetic
character shown on the key when preceded by the Shift key.
0 through 9
Produces the numeric character shown on the key.
Navigation
Moves the cursor around the screen or highlights the items in a menu.
Function keys
F1 through F5
Programmable function keys. The application determines the use; see the software or application
documentation.
Enter
Moves the cursor to the next data field or screen.
Del / Bksp
Deletes the character to the right of the cursor / Deletes the character to the left of the cursor.
Space
Enters a space between characters or words.
1
To program the operation of Function keys, refer to Enterprise Mobility Developer Kits (EMDKs).
2
To program the operation of Function keys, refer to Enterprise Mobility Developer Kits (EMDKs).
Soft Keyboard
The VC6000 Series contains two on-screen Soft Input Panel (SIP) keyboards (see Figure 3-2). The Microsoft SIP
looks and functions like a standard keyboard. The VC6000 Series SIP looks and functions like the optional
keyboard.
3-4
VC6000 Series Product Reference Guide
To display the Microsoft SIP keyboard, tap the Input Panel icon in the task tray and select Keyboard from the
pop-up menu.
Soft Input Panel (SIP)
Input Panel icon
Figure 3-2 Soft Input Panel Keyboard
Getting Started
3-5
Starting the Mobile Computer Boot Up
The VC6000 Series starts automatically as soon as power is applied; either with a connection to the vehicle power
system or when connected to the Indoor Power Supply Unit. If the VC6000 Series does not power on, perform a
cold boot.
When the mobile computer is powered on for the first time, it initializes its system. The Windows Mobile 6.1 Boot
screen (Figure 3-3) appears for a short period of time followed by the Start Up window.
Version 6.1
Figure 3-3 Windows Mobile 6.1 Boot Screen
Today Screen
The Today screen (Figure 3-4) displays important information, such as upcoming appointments and status
indicators. Tap a section on the screen to open the associated program. Alternatively, tap Start > Today to display
the Today screen.
Connectivity
Notification
Open the Start Menu
WAN Status
Adjust volume
Battery Status
Change the date
and time
Change the date and time,
set up the alarm, and more
Turn on or off radios
BTExplorer
Wireless Applications
Command Bar
Soft Keys
Figure 3-4 Today Screen
3-6
VC6000 Series Product Reference Guide
To customize the Today screen, tap Start > Settings > Today icon. Use the Appearance tab to customize the
background and the Items tab to change the list and order of items that appear on the screen.
Status Icons
The Navigation bar at the top of the screen can contain the status icons listed in Table 3-2.
Table 3-2 Status Icons
Icon
Function
Description
Notification that one or more instant messages were received.
Notification that one or more e-mail/text messages were received.
Notification that one or more voice messages were received.
There are more notification icons than can be displayed. Tap to display
remaining icons.
Indicates a reminder of an upcoming calendar event.
Connectivity
Connection is active.
Connection is not active.
Synchronization is occurring.
Wi-Fi available.
Wi-Fi in use.
EGPRS connecting.
GPRS connecting.
WAN (VC6096 only)
Call missed.
Dialing while no SIM card is installed.
Voice call in progress.
Calls are forwarded.
Call on hold.
Speakerphone is on.
Antenna/signal icon: wireless on/good signal.
Antenna/signal icon: wireless off.
Antenna/signal icon: no service or searching.
GPRS in use.
EGPRS in use.
Roaming.
SIM Card not installed.
Getting Started
Table 3-2 Status Icons (Continued)
Icon
Function
Speaker
Description
All sounds are on.
All sounds are off.
Time and Next
Appointment
Displays current time in analog or digital format.
3-7
3-8
VC6000 Series Product Reference Guide
The command bar at the bottom of the screen can contain the task tray icons listed in Table 3-3.
Table 3-3 Task Tray Icons
Icon
Description
Wireless connection
status (VC6096 only)
Indicates WLAN signal strength.
Bluetooth Enabled
Bluetooth radio is on.
Bluetooth Disabled
Bluetooth radio is off.
Bluetooth Connection
Bluetooth radio is connected to another Bluetooth device.
ActiveSync
Active serial connection between the VC6000 Series and the host computer.
Programs
Table 3-4 lists the default programs on the Start menu.
Table 3-4 Programs in the Start Menu
Icon
Name
Description
Calendar
Keep track of appointments and create meeting requests.
Contacts
Keep track of friends and colleagues.
Phone (VC6096 only)
Make and receive calls, switch between calls, and set up conference
calling.
Help
See Help topics for the current screen or program.
Getting Started
3-9
Table 3-5 lists programs that are listed in the Programs window.
Table 3-5 Programs in Program Window
Icon
Name
Description
ActiveSync
Synchronize information between the VC6000 Series and a host
computer or the Exchange Server.
AirBEAM
Allows specially designed software packages to be transferred between
a host server and the VC6000 Series.
BTExplorer
Manages Bluetooth connections.
Calculator
Perform basic arithmetic and calculations, such as addition,
subtraction, multiplication, and division.
File Explorer
Organize and manage files on your device.
Internet Sharing
Connect a notebook computer to the Internet using the VC6000
Series's data connection.
Ethernet LAN Power
Turns on the VC6000 Series Ethernet LAN.
The factory default states for Ethernet LAN power is off.
Device Power Off
Turns off the VC6000 Series.
Diagnosic Center
Test the VC6000 Series hardsware (speaker, screen, memory,
keyboard, battery and more items).
Messenger
Use this mobile version of Windows Live Messenger.
MSP Agent
Interacts with MSP agents to collect monitoring and asset information
to enable the configuration, provisioning, monitoring and
troubleshooting of the VC6000 Series.
Notes
Create handwritten or typed notes, drawings, and voice recordings.
Pictures & Videos
View and manage pictures, animated GIFs, and video files.
3 - 10 VC6000 Series Product Reference Guide
Table 3-5 Programs in Program Window (Continued)
Icon
Name
Description
Rapid Deployment
Facilitates software downloads from a Mobility Services Platform Console
FTP server to the VC6000 Series.
Remote Desktop
Log onto Windows NT server type computers and use all of the programs
that are available on that computer from the VC6000 Series.
Search
Search contacts, data, and other information on your VC6000 Series.
SIM Toolkit
Manage the contacts that are stored on your SIM card. Copy SIM
contents to Contacts on the VC6000 Series.
Tasks
Keep track of your tasks.
Windows Live
Use this mobile version of Windows Live™ to find information on the
web.
Windows Media Player
Mobile
Play back audio and video files.
Settings
Table 3-6 lists control applications pre installed on the VC6000 Series. Tap Start > Settings to open the Settings
Table 3-6 Settings in the Setting Window
Icon
Name
Description
Personal Tab
Buttons
Assign a program to a button.
Input
Set options for each of the input methods.
Lock
Set a password for the VC6000 Series.
Menus
Set what programs appear in the Start menu.
Getting Started 3 - 11
Table 3-6 Settings in the Setting Window (Continued)
Icon
Name
Description
Owner Information
Enter personal information on the VC6000 Series.
Phone
Make and receive calls, switch between calls, and set up conference
calling.
Sounds & Notifications
Enable sounds for events, notifications, and more, and set the type of
notification for different events.
Today
Customize the appearance and the information to be displayed on the
Today screen.
About
View basic information such as the Windows Mobile® version and type
of processor used on the VC6000 Series.
Backlight
Set the display backlight time-out and adjust brightness.
Certificates
See information about certificates installed on the VC6000 Series.
Clock & Alarms
Set the device clock to the date and time of your locale or to a visiting
time zone when you’re traveling. Alarms can also be set at specified
days and times of a week.
Customer Feedback
Submit feedback on the Windows Mobile 6 software.
Encryption
Allow files on a storage card to be encrypted. Encrypted files are
readable only on your device.
Error Reporting
Enable or disable the device's error reporting function. When this
function is enabled and a program error occurs, technical data about
the state of the program and your computer is logged in a text file and
delivered to Microsoft's technical support if you choose to send it.
External GPS
Set the appropriate GPS communication ports, if required. You may
need to do this when there are programs on your device that access
GPS data or you have connected a GPS receiver to the VC6000
Series.
GPS Setup
View GPS SUPL information.
System Tab
3 - 12 VC6000 Series Product Reference Guide
Table 3-6 Settings in the Setting Window (Continued)
Icon
Name
Description
Keylight
Set the keypad backlight time-out.
Memory
Check the device memory allocation status and memory card
information and stop currently running programs.
Power
Check battery power and set the time-out for turning off the display to
conserve battery power.
Regional Settings
Set the regional configuration to use, including the format for displaying
numbers, currency, date, and time on the VC6000 Series.
Remove Programs
Remove programs that you installed on the VC6000 Series.
Screen
Change the screen orientation, re-calibrate the screen, and change the
screen text size.
Task Manager
Task Manager shows you the programs, processes, and services that
are currently running on your VC6000 Series. Use Task Manager to
monitor your VC6000 Series performance or to close a programs that
are not responding.
System Info
Displays the VC6000 Series’s software and hardware information.
Windows Update
Link to Microsoft's web site and update Windows Mobile® on your
VC6000 Series with the latest security patches or fixes. Do not use.
Obtain updates from Motorola.
Connections Tab
Beam
Set the to receive incoming IrDA beams (not aplicable for the VC6000
Series).
Connections
Set up one or more types of modem connections for your device, such
as phone dial-up (VC6096 only), GPRS (VC6096 only), Bluetooth, and
more, so that your device can connect to the Internet or a private local
network.
Getting Started 3 - 13
Table 3-6 Settings in the Setting Window (Continued)
Icon
Name
Description
USB to PC
Enables or disables the enhanced network connectivity.
Wi-Fi
Setup wireless network connection and customize settings (VC6096
only).
Wireless Manager
Enables or disables the VC6000 Series wireless radios and customizes
Wi-Fi, Bluetooth and Phone settings.
The VC6000 Series factory default radio states are:
Wi-Fi - ON.
Bluetooth - OFF.
Phone - ON.
3 - 14 VC6000 Series Product Reference Guide
Adjusting Volume
To adjust the system volume using the Speaker icon in the navigation bar:
1.
Tap the Speaker icon. The Volume dialog box appears.
Figure 3-5 Volume Dialog Box
2.
Tap and move the slide bar to adjust the volume.
3.
Select the On or Off radio button to turn the volume on or off.
You can also adjust the system volume using the Sounds & Notifications window, or use the Up/Down button on
the left hand side of the VC6000 Series front panel.
Chapter 4 Using the Phone
Introduction
Use the VC6000 Series to make phone calls, set up speed dials, keep track of calls, and send text messages. Your
wireless service provider may also provide other services such as voice mail, call forwarding, and caller ID.
Also use the integrated phone to connect to an ISP or work network in order to browse the Web and read e-mail.
Connect to the Internet or work network over General Packet Radio Service (GPRS) using Cellular Line, or using
the modem specified by the mobile operator. For more information, or to customize the VC6000 Series phone by
changing phone settings.
Accessing the Phone Keypad
Access the keypad regardless of the program in use. Applications on the VC6000 Series can be in use during a
call.
Antenna Signal
Figure 4-1 Phone Keypad
To access the phone keypad tap Start > Phone or press the green phone key on the VC6000 Series keypad.
4-2
VC6000 Series Product Reference Guide
The VC6000 Series receive calls when the is in Suspend mode, leave the phone radio turned on.
Turning the Phone On and Off
Windows Mobile 6.1 devices include Wireless Manager, which provides a simple method of enabling and
disabling the phone.
To open Wireless Manager, tap the Connectivity icon.
Figure 4-2 Opening Wireless Manager
Select Wireless Manager. The Wireless Manager window appears.
To toggle on or off the phone, tap blue Phone bar.
To configure settings for a connection, tap Menu > Phone Settings.
Using the Phone
4-3
Audio Modes
The VC6000 Series offers three audio modes for use during phone calls:
• Speaker Mode: Use the VC6000 Series as if on speaker phone.
• Headset Mode: Connect a Bluetooth headset to automatically switch audio to the headset.
Using a Bluetooth Headset
You can use a Bluetooth headset for audio communication when using an audio-enabled application. See Chapter
6, Using Bluetooth for information on connecting a Bluetooth headset to the VC6000 Series. Set the VC6000
Series’s volume appropriately before putting the headset on. When a Bluetooth headset is connected the
speakerphone is muted.
NOTE
Ensure that the Bluetooth headset is set to stay on.
When using a Bluetooth headset, during a call the VC6000 Series power button is disabled and the VC6000
Series will not go into suspend mode. Once the call is completed, the power button functionality is enabled.
Adjusting Audio Volume
Use the Volume Control Slider or the keypad keys to adjust the volume of the ringer when not in a call and the
audio volume when in a call.
Phone Volume Slider
Figure 4-3 Phone Volume Slider
To adjust the volume tap the Speaker icon in the Title bar. Move the slider up or down to adjust the volume.
NOTE
Adjust the conversation phone volume during a call. Adjusting the volume while not in a call affects the ring
and notification sound levels.
4-4
VC6000 Series Product Reference Guide
Making a Call
NOTE
You can make emergency calls even when the VC6000 Series is locked or when a SIM card is not installed.
See Making an Emergency Call on page 4-5 for more information.
With the VC6000 Series, you can make a call from the phone, contacts, speed dial and call history.
Using the Phone
To make a call using the phone keypad:
1.
Tap Start > Phone or press the green phone key on the VC6000 Series keypad.
2.
From the Phone keypad, tap the number to call.
3.
Tap Talk.
4.
Tap End to stop dialing or end the call.
NOTE
Alternatively, use the Send (green) and End Call (red) phone keys on the VC6000 Series keypad to dial or
disconnect.
If you tap a wrong number, tap Del key to erase each subsequent digit of a number. To erase the entire
number, tap and hold the Del key.
Using Contacts
Use Contacts to make a call without looking up or entering the phone number.
To make a call from Contacts:
1.
Tap Start > Contacts.
2.
From the contact list, tap and hold the contact name.
Figure 4-4 Contacts Menu
3.
Tap Call Work, Call Home or Call Mobile.
NOTE
To make a call from an open contact, tap the number to call. See On-Device Help for more information about
Contacts.
Using Call History
To make a call using Call History:
Using the Phone
1.
Tap Start > Phone or press the green phone key on the VC6000 Series’s keypad.
2.
From the Phone keypad, tap Call History.
4-5
Phone icon
Figure 4-5 Call History
3.
Tap the phone icon next to the number to begin dialing and return to the phone keypad.
4.
Tap End or press the red phone key on the VC6000 Series keypad to stop dialing or end the call.
Making a Speed Dial Call
Use Speed Dial to call someone saved in the speed dial directory.
To make a speed dial call:
1.
Tap Start > Phone or press the green phone key on the VC6000 Series’s keypad.
2.
From the Phone keypad, tap and hold the speed dial location number assigned to a contact. (To dial a one-digit
speed dial location number, tap and hold the speed dial number. To dial a two-digit speed dial location number,
tap the first digit and then tap and hold the second digit.)
or
From the Phone keypad, tap Speed Dial and tap the speed dial location number of the desired contact in the
list.
Speed Dial
Location Number
Figure 4-6 Speed Dial Contact List
3.
To stop dialing or end the call, tap End or press the red phone key on the VC6000 Series keypad.
Making an Emergency Call
Your service provider programs one or more emergency phone numbers, such as 911 or 999, that you can call
under any circumstances, even when your phone is locked or the SIM card is not inserted (onVC6000 Series). Your
service provider can program additional emergency numbers into your SIM card. However, your SIM card must be
inserted in your phone in order to use the numbers stored on it. See your service provider for additional
information.
4-6
VC6000 Series Product Reference Guide
When the alpha-numeric keypad phone is locked, press the Orange key twice to set the keypad to numeric mode
and then enter the emergency number.
NOTE
Emergency numbers vary by country. Your phone’s pre-programmed emergency number(s) may not work in
all locations, and sometimes an emergency call cannot be placed due to network, environmental, or
interference issues.
Answering a Call
A dialog box appears on the VC6000 Series when it receives an incoming call. If the phone is set to ring, a ring
tone sounds. Answer or ignore the incoming call.
To answer an incoming call tap Answer on the Phone > Incoming... dialog or press the green phone key on the
VC6000 Series keypad.
Figure 4-7 Incoming Call
To ignore the incoming call tap Ignore. This may send the caller to voice mail, depending on the service provider.
Otherwise, this presents Busy to the calling party.
To end the call tap End or press the red phone key on the VC6000 Series keypad.
Incoming Call Features
• If you receive a call while in a call, tap Wait to place the call in call waiting.
• You can use other programs on the VC6000 Series during a call. To switch back to Phone, tap Talk or tap
Start > Phone. Tap End to end the call.
• If a caller isn't in your contact list, create a contact during the call or from Call History by tapping Menu >
Save to Contacts.
• To terminate a call when a second call comes in and answer the waiting call, tap End on the Phone keypad to
disconnect the active call, then tap Answer or press the Send key to answer the waiting call.
• To hold the current call and answer a waiting call, tap Answer or press the Send key to place the current call
on hold and answer the incoming call.
• To put a call on hold to call another number or answer an incoming call, tap Hold. To move from one call to
another, tap Swap.
Using the Phone
4-7
Smart Dialing
Smart Dialing makes it easy to dial a phone number. When you start entering numbers or characters, Smart Dialing
automatically searches and sorts the contact entries on the SIM card, in Contacts, and the phone numbers in Call
History (including incoming, outgoing, and missed calls). You can then select the desired number or contact from
the filtered list to dial.
Open the Phone screen, then tap the keys on the Phone keypad that correspond to the phone number or contact to
call. The contact panel lists contacts that match the sequence that you entered.
Smart Dialing starts looking for numbers or contacts that match the sequence entered.
To find a phone number:
• Enter the first one or two digits to find a phone number in Call History.
• Enter the first three digits or more to find a phone number from the saved Contacts and SIM card.
To find a contact name:
• Enter the first letter of a contact’s first name or last name. Smart Dialing searches for the letter starting
from the first character of a contact name as well as from the character that appears after a space, dash,
or underscore in a contact name. For example, if you tap number “2” which is associated with [a, b, c] on
the Phone keypad, contact names such as the following will be considered matches: “Smith, Bernard”,
“Adams, John”, “Carlson, Eileen”, “Dillon, Albert”, “Childs, Larry”, “Cooper, Robert” and “Parks, Celine”.
• If the matching list is long narrow down the search further by entering another letter. Using the same
example above, tap “3” which is associated with (d, e, f), the matching list is narrowed down to the
following names: “Smith, Bernard”, “Adams, John”, and “Parks, Celine”.
Figure 4-8 Finding a Contact
To make a call or send a text message using Smart Dialing:
1.
Begin entering the first few numbers or characters.
2.
In the Smart Dialing panel, use the up and down arrows on the keypad to navigate to the desired contact or
phone number.
3.
When the correct contact is selected, press TALK to make a voice call.
4.
To send a text message to the selected contact, tap Menu > Send Text Message.
5.
To call a different phone number associated with the selected contact, tap the contact name and select the
phone number to call.
4-8
VC6000 Series Product Reference Guide
Muting a Call
During a call, you can mute the microphone so you can hear the person on the line but he or she cannot hear
conversation from the microphone. This is useful when there is conversation or background noise on your end.
To mute or unmute a call:
1.
Tap Start > Phone or press the green phone key on the VC6000 Series’s keypad.
2.
Make a call.
3.
Tap Mute on the display to mute the audio. The Mute icon appears.
Mute Icon
Figure 4-9 Mute Button and Icon
Taking Notes
To create a note during a call, tap Note on the display, then enter the note. For more information about creating
notes see the Windows On-Device Help.
To access a note created during a call:
1.
Tap Start > Phone or press the green phone key on the VC6000 Series keypad.
2.
From the Phone keypad, tap Call History.
3.
Tap and hold the number or the Note icon for the phone call entry containing the note.
Note icon
Figure 4-10 Call History - Notes Menu
Using the Phone
4.
4-9
Tap View Note.
Figure 4-11 Call History - Notes
5.
Tap ok to exit.
NOTE
Also access notes directly from the Notes application by tapping Start > Notes.
Using Speed Dial
Create speed dial numbers to dial frequently called numbers with a single tap. Before creating a speed dial entry,
ensure the phone number exists in Contacts.
Adding a Speed Dial Entry
To add a speed dial entry from the phone keypad:
1.
Ensure the contact and phone number are in the Contacts list.
2.
Tap Start > Phone or press the green phone key on the VC6000 Series’s keypad.
3.
Tap Start > Speed Dial > Menu > New.
Figure 4-12 Contacts
4.
Tap the desired contact name and number in the list.
Figure 4-13 Speed Dial Contact Location
5.
In the Location field, tap the up/down arrows to select an available location to assign as the new speed dial
entry. The first speed dial location is reserved for voice mail.
4 - 10 VC6000 Series Product Reference Guide
6.
Tap ok to add the contact to the speed dial list.
Figure 4-14 Speed Dial Contact List
7.
Tap ok to exit the Speed Dial Contact List.
To add a speed dial entry from the Contacts window:
1.
Tap Start > Contacts.
Figure 4-15 Contacts
2.
Tap a contact name.
3.
Tap Menu > Add to Speed Dial.
Figure 4-16 Speed Dial Contact Location
4.
Tap the up/down arrows to select an available location to assign as the new speed dial entry. The first speed
dial location is reserved for voice mail.
5.
Tap ok.
Editing a Speed Dial Entry
1.
Tap Start > Phone or press the green phone key on the VC6000 Series’s keypad.
Using the Phone 4 - 11
2.
Tap Menu > Speed Dial.
Figure 4-17 Speed Dial Contact List
3.
Tap and hold the contact name.
4.
Tap Edit... .
5.
Change the name, phone number, or location information.
6.
Tap ok.
NOTE
Editing names and phone numbers in Speed Dial does not alter contact information in Contacts (Start
> Contacts).
Deleting a Speed Dial Entry
1.
Tap Start > Phone or press the green phone key on the VC6000 Series’s keypad.
2.
Tap Menu > Speed Dial.
3.
Tap and hold the contact name.
Figure 4-18 Speed Dial Delete Menu
4.
Tap Delete.
5.
Tap Yes to confirm permanently deleting the speed dial entry.
NOTE
Deleting names and phone numbers in Speed Dial does not delete the contact information in Contacts (Start
> Contacts).
4 - 12 VC6000 Series Product Reference Guide
Using Call History
Use Call History to call someone who was recently called, or recently called in. Call History provides the time and
duration of all incoming, outgoing, and missed calls. It also provides a summary of total calls and easy access to
notes taken during a call. Table 4-1 lists the call history icons that appear in the Call History window.
Table 4-1 Call History Icons
Icon
Description
This icon appears next to the contact information for all outgoing calls.
This icon appears next to the contact information for all incoming calls.
This icon appears next to the contact information for all missed calls.
Managing Call History
Change views, reset the call timer, and delete calls to manage the calls stored in Call History.
Changing the Call History View
1.
Tap Start > Phone or press the green phone key on the VC6000 Series’s keypad to display the Phone keypad.
2.
From the Phone keypad, tap Call History.
3.
Tap Menu > Filter to show the menu.
Figure 4-19 Call History - All Calls/Show Menu
4.
Select a view type from the menu to display only missed calls, outgoing calls, incoming calls, or calls listed
alphabetically by caller name.
5.
Tap ok to exit the Call History window.
Resetting the Recent Calls Counter
1.
Tap Start > Phone or press the green phone key on the VC6000 Series’s keypad to display the Phone keypad.
2.
From the Phone keypad, tap Call History.
3.
Tap Menu.
Using the Phone 4 - 13
Figure 4-20 Call History - Tools Menu
4.
Select Call Timers... .
Figure 4-21 Call History - Call Timers
5.
Tap Reset. (The All Calls: counter cannot be reset.)
6.
Tap ok to exit the Call Timers window.
Deleting Call History Items by Call Date
1.
Tap Start > Phone or press the green phone key on the VC6000 Series’s keypad to display the Phone keypad.
2.
From the Phone keypad, tap Call History.
3.
Tap Menu > Call Timers... .
Figure 4-22 Call History - Call Timers
4.
In the Delete call history items older than: drop-down list select a time period on which to base deletion of
stored items.
5.
Tap ok to exit the Call Timers window.
Deleting All Call History Items
1.
Tap Start > Phone or press the green phone key on the VC6000 Series’s keypad to display the Phone keypad.
2.
From the Phone keypad, tap Call History.
3.
Tap Menu.
4 - 14 VC6000 Series Product Reference Guide
Figure 4-23 Call History - Tools Menu
4.
Select Delete all calls.
Figure 4-24 Call History - Delete All Dialog
5.
Tap Yes.
6.
Tap ok to exit the Call History window.
Viewing Call Status
1.
Tap Start > Phone or press the green phone key on the VC6000 Series’s keypad to display the Phone keypad.
2.
From the Phone keypad, tap Call History.
3.
Tap an entry. The Call Status window appears.
Figure 4-25 Call History - Detail
NOTE
4.
When more than one call is on the phone line, only the duration of the first call is recorded.
Tap ok and then ok to exit.
Using the Phone 4 - 15
Using the Call History Menu
Use the Call History menu to dial voice mail, access the Activation Wizard, save to contacts, view a note, delete a
listing, send an SMS, and make a call.
1.
Tap Start > Phone or press the green phone key on the VC6000 Series’s keypad to display the Phone keypad.
2.
From the Phone keypad, tap Call History.
3.
Tap and hold an item in the list.
Figure 4-26 Call History - Menu
4.
Select an applicable item from the menu, as needed.
5.
Depending on the item selected, the appropriate window displays. For example, select Send SMS to display
the Inbox window.
6.
Tap ok to exit the Call History window.
Swapping Calls
To move between two or more phone calls:
1.
Tap Start > Phone or press the green phone key on the VC6000 Series’s keypad to display the Phone keypad.
2.
Enter the first phone number and press Talk. When the call connects, Hold appears on the keypad.
Figure 4-27 Call Swapping - Hold
3.
Tap Hold on to place the first number on hold.
4 - 16 VC6000 Series Product Reference Guide
4.
Enter the second number and tap Talk.
Figure 4-28 Call Conferencing - Conferencing
5.
Tap Swap to move from one call to the other.
6.
Tap End or press the red phone key on the VC6000 Series keypad to end each call.
Conference Calling
NOTE
Conference Calling and the number of conference calls allowed may not be available on all services. Please
check with your service provider for Conference Calling availability.
To create a conference phone session with multiple people:
1.
Tap Start > Phone or press the green phone key on the VC6000 Series’s keypad to display the Phone keypad.
2.
Enter the first phone number and press Talk. When the call connects, Hold appears on the keypad.
Figure 4-29 Conference Call - Hold
3.
Tap Hold to place the first call on hold.
4.
Enter the second phone number and tap Talk.
5.
After the call is answered, tap Menu > Conference to place the calls in conference mode.
Using the Phone 4 - 17
Figure 4-30 Creating a Conference Call
6.
Tap Hold to place the conference on hold.
7.
Enter another phone number and tap Talk.
8.
After the call is answered, tap Menu > Conference to place all the calls in conference mode.
9.
Repeat steps 6 through 8 for up to six phone numbers.
10. Tap End or press the red phone key on the VC6000 Series keypad to end the conference call.
NOTE
To speak privately with one party during a conference call, tap Menu > Private. To include all parties again,
tap Menu > Conference.
Figure 4-31 Creating a Private Call
Text Messaging
Use the Text Messages window to send and receive text messages to and from mobile phones. The text can
contain words, numbers, or an alphanumeric combination no longer than 160 characters.
Short text messages delivered over mobile networks transmit from the sending VC6000 Series, are stored in a
central short message center, then forwarded to the destination mobile device. If the recipient is not available, the
message is stored and can be sent later.
Viewing Text Messages
To view a text message:
You can view a text message whether the phone is on or off. When the phone is on, you can view a text message
from its notification callout. Tap the text message notification icon on the navigation bar to display the message.
4 - 18 VC6000 Series Product Reference Guide
Text Message Notification Icon
Figure 4-32 New Text Message Notification
The Caller Identification feature matches incoming text message numbers with those stored in Contacts so you
know who is sending you a message. Furthermore, the New Text Message dialog box gives you the option to call
the sender or save, dismiss, or delete the message.
Figure 4-33 New Text Message Options
When the phone function is off, you can still view received text message in Messaging:
1.
Tap Start > Messaging > Text Messages, or on the Today screen, tap Text Messages.
Tap Text Messages.
Figure 4-34 Text Messaging on Today Screen
The Messaging window appears.
Figure 4-35 Messaging Window
2.
In the message list, tap a Text Messages.
Using the Phone 4 - 19
Tap to reply the message.
Figure 4-36 Text Messages List
NOTE
If the phone is turned off and you tried to call the sender, send a reply, or forward the message, you are
prompted to turn the phone function on.
Sending a Text Message
To create a text message:
1.
On the Phone screen, select a contact name that you want to send a message to.
2.
Tap Menu > Send Text Message.
Figure 4-37 Phone Screen Contact List
3.
Compose your message.
Address Area
Message Area
Figure 4-38 Create Text Message
• The auto-correct feature automatically fixes common spelling errors as you type so your messages are
more accurate.
• The character counter lets you see and control the size of the message as you compose.
• If you want to know if your text message was received, tap Menu > Message Options, then select the
Request SMS text message delivery notification check box.
4 - 20 VC6000 Series Product Reference Guide
Figure 4-39 Message Options Window
4.
Tap Send when you've finished the message.
If the phone is turned on, your text message is sent. If it’s off, you are prompted to turn on the phone. If you do
so, the message is sent; otherwise when you tap ok, the message is saved in the Drafts folder and sent when
the phone is turned on.
If you are out of coverage area, the message is saved in the Drafts folder and sent when you return to a
coverage area.
NOTE
On VC6000 Series, the message remains in the Drafts folder and has to be manually re-sent when you return
to a coverage area.
Chapter 5 Wireless Applications
Introduction
Wireless Local Area Networks (LANs) allow mobile computers to communicate wirelessly and send captured data
to a host device in real time. Before using the VC6000 Series on a WLAN, the facility must be set up with the
required hardware to run the wireless LAN and the VC6000 Series must be configured. Refer to the documentation
provided with the access points (APs) for instructions on setting up the hardware.
802.11d is enabled by default. When enabled, the AP must be configured the same in order to connect.
To configure the VC6000 Series, a set of wireless applications provide the tools to configure and test the wireless
radio in the VC6000 Series. The Wireless Application menu on the task tray provides the following wireless
applications:
• Find WLANs
• Manage Profiles
• Manage Certs
• Manage PACs
• Options
• Wireless Status
• Wireless Diagnostics
• Log On/Off
• Enable/Disable Radio.
Tap the Signal Strength icon to display the Wireless Applications menu.
To configure the VC6095, a set of wireless applications provide the tools to configure and test the wireless radio in
the VC6096. Refer to the Wireless Fusion Enterprise Mobility Suite User Guide for Version X.XX for information on
configuring wireless profiles; where X.XX is the Fusion version. Goto
http://www.motorola.com/enterprisemobility/manuals for the latest version of this guide. See Fusion Software
Versions on page 2-xii to determine the Fusion version on the VC6000.
5-2
VC6000 Series Product Reference Guide
Figure 5-1 Wireless Applications Menu
Signal Strength Icon
The Signal Strength icon in the task tray indicates the VC6000 Series’s wireless signal strength as follows:
Table 5-1 Signal Strength Icon
Icon
None
Status
Action
Excellent signal strength
Wireless LAN network is ready to use.
Very good signal strength
Wireless LAN network is ready to use.
Good signal strength
Wireless LAN network is ready to use.
Fair signal strength
Wireless LAN network is ready to use. Notify the network
administrator that the signal strength is only “Fair”.
Poor signal strength
Wireless LAN network is ready to use. Performance may not be
optimum. Notify the network administrator that the signal strength is
“Poor”.
Out-of-network range (not
associated)
No wireless LAN network connection. Notify the network
administrator.
No wireless LAN network card
detected
No wireless LAN network card detected, Wireless LAN disabled or
radio disabled. Notify the network administrator.
No wireless LAN network card
detected or Wireless LAN
disabled
No wireless LAN network card detected or Wireless LAN disabled or
radio disabled. Notify the network administrator.
Wireless Applications
Turning the WLAN Radio On and Off
To turn the WLAN radio off tap the Signal Strength icon and select Disable Radio.
Figure 5-2 Disable Radio
To turn the WLAN radio on tap the Signal Strength icon and select Enable Radio.
Figure 5-3 Enable Radio
5-3
5-4
VC6000 Series Product Reference Guide
Chapter 6 Using Bluetooth
Introduction
Bluetooth-equipped devices can communicate without wires, using frequency-hopping spread spectrum (FHSS)
radio frequency (RF) to transmit and receive data in the 2.4 GHz Industry Scientific and Medical (ISM) band
(802.15.1). Bluetooth wireless technology is specifically designed for short-range (30 feet/10 meters)
communication and low power consumption.
VC6000 Seriess with Bluetooth capabilities can exchange information (e.g., files, appointments, and tasks) with
other Bluetooth enabled devices such as phones, printers, access points, and other mobile computers. To use the
VC6000 as a modem, create a dial-up modem connection between a computer and the VC6000.
VC6000 Seriess with Bluetooth technology use the StoneStreet Bluetooth stack. To program Bluetooth within the
VC6000, refer to the Software Developer Kit (SDK) documentation.
Adaptive Frequency Hopping
Adaptive Frequency Hopping (AFH) is a method of avoiding fixed frequency interferers, and can be used with
Bluetooth voice. All devices in the piconet (Bluetooth network) must be AFH-capable in order for AFH to work.
There is no AFH when connecting and discovering devices. Avoid making Bluetooth connections and discoveries
during critical 802.11b communications. AFH for Bluetooth consists of four main sections:
• Channel Classification - A method of detecting an interference on a channel-by-channel basis, or pre-defined
channel mask.
• Link Management - Coordinates and distributes the AFH information to the rest of the Bluetooth network.
• Hop Sequence Modification - Avoids interference by selectively reducing the number of hopping channels.
• Channel Maintenance - A method for periodically re-evaluating the channels.
When AFH is enabled, the Bluetooth radio “hops around” (instead of through) the 802.11b high-rate channels. AFH
coexistence allows Motorola mobile computers to operate in any infrastructure.
6-2
VC6000 Series Product Reference Guide
The Bluetooth radio in this VC6000 Series operates as a Class 2 device power class. The maximum output power
is 2.5mW and the expected range is 32.8 feet (10 meters). A definition of ranges based on power class is difficult to
obtain due to power and device differences, and whether one measures open space or closed office space.
NOTE
It is not recommended to perform Bluetooth wireless technology inquiry when high rate 802.11b operation is
required.
Security
The current Bluetooth specification defines security at the link level. Application-level security is not specified. This
allows application developers to define security mechanisms tailored to their specific need. Link-level security
occurs between devices, not users, while application-level security can be implemented on a per-user basis. The
Bluetooth specification defines security algorithms and procedures needed to authenticate devices, and if needed,
encrypt the data flowing on the link between the devices. Device authentication is a mandatory feature of Bluetooth
while link encryption is optional.
Pairing of Bluetooth devices is accomplished by creating an initialization key that is used to authenticate the
devices and create a link key for them. Entering a common PIN number in the devices being paired generates the
initialization key. The PIN number is never sent over the air. By default, the Bluetooth stack responds with no key
when a key is requested (it is up to user to respond to the key request event). Authentication of Bluetooth devices
is based-upon a challenge-response transaction. Bluetooth allows for a PIN number or passkey that is used to
create other 128-bit keys used for security and encryption. The encryption key is derived from the link key used to
authenticate the pairing devices. Also worthy of note is the limited range and fast frequency hopping of the
Bluetooth radios that makes long-distance eavesdropping difficult.
Recommendations are:
• Perform pairing in a secure environment
• Keep PIN codes private and don't store the PIN codes in the mobile computer
• Implement application-level security.
Using Bluetooth
6-3
Turning the Bluetooth Radio Mode On and Off
Turn off the Bluetooth radio to save power or if entering an area with radio restrictions (e.g., an airplane). When the
radio is off, other Bluetooth devices cannot see or connect to the VC6000 Series. Turn on the Bluetooth radio to
exchange information with other Bluetooth devices (within range). Communicate only with Bluetooth radios in close
proximity.
Disabling Bluetooth
To disable Bluetooth, tap Bluetooth icon > Disable Bluetooth. The Bluetooth icon changes to indicate that
Bluetooth is disabled.
Figure 6-1 Disable Bluetooth
Enabling Bluetooth
To enable Bluetooth, tap Bluetooth icon > Enable Bluetooth. The Bluetooth icon changes to indicate that
Bluetooth is enabled.
Figure 6-2 Enable Bluetooth
6-4
VC6000 Series Product Reference Guide
Bluetooth Power States
Cold Boot
Performing a cold boot on the VC6000 Series turns off Bluetooth after initialization (which takes a few moments). It
is normal to see the Bluetooth icon appear and disappear, as well as a wait cursor, when initialization proceeds in
all modes.
Warm Boot
Performing a warm boot on the VC6000 Series returns Bluetooth to the last state after initialization.
Suspend
Suspending the VC6000 Series turns off Bluetooth.
NOTE
When the VC6000 Series is placed in suspend mode, the Bluetooth radio mode powers off and the piconet
(Bluetooth connection) is dropped. When the VC6000 Series resumes, it could take up to 10 seconds for the
Bluetooth radio driver to re-initialize the radio.
Resume
When the VC6000 Series resumes, Bluetooth turns on if it was on prior to suspend.
Modes
The BTExplorer application has two modes for managing Bluetooth connections: Wizard Mode and Explorer Mode.
The Wizard Mode is for novice Bluetooth users and the Explorer Mode is for experienced Bluetooth users. To
switch between modes, select View > Wizard Mode or View > Explorer Mode.
Wizard Mode
Wizard Mode provides a simple process for discovering and connecting to Bluetooth devices.
NOTE
Switching between Wizard Mode and Explorer Mode closes all active connections.
Wizard Mode shows the devices and services in a simple Favorites view created by following the step-by-step
wizard.
Explorer Mode
The Explorer Mode window is easy to navigate and provides greater control to users familiar with Bluetooth. The
menu bar provides quick access to the options and tools used to connect to devices. To access Explorer Mode, tap
View > Explorer Mode.
Using Bluetooth
6-5
Figure 6-3 Explorer Mode Window
You can also use the “tap and hold” technique to view available options. Scroll bars and view options are similar to
those on the Windows desktop. The tree structure lists the following sub-items:
• Local Device - This device
• Remote Device - Other Bluetooth devices
• Trusted Devices - Bonded (paired) Bluetooth devices
• Untrusted Devices - Discovered devices that are not bonded
• Favorites - Selected services that are set as Favorite for quick access.
NOTE
Switching between Wizard Mode and Explorer Mode closes all active connections.
6-6
VC6000 Series Product Reference Guide
Discovering Bluetooth Device(s)
The VC6000 Series can receive information from discovered devices without bonding. However, once bonded, the
VC6000 Series and a bonded device exchange information automatically when you turn the Bluetooth radio on.
See Bonding with Discovered Device(s) on page 6-20 for more information.
To find Bluetooth devices in the area:
1.
Ensure that Bluetooth is enabled on both devices.
2.
Ensure that the Bluetooth device to discover is in discoverable and connectable modes.
3.
Ensure that the require profile is enabled on the VC6000 Series. See Profiles Tab on page 6-32 for more
information.
4.
Ensure that the two devices are within 30 feet (10 meters) of one another.
5.
Tap the Bluetooth icon and select Show BTExplorer. The BTExplorer window appears.
NOTE
6.
If favorite connections have already been created, the Favorites screen displays. If no favorite connections
have been created, the New Connection Wizard screen displays.
Tap Menu > New Connection.The New Connection Wizard appears.
Figure 6-4 BTExplorer Window
7.
Select Explore Services on Remote Device or another from the drop-down list and tap Next.
Using Bluetooth
6-7
The following actions are available in the drop-down list (actions may vary depending upon configurations):
• Explore Services on Remote Device
• Pair with a Remote Device
• Active Sync via Bluetooth
• Browse Files on Remote Device
• Connect to Headset
• Connect to Internet using Access Point
• Connect to Internet using Phone/Modem
• Connect to Personal Area Network
• Connect to Printer
• Send or Exchange Objects
• Associate Serial Port.
NOTE
8.
If a device discovery action has not been previously performed, a device discovery is automatically initiated. If
a device discovery has previously been performed, the device discovery process is skipped, and the
previously found list of devices displays. To start a new device discovery, tap and hold in the window and select
Discover Devices from the pop-up menu.
BTExplorer searches for Bluetooth devices in the area.
Figure 6-5 Discover Devices Dialog Box
The discovered devices display in the Select Remote Device window.
6-8
VC6000 Series Product Reference Guide
Figure 6-6 Select Remote Device Window
9.
Select a device from the list and tap Next. The VC6000 Series searches for services on the selected Bluetooth
device.
Figure 6-7 Device Services
NOTE
If the VC6000 Series discovers a service but the service is not supported, the service icon is grayed-out.
10. Select a service from the list and press Next. The Connection Favorite Options window appears.
Figure 6-8 Connection Favorite Options Window
Using Bluetooth
11. In the Favorite Name text box, enter a name for this service that will appear in the Favorite window.
12. Tap Next. The Connection Summary window appears.
13. Tap Connect to add the service to the Favorite window and connect to the service.
Figure 6-9 Favorites Window
Available Services
NOTE
Some devices might not require a PIN. This depends upon the device’s authentication.
The VC6000 Series offers the following services:
• File Transfer Services
• Dial-Up Networking Services
• OBEX Object Push Services
• Headset Audio Gateway Services
• Hands-Free Audio Gateway Services
• Serial Port Services
• Personal Area Networking Services
• IrMC Services.
See the following sections for information on these services.
File Transfer Services
NOTE
Shared folders are a security risk.
To transfer files between the VC6000 Series and another Bluetooth enabled device:
1.
Ensure the VC6000 Series is discoverable and connectable. See Device Info Tab on page 6-23.
6-9
6 - 10 VC6000 Series Product Reference Guide
2.
Ensure that OBEX File Transfer profile is enabled on the VC6000 Series. See Profiles Tab on page 6-32 for
more information.
NOTE
If favorite connections have already been created, the Favorites screen displays. If no favorite connections
have been created, the New Connection Wizard screen displays.
3.
Use the Connection Wizard to search for a Bluetooth device.
4.
Select the device and tap Next. The Select Remote Service window appears.
5.
Tap Next. The Connection Favorite Options window appears.
6.
Tap Next. The Connection Summary window appears.
7.
Tap Connect. The remote device’s accessible folders appear.
Figure 6-10 File Transfer Window
8.
Double-tap the file to copy. The Save Remote File window appears.
Figure 6-11 Save Remote File Window
9.
Tap and hold on the file. A pop-up menu appears.
10. Select the action to perform:
• New - create a new file or folder on the remote device
• Delete - delete the selected file on the remote device.
• Get File - copy the file from the remote device to the VC6000 Series.
Using Bluetooth 6 - 11
• Put File - copy a file from the VC6000 Series to the remote device.
Creating a New File or Folder
To create a new folder or file on the remote device:
1.
Tap and hold on the screen and select New > Folder or New > File. The Create New Folder or Create New
File window appears.
2.
Enter the name for the new folder or file.
3.
Tap OK to create the new folder or file on the remote device.
Deleting a File
To delete a file from the remote device:
1.
Tap and hold on the file to delete and select Delete.
2.
In the Delete Remote Device File dialog box tap Yes.
Getting a File
To copy a file from a remote device:
1.
Double-tap or tap and hold on the file and select Get. The Save Remote File window appears.
2.
Navigate to the directory to save the file.
3.
Tap Save. The file is transferred from the remote device to the VC6000 Series.
Copying a File
To copy a file to a remote device:
1.
Tap Action > Put. The Send Local File window appears.
2.
Navigate to the directory to save the file and select a file.
3.
Tap Open. The file copies from the VC6000 Series to the remote device.
Connecting to the Internet Using an Access Point
This section explains how to access a Bluetooth-enabled LAN access point (AP) for a network connection. Use
Internet Explorer to connect to a server.
1.
Ensure the VC6000 Series is discoverable and connectable. See Device Info Tab on page 6-23.
2.
Ensure that the Personal Area Networking profile is enabled on the VC6000 Series. See Profiles Tab on
page 6-32 for more information.
3.
Use the Connection Wizard to search for a Bluetooth AP.
NOTE
4.
If favorite connections have already been created, the Favorites screen displays. If no favorite connections
have been created, the New Connection Wizard screen displays.
Select the Personal Area Network or Network Access service and select Connect from the pop-up menu.
The VC6000 Series connects with the access point.
6 - 12 VC6000 Series Product Reference Guide
5.
Tap Start > Internet Explorer. The Internet Explorer window appears.
6.
In the address field, enter an internet address and tap the Enter button. The web page loads.
NOTE
Network Access profile is not supported.
Dial-Up Networking Services
Dial-up networking allows the user to connect a PC or laptop to the VC6000 Series and use the VC6000 Series as
a modem to connect to an office network or ISP.
Before setting up dial-up networking, obtain dial-up information and other necessary settings (username, password
and domain name, if required) for the office network or ISP. To create a new Bluetooth connection:
1.
Ensure the VC6000 Series is discoverable and connectable. See Device Info Tab on page 6-23.
2.
Ensure that the Dial-Up Networking profile is enabled on the VC6000 Series. See Profiles Tab on page 6-32
for more information.
3.
Tap Menu > Settings > Services tab.
4.
Tap Add button.
5.
Select Dial-up networking Service.
6.
Tap OK. The Edit Local Services window appears.
Figure 6-12 Edit Local Service Window
7.
In the Local COM Port drop-down list, select DUN1 for GSM configurations or WMP9 for CDMA
configurations.
8.
Tap OK twice.
9.
On the PC or laptop, set up Bluetooth according to the manufacturer’s instructions.
10. On the PC or laptop Bluetooth software, search for the VC6000 Series and select the Dial-up Networking
service.
11. Using dial-up software on the PC or laptop, connect to the VC6000 Series.
12. The VC6000 Series phone function dials the ISP number and connects to the ISP.
13. To verify, on the PC or laptop, launch Internet Explorer and open a web site.
Using Bluetooth 6 - 13
Object Exchange Push Services
Object Exchange (OBEX) is a set of protocols that allows sharing objects such as Contacts or pictures using
Bluetooth.
To exchange contact information with another Bluetooth enabled device:
1.
Ensure the VC6000 Series is discoverable and connectable. See Device Info Tab on page 6-23.
2.
Ensure that the OBEX Object Push profile is enabled on the VC6000 Series. See Profiles Tab on page 6-32
for more information.
NOTE
If favorite connections have already been created, the Favorites screen displays. If no favorite connections
have been created, the New Connection Wizard screen displays.
3.
Use the Connection Wizard to search for a Bluetooth device.
4.
Select the device and tap Next.
5.
Select the OBEX Object Push service and select Connect. The OBEX Object Push window appears.
6.
In the Action drop-down list, select one of the following options: Send Contact Information, Swap Contact
Information, Fetch Contact Information, or Send a Picture.
Sending a Contact
To send a contact to another device:
NOTE
1.
Prior to sending and receiving contacts, a default contact must be set up before attempting to send a
contact.
Tap and hold on OBEX Object Push and select Connect. The OBEX Object Push window appears.
Figure 6-13 OBEX Object Push Window
2.
In the Action: drop-down list, select Send Contact Information.
3.
Tap
. The Select Contact Entry window appears.
6 - 14 VC6000 Series Product Reference Guide
Figure 6-14 Select Contact Entry Window
4.
Select a contact to send to the other device.
5.
Tap OK.
6.
Tap OK to send the contact to the other device and display a confirmation dialog box on the other device to
accept the contact. A Send Contact dialog appears.
7.
Tap Ok.
Swapping Contacts
To swap contacts with another device:
NOTE
1.
Prior to swapping contacts, a default contact must be set up before attempting to send a contact.
Tap and hold on OBEX Object Push and select Connect. The OBEX Object Push window appears.
Figure 6-15 OBEX Object Push Window
2.
In the Action: drop-down list, select Swap Contact Information.
3.
Tap
. The Select Contact Entry window appears.
Using Bluetooth 6 - 15
Figure 6-16 Select Contact Entry Window
4.
Select a contact to send to the other device.
5.
Tap OK.
6.
Tap OK to swap contacts with the other device and display a confirmation dialog box on the other device to
accept the contact.
7.
Tap Ok.
Fetching a Contact
To fetch a contact from another device:
NOTE
1.
Prior to sending and receiving contacts, a default contact must be set up before attempting to send a contact.
Tap and hold on OBEX Object Push and select Connect. The OBEX Object Push window appears.
Figure 6-17 OBEX Object Push Window
2.
In the Action: drop-down list, select Fetch Contact information.
3.
Tap OK. The contact on the other device is copied.
Sending a Picture
To send a picture to another device:
6 - 16 VC6000 Series Product Reference Guide
1.
Tap and hold on OBEX Object Push and select Connect. The OBEX Object Push window appears.
Figure 6-18 OBEX Object Push Window
2.
In the Action: drop-down list, select Send A Picture.
3.
Tap
. The Send Local Picture window appears.
Figure 6-19 Send Local Picture Window
4.
Navigate to the picture to send to the other device.
5.
Tap Open.
6.
Tap OK to send the picture to the other device and display a confirmation dialog box on the other device to
accept the picture. A Send Picture dialog appears.
7.
Tap Ok.
Headset Services
To connect to a Bluetooth headset:
NOTE
Newer Bluetooth headsets are device dependant and remember the last device they connected to. If problems
occur while connecting to the headset, place the headset in discovery mode. Refer to the headset user manual
for more information.
Using Bluetooth 6 - 17
1.
Ensure the VC6000 Series is discoverable and connectable. See Device Info Tab on page 6-23.
2.
Ensure that the Headset profile is enabled on the VC6000 Series. See Profiles Tab on page 6-32 for more
information.
3.
Use the Connection Wizard to search for a Bluetooth headset.
4.
Select the device and tap Next.
5.
Select the Headset service name and select Connect. The VC6000 Series connects to the headset. Refer to
the headset user manual for instructions on communicating with a Bluetooth device.
NOTE
When using a Bluetooth headset with Headset Services, you cannot accept or end a call from the headset.
You must accept or end a call on the VC6000 Series.
6.
Press the communication button on the headset. This routes both system and WAN call audio to the headset.
7.
When a call is received on the VC6000 Series, tap the Accept button to answer the call.
8.
Press the communication button on the headset to route the audio back to the VC6000 Series.
NOTE
If a wired headset is connected to the VC6000 Series, the Bluetooth headset connection is disconnected.
Hands-free Services
To connect to a Bluetooth headset:
NOTE
Newer Bluetooth headsets are device dependant and remember the last device they connected to. If problems
occur while connecting to the headset, place the headset in discovery mode. Refer to the headset user manual
for more information.
Only WAN audio is routed to the headset. System audio is still emitted through the VC6000 Series speaker.
You can accept calls and re-dial using the Hands-free profile.
Hands-free profile does not support 3-way calling.
1.
Ensure the VC6000 Series is discoverable and connectable. See Device Info Tab on page 6-23.
2.
Ensure that the Hands Free profile is enabled on the VC6000 Series. See Profiles Tab on page 6-32 for more
information.
3.
Use the Connection Wizard to search for a Bluetooth hands-free headset.
4.
Select the hand-free device and tap Next.
5.
Select the Hands-free service name and select Connect. The VC6000 Series connects to the headset. Refer
to the headset user manual for instructions on communicating with a Bluetooth device.
6.
During an active connection, the VC6000 Series cannot go into suspend mode when the Power Button is
pressed. A message appears notifying the user.
Once the WAN call is disconnected (with Hands-free profile) the Power button is enabled.
6 - 18 VC6000 Series Product Reference Guide
Headset icon
Figure 6-20 WWAN Bluetooth Audio Notification Dialog Box
Serial Port Services
Use the wireless Bluetooth serial port connection as you would a physical serial cable connection. Configure the
application that will use the connection to the correct serial port.
To establish a serial port connection:
1.
Ensure the VC6000 Series is discoverable and connectable. See Device Info Tab on page 6-23.
2.
Use the Connection Wizard to search for a Bluetooth serial device.
3.
Select the device and tap Next. The Connection Favorite Options window appears.
4.
In the Local COM Port: drop-down list select a COM port.
5.
Tap Finish.
ActiveSync Using Serial Port Services
NOTE
By default, COM ports COM5, COM9, COM11, COM21, COM22 and COM23 are Bluetooth virtual ports. If an
application opens one of these ports, the Bluetooth driver activates and guides you through a Bluetooth
connection.
Use the wireless Bluetooth serial port connection for ActiveSync just as you would a physical serial cable
connection. You must configure the application that will use the connection to the correct serial port.
Using Bluetooth 6 - 19
Figure 6-21 ActiveSync Connection Settings Window on PC
To establish an ActiveSync connection:
1.
Ensure the VC6000 Series is discoverable and connectable. See Device Info Tab on page 6-23.
2.
Ensure that the Sync profile is enabled on the VC6000 Series. See Profiles Tab on page 6-32 for more
information.
3.
Use the Connection Wizard to search for a Bluetooth device, such as a PC. In the drop-down list select
ActiveSync via Bluetooth.
4.
Select the device and tap Next. The Connection Favorite Options window appears.
5.
Tap Connect. The Remote Service Connection window appears.
Figure 6-22 Remote Service Connection Window
6.
In the Service Type drop-down list, select Active Sync.
7.
Tap OK. The VC6000 Series connects the PC and an ActiveSync session begins.
8.
Tap Finish. The Connection Favorite Options window appears.
9.
To end the session, tap the ActiveSync icon in the Favorite window and select Disconnect from the pop-up
window.
6 - 20 VC6000 Series Product Reference Guide
Personal Area Network Services
NOTE
This profile supports Ad-hoc and PAN User. Network Access Profile is not supported.
Connect two or more Bluetooth devices to share files, collaborate, or play multi-player games. To establish a
Personal Area Network connection:
1.
Ensure the VC6000 Series is discoverable and connectable. See Device Info Tab on page 6-23.
2.
Ensure that the Personal Area Networking profile is enabled on the VC6000 Series. See Profiles Tab on
page 6-32 for more information.
3.
Use the Connection Wizard to search for a Bluetooth device.
4.
Select the device and tap Next. The Connection Favorite Options window appears.
5.
Tap Next. The Connection Summary window appears.
6.
Tap Connect. The VC6000 Series connects to the Bluetooth device.
IrMC Synchronization Services
IrMC Synchronization is used to synchronize PIM contacts between a remote device and the VC6000 Series. To
establish an IrMC synchronization:
1.
Ensure the VC6000 Series is discoverable and connectable. See Device Info Tab on page 6-23.
2.
Ensure that the Sync profile is enabled on the VC6000 Series. See Profiles Tab on page 6-32 for more
information.
3.
Tap Menu > Settings > Services tab.
4.
Tap Add button.
5.
Select IrMC Synchronization.
6.
Tap OK. The Edit Local Services window appears.
7.
Tap OK twice.
8.
Use the Connection Wizard to search for a Bluetooth device, such as a Car Kit.
9.
Select the device and tap Next. The Connection Favorite Options window appears.
10. Tap and hold IrMA Synchronization and select Connect in the pop-up menu.
NOTE
To automatically transfer contact with a Car Kit, ensure that the IrMC Synchronization service is enabled on
the VC6000 Series.
Bonding with Discovered Device(s)
A bond is a relationship created between the VC6000 Series and another Bluetooth device in order to exchange
information in a secure manner. Creating a bond involves entering the same PIN on the two devices. After creating
a bond and turning on the Bluetooth radios, the devices recognize the bond and can exchange information without
re-entering a PIN.
Using Bluetooth 6 - 21
To bond with a discovered Bluetooth device:
NOTE
If favorite connections have already been created, the Favorites screen displays. If no favorite connections
have been created, the New Connection Wizard screen displays.
1.
Tap the Bluetooth icon and select Show BTExplorer. The BTExplorer window appears.
2.
Tap Menu > New Connection. The New Connection Wizard window appears.
3.
In the drop-down list, select Pair with Remote Device.
4.
Tap Next. The Select Remote Device window appears.
NOTE
Devices discovered previously are listed to save time. To start a new device discovery, tap and hold on the list
area and select Discover Devices from the pop-up menu.
Figure 6-23 Select Remote Device Window
5.
Select a device from the list and tap Next. The PIN Code Request window appears.
Figure 6-24 Connection Favorite Options Window
6.
In the PIN Code field, enter the PIN code.
7.
Tap OK. The Pairing Status window displays.
6 - 22 VC6000 Series Product Reference Guide
Figure 6-25 Pairing Status Window
8.
Tap Finish. The devices are successfully paired. The device name moves to the Trusted Devices window.
Deleting a Bonded Device
To delete a device no longer needed:
1.
Tap the Bluetooth icon and select Show BTExplorer. The BTExplorer window appears.
2.
Tap Menu > Trusted Devices. The Trusted Devices window appears.
3.
Tap and hold on the device select Delete Link Key in the pop-up menu.
4.
A confirmation dialog appears. Tap Yes.
Accepting a Bond
When a remote device wants to bond with the VC6000 Series, enter a PIN when requested to grant permission.
1.
Ensure that the VC6000 Series is set to discoverable and connectable. See Bluetooth Settings on page 6-23.
When prompted to bond with the remote device the PIN Code Request window appears.
Figure 6-26 PIN Code Request Window
2.
In the PIN Code: text box, enter the same PIN entered on the device requesting the bond. The PIN must be
between 1 and 16 characters.
3.
In the Device Name: text box, edit the name of the device requesting the bond, if desired.
Using Bluetooth 6 - 23
4.
Tap OK to create the bond. The VC6000 Series can now exchange information with the other device.
Bluetooth Settings
Use the BTExplorer Settings window to configure the operation of the BTExplorer application. Tap Menu >
Settings. The BTExplorer Settings window appears.
Device Info Tab
Use the Device Info tab to configure the VC6000 Series’s Bluetooth connection modes.
Figure 6-27 BTExplorer Settings - Device Info Tab
Device Name
Displays the name of the VC6000 Series.
Discoverable Mode
Select whether or not the VC6000 Series is discoverable by other Bluetooth devices.
Connectable Mode
Select whether or not the VC6000 Series is connectable by other Bluetooth devices.
Services Tab
Use the Services tab to add or delete Bluetooth services.
Figure 6-28 BTExplorer Settings - Services Tab
6 - 24 VC6000 Series Product Reference Guide
To add a service:
1.
Tap Add. The Add Local Service window displays.
Figure 6-29 Add Local Service Window
2.
In the list, select a service to add.
3.
Tap OK. The Edit Local Service window displays for the selected service.
4.
Select the appropriate information and then tap OK. See the following sections for information on the available
services.
Dial-Up Networking Service
Dial-up Networking allows other Bluetooth devices to access a dial-up modem.
Figure 6-30 Add Local Service Window
Table 6-1 Local Service items
Item
Description
Service Name
Displays the name of the service.
Service Security
Select the type of security from the drop-down list. Options are None, Authenticate, or
Authenticate/Encrypt.
Using Bluetooth 6 - 25
Table 6-1 Local Service items
Item
Description
Local COM Port
Select the COM port.
Local Baud Rate
Select the communication baud rate.
Local Port Options
Select the port option.
File Transfer Service
File transfer allows other Bluetooth devices to browse files.
Figure 6-31 BTExplorer Settings - File Transfer Information
Table 6-2 File Transfer Information Data
Item
Description
Service Name
Displays the name of the service.
Service Security
Select the type of security from the drop-down list. Options are None, Authenticate,
or Authenticate/Encrypt.
Root Directory
Select the directory that other Bluetooth devices can access.
File Permissions
Select the file permissions for the selected directory. Check the appropriate box to
grant read access, write access, and delete access.
6 - 26 VC6000 Series Product Reference Guide
Hands-Free Audio Gateway Service
Hands-Free Service Audio Gateway allows connection to hands-free devices.
Figure 6-32 BTExplorer Settings - Hands-Free Audio Gateway
Table 6-3 Hands-Free Audio Gateway Data
item
Service Name
Description
Lists the name of the audio service.
Headset Audio Gateway Service
Headset Service Audio Gateway allows connection to headset devices.
Figure 6-33 BTExplorer Settings - Headset Audio Gateway
Table 6-4 Headset Audio Gateway Data
Item
Service Name
Description
Lists the name of the audio service.
IrMC Synchronization Service
The IrMC Synchronization service used to synchronize PIM contacts between a remote device and the VC6000
Series.
Using Bluetooth 6 - 27
Figure 6-34 BTExplorer Settings - IrMC Synchronization
Table 6-5 IrMC Synchronization Data
Item
Description
Service Name
Displays the name of the service.
Service Security
Select the type of security from the drop-down list. Options are None, Authenticate, or
Authenticate/Encrypt.
Phonebook
Select the Phonebook checkbox to allow synchronization with the VC6000 Series’s
contacts.
Select Read, Write, Create and/or Delete to allow phonebook permissions.
OBEX Object Push Service
OBEX Object Push allows other Bluetooth devices to push contacts, business cards, pictures, appointments, and
tasks to the VC6000 Series.
6 - 28 VC6000 Series Product Reference Guide
Figure 6-35 BTExplorer Settings - OBEX Exchange Information
Table 6-6 OBEX Exchange Information Data
Item
Description
Service Name
Displays the name of the service.
Service Security
Select the type of security from the drop-down list. Options are None,
Authenticate, or Authenticate/Encrypt.
Do not allow clients to push objects
Disables clients from pushing objects to the VC6000 Series.
Inbox Directory
Select a directory where another Bluetooth device can store files.
Personal Area Networking Service
Personal Area Networking hosts a Personal Area Network which allows communication with other Bluetooth
devices.
Figure 6-36 BTExplorer Settings - Personal Area Networking
Using Bluetooth 6 - 29
Table 6-7 Personal Area Networking Data
Item
Description
Service Name
Displays the name of the service.
Service Security
Select the type of security from the drop-down list. Options are None,
Authenticate, or Authenticate/Encrypt.
Support Group Ad-Hoc
Networking
Select to enable Ad-Hoc networking.
Serial Port Service
Serial port allows other Bluetooth devices to access COM ports.
Figure 6-37 BTExplorer Settings - Serial Port Services
Table 6-8 Serial Port Services Data
Item
Description
Service Name
Displays the name of the service.
Service Security
Select the type of security from the drop-down list. Options are None, Authenticate, or
Authenticate/Encrypt.
Local COM Port
Select the COM port.
Local Baud Rate
Select the communication baud rate.
Local Port Options
Select the port option.
Security Tab
Security settings allows you to set global security policies for Bluetooth. Note that these settings are only active on
local Services that are set to Authenticate or Authenticate/Encryption. You can set authentication on local Services
under the Services tab.
To adjust the security settings for an individual service, select the Services tab first, then select the individual
service, then Properties.
6 - 30 VC6000 Series Product Reference Guide
Figure 6-38 BTExplorer Settings - Security Tab
NOTE
To use PIN Code, select Authenticate or Authenticate/Encrypt from the Service Security drop-down
list on each local service.
Table 6-9 Security Tab Data
Item
Description
Use PIN Code (Incoming
Connection)
Select for automatic use of the PIN code entered in the PIN Code text box.
It is recommended not to use this automatic PIN code feature.
PIN Code
Enter the PIN code.
Encrypt Link On All Outgoing
Connections
Select to enable or disable encryption on all outgoing connections to other
Bluetooth devices.
Discovery Tab
Use the Discovery tab to set and modify discovered devices.
Figure 6-39 BTExplorer Settings - Discovery Tab
Using Bluetooth 6 - 31
Table 6-10 Discovery Tab Data
Item
Description
Inquiry Length
Sets the amount of time the VC6000 Series takes to discover Bluetooth
devices in the area.
Name Discovery Mode
Select either Automatic or Manual to automatically attempt to discover a
Bluetooth device's name after finding the device.
Discovered Devices - Delete
Devices
Deletes all discovered devices and link keys from memory.
Discovered Devices - Delete
Linked Keys
Removes all pairing from remote Bluetooth devices, and makes them all
un-trusted.
Virtual COM Port Tab
Virtual COM Port defines which COM ports BTExplorer attempts to use for virtual COM ports. Check the
appropriate checkbox to use the port as a virtual COM port. When finished, choose Apply to enforce changes, or
Revert to restore the original settings.
Figure 6-40 BTExplorer Settings - Virtual COM Port Tab
Table 6-11 Virtual COM Port Tab Data
Item
Description
COM5:Bluetooth
Enable or disable COM Port 5.
COM9:Bluetooth
Enable or disable COM Port 9.
COM11:Bluetooth
Enable or disable COM Port 11.
COM21:Bluetooth
Enable or disable COM Port 21.
COM22:Bluetooth
Enable or disable COM Port 22.
COM23:Bluetooth
Enable or disable COM Port 23.
6 - 32 VC6000 Series Product Reference Guide
HID Tab
Use the HID tab to select The Human Interface Device Profile programming interface defines the protocols and
procedures to be used to implement HID capabilities.
Provides support for devices such as mice, joysticks, keyboards.
Figure 6-41 BTExplorer Settings - HID Tab
Table 6-12 HID Tab Data
Item
Description
Enable Key Repeat
Enables key repeat functionality.
Delay
To increase key repeat delay, drag the Delay slider to the right. To decrease
key repeat delay, drag the Delay slider to the left.
Rate
To increase key repeat speed, drag the Rate slider to the left. To decrease
key repeat speed, drag the Rate slider to the right.
Profiles Tab
Use the Profile tab to load or remove Bluetooth services profiles. If a profile is not used, it can be removed to save
memory.
Figure 6-42 BTExplorer Settings - Profile Tab
1.
Tap a check box next to the profile to load (activate).
Using Bluetooth 6 - 33
The Serial Port profile is always active and cannot be removed.
2.
Tap Select All to select all profiles or tap Deselect All to deselect all profiles.
3.
Tap Apply to activate the profiles and then Close to exit the application.
System Parameters Tab
Figure 6-43 BTExplorer Settings - System Parameters Tab
Table 6-13 System Parameters Tab Data
item
Description
Page Timeout
Sets the amount of time the VC6000 Series searches for a device before
moving on the next device.
Link Supervision Timeout
Sets the amount of time that the VC6000 Series will wait for a device to come
back into range after it has gone out of range. If the device does not come
back into range by the set time, the VC6000 Series drops the connection.
Miscellaneous Tab
Figure 6-44 BTExplorer Settings - Miscellaneous Tab
6 - 34 VC6000 Series Product Reference Guide
Table 6-14 Miscellaneous tab Data
Item
Description
Highlight Connections
Select the connection type to highlight when connected. In the Wizard Mode,
the only options are Favorites or None. In the Explorer Mode the options are
None, Tree View Only, List View Only, or Tree and List View.
Apply Text Style
Select the text style to apply to the connection text.
Apply Text Color
Select the text color to apply to the connection text.
Chapter 7 GSM Configuration
Introduction
This chapter explains how to verify VC6000 Series service on an Global System for Mobile communications (GSM)
wireless network and establish settings.
GSM networks deliver mobile voice and data services, such as Short Message Service (SMS)/Text Messaging,
with full roaming capabilities across the world. GPRS enabled networks offer Internet-based content and
packet-based data services. This enables services such as internet browsing, e-mail on the move, powerful visual
communications, multimedia messages, and location-based services.
When using the VC6000 Series as a phone, services can include speed dialing, call tracking, voice mail, call
forwarding, conference calling, and caller ID, depending on the type of service.
Also use the integrated phone as a modem to connect the VC6000 Series to an ISP or work network. The GSM
enabled VC6000 Series can connect to the Internet or work network using Cellular Line, or using the modem
specified by the mobile phone service provider.
NOTE
Before using an VC6000 Series on a wireless network, first select a provider, establish a voice and
data-enabled service plan, and configure the VC6000 Series (where applicable). Refer to the VC6000 Series
Quick Reference Guide for information on how to use the phone and services.
Quick Startup Steps
To use the VC6000 Series for phone and data connections:
1.
Install a SIM card. See for Installing a SIM Card on page 1-7 installation procedures.
2.
Replace the battery and battery cover.
3.
Press the red Power button.
4.
Tap Start > Phone > Menu > Options > Network tab and verify that the service provider appears in the Current
network: field.
5.
Make a call to verify connection.
6.
Start the VC6000 Series.
7 - 36 VC6000 Series Product Reference Guide
7.
Ensure network coverage (page 7-36).
8.
Configure a data connection (page 7-37).
NOTE
9.
Data connection configuration is pre-packaged with T-Mobile service. Other service providers may require data
connection configuration.
Configure settings (page 7-41).
10. Use the phone.
VC6000 Series Service Verification
VC6000 Series phone and data services require a live SIM card, obtained from a service provider, installed in the
VC6000 Series phone. The SIM card has embedded circuitry on one side of its surface which, when inserted into
an VC6000 Series phone, provides phone service. The SIM card provides a phone number, determines the
features or services available to the subscriber, and identifies the subscriber to the network.
In addition to SIM card installation, the VC6000 Series may require various settings to operate as a phone with
data connection features.
Ensuring Network Coverage
1.
Ensure an activated SIM card, from the phone service provider, is installed in the VC6000 Series.
NOTE
2.
The SIM card must be enabled to connect to the network.
Verify active phone and data services by tapping
the dialog box.
to display the Phone dialog. The Carrier name appears in
Figure 7-1 Connectivity Dialog
3.
Verify SIM card functionality:
a.
Tap Start > Settings > Personal tab > Phone icon > Network tab.
GSM Configuration 7 - 37
Figure 7-2 Phone Settings Window - Network Tab
b.
Ensure the service provider’s network appears in the Current network: field.
c.
If the network does not appear, tap Find Network. If the network still does not appear, verify that the SIM
card was installed correctly. If it was, and no network appears, contact the service provider.
Configuring a Data Connection
A data connection allows Internet access across a wireless network.
To set up a new data connection:
1.
Acquire an Access Point Name (APN) from the service provider.
2.
Tap Start > Settings > Connections tab > Connections icon > Tasks tab.
Figure 7-3 Connections Window
3.
Under My ISP select Add a new modem connection.
Figure 7-4 Connections Window - Make New Connection
4.
Enter a connection name in the Enter a name for the connection: text box.
5.
Select Cellular Line (GPRS) from the Select a modem: drop-down list.
6.
Tap Next.
7 - 38 VC6000 Series Product Reference Guide
Figure 7-5 Connections Window - Access Point Name
7.
Enter the APN from the service provider in the Access point name: text box.
8.
Tap Next.
Figure 7-6 Connections Window - User Name & Password
9.
Enter a username in the User name text box, if required by the service provider.
10. Enter a password in the Password text box, if required by the service provider.
11. Enter a domain name in the Domain text box, if required by the service provider.
12. Tap Finish.
13. Tap ok to exit Connections.
Establishing a Data Connection
1.
Ensure a SIM card is installed in the VC6000 Series.
2.
Configure a GPRS data connection. See Configuring a Data Connection on page 7-37.
3.
Tap the connectivity icon
or
Figure 7-7 Connectivity Dialog Box
4.
Tap Settings.
5.
Tap Connections icon.
6.
Tap Managing existing connections.
at the top of the screen.
GSM Configuration 7 - 39
7.
Tap and hold on the data connection until a menu appears.
Figure 7-8 Data Connection
8.
Select Connect.
Figure 7-9 Connecting Using GPRS
9.
If the SIM card is protected with a Personal Identification Number (PIN), a dialog box pops up requesting the
appropriate PIN to unlock the SIM card. In this case, enter the PIN and tap ok.
NOTE
Place emergency calls at any time, without entering a PIN or a SIM card.
10. When a connection is established, launch Internet Explorer to browse the Internet or launch an applicable
application.
Ending a Data Connection
To cancel a data connection in progress, tap Cancel in the Connecting... dialog window.
To end an established data connection:
1.
Tap,
or
to display the Connectivity dialog box.
Figure 7-10 Connectivity Dialog Box
2.
Tap Disconnect.
7 - 40 VC6000 Series Product Reference Guide
NOTE
Tapping Disconnect during an active data transfer (e.g., downloading a web page) automatically reconnects
the connection. You cannot disconnect the connection until the data transfer is complete.
GSM Configuration 7 - 41
VC6000 Series Settings
Use the Phone Settings window to customize settings, such as the ring type and ring tone for incoming calls,
security options, and other options depending on the type of service.
Phone
Use the Phone tab to customize ring type, ring tone, keypad tone, and security options.
Tap Start > Settings > Personal tab > Phone icon > Phone tab
or
Start > Phone > Menu > Options > Phone tab.
Figure 7-11 VC6000 Series Phone Window - Phone Tab
Sounds
1.
Phone Number automatically displays on the Phone tab when a live SIM card is installed.
2.
Select a ring type from the Ring type: drop-down list. The ring type changes the way the VC6000 Series rings
when you receive an incoming call. Regardless of the ring type selected, a dialog box appears on the VC6000
Series’s display for incoming calls.
3.
Select a ring tone for incoming calls from the Ring tone: drop-down list. To hear a sample of the selected ring
tone, tap
NOTE
4.
. Tap
to end the ring tone.
To use custom .wav, .mid, or .wma files as ring tones, use ActiveSync on the host computer to copy the file to
the /Windows/Rings folder on the VC6000 Series. Then select the sound from the ring tone list.
Select a keypad tone from the Keypad: drop-down list. This selection determines the tone that sounds when
entering a phone number on the keypad.
Select Short tones or Long tones to specify the duration of the sound when you press a number on the keypad.
Select Off to disable tones.
NOTE
Turning off sounds saves power and prolongs battery life.
7 - 42 VC6000 Series Product Reference Guide
Security
Enabling a PIN
NOTE
Place emergency calls at any time, without requiring a PIN or a SIM card.
To require a PIN when using the phone:
1.
From the Phone tab (Figure 7-11), select the Require PIN when phone is used check box under Security.
Figure 7-12 Enter PIN
2.
Use the touch keypad to enter a four to eight digit PIN.
3.
Tap Enter to enable the PIN and return to the Phone tab.
Changing a PIN
CAUTION
If you enter an incorrect PIN, the message “SIM PIN incorrect: Try again” appears. After three consecutive
incorrect attempts, the SIM card is blocked. The phone does not allow you to attempt to enter your PIN
again and you must obtain a PIN Unblock Key from your service provider.
1.
From the Phone tab (Figure 7-11), tap Change PIN.
2.
Use the touch keypad to enter the current PIN.
3.
Tap Enter.
4.
Use the touch keypad to enter a new four to eight digit PIN.
5.
Tap Enter.
6.
Reenter the new PIN for confirmation and tap Enter.
7.
Tap ok to confirm the change.
Disabling a PIN
1.
From the Phone tab (Figure 7-11), deselect the Require PIN when phone is used check box.
2.
Use the touch keypad to enter the current PIN.
3.
Tap Enter.
4.
Tap ok to confirm the change.
GSM Configuration 7 - 43
5.
Tap ok to exit settings.
Services
Use the Services tab to configure settings for subscribed phone services. For example, block certain types of
incoming and/or outgoing calls (page 7-43), disclose the caller’s identity when making outgoing calls (page 7-43),
forward incoming calls to a different phone number (page 7-44), receive notification of incoming calls when a
phone session is in use (page 7-44), and set up voice mail and short message service (page 7-45).
1.
Tap Start > Settings > Personal tab > Phone icon > Services tab.
or
Start > Phone > Menu > Options > Services tab.
Figure 7-13 VC6000 Series Phone Window - Services Tab
2.
Select a service from the list and tap Get Settings... .
3.
Change services settings as follows.
Call Barring (Call Blocking)
Use call barring to block certain types of incoming and/or outgoing calls. Select the type of incoming and/or
outgoing calls to block.
Figure 7-14 Call Barring/Call Blocking
Caller ID
Enable caller ID to reveal the identity of the person making an outgoing call. Select the Everyone radio button to
always display the caller ID. Select the No one radio button to prevent the caller’s identity from appearing to others.
7 - 44 VC6000 Series Product Reference Guide
Figure 7-15 Caller ID
Call Forwarding
NOTE
Call Forwarding may not be available on all networks. Check with your service provider for availability.
Use call forwarding to forward incoming calls to a different phone number.
• To forward all calls to a different phone number:
• select the Forward all incoming phone calls check box.
• enter the phone number to receive forwarded calls in the To: text box.
• To forward incoming calls to a different phone number based on a specific situation, select one or more of the
check boxes under Forward phone calls only if:.
• No answer: enter the phone number to receive forwarded calls only when the phone cannot be answered.
Then select a time period from the Forward after: drop-down list. Options are 5, 10, 15, 20, 25, and 30
seconds.
• Unavailable: enter the phone number to receive forwarded calls only when the phone is turned off or the
user is unreachable.
• Busy: enter the phone number to receive forwarded calls only when the line is busy.
Figure 7-16 Call Forwarding
Call Waiting
NOTE
Call Waiting may not be available on all networks. Check with your service provider for availability.
Call waiting notifies you of an incoming call when the phone is in a phone session. Select the Notify me radio button
to enable call waiting. Select the Do not notify me radio button to disable call waiting.
GSM Configuration 7 - 45
Figure 7-17 Call Waiting
Voice Mail and Text Messages
To use voice mail and send short messages, enter the voice mail and/or text message phone number in the
appropriate text boxes.
Figure 7-18 Voice Mail and Text Messages
Fixed Dialing
Use Fixed Dialing to restrict the phone to dial only the phone number(s) or area code(s) specified in a Fixed Dialing
list.
1.
Select Fixed Dialing and tap Get Settings.
Figure 7-19 Fixed Dialing Window
2.
Select the Enable fixed dialing check box.
3.
To add a number to the list, tap Menu > Add.
4.
Enter the phone number or area code to restrict and tap Done.
5.
Repeat steps 3 and 4 to add more numbers, and tap Done twice when complete.
6.
Enter PIN2 and tap Done.
7 - 46 VC6000 Series Product Reference Guide
Network
Use the Network tab to view available networks, determine the order in which the phone accesses another network
if the current network is unavailable, and specify whether to change networks manually or automatically. The
current network remains active until it’s changed, the signal is lost, or the SIM card is changed.
The network the VC6000 Series currently uses appears in the Current network: field at the top of the window.
Changing Networks Manually
1.
Tap Start > Settings > Personal tab > Phone icon > Network tab
or
Start > Phone > Menu > Options > Network tab.
Figure 7-20 VC6000 Series Phone Window - Network Tab
2.
From the Network selection drop-down list, select Manual.
Figure 7-21 Choose Network
3.
From the Choose Network window, select the network to use.
4.
Tap OK.
Viewing Available Networks
To view all wireless networks available:
1.
Tap Start > Settings > Personal tab > Phone icon > Network tab.
or
Start > Phone > Options > Network tab.
GSM Configuration 7 - 47
Figure 7-22 VC6000 Series Phone Window - Network Tab
2.
Tap Find Network.
Figure 7-23 Choose Network
3.
From the Choose Network window, select the network to use.
4.
Tap OK.
Setting Preferred Networks
Set networks in a preferred order of access. Setting preferred networks allows the VC6000 Series to access a
second preferred network if the first is unavailable.
1.
Tap Start > Settings > Personal tab > Phone icon > Network tab
or
Start > Phone > Menu > Options > Network tab.
Figure 7-24 VC6000 Series Phone Window - Network Tab
2.
Tap Set Networks to view all available networks.
7 - 48 VC6000 Series Product Reference Guide
Figure 7-25 Preferred Networks
3.
Select the preferred networks by tapping one or more check boxes.
4.
Tap Move Up and Move Down, as necessary, to place the selected networks in the preferred order.
5.
Tap ok to send the new settings to the network.
6.
From the Network tab, select Automatic from the Network selection drop-down list.
7.
Tap ok to exit settings.
Phone Info
Use the Phone Info tab to view hardware and software information about the phone.
1.
Tap Start > Settings > Personal tab > Phone icon > Phone Info tab
or
Start > Phone > Menu > Options > Phone Info tab.
Figure 7-26 VC6000 Series Phone Window - Phone Info Tab
2.
Tap ok to exit settings.
Network Time Synchronization
The VC6000 Series can be configured to synchronize the clock with the time from the carrier network. A registry
key on the VC6000 Series has to be created to enable this feature.
GSM Configuration 7 - 49
Using a registry editor, navigate to the following:
[HKEY_LOCAL_MACHINE\SOFTWARE\Symbol\RIL\RHA\HC25]
Create the following key:
“SyncSystemTime”=dword:00000001
where:
dword:0 = disabled
dword:1 = enabled
After setting the registry key, warm boot the VC6000 Series.
Enhanced Operator Name String
The VC6000 Series is enabled to download and display the name of the GSM network currently logged in to. Four
registry keys on the VC6000 Series have to be edited to disable this feature.
Using a registry editor, navigate to each of the following:
[HKEY_LOCAL_MACHINE\Software\Microsoft\RIL]
[HKEY_LOCAL_MACHINE\Software\Microsoft\RIL\Configurations\GSM_HC25]
[HKEY_LOCAL_MACHINE\Comm\Cellular\Ril]
[HKEY_LOCAL_MACHINE\Comm\Cellular\Ril\Configurations\GSM_HC25]
Edit the following key:
“EonsEnable”=dword:1
where:
dword:0 = disabled
dword:1 = enabled (default)
After setting the registry key, warm boot the VC6000 Series.
Service Provider Name Display
The reg key (“UseServiceProviderName”) originally was used to fix the dual-line SIM card issue with value 2. But
for the Italian Post, the value 1 should be used to show the virtual carrier name (Poste Mobile).
[HKEY_LOCAL_MACHINE\Software\Microsoft\RIL]
“UseServiceProviderName”=dword:1
where:
dword:0 = Display provider name
dword:1 - Display service provider name (default)
dword:2 - Display both provider and service provider name
7 - 50 VC6000 Series Product Reference Guide
Chapter 8 Using GPS Navigation
Introduction
The VC6000 Series includes Global Positioning System (GPS) technology using the SiRF III chipset. GPS
technology is based on a worldwide system of GPS satellites orbiting the earth that continuously transmit digital
radio signals. These radio signals contain data on the satellites’ locations and their exact clock time and are used
to determine your location on the earth.
WARNING!
When using the VC6000 Series in a vehicle, it is the user’s responsibility to place, secure and use
in a manner that will not cause accidents, personal injury or property damage or obstruct their
view. It is the responsibility of the driver to operate the vehicle in a safe manner, maintain
observation of all driving conditions at all times, and not become distracted by the device to the
exclusion of safe driving practices. It is unsafe to operate the controls of the device while driving.
Software Installation
Third-party GPS navigation software is required. Evaluation software is available from various suppliers. For
example; VisualGPS, visit: http://www.visualgps.net/VisualGPSce/
If interested in purchasing GPS navigation software check with the GPS software vendor (before purchasing,
downloading, or installing any software) to determine that the application is compatible with the VC6000 Series.
Refer to the application’s user guide for application installation and setup information.
VC6000 Series GPS Setup
The GPS-enabled VC6000 Series uses Microsoft Windows Mobile 6, so the operating system automatically
manages access to the GPS receiver to allow multiple programs to simultaneously access GPS data.
Ensure that the following settings are set on the VC6000 Series:
1.
Tap Start > Settings > System > External GPS icon.
2.
In the Programs tab, select None from the GPS program port drop-down list.
3.
In the Hardware tab, select COM8 in the GPS hardware port drop-down list.
8-2
VC6000 Series Product Reference Guide
4.
VC6000 SeriesSelect 57600 from the Baud rate drop-down list.
5.
Tap ok to close the Setting window.
NOTE
If an application error message appears indicating that the COM port cannot be opened, ensure that a free COM
port is selected in the GPS hardware port drop-down list.
Operation
Acquiring satellite signals may take a few minutes. It is best to be outside and have a clear, unobstructed view of
the sky. Without a clear view, acquisition takes much longer and could result in the VC6000 Series being unable to
compute the initial position quickly. When operating the device indoors access to the GPS signals may be limited or
unavailable.
NOTE
When using a GPS navigation application, ensure that the VC6000 Series does not go into suspend mode. If the
VC6000 Series suspends then the power to the GPS radio is removed. Upon resume the GPS receiver must
reacquire a valid GPS signal, resulting in a a delay of positional information.
GPS Maps on microSD Cards
GPS navigation software vendors may sell maps on SD memory cards. If using a SD memory card with the GPS
navigation software install the SD memory card using procedure in Installing an SD Memory Card on page 1-8.
Answering a Phone Call While Using GPS
If you receive a phone call while using your GPS navigation software:
1.
Answer the phone call by pressing the Answer button.
2.
Once you end the phone call, press the End Call button to resume the audio on the GPS software.
NOTE
Anytime you are using GPS on the VC6000 Series and you receive a phone call, the audio on the GPS navigation
software is muted until you finish the call.
Losing the GPS Signal While in a Vehicle
GPS performance on the VC6000 Series may be affected if the vehicle has thermal glass windows and
windshields, which can block the VC6000 Series from receiving a GPS signal from satellites. To improve GPS
signal strength, place the VC6000 Series where there is a clear view of the sky. A direct line of sight is required
between the VC6000 Series and the GPS satellites to access information from the satellites.
The Global Positioning System (GPS) is a system that allows the user to track their position anywhere on the earth.
Assisted GPS
GPS can be used in stand-alone or Assisted GPS (A-GPS) modes. A Stand-alone GPS receiver downloads data
from GPS satellites. It can take several minutes to get a fix. By using GPS Location servers, A-GPS dramatically
improves the performance of the Time To First Fix (TTFF) of GPS receivers by providing them with data that they
would ordinarily have to download from the GPS satellites. With the A-GPS data, GPS receivers can operate faster
and more reliably.
Using GPS Navigation
8-3
A-GPS follows the Secure User Plane Location (SUPL) protocol which allows a mobile device to communicate with
a location server. Refer to the EMDK Help file for information on setting up SUPL on the VC6000 Series.
8-4
VC6000 Series Product Reference Guide
Chapter 9 ActiveSync
Introduction
You can use Microsoft® ActiveSync version 4.5 or above to synchronize information between the VC6000 Series
and a host computer. ActiveSync enables to view the VC6000 Series directories and files on the host computer
screen, transfer files, download and run applications.
Installing and Setting Up ActiveSync
To synchronize the VC6000 Series with a host computer, you must first install Microsoft ActiveSync on a host
computer running Windows XP™ or earlier.
Before installing the software, verify that your host computer and operating system meet the minimum
requirements stated at Microsoft Windows® Mobile Web site (www.microsoft.com/windowsmobile). This Web site
also lets you download the latest software for ActiveSync.
First Time Sync Connection
1.
Install Microsoft ActiveSync on the host computer.
9-2
VC6000 Series Product Reference Guide
After setup completes, connect the VC6000 Series to the host computer (see Figure 9-1) - the Sync Setup
Wizard automatically starts.
R
2.
VC6000 Series
USB Connection Cable
Host Computer
R
Figure 9-1 Connecting the VC6000 Series to the Host Computer
3.
Follow the instructions on the screen to complete the wizard. The wizard prompts you for User Name,
password and domain name. If you don’t have this information, contact your system administrator.
4.
When you finish the wizard, ActiveSync starts to synchronize automatically with the VC6000 Series. Once
synchronization completes you may need to restart the host computer.
Routine Sync Connection
Once Microsoft® ActiveSync is installed on your host computer, you can connect it to the VC6000 Series and sync.
1.
Turn on the VC6000 Series.
2.
Connect the VC6000 Series to your host computer using a USB cable and follow the instructions on the host
computer screen - The ActiveSync icon A, located on the host computer Taskbar, becomes green and a
partnership window appears.
3.
Follow the instructions shown on the screen to set partnership.
To explore the VC6000 Series from the host computer; run the Desktop Explorer program on your host computer
and select the Mobile Device icon located under the rout directory of your host computer.
Chapter 10 Maintenance and
Troubleshooting
Introduction
This chapter includes instructions on cleaning the VC6000 Series, and provides troubleshooting solutions for
potential problems during VC6000 Series operation.
Maintaining the VC6000 Series
The computer is factory-sealed (except for the SIM card door and memory card slot) and contains no
user-serviceable parts.
Only qualified Motorola Service Centers should service the computer.
For trouble-free service, observe the following tips when using the VC6000 Series:
• Do not scratch the screen of the VC6000 Series. When working with the VC6000 Series, use stylus or
plastic-tipped pens intended for use with a touch-sensitive screen. Never use an actual pen or pencil or other
sharp object on the surface of the VC6000 Series screen.
• Although the VC6000 Series is water and dust resistant, do not expose it to rain or moisture for an extended
period of time. In general, treat the VC6000 Series as you would any other electronic device.
• The screen of the VC6000 Series is glass. Do not to drop the VC6000 Series or subject it to strong impact.
• Do not store or use the VC6000 Series in any location that is extremely dusty, damp, or wet.
• Periodically check nuts and bolts to ensure they are tightened to the proper torque.
• Ensure that all unused connctors and slots are coverd or close.
• Protect the VC6000 Series from temperature extremes and keep it away from heat sources.
• Use a soft lens cloth to clean the VC6000 Series. If the surface of the VC6000 Series screen becomes soiled,
clean it with a soft cloth moistened with a diluted window-cleaning solution.
• Periodically check the vehicle battery to ensure proper product operation. Vehicle battery life depends on
individual manufacture instructions.
10 - 2 VC6000 Series Product Reference Guide
• A screen protector is installed to the VC6000 Series screen. The protector minimizes wear and tear. Screen
protectors enhance the usability and durability of touch screen displays. Benefits include:
• Protection from scratches and gouges
• Durable writing and touch surface with tactile feel
• Abrasion and chemical resistance
• Glare reduction
• Keeping the device’s screen looking new
To replace screen protector, contact Motorola Service Centers.
Cleaning
CAUTION
Always wear eye protection.
Read warning label on compressed air and alcohol product before using.
If you have to use any other solution for medical reasons please contact Motorola for more information.
WARNING!
Avoid exposing this product to contact with hot oil or other flammable liquids. If such exposure
occurs, unplug the device and clean the product immediately in accordance with these guidelines.
Materials Required
• Alcohol wipes
• Lens tissue
• Cotton tipped applicators
• Isopropyl alcohol
• Can of compressed air with a tube.
Cleaning the VC6000 Series
Housing
Using the alcohol wipes, wipe the housing including keys and in-between keys.
Display
The display can be wiped down with the alcohol wipes, but care should be taken not to allow any pooling of liquid
around the edges of the display. Immediately dried the display with a soft, non-abrasive cloth to prevent streaking.
Connectors
1.
Remove the power cable from VC6000 Series.
2.
Close SIM door and the protective ruber cap of the SD memory card and USB port.
3.
Ensure all unused connectors are covered by the protective rubber caps.
Maintenance & Troubleshooting 10 - 3
4.
Dip the cotton portion of the cotton tipped applicator in isopropyl alcohol.
5.
Rub the cotton portion of the cotton tipped applicator back-and-forth across the connector on the bottom and
back of the VC6000 Series. Do not leave any cotton residue on the connector.
6.
Repeat at least three times.
7.
Use the cotton tipped applicator dipped in alcohol to remove any grease and dirt near the connector area.
8.
Use a dry cotton tipped applicator and repeat steps 4 through 6.
9.
Spray compressed air on the connector area by pointing the tube/nozzle about ½ inch away from the surface.
CAUTION
Do not point nozzle at yourself and others, ensure the nozzle or tube is away from your face.
10. Inspect the area for any grease or dirt, repeat if required.
Cleaning Frequency
The cleaning frequency is up to the customer’s discretion due to the varied environments in which the VC6000
Series are used. They may be cleaned as frequently as required. However when used in dirty environments it may
be advisable to periodically clean the screen to ensure optimum performance.
10 - 4 VC6000 Series Product Reference Guide
Troubleshooting
VC6000 Series
Table 10-1 Troubleshooting the VC6000 Series
Problem
The VC6000 Series
does not power on.
Cause
Solution
Vehicle ignition key in OFF
position.
Switch the vehicle ignition key to the ON position.
SIM door is open.
Close the SIM door properly and secure screw.
Drained vehicle battery.
Charge or replace battery.
Vehicle battery not installed
properly.
Ensure battery is installed properly.
System crash.
Press the Power button. If the VC6000 Series still does not turn
on, Perform a warm boot. If the VC6000 Series still does not turn
on, perform a cold boot. (see Resetting the VC6000 Series on
page 1-10).
Low Battery level
warning is issued.
Vehicle battery Voltage
dropped below 9 V DC.
Start the vehicle engine to charge the battery.
Replace battery.
LCD and Keypad
backlight do not
function.
Critical Battery level. Vehicle
battery Voltage dropped
below 8V DC.
Start the vehicle engine to charge the battery. Replace battery.
Display backlight
intensity is reduced.
Display temperature is below
10 °C or above 35 °C (below
50 °F or above 95 °F).
Control the temperature inside the vehicle.
The VC6000 Series
powers off during
operation.
VC6000 Series temperature
is out of range: -20 °C to 60
°C (-4 °F to 140 °F).
Control the temperature inside the vehicle.
To resume operation, momentarily press the Power Button.
The screen turns
blank.
VC6000 Series is jammed.
Momentarlly press the Power button.
No sound.
Volume setting is low or
turned off.
Adjust the volume. Adjust the volume (Adjusting Volume on
page 3-14).
VC6000 Series shuts
off when the vehicle
engeen is idel.
VC6000 Series is Suspend.
The VC6000 Series turns off after a period of inactivity. If the
VC6000 Series is running on vehicle battery power. To resume
operation, touch the screen or press any keyboard key.
Vehicle battery is depleted.
Replace the battery.
Maintenance & Troubleshooting 10 - 5
Table 10-1 Troubleshooting the VC6000 Series (Continued)
Problem
The VC6000 Series
does not power on.
Cause
Solution
Vehicle ignition key in OFF
position.
Switch the vehicle ignition key to the ON position.
SIM door is open.
Close the SIM door properly and secure screw.
Drained vehicle battery.
Charge or replace battery.
Vehicle battery not installed
properly.
Ensure battery is installed properly.
System crash.
Press the Power button. If the VC6000 Series still does not turn
on, Perform a warm boot. If the VC6000 Series still does not turn
on, perform a cold boot. (see Resetting the VC6000 Series on
page 1-10).
Low Battery level
warning is issued.
Vehicle battery Voltage
dropped below 9 V DC.
Start the vehicle engine to charge the battery.
Replace battery.
LCD and Keypad
backlight do not
function.
Critical Battery level. Vehicle
battery Voltage dropped
below 8V DC.
Start the vehicle engine to charge the battery. Replace battery.
Display backlight
intensity is reduced.
Display temperature is below
10 °C or above 35 °C (below
50 °F or above 95 °F).
Control the temperature inside the vehicle.
The VC6000 Series
powers off during
operation.
VC6000 Series temperature
is out of range: -20 °C to 60
°C (-4 °F to 140 °F).
Control the temperature inside the vehicle.
To resume operation, momentarily press the Power Button.
Tapping the buttons
or icons does not
activate the
corresponding
feature.
Screen is not calibrated
correctly.
Re-calibrate the screen. Tap Start > Settings > System tab >
Screen icon > Align Screen button.
The system is not
responding.
Warm boot the system (see Resetting the VC6000 Series on
page 1-10).
A message appears
stating that the
VC6000 Series
memory is full.
Too many files stored on the
VC6000 Series.
Delete unused memos and records. If necessary, save these
records on the host computer (or use an SD memory card for
additional memory).
10 - 6 VC6000 Series Product Reference Guide
Bluetooth Connection
Table 10-2 Troubleshooting Bluetooth Connection
Problem
Cause
Solution
Too far from other
Bluetooth devices.
Move closer to the other Bluetooth device(s), within a range of
10 meters.
The Bluetooth device(s)
nearby are not turned on.
Turn on the Bluetooth device(s) to find.
The Bluetooth device(s)
are not in discoverable
mode.
Set the Bluetooth device(s) to discoverable mode. If needed,
refer to the device’s user documentation for help.
When trying to connect a
Bluetooth device with the
VC6000 Series, the the
Bluetooth device thinks a
previously paired VC6000
Series is used.
The Bluetooth device
remembers the name and
address of the VC6000
Series it last paired with
via the Bluetooth radio.
Manually delete the pairing device and name from the Bluetooth
device. Refer to the Bluetooth device user documentation for
instructions.
Cannot connect using the
phone.
SIM not installed properly.
Re-install SIM card or clean the SIM contacts using lens tissue.
Contact your service provider.
During data
communication, no data
transmits, or transmitted
data was incomplete.
Cable was disconnected
from VC6000 Series
during communications.
Re-attach the cable and retransmit.
Incorrect cable
configuration.
See the system administrator.
Communication software
is not installed or
configured properly.
Perform setup as described in the Chapter 3, ActiveSync.
VC6000 Series cannot
find any Bluetooth devices
nearby.
Appendix A Specifications
VC6096/VC6000 Specifications
Table A-1 VC6096/VC6000 Specifications
Physical and Environmental Characteristics
Dimensions:
9.53 in. H x 9.25 in. W x 1.95 in. D
24.2 cm H x 23.5 cm W x 4.95 cm D
Weight:
4.85 lbs./2.2 kg
External Keyboard:
Full backlit QWERTY, 65-key with tactile feedback and audible key beep
Dedicated Send and End Call buttons on VC6096
Dedicated Home and Back navigation buttons on VC6000
Power:
Powered by vehicle: voltage input – 10V to 33 V DC, negative ground, on-terminated power
cable at vehicle end; maintained real time clock when external power is disconnected
Soft Keys:
Five: user programmable
Display:
6.5 in. color VGA (640x480) resistive touchscreen
A-2
VC6000 Series Product Reference Guide
Table A-1 VC6096/VC6000 Specifications
Interface Ports:
(2) USB 1.1 host Type A connectors
(1) USB 1.1 device Type mini-B connector
(1) 10/100 Base-T Ethernet port
(1) 50 pin auxiliary port to support:
(1) SAE J1708 or SAE J1939 connection for reading from and writing to the engine bus (VC6096
only)
(2) Full RS-232 connections
(8) Digital inputs (switch to ground or switch to vehicle battery voltage)
(8) Digital outputs (relay driver, 200mA drive capability)
(2) Analogue inputs, up to 34V maximum
Audio:
Headset mode (via Bluetooth wireless headset); speakerphone mode (via internal speaker and
microphone); volume control
Expansion Slot:
SD slot for MMC and non-SDHC SD memory cards
Antenna:
Combination WLAN/WWAN external antenna; internal Bluetooth antenna; external GPS
antenna
Performance Characteristics
CPU:
XScale™ PXA270 624 MHz processor
Operating System:
Microsoft® Windows Mobile® 6.1 Professional Edition
Memory
(RAM/ROM):
128MB SDRAM/256MB Flash
User Environment
Operating Temp:
-20° to 60° C/-4° to 140° F
Storage Temp:
-40° to 60° C/-40° to 140° F
Relative Humidity:
Up to 95% non-condensing at 50° C
Environmental
Sealing:
IP64 (dust tight and able to withstand splashing from any direction)
ESD:
±15kV air discharge, ±8kV direct discharge
Mechanical Shock:
MIL-STD 810E 516.4, Procedure 1 - Functional Shock
Crash Hazard:
MIL-STD-810E, 516.5 Proc VI
Thermal Shock:
-40° F to +176° F/-40° C to +80° C
Salt Fog:
MIL-STD 810F (survives eight hours of 5 percent salt solution fog at 35° C)
Vibration:
MIL-STD 810E, Method 514.4, Ground Mobile (VIII)
Solar Radiation:
MIL-STD 810E, Method 505.3, Procedure I
Getting Started
A-3
Table A-1 VC6096/VC6000 Specifications
Altitude:
Operating range: 1,200 ft./365 m below sea level to 15,000 ft./4,572 m above sea level
Wireless LAN Data Communications (VC6096 only)
WLAN:
IEEE 802.11a/b/g* Wi-Fi radios
WLAN Security:
WPA2, WEP (40 or 128 bit), TKIP, TLS, TTLS (MS-CHAP), TTLS (MS-CHAP v2), TTLS (CHAP),
TTLS-MD5, TTLS-PAP, PEAP-TLS, PEAP (MS-CHAP v2), AES, LEAP
Wireless WAN Data Communications (VC6096 only)
WWAN Radio:
GSM: 3.5G HSDPA
Wireless PAN Data Communications
WPAN (Bluetooth):
Class II, v2.0 EDR, 3 Mb/s, internal antenna
GPS Data Communications (VC6096 only)
GPS:
SiRFstarIII GSC3ef/LP GPS chipset; integrated Autonomous GPS (A-GPS); SUPL 1.0 compliant
Regulatory
Environmental:
RoHS/WEEE compliant
Electrical Safety:
IEC UL94-VO
WLAN and Bluetooth:
USA: FCC Part 15.247, 15.407; Canada: RSS-210; EU: EN 300 328, EN 301 893
Quad Band: GSM/
EDGE
USA: FCC Part 22, Part 24; Canada: RSS-132, RSS-133; EU: EN301 511, EN301 908/
RF Exposure:
USA: FCC Part 2, FCC OET Bulletin 65 Supplement C; Canada: RSS-102; EU: EN 50360
EMI/RFI:
North America: FCC Part 15, Class B; Canada: ICES 003 Class B; EU: EN55022, EN 301
489-1,EN 301 489-7, EN 301 489-17, EN 301 489-19, EN 301 489-24
*802.11a is not available in this product in Thailand.
A-4
VC6000 Series Product Reference Guide
Index
A
ActiveSync . . . . . . . . . . . . . . . . . . . . . . . . . . . . . . . . . 3-9
icon . . . . . . . . . . . . . . . . . . . . . . . . . . . . . . . . . . . 3-8
adaptive frequency hopping . . . . . . . . . . . . . . . . . . . 6-1
adjusting volume . . . . . . . . . . . . . . . . . . . . . . . . . . . 3-14
AFH . . . . . . . . . . . . . . . . . . . . . . . . . . . . . . . . . . . . . . 6-1
AirBEAM . . . . . . . . . . . . . . . . . . . . . . . . . . . . . . . . . . 3-9
answering a call . . . . . . . . . . . . . . . . . . . . . . . . . . . . . 4-6
APN . . . . . . . . . . . . . . . . . . . . . . . . . . . . . . . . . . . . . 7-37
B
Bluetooth . . . . . . . . . . . . . . . . . . . . . . . . . . . . . . . . . . 6-1
adaptive frequency hopping . . . . . . . . . . . . . . . . 6-1
bonding . . . . . . . . . . . . . . . . . . . . . . . . . . . . . . . 6-20
deleting bonded device . . . . . . . . . . . . . . . . . . . 6-22
icon . . . . . . . . . . . . . . . . . . . . . . . . . . . . . . . . . . . 3-8
security . . . . . . . . . . . . . . . . . . . . . . . . . . . . . . . . 6-2
turning off . . . . . . . . . . . . . . . . . . . . . . . . . . . . . . 6-3
turning on . . . . . . . . . . . . . . . . . . . . . . . . . . . . . . 6-3
bluetooth
discovering devices . . . . . . . . . . . . . . . . . . . . . . . 6-6
icon . . . . . . . . . . . . . . . . . . . . . . . . . . . . . . . . . . . 3-8
troubleshooting . . . . . . . . . . . . . . . . . . . . . . . . . 10-6
turning on and off . . . . . . . . . . . . . . . . . . . . . . . . 6-3
bonding
Bluetooth . . . . . . . . . . . . . . . . . . . . . . . . . . . . . . 6-20
boot
cold . . . . . . . . . . . . . . . . . . . . . . . . . . . . . . . .3-5, 6-4
warm . . . . . . . . . . . . . . . . . . . . . . . . . . . . . . . . . . 6-4
BTExplorer . . . . . . . . . . . . . . . . . . . . . . . . . . . . . . . . . 3-9
calendar . . . . . . . . . . . . . . . . . . . . . . . . . . . . . . . . . . 3-8
call blocking See call barring . . . . . . . . . . . . . . . . . . 7-43
call forwarding . . . . . . . . . . . . . . . . . . . . . . . . . . . . . 7-44
call history . . . . . . . . . . . . . . . . . . . . . . . . . . . . . 4-8, 4-12
call waiting . . . . . . . . . . . . . . . . . . . . . . . . . . . . . . . . 7-44
caller id . . . . . . . . . . . . . . . . . . . . . . . . . . . . . . . . . . 7-43
changing a PIN for phone use . . . . . . . . . . . . . . . . . 7-42
Cigarette Lighter Cable . . . . . . . . . . . . . . . . . . . . . . . 2-3
Clean Boot . . . . . . . . . . . . . . . . . . . . . . . . . . . . . . . 1-10
cleaning . . . . . . . . . . . . . . . . . . . . . . . . . . . . . . . . . . 10-1
clock & alarms . . . . . . . . . . . . . . . . . . . . . . . . . . . . . 3-11
Cold Boot . . . . . . . . . . . . . . . . . . . . . . . . . . . . . . . . 1-10
cold boot . . . . . . . . . . . . . . . . . . . . . . . . . . . . . . . 3-5, 6-4
command bar . . . . . . . . . . . . . . . . . . . . . . . . . . . . . . 3-8
icons . . . . . . . . . . . . . . . . . . . . . . . . . . . . . . . . . . 3-8
conference call . . . . . . . . . . . . . . . . . . . . . . . . . . . . 4-16
connectivity icon . . . . . . . . . . . . . . . . . . . . . . . . . . . . 3-6
Contacts . . . . . . . . . . . . . . . . . . . . . . . . . . . . . . . . . . 3-8
contacts . . . . . . . . . . . . . . . . . . . . . . . . . . . . . . . . . . . 3-8
contacts application . . . . . . . . . . . . . . . . . . . . . . . . . . 4-4
D
data connection . . . . . . . . . . . . . . . . . . . . . . . . . . . .
deleting Bluetooth bond . . . . . . . . . . . . . . . . . . . . .
disabling PIN for phone use . . . . . . . . . . . . . . . . . .
disconnecting . . . . . . . . . . . . . . . . . . . . . . . . . . . . .
7-37
6-22
7-42
7-39
E
enabling PIN for phone use . . . . . . . . . . . . . . . . . . . 7-42
enhanced operator name string . . . . . . . . . . . . . . . 7-49
EONS . . . . . . . . . . . . . . . . . . . . . . . . . . . . . . . . . . . 7-49
C
Cable Tie Bracket . . . . . . . . . . . . . . . . . . . . . . . . . . . 2-2
calculator . . . . . . . . . . . . . . . . . . . . . . . . . . . . . . . . . . 3-9
F
file explorer . . . . . . . . . . . . . . . . . . . . . . . . . . . . . . . . 3-9
Index - 2
VC6000 Series Product Reference Guide
Function Keys . . . . . . . . . . . . . . . . . . . . . . . . . . . . . 1-10
K
G
Keypad Illumination . . . . . . . . . . . . . . . . . . . . . . . . . . 1-9
keypads
phone . . . . . . . . . . . . . . . . . . . . . . . . . . . . . . . . . 4-1
getting started . . . . . . . . . . . . . . . . . . . . . . . . . . . . . . 1-7
GPRS
data connection . . . . . . . . . . . . . . . . 7-36, 7-37, 7-38
data disconnect . . . . . . . . . . . . . . . . . . . . . . . . . 7-39
registry file . . . . . . . . . . . . . . . . . . . . . . . . . . . . . 7-37
WAN configuration . . . . . . . . . . . . . . . . . . . . . . 7-37
GSM
access point name . . . . . . . . . . . . . . . . . . . . . . 7-37
configure GPRS data connection . . . . . . .7-36, 7-37
ensuring network coverage . . . . . . . . . . . . . . . . 7-36
GPRS data connection . . . . . . . . . . . . . . . . . . . 7-38
settings
networks 7-46
phone 7-41
phone info 7-48
PIN 7-42
security 7-42
services 7-43, 7-44, 7-45
sound 7-41
H
hard reset . . . . . . . . . . . . . . . . . . . . . . . . . . . . . .3-5, 6-4
Hardware Kit . . . . . . . . . . . . . . . . . . . . . . . . . . . . . . . 1-1
headset . . . . . . . . . . . . . . . . . . . . . . . . . . . . . . . . . . . 4-3
Heavy-Duty . . . . . . . . . . . . . . . . . . . . . . . . . . . . . . . . 2-4
I
icons
ActiveSync . . . . . . . . . . . . . . . . . . . . . . . . . . . . . 3-8
Bluetooth . . . . . . . . . . . . . . . . . . . . . . . . . . . . . . . 3-8
bluetooth . . . . . . . . . . . . . . . . . . . . . . . . . . . . . . . 3-8
connectivity . . . . . . . . . . . . . . . . . . . . . . . . . . . . . 3-6
phone . . . . . . . . . . . . . . . . . . . . . . . . . . . . . . . . . 3-6
speaker . . . . . . . . . . . . . . . . . . . . . . . . . . . .3-7, 3-14
status . . . . . . . . . . . . . . . . . . . . . . . . . . . . . . . . . 3-6
task tray . . . . . . . . . . . . . . . . . . . . . . . . . . . . . . . 3-8
time and appointment . . . . . . . . . . . . . . . . . . . . . 3-7
wireless status . . . . . . . . . . . . . . . . . . . . . . . . . . 3-8
install SD memory . . . . . . . . . . . . . . . . . . . . . . . . . . . 1-8
Installtion guidelines . . . . . . . . . . . . . . . . . . . . . . . . . 2-2
internet
disconnecting GPRS . . . . . . . . . . . . . . . . . . . . . 7-39
via GPRS . . . . . . . . . . . . . . . . . . . . . . . . . . . . . 7-38
wireless connection . . . . . . . . . . . . . . . . . . . . . . 7-37
internet sharing . . . . . . . . . . . . . . . . . . . . . . . . . . . . . 3-9
IrDA . . . . . . . . . . . . . . . . . . . . . . . . . . . . . . . . . . . . . 3-12
M
main battery
charging . . . . . . . . . . . . . . . . . . . . . . . . . . . . . . . . 1-7
installing . . . . . . . . . . . . . . . . . . . . . . . . . . . . . . . 1-7
maintenance . . . . . . . . . . . . . . . . . . . . . . . . . . . . . . 10-1
Media Player . . . . . . . . . . . . . . . . . . . . . . . . . . . . . . 3-10
Memory Card Slot . . . . . . . . . . . . . . . . . . . . . . . . . . . 1-8
mobile computer
starting . . . . . . . . . . . . . . . . . . . . . . . . . . . . . . . . . 3-5
MSP Agent . . . . . . . . . . . . . . . . . . . . . . . . . . . . . . . . . 3-9
muting a call . . . . . . . . . . . . . . . . . . . . . . . . . . . . . . . . 4-8
N
navigation bar
icons . . . . . . . . . . . . . . . . . . . . . . . . . . . . . . . . . . 3-6
network
configuring GPRS WAN . . . . . . . . . . . . . . . . . . 7-37
GSM . . . . . . . . . . . . . . . . . . . . . . . . . . . . . . . . . 7-46
network coverage, GSM . . . . . . . . . . . . . . . . . . . . . 7-36
notes . . . . . . . . . . . . . . . . . . . . . . . . . . . . . . . . . . . . . 3-9
notes application . . . . . . . . . . . . . . . . . . . . . . . . . . . . 4-8
P
parts of the mobile computer . . . . . . . . 1-1, 2-2, 6-1, 9-1
phone . . . . . . . . . . . . . . . . . . . . . . . . . . . . . . . . . . . . . 3-8
answering a call . . . . . . . . . . . . . . . . . . . . . . . . . . 4-6
call history . . . . . . . . . . . . . . . . . . . . . . . . . . . . . 4-12
call swapping . . . . . . . . . . . . . . . . . . . . . . . . . . . 4-15
conference call . . . . . . . . . . . . . . . . . . . . . . . . . 4-16
contacts . . . . . . . . . . . . . . . . . . . . . . . . . . . . . . . . 4-4
keypad . . . . . . . . . . . . . . . . . . . . . . . . . . . . . . . . . 4-1
muting a call . . . . . . . . . . . . . . . . . . . . . . . . . . . . 4-8
speed dial
adding entry 4-9
calling 4-5
deleting entry 4-11
editing entry 4-10
taking notes . . . . . . . . . . . . . . . . . . . . . . . . . . . . . 4-8
text messaging . . . . . . . . . . . . . . . . . . . . . . . . . 4-17
three-way call . . . . . . . . . . . . . . . . . . . . . . . . . . 4-16
using keypad . . . . . . . . . . . . . . . . . . . . . . . . . . . . 4-4
phone icon . . . . . . . . . . . . . . . . . . . . . . . . . . . . . . . . . 3-6
phone security . . . . . . . . . . . . . . . . . . . . . . . . . . . . . 7-42
phone settings . . . . . . . . . . . . . . . . . . . . . . . . . . . . . 7-41
Index - 3
pictures . . . . . . . . . . . . . . . . . . . . . . . . . . . . . . . . . . . 3-9
PIN, changing for phone . . . . . . . . . . . . . . . . . . . . . 7-42
PIN, disabling for phone use . . . . . . . . . . . . . . . . . . 7-42
PIN, enabling for phone use . . . . . . . . . . . . . . . . . . 7-42
Power Cable . . . . . . . . . . . . . . . . . . . . . . . . . . . . . . . 2-3
R
rapid deployment . . . . . . . . . . . . . . . . . . . . . . . . . . . 3-10
reset
hard . . . . . . . . . . . . . . . . . . . . . . . . . . . . . . . .3-5, 6-4
soft . . . . . . . . . . . . . . . . . . . . . . . . . . . . . . . . . . . 6-4
resume . . . . . . . . . . . . . . . . . . . . . . . . . . . . . . . . . . . . 6-4
Resume Standby . . . . . . . . . . . . . . . . . . . . . . . . . . . . 1-9
S
Screen Brightness . . . . . . . . . . . . . . . . . . . . . . . . . . . 1-9
search . . . . . . . . . . . . . . . . . . . . . . . . . . . . . . . . . . . 3-10
Secure Digital . . . . . . . . . . . . . . . . . . . . . . . . . . . . . . 1-8
security
Bluetooth . . . . . . . . . . . . . . . . . . . . . . . . . . . . . . . 6-2
service provider name display . . . . . . . . . . . . . . . . . 7-49
services, GSM
call barring . . . . . . . . . . . . . . . . . . . . . . . . . . . . 7-43
call forwarding . . . . . . . . . . . . . . . . . . . . . . . . . . 7-44
call waiting . . . . . . . . . . . . . . . . . . . . . . . . . . . . 7-44
caller id . . . . . . . . . . . . . . . . . . . . . . . . . . . . . . . 7-43
text messages . . . . . . . . . . . . . . . . . . . . . . . . . . 7-45
voice mail . . . . . . . . . . . . . . . . . . . . . . . . . . . . . 7-45
settings . . . . . . . . . . . . . . . . . . . . . . . . . . . . . . . . . . 3-10
about . . . . . . . . . . . . . . . . . . . . . . . . . . . . . . . . . 3-11
backlight . . . . . . . . . . . . . . . . . . . . . . . . . . . . . . 3-11
beam . . . . . . . . . . . . . . . . . . . . . . . . . . . . . . . . . 3-12
buttons . . . . . . . . . . . . . . . . . . . . . . . . . . . . . . . 3-10
certificates . . . . . . . . . . . . . . . . . . . . . . . . . . . . . 3-11
connections . . . . . . . . . . . . . . . . . . . . . . . . . . . . 3-12
customer feedback . . . . . . . . . . . . . . . . . . . . . . 3-11
encryption . . . . . . . . . . . . . . . . . . . . . . . . . . . . . 3-11
error reporting . . . . . . . . . . . . . . . . . . . . . . . . . . 3-11
external GPS . . . . . . . . . . . . . . . . . . . . . . . . . . . 3-11
GPS Setup . . . . . . . . . . . . . . . . . . . . . . . . . . . . 3-11
GSM . . . . . . . . . . . . . . . . . . . . . . . . . . . . . . . . . 7-36
GSM/GPRS . . . . . . . . . . . . . . . . . . . . . . . . . . . . 7-41
input . . . . . . . . . . . . . . . . . . . . . . . . . . . . . . . . . 3-10
keylight . . . . . . . . . . . . . . . . . . . . . . . . . . . . . . . 3-12
lock . . . . . . . . . . . . . . . . . . . . . . . . . . . . . . . . . . 3-10
memory . . . . . . . . . . . . . . . . . . . . . . . . . . . . . . . 3-12
menus . . . . . . . . . . . . . . . . . . . . . . . . . . . . . . . . 3-10
owner information . . . . . . . . . . . . . . . . . . . . . . . 3-11
phone . . . . . . . . . . . . . . . . . . . . . . . . . . . . . . . . 3-11
power . . . . . . . . . . . . . . . . . . . . . . . . . . . . . . . . 3-12
regional settings . . . . . . . . . . . . . . . . . . . . . . . . 3-12
remove programs . . . . . . . . . . . . . . . . . . . . . . . 3-12
screen . . . . . . . . . . . . . . . . . . . . . . . . . . . . . . . . 3-12
sounds & notifications . . . . . . . . . . . . . . . . . . . . 3-11
system info . . . . . . . . . . . . . . . . . . . . . . . . . . . . 3-12
today . . . . . . . . . . . . . . . . . . . . . . . . . . . . . . . . . 3-11
USB to PC . . . . . . . . . . . . . . . . . . . . . . . . . . . . . 3-13
Wi-Fi . . . . . . . . . . . . . . . . . . . . . . . . . . . . . . . . . 3-13
wireless manager . . . . . . . . . . . . . . . . . . . . . . . 3-13
SIM card
activation . . . . . . . . . . . . . . . . . . . . . . . . . . . . . . 7-36
network access . . . . . . . . . . . . . . . . . . . . . . . . . 7-46
SIM Toolkit . . . . . . . . . . . . . . . . . . . . . . . . . . . . . . . . 3-10
soft reset . . . . . . . . . . . . . . . . . . . . . . . . . . . . . . . . . . 6-4
speaker icon . . . . . . . . . . . . . . . . . . . . . . . . . . 3-7, 3-14
speed dial . . . . . . . . . . . . . . . . . . . . . . . . . . . . . 4-5, 4-9
Standby . . . . . . . . . . . . . . . . . . . . . . . . . . . . . . . . . . . 1-9
starting the mobile computer . . . . . . . . . . . . . . . . . . . 3-5
status icon . . . . . . . . . . . . . . . . . . . . . . . . . . . . . . . . . 3-6
connectivity . . . . . . . . . . . . . . . . . . . . . . . . . . . . . 3-6
phone . . . . . . . . . . . . . . . . . . . . . . . . . . . . . . . . . 3-6
speaker . . . . . . . . . . . . . . . . . . . . . . . . . . . 3-7, 3-14
time and appointment . . . . . . . . . . . . . . . . . . . . . 3-7
suspend . . . . . . . . . . . . . . . . . . . . . . . . . . . . . . . . . . . 6-4
T
task tray icons . . . . . . . . . . . . . . . . . . . . . . . . . . . . . . 3-8
tasks . . . . . . . . . . . . . . . . . . . . . . . . . . . . . . . . . . . . 3-10
text messages . . . . . . . . . . . . . . . . . . . . . . . . . . . . . 7-45
three-way call . . . . . . . . . . . . . . . . . . . . . . . . . . . . . . 4-16
time and appointment icon . . . . . . . . . . . . . . . . . . . . . 3-7
Today screen . . . . . . . . . . . . . . . . . . . . . . . . . . . . . . . 3-5
troubleshooting . . . . . . . . . . . . . . . . . . . . . . . . . . . . 10-4
bluetooth . . . . . . . . . . . . . . . . . . . . . . . . . . . . . . 10-6
EDA . . . . . . . . . . . . . . . . . . . . . . . . . . . . . . . . . . 10-4
U
unpacking . . . . . . . . . . . . . . . . . . . . . . . . . . 1-1, 6-1, 9-1
using wired headset . . . . . . . . . . . . . . . . . . . . . . . . . . 4-3
V
videos . . . . . . . . . . . . . . . . . . . . . . . . . . . . . . . . . . . . 3-9
voice mail . . . . . . . . . . . . . . . . . . . . . . . . . . . . . . . . . 7-45
W
Warm Boot . . . . . . . . . . . . . . . . . . . . . . . . . . . . . . . . 1-10
warm boot . . . . . . . . . . . . . . . . . . . . . . . . . . . . . . . . . 6-4
Windows Live . . . . . . . . . . . . . . . . . . . . . . . . . . . . . . 3-10
Windows Live Messenger . . . . . . . . . . . . . . . . . . . . . 3-9
wired headset . . . . . . . . . . . . . . . . . . . . . . . . . . . . . . 4-3
Wireless . . . . . . . . . . . . . . . . . . . . . . . . . . . . . . . . . . . 4-2
wireless
Index - 4
VC6000 Series Product Reference Guide
internet . . . . . . . . . . . . . . . . . . . . . . . . . . . . . . . 7-37
Wireless Manager . . . . . . . . . . . . . . . . . . . . . . . . . . . 4-2
wireless manager . . . . . . . . . . . . . . . . . . . . . . . . . . 3-13
wireless status . . . . . . . . . . . . . . . . . . . . . . . . . . . . . . 3-8
WWAN
configuring GPRS . . . . . . . . . . . . . . . . . . . . . . . 7-37
Index - 5
Index - 6
VC6000 Series Product Reference Guide
Glossary
A
API. An interface by means of which one software component communicates with or controls another. Usually used to refer
to services provided by one software component to another, usually via software interrupts or function calls
Application Programming Interface. See API.
ANSI Terminal. A display terminal that follows commands in the ANSI standard terminal language. For example, it uses
escape sequences to control the cursor, clear the screen and set colors. Communications programs support the ANSI
terminal mode and often default to this terminal emulation for dial-up connections to online services.
ASCII. American Standard Code for Information Interchange. A 7 bit-plus-parity code representing 128 letters, numerals,
punctuation marks and control characters. It is a standard data transmission code in the U.S.
B
BIOS. Basic Input Output System. A collection of ROM-based code with a standard API used to interface with standard PC
hardware.
Bit. Binary digit. One bit is the basic unit of binary information. Generally, eight consecutive bits compose one byte of data.
The pattern of 0 and 1 values within the byte determines its meaning.
Bits per Second (bps). Bits transmitted or received.
Bit. Binary digit. One bit is the basic unit of binary information. Generally, eight consecutive bits compose one byte of data.
The pattern of 0 and 1 values within the byte determines its meaning.
bps. See Bits Per Second.
Byte. On an addressable boundary, eight adjacent binary digits (0 and 1) combined in a pattern to represent a specific
character or numeric value. Bits are numbered from the right, 0 through 7, with bit 0 the low-order bit. One byte in
memory is used to store one ASCII character.
Glossary - 2
VC6000 Series Product Reference Guide
boot or boot-up. The process a computer goes through when it starts. During boot-up, the computer can run self-diagnostic
tests and configure hardware and software.
C
CDRH. Center for Devices and Radiological Health. A federal agency responsible for regulating laser product safety. This
agency specifies various laser operation classes based on power output during operation.
CDRH Class 1. This is the lowest power CDRH laser classification. This class is considered intrinsically safe, even if all laser
output were directed into the eye's pupil. There are no special operating procedures for this class.
CDRH Class 2. No additional software mechanisms are needed to conform to this limit. Laser operation in this class poses
no danger for unintentional direct human exposure.
Character. A pattern of bars and spaces which either directly represents data or indicates a control function, such as a
number, letter, punctuation mark, or communications control contained in a message.
Character Set. Those characters available for encoding in a particular bar code symbology.
Check Digit. A digit used to verify a correct symbol decode. The scanner inserts the decoded data into an arithmetic formula
and checks that the resulting number matches the encoded check digit. Check digits are required for UPC but are
optional for other symbologies. Using check digits decreases the chance of substitution errors when a symbol is
decoded.
Cold Boot. A cold boot restarts the mobile computer and erases all user stored records and entries.
COM port. Communication port; ports are identified by number, e.g., COM1, COM2.
D
Data Communications Equipment (DCE). A device (such as a modem) which is designed to attach directly to a DTE (Data
Terminal Equipment) device.
DCE. See Data Communications Equipment.
DCP. See Device Configuration Package.
Decryption. Decryption is the decoding and unscrambling of received encrypted data. Also see, Encryption and Key.
Device Configuration Package. The Symbol Device Configuration Package provides the Product Reference Guide (PRG),
flash partitions, Terminal Configuration Manager (TCM) and the associated TCM scripts. With this package hex images
that represent flash partitions can be created and downloaded to the mobile computer.
DRAM. Dynamic random access memory.
DTE. See Data Terminal Equipment.
Glossary - 3
E
Element. Generic term for a bar or space.
Encoded Area. Total linear dimension occupied by all characters of a code pattern, including start/stop characters and data.
ENQ (RS-232). ENQ software handshaking is also supported for the data sent to the host.
ESD. Electro-Static Discharge
F
Flash Disk. An additional megabyte of non-volatile memory for storing application and configuration files.
Flash Memory. Flash memory is nonvolatile, semi-permanent storage that can be electronically erased in the circuit and
reprogrammed. Series 9000 mobile computers use Flash memory to store the operating system (ROM-DOS), the
terminal emulators, and the Citrix ICA Client for DOS.
File Transfer Protocol (FTP). A TCP/IP application protocol governing file transfer via network or telephone lines. See
TCP/IP.
FTP. See File Transfer Protocol.
Flash Memory. Flash memory is responsible for storing the system firmware and is non-volatile. If the system power is
interrupted the data is not be lost.
H
Hard Reset. See Cold Boot.
Hz. Hertz; A unit of frequency equal to one cycle per second.
Host Computer. A computer that serves other terminals in a network, providing such services as computation, database
access, supervisory programs and network control.
I
IDE. Intelligent drive electronics. Refers to the solid-state hard drive type.
IEC. International Electrotechnical Commission. This international agency regulates laser safety by specifying various laser
operation classes based on power output during operation.
Glossary - 4
VC6000 Series Product Reference Guide
IEC (825) Class 1. This is the lowest power IEC laser classification. Conformity is ensured through a software restriction of
120 seconds of laser operation within any 1000 second window and an automatic laser shutdown if the scanner's
oscillating mirror fails.
IEEE Address. See MAC Address.
IOCTL. Input/Output Control.
Internet Protocol Address. See IP.
I/O Ports. interface The connection between two devices, defined by common physical characteristics, signal
characteristics, and signal meanings. Types of interfaces include RS-232 and PCMCIA.
Input/Output Ports. I/O ports are primarily dedicated to passing information into or out of the terminal’s memory. Series
9000 mobile computers include Serial and USB ports.
IP. Internet Protocol. The IP part of the TCP/IP communications protocol. IP implements the network layer (layer 3) of the
protocol, which contains a network address and is used to route a message to a different network or subnetwork. IP
accepts “packets” from the layer 4 transport protocol (TCP or UDP), adds its own header to it and delivers a “datagram”
to the layer 2 data link protocol. It may also break the packet into fragments to support the maximum transmission unit
(MTU) of the network.
IP Address. (Internet Protocol address) The address of a computer attached to an IP network. Every client and server
station must have a unique IP address. A 32-bit address used by a computer on a IP network. Client workstations have
either a permanent address or one that is dynamically assigned to them each session. IP addresses are written as four
sets of numbers separated by periods; for example, 204.171.64.2.
K
Key. A key is the specific code used by the algorithm to encrypt or decrypt the data. Also see, Encryption and Decrypting.
L
laser scanner. A type of bar code reader that uses a beam of laser light.
LASER. Light Amplification by Stimulated Emission of Radiation.The laser is an intense light source. Light from a laser is
all the same frequency, unlike the output of an incandescent bulb. Laser light is typically coherent and has a high energy
density.
LCD. See Liquid Crystal Display.
LED Indicator. A semiconductor diode (LED - Light Emitting Diode) used as an indicator, often in digital displays. The
semiconductor uses applied voltage to produce light of a certain frequency determined by the semiconductor's particular
chemical composition.
Liquid Crystal Display (LCD). A display that uses liquid crystal sealed between two glass plates. The crystals are excited
by precise electrical charges, causing them to reflect light outside according to their bias. They use little electricity and
react relatively quickly. They require external light to reflect their information to the user.
Glossary - 5
Light Emitting Diode. See LED.
M
MC. Mobile Computer.
MDN. Mobile Directory Number. The directory listing telephone number that is dialed (generally using POTS) to reach a
mobile unit. The MDN is usually associated with a MIN in a cellular telephone -- in the US and Canada, the MDN and
MIN are the same value for voice cellular users. International roaming considerations often result in the MDN being
different from the MIN.
MIL. 1 mil = 1 thousandth of an inch.
MIN. Mobile Identification Number. The unique account number associated with a cellular device. It is broadcast by the
cellular device when accessing the cellular system.
Misread (Misdecode). A condition which occurs when the data output of a reader or interface controller does not agree with
the data encoded within a bar code symbol.
Mobile Computer. In this text, mobile computer refers to the Symbol Series 9000 wireless portable computer. It can be set
up to run as a stand-alone device, or it can be set up to communicate with a network, using wireless radio technology.
N
Nominal. The exact (or ideal) intended value for a specified parameter. Tolerances are specified as positive and negative
deviations from this value.
Nominal Size. Standard size for a bar code symbol. Most UPC/EAN codes are used over a range of magnifications (e.g.,
from 0.80 to 2.00 of nominal).
NVM. Non-Volatile Memory.
O
ODI. See Open Data-Link Interface.
Open Data-Link Interface (ODI). Novell’s driver specification for an interface between network hardware and higher-level
protocols. It supports multiple protocols on a single NIC (Network Interface Controller). It is capable of understanding
and translating any network information or request sent by any other ODI-compatible protocol into something a NetWare
client can understand and process.
Open System Authentication. Open System authentication is a null authentication algorithm.
Glossary - 6
VC6000 Series Product Reference Guide
P
PAN . Personal area network. Using Bluetooth wireless technology, PANs enable devices to communicate wirelessly.
Generally, a wireless PAN consists of a dynamic group of less than 255 devices that communicate within about a 33-foot
range. Only devices within this limited area typically participate in the network.
Parameter. A variable that can have different values assigned to it.
Percent Decode. The average probability that a single scan of a bar code would result in a successful decode. In a
well-designed bar code scanning system, that probability should approach near 100%.
Programming Mode. The state in which a scanner is configured for parameter values. See Scanning Mode.
Q
Quiet Zone. A clear space, containing no dark marks, which precedes the start character of a bar code symbol and follows
the stop character.
QWERTY. A standard keyboard commonly used on North American and some European PC keyboards. “QWERTY” refers
to the arrangement of keys on the left side of the third row of keys.
R
RAM. Random Access Memory. Data in RAM can be accessed in random order, and quickly written and read.
Reflectance. Amount of light returned from an illuminated surface.
Resolution. The narrowest element dimension which is distinguished by a particular reading device or printed with a
particular device or method.
RF. Radio Frequency.
ROM. Read-Only Memory. Data stored in ROM cannot be changed or removed.
Router. A device that connects networks and supports the required protocols for packet filtering. Routers are typically used
to extend the range of cabling and to organize the topology of a network into subnets. See Subnet.
RS-232. An Electronic Industries Association (EIA) standard that defines the connector, connector pins, and signals used to
transfer data serially from one device to another.
S
Scanner. An electronic device used to scan bar code symbols and produce a digitized pattern that corresponds to the bars
and spaces of the symbol. Its three main components are: 1) Light source (laser or photoelectric cell) - illuminates a bar
Glossary - 7
code,; 2) Photodetector - registers the difference in reflected light (more light reflected from spaces); 3) Signal
conditioning circuit - transforms optical detector output into a digitized bar pattern.
SDK. Software Development Kit
Self-Checking Code. A symbology that uses a checking algorithm to detect encoding errors within the characters of a bar
code symbol.
Shared Key. Shared Key authentication is an algorithm where both the AP and the MU share an authentication key.
SID. System Identification code. An identifier issued by the FCC for each market. It is also broadcast by the cellular carriers
to allow cellular devices to distinguish between the home and roaming service.
SMDK. Symbol Mobility Developer’s Kit.
Soft Reset. See Warm Boot.
Substrate. A foundation material on which a substance or image is placed..
T
TCP/IP. (Transmission Control Protocol/Internet Protocol) A communications protocol used to internetwork dissimilar
systems. This standard is the protocol of the Internet and has become the global standard for communications. TCP
provides transport functions, which ensures that the total amount of bytes sent is received correctly at the other end.
UDP is an alternate transport that does not guarantee delivery. It is widely used for real-time voice and video
transmissions where erroneous packets are not retransmitted. IP provides the routing mechanism. TCP/IP is a routable
protocol, which means that all messages contain not only the address of the destination station, but the address of a
destination network. This allows TCP/IP messages to be sent to multiple networks within an organization or around the
world, hence its use in the worldwide Internet. Every client and server in a TCP/IP network requires an IP address, which
is either permanently assigned or dynamically assigned at startup.
Telnet. A terminal emulation protocol commonly used on the Internet and TCP/IP-based networks. It allows a user at a
terminal or computer to log onto a remote device and run a program.
Terminal. See Mobile Computer.
Terminate and Stay Resident (TSR). A program under DOS that ends its foreground execution to remain resident in
memory to service hardware/software interrupts, providing background operation. It remains in memory and may
provide services on behalf of other DOS programs.
Terminal Emulation. A “terminal emulation” emulates a character-based mainframe session on a remote non-mainframe
terminal, including all display features, commands and function keys. The VC5000 Series supports Terminal Emulations
in 3270, 5250 and VT220.
TFTP. (Trivial File Transfer Protocol) A version of the TCP/IP FTP (File Transfer Protocol) protocol that has no directory or
password capability. It is the protocol used for upgrading firmware, downloading software and remote booting of diskless
devices.
Transmission Control Protocol/Internet Protocol. See TCP/IP.
Trivial File Transfer Protocol. See TFTP.
Glossary - 8
VC6000 Series Product Reference Guide
TSR. See Terminate and Stay Resident.
U
UPC. Universal Product Code. A relatively complex numeric symbology. Each character consists of two bars and two
spaces, each of which is any of four widths. The standard symbology for retail food packages in the United States.
UDP. User Datagram Protocol. A protocol within the IP protocol suite that is used in place of TCP when a reliable delivery
is not required. For example, UDP is used for real-time audio and video traffic where lost packets are simply ignored,
because there is no time to retransmit. If UDP is used and a reliable delivery is required, packet sequence checking and
error notification must be written into the applications.
V
Visible Laser Diode (VLD). A solid state device which produces visible laser light.
W
Warm Boot. A warm boot restarts the mobile computer by closing all running programs. All data that is not saved to flash
memory is lost.
Motorola, Inc.
One Motorola Plaza
Holtsville, New York 11742, USA
1-800-927-9626
http://www.motorola.com/enterprisemobility
MOTOROLA and the Stylized M Logo and Symbol and the Symbol logo are registered in the U.S. Patent and Trademark Office.
All other product or service names are the property of their registered owners.
© Motorola, Inc. 2008
6802986C08 Revision A - December 2008