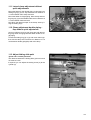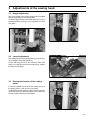
1
Universal-Flap-PocketMachine 100/58
Operating instructions
Version 2.1, 11-18-98
© 1998 – 1999 Beisler GmbH
Frohnradstr. 10 • D-63768 Hösbach • Phone-No. Service: +49-6021-501940 • Fax: +49-6021-540061
These operating instructions contain the following parts:
Part 1:
Operating instructions (pages 1-xx)
adresses to the operator of the machine, that means the person
who works at and with the machine
Part 2:
Mechanics manual (pages 2-xx)
is used for the putting into operation, adjustment, troubleshooting
and maintenance of the machine and adresses to qualified staff
only
Part 3:
Technical manual (pages 3-xx)
contains information on the further adjustment, maintenance,
troubleshooting and repair of this machine and adresses to
especially trained and experienced staff only.
Please obtain all safety, warning and other hints and regulations in this manual.
Part 1
Operating instructions
Hint
These operating instructions contain all information required for the operation
of the machine. It adresses to the operator of the machine, that is the person
that works at and with the machine. Please obtain all rules and regulations.
Contents
Page
Part 1
Operating instructions ...................................................................................... 1-1
1
1.1
1.2
1.3
1.4
1.5
Security advice and warning hints ................................................................... 1-2
Classification ........................................................................................................ 1-2
Range of validity .................................................................................................. 1-2
Authorized person ................................................................................................ 1-2
General security advice and warning hints ........................................................... 1-2
Copyright ............................................................................................................. 1-3
2
2.1
2.2
2.3
2.4
2.5
2.6
Preliminary remarks .......................................................................................... 1-4
Introduction .......................................................................................................... 1-4
Limitation of liability .............................................................................................. 1-4
Guarantee regulations ......................................................................................... 1-5
Use as agreed ..................................................................................................... 1-5
Description of the machine .................................................................................. 1-5
Main parts of the machine .................................................................................... 1-6
3
3.1
3.1.1
3.1.2
3.2
Security ...............................................................................................................
Available security systems ...................................................................................
Program stop button ............................................................................................
Mains /emergency stop button .............................................................................
Security measures of the operator .......................................................................
4
4.1
4.1.1
4.1.2
4.1.3
4.1.4
4.1.5
4.1.6
4.1.7
4.1.8
4.1.9
4.1.10
4.2
4.2.1
4.2.2
4.2.3
4.2.4
4.2.5
4.2.6
Operation of the machine .................................................................................. 1-9
Controls and indicators ........................................................................................ 1-9
Operation device ................................................................................................ 1-10
Insertion station .................................................................................................. 1-13
Mains / emergency stop button .......................................................................... 1-13
Foot pedal machine sequence ........................................................................... 1-13
Foot pedal vacuum ............................................................................................ 1-13
Foot pedal stacker ............................................................................................. 1-13
Swing out the folder ........................................................................................... 1-14
Change folder .................................................................................................... 1-14
Change interface roll .......................................................................................... 1-15
Empty the stacker .............................................................................................. 1-16
Operation ........................................................................................................... 1-16
Machine sequence ............................................................................................. 1-16
Program operation ............................................................................................. 1-16
Select a sewing program.................................................................................... 1-16
Enable/disable seams ........................................................................................ 1-17
Change seam length .......................................................................................... 1-17
Remove and add seams .................................................................................... 1-17
5
Required cleanings .......................................................................................... 1-18
1-7
1-7
1-7
1-8
1-8
1-1
1
Security advice and warning hints
1.1
Classification
Three different types of hints are used in this manual, which are indicated
with different symbols and signalling words:
DANGER
This indicates a possibly dangerous situation or action, which may cause
injuries to persons or severe damage to the machine.
ATTENTION
This indicates a situation or action, which may cause damage to the
machine.
Hint
This indicates hints for a better use and other helpful information or hints.
Please obey all rules and regulations.
1.2
Range of validity
This operating manual is valid for Pocket-Piping-Automatons manufactured
by Beisler named ‘Universal-Pocket-Piping-Automaton 100/58’.
This operating manual is not valid for the sewing head applied in the
machine. Please refer to the operating manual of the sewing head delivered
with the machine, for which we don’t take any liability.
Further security advice (verbal and written) for this machine or the
components will not be repealed by this manual.
1.3
Authorized person
Danger
Danger might arise for persons, things and environment by inappropriate
operation of this machine. Installation and maintenance duties may only be
carried out by authorized staff.
Persons are regarded as authorized, who are able to recognize possible
danger and judge the assigned duties from their technical education and
experience.
1.4
General security advice and warning hints
Danger
Danger might arise for persons, things and environment by inappropriate
operation of this machine. Installation and maintenance duties may only be
carried out by authorized staff.
1-2
Danger
Danger of injuries in the range of the sewing head! Don’t grasp into the
affected area of the needle during the sewing process!
Danger
Before any operations at or with the machine (putting into operation,
operation, maintenance, repair, etc.) the person carrying out has to read and
understand this manual with each appendix completely.
Danger
Before carrying out maintenance or repair duties, the mains supply must be
cut off. Additionally pressure must be released from the pneu-matical system.
Attention
The machine will be destroyed by a connection to a wrong mains voltage!
See the section ‘Technical data’ before connecting the power supply.
1.5
Copyright
© 1997 Beisler GmbH, Hösbach
Pocket-Piping-Automaton
The Universal-Pocket-Piping-Automaton 100/58 and this operating manual
with all parts are protected on copyright. Manufacture without license will be
prosecuted by law. All rights reserved on this operating manual, including
reproduction in any thinkable way, either by copying, printing, on any data
recording media or in translated form. Reproduction of this operating manual
- even in extracts - only with written approval by Beisler GmbH.
This operating manual contains a description of the product, but no promise
of certain qualities or results of use. The operating manual has been proved
before delivery. The Beisler GmbH takes the liability, that this operating
manual if free of errors reducing its value for the estimated use. The editors
don’t take liability for consecuting damage arising through application of the
operating manual. We are always thankful for hints and ideas.
The technical standard of the common delivery of product and operating
manual by the Beisler GmbH is decisive, if not other information is given.
Technical changes without prior notice are reserved, previous operating
manuals loose validity.
The general conditions of sales and delivery of the Beisler GmbH are valid.
Do you have questions or problems with installation or putting into operation?
Don’t hesitate to call us.
Beisler GmbH
Frohnradstr. 10 - D-63768 Hösbach
Tel: (+49) 6021 / 50 19 0
Fax: (+49) 6021 / 50 19 10
1-3
2
Preliminary remarks
2.1
Introduction
This operating manual adresses to the operator of the machine, that is the
person that works with the machine. It is not a technical manual. Please ask
questions exceeding the contents of this operating manual to our service
staff.
Attention
All service and maintenance duties at this Pocket-Piping-Automaton may only
be carried out by qualified staff (qualified electrical employee or electrotechnical instructed person according to IEC 364 and DIN EN 60204-1).
Machine operation may only be carried out by an instructed person, who had
read and understood this operating manual completely.
Attention
Any structural changes to the machine, either electrically, mechanically or
regarding the machine control, are suspect to the responsibility of the
machine owner.
The following documents are part of the documentation of the UniversalPocket-Piping-Automaton 100/58:
1. Electrical wiring plans
2. Parts list
Please check the documents delivered with the machine for completeness.
2.2
Limitation of liability
We guarantee the faultless functioning of our product in accordance with our
advertising, the product informations edited by the Beisler GmbH and this
manual. Further product-features are not guaranteed. We take no liability for
the economy and faultless function if the product is used for a different
purpose then that described in the chapter „Use as agreed“.
Compensation claims are generally impossible, except if intention or culpable negligence by the Beisler GmbH is proved, or if assured productfeatures are not provided. If this machine is used in environments, for which it
is not suited or which do not represent the technical standard, we are not
responsible for the consequences.
We don’t accept responsibility for damages at installations and systems in
the surroundings of this machine, which are caused by a fault of the product
or an error in this manual.
We are not responsible for the violation of patents and/or other rights of third
persons outside the Federal Republic of Germany.
We are not liable for damages, which result from improper operations
according to this manual. We are not liable for missed profit and for
consecuting damages due to non-regardance of security advices and
warning hints. We don’t accept liability for damages which resulted from the
use of tools and accessoires which are not delivered and/or approved by the
Beisler GmbH.
The prdocuts of the Beisler GmbH are designed for a long life. They
represent the standard of technique and science and were checked on all
functions individually before delivery. The electrical construction corresponds
to the current norms and regulations, particularly DIN 5713 / VDE 0113.
Beisler GmbH is doing product and market research for the further
1-4
development and permanent improvement of their products. In the case of
faults and/or technical trouble please contact the Beisler GmbH service staff.
We assure that suitable measures will be done immediately.
The Beisler GmbH guarantee regualtions are valid, which we will send to you
on demand.
2.3
Guarantee regulations
We guarantee the fault-free functioning of the Universal-Pocket-PipingAutomaton 100/58 according to this operating manual except the tools for a
time range of six months after delivery. If the machine is used in double- or
triple-shift operation, the term of guarantee is reduced to three or two
months.
The term of guarantee starts with the date of delivery to the customer,
independant from the time of putting into operation. Guarantee will be
spoiled, if the machine isn’t installed and operated according to this operating
manual and the regulations given by the Beisler GmbH staff. A cost-free
repair is only possible, if all regulations considering storage, transportation
and putting into operations have been obeyed.
Customers and third persons may only mesh with the machine after getting a
written approval by the Beisler GmbH. The Beisler GmbH takes no
responsibility for injuries and damages arising from non-obeyance of this
stipulation. All warranty will be spoiled in this case.
The Beisler GmbH takes no responsibility for faults of the machine as
consequence of defective or functional faulty equipment in the surrounding of
the machine or by the use of accessoires, which were not delivered by the
Beisler GmbH.
The general conditions of sale and delivery of the Beisler GmbH are valid.
2.4
Use as agreed
The Universal-Pocket-Piping-Automaton 100/58 has been developed for the
piping of pockets and the sewing in of pocket bags.
Danger
This machine has been developed and build for a certain purpose. Adaptions
may influence security equipments negatively. We recommend to contact our
service staff in such a case.
2.5
Description of the machine
The Universal-Pocket-Piping-Automaton 100/58 allows the automatic piping
of pockets. The machine is equipped with a cutting device, a clamp
transportation system, a sewing head and a stacking system for the
produced pieces.
All components of the machine are mounted on a base frame made of
square steel pipes and controlled by an innovative micro-processor system.
Machine operation is achieved with an operation device. Here you can open
several control programs, define new programs and check all machine
components individually for maintenance and repair duties.
1-5
2.6
Main parts of the machine
A
Sewing head
B
Operation device
C
Insertion station
D
Clamp transportation
E
Mitre knife
F
Stacker
G
Foot pedal sew sequence
H
Sew motor
I
Power / air supply
J
Power distribution
K
Spool rack
L
Mains / emergency stop switch
M
Foot pedal vacuum
N
Foot pedal stacker
O
Program stop button
The following chapters contain further information on the machine’s
components.
1-6
3
Security
The topic of this chapter is the security exclusively. Please see chapter 1 for
the general security advice and warning hints and the security and warning
hints in the other chapters of this operating manual.
3.1
Available security systems
Danger
Check all security systems daily for functioning and effectivity!
Danger
Changes to the machine may influence function and effectivity of the security
systems negatively!
A
B
3.1.1
Program stop button
Mains / emergency stop button
Program stop button
The program stop button is mounted in the right upper corner of the operation
device. After pressing, all movements and the sewing process will be
stopped immediately.
Before a re-start the program stop button must be turned to the right to be
unlocked. With the release, the reset will be triggered.
1-7
3.1.2
Mains /emergency stop button
The mains / emergency stop switch is mounted on the front side of the
machine, right-handed below the working plate. It can be used to cut-off the
power supply.
3.2
Security measures of the operator
The security systems of this machine work passively, that means that they
can only react on certain incidents. To achieve the required security for your
health and that of your collegues, active measures of the operator are
required.
Please obey the following general rules for the use of this machine:
1. Always work concetrated and avoid actions with a risk.
2. Don’t try to bridge existing security systems or to disable them in any way.
3. Check all security systems on function and effectivity before starting work.
4. Cut off the power supply before opening the switchbox.
5. Switch off the machine with the mains / emergency stop switch, before
executing cleaning and mainetenance duties.
1-8
4
Operation of the machine
Danger
This machine may only be operated by qualified staff, who had read and
understood this operating manual completely.
4.1
Controls and indicators
A
B
C
D
E
F
Operation device
Insertion station
Mains / emergency stop button
Foot pedal machine sequence
Foot pedal vacuum
Foot pedal stacker
1-9
4.1.1
Operation device
During production the machine can be operated with the operating device;
existing programs can be called and new programmed. You will find the
program stop button at the device.
A Slot for the Memory card
B Program stop button
C Display
D Ten key pad with P- and M-key
E Function keys
F Arrow and enter keys
The elements of the operating devices have the following occupations:
4.1.1.1
Slot for the Memory card
The Memory card is used as a backup memory for software and programs of
the machine. You can load programs to the Memory card or read them after a
possible data loss into the machine.
4.1.1.2
Program stop button
By pressing the program stop button, all movements of the machine will be
stopped immediately. To continue production, you have to turn the button to
the right and release it.
4.1.1.3
1-10
Display
All information required for the operation of the machine will be imaged in the
display. During normal production the display shows the following (see Pict.
6):
• the graphic on the left side images the mitre cut of the pocket; in the
shown example, the mitre cutter cuts the basic value 50 at the seam start
and 0.5 mm less at the end, that is the value 45
• the graphic to the right shows the seam or flap lenght of the pocket; the
value displayed above the flap (33.0) defines, how far the flap will be
pushed behind the needle, after the photocell has recognized the flap
(value for the seam start); the value displayed below the flap (40.0)
defines, how long the machine continues sewing, after the photocell has
recognized the end of the flap
• the most upper line shows the number of the selected program (M01) and
the seams assigned to this program (30, 31, 32 and 33); seams 30 and
32 are enabled (32 will be the next seam to be sewed), 31 and 33 are
disabled
• the name of the current seam is displayed to the right
• the square below contains the icons of the machine functions assigned to
the current seam
• below the square, the stock of bobbin thread (45 m) and the number of
produced parts (149) are displayed
4.1.1.4
Ten key pad with P- and M-key
Numerical inputs can be done using the ten key pad.
The letters displayed below the digits can be entered, after the function key
with the corresponding color indication has been pressed before.
The P-key is used in several steps of the machine programming.
Sewing programs can be selected after pressing the M-key.
4.1.1.5
Function keys – lower occupation
The function keys are occupied as follows
switches to the upper occupation of the function keys
Mitre knife correction; press this key once to change the mitre
knife position at the seam start; press F1 and the cursor stands
on the seam start; press twice to change the position at the
seam end; after pressing F1, enter the new value using the ten
key pad, which will be displayed in the left-handed graphic; 50 =
middle value; the higher the value, the more far the mitre knife
cuts to the outside
e.g. old value 50, new value 56 and the mitre knife cuts 0.6 mm
more to the outside
e.g. old value 50, new value 22, the mitre knife cuts 2.8 mm
more to the inside
1-11
Change pocket length; press F3 and enter the new value for the
length to be sewed; when producing with flap, this sets the
photo cell security length, too; e.g. security length 140 mm
allows the sewing of a flap length between 130 and 150 mm;
when producing flaps it is possible to disable the security length
by entering 999 here.
Sewing-over at seam start and end (only valid when sewing with
flap); press once to set the sewing-over at seam start, twice to
set it at seam end; enter the new value using the ten key pad
Seam start: the smaller the set value, the more the flap will be
sewed over; seam end: the bigger the set value, the more the
flap will be sewed over
Pick needle thread manually; after the first pressing, the main
clamp drives to end position, with the second pressing the
needle thread catcher will be enabled; it remains enabled, until
the key is released
Push interface forward manually (option); after changing the
interface roll, the interface will be cut with a key pressure and
then be pushed in position (only available if interface mode is
enabled)
reserved
Reset key; use this key to reset the program sequence step by
step; sets the clamp into starting position
4.1.1.6
Function keys – upper occupation
The function keys are double occupied. Press F1 to switch to the upper key
occupation. The icons will be displayed in the lower line.
switches back to the lower key occupation
Switch middle knife on/off; the knife is switched off, until it will be
switched on here; together with the middle knife, the mitre knife
is switched off
Switch mitre knife on/off; it remains switched off, until it will be
switched on here
Switch stacker on/off; it remains switched off until it will be
switched on here
Here without function
Sets counter to zero
Manual spooling; the sewing head runs with low revs, after a
second key press, it stops in the upper needle position
Attention
At machines with insertion station, the station must be swung out first (see
chapter 4.1.6); in any case, both threads must be removed from the needles
and the spools from the pickers.
1-12
Reset spool thread length; when removing a half-full and
inserting a full spool, you can display the whole thread length by
pressing this key
4.1.1.7
Arrow and Enter-keys
Use the arrow keys to move the flashing cursor between the different
sections of a display. Confirm inputs using the Enter key.
4.1.2
Insertion station
The parts to be manufactured are inserted at the insertion station. Use the
marking lamps to align the parts exactly.
4.1.3
Mains / emergency stop button
With the mains / emergency stop button, you can cut-off the power supply of
the machine.
4.1.4
Foot pedal machine sequence
Use this foot pedal to trigger the steps of the machine sequence (see further
below).
4.1.5
Foot pedal vacuum
Press this foot pedal to enable the vacuum. The parts inserted at the
insertion station are fixed by the vacuum which will be disabled automatically,
after the main clamp has picked up the parts.
4.1.6
Foot pedal stacker
Press the foot pedal stacker to open the stacker to be able to take out the
stacked parts.
1-13
4.1.7
Swing out the folder
For several reasons (e.g. manual spooling), the folder must be swung out to
get access to the sewing head. Pull out the locking pin (A) and swing the
folder (B) to the left.
When swinging back, move the folder slowly to the right until the locking pin
inserts feelable.
Attention
The folder and the lamps of the crosshair attached to it are adjusted exactly
and are sensitive against violence. Therefore, swing the folder slowly and
without the use of power.
4.1.8
1-14
Change folder
Different folders are needed for different pocket shapes (e.g. double/single
piping):
1. Open the locking (B) of the folder (A).
2. Pull the folder towards yourself and downwards to remove it.
3. Push in the new folder from the bottom side into the two attachments and
then push it forward.
4. Fix the locking (B).
4.1.9
Change interface roll
The interface roll is placed below the working plate and can be changed this
way:
1. Lift the insertion plate at the front side and push it to the left.
2. Remove all rests of the interface in the machine.
3. Insert the new interface roll.
4. Insert the interface over the roll into the interface guiding.
1-15
5. Press F6 repeatedly, until the interface appears above the working plate.
6. Mount the insertion plate; be sure that the positioning pins are inserted
into the drill holes.
4.1.10
Empty the stacker
Press the foot pedal of the stacker, if it is full. The stacker will open and you
can remove the parts. Release the foot pedal to close the stacker.
4.2
Operation
4.2.1
Machine sequence
The production sequence is divided into several parts:
1. Machine sequence can start, if the machine is in starting position.
2. Insert the parts to be sewed and align them exactly.
3. Press the foot pedal machine sequence and the clamp comes forward.
4. Press the foot pedal again, the clamp will be lowered.
5. Press foot pedal, the folder is lowered and the fold pushers are driven to
the front.
6. Press foot pedal, the flap clamp closes.
7. Press foot pedal, the clamp pushes the part under the sewing head, it will
be sewed there, the mitres will be cut, the clamp opens and the sewed
part will be stacked.
The operator can trigger each step with a short pressing of the foot pedal, or
run an automatic process by keeping the foot pedal pressed.
Depending on the programming, different machine sequences might occur.
4.2.2
Program operation
The machine is operated with programs, which can be selected by the
operator. A program is stored at a memory location (e.g. ‘M01’) and contains
one or several seams (max. number is six).
The selected program and the assigned seams are imaged in the upper line
of the display. The machine executes all enabled seams of a program
sequentially. An enabled seam is displayed inverted (white on black).
You can produce several pocket shapes and lengths sequentially, without
changing the sewing program. This allows to sew several pockets of a jacket
part.
The following operational actions are explained in this chapter:
• select a sewing program
• enable/disable seams
• change seam lengths
• change sewing programs
• create new sewing programs
• program new seams
4.2.3
Select a sewing program
The current sewing program is displayed in the upper line of the display. How
to select a program:
1. Press M-key.
2. Enter the number of the desired program using the ten key pad.
3. Press ENT-key.
1-16
4.2.4
Enable/disable seams
Seams are assigned to every sewing program. All enabled seams are sewed
sequentially. Enabled seams are displayed inverted (white on black).
If a seams shall be skipped, it must be disabled. How to enable/disable a
seam:
1. Move the cursor on the desired seam using the arrow keys.
2. Press the ENT-key to enable/disable the seam.
4.2.5
Change seam length
Several parameters of the current seam are imaged in the left half of the
display (e.g. seam length, mitre knife position). You can change these
settings individually using the function keys.
All changes executed with the function keys are stored for all seams with the
same number, even if they are used in different programs.
Further information are contained in the chapter ‘4.1.1.5 Function keys’.
4.2.6
Remove and add seams
You can add seams to and remove them from sewing programs:
4.2.6.1
Remove seams
1.
2.
3.
4.
5.
6.
4.2.6.2
Select the sewing program to be changed.
Press the P-key.
Press F1.
Move the cursor on the seam to be removed using the arrow keys.
Press the M-key.
Repeat steps 4. and 5. for all seams to be removed.
Add seams
1.
2.
3.
4.
5.
6.
7.
8.
Select the sewing program to be changed.
Press the P-key.
Press F1.
Use the arrow keys to move the cursor to the place, where you want to
add a seam.
Press the ENT-key.
Enter the number of the desired seam.
Repeat steps 4. to 6. for all seams to be added to the current sewing
program.
Press the P-key to store the settings and leave the submenu.
1-17
5
Required cleanings
To achieve the value and function of the machine, we recommend to keep it
always clean and free of spare materials and waste.
Blow off threats and cloth rests daily from the machine using the air
pistol.Below the air pistol you see a supply bottle for the oil needed in the
sewing head.
1-18
Part 2
Mechanics manual
Hint
This part of the operating instructions contains all information required to put
the machine into operation and to do programming, troubleshooting and
maintenance. It adresses to trained technical personnel, which is able to
overview their tasks and recognize possible danger at an early moment. The
operating instructions given in part 1 of this manual are to be considered as
part of this mechanics manual.
Contents
Part 2
1
1.1
1.2
1.3
2
2.1
2.2
2.2.1
2.2.2
2.3
2.4
3
3.1
3.1.1
3.1.2
3.1.3
3.1.4
3.1.5
3.1.6
3.2
3.3
3.3.1
3.3.2
3.3.3
3.3.4
3.3.5
3.4
3.4.1
3.4.2
3.4.3
3.5
4
5
5.1
5.2
5.3
5.3.1
5.3.2
5.4
5.4.1
5.4.2
5.5
5.5.1
5.5.2
5.5.3
5.6
5.7
Page
Mechanics manual ............................................................................................. 2-1
Delivery, transportation, storage ...................................................................... 2-2
Delivery ................................................................................................................ 2-2
Transportation ...................................................................................................... 2-2
Storage ................................................................................................................ 2-2
Installation .......................................................................................................... 2-3
Technical data ...................................................................................................... 2-3
Mechanical installation ......................................................................................... 2-3
Unpack and put up ............................................................................................... 2-3
Connection of air supply....................................................................................... 2-4
Elektrical installation ............................................................................................ 2-4
First putting into operation .................................................................................... 2-5
Programming instructions ................................................................................ 2-6
Create new sewing programs .............................................................................. 2-6
Select a M-memory location ................................................................................. 2-6
Add seams ........................................................................................................... 2-6
Copy seams ......................................................................................................... 2-6
Adjust seams ....................................................................................................... 2-6
Name seams ........................................................................................................ 2-7
Delete seams ....................................................................................................... 2-7
Seam functions .................................................................................................... 2-7
Seam parameters ................................................................................................ 2-9
Seam parameter 30: Flap clamp mode ............................................................... 2-11
Working WITHOUT automatic clamp push-back ................................................ 2-13
Working WITH automatic clamp push back ....................................................... 2-13
Working with INTERMEDIATE STOP of the main clamp .................................... 2-13
Working with automatic PICK UP PART using the main clamp .......................... 2-13
Seam images ..................................................................................................... 2-14
Sewing with catch .............................................................................................. 2-14
Sewing with stitch condensation ........................................................................ 2-14
Sewing with stowing ........................................................................................... 2-14
Basic parameters ............................................................................................... 2-15
Troubleshooting hints ..................................................................................... 2-18
Maintenance of the machine ........................................................................... 2-21
Water separator at air connector ........................................................................ 2-21
Grease linear guiding ......................................................................................... 2-21
Use of the Memory Card .................................................................................... 2-22
Saving seam data on the Memory Card ............................................................. 2-22
Loading seam data from the Memory Card ........................................................ 2-22
Loading data from the EPROMs ........................................................................ 2-23
Loading the basic parameters ............................................................................ 2-23
Loading seam parameters ................................................................................. 2-23
Test programs and diagnostics .......................................................................... 2-23
I/O-Test .............................................................................................................. 2-23
Diagnostics ........................................................................................................ 2-26
Service Code ..................................................................................................... 2-28
Preset sewing programs .................................................................................... 2-29
Diagram of the menu structure .......................................................................... 2-30
2-1
1
Delivery, transportation, storage
1.1
Delivery
Hint
Check right after receiving the machine, whether all parts according to the
parts list are complete and without damage. Later claims can’t be accepted.
If you see damage to the transportation packing of the machine, which
indicates a possible damage to the delivered parts, don’t hesitate to claim this
to the transportation company.
1.2
Transportation
Generally it is possible to move the machine. Obey the following hints:
1. Cut off the power supply, release the pneumatical pressure.
2. Fix movable and loose parts.
3. Lift the base with a hoisting device and be sure to lift possible additional
devices (e.g. stacker). If the machine is equipped with transportation
casters (option), you will have to release the brakes at every caster.
4. Move the machine carefully to the new location.
Attention
Attention when moving the machine on sloping areas! Enormous pull power
arises from the machine weight.
1.3
Storage
If no other agreement is fixed, the following limitations have to be kept:
1. In closed rooms only.
2. Temperature range -10 ... +45 °C.
3. Humidity max. 80% non-condensing.
Attention
If stored or transported in improper environments, the machine can be
damaged severely. Damages may not be visible from the outside.
2-2
2
Installation
Attention
Installation and putting into operation may only be carried out by mechanically
and electrically qualified staff. These people must read and understand the
complete operating manual before starting.
2.1
Technical data
Dimensions
1.600 x 750 x 1.300mm (LxWxH)
Table height
830 mm
Weight
220 kg
Mains power
220 V AC
Power consumption
0,7 kW
Fuse
10 A
Req. air pressure 6 bar
Req. air quality oil-free
Air consumption 5 NL/WD
2.2
Mechanical installation
Attention
Check before starting the installation, whether the desired location meets the
requirements (see chapter 2.1, technical data). This is very important
regarding the stability of the ground.
2.2.1
Unpack and put up
1. Remove the packing material and possible transportation protections.
2. Position the machine on a solid and horizontal ground.
3. Level the machine to a horizontal stand using the adjustable frame feet.
2-3
2.2.2
Connection of air supply
1. Connect the air pipe (A) to your air system.
2. Open the air supply of your air system.
3. Level the air pressure to 6 bar using the control (B); the air pressure can
be read at the scale (C).
Attention
We recommend to switch off the air supply when the machine is not in duty.
Use the black control (B).
2.3
Elektrical installation
Hint
All work at the electrical components of the machine may only be carried by
qualified staff (qualified electrical employee or instructed person according to
IEC 364 and DIN EN 60204-1).
Danger
Parts under electrical current! Without cutting off the power supply, you might
be injured severely. Please obey the security advice given in chapter 1.
2-4
Attention
The machine will be destroyed by connecting to a wrong mains voltage!
Check, whether the requirements from chapter ‘Technical data’ meet the
local conditions.
1. Use the power cord located at the backside of the machine.
2. Plug it into a socket.
3. Lay the cord in a way, that the danger of stumbling is avoided.
Danger
Danger to life from unsufficient grounding! Do a grounding according to DIN
EN 60204-1.
2.4
First putting into operation
This machine has been configured to the individual requirements of the
customer. The first putting into operation can be done easily:
1. Adjust the machine to a horizontal stand.
2. Connect power and air supply.
3. Switch on the machine using the mains / emergency stop switch at the
front side of the machine.
4. Check all security systems for function and efficiency.
Danger
The machine may only be used for production purposes, after the security
systems have been checked. If a security doesn’t work adequately, it must be
repaired first.
As a factory setting, several production programs are contained in the buffer
of the machine. You may use one of them or create your own programs.
2-5
3
Programming instructions
3.1
Create new sewing programs
The following steps are required to create a new sewing program:
1. Select memory location (Mxx).
2. Add or copy seams.
3. Adjust the seams.
3.1.1
Select a M-memory location
Due to customer-specific configuration, several M-memory locations are
occupied by sewing programs. There are enough memory locations available
for new sewing programs.
Select an available memory locationz:
1. Press the M-key.
2. Enter the number of the desired memory location (e.g. 09).
If the memory location is available, seam No. 50 is assigned six times.
3.1.2
Add seams
If existing seams shall be used in the new program, you can remove the
seams of the memory location and add the desired seams like described in
part 1 of this manual.
If you want to create new seams, you will first have to assign new numbers to
the seams, which are not used in another program.
3.1.3
Copy seams
If existing seams shall be manipulated for the new program, the seams can
be copied to a new seam number. This allows to keep the original seams
unchanged:
1. Move the cursor to the seam number, where you want to copy another
seam to (e.g. No. 45).
2. Press the P-key.
3. Press F1.
4. Press F2.
5. Enter the number of the seam, which you want to copy (e.g. 10).
6. Press the ENT-key.
Now seam No. 10 has been copied to No. 45, a new number has been
assigned. Seam No. 10 and 45 are identic. If you need more new seams, you
can assign further seam number to the program (e.g. 46, 47, 48, a.s.o.) and
copy existing seams to these numbers.
3.1.4
Adjust seams
The seams copied to the seam number 45, ... can now be manipulated
without changing the original seams (which are used in other programs).
The following items can be adjusted:
• mitre knife position, seam length, a.s.o.
• seam functions
• seam parameters
• seam name
2-6
3.1.5
Name seams
To be able to distinguish seams, it is possible to define seam names. Follow
this procedure:
1. Press the P-key (opens the menu levels).
2. Press the key F5 (INIT-Parameter).
3. Press the key F1 (enter seam name).
4. The keys of the ten-key pad are occupied with letters, too. Each letter is
shown on its key with a color (blue, orange, green). Press one of the keys
F1...F3 together with a number key, to enter the desired letter (F1 blue, F2
orange, F3 green). Examples: A = F1 + 1; N = F2 + 5; U = F3 + 7.
5. Press the arrow keys to switch to the next or prior letter.
6. Press the P-key to terminate the entering and save the seam name.
3.1.6
Delete seams
An existing seam can be deleted.
ATTENTION
If a seam is used in several programs, it will be deleted in all programs. The
deletion of a seam can not be undone.
1.
2.
3.
4.
5.
3.2
Press the P-key.
Press F5.
Press F5.
Enter the number of the seam to be deleted.
Press the P-key to delete the seam.
Seam functions
Several machine functions can be enabled/disabled for single seams. Follow
this procedure to enable/disable a machine function:
1. Select the seam number using the arrow keys.
2. Press the P-key.
3. Press F2.
4. Select the desired function using the arrow keys.
5. Press the ENT-key to enable/disable the function.
6. Repeat steps 4. and 5. for all desired functions.
7. Press the P-key to leave the menu.
An enabled function is displayed inverted (white on black), a disabled
function black on white.
The functions are visualized with icons:
Center knife
cuts the pocket between the seams; if the center knife is disabled,
the mitre knife will be disabled automatically
Mitre knife
cuts the pocket edges; if the center knife is disabled, the mitre knife
will be disabled, too
Stacker
stacks the sewed parts automatically
2-7
Vacuum
keeps the parts in the insertion station, until the main clamp is
closed
Vylene
automatic supply with vylene
Stamp (option)
fixes the parts in the insertion station (3rd hand)
Piping blowing
piping is blown to the folder, to prevent a snapping during insertion;
should be enabled sewing thin parts
Folder up after seam end
increase of the production speed; earlier insertion of new parts is
possible
Flap clamp left
necessary if additional parts to the piping are inserted (e.g. pocket
bag, facing strips)
Flap clamp right
like flap clamp left (see above)
Seam shape trapeze jacket
breast welt production; left seam longer than right one
Seam form parallel
both needles work parallel
Seam shape trapeze troucers
left needle shorter than right one
Seam shape sloping pocket right
left seam with offset to the right one
Seam shape sloping pocket left
left seam with offset to the right one; mirrored to the right sloping
Piping pulling through (option)
turns the overlap of the piping (only during piping)
Photo cell left
necessary during sewing of left flap
2-8
Photo cell right
necessary during sewing of right flap
Positioning point front
calculation point for the seam start during sewing without flap
Positioning point middle
calculation point for the seam start during sewing without flap
Positioning point rear
calculation point for the seam start during sewing without flap
Zipper scissor (option)
during sewing an endless zipper, this function gives a stopcommand to the machine to allow the cutting of the zipper
3.3
Seam parameters
Several seam-depending machine processes can be set:
1. Press the P-key.
2. Press F3.
3. Select the desired seam parameter using the arrow keys.
4. Press ENT-key.
5. Enter the desired value.
6. Repeat steps 3. to 5. for all desired seam parameters.
7. Press the P-key to leave the submenu.
During the selection of the parameters, you can scroll line per line using the
vertical arrow keys. You can also select the pages directly:
• Key 0: seam parameters 01 - 14
• Key 1: seam parameters 10 - 23
• Key 2: seam parameters 20 - 33
• Key 3: seam parameters 30 - 40
The seam parameters listed below can be changed. The factory-set default
configuration are shown in square brackets [ ], the possible settings in
rounded brackets ( ).
1
Change positioning point 135/225/315 mm
the set value defines the relation point of the seam
2
Insertion speed [60%] (10-90%)
clamp speed from the insertion position to the sew start position; when
photo cell is active, speed will be halved to allow a more exact
scanning; when producing with vylene, reduction to 1/3
3
Revs seam start [1500 rpm] (500 - 2000 rpm)
sewing head revs freely selectable, depending on needle- and center
knife setting
4
Revs during seam [2500 rpm] (500 - 3000 rpm)
freely programmable
5
Revs at seam end [1500 rpm] (500 - 2000 rpm)
freely programmable
6
Distance of seam start revs [5 mm] (0 - 99 mm)
distance with the revs of parameter 3
2-9
7
8
9
10
11
12
13
14
15
16
17
18
19
20
21
22
23
24
25
26
27
30
31
2-10
Distance of seam end revs [5 mm] (0 - 99 mm)
distance with the revs of parameter 5
Stitch length seam start [1,5 mm] (0,5 - 3 mm)
stitch length at seam start for tack or stitch condensation
Stitch length in the seam [2,4 mm] (0,5 - 3,5 mm)
Stitch length seam end [1,5 mm] (0,5 - 3,0 mm)
freely selectable, effects on tack and stitch condensation at seam end
Distance stitch length seam start [10 mm] (0,5 - 99 mm)
distance with stitch length of parameter 8
Distance stitch length seam end [10 mm] (0,5 - 99 mm)
distance with stitch length of parameter 10
Tack length seam start [10 mm] (0 - 20 mm)
if this value is set to 0, stitch condensation will be sewed automatically
Tack length seam end [10 mm] (0 - 20 mm)
if this value is set to 0, stitch condensation will be sewed automatically
Slope at seam start [3 mm] ( 0 - 10 mm)
seam offset (difference left/right needle) at seam start
Slope at seam end [3 mm] (0 - 10 mm)
seam offset at seam end
Enable center knife [17 mm] (0 - 30 mm)
depending on seam and knife width, the center knife should cut est. 1
mm further than the mitre knife
Disable center knife [0 mm] (0 - 30 mm)
depending on seam and knife width, the center knife should cut est. 1
mm further than the mitre knife
Thread monitor on after [30 mm] (0 - 99 mm)
distance after which the thread monitor will be enabled; change this
parameter if seam length < 30 mm
Thread monitor filter [07] (00 - 99)
the smaller the digit, the more sensitive the upper thread monitor
reacts; 99: thread monitor disabled
Length vylene seam start [60 mm] (0 - 99 mm)
vylene overlay at seam start
Length vylene seam end [80 mm] (0 - 99 mm)
vylene overlay at seam end
Duration final roller [0,5 Sek.] (0 - 99 Sek.)
exact positioning of the work piece to be stacked
Intermediate stop selection + pos. [0 cm] (0 - 48 cm]
enter a position, where the main clamp shall be driven to after
stacking; 01 cm = main clamp is driven to the insertion station
Pick up part selection + pos. [0 cm] (0 - 48 mm)
if a value is defined, the main clamp pressure is released after mitre
cutting automatically and the work piece will be driven to the set
position; 01 cm = work piece is driven to the insertion station
Revs center knife [40%] (10 - 99%)
definition of the cutting speed
Revs final roller [99%] (10 - 99%)
a reduction achieves an optimized positioning for the stacking
Flap clamp mode >> see further below
Folding slide mode
00: left + right fold slider enabled
01: left fold slider enabled
02: right fold slider enabled
32
33
35
36
37
38
39
3.3.1
Vacuum mode (option)
00: vacuum disabled
01: vacuum on with foot pedal vacuum (with display ‘enable
vacuum’ if not enabled with foot pedal)
02: vacuum on automatically if main clamp at insertion position
03: vacuum on with foot pedal advance
Main clamp mode
00: main clamp left/right down and tight
01: main clamp left down and tigh
02: main clamp right down and tight
03: main clamp both weak, before insertion both tight
Stacker mode
01: only final roller
02: only folding stacker
03: folding stacker and final roller
Push-back locking off
00: Push-back locking enabled
01: Push-back locking disabled
Folder as stamp [00] (00 - 01)
00: normal insertion process enabled
01: with the first step on the foot pedal, the folder is lowered and
fixes the work piece; next step drives main clamp to insertion position;
after clamp is closed, the folder is pushed up to allow the insertion of
the vylene; only required for trouser production with pocket automaton
100/58 without stamp
Flap clam mode
00: flap clamp active with foot pedal
01: flap clamp automatically active
Breast welt mode
the breast welt will swing in together with the flap station
00: folder down after flap clamp closed
01: folder down when left flap clamp closed
Seam parameter 30: Flap clamp mode
In the control, you can switch on/off the left or right flap clamp and select one
of eight modes additionally; dependant on the selection, the flap clamp
behave different. In the following table, the mode number is shown in the first
column, the behaviour of the flap clamps is indicated with graphics.
left clamp closed
right clamp closed
left clamp open
right clamp open
Left and right flap clamp switched on:
00:
Insertion position
01:
like 00
02:
like 00
03:
like 00
04:
Insertion position
automatic with folding slide
05:
like 04
06:
like 04
07:
like 04
2-11
Left flap clamp switched on, right switched off:
00:
Insertion position
with foot pedal pressure
01:
like 00
02:
Insertion position
automatic with folding slide
with foot pedal pressure
03:
like 02
04:
Insertion position
automatic with folding slide
with foot pedal pressure
05:
like 04
06:
like 04
07:
like 04
Left flap clamp switched off, right switched on:
2-12
00:
Insertion position
with foot pedal pressure
01:
like 00
02:
Insertion position
automatic with folding slide
with foot pedal pressure
03:
like 02
04:
Insertion position
automatic with folding slide
with foot pedal pressure
05:
like 04
06:
like 04
07:
like 04
Both flap clamps switched on:
3.3.2
00:
Insertion position
with foot pedal pressure
with 2nd foot pedal pressure
01:
Insertion position
with foot pedal pressure
02:
Insertion position
automatic with folding slide
with foot pedal pressure
03:
like 02
04:
like 00
05:
like 01
06:
Insertion position
with foot pedal pressure
07:
like 06
Working WITHOUT automatic clamp push-back
Seam parameter 24 INTERMEDIATE STOP SELECTION + POS.
This parameter allows to define the positioning of the main clamp after
stacking.
Seam parameter 24 = 0 cm.
This setting causes the main clamp to wait on the mitre knife position, until
the foot pedal seam process is pressed.
3.3.3
Working WITH automatic clamp push back
Seam parameter 24 INTERMEDIATE STOP SELECTION + POS.
Seam parameter 24 = 01 cm
With this setting the main clamp will be driven to the insertion position after
stacking. Pressing the foot pedal seam process closes the main clamp.
3.3.4
Working with INTERMEDIATE STOP of the main clamp
Seam parameter 24 = 20 cm
With this setting the main clamp will be driven until 20 cm before the insertion
position after stacking. Press the foot pedal seam process to drive the main
clamp to the insertion position.
If a different intermediate position of the main clamp is required, it can be
achieved by changing the SP 24. The higher the value the larger is the
distance between intermediate and insertion position.
3.3.5
Working with automatic PICK UP PART using the main clamp
Seam parameter 25 = PICK UP PART + POS.
Seam parameter 25 = 00 cm
Pick up part using the main clamp is disabled.
Seam parameter 25 = 01 cm
Pick up part using the main clamp until the insertion position.
The main clamps will be lifted after mitre cutting and SP 23 (duration final
roller) is carried out. The final roller pulls the work piece a little out of the
open main clamp. Now the main clamp is lowered after the time of basic
parameter 28 and drives with the work piece to the insertion position.
2-13
Seam parameter 25 = 01 cm
When defining SP 23 (duration final roller) = 00 and NSP 23 = 00 sec., the
final roller won’t get active; the main clamp remains closed and drives without
clamp pressure to the insertion position.
Seam parameter 25 = 20 cm
Pic up parts with the main clamp until 20 cm before the insertion position.
2-14
3.4
Seam images
3.4.1
Sewing with catch
3.4.2
Sewing with stitch condensation
3.4.3
Sewing with stowing
3.5
Basic parameters
The basic parameters contain the general settings of the machine. Changes
effect all programmed seams.
Attention
As a factory setting, the basic parameters are optimized. Improper changes
may cause faults in the machine process, which may lead to a reduction of
quality and damages to the machine.
Follow this procedure to changes basic parameters:
1. Press the P-key.
2. Press F4.
3. Select the desired basic parameter using the arrow keys.
4. Press ENT-key.
5. Enter the desired value.
6. Repeat steps 3. to 5. for all desired basic parameters.
7. Press the P-key to leave the submenu.
During the selection of the parameters, you can scroll line per line using the
vertical arrow keys. You can also select the pages directly:
• Key 0: basic parameters 01 - 14
• Key 1: basic parameters 10 - 23
• Key 2: basic parameters 20 - 33
• Key 3: basic parameters 30 - 40
The following basic parameters can be changed [factory-set values in square
brackets]:
01
Front positioning point [135 mm]
distance between insertion position and seam start; if seam length is
changed only the seam end is varied
02
Middle positioning point [225 mm]
with this setting the seam start is calculated that if the seam length is
changed, seam start and end are delayed the same; is used for back
pocket with dart, if dart shall be positioned in the middle of the pocket
03
Rear positioning point [315 mm]
distance between insertion position and seam end; if seam length is
changed, only the seam start is varied
Length of main clamp
165 mm
set value
205 mm
245 mm
285 mm
290 mm
330 mm
Attention
This parameter defines the end of the main clamp. If this parameter is set too
large, there may be sewing problems while sewing flaps.
04
05
08
09
Folder up after [335 mm]
time of the folder lifting after the seam; if distance too short, folder gets
caught by the fold pushers
Thread length full spool [57 m]
a wrong thread length leads to incorrect values in the display of
remaining thread
Clamp down automatically
if defined, the main clamp closes after reaching the insertion position
and the set time
Time after clamp down
time delay between clamp down and next operation
2-15
11
16
17
18
19
20
21
22
23
24
25
26
27
28
29
30
31
32
33
34
2-16
Before zipper (zipper clamp) clamp lateral (option)
Time before insertion
after the set time the main clamp drives from the insertion position to
sewing start (foot pedal machine process pressed)
Piping blowing off
piping and flap are blown to the folder, to prevent a tilt movement of
the piping; time may not be too long, since otherwise the thread will be
blown to the needle
‘Thread clamp open’ at seam start (Beisler sewing head)
after the first two stitches the upper threads should be released from
the thread clamp; after the time defined here, the thread clamp opens
‘Thread clamp open’ - duration
duration of ‘thread clamp open’ at seam start
Point stitches during sewing
allows one or several stitches at seam start and end to meet the end
point exactly
Cut til upper thread
time for catching and cutting of the upper thread
Upper thread cutting time
length of the threads after upper threads picked up
Scissor cutting time
influences the zipper scissor to cut the zipper completely before
moving to the end position
Drive to cutting
percentage of the clamp speed used by the main clamp to drive to the
mitre knifes
Mitre knife distance
distance between the mitre knifes
Mitre knifes cutting time
cutting time of the mitre knifes
Main clamp open
open the main clamp after mitre cutting; if time’s too short, the work
piece may slip out of the machine before taken by the stacker
Taking parts
when taking parts with weak clamp (inner pocket production) the main
clamp opens after mitre cutting, the final roller moves the part lateral
from the clamp; then the clamp is switched with this parameter, that
the main clamp detects the work piece faster and brings it to the
insertion position
Turn til final roller [0.1 sec.]
time for the start of the final roller
Time til final roller up [0.5 sec.]
keeping the work piece after rolling, until the stacker has taken the
work piece
Clamp speed [90%]
speed of the main clamp to the insertion position
Process step-by-step [00]
enter >01 to enable the switching of all machine functions
Remaining thread counter on/off [00] (option)
function can be enabled and disabled; 01 = remaining thread
monitoring on; this disables the spool thread counter
Thread cutter revs [250 Rpm]
positioning revs for threat cutting systems:
Beisler sewing head
250 Rpm
Pfaff sewing head
180 Rpm
Singer sewing head
250 Rpm
35
36
37
38
Thread cutter position [45] (01 - 59)
start correction threat cutter impulse; the smaller the number, the
earlier the bobbin threat cutter is started
Threat cutter duration [0,1 Sek.]
duration of bobbin threat cutter should be minimized, otherwise the
main clamp is already driving
Piping turn delay [00 mm]
37: after the mitre cutting, the main clamp drives the distance set here
in mm.
Piping turn duration [0,0 Sek.]
05: impulse duration for the piping turn
2-17
4
Troubleshooting hints
The following tables show possible error messages and the recommended
reactions of the operator. Error messages are imaged in the display of the
operating device.
Attention
Please obey the recommended actions in case of errors. Otherwise you
could damage the machine. In this case, producer’s warranty would be
spoiled. We won’t accept any liability for caused damage.
Error message
Circumstances
Recommended actions
Error 01: Sewing
program empty
current sewing program is empty,
possibly distances and values are
not entered or the whole program is
deleted
enter program values manually if required; copy
from other programs or load from the memory
(INIT parameter)
Error 02: Seam not
enabled
current seam not enabled; No. is
shown black on white
Press ENT-key to enable the seam
Error 05: I/O communication error
transfer error between controls and
I/O module
check connecting wire; if not successful, change
controls and/or I/O module
Error 06: Path pulses
not valid
wrong position of the clamp sledge
check generator connection to clamp enginecheck flat conductor plug of adaption module
9020020 > 9020013change adaption module
9020020
Error 07: No path pulses
from engine
no path pulses from clamp engine;
if the clamp engine has done a
small movement, the path pulses
couldn’t be processes adequately
check connection to clamp enginechange clamp
enginechange adaption module 9020020
if the engine doesn’t work, the fault
is in the activation or the power part
of the clamp engine
check condition of the diodes at the power card
(Berger); do further examinations according to the
Berger engine diagnosticscheck connection to
clamp engine (plug)check connection 9020020 >
power insert (plug)change adaption module
9020020
Error 08: Main clamp at
the stop
limitation switch ES01 or ES17 has
switched during clamp move,
although the clamp is at a distance
check distance counter using the test program
(path steps); if counter defective, change clamp
engine or adaption board 9020020if counter OK,
check both switches and connections
Error 09: Clamp can’t
leave the switch
clamp sledge drives to the termination switch after initialisation but
cannot leave the switch (no change
of direction)
enter a small speed with test program ‘Clamp
engine control’ and change direction using the
arrow keys; check if engine doesn’t change
direction:connection 9020020 > power insert
(plug)Berger power partif the engine changes
direction, check termination switch ES 17
Error 10: A piece is
inserted
push back barrier (photo cell ES27)
is not lighted
check photo cell and film
Error 11: Enable vacuum before
vacuum enabled with mode Par32
= 01, but not switched on before
sewing start
switch on vacuum or change vacuum mode
Error 12: Interface end
interface monitor (photo cell 21)
detects interface end
insert new interface roll or check photo cell
2-18
Error 13: Error clamp
position
difference between must and real
position (impulses from incremental
Gerber) of the clamp sledge is too
big; clamp sledge blocked
removed the blocking partcheck clamp sledge for
easy goingcheck engine piniontighten transport
belt
Error 14: Insertion /
seam length wrong
back insertion point is selected;
seam length longer than the distance to the back insertion point
program lengths correctly
Error 15: Stamp not up
stamp hasn’t reached the top
position after switching off
check cylinder, gauge Y20, termination switch
ES19
Error 16: Folder not
straight
folder hasn’t reached middle
position within error time
check cylinder, gauge Y15, termination switch
ES05
Error 17: Folder not up
folder hasn’t reached top position
within error time
check cylinder, gauges Y24 Y25, termination
switches ES03 ES04
Error 18: Folder not
down
folder hasn’t reached position within
error time
check cylinder, gauges Y24 Y25, termination
switches ES03 ES04
Error 19: Folder not
sloping
folder hasn’t reached position
‘sloping’ (for picking) within error
time
check cylinder, gauge Y15, termination switch
ES06
Error 20: Knifes not
together
the mitre knife hasn’t reached start
position before sewing insertion
check termination switch ES20check connection
to mitre knife engine (plug)check diodes on
Berger power cardcontinue search acc. to Berger
engine diagnostics
Error 21: Mitre knife not
up
mitre knife couldn’t reach top
position within error time
check cylinder, gauges Y03 Y48, termination
switch ES13
Error 22: Front mitre
knife not down
front mitre knifes (seam end)
couldn’t reach bottom position
within error time
check cylinder, gauge Y04, termination switch
ES19
Error 23: Rear mitre
knife not down
rear mitre knifes (seam start)
couldn’t reach bottom position
within error time
check cylinder, gauge Y04, termination switch
ES18
Error 24: Scissor not up
scissor couldn’t reach top position
within error time
check cylinder, gauges Y21 Y22, termination
switch ES14
Error 25: Scissor not
down
scissor couldn’t reach cutting
position within error time
check cylinder, gauges Y21 Y22, termination
switch ES15
Error 26: Pinole not up
the pinole for flap turning couldn’t
reach top position within error time
check cylinder, gauge Y59, termination switch
ES41
Error 27: Pinole not
down
bottom position not reached within
error time
check cylinder, gauge Y59, termination switches
ES39 ES40
Insert: see right-handed side
Error 52: Flap station
not in starting position
flap station couldn’t reach starting
position within error time
check cylinder, gauge Y17, termination switch
ES07
Error 53: Pocket bag
station not in starting
position
Pocket bag supply couldn’t reach
starting position within error time
check cylinder, gauges Y18 Y19, termination
switch ES11
Error 54: Station not
locked
folder station not locked
lock stationcheck termination switch ES02
2-19
Error 28: No impulses
from sewing engine
no impulses from sewing engine
after sewing start (engine doesn’t
work)
check sewing engine and synchronizationcheck
connection 9020013 > sewing engineread two
upper diodes at 9020013: left lights shortly if
needle in top position; right shows synchronizator
impulses (512 impulses per turn); if none lights
while turning the hand wheel, check power
supply; possibly change sewing engine
if diodes are working and engine doesn’t move
before error message, check connection 9020020
> sewing engine; possibly change 9020020 or
engineif engine works shortly before error message, check connection controls > I/O module;
possibly change components
Error 29: Sewing engine
too fast
during thread cutting the sewing
enginge couldn’t reach cutting
speed within error time
change sewing engine or synchronizator
Error 30: Thread cutter
position doesn’t come
the sewing engine hasn’t reached
the position for thread cutting
set a slower cutting speedset an earlier cutting
positionchange sewing engine or synchronizator
Error 33: Sewing engine
doesn’t stop
engine doesn’t stop within error
time after thread cutting
set a slower cutting speed; set an earlier cutting
position; change sewing engine or synchronizator
Error 34: Needle not up
needle couldn’t reach the top
position; with the error message the
control tries to put the needle into
the top position again
check sewing engine and synchronizator; check
connection 9020013 > sewing engine; read two
upper diodes at 9020013: left lights shortly if
needle in top position; right shows synchronizator
impulses (512 impulses per turn); if none lights
while turning the hand wheel, check power supply;
possibly change sewing engine
if diodes are working and engine doesn’t move
before error message, check connection 9020020
> sewing engine; possibly change 9020020 or
engine
Error 35: Thread broken
threat monitor detects breakage
Error 36: Spool empty
mode ‘Bottom thread counter’
enabled; remaining length is zero
Error 37: Spool only
residual
one of the photo cells at the spool
capsule is lighted, the spool is
empty
if both spools are not empty, one photo cell
reflects the thread and must be set smaller
Error 41: No flap
automatic flap legth detection with
phot cell is enabled but no flap is
detected
insert flapcheck photo cell ES31 and film
Error 42: Photo cell not
lighted
automatic flap length detection with
photo cell enabled; no flap within
the security length detected
program a longer security lengthswitch off supervision (enter 250 mm as seam length)check photo
cell ES31 and film
Error 43: Photo cell
lighted too early
automatic flap length detection with
photo cell enabled; photo cell
detected flap end too early
program a shorter security lengthswitch off
supervision (enter 250 mm as seam length);
check photo cell ES31 and filmset photo cell
sensitivity smaller (reflections?)
Error 45 ... 48: I/O
DACI/O ULNI/O 485I/O
RES
internal hardware errors during data
transfer to adaption board 9020020
change 9020020
Error 51: Flap station
doesn’t swing
flap station couldn’t reach the active
position within error time
check cylinder, gauge Y17, termination switch
ES08
Continuation: see bottom of left-handed side
2-20
5
Maintenance of the machine
This machine works nearly free of maintenance. To achieve the maximum
ability of the machine for a long term, some regular maintenance duties are
required.
Danger
Before starting maintenance and repair duties, the following power down
procedures are to be executed. Otherwise there could be danger to life!
Cut off mains power
•
•
switch the mains / emergency stop switch to '0' and assure that it can't be
switched on
check whether the machine is without current and that there is no statical
loading
Switch off pneumatic system
•
•
5.1
close the main gauge
ventilate all pipes and gauges
Water separator at air connector
The air connector is equipped with an automatic water separator. If the air
supply looses pressure, the contained water will be let out automatically.
5.2
Grease linear guiding
At least once a year, the linear guiding must be greased with normal ballbearing grease:
2-21
5.3
Use of the Memory Card
The Memory Card allows to save created seams and/or seam orders on a
removable data cartridge or load them back into the machine.
Hint
We strongly recommend to save own seams or seam orders on the Memory
Card, since otherwise they might get lost in case of an defective EPROM or
possbile other faults.
ATTENTION
The Memory Card contains a battery which is good for est. 2 to 3 years. If the
battery is empty, the saved data will get lost in a short period of time. Don’t
forget to change the battery in time and then save the machine data on the
Memory Card again.
5.3.1
Saving seam data on the Memory Card
1. Insert the Memory Card into the corresponding slot in the front panel of
the operating device (see operating instructions).
2. Press the P-key.
3. Press the F6-key.
4. Press the F2-key.
5. Press one of the keys F1, F3 or F5 (see further below).
6. Confirm by pressing the ENT-key.
You can use one of serveral possibilities to save data on the Memory Card.
Press the key
F1
to save the active seam (which is currently displayed in the
operating device) on the Memory Card;
F3
to save all seam orders;
F5
to save all variables.
If you want to save all your data on the Memory Card, you should press the
F5-key.
5.3.2
Loading seam data from the Memory Card
ATTENTION
Seam data from the Memory Card overwrite the data saved in the operating
device. If you have changed your seams, you will have to save them on the
Memory Card.
1. Insert the Memory Card into the corresponding slot in the front panel of
the operating device (see operating instructions).
2. Press the P-key.
3. Press the F6-key.
4. Press the F2-key.
5. Press one of the keys F2, F4 or F6 (see further below).
6. Confirm by pressing the ENT-key.
2-22
You can use one of serveral possibilities to load data from the Memory Card.
Press the key
F2
to load the active seam (which is currently displayed in the
operating device) from the Memory Card;
F4
to load all seam orders;
F6
to load all variables.
If you want to load all your data from the Memory Card, you should press the
F5-key.
5.4
Loading data from the EPROMs
If desired, you can load the factory-set basic and seam parameters from the
EPROMs (not from the Memory Card). This can be necessary after a
complete loss of data.
5.4.1
Loading the basic parameters
1. Press the P-key.
2. Press the F5-key.
3. Press the F3-key.
4. Enter the number ‘1’ and press the ENT-key.
The basic parameters saved in the EPROM will be loaded and overwrite the
parameters saved in the operating device. This resets the basic parameters
to factory-set conditions.
5.4.2
Loading seam parameters
1. Press the P-key.
2. Press the F5-key.
3. Press the F4-key.
4. Enter the number ‘1’ and press the ENT-key.
The seam parameters saved in the EPROM will be loaded and overwrite the
parameters saved in the operating device. This resets the seam parameters
to factory-set conditions.
5.5
Test programs and diagnostics
This machine contains a huge variety of test programs, with which all
functions can be individually tested.
5.5.1
I/O-Test
1. Press the P-key.
2. Press the F6-key.
3. Press the F1-key.
4. Execute the desired actions (see further below).
5. Press the P-key to end the test.
All inputs with their numbers will be displayed in the upper half of the display.
The inputs displayed inverted are currently active.
All outputs with their numbers are displayed in the lower half of the display.
The outputs displayed inverted are currently active.
You can now select an output using the arrow keys and activate or deactivate it by pressing the ENT-key. If you press the ENT-key longer than two
seconds, the output switches between active and de-active, unitl you press
the ENT-key again (shortly).
The following inputs and outputs are available in this machine.
2-23
5.5.1.1
Available inputs
Inputs pocket welting machine 100-58
Standard equipment
Input S-No Description
Type
Connected Remarks
01
01
Clamp at front
Initiator
Opener
X24 Pin 02
04
04
Folder down
Initiator
Closer
X24 Pin 05
13
13
Center knife up
Initiator
Closer
X24 Pin 06
17
17
Clamp back
Initiator
Opener
X24 Pin 03
18
18
Mitre knife down NE
Initiator
Closer
X24 Pin 07
19
19
Mitre knife down NA
Initiator
Closer
X24 Pin 08
20
20
Mitre knifes together
Initiator
Closer
X24 Pin 09
22
22
Foot switch forwards
Foot sw.
Closer
X24 Pin 01
Options
03
03
Folder up
Initiator
Closer
X24 Pin 04
09
09
Dart stretcher up
Initiator
Closer
X27 Pin 20
10
10
Clamp quick adjustment
Initiator
Closer
X27 Pin 21
14
14
Scissor up (home position)
Initiator
Opener
X27 Pin 22 or as folder safety switch
15
15
Scissor cown (cut position)
Initiator
Closer
X27 Pin 23
21
21
Vylene end
Photocell
Photocell
X27 Pin 24
23
23
Foot switch vacuum
Foot sw.
Closer
X24 Pin 12
26
26
Switch reset
Foot sw.
Closer
X24 Pin 13
27
27
Clamp stop photocell
Photocell
Photocell
X24 Pin 11
28
31
Photocell left
Photocell
Photocell
X24 Pin 10
32
Switching single welt jacket/trouser
Initiator
Closer
direct
32
33
Photocell right
Photocell
Photocell
X27 Pin 17
35
35
Thread monitor F&P
Photocell
36
Zipper transport
Micro sw.
Closer
direct
38
38
Bobbin detector
Photocell
Photocell
X27 Pin 29
39
39
Pocket weltturn dev. down seam start Initiator
Closer
X27 Pin 30
40
40
Pocket weltturn dev. down seam end Initiator
Closer
X27 Pin 31
41
41
Pocket welt turn dev. up seam start
Closer
X27 Pin 32
2-24
Initiator
X27 Pin 25
5.5.1.2
Available outputs
Standard equipment
No.
Description
Valve No.
Cylinder
No.
Occupation
State
01
Bobbin threat cutter
Y01
01
X25 Pin 01
03
Center knife motion
Y03
03
X26 Pin 26
04
Mitre knife up
Y04
04/04.1
X25 Pin 16
11
Tension release
Y11
11
X25 Pin 02
24
Folder upwards
Y24
24
no airpressure
X25 Pin 07
25
Folder downwards
Y25
25
no air pressure
X25 Pin 08
Clamp quick adjustment
Y32
32
33
Pocket pouch clamp right
Y33
33
X26 Pin 20
34
Folding slide left
Y34
34
X25 Pin 13
35
Folding slide right
Y35
35
X25 Pin 14
36
Pocket pouch clamp left
Y36
36
X26 Pin 19
38
Both main clamps open
Y38
39/40
no air pressure
X25 Pin 04
39
Main clamp left
Y39
39
no air pressure
X25 Pin 05
40
Main clamp right
Y40
40
no air pressure
X25 Pin 06
41
Top threat catcher
Y41
41
X25 Pin 03
48
Center knife actuator
Y48
48
X25 Pin 15
Options
12
Mitre knife middle stop
Y12
05
Mitre knife left seam end
Y05
05.1
X25 Pin 11
06
Mitre knife left seam start
Y06
06
X25 Pin 12
53
Needle switch off right
Y53
53
no air pressure
X26 Pin 22
54
Needle switch off left
Y54
54
no air pressure
X26 Pin 23
09
Vylene cutting
Y09
9
X26 Pin 31
51
Vylene release
Y51
51
X26 Pin 30
60
Vylene feed motion
Y62
60
X26 Pin 29
13
Stacker
Y13
23
Take off roller
Y23
23
X26 Pin 17
20
Dart stretcher
Y20
20
X26 Pin 25
21
Scissor swing in
Y21
21
X26 Pin 28
22
Scissor cut
Y22
22
X26 Pin 27
10
Vacuum
Y10
10
X25 Pin 10
42
Piping blowing system
Y42
01
X26 Pin 21
X26 Pin 18
X25 Pin 09
Clamp quick adj. trouser/jacket Y50
50
Blowing bobbin detector
56
Y55
X25 Pin 01
2-25
02
Main clamp laterally
Y02
2
X35 pin 14
56
Pocket welt turner device bed slide
Y56
56
X26 Pin 22
57
Pocket welt t. device outside seam st. Y57
57
X25 Pin 12
58
Pocket welt t. device outside seam e. Y58
58
X25 Pin 11
59
Pocket welt turner device up
Y59
59
X26 Pin 21
31
Zipperfinger move
Y60
60
X26 Pin 23
32
Ziipperfinger up/down
Y61
20
Needle strip big
Y08
5.5.2
X26 Pin 24
08/08.1
X26 Pin 25
Diagnostics
1. Press the P-key.
2. Press the F6-key.
3. Press the F3-key.
Here you can choose from six different sub-menus, with which you are able
to check system components individually.
5.5.2.1
Service Test
ATTENTION
These tests may only be executed by service technicians of the company
Beisler. The complete loss of all data can easily occur due to false
operations.
5.5.2.2
Sewing motor
1. Press the P-key.
2. Press the F6-key.
3. Press the F3-key.
4. Press the F2-key.
Here, four tests for the sewing motor are contained. Select the desired test
by pressing the corresponding F-key:
F1
Select sewing motor
Here the actual value is compared with the must value of revs of the sewing
motor. After opening the test, you can enter the desired revs using the
number keys.
ATTENTION
The insertion station must be swung out and all threats and bobbins must be
removed from the sewing head before the test can be executed. Beisler
sewing heads may only be run with revs up to 2500 Rpm.
Enter the desired revs of the motor and press the ENT-key. The sewing head
starts and the measured actual value is displayed.
Press the P-key to terminate the test.
2-26
F2
Threat cutter
ATTENTION
The insertion station must be swung out and all threats and bobbins must be
removed from the sewing head before the test can be executed.
Press the 0-key (zero) and the sewing head runs for a short time. After the
needle has been positioned, the threat cutter gets active (basic parameter
36: TC duration).
F3
Position actor
ATTENTION
The insertion station must be swung out and all threats and bobbins must be
removed from the sewing head before the test can be executed.
After the selection of this test, the ‘Hand wheel increments’ and ‘Hand wheel
position’ will be displayed. By turning the hand wheel to the left or right, the
increments will be counted. There must be 520 increments per turn.
To check the needle-up-position, press the 0-key (zero) and the needle will
be positioned. There should be 510 increments displayed now. This value
should not deviate for more than 1 increment.
F4
Sewing motor
This function can be used to transfer the parameters required for the sewing
motor from the control. After changing the control or seam motor, the
execution of this function is required.
Select the function and press the ENT-key. The data will be transferred
automatically. Switch off the machine using the mains switch. After switching
on the machine again, the data will be loaded automatically.
5.5.2.3
Clamp motor
1. Press the P-key.
2. Press the F6-key.
3. Press the F3-key.
4. Press the F3-key.
Here three test functions for the clamp motor are contained:
F1
Clamp motor path steps
This function measures the path steps of the clamp path (see Technical
manual, 1.20.2).
F2
Select clamp motor
ATTENTION
This function may only be executed by service technicians of the company
Beisler or authorized and especially trained staff.
F3
Clamp motor long-term test
Hint
The main clamp must be driven into starting position (clamp on initiator 17)
before this function can be executed.
2-27
Select the function and press the ENT-key. The main clamp moves back and
forth with high speed and must change direction at the same position.
5.5.2.4
Mitre knife motor
1. Press the P-key.
2. Press the F6-key.
3. Press the F3-key.
4. Press the F4-key.
Here two test functions are contained:
F1
Select mitre knife motor
ATTENTION
This function may only be executed by service technicians of the company
Beisler or authorized and especially trained staff.
F2
Mitre knife motor long-term test
Before execution, the movable mitre knife must be moved into starting
position (on intitiator 20).
Select the function and press the ENT-key. The mitre knife moves back and
forth with constant speed and must change direction always at the same
position.
Turn the mains/emergency stop switch to terminate the function.
5.5.2.5
Center knife motor
1. Press the P-key.
2. Press the F6-key.
3. Press the F3-key.
4. Press the F5-key.
Enter a value between 01 ... 99 to check the speed of the center knife motor.
Press the ENT-key to switch off the motor again.
If the center knife shall be switched on additionally, press the 0-key (zero).
You can also stop the center knife by pressing the ENT-key.
Press the P-key to terminate this function.
5.5.2.6
Final roller
1. Press the P-key.
2. Press the F6-key.
3. Press the F3-key.
4. Press the F6-key.
Enter a value between 01 ... 99 to check the speed of the final roller. Press
the ENT-key to switch off the motor again.
Press the P-key to terminate this function.
5.5.3
Service Code
Here two codes are contained, whith which all or only a part of the machine
data can be locked.
2-28
5.5.3.1
Machine Code
This is required to copy seam parameters, basic parameters or seam
programs and to select a part of the diagnostic programs.
The code number is ‘50190’. If this code is disabled due to safety reasons,
‘00000’ must be entered.
5.5.3.2
Safety Code
This code is required for the execution of most of the diagnostic functions. It
can be ordered in written form giving the machine number from the service
department of the company Beisler.
5.6
Preset sewing programs
The following shows the factory-set structure of the seams in the memory
buffer:
Seam-No.
Seam
01 ... 09
Jacket outside pocket; with/without flap
10 ... 19
Jacket outside pocket; slanted pocket / slanted flap
20 ... 29
Inside pocket; lining pocket with pelon
30 ... 39
Pants pocket; pants front/back pocket with/without flap
40 ... 49
Pockets with zipper
The following shows the factory-set occupation of several memory locations
with seams:
Memory loc.
Seam
M01 01
Flap pocket; jacket right panel
02
Flap pocket; jacket left panel
03
Welt pocket; jacket right panel
04
Welt pocket; jacket left panel
M02 10
Slanted pocket with flap; right panel
11
Slanted pocket with flap; left panel
12
Slanted welt pocket; right panel
13
Slanted welt pocket; left panel
M03 20
Jacket inside pocket with pelon; pocket length 100 mm
21
Jacket inside pocket with pelon; pocket length 100 mm
22
Jacket inside pocket with pelon; pocket length 150 mm
23
Jacket inside pocket with pelon; pocket length 150 mm
M04 30
Pants back pocket
31
Pants front pocket
32
Pants back pocket with flap
33
Pants back pocket with button loop
M05 40
Pocket with zipper
41
Pants back pocket with zipper
M07 16
Jacket breast welt pocket
2-29
5.7
2-30
Diagram of the menu structure
Part 3
Technical manual
Hint
This Technical manual contains information for the further maintenance,
adjustment and troubleshooting. It adresses axclusively to trained and
experienced technical staff, which is able to assess the tasks and recognize
possible danger at an early moment. The prior parts of this documentation ‘1
Operating instructions’ and ‘2 Mechanics manual’ are to be considered as
parts of the Technical manual.
Contents
Part 3
0.1
0.2
0.3
0.4
0.4.1
0.4.2
1
1.1
1.2
1.3
1.4
1.5
1.6
1.7
1.8
1.10
1.9
1.11
1.12
1.13
1.15
1.14
1.16
1.17
1.18
1.19
1.20
1.20.1
1.20.2
1.20.3
2
2.1
2.2
2.3
2.4
2.5
2.6
2.7
2.8
2.9
2.10
2.10.1
2.10.2
2.10.3
2.10.4
2.10.5
Page
Technical manual ................................................................................................. 3-1
Reason for this manual .......................................................................................... 3-3
Structure of the manual ......................................................................................... 3-3
Safety instructions ................................................................................................. 3-3
Preparing measures .............................................................................................. 3-4
Cut off power supply .............................................................................................. 3-4
Release pneumatic pressure ................................................................................. 3-4
Clamp adjustment................................................................................................ 3-5
Clamp drive belt ..................................................................................................... 3-5
Adjust axial free play of the clamp arms ................................................................ 3-6
Parallelity of the clamp arms to the sewing head................................................... 3-6
Lateral adjustment of the double piping ................................................................. 3-6
Lateral flap adjustment .......................................................................................... 3-6
Adjust main clamp height....................................................................................... 3-7
Adjust main clamp pressure .................................................................................. 3-7
Main clamp pressure distribution ........................................................................... 3-7
Clamp quick adjustment jacket/trouser (option) .................................................... 3-8
Clamp quick adjustment double/single piping (option) .......................................... 3-8
Lateral clamp adjustment without quick adjustments ............................................ 3-9
Clamp adjustment double piping – flap without quick adjustment ......................... 3-9
Adjust folding slide path ......................................................................................... 3-9
Adjust folding slide ............................................................................................... 3-10
Adjust parallelity of folding slide ........................................................................... 3-10
Flap clamp position .............................................................................................. 3-10
Opening path of the flap clamp ............................................................................ 3-11
Photo cell foil ....................................................................................................... 3-11
Check/change clamp rubber ................................................................................ 3-11
Adjust clamp path ................................................................................................ 3-12
Adjust front stop ................................................................................................... 3-12
Measure clamp path ............................................................................................ 3-12
Adjust back stop rubber ....................................................................................... 3-12
Adjustments at the insertion station ............................................................... 3-13
Folder height ........................................................................................................ 3-13
Initiator at the insertion plate ................................................................................ 3-13
Folder free play .................................................................................................... 3-13
Folder parallel to main clamp............................................................................... 3-13
Adjust piping width ............................................................................................... 3-14
Center knife protection ......................................................................................... 3-14
Lateral distance of the guiding plate to the needle .............................................. 3-14
Height stop of the guiding plate ........................................................................... 3-15
Pressure of the guiding plate ............................................................................... 3-15
Adjust marking lamps .......................................................................................... 3-15
Adjust parallelity ................................................................................................... 3-15
Adjust distance .................................................................................................... 3-15
Size of the light cross ........................................................................................... 3-16
Focussing sharply ................................................................................................ 3-16
Demount and mount marking lamps .................................................................... 3-16
3-1
2.10.6
2.11
2.11.1
2.11.2
3
3.1
3.2
3.3
3.4
3.5
3.6
3.6.1
3.6.2
3.6.3
3.6.4
3.6.5
3.6.6
3.6.7
3.6.8
3.7
3.7.1
3.7.2
3.7.3
3.8
3.9
3.10
3.10.1
3.10.2
3.11
3.12
3.12.1
3.12.2
4
4.1
4.2
4.3
4.4
4.5
4.6
4.7
4.8
5
5.1
5.2
5.3
5.3.1
5.3.2
5.3.3
5.3.4
5.3.5
5.3.6
5.4
5.4.1
5.4.2
5.5
5.5.1
5.5.2
5.5.3
5.5.4
5.5.5
5.5.6
3-2
Change light mask ............................................................................................... 3-16
Dart stretcher ....................................................................................................... 3-16
Fixing in the guiding plate .................................................................................... 3-16
Magnet switch at the dart stretcher cylinder ........................................................ 3-16
Adjustments at the sewing head ...................................................................... 3-17
Height adjustment ................................................................................................ 3-17
Lateral adjustment ............................................................................................... 3-17
Driving belt tension of the sewing motor .............................................................. 3-17
Top threat cutter (Beisler sewing head) ............................................................... 3-18
Height of top threat catcher ................................................................................. 3-18
Center knife adjustments ..................................................................................... 3-18
Switching on ........................................................................................................ 3-18
Switching off ........................................................................................................ 3-18
Safety initiator at the center knife pole ................................................................. 3-18
Depth adjustment of the safety initiator ............................................................... 3-18
Height of center knife ........................................................................................... 3-19
Shear angle of the center knife ............................................................................ 3-19
Lateral adjustment ............................................................................................... 3-19
Needle protection ................................................................................................. 3-19
Adjustments of the bobbin threat catcher (Beisler sewing head) ......................... 3-20
Catcher adjustment .............................................................................................. 3-20
Time of bobbin threat cutting ............................................................................... 3-20
Duration of bobbin threat cutting .......................................................................... 3-20
Sensitivity of the bobbin detector (option) ............................................................ 3-20
Clean tactual head of the bobbin detector (option) .............................................. 3-21
Adjust piping detection ......................................................................................... 3-21
Lateral adjustment ............................................................................................... 3-21
Adjust intensity ..................................................................................................... 3-21
Swing up sewing head ......................................................................................... 3-22
Upper threat monitor ............................................................................................ 3-22
Switch on time ..................................................................................................... 3-22
Filter threat monitor .............................................................................................. 3-22
Adjustments at the mitre knifes ....................................................................... 3-23
Basic adjustment locked mitre knife (seam end) ................................................. 3-23
Basic adjustment movable mitre knife (seam start) ............................................. 3-23
Mitre knife height ................................................................................................. 3-23
Mitre knife broadth ............................................................................................... 3-23
Pre-stabber .......................................................................................................... 3-24
Lateral adjustment ............................................................................................... 3-24
Fine adjustment in the length ............................................................................... 3-24
Tighten cog-belt of the mitre knife drive ............................................................... 3-24
Adjustment of machine options ....................................................................... 3-25
Automatic push-back blocking ............................................................................. 3-25
Height of the take off roller ................................................................................... 3-25
Mitre knife slant position ...................................................................................... 3-26
Distance between basic bodies ........................................................................... 3-26
Height adjustment ................................................................................................ 3-26
Center adjustment ............................................................................................... 3-26
Adjust mitre knife stops ........................................................................................ 3-26
Knife arrangement ............................................................................................... 3-26
Arrangement of the mitre knife during flap pocket production ............................. 3-27
Split needle (Beisler sewing head) ....................................................................... 3-27
Distance to cylinder of the top threat catcher ...................................................... 3-27
Center adjustment ............................................................................................... 3-27
Vylene adjustments .............................................................................................. 3-27
Correct vylene adjustment ................................................................................... 3-27
Demount vylene plate .......................................................................................... 3-28
Change cutting pressure...................................................................................... 3-28
Adjust vylene supply ............................................................................................ 3-28
Easy-running of the vylene roll ............................................................................ 3-28
Vylene supply speed ............................................................................................ 3-28
0.1
Reason for this manual
With this manual, especially qualified and authorized persons shall be
enabled to execute further adjustment and maintenance duties at the PocketPiping Automaton 100-58 manufactured by Beisler.
Even these persons will first have to read and understand the complete
documentation and obtain all rules and regulations.
0.2
Structure of the manual
This manual is structured in two columns. On the left side you will find
explaining texts, on the right side photos which illustrate the texts and show
certain assemblies or parts of the machine.
0.3
Safety instructions
Many of the measures described in this manual can be executed at a
machine powered-off and with released air-pressure. Please obtain the
switch-off procedures described below.
Some of the measures described in this manual can only be executed, if the
machine is under electrical power or air pressure.
DANGER
Never work alone! Assure that a second person is present which can initiate
life-saving actions and/or calls for paramedical help in the case of an
accident.
DANGER
Danger of mortal electrical shock! While working at a machine where
electrical voltage is present, any contact to hot parts must be avoided.
DANGER
Danger of shearing and crushing! Be very careful working at a machine
which is under pneumatical pressure. Otherwise, unintented moves of
machine components could cause severe injuries.
3-3
0.4
Preparing measures
In this manual, you will find hints at any measure, where the machine must
be powered off or the pneumatic pressure must be released:
<power off>
machine must be cut off the power supply
<release pressure>
pneumatic pressure must be released from the
machine
To be able to work under maximized safety, the preparing measures should
be obeyed at any time.
0.4.1
Cut off power supply
Use the mains/emergency stop switch to switch off the machine. Cut off the
power supply and assure that it can’t be restored unintentedly.
0.4.2
Release pneumatic pressure
Close the air supply with the black switch at the air supply unit. Cut the
machine from the air supply and assure, that it can’t be restored unintentedly.
3-4
1 Clamp adjustment
The following assemblies must be distinguished in the
clamp area:
1.
Clamp motor
2.
Clamp carriage
3.
Clamp drive belt
4.
Clamp arms
5.
Main clamp
1.1 Clamp drive belt
The clamp must stand in home position (like shown in
the upper picture).
The drive belt (1) must have enough tension that it gives
about 15 mm when loaded with 1 kg (in the middle between both belt disks).
If required, loosen both fixing screws (2) and adjust the
set screws (3). Tighten the fixing screws (2) again.
3-5
1.2 Adjust axial free play of the clamp
arms
<power off> <release pressure>
The clamp arms (1) must be adjusted without free play.
Although they have to move easily.
Check the correct adjustment from time to time. If required, you can adjust the axial free play of the clamp arms
with the screws (2).
1.3 Parallelity of the clamp arms to the
sewing head
This is adjusted in the factory and doesn’t have to be
changed.
1.4 Lateral adjustment of the double
piping
<power off> <release pressure>
Insert the folder for the double piping.
The distance between the inner side of the main clamp
and the sole edge at the folder shall be 1.5 mm on the
right and left side (see right).
This distance can be adjusted with the setting rings (1).
1.5 Lateral flap adjustment
<power off> <release pressure>
Insert the folder for single piping.
There should be a distance of 1.5 mm between the inner side of the clamp and the sole of the folder.
This can be adjusted with the two outer setting rings (1).
3-6
1.6 Adjust main clamp height
The main clamp height in insertion position must be 30
mm.
To adjust this, loosen the nuts (1) at both clamp pressure cylinders and turn the piston pole (2) until the must
height is present.
1.7 Adjust main clamp pressure
The clamp pressure must be 3.5 bar. You can read it at
the pressure gauge (1) on the clamp carriage.
To adjust the pressure, pull out the black knob and turn
it into the required direction. Press the knob down again.
1.8 Main clamp pressure distribution
An even pressure must be over the whole main clamp
area.
Drive the main clamp into insertion position and lay thin
sewing material under the clamp arms. Close the main
clamp (control: check outputs). Pull the sewing material
laterally and check the even clamp pressure.
If required, you can adjust the pressure distribution. Loosen the fixing screws (1) of the two allen screws (2).
Turn the two allen screws (2) until the correct pressure
distribution is present. Tighten both fixing screws (1)
again.
3-7
1.9 Clamp quick adjustment double/
single piping (option)
An initiator is mounted at the insertion station, which recognizes the folder for double or single piping. The main
clamps will be driven into the correct position dependant
on the inserted folder. These positions are adjustable.
Mount the folder for the double piping and move both
inner setting rings (1) in a way that there is a distance of
1.5 mm between sole edge and main clamp edge (see
lower picture).
Mount the folder for single piping and move the outer
setting ring (1) until there is a distance of 1.5 mm and
the clamp can only move to one side.
Tighten the fixing screws of all setting rings.
1.10 Clamp quick adjustment jacket/
trouser (option)
With the additional initiator at the folder (1) a valve for
the additional clamp move is controlled.
Adjuste the outer position of the clamp with the two outer setting screws (2) in a way that there is a distance of
1.5 mm between the folder sole and the inner side of the
main clamp.
3-8
1.11 Lateral clamp adjustment without
quick adjustments
Mount the folder for the double piping. Adjust the inner
setting rings (2) (3) in a way that there is a distance of
1.5 mm between main clamp and sole.
Mount the folder for single piping. Move clamp and setting rings (3) (4) to the outside until there is a distance of
1.5 mm between folder and sole.
Now block the lateral escape of the clamp arms by fixing the setting rings.
1.12 Clamp adjustment double piping –
flap without quick adjustment
Here you will have to move one clamp arm with the setting rings when changing between folder double or single piping.
Loosen the setting ring (3) or (4) and move them together with the clamp arm until there is a distance of 1.5
mm between double piping/flap and main clamp.
1.13 Adjust folding slide path
<power off> <release pressure>
The distance between the folding slide (1) driven in and
out must be 5 mm.
If required you can adjust the setting screw (2) at the
cylinder (3).
3-9
1.14 Adjust parallelity of folding slide
<power off>
In driven in state, the folding slide must be parallel to
and 0.5 mm away from the edge of the main clamp.
This can be adjusted with the fixing screws of the folding slide cylinder (1).
1.15 Adjust folding slide
<power off> <release pressure>
A turn movement of the folding slide must be assured
which allows him to adjust to the strength of the sewing
material.
Adjust the screws (1) to adjust the folding slide with no
free play axially.
1.16 Flap clamp position
<power off> <release pressure>
The flap clamps must stand in a distance of 5 mm parallel to the inner side of the main clamp.
To adjust the flap clamp, loosen the fixing screws (1) of
the flap clamp beam. Adjust the flap clamp correctly and
tighten the fixing screws (1) again.
3-10
1.17 Opening path of the flap clamp
The opening path of the flap clamps (4) must be adjusted in a way that the flap clamp presses with its complete length onto the main clamp, when the flap clamp
cylinder is driven out.
Loosen both allen screws (1) at the flap clamp to be
adjusted and adjust the cylinder (2) correctly. Tighten
both allen screws (1) again.
1.18 Photo cell foil
A photo cell foil (5) is fixed to each clamp (3). This allows an always good detection of the flap.
Clean the foil with a clean cloth from time to time. If the
foil is damaged, it must be changed.
1.19 Check/change clamp rubber
<power off> <release pressure>
There are moss-rubber strips below each main clamp. If
there are problems of the sewing material and the clamp,
these rubber strips should be checked.
Demount the clamp by loosening the allen screw (1).
The moss rubber strip is fixed with three screws (2).
If the rubber is damaged, loosen them and change the
strip.
Fix the clamp arm again and adjust it.
Hint
When working with thick sewing material it is advantageous to use a thicker clamp rubber or mount a
heightening.
3-11
1.20 Adjust clamp path
1.20.1Adjust front stop
<release pressure>
Drive the clamp carriage (1) into insertion position intil
initiator 1 (2) switched dark. The distance (A) between
the beam and the clamp carriage must be 19 mm.
To adjust the distance, loosen the fixing screws of the
initiator 1 (2) and move him in the desired direction. Tighten the fixing screws again.
Loosen the fixing screw of the stopping rubber (3) and
turn this in or out, until there is a distance (B) of 3 mm to
the clamp carriage. Tighten the fixing screw again.
1.20.2Measure clamp path
Switch on the machine with the mains/emergency stop
switch. Wait until the clamp has been initialized.
The machine must be in home position (clamp carriage
in the back position).
Press sequently the keys [P] – [F6] – [F3] – [F3] – [F1] at
the operation device.
Push the clamp forward into insertion position until initiator 1 switches dark. Check the value which is displayed in the lower right corner of the display (in mm):
< 000 mm initiator 17 (see picture in section 1.20.3) is
too far in the back and must be adjusted
towards the sewing head.
= 000 mm initiator 17 is adjusted correctly.
> 000 mm initiator 17 is too far in the front and must
be adjusted away from the sewing head.
1.20.3Adjust back stop rubber
The stop rubber (1) beside initiator 17 (I 17) must show
a gap of 3 mm to the clamp carriage.
Drive the clamp carriage into home position. Loosen the
nut (2) and turn the stop rubber, until there is a distance
of 3 mm to the clamp carriage. Tighten the nut (2) again.
3-12
2
Adjustments at the insertion station
2.1 Folder height
Select output 24/25 in the machine control.
The distance (A) between sliding plate and folder sole
must be adjusted to the used sewing material. The basic setting is 2 mm.
If the folder is set too deep, the material will be blocked.
If it is too high, the folding slides cannot fold the sewing
material.
Loosen the nut (1) and turn the allen screw (2) in or out.
Tighten the fixing screw (1) again.
After changing the folder height, the position of the initiator at the insertion plate should be checked (see section 2.2).
2.2 Initiator at the insertion plate
When the folder is lowered completely, this initiator will
be switched and triggers the closing of the folding slides
(if activated in the program). If the initiator isn’t set correctly, the folding slides come too early or not at all.
Loosen the fixing screws (1) to adjust the initiator and
move it correspondingly. Tighten both fixing screws again.
2.3 Folder free play
<power off> <release pressure>
The folder should not have any free play in folding position (see picture at section 2.1).
To adjust the free play, loosen the fixing screws at the
stop bar and push it towards the bearing. Tighten both
screws again.
2.4 Folder parallel to main clamp
<power off> <release pressure>
Loosen the allen key (4) a little and adjust the folder parallel to the main clamp.
Tighten the allen key in this position.
3-13
2.5 Adjust piping width
<power off> <release pressure>
To adjust the piping width, loosen both fixing screws (4)
at the clamp block. Tilt the clamp block with the help of
the setting screw (3) a very little to the left or right.
Tighten the fixing screws again.
Then you should check and possibly adjust the distance
to both clamps.
Hint
Double and signle piping width are adjusted in the
same procedure automatically.
Hint
After adjusting the folder, the positions of the marking
lamps must be checked and possibly adjusted.
Hint
The folder sole width is decisive for the piping width. It
can be changed if desired by the customer.
2.6 Center knife protection
<power off> <release pressure>
The center knife protection (2) is mounted at the folder.
It should surround the center knife (1) without touching
it.
Adjust the center knife protection (2) carefully if required.
2.7 Lateral distance of the guiding plate
to the needle
<power off> <release pressure>
Distance (A) to the needle should be minimized. The
guiding plate (1) may not get contact to the needle (2) or
needle head, since otherwise there would be loud noise
and the possibility of a threat break.
Adjust the distance using the corresponding bending tool.
3-14
2.8 Height stop of the guiding plate
There may be a distance (A) of max. 0.5 mm between
upper side of the sole (2) and lower side of the guiding
plate (3). Only when sewing very thick material, distance
(A) must be enlarged.
To change the height, loosen the fixing screws of the
two screws (1) and turn them in or out. Tighten the fixing
screws then.
2.9 Pressure of the guiding plate
The spring pressure must be adjusted in a way that both
plates are pressed safely downwards at any time. If the
pressure is too low, a needle break can appear during
the front tack. If the pressure is too high, the flap will be
pushed back at seam start.
Turn both settings screws (4) until enough pressure is
present at the guiding plates.
2.10 Adjust marking lamps
2.10.1Adjust parallelity
The middle axis of the light crosses of the marking lamps
must be on the middle cut exactly.
Loosen the fixing screw (5) to adjust the marking lamp.
Loosen the fixing screw in the ring (4) to turn the marking lamp.
2.10.2Adjust distance
The first line of the marking lamp seam start (1) must be
135 mm (A) away from the needle. The distance between the first line of the marking lamp seam start (1)
and the last line of the marking lamp seam end (2) must
be 180 mm (B). The distance between the first line of
the marking lamp seam start (1) and the middle line of
the third marking lamp must be 90 mm (C).
Loosen the fixing screws (3) and push the marking lamps
until the correct distances are adjusted.
3-15
2.10.3Size of the light cross
Loosen the fixing screw (1) and push the marking lamp
vertically to adjust the size of the light cross.
2.10.4Focussing sharply
Turn the setting ring (2) to focus the light cross sharply.
2.10.5Demount and mount marking lamps
Unplug both plugs from the top side of the marking lamp.
Loosen the holding screw (1) and take out the marking
lamp.
Mount the marking lamp in reversed order.
2.10.6Change light mask
With different light masks different shapes of light crosses can be projected.
Demount the marking lamp (see section 2.10.5) and loosen the allen fixing screw in the upper lamp cylinder (1).
Be careful when opening the casing since the lamp components could be thrown out due to the spring pressure.
Insert the lamp components in the order distance ring
(5), mask (4), lens (3) and spring (2) into the lower lamp
cylinder (6) and assure that the lens (3) is inserted with
the vaulted side downwards into the cylinder. Push in
the upper lamp cylinder (1) and tighten the allen fixing
screw.
Mount and adjust the marking lamp.
2.11 Dart stretcher
2.11.1 Fixing in the guiding plate
There is a deepening (2) in the sliding plate (1) where
the cylinder locks slightly.
The height of the rubber stopper (3) can be changed by
loosening the rubber stopper (3) and turning the cylinder
pole (5) in or out. Fix the thread case again.
2.11.2 Magnet switch at the dart stretcher cylinder
The magnet switch (4) must be adjusted in a way that a
safe switching is assured.
If the switch is not adjusted correctly, the machine shows
the error ‘Dart stretcher not up’ permanently.
3-16
3
Adjustments at the sewing head
3.1 Height adjustment
The ground plate of the sewing head must be levelled
with the upper edge of the working table.
To adjust height and horizontal level loosen the nuts (1)
and adjust them by turning in or out. Tighten the counter
nuts again.
3.2 Lateral adjustment
The stitch plate (2) of the sewing head (1) must be exactly in the gap of the sliding plate (3).
Loosen the fixing screws in the mounting frame (see
section 3.1) and level the sewing head exactly. Tighten
the fixing screws again.
3.3 Driving belt tension of the sewing
motor
It must be possible to push down the driving belt (2) of
the sewing motor (1) for 20 mm in its middle.
To adjust the tension loosen the fixing screws (3) of the
motor and move him vertically until the correct tension is
present. Tighten the fixing screws again.
3-17
3.4 Top threat cutter (Beisler sewing
head)
The toip threats will be caught by the top threat catcher
after the sewing during the clamp drives to the mitre
cutting.
The threats will first be clamped on the top side of the
catcher and then cut on the backside. The threat clamp
must hold the threats during the first stitches of the seam
start to assure a clean sewing image at seam start.
3.5 Height of top threat catcher
A distance (A) of 3-4 mm must be present between sliding plate (2) and catcher (3) when the threat catcher
cylinder (1) is driven out.
For adjustment loosen the fixing screws (4) of the cylinder and move him until the correct height is present.
Tighten the screws (4) again.
ATTENTION
The enabled center knife may not get contact with the
top threat catcher!
3.6 Center knife adjustments
3.6.1 Switching on
The center knife is pushed down during the sewing process with the help of the cylinder Y3 (1). The the pin at
cylinder Y49 (2) takes over the locking of the center knife.
3.6.2 Switching off
As soon as the seam end has been reached the center
knife will be switched off. This can be delayed by an
entering in the control.
The mechanical switching off is done by a withdrawal of
the locking pin at cylinder Y48 (2). This allows the pressure pole of the center knife to be pulled upwards by the
pulling spring.
3.6.3 Safety initiator at the center knife pole
During center knife switched off, the diode at the initiator
(3) must be lighted.
3.6.4 Depth adjustment of the safety initiator
The safety initiator (3) must be mounted in a distance of
0.3 - 0.5 mm to the center knife pole.
To adjust it loosen the fixing nut of the initiator (4) and
turn it in until it has contact to the center knife pole. Now
turn it out for half a rev and tighten the fixing nut (4) in
this position.
3-18
3.6.5 Height of center knife
The front edge of the center knife (1) must stand (in
switched on state and deepest position) 1 mm deeper
than the top side of the stitch plate.
To adjust it, loosen both fixing screws (2) and move the
center knife. Tighten both screws again.
3.6.6 Shear angle of the center knife
The center knife should stand slightly folded against the
counter knife in the stitch plate.
Loosen the allen key (3) and turn the holding hook on
the center knife pole until the desired position is met.
Tighten the allen key again.
3.6.7 Lateral adjustment
The center knife (1) must be adjusted laterally that the
pressure is minimized.
Loosen the fixing screws (2) and adjust the center knife
exactly. Tighten both screws again.
ATTENTION
Possible faults in machine sequence! If the center
knife has too strong contact to the counter knife, it
cannot be withdrawn after sewing into home position
by the spring. Additionally the knife gets blunt very fast
which causes bad cutting, different seam lengths,
improper mitre cutting and additional width in the
seam.
3.6.8 Needle protection
The needle protection (2) is mounted at the holder of the
upper threat catcher. It should stand 1 mm deeper than
the top of the center knife (1) and 1 - 1.5 mm away from
the back of the knife.
To adjust it loosen the fixing screws (3) of the needle
protection and move it. Tighten the fixing screws again.
3-19
3.7 Adjustments of the bobbin threat
catcher (Beisler sewing head)
3.7.1 Catcher adjustment
<power off> <release pressure>
Turn the belt disk manually until the spool capsule lever
stands as far as possible back into arrow direction. Fix
the movable knife (4) temporarily with the screw (3) and
press manually onto the top side of the knife (4) to move
it. Tighten screw (3) when the distance between the top
of the movable knife to the holder of the catcher is netween 0.05 and 0.2 mm.
Fix the movable knife (4) at the top of the spool clamp
spring now.
3.7.2 Time of bobbin threat cutting
This time can be programmed.
If the time is too early, upper and bobbin threat will be
caught and cut at the same time. Then the upper threats
will be too short for the next sewing process.
3.7.3 Duration of bobbin threat cutting
This time can be programmed.
If the time is too short, the bobbin threats will not get
caught. If the time is too long it is possible that the main
clamp drives to the mitre cutting before the threat catcher is in cutting position. This lengthens both threats
remaining at the seam end.
3.8 Sensitivity of the bobbin detector
(option)
Insert full bobbins into the grasper and close the sliding
plate. Activate the bobbin detector.
Open the casing of the switchboard and turn the potentiometer (2) to the left until the LED (1) lights up. Now
turn the potentiometer (2) as far to the right until the LED
doesn’t light up during the sewing. Mount the casing of
the switchboard.
Occupation of the LEDs and potentiometers:
(1) (3) right-handed spool
(2) (4) left-handed spool
Hint
During sewing with residual threat on the spool, the
LED (1) (2) must switch several times per rev.
3-20
3.9 Clean tactual head of the bobbin
detector (option)
There is a blowing system at the bobbin detector which
blows the tactual head free of dirt.
Clean the tactual head (1) with a clean and lint-free cloth
from time to time.
3.10 Adjust piping detection
3.10.1Lateral adjustment
The photocell (1) is equipped with a red light point (4 –
illustrated by drawing), which indicates the exact switch
point on the folding slide. The complete light point must
hit the reflecting foil when the folding slide is driven out.
Loosen the fixing screw (2) of the photocell (1) and adjust it exactly. Tighten the screw again.
3.10.2Adjust intensity
The intensity of the photocell (1) can be adjusted with a
potentiometer (3) which is at the side of the casing.
Drive the clamp into insertion position and close the main
clamp. Insert the flap and press the ‘Program-Stop’ button (remain it pressed). Push the clamp manually under
the photocell.
There is a red and a green LED on the front side of the
photocell (3). Adjust the intensity with the potentiometer
(3) in a way that both LED light up during reflection from
the foil.
Push the clamp until the flap covers the reflecting foil.
Now the green LED must be lighted and the red not.
Hint
After changing the intensity of the photocell you will
have to check and possibly adjust the detection
correction of the flap at flap start and end.
3-21
3.11 Swing up sewing head
The sewing head can be swung up. First you will have to
demount several parts: spooler, position actuator, belt
protector; push sliding plate to the left.
Loosen screw (1) and swing the sewing head upwards.
Use the support (2).
DANGER
During maintenance duties at the swung up sewing
head, the support must be locked completely at the oil
reservoir. Otherwise it can slip away and the sewing
head can cause severe injuries.
3.12 Upper threat monitor
Both upper threats are permanently monitored during
the sewing. The threats must be guided through the threat
guidings with low tension. Both green LED (2) in the control are showing the switching of the tactual heads.
3.12.1Switch on time
The switch on time decides, when the threat monitor is
questioned (key [P] - [F3] - parameter 19). Further information is contained in the prior parts of this manual.
If the time is set too early, misswitches can arise at sewing heads with switchable needle in the range of the
tack.
3.12.2Filter threat monitor
The set value defines after how many missing impulses
of the threat monitor the control signalizes threat breakage.
Select parameter 20 using the keys [P] and [F3]. For
further details see the prior chapters of this manual.
3-22
4
Adjustments at the mitre knifes
4.1 Basic adjustment locked mitre knife
(seam end)
Between the mitre knife for the seam end and the basic
holder a distance (A) of 21 mm must be adjusted.
Loosen both screws (6 in this and in the picture at section 4.2) and move the mitre knife axially. Tighten both
screws again.
4.2 Basic adjustment movable mitre
knife (seam start)
When the movable knife for seam start (1) has contact
to the locked mitre knife, the distance between both holders must be 3 mm.
Turn the screw of the magnet (2) in or out to adjust the
distance.
4.3 Mitre knife height
The height of the mitre knife pinoles (3) must be adjusted that they are in their lower position the distance (B)
of 6-7 mm higher than the holder of the mitre knifes.
Loosen the fixing screws (4) and move the pinoles (3)
axially. Tighten the screws again.
4.4 Mitre knife broadth
Turn the two screws (5 in the picture at section 4.2) until
the mitre knifes can be taken out.
Adjust the broadth (A) of the mitre knifes with the two
screws (1). At a seam distance of 12 mm, you will have
to adjust 10-10.2 mm here.
Now turn the two screws (2) as far until both knifes get
contact at their top.
3-23
4.5 Pre-stabber
The pre-stabber (3) at the mitre knifes is used as a protection. It prevents the piping and the flap to be damages during cutting.
4.6 Lateral adjustment
To achieve an exact mitre knife cutting, the knifes must
be adjusted also laterally.
Bring the mitre knifes into the upper final position (output 54). Measure the distance between sliding plate and
mitre knifes exactly.
Loosen both allen screws (1) a little and turn the exenter
adjustment (2). If the exenter for the mitre knife for seam
start is turned to the right, the mitre knife moves to the
left at seam start.
If the exenter for the mitre knife for seam end is turned
to the right, the mitre knife turns to the right.
Tighten the allen screws (1) after the adjustment.
Hint
After changing the exenter adjustment you should
carry out sewing tests before continuing the production.
4.7 Fine adjustment in the length
This is done in the machine control.
After the first pressing of the key [F2] you can adjust the
mitre knife for seam start, after another pressure you
can adjust the knife for seam end.
4.8 Tighten cog-belt of the mitre knife
drive
It must be possible to press down the middle of the cogbelt of the mitre knife drive (1) 2-3 mm.
To adjust the tension, loosen both fixing screws (2) and
move the motor until the correct tension is present. Tighten both fixing screws.
3-24
5
Adjustment of machine options
5.1 Automatic push-back blocking
The light beam of the photo cell (5) of the automatic
push-back blocking must hit the center of the reflecting
foil (1). This must be 70 mm away from the outer edge
of the table.
The distance between the setting ring (2) of the photo
cell (5) and the bearing shield (3) must be 10 mm. To
adjust it, loosen the fixing screw (4) and push the photo
cell together with the setting ring. Tighten the fixing screw.
To check whether the light beam hits the middle of the
reflecting foil (1) exactly, lay a piece of cloth or paper on
the table and push it from all directions over the reflecting foil. As soon as the photo cell switches, the red diode (6) turns dark. Move the photo cell by moving and
turning of the setting ring until the light beam is adjusted
exactly.
Hint
In the case of a breakdown of the push-back blocking
it can be disabled in the machine control (seam
parameter 36).
5.2 Height of the take off roller
Lower the take off roller (1) (output 23 in the machine
control).
Check whether the screw (2) has a free play of 1 mm. If
not, loosen the counter nut at the screw and move it
correspondingly.
Tighten the counter nut again.
3-25
5.3 Mitre knife slant position
5.3.1 Distance between basic bodies
<power off> <release pressure>
The distance (A) between the basic bodies of the mitre
knifes must be 3 mm in home position (both knifes completely right).
To set the distance you will have to move the initiator
and adjust the mechanical stop.
Loosen the fixing screws (2) of the initiator (1) and move
it until the required distance is present in the home position.
Push aside the movable mitre knife, loosen the counter
nut of the mechanical stop (3) and turn this in or out.
Tighten the counter nut.
5.3.2 Height adjustment
This is done similar to the height adjustment of the standard mitre knifes (see section 4.3).
5.3.3 Center adjustment
For the center mitre knife a lateral adjustment must be
executed. This is done similar to the adjustment of the
standard mitre knifes (see section 4.6).
5.3.4 Adjust mitre knife stops
The mitre knife stops must be adjusted at both mitre
knifes. The adjustment procedure is similar and is shown
here for the example of the movable mitre knife:
The right stops (1) are adjusted by loosening the counter nuts (2) und turning the screws (1) in or out. Tighten
the counter nuts again.
The left stops (4) are adjusted by loosening the counter
nuts (3) and turning the allen screws (4) in or out. Tighten the counter nuts again.
ATTENTION
Adjust the stops equally. The basic body of the mitre
knifes must have an equal contact to the upper and
lower stop.
5.3.5 Knife arrangement
Assure to insert the knifes in the correct order when changing the knifes.
At the locked knife for the seam end, the cutting blades
must show an concave bow (left side in the drawing).
At the movable knife for the seam start, the cutting blades must show an convex bow (right side in the drawing).
3-26
5.3.6 Arrangement of the mitre knife during flap
pocket production
The photo shows the correct Arrangement of the mitre
knife during flap pocket production.
5.4 Split needle (Beisler sewing head)
5.4.1 Distance to cylinder of the top threat catcher
There must be a distance on at least 0.5 mm between
the pushing block of the split needle (1) and the cylinder
of the top threat catcher.
If required, loosen the fixing screws (3) of the top threat
catcher (2) and move it, until the minimum distance is
kept. Tighten the fixing screws again.
5.4.2 Center adjustment
The setting ring of the split needle (1) must be in the
middle of the rectangular metal frame while in home
position.
If required. loosen the fixing screw of the setting ring
and move him. Tighten the fixing screw again.
5.5 Vylene adjustments
5.5.1 Correct vylene adjustment
The vylene strip (3) must be seen with the inserted sliding plate but set back from the front edge of the vylene
supply for the distance (A) of 3 mm.
1:
Vylene plate
2:
Counter knife
3-27
5.5.2 Demount vylene plate
<power off> <release pressure>
Pull out the vylene strip (3) from the supply slot.
Loosen the fixing screw (2) of the roll (3) and take this
out by pulling to the left.
Loosen the three fixing screws (4) of the vylene plate.
Assure that the vylene plate cannot tilt away.
Loosen the fixing screw of the table support (5) and swing
it to the front or back.
Now you can take out the vylene plate.
ATTENTION
Assure that the hoses at the vylene won’t be damaged. We recommend to leave the hoses at their
positions.
5.5.3 Change cutting pressure
Loosen both allen keys (1) and move the counter knife
(No. 2 in picture at section 5.5.1) until an adequate cutting pressure is present.
Tighten both allen screws.
5.5.4 Adjust vylene supply
The vylene must to be seen when the sliding plate is
inserted. To adjust the supply, loosen the fixing screw
(2) at the cylinder (4) and move this correspondingly.
Tighten the fixing screw again.
5.5.5 Easy-running of the vylene roll
The vylene roll must run easily.
Loosen one of the allen screws (3) and push the roll,
until it runs easily. Tighten the loosened allen screw.
5.5.6 Vylene supply speed
The vylene supply must be adapted and synchronized
to the clamp speed.
Adjust the throttle (1) to change the vylene supply speed:
turn right: slower
turn left:
faster
3-28
Hint
By adjusting the fixing screws (4) it is possible to adapt
the height of the vylene plate to the table height.