1
www.blaupunkt.com
Mobile Navigation
TravelPilot Lucca 5.3
Operating and installation
instructions
Long version
Lucca_5_3_long_GB.indd 1
01.11.2007 14:11:33 Uhr
Device overview
1
2
3
4
5
6
7
8
9
:
;
<
=
2
Lucca_5_3_long_GB.indd 2
01.11.2007 14:11:35 Uhr
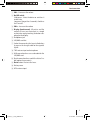
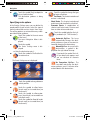
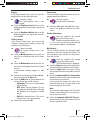
Device overview
1 VOL -: Decreases the volume
2 On/Off switch:
Short press: Starts the device or switches it
to idle state.
Long press (longer than 3 seconds): Switches
the Lucca off.
3 VOL +: Increases the volume
4 Display (touchscreen): All entries and the
control of Lucca are carried out in a simple
and intuitive way by touching the buttons displayed on the display.
5 Headphone jack
6 SD/MMC card slot
7 Socket for connecting the Lucca to the battery
charger or the charger cable for the cigarette
lighter.
8 TMC antenna input and microphone
9 USB connection for use as card reader for the
SD/MMC card
: Quick connection for use with the Active Cradle (optional accessories)
; Reset button: Restarts the Lucca.
< Battery cover
= GPS antenna input
3
Lucca_5_3_long_GB.indd 3
01.11.2007 14:11:45 Uhr
Contents
Lucca scope of delivery ........................7
Safety notes ........................................7
Use as directed .....................................7
Safety notes for navigation......................7
Safety notes for handling the Lucca .........7
Notes for handling the DVD .....................8
Initial startup of Lucca .........................8
Protective film and covers .......................8
Charging the battery ..............................8
Setting the language ..............................9
Installation in the Vehicle ....................9
Attaching the support ............................9
Removing the support ............................9
Attaching the cradle ............................10
Installing Lucca in the cradle .................10
Removing the Lucca ............................10
Switching on/off ................................10
Initial switch-on...................................10
Switch-on ..........................................10
Activating the idle state ........................10
Switching off ......................................10
Reset ................................................10
Controls ............................................11
Basic buttons......................................11
Keyboard ...........................................11
Lists ..................................................11
Performing basic settings ..................12
Setting the time zone ..........................12
Activating the PIN query .......................12
Changing the PIN .............................13
Compass ...........................................13
Navigation ........................................14
General notes about the navigation ........14
Starting the navigation .........................14
Entering a destination address ..............14
Entry via the keyboard ......................15
Entry via voice entry .........................15
Copying one of the recent destinations ...16
Copying the destination from
the favourites......................................16
Copying a favourite for destination
guidance .........................................16
Entering a point of interest ....................17
Selecting a point of interest ...............17
Selecting a point of interest nearby .....17
Selecting a point of interest in the
destination area ...............................18
Selecting a point of interest at a
specific location ...............................18
Travel guide ........................................19
Selecting a travel destination .............19
Selecting a travel destination nearby ...19
Selecting a travel destination in the
destination area ...............................19
Selecting a travel destination
at a specific location .........................20
Fast retrieval .......................................21
Copying a destination from the map .......21
Moving and scaling the map ...............21
Copying a destination from the map ....21
Specifying route options.......................22
Destination guidance ...........................23
Start destination guidance.................23
Disturbed GPS reception ...................23
Voice instruction ..............................23
Quitting the destination guidance .......23
Reaching the place of destination .......24
Storing a destination address ................24
Storing the current position ..................24
Managing destinations .........................24
Renaming a destination
(Favorites only) ................................24
4
Lucca_5_3_long_GB.indd 4
01.11.2007 14:11:45 Uhr
Contents
Deleting a destination .......................25
Delete all destinations
(last locations only) ..........................25
Route planning with stages ...................25
Entering the starting point .................25
Adding additional route points ...........25
Deleting a route point........................26
Optimising the sequence ...................26
Changing the order ...........................26
Start destination guidance.................26
Route simulation ..............................26
Functions during the simulation..........26
Map display during destination
guidance ............................................27
Navigation tools ...............................27
Route information ............................27
Speed limit......................................27
Bluetooth connection........................27
Working with the map ..........................28
Display map ....................................28
Moving and scaling the map ...............28
Touching the map .............................28
Additional functions .........................28
Changing map settings ......................28
Additional functions during the
destination guidance ...........................29
Blocking route segments ...................29
Route description .............................29
Jump to a specific place on the map ....29
TMC function.....................................30
Connecting the TMC antenna ................30
Changing TMC settings .........................30
TMC station search ...........................31
Traffic jam detours ...........................31
Showing traffic jam reports ...................31
Manual by-pass ...................................31
Configuring Lucca .............................32
Device settings ...................................32
Language ........................................32
Time...............................................32
Display ...........................................33
Factory settings ...............................33
Touchscreen ....................................33
Product information .........................33
Night display ...................................33
Theft protection ...............................34
Button sound ...................................34
Audio/video ....................................34
Settings for navigation .........................34
Speed limit......................................35
Display ...........................................35
TMC station .....................................35
Volume ...........................................35
Category for fast retrieval ..................35
Preferred petrol stations ...................36
Keyboard ........................................36
Select map ......................................36
Units of measure ..............................36
Map view ........................................36
Data transfer .....................................37
Using road maps of SD/MMC cards ........37
Using media files of SD/MMC cards ........37
Bluetooth function .............................38
Starting the Bluetooth application..........38
Starting the registration process ........38
Registering Lucca with the cell phone ..38
Establishing and disconnecting
Bluetooth connection ...........................38
Calling a point of interest ......................39
Calling ...............................................39
Making a call ....................................39
Answering or rejecting a call ..............39
Adjusting the ringtone volume ...............39
Audio transmission ..............................39
Activating and deactivating the
Bluetooth function ...............................40
Unregistering cell phones .....................40
Media player .....................................40
Inserting the SD/MMC card ...................40
Starting the media player......................40
5
Lucca_5_3_long_GB.indd 5
01.11.2007 14:11:45 Uhr
Contents
Playing music files ...............................40
Navigating through the music files.......41
Changing to the music browser...........41
Repeated play of music files (Repeat) ..41
Random play of music files (Shuffle) ...41
Showing image files .............................41
Navigating through the image files ......41
Display image folders ........................41
Rotating image files ..........................41
Changing to the picture browser .........42
Configuring the slide show.................42
Starting the slide show......................42
Playing video files ................................42
Stopping playback ............................42
Connecting an external audio-video
source ...............................................42
Ending the media playback ...................42
Removing the SD/MMC card .................42
Software of the Lucca ........................43
Reinstalling navigation software ............43
Updating the navigation software...........43
Active Cradle ....................................43
Accessories ........................................43
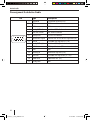
Pin assignment D-sub Active Cradle .......44
Technical data ...................................45
Disposal of old unit ............................46
Service .............................................46
Warranty...........................................46
Frequently asked questions / FAQ .......47
Troubleshooting table ........................48
6
Lucca_5_3_long_GB.indd 6
01.11.2007 14:11:46 Uhr
Scope of delivery | Safety notes
Lucca scope of delivery
The scope of delivery contains the following components:
• Lucca
• Suction cup holder
• Charger cable for cigarette lighter
• Battery charger
• USB cable
• Antenna for TMC reception
• Operating instructions (short version)
• DVD with road maps and operating instructions (long versions), restore program
• Cradle (Active Cradle available as an option)
Note:
We recommend the use of original Blaupunkt
accessories.
Safety notes
For your personal benefit, carefully read the following safety notes and warnings before operating your Lucca for the first time.
Use as directed
The device is designed for mobile use in vehicles.
The device can also be used by pedestrians.
Special information about the navigation of trucks,
busses and campers, such as altitude and width
limitations or maximum permissible road load, is
not included in the navigation data!
Navigation off the roads (offroad) is only possible
to a limited extent with the Lucca.
Safety notes for navigation
Caution:
Do not operate the Lucca while driving to protect
yourself and others against accidents!
View the display only if you are in a safe travel situation!
The street routing and traffic signs have priority
over the instructions of the navigation system.
Follow the instruction of the Lucca only if circumstances and traffic regulations allow! Lucca will
bring you to your destination even if you have to
deviate from the planned route.
Notes:
• Routes are best planned before starting
your trip. If you want to enter a new route
while on the road, please head for the next
parking or rest area!
• If you did not understand the voice information or if you are not sure what to do at
the next intersection, use the map or arrow
display for quick orientation.
Safety notes for handling the Lucca
Caution:
Protect the device against moisture since it is not
waterproof and not splashproof.
Do not modify or open the device.
Do not expose the device to extreme temperatures (cold, heat, fire), e.g. in a parked car with
direct sun exposure, to avoid the formation of condensate inside the device or overheating.
Otherwise, the device or the battery could be deformed, ignite or explode.
Notes:
• Remove the plug to the power supply of
the Lucca if you are parking your vehicle
for more than three days. The GPS receiver
constantly uses electricity and could discharge the vehicle battery.
7
Lucca_5_3_long_GB.indd 7
01.11.2007 14:11:46 Uhr
Safety notes | Initial startup of the Lucca
• Do not unplug the connector by pulling on
the wire. The wire could be damaged!
• Do not use strong detergents for cleaning
the device. Use only a moistened, lint-free
cloth.
Notes for handling the DVD
The device is supplied with a DVD that contains
navigation software and map material. To protect
the DVD against dirt and damage, observe the following notes:
Store the DVD in its case.
Hold the DVD only at the edge.
Do not expose the DVD and the case to
direct sunlight.
Use only a clean DVD. If necessary, clean
the DVD with a soft, lint-free cloth from
inside to outside.
Never clean the DVD in a circular motion.
Do not use any solvents, including the
printed side of the DVD.
Initial startup of Lucca
Protective film and covers
Prior to the initial use, remove the protective film
from the display. Before using the Cradle, remove
the elastic cover at the bottom of the housing. Remove the dummy SD card before inserting an SD/
MMC card in the slot. To protect the contacts, you
can use the elastic cover and dummy card again
after using the Lucca.
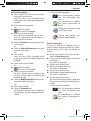
Charging the battery
The built-in battery allows for operating the Lucca battery-operated for up to 5 hours. The exact
usage time is dependent upon the type of operation.
The charge state indicator of the battery is located
at the top in the centre of the display in the map
view. The number of bright block segments on the
battery symbol indicates the charge state of the
battery (0 to 3 segments). The symbols have the
following meaning:
The device is supplied by an external
•
power source.
The device is supplied by its internal
•
battery. The charge state of the battery is sufficient.
The device is supplied by its internal
•
battery. The charge state of the battery is
low.
If the charge state of the battery is very low, a
warning message is displayed.
쏅 To charge the battery, attach the supplied
battery charger or the charger cable for the
cigarette lighter to the charging socket.
Notes:
• Use only original chargers for operating
and charging the battery.
• The battery is equipped with a protection
to prevent overheating. For this reason, the
battery stops charging at an ambient temperature above 45 °C.
8
Lucca_5_3_long_GB.indd 8
01.11.2007 14:11:46 Uhr
Initial startup of the Lucca | Installation in the vehicle
•
Do not dispose of defective batteries
in the household trash. Return them
to the corresponding collection facilities.
Setting the language
If you are starting up the Lucca for the first time,
you must set your preferred language for the
menus and the voice output.
쏅 To switch on the Lucca, press the On/Off
switch below the display.
Installation in the Vehicle
For temporary installation in a vehicle, the Lucca
features a suction cup holder with a suction cup to
attach it to the windshield.
Caution:
Install the Lucca so that it does not block your view
and does not distract from the traffic.
Do not install the Lucca in the airbag deployment
area.
Ensure that the Lucca does not pose a threat to
passengers in the vehicle in case of emergency
braking.
Attaching the support
쏅
Touch the symbol in the main menu.
The Settings menu displays.
쏅
Touch the symbol.
A list with available languages is displayed.
쏅 Touch the language in the list that you want to
use for menus and voice output.
쏅 Touch the OK button.
A message indicates that the device is being
reset.
쏅 Touch the Yes button.
The language is being loaded.
The Lucca can be installed in the vehicle in a simple way using the supplied suction cup holder.
쏅 Locate a suitable place for installing the
Lucca.
To ensure a perfect hold, the glass must be
free of dust and oil. If necessary, clean the
glass first using a lens cleaning tissue.
쏅 Press the suction plate of the support against
the glass.
쏅 Push the lever on the suction support towards
the glass.
쏅 The holder can now be adjusted. The track
for mounting the Lucca must be aligned vertically.
Removing the support
If you change vehicles, you can simply remove the
support.
쏅 Push the lever on the suction support away
from the glass.
쏅 Carefully loosen the suction plate at the edge
from the glass so that air can enter between
suction cup and glass.
쏅 Carefully pull the suction cup off of the glass.
9
Lucca_5_3_long_GB.indd 9
01.11.2007 14:11:47 Uhr
Installation in the vehicle | Switching on/off | Reset
Attaching the cradle
The suction cup holder features a mount for the
cradle.
쏅 Snap the cradle with the suction cup holder
into position.
Installing Lucca in the cradle
The Lucca features an opening on the underside
for mounting the cradle.
쏅 Remove the elastic cover from the underside
of the housing.
쏅 Place the Lucca on the mount of the cradle
and snap the Lucca to the rear and into position.
Switching on/off
Initial switch-on
During the initial switch-on of the Lucca, the software is loaded into the system. For this reason,
the switch-on process may last up to one minute.
The initial destination guidance also requires a
longer time than usual.
Switch-on
쏅 To switch on the Lucca, press the On/Off
switch below the display.
The Lucca is switched on. (If the device is in
the idle state, the previously active display is
shown again.)
Activating the idle state
쏅 To activate the idle state, briefly press the On/
Off switch below the display.
The Lucca switches to the idle state.
Switching off
쏅 Press and hold the On/Off switch for longer
than 3 seconds to switch off the device.
The Lucca is switched off.
Note:
A complete switch-off of the Lucca is only necessary if you do not operate the device for an
extended period of time or if you want to load
new map material from the SD/MMC card.
Removing the Lucca
쏅 Press the lever of the cradle at the rear side of
the Lucca and pull the Lucca to the front.
쏅 Remove the Lucca to the top and out of the
cradle.
To protect the contacts, you can use the elastic cover and dummy card again after using the
Lucca.
Reset
The Lucca can be restarted by using the Reset
button.
쏅 For this purpose, press the Reset button on
the underside of the Lucca.
10
Lucca_5_3_long_GB.indd 10
01.11.2007 14:11:48 Uhr
Controls
Controls
Basic buttons
Touch this button to return to the previous menu.
Touch this button to change to the
next page in the menu.
Touch this button to confirm an entry
or a setting.
•
•
•
Keyboard
If text entries are required, the display shows a
virtual keyboard. You can perform all the entries
on the touchscreen by touching the respective
symbol with your finger. You can only enter capital
letters.
You do not have to enter any special characters or
umlauts when entering city or street names. The
Lucca completes these characters automatically.
This keyboard also includes these keys:
Delete last character
Lists
In many cases, you can display lists from which
you can select an entry.
This is the case, for example, if you do not enter
the complete name of a place during the entry.
The list displays all the entries that start with the
characters entered so far.
To display a list with additional matching entries:
Touch the symbol.
쏅
The result list is displayed.
쏅 Touch the entry in the list to select it.
The list element is selected and the entry
menu is displayed again.
Note:
If the list features more than 5 elements, the
scroll bar indicates the current position in the
list.
Enter a hyphen
Entering blank spaces
Toggle alternate character keyboard
Call up numeric keypad, e.g. to enter the
house number
Call up character keyboard
11
Lucca_5_3_long_GB.indd 11
01.11.2007 14:11:49 Uhr
Performing basic settings
Performing basic settings
Before working with the Lucca, you should set the
time zone that applies to your location so that the
correct arrival times are displayed during your
navigation.
In addition, the PIN query allows you to lock out
unauthorised persons from using the Lucca.
쏅 Touch the Format button to toggle between
12-hour and 24-hour display.
쏅 Touch the OK button.
The Settings menu displays.
Activating the PIN query
The PIN query allows you to lock out unauthorised
persons from using the Lucca.
Note:
During the PIN entry, you have 3 attempts to
enter the correct PIN or subsequently 3 attempts to enter the correct PUK. If you enter
an incorrect PUK for the third time, your device will be blocked.
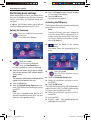
Setting the time zone
쏅
Touch the symbol in the main menu
of the Lucca.
The Settings menu displays.
쏅
Touch the button in the Settings
menu.
The display shows the second page of the
menu.
쏅
Touch the symbol.
The Time menu is displayed.
쏅 Touch the Time Zone button.
A list with available time zones is displayed.
쏅 Touch the time zone in the list that is valid for
your current position (GMT without daylight
savings time).
Note:
The selection is facilitated by the display of the
capitols in the respective time zone.
쏅 Touch the OK button.
쏅 Touch the Daylight Saving Time button to activate (ON) or deactivate the daylight savings
time (OFF).
Note:
If the time is changed at your position or if
you drive into a different time zone, you must
adjust the corresponding settings.
쏅
Touch the symbol.
The Anti Theft Protection menu is
displayed.
쏅 Touch the Protection Setup button.
쏅 Follow the instructions and enter a self-selected PIN.
쏅 Touch the OK button.
The initial configuration of the PIN is followed by a
request to enter a PUK. The PUK is used to unlock
the Lucca if you should forget the PIN.
쏅 Follow the instructions and enter a self-selected PUK.
To secure your PUK:
쏅 Register under http://puk.blaupunkt.com
and follow the instructions.
12
Lucca_5_3_long_GB.indd 12
01.11.2007 14:11:49 Uhr
Performing basic settings | Compass
Changing the PIN
쏅 In the Anti Theft Protection menu, touch the
Change PIN Code button.
쏅 Follow the instructions and enter a new selfselected PIN.
쏅 Touch the OK button.
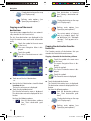
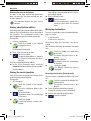
Compass
The Compass menu contains information about
your current position and your current speed.
Touch the symbol in the main menu
쏅
of the Lucca.
The menu Navigation Menu is displayed.
Touch the button.
쏅
The map is displayed.
Touch the symbol in the map dis쏅
play.
The Display menu is displayed.
Touch the symbol.
쏅
The Compass menu is displayed.
–
–
–
–
–
–
Number of received GPS satellites (bars
at top right)
HDOP (Horizontal Dilution of Precision): Quality of GPS reception (values
from 0 to 50 ). The lower the value, the
more precise the positioning (value 0 =
no deviation from the actual position).
Values up to 8 are acceptable for navigation.
The compass: Driving direction (reliable
information after approx. 5 km/h)
Speed: Indicates the current speed of the
vehicle
Altitude: Current height above mean sea
level
Latitude/Longitude: Current position in
east longitude and north latitude
13
Lucca_5_3_long_GB.indd 13
01.11.2007 14:11:49 Uhr
Navigation
Navigation
General notes about the navigation
Caution:
Do not operate the Lucca while driving to protect
yourself and others against accidents!
View the display only if you are in a safe travel situation!
The street routing and traffic signs have priority
over the instructions of the navigation system.
Follow the instruction of the Lucca only if circumstances and traffic regulations allow! Lucca will
bring you to your destination even if you have to
deviate from the planned route.
쏅
Note:
To be able to extensively use the navigation of
the Lucca, perform the basic settings before
the first navigation (ch. "Performing basic
settings").
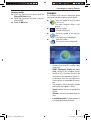
Starting the navigation
쏅
Touch the symbol in the main menu
of the Lucca.
Touch the symbol.
The Select Destination menu is displayed.
You have the following options:
– Enter a new destination via keyboard or
voice entry ("Entering a destination address")
– Enter a point of interest ("Entering a point
of interest")
– Select the last destination (not for the initial destination entry)
– Select a destination from the Favorites
(only if at least 1 destination has been
stored)
Entering a destination address
쏅
The menu Navigation Menu is displayed.
Touch the symbol in the Select Destination menu.
The Postcode menu is displayed.
- or Touch the symbol in the Select Desti쏅
nation menu.
The Town menu is displayed.
The destination entry uses the last
selected country.
쏅 Touch the flag symbol in the top left corner to
select a different country.
A list of the available countries is displayed.
쏅 Touch the country in the list to select it.
The country is selected.
You can continue the destination entry via the
keyboard or voice entry.
14
Lucca_5_3_long_GB.indd 14
01.11.2007 14:11:50 Uhr
Navigation
Entry via the keyboard
쏅 Enter a town in the Town menu or the postcode in the Postcode menu.
During the entry, up to 3 possible results
matching your entry are displayed above the
keyboard.
쏅 Touch an entry of your choice.
- or Touch the symbol.
쏅
The result list is displayed.
쏅 Touch an entry of your choice.
The Road menu is displayed. You can enter a
street, or navigate to the centre of town or a
point of interest in the town:
쏅 Touch the Centre button tom navigate to the
centre of town.
- or 쏅 Touch the Points Of Interest button to enter
a point of interest next.
- or 쏅 Enter a street.
During the entry, up to 3 possible results
matching your entry are displayed above the
keyboard.
쏅 Touch an entry of your choice.
- or Touch the symbol.
쏅
The result list is displayed.
쏅 Touch an entry of your choice.
The House Number menu is displayed. You
can enter a house number or navigate to the
middle of the road:
쏅 Touch the Middle of the Road button to navigate to the middle of the road.
- or 쏅 Enter a house number.
쏅 Touch the Proceed button.
The Detailed Information menu is displayed.
The destination entered is displayed for verification.
You have the following options:
Start the destination guidance
–
(see "Start destination guidance")
Save destination as favourite
–
(see "Storing a destination address")
Display destination on the map
–
(see "Display map")
–
Defining route options (see
"Specifying route options")
Entry via voice entry
The entry via voice entry is possible in the respective national language for Germany, Austria,
England, Spain, France, and Italy (German for
Austria).
쏅 In the Town menu or in the Postcode menu,
touch the Voice Entry button.
쏅 Say the name of the town or postal code loudly and clearly.
The result list is displayed.
쏅 Touch an entry of your choice.
쏅 Say the street loudly and clearly.
The result list is displayed.
쏅 Touch an entry of your choice.
쏅 Say the house number loudly and clearly.
The result list is displayed.
쏅 Touch an entry of your choice.
The Detailed Information menu is displayed.
The destination entered is displayed for verification.
You have the following options:
Start the destination guidance
–
(see "Start destination guidance")
Save destination as favourite
–
(see "Storing a destination address")
15
Lucca_5_3_long_GB.indd 15
01.11.2007 14:11:50 Uhr
Navigation
–
Display destination on the map
(see "Display map")
–
Save destination as favourite
(see "Storing a destination address")
–
Defining route options (see
"Specifying route options")
–
Display destination on the map
(see "Display map")
–
Defining route options (see
"Specifying route options")
–
For certain points of interest
only (e.g. hospital, hotel): Call
up destination (ch. "Bluetooth
function", "Call up point of interest")
Copying one of the recent
destinations
Your destinations approached last are automatically stored in the Last Locations list.
The last three destinations are displayed in the
Select Destination menu and can be selected directly.
Touch the symbol in the main menu
쏅
of the Lucca.
The menu Navigation Menu is displayed.
Touch the symbol.
쏅
The Select Destination menu is displayed.
쏅 Touch one of the last 3 destinations.
- or 쏅 Next to the last 3 destinations, touch the Last
Locations button.
The Last Locations menu is displayed.
쏅 Touch the desired destination.
The Detailed Information menu is displayed.
The destination entered is displayed for verification.
You have the following options:
Start the destination guidance
–
(see "Start destination guidance")
Copying the destination from the
favourites
The Favorites contain all destinations that you
stored in the Detailed Information menu.
Copying a favourite for destination guidance
쏅
Touch the symbol in the main menu
of the Lucca.
The menu Navigation Menu is displayed.
쏅
Touch the symbol.
The Select Destination menu is displayed.
쏅
Touch the symbol.
The Favourites menu is displayed.
쏅 Touch the desired destination.
The Detailed Information menu is displayed.
The destination entered is displayed for verification.
You have the following options:
Start the destination guidance
–
(see "Start destination guidance")
Display destination on the map
–
(see "Display map")
–
Defining route options (see
"Specifying route options")
16
Lucca_5_3_long_GB.indd 16
01.11.2007 14:11:51 Uhr
Navigation
–
For certain points of interest
only (e.g. hospital, hotel): Call
up destination (ch. "Bluetooth
function", "Call up point of interest")
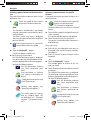
Entering a point of interest
The points of interest or POIs include specific locations such as hotels, parking options and petrol
stations. These points of interest are stored in the
map material and can be used as a navigation destination.
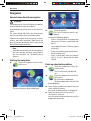
Selecting a point of interest
Touch the symbol in the main menu
쏅
of the Lucca.
The menu Navigation Menu is displayed.
Touch the symbol.
쏅
The Select Destination menu is displayed.
쏅 Touch the Points of Interest button.
The Points of Interest menu is displayed.
You can now select one of the following points
of interest:
– Hotels
– Parking options
– Petrol stations
– Hospitals
– Restaurants
Notes:
• Touch the Display More Special Destinations button to call up additional points of
interest, such as tourist attractions. The
desired point of interest us selected by
touching it.
• Touch the MERIAN Scout Guide button to
call up the travel guide. (ch. "Travel guide")
쏅 Touch a symbol of your choice to call up a
point of interest category.
You can now select whether you want to navigate to a point of interest in your vicinity, in the
destination vicinity or at a specific location.
Selecting a point of interest nearby
If you want to navigate to a point of interest in your
vicinity:
Touch the symbol to select a point of
쏅
interest near the current position.
Note:
If no GPS signal is received, the Lucca starts
from the last known position.
The Name (search term) menu is displayed.
You can enter a point of interest or display all
points of interest:
Enter a point of interest or a part of the
쏅
name and then touch the symbol.
- or 쏅 Touch the Display All ... button.
A result list appears in both cases.
쏅 Touch an entry of your choice.
The Detailed Information menu is displayed.
The destination entered and additional information is displayed for verification purposes.
You have the following options:
Start the destination guidance
–
(see "Start destination guidance")
Save destination as favourite
–
(see "Storing a destination address")
Display destination on the map
–
(see "Display map")
–
Defining route options (see
"Specifying route options")
–
For certain points of interest
only (e.g. hospital, hotel): Call
up destination (ch. "Bluetooth
function", "Call up point of interest")
17
Lucca_5_3_long_GB.indd 17
01.11.2007 14:11:51 Uhr
Navigation
Selecting a point of interest in the destination
area
If you want to navigate to a point of interest in the
destination area:
Touch the symbol to select a point
쏅
of interest in the destination area.
Note:
This function is available only if you already
entered a destination and started the destination guidance.
The Name (search term) menu is displayed.
You can enter a point of interest or display all
points of interest:
Enter a point of interest or a part of the
쏅
name and then touch the symbol.
- or 쏅 Touch the Display All ... button.
A result list appears in both cases.
쏅 Touch an entry of your choice.
The Detailed Information menu is displayed.
The destination entered and additional information is displayed for verification purposes.
You have the following options:
Start the destination guidance
–
(see "Start destination guidance")
Save destination as favourite
–
(see "Storing a destination address")
Display destination on the map
–
(see "Display map")
–
Defining route options (see
"Specifying route options")
–
For certain points of interest
only (e.g. hospital, hotel): Call
up destination (ch. "Bluetooth
function", "Call up point of interest")
Selecting a point of interest at a specific
location
If you want to navigate to a point of interest at a
specific location:
쏅
Touch the symbol to select a point of
interest at a specific location.
The Town menu is displayed.
The destination entry uses the last selected
country.
쏅 Touch the flag symbol in the top left corner to
select a country.
A list of the available countries is displayed.
쏅 Touch the country in the list to select it.
The country is selected and the Town menu is
displayed again.
Next, select a city:
쏅 Enter the city via keyboard or voice entry as
described in the section "Entering a destination address".
쏅 Enter the name of a point of interest via the
keyboard.
- or 쏅 Touch the Display All ... button.
The available points of interest of this category are listed.
쏅 Touch the point of interest to which you want
to navigate.
The Detailed Information menu is displayed.
The destination entered and additional information is displayed for verification purposes.
You have the following options:
Start the destination guidance
–
(see "Start destination guidance")
Save destination as favourite
–
(see "Storing a destination address")
Display destination on the map
–
(see "Display map")
–
Defining route options (see
"Specifying route options")
18
Lucca_5_3_long_GB.indd 18
01.11.2007 14:11:52 Uhr
Navigation
–
For certain points of interest
only (e.g. hospital, hotel): Call
up destination (ch. "Bluetooth
function", "Call up point of interest")
Travel guide
The travel guide allows you to navigate to tourist
attractions during your vacation trip.
Selecting a travel destination
Touch the symbol in the main menu
쏅
of the Lucca.
The menu Navigation Menu is displayed.
Touch the symbol.
쏅
The Select Destination menu is displayed.
쏅 Touch the Points of Interest button.
The Points of Interest menu is displayed.
쏅 Touch the MERIAN Scout Guide button.
The MERIAN Scout Guide menu is displayed.
You can now select one of the following travel
destinations:
• Restaurant
• Shopping
• Golf
• Leisure time
• Attraction
The second page of the menu also contains the
following travel destinations:
• Going out
• Hotel
쏅 Touch a travel destination of your choice.
You can now select whether you want to navigate
to a travel destination in your vicinity, in the destination vicinity or at a specific location.
Selecting a travel destination nearby
If you want to navigate to a travel destination in
your vicinity:
Touch the symbol to select a travel
쏅
destination near the current position.
Note:
If no GPS signal is received, the Lucca starts
from the last known position.
The Name (search term) menu is displayed.
You can enter a travel destination or display
all travel destinations:
First, enter a travel destination or a part
쏅
of the name and then touch the symbol.
- or 쏅 Touch the Display All ... button.
A result list appears in both cases.
쏅 Touch an entry of your choice.
The Detailed Information menu is displayed.
The destination entered and additional information is displayed for verification purposes.
You have the following options:
Start the destination guidance
–
(see "Start destination guidance")
Save destination as favourite
–
(see "Storing a destination address")
Display destination on the map
–
(see "Display map")
–
Defining route options (see
"Specifying route options")
–
For certain points of interest
only (e.g. hospital, hotel): Call
up destination (ch. "Bluetooth
function", "Call up point of interest")
Selecting a travel destination in the
destination area
If you want to navigate to a travel destination in the
destination area:
Touch the symbol to select a travel
쏅
destination in the destination area.
19
Lucca_5_3_long_GB.indd 19
01.11.2007 14:11:52 Uhr
Navigation
Note:
This function is available only if you entered a
destination and started the destination guidance.
The Name (search term) menu is displayed.
You can enter a travel destination or display
all points of interest:
Enter a travel destination or a part of the
쏅
name and then touch the symbol.
- or 쏅 Touch the Display All ... button.
A result list appears in both cases.
쏅 Touch an entry of your choice.
The Detailed Information menu is displayed.
The destination entered and additional information is displayed for verification purposes.
You have the following options:
Start the destination guidance
–
(see "Start destination guidance")
Save destination as favourite
–
(see "Storing a destination address")
Display destination on the map
–
(see "Display map")
–
Defining route options (see
"Specifying route options")
–
For certain points of interest
only (e.g. hospital, hotel): Call
up destination (ch. "Bluetooth
function", "Call up travel destination")
Selecting a travel destination at a specific
location
If you want to navigate to a travel destination at a
specific location:
Touch the symbol to select a travel
쏅
destination in a specific city.
The Town menu is displayed.
The destination entry uses the last selected
country.
쏅 Touch the flag symbol in the top left corner to
select a country.
A list of the available countries is displayed.
쏅 Touch the country in the list to select it.
The country is selected and the Town menu is
displayed again.
Next, select a city:
쏅 Enter the city via keyboard or voice entry as
described in the section "Entering a destination address".
쏅 Enter the name of a travel destination via the
keyboard.
- or 쏅 Touch the Display All ... button.
The available travel destinations of this category are listed.
쏅 Touch the travel destination to which you
want to navigate.
The Detailed Information menu is displayed.
The destination entered and additional information is displayed for verification purposes.
You have the following options:
Start the destination guidance
–
(see "Start destination guidance")
Save destination as favourite
–
(see "Storing a destination address")
Display destination on the map
–
(see "Display map")
–
Defining route options (see
"Specifying route options")
–
For certain points of interest
only (e.g. hospital, hotel): Call
up destination (ch. "Bluetooth
function", "Call up point of interest")
20
Lucca_5_3_long_GB.indd 20
01.11.2007 14:11:53 Uhr
Navigation
Fast retrieval
Copying a destination from the map
Fast retrieval allows you to directly access a specific points of interest category. You can define
the category for fast retrieval in the Fast Retrieval
menu. (ch. "Settings for navigation")
Touch the symbol in the main menu
쏅
of the Lucca.
The menu Navigation Menu is displayed.
This function allows you to select the destination
for a navigation directly on the map. In addition
to towns and streets, you can also quickly select
points of interest.
Touch the symbol in the main menu
쏅
of the Lucca.
The menu Navigation Menu is displayed.
Touch the button.
쏅
The map is displayed.
쏅
Touch the symbol.
A list of the points of interest categories is displayed.
쏅 Touch the desired destination.
The Detailed Information menu is displayed.
The destination entered is displayed for verification.
You have the following options:
Start the destination guidance
–
(see "Start destination guidance")
Save destination as favourite
–
(see "Storing a destination address")
Display destination on the map
–
(see "Display map")
–
Defining route options (see
"Specifying route options")
–
For certain points of interest
only (e.g. hospital, hotel): Call
up destination (ch. "Bluetooth
function", "Call up point of interest")
Moving and scaling the map
To view the desired destination area on the map,
you can move the map section and scale it (zoom
in/out).
Touch one of the symbols to
쏅
zoom in or out of the map.
쏅 Touch the map and move the map in the desired direction.
Note:
If you move the map, the symbol is
shown on the left side of the bottom
display bar. Touch the symbol to return to your current position.
Copying a destination from the map
쏅 Touch the town (street or point of interest) to
be defined as the destination.
The city is selected and its name appears in
the top display bar. If several streets are selected, arrow keys are also displayed. Touch
the arrow keys to make a selection.
This symbol is displayed on the right in the
bottom display bar:
21
Lucca_5_3_long_GB.indd 21
01.11.2007 14:11:53 Uhr
Navigation
쏅
Touch the symbol (flag) to adopt the
city as the destination.
The destination guidance is being
started.
쏅
–
Specifying route options
In the Routing Settings menu, you can define the
speed profile of your vehicle, select the type of
routing and exclude certain streets from usage.
The routing options are retained for every subsequent destination guidance.
Touch the symbol in the main menu
쏅
of the Lucca.
The menu Navigation Menu is displayed.
Touch the symbol.
쏅
The Route Settings menu is displayed.
- or (after the destination entry) Touch the symbol in the Detailed In쏅
formation menu.
–
쏅
–
–
The Route Settings menu is displayed.
–
쏅
Touch the symbol to change between
vehicle profiles.
쏅
Touch the symbol to allow ferries
(check mark) or to avoid them (no
check mark).
Touch the symbol to allow motorways (check mark) or to avoid them
(no check mark).
Touch the symbol to allow toll roads
(check mark) or to avoid them (no
check mark).
쏅
쏅
Touch the symbol to change the type
of route calculation:
– Fast Route: The shortest route based
on time is calculated.
Short Route: The shortest route based
on distance to be travelled is calculated.
Economic Route: A combination of
shortest and fastest route. Distance and
time are taken into consideration.
Touch the symbol to define the traffic jam detour (ch. "TMC function"):
Automatic By-Pass: The Lucca
automatically changes the destination guidance as soon as it receives information about traffic obstructions.
Manual By-Pass: In case of traffic
obstructions, a symbol is displayed on the right side of the map:
If you touch the symbol, the traffic jam detail view appears and
you can calculate an alternate
route.
No Congestion By-Pass: The
Lucca does not change the destination guidance, even if it receives information about traffic obstructions.
22
Lucca_5_3_long_GB.indd 22
01.11.2007 14:11:54 Uhr
Navigation
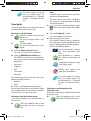
Destination guidance
Start destination guidance
After the destination entry, touch the
쏅
button in the Detailed Information
menu.
The route is calculated and the map displayed.
Carsor:
Your current position is represented by a
blue triangle. The route is highlighted in
blue.
Compass:
Always points north (for orientation)
Notes:
• The route is calculated using the settings
for the route calculation.
• The destinations entered are automatically
stored as Last Locations in the Select Destination menu. ("Entering a destination address")
Disturbed GPS reception
If no sufficient GPS signal is received after the
destination entry, the Lucca asks whether it
should calculate the route starting with the last
known position.
Touch the button to calculate the
쏅
route.
- or Touch the button to cancel the route
쏅
calculation and to restart it.
Note:
If you are in an enclosed room, move to the
outside. As far as possible, the Lucca requires
an open line of sight to the sky.
If the GPS reception is disturbed during the destination guidance, the navigation is stopped.
As soon as the reception is re-established, the
navigation system automatically recognises
whether your position has changed and, if necessary, recalculates the route. At that time, you can
simply continue your navigation.
Voice instruction
If you did not understand the voice instruction or
you are not sure what to do at the next intersection, you can repeat the voice instruction:
쏅 Touch the bottom display bar (route information).
Quitting the destination guidance
Touch the symbol in the map dis쏅
play.
The menu Navigation Menu is displayed.
Touch the button.
쏅
The display shows the second page
of the menu.
Touch the symbol to quit the destina쏅
tion guidance.
The map is displayed.
- or On the first page of the menu Navi쏅
gation Menu, touch the symbol to
start another application, e.g. the
music player.
The main menu displays.
If you quit the destination guidance before reaching your destination, the menu Navigation Menu
opens. You can now enter a new destination or
continue the navigation to the original destination
by selecting the original destination again from
the "last destinations".
23
Lucca_5_3_long_GB.indd 23
01.11.2007 14:11:54 Uhr
Navigation
Reaching the place of destination
As soon as you have reached the destination
point, the message "You have reached your destination" appears.
The map now displays only your current
position.
Storing a destination address
Each destination you entered and the destinations
from the Recent Destinations list can be saved in
the Favourites. This is particularly useful if you
want to approach this destination repeatedly.
Prerequisite:
• Entering a destination
Touch the symbol in the Detailed
쏅
Information menu.
The keyboard is displayed.
쏅 Enter a name for the destination.
Touch the symbol.
쏅
The destination address is stored in
the Favourites menu with the selected name.
To select a stored destination address:
쏅 In the Select Destination menu, touch the
Favourites button and select the desired destination address.
Storing the current position
You can store your current position and use it later
as destination for the navigation.
Prerequisite:
• GPS reception
Touch the symbol in the map dis쏅
play.
The menu Navigation Menu is displayed.
Touch the button.
쏅
The display shows the second page
of the menu.
Touch the symbol.
쏅
A menu for entering a name is displayed.
Date and time are entered by default. This entry can be changed:
쏅 Enter a different name.
쏅
Touch the button.
The current position is stored in the
Favourites menu with the selected
name.
Managing destinations
Two lists are available in which individual destinations are saved:
• In the Favourites
• In the Last Locations list
Destinations from the Favourites can be renamed.
You can delete individual destinations from both
lists.
쏅
Touch the symbol in the main menu
of the Lucca.
The menu Navigation Menu is displayed.
쏅
Touch the button.
The display shows the second page
of the menu.
쏅
Touch the symbol.
The Manage Destinations menu is
displayed.
Renaming a destination (Favorites only)
You can rename a stored destination in the Favorites:
Touch the symbol in the Manage Des쏅
tinations menu.
The Rename Favourite menu is displayed.
쏅 Touch the destination to be renamed.
A menu for entering a name is displayed.
쏅 Enter a new name for the destination.
Touch the symbol.
쏅
24
Lucca_5_3_long_GB.indd 24
01.11.2007 14:11:55 Uhr
Navigation
Deleting a destination
You can delete a destination stored in the Favorites or a last destination:
Touch the symbol in the Manage
쏅
Destinations menu.
The Delete Favourite menu is displayed.
- or Touch the symbol in the Manage
쏅
Destinations menu.
The Delete One Last Location menu
is displayed.
쏅 Touch the destination to be deleted.
Touch the symbol.
쏅
Delete all destinations (last locations only)
You can delete all the last destinations:
Touch the symbol in the Manage
쏅
Destinations menu.
A confirmation menu is displayed.
Touch the symbol to delete the list.
쏅
- or 쏅
Touch the symbol to not delete the
list.
Route planning with stages
You can also perform the route planning without
GPS reception, e.g. at home at your convenience,
and gain an overview of your route for your vacation. The route cannot be stored.
You can use the planned route to:
• Start a simulation (see "Route simulation")
• Display the route description (see "Route description")
• Jump to a specific place on the map (see
"Jumping to a specific place on the map")
Note:
You can enter a route with up to 5 route points
and a total length of 5,000 km.
Entering the starting point
Touch the symbol in the main menu
쏅
of the Lucca.
The menu Navigation Menu is displayed.
Touch the symbol.
쏅
The Route Planning menu is displayed.
The starting point is the last known position,
but it can also be changed:
Touch the symbol to change the
쏅
starting point.
The Select Destination menu is displayed.
쏅 Define the route point similar to the destination entry. For more information, see the
chapter "Entering a destination address".
Touch the symbol in the Detailed In쏅
formation menu.
The Route Planning menu is displayed again.
The destination entered is listed as the starting point.
Adding additional route points
You can add a route point in the Route Planning
menu or directly on the map:
Touch the symbol in the Route Plan쏅
ning menu.
The Select Destination menu is displayed.
쏅 Enter an additional route point.
Touch the symbol in the Detailed In쏅
formation menu.
The Route Planning menu is displayed again.
The destination entered is listed as route
point.
25
Lucca_5_3_long_GB.indd 25
01.11.2007 14:11:55 Uhr
Navigation
쏅 Repeat the steps for all additional destinations (up to 5) to be added to the route.
Note:
After calculating your route, you can add any
city as route point directly on the map:
Touch a city on the map, followed by
the symbol.
The route is being recalculated.
Deleting a route point
쏅 In the Route Planning menu, touch the route
point to be deleted.
쏅
Touch the symbol.
The route point is being deleted.
Optimising the sequence
In the Route Planning menu, touch
쏅
the symbol to switch between the
symbols.
Touch the symbol to automatically
쏅
bring the route points into an optimal sequence.
The starting point remains intact.
Changing the order
쏅 In the Route Planning menu, touch the route
point to be moved.
Touch the symbol to switch between
쏅
the symbols.
쏅
Touch the symbol to move the route
point up.
쏅
Touch the symbol to move the route
point down.
Start destination guidance
쏅 In the Route Planning menu, touch the Start
Navigation button.
The route is calculated and the map displayed.
If you changed the starting point, this symbol
is shown at the top of the map:
Touch the symbol.
쏅
The destination guidance is being
started.
Route simulation
Prerequisite:
• Route planning and destination guidance
have been started
Touch the symbol in the main menu
쏅
of the Lucca.
The menu Navigation Menu is displayed.
Touch the button.
쏅
The display shows the second page
of the menu.
Touch the symbol.
쏅
The map is displayed and the simulation started.
During the simulation, the same information
is displayed and voice instructions are output
as during a destination guidance ("Map display during destination guidance").
Functions during the simulation
During a simulation, the following buttons are
available:
• Stop Simulation
• Next Manoeuvre: Omit the next route point
and approach the subsequent destination
26
Lucca_5_3_long_GB.indd 26
01.11.2007 14:11:56 Uhr
Navigation
Map display during destination
guidance
During a navigation, the map display shows different navigation tools and route information. You
can also change to the arrow display (ch. "Working
with the map", "Additional functions")
Caution
The information on the digital road maps may no
longer be current due to short-term changes (construction, etc.)!
Additional information, e.g. the speed limit, can
be shown only if they are contained in the map
material.
The traffic situation and the local signpost information have priority over the information of the
Lucca.
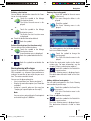
Navigation tools
The following navigation tools are shown on the
map:
Action arrow:
Next action and remaining distance to
that action. If you continue to approach
the next action, a bar is shown on the
right. The more the bar is filled, the closer you are
to the location of the next action.
Route information
The lower display line shows the following route
information:
•
Estimated time of arrival
•
Estimated remaining travel time
•
Remaining distance to destination.
•
Current speed
Note:
The Trip Info menu displays additional information, e.g. the average speed. ("Additional
functions" in this chapter)
Speed limit
The speed limit is shown in the right area
of the map.
Carsor:
Your position (always shown in the centre
of the map)
Compass:
Always points north (for orientation)
Top field:
Name of the next city and the signpost information
Note:
This information can be displayed only if it is
activated in the navigation settings. (ch. "Configuring Lucca", "Settings for navigation")
Bluetooth connection
If you registered a cell phone with the Lucca, this
symbol appears on the map:
If you touch the symbol, the Bluetooth
Menu is called up.
For further details, please read the chapter "Bluetooth function".
27
Lucca_5_3_long_GB.indd 27
01.11.2007 14:11:56 Uhr
Navigation
Working with the map
Display map
Touch the symbol in the main menu
쏅
of the Lucca.
The menu Navigation Menu is displayed.
Touch the button.
쏅
The map is displayed.
- or (directly after the destination entry) Touch the symbol in the Detailed
쏅
Information menu.
The map is displayed.
Moving and scaling the map
To view the desired destination area on the map,
you can move the map section and scale it (zoom
in/out).
Touch one of the symbols to
쏅
zoom in or out of the map.
쏅 Touch the map and move the map in the desired direction.
If you move the map, this symbol is shown on
the left side of the bottom display bar.
Touch the symbol to return to your
쏅
current position.
Touching the map
쏅 If you touch a city (the street or the point of
interest) on the map, the city is selected and
its name displayed in the top display bar.
The city is selected and its name appears in
the top display bar. If several streets are selected, arrow keys are also displayed. Touch
the arrow keys to make a selection.
This symbol is displayed on the right in the
bottom display bar:
Touch the symbol to adopt the city as
쏅
the destination.
The destination guidance is being
started.
Additional functions
Touch the symbol on the map to dis쏅
play additional functions.
The Display menu is displayed.
/
Touch the symbol to
쏅
change between 2D and
3D view.
Touch the symbol to display traffic
쏅
jam information. (Ch. "TMC function")
Touch the symbol to display informa쏅
tion about the GPS reception and
the current position. (Ch. "Compass")
Touch the symbol to display the route
쏅
description for the current destination guidance. (Ch. "Additional functions during the destination guidance")
Touch the symbol to display route in쏅
formation, such as the average
speed.
Note:
You can reset the values to "0" by touching the
Reset button.
Touch the symbol to change to arrow
쏅
display for destination guidance.
Touch the button to exit the arrow display again.
Changing map settings
In the Representation menu, you can change the
map orientation or select the 3D view. (Ch. "Configuring Lucca")
28
Lucca_5_3_long_GB.indd 28
01.11.2007 14:11:57 Uhr
Navigation
Additional functions during the
destination guidance
The following functions can be used during a navigation:
• Blocking route segments
• Route description
• Jump to a specific place on the map
Blocking route segments
During the destination guidance, you can block
the route segment lying ahead of you. An alternate
route is calculated and the blocked partial route is
bypassed.
Prerequisite:
• Destination guidance
- or • Route simulation
Touch the symbol in the main menu.
쏅
The menu Navigation Menu is displayed.
Touch the button.
쏅
The display shows the second page
of the menu.
Touch the symbol.
쏅
The Avoid Route menu is displayed.
In this menu, you can select the length of the
blocking, starting with your current position.
쏅 Touch a segment length in the Avoid Route
menu.
The route is recalculated and the blocked
route segment is bypassed.
The blocked segment is marked with
the symbol.
You can enter any number of blockings. The
number of blockings is displayed in the bottom display bar.
쏅
To cancel all blockings:
Touch the symbol.
Route description
You can display the description of your route.
Prerequisite:
• Destination guidance
- or • Route simulation
Touch the symbol in the map dis쏅
play.
The Display menu is displayed.
Touch the symbol.
쏅
The Directions menu is displayed.
Jump to a specific place on the map
During the destination guidance or after a route
planning, you can display your current location on
the map or the starting point of the planned route,
the destination area or the entire route.
Prerequisite:
• Destination guidance
- or • Route simulation
Touch the symbol in the main menu.
쏅
The menu Navigation Menu is displayed.
Touch the button.
쏅
The display shows the second page
of the menu.
Touch the symbol.
쏅
The Go to ... menu is displayed.
29
Lucca_5_3_long_GB.indd 29
01.11.2007 14:11:57 Uhr
Navigation | TMC function
쏅 Touch one of the symbols to jump to these locations on the map:
–
Your current position
–
Destination area
–
Entire route
The map with the selected view is displayed.
TMC function
The Traffic Message Channel (TMC) supplies your
Lucca with traffic reports that are broadcast by
the radio stations with the RDS (Radio Data System) signal.
The transmitted traffic reports can be incorporated in the route calculation by the Lucca and used
for calculating an alternative route in case of disturbances on the calculated route.
TMC is available in the following countries:
Belgium, Denmark, Germany, England, Finland,
France, Italy, Netherlands, Norway, Austria, Spain,
Sweden, Switzerland and Czech Republic.
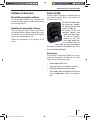
Connecting the TMC antenna
쏅 Connect the supplied TMC antenna to the TMC
antenna input on the left side of the Lucca.
쏅 Attach the TMC antenna with the suction
cups as parallel as possible to the instrument
panel.
The Lucca can now receive traffic reports, if
available.
Changing TMC settings
쏅
쏅
Touch the symbol in the menu Navigation Menu menu.
The Settings menu displays.
Touch the symbol.
The TMC Transmitter menu is displayed.
30
Lucca_5_3_long_GB.indd 30
01.11.2007 14:11:57 Uhr
TMC function
TMC station search
You can adjust TMC stations automatically or manually:
Touch the symbol in the TMC Trans쏅
mitter menu.
The following settings are possible:
Automatic Station Search: The
–
Lucca automatically searches for a
TMC station. If the reception quality deteriorates, it immediately searches for a
new station.
Manual Station Search: Adjust a
–
TMC station of your choice. If the
reception deteriorates, the Lucca does
not automatically search for a new station.
Frequency Selection: Search for
–
a TMC station in 100-kHz increments.
쏅 Touch one of the buttons to select the setting.
Traffic jam detours
You can select between manual and automatic
traffic jam detours.
Touch the symbol in the TMC Trans쏅
mitter menu.
The following settings are possible:
Automatic By-pass: The Lucca
–
automatically changes the destination guidance as soon as it receives information about traffic obstructions.
–
Showing traffic jam reports
쏅
쏅
Touch the symbol in the map display.
The Display menu is displayed.
Touch the symbol.
The traffic reports are displayed.
쏅 Touch the arrow symbols to change between
messages.
쏅 Touch the TMC button to display the TMC
Transmitter menu and to change TMC settings.
Manual by-pass
If you selected the manual bypass, you must initiate the recalculation of an alternate route:
Touch the symbol.
쏅
The traffic jam detail view is displayed.
Touch the button to calculate an al쏅
ternate route.
- or Touch the button to exit the menu
쏅
without calculating an alternate
route.
Manual By-pass: In case of traffic
obstructions, a symbol is displayed on the right side of the map:
If you touch the symbol, the traffic jam detail view appears and
you can calculate an alternate
route.
No Congestion By-pass: The
–
Lucca does not change the destination guidance, even if it receives information about traffic obstructions.
쏅 Touch one of the buttons to select the setting.
31
Lucca_5_3_long_GB.indd 31
01.11.2007 14:11:58 Uhr
Configuring Lucca
Configuring Lucca
The Lucca features two menus in which you can
perform settings:
• Device settings: The properties of the device
are defined here.
• Setting for the navigation: The properties of
the navigation are defined here.
Device settings
In the Settings menu of the Lucca, you can define
settings for the following areas:
• Language
• Time
• Display
• Factory settings
• Touchscreen
The second page of the menu also contains the
following settings:
• Product information
• Night display
• Theft protection
• Button sounds (sound of the buttons)
• Audio / video
Touch the symbol in the main menu.
쏅
The Settings menu displays.
쏅
/
touch the button to scroll
in this menu.
쏅 If you made changes to the settings, you can
touch the OK button of the to accept the
changes you made.
- or Touch the button to exit the menu
쏅
without saving the changes.
Language
In the Language menu, you can define the language in which the menus of the Lucca are displayed. With one exception: The menu guidance
of the multimedia application and the Bluetooth
function is in English. The voice outputs are also
using the language specified.
Touch the symbol.
쏅
A list with available languages is
displayed.
쏅 Touch the language in the list that you want to
use for menus and voice output.
쏅 Touch the OK button.
The language is loaded and the main menu is
displayed.
Time
쏅
Touch the symbol.
The Time menu is displayed.
쏅 Touch the Time Zone button.
A list with available time zones is displayed.
쏅 Touch the time zone in the list that is valid for
your current position (GMT without daylight
savings time).
Note:
The selection is facilitated by the display of
the capitols in the respective time zone.
쏅 Touch the OK button.
To switch to daylight savings time:
쏅 In the Time menu, touch the Daylight Savings Time button to change between the options ON and OFF.
Note:
Adjust the corresponding settings if the time
is changed at your position or if you drive into
a different time zone.
쏅 Touch the Format button to toggle between
24-hour and 12-hour display.
쏅 Touch the OK button.
32
Lucca_5_3_long_GB.indd 32
01.11.2007 14:11:58 Uhr
Configuring Lucca
Display
In the Representation menu, you can set the display brightness for day and night mode.
Touch the symbol.
쏅
The Representation menu is displayed.
쏅 Touch the Brightness Day button to set the
display brightness for day mode, and confirm
with OK.
쏅 Touch the Brightness Night button to set the
display brightness for night mode, and confirm with OK.
Factory settings
In the Factory settings menu, you can reset the
navigation software to the factory settings and
configure the USB interface.
Touch the symbol.
쏅
The Factory Settings menu is displayed.
쏅 Touch the Navigation button to reset the settings for the navigation back to the factory
settings.
- or 쏅 Touch the Multimedia button to reset the settings for the media player back to the factory
settings.
A confirmation dialogue appears in both
cases.
쏅 Confirm the resetting by touching the Yes button or cancel it with the No button.
쏅 Touch the USB button to change between the
settings for the type of USB interface:
– ActiveSync: The Lucca is recognised by
MS ActiveSync.
– MTP: Media Transfer Protocol. This setting allows the MS Media Player 10 under
MS Windows XP to recognise a mobile
device.
– MSD: Mass Storage Device. The Lucca is
recognised as mass storage device.
쏅 Confirm the setting with OK.
Touchscreen
You can recalibrate (align) the touchscreen if it responds imprecisely to touches.
Touch the symbol.
쏅
A confirmation is displayed.
쏅 Touch the Yes button and follow the instructions on the display to calibrate the touchscreen.
Product information
Touch the symbol on the second
쏅
page of the Settings menu.
Product information about the Lucca, such as the version of the map used and
the navigation software, are displayed.
Night display
You can manually perform the day/night mode
switching or activate the automatic function. For
the night display, your setting in the Representation menu is used.
Touch the symbol on the second
쏅
page of the Settings menu.
The Night Mode menu is displayed.
쏅 Touch the Day button to activate (check mark)
or deactivate the day mode (no check mark).
쏅 Touch the Night button to activate (check
mark) or deactivate the night mode (no check
mark).
쏅 Touch the Automatic With Car-Connectivity
button to activate (check mark) or deactivate
the function (no check mark).
If you activate the function, the Lucca automatically switches to the night mode if you
turn on the lights of the vehicle.
Note:
The automatic mode requires that the Active
Cradle is connected with the car sound system via the Smart Cable.
쏅 Touch the Automatic With GPS Time button to activate (check mark) or deactivate the
function (no check mark).
33
Lucca_5_3_long_GB.indd 33
01.11.2007 14:11:59 Uhr
Configuring Lucca
If you activate the function, the Lucca automatically switches to night mode at sunset.
Note:
The automatic mode requires that the time
zone is set correctly ("Time" section in this
chapter).
쏅 Confirm the setting with OK.
Theft protection
In the Anti-Theft Protection menu, you can assign
a PIN and a PUK to the Lucca to protect it against
unauthorised use. The PIN can be changed at any
time. Register under http://puk.blaupunkt.com
to securely store your PUK. For further details
read, please read the chapter "Activating the PIN
query".
Button sound
On the second page of the Settings
쏅
menu, touch the symbol to activate
or deactivate the sound when touching a button.
쏅 Confirm the setting with OK.
Audio/video
Touch the symbol on the second
쏅
page of the Settings menu.
쏅 Touch the Video Format button to
switch among the video formats PAL, NTSC
and SECAM.
Settings for navigation
You can perform settings of the Lucca in the navigation menu for the following areas:
• Speed limit
• Display
• TMC station
• Volume
• Category for fast retrieval
• Preferred petrol stations
The second page of the menu also contains the
following settings:
• Keyboard
• Select map
• Unit of measure
쏅
쏅
Touch the symbol in the main menu
of the Lucca.
The menu Navigation Menu is displayed.
Touch the symbol in the main menu.
The Settings menu displays.
쏅 If you made changes to the settings, you can
touch the OK button of the to accept the
changes you made.
- or 쏅
Touch the button to exit the menu
without saving the changes.
34
Lucca_5_3_long_GB.indd 34
01.11.2007 14:11:59 Uhr
Configuring Lucca
Speed limit
In the Speed Limit menu you can define whether
speed limits should be displayed during the navigation and whether you should be warned audibly
if you are exceeding the speed limit.
Caution:
The information on the digital road maps may no
longer be current due to short-term changes (construction, etc.)!
Additional information, e.g. the speed limit, can
be shown only if they are contained in the map
material.
The traffic situation and the local signpost information have priority over the information of the
navigation system.
쏅
Touch the symbol on the second page
of the Settings menu.
The Speed Limit menu is displayed.
쏅 Touch a button of your choice to select the
setting:
– Do Not Show: Do not show signs
– Show Without Warning: Show signs,
warning beep off
– Warning at ... excess: Warning beep at
selected speed limit violation
Display
In this menu, you can change settings for the map
view.
Touch the symbol.
쏅
The Representation menu is displayed.
Align Map Automatically: The
–
map is aligned to the north depending on the map scale or in driving
direction
–
–
–
Map In Driving Direction: The
map is always aligned in driving direction
Align Map Northward: The map is
always aligned to the north
3D Map: The 3D map is always
aligned in driving direction. The
map cannot be moved, but scaling is still
possible.
TMC station
In the TMC Transmitter menu, you can also define
whether route changes for traffic obstructions
should be performed automatically by the Lucca
or only after a manual confirmation.
For further details, please read the chapter "TMC
function".
Volume
In the Speech Volume menu, you can adjust the
volume for the voice output of the navigation.
Touch the symbol.
쏅
The Speech Volume menu is displayed.
Touch the arrows to adjust the vol쏅
ume.
Category for fast retrieval
You can define a category of points of interest for
the fast retrieval. In the menu Navigation Menu,
you can directly access this category. (Ch. "Navigation", "Fast retrieval")
Touch the symbol.
쏅
A list with available points of interest categories is displayed.
쏅 Touch the category in the list that you want to
use for the fast retrieval.
35
Lucca_5_3_long_GB.indd 35
01.11.2007 14:12:00 Uhr
Configuring Lucca
Preferred petrol stations
You can adjust your preferred petrol station brands
to display them as preferences when searching for
a petrol station. This is particularly useful if you
have a petrol station customer card.
Touch the symbol.
쏅
A list with available petrol station
brands is displayed.
쏅 Touch your preferred petrol station brands in
the list.
You can select several petrol stations.
Keyboard
If you enter a destination address in the Select
Destination menu, a virtual keyboard is displayed.
Instead of the standard keyboard, you can also
display a keyboard that resembles a cell phone
keyboard.
Touch the symbol on the second
쏅
page of the Settings menu.
The Keyboard menu is displayed.
You have the following options:
– Standard Keyboard: A customary keyboard
– Telephone Keyboard: Keyboard similar
to a cell phone
쏅 Touch the button to select the setting.
Units of measure
You can define which units of measure should be
used for distances.
Touch the symbol on the second
쏅
page of the Settings menu.
쏅 Select a format by touching the respective
button.
Map view
You can define whether you want to change to the
arrow view during an action, e. g. a turn off.
쏅
Touch the symbol on the second
page of the Settings menu.
쏅
Touch the button to display the arrow
view during an action.
The card is displayed after the action again.
쏅
Touch the button to show an action arrow during an action.
Select map
In the Select Map menu, you can select a different
map material. This function is only available if you
saved map material on the SD/MMC card.
Touch the symbol.
쏅
A list of the available road maps is
displayed.
쏅 Touch the desired road map in the list to select it.
The selected road map is loaded.
36
Lucca_5_3_long_GB.indd 36
01.11.2007 14:12:00 Uhr
Data transfer
Data transfer
You can provide the Lucca with data (road maps,
music data, image files and video files) via an SD/
MMC card.
The Lucca supports SD/MMC cards with a storage
capacity of up to 4 GB.
Caution: Risk of damage
If you connect the Lucca via a USB cable with your
computer, you have access to the internal memory
of the Lucca and the SD/MMC card. If you change
or delete files in the internal memory, it may render the Lucca inoperable.
Access the SD/MMC card only via your computer
and do not change or delete any files in the internal memory of the Lucca.
If you want to transfer data via the supplied USB
cable:
쏅 Insert your SD/MMC card into the SD/MMC
card slot until the card engages.
쏅 Connect the Lucca with a computer using the
supplied USB cable.
The computer recognises the Lucca as a card
reader. The SD/MMC card and the internal
memory of the Lucca are displayed as drives.
Note:
As an alternative, you can also transfer the
data to the SD/MMC card using an SD/MMC
card reader.
Using road maps of SD/MMC cards
A road map of Europe is pre-installed in the memory of the Lucca. The enclosed DVD contains the
road map for restore purposes.
쏅 Copy the road map by using the installation
program supplied on the DVD to your SD/
MMC card to install it.
To use the road map in the Lucca:
쏅 Insert the SD/MMC card into the SD/MMC
card slot.
Touch the symbol in the main menu
쏅
of the Lucca.
The menu Navigation Menu is displayed.
Touch the symbol.
쏅
The Settings menu displays.
쏅
Touch the button.
The display shows the second page
of the menu.
Touch the symbol.
쏅
A list of the available road maps is
displayed.
쏅 Touch the desired road map in the list to select it.
The selected road map is loaded.
Using media files of SD/MMC cards
The media player of the Lucca allows you to play
the following media files:
• MP3, WAV and WMA for music files,
• JPG and BMP for image files, and
• WMV for video files.
쏅 Copy the media files to the SD/MMC card.
쏅 Start the media player. (Ch. "Media player")
The media player automatically locates the
data on the SD/MMC card and displays them
in the browser.
Note
For WMV files, use the supplied USB cable and
transfer the data using the MS media player
version 10 or later and MS ActiveSync.
37
Lucca_5_3_long_GB.indd 37
01.11.2007 14:12:01 Uhr
Bluetooth function
Bluetooth function
Bluetooth is a wireless radio connection over a
short distance. Hence, a Bluetooth-capable cell
phone allows using the Lucca as a hands-free system. In addition, it can play and operate music
tracks stored on the cell phone.
Prerequisite:
• Compatible Bluetooth cell phone (ch. "Technical data")
Starting the Bluetooth application
쏅
Touch the symbol in the main menu
of the Lucca.
The menu Bluetooth Menu is displayed.
If you start the Bluetooth application for the
first time, a message indicates that no device has been registered yet ("No Paired Device."). A Bluetooth connection requires that
the Lucca is first registered with the cell phone
("Registering Lucca with the cell phone").
Otherwise, start the registration process.
Starting the registration process
Touch the symbol in the menu
쏅
Bluetooth Menu.
The Bluetooth Settings menu is displayed.
쏅
Touch the symbol.
A query is displayed whether you
want to register a device.
Registering Lucca with the cell phone
쏅 In the query "Pairing Now?", touch the Yes
button to register the cell phone.
쏅 Activate the Bluetooth function in the cell
phone.
Note:
Every cell phone uses different ways to establish a Bluetooth connection. For this reason,
read the instructions of your cell phone to
activate the Bluetooth function and to search
for Bluetooth devices.
The Lucca is recognised under the name
"Lucca 5.3". A PIN query is displayed.
쏅 Enter the PIN "0000" in your cell phone.
The devices are registered and the Bluetooth
connection is established.
You have the following options:
– Using the Lucca as hands-free system
– Using the Lucca to play back music
Notes:
• After you switched off the Lucca or physically separated the cell phone and the
Lucca, the Bluetooth connection must be
re-established:
• You can couple up to 10 cell phones. If you
couple an eleventh one, the oldest coupled
cell phone is deleted.
Establishing and disconnecting
Bluetooth connection
Prerequisite:
• Cell phone is already registered ("Starting the
Bluetooth application")
Touch the symbol in the main menu
쏅
of the Lucca.
The menu Bluetooth Menu is displayed.
Touch the symbol.
쏅
The Connection Settings menu is displayed.
38
Lucca_5_3_long_GB.indd 38
01.11.2007 14:12:01 Uhr
Bluetooth function
쏅
Touch the symbol to established
the connection (check mark) or to
disconnect it (no check mark).
Note:
The phone numbers selected and answered
with the Lucca are stored and displayed in the
Call menu next to the keyboard. You can select the phone numbers by touching them.
- or 쏅
Touch the symbol to activate the automatic connection (check mark) or
to deactivate it (no check mark).
If you activate the automatic connection, your
cell phone is automatically connected as soon
as it is located in the vicinity of the Lucca.
Calling a point of interest
Certain points of interest, such as hotels, can be
called, so that you can book the hotel directly, if a
Bluetooth connection exists to your cell phone.
After the destination entry, touch the
쏅
symbol in the bottom display bar in
the Detailed Information menu.
A list with phone numbers for the selected
point of interest is displayed. The phone numbers are sorted by country.
쏅 Touch a phone number in the list to call the
point of interest.
쏅 Touch the End button to end the call.
Calling
If the Lucca is connected with your cell phone,
you can answer or reject calls and make your own
calls.
Making a call
Prerequisite:
• Bluetooth connection to cell phone
Touch the symbol in the menu
쏅
Bluetooth Menu.
The Call menu is displayed.
쏅 Enter a phone number of your choice via the
keyboard.
쏅 Touch the Send button.
The call is made.
쏅 Touch the End button to end the call.
Answering or rejecting a call
If a call comes in, the "Incoming Call" message and
the phone number of the caller are displayed:
쏅 Touch the Accept button to receive the call.
쏅 Touch the End button to end the call.
- or 쏅 Touch the End button to reject the call.
Adjusting the ringtone volume
쏅
쏅
쏅
Touch the symbol in the menu
Bluetooth Menu.
The Bluetooth Settings menu is displayed.
Touch the symbol.
The Ringtone menu is displayed.
Touch one of the buttons to adjust the volume.
Audio transmission
If you connected the Lucca with your cell phone,
you can listen to music stored on your cell phone
via the Lucca.
쏅
Touch the symbol in the menu
Bluetooth Menu.
The Music Player menu is displayed.
쏅
Touch the button to start the playback.
쏅 Press the VOL - or VOL + button to adjust the
volume.
39
Lucca_5_3_long_GB.indd 39
01.11.2007 14:12:02 Uhr
Bluetooth function | Media player
Note:
The maximum volume depends on the adjusted volume in the cell phone.
Touch the button to play the next
쏅
track.
Touch the button repeatedly to play the
쏅
current or the previous track.
쏅
Touch the button to end the playback.
Activating and deactivating the
Bluetooth function
쏅
쏅
Touch the symbol in the menu
Bluetooth Menu.
The Connect Settings menu is displayed.
Touch the symbol to activate (check
mark) or deactivate (no check mark)
Bluetooth.
Media player
The media player can be used to play music, image
and video files.
Inserting the SD/MMC card
The SD/MCC card slot is located on the right side
of the Lucca.
쏅 Insert your SD/MMC card into the SD/MMC
card slot until the card engages.
Note:
First exit the media player to insert a different
SD/MMC card.
Starting the media player
쏅
Touch the symbol in the main menu
of the Lucca.
The Multimedia menu is displayed.
Unregistering cell phones
쏅
쏅
Touch the symbol in the menu
Bluetooth Menu.
The Bluetooth Settings menu is displayed.
Touch the symbol.
A confirmation is displayed.
쏅 In the query "Pairing Delete?", touch the Yes
button to unregister all cell phones.
- or 쏅 In the query "Pairing Delete?", touch the No
button to not unregister any cell phones and
to return to the Bluetooth Settings menu.
Playing music files
쏅
Touch the symbol.
The music browser is displayed.
You can sort your music files as follows in the music browser:
• Album: Assigns the music files on your SD/
MMC card to the respective albums.
• Artist: Shows only music files from a certain
musician.
• Genre: Sorts music files according to certain
musical genres.
• Playlist: Shows the playlists that are stored
on your SD/MMC card.
40
Lucca_5_3_long_GB.indd 40
01.11.2007 14:12:02 Uhr
Media player
Song: Shows an alphabetically sorted list of
all music files on your SD/MMC card.
쏅 Touch the respective list entry you want to
select.
Depending upon the sort, additional lists may be
displayed with which you can refine your selection even further. Touch the list entries here that
you want to select. If you reached the list with the
music files:
쏅 Touch the music file you want to play.
쏅 Touch the Play button.
The playback menu is displayed.
•
Navigating through the music files
The playback menu displays a list of all music
files that can be played back (except for shuffle
mode).
? @
? Play music file
Random play of music files (Shuffle)
쏅 In the music browser, touch the Shuffle
button.
The media player now plays the music files on
your SD/MMC card in random order.
If you want to cancel the Shuffle mode:
쏅 In the music browser, touch the Shuffle
button.
The check mark behind Shuffle is hidden.
Showing image files
쏅
Touch the symbol.
The playback menu is displayed.
Navigating through the image files
The first image is displayed in the playback menu.
C D
D Display next image
@ Select next music file
from the list
A Cancel playback
B A
B Select previous music file
from the list
Changing to the music browser
쏅 In the playback menu, touch the Browse
button.
The music browser is displayed.
Repeated play of music files (Repeat)
쏅 In the music browser, touch the Repeat
button.
A check mark is displayed behind Repeat.
Every music file selected is repeated until you select a new music file.
If you want to cancel the Repeat mode:
쏅 In the music browser, touch the Repeat
button.
The check mark behind Repeat is hidden.
C Display next folder
E Display previous
folder
F E
F Display previous image
Display image folders
쏅 In the playback menu, touch the More
button.
A selection menu is displayed.
쏅 Touch the Show folder and picture name
button to select between the options yes and
no.
If you selected the yes option, the folder name
is displayed.
쏅 Touch the OK button.
Rotating image files
쏅 In the playback menu, touch the More
button.
A selection menu is displayed.
쏅 Touch the Rotate button to select among the
options no, left and right.
The image is rotated clockwise by 90 degrees.
쏅 Touch the OK button.
41
Lucca_5_3_long_GB.indd 41
01.11.2007 14:12:03 Uhr
Media player
Changing to the picture browser
쏅 In the playback menu, touch the More button.
A selection menu is displayed.
쏅 Touch the Browser button.
The picture browser is displayed.
Configuring the slide show
You can set the display time for every image in a
slide show.
쏅 In the playback menu, touch the More button.
A selection menu is displayed.
쏅 Touch the Slideshow Timeout button repeatedly until the desired time is displayed.
Note:
The time is counted up in increments of five.
An image can be displayed for up to 30 seconds.
쏅 Touch the OK button.
Starting the slide show
쏅 Touch the Slide Show Start button.
The slide show is being started.
쏅 If you want to end the slide show, touch the
image.
The playback menu is displayed.
Playing video files
쏅
If you want to continue the playback of the video
file:
쏅 Touch the Play button.
Connecting an external audio-video
source
You can connect an AV source to the Lucca by using an AV cable. For further details read the section "Active Cradle".
To view videos via the AV input:
쏅 Touch the My Videos button.
쏅 Touch the AV In button.
Ending the media playback
쏅 In the MyMusic menu, touch the Main Menu
button in the bottom display bar to start a different application during the music playback.
You can now start a slide show or a navigation
while the media player continuous to play
music.
In the media player menus, touch the
쏅
button to exit the media playback.
Removing the SD/MMC card
쏅 End the media player.
쏅 Carefully push on the SD/MMC card in the SD/
MMC card slot until it disengages.
The SD/MMC card is pushed a little bit out of
the SD/MMC card slot and can be removed.
Touch the symbol.
The video browser is displayed.
The video browser lists all video files on your SD/
MMC card in alphabetical order.
쏅 Touch the video file you want to play.
쏅 Touch the Select button.
The video file is played back.
Stopping playback
쏅 Touch the display until the Pause button is
displayed.
쏅 Touch the Pause button.
The playback of the video file is stopped.
42
Lucca_5_3_long_GB.indd 42
01.11.2007 14:12:03 Uhr
Software of the Lucca | Active Cradle
Software of the Lucca
Reinstalling navigation software
For reinstallation purposes, the navigation software of the Lucca and instructions are located on
the enclosed CD/DVD.
Updating the navigation software
To ensure that your Lucca is always state-of-theart, Blaupunkt offers software downloads at regular intervals. They can be found on the Blaupunkt
Internet site www.blaupunkt.com.
Follow the instructions on the display of the
Lucca.
Active Cradle
A Active Cradle is available as an option from your
specialised Blaupunkt dealer and expands the
functions of the Lucca.
The Connect Cradle allows
you to transfer a composite video signal (back-up
camera, DVD player).
The 4-pole 3.5-mm jack
connector contains one
audio and video input.
As soon as a signal is
present at the Connect Cradle and the Lucca is installed in the Connect Cradle, the image and sound of
the source is shown on the display of the Lucca
(Lucca must be switched on).
Accessories
You can obtain a cable (Smart Cable) as an accessory which expands the functions of the Active
Cradle with the following functions:
•
•
•
•
Power supply of the Lucca.
Switching the Lucca on and off via ignition.
Muting the radio for travel instructions.
Voice output and music playback of the Lucca
via the loudspeakers of the car sound system.
43
Lucca_5_3_long_GB.indd 43
01.11.2007 14:12:04 Uhr
Active Cradle
Pin assignment D-sub Active Cradle
Pin
1
6
11
5
10
15
Type
Description
1
Ignition IN
Car ignition signal IN (12V)
2
GND
GND
3
GND
GND
4
Analog OUT left
Audio line OUT left channel
5
GND TMC Return
TMC antenna Ground
6
Battery Plus
12/24 V DC Power IN
7
Speed Pulse Signal
Continue nav. in case of GPS signal lost (5V)
8
TMC IN
Car Audio TMC Signal IN (3.7-5V)
9
Analog OUT right
Audio line OUT right channel
10
TMC-Antenna
TMC signal Antenna (75-cm wire antenna)
11
GND
GND
12
Dimming IN
Illumination Signal IN (12V)
13
TMC-OUT
Car Audio TMC Signal OUT (3.7-5V)
14
Audio mute
Audio mute OUT (5V)
15
Analog GND
GND
44
Lucca_5_3_long_GB.indd 44
01.11.2007 14:12:04 Uhr
Technical data
Technical data
TFT display
Active colour matrix,
4 inch, 16:9 diagonal,
480 x 272 pixel
Audio
Built-in loudspeaker:
Mono, 8 Ohm, max 1 Wrms
Audio output via Active Cradle:
Stereo, Vmax = 1 Veff, Rtyp = 600 Ohm
Samsung D600, D820, D908, E258, E788,
SGH T509, V720, Z540V
• Sony Ericsson K610i, K650i, K700i, K800i,
S700i, T610, T637, W850i, W950i, Z608
Edition: 07.2007
Information about which cell phones are currently supported by this device can be found on the
Internet under www.blaupunkt.com.
•
Battery (lithium-ion)
Voltage: 3.7 V
Capacity: 2600 mAh
Weight
approx. 235 g
Charger cable for cigarette lighter
Input voltage: 12 V to 24 V
Fuse in the connector: 2 A
Battery charger
Input voltage: 90 V to 240 V, 50/60 Hz
Output voltage: 12 V
Output current: max. 1 A
GPS receiver
20-channel Nemerix
Bluetooth
Version 2.0 (downward compatible)
Compatible cell phones:
• ASUS P535
• LG KE820, KG688, KG800, M4410,
U890(3G)
• Motorola A780, A1200, KRZR K1, RAZR V3i,
RAZR V3X, SLVR L7, U6, V360, V525
• Nokia 3230, 3250, 6103, 6131, 6230,
6270, 6280, 6288, 6300, 6630, 7610,
8800, N70, N73, N92, N95
• Philips 589, 900
45
Lucca_5_3_long_GB.indd 45
01.11.2007 14:12:05 Uhr
Disposal of old unit | Service | Warranty
Disposal of old unit
Warranty
(EU countries only)
Do not dispose of your old unit in the household trash!
Use the return and collection systems available to
dispose of the old device.
We provide a manufacturer's warranty for our
products bought within the European Union. For
devices purchased outside the European Union,
the warranty terms issued by our respective responsible domestic agency are valid.
You can view the warranty terms at
www.blaupunkt.com or request them directly
from:
Service
In some countries Blaupunkt offers a specific repair service including a pick-up service.
In case your Lucca has to be sent to Blaupunkt for
service you can order a pick-up service for your
device on the internet.
Refer to www.blaupunkt.com to check if this service is available in your country.
Blaupunkt GmbH, Hotline
Robert-Bosch-Str. 200
D-31139 Hildesheim
46
Lucca_5_3_long_GB.indd 46
01.11.2007 14:12:05 Uhr
FAQ
Frequently asked questions /
FAQ
The FAQ list contains exclusively answers to frequently asked questions.
Information about solving problems or removing
malfunctions can be found on the next page in the
problem support table.
Why does the Lucca require GPS reception?
By using GPS satellites, the device determines
where it is located and in which direction it is
moving. Without GPS reception, navigating with
the Lucca is not possible.
Why does the Lucca require TMC reception?
The Traffic Message Channel (TMC) supplies your
Lucca with traffic reports that are broadcast by
the radio stations with the RDS (Radio Data System) signal.
Do I need a TMC-capable car sound system to
receive the traffic reports?
No, the Lucca features a TMC receiver integrated
in the device which allows for receiving traffic reports – however, the TMC antenna must be connected to the Lucca for this purpose.
Can I change the map material?
Yes, you can change the map material. For information about using the map material in the Lucca,
please read the chapter "Data transfer".
Which memory cards can I use?
The Lucca is optimised for using commercially
available SD/MMC cards. We tested SD cards
from ScanDisk and Kingston.
Can I connect my video camera to the Active
Cradle?
You can connect your video camera to the Active
Cradle and have the Lucca play back the video image and the sound track.
Can I use the Lucca as a digital guide for hiking
tours?
Navigation off the roads (offroad) is only possible
to a limited extent with the Lucca. For this reason,
the Lucca is not suitable as a digital guide for hiking tours.
How precise is the speed display of the Lucca?
The speed display is generally even more precise
than the vehicles speedometer; however, the Lucca cannot always precisely reflect acceleration
processes since the GPS signal is refreshed only
once every second.
Can I operate the Lucca with a pen?
No. Please use only the special entry pens for
touchscreens that are commercially available.
Can I play WMA music files with DRM protection using the Lucca?
The playback of WMA files with Digital Rights Management protection (WMA-DRM) is not possible
since the license key is not transferred during the
transfer of the WMA file from the PC.
The playback of WMA files without DRM protection is, of course, possible.
47
Lucca_5_3_long_GB.indd 47
01.11.2007 14:12:05 Uhr
Troubleshooting table
Troubleshooting table
Problem
Cause
Solution
The display remains dark if I The display may temporarily Place the Lucca in the shade for
switch on the Lucca.
loose its contrast after long and approximately ten minutes and
heavy exposure to the sun and switch it on again.
high temperatures.
The battery is not sufficiently Fully charge the battery. The
charged.
complete charging time is approx. 5 hours.
The battery is always empty.
In its switched-off state, the
Lucca uses a minor amount of
energy for the memory and the
GPS receiver. Hence, the battery could be discharged after
a few days.
To obtain battery operation of up
to 5 hours in navigation mode,
completely charge the battery
for approx. 5 to 6 hours.
During short driving times, Always operate the Lucca in
the battery is not completely the vehicle together with the
charged.
charger cable via the cigarette
lighter.
The Lucca does not respond The operating system of the Press the Reset button.
when I touch the buttons.
Lucca is overloaded.
The Lucca has no or only a very After switch-on, the Lucca repoor GPS reception.
quires approx. 1 minute until it
is ready for navigation. During
the initial switch-on, it requires
a longer time and a strong GPS
signal.
Move to the outside, place the
device at an elevated position
and do not move it. Your Lucca
is operational again after no
more than 2 to 5 minutes. At
that time, the navigation is also
possible under less than perfect
conditions.
The Lucca has no GPS reception Press the Reset button and take
for an extended period of time. the Lucca outside so that it can
search for GPS signals again.
Heavily metal-evaporated windshields may present an obstacle
to the GPS reception of the
Lucca.
Connect a GPS antenna, which
is available as an option, to the
Lucca to improve the GPS reception.
48
Lucca_5_3_long_GB.indd 48
01.11.2007 14:12:06 Uhr
Troubleshooting table
Problem
Cause
Solution
The Lucca has no or only a very The supplied TMC antenna is Connect the TMC antenna to the
poor TMC reception.
not connected or incorrectly Lucca or align the antenna difaligned.
ferently.
The TMC reception is currently TMC is currently available in
not available in all European Austria, Belgium, Czech Repubcountries.
lic Denmark, Germany, England,
Finland, France, Italy, Netherlands, Norway, Spain, Sweden,
and Switzerland.
The media player does not play The media files on the SD/MMC Transfer the media files in the
some or all media files on my card are stored in the wrong file formats MP3 and WMA for muSD/MMC card.
format.
sic, JPG and BMP for images
and WMV for videos to the SD/
MMC card.
The SD/MMC card was format- Format the SD/MMC card in the
ted using the wrong file system. file system FAT16 or FAT32.
The media player does not The file uses a bitrate that is Use video files with a maximum
smoothly play a video file on my not compatible with the media bitrate of 384 kbit/s.
SD/MMC card.
player.
No connection can be estab- The MSD setting in the Lucca is Under the factory settings, actilished to the computer via USB. not activated.
vate the USB setting "Mass Storage Device (MSD)".
Install MS ActiveSync on your
computer, at least version 3.7.
49
Lucca_5_3_long_GB.indd 49
01.11.2007 14:12:06 Uhr
Country:
Phone:
Fax:
Germany
(D)
0180-5000225
05121-49 4002
Austria
(A)
01-610 39 0
01-610 39 391
Belgium
(B)
02-525 5444
02-525 5263
Denmark
(DK)
44-898 360
44-898 644
Finland
(FIN)
09-435 991
09-435 99236
France
(F)
01-4010 7007
01-4010 7320
Great Britain
(GB)
01-89583 8880
01-89583 8394
Greece
(GR)
210 94 27 337
210 94 12 711
Ireland
(IRL)
01-46 66 700
01-46 66 706
Italy
(I)
02-369 62331
02-369 62464
Luxembourg
(L)
40 4078
40 2085
Netherlands
(NL)
00 31 24 35 91 338
00 31 24 35 91 336
Norway
(N)
+47 64 87 89 60
+47 64 87 89 02
Portugal
(P)
2185 00144
2185 00165
Spain
(E)
902 52 77 70
91 410 4078
Sweden
(S)
08-7501850
08-7501810
Switzerland
(CH)
01-8471644
01-8471650
Czech. Rep.
(CZ)
02-6130 0446
02-6130 0514
Hungary
(H)
76 511 803
76 511 809
Poland
(PL)
0800-118922
022-8771260
Turkey
(TR)
0212-335 07 23
0212-346 00 40
http://www.blaupunkt.com
© 2007 All rights reserved by Blaupunkt. This material may be reproduced, copied or distributed
for personal use only.
This product is protected by certain intellectual property rights of Microsoft. Use or distribution of
such technology outside of this product is prohibited without a license from Microsoft.
Blaupunkt GmbH,
Robert-Bosch-Straße 200, D-31139 Hildesheim
09/07 CM-AS/SCS1 (GB) 8 622 405 753
Lucca_5_3_long_GB.indd 50
01.11.2007 14:12:06 Uhr